Transcripts
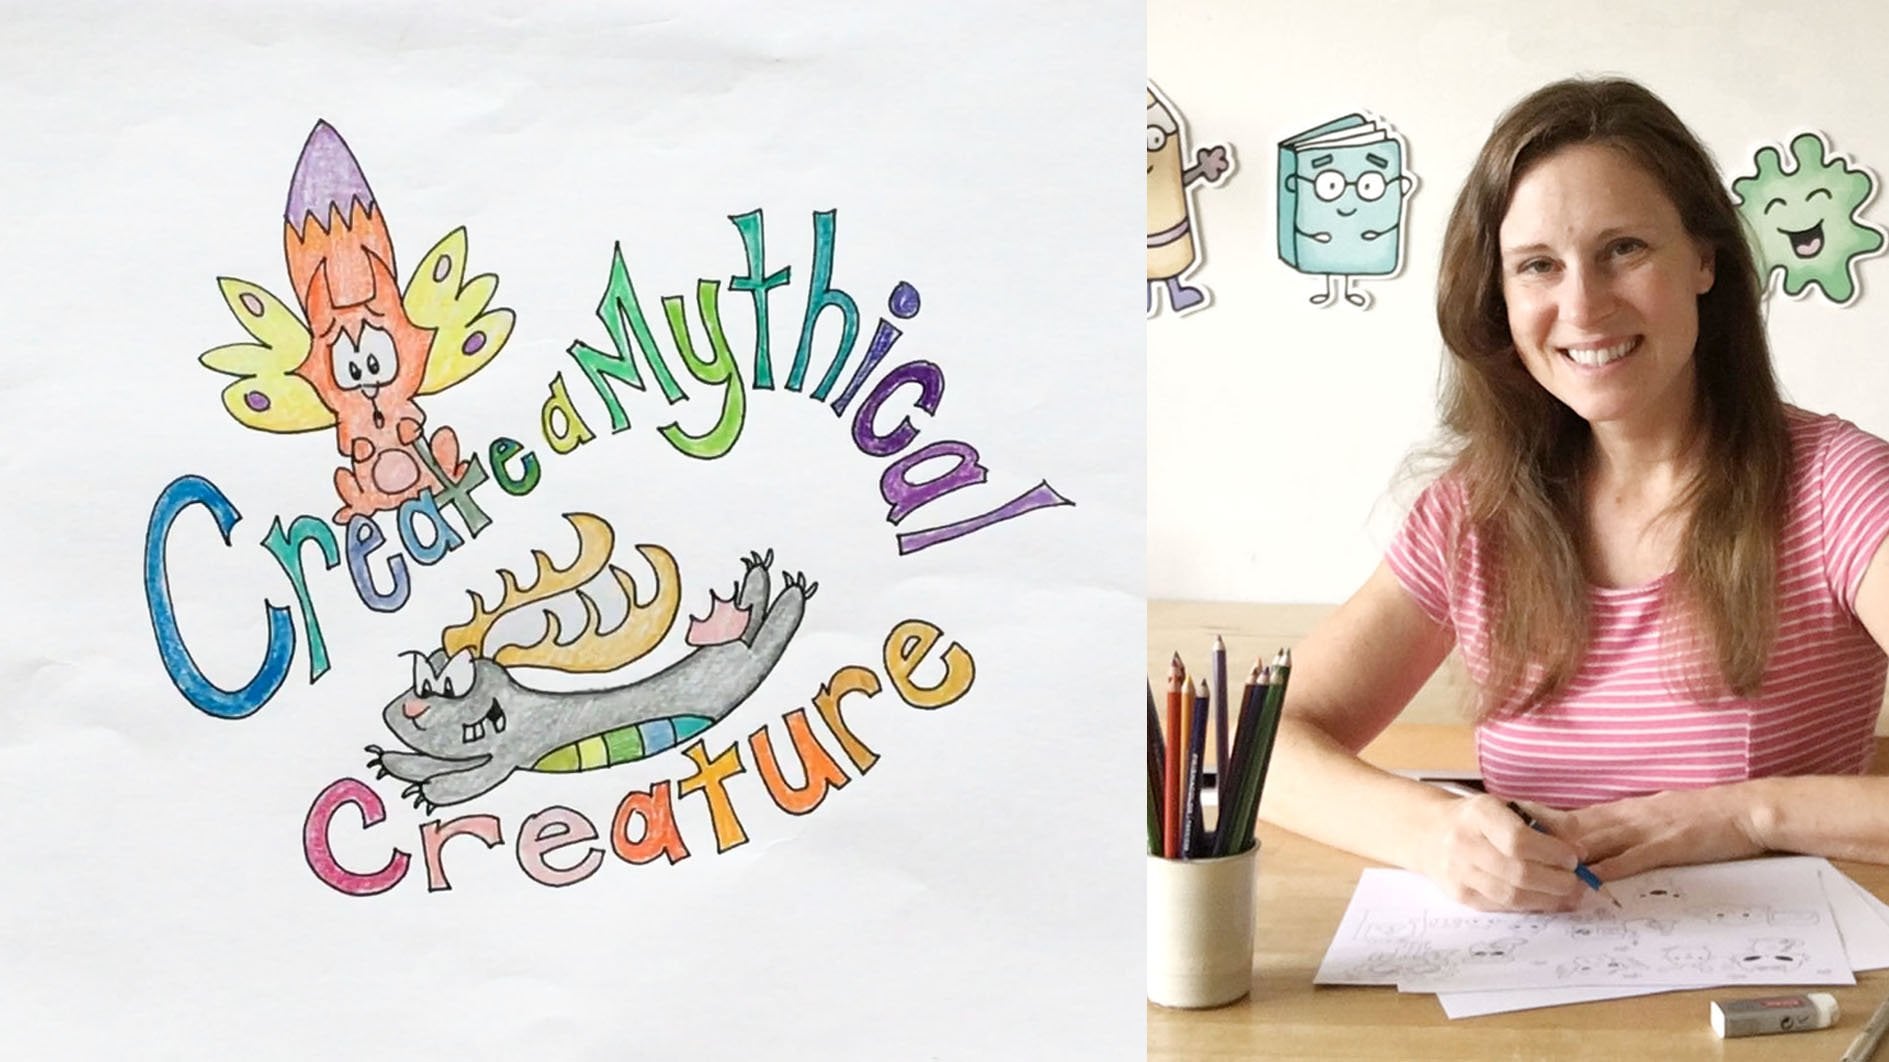
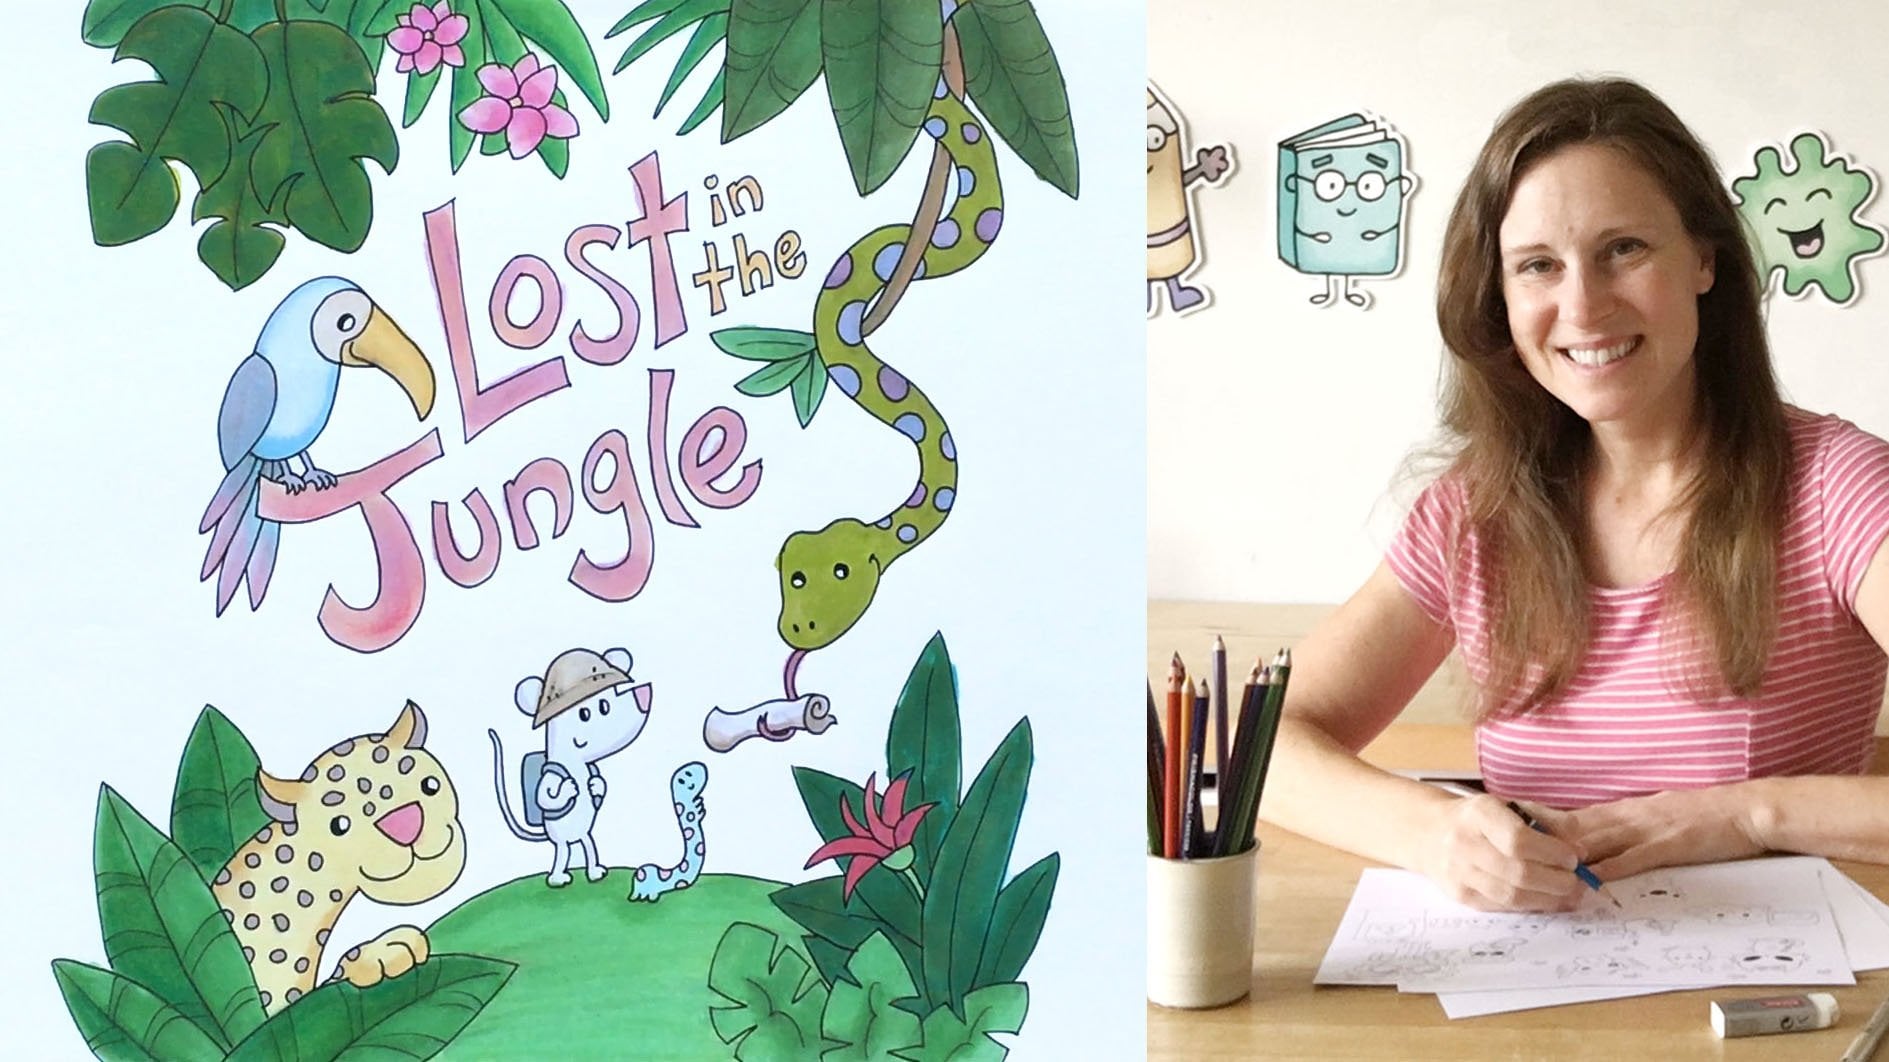
1. Introduction: Welcome to Khartoum club, introduction to
cartooning, an online course by me, Sarah
Jane Vickery. Based on my cartoon
pub online classes. I designed it for kids, epic kids who love to
doodle and get creative. Anyone ages eight
and up can do it. Beginners and Kim
Dude lose alike. It's an introduction
to cartoony, but it's also about
thinking creatively. If you want to be able to
design cool characters, Draw fantastic cartoon themes, and develop your own style. This is the course for you. Each lesson is more than
just a step-by-step. I'll explain how I
approach each drawing, how I play with ideas, and the kinds of questions I asked myself when I get stuck. So you'll be able to
do the same thing when you're working on your own. To start, we'll get all set up. I'll tell you what
materials you'll need for the course and talk to
you about my favorite. Spend some time practicing are all important
sketching skills. Then we dive in and start
drawing with shapes, warm-up with them,
wizards and dragons. And in no time will have doodled a whole
valley of dragons. Next, we'll play
with proportion, changing the sizes
of our characters to create one crazy dog pack, and moving around
funny features to make hilarious basis onto
capturing expression. The key to fantastic cartoons will draw a blob
with many faces, change eyebrows and
mouth on Moody monsters, and put it all together
in the big find, our first cartoon scene. Then we'll challenge ourselves
with cartoons in motion. I'll show you how to turn
Stickman into ninjas and use your fraction drawing
skills to create spies and training
at the spy Academy. Next, we'll grab our pens
before cartooning words. In monster sound
studio was wrong. Words how they sound. A bit of fun with lettering,
bubbles and shapes. Once I've shown
you those basics, we're going to start designing
our own cool characters. To start, It's surprise
I'm alive where I show you how to bring
everyday objects to life. Then we'll play
with light and lead inspire very fine and
fantastic new characters. I'll leave it to
show you how to take one character and turn it into a whole group of characters in doodle cartoon bunch that will be getting
creative with scenes, will link are cool characters
together to form a cartoon, colony, life on Mars. And I'll show you how to
brainstorm and develop ideas as we each design
our own dreams studio. Last but not least, color. I'll show you how to
blend and layer with pencil crayon to really make your characters pop
up out of your page. If you're wondering if the
course is right for you, you can grab your
pencil and draw along with me my
free course tasted. And as always,
thanks for cartoony. Me and the team would
love it if you'd share your pictures in
our Facebook group. And I promise you're going to be surprised at just how
creative you can be.
2. What you'll need: I'm going to show
you everything that you need to do the
online course. If you'd like me and
you love to draw it, you probably like nothing better than a little trip
to the art shop. Now you probably
have everything you need lying around at home. But if you're curious about what I think is great
for cartooning, I'll show you what
I'm currently using and I'll tell you why I like it. So first things, first, pencils, you will see me draw
with either a 23 or four B. Now that is the
number on the end of your pencil that tells
you how hard the lead is. I'd like this pencil
a lot of 3D because I find it's great for
sketching out my cartoons. If I have something
that's too hard, so that would be an HB or a B. Then I find it's not so
great for sketching. I don't get that nice,
loose, sketchy line. And if it's too soft, that'll be a higher number
like a six B or AB, then I find is too dark and
it's really hard to erase. So that's why Goto pencil
to three or four B. And I'm currently
drawing with Staedtler, Mars demographic
or Faber-Castell, two really great pencils. But n equals two. Next is block fine liners. Now you can do the entire
course just in pencil. You don't need to
outline in pen. But if you want to, you will see me a lot of my cartoons in a
black fine liner. So I often am using this one micron and I'm drawing with a 0.5 millimeter tip. I find it's really great for
just general cartooning. So that is a great one. I also draw with favorite
Castile or CAPEX. So great pens, but again, any black fine liner
will do the trick. Next is markers. We only have one exercise
where we do this, but we will do some outlining
of lettering with a marker. Now you just need a plain old, fairly pointed to block
marker will be perfect. You'll also see me
use a brush marker. In that exercise. You don't need to have one, but it's useful to see
it and you can always decide if you want to play
around with it afterwards. That's a favorite Castile. One with a bit of a bigger
tip, that's a Tombow, so fun to play with
brush markers. But like I said, don't
need it for the course. Just if you want to.
Next is erasers. If you've ever see
me in the Art Shop, I might be doing, doing this, giving a little squished
to the erasers. I like an eraser that
has a little bit squishy because I find if I
have one that's too hard, it starts to rub off my paper
or it will lift off my ink. So there you go, a little
squished test and you've got a great professor,
that's a fabric. Estelle. Next is paper. I'll draw in the course on
plain old printer sized paper. So that's absolutely fine. Or of course, you can
use a sketchbook. The good thing
about a sketchbook is that by the end
of the course, you'll have everything all in one place and you'll
flip back through and look at your
drawings and see how you've changed
your cartooning. So that's the good
thing about sketchbook. I always have one of my smaller than all books that
are used for doodling. And it's great
because then I can flip back through
and remind myself about some of the ideas
I had and then it can inspire drawings in the future. So that's always the big
advantage of a sketchbook. And lastly, pencil crowns. We only have one exercise
where we do some coloring. You're free to call your
pictures afterwards, but we're always doing
so much drawing. There's not much
coloring happening. Pencil crowns, you only need about a handful of ten
will do the trick. And I draw with either
Prismacolor or favorite Castile. Any brand will be
absolutely fine. That's it. That's everything you need to do the online course. But remember playing
around with materials. See what you like, see
what works for your style. It's all different. Everyone likes
something different. Even I still choose
what I'm using. This is what I'm
currently using and I'll leave links to it in
the description below. So if that's a help for you, you can check it out there. And I think we're ready
to start drawing.
3. Sketching Skills: Alright, sketching skills
we're going to work on are all important cartoon
sketching abilities. All you need is a
pencil and paper and we're ready to have
a little play around. Before we jump into our
first cartooning exercise, I wanted to show you the basic sketching skills
you'll need to do the course. Now, this is how
you'll see me draw in all of the
different exercises. It's easiest if I show you
using a couple of characters. So if you want to
grab your pencil and draw along with me, feel free. But remember, this isn't so much about
drawing characters, It's really about trying to develop our
sketching abilities. So I'm going to
draw, I'll show you. I'm going to draw my
first little character and you'll see me sketch. Okay, I began
everything by drawing really lightly in pencil. And if you watched my
video on materials, you'll see I'm often
drawn with a freebie. That's what I've got right here. Freebie pencil. And I'll sketch in my shapes
lightly, fairly lightly. I use lots of sketchy lines. Okay. I I e.g. I. Don't just draw
the shape like this with a single outline. I don't do that. Instead, you'll see me. You'll see me doing this, okay? Sketching up a shape
using lots of line. The lines might crossover, okay, so allow your lines to cross over sketching and
that's again here, sketching another little shape. So I don't worry about
it being perfect at all. There are lots of lines. I don't press too hard, okay, because I want to
be able to erase this or to draw darker
over top of it. So say this is my
first I'm drawing. You don't have to draw. This isn't about
drawing characters. This is just about,
about sketching out. Okay, so here I've
got a nice easiest, I'd like to do it
as a character. This is my character pen. Okay, So he's curious couple of, couple of eyes on him
gain a sketchy, right? That's the back of them. And sketchy, sketchy shapes, sketchy lines in his mouth. How could I forget pens mouth? Because I'm doing it quickly. There we go. We've got pen. Okay,
So that's how I begin. My characters is sketching
lightly with pencil. Then I will either outline and pen or darker and
pencil for Penn, I'm going to outline in pen. So basically I come in with
my with my black fine liner, which is like I said in my, in my video about materials, I'm frequently drawing
with a micron, micron 08. And then I outline, this is just my most
frequent method. Okay, then I'll outline
the character in, in pen so I don't erase off
my sketchy pencil lines. I leave them. Okay. And
I go over it in pen, one of my pin and pen. And you will also see that I, I don't go directly over the
sketchy lines I've created. I go over where I decide that I think the
line is going to look best. Okay. The reason that I have the sketchy lines
is that That is neat, figuring out where the
character is going to be. And then when I come
in with my pen, that's me finalizing the line that I'm going to choose
to create the character. Remember, this is just
about sketching, okay, So that's, that's what you'll
see me do most frequently. The other thing you can do to work entirely in pencil, okay? So let's do, let's do pencil. Here is this is,
this is actually hue is another character. So again, I begin by sketching. So if your sketch along with me, sketching lines lightly in pencil here, I'm just sketching. It's a rectangle with a little triangle peak
on top of my head. Okay. There's a little bit like a pencil with
a few little lines. I sketch them along. I don't worry about them
overlapping or looking messy and don't press too hard. I don't press too hard. You'll also see that I don't
hold my pencil like this. I don't hold it straight down to the page and I don't
grip it like this. Hold it out further out at
the edge or at the end, Let's just say,
okay, Because this, this prevents me
from pressing too hard the whole pencil like this, more like a more
than a paintbrush, then my lines stay
light and sketchy. Okay, so practice that, practice the way and think about the way you hold your pencil. It might feel funny. A lot of people are like,
Oh, I don't know if I can have it feels weird. It it it might feel weird. It might feel weird for awhile. This is just you don't need
it. You don't reproduce. You don't need to be sketching
the character I'm doing is just as easy for me if I sketch. So there is, there's, there's, there's Huey
sexually but little. A little stubby
pencil crown areas. So like I said, this method here
or here is drawn starting off with
sketching lightly in pencil and then
go over it in pen. Here I draw entirely in pencil. So I've done my
sketching pencil, and then I come in and I
outlined it darker in pencil. Lots of people
will draw in class entirely in pencil
and it looks great. It's all a matter of your style and the
way you like to work, there's no, Oh, men
will say sorry, here we dip in his head. He hasn't been
sharpened properly. You still see my
sketchy lines. Okay. But then I go over darker. I outline in pencil so that I'm not going to say almost forgot
one of whose fingers. So that is how I work when
I work entirely in pencil. And then so say I wanted
to neaten up my drawing. So for my pen pen pen
after my ink has dried. Okay. Yes, I'll give it a good
amount of time for it to dry. Then I can come in and erase off my initial sketchy pencil lines. And that is why I don't
do them too dark, so which doesn't really get
this Oh, I can't get it off. But it's more difficult. Okay, So if I had I
done my pencil line too dark to begin with over pen, then I'd be, I'd
be erasing harder. It's harder to get
the pencil off. And I'd be lifting
some of my ink, which I don't want to do. And also I make sure that I leave my drawing for
a little bit too dry. And when I, when
I start erasing, I erase off a little bit and
see if it's going to smudge. I don't want to smudge
smudge the ink. So that's why I do that. Then if I was drawing entirely in pencil as I've
done with Huey here. If I wanted to meet him up, I don't have it just
go around some of the the sketchy lines
and Newton, okay. You can even eat it,
really leave it for me. The sketching pencil
lines don't bother me. 11 tiny bit in a drawing. It's to me, it's
absolutely fine. Okay, So those are the
two methods you'll see me using the way that
I sketched and why. That's why I do
that. Another thing is if you're using the
videos and you're filing oh, I'm going too quickly. Or you've missed something. Remember, there's
always, there's a little off little gear icon. Okay, there's a little
gear icon down in the corner of your screen. You can click that and you can
slow down the audio speed. If I speak too quickly,
you can do that. Somebody will say I'm too
quick, so it was empty. So let's turn it
into a character is this is our little gear. If you're finding it out others, this mother just want if you're
finding it all too fast, slow down the audio speed. And of course you
can always just rewind and re-watch sections, okay, you don't have to eat
how to do it all at once. Also, you've done an
exercise and you feel like, Oh, it hasn't turned out
the way I wanted it to. Just go back and redo it, but there's no harm in it can only help redoing
some of the exercises. And it also you can go back
and watch the exercise again, but maybe, you know, change it and do it in a slightly
different way. Like maybe you do one
exercise and you work, and you do this method working with sketchy lines and pen. And later the next
time you thought, oh, I love that I draw and
turned out do it again and try it doing entirely pencil. Oh, and one other thing
to point out about the videos is if you see that the play bars on top
of the, top of the drawing, as long as your mouse is, you move your cursor
away from the screen, then that played bar goes
away and then you'll see the full picture. Alright, so that was
a little warm up. Now if we can start with our
first cartooning lesson.
4. Wizards and Dragons: We're gonna get warmed up by
drawing wizards and dragons. This is where we learn all
about sharing with shapes. You're gonna be amazed at how quickly you're gonna
be able to start to create some really
fun cartoons using nothing more than basic
shapes like these. You can see which one I use for creating these characters. For this exercise, all you need with you is a pencil and paper. I'm also going to outline my cartoons and a
black fine liner. You can do that or you can
work entirely in pencil. That's up to you. Alright, I think we're ready for
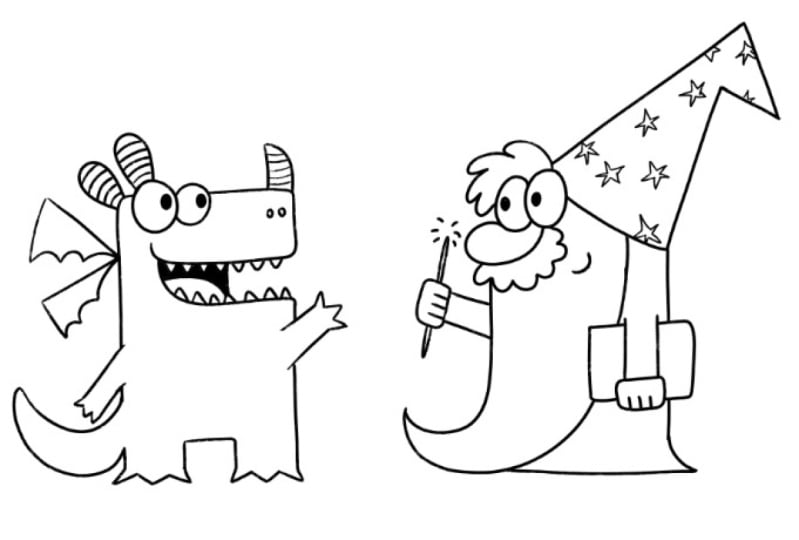
wizards and dragons. Here's a look at the wizard and dragging that will draw
for this exercise. I've grabbed our shape
to simple rectangle, and let's have a look at
these two characters. You can see in the Wizard
where I've used the shape, it forms the basis for his entire head and
body, his robe. There you can see
the rectangle shape, how I've used it
there to create him. Now over here in our dragon, you can see it as God made
a little bit narrower, Nikesh make a water next time. And here is the
rectangle shape again, creates the characters
entire head, body and even down to his legs. Alright, so that's
where we're going to start by sketching in our shape. And then we'll create our
wizard and to try again. And then let's see, I know that I've created my two characters, so I'll do my drag over
here and let's sketch in. My rectangle for my wizard. Doesn't have to be
exactly like this. Remember, you can change
it however you want. Like maybe I wanted to, I could do it taller,
rectangle for my wizard. But again, you'll see I
keep my lines sketchy, okay, So I'm not pressing hard. This is sketchy, sketchy lines. I figure out how
wide do I want this? How will I don't
want my rectangle? I think this is good. And then I'm going
to do my rectangle for my drag and then
I'm going to line, these guys are actually take a line across there
and see that they're, that they're lined up. Make sense, it might seem I'm leaving
a little bit of space in-between because
I didn't leave my wizards holding his
wand or something. So there we go. Okay, alright, so our shape is in nice enlightened sketchy. Let's start with Dragon. Now, the first thing that
I'm going to do when I'm starting with a very
basic shape and creating a character is to come in and sketch in their eyes. Now, there's no rule as
to where I put the eyes. This is the very basis for
what's going to start to create your character and
how unique it is to you. I'm pretty my eyes back here, so I've done an oval and
then a sort of a smaller, smaller oval or
circle right there. Now, the reason that I've
done my eyes different sizes that I think
it's going to make my character look
a little more fun. And I've chosen to
stick my eyes back here because I'm picturing
this as being the back of my character's head. As for my dragon, I can come across and
this forms his nose. Okay, That's what
I'm picturing that his, that's his nose. So next thing is, I think, about my next most important
feature in my character, which for the dragon is
definitely his mouth. I'm pitching a big
wide open mouth. So I'm going to form that
out of the rectangle. So all I'm gonna do is
bring a line back here, see from the front of his
nose all the way back. And then I got to maybe
give him a little, little curve up with the answer. So you smiling. So there we go. And then another line down
will make me Smith chart. Another line down. Now it looks like
his mouth is open. You didn't have to
do it like that. You do it is just a smile, but I'm going to do
it as if he's got a big wide open mouth. He's talking to the Wizard. Anything else for my
character's mouth? I might make it like
he's got yellow because his mouth is open. Maybe we see his tongue,
you know, so there we go. Maybe we're seeing, seeing
his tongue like that. That's draw some nice attention. Then next, I need to get, I think my character's
arms and legs on. Legs are straight there.
I could come along and draw another shape down
here to create some legs. But what I think I'm
gonna do is I'm going to make my character
to be quite short. And I'm just going to show a little rectangle
out of the base. Then all of a sudden there
he's got he's got legs. I guess I'm not I'm not
doing that parser here. I can erase off. There you go. Now he's already,
he's got some legs with a very short,
very short and wide. That's quite cute. And now I want his arms. So what I'm gonna do is I'm not going to chop
it shape up for that. Instead, I'm going to. Adding a little rectangle. That little rectangle
will be his arm. I'm picturing him
waving at my wizard. So I've drawn it at an angle, but you can draw it
however you like. I'm pushing it out
there at an angle. Next is my characters
other arms. So I decide what's he doing
is he got his arm up, you know, he could
have is let's do this. I'm gonna do that this time.
His arm up as a fuse, use. He's very excited
to see the wizard. So another, another little
rectangle up like that. So he looks like he's
got his, his hands up. Now I'm missing some big
features of my dragon. The most important is tail. Now if the tail, I'm also going to add a shape, what I'm gonna do
is I'm pitching this is my characters back. All I'm gonna do is swoop
a line out like this. You see there? So it almost looks like where's that little
holes I can move and it's going to attach a
moon to his, to his back. Here we go, That
he's got a tail. Look like that. But you could draw everyone. Maybe you want to go
a little triangle on the end and he's got a
spiky tail or something. But I'm going to leave
it like that, I think. So next, I've got the outline for my character and he starts to
look like a dragon. So now I can come in and add some smaller
features to them. First and most importantly, I want to get in my
characters Peoples. I'm picturing him looking
over at the wizard. So I sketch in two
little circles or ovals, ovals that are on this
side of his eyes. So it looks like he's
looking over here. So that's quite good. What else? I think he needs? He needs some horns.
He's a dragon, so let's get some,
some horns on him. I'm going to do one
up here. And again I'm just adding a shape. So it's almost like a
straight line and the curve, it looks like a quarter of a circle or maybe
more than that. So there we go. Now I can decide. I'm going to add some
spikes in his back. I think I'm gonna do
two horns on his head. A couple more shapes like this
or like this or like long, long, long oval
shapes almost there. Anything else? I think
that's fine for him. I think that's fine. Except I think he needs
a little bit more. Oh my goodness, I'm forgetting
most important thing. We need his wings on it. Okay, so I'm going to get
on my characters wings. So I'm going to do those. I'm gonna make them small. I don't know how this guy flies, but he gets small, small wings. And all I'm drawing is two
triangles onto my character. And see this,
they're at an angle, triangles and they're at
an angle to each other. There we go. I could make
them want to make this shape. I could do them. I could do them like teardrops. I could do them. I might
do it that makes you a scallop line down up,
down the bottom of them. How's that going to do a scalp? Scalp under the curve Kircher, three little curves
along his wings. Or I could make
them join, but I'm going to leave them
small like that. Then next, any other
details for my characters? I think, you know what? I
liked this triangle shape. I'm going to use that. I'm going to put
little triangles onto the ends of his fingers. Now it looks like
a little thing, little, little claws and toes, little triangles along and
it's all building up shape. Charles, there we go. Now he's got his
little, little clause. Look laws, just simple circles. And just that olecranon
and we give them nostrils, nostrils die, those are going to be what do
I think that's it? I'm thinking I'm ready to
outline this character. Remember you don't
have to have one pen. You can just go over your
lines darker in pencil, but I'm going to
go over and pen. I come in and I
outlined my eyes first. Now the reason that I do eyes first is because I
want to make sure that I capture my
characters expression to meet the eyes are
really important for that. So I kinda do those first. Then I can start going
round my character's face. I'm going to keep the shapes
all quite squared up. All the lines are
staying quiet square. You could round off his
nose if you wanted to. It's all a matter
of how you want to do the character
in your style. But I'm going to, I'm
going to leave them like that little lines as it's
been quite, quite simple. Now the other thing
is, I haven't done any teeth
along my character. I think I need some teeth. I've done these nice
little triangles here. Why don't I add some
teeth to my character, little triangles, it's just
little triangles all along. He's now, here we go. The reason I'm doing this now because they're in front
of his tongue. You see? I want to do the
teeth and then I go in and I then I
outline my characters. Tongue. There we go. And also because
his mouth is open, I'm probably saying
I want to show that I see through to the
back of his he was male. So there we go. I've
drawn a line down and that will be the
back of his mouth. So we're sort of seeing
him at the side. Now that I've got the
most of my characters. Eyes and mouth dub. I can come around and do
the rest of my characters. Smaller features around is
the back of a moose body. So horns, horns down is back. Then I remember when I get
to my character's arms, I stopped because I want to show the characters arm in front of his his back or in
front of his spine. Okay. Then I can keep going down my
character. He's been tail. Remember, you want to spike
Yeoman and leave it plain. And around the rest of
my character's body. Nice, spiky little toes. And body again, I
get to this arm. I'm going to stop an
outline like that. I could have done it because
otherwise my picture him, he's just got to rotate it. He's kinda turned
around a little bit. And then the rest of my
little, little details, all my characters, nostrils
and use fun wings. And I'm gonna make
them with this scallop you kinda curvy
line at the bottom. You don't do that. However you like, get
creative about stuff. I don't know if I look at
my ink is going to be dry but I'm going to
erase off my lines. Don't do what I do. Don't erase, erase
your your character too soon because you can
smudge your ink that way, especially parts that are that have more ink on
unlike lipid pupils in that right where
you've gone over with more ink like Erica. And I'll erase this off. And then I'm going to have a
look back at my character. Whoops, I did too much. Going. Have a look back at my
character and see if I need to add any more details. There we go. Oh, he's good. So looking back to my character, do I need anything
else I had to I mean, I feel like I could add
maybe a little belly to him. You could do that. Or I think I'm going to
do some stripes that my characters who are maybe both and they both need stripes and all the other steps on, on all the horns just for fun. But could be something
else. Maybe he needs some polka dots down his his, his tail or eat like you said, you could have done spikes
down in I think that's enough. The only other thing
that I would do. Another marker for
this is this is where it's helpful to have a black marker
that's a little bit thicker versus the one
that I'm coloring this in. This is the back of his mouth. You see, if I color
this in black, then it's going to
really help make my character's mouth noticeable. You really going to see it
at your, your attention. You're going to notice
that there we go, the first character
drawable shapes. Time to work on our
wizard. The wizard. Having a look at him. I've got this rectangle
shape that I'm going to use to create his
head and his body. Okay. I'm not adding any more
shapes to this one. Well, not not for those parts. I'm going to start the same way. I'm going to come in and
drama characters, eyes, so two circles or ovals
for my character's eyes. Except this time
I'm going to stick this side of the rectangle. But again, there's
no telling that you have to put them up the top. You can pay for them further
down, It's however you want. But I'm picturing my wizard
looking over at the dragon. So there we go. Eyes on this side and
these turned this way. That means we see his nose. Okay, so here I start
around my character's nose. I think this is gonna be
a bigger feature for him. Adding a as long as like an oval so
you could picture that being an oval shape. So I had an awful maybe yours is small, I can do it however. And then I'm going to do similarly to what we
did with the drag and see how I created this tail
by doing a soapy line down. It's just like the shape of
a moon, almost slim moon. So here we go. This is going to create
my wizards beard. Put straight in here like this to draw yours however you like, make it creative with it. And then I'm going to
continue the lineup, right. So I'm picturing like his beard. His long beard was
already on the ground. It comes up like this towards
where his ear would be, like a word with earlobes. I'm going to hide
it under his hat, I think. Like that. So it kind of cuts his body and not quite half
but up that one. I just I just
continue the curve. There we go. He's starting to take
the shape for wizard. Now I want to do the next
most important thing. I think I need to get
onto my character's arms. So here we added a rectangle. I think I'm gonna do
the same kind of thing. I'm going to add a rectangle. It sounded a little
bit of an angle again. My characters arm coming out. In this case, I'm
going to also add on another shape
to be my wizards, and hence can be tricky. So all I'm going to do
is add a rectangle. You see that direction on top of his rectangular are a coder. I can make this line come
down and go like this. It looks like it's his, his, his cloak rabbit, but, but I'm just going
to keep it simple. So there we go. Next, I need my
characters other arm. I think I'm just
going to do that straight down and decide. So I'll keep it like this. I could have done it and
I hear that the arm out, I'm going to keep my
wizards arm straight down. So another rectangle now I
sketch in a hurricane really lightly because I'll be going over this darker in
my ink or like I said, you can do the parasol
and another rectangle on to be his hand. I think I'm going to tuck. How's this going to
do another rectangle? It's like he's got his
spell book under his arm. Teach that dragon or
something, some spells. Just a rectangle coming
out from under his arm. Going into, you see just where his hand
curve around the book. But we don't even
need to do don't even need to do fingers. And then I do want to put a
wand into my wizards ham. So here it is. A straight stick. Maybe go make mix a
little bit thicker. And I think there is a charge. Does it need a little
star on the amniotic? Do this, but whenever you
want to put on the end, or it could be a little bright. What I, what if I do this? Those stars have fun shapes. I could go like
this X capital a, little sparks coming off of it. Could you that maybe now I'm missing a
really key feature. I'm missing my wizards hat. So let's get that in. I'm going to draw this by
drawing on another shape. So starting from around my
character's eyes, okay, there, I draw a line
back and align up. I'm making a triangle. So I play around with those. I love for you though, right? I think I'm going to make my
wizards hat flopped down. I draw another
triangle on the dock. See two more lines out. Floppy hat, big floppy
drives is right. There we go. And I got to finish off his
hat on his head, right. It's down on his head. So from around where I
would picture he's either you go through that
loop for voters. I down to the back of his hat. Now it looks like it's sitting
right down on his head. There's into a beer. Describe a little bit. And then what am I missing? Oh, I need some
more details now. I'm missing the most important
thing, pupils, right? I want them looking
over at my drag it. So here we go. Two circles
on this side of his eyeball, looking over at his
friend, the dragon. And Aye. Aye, Mr. One important one. What do you think that
smile, He's no mouth. But I think I'm going to add a mustache to
this character. So that's just gonna be, it's all formed
out of this shape. So if I just curve around
as if that were a circle, then I might make a
little bit like I did the scallop line on
this character's wing. I'm going to do the same
thing, but the other way around just do like
curves like this. So it looks like
he's got a fuzzy, fuzzy mustache like theories. Make it longer. Terrific. Maybe I need the
same thing up top, so little tuft of
hair coming out. So again, I would
pretend like how about a circle there and then draw curving
line coming around. So it looks like he's got a tuft of hair coming out
the top of it. And then this
little smile areas. And I think I'm ready to, to outline this character. I start with by outline
my character's eyes. If it were a character where I thought the mouth
was most important, I might do that first, or if there was some
other feature that, that was really important for me to capture, that
might do it first. But for most characters, I'm going to catch the
look in their eye. Now she just knows and now I can come over the top of
my character's head. Can do his wizards her hair above. Now I can come down
around my characters, the rest of his body. So I can do is be here. Now remember same thing. What I have something that's
overlapping in front I stop. The spell book is in front
of my characters beard. I outlined that. And all I've done is I
go over my characters. Feste is get a little curves. It looks like he's got knuckles. Spell book in
restaurants, beard. No, I can do his other
arm as I catch it. Lines up there. Keep it simple. And here's his uses warned. The only other thing
I have to do is down his back and I think I might I'm just going
to swap this out. So it looks like That's the back of his
robe, it goes out. I think that will look good. Now, I erase off my lines. Or even if you've opened pets, I can still just neaten up some of those sketchy
lines if you like. And then I'll have a look
back at my character and decide if he needs more work. If he's if he's got enough on him or if he
needs some more detail, like I'm thinking
maybe some patterning or I could do something down his cloak, his hat. There we go. Great. I think what I'll add is
some stars to his hat. And I could do a different
pattern down his cloak. I'm going to leave it plain. I think the stars are
going to be enough. I didn't do any I didn't do a star on the end of his wives. I feel like I need to
do some stars here. And I do some, some that are you see
the whole star and some that are like this where it's
like they go off the edge. Because this will help to make my characters hat look
like it's fabric, right? So to feel a little bit
more, more realistic. So how's that aren't enough? I think that's enough. Right? We've done, are done our wizard, wizard and drag it. Let's have a look
back at our shake. So you can see here how we use the rectangle
to create our wizard, his whole body and his head. And then adding on
shapes to Korea. The other parts like he's, he's had in his arms. And then over to our dragon. Same thing. I thought again, I could
have made it water from the shape creates his entire head, body, and legs. Then adding on more
shapes, the moon shape, the rectangles, half circles, triangles to create the rest of the features
on the character. So that is how I like using shapes ofs much within how I like using shapes
to create characters. It gives me a great
starting point. If you want to give yourself
a little do challenge, How about this?
Use another shape. So here's one. This could make,
What do you think I can make a pretty good, pretty good dragon and
a pretty good wizard. So same process. Sketchup your shape. Put some eyes on and
then see where you can add to that with shapes
to create your character. And I'll see you in
the next lesson.
5. Valley of Dragons: In our first exercise, we took one basic shape and turned it into
two characters. This time I'm going to do something a little
bit different. We're going to play around a little bit more with the shapes. We're going to draw a bunch
of different shapes all over our page and turn them
all into drag it as well. There may be a wizard
or to throw it in. Now, you may think that some
of your characters turn out a little bit funny
looking for That's okay. The aim here is to see
what happens when we take a basic shape and really use our imagination and see
what we can create with it. Now this one is a sketchy one, so all you need is
a pencil and paper. Alright, I think
we're ready to start drawing our valley of dragons. Here's our next
exercise, using shape. Now what I've done is I've
grabbed, I grabbed a bunch of, a bunch of different
shapes and I thought we can start off by sketching out some
shapes on our page. I'm going to arrange them. However I feel might
be kind of fun. You can use the
shapes I'm using. Or you can also sketch
in some of your own, especially some of your
own shapes if you like. I'm thinking that maybe this, this might look kind
of fun. I'm doing. Mainly I'm gonna do dragons, but I may pop in
or a wizard or so. So thinking now these
might look like maybe those were flying dragons. I like that maybe
someone's sitting down. I don't know. Alright, I'm going to
sketch out these shapes. So start off sketching yourself in lightly some shapes
as my circle old habits, small as okay, I want to
leave a little bit of space around the edges because
these are dragons, right? I might be doing a tail or
a long head. I don't know. Here's my next one. It's kinda, it's kinda
like a teardrop shape. Alright, so my sketching, sketching my teardrop areas, Sketch and Sketch myself
at mosh pit right there. Sketch in my teardrop. Like this. This feels
like it wants to be a line Dragon for sure. All right, that was
done. Great. And then I want to do a tribal well, let me get quite that
big, but I'll make it, I'll make it pretty big
somewhere around here. It doesn't have to be used
as an attribute level. It can be maybe something
a little bit of an angle. Anything that can make Maya, maybe I'll do a bit more wide. Here we go. How's that? Okay. Perfect. See how you're
sketching my lines. Get this is this one's just, I was just playing around. Alright. These won't be
perfect finished characters. And I have a sort
of a half circle. Pop that one and I'll
do it down here again, I'll maybe do it level or do I do I put it out a
bit of an angle again. I think it's all
right like this, maybe a bit smaller.
I can vary them. I don't have to do them the
same size is that these, that these shapes
are, they're just there just to give me an idea. Alright, that's my
half circle done. I can move those eyes off. And then I've got
an oval. Again. I can place it in whichever which we don't want
to be standing up. So I'm going to do it
kinda like this on an angle and pop in life. My oval here it is. It's not quite as awkward as long as that one,
but that's all right. Perfect. Okay, so we've
got some shapes to begin. Let's see how these can inspire
me to do is some dragons. And like I said,
maybe it was or two. So I'm going to start
up here at this one. This one seems like it might be one of the easier ones
for me just to start with, because I'm thinking
it feels like natural physical line dragon. So if it's a flying dragon, I'm picturing that this
is my, my dragon's tail. I'm not even really
change it very much. I may just add a
little, little point on the tendency to thicken that up a little
bit and let's see. I didn't like that already. Then I'm going to
come in. I'm going to place my character's eyes. Alright, so that can
help me see where and how I'm going to create
my character's head. I saw a couple of
eyes get sketched on. Remember you don't
have to do it. The way I'm doing
is just one way. Then I'm going to get into
this character's mouth. And it almost feels like for some reason it's
gonna be a giant mouth. It's like for this character, I feel like the ending
part of the body. So on the main part of
this character feels like, like it's this big, big mouth here and
face at the front. Just because that's sort of what the teardrop shape
makes me feel like. You might see it differently, but that's sort of how it, how it makes me feel. They've been lots worthy, almost looks a little bit lucky. Could you turn them into a whale or something
couldn't do, but he's going to
turn into a dragon. Definitely, Yeah, well, at work, a couple of pupils, okay. Couple of pupils
for my characters. I, I want, he's flying this
direction in my opinion, so he's looking down here. Oh, please not
going to crash into this striking over here. Next, What's next most
important in my character? I think that because
he's flying, I better get in some wings. The wings, I'll do them
like two triangles, right? So I do a V shape, and then I do another
one into a triangle. There we go. That's when going one way. And then I turn the other
one into a triangle as well. Okay, so I'm just
building on my shapes. If I want to, I can
make the bottom part of the wing a little a
little a scallop line. It's a curve, three low curves. 123, same with the other 1123. Or I can keep it straight. I have this little
triangle for the tail. So it makes me feel like I want a little bit of a pointy
shapes somewhere else. So that's why I thought maybe some little points on the
wings might look good. Because the rest
of my character is just one big round
teardrop shape. Next, I want to keep making him look a little
bit more like a dragon. Perhaps he needs I can
give them nostrils. I could give him a big,
perhaps it's going to get big, a big horn on top of it. We've got a big,
big, big horn there. Or I could give them too little like two
little communicates. Tuple horns behind us. Behind this are behind his eyes. Two little horns like
that. He could have. Remember, this is just, we're just sketching. I'm
playing around. Maybe I don't think maybe
those stuff too small. Maybe that doesn't look right. Grab my rubber. Maybe I maybe that's not right. Okay. So maybe, maybe
this maybe this. What if I make him what if I make them all
but fierce talking? I'll just angle has z. If I chop off the top of this, I have is a circle. But a little bit, little bit fierce, but
I've gotten smiling. Maybe that's not the best idea. Let's try again. Try again. What will the
shape influence me to do? Why don't I round up? I'm going to round up. That feels better.
Round the eyelids are top of my character's eyes. Maybe I turn this into maybe
this is this is Mrs. Mrs. Dragon. There she is. I gave
her eyelashes and the eyelids and
if I can give her some little eyebrows,
how does she feel now? Yeah, that feels more fun. Okay. Then I've given her
this gigantic mouth, an exaggerated a bit
by adding some teeth. Okay. Because it's
just a straight line. I could have drawn it open. That would actually have been quite a good design
for something that's a teardrop shape as well because this part of the
character is very large, but I'm gonna go quite simple. Jaggedy teeth like that. Maybe she does need
a good nostrils. Nostrils on her. That looks better.
I'm missing her legs. They're gonna be teeny tiny
because I don't want them to overpower the nice shape
I've got of her body. She's just going to have
a little tiny lift, couple little curves, couple
little curves out the front. And it's almost as if I've done little rectangles
that are curved and pointed her little
toes because I have the points here on the wings
and the point on the tail. And I've got a point as
well on the, on the horn. So those are our nice features and then I can do
too little that. So that's why I put points on the front feet and I'll
do the same thing to her, her little, little back feet. I think that's it
for this character. I'm just, like I said, this exercise is sketchy, so I'm just going to
outline the lines that I like in pencil. Beginning with her eyes. Okay. Beginning with her eyes. She used her eyebrows. Maybe I should have
made those points. That could have
been a good idea. Around her body. And under her belly like
this, here she is. And her around a
rather large face, which is created by
our teardrop shape. And then just her little
brother, large smile. Again, the repetition
of the triangle shape, right for her teeth off quick
query triangles in here, despite starting off with
the basics of a teardrop. There we go. First, first drag and I got to have a bit more detail to
hurry only get one. Like there were some stripes
are some spots or whatever, but I'm going to
leave her like that. And I'm going to go onto, I'll go to this little
character here actually. This is also going to
be another line dragon. But I've got, I've got a
fairly different shape here. I mean, if the teardrop you can imagine that that
would be a circle. But here I've got just
circle, no tails. I'm going to have
to add in a tail, but I think I'm going
to make it quite small. I'm going to make
this as if this is my characters
gigantic, round body. Okay, so I'm going
to exaggerate that as the round body here, I did it such that the, the shape created the
character's head. Here I'm going to do
it where the shape is creating the
character's body. This I'm imagining
is my dragons body, which means I'm going
to need to add a tail. You might make it long and wavy. I'm gonna do it short actually, because I'm going to make it
such that both the tail and the head are small and
short and the body is big. Okay, So here we go. I'm adding in a little
curve line that's gonna be sort of like the
opposite side of my tail. Okay, So kinda balances out
the tail on the other side. That's the little,
little characters. Neck is a small,
short bottleneck, short little tail, and then
a little oval on the front. Again, that's quite small. Or academic route,
maybe I would want to exaggerate that round shape, oval to be my character's head. So in this character, the body is what really is exaggerated and
expressed in my character. I'm going to leave it
just around like that. I'm going to start
and I'm going to put some eyes on my character. I'm going to get there.
We're just gonna do small oval but maybe I make
them round, that make sense. It's either round body. I'm gonna do a
character with rounded, rounded eyes like this. There he is. He's cute, okay. And maybe I'll do
the same thing. I'm going to stick with this
idea of round and I do think round nostrils cells that
maybe they're blowing smoke, you know, maybe
there's a little puffs of puffs of smoke coming
out or something. So here's just a gigantic mouth. I'm going to just little
tiny smile, That's it. I'm not exaggerating
the faceless character, saturating the body. I've got. Now what is starting
to feel like a dragon? I need some more drag
any kind of features. I think what I'm going to add is maybe this character
gets some sort of like, I think he might need
a couple of horns there because his
head is quite small. Just a little something else to pull some attention there. Why with a couple of
two horns on his, on his head may be
angled this way. I'm going to do maybe spikes down the character's
back. How's that? Spikes along? A little spikes all down. I think that looks good. Maybe just maybe
just tiny wings. Maybe just like little
tiny, little tiny wings. So it's kinda funny thing
was carefully gigantic body, big, big feature of
its gigantic body, a little, little tiny wings. Somehow he manages to fly. Then I'm gonna do, I'm gonna
just save it teeny legs. I'm going to do energy
teeny legs on them. So that is a four
little rectangles and just spread them out when it's coupled of fraud and round here and a
couple more at the back. I could do. I make this
character maybe I'll keep them. That the legs quite simple, I'm just going to do occur
if I'm not gonna do toes, there are pretty small so
that you keep them straight, straight little legs like that. Feels a little more
dinosaur-like. Alright, so that's that. And since I've got
this gigantic body, it needs broken up somehow because it's big and
it's quite plain. I could do something like put spikes all over him or I could, I could do a pattern, I could do sports. But what I think I'll
do is I'll start here. I'm going to do like a
curve as if he's got a different colored belly like around like this,
follows the shape. Here's the curve, I should say, of my round body. Here it is. Here it comes down.
I don't know. Let's play around with it. Remember these ones
such as sketchy, when I'm not gonna, I'm
not gonna be inking. Then let's see, maybe I can do a curved pattern along
around the belly. I'm thinking. Then you'll really feel how round
this character is. Alright, I'm ready to just give myself a little, little outline. So I actually did the horns their first because
they're right intersecting with the eyes around
my character. And down and around him. Then over his back. Actually, what might've
looked good is instead of doing spiky scales, I could have done
it rounded ones. That might have been a good
idea to work exaggerating. Getting my character like a little wings on waving like
little, little motion lab. So the waves, we
feel like it's fine. The wings rounding them up.
It's a good idea to do. It. Exaggerates the feeling of the characters
round body, right? When I'm letting myself do, is be influenced and get ideas from the shape
that I've started with. Don't forget, there's
a couple of couple of puffs of smoke coming
out of his nostrils. There he is. He's got, he's got
it takes a lot of energy to lift up this body. Alright, next character, so I like those,
those are quite fun. Now next character,
I'm going to go four. I'll do, I'll do this one. I'll do my triangle. It's gotten a little bit closer. And then I'm going to sketch my triangle a little
further over. A little bit smaller. We're going to go house that has a little bit close to smoke. Alright, so I've got, I've got a shape,
my triangle shape. This, this is a bit
trickier almost I think, because I'm naturally want to round out some of these
edges to create my, my dragon. But I'm gonna do something different with this
one a little bit more. What I did here, see
I used the shape and I created the head that
right within the shape. Here I added, added a shape on top to create the character. Here, I'm going to
do a similar thing. I want to just
slice out a section of my shape and this is gonna
be my character's head. You say, I'm picturing
this character. This is like the, the, the, the back, the tall
back of the character. And that's if we're seeing
him from the front. His head is right here. I'm doing a half,
half circle shape. This is going to
create my characters. Have a look there he
is. That's his head. Because the way
this curves around, I naturally think that maybe
he's got all these little, maybe it's melts down there
at the end of this curve. That makes me go and place
in my character's eyes next, okay, because now I've
decided that that's his head. You could do it in
different way around. Maybe you want to do a little curve down here and that's your character's head. But I'm doing it up here. I'm going to do bigger eyes on this character
here is bigger, bigger eyes, bigger eyes. Because I've done my sliced up a section for my
character's head. So there's my
characters, Baker eyes, maybe he's got a couple of life that I feel like he needs a couple of little
horns or even, even ears maybe look to it. You might look too
much like a cat. I won't do that. But I do like the idea of a
couple of horns on him. And because we've created
this head within the shape, I might need a few more features to make it so that you can kind of understand
how that's going to be. But for the moment, I'm going to go on and
do my character's body. So this is, I feel
like this is his back. Okay, and then maybe I'll
add a little swoop out here. This is his tail. Kind of like maybe use this
sitting right on his tail, just bends around like this. I add a little swoop. Little swoop. Maybe I'll give them,
actually give them a triangle on there.
I don't know. Let's see how it looks. It's a triangle shapes and maybe a triangle would be
a nice thing to add. Now, this thing is
my character's body. It's as if he's sat down. So maybe you always see
is like this is what he's got to at least got
a leg leg out there. We did this in the
previous exercise where I created legs on the dinosaur
by chopping out a shape. I'm gonna do the
same thing here. I'm gonna, I'm picturing, well, not actually going
to chop it out on, but I am going to draw
the legs are like this. Like you sat down but
like your dog with you. So these are the front legs. I draw them within my shape. Or I could go like that and
make it as if he's sitting, but I'm going to
pretend like this is his big belly comes
down or something. But there we go. Those
are his front legs. Do I even need a back leg? I mean, I could possibly put it in a little older, Shorty one. Maybe. You sat down like this. Little back leg like that. Okay. There's there's the knee
partners, there's there's foot. Okay. Now, let's add a few more details to start to make him feel more
like a dragon. We need pupils and his eyes like my picture is
characterised by piece. He could have been looking
up at this character, would make him looking
down pupils down there, looking down at whatever
is happening to this character and give them, give them nostrils,
U-shapes, upside down U, as I said, like us giving him hormones which I quite like maybe there's a tuft
of hair on there. And what else? What if he's sitting, we're going to maybe he's got his wings out like this, right? So we're just seeing these
wings in behind and I'm going to do them sort of
triangle icon areas. Now it's starting
to feel a bit more. I see when I add
the limbs like that was starting to feel a bit more like we're seeing him
sat down from the front. There's just there's his mouth
open to do the open mouth. I just show that
character subtle curve for the characters tongue. So here's wings and Microsoft. I'm going to give them
a little, I'm going to give it a little scallop
shape at the bottom. So I like this one. They're quite small. I wanted to feel because
we've got the triangle. So I want to really
feel like he's books that sat down on
the ground, right. Anything else I could give? I could give some
spikes or something down as devil's back. Do I need them? I don't know. Well, I guess I can put
them in I'll put them in a few spikes down his back. Then I think that's pretty
good for this character. I might give him since
I've got the spiky using the points they're making
them a little pointed toes. It might help to show
that those are legs, his front legs in
comparison to his body. Just a little couple little
toes down their back leg. And now I can darken down
the lines that I like. And again, these are just quicker, quicker
sketches, right? You can even try doing these, these drawings with shapes faster than I'm
doing them right? If you want to just
like SketchUp ideas, they don't have to be, they
don't have to be finished. Finished drawings. I just think that sometimes I'm just
like sketching quickly and sometimes
it's nice to, to see which lines you pull out to create the
drawing at the end. That's why I like to do it. Well, you can definitely see
the triangle shape in there. Alright, next
character I'll go to. Ok, I want to hear, I'll go onto here. And I'm going to do something somewhat similar to
what I did here. Because this one, this one I
feel is a little bit easier because I feel like I'm looking
at a dragon. He could be. I'm thinking I'm
thinking head on head offices, head-on, sleeping. But you could do it where
you add a little head here and a little tail there and
he's and he's sleeping. But I thought I'd
do it a little bit. Slightly different
viewpoint to this one. Where he's like, this
is head on, head up. This is going to be a character's
head and he's asleep. So I'm just going to do a little like sleepy eyes like that. Just little curves as
all little U-shaped. That's pretty
simple. I could add, do I need to add a chin? I could possibly add a give my character a chin down here. Alright, at this stage
I'm sketching in any other shapes that are
creating my character. So that's why I've
got my initial shape. And then I've added
another semicircle within this half circle, just another, another
half circle down there. The characters sleeping. Maybe they've got, and then we just
see like the tip of their tail flipped out the door. Or maybe it's maybe it's
curved around here. There's a little maybe
that's the tip of their tail curved around. How should you ask?
So not another curve. This one is all about
adding, adding curves, or maybe we'll even give
them a tip to tail. I'm even going to curve
that curve curvature. Let myself be influenced
by the curves. Curved tail, curved triangle, a bit more curved, curved chin, maybe some
curved little arms. Curved little, little arms curved underneath his,
underneath his chin. This is he sleeps. Corolla makes me wanna
do curve nostrils. What if I do a little curve
is here for his nostrils. X, Alright? Okay. I can make them, can
make them quite, quite big and roundy, roundy. I may want to see, I'm going to put some horns on. I wanted to start to
get the character looking like a dragon. His horns. So pouch
on the question. That's okay. Then I could do it. Could you
spikes again down his back but this one because we're
seeing him like this, I feel like what we need
to see is the wings. Little trunk of the wings. The wings maybe folded, folded, lying down on the
character's back as he is. He naps, maybe curving around. Maybe I didn't curves like this. Maybe I do, instead
of a scallop this direction maybe I do
little curve like that. Wings. So I can exaggerate that
curved shape like that. How's that? Feel like? I feel like a sleepy, sleepy little dragon lands under under space and give him some little
curves at the side. I don't know if I
can decide if I'm going to keep this shape
straight like that. I forgot, I just let him
then curve around a bit. I think he's gonna
be alright like that though. Anything else? Oh, I need some teeth
or the nostrils and then teeth and even need a
couple of some big, big teeth. There we go. Okay, I can
outline this character. She's final lines. So my advice for
sleep utilize me. I'll make this another
girl TO eyelashes, but quite, quite good. And these are just little
curvy set aside at, and those are scales. There's something on
my, on my dragon. Curved nostrils,
curved up the mouth, curved a little chin. Same little arms
underneath my character. I probably should
have started with the wings since they're
on top of the body and are curved tail. And the curved point. Dan, Okay, one more and I
said I might pop in a wizard, so I'm going to do this pencils
directly, my next pencil, alright, wizard,
here's my wizard. But could have done him. I'm catching the center if you want to stick with dragons, but I just thought I'll
pop in one wizard. The wizard, I'm going
to do him here. He is. I could make us his head, a little teeny body
maybe make that as gigantic head could do that. I think what I'm
gonna do though, it's a little bit different. I'm going to make it, these are gonna be my character's eyes. Well, you see what
I'm going to do. This is what I'm
thinking. I come into place the eyes. I
place the eyes. Wizard knows he's going to have a giant beer that we did a joint beard and the other
in the other journalists, I knew it hasn't been
saving giant beard except so This is gonna be my beer. I'm gonna get a little
swoop for a little curve. Okay, Are you start to
see what I'm doing? I'm pushing my wizard. He's got knocked off his
feet. Okay, so here he is. Maybe he's like
little 0 first male, he's gotten knocked
off his feet. Maybe that's why this gentleman and I better get a
wizards hat on him. I'm going to do is get my occupancy he's created over and I was about
to do it straight, but then I thought, No, he's
created out of an oval. Let's stick with that shape. So I give myself an oval on the top of his head to
be the brim of his hat? Can I can do his hat. Oh, maybe it's just
stick up like that or says Stick them like I think
it sticks down like this. Flops down, I should say. Flops down like that. Great. I like him already. And I think he might
need eyebrows. I'm gonna give him
a gonna get gave him his bushy eyebrows. I better make them out of ovals. Oval is the shape. I'm gonna
give an oval eyebrows and then he's going to
give him little hands. Okay. Now I add in the rest
of the details, right? Or what's going to create. My characters look
like my characters are a little arms out like this. He's, he's curtis. Our careers handed
a little circles. Hands can be difficult
but start with the shape. Okay? So what I've
done to do his arms and the rectangle out and then a little circle on the end. This will turn into his hand. And then next, I need to do the same thing
on its little legs. Legs, legs. You see too much. I don't think that
the idea that he is he's a flopped over. And I'll do the
same little ovals. Ovals for his feet should be
enough. And he better be. He's dropped his want. Okay, So here his want. So this is going to
give it a little, a little star on it. Maybe. They're just want his, his fingers are gonna be open. Alright, so I just
draw a little again. Areas, excuse me. Draw a little ovals all over. He's shocked. I draw a little ovals. I drew the one to close. It's supposed to be
falling out of his head. Little over onto his hand,
creates his fingers. Ok. So everything is made out of shape and now I
can outline him. Okay. Let's grab as either way
it looks it looks like it looks very, very shocked. I didn't give them a mustache. I'm going to give
them a last-minute sticking a mustache and all
of his greatest mishmash, I probably didn't even need it. And then brim of his Hajj little extra
bool level up there. I could come in and
do details like little star on his
hat or whatever, but I'm gonna keep it
just simple like that. And his beard. Now you see it's
shaped, aren't you? It's also a little bit like
this shape sleeve of his Of his robe, I could
have drawn in the rope. Maybe I should draw a
little shape for the robe. I'll leave it there. I'm going to leave it just
like this. I'm not going to get fancy with just the theta's legs
and feet as shapes too. I don't need to love seasons. And again, I'm just outlining,
outlining the shapes. Okay, It's all abode. All about shape. Alright, that was good. We've got quite
the little valley of dragons and maybe it, maybe it needs a little issues
with little valley here. So what we did was we sketched in a bunch of
our shapes and then saw how each shape could
influence to us to create a character and look
at how different they are. I mean, here were the
shapes that we started with AI. You see that? The teardrop and how I
made that into the drag, where the focus is on this big head of my character.
Then what do we do? Or that we did this circle. Okay? So similar like
a curve like this, but we added in, added in the tail and
the head and exaggerated the circle as being the character's body and
then other features small. Okay, so that's how that
one was influenced. Then there was the triangle
on this character, a trickier one to do. But by coming in, in, shopping in a smaller
shape to create a head. All of a sudden, I
can see how I have a character who's in a
different type of a position. Not a typical, normally would picture a dragon flying through the air or
something like that. But not such a typical
were usual position. But it works I think it works. Actually kind of
like him the best. I like them all. And then what do we do? We did our little half circle. This is maybe an
easier one to do, But, but drawing the character head-on is perhaps not the most. Perhaps this on the first way that you would
think to draw him, you might think of drawing
this says the characters back and then his head out
here and his tail out there. Similar to these but by
using the shape and then duplicating the
shape by creating a head and using that
shape and other areas. It creates a different, again, another different position
for the character. And lastly, we got in
our unfortunate wizard. And instead of that, I could
have put them like this, which might have been
easier for drawing a wizard, put them like this. And all of a sudden he is, he's knocked a wizard
who's had a little, little accident or as well, something's gone a
little bit wrong anyway. Never mind. So I hope you enjoyed that. I hope that gave you
a good idea for how shape can be used to
influence your characters. Now if you want, give yourself
a little doodle challenge, you can keep working. And what I would
do is same thing, sketch out a bunch of different shapes
all over your page. Keep it sketchy, but create
a different character. Like maybe if you're in, if your favorite animals, dogs or horses, or you could
do a whole page of these, could all be birds
flying, right? Or maybe, maybe instead of doing drag as maybe you do dinosaurs, so they're a little bit similar, but you'll come up
with all kinds of different characters
just using shape. Alright, see you in
the next lesson.
6. Crazy Dog Pack: One of the best ways to
create a super fun and silly looking characters is
to play with proportion. This is where we change around the sizes of our
character's head, body, arms, and legs to see just how silly
we can make them look. We're going to draw a pack
of dogs for this exercise. We'll start off by
drawing our shapes. Then we'll change the
shapes around and create different
characters. In each case. Here's another one
where we're playing around its lights
sketchy exercise. So all you need with you, It's a pencil and paper. And we're ready to create
disproportionate pack of dogs. Get us going on, are playing with
Proportion exercise. I've grabbed us a
couple of shapes. So we've done drawing where we create a
character using one shape. Now I'm going to
stack two shapes together to create
my next characters. So I'm going to use these
two to create my dogs. I'm going to draw
probably for dogs. I think. I'll use these two
shapes so that the half circle will
be the dog's head, and then the rectangle
will be the dog's body. We're going to do this
for different times. But what I'm gonna
do is I'm going to change how big I make the half circle and how big I make the rectangle in each case. And then we'll see
how differently we can draw the cartoons, how generally these
characters are going to look. So to start with, I'm going to give
myself a little line, a ground line along the bottom of my page so my
dogs have somewhere to stand. And I'm also doing this
because I want to look at how differently they look in
comparison to one another. Now I'm doing for dogs. So that's going to
be one dog here. Dock yard dash marks
where the dark so I can kinda going to space them
out somewhat evenly. There's not like felt right? 1234, almost always, it's not quite right.
Alright, so there we go. I'm going to place my dogs in
those spots along my line. Alright, we've got a
rectangle and half circle. I'll start with the
first dog here. And I'm going to do them, well, I'll do a boat
in these proportions. So I sketch in a
rectangle like that. And I've left a
little space here, that's where his legs
are going to go. It's going to be my sort of normal English proportion dog. This is what I'm imagining. There goes my half circle
on top of my rectangle. Okay, so this is going
to create my first, hopefully normal ish
proportion looking dog. Of course, he stands up because
he's a, he's a cartoon. So he's going to be like that. Now. I'm going to give my dogs into
the legs down here. Okay. And the legs. And now I'm going to continue creating and turning
him into a cartoon. So let's see, I could give
him a big nose like this. And I'm going to give him yeah, I'm going to give
them some Google, a stylized so come in and
draw on a couple of circles. Day my character's eyes. Here we go. Spec ears,
floppy ears, maybe. I'll give them, goes flop, flop Italian, up and
down, floppy ears. And give him, as his
pupils have been looking over this
character here, that his other dog in his pack, in a lot of thought smile there. He's got sort of shortish. I could've made a
little bit longer to make them more proportionate, but I'll give him a
short legs like that. Little circle first
fit maybe stands on the ground and
little arm to match. So it's just sort of
a curved line out. Another little
circle for his part. Male first sale, I always
forget characters, tail and tail on their hearts. They look pretty good because
they need anything else. I'll probably do
some curves along his paws to make him look
like he's got doggy pause. I think that will do
it for that character. Now, I'm not going to
outline him just yet. I'm going to go to my next space and sketch in my next character. Again, I've got a rectangle for the character's body and a half circle for the
character's head. Except I'm going to
change these proportions. I'm going to make. So here had, had a fairly standard
looking rectangle here. I'm going to make this a tall. I'm going to keep the
legs but at the same length and looking for a tall, slim rectangle. So it's as if the character's
body has gotten elongated. It's gone, gotten longer. How's that? X belong? I'll do the head
the same same size as this half circle about. Maybe I could tilt
it, maybe I'll do, I'll change the title, tilt this character's
head up a little bit. And how's that manner? There? She's a girl dog. There. It changed
here is similar. It's similar size head, tilted it, and a long, long, long, narrow
rectangle for the body. Let's sketch on some legs. So she's got about the same
length legs as this guy. Maybe I'm going to
change it a little bit. I always like to change
things. I'll make her she's kicking out your
leg for some reason. Maybe. Yeah, I'm
changing my wife. She's going to pick up
this lecture is going to be maybe she's playing
soccer or something. That's just my little mark so that I get it in the
right position when she's dancing on one leg up in
our tail, tail, tail there. There's one on my golf social
delta is similar. Legs. She's kicking on out. She looks almost like a
sausage dog, doesn't she? Really super long
body sausage are. So they have those
little V-shaped ears. Why don't I give her
those V-shaped ears? This is a sausage job maybe. Erica. And I'm going to do
little eyes closed. Very simple. Curves like that. And a little bigger smile. I cannot, and I make it bigger, bigger smile on this
character like this. I'll use this whole shape
here to be my characters. Up into her smock isn't
eyelashes there to go. Bigger, curve around
there for her. I like her and give her
her little front leg. So we have extra preferable in archaea. It's too
close to his house. I can fit it in my style sheet. That's good with
Google for arms up. She's a Bob, him in the nose. She is well circle for her paw. Enforce. The tail. Will care about you for
a pretty short tails. Sausage dogs. So here we go. So
now we've changed. We've done a normal ish
type of standard dog. If it's standard
document or not, then we've done a long rectangle for this character's body. So what shall I very next? I'm going to, I'm going
to change the body again, except I'm going to
make it much smaller. Okay, so I've got
super long hair, got kinda meeting there. Here. I'm gonna do a
short little body, but here I've done all the
same length leg, legs. This time I wanted to do
really long, really long legs. So I sketch in my shape
for my character's body, that it's not big enough.
It's pretty tiny, isn't it? Why is this maybe a
little tiny bit wider? And my God, here's my eyes. What kind of dog has
really long legs? This could be a
poodle. Prompts me. This is a nice, elegant,
nice, elegant poodle. Screen, nice elegant pool, aka a lot tougher
around the tail. And then I'll have probably heard myself have
done my character's head. The head, the half circle was kept the same in
both these cases, I can make it bigger or
I can make it smaller. I may make this
character's head smaller. This, and I'll give this dog, this dog and neck and let's see. No, I don't think so. I think that I will see, I think I will make this character it
would be smaller head, but other down here, down here on the bottom,
there's a half circle. I tilted it again. It's a
bit smaller than these, so both the body and
the head are smaller. And I said I do a poodle, so maybe she's got a big
puffy, Puffy hairdo. And they've got sticky
audi ears like this. Like a poodle. I guess. If my character, long arms, maybe she's like maybe she's a she plays she plays
basketball or something else is
just going to have a long arm here and here's
her mother, that long arm. She's calling out, calling her friends, come over
and play with her. Here she is. She's she's playing basketball. So I can finish off my character by getting
some eyes on her. Circles, her eyes. She's she's looking
over this away. She's looking over at her other Friend and her pack in all
those unnatural line there, I can really make that her
smile, sideways smile there. How would that work? There she is. And do poodles have adult
they have a little while. Little puffs of hair around
their ankles don't like. That'll work. Yeah. Little puffs of air a first-day around their ankles. So there will be her Here's the he or she is
playing basketball. Okay. That's also
going to be reweaving. She's calling calling
a friend over. Here. She is saying, come on over. Okay, For the last dog. What I need to change is I
think the size of the head, I have medium, medium and
smaller half circle here. So this time we're going
to do a big half circle. I don't have a lot of space
to do it this direction, so I'm going to do it. I'll do it this direction. How's that? Looks pretty big. So here I'm changing
the proportion of the size of the head. Big half circle. I've done medium rectangle, tall, slim, one, small one. I could do. I could do, I could do y do. I'll I'll do a
little bit narrower, but I'll make it longer. How's that? So as if he has very, very short legs, There's
the rectangle, rectangle. And then there's the head sitting on top of the rectangle. And he is super short legs, little tiny, little tiny legs. Let's draw them as
little tiny rectangles, little squares down rather means he's going
to have tiny arms. I think. John, medium
EMRs, long arms. This is super teeny tiny arms, which of course
he do to support. You won't be very
good at basketball. I don't think a new tail on him. And he's going to come
over and maybe he's got he's going to,
he's got a racket. He's, he really wants to
play racquetball barriers. These programs don't have
any sports or she's dancing. This guy discuss and
need to be the coach. I'm going to give him a whistle. There it is. It's
got to resolve. Okay. I'll finish off this dog. The dog has a super big, long face, so I better
to bigger style of eyes. So maybe too big. Ovals overlapping
on this character. I chop off the bottom
of those and I feel like he needs oh, maybe he's got a headband on because he's going to
play, what did I say? Squash. And I think he needs one years. Lawyers have this huge, long years, long, maybe even
longer, elongate the ears. These characters, I haven't done anything special with the ears. They've all been kind of kept the same. And
here, here we go. We see is super long
ears popping through. And I think he needs a big nose. This was all the
same size November getting the nice big nose. And a little tiny smile to
exaggerate his big nose. I think you might
need eyebrows, this guy, eyebrows on him. Maybe not. Because he's a little tougher to softer hair out with top two. So let's outline
these characters. The reason that I didn't
outline them as I went along was I wanted to sketch them all in
first and see what they would be like as I changed the various proportions of them. I'm going to add our grasp
this guy as I go along. So I'm going to outline
my characters now. Let's see how they look and how differently the
characters appear. With the different proportions. Various heads and bodies, but mainly, mainly
what we varied. The rectangle for their body and then the half
circle further head. And just by doing
those two variations, we have very different
characters happening. When you're drawing yours. You don't have to do the
proportions that I've done. If you think you want to do
a giant head with a skinny, tiny body, I mean, that could work really well too. So don't feel like you have
to do the ones that I did. Here. I'm just doing
this exercise and pencil because it's just one
where I'm playing around. These aren't these aren't
finished characters. They're just they're helping me to see what it's like when I change different proportions
of the characters. Seals and seeing what
that does to them, to the personality, right? Because you're always trying to create characters with
lots of personality. Here's my little basketball guy. I like basketball girls. Maybe she needed a jersey on. Oh, am I supposed to
put the little oh, I missed putting the little
further balls around her wrists that she's probably supposed to have those. Poodle. Poodle makes a great
basketball player. So don't worry about these as being perfect
finished characters. Possible. The basketball. Also, the reason
that I made them the thermal rockets and
balls and things, is that even when I'm
doing something that's just just to sketch
where I'm just playing around with an idea like this one playing
with proportions. I, myself find that it's helpful to have a
little bit more of a context or an idea about what the
character is doing. Because for me, that
really helps me add to the character's personality
and get a feel for them. And again, it's not like this character is
going to wind up being my only dog
racquetball player. But by having something with them like the
rocket or that. It also helps me
to see how having another element in will change
the look of the character. So there you go. There we've
got our four different dogs. And they are all very
different in this guy. When I look back, when I
looked at all of them. This guy, does they just pretty
normal if if if you will. I think she might look the funniest or maybe
him, because we, all we did in this
character was changed the body that's kind
of normal mesh size. And you can even imagine a
sausage dog walking like this. But the poodle, and you look
at the length of the legs, look how short the body is. I can look at the
length of this body. The length of this body. This body is almost a third of this bikes will not three
times the length of that. So really, really different. And it's about his body is about twice the
length of that one. Then here he's about, he's about to two
times the poodle. Then look at the head, so kinda normal, normal. And then we'll make
this one a little bit smaller right down on the body. And then him look
at the length of his head for how long it is in comparison
to the other one's. A really good way to judge, is also to use your use
your pencil, right? So if you're if
you're wondering, oh, have I really made that
body damaged longer? Use your pencil market, Take it over to the next one. See you look at that
almost twice the length. And then I can see it here. That's about two-thirds
of this one. And then there Normal
normal dog. All right. I hope I gave you a good
idea of what you can do and how you can really change your characters when you
play with proportion. And we did it remember
using just two shapes. So all these characters
created using just these two basic
shapes for inspiration. If you want to give yourself
a doodle challenge, you can give yourself to more shapes and see what
you can create with them. You don't want to do dogs. Maybe you like,
you're a cat person, maybe you want to do cats. But how about these two? What about a square and an oval? And remember you can
change the angles. Imagine that being
a cat, alright? Without being a cat. And
what if you made a big, big, big square in a normal oval? One little trick that
makes us very continue, but it was a quarter of
the size and a giant head. You can imagine how different
the characters would look. So there you go. If you want a little doodle
challenge and play with some more proportions,
there's an idea for you. See you in the next exercise.
7. Hilarious Faces: We're going to play
with proportional gain, except this time we're going to focus in on our
character's faces. Are going to change where we
place our character's eyes, nose, and mouth to see how differently
we can make the luck. This will help you understand
how you can change just those three
things to create some really different
looking and fun characters. It's another sketchy one. So all you need is
a pencil and paper. And we're ready to create
hilarious spaces to get us started playing with proportion
in our character's faces. I just grabbed just a super
simple shape, little circle. I think we can draw a
bunch of faces using this. Now I'm going to set this
one up slightly differently. I am going to draw
myself three lines where we're going to draw
three rows of faces. So I've spreading those out. It's easiest to draw. Just draw a line in
the center first, that's easiest to judge. And then another two
lines on either side. I'm going to do three
circles on each line, okay, three different
phases. On each line. You could use a different shape, but I'm going to keep it
simple and do circles. So again, lightly sketch. These are just little sketches so that not going to turn
out like finished cartels. It's just have a
look at how much you can change a character's
look by where you place the
different features on their face so it doesn't
need to be perfect. Get my circles in there. The reason that I've drawn
them with a line through the center is that this is
going to help me judge, or tell where I'm
placing my eyes, nose, and mouth on my
character. Stay, we go. Great. So let's start with
the character's eyes. We're going to change where the character's eyes
are on the face. So I'm gonna begin actually by drawing a nose on each of these, each of these characters. I'm going to draw the nose
right at the center line. This line that I've drawn here, it's giving you my,
what I'm judging by and draw a little
nodes on each of those. And I'm just doing a
straight line and curve, straight line and
curve, straight line. And the curve looks like it looks like a
bee that's not closing. A B, I get a straight
line and curve. Then from my first character, I'm going to draw eyes on it. And I'm going to drop our
eyes high up in the head. I'm going to draw so two circles
for my character's eyes, fairly high up in the
character's head. It's my first set of eyes. Then for the next character, I'm going to draw the eyes. But I'm going to take them
right down to this line. Right down to that line
that I sketched in NFL. And then for my next one, I'm going to drop the eyes even more difficult than
even lower down. How crazy is that
characteristics? They don't have to look
like great characters is just having them look at. Here. The eyes are right on
the line right here that either write down at it. How does Larry's okay? So high, medium and low
though though, eyes. So I'm going to come in and up, up pupils in my character's eyes so that we get a better
feeling for them. Actually looking like a
person. There you go. It's hilarious. And now I'm going to add a mouth and wherever you
want, put the belt. I'm going for this
character, I'm gonna be normal looking at one little simple smile
right at the center there. For here. I'm going to put them the
other day about the same. So it's very simple. This one That's all
squished out. What? I pulled the mouth up. Pull the mouth up.
How does that look? Let's just darken down our lines and check
out our characters. I'm not inputting eyebrows
on these characters to just sketches to have
a look at locket L2, I'll do it all on the face. Don't quite need to button
here the eyes on the line. No. Kinda like him too. And here my lowdown
load down eyes. And look at how
high the mouth is. Look at our different
ladies characters like he almost looked
like the picture. This is your turning them
into like it's like dad. Dot character and discouraged. Little bit cuter. I quite like unusual. So it's like, you know,
she was the daughter or something like her
eyebrows in there. And this almost looks like a
Baby like you almost want to put a little curl
of hair at the top and turn him into a baby. This whole line, all
we changed with eyes. So let's go to our next line. This time. Let's vary where
we put the nose. So here's our, There's,
there's my line. So the first nose, I'll just put just
the same little, little V-shape, so
straight line and curvy. And I'm putting it
right on the line. Then I've had Juno is higher up, so I'll move it up in the character's face
that's going up there. It's well above
the line up high. And then I could do a lowdown, knows what time it
starts about there. Starts at one and
goes down below it. Right. So normal high, low noses. And now I'm going
to put in my eyes, I'm going to keep the
eye is all kind of normal about App line. Kind of normal, shaped
and sized eyes. Though AP at home. Here. Hello dear Solaris. And there we go. And again, I'm putting
the eyes at the line. And I think that looks good. Let's see. Mouth. I'm gonna make them sort
of normal place here. I'm going to actually
move the mouth up. We're going to, just for fun, we're going to move the belt up. I could do normal place
back up a little bit, forced to move the mouth
down a little bit here. Or I could put to the side. I just want to put it up
and lower down there. And let's put pupils
in her characters. Look a little more like people. And darken down our lines and see how our characters look. This is a good
exercise to do as well because I find it's easy to get into the routine of drawing characters with the
same types of faces. I do that sometimes
where it gets stuck drawing the same types of eyes or placing features
in the same places. And so my characters wind
up looking very similar. And it's very useful
to be able to change around some of
the features like here, what was our nose here? We just changed the, where the nose was
placed on each of those pieces and
really changed around. This character again, looks
quite young. I find scared. It looks quite young. It's where the features
are all very close together and the
eyes are higher up. And here they are a
normal character. He looks funny. I just want to add a big
beard down on them or something like that guy. We've done eyes, nose. Let's change where
we put the mouth. So I will put it, we're going to want a normal. So here's a normal
normal positioned mouth. Say, Oh position, well, I'm going to a lowdown mouth
soup, blow down, whoop. I'm going to go high
up now if I could do it high in the center, the center or high side. I don't hide this
out and I'll do it hide the center just
just to see how that, how that works if I
move it to the side. So now I can add in
my eyes and my nose. I'll start with the nose. I'll put it I'm going to try and put it in a normal position, which is right at the line here. I could also put it right
as live there and gets stuck because my my
mouth is way up high. So I need to either move my nose up or move my mouth to psi. Well, if I move my mouse
to the side rules, it's just playing around. Then I put my nose
the same position. Position right there. Eyes. Eyes, I'm going to
do them offline if I can. The line there, I can
do the math line here. I like this look actually at a, we're looking to
get a bit stuck. Your metric measure, move
this one I up there. This one is a little bit
of an angle that's not go. And give my character pupils. I quite like the look
of this character. And how's this keratin? Maybe I'll angle the pupils. Looks like he's looking down. It's kind of a useful, isn't it? Darken down my lines? Smile and laugh or
carriage with last-mile. This one, I'm good too. Let's see how I said they don't look quite
like finished characters. That's all we're doing is a
circle around their head. But it gives voice
or glove wonky. It's got a huge chin. And this was mouth. We changed the mouth,
eyes, nose, and mouth. Let's look at the, let's
look at the mouth. I just love this character. She feels like she wants to
be like young girl there. She's got some hair to her. I love that character. For some eyelashes. You're gonna carried away
here. This character OR gate, maybe he needs it, maybe
it needs a big beard. Maybe that's sparse
or big mustache, big beard and mustache. What do I think with that one? Then here this was our
normalization on which character. Not quite as inspiring. I feel like when I move the features around to a
certain extreme, right? So I pushed, say this, when I push them
all the way down, I see a lot of character
in the cartoon. Even this character, I would not normally have done it maybe, and maybe just a
little change will make him look a bit better. Like maybe the
smiles a bit more. Off to the side lab is
like a vat or opens up, open up, open up his mouth. So this can start to
help you see ways for creating some really
different characters by varying positions
of the eyes, the nose, and the mouth. So if you want to give yourself a little doodle challenge, what you can do is do
the same thing again, but try a different shape. What if you did
these characters? Moving eyes, nose, and mouth, but you use this shape, then you can get really different
looking characters game or maybe a different shape. Here's a challenge. They might not look like our people or the math look
like people who knows. You can make those
look like people. Triangular head. And again, move eyes,
nose, and mouth. So same thing, you draw
three of those shapes, centered about a line
and three times. So you have nine
shapes all the same. And I'm the first one
changed the eyes. Second one, change the nose. Third one, change them out
and see what kind of crazy, hilarious characters
you come up with. Okay, see you in
the next exercise.
8. The many faces of Blob: For me, capture expression is the key to create really
great characters. This is what gives them
their personality and really brings them to life and
helps to tell the story. Now, in this section, we're going to focus in
on our character's faces. For this exercise is
all about the eyes. We're going to draw block,
super simple character, but I'll show you how by changing the way that you
draw your character's eyes, you can really change
their expression. It's another sketchy exercise, but playing around again. So all you need is
a pencil and paper and we're ready to create
the many faces of lobe. Before we get going, Let's have a closer look
at my friend, blob. Here is now blobs, great because he's a super
simple character to draw. He's just a little bit more
than a half circle, you know, there there's a shape
like a D and simple eyes. Okay? But a couple of things
to notice about Blob. So he's got, he's got, his pupils are a little bit
in from the sides again, it makes them look kind of cute. He's got up quite a small smile. Now we're going to be showing different expressions on him. We have a couple of
challenges here. The first one is blob
has no eyebrows. Now, in capturing expression, eyebrows are really important and it can be really helpful. But with Blob, we don't
have that option. Oh, we've got is his eyes
and his blobby body. Next is Blobs mouth. This is the next
challenge is that blobs mouth is quite
low down in his body, and it's quite small. So I can't go and make a
gigantic or something. It wouldn't feel like
the law anymore. So this is, this is
the next challenge. So there we go. There are
challenges in drawing our blob. But the good thing about
flop is why I like doing this exercise with
an actual character, is that in behind I have an idea about the
character's personality. So a person who I could do this exercise during a bunch of different expressions
just by drawing a circle and some
shapes and faces. But it's more fun to do it
this way with offered block. So grab your pencils
and let's get started. The way I'm going to
begin is by getting in a couple of lines on my page so that I
have somewhere to stick my lobes. So here we go. Lines sketched in. And then I'm going to draw
in six different blobs. So I'll start with the
one in the center. Okay. Because it's
easiest for me to judge the center of my
page. So here we go. Half circle or so. For my, for my first blob, I'm going to try and make
them all the same or similar so that I can compare when I'm
changing as expressions. So there we go, and then I can do the
other one underneath. Now suddenly life was saying about the same height and width. I can tell because I
drew a line down there. It'd be boat the boat is wide. So there we go. As my next blob and then come over to
the guys on the sides. About as tall as you can
see why I do a bunch of sketchy lines
because I don't expect to get my shape right
with a first line, just sketchy lines
and one of them will be will be close off. Then once I've gotten in my, in my shapes, my blogs, like I said, that
companies look like a D on this on its side. Then I go to sketch
in blobs eyes. Now, I'm going to do this
in all of the characters, even though we're
going to change them as we change the expression. Now blobs, eyes are quite far out on his own,
his blobby body. Okay, so they're out towards the edges of his
half circle shapes? Oval. So they're a little bit
taller than they are wide. And I do the same
thing on my next blob. Fairly, fairly wide
apart, eyes like this. Again, areas and C and I can check
that they're conquering. Why does she mean by running my pencil up
and down and having a thick if they're
about the same places as little further
over, but that's okay. But basically have similar
enough looking, looking blobs. So let's start up here by
just drawing normal blob. So we have signed to compare to. So first thing for normal
blob is a blobs pupils. So let's get those in. And like I said,
they're a little bit. More towards the
center of his body. This helps to make
them look a little extra, little extra cute. Versus if I put
the pupil right in the center of the oval. So it's a little bit
in towards this body. Here, use a simple little smile which is quite low
down in his body. If you look at how
big his body is, look at where the
little smile it's it's quite fairly narrow. It's almost like just
a bonus narrow portion of the bottom of
one of those odd. So there you go.
That is normal blob. So I can outline normal blob. I'm just going to
do this in pencil. I'm not, I'm not
outlining these in pen. It's just a sketchy on here. Starting with my character's
eyes and dark containers, pupils, mouth, and then around. Another reason why it's good to start with the eyes is that I want to get the eyes
in the right position. But I can always move the body
around a little bit if I, if I need to move
it a little bit to the side because it's too
close to the eye or something. There we go. We've
got our first law. So the normal blob next, I think I want to do sort
of a surprise blob luck. Okay, so let's start and get
in the look of surprise. Surprised. Now for surprised, when you picture yourself
of your surprise, your eyes wide open. Okay, So maybe I
make blobs eyes. I just sketched them
a tiny bit taller. Here's a tiny bit taller, a little bit lower down,
so they're just get the wide and tall are. Also, you'd be looking wide audience and your pupils
be straight ahead if he be focused on what you're
looking at and surprised by, I take the pupil and
I put it more in the center of this
oval, like that. Okay. So it looks
like he's really focused on what
he's surprised by. And then the look of surprise. I can do a really simple
mouth. Picture your mouth. If you're surprised. It makes almost an 0 shape. Hacker to a giant open, remember it's blob,
he's got a small mouth, so I do a small oh, the other thing is,
look, surprise. What if we make we don't have eyebrows when I present blob, I could make because
I always would go up. What if I just make his body
grow a tiny bit taller? I don't have eyebrows,
but I can move around the blobby
body a little bit, so it just gets a
little bit taller. Now let's outline law and
see if he looks surprised. Started with my eyes,
name your eyes first. Little bit taller. And those eyes like though, this is not quite so circular. And around the top
from just being a little bit taller,
you very much. There we go. I
think he loves it. Surprised. Surprise by next. Let's do a little bit more. Upset like a grumpy, I'm going to do grumpy blob
of ketones have inverter. It's gonna be grumpy,
grumpy blobs here. Now, the eyes, the
eyes, you can actually, if you're grumpy, it's
kind of like your, your your eyebrows
come in, right. Like you kind of
get a little bit about furrowing
your brow, right? So instead we don't
have eyebrows, but what we can do is we can ankle for eyes in a little bit. So what I can do is take my ovals and chest,
angle them in. Okay. It's as if he's kinda
like scrunching his brow, ridges of his eyebrows will come in hope
it doesn't happen. But in the eyes angle
in a little bit. Again, I'm lacking eyebrows. Because in grump your eyebrows might come down over your eyes, but I can bring his
blobby body down. I just lop off. You see that? It's a little curve. Lop
off the top of his eyes. It just comes in like
that and it angles in. You see just like the eyebrow would just take off
the top of the eye. Then the pupil a little bit focused towards the
center and maybe a little up towards where this is part
of the eye is lopped off. Even angle that pupil slightly
in just little things. Little things, stuck pretty
angry and then a mouth. I'm going to keep
the most simple. It's just gonna be slightly
sideways like that. If he's got his lips
pressed together like that. And I think he's gonna
look, look grumpy. I come in and I
outlined his eyes. Seems just move a little
bit of that angle in Miami, that too wide hearts. Okay. A little bit
of that angle in their mouth around around blob. With this one, I could even
have made them a little bit shorter as if his
brows come down. I could have Tanaka
shorten his his, his body a bit more, but I think he
looks pretty angry. Grumpy. Grumpy can be Blob. Let's make him a little bit
more playful on this one. So next, I'm going
to play for Blob. He's going to have a
little bit more fun. So for playful. Now, my character, I want to make him look like he said
a little bit of an angle. Achilles smiles a little
bit playful, right? So maybe the eyes also
are little bit uneven. I want them to look like he's maybe leaning in a little bit. So let's see what we can do. I'm going to angle
this I in a bit. If he's leaning towards
whatever he's looking at and being playful towards how
angle this side as well, a little bit that way. So he's leaning into whatever
he thinks is quite fun. I think he's maybe even I'm
picturing him looking up, isn't the pupils are higher
up in his eyes like this. It looks a little bit fun
already. So there we go. And then the bottom of the
eyes only have a bigger smile. So I'm moving this
smile to the side of making it a little
bit, a little bit bigger. I'm going to exaggerate it
too much because blob is somebody width a
fairly small mouth, but I still want it
to look fun, right? So a little bit bigger, a
little bit over to the side, and that would make
his cheek come up. If you smile, your
cheeks come up. So up comes his cheek. So I chop off the
little curve up, but the bottom of his eye. So now we feel like his
cheek has come up like that. And a little bit on
this one as well. Because remember the
mothers on this side, so this cheek will
come up the most. Maybe the site, we
see a little bit higher than this cheek, a little bit so it
looks quite smiley. This adds to the feeling of
him being Smiley and playful. Now I think I can
outline why my blob. Just that little bit
of a lien on my eyes. Mussolini into
whatever he thinks is quite fun around him. And I could even lean
limbs, body or Lulu. Linda's body in a
little bit too. Looks quite playful there. Right? I'll play my phone. Playful block. Let's do the opposite. I'm going to make him, he's nervous of whatever he
is, whatever you save. So this is going to
be nervous blob. So we're going to sit here, everything angled this
way towards what he's interested in being playful about here, I'm gonna
do the opposite. I can move them away. So pretend he's nervous
is something over here. He's gonna kind of move away. His eyes is body, everything is going to move
away and even his mouth. So let's start with the eyes. I'm going to take my
eyes and angle them a bit away from what he's nervous outright
because if you're nervous, you might, you might
recoil of it or move away. So both eyes, I'm
going to move away. There we go. So both
angled a little bit away. And his pupils are still
looking over here, right. So they're still on
this side of his eye. Okay. So pupils there and his mouth his mouth is going to be it's like
he's gritting his teeth. Okay. So I'm going to do a simple little triangle shape like this. And over to show his
teeth. There we go. So it's like he's
kinda kinda gritting his teeth and pulling away, which means I probably need
to angle his body language, his body just that
little bit back. If he's leaning away from
what he's nervous of, Erica, then he's he's
a bottom of his eye. I'm going to take
it off slightly. Okay. Because if you picture your grit
your teeth like this, your cheeks come up slightly, but I don't want them to
look happy like he does here just a little bit straighter. Okay. So his eyes are
fairly wide open. Just lopped off of the bottom
layer is greeting teeth. And I think I can
outline my outline blob. Everything just leans away. The mouth is still small. But he looks nervous. If you need a viewer,
drips of sweat. Here's Bobby's. Few drips as sweat
happening here. Don't overdo the drips of sweat. When this is, this is
nervous or nervous blob. Last, let's make
blob a bit hopeful. I think he needs to have some
hope renewed after nervous. For hopeful. Picture yourself hopeful. This is an opening, kind of an expression. I want the eyes to feel like
they're opening up. Here. We tilted both eyes away. And again here he
tells us both eyes toward here I'm going
to open up the eyes. It's almost the
opposite of grumpy. So the eyes are going
to angle out slightly. Angled, slightly. I just changed that a little bit and just have quite a big smile. So I just a little bit more
than his normal smile and be like this and make it
a little bit wider and a little more
open like that. So again, I open up the smile, open up the eyes and ears. He's smiling more so
I'm going to show this little cheek coming up
there it goes his cheek. And it's at an angle
like it's open as well. See that? You see it there. And he's going to be looking up. Okay, It's hopeful. So pupils up towards
the tops of the eyes. And even his, his
body can open up a little bit like this and make it a little
bit wider there. Where his his eyebrows, eyebrows, a little bit, a little bit wider, opens up. I think I can outline. Nice big smile. And around his body. Nice open shape. This is hopeful blob. So
I think it looks great. I especially like, I
actually quite like nervous blob here looks good as it drips of sweat
that add to it, but you can see what we've done. So we started off with our six shapes and I sketched
in all the same positions. And then it was just
small changes in comparison to
normal normal blob. The small changes
in comparison to normal blob to make
them look surprised, widening and opening up
the eyes and the little 0, everything, and everything lifts a little bit for a surprise. So he looks wide
open, surprised. Grumpy, grumpy blob, angle
the eyes in little bit. Instead of, we don't have an
address which is lopped off the top of his eyes and
a little grumpy frown. Hopeful blob. He leans in here, and these ones were moving
the body shape a bit here. We only change the hours. So now we angle his body in a little bit toward
words he's seeing, angle the eyes and a little bit. Move the, move the smile a little to the side
and he looks playful, Nervous, a bit the opposite. Move them up and away
from what he's seeing. His eyes angle away. Mouth looks simple
but gridded in a way. Then hopefully we opened him up, we open up the eyes, we open up the nerve,
we open up the shape. And he loves hopeful. So I hope you're happy with
your expressive blobs. Now, if you want
to give yourself a little doodle challenge, what you can do is draw yourself some more shapes for Blob and do some
different expressions. So e.g. you do, do your two lines
again and you're six shapes and irregular blob. And then maybe try say, you could do like shy blog, you could do thoughtful. Maybe he's thinking
about something. What about a lonely blog
or a sad blob or scared? You could try some of those different expressions and just changing eyes and mouth and
have some fun maybe changing, moving a shape around to see
you in the next exercise.
9. Mood Monsters: Now that you've seen how
you can really change a character's expression
by how you draw the eyes. We're going to move on and
we're going to focus on how we draw our characters,
eyebrows, and mouth. For this one, we're
going to draw monsters. And they are terrific for this exercise because
you can really exaggerate how you draw the eyebrows and the way
that you draw big fun mouse. Now, this is another
sketchy exercise. So all you need is
pencil and paper, and we're ready to draw
our six moody monsters. Before we begin,
let's take a look at this one little character here. Now, I've created him using
a basic circle shape. And then I've added some simple eyes and then a really big mouth
and some eyebrows. Because we're going to focus
on changing the eyebrows and the mouth on our character to show different expressions. And then the rest of
the character has gotta be kept,
kept quiet simple. Well it's just jaggedy J. Lyons. Okay, so that's what
we're gonna do. Now. I want to choose a shape. So all I've pulled out this
one, the teardrop shape. This could make quite
a good monster. I might make a
little wider though, but that I think it'd
be good monster. So let's do that. The first thing I'm gonna do is sketch myself in two lines, okay, so two horizontal
lines across my page. Because I'm going to
put three characters on each line. There we go. They don't want to be perfect. It's just to help
me line them up. And then I'm gonna give
myself my first shape. And I do that in the
center of my page. So like the blog, I start in the center drawing my shape because it's
easier for me to judge where the center of
the pages versus starting on one side and
then spreading them out. Okay, So here we go,
center of my page, There's my first teardrop and I do another one
over here to here. But the center and then decide, you know, what I'll round is
going to be should be good. Then I can come over and do
my teardrop on the side. Remember lights sketchy, sketchy lines will
press too hard. It's sketchy lines. Again. Sketch that in the end
they don't have to be identical, just
similar, similar. The other side,
sketching your shapes. Again. Alright. Now, the next thing I want to do is getting
my eyes for my character. Alright, And what I'm
gonna do is I'm going to give two circles on
each of these shapes. They're going to
be fairly high up in the character's head. Okay? I'm going to
do them a little, a little game
asymmetrical, okay. So one's a little smaller, maybe one's a little bit bigger, a little bit on an angle. We can draw them
however you like. I'm going to give
them, like I said, approximately the same on
each of these characters. So there we go. Again. Here we go. If I'm
trying to keep this up, somebody lights and
run my rent my hand along to make sure I'm getting
an approximately in line. We might move them
around a bit as we draw, to draw characters, but it's
a pretty good, good stuff. Alright? So for the first
character, this guy here, I want to make him a smiley, friendly kind of jelly
kind of character. For that. I'm going to start by putting
the character's mouth. I want a big smile and I'm really going to exaggerate this. So what I could do is do a smile like straight across
his body like this. But I have what I think
I'm going to do to make them look a little more. Jolie and friendly
is actually draw my smile a bit sideways
is if we're seeing him like from the side and mouth goes off to
the side like that. And off, off the page
becomes comes up quite high. There we go. Because it's
a very wide open mouth. I'm also going to show
my characters tongue. Alright, so to do that,
it's just either, either half circle
or two half circles. I want a little bit like that. Then it looks like we've got big open mouth and
we see the tongue. I'm gonna give them some teeth because he is an artist herself. Few little pop, a few
little teeth in there. Maybe, you know, maybe
just a couple of teeth and three teeth
at the bottom for four, however you like to
do them, or maybe you've pointed teeth,
whatever you like. So There we go. Then the
last little thing is. Because we're seeing it
from the side and we're seeing just in his tongue there. I'm going to show the
inside of his mouth, right? So there's a little
line there you see? And then this will be,
this will be colored in. Okay, so it's if we're seeing the dark part that's inside
his mouth because it's wide-open that I want to come in and have a think about
my character's eyes. Now he's a friendly ones. I'm having him he's looking
at me and he's smiling. So I'm going to put his pupils fairly close together,
not super close. Got a fairly close
together in his eyes. It unless if he's looking at me, they may be a little bit a
little bit on the diagonal, so not perfectly
straight across. And then the next thing I
wanna do is I really want to add to his sort of
happy, friendly love. When you think about
it, if you just saw a friend or something
that you really like, your, your face would feel open, maybe your eyebrows
go up and you smile. So let's do that to him.
Got the open mouth. Now let's do the
wide open feeling. Eyebrows. Eyebrows are
quite high above the eyes. Open as in they're not they're not straight across
his eyes like that. They're there. They pushed a bit further
out to the sides. Okay, so there we go. And it gives him the feeling of sort of happy excitement
and friendly. Then all I do to finish
off my character is given some crazy kinda jaggedy around him enough,
That's it for him. I could add arms and
I'm going to keep my characters just like this. That's him now I can find him. I'm just going to
do this in pencil because he's such a sort of a faster kind of drawings. I'm not going to
be inking these. They're just sketches to
see what happens when we change eyebrows and
nails on characters. Just checking lines that
will give us his refill. And then what I'm
doing his mouth and the first thing
I want to do are his teeth DC because they're
in front of his tongue. I dropped in front first group, the crocodile might actually
add to his character. Then I do the tongue,
and then C. Lastly, I colored it and give a
little, little shade. Okay, so I darken in
the back of his mouth. I just stopped over there. So there it feels a little
bit like he's sideways and he's friendly and smiling
at us like that guy. Alright, Next, let's do
a bit of the opposite. Let's do someone who's a bit, I kinda like angry, like a fierce looking,
fearsome looking roster. So opposite friendly, fierce. Now we've got the
same places, gay. So what can we do with these? Now, if the character is angry, it's gonna be looking
again straight out at me, but with a more kind
of ferocious a look. His pupils, again are
fairly close together. Okay. Because he's
focused on me, say, and then his eyebrows are going to be down in
this sort of shape. Isn't his brow is
coming like they're in an angry looking right here. I give myself some angry looking at eyebrows
that on an angle, decide how big they are. I could eat them
like fluffy ones. I'll give them simple like this. I've done them a little bit curved in on an angle like that. Now what's next? I need his big mouth. Okay. I need so I want a big,
angry looking mouth. He's kind of going
like opportune boat. Like he's making a sound and almost growl and kind of
hat we were just looking at. So that's going to be a big
wide open mouth, right? So it almost is the
shape of like a like a jelly bean is where the
sides of the mouth come down, sides, the quarters,
or have it come down. And even here like maybe
these are the memorial up, these edges here or down. It almost looks
like a like a bit of a bit like a dog
bone, doesn't it occur? Very curved dog bone. Then I'll definitely want to
give this guy some teeth. Okay, So maybe that'll
make him look extra. Some really big teeth 2009. And pointy ones. Really draws attention to
his angry looking mouth. That looks quite good. And then we need his
home, his hair okay. For years. And I think that's
it for your help on. So starting with the eyes, I want to make sure that I
capture that I can even make it not look good. Then onto the eyebrows. They're really key
in characters that, that's angry like this. Then there's mouth. Can do that next. And its teeth for
this character, I mean, you could
show his tongue. I'm not going to, I'm
just want to show the teeth because I want to show the contrast
or the difference between the white of
his teeth and then how dark is his mouth is, right. So then I would
come in and darken in shading in behind his mouth. This will really
draw your attention into the expression
of his mouth, which is very angry. And the pointy teeth. They even did a good job
here where our ankle, even the side teeth. So it all looks quite ferocious like you wouldn't
want to encounter this guy. And then, oops, I just
knew his little crazy, crazy for maybe I'll make it a little extra jaggedy for him. See look more ferocious, I hope so. There we go. Fierce, fierce. See it looks quite fierce. Now next let's do, let's do character who's a little bit, I'm
picturing, lonely. Okay, So we've had friendly, we've had sort of angry fears. Now let's do the only character, okay, So this is sad and lonely. Okay, here he is. So we've got our eyes, just like the other character. For these ones. He's sad, right? So I want his pupils to be looking down at the
bottom of the eye. And they're a little bit
in towards the center, not too much, a little bit. So he almost has like a
worried and sad looked like. And then for his eyebrows, I wanted to look at that. So instead of here where we had the eyebrows high up above the eyes that he's
friendly, open and excited. Here's the opposite. Here the eyebrows are down. The curved this way. You see curved in there
down over the eyelids. His eyes, I should say,
withdrawn eyelids on here. Down over his eyes a little bit so it
covers them a little bit in the curved since
we almost looks like sad and worrying. Then for his mouth. I'm going to keep it simple. A very simple, ever so
slightly curved down line. So it's not a big frown is
just maybe a tiny bit more. Just it's just a
little sad curve and I'm going to
do even his teeth. Sharp teeth too, but there
there's down in okay. So everything about him
down and then we have is 0. I could even maybe
it may even flop over his first so it's down. Okay. It's not spiky like this. It's going down,
down, down, down. And I could even make his
shape a little bit more. Maybe those There's
malt street art By the Side, moles,
repeat whatever. So everything's,
everything's about him down. Okay? Now I can hit one this character with his eyes and then
make sure that I get the pupils in the right place
where I think they're going to need to be for
him to look. Lowly. Eyebrows. Then he's sad, mouth flops down his flock
donors for their use. Sad and lonely. All right, Let's,
let's do something a little more fun
after sad and lonely. Let's do like a joker, someone who is silly. This is gonna be silly monster. For silly monster. Again, I've got the nicer
eyes that are a little bit. And I could maybe
even exaggerate that a bit more than I should be fine for the pupils you in
this character is focused, had these guys are all focused
head, he's looking down. This character is going to
be looking every which way. So one pupil looking up, one pupil looking down. Like our, our silly,
silly jumper. There we go. That's good. I'm darkening my pupils. That's actually, it's
quite a Credit key feature of a silly looking character
where you put the pupils. So next, I need eyebrows and I have the eyes uneven
and the pupils that even, let's do the eyebrows
uneven as well. That should exaggerate things. So what if I do one
eyebrow up like, whoo, like this one I wrote
up in one eyebrow, maybe a little bit over uneven. That look a bit silly. Starting to, I think what
we'll do is his mouth. And again, I want a big mouth, but I'm going to do
kinda like wonky, kinda curvy, curvy, crazy mouth like
their study look silly. I might bring it up
quite high by his cheek. So play around with it. So what you decide what you like and maybe they should
be his tongue, she's tongues to go
with his tongue. His tongue twister go. Tongue sticks out and I couldn't the teeth,
I'm going to leave it. I think there'll be fine. I think you'll be alright. And then of course he gets
his kinda crazy, crazy hair. Brushes thick. Outline this guy. So finish off my eyes and eyebrows there, but all over the
place, That's good. Funny smile, tongue or put a line down it just
kind of exaggerated. I can maybe student has hair
stick up all over the place. Should that be making
a little extra, extra funny-looking with
crazy for this variable. So that's good. I like him. That's our
ciliate joker guy. Now let's do someone who is, maybe this character is
seeing this guy and he's, he's a bit scared, okay, I'd be scared of
I saw him two are fierce character onto scared. I'm scared. That's again, we
come into our eyes. So I've got a little bit again and they're
asymmetrical eyes. Now, if the character scared, he's a little bit like
this where his art is, pupils are going to be
together because he's probably a little bit, He's a, he's quite afraid
of what he's seeing. So pupils are looking ahead, looking at what he's
saying and afraid of. And they're going to be
a little bit more in the center of the eye. Now, the character's mouth,
I'm going to do that. And he's sort of going like I like his mouth is open and I'm
not sure if you're scared. You must be quite open. Quite open. And maybe a
little bit down at corners. Basically the
differences here is like his his mouth comes up in
the front end to end down. Okay, So it sounds like he's grappling with this character. Just down almost a much more. Select the shape of say, a banana or something. Oh, very wide banana, I would say but a banana. So there we go. Down at the edges, up at the top down
those corners. I think for him, I will show his tongue. So I'm going to show a little
too little curves now. His tongue and make
just a couple of teeth are not going
to leave and maybe make them square teeth though. A few little fuel
square root, I'll give a couple of bottom two. Don't even think that
I should look good. Now, eyebrows, eyebrows, I
needed to look a bit worried here this character looks
sad and a bit concerned. Here I still, I'm
going to just similar where the eyebrows
curve in except there gonna be higher up
above the eyes you see because like almost
like our happy, excited character, the
eyebrows, the eyes are open, the eyes are open wide
except in this case, he's, he's scared, right. So the eyebrows curve in and they're a little
bit closer together. Okay. So not so openness. Those ones are they close
together because he's also, he's worried, he's
afraid, right. So there we go. Just notice he looked
quite scared, I think so. Maybe what do I
do with his firm? Does it all kind of
stick out like this? Maybe it sticks out like
I think he looks scared. Okay, Let's hope low in the sky. Eyes. And he's worried
for wide eyebrows. Mouse. I almost feel like I've made this a bit
bigger than its teeth. I'm just going to imagine
his top teeth like this. And I hope couple
of Bach and look up one teeth, then his tongue. And then I would color
in my reading listening. Which case you'd be
thinking you mouth. Because that is a big part of this character's expression. Is that the shape of his mouth. Crazy, right? I think it looks scared. Next, I'm going to do, I think like a sort of a baddie. Okay. So this is a, this is a, he's a, he's a body of evil. So sly, like he might
be getting into trouble and he's up to
no good this character. That's what I'm picturing here. So for that, we're
quite fortunate we've got these eyes that are, again not symmetric, so we
can put those to use for us. And I think I'm going to do
him so that perhaps he's like He's going to be looking because he's gonna be
looking as if he's got he's sort of glancing
over the corner of his eye like he's,
he's up to no good. So here he is. So that means pupils at the corners
looking save this. So he's looking over here. Pupils right up in the right upper corner
of those eyeballs. Then his eyebrows. They're going to be they're not, they're not
going to be symmetrical. They're going to be
asymmetrical two, such that there's one a little bit like the evil one
like on an angle, right? Because he's a b is
a bit up to no good. He's about here. So there we go. One I wrote it like
that on an angle. So it looks a bit. But then I wanted to look a bit suspicious or a bit of a baddie. So he's going to have one
eyebrow That's kind of up up like this above the sky as if he's
appearing up in this, exaggerates this bigger
I that's pairing up. There we go. That's quite good for
the eyes, for SLI. Do a mouth on him. That's, again, it's
a bit of a mix. So it's going to go a little bit grumpy looking there and then
he's now it's going to curve up until
a little bit of an evil cackle like
hahaha, like this. So it's comes up towards
the thigh, goes back down. And then I give it a little half circle to
open it up and I can live. I'm going to put my
little teeth in there. See. It looks a bit like then I can make my flop
his hair over. Hiding behind his lost her hair. Lots tougher for him. Just regular kind of multi-story for I
think it'll be fine. I think I can outline this
guy starting with his eyes, pupil right up in the
corner of this of this eye. The next bigger I people
higher up eyebrow. Okay. I can come into his mouth. His little Sharpie teeth. Then again, I'm going to
color in the little bit of his mouth open just to
draw attention to that. Anywhere where you're
drawing your color. And I should say in dark, larger space, you're going to draw attention to
that in your drawing. Alright. There are our six
moody monsters. I think they all have
very different nodes. I'm pretty happy
with them. And so let's have a look at
myself, look back. So all of them have
quite big mouth. But we've only done three of our characters with
really wide open mouth, all different expressions
that we've got our friendly, happy guy right, drawn to the side and
was quite an open mouth, really draws attention
to that and him. And then our fearsome
angry character. And this really
draws attention to the shape of his mouth. And then our poor
scared guy, Oh dear. Then the only other one that
we will show a little bit of contrast is our SLI
baddie character where we draw attention
to this little snicker that he's getting
at the side of his mouth. And our other two characters, they're really portrayed a lot by this are lonely characters, sort of downcast eyebrows
and then our silly ones like the pupils, pupils. And then this crazy mouth that really make a big
difference on him. And he is a funny
little eyebrows that are every which way. So there you go. I hope
that gives you an idea how you can take
one simple shape, the same types of eyes, then really changed
around eyebrows and mouth to give your characters are really different expression. So if you want to give yourself a little
doodle challenge, here's what you can do. You can try drawing more characters and you can do something else like
maybe you want to draw, maybe you want to monsters again or maybe you want
to do something else, maybe on another, another
simple character. But you can try and do them with the expressions like
we did in blob. That was surprised, grumpy. I think we have
nervous, playful, and hopeful blog with the expressions by
changing his eyes. You can do the characters again, but change the eyebrows
and the mouth to make those expressions and
see how that goes for you. Alright, see you in
the next lesson.
10. The Big Find: We're going to draw our
first cartoon theme is called the big font. We're imagining that we're
archeologists on the site of a big excavation and we've dug out some amazing treasures. What we're going to do is put our expression capturing
skills to test. We're going to draw a whole
bunch of archaeologists, each with different
expressions on their faces when they see what it is
that they've uncovered. This is gonna be a
great exercise for you to start to see how you
can really tell a story. By the way, you draw different expressions on
each of your characters. For this one, you're going
to need a pencil and paper. And I'm also going to outline my cartoons and a
black fine liner. You can do that or work entirely in pencil.
It's up to you. I think we're ready
for the big fight. We are archaeologists on
the site of a big ****. So we need to picture
what's happening. Do we discover any treasure? Do we dig up any bones that's supposed to be a
little skull in there, maybe some ancient pottery
or do we uncover a two? We're going to pitch, what
are archaeologists are doing? We're going to focus
on their faces, on using our ability
to capture expression, show different types of facial expressions
on our characters. And that's going to help
tell our story about what's happening on the side
of our big find. Alright, so let's get started. Now for this one, I
will be outlining in, in black fine liner. But I'm going to start
sketching lightly by getting in the start of my big **** because we're doing
our first scene. I'm going to start by
setting the scene. So what I'm gonna do is
draw myself a little, little bit actually, this
is my big, big Nicole. Okay, So this is the
this is the dig. So what I've done
is giving myself a mound over on the
side of my page. And then another one
down here? There, yes. Okay. So a couple of curvy lines. And this will give me somewhere
to set my characters. Alright, so my first character, I'm gonna do right in
the center of my page on imagine that this is the
character who's dug up. Maybe he's uncovered like a, like a crown or something
I really great treasure. And all of these characters, I'm going to draw
them super simply. The focus is all going
to be on their faces. And we're drawing people here. So this is a little bust, a little change or
drawing, drawing people. And I'm going to start
my first character, but drawing in a circle
for my character's head. All of these characters are
gonna be made of circles for their heads and little
squares for their bodies. Alright, keeping them
really, really simple. So here's my first
character. Surfers had little square will turn
into my character's body. And then I'll give them a
couple of little sticks down. Those will be his legs in
a little sticky note here, that will be his arm. Stick down here. Like characters. Other arm, the arm picturing
this character, like I said, as he's uncovered,
you can get creative. You decide whatever you want. I'm going to give him a nice big He's just dug up a crown. It's like ancient crowds. Jewel on top of it. You draw whatever you
want right there, okay, and this is
what your characters. First character is uncovered. This character has got, he's got lovely jewel. Maybe it's sparkling away. And my character is
going to be excited. Alright, we've done
excited character before and happy and
excited, I should say. I start with first thing,
my character's eyes. So two ovals, fairly open
from a character's eyes. And this character, the
coefficient I'm looking up. So say they're, they're looking up at another
character over here. I don't know who that
is yet, but looking up their pupils Like up and looking over a
little bit to the side. Like I said, this character is smiling and happy,
okay, quite excited. So I'm picturing that there got a big smile is
good that in urine is, remember just like
we did before. Oftentimes it's good to be an open mouth smile
because my small, good to make the smile
a little bit off to the side because of
characters looking over here. So I've got this smile a little on the side
of their face. They have a go and the
cheek has come up, right. So there's the cheek like this. So maybe that means that the cheeks come up into
the air by their IRAs. Curve there because
they're smiling, cheeks come up and it crunches
your eye a little bit. So that's that I just got
my character super simple knows it's a little
straight line and curve. Then that's often quite good. Now I need to turn my character
into an archaeologist. So we've forgotten wonky
thing I've heard on eyebrows. What did we say? Eyebrows,
eyes and eyebrows. Eyebrows for our happy,
excited character, are up above the eyes and open. So maybe go up above
the eyes and open. Now I'm turning into
an archaeologist. So I'm gonna give him a hat, oval shape above his head, another little half
circle on top. Does that look like a
archaeologists have? And then I'll just fill
in the rest a bit like IRR are monsters
give him some hair, scruffy bits of hair,
little zigzaggy lines. I think got what it looks
like. I'll answer first. This character,
the rest of them. I'm keeping it really simple. Little, he's got
a belt on, right? A little couple of
little triangles there for the color
of his shirt. And I'll just thicken
up the arms and legs and give a couple
little oval to be his feet. Tiny ovals or as V. And when I have
character here, it's, I haven't done his hand yet
and he's holding the Crown. Do is give a little a
little curve around there and that's his thumb hooked over whatever
he told them. Okay. So there we go. In the other hand,
maybe he's set down his tone, his shovel. So I do a little circle, full circle for his hand. Little triangle there,
and that's a shovel. Straight line. There we go. We've got our first character. You don't have to put a
shovel and just handy, you can just leave it or you use another idea for what he
could be what he could be. Holding. There we go. I keep
that all simple. Okay. I keep it in the shapes
that I initially drew in. I just thicken up the lines of the arms and the
legs a little bit. I gave him ovals for feet, little circles for Heather. Certainly there to be his thumb. That's my characters and she was teeth that I wish it was D. So I'm ready to outline
this character. And I can always try and more details into
the characters. You know, this is lovely
crown or whatever. But the most important thing I want to capture my
character's expression. So in, into his eyes, eyes, I outlined those eyes, looking at locking locking
them in a little bit there. Okay. Because it'll draw
more attention to his lovely open eyebrows. I'm down to his mouth. It's a little bit open. We see its teeth, right? And then I can do He's little scruff,
my character's hair. I can give them an ear. I've given him an ear there
and then around his face, around my character space that I could give him
a neck and do that. And his hat, which is remember, remember your shapes, oval. Oval. One more line. Then little details
like maybe there's a little vents and
the Tat or something. And then down the
rest of my character, keep these shapes simple. It's got a belt on. And why we said that archaeologists
have to wear a belt. Ovals for thumb on
the, on the crown. Little shovel. And then remember
it's even the shovel is built out of shapes, okay, it's a triangle
for the handle, straight line for the for
the shaft of the shot, and then a little rectangle
to make it look like it's set into the sand. I just do a little
curve at chop it off and make it look like
it's set into the sand. Then here's what, here's
where you can have good fun. You can probably come
up with a more fun type of a design for a crown than me, but I'm Patrick there. Jewel, maybe he's got some other another line across it on another
another big jewel there. Okay, there we go. We've got our, we've got
our first character. Now. It's time to pick up my pencil again and decide on
my next character. So I have him, he's
looking up at. Something. Okay, so I'm picturing
him looking up at his, his colleague up here who's
maybe something else is, something else has
happened here she is. And I want her to have a
different expression, the name, so she's noticed something else. Perhaps he's on, he's
on a mount here, perhaps at the same time, suddenly else has
got to stick a tomb. There has been a tomb
that's gotten opened. So all I've done is I extended
this little line here. Remember you can
place them wherever you want in your drawing. Feel free to play
around with it. And then I draw my next shape. So it's just a square, but of course it's
hidden in the sand, so lop it off. Then maybe the tops come
off and sliding off. Another rectangle. There's the top of
the tube sliding off. And maybe there's a
there's a little ghost, your spirit kind of him
coming out a few areas. That's gonna be my spirit. I should write it with a proper archaeologists
had on him theories. This is going to be my spirit. Okay, So this is where
you also get creative. You're RB1 dry, a ghost, spirit, halogen, really simple. So overlies and oval
mouth barriers. This character, she's, she's
scared by the, the spirit. And he's, he's looking over, he's
not paying any attention. He's looking straight over
to his colleague, friend. So there we go. There's, there's the next
character that I'm starting. So same thing, circle
for my character's head. Light and sketchy. Okay? And now she is
going to be jumping back and she's afraid
of this ghost. So I've put on the little
square for her body. Remember too little to little sticks for
her arms and legs. Legs going to be out.
She sort of jumping back and in her arms out. She's like she's a, she's jumping away from
this spirit character here. So her expression, It's
surprised and scared. Alright, so wide-eyed. So I start with
circles for her eyes. Okay. Circles for eyes and
making them round open. And she's going to be
looking over at him so that pupils needs to be
a little bit over. So she looks like she's
looking at the Spirit. Then we need her mouth. So it's going to be a bit like a brian that the way to the
scared mouth of the monster. Do this one little
bit different. It's somewhere if it should go down a little bit of corners, but it's going to be a bit wavy. Little wavy. So she's like that. It gives you the feeling like she's she's trembling
and unafraid. There's her open mouth, which is quite scary, Ashley. And I'm going to give her
wanted to see her tongue. Okay. So it's gonna be open mouth and we'll see her,
her tongue in there. And he said give her a
little they'll nose, straight line, little
curve or IV like to do it. And then we need her eyebrows. Eyebrows are gonna be gonna be up above her eyes
and a little bit, maybe a little bit
curved in so that she looks worried and scared
at the same time. Okay. How's that look? Good? And I can give her give
her some hair wherever the style of hair you think my little well should make her
hair fly out a little bit. That will add to the feeling
of her being scared, maybe her hat and
use your house, perhaps flowing off of her. She's like she's jumped back and off goes
the officer hat. Let's just an oval, remember, same way over. And then another curve
on top creates my, creates my half,
literally fly off. Little lines like that. Alright, now I just
finished off my character, her body, so I just give her
a few triangles for her. Color of her shirt and
thicken up her legs. The legs ovals for feed. Because this y so she looks
like she's tipping back. There we go. Then her arms the
arms little circle on the end and her
hands are like the open like she's
jumping back, right. So she's dropped everything
on top of the circle. I just do some little ovals
and so she's open hands. So those are the
society, the sleeves of her off her shirt. What I think I'm ready to
outline her and I can do this. This is a spirit
He's gone is that archaeologists
have up to a wash. So afraid. I'm going to outline
these characters. Okay, That's my next thing. I can ink them. And again, you don't have
to be drawing with ink. You are, you can
always feel free to do everything in pencil. Line, tie their shoes. And her worried eyebrows. That are above her
eyes and a little bit. And here's her open screaming mouth
are blocking that. You ever some pair and
now she's jumping back. So we're here as a
bit a bit all over the place around her face. And then I could go down
the rest of your body. I give her neck. Gosh, do that. Right? I keep all the rest of the lines quite
straight in plain, simple shapes for
the rest of her. Remember the hands? Just think about the hands. Shapes as well. Okay. Just outlining ovals around what we're little
circles for her pause. And then a few other details where we can put in whatever
the details you like. I think, or have fallen
off his political stripe. Falling off. And I can do the, here's the spirit guy. Probably quite fun if I put some like hieroglyphics
are sort of ancient, ancient writing on my, my two more feeling like a tomb. But I think that's good. I think that's good for now. So details I can always
put in afterwards. He's got a hat and
I can also ink in this part of the
hill or do that. She is but she's on okay. Because I'm finished
with that section now. I'm not going to ink this
and just yet because I haven't had a couple
of characters to go in and I don't know, I want to go here, but what where's the other
one I'm gonna go? I don't quite know that yet. So I'll stop there on that. And only one thing I did
say is I would would ink in her mouth, so we draw our
attention to that. And hers screech,
or she's forgotten. Alright. Now next, I'm going to
do another character. Maybe they're up here. I have a pretty good space here. Remember, if you are trying to lay out a bit differently,
that's alright. You can always move things
around to character up here. And let's say she's just uncovered ionosphere is
uncover some sort of a little crazy like a like a little spirit kind
of guy there he is. Okay. Don't worry if it sounds
like you would a okay. So this character, same thing, I begin with my care circle
for my character's head. And I keep it sketchy. So if I need to move
it over, I will. Alison decided, and
it's hard to be a little bit closer
to this character. Square, whole square
for her body. She is, she's sort of
leaning forward and I think I'm picturing
her like brushing off. She's brushing off
the dust issues uncovered this little
little character here. So there's a stick for her arm. She's flicking a brush. There's another stick
for this is the brush. Okay. So the brushes that
a straight line and that's the brush on the end, a little square, building
everything out of shapes. Now, I need my character's legs. So the little, little bent,
she's she's kneeling. That's what she's like.
She's she's kneeling. So two little bent lines there. Then with our other
hand, maybe she's brought it up to her
face because she seems like she's like she's going to be surprised,
not scared. This character is so very scared and spread that
she's just going to be surprised by what
she's just uncovered, brushing away here into
a character's face. So first things, first, eyes are red and
these are going to be a little bit taller here. I hadn't very round,
wide-open eyes here. I'm putting a little
bit taller maybe for a little variety. It's the same thing I'm
picturing her as being like mood like she's she has
simple little mouth. It's maybe like oh, okay. So did the same
thing with her eyes. She's wide-eyed, looking down. So pupils looking down. What she's discovered. The simple little nose
straight line, curve. I can draw that again
however you like. Alright, now, oh,
she's brought her some of them thinking she's brought her her hand up to
her mouth, right. It's just kind of covering
covering her mouth. So same thing. I do a little circle
where the hand is, where the palm of the hand is, and then she's got a little
overlies for her fingers. Okay. So that's it. Really simple. And her other arm and we've made it a
little bit long here. I'm not short enough. So I put a circle where her hand is an inch or her
hand and move it closer. He says, is this
brushes brushed off, rushed off his character. And then I can
give her her given her belt and her little thicken
up her legs and her legs, they're going to give her
little ovals for a fee. Just keep that simple. And iPhone was ignored. Her eyebrows and her
hair. Let's get that in. So eyes are wide open here. So eyebrows are going to be up, up above the eye. So it could possibly
be a little bit, a little bit open to us
in a little bit more too, besides, I play
around with those of it until I feel like I got
the right expression on her. I think that's
that's pretty good. Let's give her what
can you do it now you draw on whatever
kind of hair you are. Going to give her a hat to be really close to
my page on there we go. We should put just sneak her hat and I didn't find that true. Well, here's her long hair. I'm going to make her hair. Here's your shoes or hairs
tied back and show ponytail. Alright, pairs of hairs,
and here's her ear. Ear, and our Harris tie
back in a ponytail. And here's maybe this
is a grumpy little b, little, a little character
that she's stuck up here. You can draw whatever
character you're like. Alright, now it's time to ink, okay, time to ink this. And that led to my last
little character down here. So I have about that. But first things first, I come into her and
I ink her eyes. Okay, I want to capture
those tall and open. Surprised. They would go for the nose and
a little open 0 for males. Sometimes. Small and simple mouse
can be very effective. So we see her expression just, just really simple,
simple, simple pictures. Now I can go around
her head, okay, So I get her it or herring. You don't have to draw it here. I just draw that in a ponytail. Perhaps I almost didn't fit on. Just sneak it in. And then around her face. And remember, I need you
to be careful if you've drawn the hand up at
her face like me. You have to be careful
because week after stop inking and then come back to it,
right? So there we go. The rest of the character. Keeping it simple. Here, I've got her hand, her hands on this brush. I'm just drawing it very
simply as a circle. Okay. So it looks like
her fist holding the brush that I just gave it to me and I haven't been making it
a little curved here. So it looks like maybe she's
like flicking flicking sand, sand flying off the end of
her and different brush. Then the legs and simple
little ovals for the beach. And of course I've drawn
my little character who you can imagine. She could uncover anything. You draw whatever
you like there. And now I've finished
off this section. So again, I can ink in
this part of my DIG, okay, now I'm ready to decide what characters are
going to happen down here. So I'm going to get in
one more character and I think say I've got a bit of an awkward space here and then I have something over here. So I'm going to get
a character here. I'm going to draw on a
circle for these characters. And I need to decide
what they're doing. I'm thinking maybe maybe
pop their head up. I would have like a whole okay. Maybe there they're
down up there, down a hole and
they've they've just brought out maybe some heavy at maybe a skull and maybe it maybe some bones here. She's she's just found, dug up a bone. Circle again, same thing, circle for the character's head, little square for the body, okay, here it is. Then I draw an oval
shapes, then oval. So that's her down in him. I told him about my
character down in the hole. Chop them off. Little sticks. But my character's arms a little circle around
whatever it is he's, he's discovered it should he holds or maybe he's
holding in his hand. I give him a little
circle first hand, he's holding a maybe a short, little short little shovel. He's got from areas
small little shovel. And he's looking down at
his what he's dug up. And maybe he's disappointed
by this or take, but, but politically
is maybe he's, he's pleased by this. Dude, we do disappointed, so his eyes are down. We did this a little bit
like a somewhat like that. The loan, the character. Pupils lower down in
the eyes, looking down, maybe eyebrows that are a little curved in and down
on top of his eyes, right? So he's a bit disappointed. All he's got is a
bone, has got a crown. Simple nose, which is a
curve in a straight line. And then look how
simple this mouth is. Just a little dash mark and it's a little bit downcast,
little bit down. So it's, it's a, it's not a huge fan, not like our moon Wall Street. And it's just a little, I think that I've got a pop
on his hat in their houses. Probably angled more like this. Okay, So oval oval
forest hat, top of it. And give your character
some some hair. So it's various, Oh, I forgot his color of his shirt. And their weight is
down in the hole. So I can ink this character and all the little
bit of space here. I think that i'm, I'm gonna go with the
theme of the bone. I'm gonna give myself a, maybe a skull here. This is this sculpted. Chattering away
to him being like why you've talked
about my bones. Circle for the skull, circles on top,
circle for his nose. From the same things. Just go down in down
in the sand, right. Maybe pop a couple
a couple of bones. Bone or to popping up. Popping out of the sand
or one on the ground. Okay, I can ink this now. Beginning with my
character and again with my character's eyes. Okay, so that's all
I want to talk to. Those first MUX. Quite sad part I. Pupils down. Simple knows what medicine in a whole new era to like. Add a neck as I go along. There's his shirt collar. I have forgotten my characters. And then the rest. I keep simple. Just simple little circle for the characters and
not worry about it. And same thing on the
other arm where he's just holding his little shovel. That's made out of shape. So same thing, just build
build it up at a shapes. And he has to his belt
and he asked her down into various down in the hole. And my very last bits, which are my skull. There we go. We've created our first cartoon. So I hope that gives you
a good idea of how you can use your skills of a
drawing characters with expression to really
tell a story in a scene. I can go ahead and do some
more details here if you like, you know, like e.g. I thought My God, who probably look quite good if I colored in some
little bits in black. My spirit character could
have maybe something. I don't remember it, some
hieroglyphics on them. I don't know what
these look like. Hieroglyphics on
my side of my two. If you like what you can do. If you think your picture, you may want to spend a bit
of time and then color it. And if you go into color
and you're going to heat, remember the thing about
racing off your lives? I start off by race and off the first character that I drew it because now
it's gonna be dry. I hope. I'll be trying and
then they go along to my, my next character. So I want to give the rest of it good amount of time to dry. Especially where I've done a
lot of coloring in a black. Because sometimes
that takes longer to dry her with her. Whatever it is, crazy
little characters that she's, he's dug up. But you can see that
by using our shapes and focusing on the
character's eyes, eyebrows, and mouth. We can draw very
expressive seen. The characters. All of them were
constructed the same way. It was a circle and
a little square. So they all start out
with the same basis. Then you can really
change them up. We did that in some other other, other little challenges
like putting your characters in slightly
different positions. Or a little girl who does, She's almost toppling over and
he's standing straight. So here's our first one. This first one we did then
the kneeling down character. And then here we look. We just dropped him off and stuck down the hall that
look good color too. So I hope you had fun
doing our first card. And I'll see you in
the next lesson.
11. Ninja Master: It's time to put our
characters into motion. We're going to be
drawing Ninja master. This is where I'm going to show you the basic way of taking simple stick figures
and turning in Jewish characters like these
ninjas that are jumping, munging, and stroking
all over your page. You can use this technique, withdrawing all kinds of
different characters. All you need is a
pencil and paper. And I'm also going to outline my characters in a
black fine liner. You can do that too if you want. Alright, we're ready
for ninja and master. This is going to be a fun one because we're
gonna be putting our characters into motion. We'll start off by drawing
this character here. Then we're going to add a couple of more characters on the side. So if you have a little
look at this ninja, there are a couple of features
I want you to notice. First of all, ninja, we're going to draw them
and they're wearing a mask. Their face is covered. So all we got to show
where their eyes, alright, so that's
our expression. Some come from
there a little bit, but most of it comes
from their motion. And we're going to
draw these characters using stick figures. And I'll show you
how to do that. A couple of the things
about ninjas you might notice is they might
be wearing gloves. I've got my character
wearing gloves. I've got my character has got a sash tied around his waist and then he's gotta sort of
slightly baggy trousers on. And what else? Well, he's got two swords. Sometimes they got
tattoo sorts of themes. And you can see the little ties from my characters mask
flying out the back. Okay, so those are a few
things to notice about ninjas. Now, grab your pencil. Let's get started
with our first ninja. Who will be this character? Alright. We're not
going to color in, but we will ink Kim. Just start with, the
first thing I'm gonna do is start with a shape. As always, I start with a shape. I'm drawing this first character in the center of my page. Now I'm going to leave space on the either side for
the other characters. First character here we go, circle for my character's head. And it's about a third of
the way down my page because I need space on that a little smaller because I might need, I will need space for the swords that are above
my character's head. And so that's first step, circle for the character's head. Now I'm going to sketch in the rest of my character
as a stick figure. So not a shapes but
as a stick figure. And what I imagine is
a straight line down. This is my characters spine. Remember, all of
this is going to be covered up what,
when we ink it. So keep it, keep it light, keep your sketching light. Little line down as
my characters spine. Then this character,
he has both arms out, straight out like this, holding the two sorts. So two sticks out like that. As my character holds
holds the sorts, sorts are going to be
up there like this. You might make them,
makes them straight. I'm doing one slightly
curved like that. So I sketch in approximately where I think those sorts are
gonna be an admin. I look at my home and I made his arms a little bit
short for swarming out, bring it in, little bit, sort of play around with where it is. I'm happy with that. I'm happy with that. Okay. Next or my character's legs. So this character, you can
have them both straight out. I'm gonna do one leg bent. Okay. So it's like he's got
one leg bent, one leg out. Diving, diving through the air. This, this ninja. Okay, good start. Now, to get another feeling for how my character
is positioned. I'm going to add in
my character's feet, just like we did
with the big five, but we were drawing
our archaeologists. I'm going to keep, these is my character's feet as
simple little ovals. Now I'm picturing this
character has got this, this foot flexed, so
it's up like that. This one out maybe
maybe a little bit down or you could
make it pointed. I'm going to keep it like that. Let's go there. Now I'm going to come in
to my character's hands, okay, and I'm going to keep
this as little circles. Now one thing to have a look at is that to feel as if you're, to make sure your characters
the right proportion or feels like the
right proportion, is to see that your arms, your characteristic
arms, are about the same length as your
characters. Stick. Legs might be a
tiny bit shorter, but there we go. Then I check that and then
I put a little circle on the end to be my
character's hand. Alright, we're gonna
keep the hands quite simply not going to get much
more complicated than that. Now we can start to
turn this character into a looking like
more of a ninja. So first things first, I'm going to come in and draw on my character's ninja mask. So about a third of the way down my character is
circle for the head. I'm going to give a
little curve there. And that's going to be
the opening of the mass and another little
curved down below. I might curve it up is if
it comes up over his nose, I could keep it straight
is whatever style you want to draw. So this is where you start to be creative in your own
style of doing things. There's the start
of the mask and then he's going to have
a little tassel is flowing out the bad wolf
that's part of his tie, I should say from
his mask and say I draw it like a little swoop, you know, and again, do
it, do it how you like, maybe put them close
together or further apart. But if I do it like this, then it adds to my
character's feeling of being in motion. Alright, Next I can do
my character's eyes. Decide where my characters
pupils are looking. He's looking straight ahead or maybe it's looking down here. Maybe it's looking a
little bit down like that. Could be a curve on other side because that's
all we see of his eye. And then we add eyebrows. I'm going to because this is what we only, we only see eyes. So that's all we have for showing a character's
facial expression. We don't have a mouth, we don't have we don't have cheeks, we'll just have eyes. But I do get eyebrows. I'm going to just
capture my character with angled in eyebrows. It looks a little fierce. We did it, we did a fierce,
fierce monster, right? So a little bit like the fear small, so we've
got quite a spheres. Okay, so there's,
my character's face is starting to look a
little bit like a ninja. Now, we're going to thicken up and flesh up our characters. Stick body. So I'm
going to start with the body of my character. Right here. I'm telling it as a triangle. This character has got a vest
on and picture like that. There's the characters waste. Maybe that's a little rectangle
across because remember, I'm going to show on my show
my character wearing a sash. So you can do that if you'd like or you might wanna do
it a bit differently. So maybe there's
another little her, maybe they're both
on the same side. This is the end of the sash. I do some flowy lines
coming out the side. And again, this is
where you can get creative and draw
it how you like. Now, I can give my
character who's a ninja, ninja trousers in Japan. I just draw these as if they're a little
bit blue near I guess. A little bit like a little
sausage-shaped maybe. Alright, and I draw that and I follow around the line
of my characters. Stick legs. Okay? So this is
where I'm imagining the fabric of the close
kinda billowing out. He's in motion. In the rest of the
character like this, I'm going to keep the feet
just the simple little ovals. I'm going to leave
that like that. Now I'm going to come up
to my character's hands. And for this, I'm going to pretend like my character's
wearing gloves. So what I'm gonna do, draw a little rectangle shape onto the ends they're attaching to his
little circle hand. That's going to look
fine for for the, for my character's hands. If I wanted to, I could
put a little curve to be, to be the thumb like that. If I want to get fancy, but I
think it'll look just fine. Then I can finish off by drawing
in my character's sorts. So we see the bottom part of the sword coming out underneath
my character's hand. That's just a little
rectangle down. Then the top of your sodium, draw this how you
will get creative. Neutral. Pointy swords are thicker
however you like. Okay, it looks like we've
got our first character. I think I'm ready to
ink my character. Let's, let's do that. Inking, same with
this character. I'm going to start in
with my character's eyes. Even though most of the character's expression
comes from his motion. Still the eyes are
really important, so I go drawing those. I always want to
get those right. I can just keep it simple. Circle of my character's head. So part of this
flies out the back. And then I have my characters
triangular symbol on there. Maybe it's Leto that ninja
into house or something. And tell my character's body, here's this little
sash or that however you like, flies out. And I just felt like on my
ninja characters, trousers. Here I just keep the foot and the ankle very simple,
straight shapes, Okay. And then finish
off my characters. And out of that little, that little circle there. So it looks a bit like
my characters thumb. Really don't even
have to do that. That can be tapped. Just the, just as a circle alignment to do a little top on top of
Maya, on top of the store. That's a little
hand product tall. And however you like
to draw their swords. Given a little rectangular
shape to them, how sad. I think it
looks quite good. I won't rub out those
pencil lines yet. We'll start the other ninjas
and then I can come back and erase those back to the pencil. Now, we need a couple of more stick figures to
start our next two ninjas. First off, I think I will
draw a character over here. And I need to start by getting
in first things first, circle for my character's head. And you might, you might be
positioning your character differently than mine
depending on where you've set up your
character on your page. So whatever, whatever
works for your drawing, I'm going to do is
head like that. Little circles. Yes, I'm happy with that. I'm picturing this
character lunging, okay, he's gonna just have
one sort instead of two. And he's lunging,
lunging forward. There isn't good lunging over
this character, I think. So. That means that the body, which is this little stick
here, is angled forward. So you see it feels like my character's body
is leaning forward. Then I need my character's
arms and doing arms mixed because this
character has a sword. So I, I sketch in a straight line for
my character's arms. This is if they're
stretched out, you see, I'm picturing the sword in
this hand up like that. So I sketch in lightly
where I think the sort would feel about right. Then I come down and draw
my character's legs. Because I dropped my
character's legs now, because I can sketch in these these sticks so that it feels like my
character is balanced. You see, I actually
feel like I need to bend this leg a
little bit more so I might play around with
how I've positioned. Stick legs until I feel like the character
will be balanced. E.g. if I put the leg like this, if I drew my leg like this, you wouldn't, you'd feel
like the character is about to fall over, right? So this is what I mean
by playing around with the angles of
your characters. I like that. I like,
I'm going to go with that. So that's how I decide. Again now I need hands and feet. So this character is here. Let's use this foot here. It's just going to
be outstretched, maybe stretched out like that. I'm very close this off my page, a little oval there. And then this character's foot here is like this on the ground. Or I could have made it
maybe it's up on his toe, but I'm gonna do a
little oval like that. The characters like
that on the ground. There's more I play around with, with the stick legs and feet
to make him feel balanced. And then my other hand we've got the one hand starting on here on my sore than the other
hand is outstretched. So that'll be there. And I'll need maybe some
little overlies for fingers to be to make it look like he's
got his hand out like that. What's next? I'm happy with my stick
figures position, how he feels and he feels
balanced and ready to, ready to have a sword fight. And now I can start
creating my character. So into my character's face. This character is
looking this way. Okay, So we're seeing
side of this character. We're seeing them on the side, might still show both
eyes, like both pupils. But I create a little openings. So this is the shape of that ones that almost
like a curvy triangle. Okay, a little slit in his mask. Here it is. For my character's eyes. And I point my pupils
will make us look at, I just realized, I forgot to draw the characters
other side of the eyeball. Alright, back to this character. So I'm going to
point his pupils. He's looking over here and show two or I could show it just so as a site of just one. When i then I'm going
to show them like that. Okay, so 22 pupils
looking over here, make sure I've gotten
the right position. And then eyebrows. Fearsome, fearsome
looking fierce, little eyebrows,
little angry, that is. And I can do my characters tie for his
masks when we're seeing that. How is it? I think about
it, I don't know how, how do I want this
little tassel? This isn't moving that much, nearly as much as this
character, right? So maybe I don't
need it flipped up. So I mean, he's just come out the back like
that too though. Too little ties at the back. I think that looks pretty good. I think my character looks
like he's looking more at ease to be a little
bit more forward. And now I can go down
my character's body. I'll do a similar kind
of design is here, and then I give my
character vest like this. Okay, So a triangle kind of shape over top of my
characters spine c in it. You can see it's at an
angle as opposed to this triangle was straight up
and down around that spine. Whereas this one,
see I go around and draw the triangle around
this character spine, which is on the
angle as his belt. I decide on how it's gonna go. Yeah. Good on them. And then same thing, I come down my character's body and I gave him his
ninja, ninja trousers. Just like that. I do think I made this
leg a little bit short, but that's what z is. So we go on into it and into
trousers. It looks great. I, and I just need my sword. No adult, I need my
forgotten my gloves. So that is a little
rectangular shape, line angles in a little bit. So it feels like a glove
that comes in at the wrist. Then this is our first little, our first bit of where we are actually seeing
fingers on this one. Remember from this
circle that is your characters
palm of their hand. Little ovals around, little ovals that are,
that are fingers. Remember to keep
them really pretty small to look or does he feel like he's
stretching his head? I don't think I need to spread the fingers out a bit more. That adds to the feeling of your character
in motion as well. There will be him with
his finger stretched out. Then finally, I can do my
little little sword here. There is the rectangle makes
the bottom of the sword, even though we're
doing stick figures, when we flush up or characters, it becomes a boat shape. The shapes always come in. And there's a couple hours
that was sort of a half circle mix the top of that
sort and pickups. Okay, I could think
this character, I won't forget, she
was always this time from both sides to them. Again, I'm going to start with my character's eyes,
eyes, and eyebrows. You don't have to show
eyebrows, maybe you hide them. This is up to you. What you think will look
best with your style. I'll finish off my
characters mask. I could make it, I
could show like it's wrapped and show little
lines across the mask. I'm going to leave mine plane, but that's something
you might want to do. My character's body. His
body is facing floors. We see the full, we see the full triangle
of his vast sash. My character's body
isn't going along. I make sure that it, It's a feeling right, for where my characters
stick legs are position. I was like this is if
those were his bones are foreseeing into the
characters skeleton or lost. This, this foot is pointed
out that someone imagined it. Then I can finish off
my character's hands to show that little
thumb or not. Here we get to do
our characters. Nice, outstretched
hand. Looks good. Finish with the characters. Sword. I've never owned media. I'm gonna make my characters,
so I have a little, little diagonal lines
across it will make it feel like it's more of a handle. Okay, look a little bit
of definition to that. Great. Next character. I'm going to do an integral. I'm going to do
an integral next. So she's over here and she's
coming towards ninja boy. And now I need to
decide on her position. So he had his sword in behind. I can make her with
a sword in front. That's what I'm picturing. Get a sore. It's going to
be somewhere like that. Now I begin, I get in my character's circle for her head and see what I've done. I line up because I want her to be these two are
coming out each other. So I want her head lined up
with this character's head. So I, I just take my hand, I sort of imagine
a line across so I could literally sketching
the line of a one to one. And now I give my character
this circle for her head. I'm going to try and give
myself enough space back here. So maybe I had movers. Her head a little
further forward. I made that mistake
before we go. Now, I'm picturing her. She's sort of more in
a kneeling position, so he's lunging.
She's going to be. Nearly as in her body. Her spine is gonna be fairly
straight up and down. And that she's got
one leg bent like this and another leg
kinda like this. So two bent legs and the Sword. She has both hands
out front with her sword being held straight
out like this, like that. Reposition my sword
a little bit. That's where I play
around with that. So straight line for her arm and we'll just see
a little circle for her. And so now I come down and I
make sure that I feel like my legs by stick legs are in the right position to
make her feel balanced. So let's play with
the front one first. Maybe she's a Sheila but
upon her toe, I don't know, maybe the same with back when she's ninjas are a very natural. So she's like we're ready to
ready to pounce on those, then this leg feels
good like that. See, I could what if I put it
like that? I could do that. Maybe maybe you'll
play around with it. Maybe it straight
out. That would probably look alright too. There are a number
of positions that can show your
character in emotion. Emotion without hoping
exactly the same. So I'm gonna go with that. Now what I've done is I've done is I've gone ahead
and done her foot, so there's a little
oval for that. But she's she's got her
her toe down right. So it might vent a little
bit like an event oval. Here we go. Same with this one. There's oval, it's
bent a little bit like it's like the ball of her foot is down
on the ground. So it makes sense. There we go. Now, I'll come back
to my character's face and I won't say what. I lot eyes are almost
exactly where the size. There we go. I didn't hear that
slit in the mask for my character's eyes to
pop through and see. I've actually kind
of curved it a little bit because
remember our heads around. So it was wrapped with the mask. The mask might appear
to curve a little bit. That will add to the feeling
that her head is round. Little curve around like that as opposed to redrawing it
straightened, right? That may not look it
won't look as curved. But it doesn't mean
that it wouldn't be a cool style, right? There's nothing wrong with styling things in
different ways. That if that's your style than, than it can look
really good too. Pupils for my character's eyes. And there you go. See her. Oh, and I should she be? Not too. I'll make
her fierce as well. She's she's just a scarcity
is very fierce there she is. She's an int, a girl, I
better give her ponytail. Use this new journey
to girls ponytail and she also gets ties for her mask coming out
and that looks fun. I like that. Draw that however you
like. It's just there again is our ECR
teardrop shape appear. Shapes will reappear, right? We can build them up, however. Now, down integrals body, so both her arms are forward. We might, we might need to
thicken those up a little bit. Then for our body
that see I can do a little bit different outfits she's gonna be
wearing like that. I'm just going to dislike a
simple little louder, sorry. So I have a sausage shape or oval sausage shape
around her body. She gets definitely a nice
sash around her waist. And maybe she's got
like in the first, first character I showed you interact in our intro drawing. What do you hear? Birds singing into drawing? My character had the thicker
kind of sash around as well. So I'm going to draw that on her flying back. It's not too much. I think his father's family that might not maybe it looks makes it look like
she's too much in motion, but if she's just jumped
down, say so her, the fabrics flowing up, she's landed here and
she's about to pounce. That's what I'm picturing. Integrals, trousers. And again, I am
following, right? So I'm keeping in
mind the angles and the shapes of the sticks. Okay. So the lines of
those fall, I should say. And there she is. She looks so good. And now I can come in and do
the smaller things like her her gloves. That's all we have to see. Guernica see any fingers
or anything, right? Because we're seeing
this part of her hand. Sword, half circle shape on
top if you want it like that. And then look up for
the first source, like a very different
style of soda ash. You can have this
style. I like it. All right, time to incur. Beginning with my
character's eyes, I can't get her pupils
and fierce eyebrows. Hello. We'll eyelashes
on her. There she is. It's not very much,
but it's enough. Adding little details like that can really make a
difference in your journal. Doesn't have to be a lot. Like a little just a little
jaggedy on the end of her ponytail just for fun. All of this, the
details in your style, you know, play around
with what you think. Looks good. Here's her billowing blouse. And then the part of her outfit makes it feel
like she's just jumped down. Maybe I could add some
little motion marks there. Like this. He knows how feels
like she's just jump down. Here she is upon her toe. So it's an oval. Flattened out a little bit. Again. Oval. Looks like she's up on her toe. She looks poised. Simple shapes for the hands. And here I'm drawing in
behind, we're just seeing, so she has both
hands on this sword. So we're just seeing a little
bit of that arm in behind. You could even draw
it without even showing that it would
look fine as well. And my sword. And when I'm coming in to do
something like a sword, I make sure that I
line up my life. I'll pick up where I came
across here with my, with my pencil, feeling like
I had the eyes in line. I do the same thing here. I want the handle of
the sword to line up with the top of the
sort with the blade. But in between it, I've
got a hand, right? So I don't want to just
start drawing over here. I want to make sure
that I pull my hand up and I've got the handle
in line with the sword. It's just one way of trying
to make things line up. And that's it. What little I pointed
feeling marks on your latch. It makes it feel like the
swords pointy at the end. And is there anywhere
else that I could add some motion marks? I'll think about that so
I can come in and erase. The lines are my first
messenger for sure. Depending on what Penny use, ink and draw pretty fast. I find that the pens
but I'm using the dry. My goodness. Look, I just said that your dries very quickly
and look at that. It's just much I do tend to find that
the dry fairly quickly, but obviously there's
exceptions to every rule. And when I'm not sure if
it dries, like I said, it's best to do a
little a little test. Don't do what I do,
smashing things. Let's see her. Maybe she's
going to show you this much. I'm not too
worried if she does. So I'm not going to color these, but if you want to
have a bit of fun, you can color your drawings, whether that's with
marker or pencil crown, because these characters
will look super colored and you want to give yourself
a little doodle challenge. Here's an idea for you. So you can draw more ninjas. Same process coming in and draw on yourself
and stick figures, but in different positions. Then doing the same thing and
turning them into ninjas. So you begin with
your stick figure. Began with your stick figure. Then draw in your character's
eyes and face and masks. Then come down your character's
body and add your shapes. So that's your shapes
for the body and your sausage shapes
around the legs. And then the rest of
your details with your little gloves and sword. So do that for your characters. And like I said,
play around with the stick figures in
different positions. If you want to have
some real thought, there's no saying that Ninjas
need to be people, right? You could do ninja cat or
ninja navies, ninja hamster. A few of those before,
whatever you like. So that's it for now. I hope that gave you a
good idea of how to turn something as simple as a stick figure into a character
that's really pretty, quite, quite good and
advanced our ninjas. And I'll see you in the next
motion of drawing exercise.
12. Spy Academy: It's time to put our action
drawing skills to the test. We're going to be spies and
training at the spy academy. Now we're going to use
the same technique like we did with our ninjas, drawing stick figures and then turning them into
cartoons and motion. Except this time, I'm
gonna show you how to set those cartoons
into a full scene. Now for this exercise, all you need is your
pencil and paper. And I'm also going to
outline my cartoons. Black fine liner. You can do that too if you like. Alright, are you ready to
go to the spy Academy? Here? We're going to have
a lot of fun making your characters in
motion, jumping, flying, repelling, and generally training like crazy spires all over the place. So let's get going. Grab your pencil. I'm going to show you how to
start off with this picture. So we're at a spy Academy and I'm imagining that we've
got a couple of buildings, okay, We're on the campus. We're going to give us,
give herself a couple of buildings so we
can have our spies maybe on the roof or repelling jail the side
or whatever we want. The first thing I'm
gonna do is sketch myself and a couple
of rectangle shapes. Okay? These are the
upsides of my page. So it's as if the building is going off the side of the page. That's all we see for it. Okay. I'm leaving some space at the
top because I'm imagining I can put some of my spies
appear on the roof. Then if I give myself
another building over here, maybe I'll do the same thing. There's little, little
bit of space on the roof because
it's kind of like, oh, maybe leave a
little bit smaller. Like that. Alright,
how to spot look? Because I also want a
little bit of space in-between for my spies to be doing some
training on the grounds. I do it with a
line across there. I'm imagining that this is the, the training field frontier.
We're seeing that. Let's start with our
first spy in motion. And my character is
going to be up here on the roof, right around here. And we're going to draw
these, just like we drew the ninjas will vary similarly, starting with a shape, a circle for my
character's head. So right about there, he's, he's poised on the
edge of this building. C that, and now I draw
in my stick figure, just like with our ninjas. This character, you can
draw on how you like. I'm going to do in like this, as if my character is leaning over the
edge, okay, So PCB, my character has one arm, one arm down like this, balancing himself, and
another arm out like this. Maybe about two though
to do something. Are they looking
through a telescope? I'm not sure what the dream. Maybe there they've got
one of those little, little guns that they
can use to shoot a line over to the next
building so that they can repel or jump over
to the next building. Maybe that's what they're
doing. One of those little constitute as it has the
little spiky is on it. Okay. Sure. What's called a gun
so that they can then shoot it the minute they get a line across
to the next building. So back to my character, my character's head, a
circle, characters spine. And then I've given my
character their arms down and they feel
pretty balanced. And I just saw and
how are their legs? I'm picturing my character and balanced on the edge of
the building like this. So maybe one leg bent or a mixer Neil and that could be kneeling, kneeling like that. What feels best here? Same way as we did
with the ninjas. I play around with
the characters. Stick legs to see what's
going to feel best. I think I'm gonna go with knee bent and foot on the
edge of the building. And remember this is where
everything's sketchy, light and sketchy
because I need to make, we need to move some of my lines about I've decided my building
ECO habitable lower. That's what I've done there. And then I can do my
character's feet. And I'll do them quite simply like we did
with the ninjas. Oval and maybe this character
is upon, upon his toe. So that makes it two
ovals when awful there. So it makes sense. I hope so. And then the other
foot just maybe flat flat on the edge
of the building. There. I think that feels
quite good for my characters poised physician. Why he's about to, about to do a little shoot
with his, with his gun. So now I give my
character hands, little circles,
little circles on the end of my stick arms. These characters, I think
I can keep them quite simple by giving them
gloves as well, right? So like we did with the ninjas, some little rectangle shapes at the edge of their hands and then it feels like
they've got the gloves on. And I can keep the
hands as little circles there on their spy gun. This is supposed to
be, supposed to be a little hook. The hook. Now I can start turning
my character into a spy. So the characters that
I'm gonna do here, I'm going to put
them into helmets. So I wanted to look
a little official, right, so that's fun doing. So this line is the top
of my characters helmet. Then maybe I'd give a
little line down. See that? And that's a little
curve around the psi. See that it looks like my
character Scott, helmet on. Next character's eyes. Now, these are spies. So I want them to
look like they're being sly or tricky, right? So I'm giving my
character big wide eyes. This is why you can
play around with it. And then I decide, again, where's my character looking? My character may be there. They may be shooting this
direction and maybe they're looking back this
direction, right? So I'm happy with my
pupils like this. So this character's like
amino checking to see if anybody is following him. Or those lists by
student. Here we go. You put a little emblem or little symbol on top of
your characters helmet. Because I'm thinking I want
all the characters to look like they're all from
the spy Academy. So I want to give them a
similar kind of a uniform. Now the rest of my character, I'm going to do very simple. All I'm gonna be
doing is thickening up my stick figure with shapes. And I'm going to keep them
quite straight in this case. With an interest we
did sort of Bill Haley and larger kind of clothing. But these spies, I'm going
to keep in sort of slim, slim and angular type
outfits. How does that look? I'll thicken up his arm a
little bit thick enough that arm a little bit and
reduce your carriers on. I haven't jumped away from SAS session to
come back to his face, knows my character's nose
and a little, a little, maybe he's got a little wave
for smile because he's, he's a bit suspicious that something's
happening back here. Perhaps I give my
character a backpack. Maybe he's got his, his tools and his gear up here. You know something, I know
what it's not up there. There we go. Backpack. I think that's it
for this character. I think I can income. I haven't shown eyebrows on this character, but
I think that's okay. I'm making him look as if his
helmet is right down over his eyes. Looks a
little bit worried. What happens when you're
a spy and training. A little symbol and
put it up here. I hope it looks like a target. So he looks like he's from the sky Academy. That's my idea. Their face is done. I can go down my
character's body. A lot of the lines. Remember, I can just keep
very simple and straight. I'll give them a
character boots. I want her to look like he's got an official spy outfit on. There we go. He's wearing boots. I could maybe give him like a lady's got a
belt or something. I think that sort of breaks up the feeling of his outfit a bit. Now one thing I haven't
done is put any fingers on this hand or maybe
he's just resting his fist down on the
side of the building. So that would probably work. And the rest of it, simple little shapes
for the hands. Here. Uses spike on his backpack. And then we've got our
first spy on the roof. Now I don't think the roof or this line where
he is because I don t know yet what other characters might be interfering are
coming into that area. So I leave that. I'm going to
go on to my next character. And I think for this, I'm going to have a
bit of fun with this. I'm going to put in my
judgment by Golden overspeech. A spy helicopter. Okay, so here's because one of the pictures
by helicopter, this is just an oval. It's on it's on an angle. And I'm picturing somebody throw that there could
be hanging from it or they might beat me
with a trailing out trailing out the back
off of the line. How's that? Okay, That's
what's going to happen. That's my next fun
little spy in motion. So to do my helicopter, this is not a big
part of my drawing, but I need to show it so
I can do it quite simply, oval for the main body
of the helicopter. And then I give myself a
couple of little propellers. Or I could show that even more simply by just doing a circle, another oval on top right. So I drew a line coming out
the top of my helicopter and then just lightly
drawn oval or two. So that's going to show as
in the propeller is moving. Then I need a front
to my helicopter. I won't even draw
anybody inside it. But if you want, a
challenge is off, you could draw a little
character in here, you know, you want it to. And then this is the
tail of the helicopter. Just a long rectangle
coming out the back and a little angled rectangle
on the end right there. I just put together the shapes
and we have a helicopter, but I'll give a little open
door so we can see what is the line that comes out in my character is going to
be hanging from here. So he's, he's smaller, right? Because he's he's
further in the distance. So now I come down and let's draw our next
character in motion. So this character, I begin with my character's head areas. Like I said, he's a
little bit smaller. So character's head, the
characters arm is straight up. You see a straight up along
the line that comes out of the helicopter
because he's sort of approaching kind of like
old trailing along. Okay. He sees in training maybe it's
not very good at this yet. So a circle for the
character's hand and stick for their arm, then a stick for their body. And they're sort of
like as a trailing, trailing along with visit. Maybe they've got their
other arm arm out. Okay. And maybe their legs are
like like like this. You are the kind of spread
out. Should you be looking? I think the character
is looking out. I think the legs will
be trailing down behind the arm and these sovereign leg will be trailing down behind. Okay. So it looks like
they're being pulled right is the line of
what's happening here. My helicopter needs
to be bigger. If that's alright.
Character's head. Then the other leg could be, it could be
trailing out the back. It could be like this actually feels quite good. I
think I'll do that. So this is again where
I play around with the stick figure until I decide that I've got them
in the right position. Even need to move my field down. I don't want it to look like
USA on the Brownsville. There we go. Now I can begin drawing
this character. So I've decided he's
gonna be looking up. And again, I'm giving
my character helmet, little opening there
for my helmet. Eyes, pupils looking up. Maybe I'll have the
eyebrows here heat. So he looks a
little bit worried. They look a little bit worried. Worried luck is with eyebrows
and golden years old here. Maybe a little open mouth, a little 0, 0 like that. This will be clearer when
I ink it will very soon. Then same thing down
my character's body. Drawing. Shapes over top
of the stick figure. So a rectangle for the body. Legs, sticking those
up a little bit. And I haven't done
my overly feet a little ovals pointing
down like that. Let's see how it needs to look like that little ovals pointed down and while they're
gonna be boots rights either give them a little rectangle on
the end to be his boots, same with his his gloves and those little hands
still it's just a circle. Just just circle. I think this army stay longer. Remember there's the
trick of legs need to be about as long as arms. And a few little
fingers on the end. Just add a spy, hopefully, given the backpack, maybe
your backpack in the belt. This hand, it looks like
I've made it too short. So before you go inking, have a look back
to your character and makes sure that you feel like their proportions
are looking good. I think I'm ready
to ink this guy. My poor worried, worried spy. Oh, oh, for his mouth. I should put the
little spy symbol again on his, on his helmet. Will circle with
some dashed lines. Then down my character's body, which puts gloves on
outstretched fingers. Again, remember
they're just shapes. Just think about anything
that's difficult, like hands as shapes, spy boots. I'm just going to keep
this hand very simple, just a closed fist, so just a circle. And now I can do
my spy helicopter is this is not a big feature of my drawing, so I can keep it pretty simple. Just made my propelling
a little bit bigger something I should put that little symbol for the spy
Academy on the back of it. Maybe you want to label your helicopters by
Academy on the side. All kinds of little
details you can add in. So it looks more fun. And therefore the propeller, all I did with some
quick couple of light circles and I use my pen more on the edge so that it doesn't come out as thick line. Alright, oh, and I
should probably put on some little while landing, landing legs but helicopter. And I could show
the helicopter with a few little motion marks, just like I could show my
character is being pulled up. A few little motion looks
whipped off the ground. Great to characters
and this is good. Let's do another character. And they could be, it
could be up on the roof. I've got that space. But I think I might do a
character on this building, but repelling down at, you know, select on one of those lines. And they're, they're
climbing down the buildings that are
repelling, repelling down. Now I need to move Life
Building over a snitch. So here it goes. It's not gonna work. Yeah, I think that
should give me good space for my characters. I move that around. And now I draw in my character
who's on the building, my opinion, but I want to leave
more space at their site, put another character
and the top is built. I'm going to lower
my building a bit. How's that? That looks good. Again, play with where your buildings are in
relationship to your characters, the important part or
the characters here. So here's my character who's
climbing down the building. I start with the
character's head. It needs to be a little distance
away for this building. So character's head a little bit bigger there is
both as big as this character. And then the body
spine, the line down. Because there's not, they
walked down the building. It's kinda like
they've got one leg that's sort of bent like this. Maybe he's got one
leg out and he's he's he's he's walking
down the Billy. He's got the line. Okay. So there's gonna be
whatever line he's holding onto that has arms go straight up that a little bit
like this character. So there's the line but he's
holding his hand or hands. Erbitux got both
hands on it. I hope. Line of characters arm coming down here and do what
will be your shoulder. You can change the
positioning of legs however you feel maybe one
likes down here, I don't know. I like the feeling
of them like this. One knee bent in here on the building and the other one like
like like that. I feel good. I think so. Downey goes down the building. Now I checked that I
like my stick figure, like he feels pretty good for daughter is a
little bit curved. That's okay. Just naturally doesn't actually
perfectly straight. In fact, I often will draw things that are normally
straight like a building, but with a little
bit of a curve. Because it adds some
interest to my picture. And it means that the
picture doesn't need, the rest of the lines
don't need to be straight either because
everything's a bit curved into my character's face. What's this guy
doing these keratin actually be looking down. I caught this character is
looking up at the helicopter. Let's do this character
looking down here he is. I think maybe if he's
lost his helmet, his helmets fallen off here this holiday, so he's looking down, so I'm going to give them some. He's, he's surprised. Okay, we're getting some
of our expressions in. So there's like a
wide-open eyes. He's like maybe he's
open milk as well. Why does water open mouth? Because he's just dropped. This is how it's just
fallen off his face, his head rather than
here's his helmet. Circle. Same size of his head. Anomeric, your foot a
little opening like this. There's the helmet. And it's fallen down there because his helmet should be a little strap
or here's a little, little strep throat
this however you like. Here we go. There goes his helmet. He didn't have a strapped
on, the straps broken. So back to my character
is surprised expression. Toll, wide-open eyes and
eyebrows high up above, high up above the eyes. The eyes are wide open, pupils. Looking at his
helmet that is lost. I can just give him a
little girl here she is. Spy girl, ponytail, hair up. Hello, I can show an E or
maybe on her because we're seeing very much the
side of her face. And she looks down at her
helmet, which she's lost. Now I can come in and draw my
shapes over my characters. Stick figure. I'm going to give her backpack. She's a backpack. Backpack? Yeah. Or maybe she's got she's
rope on her belt There she is a couple of ovals and Olson she has a
rope on her belt. And I gave her her gloves and the hands stay
a simple circles. And I give her
spine spiral boots. There she is. I'm going to pick up on her toe. The Oxford. This leg Here's
her other other foot. Brilliant. I think we're ready to ink her. And I began with her
eyes and her face. So make sure that
their pupils are pointing where she's looking. Surprised eyebrows. I'm gonna do her with a
little her mouth is open. It's drawn like a what is this? This is an upside down V. And I ink in a little bit. So it looks like we
see her tongue because she's surprised. Memorial, She's lost her helmet. And again, keeping all of the rest of her simple
straight lines and shapes. By backpack, we could, I could put the symbol for the spy Academy
on her backpack too, but I'm not going
to do if you want, you can add those little details that make a difference to the overall feeling
of your drawing. And how much of a story
that you're drawing tells. How, but don't forget my helmet. They would go what sees? Things went wrong. It was dichotomy. What's next? So you'll notice
I haven't linked in the building or the
line that she's holding. I could I'm not gonna
do that until I decide if there's anything happening in or on top of my building. So that's next. Let's look at what
we can add next. Who's our next spot? I'm picturing perhaps
somebody in the building. So I'm drawing myself a window. Okay. And again, it's not straight. It's a little bit on a curve,
just like my building. You can draw your
straight if you'd like. Whatever your style is, all these little differences add to your own unique style. So I'm going to do what about, what about a character
who's on a spy scooter? I'm gonna do a
flying spy scooter. I'm gonna do a character on
a flying spy scooter and his eyes just come up the window is as you
would if you were a spy. So here we go. Window
for some reason is open, and here's my character on
his flying spy scooter. So I positioned
where the scooters. And then I start my character, a circle from a
character's head. How many That's what he's
looking at us. Perfect. Almost lines up
with this character back a little bit for him
to be looking like Bono, someone's coming out
the window at me at a spice, beautiful today. I see you. I can line it up. So again, I grab my pencil and I'm like, what would be his line
of line of sight? Where would he be?
Lucky? Now let's see. If I put my character right
here on the spice theater. Maybe this guy's looking up. How's that? Should
be looking up? Well, maybe he's
looking over here, circled with the
character's head. The line for his body. And how's, how's it
poised on the scooter? Likes looks like this may
be how would you be on your on your flying spy scooter? I'm imagining like this. Okay, and then an oval. So I added my next shape. Now I've got my character
on his hovering, hovering spicy
food or how great. We need a little bit of
a spike here and here. The character, both arms, Here's the little handle
of the spy scooter. I put my character's arms, sticks, sticks out
on a spy scooter. Maybe you should be waving. I'll do like that. You might want to do them waving or maybe he's he's he's
holding some spotty. So hauling was talking
to you it into a spy here and changing
it to contain it. He's going to talk into his spy. Spy followed a spy gear there. Okay. So this is a little
more challenging. This guarantees not
looking where he's going. Hand-on. He still has his
hand. He's been good. He's got his hand
on the scooter. But he's looking back and
he's not paying attention. He's talking in
two years Despite on or maybe I could
put a little lot. Okay. I won't be that bad
and won't be that bad. Don't do it, don't
do what I'm doing. I just put both hands
on the spy scooter. He's going to have a mic and a walk a little walkie-talkie
on his helmet. Okay. You can do it how you want. But now on goes his
helmet. There it goes. Because helmet on. He's talking on
his this is a mic, that little oval there. That's his mic. And maybe this is the instructor coming out to tell everybody what
they need to do. Okay, continuing along,
overcome cotton, little distracted
by all that fun. Okay, so back to the character, back to the character eyes. I need to decide
what this character is to always sunglasses. He's Scott, spy
glasses on as well. Alright, so just a
couple of D shapes and he's got spy glasses on. So obviously it's, it's
character's nose and he's a, it's kinda like a square
mouth because he's kinda, kinda gridding or yelling
into the spy microphone. Here, Here's great level. Similar on the helmet. Same thing down the
characters body. Keeping it really simple. It definitely has
on us by backpack. Character's body down the legs. And the one thing I've ignored a little bit on my
character's feet. So ovals, boots, actual
little bit pointy. These characters boots to
look a little bit pointy. All of these little
details and how you dress and act
your characters. All things that create your style and how
your picture looks. You can always start
off with the basics, the basics of the stick figure to capture your character in. The type of motion that
you want them to be in. And then everything else, you know, you really
get creative with. Once you've got the basic shapes and know how you're going
to be drawing a picture. The rest is pretty easy, fun, but really, here's my spy. Hover, hover board is tolerable. Scooter, hovering scooter. Definitely the spy
Academy symbol on it near her way because
right here there's a, there's a plate here and it
has a spike had dummy symbol. There it is. Again, just draw another shape
and stick that in there. Would you put it on the scooter? I'm ready to ink this character. Same thing. I start with my
character's face, even though she's got sunglasses
on, spy glasses, rather. Sunglasses. Still going to capture that expression like I just stuck some
eyebrows on there, but I'm going to
leave him plane. Few little dots
on the microphone to draw some attention to that and make you feel
like it's a microphone. Characters, gloves and
the same thing keeps the shapes of the hands
are really simple. So good thing about gloves. I can simplify drawing hands. Have some fun with whoever
you want to design new. Spy scooter areas. I'm just going to add some
lines down and some clouds. It looks like he's blasted
offers curvy lines and the motion lines down that will make him feel
like he's blasting off. So I can almost
inking this part of my building because I've decided on all my characters
that go here. You may want to add more to it, but I'm going to wait on that. I want to finish off over
on my other building. I need to decide who's who's in the building
and what they're doing. So let's think about that. I think what I'm gonna do, a character, he's here. Maybe this is the instructor. The instructor. And he's a he's definitely yelling into his
microphone and he's pointing he's
pointing like this, like somebody's this guy. He's telling this
guy what to do. Maybe I'll give them,
give them a like as well. So he's pointing what
this guy needs to do. And he's going to have a
mike on his helmet as well. So here he is and maybe
he's got his hand up to his head because he's
like general thing. So little sticker my character's body and I
couldn't eat too much. Let me, standing on the
edge of the building, it might feel a
little bit more spy like you're just gonna be up on, up on the edge of the
building like that. Maybe let me start a
chocolate building down. That's okay. I can leave them on maybe a lot, maybe all these and
I'll leave them like this as if he's
appearing over the edge. Just keep it simple. Now give me a little
bit of space to put us somebody window here, maybe. There's various same thing. So go for the character's
head and then he's, he's pointing this way. Okay. So the action of that
arm and then just stop. You want the other arm to
do is you waving it around? Like Don't go there or is he I think I'm gonna do
my characters if he's got his hand up on
his head going Bono. So here's just a helmet. And I think I'm going to do, he's going to match
this character because he's talking
to his character. So I'm going to do
them with spy glasses. Spyglass, simple little nose, which again is just
start a little C-shape. And he's gonna be like
maybe he's he's going to have a wide open mouth. It's always like
yelling and worried. And hand up on his head
with his little fingers, trying to tell them what to do. And his body, they're just
a little rectangle down. Of course we need his hand pointing a circle
with the little one, little oval out as
his finger. Okay. I could do a little little
thumb if I wanted to. I could just make it
really simple like that. I think maybe he needs to
be maybe holding something. I'm going to change
what my characters are doing with his hand. He's instead going to be hold or if I was
going to do the mic. Right. So here he's
talking on the mic. He's got his hand
up to the mic on his on his helmet.
He's holding that. Okay. That'll be good. Forgot that character. Time to ink him. Finish off by putting some character
into the window here. I was going to do
that here, but I went stuck with character on top. Few little diagonalize,
cross the glasses. Make it feel like it's glass. So we kept the idea that he's wearing glasses though
it looks very upset. My ink in this metals
to really draw some attention to the
fact that he's not very happy with whatever
is happening. Here is his little hand on the on the mikes are just
a few little curved lines. Here we go. Oh, brother. And he's holding the
little dots on it. Some attention about. And then we know
what he's doing. Airports. Symbol for spy
Academy might be quite good, right in the word Fire Academy. If you're gonna do some little
fun additions like this, I caught this great space here where I can write the
word spy Academy. Maybe I start with the
symbol for the spy Academy, which is just circle and for dashes through it.
And I can write in. It's by academies. So I look at how much space
I have a little ahead. We're gonna do
wording when we get into most yourselves studio that's in a few
buses from you now, but there's a little head start. This is how I would put
in a word on my picture. The word is spy Academy. So I've got two words and I know about how much space
I want it to take up. I bought this much space. So I draw an orbital shape. Okay, there's my shape and
I can write spy, Kathy. Spy. Hi Academy. Perfect. I'm going to do my last little somebody or
other someone in here. What should I do? I'm going to do a
character who is, maybe they are on like a
listening listening device, or maybe they're there. I know I want to
do somebody who's right up in the window. Just about to, just
about to jump out. How's that? So I begin with my character's head to make a little further
over how's that? They feel much more like
they're about to jump out or amino repel out whatever kind of crazy spine move
they're about to do. Then my characters spine. And this character
is poised up on the sill of the window. Okay? So they are, they had
a foot right up on the window sill
and they are about to jump on me if they're
about to throw something. Here we go. They're throwing the practicing throwing
throwing, throwing grenades. That's why something like a
paint blooms or something. So that's my character is
going to be doing just fine. I got his leg up on the ledge. The other one I can decide
or the kneeling up there, I think it would be like this. That's if 1 ft is on the ground, inside the building and
1 ft is up on the ledge. And then with this arm, they're going to the
answer we straight out is if there is, if they're aiming or pointing
at what they're going to throw these balloons out. How to stop deal. I
think that's good. Now, into my character's
face, helmet goes on. The eyes. Where do I want my 3.2
and 1.2 all maybe their hand you see further up,
your hands me further up. And I'm going to have the eyes looking right at reviews,
any of this guy. So I'm water balloon out of
their eyes, eyes on him. And he's gonna,
I'm gonna give you an angry expression a
little bit like the ninjas. Those fierce eyebrows. Really space for my spy
symbol up here we go. Once I've roughed in my
character's face a little, I scrub a frown on simple
little downward line. Drawing the shapes over top
of my character's body. Boots on. Like it's cut off, you don't see
it. It's down below. Here. He's holding
his hand on it. Here's a hand on
top of the spike. Have any water
balloons, little symbol on there to spot
Academy water-related. And he's aiming.
We've got our circle for the hand and I can draw on some level ovals
to be the fingers. I say he's got his
hand up like that. And then the hand that's
holding the water balloon, just a little ovals on there. It looks like looks
like fingers. Here we go. I can add up. And he's ready to launch his
horrible at a talk. I can think my final character. So I think we've gotten quite a few different characters in very different positions. All using the same technique. Starting with their head. Trying a showing a stick figure. And then adding the shapes
and question them up. So now I can go in and finish off the lines of my buildings. And my background is not, not too much to it. So quite simple. Now we feel like
she's on the flight. Whoops, He's now she
feels like she's relentless side of the
building. I like that better. And I can finish off
my spy academy sign, square style writing spy, spy Academy. And I can do with the building. Now here is our first one. We did great poised upon the side of building.
And I'll draw in. This window, might look
quite good if I may, this little face of
a student they're looking at and being
shocked when you see somebody on a by scooter
background of the deal. And that's it. We've done, wow, six characters, quite good. And I can probably erase off, erase off my lines. Now, I hope you
liked doing spies. And I've now gotten a
better feel for how to put your characters into lots of different poses and show
them in everything from, you know, a lot of action, like our character
here being pulled by the helicopter to a character who's not as much
oxygen is not moving, but he's got his
arm out, poised. And then we've got
our little character who's, he's not moving, but he's he's about to throw something that maybe needs a few little motion marks bound what he's about to
throw to someone like our spike girl here who is repelling all the
way down the building. Her how much? I think this might be my
favorite character, a spontaneously added character. I think about him before. And
there we go on his scooter. Now if you want to give yourself a bit of a doodle challenge, this is what you can do. You can add to this picture. You can add in some
things like, well, I suggested the idea of putting
in a little face here in the window of a student
looking out and being surprised at
what he sees, right? So you can practice
filling in little space and the expression on
that character's face. You can add something else. Maybe you've gotten a little
bit more space down here. You could add in, say, a look at nutty
professor in a window. And he's, he's
maybe giving one of the students some new
spy gear or something. Or you could add in a
little bit more detail to the background of what's happening down
below in your picture. Maybe there's another character
down here in the field. Maybe you've got spy dog. My dog down here. Here is my dog. My dog. Or another character
in motion down there. So those are a few ideas
of ways that you can keep challenging yourself
with this picture. And it would also look
fantastic colors by Academy. There you go. See you in the next lesson.
13. Monster Sound Studio: We're going to switch
it up a little bit. We're going to be
cartooning words. It's called Monster
sound studio. We're imagining that there's a monster and he's gotten into our sound studio and he's
making all kinds of noise. So what I'm going to show you
is how to draw the monster. And then we're gonna cartoon all the sounds that he makes. Like pop, Boom, bang, using shapes,
letters and bubbles, and making them look the
way that they sound. So for this exercise, you're going to need your pencil and you're black fine liner. And I'm also going to show you how to underline your lettering. So you're also going
to want to grab a black marker or maybe a brush
marker if you've got one. Alright, are you ready to
do monster sound studio? Picture this. Monster has
taken over that sound studio. Here's our little guy here. And I've drawn it with
all kinds of long, kind of crazy arms. Because he's gonna
be playing all kinds of different instruments. Maybe he's got a keyboard here. Here you see some speakers. Maybe he plays the drums. So he makes all kinds
of sand and our studio. And then we're going to
draw words up above him, looking like how they sound. So here you can see I've
drawn the word monster with the word monster. I've done it in kind
of a wiggly shape, a bit like my crazy shapes
in my monster and I've given it eyes in the
bubble, the shape. And even in my lettering, look, I've drawn little eyes and little teeth so that the
word looks like a monster. Next one sound,
I've made that look like it's making a
big crash sound. Then for the word studio, I've written that in what
looks like a studio sign. So that's our plan for today. Let's grab our pencils and
get started and don't forget, you're also going to need
your black fine liner and maybe even a marker or a
brush marker for this one. Because it can help for
underlying some of the words. First things first,
we're going to set our scene and we want
our monster at our desk. So how I'm gonna do that is I'm gonna give myself
a, a desk here. So that's just
going to be curved. Line. Towards the bottom of my
page is about a quarter, a quarter or third
of the way down my page because I want a
little bit of space on the desk because I
might put in here as a keyboard or
something like that and maybe some other
instruments that he's playing. Or maybe it could be a speaker
on the desk or something. So there's the start of my
picture for setting my scene. Okay, so simple sort
of curved shape. And again, I've made the
desk curved because, well, it's easier than trying
to make a straight line. So let's, I'm gonna
go with that. Next. I'm going to rough in the
shape for my monster. I'm going to make him,
he's quite, quite, quite small, low down and wide near the desk was
how I'm picturing. But feel free to get creative and Android
or malls or in any kind of crazy
shape you like. The only thing to be
sure of is that you leave enough space up above, because this is where
we're going to be drawing all of our words, all of our different
sounds that he's making. Alright, continuing
with the monster, a monster it can have
any number of ours, so you can drawn, let's start with that
drawing on some eyeballs. I'm going to do these, maybe this guy's got
three other types too. I'll do 333 eyeballs
this time here you see you might be looking all around to the different
things he's doing. His eyes, ears, eyes. And I might make them look
a little, a little wild. So I'm gonna give him his
pupils talking every which way. This was looking down at
the keyboard and that's looking over at
something he's doing. And this is looking up at some
sound maybe that is made. And I'll give him a big, huge, big wonky melt. It could be singing as well. We don't really know. It's crazy, big,
crazy big mouth. How's that? Yeah, Anyway, ask
me singing as well. Singing and smiling and val2 managed to lower
my table a little bit. How's that desk rather? Good start. Maybe he's got on horns and the fun that it little
example shaven pores. I was thinking about
putting headphones on him. I think I'm going to put
headphones on this character. I think there'll be a
little bit more fun. Okay, so half circles, D shapes, half circle there. Again, I'm building
a mode of shape. This character. Here we go. Those are gonna be,
get rid these ones. I'm going to leave out, I put them in, back
in or want to see. And he's got on his headphones. He's an a sound studio, so he may as well have on a
set of headphones. Great. I like them over and over. And I want to see his tongue in here because remember Hazel either fix the bottom
as well because he's singing away or screaming. He's something he's, he's
making sound anyways, it's making sounds
that we see inside his mouth and I can I can
talk about in afterwards, so. Okay, good start. Now I want to have
a few things around instruments or keyboard and some speakers may be that he's making all
this sound width, okay, so onto my desk, I draw a curvy kind of
rectangle. There we go. That's going to be the keyboard. Now a keyboard, tricky to draw, but the key to making something
look like a keyboard, and fairly quickly I've
discovered is to do this, I draw two rectangles
that a little space. And then I draw three
rectangles together. 123, then another
two rectangles, and then another
three rectangles. All of a sudden, it looks
like a, like a keyboard. Super. So what else do I want on this desk for him
to be playing with? I thought he could have
perhaps a mixing board, right? Maybe there's a sound mixers, So it's like a rectangle, millimeter long, big
long, big long rectangle. It's got little sliders
all around it and all. You know, he mixes mixes. I don't know too much
about it, but I'm picturing him mixing the sound there and it
plays on the keyboard. Maybe he's got a like
a record player. Yeah, you could do, you can
do scratching like a DJ. So that's what this is. This is just a circle. That's little needle and
that needle on that needle, all the records that however you'd like just make make that up as like a needle
on the record. Hope so. Okay, so let's go put that
chip it then a square. Now I want some speakers, but remember you are master might be doing
something else. Maybe you want him. Maybe he's gonna be
playing the guitar, the drums, drums I
think are a good idea. Drums, I'll put those in. So he's going to have, I'm actually start
off drawing a symbol. That's what I picture
when I picture drops. And then this is going to be just gonna be here all
day to drums like this. And then I'll do
11 term here and a cymbal crashing down on that symbol there.
Here's the drum. It could be maybe he's
banging bad or something. And here's the drunk. So those are just
everything spelled little shapes,
ovals, oval shapes. The symbol. So it's got a little Stan. Stan, right? That looks like a symbol. Maybe I need to I don't know. And I'm going to put a speaker. I'll gonna do speakers
maybe on either sides. So I think both
speakers is I can conscious whatever shape
I want them to be. There we go. I can take it straight
off the page, right. I could draw it like this. A little box that
goes off the page. I could do the same
thing over here. How will it fit me? I could
do that and it gets bigger, bigger, bigger
speaker over here. Circle area. Okay, so we're starting
to feel like we've got our monster and
he's got some stuff around and make noise and
he needs a I'm gonna give them a little you
can use to drink. Maybe he's got his account
of pop on his desk. I figured that's something
else that could make us out who pops out? So they become, he's got a
little cannot pop on his desk. But you can imagine
any other things. Maybe you're going to put
in a guitar or something. How cute kitten, and I'll
do a guitar to do a guitar, that seems like a good thing
to have a sound studio. And I'm going to draw it
like an electric guitar. So I start off by getting
in my shapes. Same thing. So there's a circle for the
bottom part of the guitar. And maybe it would be like a really kind of
shape there for them. Top part of the guitar. It's an electric guitar. So I'm just going to curve. This. Curve is like this. The two shapes come together. And an electric guitar that
sticks out here at the top. This is the kind of drawing
the top of the cap. Here we go. I think it might be may
not be symmetrical. I wanted those parts will
be longer than the other. So that's why I've
drawn it like that. Then it needs some strings. So that's really
just a rectangle. A long, a long slim rectangle
should give me that. When there's the keys
go on the end of the, end of the guitar here. Just a few little circles on
the end of that square root. I think it looks like a guitar. Now we've got our
character with all of his equipment
out the sound desk, except I need him to be
playing things, right. So I need his arms to be
kind of like smashing the symbol and maybe
banging the drum. And maybe he's got a
hand on the keyboard. He's kinda up his arms
all over the place. So I'm going to start drawing his arms onto
things and I'm gonna do them really
quite, quite simple. I'm gonna give myself lots of room for error, if you will, because it can be
tricky to get all of these arms in onto the. Instruments that he's playing. So I'm just going
to draw a wavy, curvy shapes to create his arms on top of wherever
I want to place them. Okay. So here's one onto the keys. I'm not giving him just pointy little triangles for fingers. Where else do I want one?
I wanted to have an arm. A little curvy line up
onto this mixer here. He's doing some sort
of mixing, some sound. Now I've got a couple
of those arms and now let's see onto the symbols. So maybe he's got a drumstick and he's going
to smash the symbol. So notice what I do. I don't draw the arm, actually draw the
drumstick first. I do that Because I want
to place it where I want it to go in
comparison to my symbol. There it is. And then I need a hand on there. Okay, So a little circle that
will give me my idea for how my hand isn't gonna
just attach it to his body. That's all. He needs, his little
pointed fingers and then also a
little a few Pointes. And we've got him about
to smash the symbol. Okay, what am I missing? I could have them doing
a little drum here. I can probably just sneak a
little arm or if I just stick a little hand over here on top of the drought
does not work. I think so. The hydrogen behind he doesn't actually
went into the speakers, but he does need to hold the
guitar and he does need to his comprehensive
scratching over here onto the the record. So all I have sneak a hand up here so you could be
hidden by the desk. So I give a little curve, I figured out where
that could go. Then I give my
little triangles on the end where he's holding the record player onto
the guitar. A little bit. What message? Onto the guitar? For my guitar, he needs to, while you split the strings
and he needs to hold the bottom of the,
of the guitar. So let's see, I need nietzsche, his hand to wind up there. Okay. I can always do the hand versus the
triangle of the fingers. Just draw a curved line down
and attach it to his body. Okay, that's it. And then he needs
to hold this part of the guitar so much. See you have them. He's going to have as
his hand here, say, the strings to draw on the hand, little pointed
fingers, I should say. And it goes in front of there. And then I just kind of
curve it underneath. Holding the, holding the guitar. Super stuff that
will curve around. Anything else? I
think that's good. He could be it could be. Maybe he's reaching around
here for his can of pop. At the same time,
while he's very, very multi-talented,
this guy here, we use so much sound. Okay, you can see
why I have done this whole part of my drawing in pencil and I haven't
done any inking. The reason is because so
many parts here overlap. This part of the
really tricky thing about this drawing is how many moving arms
he has and how they go over top of all the different parts on
the bottom of this drawing. So that's one real
challenge with this dr. Apart from our rewards which
we haven't even started. So I can come in and like
an ink this section. Once I've done that, then we can start on
some of our words. First things first,
my character. And again, I can
begin with his eyes. So same process
thinking his eyes. And I might add an extra
little circle within his eye because I've drawn with very large big eyes, big pupils. So I think that will work
well on this character. There we go. I still keep the rest of my
shapes really simple. So these were just half circles
on the side of his head. Making my headphones. I can always add an extra little line or
a little bit of detail, whatever I think is going to add to the character like here, I see there's all space here. Maybe I give them
some sort of like a crazy, crazy monster here. Worker just draw it straight. But I think that was
good. Then his mouth, which is whiles wavy. Thing. No. I haven't, I didn't
have any teeth. I definitely want some
big monster teeth. So here we get some big teeth. And his tongue, right? So that's in behind. Hand-drawn his tongue.
Tucked in mind there. Now, when I started
sketching this with pencil, I drew in the instruments first. But because his hands and his arms are on
top of everything, I draw those next. Okay. I draw what is on top in my picture so his hands
are on top of everything. So they go in next. Okay. Then I can come back
and ink the grass. But starting off with his arms that are on
top of the keyboard. Next. Would've
other arm up next. Just keep working my way out. Wave their way around
somewhere else. Here's another one. Sneaks
up onto the record player. In that note, don't forget, he's kinda pop over and maybe you haven't
drinking something else. Maybe he's got a
coffee or something. Who's got pop would
make a sound. There we go. And I started his, started the instruments
down my drums. So now that I've got
all of his arms and I can start drawing all
of the instruments, the keyboard, everything
else that's underneath. Alright, so that's next. Let's do the keyboard. For this. Doesn't have to be drawn
or ink super carefully. Because I have curved it right. Then it doesn't have to be like I don't have
to worry about it. Turning up perfectly
straight or anything. Look at the keys on my keyboard. I just sketch them
in quickly, right? They don't have to be super, super carefully
drawn in order to be effective and to show what it is that the character is doing. And saying, mixer right here, I'll just sketch
out some shapes. Few lines. Natural look like a natural look
like a mixed abilities. A few lines this way. If he's measure up where he's shifting,
here's a little keys. I haven't drawn
my can pop there. And onto the rest
of my instruments. Again, the, it's like the
strings of the guitar. Keys on the end. All that can be a
bit more sketchy, doesn't have to be
so carefully done. Almost forgot the arm of my
arm of my record player. And my seekers on
top of my desk, which are quite massive. There's another type is sketchy. But again, this is all part of how you develop your style. Maybe you want to draw
these items more. The more carefully as well. It's all up to you and
that's all what changes the overall look of your
drawn sketchy lines. So we see the record
of a record player or you forgotten his drumstick. I shouldn't have
really had a legacy still due at the end of it coming through the
other side of his hand. Just like we did a few little
motion marks and some of our characters in motion and spy Academy and Ninja master. I'll show you a
little, you know, little motion marks
or vibration marks and a few places that maybe
I feel like they belong, like maybe the around the symbol or maybe
by the drum, right? Maybe I got a few little
bang, bang looking marks. And does there need to be
anything around the guitar? Maybe really what it needs
is a few little music notes. Okay, let's start with you. Just so we get a little
feeling for go for some music. These are little
details that I can continue adding in later. We got on my desk over your desk that I
continue adding in later once I've got the
rest of my picture down. Alright, so that is a big
chunk of our drawing done, getting our monster in and
all of our instruments. I want to erase it just yet. I'll give it a little
bit of time to dry. But in the meantime, let's start into starting to our
words. So what did I say? We have, well,
we've got a guitar and he's got his headphones on. What else do we have?
We have a mixer. Okay. So he could be doing
he doing anything with fat. It's going to pop. I'm going
to start right there, pop. So our first word is pop. Now I'm going to start, believe it or not, by
drawing a shape for pop. I'm picturing can
of pop like I'm picturing that sound when you open it up in
the fizz comes out. So I'm going to draw a shape
to begin my my word pop. What I'm going to draw
as a shape that's a little bit like a can of pop, except make it more
open at the top. Like let's call it picturing
the word pop with it. It maybe like some bubbles or something coming out so
we get the feeling of pop. Once I've drawn my shape, I'm going to sketch
in my letters, okay, So P 0, P, P. Maybe I do, I do the 0 TO, I'm going to make it
down there, p, p. So the letters that I sketch in fill the shape
that I've drawn. You see that the
shape of a can of pop, a little bit exaggerated. And then out the top, I'm going to draw myself
bunch of bubbles, bubbles like that coming
out of my can of pop. That's gonna be my
first first-level. I think I can ink up. One other thing is I
haven't done this. I sketched in this
slithering quite quickly what I can do very similar to what I would do
with a character with e.g. the stick characters
that we were drawing. I just thicken up
the lines right? So I've drawn that. When I go into ink it, I'm going to draw the
lettering is if it's a little bit wider, I just draw a shape around it. Okay. Now I can get my letters following the shape that
I created for them. Great. I'm going to make
little, little, little bubble is coming out from the center That's folder. And then request and
blue bubbles bigger. Some of them small
and vary the size. They might have either
more bubbles right at the very center where it
where it comes out there. Because oh, it looks like it like all the bubbles
come out of the 0. And then I make it
different, make it a little bit further spaced
further apart. As I go further out. How does that feel? Does that feel like pop? Pop. Alright, great. First word I like
about what's next. We've got our we've
got our symbols. I think that's
quite a good boss. I can crash. It could be sound of Crash. How about we do crashed? So for crash, again, I'm going to start with a shape. I wanted to take him
about this much space. I think that will that will work because I have
what are five letters. And for this one crashes actually more of like a
cracking kind of sounds. I actually think
that I won't do. I will keep the bubble
smooth like this. I think I'll actually make
it maybe kind of jaggedy as if as if it's something
that has cracked, right. So some sort of chair getting
kind of line and shape. That's what I'm picturing. It feels more like it's cracked and he's like a like a
window crack or something. Then within that, I'm going
to write the word crack. And I think I want
the word crack to be I want it to be quite straight because all of these
lines are straight. So I'm going to make the word
the letters quiet straight. I'm going to sit them
within this box. You see I've drawn another
rectangle within my bubble. Okay, my jaggedy bubble, it's not very rounded,
all jaggedy bubble. And I've got five
letters to get in. So I can divide that rectangle
up into five sections. Cover ash, okay, so that's, those will be our
with letters go. Then I draw in my
drawing my letters. This is where you
can have some fun. Decide what kind of style
of lettering you want. I'm making mine quite straight. Oh, actually, you know,
I've got an idea. I'm going to make the ends of my letters pointed so it
feels like a crack as well. A crash. Crash. Make the a kinda pointy
like that. And even the S. So if an S MOM, it
looks like that Going live at 0.0 point the end. I can make it more
angrily. Okay. Crash under my h and I'll
make it point as well. The ends of it
would be pointing. I think that kind of goes with that jaggedy looking bubble. I think I can ink this. I think I can even actually
know what the good. Probably showing a few
little bits that have crashed off of this bubble. It does not work, I
think so. How's that? It's not because there's
only a little tiny one here. I can ink this now. And then we can get in a few more words. I think. When I ink a
word that has a bubble, I begin by inking the word. When I started sketching it, I started with the
shape of the bubble. But when I go to ink it, I do the word first. The reason that I ink the word first is that it's
much easier for me to fit a bubble
around a word than it is for me to fit a word inside
a bubble once it's inked. Because if I wanted to say I pushed my letters
out a little bit further, say I start inking
on what I think it needs to be a little bit longer, a little low further out. And I can adjust my words. But I don't really
want to be adjusting. I mean, I can adjust my
ball, but the words, they're much harder to change if you already
inked your bubble, crash. And then my chickadee
style of buckle. Don't always follow exactly the lines that
I've sketched out. I might fall to them a
little bit as I go along. I think that looks pretty good. Yeah, it looks like a crush. And I think I could
almost make that look a little bit
more 3D probably by drawing in onto
my jaggedy bubble. Some, some lines as if we're seeing a bit of a bit of a
thickness of it like that. So it's like I'm outlining
part of the bubble. Foreseeing a little bit of little bit of it on its
side and it doesn't, this doesn't have to
be done perfectly, but I think that gives enough of an idea of how it can look
a little bit of thickness. I can do the same thing
with some of the shapes. I don't have to all of them. It's just I think that'll
add a bit of interest. Okay. Next word. I'm thinking, well,
we've got others. We do have our our our
record that he's scratching. So I could do scratch
or I actually really like to get a sign that says Sounds duty or on the air. The one other thing I'd like to get in is something
that we're going like boom or bang or
maybe it's like maybe, maybe for the boom is coming
from the speakers, right? So why don't they do boom. I think that's good. There could be a bill and I'm going to do it right in there. I'm gonna do, I'm gonna
do Bu right here. This is going to be
built right here. Boom. And then I'm going to fit in my own air signs
gonna go here. Now that I'm down to less
space in my drawing, I want to actually
think about what I've got left and where I'm going to place it
because when I just had nothing up top and I
start with my one word, I can put it anywhere and it wouldn't interfere
with other things. But now that I'm down to just say two or three more words, I want to think about where they're going to
fit in my drawing. I said, boom, I'd like an
on-air or studio sign. Like I like the idea of doing the studio sign like we saw in the in my intro drawing. I think that could go there. This is on air or studio, maybe a monster studio sign. So that's where that's gonna
go, sketching the shape. And then I move on to
the next thing that I think I want to put it
in my drawing, which is, I want, I want boom, okay, for the speakers and I won't scratch to you
for this record. So I think Scratch could
maybe go along here. I do scratch like a long
legs quinolone word. We have what? So I can go along, along there, like
it's long scratch. So I'm going to do it
into that shape, I think. Then my boo, I want to
be fairly big as well. It's going to move there. Then I may have some
little spaces left, but I can always fill those in with or maybe there's
a little sound. Maybe there's like a
painting or something. We can put it in a smaller
sound or a tweet or something. I'm gonna do Boom next. Okay, so now that I've got in my remaining shapes that
I'm going to be filling in. Next is going to be boom. Boom is a big heavy sounds like the sound of the bass,
whatever coming out. So this is where my shape
that I'm going to fit. I'm going to fit all
my lettering within. Now I need my
lettering is going to go inside of here and boom, I want to feel like kinda
big, heavy letters. So I decide are those going
to be kind of rounded? And I do rounded
letters for this, okay? So I need four letters
and I'm going to fit them into this oval. I'm sketching in for
ovals within there. So I can fit in BOM, BOM. And now I come in and I sketch in my letters and
Monarch And we kinda, kinda bubble style letters. You might picture
them as being bigger, square letters, it's
whatever you think, okay? For me, I picture
them being rounded. So you know, kinda
bubbly letters. Boom. Okay, that's good. And it's
going to be doing like a curvy curvy cloud. Cloud shape is what mine. Ovals turning into. Boom, I'm picturing it
like a like a bolt of thunder and a coming in that would make a
boom sound as well. So maybe that's why I
show my initial bolt of lightning coming down through 0 is going to
introduce Harold derivations that over where would
it go Here it is, I'm going to come inside is six. I've got my I've got my studio sign that's
going to happen up there. So I better put it I'm going
to put a lightening bolt in. Then I better do it. I better I better
do it over here. Yeah, that'll fill in
that space nicely. I think if I can come in like
laugh and made it taller. But Utah is going to
be set up differently. Everyone draws your eye to the different
tosses a little bit differently than what it
comes. It comes down here. Boom. Little bolt of
lightning through. Play around with
those things, right? Like it doesn't have to
draw on the way minds. John is just an idea of where
something can be placed. Look at your drawing and think about what's going
to work for your drawing. Like, I didn't want this end of this lightening coming
into my character's head, not enough space for
it, so I moved it over, but maybe yours goes
straight through the center. It's all a matter of how
you've set up your drawing. Okay, I can ink this guy. My boom. I start
with my letters. Okay, So my words first. These are something
that I take my, my timer and I'm probably to do this
little bolt of lightning. And then the cloud
continues around. And the other bolt comes out. Like I'm in the the big find where we had all those tools. I sort of hide them
within a bit of sand. Same thing here,
except I'm hiding, hiding the bolt of lightning
within a cloud, right? So just gets chopped off
and it goes like boom, okay, It's quite good. Next crash tube is
quite a contrast there. They look quite different. Next I'm going to put it in my I'm gonna do want to scratch. I'm gonna do scratch
and then I'll do the little studio
sign here. Studio. This is crash. I mean, scratch, scratch,
scratch, scratch. I'm going to do it. I think it needs to be like a
a a jaggedy shape itself as if it's been like a scratch
put into something. Okay. And then I'm going
to put my letters in a kind of jaggedy fashion along that I think that will feel like I'd like a scratch. But again, you may
have a different idea. This is just one way to
draw the sound scratch. Meeting. You pictured it more within
a shape of a record. Or it could be like that. Kind of a tricky shape
to get the word. Scratching too. So I'm gonna, I'm gonna do the letters quite,
quite straight. I think. I need to get in. Let's see. I wanted to say seven letters. Okay. So there's a new 1234567. So all I've done is given myself some little shapes where I'm going to draw each
of those letters. And they don't this
doesn't have to be the shape of the letter
on I'm going to do, but it shows me the places
where they're going to go. Onto my letters. Scratch, how should I do this? I think I want to do it. It needs to be initially
with jaggedy like scratches S work the letters up into some of these shapes. I also T there. And
that's my A's scrap, scrap. And then here's my tea. So I can go right
down into this point, C and the H. Okay? So you'll see this
better when I ink this. The thing about the words is
that there's quite a bit of building up of shapes in
order to get them to fit in. It's not it's not
always a neat process. So here are my letters and
this is the one where I want to ink the letters first. Especially because there's so irregularly shaped how all over the place They don't
even follow a line. Here's my a then I
almost made into a tea. Might have been quite good to,
to have lettering that was a bit jaggedy, right? That would have been
another way to represent or show the word scratch. And now my my bubble shape around jagged global
shipping routes. Okay. Oh, yeah. Scratch instead. Last but not least,
the studio sign. Got to get that in or
could they on air? It's up to you if you
want to say on air, studio, studio, just
going to write this. So I don't know that
much space actually. I'm gonna do on-air, do
on air because I've, I've, I have a limited
amount of space. This is my little rectangle
where I'm writing on air, 0 a n a, i are on, on air. And then it's a
rectangle around it. Again, not perfectly
rectangular. Lights. It definitely needs to
have some little circles all around it for lights, I think that will look fun. Circles provides and
that can be linked. Sometimes I will ink something when it's
really, it's quite rough. You don't have to do that. You can always do more careful pencil
work before you ink. It's again, as a
matter of how you like to work with
this trying again, you don't have to be
working in pen, right? If you want to do this
drawing entirely and pestle. That also works on air. Rectangle around it. And my little
circles for lights. Just feel like he's
in the studio. We use what kind of my on-air. Brilliant. Okay. Those
are all of our words. So I'm going to erase
all my pencil lines. And then what I'm going to show you is a little
more that you can do with your lettering
if you like. You could stop at
this point. Okay. It's a matter of how you
want your words to lock, but I'm going to show you
a few little ways to add some more 3D effects
to your letters. And all you need for this is you can use to
block fine liner. Okay. But it might be depending
on how thick it is, it might be a bit fine for it. But like I said, you tend to it. Or you can use a black
marker that will that work. Or you can use a brush marker. So I'm going to do some
using a black marker and I will do some using
the brush markers. So you can see both ways and have a think about
what might work for you. You don't have to
use a brush markers. So I feel like it's licensed. People don't. I find that's the way with materials you can use
to what you know, what kind of works for you. And it all depends
on your style. I call them, hope Susan, haven't got bold line. Lines are enough not to do
the next set of thinking. Okay, so I'm going to
grab my plain old marker, okay, So it's kind of a
thick ish black marker. And I'm going to look
at, let's say boo. Okay, so what can
I do with my word do to give it just a
little bit more of a pop. I think I could just color in the little dots of
the, of the word boom. And then the other
thing that's really cool about this is the, I think it's the lightning
bolt going through the Cloud. So what would it
look like if I just outlined one side of
a lightning bolt? Is that enough? Then I looked back and I decided that enough. It might be that
might be enough. I could possibly
do a little bit of underlining under the word maybe or fuel little ticks
along the bottom of the cloud. I'm going to leave
it there though. I'm going to look
at another word. Let's say, let's say I'm
going to go to crush. Now for this one, I'll pull up my black brush marker and how they'll think about what I could do with
the word crash. I could go in and color all the letters in, but I
don't think I'll do that. I think all I'm going to do
is a little bit of blocking in some of these double
lines that material. And I'll see how that looks. I mean, I don't have to do it super carefully. I could do it. I could do it faster
and loose it, right? Not everything has to be
super carefully colored in. Let's see how this looks. I'm doing is just on the on the bubble and a few little bits on these cracked off parts. I'm just wondering if it
needs it in the word or not. I'm going to leave
it there for now. I think that looks quite cool. Now, what other words? Idea about Scratch. I'm going to pull out, I've got another brush marker. I'll show you when I'm
thinking of it for this, this is still slightly, the actual tip is bigger. It's a Tombow and
it's also a gray. Okay. So it's not black
one but a gray. And the word scratch, I think I'm going
to come along here. I actually drew in an extra line underneath the Jackie bubble, but here I'm just
going to outline it. Let's see how this style looks. To exaggerate some
of the points. I look back, I think Danny boy, I think this case I'm
going to try just quickly going over the lettering, scratch with my
gray brush marker. This could have easily be
done in a black one to two. Then I look back,
is that enough? I think so. No, I could just
do something on on Pop. I think with pop, I'm not
going to do too much, but just a few of
these little bubbles. I'll darken down that. Not all of them. Just a few of them.
And I think it does need a little bit of
outlining of the word. So I'm just going to outline
one side of the word. Okay, So I've started
outlining the left side. So when I come into
this part of the p, I'll just outline
the left side of the curve of P that
I come to the 0. And the outline left side of the curve of
each part of the 0. Again, my P, left side, left side of the curve at P. I'm here to do a little
bit underneath too. Good. I like pop. Now, let's see, we've
got 0 and I'm on air. On air. I need anything done to on air. On urban do the opposite. I'm just going to color in
the inside of the bubble. I'm going to leave
the word, Okay, I'll leave the word white
as if it's a light. And I will color in, inside of my bubble dark, this would have
looked quite good, colored in black actually. But that's alright. Great. Well till you get all kinds
of different grays to, this is probably a cool gray. Can't see the color on it. I think it's a cool gray. Once I've done it and
I look back and I think a little bit more, so I'm gonna go around
the outside of the sign. I just wanted to
feel like it pops up off the wall a little
bit like that. Done anywhere else?
Anything else? I'm going to grab my
black brush marker game, and I think maybe just a few
little lines to exag
14. Surprise! I'm alive: Now we're going to come back to some shorter sketchy exercises as we start to create
our own cool characters. For this one, I'm going
to show you how I take everyday objects and
turn them into cartoons. Here's one, this is my
favorite little pencil. I turned them into my
cartoon character, Huey. So for this exercise, all you need is
pencil and paper. And of course we're going to
need our everyday objects and get ready to turn them
into our cool characters. Here is my first
everyday objects. Well, it's an empty
object for me. It is a well of ink. And I'm going to use
this as inspiration for my character and see what
we can do with them. Now, normally I'm gonna start with shape your life and
maybe start with a circle. We start with a teardrop
before I'm going to use this as my shape to
influence my character. Let's start right there. I'll leave it out a little bit on the slides
here so we can see it. You can grab your pencil
and draw along with me. And I'll talk you through how I let the object
influenced my character. But remember, feel free
to change the character. However you see, you may think differently from looking
at an object and I do. So I'm sketching in the shape. What's going to turn
it into my character? Here is there's the body part
I may have is two square, I think I need to Bring it out. He's a well of ink. So I want to exaggerate
this part where the ink is. Alright? So there's the first
thing is I want to feel like this is the right
shape for the characters. What I'm picturing is his body. Because I feel like the
top and the cap that can be more his head or
maybe the cap could be made us literally like
a hat on his head. All I want to think about it. So next I'm going to come
up and do the next shape, which is a rectangle
for the, for the cap. And it's a little bit
further in from the sides. Okay, So here we go. And again, I don't
have to draw it exactly like the shape
of the actual object. But I do want to
think about what is characteristic about this shape that I want to
include my objects. Now here, e.g. on
the neck part of the of the jar is a little lip. So certain things
like do I want to include that? Is that important? I'll try what do I want to
snap to come in like this? Or is it a character
like this with a slim neck? Don't think so. I think she kind of
liked that little curve. You're going to include
it a curve it out. Maybe those are those
would be like his cheeks. Maybe those are a
little bit cheeks. And I'm not gonna do
slim neck at all. I'm going to bring it
right down like this. Maybe this rectangle,
these cut down walk. Again, I'm playing around
with my shape, right? And I'm thinking about how the shape will help to
create the character. So yes, I hope not
little curve there. I don't want little curve in. I want them to be short
and cute as well. I'm picture of short,
cute little while. So once I'm happy with my shape is a short and
I might Emily's little, tiny bit, a tiny bit shorter. Let's say. He's he's probably
got his phone. I've only had it. Good. Start with. Alright. Now, use of our
drawing was shaped, bone, draw the shape and then come in and start with the eyes. I think I'm going to do that in this case, I like that idea. I think the odds are really important on this character
where I placed them. So this is again, something
where you can play around. Do I want the eyes up here? Big, cute there? Do I want them further
into the characters? Into the character's body? Is this his head
or is this a hat? You know, is that it can
imagine that that's a hat. I put his eyes down here. This is where I play around with a few different options and
do the same thing. Okay. Where do you think
that I should be? Where do you feel like they
are on your character? I'm going to put my eyes here. Alright, I'm going
to stick my eyes. Maybe they pop up
just a little bit, actually come with just a
little bit above the lid. And they're going
to be spread out again. How do you want them? Do you want your
character's eyes together, like two circles together? Do you want them big? I'm making mine kind of medium. Medium in comparison to the
characters overall shape. And I'm going to stick
up just a tiny bit above his little chunk considering
to the top of his head. Because I liked the
idea of using the This little curvy bit to be his cheeks, I wanted
to look cute, which implies to me that I need to put my
character's mouth here. Now I play the game. What I want. I think I'm happy with
small iPad I should, but I, maybe I wanted a bigger
mouth here. Look at that. How does that change
the character or could make that into a nose? I don't think I'm gonna do it,
but it's an option, right? There's no right or wrong. It's all a matter of how you see it and what do you want your character
to look like. But it's something worth
playing around with. Unhappy with the eyes
there and the pupils. I want it to be a
little, he's quite cute, so I'm bringing the pupils in closer to the
center of the eye. So he looks a little bit cuter. Maybe I want big pupil, Sam even want big circles. I like the little ones though. I think this is,
this is his style. That's my style, but
it's the same with you, Like you choose
what your style is. This line straight across
my character's face on it. And just see what it's
like if I take that out, no rules, right? I can take that out. There's no square little hip. Perfect. Now, I have this body. What am I going to do with it? Okay? Am I getting this
character like big arms? What's he going to have is
going to have stick arms. Have Stick, Stick,
simple stick arms, simple stick legs, top odd. But he is a world of ink. So inside his ink. So why don't I use that idea? So instead of doing stick arms, I'm going to use
the idea of ink. So how about what if
he had little drips, I think trips of
ink for his arms, hitting P waves, one. Here he is waving,
waving his little clip. I think I'm going to
put it down here. So you just have some
down by his side. Are they big enough? Level would definitely they need to
be a little bit lower? Arms need to look. Again. I play around. I don't I just sketching
and sketching out ideas. I see why. He's looking quite cute. What I think feels right
for me and for my style. Now. Okay, the stick legs don't
really go because I've got the nice little
drips for his arms. I can make them longer. It's quite cute like
that. And what am I do? Little drips of
ink for his feet. They don't like that. Trips, I think. When I've got an
idea that I like, like the drips of ink, then it could be
something that I want to reinforce or do more off. Okay, So that's what I do. I like that feature or that
idea about this character. And so I exaggerated a bit and
I do it a little bit more. So maybe go. Yes. Oh my gosh. I have, you know, playing on the idea of ink. Let's pretend. This is, the salons are
quite dark and solid. I'm pretending my heart can see inside of well, I hear you. I can see his ink sloshing
around inside of his belly. Here he is. And I draw it so
that we know that this is a glass jar, right? So here's a little way. It goes like this. And here I've taken what was a large space and
divided it up as well. So it looks like he's, you
know what? That's like. It's a equivalent his design on his T-shirt or something like
his clothing or whatever. But that's close if
you're a well of ink. Again, coming back to my idea of the ink
drips, what about there? I haven't done eyebrows. If they're a little, little
drips, drips of ink. Orange, I should
say, in the shape of a cup with the right
way with it long or down his eyes. I'm
like, Look here. It makes him look
kind of questioning, curious, curious, Willie. Here he is curious. Well, what about
wonderful ruffling? There is no reflection. Reflection mark on the glass. When Louisville,
Memphis in here in blue reflection
mark on my glass. And now I'm happy with him. So I outlined them. I'm just this is
just done in pencil. I'm not going to ink. He's just he's a
little rough idea. Same thing starting with
the character's eyes. Mouth, loves the drips
of ink for his eyebrows. It's arms. If you were trying
well, you're welcome. Look totally
different than mine. You might like him like this. And then I have a look
back and I decide. Just pick a few of these slides. I'm going to decide does
he need anything else? Anything else that could
add to my character? Will neaten this up too much. It's not a finished drawing. I like to look for flexion or I could maybe
put went up there. Um, I paid too much but I see on my lid there are
little vertical lines. Yeah, I do a few
little p little lines. That helps to draw a bit
more attention to his head. Just a little bit of
contrast between him and the glass jar.
And that's it. That's well, okay. So that's well, well
done, good work. Well, next, Here's another minor very
everyday objects for me. How boda, I'll put a rubber. There's one that I use. I use constantly be using
through the course. So let's take our eraser, erase or rubber in the UK. Here we go. I'm going to turn my
rubber into a character. So let's have a look at that. It's pretty easy for shape. Alright. Do I want the
shape straight up and down? Do I want it like this? I come in and draw
my rectangle in, lightly sketch in my rectangle. Again, I start the
thought process. How, how big do I want? I don't want this TO tall
is it tones limb like this is just a little bit
wider. You see it. You know, how, how
is it positioned? Mean this board a little bit. Okay, Just for fun. Do I show the side?
Is it like this? I think it might be a little more interesting
than straight on. I'm going to give
mine a little angle. Like that. I'm going to show a bit of
the side of the rubber. Am who angle again, low angle has that. My character is, he's
leaning in a bit. What else is going to influence
my idea about disrupt? All can live with there. Again, I'm going to
start with the eyes. So here's where you play around. Where do I feel like
my character's eyes are kinda like some
at the top here. Let's see if they look good
there, there's an option. Or they together,
I'm going to make them a little bit,
a little bit apart. Again. That could have been
somewhere else. They could they could
have been on the edge, even maybe they're
tiny eyes on the edge. Or there could be. This is not a bad
idea to bigger, bigger eyes right
within the rubber, but he has this paper
cover on, right. So do I want that all? Maybe I do, because I think if I may be able to do
something with that. So here we go. I'm
going to leave my eyes at the top
because I liked the idea of using this in my drawing. So let's add that little line there and a little line there and pull it up from
where my gosh. She's going like that. Alright, what it looks
like when you get a new one as opposed to
when it's been used. So there we go. And the
longest size a little bit. Because this I can
I'm pretending as if this is like his
eyes closed and, you know, he's a he's a super, super rubber rubber, something that it's
saved you, right? Because when you make a mistake, you can come in and fix it. So I think that is a good
concept for my character. He's like a super rubber and abuse like a
superhero rubber. Now I'm going to come in and do his pupils. Where is he looking? He's, he's standing
facing that way. So I'm going to put
his pupils here. He's looking up at Yale. He's like, I like the idea, these kind of brave. He's like shapes the rescue. And simple little mouth. I don't want that to be
too big of a feature. It's not like he's a monster or something and he's a
giant mouth for me, it's just a little Mel,
could be off to the side. That might be quite
cute actually. Let's see what that looks like. Yep. That's quite good at it. Maybe more like
just a little bit, a little bit asymmetrical,
just a little like that. Since I have this rectangle drawn a bit on the
side or over here, we'll Severus that again. Clear off some of these lines. There's something right? I mean, look at what does
what does an eraser do? You get these little
shavings from it. So maybe I need to use that
as my df for my character. I bought him with his little
clothing because outfit. But I need arms and legs. So here with well, we did a little drips of
ink for his arms and legs. What am I do? Little eraser shadings. Here. Here's arms. Arms like this. Little curve is. Okay. They look like little law, like little eraser shadings. But he's got his
hands on his hips. And I can do the same
thing with his legs. Curved like this. Maybe I want to just to kinda sturdy so I might curve this. I'm going to curve
and what curtain like this. There we go. Yeah. He looks a bit more
sturdy that way. I want to feel like
he's balanced, little bit longer,
little bit longer. Remember, you may see
this differently. Maybe you want to be
watched shorter legs. Maybe character doesn't
have to have legs, right? He can be just like that. It all depends. Characters can be really
great even when a very, very simple no rules in how
you design your characters. And we had the great
idea of having little ink drops up there
for Willie's eyebrows, I'm gonna do a little razor
shaving, shaped herself. Good. Little eraser shading
shaped eyebrows like that. And you see a little bit how the mock site just you have to have as
Melba no way to close. I'll get it close. But he might look
like if it is not, but he's not he's not
talking about it now. But that will work. Things I want to
think about when I do have a character
that I'm then going to draw into different positions
in that knowing that I want to leave some
space in here for me to move around his mouth
Tibet and change it. But for now I think I
think that'll work. And I said I'm
going to call him. He's like a super super shave. Okay. So he's going to get an S. Like you said, it will
send symbol on his, on his paper outfit here, a little S shaped. Since he's, he's kind
of like a superhero. So what am I take? It's as if I've
taken the back of my little paper cover here and then a split on a like
flies up back leg a little bit like it's got
a little tape you see? Now who really looks
like a super shapes. Appreciate it. If there needs to be bigger,
you probably want it bigger. If you want a bigger,
How do you feel? Shave. Choose more lines and
outline my character. Michela, I'm not doing
this on an ink is just just the way that I play around with objects to
turn them into characters. And I hope that
gave you an idea of the kinds of ways that
I can take something, you can take something simple
and turn it into a cartoon. And it's the same process that I use by best starting
with the shapes. Then I allow the objects to
help to influence or inspire me for how I'm going
to draw the character and for some of the
characteristics of what the character is like. Ears. Here's our shape is also like a shaped like an array of
equina razor shaving too. And I think that does it. I think that represents shape. I can clean this up, this
drawing up a little bit. But again, yours. As you do your shapes,
making different, you don't have to
understand like me, there are lots of
different ways for seeing the same object and creating
characters from them. If you want to give yourself
a little doodle challenge, have a look around, see what's simple objects you have lying
around your house. It doesn't have to be
something complicated. It could be, could be a book, could be a marker. You don't have to use
stationary like me. It could be could be science. I had a student who he drew a spatula and turned
it into a character. And next the medial half, the people in class for
drawing a spatula as, as a cartoon character. So there you go. Anything could be
your inspiration.
15. Furry, Fun and Fantastic Lines: We're going to
play around again, except this time with live, we're going to see how line can inspire us to create our
own cool characters. What we're gonna do is we'll
start off with some shapes. Then we'll draw various
types of lines around each of them and see how that inspires us to
create characters. For this one, all you
need is pencil and paper. And we're ready to
create our free font and fantastically characters. I'm going to start us off with our line exercise by
starting with a shape. I've grabbed a super simple
little circle and another, another shape here for our second shape I
thought we'd do to, you could do three on one line and three more shapes
on another line. And then we'll get into
our line exercises. So I'm, well, maybe some more similar sizes
are kind of different, but I'm going to make them
more similar when I draw them. So first one, first mine. On the first one I'm going
to put three circles. No, my mother-in-law
and sketch that. Starts off talking
a little bit like the exercise we did with love. Modes do on a couple of
lines drawn across my page. And the first line, I'm going to give two circles. I'm often too big. I'm gonna give myself
a little space around. I'm not sure if I'll add, you will add arms or legs, these characters, I'm
not really sure where. Three circles along the top. Then my next line is going
to be this kind of shape. It's a bit more oval
looking than a, than a half circle. A little bit elongated,
a little bit longer. But I might make it I like that. You know, something
about belt that they fit nicely on my page. That gives me six
different areas to play around with light. Remember this exercise is
just about playing around. These won't be final
finished characters that just for helping to inspire us to come up with some cool characters and different kinds of ideas
for characters we would go. So let's start with the circles. I think that'll be a
little bit easier. And what I'm gonna do is
I'm going to be drawing different line types
around the circle. So slightly like we
did with the Stickman, where we draw the stick figure, we draw the stick
figure and then we'd, then we draw shapes
around the sticks to thicken up the lines
of our character. Here I'm a little bit, little bit, little bit similar, but where do you draw the
various line types following these shapes and
see how they can inspire me to have some new
and interesting characters. And I do want to start
with, It's just like maybe you like a
curvy kind of lie. I'm thinking like that though it looks a
bit like a cloud, curved lines and then enumerated
types that I'm doing. I'm just kinda, maybe this
is spiky, spiky line around. See I'm following the shape that I've lightly sketched it. So you want to use these
shapes to be quite light. And then I need another line
type, maybe more spiky. Spiky like that. Well, this is tall
spikes, is this, I should say more Fourier's, more like, more
like for you. Sure. I don't know. It was you can play around
with the line types. If you don't like one
that you don't just erase it off and try again. But I think those could
make fun characters. Again, I just follow the lines
that follow the circle and let that give me my basic
shape for my character. I think I'm going to start by creating some of
these into characters. And then we'll come down to
the, to the other shape. First one. The first
thing I'm gonna do is add in some eyes
to my character c. What would feel I could
make a character with? Maybe I could wide
apart eyes like below, calling this the Z. And I think auditing your nose. I don't think so. I don't think looks right. What about does he
get a big mouth? Not quite so big. So play around with yours. I'm going to change
the eyes too. Wide apart eyes. I think I'm going to do
eyes that are closer together because he's
circular like I think, oh, do I want this
character can have arms and legs and maybe I'm
going to get the eyes in. Let's see if I think I wanted to be a little bit of a surprise, maybe roundish, roundish style. Eyes that are together. Yeah, you know what? Since there's little
curly line around, maybe I do the same thing
for little, little eyebrows. Let's see how that is. Little eyebrows and I could
make the eyebrows are curly. Curly eyebrows. Maybe. Then his mouth, it
looks like a surprise. Remembered his pupils
that how does that look? It looks a little bit surprised. Maybe I'll give him
a little open mouth. Dropped like this. Yeah, maybe maybe
some curve like that. Yeah. My curve the mouth. I prefer tongue. Tongue in there too. Yeah. I feel like that. Does he need arms?
Like I'd be looking. He's a little something else. Arms. He's going to his
arms up because I'm really happy with God. And the same thing I
think I'll do curve ease. I'll let this line
style influenced my style of fingers that I draw. If I just do little
curves around similar to the line I've drawn
around, my character. Doesn't need a little feet are just not be enough like that. Let's look. Little feet that I
don't often see. Let's look good. You need feet. This is where sketch
something on. I'll erase it off. I'll I'll decide you don't
do it like that or not. I'm going to leave
it just like that. Okay. Next character and
Shelby all outline them. I was going to come
back in at London afterwards and discard
them right now. Just darken them,
talking them down. I like the curly eyebrows. I like the curb enough and do some spirals on this. Maybe a few a few little
spirals around that line. And I think that looks good. Maybe I could have
even curved up part of his arm, Laura. Sure. That starter kit character. Now I've done this spiky one, which I love spikes
to be this long, I can decide to change. Maybe I make the
spikes straighter. I can play around with the
line type that I've drawn. Maybe I straighten out
those spikes of it. Let's see how that looks. Make him a little bit
less red looking because I have this one that's
quite shaggy for a living. So I'm going to straighten out the spikes and maybe I add him, he needs more spikes
on how to do that yet, I'm going to do the
character's eyes and see how I feel about him. Then I can do some just sat over the eyes
there and maybe put, you know what, I have
this spiked line, maybe high, maybe
a little angry. Maybe I maybe not
ankle the eyes. Maybe I'll make the eyes like this straightened out a bit. So maybe that's the
line of course, pupil or maybe both
pupils higher up. Maybe the longer, the longer. Or maybe they are braces
off and try again. Maybe his pupils
are like triangles down at the bottom of his eyes. Oh yeah, maybe that's it. Let's see. We'll make that a little
more severe looking. Okay. So what angle to his
brow does he need eyebrows? I can make triangle eyebrows. Maybe. I'm going to put
his mouth and is it a triangle to triangle? Triangle personnel
or, or maybe he is. Maybe it's an 0 pin
triangular mouth with triangular teeth. Wow, it looks quite scary. I wanted to be a
little bit nicer. I'm going to give him
I'm just going to give a super-simple little
triangle mouth, trying to decide if I need
those spiky eyebrows. What if I add does he get
other spikes on him too? I add more line around. I'm not going to put I
don't think you need legs. I think it's too much.
It doesn't need legs. He just floats around
like a like a spike man. But I might need
additional bikes on him. Yeah. I think I like the
additional spikes has that there's enough is enough. And again, play around. I keep I need the eyebrows. And again, you know,
put things on, erase them off, play around. I don't know if I do
need the eyebrows. I'm going to draw him like
this and see how it looks when I've gone over him
with darker lines. Saturate those triangles,
the pupils of it. He's pretty good. I'm happy with him. Maybe I don't know how a
leader without the eyebrows, I think there's enough with him having all these spiky
is all around him. Onto my third character that's all created
from this circle. I like the just the furniture
to be any different. Is it smaller, conifer
and it was a finer yeah, I think it's okay, I'm gonna
give this character eyes. I've got to get the
headless, slightly two different sized eyes. I feel like he says
on more and more fun, this guy seems like his father. Raya, around all
those eyes maybe bet. I would like them together. I dropped my eyes
together frequently. But they might look
good for Adam. I don't want them further
apart on this character. I don't think
closer together and their use bigger pupils, maybe bigger pupils to different
sized eyes. I like that. And does he get furry,
furry eyebrows? Yeah. Maybe maybe very, very eyebrows. Go up for e-mail. Is for the sides. Does he get a big a could do
a big multi-story condos, actually grab a
big monster style. I think with this character
though I'm going to keep the long nose smaller, anteriorly simple, maybe
eventually sell side. How's the mouth had his
mouth looks a little bit to the side like that. And I haven't given
arms to this, nothing to this character, this character, I
can get some arms. So he read a little
bit like the eyes, like the monster character was monsters that we drew
with the expressions. Except teeth with arms and
legs, fuzzy, fuzzy legs. I like him. More, smell,
more to the side. How's that? This style of character? I haven't drawn the line fully through the
center of his eyes. And it kinda like,
kinda like that. Sometimes I like doing
this because it enables me to move the pupils
around even more. Versus when I have an i
style like this where I've drawn the line completely
around the oval. Move the pupil over
so far here it allows me to sort of move those pupils around more to give my character
even more expression. But again, it's a
question of what style you like drawing on how you
want your characters to look, at least the handwriting
of the way there. You also had other finger to
log n is big, fuzzy, fuzzy. The theories. I'm going to hit
my patient about shoes on. I don't know if I like him. Oh, now we're onto our
bottom line of characters. This sort of elongated
half circle guide is. So again, I come in and I start doing some
different line types around my character. Now, just because in
these characters, I did the same line type
the whole way around the circle C curve is
all around spikes, all around, shaggy
for all around. There's nothing wrong
with a line type that's smooth, right? Maybe the line type is smooth and part of it is wavy, right? I could do something like little ghost guy or
something, right? So part of it could be wavy line or the whole thing
could be wavy line, right? It could be like, oh, like
a splatter on a character. Do that. You know what I'm gonna do for the next one is I'm going
to combine my lines. Here. I've got straight smooth
line I should say, and wavy line here. Maybe I'll do like large wave
and just a little wiggle. When I got like a
jelly, jelly guy, I'm picturing jelly,
jelly character. And then maybe I'll
combine it with Spike. Lee will give us some spike. That's more like for annuity, more spike, spike,
Maybe it smaller. I can also vary. Remember, think about all the
things that you can change. Just because you're
drawing another spike line doesn't mean it has to be the same as size of
a spike as this character. I could do one where the
spike is little, right? So it's not just a little,
little, little spike. Look at pitching this price of jelly character with spikes. For my last one, I quite like this spiky line.
I'm going to combine it. I'm going to do spiky line. I'm gonna do smooth lines of smooth, but he's moved spiky. So see I could even smooth. Spiky, smooth, spiky nasal spiky here,
spiky, spiky, smooth, spiking into this will make
his arms and his legs just spiky as long they're smooth and maybe get
spiky spiky hair. See you, but I couldn't make
it to different line type. Maybe this is Curly, right? Maybe you want that currently
are currently on top. I quite like this smooth
and spiky though. So back to my first line type. It does look kind
of like a ghost, but I don't know how exciting
would be if I just put in ghost ghost eyes and mouth. What if I change it up? I could make him
we didn't ninjas. I could give them a ninja mask. Maybe he's like this. Then ninja ghost. It could be Ninja Ghost. One idea. What else can I do
with this character? Maybe it's like us by
maybe I can spy style, spiced up or just some
big crazy, crazy glasses. I'm going to do that. Big crazy glasses. I have this curved shape here. I want to do similar
curves along here. How about that curve
like that wave, wave, like this look on this character that I'm not
even going to show his eyes, his name would
occur much occurred it down, curve it down. Curvy. Curvy, curvy. Curvy curvy glasses. But it could've been maybe they should maybe be a bit smaller. Like I'm sticking out the side. So how's that? And a kernel do curve. Curvy lens can be
lens on the glass. I don't like eight months. Okay. Curve. Does it mean to I don't want to I'm not going to come
up super simple mouth. He's a little cranky guy. And for him, it was a
light coming through. It just seemed a
little, little eyes. Right? And then I'll darken down the
lens through the opposite. I'll do the opposite
here. So look at this. Start with my characters will normalize it with their
eyes and some strain within the lens of
his crazy glasses. The pupil. I'm picturing that
I'm going to shade in this C. Lookalike, sunglasses. Glasses. Great. I wanted to somebody. I was just thinking,
I wonder if I need to add hair to this character. What's his Bostrom out there? And while he's, he's
walking this direction. It could be the case
and dark and down these glasses that
he's got on in there, he might look quite good
colored this character, He's picturing him
as being purple. And maybe the glasses are all marine or
something like that. The breadth of glasses, I mean, high school. I mean, you could
have pointed edges of the glass is more. And I came onto the
jelly looking character. I kinda feel like he
might have big mouth. I'm going to start with,
I'm not going to start with his eyes and just like a
jazzy feel like eating sugar. Yeah, he feels like he
should have a big mouth. Like the monsters Isa, which has two symmetrical
play with that, play around with
the mouth a bit. This could be a family of
bulges, side out here. Bulge decide on a bit worried. Cheek comes out as
mouth opens up and cheek comes out from his
jelly bytecode is in here, bulging or down but it around. So I'm free to play with the, the line style that I've drawn. Maybe I want it to be and maybe maybe tighter waves
would have been better. Or maybe, maybe it
transitions, maybe it changes. Maybe it's big waves here, small waves down bottom. I want to keep this basic
shape though he's lost. His jelly guy. I think he needs he
doesn't need big big guys, but I think that
could be uneven. Like this. His mouth is really uneven, his body is uneven. Let's make his eyes
are really uneven. 21 up, one down, eyebrows. I've got this spiky hair house. I'm going to get this
in omega1 to round out. I'm going to round
them out here, round him in his eyeballs and then then this spiky
little spiky hair comes out. It's the year two. Eyebrows, eyebrows. It can be really simple
eyebrows maybe on him. Actually perhaps lions, lions
to cope with his party. Maybe they need to be curved. Let's try curved. This is where keep playing
around with things and your taste is going to be different from
lightest yellow curve, longer, longer, longer
eyebrows, curved. Logger eyebrows and curved? Yes. It kind of helps
to exaggerate how asymmetrical or uneven his eyes are when I add the eyebrows. So I think I like that. Pupils. Pupils look with this. Maybe he's a little whoo. Maybe it's like one
of those monsters, like silly monster that we did. Isaac buys down. I just figured. Yeah, eyes see pupils
in here like this. And I think that will work. Shows the unevenness
of his eyes. What's next? Oh, actually it's going
to the tongue here. I need a curvy tongue. He needs a crit definitely
to query tongue to go with those curvy body, really big, big curvy tongue
that we see inside of him? Or should we weigh the way the term weight and
image, shovel wavy. Because like a jelly
bean and teeth. Just a couple of
beat three teeth. Yeah, 3D. Maybe you used to do
but I'll put two up, put them in because
it adds to how how jiggly he looks
with the teeth all in different
kinds of positions. So I think I will go with that. So the teeth are angled and the eyes are
angled. Okay, good. I like him. So I can add line. Figure. How's that? That's alright. As I come into outline, this is where I
let myself slide. Which of these lines
too I really like. The reason that I keep
it really sketchy, especially when I'm
developing new characters, is that it lets me see the different line options
that I chose, e.g. in this, in this character
is now looking back, I can see, I still
have this line here, that light sketchy one. I can see that
really I should have just proper character
down, down here. But now that I've drawn this line drawing
is very hard to resolve. But I can at least see
my mistake, right? He's just a
developing character. That's okay. That happens with them and what you want that
to happen, right? That's that's part of
getting it right is you've got to get into a
little bit wrong many times. Actually, I should curve is teeth a little bit
this character, instead of being So
squared off, How's that? Great? And his wavy tongue, and he definitely needs, his mouth is shaded in. But I told her do it perfectly
again, these are sketches. Sketches give us some ideas of how to develop
our own characters. Like it's quite fun.
Blast is my streets, buggy streets, straight with small street with small spikes. Okay. So let's see. Straight and small spikes. I'm not so sure about
this character. So I want to clarify
one little bit. I do like this. I here, I wouldn't choose
those curves over top. Don't like them. I do like the idea
of these being his little hands or
maybe they point down, it went down a bit more. Let's see. Neither extra. I've drawn three, tend to draw
three fingers and logging. So let's make them more like furry little multiple vendors,
multiple furry fingers. Let's bit different for me. And the bottom I'm going to make these little bit irregular
has now kind of like him. Now the character's
face. For some reason. I don't like big eyes like
this because he's got the fuzzy hair and I kinda feel like you need
big fuzzy eyebrows. So that's sort of sense to
me that I needed small eyes. If I want less speed
of the eyebrows, arms sketching some crazy lines. Yeah, maybe I'll just sketch
around and stuff like that. How does it feel? How does this side of my
screen scratchy lines look in comparison to the
rest of the character is actually kinda makes
them look quite cute. Had these eyebrows, this big, bright up by his arms. His eyebrows almost
let him his shoulders. So maybe he gets teeny little little lies in the close together in quite that close. How's that? Again, sketch on
some little lines. Can keep his own needs. And what about these
big mustache on a guy? And how would that look? He's all about the hair, this character, comb hair, ears. Metal Pies. I'll do this. They occupy simple, frequently
draw this style of I. So let's do some more simple. I made it angles
in a little bit. Again, remember, think of
other things you can change. There's lots you can change. What about the ankle, the eyes, and just a little bit. Same angle of God. Sides going a bit angled. So let's think a little bit
about how I was taught. But beginning in different
expression in his nose, nose, walking on
those simple noses. Is it too far down? A little bit more? Pointy nose, nose. I'll stick with his nose. And then the mustaches,
it will all vote. Doesn't need to. All those sides. Play with your line, play with your line. I think it was arms Nash lambs needs to be
more, for some reason. Maybe size around my shape
and I can still see it. I liked the flat bottom. Unlike this. None of these
characters have legs. They really don't need
them because they had a nice flat bottom. They're all a bit, a little bit ghost-like or they
hover, I should say. Very dull. I think I'm happy with this one. I haven't done a very
good I'm going to let me just neaten up these
eyebrows on them. Julie coast spec here at the top and the
bottom are just the top. Straight. I should know there'll be spiky at the top and straight
at the bottom. Just like I've done here. Spiky lines, straight lines, spiky lines, straight lines. And let's see if I'll
do that here as well. Spiky load. Yeah, that's good. So again, it's straight lines, spiky lines, spiky
line, straight line. And here's his little
chapter here I like that. Straight line, spiky lines, straight line, straight
line. Like you use. Who needs legs when you're
going to have Spike, he's terrific. Alright, so you see
how we've been able to design six very
different characters, all using line type. And up here we did them fairly simply because we kept within
the shape, simple circle. And then we did one line
type all the way around, spiky line, all the way around, through line, all
the way around. And then the next thing
was to come in and decide the character's eyes. What kind of gives them their
own personality, right? So different style of eyes
on all of them a little bit. These two are quite similar. But then allowing
the line type to inspire or give me ideas for what else
happens in the characters, such as the triangular
ish, eyes and V-shaped. What would be eyebrows
and extra spikes on them? Spike for his mouth. And then coming down to
our last row where we had our elongated half circle shape. And I looked at all of them are revealing a very
simple no, no feeder, anything. But here we varied the line by having two
different types of lines. So here's straight line, wave, wave and spike,
spike and straight. And then again, very
different types of eyes. And sometimes in this character, the line is very, very simple. And yet one addition of
one type of a feature like cool glasses or something
and he's a great character. And another one. The main features is
something else but influenced by his
jelly like boys, so big jelly, crazy,
crazy mouth, right? So that's his big, big feature that really
characterizes this guy. And then my last one, again, I repeated
straight spiky, straight spiky all
the way through, even to his other features like his eyebrows and mustache. So if you want to give
yourself a doodle challenge, grab yourself another shape, I'm going to sketch an
ellipse shape, I should say. How about you could do line
types around a triangle. We've done this one before, but maybe move the trunk along here, do a couple up here
that are like this, and a couple down here that
are on different angles. And then draw a different
line types around and see how that would
influence a character. And you may think, Oh, you're right, triangle,
you naturally do spikes, but try not to try and go
with a curvy line like this. Or what about a triangle
that is a wave around. It just creates a
different basis for your character
versus you see. What about another shape? What about a simple shape? Here we did circles. What about the chart just doing squares. Squares, what about C? You
imagine him, okay, a square. And then for every line
all around this guy, what could you do from that? There's a little
doodle challenge, so that's another
way for coming up with your own characters.
16. Doodle Cartoon Bunch: Now I'm going to show you
what I do when I want to take one character and turn them into a whole group
of characters. We're going to build on our
last exercise for this one. I'm going to choose my favorite
character from that one. And I'm going to create a whole bunch more characters all based around
that one design. The difference here is unwilling to doodle
these characters, which means I'm going to
work entirely in pen. No sketching beforehand. You may not be comfortable
working straight and in pen, but it's another way to spark and inspire your imagination. So you may want
to give it a try. So all you'll need
is pen and paper, and we're ready to doodle
our cartoon bunch. To start this exercise. I'm just going to pull
up the characters that I drew from
the last exercise. Because I'm going
to decide which of these little guys I'm going to use to create my little
village of characters. I think that I will
want naturally. Think of either of these
two as the ones that I want to use to create my big
bunch of characters. I feel like I'd like
this character. But this character, e.g. I don't think
there's a lot that I can vary as much in him. Same with this guy, well
maybe more so in this guy. And likewise with the, the ghost to capture
with the glasses. Although again, I
shouldn't say that because once you get going it you can always change a lot of things. Like maybe they're a whole
little village of characters, all the different,
different style glasses, or maybe they're
different colors. But I'm gonna do
one of these two. And I think I could have been naturally want to
do this character. I'm going to choose
him because He's got, he's got arms and legs and feels like I could change them into a bunch
of different characters. Like I could make it a little girl for character
and then a little, maybe a little baker
for character. And this one will
be good as well, but I'm gonna go with this one. So have a look at the
drawings that you did and choose one to do your
doodle challenge with. If you don't have
one that you like, then you can do this
little guy with me, my little fun furry
guy. Alright? So again, like I said, I'm going to do this
simply by doodling. This is playing around. The idea is I want to see where I can take
one character when I play around with
him in a bunch of different looks and scenarios. Okay? So I don't expect these to turn out perfectly in this gonna
be randomly all over my page. I'm not making any
plan for this. Okay, so I'm just going to
press the whole doodle, my little, my little guy. So this is our start
with his Fourier line. I'm drawing these smaller, okay? And always very eyebrows, eyebrows and his, his
eyes there together. Now I'm going to make
them looking up this way, remove the pupils around. One little change. Maybe he's got a
little frown on. Okay. Oh, I hadn't I hadn't waving. I'm going to make it so
that his arms are down. We did that lonely
character in one of our exercises on
capturing expression. And we had that character with his arms down and
looking rather sad. So there's a sad
version of this guy. What can I do next? Maybe he's looking
over at his friend. So here's his friend. I will start by
doodling in his shape. This is a, this is girl, fun fairy guy, girl, girl, girl. And she's going to be, she's handing him something
and we don't know what it is. Here's your finger, which is handing him
something for some reason. He's not he's not happy about
what he's getting handed. Years. Her eyebrows. She looks down at him
for some eyelashes. I think that will work for making her loved with different, let's say if I give her
the different lips, How does she look? Again, it's just playing
around these characters. Maybe she's the teacher.
She's a teacher. How about that? She's
handing him his homework. Where can that lead me? I'm going to do another one. And I'm going to do
this is going to be, I know this is going
to be a character and I start with a little, maybe there's a
half, okay, this is, this, this character's
schoolmate. Little hat on him strives for. Now, the reason that I'm doing this as a doodle and I use the term doodle,
maybe interchangeably, but my doodle, I mean, I'm trying straight
in with the pen. Not planning so much, right? The reason that I
like doing this sometimes is that I
might make mistakes. But it's makes me slow down. I'm gonna take
this he's going to carry put him with where
to carry his school bag. It makes me slow down and think about various ways that I can change my characters
into different, different scenarios,
different situations. And also because I already know the basics of the
character's design, I'm not really working
on that so much as I can keep drawing
the same character. But maybe he's holding a basketball basketball
curve like that. But I'm not positive of the
design of the basketball. If you look that
up, That's okay. Regardless little. We've got the teacher. The teacher may be Neizha hat
or something else on there, but I'll leave her alone. What else can I do? How about there's hair, there's a whole character here. I've got one, I've got no idea he's going to be so I
start off with his name. He's got a little bit longer for honors for rehab areas and he's he's putting his eyes, I think that this character, he's gonna be like he's at
school as well except to use, He's eating us eating a sandwich when you're
dealing with the books. He's not supposed to be doing. This teacher hasn't noticed, used to eating, is eating his, eating his school book. So what's the pencil? I can be I can be
messy and sketch around and see all kinds of different lines.
When I'm doodling. It's almost the opposite. Lineup put down is
going to be there. But if it goes wrong,
it's all right. Sometimes it's one
of those situations. There is eating his
book, what's it called? It called for, but for book
on, for his eating it. But if something goes wrong in the character, doesn't matter. It's just a little because sometimes I haven't been in this
characters eyebrows, maybe they don't
all need eyebrows. He's only got one. That's okay. Processing. So if something goes wrong, sometimes I find when something goes wrong and it's
permanently on the page. Sometimes you can
wind up with some happy with what I
call happy mistakes. Because my, my art teacher, she would call them happy
mistakes, happy mistakes. So you can see something that happened that you
weren't planning on. And it can inspire something new in your
character design that you wouldn't have
imagined otherwise. It's a different way of working. And it can be equally useful in helping you to
create your own characters. And really built, I'm going to give this guy a little shoes. Oh, it looks like shifts. And also provide you with ideas that you may otherwise not have come up with if you keep working
in the same way. So maybe we'll do this
guy Scott on it's like, Oh, he definitely has eyebrows. He's got a little it was meant to look
like a birthday hat. It looks a little bit
leopard spots on it. It looks a little bit
like it could be, could be a Santa hat,
but there we go. Maybe I do a Wizard. Maybe one of these
guys is a wizard. That's what I'm gonna do. That gives me an idea. Okay, So here's the
little wizard character. Oh, I better draw
the half first. One. Other difference,
quite a big difference in doodling if
you're just working with Penn, is that you have to decide
what to draw first. And it's not always the same as when you're
working in pencil. Because you see with
the pencil I was sketching the shape and
then I would do the eyes. And then I continue
building up my character. Let's kinase bigger eyeballs. When I'm working with pen. It depends. For this wizard here. I have to start with
the I didn't have to, but I started whole image up draws hand up high or well or video that demos on how
high blood was the wizard. I started with the hat
because I decided that that would determine
where I started doodling. My wizard, I better give
they don't have noses. I'm going to give
this guy a big this. He gets a big mustache
this for a guy. And I think you'll hold, how does it help
the older staff, like one of those
wizards, staffs. Hey, Scott, maybe it maybe instead of having a ball on it, it has like a football. Football then they
can make good, good wizard sometimes look quite look like a football,
but that's alright. Sometimes it's useful to think of different places where
your characters could be. Here started off
and I drew him and then then I wound up at
the teacher, whatever. Maybe I'm out of schools, then I can think
about what else am I needed a school,
whatever it was it. Oh, right, because I
drew, I drew this hat. So here's my wizard. But some stars on his, his hat. What else? Maybe he needs, maybe he needs an assistant, maybe it here as a system. So over here, system
is is taking a break. And here's a, here's a system
that was his assistant. Dramas. Pupil's big enough. And he's going to be he'll be taking he's
taking a break too. He's having a little snack
as far as eating as well. Maybe I'm hungry. Disguise eating as well. There is eating. They're not sure what this is. Or I should draw
on his hand first. Oh, that's all right. I'll just I'll put it on like this and we'll
look quite right, but that will do. He's
having a little snack. I remember to put the hand
on firsthand goes on. There we go. And then I'll draw
the rest of my snack with these eating. How do we know that he's
a Wizards assistant who I should put a cap
on and perhaps Pepsi. I was kept beside him
having little seat. Interpreter put his
feet sticking out. Look like he's sitting down. It's an odd power character, bit of a different position. It will also show me
the types of things that I need to work on. If I decide this is
a character I really liked that I want to
use in different ways, like in comics or
anything like that. And maybe this
character, Scotty, maybe there's a, maybe
there's a fun fur cat. Okay, so maybe here's
the wizards calling over 2/2 is fun for cats. I don't want to
turn this character into the ACAT version of it. I wonder how do the uncontrolled
actually just start with a basic shape changed
at all to be a cat. I don't know. Let's see. I'm going to make it smaller feet
like this perhaps. And I'll give it a cat ears. Or maybe it's a
character who's dressed up like a cat. Maybe
they dress up. And I'll give this
one a little bit. Maybe more cranky looking eyes, eyebrows pointed in
and they need a tail. And here's the, oh, I should've made a fairy tale
Omega three at the back. That's alright. I guess this one
does, this one kinda knows what goes
with the Catholic. Okay, maybe that looks like
a fun for a character cat. It'll take a few more. Let's see How about I gonna do, I'm gonna change this. I only have this one. I want a girl and I'm just
doing another girl. I think she's going to be right over here. I'm going to show
you the way it was fine. And she's going to be maybe how she's been
to the hair salon. So she's got slightly
different do up top hairdo. It's smoother. She's gone. She's gotten her her
first moved out. It's like opposite of a perm. There she is. And she's here. Nice big eyes, looks
across all the lines there and give her a little
here's her little hand. She's got her her bag as well. She's strolling along. I should do this character. I haven't done anyone
really walking. So how does it look? How can I use my character's legs to make
her look like she's walking. She's here, she's coming
on what she's wearing, wave to her cat or should
have kept looking over. And I'll give her the slope so well, maybe the other ones. When she does need She's smoother eyebrows to
smoother eyebrows. There's a little change
in my character. I can also decide that, I mean, I've put shoes on
this character. Maybe I need to put maybe a
hat or something different. Hats, shoes. I'm going to do a beam. I'm going to do a girl. And I'm also going to change. Hello again. She's going
to have bangs like this. And I'll do her with shoes, just going to have
fancy shoes on there. She's not going to give her
a kind of give her some long because if
she has long hair. And here it say I'm
playing around, I'm pushing the design
of my character a bit. And I'm going to see, does it still look like this character fits
in with my others? Does it still feel like
she's one of this bunch? Or is it too much? If I change the
character too much? Oh, she's maybe she's
calling her son. Her school assignment back as
well to see how she looks. Wonderful dress on
her and that's okay. I'm giving her here. She is just going to get I don't know if these
type of foot work. I think maybe I
need to stick with the characters with
these little feet. Maybe not. I'll do, I'll do a few more designs and see I haven't done too
many characters in motion. I've drawn a lot of
them quite stationary. Let's do somebody else
who's say running along. Okay, I'm going to do a little
character running along. And I'll see what happens
if he's in motion. Maybe I'll make him with
all his hair going back like that and maybe this is we're seeing the
side view of him. So he's gonna be like this. One arm is back like this and there's other arm
is forward like this. How will this look? This can give me ideas as
well of the kind of range of motion types of
things that I can do with a character's
who's designed like this because
I made this line the character in one
view and think that, oh, I can use them in
lots of different ways. And then I can run into difficulty using the
character in different ways. Okay, he may not
have enough range of motion are ways
for me to change him. But I think this guys, there's quite a bit
of ability for me to change the character. I stop. Okay, I'm gonna
do a couple more. And then, and then that will be a pretty good
experiment I think. And how about, or thereabouts out even
though they're not broken. But the eyelashes on
my girl here she is. And she hasn't maybe the
girls, she has libraries. Maybe the girls have
no eyebrows and the boys have eyebrows
for something. You can do it like that. I'm going to do a
little character who is a different position, but this character
is going to be leaning down and
reading his book. Okay, so here he is. So let's see. It's
about because he's leaning on his hands like
this and looking down. So they're the little
eyes looking down here, down at his book
here it is. Areas. And maybe he's changed
the eyebrows already. So I ponder a little smile out there are little questioning
for our lecture today. And maybe I like the hair
flopping overload it. Let's do have that luck. Yeah, He's cute. So just see that. Just
see the front of him. One last character. And she will be like I'm just squeezing
over here perhaps. How about I haven't
done a lot of different expressions
ongoing to. This is going to be a little
like a character who's angry expression first and then I'll draw
character around that. Or maybe she has. What if I get a ponytail? I am only with two pigtails. Not work on this character. Look what I originally he
or she has maybe she's got, maybe she's got her arms
crossed to do that. Maybe there's one
arm over top of the other and has rather I
actually got arms go. Oh dear, She's
gotten a bit long. So what happens when you
don't sketch in first? That's okay. Just a just a doodle. And she's I guess I'll
keep her her her legs. I essentially give her eyebrows. Good. I do Any others as do many others about my book and do some
writing of the book. That gives you an idea, I hope, of how you can take one
character that you've designed and draw a whole bunch of characters based on that one. And starting with the
simple version of the character you've designed
and see where it leads you. You don't have to do it by doodling and pen
if you don't want. You can do this in pencil. But I like doing it
with pen because it makes me commit to
what I'm doing. And so it may not turn out perfectly with a
little look at this virus. Basketball is kinda, kinda
balance and when his thumb, but it gives me an idea
of the variety of way and the different ways that I
can create a whole bunch of characters based on one
single design I've done. If you want to give yourself
another doodle challenge, you can either build
more characters based on the one design that you like or try another one
of your characters. I mean, looking back at mine, I think that this
character could be a really good one to do a whole bunch of
characters based on, especially since
I'd have to change the character around
to have girls, girls to get rid of the moustache, what
would I do instead? I could, that could be
something that could be a really good one to do to
a bunch of characters from. Alright, see you in
the next lesson.
17. Life on Mars: This is a super fun topic. It is life on Mars. We're going to be imagining
that we've landed on Mars and we're going to be
creating a Mars colony. We're gonna go live on Mars. Now. We're going to draw
on a whole bunch of the skills we've
learned so far. Everything from drawing cartoons and motion to capture
and great expression. Immediate will even pop in at some of the cool
characters we've designed ourselves to create our
full Mars colonies scene. All you need for this
one is your pencil, black fine liner if you want it. And we're ready
for life on Mars. Welcome to life on Mars. Here's my little concept
drawing to give us an idea of what we might
put into our cartoon scene. So we have landed on Mars
and we're colonizing it. So we're going to live on Mars. So I'm going to show
some astronauts. I've got a little
example of one here. They're tethered or attached to, it looks like maybe that's
science station or something, a little cat and the window with his clipboard observing or
whatever's happening out here. And my character has got a
can have 0 space, water. He's watering little
monster down here. So I bet you, we could pull
in some of the funny monsters and other characters
that we drew and some of our previous exercises
and put them into B. Some are aliens. And then I've caught
in the distance a few different
buildings on Mars. Mars I think is a red planet, which is why I've
colored this bread and it's got some mountain you're looking structure in
the background here. And then I show quite a bit
of the sky. My concept. I've done the title bar, I'll make that smaller, I think in the actual
cartoon scene. So let's get started. Now, the way I'm going
to begin my scene is by giving myself a little bit
of a division in my page. So I think what I'm gonna do is sketched myself in a curve. This is going to be the
curve of the planet. Okay? So I'm making it about, about a quarter of
the way down my page. Okay. If that's about a half, that's about about a quarter because I want to be
able to show some, maybe some, maybe
there's a little like a Observatory station
and the distance. Or maybe some, you will
see some little planets in the background or
asteroid or something. So that will give me a
feeling for where I am. But I want a good amount
of space so that I can set up the rest of
my characters and my, maybe my lab or my Mars nursery or whatever
else I have happening. So that's my first
division in my page. And then I think I'm going to rough in some shapes
that are going to turn into the other
space buildings. This might be, this could be, I know this is gonna be the, the Mars nursery, Wilbur
growing some plants maybe, or you might want
to turn that into a lab or something like that. I'm going to show it like that. So what I've done is I'm only showing part of the bill that I'm not showing
the whole thing in the center because
I want to be able to show different buildings
that we're making on Mars. So this is like a
triangle shape. I might make it
bigger or smaller, but I kinda rough it in so I get an idea of where
that might go. Then I'm going to show at least one other
building and I'm thinking something in this corner
or this side of my page. We've made, perhaps
we've taken one of the rockets that we'd landed in. Number chilled turned it into a maybe like a lab or something. I'm just going to
show the top of it. Well, that's an idea. Maybe we show a little bit, There's a little rocket coming in that's taken off
Venice heading towards, it's, maybe there's
another, more and more colonists coming to come
and live with us on Mars. I won't go into
those details yet, but it gives me an idea for, so when I have an
idea like that, sometimes it's helpful
to just sketch it in. It doesn't actually
finished like that. Maybe that's Earth that we
see where in the distance. And I had this
idea for having us conservatory or
somewhere where we can have like a telescope, telescope and look out with
his telescope up there. So now I feel like I've set up my scene and now I can figure out where some of
my characters are going. But first, are there
any other big parts to my drawing that I
want to roughen first? Maybe I'm thinking I
might do a Mars rover. So a vehicle, one of
the ones with the big, the big wheels
picturing assaulted. I don't know quite how to
draw something like this. I start with a shape, okay. So let's pretend this is the
main body of my Mars Rover. And I'll give it
some big wheels. And they kinda go off the page. That's okay. Here we go. Here's sort of
a curve is partial circles. These are the how it attaches
to the body of a rover. And then I can put
one of my fun little characters that I've
designed into here, okay, so one goes in there, and how many characters are
going to get? I'm not sure. It's sort of like five
or 65 characters. Maybe somebody here,
certainly somebody in the, what is it that the Mars nursery where we're growing
plants and then, and then I'll get a character
in here in my Mars Lab. And then I'm going to
have some might worth my astronauts floating around and doing something in the
middle of my page. Maybe there's like some craters. We might show some craters. There's little crater here. Maybe I'll do a bigger,
bigger crater here. And I can show another one of my cool characters that I've designed popping
out of there. I mean, you know,
pumping his head out. We could do that. Alright, so now I feel
like I have a layout for what I'm going to draw and
maddening to my cartoon scene, I can start drawing
one of my sections. I'm going to start
right here. I'm going to start in my Mars and nursery. So first things first, let's create a couple of lines. And I'm going to create, there's gonna be another,
gonna be like crazy plants. These are alien plants growing
up out of these little, little holes where
maybe there's some goo, There's a few little circles. Those circles. And then I'm going to create some
crazy looking plants. Now I can do this
with the way that I only overdrawing
with the line types. So here I sketch in
some shapes, maybe, maybe a oval or
maybe a triangle, a little triangle in there. Few shapes, if you like. And then I can turn
these into crazy plants. I did. Oh, I remember the
one where I did with it. Curly curvy line. I'll do a curly curvy one that's some sort
of a marsh plant. And then I did have
some spiky, spiky line. Spiky lines around that shape. This one. I'll do, I'll make atomic what I
wanted to be a planet. So I'm going to make it
with this look like leaves. Trying to make it
look like leaves around a triangle shape.
Okay, that's good. I might make these plants,
they're all alive. So they're going to be like crazy alien plants
give him some eyes. Maybe this one has, maybe
this one has eyes like this. Maybe the vertical. Oh no, this one is this. I'm going to make this
one have three eyes. Yeah, that one has
three eyes and actually I changed
my mind on this one. This one's going to be it's guy is gonna be
just a cranky guy. I'm gonna do a
cranky space plant. There he is. He's looking over at
my character here. This is my scientist. This one, this
goes all confused. So I'll make his eyeballs
all over the place, open. A little wavy smile. Who? This character? He's got a frown. This one. Let's see. He's just surprised. He's like, Oh my goodness,
we're being called. I move his arms. I think
it's character in his arms. My craziest bass player. And then I want a scientist. And I'm going to start this character out
of stick figures. So a little bit like we were
doing with our sticker. Your characters circle
for my character's head. And then I decide
what he's doing. So maybe he's he's
pointing he's pointing to, he's holding the,
he's holding a can of fertilizer is truly wants to fertilize this guy and he doesn't like
the idea of it. So that's just a little can of looks like a watering can and it's
gonna be space fertilizer. Or maybe I should make it
and maybe it looks like a changed my mind on here. I'm going to make it
look like a beaker so that it looks like
it's in a lab, right? So kind of shaped like that. We use the scientist
is holding onto, aim his arm down and give them a little circle onto the
container to be his hand. So just like we
would have done with our stick figure
characters in here, another circle and he points, he points over here. So circle firsthand, oval
for his fingers, he points. That should be enough to give us our little spelled out a
lot of what's happened. I saw her on to give
us our scientists. So let's start
creating him glasses. He'll have glasses on. So two big circles
for his glasses. And I'm doing a
character with glasses. I don't draw the
circle for their eyes. I just go straight in to drawing the pupils and
he's looking over here. There we go. And give
them a little sigh, a simple sideways knows. There we go. I just
need you to mustache. Aren't even open it. I can fit it on. No mustache or here. Little a little open
mouth as he's talking to this little space plant. And I'll give you my
typical getting crazy hair. These are mad
scientists, crazy hair. Here I'm using my
line type 0 is right. Definitely It's
very crazy here and just go around my
shape using my, whatever the line,
I want their house, wealth, wealth
crazy because air. Then I finished off
my character by just drawing the shapes around to make him look
like he's got a lab codon, little rectangle down his body, thicken up his arms. And I met, show his hand on
the beaker as some ovals, small ovals to look like
it's his fingers around the super fertilizing solution. The only other thing
maybe I could add in here is what I
might do a sign, but I'll do that. I'll refer to now. Just like we did with our
words in monster sound studio. I draw a shape where I'm
going to put my words. I'm going to say Mars nursery, Mars and nursing belt, fair chunk down where
I'm going to put the words, Mars, nerves. Crispr that at all. I like that. Let's look marginally
skewed it bigger, I think. Lars. So play around with your shapes and your
lettering until you have it. A belt where you want it to be. You know what I'm going to do, we're going to get
a little fancy. There's gonna be a space
plant in-between. Here it is. Space planet, Mars and
then nursery. Nursery. Now I can ink this section. And I'll ink this now
because it won't, and I don't think anything
will interfere with this, so I think I'm safe to ink it. Then inking this section I
think about what to do first. I can do the plants
first and then, then my scientist, the
plants don't cross over. Now remember, you're
always free to be as creative as you like
with these drawings. What I'm doing is just one idea for how to create a
crazy Mars Colony. Whoops, is a little wavy smile. But always feel free to be
creative with your ideas. Breaking up various. And my, my shocked,
shocked space plant. A little 0 for an Alpha game. Maybe he's just had,
had the fertilizer is not happy. They recover. And my scientist who haven't been eyebrows on my
scientists do I need them? I think he's expression
might be alright without couple of dashed
lines on the characters. Glasses, make it look,
feel like class. Crazier. Again, it's
just a line that follows around the basic circle shape that I use to create
the character's head. Then he gets a color. Hands are always tricky. I still find hands very tricky. But if you simplify them
as much as possible and think about them as
shapes, they're much easier. Then I find they
always look okay. Now I need to do my
lettering and then I'll draw around the outside of
my Maurice nursery. You might wanna do
fancy lettering. And I'm going to keep it simple. Oh my goodness, I spelt nursery or should
be or their nerves. Don't don't spell the
nursery wrong with who you are and you
are most nursery. I haven't Mars necessary. This is what happens oftentimes
when I'm drawing this, I forgot about my, my spelling. On Mars. It's called the unnecessary. The final details inside first section of our Mars
Colony done amazing. What's next? Shall I
come over to the lab? Character in here maybe
doing a patrons as being like a food lab or something
that they're making, growing food in the lab. We go, I think I'm actually
going to do a sum, an astronaut, astronaut floating along out here over to this, whatever it is, Crater. I'm gonna do that first
because I know where this element of my drawing is. So let's do a little astronaut. So I placed the
astronaut and then I can attach them to the, the rocket blab on
it's good idea. I'll call it rocket blasts,
and I won't spell it wrong. So Rocket, Rocket Lab, Lab. Where can I place my astronaut? He's going to be moving my
creator over a little bit. In your drawing is going to be set up differently than mine. Feel free to move
elements around wherever. Now the astronaut is
going to be in motion. It's kind of floating along. So I'll draw him out of
stick figures to start with. Maybe he's like I want it to look like he's sort of sort
of walking slash floating. So will that without
positioning feel like that our staff families
bringing something over there. He's got a repair kit,
he's got to repair case, come over to do some work on this crater to help out
whatever alien is in here. Somebody popping up as a whole. There are two sketches,
so here he is. I think I should
be able to create him out of these shapes. Alright, he's coming over, he SCADA, what's easy over
to give this guy something. He's giving you a
tool or something, like a space-based screwdriver. He's giving him come over to
do repair into my character. Now this character
is an astronauts. I'm gonna do it with a
helmet on a little bit like our characters
in spite Academy, I work with a circle
for my character's head and slice at a section
that's his visor. We can see inside
to see his eyes. Maybe there's a little, little nose, maybe
his, his mouth hidden. What can we see his mouth? Maybe I'm going
to make the ohmic the mask a little
bit bigger because his mouth Here he is. Hopefully that looks
like there's an M, M on it for MC Mars Colony. He's got a little logo on
his helmet, MC Mars Colony. Then I come down, same
thing that we did, drawing shapes over top of my character to create
his space suit. I think it needs to be a
little bigger, bulkier, right? I think that that can
be quite a big square. And then the legs keep
that quite simple. And he's going to have on
space boots so I can draw those using sort of
a half circle shape. Like that. I'll actually look
quite, quite bulky. They exude same with his
arms, thicken those up. And he'll have on gloves. Gloves. So I just circle
around whatever he's holding. Maybe needs a jetpack and I
have jetpack on his back. Maybe you have a jet
and maybe his Jedi, maybe he's not tethered to the potassium iodide
being attached to this. He's got a tether, a line attaching him
to the Rocket Lab. There's bringing over
his tool to help us character. I don't know. I don't think I have space
for my space kit at all. If you forgot space,
you can try or maybe I'll try that here. He's got a space gear. And at the same time I'll draw in the character
he's approaching. These two characters
kind of go together. So anything that's
working together, I'll sketch that up
completely before I, before I, before I ink it. This character, let's pull
out one of our characters from maybe one of the monsters, Yeah, One of the
monsters that we made when we were doing
those crazy expressions. So here I'm going to,
they were made out of a teardrop shape.
So I'll do that. I'll give myself
a teardrop shape. Alien is hidden down
in the crater, right? We want to see part of a
hidden down the crater. And he's got I couldn't leave
it in water to two eyes, two eyes on those other monster. So there are two eyes on him. And he's going to be very happy because this
guy is bringing him a tool to fix whatever
is down in his crater. A big, big, big
crazy open mouth. I think we see is tongue. How Snapchat works? See his tongue and we'll
do some teeth in them. These characters were
kind of shaggy looking, so I'll do that as well. Does he mean, I don't
think he's hands. He's just these right down
in there and the crater. I think that will do. Now I
can ink these two characters. Start with my astronaut. I don't put eyebrows on this
character, but you may, you may fit them in and
all the bonds on how you draw on your characters. Like characters either
right up at the top. So I don't think I can
fit. Mc, Mars Colony. It's great having
characters like astronauts with about two of
those characters like astronauts with gloves and things because it makes it
very simple at home on his, on his chest and just draw some circles and that's
what it looks like. He has some sort of
maybe it maybe since his breathing
breathing apparatus or whatever he's
got on his space, you really rounded kind of
boots or I could do big, big favors, a big
thick so on them. Areas for for
walking around Mars, jetpack and his little toolkit. I'll put a little MC on it
as well and see Mars Colony. Their heads attached
to the rocket. And he might need a few
little motion marks. So I feel like he's
bouncing along. Advice how it to
their neighbors, they feel that it's bouncing. And my little monster,
or happy monster. What we're going to make
those eyebrows very fuzzy, like is, I suppose monster body. And does he have
teeth, gums and teeth? That I drop them
down in the crater. Right. Now. What I decided, what I'm going to do next, I think I'm going to do this. The Mars Rover. I think that's what's next in my drawing because that takes
a fair amount of space. It's in. I'd like to get that in. Next. I'll leave this one to dry
before I erase off that ink. So firstly, I want to
decide is I'm going to pull in one of the other
fun characters that I designed in the last exercise to make me be the
driver on here. Which one should I choose? Maybe. What about the what
about spiky guy? Oh, no. What about the cloud? The cloud is kind of
guy. He's got hands. I'm gonna do, I'm gonna do the, I'll do this spiky guy. Maybe the spec, you guys
floating around here, hippie spiky, spiky characters pop up
out of this creator. Maybe things that's
what they come out of. The camera there. And this will be the fuzzy
kinda guy because he had arms. So he's going to be deriving, he's going to deriving
the space rover. So I created the same
way circle for his body. Then there's line around him. Here he is. He's definitely having a
very good time deriving the rover. Those are little arms. Does he need anything
else to make him look like he's hidden space? That's alright.
And he needs to be holding some sort of
gears or something. Oh, there we go. This person, Mars Rover. Where do I fit that? Mars rover? Again, using my
shapes to determine where I'm going to
place the writing. Maybe these are
spiky kind of tires, different line
type around those. Okay, I can ink that guy. The character first
because he's sitting on top of the rover. Oh, I forgot he had
curly eyebrows. Want to put those
in the eyebrows? Then they do the rover. An HDMI writing. I've gotten a little
ahead of myself. Mars. Fiona, spelling
mistakes on that one. For the rest of this, remember, I just, I just keep
the shapes and prop. Perfect Mars rovers then. I don't think he needs any
motion, Marx. He's alright. What is next is I'm going to
come over and do the lab. The rocket that's been
turned into food. Or I can take my, I
forgot actually do a few little lines on there. So it looks like glass helps
to differentiate between the sky and inside
my Mars nursery. Missing that are offered to see. Rocket Lab, rocket food lab. So I'm gonna put a
character in here. Now, should it be a person? Or I think actually I will do, I'll do a person
because I think that characters are characters over there and I think
they're going to be aliens and balance it out. I'll do a person in here and there inside
the window. The window. This up a little bit. I can make my window around. And in goes my, whatever my characters doing, my character is making Idaho. This is some sort of a
space, space, space. Space, space brew. Hear it as it's, it
can be in a bowl and they're dipping in. Maybe there's a, maybe
there's some sort of a measuring device
and it's maybe it's gone wrong there sticking
in seeking and some other, other kind of probe to determine if this has
turned out right. This experiment where
I put it up on it until it looks more
like a beaker. There is. So what I've done is I've drawn my circle
for my character's head. And then the objects,
what they're doing. Because then I can
come in and attach my stick figure like this
to what they're doing. So we'll arm there with
a circle on the end. And their arm here, it's bent
around the circle holding the other probe or whatever thing that I'm
measuring their space food with. Then same thing I can thicken
up my character bit and do their puzzled looking face. Here's, here's
Puzzle. Maybe there. Their eyes are like looking
down at what they're doing. So two circles with
eyes looking down, notes down a bit and I
need to look a little bit. Little, little puzzles how it's gonna be a simple line
that I've done it twice. How are they upset? I'm just trying to solder there, but they have their
little upset. So there we go. And there their eyebrows are a bit angled and they look
a little bit worried. This has not gone
right, this experiment. And here is my Sophie, like my girl here, Here she is. Yeah, maybe a
little color there. So it looks like she's
got her his lab coat on. And I can ink this section
and character first, okay, and then I do
the circle around her. So here she is. Rather worried. And then once I get
to here, I flip it. I started drawing the object and the hands because that's
in front of my character. And I'm going to keep her
hands really very simple. Here we go. Touch touch her to
what she's holding and experimenting
with their shoes, what was different in
the button over here. And then put her
into the window. Because I can always
fit that around her. Maybe it needs a couple
of marks like this. It looks like glass. One little circle around it. I do want this to
look like metal. I want it to look like a rocket. So I need to draw on some parts to make
it look like a rocket. So here I say I chop off
the top of it there. And what if I gave
some little bolts like little circles along? Then those can look like bolts. So it starts to look a
bit more like a rocket. I could do the same thing
here. Maybe there's a little, a little panel here that we see. You know, maybe there's
some bolts around there, so they just like that. Then I need to write
in rocket lab, I should probably have rough that in before, but
I'll see what I can do. Roth Rocket Lab with
this, whatever. Rocket Lab. Maybe it's Moore's law. Title your areas differently. Okay, great. Erase off my astronaut. Do him. And probably even
the Mars Rover. Now, I'm going to move along to do the characters and little
bits in my background. In this scene that we're
setting because we're on the planet and we're seeing
the planet like this, okay, so we're
looking across it. I want to show these characters and these
little elements back here. Smaller, feels like it's a round planet and we're seeing the horizon back in the planet. So that means for here, I'll do another, do
another creator. And who did I say I
was going to have some of our other fun characters popping out a grid
or the spiky guy, he's going to pop up here,
here. Comes it down. There's my wherever there are a couple of craters and a
couple of craters outcomes. The spiky character, just my circle and my spiky line style drawn all the links is going to be, I is
gonna be cranky still. He's, he's upset at something. He's looking at a subset that the rockets coming in, another, another rocket full
of astronauts, various areas upset and he shoots up out of this or this or that way
I was like This, shoots up out of this crater. Then there's going to be
another crater over here. I do. Creator also do
Christian thought about doing based on what I know, I'm going to do space dog, there's gonna be spaced dog. You may want to put them
some other characters. I quite like this keratin
coming up out of the crater. But I'm going to do
space dog and space dog. So he's going to
be fairly small. There'll be wearing
actually, weren't you guys wearing a
helmet here is based on little spotty little legs. I'm spellbound down to lock down here. Play around with him. And he's got it's got
a helmet on space. And he's chasing,
chasing a ball. Here, the balls vote
to hit this alien. About to hit our poor little
spiky guys buggy Elliot. You can see how much
smaller I've drawn these characters in comparison to like look at this character. So this was one of the
characters that we drew in our line experiment,
the curly guy. And here is the
spiky guy, right? When we're drawing
them all in a row, they were the same
size and look how much different sizes will compare. So you pick up a YouTuber less
than half the size, almost some of the characters
this much smaller. And when the characters
in the distance, I cannot get in as much detail as I would have here. A closer up. And space dog. Maybe you want space cats. Cat will be good idea
to do a space cat. Question. If I have
space dog wearing, these are space
boots on scuttle, little antenna on his, on his tail stock. And finally, I want to fill in some details into my background. Okay? So these are
things that are going to really help to
finish off my scene. In terms of making us
feel like it's on Mars. What could there
be? There could be. I haven't drawn the
decimal this in the lab. Let me get the desk on.
There could be because see, maybe some shooting
asteroids, shooting star. We could show some planets. I'm going to show here
this is gonna be earth. Earth. And I want to show
a little rocket. Then here, I want to show
a few little buildings. But they're going to be small. Because again, as I made these characters smaller in
comparison to these ones, here, I'm going to make my
buildings much smaller. So it's as if they're
in the distance. And this doesn't
have to be perfect. Because back here, I don't
get as much detail in. What I do is I sketch in
some shapes, rectangle. This is a half circle chopped off because
it goes off the page. Maybe there's a little
window in this, like a drop on this LeMay
space cotton there. This is a telescope
up on the roof. But that will help to
finish off my scene. Here's our, here's our rocket. Again, doesn't need too much
detail in it because it's, it's smaller and further away. It may be '20s of the crater. Anything else? I do one
more little crater here. Let me not with anyone in
it, but just a little crater so we see scenery, so we feel like we're on Mars. Like an outline. I didn't put in any of those. I didn't put in the
Mars bar, the mountain. I can put that in right
there, or maybe it's here. Maybe it comes in there. Let's have a little look. I talked to draw this
as carefully because it is the distance. A little alien popping
out at our drink. Good. Encrypt. You seem to do that though. And maybe just some dots. For instance, stars. I could also show
some bigger stars and there could be a variety. There's another planet there, a star that's a bit closer. Few of those. And I'm always tempted to, It's easy to overdo
this part, right? But I try to stop the South before I overdo the
little details. One other thing about doing background that's
further away is I will, I will put some of the elements closer
together, like see e.g. that's what I've done,
these little dots. The dots are the stars closer together because it feels
like they're further away. Okay. Not enough to have
enough join either. The Maurice, I'll do
the Mars mountain. Just something sketchy
lines across it. I should do what do I want more? Oh, I should, I should put
a welcome to Mars sign. Welcome to Mars. Can I fit it in? I can do it. I gotta get into, gotta get
into welcome tomorrow sign. Just seen working to welcome. Welcome to Mars Colony. Although she doesn't
look very welcoming, does it extend his
little? There it goes. It goes there. Welcome to Mars Colony. Docker. Based off the
rest of my lines, I hope you've liked
drawing that scene. And I hope it showed you ways that you can
incorporate in a lot of the other exercises that we
did in terms of capturing expression and creating
fun characters with line, showing characters in motion. We even did one here with doggy. As well as some ways of showing a scene where it has a bit of a
different perspective. And we have some of our characters who are close
to us and in the foreground, in some of our characters, in parts of the drawing
that are further away. Never got one last
thing I think I needed. You see how I did the lights sketchy lines across
the mountain here. I think that this building
also need some lights, sketchy lines across it to
pull it out of the background. And that's it. If you want to doodle challenge, you can add more characters
to this drawing. Or this would be a
fantastic one to color. If you want to work more. There's my dear for you.
18. Dream Studio: Welcome to dream studio. We're going to be
designing our ideal create a space when that will be
super inspiring to us, especially if you're cartooning. We'll start off by doing
some brainstorming. I'm going to show
you how I come up with the idea for a scene. How would decide
where's it going to be, who's gonna be there,
what's gonna be in it. And then we'll draw our creative space and maybe pop in some of the cool characters we've
designed ourselves. This one, all you need is pencil and paper and
your black fine liner. And we're ready to
create our dream studio. I'm excited to design my
dream studio with you guys. So here's my little concept dry. And I've designed this one up in a cloud or when
I thought about, dream about, well, that's the first thing that
comes to mind for me. So I've created different levels for my imagined dreamy studio, up and up in the clouds. Up here I've got a
little painting area and what's covered? I have a little bird who's flying in with some
paint supplies. What else do I have? I have big I always wanted a big super long
scroll kind of thing. So I could just do huge
murals and drawings on. I'd like pottery as well. So this, this character
here is doing a little spinning on
the pottery wheel. And I run another little bird flying in with a paintbrush. And I've also, I haven't
drawn people as characters. I've drawn cats
all through here. So, you know, the characters
can be whatever you want. You may want to
draw yourself in. You may want to draw and
maybe it's your cat, maybe it's your dog,
whatever you want. So we're going to start off
by doing a little bit of brainstorming to think about what we might put
in our pictures. So let's begin. Let's see. I have where, who and what. Well, that one I did
up in the clouds. So there's an idea. It could be the cloud,
it could be in-order. Tree house was one of my ideas. I thought a tree house could be a super fun place to
have a dream studio. What about on a boat? I always love or houseboat? House boat. Those those are the
boats on the water. They literally look like they're
a house and they're very flat and they float on
water like that houseboat. We have some of those
up by our coverage. And could it be it
could be a cube, it could be in outer space. I mean, it doesn't have to be on Earth or it could
be outer space. How's that for an
idea about who? Maybe your cats there? Maybe it maybe cats there are my favorite cat
TCS names Top cat. Maybe it's maybe
my dog, you know, maybe maybe your dog is there, might bring back one of my
dogs who was making my horse. Maybe I'll bring bringing
my horse, maybe shelf-life. I'd like have a little animals flying so something could be bird or maybe it's somebody in something
like a parachute. In parachute. Somebody could parachute in
red. How do you get there? There's Treehouse, some of the parachute into
the Treehouse. What are So that's not
exactly who, but that's okay. It could be somebody
who is a character, a character parachuting, and
that's what I meant there. Anything else for whom
I might be there, I might put myself in. Maybe some, maybe some of the characters,
maybe pen, you know, maybe some of my
favorite characters from cartoon club pen. Or I put it in number, put in serious Bob,
serious, serious Bob. Some of those guys
who have older, what about our fun for there? I'd love these characters,
Bian, phon far. You know that the,
these fancy guys, these little guys, tempers, confers, put some
of those guys in. Anyone else. There could be some pending
block. Blob may come in. Neighboring blob in what, what is going to happen
in my dream studio? Well, I definitely need
a drawing area, drawing. And I loved the idea of having that big scroll or
like a 2D murals, murals to do murals. What else? Pottery.
I like pottery. I also love sewing. So there might be a sewing
area in my dream studio. Anything else? Well, I mean, you could have things that are
inspiring to you as well. So for me, I like reading. Maybe there's a
reading area or maybe I have a bookshop.
My books are there. Books, magazines are
flipping through magazines, horse magazines and stuff. When I need somewhere
for my supplies. I want maybe a really cool kind about something
that's sort of like. It floats around my paint
brushes and stuff in it. And there we go. My, in my books on my
journals, journals too. That's a really
important one journal. My journals need to go in. I forgetting anything else. Do I want a painting area? Painting? Want an area for Lego. Lego has been going, oh goodness, I'm
running out of space. I could start. It's time to start the
drawing as soon as the page is full.
It's time for me. That's my cue to
start my drawing. So these are some ideas from me. You'll come up with your own. You can use some
of mine as well if any of these are
inspiring to you. But feel free to
add in whatever you think is going to be
fun for your drawing. This is all about thinking creatively and designing
your own scene. So let's begin. I'm
going to start with, I think I'm going
to stick with this. I'm going to stick
with the Cloud Studio, although I love
this idea as well. But I'm going to stick with clouds because I think that will be quite fun because I know
what house and you sort of a, an area to relax you. Maybe I've got a hammock
or something swing or somebody who's swinging could be a swing or a hammock.
There we go. I'm going to start here
clouds and I'm going to get in my first area. Maybe it's the pottery or iron or something.
Let's see how it goes. So I'm imagining maybe maybe for four or
five areas to my, to my dream studio house this and leave some
spaces in between. So I'm going to start by sketching in some shapes
and I'll just do them. Ovals, turned into
clouds, ovals area. Maybe there's one in the middle. There's a couple of them attach. How's that? It's like a step down to
this part of the studio. There's the higher-up area. Maybe that's the reading areas. Maybe it's like a quieter area
is higher up that reading. And then down here
in the center, this might be my drawing
or painting area perhaps. And down here are the big area. I'll make this pottery. That will be pottery. Maybe this is the sewing area. And we've gotta
get in my hammock. And we then move this cloud up. Although some characters
flying and deny, how am I going to attach these? Maybe there's a little louder. Maybe slide maybe is a slide. I could slide down. Well, if it's a ladder
and climb back up, it will, but I'm sure
it must be able to fly. Whatever you think,
whatever you think, you can do it however you want. But I've got to get
in my hammock area. Let me write it. I can put it right here. It's touches right there. Attaches to the
bottom of the ladder. That's gonna be
the hammock area. Alright, so I sketch in the
shapes that are going to be the areas where I'm
going to have in my studio. So a little bit similar to
what we did with life on Mars, sketching in the blocks
where we were going to put our different parts
of our colony here. I'm sketching in shapes for my clouds from
different areas. I think that'll be good, but keep a sketchy because
it could change. I'm going to start
with the pottery area. And who should be doing
potteries that maybe I thought maybe if called the
cat doing pottery, going to do a little
cat character a rule. Here's my kind of
my little cat here use starting with some shapes. And what's he doing? He's putting something
into the kiln, excuse, put a fire some of
his pottery here, this is gonna be, that's
gonna be the killed. Alright, so my character, he is putting some, say what's even making
careful when making a lovely heritage just going
in to be fired and the, oh no, it's, my cast is
going to make a jug of milk. Milk jug. There we go. Here's my, here's my kel. I'm in a Cloud. So a little bit like we
did with the big fine, I can just bury my count inside some curvy lines of my cloud. Is my cat buried and all
my cow is standing on top. Now, once I've got the item
that my cat is holding, now I finish off, my cats will make that bigger. My cat's little pause, holding on to the tray. Okay, so that'll circles
for the character's hands. Then I attached the
hands to the body. And don't forget a tail. Tail. Here's my character. Oh, nice big eyes, nice big. Oh, he's got to
look like they're very definitely a big smile. Thrills with who's this part? Oh, he better be wearing. He's wearing an apron. I want at all with the artsy. Looking at RSD scholars
apron on how's that? You use a print on. Anything else that
needs to go into this little area. I
think this is good. I'm ready to ink. Now. I'll only ink areas that I
know are finished, right? I don't want to ink anything where there
could be something else overlapping or coming in. Picture. Once I think I've got my design finished for that
section, then I'll link it. Has kidney stripes, apron. And as I go along, I'll get my character. Little details like little
little toes on his, on his feet and that. I don't do that when I'm
sketching in pencil, although you might just
how you want to work. You slide it into the kennel. I do the line like that
and it feels like there's some depth or distance into my account joining a puff
of smoke coming up there. I might, but I don't know
what's gonna be up top so that I walked around the rest
of the cloud yet years. Here's my cloud, a parasol, fun and easy to do. Brilliant pottery or I
could label these if I want you to have to
put a little like cat, cat pottery, whatever,
I'll leave it. I'm going to go onto
my next section. I wanted, or I know
one thing I did want that drawing area with the big long scroll
paper so I can do miracles. So why don't I do that up here? Where
are we going to do it? When I'm put it? Let's see, I'll
sketch in a shape and I'll see if
this okay, So if I, if I can't figure
out whether or not something's going to
work in a certain area. I can always do that. What if I move along, we'll move this one up and
then I can do my foot here. So a sketch in my shape. There's my big, a big paper
comes down like this. And I was way off the
page a super long, does it because it's
just continuous paper. Just comes straight
out of this cloud. And I can sit down here and
do some, do some drawing. National, I make this me or shall I make this?
Maybe this is pen. I'm gonna put pen. My character panel right here, right on top of the, Get rid of this part,
right on top of the paper, doing a, doing a doodle. Let's draw a curvy
can rectangle. Couple little squares
on the end there yet, What's the drawing is
going to be drawing? Stick girl is realistic
colors you use. Yeah. Stick girl with paintbrush. That's what it's trying
to fish pen here, There's pen and he's looking down at the character, right? So point C, things
point the characters. Pupil's big smile for sure, and his hands up
as he's excited. Drawing a sticker after he's already done
another drawing. This is a stick dude here. Stick dude here. Great. I got my big drawing area. I won't think that just
yet because I've got this section here and it
crosses over with this. So I'm going to
decide what happens here before I ink all of this. When we just look,
look back to my list, is really helpful having, doing the brainstorming sheet. If you want, when you
want to come up with your ideas and
writing them down, because I find it helps me to, first of all think
of other things. And then I remember some of the things
I was gonna do too. I've got written down, sewing, sewing area, the reading, the Lego, i've, I
do the Lego area. I'm going off of this drawing, so I might put it in the
painting area right beside it. I'm going to be
painting, painting work. So say, let's say
there's an easel. So say I'm painting a picture. So there's a, there's
a canvas and it's on an easel level triangle and behind the character
here, who's painting? Who should that be? I could maybe fit enough
funding for character there. How's that? That wasn't on that. We have fun. If I
was on my list, I've done pen, I'm going
to do, I've done that. I'm going to do a fun
fur here is painting, made out of a circle cycle
management arm over their pen. Here. Use those circles
being my fun for. And then this is one of
the ones where I just did a different line type
around my shape. There he is. In ESL
thing as paintbrush. Paintbrush with his little
hand all the way should it be holding his palate is going to have to be somewhere else because
I don't know if I have space to
put it in, maybe. Okay. Who hold the
palette down here? He's, he's got it. He's holding it here. Palette. So just another little
shape down there. And then his eyes looking at
here is what he's painting. Definitely smell or
does he need a little maybe needs a little
hardest hat on. It's got a little Burj on. And he's painting, he's
painting these doing portrait, He's drawing and
drawing and other fun for me or he is painting away. So that's pretty good. I think I can ink this
section before I go onto my other side.
Let's do that. I like to ink as I go along
often because this way, I feel like, well, first of all, I feel like I get a bit
of my drawing completed. And second of all, it helps to finalize a
little bit of the drawing so that I can then see where I want to go with the
rest of my picture. It helps me see what
could be missing, what I might want
to add in next. And for me, it's helpful. You may not want to
work like this, right? You may, you may find you on it. Well, first of all, you might
do everything in pencil. And you may want to not
ink until the very end. It's all a matter of your own
style and what what works? He's trying sticker and stick to it would be step
took to be holding a pencil. I should have given
him something. He's working, he's
drawing away as well. A bit like, Well, I'm doing the drawing
lettering in a, in a shape. I draw in the smaller
characters version. Then I outline a shape that
goes around because I can always move that paper
around where the mural is, but I can't change the
drawing so easily. I really like having some characters that are
really fun and easy to draw, like the fun fairs. Because it gives me something to add in that I don't
have to do a big, a big, difficult designer is not such a complicated
character to draw. Nice to have some simple
character is just, I like doing more complicated
characters as well. But there's something
about having a few simple ones because then I know I always have something
that I can add into an area. It won't over-complicate my dry because here we've
got quite a lot going on. And Josie, others, There's
a whole mural happening. There's a painting area. So there's quite a lot
of items along with our setting that along with
where our pictures happening. Next area. I'm going to,
sometimes I do this, I'll pull back up, pull
back up the idea sheet where you may have
yours to the side. So I've done my fun first
opened but blob and done Penn, I've done the mural Scroll
Area, the drawing area. I've done the pottery. I have not done Lego
or sewing with these. I want to get in this reading. I want it definitely
fit into this area. Clouds I started, I'm not
doing those things in a cat. Haven't done any of them? Have you putting myself I'm up, put me in the hammock. So the next thing
is I'm going to do our reading journals and me
Mac in my relaxation area. So that's going to happen next. So if I want to fit that in, let's see where it can go. I think actually prompts and the amino and Bono, I
don't, I don't want to, I don't want to put it here
because it'll be right above the write-up of the pottery made a good heart.
I'll do it here. Okay, so let's make this
area a bit smaller. Cloud can shrink a little bit. Because I want to get my hair. I move a hammock
up a little bit. This is my reading area
and attaches to this club. Maybe there we go, That'll work. Like this. Maybe move
totally trashes. So that's alright like this. It goes like this. And then I'm gonna
be in here reading, maybe my books are
stored up there. So here I am. And I'm thinking,
I'm dreaming of my, dreaming of what
else I should do next to my dream studio. There's me and I'm holding
a book or magazine. Here it is. I already
just call it. I'm holding the cartoon Club magazine cotton
cloth and reading cartoon Club magazine area. But I have my hands
on my magazine. Maybe you just see my feet
sticking out there we go. And I said I wanted to be I'm going to put
I don't want it to lego areas once I'm going to
put Lego and books together. So this is bookstore is just
gonna be books up here. So I'll just draw
them as a shape. I can separate them
now I have my books. There's going to be the Lego. I like working with Lego
lid like their scenarios. Just a box of Lego, anything on my journals. And then I'm going to have
my journal so I better have a little miserable pencil pot. Pulled my pencils and my genitals here,
here's my journal. So I can do some work in my job. All right, above
me, how perfect. This is definitely
a dream studio. I'm gonna decide what happens here and then I'll
ink this area. So I have left. Oh, I want I have ordered
painting as well. Paintings, Lego, and oh, there's the sewing area. You know what else I
forgotten is I think I want a music area too. I'm going to do
sewing and music. So I can get maybe blob,
blob is going to be. So I don't know how blob so is because he doesn't
have any arms, but he's, he's a creative warm. So here's blob. Blob is up in the sewing area. And here's, there's a
sewing machine flops about to work on the sewing machine. Bob sewing machine.
But that in the Cloud, there better be a little
area for all of my fabrics. This is going to
be cloud come down here. I'm gonna set,
I wanted music. We're going to put
it in a stereo. This is where we also
have stereo speaker. Speaker there. This
is music and sewing. Usually consuming with Blob. Other speaker, here it is. So I put some music notes
around there, I think. And here's blob in here. I'm not sure what he's sewing, but he's a movie's going
to do a scarf here is, here he's working on his scarf, Scarf mind through there. He saw himself, himself, a scar from Esau,
his name on his car. How's that? There is a voice
operated sewing machine. That would be cool. There we go. Then here do I need to put
anything else in here? If I missed any way
characterised, shall I put in? I'm going to put in, you know, I want to put it has
serious bargain. I'm gonna put serious bobbing. He's going to go in here. He said he was made out of
a half D shape as well, or taller one for serious Bob. And then he was sort of Sworkit
with your straight lines, jagged lines, straight lines, jagged lines, straight line. Jackie's Pharaoh's arms. And maybe he's, maybe
he's mixing our paints. Bob's going to be
mixing up paves, areas. User getting paints
ready for fun for just a giant giant vat of paint. Or maybe he's doing
a bunch of, doing a bunch of vegetable jars here. And Bob nixes paints mustache. Or you could shut off
a fun for a character. There are one of
the other kinds of simple characters you've
created in there. Anything could happen there. Now that I've sketched up all of this, I'm going to ink it. Now. Think if I need any more little
details into my picture. I begin with, I'll begin. Hear me dreaming in my dream studio. Remember when you have
something more difficult like hand clubbing, is it? Always think about
it as a shape. If you find it difficult, think about it as a shape
from **** feet sticking out. And then I'll go up to my Cloud. So there's no definite order. This has to be done
and it's just a lot of the lot of the items overlap. So it's a bit of a more challenging
picture because of that. There's quite a lot going on. We've got a lot happening. Sure. No. I'm going to spell
it. There we go. We've got a lot
happening in terms of smaller details that
are in this picture. All of the little items
that you've added in to your studio that are
inspiring to you. Books and magazines and Lego. House that. And I'll come in and do
Bob mixing his paints. Just have to remember that
he is just a series of different lines
around the shape. Will have I forgotten
Bob Sutton, bob's tuft of hair on top. There we go. I can't forget that.
Mixing is paint up. I feel like the clouds. What gives the feeling
of a dreamy studio? And it's also kind of
easy because you can hide and stick lots of different little fun stuff
right into the clouds. I like that. When a blob, I have done any erasing right
now I'm going to do some, do some erasing and
doing some sewing. Remember to pay attention to the order that you need
to ink things, right? So I've got my scarf on
top of the sewing machine, so I had to make sure that I
came in and did the scarf, ink through my increments, scarf or speakers. Music. Lots of different things
that I find can really inspire me creatively that are not necessarily part of the normal art that
I do all the time. The more different it is, the more inspiring it can be 0. And now I can come back
and do my little puff of smoke or coming out of steam, whatever coming out
of the heat marks, coming out of the kiln,
little heat marks for my cat. And I want some music
notes Around that. I might have one
last look back at my my brainstorming sheet, right, my ideas sheet, and see if I've missed anything
that I want to add in. At this stage, I
want to think about, are there any smaller
details I want to add? Is that first of all, I'll erase off these lines
and see how it looks. Because my drawing can look like it has more detail in that then actually does want to have all those sketchy
lines is still. Taking this off. I can see how the
drawing looks overall. And often I missing
bits thinking. So that's the other reason. It's easy to use
it a mess when you have so many lines,
somebody sketchy lines. I think it's looking
pretty good. Fun for painting.
Maybe you need slope, floating cans of
paint or something. There's a big space here.
Maybe I can put some of Bob's paint that
is mixed down there. What's the lines on here? Okay. So now that I'm done erasing, my lines are rubbed
out pretty much. Have a look back at
your picture and see if you feel like you've got enough in your picture or if you have any spaces that feel a little
bit empty, right? Like I feel like that
feels a little bit empty. I'm going to add
something in there. Anywhere else, anywhere
else that feels a bit empty all about them, a
little birdie or something. There are more music notes here. I'm going to pop
in some of bulbs, paint jars, your meal. There is a paintbrush
come out of this one. Maybe another 121. I'll do a little jar. This jar is going to hold
a bunch of paper edges. Related. Could've, should've sketched
this in first-year. I'm going straight in with ink. Worked out alright though. So yeah, I feel a
little paint brushes anywhere else I look back, is there anywhere else or
something that will help to reinforce what's happening
in a certain area. Like do I want to label
this cat pottery? Or do I need 0 happens, I haven't put a little bit of thread on top of my sewing
machine. Whoop, there it is. There's thread point
down and my music lover, but if you want
music notes here, that will balance that
space out. Alright. Anything else I could write
in the brain and muscle? I believe this is our book. I've got my journal written
there about Lego lego blocks. Caught his scarf. He's ready blob on it here. Low, low bond blob scarf. Happy with the rest
of it, I think. I think that's it. I hope you've enjoyed designing your own
and dream studio now, that gave you an idea for
how you can brainstorm up a bunch of ideas and then
create an entire scene from it. So I will see you
guys in the next.
19. 3D Dragon: I wanted to give you
a little introduction to color your cartoons. You'd like coloring
and you want to add some color to your cartoons. This is a perfect exercise. We're going to use one of
the characters that we do in our early exercise
on dry with shapes. So this little drag in here, I'm going to show you
how I blend a layer with pencil crayon to really make the character pop
up out of the page. Now, we're going to draw
this character games, so you'll need your pencil
and black fine liner. Then on these pencil crowns, if you want to use the
colors that I'm using. And you want to grab
yourself a light and dark green light and drug purple, yellow, a pink, and a
gray or black will do. But really any colors are fine. It's more for you to
get a feeling for the technique of blending
and layering pencil crap. Alright, I think
we're ready to add some pops of color
to our cartoons. I've grabbed the dragons
that we did from our dragon warm-up using shapes. And I couldn't choose one of
these characteristic color. I'm actually going to redraw it because when we
did this exercise, we just did drew it in pencil. Now you obviously you can
color it with pencil, but I want to draw this
character so that I can neaten up the lines
and I ink it. And it will also
give me a chance to draw my character
one more time. And I can always make a
few changes if I wanted thinking i'm I want to open
up the mouth or something. That's kinda what
I have in mind. But in a Hindu
dragon if you want, but I'm going to draw this one. Remember it came from
our teardrop shape. So let's begin with
drawing this character. And by teardrops varies. And if you're gonna
do some more, you do it in a different
part of your patient. I'm just going to
draw the character in the center of my page this time. So they were flying in. So here's my teardrop. And flying in to my page. Then we had two pretty
big eyes right here. This was a girl dragon. I'm
going to do that again. I think two pretty big
eyes and I think I'm going to open up the
character's mouth. I just think this is going
to give me something else to color because I can call
it inside of the mouth too. I should make it a little bit trickier, which can
be found at file. So open up the characters. And I'll show, show the tongue. I showed a little bit
tongue like this. And some maybe not to to her to gigantic
teeth at the front. Two little teeth on the
bottom. That's good. Maybe bigger chunk like that. Good. And we had a little legs, legs like this with our character looking
like leaping and flying through the sky. They would go to the
legs out the back. Appointees on the end
of my character's feet. And of x me, Austin, this tail, a little bit more of a longer tail I think could
get on this character. I can, because I'm going
to be the body little bit, little bit bigger. Here we go. Triangle and live in that town. I didn't just spikes
down this character, but I do have some
fairly good size wings. Triangles to start the wings. And you sat she unfortunately
that one anymore. So triangles to begin
the shapes and my wings. And I did a little scalpel
along the bottom, curve, inward curving lines to make them feel a bit more
like wings. What else? Eyebrows on my character. When a horn, I can't forget
them on the corner up here. Sorry, good thing to
do and we can't get extra big extra Big Horn. And my character homework
and I've done my characters. People's character is looking down here or lemons
character the mouth open, looking down there and cares
or had eyelids as well. So we'll be eyelids there. Couple of eyelashes. And that's it. I can ink this character. Beginning with my
character's eyes. And eyelashes around my characters. No, not giving her a nice, nice, big, nice, big smile. I think I'm going to
do a few extra teeth. How's that up top? Few extra
teeth on the bottom till. Now that I look at it, I
think I need some extras. How's that? Yeah,
I like that better than I always see my
characters tongue. And we kinda see the back of the characters know fact
there because it's open. So we're seeing
through a little bit. Then, then the rest
of the character. It's nicely drawn
characters sometimes because I find when, like when we were doing
that first exercise, the characters were very new to me whenever I haven't
created them before. Then. We were just sort of playing around with playing
around with shape. Then. You don't always get character
exactly as you like. I find when I redraw, that gives me a
chance to change. A few little details on the character that I
think will add to them. Oh, we've got
nostrils, nostrils. I think he might need
some lines down this. The characters, wings like this, just little added detail. I think that could be good
for coloring as well. Knowing all of these now I need this character to dry so I can erase my pencil lines. Another thing, it might
be quite nice to add maybe some spots or maybe the character has like a belly along a line along
the, along the front. So you could divide it in half. But I'm going to leave
the character like this where the body is just continuous know patterning or details because this will
be easiest, I think, for showing you the
coloring, the contact Nick, what I want to be
able to show you is how you can start to
make your characters feel more 3D by coloring
with pencil, crayon. And the way that I can repel. So credit is maybe a little bit different than the
way most people do. Because I will put
more than one color on the same area and I'll
layer the pencil crown. I'll show you what I mean. I don't have any character. Looks pretty good. And I like it with open mouth. Beginning to color. Now remember, you don't need
to use the colors I'm using. These are just an example. It's just one way to
color the character. But I'm going to start with the character's body and the
character's body, purple. And I have a few purples
that I'm going to use. And I start off by
doing a light layer all over my character with my lightest color of purple
that I'm going to use. Okay, so wherever I think the
lightest color needs to go, That's what I begin with. It's a bit like
when I'm sketching and I started off with
really light sketchy lines. What I don't know exactly
where the drawing is going. I start off light
and sketchy with the shapes and the light, light line, and then it
gradually gets darker, right? So it's a bit of the
same idea. In coloring. I do a light layer of my first color over
top of my character. And as I'm going
along and thinking, you know, do I need this
light purple everywhere? I think I fell down most of the character's body with this. I don't have to call it
absolutely everywhere with it. Because I'm going to use
another purple and maybe even more color on this
body of my character. And I do think I want the nose that this part of the character
is very important. This character's face, this product
definitely want to pop out and view to notice that
when you look at the drawing, notice I haven't even gone down the character's legs
with this byte purple. I've just concentrated on doing. The nose. So quite thoroughly
after the nose and down into the
body and stop there. Okay. Now I pick up my next purple. It's kind of a
media mish purple. And I'm going to go over
again the character's body. Alright, so I'm
starting at the tail. And I'm going to give this character a layer of this color. I think I'm going to
go down the legs too. So what I'm doing
is I'm creating areas within the
character's body that look a little
bit different, right? Because I'm not putting this medium purple all
over the character. I'm going along
most of its body. Then as I come up to
its head, I might, I might ease off my
my medium purple. So really what I'm
doing is blending together two colors on
the character's body. The reason that I use
more than one color, especially on an area
that's quite large, is because that will help to
create a much richer color. Like it'll look
deeper and nicer. I find when I use more than
one color. Here we go. I've done my purple,
this medium, purple, all along this character's body, and up to the characters
smiling mouth. Let's see. Do I need
it on the nose? Yeah, I think I need to come up the nose a little bit with this, especially around the eyes. Because if I start to then
see eye color in this purple around the
character's eyes are coming up into those lines. And maybe around the
top of the nose of it. And then maybe I maybe
around mouth a bit. Because I want to start to make this nose pop out
and feel round, like our whole characteristic
teardrop shape. Teardrops quite round, right? And since our character, I
want that all to feel round. That look. If I think that I want to
feel a little more round, I will go a little bit harder around by the
edges of the character. Okay, So a little around
the edge of the nose, around the edge of the
mouth. Where else? Around? Down the spine down the back of the character. More on the tail. As I go along, I just get a little
bit darker every time. Okay, so as I feel a little more certain of how my
colors are looking, then I press a bit harder
and make it a bit darker. Okay. I'm going to stop there
now that I've got a couple of layers of
color on the body, I stop on the body
and move on to a different part
of my character. Doesn't mean I won't come
back to the body, I will, but I want to see how the other colors are
starting to look in comparison to the
colors I've just done. Now the next big part
of this character, I would say, are the
characters wings. And we also have quite
a bit happening here in the mouth and the horn. But I'm going to wait on that
because that has lots of little tiny little parts
in there I can color, so I don't know yet
if I want to call it that all one color or a
bunch of different colors, that I'll decide closer to
the end instead of going to color my characters wings. And let's see, do
I want them to be? I pulled up the greens. I think this can be kinda fun. So I got a couple of
greens and I'm going to start with my lightest green. And I'm going to go all
over the characters, wings. And again, I'm not
pressing too hard. So I start off with this color. Doing a light layer, MAC layer all over. And the other wing to this green is quite,
it's quite bright. It doesn't matter if you
have a different gradients. Hello, pay, your picture looks just
a little bit different. It's absolutely fine. There. I've got one layer in of
my fairly bright green. And then I'm going to do a
layer of my next screen, a little bit, a little
bit darker green. For this, I'm gonna do a similar thing to what
I did in the body. I'm gonna do another layer, but I may not go
all over this wing. I may go more into the lines of the top and
the sides of the wing. So what I'm doing game
is giving my wing. Some variety of color. And again, they don't see
I've left this one lighter. I can always go over it again. This is why many light layers I find are better
than one dark one, because you can never erase it. You can't, can't change
it once it's down. But it's easier to make
decisions about what looks good If you build it up slowly here and it's
kind of fun that way. That I look back my, oh, do I need to darken down
the edges at all, man, I darken down right into the base where the wings come
into the character's body. Document in a little bit bigger, make it feel like to pull your
okay in wherever there is. Wherever you press
harder and wherever your color gets a bit
darker or more intense, that's where your eyes really
going to notice that part. I've got a layer on the
body, layer on the wings. I'm going to stop there. I've got two layers down. I'm going to move on
to another section. And I've totally
different colors, the purples on the body and
the greens on the wings. So I make a decision about
what's going to happen next. I think I'm going to
do the characters, eyelids and eyebrows
and the, the horn. And I'd also pulls out, I'm definitely going
to use a green again. I think I want to do, I would actually want
to do this well, picking that one because I liked the way it
looks on the wings. That because these are smaller
parts that were poached, the eyelids It's quite small
and horn that's quite small. So I think that a color that's a little bit more contrast or is a bit darker,
could look at. The other thing I'm
gonna do is gonna pull in another color. I grabbed the yellow. I like yellow when I'm
using purple because it can really have
a nice effect. You can make the purple
really stand out. I'm going all over my
characters horn again, lightly, one light
layer of my yellow. So if we go stop there. And then my green
one light layer over top of my
characters eyelids. And I'll do the same color. I'm going to wait on
that for a second. And then I think that both the horn like I've all
these nice stripes on it. I think they need to be
colored in different colors. Is it this screen
again, I might come in, grab my old but other green that I have,
my lighter green. And I can alternate and
put a layer of its light green over a few of these little stripes
to see how that looks. Quite good. Luck too rounded yet though, but I know I've got a few
ideas for how to do that. Maybe I might show you
the eyebrows light. No, No. It doesn't
hurt. Also too. If you're not sure
about something a little bit a little bit of that color down lightly
and luck, is it right? I don't know. But the eyelids, maybe the eyelids
need a second layer of this green and let's look and see. I think
that looks good. Second layer that great. Maybe now the eyebrows
can use this green. It's not going to do
the darker green. Now, I feel like I can start to darken down some
of the colors. I think the eyebrows
can be darker, so I'll take the screen
and I'm going to do it. I press a bit harder to do a
little bit more intensely. By pressing a bit harder. I don't want to press
hard all over the place because then I don't see the
differences in the colors. Just because it's just
one color doesn't mean it needs to look
the same everywhere. It can look different
depending on how hard I press. So I had this green
on the eyelids. What if I just darken down
just a little corners? It's not the whole thing,
just a little corner. Then I think her eyelid
will start to feel rounder and just got the dark dark eyebrows,
those look great. And then I looked back and I think just anything
else needs to change. I think I should
probably do the mouth next and then I'll decide on
anything more I need to do. Now. We have our open tongue. Okay. So I could
do does she have a yellow tongue maybe or do
I do for grabbing the color? It might have been
grabbing groping. You don't have to do
this. You can do it. Maybe you hear me give
her a green tone. You can use the
colors you've got. I'm going to have a pink tongue. Just for fun think-tank. I could do layer of prevalence
with that. I want to do. How about that? So light layer of pink
eye shadows, quite cute. Little light layer of this light purple
flowers that look, again even in this small area. I'm doing two colors to give a bit more richness to my color. The reason that I pulled
in one of the colors, that's this color was
in the body, right? We had a lot of
this in the body. A little bit of it can
be layered on top of. A color that doesn't
appear anywhere else in my picture so that it will help it feel like it goes
with the character. None of these, none of these
are rules or just, just, it's just one way of cut, one way in one
style of coloring. Okay, So that looks good. Now I need to look at the
inside part of the mouth. I need that to look like
it goes further back, so it needs to
reassess or push back. Now, I can do one layer, whereas my purple here is, I'm going to do one layer
lightly of the purple. That is my character's body. Because this is the
inside of her mouth and constraints we've made of
the same thing as her body. And then then I'm going
to make that look darker. So if I had my pen, I might come in and color that block which could look with a good or I could come
in and do it a darker, I can grab my grades. You could do great
what you do block and a layer over top. Again, I started at light. Then I decided it
needs to be darker. This should really make
us notice her mouth. I think it needs to be darker. And especially up into
this corner of her smile. And I want that to really get noticed how big her smile is. Jack in that, in a little bit tired
quadrant of these teeth. Look back is dark enough, are looking back
at my character. I need to decide if everything looks right in
comparison to each other. So I'm pretty happy
with the mouse. And how much I darken
that down I think. But I feel like the body of
the character doesn't feel round enough and doesn't
feel dark enough. So that's where I'm
going to go next. Pull up my purple and I'm going to press harder and color
darker on the character's body. And again, not all
over, just in parts. So definitely down the tab, see the tail that narrows right? So that's going to be quite nice and dark
and press harder. Then I'm going to
darken down. Let's see. I think these little legs need darkened lakes,
neat, dark and down. Because again, they're small, they're a little
bit like the tail. A smaller part of
my character has come in and darken
down Jacqueline legs. And just because the body was colored with two purples doesn't mean I have to
leave it like that. I can I could use one of my one of my green,
maybe this one. What if I want a dark
and Dale and Mary, what have I put a layer of
green on top of these legs. How does that look? It looks great. I'm going to continue going down my character's legs here with a little layer of this green. And maybe I'll blend a little
of it up into the body. Halfway. Something like that. Does that look? It really gives a little bit more richness to my character. Doesn't like that. And I can make it a
little bit more intense, maybe along the character's
line of their belly. That and maybe want to tail. So here's where I
play with the colors and see what it looks like when I do have a look combination
or without looks great. Now, I'm going to maybe
flip back to my purple. I want the top of the character to get a
little bit more intense, so I'll press a bit darker
with my purple. Now. Let's see how it looks. This is going to
create a real feeling of roundness around
my characters. Teardrop shapes, darker along those edges
and pressing harder. And the night or ease off a
little bit and I'm not no, press quite as hard as I blend down into the
character's body. My character is almost
going to look darker, purple on top and then have
a little like Google or any tinge along the
bottom of it spelling. For an area that's fairly large, being the head and body. Now I have some variety
in that character's body, all created by blending
the two different colors. And I think the face needs a
little more intensity now. So again, I come
in with my purple, press a bit harder, especially around the
edges near my black line. Let's see, maybe I'll
probably write up into that corner of that mouth. And another, one
thing I'd like to do oftentimes is
darken a little bit around the character's eyes
to draw some attention to it. So the theme where
we darkened in this, this part of the
character's weighting to draw some attention to it and make it
even more intense. Same thing Here, I want some attention for
I want your eye to go and where I want you to look in that I think is
important to my character. Like the eyes. I press harder with my
pencil crown so that I get more contrast or there's a bigger difference between
nose is quite light. I think. Now that I see it, I need to
darken it down a little bit. I think I might do it with
a different color though. I think I might do
what I did it with. Where's the yellow? A little bit of a
yellow over the nose. How does that look? Or whether it was pink? Maybe
I should have put pink. Feel free to play around
a little, a little, a, a, Yeah, little layer of pink
over my character's nose. Now this pink isn't
used in just one area. I usually like to have a color used in more than one
area in a drawing. For me that helps to make my picture feel
like it's unified, like everything goes together. Now I just take any
extra layer of purple. How's that? Because I do want the nose of my character to look
rounded as well. I was that is it
dark enough snow? I had looked back
and there's sawdust darken up a little bit more
than my characters back. A little bit more,
a little bit more. Definitely the tail,
That's a point-of-sale, much really tough
standard as well. More of the character's
nose around enough. Where I want to look a
little bit more rounded, a little bit more intensity, pressing a little bit harder. And anything else? Anything else in my character? I think I could do the wings
a little bit more intensely. So pressing a little bit harder. And I've got my lighter color. He not show a little
bit of, a little bit of a difference between these nice to between these, these two greens
that I have like this one can make each of
the little bit darker. A little bit more. One chance, leaving all that it kinda later on
that last wing. How does that look? I pitched the point or I could go along the
lines where I have these lovely lines that I drew this with the
scallop down that, that curvy shape their eye, that curvy shapes that move. We go up those lines. I think that's probably enough. I don't want to overdo it. Because remember,
you can't lighten things so you can
darken, lighten them. Eyelids. Okay, I think writers look at everything
else I think is okay. Another thing is I could
have colored my characters. Teeth array. I
could remember like our eyes can be yellow
ocher to her teeth, yellow. Light, light but what if I don't like like they're almost teeth? It might look good because my
character's body is purple. So if I do a yellow on, say the teeth, that will help
them stand out even more. That'd be a nice difference between the body and the teeth. Because yellow and purple are complimentary
colors right there, opposite on the color wheel. So they having home. Yeah. Okay. Yeah. We collect
the yellow teeth. Now that I've given
me the teeth yellow, I think my horn needs a bit
of another color on it, which I think is great. You know what, I have
forgotten one thing, I have used the gray. Use the gray and the mouth and that's the only
place I've used it. What if I did a little
bit of the gray around the horn so that I can start to make
that feel grounded. So along one edge, okay, Do a little layer of it. And then I blend in
lighter as I come around the horn that I do to the other side to
make it look around. Oh, yeah, starting to
look quite rounded now. Has that now I've
got the gray on to different parts
of my character. Anywhere else that I need
that you might be using blacklists you want to
use Greg could be block or just do it lighter. This is the advantage of pencil crayon is that unlike
a marker where you just, you know, it's just one
intensity with a pencil crayon. You can press hard
or press the light. That's why I like
the pencil crayons. I've got the gray there there and there anywhere
else that I needed. Like what if I did
a little bit at the very base of these wing? I just went like that, right? The very base and
just up the edge. Alright, so it's almost like
I'm adding a little bit of shading to this character. But after it's already
colored is you don't have to do
it in this order by somebody will come in, they'll shave their
whole character and then the loud color. I like to add color and then put a little
bit of gray on top. Or it could be black
and not everywhere. The color, the characters
mainly about color. How's that? So starting to look
quite 3D help, so I don't want to
overdo it anywhere else. Perhaps the tail, the
place where I'd really press really hard with
my purple pencil crowns. So with a little bit,
little bit on the tail, be a little bit up the back. I think we're almost
there with his character. She looks great, happy with her. So I hope that gives you
an idea of how you can use pencil crayon to
really give your character a nice 3D effect. And don't worry if
yours hasn't turned out exactly how you wanted
to. You can try again. You can give yourself a
little creative challenge. And this is why would you give yourself a little
creative challenge? Try another of these characters. Try coloring it. So this would be a
great one to do. This was the character,
where's my circle? There's this character that we did just based on this circle. Okay, so another great shape
for trying to round out. You could use the
same colors again. You draw the character ink
or engage in fact character. Then you could come
in, you could do similar colors to this
character or try some new ones. So what you do is
you grab, remember, a couple of colors for the body. So a lighter color
and a dark color. So I've done two
different purples, like color and dark color. So you could do that again, down the characters
body or maybe you want it to different greens, you could do the opposite. You could do. The character's body is green. So you come in, you
do a light color of the screen and then go
over and do another color, another layer rather
of this green. And then maybe he's caught
this belly on it, right? So that's a little
bit like the horn. So then you could do
a different color, maybe even pink, white, hot pink around the
belly like that. See how that looks. Decide if you want it to be
striped or not. In this character, the
wings are very tiny, not that important, right? The face is much smaller. But you don't have horns,
they're too to color it. So there could be a
nice little contrast. And this character
is vertical because this character has a spike,
these all down the back. So that's a big feature on that character that'll
be really fun to color. I would do the body and this
belly first and then decide, do I want all of those to be alternating colors or
three different colors? And I bet you they would
look good, really darkened, but I would still do a
light layer on those first and see how
it looks and then decide you can even
color them all in green lightly and then be
like, How does that look? And then come over and do another light layer
maybe alternating with another different
green and see how that looks and play around
with it, right? It's all a process of playing around and seeing what works
for you and for your style. There's options, it's great. There's our little teardrop
character and colored. I hope you enjoyed coloring with pencil crowns. Thanks
for cartooning. Me and the team would love it if you'd share your pictures
in our Facebook group. And I promise you're going to be surprised at just how
creative you can be.
 Sarah Jane Vickery, Artist