Transcripts
1. Introduction: Katrina here and welcome back. I don't know about
you, but pearls and gold just scream wedding. So I think this pearl and
gold wire set would be perfect for that DIY bride who
just loves getting crafty. We're going to start
off by creating a stacking ring set with this simple but elegant and
classy solitaire pearl ring. Then we're going to
follow it up by creating this fun arch stacker that goes along perfectly
with the solitaire ring. Lastly, we are going to
create these pearl hoops, which are my favorite
earrings of all time. As always, you can
customize any design. And I think switching out
the beads would change up the entire vibe of this set, but it would be just as amazing. From creating a
classic solitaire ring to shaping some earrings
and adding beads, these designs are fit
for any skill level. Now, let's jump into creating this super classy pearl
and gold wire set.
2. Classy Solitaire: Pearl Wire Ring: Super excited to show you how to create this pearl
statement ring. After you learn how to create
this pearl statement ring, you're going to want to watch
the video for how to create this arch ring because it stacks perfectly with
this statement ring, you definitely want
to go check that out. Starting off our materials, we are going to be using an
18 gauge solid brass wire to create the band of the ring. Then we have a 24 gauge
coated copper wire that we will use to attach
our bead onto the ring. Then we have a ring mandrel
in the size of your choice, as well as a metal file
to smooth down the wire. Then I have three
different sizes of beads. We will be using needle nose
pliers, chain nose pliers. We need our wire cutters as well as some Nylon jaw pliers. To begin creating our ring, we are going to use our
Nylon jaw pliers and straighten out a length
of the 18 gauge wire. Then we're going to
grab our file and smooth down the tip of the wire. Then using our
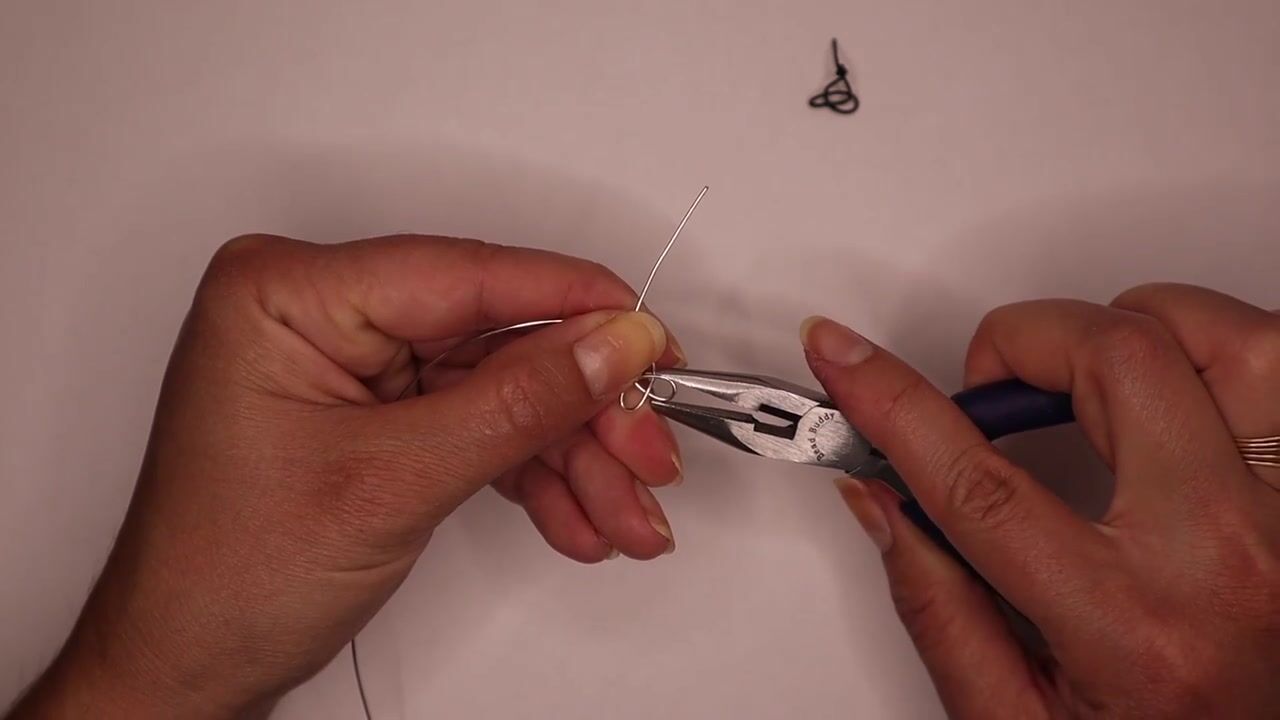
needle nose pliers, we're going to place the
very tip of the wire into the jaw of the pliers and create a loop at the
end of the wire. Readjusting the hold of
our pliers on the wire, we are going to slightly
bend the loop over so that it is centered over
the long end of the wire. Once we have created this loop, we are then going to
use our ring mandrel and place the wire
onto the mandrel, bending it all the way around to create the
curve of the ring. Grabbing our bead,
we're going to place it onto the ring mandrel to give us an estimate of where
we need to bend the wire to create
the band of the ring. Marking the spot where we
need to bend the wire, we're going to pinch
it with our fingers or our pliers and bend
it over 90 degrees. Using the first loop as
a guide for the size, we can then place the wire into our pliers and create a second loop identical
to the first one. Wrapping the wire around
to complete the loop, we will then use
our wire cutters to snip off the extra wire. Grabbing our file, we want to smooth down any rough edges. If needed, adjust the loop with your needle nose
pliers to make sure that it is centered over
the band of the ring. After we finish shaping
the band of the ring, we are then going to use our 24 gauge wire
to attach the bead. Placing the bead onto
our 24 gauge wire, we are then going to thread
the wire through one of the loops from the outside
to the inside of the ring. Pushing a short tail of
wire through the loop, we are then going
to wrap it around underneath the loop
multiple times. You can make this wrapping as long or as narrow as you want, but at least wrap it
four to five times so that the wire is secured
onto the band of the ring. Once you have wrapped it as far as you can
with your fingers, grab your chains
pliers to finish securing the wrapping onto
the band of the ring, pressing from side to side, as well as end to end to
squeeze the wrap together. With the first end
secured on the ring, we're going to slide the bead up into the center of the ring. And then we're going to
clip off the extra wire, leaving enough wire that we can thread it through and then wrap that tail of wire down around the loop like we
did on the first side. We can place the ring back onto the ring mandrel to help
us keep the correct shape. After we wrap the wire as far
as we can with our fingers, we can then grab our
chain ofs pliers to finish securing the
wire onto the ring. And then we have
finished the ring. A different way to
attach the bead is to simply thread the wire
straight through. So we go from the
outside inside, inside, outside as we thread the wire directly
through the first loop, the bead, and then
the second loop. And this creates
just a little bit of a different look when you're attaching the bead
onto the ring. Both options for attaching the bead onto the
ring work great, and it really depends on what you want the
ring to look like. I wanted to show
you this option as a reminder that when you're
creating wire jewelry, you really can just
do anything you want to create the jewelry
piece that you're making. These two rings are made with the two different
attachment styles. You can see that they
both look great, and it's really up to you what you want the
ring to look like. Now that you have finished
creating this statement ring, you have to check out this
video where we create an arched stacking ring that fits perfectly
with this ring. I hope you enjoyed creating
this wire jewelry with me, and thank you so
much for watching. Be sure to go check
out the rest of my channel where you can
find many more tutorials. Thank you again,
and I look forward to seeing you in the next video.
3. Elegant Stacks: Pearl Arch Wire Ring: Um to another tutorial, we are going to be creating
this arch ring which is perfect for stacking along with this solitaire pearl ring, which you can see
in this video here. Starting off our materials, we have an 18 gauge
solid brass wire which we will use to create
the band of the ring. Then we have our 24 gauge
copper coated wire, and this is the size
we need to attach our seed beads onto
the band of the ring. Then we have a ring mandrel
in the size of your choice, and we also have a metal file
to smooth down the wire. Then I have three sizes
of beads ready to go. For our pliers, we have
our needle nose pliers, chain nose pliers,
some wire cutters, and then we also have
our Nylon jaw pliers. To begin creating this ring, we are going to measure out
4.5 " of the 18 gauge wire. This is about how
much wire we need to create a size seven
or eight ring. Clipping the wire at
that measurement, we are then going to
fold the wire in half. Slowly bend the wire so that the ends are even
with each other. Now, I'm creating this
ring as a stacking ring. So I have here a pearl
solitaire ring that I just made in this video
here and I'm going to place that onto the
ring mandrel to help measure how I want to create
the arch of this ring. Using the solitaire
ring as my guideline, I'm then going to take
my chain of pliers to bend the wire directly over
from the arch in the wire. Bending both ends
of the wire out, we now have this little
bump or arch in the wire. Placing the whole piece of
wire onto the ring mandrel, we are then going to
shape it into a circle. Wrapping the wire tightly on the mandrel to create the shape, we can also then place
the solitaire ring on the mandrel and check the size of the arch against this ring to see
if it fits well together. With the wires crossed
opposite of the arch, then we're going to use
our chainos players and bend one end of the
wire directly up. Making sure that the
wires are criss crossed, we are going to take the
other end of wire and bend it directly down so that the two wires are wrapped
against each other. You want to create
these binds of wire as close to each other as possible so that those binds in the wire are sitting
right next to each other. We are then going to
bring the ring to the end of the mandrel and
press one end of the wire down so that we can begin wrapping it around
through the ring. Because this 18 gauge wire is pretty heavy and
stiff to work with, you will want to
use your chainos pliers to wrap this wire
around the band of the ring. Bending the wire down and
through the center of the ring, we will then pinch it with the chainospliers so that we can get a nice tight
bend in the wire. Bringing the wire up through to the other side of the ring, we are then going to
bend it over the top and securely press
the wire together. Turning the ring
around, we are going to use this same process to bend the other end of wire through the ring and begin
wrapping it as well. Pressing the wire
through the center of the ring and then
using our chain of pliers to press that bend into the wire so that it is
tight and close together. Gently squeezing the
wire together as you go to make sure that
this is secure, as this is what is holding
the ring together. Wrap each end of wire around multiple times until you are satisfied with how
the closure looks. Press this wrapping from end to end with your
pliers as you go so that it is tight and everything is pressed
securely together. Once you are satisfied
with the wrapping, then I like to bend the ends
of the wire to the inside of the ring and cut them off
there with the wire cutters. Then use your file to smooth
down any rough edges. Next, we are going to
begin attaching the beads. We are going to measure out
12 " of the 24 gauge wire. Cutting the wire to length, we are then going to
secure one end of the wire to one side of the arc. Begin by wrapping it with
your fingers and then finish it by securing it with
your chain nose pliers. Squeeze the wrapping from end
to end with your chain of pliers as you go so that
everything is pressed together. Then we can go back and
begin attaching the beads. Sliding a bead onto the wire, we're going to bring it all the way down against the arch. Holding the bead on the
outside of the arch, we are then going to
take the long end of the wire and wrap it down and around through the
center of the ring. You should wrap the wire one full rotation at the
least between each bead. I did two full wrappings in between each
bead that I added. Once we have secured
this bead on, we can then add another
bead onto the wire, bring it down against
the outside of the arch, and then wrap the long end of the wire around the
band of the ring. Then we are going to
repeat this process until the entire arch
is filled with beads. As we go, we are going to
use our chainles pliers to squeeze each wrapping between
each bead closer together. Once we have finished
adding beads, we are then going to create
a wrapping on this side of the ring that matches
the one on the other side. Clipping off the excess
wire, if we have any, we're going to use our
chainless pliers to secure and press down
the end of wire. And now you have finished
creating the ring. Wear it on its own or stack it with this lovely
solitaire pearl ring, which you can see how to
make in this video here. I hope you enjoyed creating
this wire jewelry with me, and thank you so
much for watching. Be sure to go check
out the rest of my channel where you can
find many more tutorials. Thank you again,
and I look forward to seeing you in the next video.
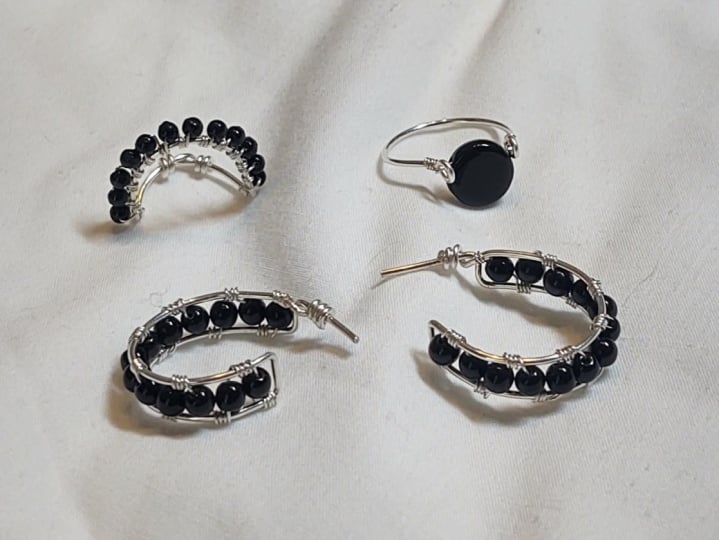
4. Timeless Pearl Hoop Earrings: Welcome back to another
video in a new tutorial. Katrina here with the
earrings that are probably some of my favorite
earrings to have ever made, which makes me super excited
to share them with you. Starting off with this 18
gauge solid brass wire, we're going to use
this to create the frame of the hoop earrings. Then we will be using a 24
gauge brass coated copper, and we need this small size so that we can string the
beads onto the wire. Of course, we have our
freshwater pearl beads, and I have three different
sizes ranging from probably a five millimeter down to two or three millimeter Cb. We're going to be using the
34 millimeter size beads to create the hoop earrings. I'm using a size eight
ring mandrel to shape the hoops and then I have a metal file to smooth
down the wire. Then for our pliers, we are going to be
using the round nose pliers, chain nose pliers. We have our wire cutters, as well as our Nylon jaw pliers. Now let's get into
creating the earrings. Using our 18 gauge brass wire, we are going to grab
the Nylon j pliers and straighten out
a length of wire. Placing the wire onto
the ring mandrel, we are going to leave a tail
hanging out over the edge. This is going to become
the post of our earring. Bending the wire three
quarters of the way around, we're going to bring
it straight up so that it crosses
with our first end. Now we have what looks
like a teardrop shape. We're going to then grab our chainnse pliers and begin creating the frame for
the hoop of the earring. We're going to take
the long end of the wire and bend it
background on top of itself to create the frame which we will then attach
the beads inside of. Using our chainnse pliers, we're going to grasp the wire just underneath the
post of the earring. Grabbing the wire in the
very tip of the pliers, we're going to bend
it over 90 degrees. Slightly over bending the wire will create a sharper angle. We're going to grab our
string of beads and place it next to the wire to see how wide we need to make the frame. Once we have a good idea on how wide this needs to be
so that the beads fit, we can then place it
into our chain of pliers and create a second 90
degree bend in the wire. After we know that the beads are going to fit into the wire, we are then going to
place it back onto the ring mandrel and wrap
the other side of the frame. Holding the wire firmly
onto the ring mandrel, we're going to bring
the other end around and draw it up next to
the post of the earring. Then we're going to clip off the wire even with the other end. Placing the wire back
onto the ring mandrel, we're just going to
make sure that it is all bent in the same shape. Now grabbing our
chain noose pliers, we are going to both
create the hoop and close off and
secure the frame. Leaving a tail, we're going
to place the wire into the pliers and bend
it over 90 degrees. Then switching to our
roundness pliers, we're going to place it
into the very tip of the pliers and bend the
wire straight up again. This end is going to be
the post of the earring. The other end of wire,
we are now going to grab our chaos pliers and bend over and wrap that around the
post of the earring. At the same level as
the first bend of wire, we're going to draw
the wire directly over creating a 90 degree turn. Placing the wire frame into Nylon jaw pliers helps
to hold it securely so that it doesn't
bend when we wrap the end of wire around
the post of the earring. To save our fingers as we're
bending this 18 gauge wire, we're going to use
the chaos pliers to do most of the wrapping. Using the wire
cutters, we can now clip off the excess wire. Using the chain of pliers, we are going to tighten
down that loop and do any adjusting that we need to
to the post of the earring. Now that we have created
our first earring, we're going to go
ahead and start creating the second earring, wrapping it on the ring mandrel to first create that
teardrop shape. Then we're going to use
our first earring as a pattern and guide to create the second
earring to match. Holding the pieces side by side, we're going to line them up
and then use our chainles pliers to begin creating the
frame on the second earring. Measuring the width
of the first earring, we're going to mark that spot
with our finger and then place the wire into the
pliers and bend over, so we can begin creating the
frame on the second earring, then wrapping it on
the ring mandrel to create that circular shape. Then lining up the ends of wire, we can snip it off
with the wire cutters. Back on the ring
mandrel, we're going to make sure the wire
is shaped correctly, and then we're going to
grab our chainnosepliers to begin creating the post of the earring and
secure the frame. Again, using the
first earring as our guide so that we know
where to bend the wire. Bending the one
end of wire over, we're then going to
switch to the round noose pliers and bend that
wire straight up again. Using the roundnos pliers
helps us to create a smaller bend in the wire that isn't as wide as when we
use the chain nose pliers. Then switching to
the chainnsepliers and the other end of wire, we're going to create
a bend in this end of the wire to meet and
match the other side. Now placing the whole frame
into the Nylon jab pliers, we're going to bend
that tail of wire around and secure
the wires together. Once we have wrapped
the wire around, we are then going to
take our wire cutters and clip off the extra wire. Then use the chain of pliers to finish securing and
pressing the loop together. Now we have created the frames
for both of the earrings, and we're going to
place them onto the ring mandrel and clip
the posts to the same size. We want to make sure
that the ends of the posts are extremely smooth, so take your time
filing it down. Now we're going to grab our
24 gauge wire and measure out 12 " of it so that we
can begin adding the beads. Now we are going to secure the 24 gauge wire onto
one side of the frame. Threading the wire through
the frame and then wrapping the 24 gauge wire down
towards the end of the frame. Use your chainose pliers
to help thread and wrap the wire and secure
it onto the frame. Depending on how wide you want the wrap
of the wire to be, will determine how much
wire you need to use. I gave myself enough to wrap the wire around
three or four times. Use your chainnse
pliers to press the wrapping from end to end and squeeze it
together as you go. Once you have secured the wire and the end is pressed down, slide the wrap to the
very base of the frame. Now we can begin adding beads. Bringing the wire down into
the center of the frame, we will then secure
it by wrapping the 24 gauge wire
onto the frame. You can put as many wrappings in between each bead
as you would like. I wrapped the wire
around about two times. Adding another bead,
we are then going to secure it by
bringing the wire to the opposite side
of the frame and wrapping the wire onto the
frame to match the other side. We're going to
continue adding beads, wrapping the wire in this back and forth pattern
where we add a bead, secure it onto the
frame, add another bead, and wrap and secure the wire on the opposite
side of the frame, going back and forth until the entire frame is
filled with beads. When we come to the
top of the frame, we are going to secure
the wire by wrapping it around multiple times up towards
the post of the earring, and then taking that
long tail of wire, wrap it around and around
to create this fun little cluster or nest of wire up around the
post of the earring. When we have finished
wrapping the wire, we'll clip off any extra
with our wire cutters. Then using our chain nose
pliers to secure and hide that little end of wire up into the wrapping
that we created. Once you have hidden and
secured that end of wire, repeat all of these steps to add beads onto the
second earring. Also, here's one more reminder to make sure that the
post of your earrings are very smooth so that there's nothing sharp or scratchy
when you put it on. I hope you enjoyed creating
this wire jewelry with me, and thank you so
much for watching. Be sure to go check
out the rest of my channel where you can
find many more tutorials. Thank you again,
and I look forward to seeing you in the next video.
 Katrina Anderson, DIY wire jewelry and craft tutorials