Transcripts
1. Introduction: Welcome to this class, and I have three
different earring designs that I'm super excited
to share with you. We are going to be
starting off with a Shamrock or clover
leaf inspired design, and we are going to be
using our round nose pliers to shape the wire and create
these loops in the design. Then we will be moving on to a little bit more
difficult design, the Trinity knot earrings, and we are going to be
tying a knot into a wire. And then we are going to
use our pliers to shape that wire into the
Trinity knot shape. Last but not least, we have a super cute butterfly
earring design, and we are going to be
using our round noose pliers to create the
butterfly shape. It's always fun to add stud earring designs to your repertoire of I
know How to make this. So let's jump on into
the videos and get started creating these
wire jewelry designs.
2. Shamrock Posts: Going to be making
some clover leaf inspired post earrings. This earring design
is so cute and it looks good in whatever
size you make it. And I'm going to show you two different sizes that
I made in this video. To begin creating the earrings, we first need to collect
all of our supplies, starting off with our wire. This is a 20 gauge silver
plated copper wire. You could also use a heavier
18 gauge wire if you prefer. Keeping it simple
with our tools, we have a pair of wire cutters, and then we have our
round nose pliers. We have our Nylon jaw pliers, and then we also have a file to smooth down the ends of
the post of the earring. Now that you know what we need
to create these earrings, pause the video, go grab your supplies,
and let's get started. Be in creating these earrings, we are going to pull out a
length of our 20 gauge wire. I always like to grab
the Nylon jaw pliers and smooth it out,
but this is optional. Now, to get started
with the earrings, we are first going to make
sure that we leave out a length of wire for the
post of the earring. I usually leave about a half
inch of wire for the post. Where you place the
wire into the pliers is going to determine the size
of your finished clover. For the clover that
I'm making right now, I'm going to place the wire
in the middle of the jaws. This is going to give me
a nice little earring that's not too big
and not too small. Wrapping the wire around
to create a loop, we are then going to slightly
pull the ends apart again so that it is more of a
teardrop shape than a circle. After adjusting the
shape of the first loop, I'm going to use my finger
to mark the spot that I created this loop so that my
next loop is the same size. Now, here's a helpful
tip and trick for you when you want to create a bunch of loops that
are all the same size, grab a piece of washi tape
and place it onto your pliers at the point of whatever size the loop is that
you want to make. So after you create the initial loop and
the size that you want, then you can mark that
spot with your washi tape, and then you're good to go. And all of your loops should
come out the same size. Now, creating our second loop, we are going to have now
a figure eight pattern. And for our third loop, we want to criss cross the wire, and we're going to
create a second figure eight pattern on top of this
first one that we made. Creating our third loop in the same teardrop shape and then we want to bend
it slightly over, making sure that we bend
it to the same size, and we're going to bring
the wire back around in the opposite direction to create our fourth loop and that
second figure eight pattern. As you create this fourth loop, make sure that you
bring that long end of the wire up over the
top of the design. Adjusting this
loop so that it is the same shape as the
other three loops, we're then going to grab
our wire cutters and snip off the long end of wire on the inside of
that final loop. Having finished creating
the clover design, we are now going
to bend this wire over to create the
post of the earring. Using either your
round nose pliers or your nylon jaw pliers, bend this post over so that it is sticking straight
out from the design. I'm also going to use
the Nylon jaw pliers to press the design together, and I'm just going to pinch the entire design all the way around so that it's
a little more flat. Now that we have
the clover design, we can go back in with our fingers or
pliers, if necessary, and do any adjusting that we want to the
design and also make sure that the end of
wire that is within the clover is not sticking
out of the design. Last but not least,
we need to grab our file and smooth down
the end of the post, testing with your finger
to make sure that there are no rough edges
or anything sharp. And with that, we have finished creating our first earring. Repeat all of these steps to
create the second earring. With our first earring for a pattern and our tape
marking our pliers, we can begin creating the
loops for our second earring. Remember to slightly
pull the ends back apart so that we don't
have a complete circle, but rather the loop is
more of a teardrop shape, and we end up with that
figure eight pattern. When you clip off
the excess wire, make sure that that end is pressed into the clover
and not sticking out. If you want to use
your Nylon jab pliers to press the design together and kind of tighten the wire up,
you can do that. And don't forget to
grab your file and smooth down the end on
the post of the earring. And once we have finished
this second earring, our design is complete. I also wanted to show you
what it looks like when you create this design with
different sizes of loops. And this all depends
on where you place the wire into your pliers. Both sizes here are so adorable, and it's completely up to you to what size you create
your earrings. And that's it for this tutorial. If you want to find more
tutorials like this one, be sure to go check
out my channel. Once again, thank you
so much for watching, and I look forward to seeing
you in the next video.
3. Trinity Knot Posts: This Trinity knot design is actually not as
hard as it looks. For our materials,
we will be using a 20 gauge silver
plated copper wire. Next up, I have my file to smooth down the
end of the post, and then for our tools, we will be keeping
it super simple by using a pair of wire cutters, our chain nose pliers, and our round nose pliers. Now pause the video, grab your
supplies and your pliers, and let's get started
creating this design. To begin, we are going to
pull out a length of wire, and this is totally optional, but you can straighten
it out with a pair of nylon jaw pliers or a piece of cloth or just in
between your fingers. We're going to start
off by creating this base part of the earring, and basically, we're going to be tying a knot into the wire. Bringing the wire around
on top of itself, we will then bring it up through that loop that we just created. We will adjust these
two loops of the wire until the design is as small or as big as
we want it to be. Now that we have our initial
knot tied into the wire, we can go in with our
round nose pliers or our chain nose pliers and adjust the design until it is the size
that we want it. We want these bends
in the wire to be sort of an elongated oval
or like a marquee shape. So that's what we're
going for as we are adjusting the shape of the wire. Now to create the
top of the earring, I'm going to wrap one end
of wire around the other. Using my fingers or you
can use a pair of pliers. We're going to gently bend
the wire here at the top of the design so that it has the same shape as the other
two bends in the wire. We want this wire on
the right side to cross over the wire that
is coming from the left, adjusting the design as we
go both with our hands and our chain nose pliers or needle nose pliers until
it looks how we want it. Now we can create the
post of the earring, and I'm going to take
this long end of wire and wrap it two times
around the short end of wire. Once we have wrapped it around, I'm going to grab
my wire cutters and clip off the excess wire. Then using the chain of pliers, we want to make sure that
that end is pressed down. Once we have tightened
that little wrapping, we can then go and create
the post of the earring. This is super simple because
all we have to do is bend the wire towards
the back of the earring. Now that the design is secured, I'm going to go back in
with my chainnsepliers and do a little more adjusting
to each of these loops. At the tip of the loop, I'm going to slightly
bend the loops inward so that the ends of the loop
are a little more pointed. Now, all we have to
do to finish off this earring is cut
the post to length, and I usually do this
at about half an inch. Now we need to grab
our file and make sure that that end
of the post is super smooth as this will be
going through our ear and we won't want any
rough or sharp edges. And now we have completed our
first Trinity knot earring. Now we are going
to repeat all of these steps to create
the second earring, bringing the wire around to create a simple overhand knot, and then using our round nose
or chaos pliers to adjust that knot shape until we have the same size as
our first earring. Checking the size against
our first earring, we can use our
chainospliers to adjust the design until it
matches the first earring. And as we go creating
the second earring, keep comparing it to the
first earring that we made so that we can create
them to be the same size. Remember, as you go
to make sure that you cross the wire in the
correct direction, bringing that wire
from the right side up over the top of
the wire on the left. Using our chaos pliers to
press the loops narrower, as well as making sure that we bend the ends so that the
loops are more pointed. And then we can go and create the post by wrapping the
long end of wire around the short end of
the wire and using our chain nose wires to press the end in against the post. Then bending the wire towards
the back of the earring, we can cut off any excess
wire with our wire cutters. Next, we want to make sure
we grab that file and smooth down the ends to
make sure that there are no rough or sharp edges. And with our chain nose pliers, doing any final
adjusting to the design, as well as checking
to make sure that your posts are the same length because I didn't cut
mine the same length, so I'm going to fix that now. Now we have completed our
second Trinity Knougt earring, and our set is complete. Hope you enjoyed
creating these earrings as much as I enjoyed
sharing them with you. Give this video a
thumbs up and check out my channel where I have many
more wire jewelry designs. Once again, thank you
so much for watching, and I look forward to seeing
you in the next video.
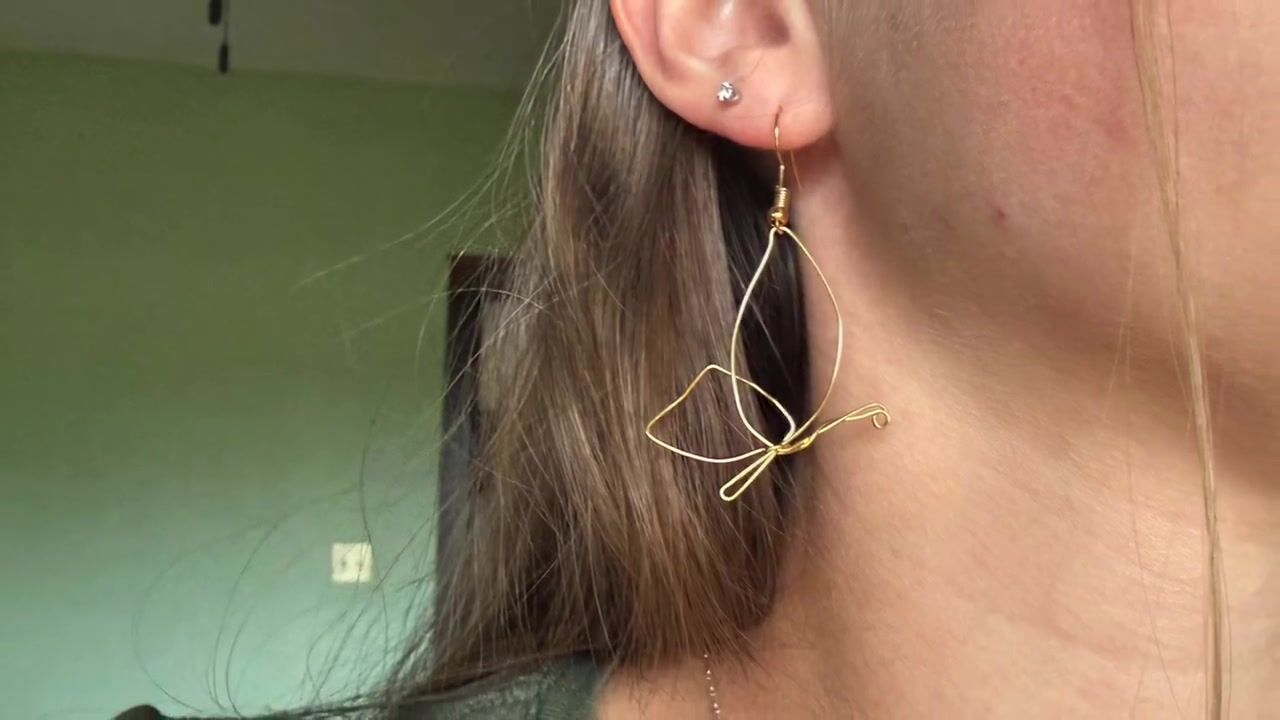
4. Butterfly Posts: Hello, and welcome
to a new tutorial. Katrina here, and today
we are going to be creating these little
butterfly post earrings, which are absolutely adorable. So let's jump right into what we will need to create
these earrings, and that is going to be a 20
gauge wire of your choice. And today, I'm using a rose
gold copper center wire. We have a file to smooth
down the end of the post, and for our tools, we will be needing a pair
of chain nose pliers, our round nose players, and some wire cutters. Now, pause the video, go grab your tools
and your supplies, and let's get started. To begin, we're going to
pull out a length of wire, and using our round nose pliers, we're going to create a
tiny loop at the very tip of our pliers in the
very end of the wire. Then readjusting the
wire in the pliers, we're going to place it
now at the very base of the jaw of the pliers to
create a larger loop. We want to leave a little bit of space between that
first loop that we created and then bend the wire around to create
a teardrop shape. And now we have created our
first half of the butterfly. We're going to do this
on the other side, creating a large loop, and we want to make
sure that when we bring the wire around for
this large loop that we bring the wire
across the top of our design and then down the
center of the butterfly. This second loop created, we can adjust it so that
it matches the first one so that both
sides are identical. And then we are going to create a second tiny loop like we
did with the first one. Slightly bending the wire over so we have room
to fit our pliers in. We are then going to bend this
wire around and make sure that you bend the wire
underneath the entire design, as this is where we will
then create the post. Holding the design with
our chain of pliers, we will then bring that long
end of the wire directly down straight out from the
design to create the post. Then using our wire cutters, we can cut off the extra wire
to the length of our post. And I usually cut the post to
be about half an inch long. Make sure you file, file, file the end of the post. We want it to be super smooth. Make sure you test it with your finger to make sure that it is completely round
and there are no rough or sharp edges. And now we can go back
in if we want to and do any adjusting or moving of
the loops that we need to. And with that, we have created our first butterfly earring. Repeat all of these
steps to create the second earring
and complete the set. And then you will have finished creating these butterfly
post earrings. These were super simple, so fast and easy to make, and I hope you enjoyed creating
them as much as I did. Give this video a
thumbs up and then go check out my channel if you want to see more tutorials like this. Thanks so much for watching. I hope you enjoyed this
wire jewelry design, and I look forward to seeing
you in the next video.
 Katrina Anderson, DIY wire jewelry and craft tutorials