Transcripts
1. Welcome to my Class!: Hi, I'm Sagi Babu
from South India. Welcome to my class. This is
my first skillshare class. In this class, we have to
learn about water painting. I will guide you through
painting vibrant colors. Whether you are
new to watercolor or have some experience, join me in each step
and feel free to add your personal touch
if you are more advanced. I will share a lot
of tapes to improve your painting skills and explore the possibilities
of watercolor. I want to make watergulor less
intimating for beginners, making learning relaxed by fun. By the end, you might surprise yourself with
a beautiful painting. If this class feels
too hard or too easy, check out my other classes
for different skill levels. In this class, we
will start with a loose and expressive approach, adding more details as we go. We will use birds to explore vibrant colors and
see how they can make your paintings standard
the techniques we will cover all versatile and can be applied to other
bird subjects, enrolling a high resolution
image of my painting. As a guide, we will
focus on painting today. I have included templates
for sketching and color charts for selecting
harmonious color. Today, we will cover
the essential materials and equipment needed
for painting. Creating an outline for
your painting through sketching basic techniques to finish your initial painting. Tips on avoiding
common mistakes, selecting the appropriate
colors for your artwork. Blunting colors, and
generating textures for various effects, corrections
and enhancements. Adding finishing touches that significantly
enhance your piece. I will share tips throughout the class including how to
turn mistakes into advantages, making the painting
process stress free. I will detail the
supplies I use. The content is in short videos
for easy understanding. You can pass anytime. If you have questions, post them below and
I will respond. Click Follow To stay updated on new classes and follow me on Instagram for my latest work. If you want to create
colorful paintings and learn watercolor tips,
let's get startered.
2. Class projects: I appreciate your
trollment in the class. Thank you. Today's focus is on the delightful
world of painting. Birds. We will be taking a relaxed approach to capture the lively essence
of these creatures. Birds, with their
vibrant energy offer an excellent canvas for honing various
watercolor techniques. Throughout the sh, we will
explore different pokes, experiment with textures,
harmonize colors, and use negative space to
add depth our paintings. The beauty of today's style
lies in its simplicity. No need for intrdicate
detailed drawings. This approach aims
to minimize stress, providing you with
the freedom to express yourself and
explore new techniques. Whether you prefer your
loose interpretation or more realistic
representation, the choice is entirely you. Feel free to replicate
my drawing or venture into your own autistic
interpretation to assist you. I have included my paintings in the resources for reference, alongside the reference photo and a tracing
template for added. Please share your work in
this student project gallery. You can draw two images
or two paintings. Click on the Create Project
button under the Project tab, where you can upload
a cover photo, give your creation a title, and share a brief
discussion of your process. I'm here to provide feedback and hear about your
insights along the way. Don't hesitate to use
the template provided. Having an accurate
underdrawing is crucial for a
successful exploration of the water color medium. Once your projects are uploaded, they will be showcased
in project gallery. Take some time to
explore and engage with the creations of
your fellow classmates. Liking and commending
on each other's work is a wonderful way to build
a supportive community. Now that you have a clear understanding of
what the class entails, let's embark on the
autistic journey together. Starting with the discussion of the equipment and
materials I will be using. I'm genuinely excited to witness the beauty
you will create.
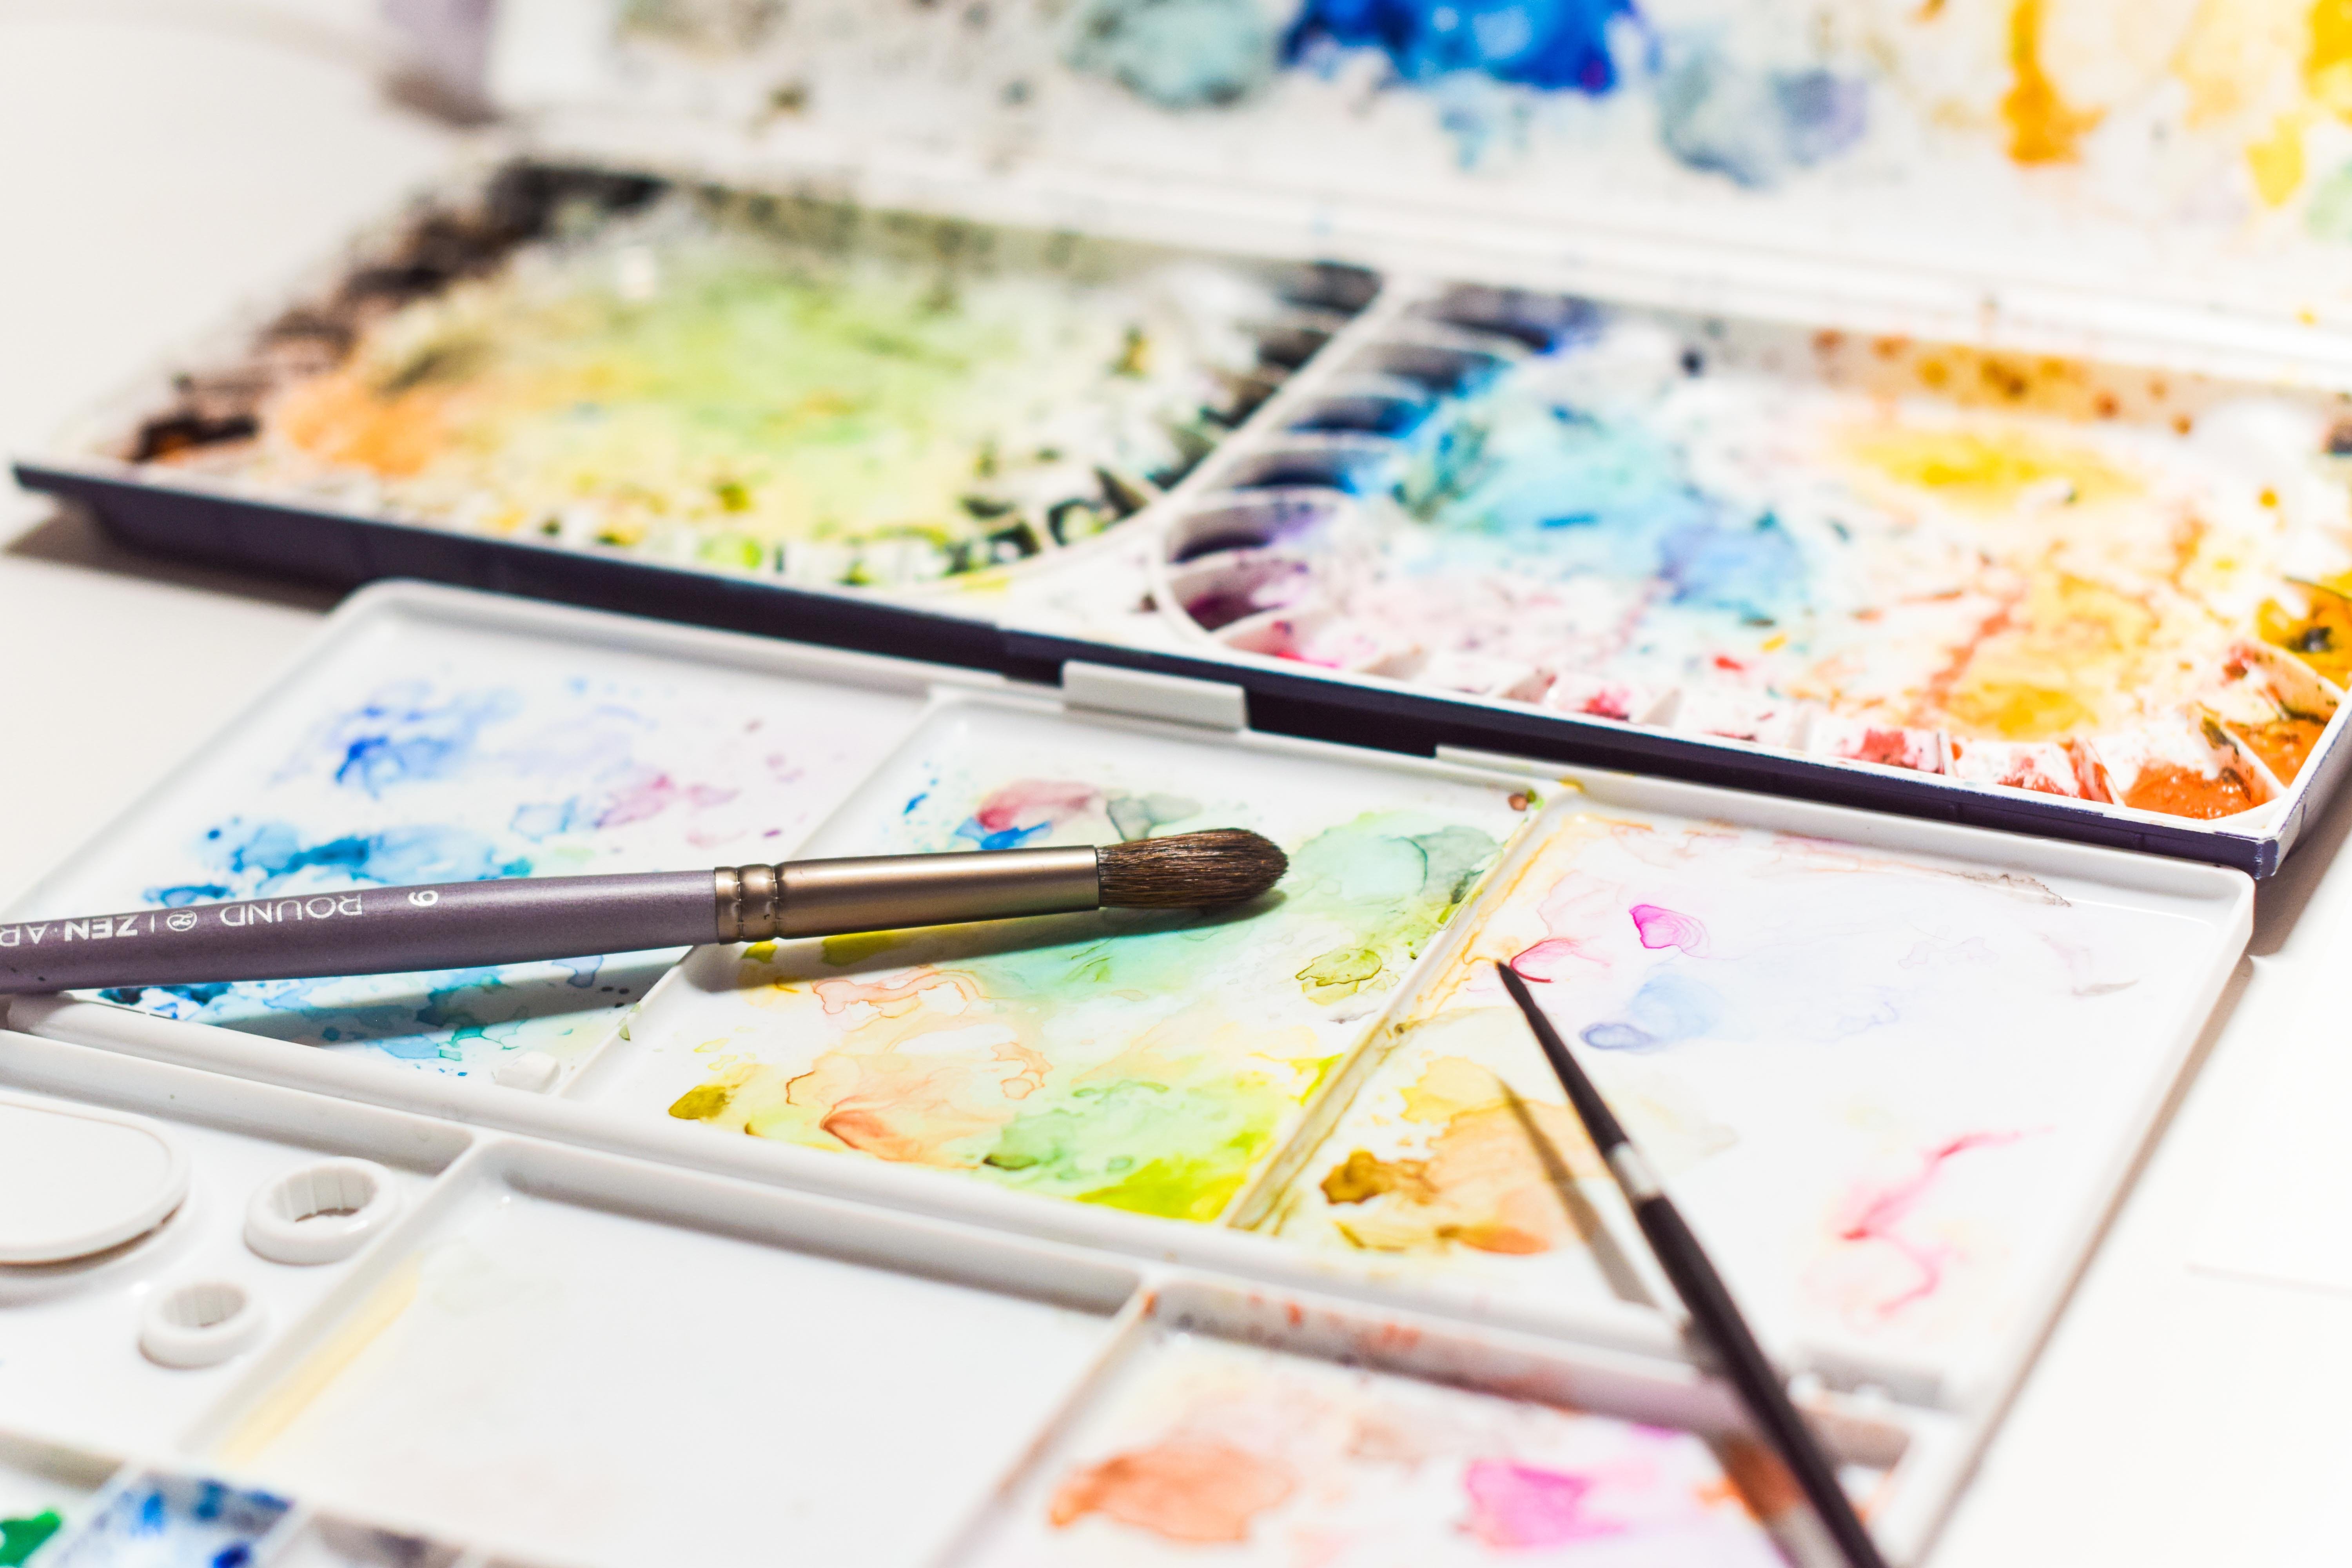
3. Materials and Supplies: Let's go over the
fundamental materials and supplies required for starting your water color
painting journey. We will begin with the colors
I personally use matter, largely influenced by
individual preferences. My palette consists of 12 stable colors
filled in cake form. Towards the end of
the painting process, I often employ white coche
for subtle highlights. And it's worth
nothing that I don't stick to a specific
brand for these colors. They are readily
available across brands. For simplicity,
in today's class, we will exclusively
use two brushes. However, I'll introduce
other option to first. One of the least is the Mopres, which excels at
broad breast Stokes and filling larger
areas of washes. These brushes offer precision with their fine tips
and durability. However, it demands
a Teddi hand, as it can be more challenging
to control due to its feel free to use your personal
favorite brushes as well. Now onto paper, the quality of which significantly impacts
your painting experience. Inexpensive paper tends
to crickle easily and is less forgiving, making
corrections difficult. Opting for high quality paper
like cotton based arches, not only allows
multiple reworking, but also enhances
pigment integration, minimizing the
likelihood of errors, and leading to
superior paintings. Additionally, some
miscellaneous materials prove invaluable. Finally, masking tape is useful
for securing your paper, preventing it from shifting
during the painting process. That covers everything essential
for you to paint alarm.
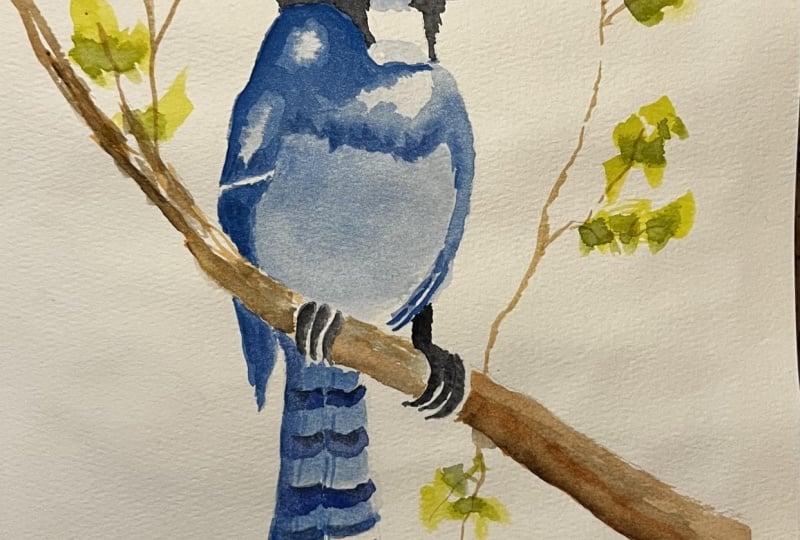
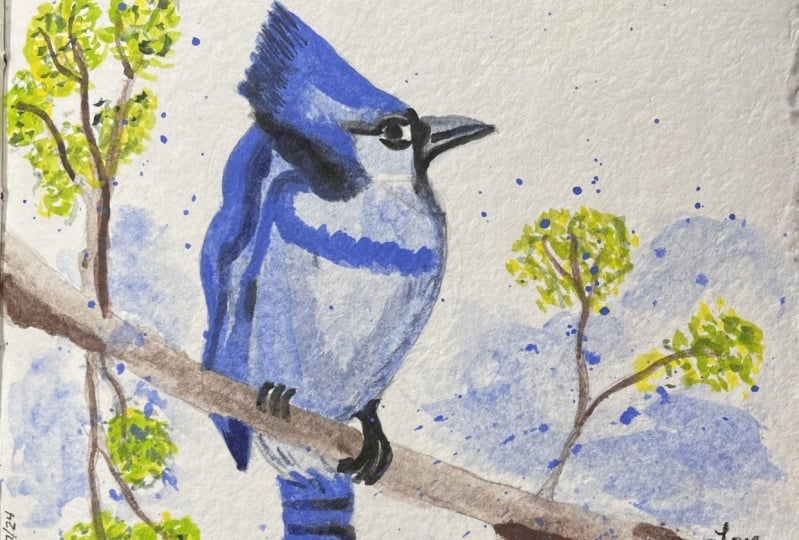
4. Day 01: Bluejay sketching: Drawing a blue can be a fun
and rewarding experience. Let's break it down
into simple steps. We will start with
a basic skitch and gradually add details. I will guide you
through the process of drawing Namblugi in
empate mood Depth. Start by lightly skitching
a medium sized oval for a body and a smaller
circle for the head. Connect them with a slightly
curved line for the neck. This is just the initial
framework keep your lines. Extend two elongated
triangular shapes from the sides of the
oval for the wings. Make them slightly rounded at the tips riff in the head By adding a
turf or crust on top. Blue Es have a distinct
crust on their hands. Connect the head to the
body smoothly for the beak. Draw a pointed sheath extending from the front of the head, curving slightly
downward for the tail. Draw a fan like sheep
extending from the back of the oval Blue Es have a relatively long tail
compared to their body. Draw the legs extending
down from the body, making them strong and sturdy. Add three forward pointing to and one backward pointing blues. Tallons for pitching
on branches. Further details, add further
details to your blue jay. The feathers on the
wings and tail can be suggested with curved lines following the shape of
the wings and tail. Pay attention to the
overlapping feathers, creating a sense of depth. Draw some finer details on the body indicating the
texture of the feathers. Position a circular
shape for the eye, towards the front of the head. Inside the eye, draw a smaller
circle for the people. Add a few curved lines
around the eye to indicate the facial markings that
are typical of blue jays. Review your drawing and make
any necessary adjustment. Add any final details
you might have missed. Erase any unnecessary guidelines and lines to clean
up your drawing. Remember practice. So feel free to dry drawing blue jays
multiple times T you were comfortable dot a city to experiment with different
poses and styles as well. If you won't add a
simple background, like a branch or leaves to
give ever blue a context, this step is entirely optional and depends on ever preference. Add more detail as you like.
5. Day 01: Bluejay watercolor: In this class, we're going to
water coloring the blue J. First we take the brush, wet your small rounded
brush in water. Gently tap excess water on the rim of the
water container. Load the brush with light blue color paint by gently swelling
eight in the palette. Applying the base color with the light even stokes.
One Wal paper. Use a combination of horizontal and vertical
Stokes for uniform coverage. Work quickly to
avoid drying lines. Keep a weight edge
for smooth blending. Consider layering
for a richer tone, allowing each layer to dry
before adding the next. Adjust the water to paint ratio for desired
transparency and intensity. Clean your brush.
Bethen color changes to avoid unintended mixing. Now applying dark blue color to the neck and wings for death, being by mixing a deeper shade
of blue on your palette, load your small rounded brush
with a dark blue paint. Apply the ker color to
the neck and wings. Using controlled strokes
start with a thin layer, gradually building up depth. Concentrate on areas that
would naturally be in shadow. Allow each layer to dry
before adding more. To avoid matins, use a slightly dry brush for textured effects in
feathers or details. Blend the edges of the dark blue with the
existing light blue. For a seamless transition, consider layering with other
colors, enhance dimensions. Step back occasionally, to access the overall balance
of dark and light tones. Now, applying dark blue
color to the tail, Mix a rich dark blue on
your water color palette. Load your small rounded brush with the concentrated
dark blue pigment. Apply the dark blue to the tail. Using controlled breast strokes, start with a light layer, gradually intensifying
the color for depth. Consider the natural flow and direction of the
tail. While painting, allow each layer to dry before adding subsequent layers
to avoid bleeding. Now create a washing
effect by adding water. To your dark blue mixture. Apply the diluted dark blue wash over specific area for
a subtle planted look. Use a larger prey for broader washes and
softer transitions. Now we apply light
blue to the blue jays. Chia makes a soft
and light blue tone only for waterclar palette. Small rounded brush,
tapping of excess water, Lower the brush with
a light blue paint, ensuring a smooth consistency. Apply the light blue toe to the chest area With a
gentle controlled stokes, use short breasts to
follow the contours of the keep the application initially building a place
for decide intensity. Blend the edges of
the light blue with the surrounding colors for
a seamless transition. Now we can add black color to the blue jays Nick for detail. Use a fine tip bras
for press detailing. Now we can add black color to the blue jays eyes and beak. With the details, create a small amount of intense
black on your palette. Switch to a fine tipped
brush for precise work. Load the brush with
the black paint, ensuring a controlled amount. Take a little amount of paint. Paint the black
color carefully on the blue jays eyes for piple, keep the people
slightly off center for a more natural look paint a thin line for the upper beak following
its natural curve. Had a smaller line for the
lower beak meeting at the tip. Use a light touch to avoid overpowering the
delicate features. Consider leaving
a tiny high light in the eyes for realism. Allow the black details dry completely before making
any further adjustments. Adding some more details
with blue as crust. Choose a fine tipped brush for detailed work load the brush with the blue paint
ensuring precision. Outline the crust with
light controlled Stokes. Define individual feathers
by adding short fine lines. Vary the intensity of blue. For a dynamic and
textural effect, consider adding a touch of shadow along one
side of the crest. Now we are adding
black for the legs. Choose a fine tip brush for
detailed work on the legs. Load the brush with the
diluted black paint. For controlled application paint the thin legs with careful, precise strokes,
emphasis joints, and subtle details
without overwhelming. Keep the application
light initially. Adding more if necessary, blend the edges of the black with surrounding colors
for a natural look. Allow the black details on
the legs to dry, completely. Add some branches as a back road using brown color and
green color for leaves, Make some brown toe on
your palette for branches. Choose a medium sized
brush suitable or kick the same load the brush with the brown paint, ensuring a fluid consistency. Paint the main
branches with leaves. Organic lines across your paper, add smaller branches branching
off for a realistic look. Allow the brown to dry before
proceeding to the leaves. Make a vibrant green ever
palette for the leaves. First we apply light green, then darker ones switch the smaller branch suitable
for finer details. Load the brush with green paint, keeping it slightly
diluted for transparency. Tap the pressure to create
clusters of leaves along the branches varying the
sizes for death and interest. Now we are adding some
more details with blues tail mix innuences, blue tune for the
tail on your palette. Choose a medium sized brush
suitable for detailing. Load the brush with
the blue paint. Maintaining control paint
individual tail feathers using delicate flowing Stokes vary the intensity of blue to
create dimension and interest. Add subtle lines for feather
texture and direction. Use a slightly drier brush for the details and highlights. Assu allow the
initial layer to dry. Before enhancing details, consider adding hints
of shadow depth, Now we are complete
the blue jay.
6. Day 02: Humming bird sketching: Now we are going to
draw the humming bird. Basic shapes start by sketching a small oval for the humming birds body
tilted slightly forward. Add a small round head
at the top of the oval, maintaining a proportional size. Draw a long, curved
beak extending from the head pointing downward
like a thin tube. Create two large, elongated oval shapes on each
side of the body. For the wings, connect the wings to the body with a slightly curved line forming
the humming birds torso. Draw a smaller tapered oval at the back for the tail
with lines extending. Formate define the tail
feathers by adding thin, curved lines that
spread out gracefully. Incorporate a
circle for the eye. Placing eight on the head to give life to the hummingbird. Now we can draw the wings and feathers begin by outlining the basic shape of the hummingbird's
wings using elongated, curved lines on each
side of the body. Add details to the wings
by drawing a series of small connected curves
to the primary feathers. Create the secondary
feathers by adding additional curved lines slightly shorter than the primary ones extending from the same points. You emphasize the bird's
delicate nature by making the feathers near longer
and more tapered. Draw a few scattered
shorter lines along the edges of the wings to indicate the texture of
individual feathers. Add a subtle curl
to the outer edges of the wings to give them mere natural and
flowing appearance. Use light quick stokes to su, suggest the overlapping
and layering of feathers, especially around
the wing joints. For the tail feathers,
draw slender, elongated shapes extending from the tapered oval at
the back of the bird. Now withdraw the neck details
and beak of hummingbird. Extend a slender, curved line
downward from the back of the hummingbird's head
to create the neck kick. The neck graceful and slender, maintaining the bird's
alanine proposition. Add a small round
eye on the head, ensuring it is placed
towards the friend. For a natural look, draw the beak by
extending a thin, tapward line from the front of the head, curving
slightly downward. Make the beak
pointed and delicate resembling a tube
with a subtle curve. Consider the angle and
position of the beak, ensuring it complements the over on pose of
the humming bird. Pay attention to the
size of the eye relating to and the placement of the
beak for proper proportion. Add a small curved line below the eye to indicate
the bird's cheek. Adding a touch of detail. Review the neck. The tiles adjusting
as needed to achieve a harmonious and
lifelike depiction of the humming birds
head and neck.
7. Day 02: Humming bird watercolor: With the upper body area
of the humming bird. With the clean brush tip, clean water, low dever brush. With the prepared low green
mixture ensuring moderately we consistency applying
the weight paint onto the da upper body. Gentle controlled stopes allow the colors to blend naturally. Taking advantage of the wet on dry technique
for defined edges. If needed, layer additional
washes for depth and intensity and the paper is
still damp but not overly met, then we can apply light
green and green for more depth with the upper body base layer dry. Makes a lighter green by diluting the original
yellow green mixture with more water with the area where you want to
apply the light green. Keeping the
surrounding paper dry. Apply the lighter green paint
using controlled stops, allowing it to
blend slightly with the existing layer for the dog. Cream mixes a deeper shade
by adding a big more green, or even a touch of blue to the
original yellow green mix. Apply the door creen
to specific areas, such as the shadows or
areas in the background. Using slightly drier brush
for more defined edges utilize the wet
right technique to maintain control over
the paint application. Ensuring the paper
is not overly wet, allow the colors to
interact naturally, but mindful of the drying times to avoid intentional blending. Now we draw the eye
and be black color. Wait for the green layers to dry completely before
adding details like the And peak makes a
concentrated black using a small amount of water for a bold pigment at a fine tipped brush and carefully draw the
humming birds eye, starting with a small
dot for the people, mix a slightly diluted
black for the beak, ensuring a balance between
darkness and visibility. Beak area with a clean, dumb brush, employing
the ton right technique. Applying the diluted black
to define the beak shape. Leaving space for
highlights if desired. Now draw the tail details
with black color. Once the body is dry, mix a concentrated
black water color for the tail details with the area where paint the
tail using clean dam brush, with a fine tipped brush, carefully draw the tail feathers starting from the base
and extending outward. Vary the pressure on the brush to create thin and thick lines. Mimicking the delicate
nature of feathers. Add details like
feather veins and subtle texture by using controlled Stokes
and a steady hand. Now we learn how
to draw the neck and the lower body
with the peach color. Allow the previous layers to dry completely before moving on. The neck and lower body mix a peach color by combining a soft red and a hint
of a low one palette. The area you want to paint
with a clean damp rush. Using on tri technique, load your brush with
the peach mixture, maintaining a moderately
weight consistency for smooth application. Apply the peach color
to the neck and lower body with gentle
controlled strokes, allowing for natural blending, additional washes if
you desire more depth, ensuring the paper is damp
but not overly weight. Now we'll learn how to draw the wings in detail
with peach color. Ensure the body and other
layers are completely dry. Before starting the wings, mix a peach color by blending a soft red
and a touch of air. Low onur palette with the wing area with
a clean damp brush. Using the ton right technique
for better control. Lowdver brush with
a peach mixture, keeping the paint moderately
weak for smooth application. Start with the leading
edge of the wing. Using gentle strokes to
create the basic shape. Add subtle details like
feather lines and veins. Using a fine tipper brush, keeping the details
soft and delicate. Vary the intensity of
the peach color to capture light and shadow on
different parts of the wing. Allow the first layer to dry, then access if additional layers are needed for
depth and richness. If necessary, use a clean, damp brush to blend
or soften edges for a more realistic
and cohesive look. No. We can add the neck details. Wait for the pach
layer on the neck to try completely
before adding details. Mix a slightly darker beach
or soft brown neck details. We the specific areas
you want to enhance with details using a clean damp
brush in the weight on. Try ten loader brush with a darker peach
or brown mixture, ensuring a controlled
and fine consistency. Add feather lines, shadows
or mocking along the neck, following the natural
control of the humming bird. Keep the details soft and delicate to maintain the
overall elegance of the bad. Allow the added details
to dry completely before assessing further adjustments
or enhancements are needed. Now how to draw the
legs using cracular, ensure the body and other
layers are completely dry. Before starting on the legs, choose a suitable
craculor for the legs, considering a soft
brown or gray, apply the craclar
to the Dab area using controlled Stokes to
define the shape of the legs. Now we can learn how to draw
the final details on wings. Confirm that the
previous layers, especially the wings
are completely dry. A slightly darker beach
or soft brown For the final wing details
specific areas on the wings using a clean, damp brush with a ton right technique lodiverbrush
with a darker color, ensuring a fine and
controlled consistency. Add intricate feather lines, subtle mockings or wings to enhance the realism
of the wings. Keep the details delicate, following the natural pattern and contour of a hummingbirds. Allow the final details to dry completely before assessing
the overall impact. Finally, we can add some
background technique. Apply the chosen
background color with broad sweeping strokes, maintaining a consistent wash. Blend the edges with
the humming bird using a damp brush for
the seamless transition. If you want to
texture background, sprinkle a bit of salt onto
the bit paint and let it dry, allow the background to dry completely before deciding if additional layers are needed, now we can complete
the Humming Bird.
8. Day 03: American Goldfinch sketching: In this lesson, we
have to learn how to draw the bird
American Goldfinch. Step step, creating a
detailed stepytep hide for drawing an American
Goldfinch involves breaking down the process into
manageable pots. Here's the guide to help you
pencil American Goldfinch. First of all, find clear
reference images of American gold finches to understand their anatomy,
colors, and detail. Then start with the light
and simple outlines, each using an HP pencil. Draw the basic shapes to outline the bird's body head in pay. Pay attention to proportions. You can start with basic shapes, refine the head by adding
details like the eye, beak, and facial markings. American gold fines have distinctive black wings and
a black cap on their heads. Sketch the y beak shape
and the cap accurately add the main feather groups, keeping in mind the
direction of the feathers. Gold fines have yellow plumage and their feathers
can have fine steals. Use short light Stokes to
represent these details. Draw the wings by adding the primary and
secondary feathers. Pay attention to the wings shape and the visible black markings. Extend the tail feathers, considering their
length and arrangement, add finer details like
the bird's feet and any other markings or features unique to the
American Goldfinch. Take your time to capture the intricacies and make
adjustments as needed. Begin shading the bird to
add depth and dimension. Use a range of pencil
from to each light to do to create a smooth
transition of tolls.
9. Day 03: American Goldfinch watercolor: In this class, we have
to learn about how to water paint the
American gold finch. First, we starts with base
color, base yellow color. Begin with a light
pencil sketch of American gold to finch
on watercolor paper, mix a light yellow wash
using watercolor pigments, ensuring a fluid consistency. Slightly apply the
light yellow wash onto the paper in the
shape of the bird, allowing the paint
flow naturally. Use a smaller brush for finer details and
feathered areas. Maintaining the
ton dry technique, we can cover completely the low, allow the base
yellow layer to dry completely before adding
additional layers. Shading and definition. Now we can add some depth
with yellow or color. Ensure the base yellow layer
is completely dry before proceeding mix a
darker yellow by adding a touch of brown or
orange to your palette. Now we can apply black color for tails and wings in detail, mix a concentrated
black water color, ensuring a thick but
workable consistency. Confirm that the
base layers are dry. To prevent unwanted
bleeding of colors, use a fine tipped brush
for precise application. Tail and wing areas. We can start with wings. Employ the weight on Try
technique by applying the back black pigment
to the dry paper. Start with the light, stokes outlining the feathers
and structure of the tail and wings gradually
build up the black color, intensifying the
shadows and details. Pay attention to the
reference image. Replicating the
intricate patterns of the bird's feathers feather
the edges of the black. To create a smooth transition with the surrounding colors. We can add in black color on
the head and draw the eye. Mix a concentrated
black water color with a fine brush
for detailed work. Apply the black pigment using the whiton right technique
to create the bird's head. Start with a light outline following the contour
of the head and beak. Gradually add layers,
intensifying the black. Shadows and defining features, pay special attention
to the eye area, leaving it unpainted or
with a faint outline. Now we can draw the legs and
beak with light brown color. Confirm that the
surrounding areas are dry. Before focusing on
the legs and beak, mix a light brown
water color with the or orange or
yellow for warmth. Choose a fine, brisk
suitable for detailing. Apply the light brown
color to the dry paper. Using the wet on dry technique, start outlining the legs and
beak with gentle strokes, gradually building up the color. Now we can move into
adding details and depth with darker colors
on the wings and the body. Adding details or the must in
watercolor or any painting, we can adding details. Now first, wait for the as lays on
the wings and body to dry. Completely mix darker
watercolors like deep browns, grease for added depth. Employ the ton right technique. Applying the darker colors, selectively focus on shadow areas and
feather details. Working in small sections. Working in small
sections gives you more accuracy and enthusiasm. Build layers,
gradually intensifying the darkness for a
realistic effect. Finally, we add
some branches and flows once again confirm that the bird and
surrounding areas are dry. Before adding branches and flows mix a brown water
color for branches, keeping it relatively fluid. The wet on dry technique
to paint the branches, allowing for controlled Stokes, vary the thickness
on direction of the branches to create
a natural appearance. Let the branches dry before
moving on to the flowers. Mix a soft pink water
color for the flowers adjusting and the intensity
to your preference. Apply the pink
color to dry paper. Using the wet on dry
technique for floor details, keep floor shapes simple. Using delicate stops for petals, introduce subtle variations in pink tones for a
more realistic look. The entire composition to dry, truly ensuring the branches and flaws complement the
bird without smudging. Finally, we complete the water
paint American cold finch.
10. Day 04: Common Loon sketching: In this class, we
have to learn how to draw the word
common lo stapistic. Creating a detailed
pencil drawing of a common loom involves
several steps. Below is a step by step guide
to help you draw this bird. Make sure to have the necessary drawing materials
such as pencils, erases, paper, and a reference image of a common loan reference image. Find a clear reference
image of a common loan. This will help you
understand the birds features, proportions,
and details. Start with the light pencil to sketch the basic shapes
of the common lo. Use simple shapes
like circles and ovals to represent the
body, head and beak. Pay attention to propusions. After drawing the basic shapes, come to the outline. Refine the basic shapes
by adding more details. Outline the body, nick and
beak using a darker pencil. Pay attention to the curves
and angles of the bird. The most important
feather details add feather details to the body. Loons have sleek
waterproof feathers. Use short, fine lines to
represent the texture. Focus on the direction
of the feathers, especially around
the neck and wings. Eye and beak details draw the eye and beak with
attention to detail. The eye should be round and the beak should have a
slightly curved shape. Shade the beak to give it
a three dimensional look. Wing details draw the wings. Paying attention to the
feathers direction. Common loans have
distinct wing patterns. Use lighter pencil strokes for the under parts
of the wings, and darker strokes
for the upper parts. Add shadows to give
your drawing tip. Identify light source in
your reference image. And shade the opposite
side of the bird. Use various pencils
for darker areas. If you want to add
a realistic touch, draw a gentle water
reflection beneath the bird. Use horizontal lines and shading to represent
the water surface. Review your drawing and make
any necessary adjustments. Refined details,
correct proportions, and ensure that your lines
are clean and precise. Add any final touches, such as background elements
or additional details. Remember to take your
time and practice. Patients don't be afraid
to experiment with different shading techniques and pencil grades to achieve
the desired effect.
11. Day 04: Common Loon watercolor: Welcome to the class.
In this class, we have to learn about
paint, Common Lone. We can begin with
the red color eye. Start with a light pencil
sketch of a common los, basic shape on watercolor paper. Makes a vibrant red
watercolor paint and apply it lightly
to the eye area, leaving some white highlights. Use a clean damper to soften the edges of the red
paint for a natural look. Next, we can draw the head and peak of
loon with black color. Begin with the light
pencil sketch, outlining the shape of the loon's head and peak
on watercolor paper. Makes a deep black
watercolor paint and apply eight to the head, cleaving some areas
light for highlights. A clean, damp brush to blend and soften the edges of the black paint for
a smooth transition. Add layers to enhance shadows
and create dimension. Paying attention
to the contour of the head paint the beak, with the strong black, ensuring to leave a white high
light along its top edge. Use a fine brush to
add details such as the eye nosted and
subtle feather textures. Now we move into draw the neck and tail area
with black color. Apply a light wash to the neck and tail area
for a weight surface. Makes a dark black
watercolor paint and carefully paint the neck, leaving some areas
lighter for highlights. Use a clean damprush to blend and soften the edges
of the black paint, creating a smooth transition. Add layers of black paint to build shadows and
define the condos, the neck and tail. Pay attention to the
feather patterns, using fine breast strokes
to suggest texture. Paint the tail with
a strong black, leaving space for high lights
and subtle variations in color allow the layers to dry before adding tiles
like small feathers, ensuring a realistic
and dynamic appearance. Consider adding
reflections of the neck and tail in the water
for added depth. Now we can move into add
wing details for load. Is the most important area. Wing details sketch
the basic wing shape lightly with a pencil. On watercolor paper. Makes a dark black
watercolor paint and carefully paint the wing, leaving some areas
lighter for highlights. Patterns with small circles. Use a clean, damp brush to
soften the edges and blend the black paint seaming
seamlessly into the body. Add layers of black
paint to create shadows and emphasize the
contours of the wing, paint the primary and
secondary feathers. Using fine brush strokes, following the natural
curvature of the wing. Leave some areas of
the feathers lighted to suggest high
lights and dimension. Pay attention to the details
near the wing joints. Adding subtle
nuances for realism allow the layers to drive
before refining details like feather edges and
additional shadowing. Now we are add nick details
and feather details of makes a dark black
watercolor paint and carefully paint the nick, leaving some areas
lighter for highlights, right lines or
running on the neck, the lines or vertical. Use a clean, damp brush to
blend and soften the edges, ensuring the smooth transition between light and dark areas. Add layers of black
paint to the neck, building shadows and defining the curvature of the feathers. Paint individual feathers
using fine brushes, paying attention
to their direction and overlapping patterns, leading spaces between lines for highlights and variations in
color to suggest texture. Finally, we adding
water effect and the background details apply the blue green tones to
the weight background, allowing them to blend naturally
for a watery appearance. Add darker blue hues, clues to the one. To create depth and contrast. Use a clean damrh to soften
edges and blend colors seamlessly mimicking the reflective quantity
of water paint. Gentle ripples or small waves. Using horizontal bras strokes to convey movement in the water, add reflections of the loon and its features in the water. Maintaining a consistent
direction with the waves. Allow the back road
layers to dry. Before adjusting the intensity of colors or adding
more details, consider adding distant elements
like trees or mountains, using soft muted tones
to create depth. Finalize the pain by ensuring the water effect
complements the loon, creating a harmonious and
realistic overall composition. Finally, we done.
12. Day 05: Northern Cardinal sketching: Welcome to my class.
In this class, we have to learn
about how to draw the northern cardinal.
Step by step. Pencil, Drawing a
northern cardinal can be a rewarding and
enjoyable experience. Here is a step by step
guide to help you create a realistic pencil drawing
out northern coordinate. First of all, we need
a reference image. Find high quality reference
images of northern cardinals. Look for images that show different angles and
details to help you capture bad accurately from the basic shapes outline. The basic shapes start
by lightly sketching the basic shapes of the
bird using an HP pencil. Begin with a rough oval for a body and a smaller
circle for the head. Add a line for a B, and a guideline for the tail. Don't worry about
details at this stage. Focus on proportions. Refine the outline. Once you are satisfied
with the basic shapes, refine the outline by
adding more details. Pay attention to the
curve of the beak, the position of the eyes, and the shape of the tail
feathers, et cetera. Keep our lines light as you will be adjusting and
refining them later. Focus on the Cardinals face. Add the eye with a small dark circle and
indicate the facial features, such as the markings
around the eyes, and the peak Cardinals
have vibrant red plumage. Consider the direction of
the feathers when shading. Next we can add feathers, and details start adding the details of the
bird's feathers. Northern cardinals have
distinctive crust on their heads. Use short light stokes to indicate the direction
of the feathers. Pay attention to the patterns and textures on the bird's body. Add details to the
wings and tail, making sure to capture the
natural flow of the feathers. Use a range of pencils. Add shading and depth to draw, darken the shadows
and create contrast. To make the word standout, pay attention to the areas where light hits and reflects
of the feathers. Use blending tools like tissue
paper or blending stems to smooth out your shading and create a more
realistic texture. Take a step back,
assess your drawing. Make any necessary
adjustments to proportions, details
and shading. Fine tune the drawing until you are satisfied with
the overall look, father details and tail
details or must in any birds. When you work detailing, the final out comes excellent. Add any final details such as subtle high lights texture,
or additional shading. Make sure all the
features are well defined and that the drawing captures the essence
of a northern coronal. Once again, remember, practice is key to improving
your drawing skills. So don't be discouraged if your first attempt
is not perfect. Enjoy the process.
Enjoy the process, and have fun capturing the beauty of the northern
cardinal on paper.
13. Day 05: Northern Cardinal watercolor: Welcome to my class.
In this class, we have to learn about the water paint Northern step step watercolor painting can be a beautiful
way to capture the vibrant colors and delicate details of
a northern cardinal. Here is the step by
step guide to help you create watercolor painting
of a North Cardinal. Start by lightly sketching the basic shapes of the
bird on watercolor paper. Using a pencil outline the body, head, beak, and tail. Pay attention to the
cardinal's distinctive crust. Keep the sketch light so that it won't show
through the watercolor. Okay, now we mix our colors. Prepare your watercolor palette with the colors you will need. For the Northern cardinal, you will need various shades
of red, brown, black, and possibly some gray mix and taste the colors on scrap paper to achieve
the desired cues. If you want soft
blended background with the paper with clean water, using a largebres while
the paper is still wiped, apply diluted washes of blue
or any color you prefer. Allow the colors to blend
and bleed into each other. For a subtle background, let it dry completely
before moving under. The male northern
cardinal is well known for its
brilliant red plumage. The feathers or a
deep red color with a slightly brighter red
on the crest and face. The vivid red color is a key characteristic that makes the male
cordonal stand out, especially against a backdrop of green foliage or
snow crest on head. Both male and female
Northern cardinals have a crest on their heads, but it's often more
prominent in the males. Define the eye and be a
focus on the Cardinals eye. And be a, use a small brush to carefully
paint the eye with a color, leaving a tiny white high light. Add details to the beak. Observing the Cardinals
characteristics features long tail with red
under tail covers, both male and female. Northern Cardinals
have a long tail with red under tail covers. The under tail covers are the
feathers beneath the tail. In the Northern cardinal, they are a bright red color, adding base color, base
wash for the bird. Start by applying a light, even wash of the lightest
color on the bird. Usually a light wash of red
for the cardinal's body, Allow it to de. Before adding the next layer, adding facial mask, the male northern
cardinal features a distinctive black
mask around its eyes. So we can paint it extending from the eyes
to the back of the gate. This black facial mask contrasts sharply with
a vibrant red plumage. Adding to the bird's
striking appearance, build layers, layer by layer, gradually build up the colors, allowing each layer
to dry before adding the next layer. Detailing is the most important one in
watercolor painting. Pay attention to the
darker areas and details. The facial markings,
wings and tail feathers. Use a smaller rush
for finer details. As the layers dry, you can add more detailed using the dry brush technique you in paint then blot most
of it on a paper towel. With a semi dry brush, lightly add details like feathers texture
and finer lines. Enhance the three
dimensional effect by adding shadows and depth. Mix darker versions
of your colors and carefully apply them to areas that would
naturally be in shadow. Feather the edges to create a smooth transition
between light and shadow. Final details and
highlights is must add any final details such as
additional feather textures, subtle highlights, and any other features that
bring the bird to life. Be patient and take
your time with these finishing touches allow you were painting
to dry completely. If you used masking tape
to secure the paper, gently remove it to
reveal cleenages. Remember, watercolor painting is a flexible and forgiving medium, so don't be afraid to experiment
and enjoy the process. Each painting is a
learning experience, and with practice,
you will improve your skills and create
beautiful watercolor out.
14. Day 06: Peregrine Falcon sketching: In this class, we have to
learn how to draw the bird, Peregrine Fog. Step by step. Pencil drawing is
a wonderful way to express your creativity. And drawing a Peregrine Folgan can be a rewarding experience. Here is a step by step guide to help you draw a
Peregrine folgen. First, we need reference. A, find a clear image of a pegrain folgin to
use as a reference. This will help you understand
the bird's anatomy, feather details, and
overall structure. Basic shapes start by sketching basic shapes to establish
the bird's proportions. Use a light pencil
to draw an oval for the body and the smallest
circle for the head. Add lines to represent
the wings, tail and legs. Don't worry about
details at this stage. Focus on getting
the overall shape right after we getting overall shape, then we move into outline, outline the body, refine the shapes to create the outline
of the Peregrine falcon. Pay attention to the curves and angles of the
body wings and tail. Make adjustments as needed to capture the birds
pose accurately. Next, we move into
facial features. Add details to the head, focusing on the ice
and facial morphings. Peregrine polgans have distinct morphings
around their eyes. We can use sharper pencil
for these details. Next, we move into
further details. Start adding feather details
to the wings, body and tail. Observe the direction
of the feathers and use light short strokes to
mimic their texture. Begin with lighter pencils and gradually move to
darker ones for shading. Add shading to create depth and dimension range of pencils to achieve
different tones, applying more pressure for darker areas and less
for lighter ones. Pay attention to the Falcons underbelly wings and the
transition between light and shadow refine over drawing by adding more
details to the eyes. And take your time to make sure each
part looks realistic. Adjust the shading and
texture as needed. Adding background,
consider adding a simple background or leave it blank to keep the focus
on the Peregrine follgan. A clear blue sky
or a rocky cliff can enhance the
overall composition. Now we come into final details. Go over your drawing
one last time. Refining any areas
that need adjustment. Use the eraser to clean up
any tree lines or smudges. Remember, practice
makes perfect. Don't be afraid to make. And take your time
with each step. Enjoy the process and you will
improve with each drawing.
15. Day 06: Peregrine Falcon watercolor: Welcome to the class.
In this class, we have to learn about how to draw the falcon and
water painting. First of all, we are adding mask technique with
white color pencil. On watercolor painting, falcon use white color pencil to gentle sketch the details of the falcon such as
feathers, beak, and eyes. Apply the white pencil
over the wet areas, allowing the pigment
to blend and create a soft ethereal effect. Far sharper highlights. Use a drying brush and softly
blend the white pencil. Stokes allow the white pencil highlights to dry completely before making any
additional adjustments. If needed, repeat the process to build up layers of highlights for a more
pronounced effect. Next we adding water
to the whole image. This is on weight technique. Tor watercolor paper
evenly with a clean brush and water ensuring its damp
but not overly soaked. Choose your watercolor
pigments and mix them on your palette for the
desired color palette, apply the watercolor paint to the wet paper while
it's still damp, allowing the pigments to
naturally diffuse and blend. Experiment with
different breasts, letting the water
guide the flu of the pigments for a
soft and fluid effect. Tint the paper at various angles to encourage the paint
to move and create. Interesting, we can use a spray bottle to mist water onto the weight surface for additional texture
and diffusion. Work quickly to
take advantage of the weight on weight
properties as the paint will spread more easily on
damp paper layer colors, while the paper is still to achieve seamless and
transitions between hues allow the painting to dry completely before adding any details or
additional layers. Practice and observe
how different pigments react to the wet on wet technique to enhance
ever watercolor skills. Now we can add low to the
folcens area, beak and legs. Begin with the light pencil sketch outlining the folcensleg. Prepare a soft yellow water
color mix on your palette. Apply the yellow pigment to the weighty areas allowing the paint to flu and
blend naturally. Use a slightly darker yellow, or a touch or orange for subtle shading on the
eye, creating depth. Be mindful of the
paint's consistency. A slightly thicker mix can
enhance color intensity. Soften edges with a dam brush
for a smoother transition. Between yellow and
surrounding colors allow the first layer to
dry before adding additional layers
for more vibrancy. If needed, use a fine brush
for precise detailing, emphasizing the
intricate features of the eye, beak, and leg. Next, we move into adding
dark crayton to the head. Begin by letting the watercolor layers on the Falcons head dry. Completely choose a dark
crayon or water color pencil, any color that complements
the existing palette. Lightly sketch the darker
tones on the Falcons head. Emphasizing shadows and cantos. Use a fine damp to blend and
spread the crayon marks, creating a subtle
eight rich texture build up the dog tones, gradually layering as needed
for depth and dimension. Focus on areas where
shadows naturally occur, such as around the eyes, under the beak and the feathers. Allow the layers to
dry intermittently to assess the overall
effect and make adjustment. Use the crayon sparingly to avoid overwhelming the
water regular base and maintain a
harmonious balance. Fine tune details
with the fine brush or the crayon itself
for intricate features. Now we applying light gray as a base color to
the whole falcon. Begin with a clean, dry watercolor paper for
the base of the fall. Select a light on or watercolor pencil
in a color that shot the overall
tone you desire. Apply the light, crayon, engendle even stokes across
the entire falcon. The paper. Consider the natural
condos and feathers of the falcon and distinct
pressure for varying tones. Use a fine brush and water to activate and blend
the crayon marks, creating a soft,
watery wash work. The selection allowing
you to blend while the crayon is still wet
for a seamless effect. Keep the application light
to allow for layering and nuanced shading later
in the painting process. Use the crater sparingly
in detailed areas, allowing the water color
as to shine through. Allow the initial layer to dry completely before
proceeding with additional layers or details. The light crayon bees
sets the fountain the foundation for
building layers and adding depth to the
overall funkin painting. Now we move into adding
details on the wing. Adding the details is essential. One, we can start with dry, lightly colored watercolor
piece on the falcon spin. Choose a fine brush and makes a slightly darker shade for the wing details
on your palette. With colored Stokes paint the feather details following the natural pattern of the wing. You can draw individual small feathers value or brush presser for a mix of thin and thick lines to
mimic feather textures. Introduce subtle color
variations within the details. By mixing in different hues, allow the initial layer to dry before adding more
intricate details. For death, use a fine
tipped water color pencil or creer to enhance
specific feather features. Consider the play of light
and shadow on the wing, emphasizing these
elements in your details. Patient and working layers. Gradually building up the
complexity of the wing. Step back periodically
to assess your progress and ensure a balanced
and realistic depiction of wing details. Now we are adding more details
on the head and the wings. Use a fine brush and makes a darker water color tone for head and wing details
on your palette, start detailing the head by emphasizing the beak eyes
and subtle feathers. With controlled strokes,
consider the falcons anatomy, adding depth for
incorporating shadows and highlights for the wings. Focus on feather patterns. Painting fine lines to represent individual feathers
introduce a variety of colors within detail to capture the natural
hues of the falcon. Use a fine tipped
watercolor pencil or crayon for precise
details and texture. Pay attention to the interplay
of light and shadow, especially on the wings. Intricate surfaces gradually
build a place to create realistic and
nuanced portrayal of the head and wings back. Occasionally, to
assess your work, ensuring a harmonious balance between details and the
overall composition. Now we can draw the tail
area with darker create, select a darker create watercolor pigment for the
tail area of the falcon. Begin by lightly sketching the tail feathers following
the natural flu and shape. Apply the crayon with
controlled stokes, emphasizing shadows and cantos. Use a fine brush and water
to blend the crayon marks, creating a smooth transition. Add depth by layering the crayon in areas where
shadows naturally. Pay attention to the individual feathers
paring ever stops. For a realistic texture, consider the direction of light. Enhancing certain areas
with darker tones for dimension, fine tuned details. Using the crayon or a fine
tipped watercolor pencil, allow the tail area to dry immediately to ***
and make adjustment. Finally, we can adding
some backgrounds, ensure the folican is
fully dry before using, before adding a background, choose a light
complimentary color for the background
on your palette. I can use a dark gray
too for a rock pattern. Apply a thin wash
around the falcon, leaving the main
subject untouched. Blend the background
color with water, allowing it to seamlessly
merge with the paper. Consider the falcons
environment, sky, landscape, or abstract wash. Add depth by introducing a slightly
darker shade in areas. Use broader Stokes for
a loose background or finer details for a
more detailed setting. Allow the background to dry before making any
final adjustments. Soften edges where
the background meets the falcon to
create a cohesive look. The back ground enhance
overpower the falcon, providing context and visual interest to
overall painting. Finally, we conclude
the painting.
16. Day 07: Snowy Owl sketching: Hi, welcome to the class. In this class, we have to
learn about how to draw the snowy step by step pencil. Drawing a snowy owl can be a fun and
rewarding experience. It is a step by step guide to
help you draw a snowy owl. First, we gather
reference images. Find high quality images of snowy owl to use as references. Study the owls features
such as feather patterns, facial structure and posture. Next, we move into basic shapes. Now we start with shapes. Start by lightly
sketching basic shapes to establish the
owls proportion, draw an oval for the body and a smaller
circle for the head. Add simple lines to indiicate
the wings and tail. Add the lines, refine the
head and body shapes. Clear outline will help
us to draw perfect out so we can outline the whole out with thin lines. After completing the outline, we move into facial features. Outline must be
completed before add facial features detail the facial features
using a guidelines. Snowy owls have
distinctive round faces, yellow eyes, a short
beak, and hair tufts. Make sure to capture the
intense gaze of the owl. The next one, the feather
details is most important. Start adding feather
details to the body. Snowy owls have fluffy feathers, especially on their heads. And you can use short, curved strokes to create a
sense of texture and volume. We can draw wings and tail. Define the wings and tail
using gentle flowing lines. Pay attention to the shape
and pattern of the feathers. Snowy owls have
wings that span out, their tails are
relatively short. You can take your
time and be patient. Detailed drawings require careful observation
and precision. First, you must study
the reference images closely to capture the unique characteristics
of snowy owls. Experiment with different
pencil pressures to achieve a variety of tones. I remember practice is key to improving
your drawing skills. Don't be afraid to make
mistakes and enjoy the process of creating
your snowy owl drawing.
17. Day 07: Snowy Owl watercolor: Welcome back to my class. In this class, we have to
learn how to paint snowy owl. First, we can use masking
fluid on the owl. And what are the uses
of masking techniques? We can add masking fluids for prevent some areas
untouched areas. That's why we are
using masking fluids. Start with a clean, dry watercolor paper and a
pencil sketch for fuel. Apply masking fluid
using fine brush or a detailing tool to cover
areas you want to preserve. In white, allow
the masking fluid to dry completely before
painting over it. Begin painting your
valve covering the masked areas without worrying about
preserving details. Once the paint is dry, gently rub or peel off the masking fluid to reveal
the untouched white areas. We can use masking
fluids many ways. These are masking techniques,
preserving highlights. Masking fluid helps
protect areas of your painting that need
to remain white or light. Such as reflections
or highlights. Preserve high lights. It's easy to creating texture masking fluid to create texture in feathers, fur, or other
intricate details by preserving specific areas
during the painting process. It used to layering colors, apply masking fluid
between layers to maintain distinct color
boundaries and prevent bleeding. Then it is used to
get fine details, perfect for preserving
fine lines, intricate patterns, or small details that are
difficult to paint around. Now we can add water
on the Owl for ton with technique at your
watercolor paper evenly, using a clean brush and clear water Before
applying any paint. Keep the surface
damp but not overly saturated to allow for
better paint diffusion. Begin painting your own
while the paper weight, letting the colors blend
and flow naturally. Experiment with
different brush tops and techniques to create soft
transition and gradients. We can use ton weight
technique for smooth blending. We can achieve seamless
color transitions and soft gradients by allowing the
weight paper to encourage. Paint diffusion. We can use ton with technique
for backgrounds, ideal for creating atmospheric
or textured backgrounds where colors can
bleed and mingle. Then we can use ton techniques
for expressive effects. Expressive effects capture the spontaneity and
unpredictability of water color by empresing
the fluidity of vital weight, creating interesting
textures and effects. Okay, now we can add base color, base brown color to the Owl. Begin by applying a light
brown base color to the Owl. Using a large soft brush. Dilute the paint
slightly with water to achieve a translent wash
for the initial layer. Cover the entire own with
a light brown base color. Avoiding areas, you may want to keep lighter or add
different colors later. Allow the base color to
dry completely before adding further details
or additional layers. Why we add the base color first, it is used to establish
tonal foundation. The base color sets the
overall tone for the owl. Providing a foundation
for subsequent layers for paint then ensures consistency. Applying a base color ensures a consistent starting point, helping to unify the painting
and avoid patchiness. Then why we add base color
first saves highlights. By starting the base color, you preserve areas that will naturally be lighter
in the final painting, such as feathers catching light finally improves
color harmony. Starting with a base color
allows you to better judge and harmonize the
subsequent colors you add, creating a more cohesive and aesthetically
pleasing result. Now we move into add
father details on the owl. Use a fine tip brush for mix and darker shade of brown
to create the details. Paint. Thin, elongated
strokes radiating from the eyes and outward
for the facial feathers. Vary the pressure on the brush
to create feather texture, making some lines thicker
and others lighter. Extend the feather
detailing to cover the body paying attention
to the natural. Direction of feathers. Add lighter highlights sparingly by lifting paint with a dam rush or leaving areas
unpainted for realism. Observe reference images of old feathers to capture their unique patterns
and arrangement. Allow each layer
to feather detail to dry before adding
subsequent layers. Building up texture,
gradually experiment with different brush size
and techniques to achieve a balance between realism and artistic expression. What are the other techniques? What are the other techniques
for watercolor detailing? There are many techniques or there specifically can
use dry brush technique. Use a dry brush to apply concentrated pigment
on dry paper for textured and fine
details, salt texture. Sprinkle salt onto weight paint to create unique textures. As the salt observes water and pigment
lifting technique lift, we paint with a clean, damp brush or paper towel to create highlights or
correct mistakes. Splattering techniques,
flick or splatter paint onto the paper using a
loaded brush or tooth brush for a spontaneous
and textured effect. Scrapping or
scratching technique, Use a palette knife or
credit code to scratch or scrap of paint for high
lights or fine lines. Masking with objects. Technique objects like leaves or stencils on the
paper before painting, then remove them to
reveal mask shapes. Negative painting, negative
painting technique, paint around the subject, leaving the negative
space to define shapes and create
intricate details. Weight on dry techniques, applying detailed brush
work on dry paper for precise lines and controlled detailing. We
already learned it. The glassing technique. Layer transparent washes
over dry paint to intensify colors or add
subtle sits in tone. You can experimenting with
these techniques will enhance your watercolor detailing skills and add diversity
to your outfalls.
18. Final thoughts: Welcome back. Hopefully your
painting is now complete. Painting journey
is now complete. Let's take a closer look
to see the abstract. We have explored creating smooth transition from
one hue to another, or using mute tones to enhance
the vibrancy of others. My aim to inspire students to uncover their
own interpretations. Recognizing that each
individual possesses a unique vision that should be embraced as part of
their autistic journey. Empoking on new artistic
endeavors can be accompanied by uncertainty At the
enhancement of watercolor lies in its
unpredictable nature. Learning watercolor
involves pushing boundaries and in doing so, accepting that
mistakes may occur. If you find yourself
dissatisfied with your progress, be kind to yourself
and take pride in the courage it took to apply paint to paper and
challenge yourself. Mastering techniques
and manipulating the medium constitute the
initial steps in painting. Subsequently, the
most crucial phase is understanding when and why
to employ these techniques. The marks the beginning of developing your
distinctive style, elevating your paintings
to the next level. If you seek feedback
on your painting or wish to receive advice
related to watercolor, feel free to share your artwork in the student project
gallery below. I will gladly respond. Skillshare also appreciates
Socs student work. Be sure to tag them after investing
effort into your work. Why not proudly displayed? Remember to click the
Follow button above the Stay updated on my
Skillshare activities. This ensures you receive notifications for
upcoming classes, important announcements,
free giveaways, or featured student artwork
in the project gallery. Thank you once again for
participating in this class. Please leave any questions or comments in the
discussion area below.
 Sahaya Babu Manickam, Motion Designer & Watercolor Artist