Transcripts
1. Introduction from Bud to Bloom: [MUSIC] There's something so evocative about roses that keeps drawing artists and
flower lovers to wanting to explore their
beauty with paint and brush. Roses symbolize so many
things artistically, we will attach our
own personal meaning to the roses in our life. Roses represent love,
for celebration, a show of appreciation
to someone in our lives. The roses are not only
a gift to others, it's a gift of
self-expression to ourselves in the closure
of painting them. Hello there, my name
is Sara Corren, and I'm a watercolor artist who unabashedly loves all
things botanical. Painting roses is
a beautiful escape into color and beauty. Watercolor roses explore light-filled and loose
painting from bud to bloom. This is a class for the beginner and more
seasoned artists. For the painter who
wants to explore loose floral watercolors
with soft light-load colors, we'll start by painting
a simple rosebud before moving on to a
rose in full bloom. Gift yourself the
beautiful imagery of roses in all stages of growth. Not only will you be giving
yourself the time to reflect and meditate with
paint and colors of the rose, you'll have three paintings in a loose and expressive style. These techniques
can be transferred to all of your floral paintings. I invite you to join
me in this class. [MUSIC]
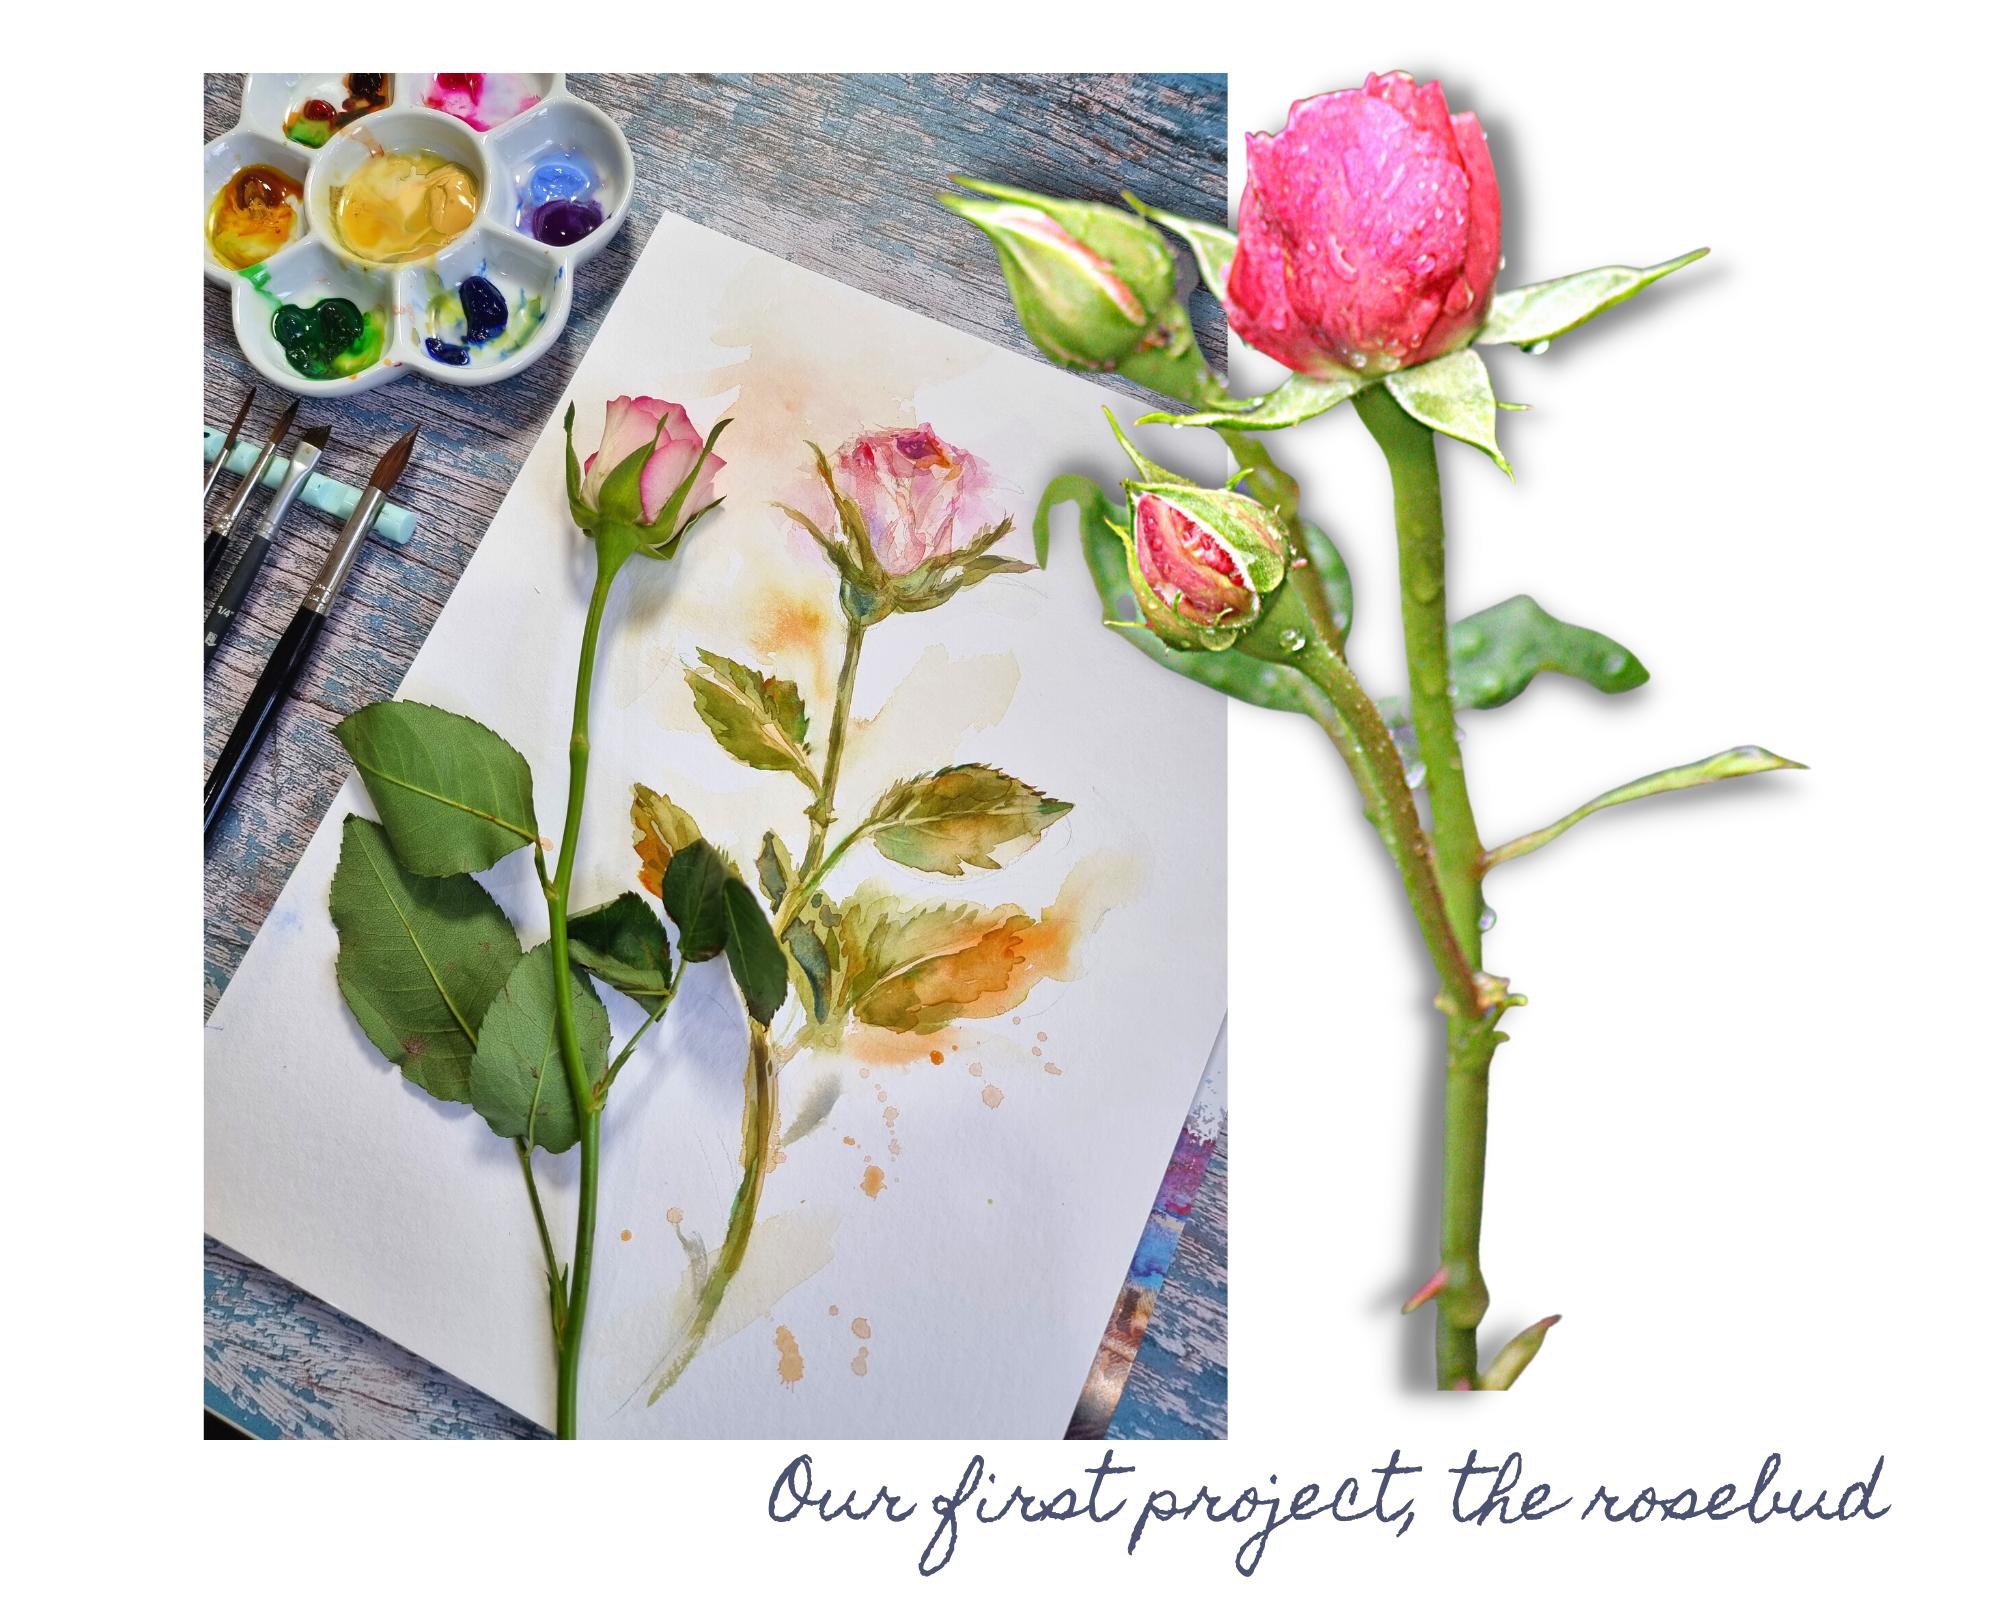
2. Your Project: [MUSIC] Let's talk
about our plan. Together, we'll be painting our roses in two growth stages. Our first project
will be a rosebud, where we will create a simple
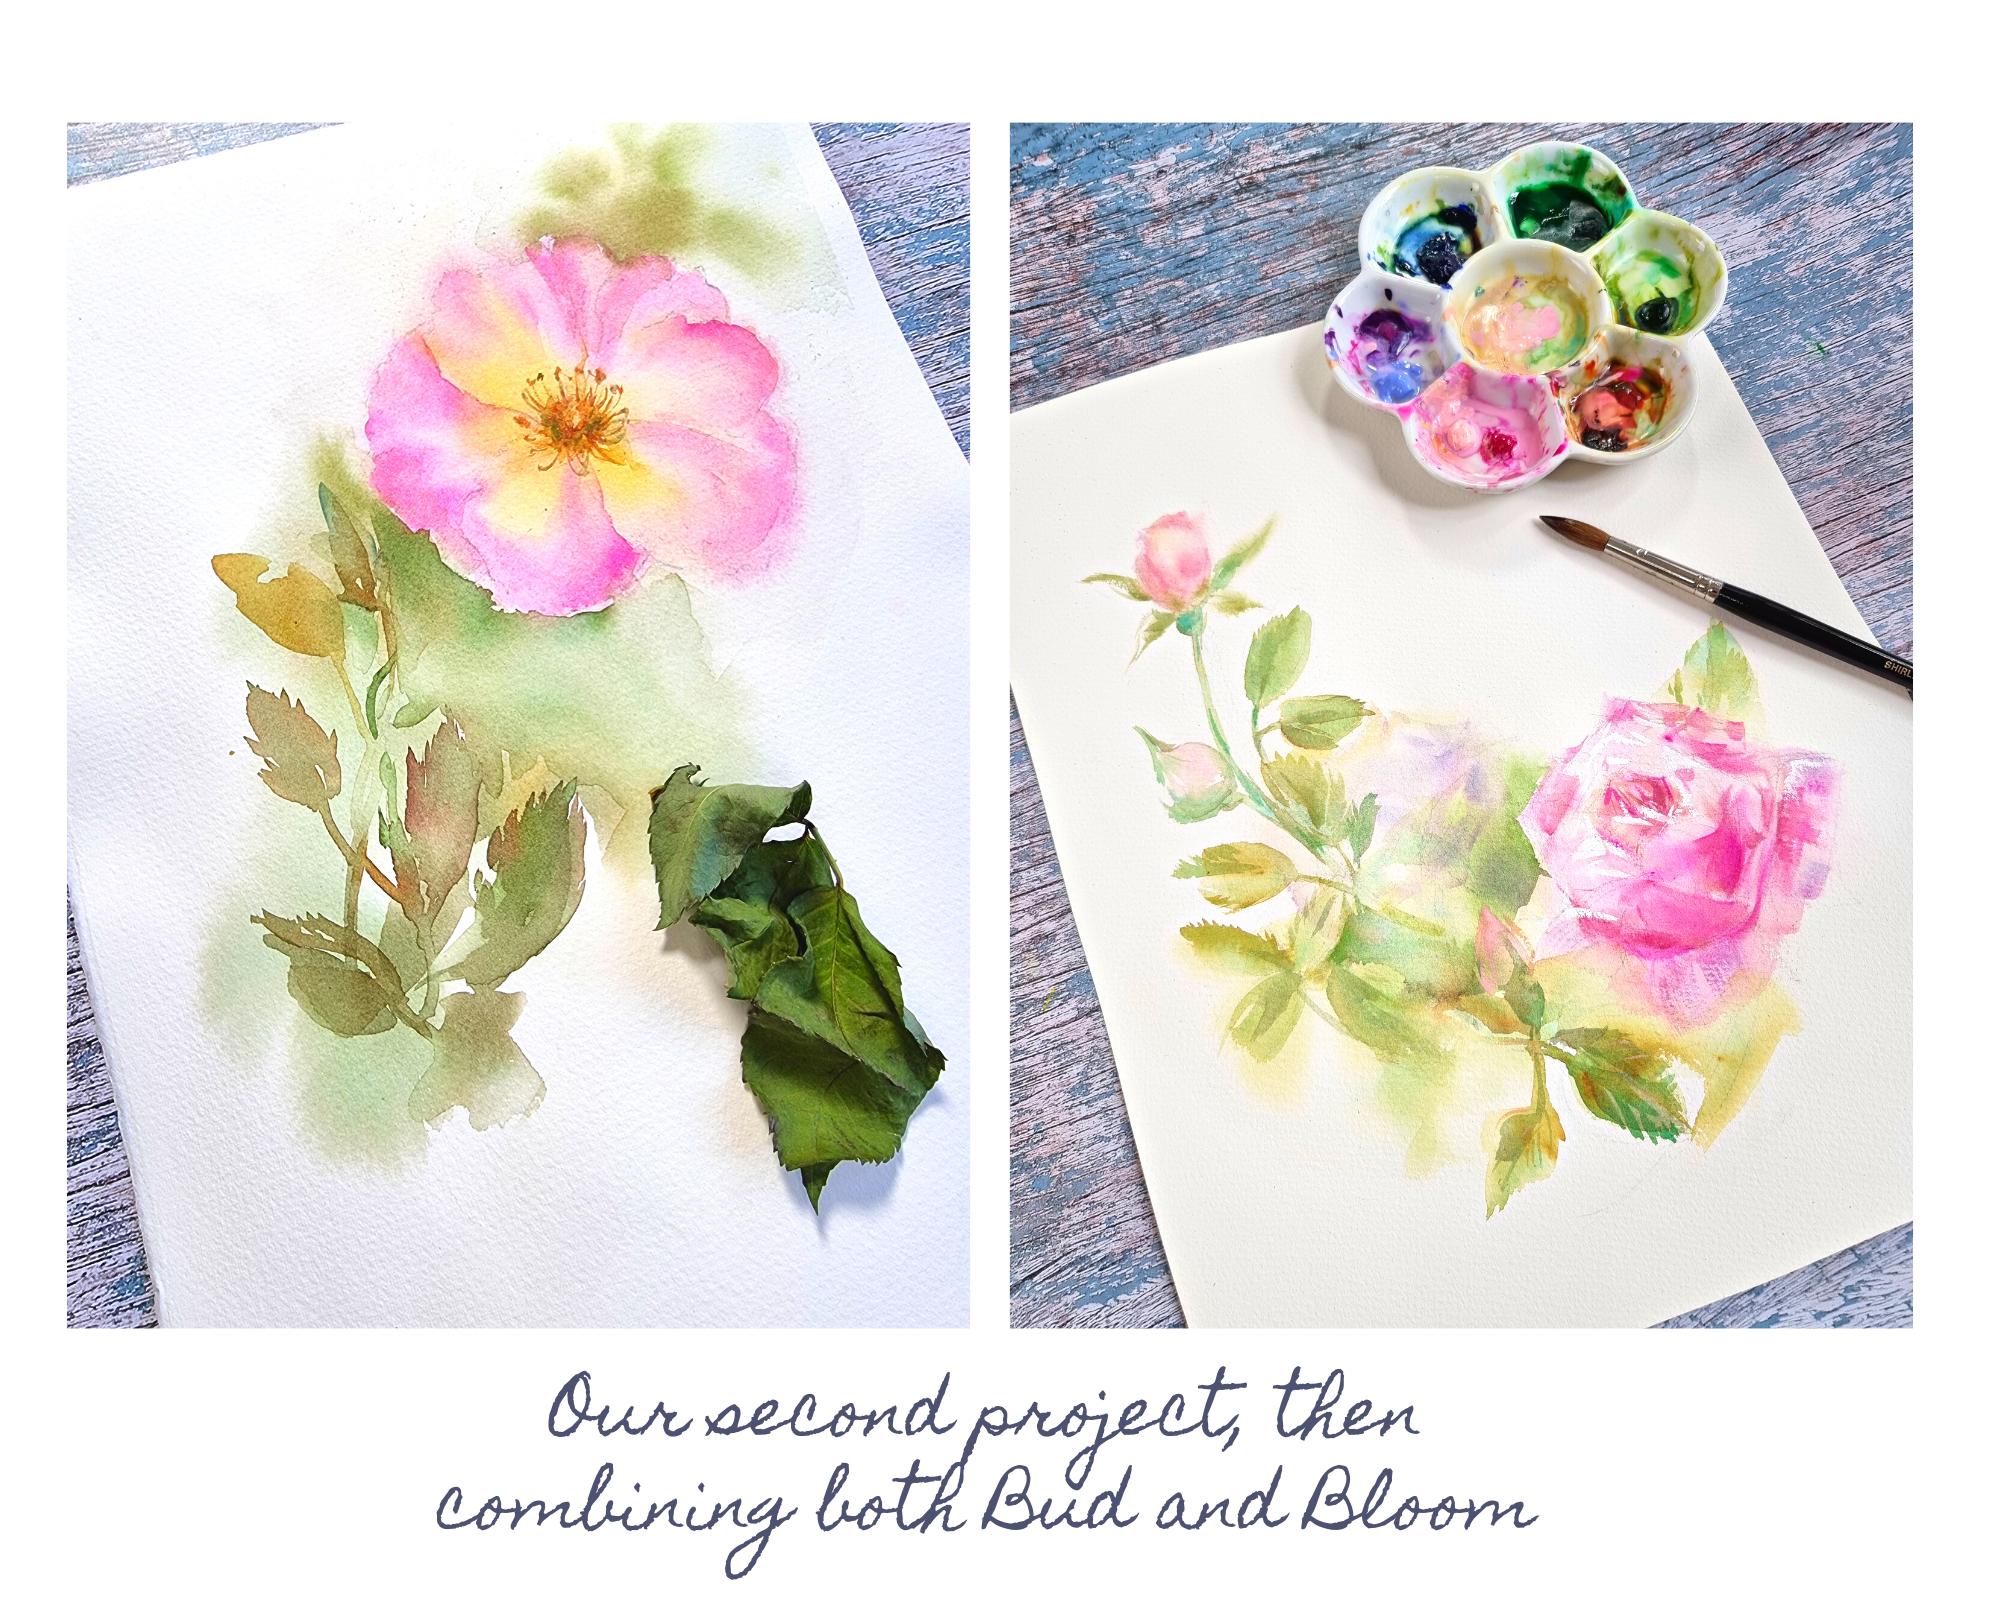
and elegant composition. We'll then paint our
rose in full bloom, exploring ways of adding leaves
and simplifying foliage. We'll quickly explore composition
and color thumbnails to provide a roadmap to help us out in creating
our final project. In our final painting, we'll incorporate everything
we've explored previously in creating softly painted
atmospheric roses with both bloom and bud. I can't wait to get
started painting. Let's go through
the materials we need in the next lesson. [MUSIC]
3. Bud to Bloom Materials: Before we get started, let's go over some of the
materials that we'll be using to paint out
beautiful roses. The brushes I'll be using are a variety I'll be
using the mop brush, some natural head rounds, a synthetic mix angled brush and a smaller
synthetic angled brush. The reason why I like
synthetics is for the details at the very end
of the watercolor passes. They hold less water, which gives you more control. Whereas I think in the
initial stages having a natural head brush
you can load up a lot of paint and pigment, though I love the effects. Also, I would recommend
using a rigger brush just to get into those
lighter details. I will be using a Derwent
sketching light wash pencil, this one is water-soluble
and it's terrific because you can get an idea of
what you're drawing, map it down, but you're
not committed to the line. So once it washes out, then you have the luxury of adding or subtracting
where you need to. Two pots of water, one to keep clean, one to wash your brush. A spray bottle is always really handy to either reconstitute your paints or perhaps add a nice effect with
the backgrounds. I'm using the Hahnemuhle paper, it has a nice cold press tooth
and it is a cotton paper. I would recommend using a 100 percent cotton paper
in the paper of your choice. There are a lot of lovely
brands out there like Fabriano or Saunders Waterford. Again, it's always
nice to explore paper towel to capture
residual water. In the resource section, I have a list of the varying
colors that we'll be using. As you can see from
this little box, I don't have a particular
mainstay of watercolor brands. One of the delights
of watercolor is exploring new colors, so rather than being loyal to one brand I really do
like to experiment, find out their
unique properties. One of the nice
things about being a watercolor artist is that
you get to collect paints. I find I'm not
particularly brand loyal, there are a lot of wonderful artist
quality manufacturers. So what I like to do
is just explore each has their unique
properties which are characteristic to them
and it's really nice to find out new colors and inject a little bit of play and exploration
into your paintings. Looking at this particular rose, I can already see in here
there's some lovely pink which could be quinacridone
pink or permanent rose. Another one is a holbein shell pink which is fairly
close match and I can see a little bit
of Naples yellow in the base of the rose bud. Again, it really is exploring and then you
get to a point where you stop imagining your own colors or exaggerating the
times that you see. Now that we've gone
over our materials, let's get to the next lesson.
4. Choosing Your Colours: I have a whole range
of different paints, from bright ones to
more muted ones. In here we have permanent rose. Here is a lovely bright almost fluorescent
pink to try out. Sap green, which we'll
put on the opposite end. Translucent orange is really
lovely for an underglow, as well as some [NOISE]
quinacridone gold. In this way, I can
have a look at my colors and I
have a little play and just reflect on
what colors I would like to use for my
oncoming paintings. This is also a wonderful way to warm up and get into
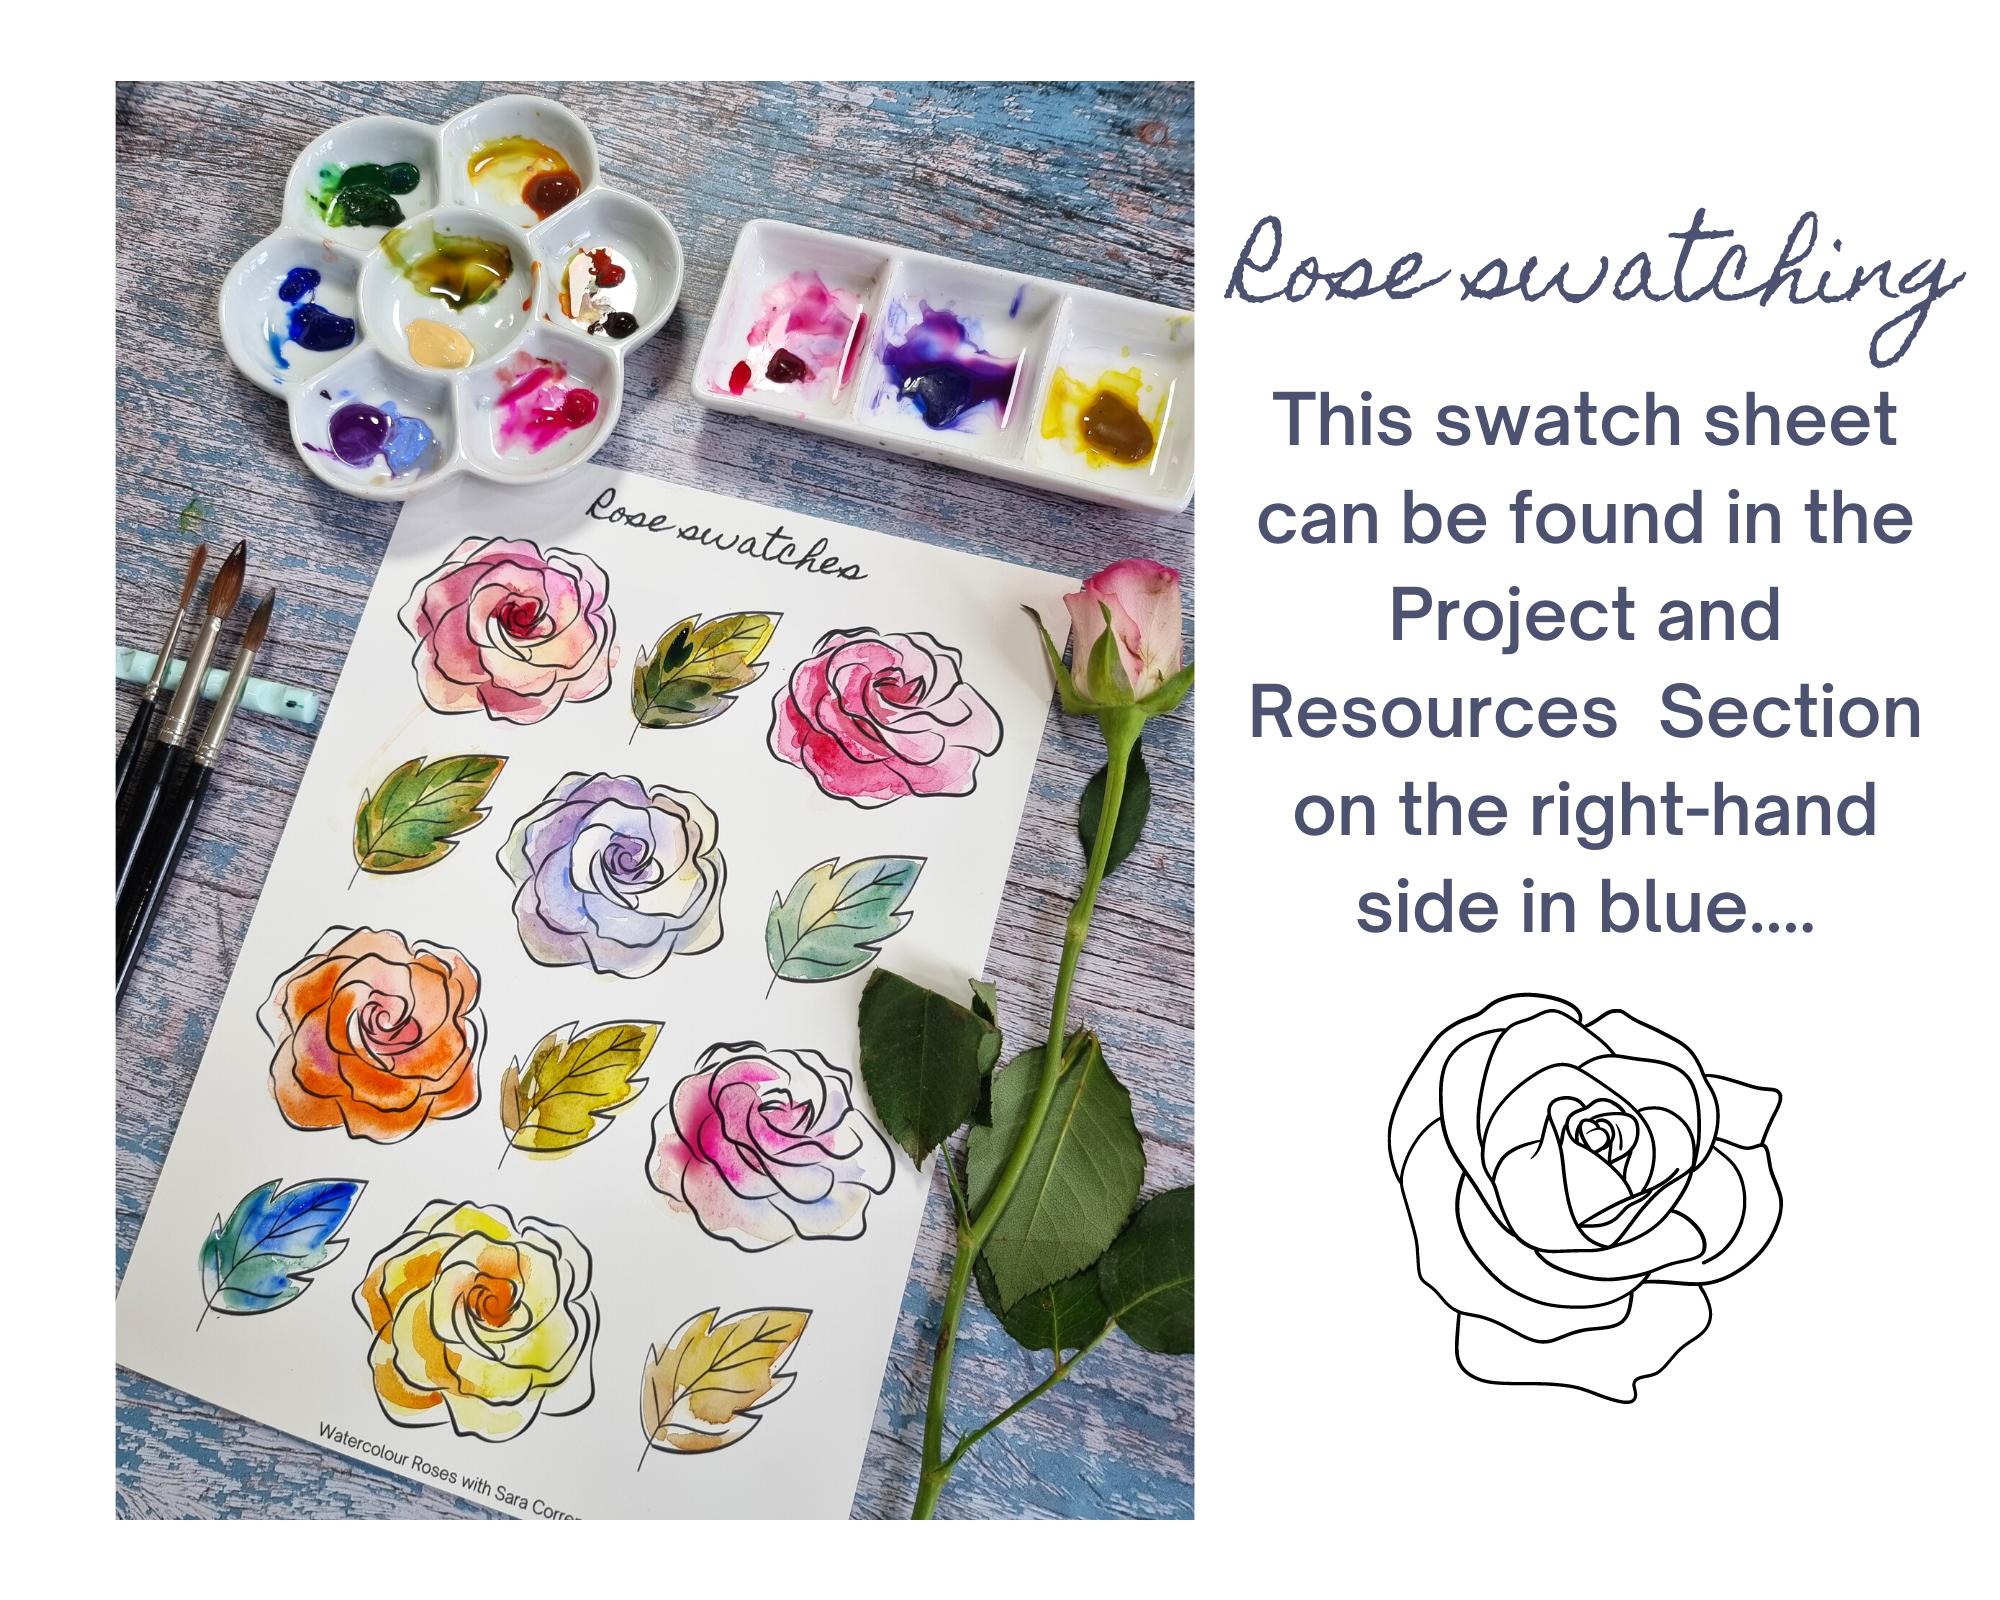
the flow of painting. As you can see in front of me, I've designed a
rose swatch sheet, which you can find in
the resource section. It makes me very happy
to look at this. Honestly, it's a
great way to warm up or if you fill
a little blocked, there's nothing
more soothing and meditative than swatching
out your favorite colors. Looking at the rows I
have in front of me, I can see little
suggestions of green, Naple yellow, different
assorted pinks. But rather than
jumping straight into a painting and perhaps
making a mess, I can warm up and get in
design by just experimenting. Here, I'm looking at
this particular rose. I'm going to show
you the difference of what happens when you do a nice underpainting compared
to just one flat color. Here, I have some lovely bright rose you could use
an opera pink. I'm taking a little bit
of transparent yellow, just dropping it in the centers. Then I'm just going to leave
this particular swatch. All one color. Maybe I'll come back in with the same color but a bit deeper. Looking at the rose leaves, again, when you look at nature, it's not one set green. This one is quite pale. It seems to have almost a
bluish tinge underneath it whereas different sections of
the leaf are a lot warmer. I'm going to experiment. Just have quite bold, transparent yellow
underneath this one. I have a beautiful
gold, quin gold. It's a lovely autumn
color going in here. Just dropping in a
little bit of violet because the violet
will mute that color. To give it a more
natural effect. This one, dropping a little
bit of translucent orange, which is a gorgeous color for
adding luminosity and feel. I'm looking at this one I think, white roses are difficult. How will I do a shadow for that? Is just such a lovely
way to play, unwind. Put some music on
with no pressure, and also find some really
lovely combinations. I encourage you to
share these sheets with me in the project gallery
because I would love to see any color combinations
that you have or discover. Another thing I'm just thinking, well, I'm doing this. What I could potentially
do is just come in later when it's dry and just make little
notations of what I like. For example, I think, oh, I love the way that
the opera rose, the bright rose blends in
with the beautiful pink. Now that this is dry, I'm having a look at some of the color combinations
that we've created. I loved this rich gold as an underpainting
for the leaves. I'm remembering
that the center of the rose is always a bit darker. Here, I've added
a deep red color. I'm imagining that perhaps the light is coming
from this way. The underneath ones are
capturing in shadow. I quite like that combination
of light against dark, the core pink against
the deeper red. Let's move on to this one. We didn't do a underpainting, we're just pretending
that we are just using the one color only. We'll drop that in and
we'll go back with the original rose and do the same thing
inventing shadows. Isn't that lovely? Just that
little watermark there. It looks like it
was intentional, but it wasn't that I
love it because it gives you that feel of
the light heating it. It's a social surprises
that are really lovely. Now we've gone in darker with the permanent rose I'm
using that one color. Another nice thing is, if you remember that of course roses are
surrounded by green. We could just come
in very lightly and just dropping a
little bit of green. The leaves would be
reflecting color back on. That's really nice. I invite you to have a play and create your own
rose swatch sheet. I think this definitely is a
very relaxing way to start, and I look forward to
seeing your color play. Now for the next lesson, we are going to look at the shapes of the
Roses. See you then.
5. Understanding the Shape of the Rose: Before we get started
on painting the rose, let's look at the
shape of the rose that is unique to this species. Rose petals can be pointed
or they can be round. But one thing that
is distinct to the rose is that teacup
shape that they all have. If we are looking at
painting a rose, try, and think of it essentially as a teacup with a wine glass
shape popped in the center. We find the center of the rose, we'll have that to ground us. Once we have that very
rough shape in line, then we can start thinking
about the petals unfurling, depending on what stage of
growth in life the rose is. Again, looking at the
center that is much darker, and you can see these little
half-crescent moon shapes that are easy to depict. Then these little
sepals come out. Roses have about five of these, which sometimes you see,
sometimes you don't. Again, looking at
the teacup shape, if the rose was
pointing away from us, we'd very lightly map that out. We wouldn't see the wine glass because it will be
turned away from us. The base of the
flower, in the center, these little sepals climbing
up the top of the rose, and we could start
adding the detail of the petals wrapping around
until it gets to that shape. Now we can see. It's a
very basic but helpful way of seeing roses, and not getting lost when
you're painting them either outside or if you have a beautiful bouquet
in front of you. It's a good way of
just mapping it. I guess the eye sees things, and makes immediate connections. Even though you may not be doing a particularly
realistic rose, even these very stylized ones, you have a sense that
it's the rose shape. Another thing roses
commonly have are the three leaflets like this, just directly under the flower. As you begin to
travel down the lane, the leaflets may
turn into three or five down most of the
center of the cane. If you're drawing from
your imagination, this is a good thing
to remember as well. Another thing to remember
is the leaves tend to have an oval or a diamond shape
that is distinctive to them. Some of them have these
different colored little edges, others not, it just
depends on the species. For our next lesson, we are
going to create a rose badge, and look at painting
the flower top. Let's go, and I'll see
you in the next lesson.
6. Creating a Rosebud: For this lesson, we are going to focus on the head of the rose. I've lightly sketched it in with the water-soluble graphite
just to give me a map. I can see that they're lovely to me; Naples
yellow color. Looking at it, I'm going to use my brush just very
lightly. Draw it in. This will give me a
sense of where to go, and also it provides a nice base for the
lovely pinks that are going to go on top [NOISE]. I've chosen to use
the bright rose color because it's
really nice to see [NOISE] that beautiful feel. I know this because of the swatch cards that
we've used before, and looking at it
and referring to it. Those were the colors
that I could decide on. Looking at my rose swatch card, I really love that
yellow combination with the bright rose. Then coming in with
a more muted $ pink. I thought that was
quite effective, and much more
interesting than just the permanent rose that
we see here before. Once it was dry, as you can see, I've come in and made
little annotations about what colors that
I've used in case I would like to use this for
future reference [NOISE]. This is still very wet, which is a lovely way to start. I'm going to get a clean, damp brush and just
lightly bleed out some of these edges so I can have a more
naturalistic look. I'm going to wait five
minutes for that to dry, and then come back in
with the second pass. Getting a smaller brush, I'm now going to get some
of the permanent rose. Maybe mix it in with a little bit of gold
just to warm it up a bit as if the sun
were touching it. Just to give a little
bit of freshness. Back into the rose looking at this center part and just
saying how it's deeper. It's nice to be able to
paint in some warm shadows, as opposed to around the edges where the
sky might reflect. Some blue on the edges or green, depending if it was surrounded
by a lot of foliage. Just dropping some pink in there to show the
fold of the leaf. I'm not going to go too dark because I'm
probably going to go over some areas in green
where the sequels are. I think the beauty of watercolor is keeping
that translucency. I won't come in and
do everything all at once because I might
not need the detail. Here the bud is
starting to open. Again, just softening the edges. It gives that sense of movement, maybe it's swaying in the wind. Certainly the leaves
don't like being under these studio lights. I have to give it a
little bit of a spritz, a little bit of pink, a little bit of lavender
to show the shadow area. Again, keeping it very simple. While that's drying, I'll go to our next lesson where we
begin to connect the stalk.
7. Connecting the Stalk to the Bud: Now we're going to connect the stalk to the
head of the rows. It's still slightly wet. What I would like to do is just bring out and down some of the maples color to connect the flower and keep it
all in the color family. I'll bring that maples
yellow all the way down following these
wonderful curves bringing it out there. Dropping in some
maples yellow for leaf and then perhaps a
larger one around here. This is not a botanical study. It's more whimsical, a little more playful,
more expressive. I'm just allowing
myself the freedom to invent leaves,
takeaway leaves. Just dropping in a
little bit of gold underneath here to
give some richness. At this stage using
different yellows, it just gives it a
different field. I might come in as well and this area here
is the underside. Just make it blue because
it seems a bit cooler. It's still mixing in. Now I'm also getting some deeper gold brown and popping it in just
to add some richness. Going in and getting a
little bit of the blue, ultramarine blue, this is. I'll just mix it
with the gold brown. Add a little bit more of sienna. Make my own daily screen to offset the clean
colors of the pink. Honestly, I have an idea of what I'm going
to do with these lessons, but I find the painting tends
to dictate what it needs. For example, these
beautiful watermarks and the way it begins to dry, the water travels, and I think you couldn't
repeat the same one in a row. Now, this is very
wet down there, so I love the way the colors
are blending in here. What I'll do now is go
and as this is quite dry, come in and start to draw
these little sepals. This is blending quite
nicely because I've kept that area still very light so it gives me a
little bit of wiggle room. This brush is lovely. It has a beautiful point
which definitely helps when it comes to making these little jagged edges
against the back of the leaf. Now looking at that, I think
I might need some variety. What I'll do now is
get some of that dirty green, rub it off, just have a practice
and dry brush just down here and there to give some
different line effects. Sometimes it's easy
with a synthetic brush actually because as I said, it carries less water. That's too good of a brush. It's got too much paint in it. That's better. It's nice to have these thick lush strikes contrasting against
the dry brushwork. Now I think that's
a beautiful start. I'm going to let that dry and come back with a
second pass on the leaves. Now, looking at this, we can see some
beautiful effects of the colors
blending in together, the softness that
is truly unique to watercolor and what makes it challenging and
energizing at the same time. You really do learn a lot
about your personality and how much you need to
relinquish control over areas. Now, I'm going to start on the sepals from the
top to the bottom, varying the colors as we go. The important thing I think
is not to make it boring. You can use the same colors, but by putting in different
amounts and dropping in different areas of
the Naples yellow, the green, the blue. You get a lot of
visual interest. I think there's
something just very universal about artists
wanting to paint roses. They're so beautiful and
very relaxing to paint. I think it's such a
meditative thing to do. I find painting flowers and painting roses is such
a comforting thing. When life gets a
little bit too much, there really is something
special about being able to put some time aside and just look at colors, at forms if you're lucky. The roses have a
beautiful scent. I know my mom was telling
me that some roses are being bred without any scent. It's mainly the
traditional garden flowers or garden roses
that do have that. Why that is the
case I do not know. There is nothing more satisfying
than coming into a house and seeing a bouquet of garden roses and having
that beautiful aroma. Now I'm going over the
stalk of the stem. If you look, it's
not a straight line. It has a curve here, a curve on the other side. That's important to keep in. We create that variety by using either a dry
brush technique, dropping in different values
of green where we see it, or that's in the shadow area or even a touch of the
gold to warm things up. Looking here, using that Goldie orange
as under painting. I'm just going to move
to a bigger brush so that I fuss around. It just gives that
beautiful and the glow. You see that when you're
looking at flowers in nature, how the sun will hit it and become transparent and
it's lovely to look at. I like that very
soft apricot fill. Even though this leaf
is technically green, I'm just going to leave it that apricot color because it's pretty and it also ties in
with that drop of orange. I think if you have the
structure of the leaves, well, then you can be a little creative and use
your imagination. Here, I'm inventing the
leaf of falling over. This leaf is looking a
little sad at the moment, but if it was feeling
upright and perky, it'd probably be curving
over without my help. I'm doing the underside of it blue here. Then this way, I'm just doing a little bit of
negative edge painting. I keep that sunlight feeling and just paint away
from the leaf. I'm coming with a smaller brush. You can get into the
zone quite quickly. Now, I'm looking at this shaft here and
I'm picking up some blue and just exaggerating the shadow color to
give it some form. These little edges are colored. Again, because we're just
doing an expressive, loose gestural rows, I'm not going to go around and
do it to every single one. Before we go on any further, I'm going to let this dry
and come back and finish off doing the details of the rosebud and make
sure we connect it all.
8. Simple Details to add Definition: For the final stages
of the rose bud, I'm using an angled brush. This is because I want
more defined lines that emulate what's happening in the actual center
of the rose itself. Also synthetics tend
to hold less water, so there's more control which
I do like at the very end. It's nice to be loose
and expressive. But then I think it's
important just to have a little bit of detail and some hotter edges to define the rows and offer
some visual contrast. I'm going back into
the rose color. The bright rose color, and just making some little
touches here and there. The nipple yellow, and the bright rose
makes a nice Daud pink. Almost a vintage pink color, which is attractive and
also gives that sense of being more natural and muted. As you can see, the
angle brush is good. I've only recently started
using it in the last couple of years because it really emulates the leaf
and flower shape, as you can see, and it gives a different feel to
just a round brush. But it's definitely has that feel of petals
and I really like it. I'm going to imagine the light source is coming
from the top right, so I need to bring very pow wash of color
to give it form. There's a little bit
of lavender there, which is nice and clean. Lavender is a really
attractive shadow color to use, particularly on yellow. Because you don't want to use a dirty brown for a
rose for shadow color. Well, not on this
particular one. Never say never. I'm just adding these tiny
little details, hard lines, not much color, and already it's beginning to
give a lot more definition. I like this soft edges
and the suggestion, so I actually think I'll leave
that and not do anymore. I think with a
watercolor like this, which is more atmospheric
loose gestural, laces definitely more, and I think it's
better to suggest the rows as opposed
to overworking it. Unfortunately, I
don't know about you, but definitely with me if I'm enjoying myself, I'm
having a good time. I'm getting lost in the process. It is so easy to keep
going and overwork, and then you've lost
that wonderful charm of a loose watercolor. I love that way that it has
those soft edges there. It just gives that
sense of movement. I'm now going into the leaves, making some areas
stronger by using that combination of gold, Sap green and a little bit of translucent orange which
are the same colors that I used in the under wash except a little bit stronger just to bring out
some of the stem shape. This is just a loose study. There really isn't a lot
more that needs to be done. I'm really happy with the way
that this has turned out. It's loose and gestural. You have the feel
of the rose bud. The last thing I'd like to
do in this row study is to recreate that
lovely apricot color, which is the conecran gold. A little bit of permanent
rose, and nipples yellow. I'm going to just lightly repeat it and
bring it in there. But it just brings it
in a little bit more. Here we go. That's nice. It has a nice s-shaped curve, a little bit of rhythm, and I'll just add some
splatters at the end, and I would say we're done
time for our next lesson.
9. From Bud to Bloom: We filmed the Rose Bud and now, we are going to look at painting the rose at the peak of its beauty when
it's in full bloom. Now, I've lightly sketched the rose in the water-soluble
graphite pencil, and I'm taking a mixture
of Naples yellow very softly and just
lightly putting in an under wash of the
petals of the rose. When drawing the rose, I think try and look at the irregular edges that
you do see in nature. It gives it a little
more credibility in the natural way
that it looks and also I think there
is something just really beautiful
about the randomness of line that you get. If it's too round, it tends to look
a little uniform, and sometimes, especially if you're creating delicate colors, which we will be
with the pink rose. It can look like a powder
puff, so it's nice. I think just to have
some variation. The rose that I'm doing [NOISE] is arise that I took a
photo of when I went to the Adelaide
Botanical Gardens and [NOISE] it was done
around the time of spring so there was lots of beautiful subjects
for me to sketch, take photos of, and what I've done
is I've created some downloads in
the resource gallery so either you can
paint along with me, or if you have a rose that you can draw
from life even better. Now at the center of the rose, I'm just going to drop in some light translucent orange and [NOISE] as you can
see at this stage, everything is bleeding together. Now I'm going to go in with translucent yellow, and just. This is probably one of my favorite stages of just
dropping in the colors, letting them merge together. Some people are scared
of the white page. I actually loved the white page. The beginning stages
of what's going to happen is one of my favorites. It's probably around
the middle to the end. That's when I get nervous. But this is lovely
because you have the translucency of the
paper showing through, and it just gives a
really beautiful effect. Now I'm going around with a damp mop brush and
just lightly bleeding out some of these
edges because I don't want it to look like a
cookie cutter illustration. I just want some of that
colors to blend out. As you can see, this
area is very delicate. We have that blush of
warm in the middle and then the very pale
pink along the edges. I'm going to now use some
bright rose or operate pink or permanent rose
depending on what you have in your repertoire. Now first of all, I'm just going lightly
over with a clean, damp water because the
layer underneath is dry. Nothing will get
muddy or mixed up, and then I'm just going
to lightly just to. I'm going to come in
now and just make some really gentle
deviations with the petals. I'm using a smaller brush, and then my thicker brush
just to bleed it out. Again, I would only do
this in the shadow areas, and that's because I
don't want to travel around every individual leaf
as if we're coloring it in. Look at your reference photo and just pick out a few areas, focusing on the colors, on the beauty of the flower. It really is a
transformative way to spend a painting session and
if I'm feeling a bit low. If I'm feeling pretty positive, it's still brings
the same result. Just that sense of peace
when you drop in some color, listen to the noise at the
brush makes in the water. It really is a
beautiful experience. I do prefer to paint from life and I feel that personally
I get better effects. But the more that
you paint from life, the more confidence it begins to give you when you
paint from photos. When we're looking at
shadows on the petals, try and think it's probably the darkest value
is really going to be no more than 20 or 30 percent
of the actual flower. I think that's important to remember because it's easy
to put too much color on, and then you lose that beautiful light coming through from the
white of the paper. We starting to see
some form, and now, I think I will go
into the center of the rose on and picking
some transparent orange, and just a Dutch of sap
green to neutralize it [NOISE] and just slowly coming around and
just drawing it in. This doesn't have to be perfect. It's just gestural. As long as you think
where is the sun coming? Let's pretend the
sun is coming from the top so the shadow
will be going this way. When painting atmospheric roses, I think what's important
is just to make suggestion rather than overkill. With this particular rose,
what I'm looking at, is that beautiful delicacy of the pink petals and
the Aeneid detail that are really be doing is at the center and that will
be the focal point. But again, I don't want
these little stems here to dominate so I'm keeping the
colors pale and just again, varying the tone,
varying the value, and already I'm feeling pretty happy with
the way it's going. I'm really happy with the soft subtleties of the pinks and the
yellows and rather than going in and adding more paint and potentially
overworking it. Let's go to the next
lesson where we'll talk about adding foliage.
10. Adding Foliage: Sometimes a rose bloom looks beautiful
just independently. It can be really tricky
adding in leaves. This is one that
I've done earlier. I was just experimenting
and I really have kept the leaves to suggestion. I wanted to keep it light. In these colors I've just
used viridian green, a little bit of
transparent yellow with some orange
to neutralize it. It's very suggestive,
it's very atmospheric. I don't think it needs a
lot of detail or leaves. It really is a personal choice. How much detail you
want to bring in. But I think if you want to
keep that sense of lightness, less is always more. Here I just have a selection of leaves for my own reference
from my old rose garden. As you can see,
I've taken photos where I love the
decay of the leaves. Namely because it has
interesting colors like these beautiful
golds and browns. I'm thinking with this one, I might go in a little darker just because I've showed
you the other version. But if I look at this, it would be a nice composition
if I traveled down with just the 3,4 leaves
and kept it quite simple. I'm to mix up some viridian with a
little bit of the brown. I have some of that
lovely gold cadmium. What I'll do first is get a clean damp wash, like so. I'm doing this so the
water will travel. With a natural hair brush, I'm going to just
lightly drop in some color because this paper is quite thick and absorbent. It's not moving around like
a smoother surface would. Drop in some cad yellow maybe at the top to emulate some sunshine and also to replicate and continue that color harmony
that we see in the front. Depending on your
own personal style, you might look at
this and think, I don't want to do much more, and I don't want to add leaves, and that would be a
fair call as well. If I take that permanent rose and then add
some of that green, I think that's quite
lovely as well. The thing with watercolor
is that if you trust it, the paper, the water will
do your work for you. But the thing is,
it is an exercise, it is a discipline
in itself just learning to trust
your own instincts about what looks good. I'm looking at the way
the water is traveling, the way the paint is dispersing, and honestly I think I could
almost leave it like that. Now what I'm doing is very
gently with clean dump water, I'm pulling the green
up into the petal. It gives that feel
of curving around. Also in real life, that green would
be reflecting in the petal area very softly. Again, it makes
the whole painting cohesive because you're
bringing that around. Because I've introduced this
lovely olive green color, I'm just going to add a
little touch of it back in at the center of the rose
to harmonize all of it. If you keep a limited
palette and repeat your colors in all areas
of your painting or study, it just gives your
work a cohesive look. Now if you're at this stage, you might look at it and think, I'm happy with just having a gentle and delicate
composition, I'll leave it. Honestly, I would
be tempted to do that because I like
it the way it is. But in this case, I'm just going to bring out some very simple leaves and then I think
we'll call it done. I'll let this dry
and we'll come back. If you are working from life, use the actual plant to help you make
compositional decisions. Sometimes what I like to do
is just play around with shapes and just see what
works, what doesn't. Nothing can give you
better inspiration than actual nature itself. I like the randomness of this. I'll pull this out. Now I'm getting my rigger
brush and putting it in my dirty water and
bringing this down. Just making some random stalks. Then I'll come in and just drop some color in
here and there. Because again, I don't
want one hash line. Then grabbing my round
with a natural hair. I'm getting a random mix. A lot that went up there. This is a beautiful gold color, which is quinacridone gold. Is just basically
dirty from my brush. Again, we're having that lovely sun-kissed
look of the leaf. I like this random arrangement. I'm going to blend this out
and then continue with that. Just pulling that here. These leaves, I guess you'd
call them a mud color. It's a mixture of all these colors that
we've used together. I'll drop in some more
of the yellow here. It's really important
just to play, not get locked into things and listen to what
your painting needs. The colors that I've
used are really soft. I don't want to come in
with anything really hard. If you are painting a rose, like a deep red rose, perhaps the work would
call for dark leaves, or perhaps you'd
like to work with that contrast of
dark against light. That's really effective too. Again, it's drawing
really nicely. I will let it dry
and just come in and just do a few details. Looking at this, I
really like this area, the way that the
watercolor paint is just traveling
off into the light. This is a nice
shape to work with. Then we have that olive. What I will do is just
bring leaf shapes. Get a smaller brush. [NOISE] Bring this around. Neutralizing it with the orange
and just play and invent. Using the base that
we already have, I'm coming in and just
going over the top of this. Looking at these, I'd
like to strengthen them. We have that warm
olive underpainting. Leaves tend to be angular
or oval-shaped with roses. If you keep within
that shape and then invent some colors just to make your compositions
more interesting, it will still be believable. Now, I'm repeating this
beautiful gold color up here. Again, keeping it very simple because this is quite a
strong shape at the top. I'm adding extra visual white by making some of these
colors a bit darker. This is really lovely. It's simple, but there's
a lot of color diversity. Now, I'm looking at this, rather than having
a stalk connected. What I will use is a tone. Come in with wet motor. This is a nice [inaudible] area. I'm using the viridian, which is quite a core green. I'm neutralizing it
with the orange and the brown and along the edges, I'm just lightly dropping it in. Just to bring these leaves. I'm bringing through tone these leaves and
connecting them. This beautiful rose from the Adelaide botanical gardens I have put down in
the resource section. I hope you will follow me
and create your own design. Basically the points to
remember is, keep it simple. Use a lot of water. These wonderful pinks and
yellows of the rose petal, will work the less that you do. I'm really looking forward
to seeing what you create. Let's go to our next lesson
where we're going to create an elegant design with
the balloon and the bad.
11. Looking at Composition: When thinking about
composing a piece, it doesn't have to be
overly complicated. We're basically using circles, ovals, and angle shapes, which are the leaves
and the blooms. In this one, I'm just imagining that I might
have one bloom shape. Press the stems will crossover with these
two little blooms. Maybe I want to give one
rose more dominance. For example, it
could be a rose bud. Then I think lots of
rose buds around it, does that work? Not sure. I would go into the next. Perhaps I would like
to have a big bloom in the bottom and have that be my dominant one with
some leaves coming out. To wipe that up, maybe a brightly colored or deep red rose bud
up here. Join them. It really is just
abstract shapes which we will be
giving more detail to. Even if you invest five or 10 minutes in
during this exercise, it really helps you
from getting lost. I've just got some markers in different grades
or dark colors. Now I'm thinking, I
know that we'll be the painting an
apricot colored bloom. Do I want to add the
top or the center? Do I want a dark bud
with it crossing over? It just depends. At this stage, we're just
pattern-making until we find a pattern that suits
our visual sensibility. In the next lesson, we're going to go over color
thumbnails once we have decided which particular composition
we're leaning towards. Be sure to share some of
your little scribbles in the project gallery and
tell me what you think. See you in the next lesson.
12. Explore Colour Thumbnails: Before we get started on
creating our final piece, let's look at some color
thumbnails and how they help provide a
foundation for you to create your piece of artwork. This process takes about
five or 10 minutes, but I find it invaluable in helping me give some direction
about where I want to go. For our final bloom and
bug piece I've opted for the bug to be on
the top traveling down towards the full-bloom. This one has a plain
white background. I'm very partial to
this because I think this composition is very
simple but very elegant. Here I was playing around with the idea of being
bright and bold. Which is really not
my personality, which is probably
why I don't feel comfortable or am gravitating
towards drawing it, even though I do like color, it doesn't feel like me. But again, I haven't invested a whole afternoon or
day in painting this. I can just say that as much
as I love blues and greens, against that, it doesn't reflect on what I'm feeling at this present moment. Here I've introduced
some cobalt blue. It's very soft, it's very
delicate and fresh and clean. I actually think that this is the one that I'm
going to elect to do. Another one that
I was partial to, was to repaint the
pinks and purples of the flowers and just blade them out in the
vignette style as well. That's a really nice way of creating harmony
in your piece. It perhaps isn't as eye-catching as something
with a more bold contrast, but I do like that
soft, delicate feel. I think it could be nice
for you if you did it in the neutral
purples and grays. I think that could look
really effective against the deep brows and
the warm orange. So again, all is not lost. Perhaps one day I'll revisit
these different ones. But for the purposes
of this exercise, I think I'll go with this one. Explore this way of working. I think it's good
to have a process to help keep you
from getting lost. Even though you still have
the ability to change your mind during the painting and listen to what
the painting needs, it's a great way of
grounding yourself. I'd love to see your versions
in the project gallery. For our next lesson, let's go towards creating
our final piece.
13. Designing with Bud and Bloom: Well, here we are, we're at our final stage where we're
going to put everything that we've learned together
and create our bloom. I'll be getting my angled brush
and some bright rose with the shell pink and just
create the silhouette. This particular rose is a wonderful garden rose
from mild backyard. I do remember it just had the most incredible scent which for some reason it
seems like in florists, they seem to be getting rid of that perfume and I'm
not quite sure why. But I think what's important is really just to think
about the silhouette of the rose rather than the
details of what is inside. It can be a little overwhelming. When you have rose
petals and there are so many of them that it's easy to become a little
bit visually lost. Now I'm going to come
in with some of that deeper and maybe warm it up with a little
bit of the orange. There's just something very poetic about the
nature of these roses. We want to connect to them on a more personal level rather
than the clinical level. Now I'm getting some more
of that deep rose and I'm looking at the shadow areas. Now let's imagine the sun is
coming from the top-left. What I'm doing is shading that teacup shape that we looked at before to give
that sense of form. The sun's hitting here and
we're wrapping our strokes, our darker shadow strokes around in order to
give that dimension. Next, I'm getting some
lavender color and it's almost neat at this stage because the
paper is beginning to dry, which does give a little bit of texture that I
think I will stop, let it dry, and then
move on to our rose bud. Using my spray bottle, I'm just going to lightly spray because I want some soft
wish and wet techniques. This time I'm going to start
off with naples yellow and lightly mold the rose bud. I've woken up pretty
early this morning. The house is quiet. I have two dogs who do like to get involved
and are quite noisy. Two little Maltese Shih Tzu who those artists have
studio companions, like dogs or cats. They are wonderful to have for company but not so good
when you're trying to film they're very inquisitive and definitely with what's
happening outside. They like to bark a lot. With this soft rose bud,
what I'm doing now, is on the very tip, I'm going to get a little
bit of the sap green. I'm not cleaning my
brush because I want those colors to
merge in together. I'm just going to put a
little bit on the base of our little rose bud
or our cup shape. It has that sense of
sitting within the sepals. Now I'm drawing that out
with some dry brush. It's nice to have a contrast
between soft strokes of the brush stroke and then some dry brush ones just
to add visual interest. We don't want our
painting to be so soft that it looks like we're
looking at an underwater. It's nice to have some
sharp edges here and there. Now I think I might
move in around here and put in a
background rose. This background rose, if you look at the
resource photo, it is in the background. But we're not going to put it in full focus because
it's just going to be a supporting player
in our painting. I'm mixing up some
very dull pink, a mixture of the shell pink, the whole bond shell pink, which is lovely,
and also lavender. The shell pink is a
beautiful convenience color. If you don't have it, you
can mix your own just by getting a favorite pink and
adding an opaque gouache. As much as I try and
have a limited palette, sometimes it's nice just to have those convenience colors
which you can go to. I'm keeping it very
pale because I want this flower to be dropped
into the leaves later on. I think that's a
pretty good start. I'm going to let these dry and then we'll
move on to the leaves. Remember when we were working
with our color thumbnails, I decided it'd be nice to
work with cobalt teal. I think that's a beautiful foil against these pinks
and apricot colors. I'm mixing very
light cobalt teal and a little bit of
quinacridone gold. I'm just going to invent some
leaves as we traveled down. I'm using pale yellows and blues as an under wash for the leaves because I'm just
mapping in the placement. Also I want that beautiful
under painting to show through when we come back in and put more
detail on the leaves. Even though I've lightly met
my composition with pencil, I'm not adhering to the lines. I'm just following
my own whimsy, using it as a guide only
because I don't know about you, but sometimes I paint
and then you see different things or something magical happens
with the painting, and you decided that you want to change direction
a little bit. But so long as you have the nuts and bolts of it should be safe. I'm dampening this area
here just so I can drop in some colors so we can have some background leaves
that are more diffused. What I'm doing now is keeping
the value range quite soft. Even though I'm changing
between gold and cobalt teal. It all pretty much
is the same value, so it all mixes together. There's something
very meditative about having silence in
the house and being the only one up or if
you're a night owl, being able to paint
just with peace. I think the very character
of roses conjure up different things for
different people that I think quite
a poetic flower. It's nice to keep that sense of beauty and lightness
when we're painting, especially with these
soft pink apricot roses. Now this is a really nice start. What I'm going to do
is let it dry off, and that's really important, and then I'm going
to come back in. I'm really happy with the
way that this has going. It's soft and suggestive. What I need to do now is just put a little bit of
detail into the leaves. I'll put some music
on and you can watch me as I just pulled
out a few leaves before we go in and
add the detail to our bloom and bud [MUSIC]. Now we're at that stage where
I think we're almost done. If we put too much in, I think we are in the
danger of overworking it. At this stage, I would
let things dry and make a cup of tea or coffee and then come back and
look at it in fresh eyes. This lovely looseness
and blending of the washes and leaves is nice. I wouldn't want to
interfere with it. I just think we just
need to perhaps make some of the inner
petals stronger, perhaps a tiny little
bit of form there. What I've done with
the leaves is I've very rudimentary got my brush, added in some veins, some edges. When you're drawing the leaves, just remember they're
just oval shapes or triangular shapes. So long as you have the tone of the leaf in the
same value family, you can play around and they
don't have to be super neat. In fact, the brushwork
is what will make the leaves interesting. I'm just going to
accentuate the shadows. If we think of the light
coming from the top-left, this will be lighter. But if we recall back to our earlier lesson where
we're thinking of this shape, being a teacup
with a wine glass. That central container will
have the shadow against it, so that will be darker there. These shadows, this
synthetic angled brush is great because it replicates the angular nature of the
petals and it's good to use a smaller brush
at the very end of the lesson or the
stage of the painting. Because the smaller the brush, the more control you have. Just with the light
green and cobalt, I'm coming in just
to draw that out. Using my mop brush
to bleed it out. It's bleeding over that particular rows in
the background, which knocks it down even more. This is nice the way that
it's all blending together. I'll leave that and
using my angled brush, just doing some negative
painting here and there. At this stage, sometimes it's good to even
leave your painting to the next day or work
on another one. Because I think people are
scared of the white page. I think this is the danger
zone at the very end when you attempted to put
on too much detail and inadvertently overwork your
painting because we want to keep this a nice, fresh sturdy. When drawing leaves or
putting in a bit of detail, try and remember the
central vein of the leaf. That will help you
proportionally when the leaves start to curl
over or move away from you. Let's move on to our
rose bud at the top. I like this soft, muted pinks and apricot, so this doesn't
really need much. I think it's nice to keep
some soft edges bleeding out. I really think if I just add some dry brush to
add some texture. We're at the stage
where the painting is still very soft and atmospheric, yet it still tells a story of garden roses in the sunshine. What I would do now is just pull out a few highlights
in the rows. But I will do that
with white gouache. I just like to use
white gouache neat and dry brush it over
petals that would be hitting the sun and I think the white gouache makes a nice fall against
the transparency. On the top of the rose, I'm doing some light
gestural marks where the sun would be heating. You want these marks
just to be quite calligraphic and very gestural. We've now come to the end
of our final project. Let's go into the conclusion where we'll wrap up on
what we've learned.
14. Wrapping Up Roses: [MUSIC] Hello again. We're now at the
end of our class, and I hope you enjoyed it as
much as I love creating it. With this way of painting, like its original source, no two rose paintings
will be the same. Your personal brushwork and painting identity
will shine through. I would love to see your creations in the
project gallery below, where you can also
find access to the materials list
and photo references. Please let me know whether
you would like me to create some more classes of
roses in the review section. I would really love to
hear your feedback. It would mean a lot to me. I'll see you in the
project section. Take care and happy painting. [MUSIC].
 Sara Corren, Watercolour Artist and Teacher