Transcripts
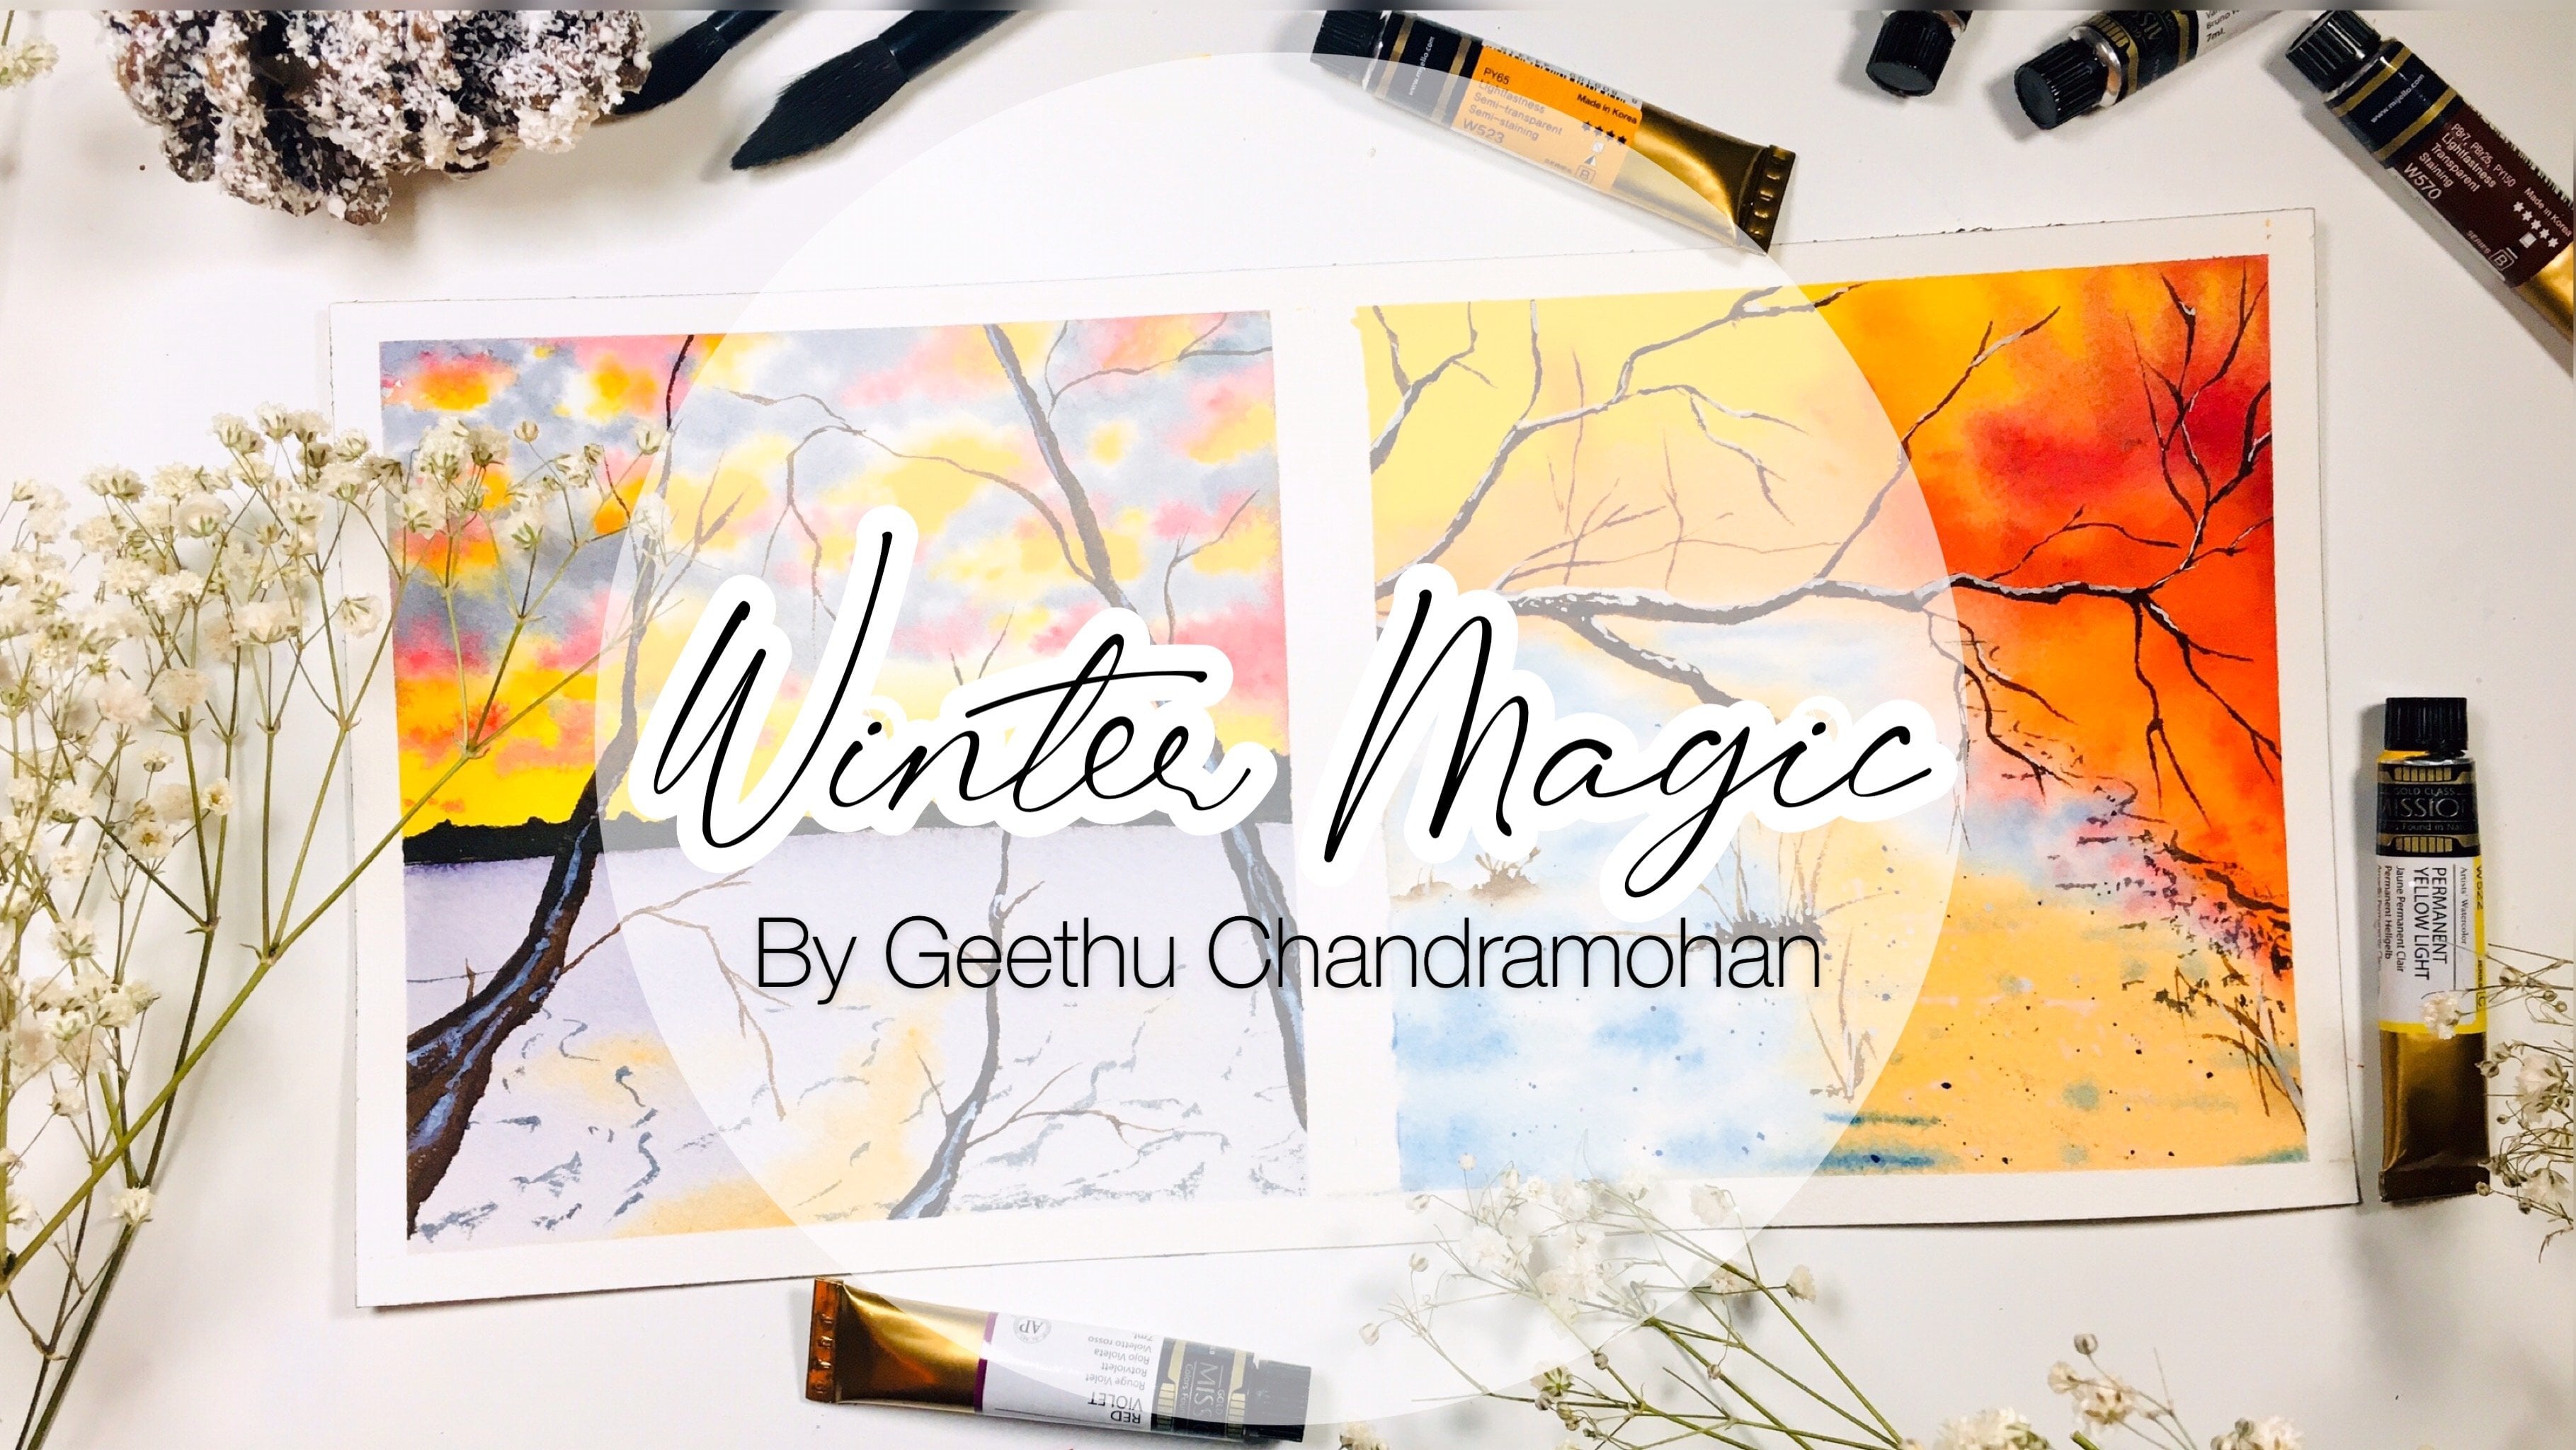
1. Welcome to the Class!: When trying to paint with watercolors, working on the wet-on-wet technique, it is quite difficult to keep the paper wet for a long duration of time, as well as trying to understand the water to paint ratio on the paper, especially if you're a beginner. Hello everyone. I'm Geethu, an engineer, an artist, and an instructor based out of the UK. You can find more about me and all my other classes on my Skillshare profile. All my paintings and snippets of my process videos are available on my Instagram profile, colorfulmystique. Welcome to this Watercolor Basics class on water control. When I started out with watercolors, I didn't know how much water to apply to the paper and I spent months trying to figure out the exact paint to water ratio that I needed to apply. This class is something I wish existed when I started out my journey with watercolors. I have tried to cover all the major factors that you need to be aware of while using water with watercolors. right from the paper to the brushes and paints, you will get a deeper insight into how it affects the water control on the paper. The class is short and simple and gives you a total insight into the things that you need to take care while applying water to your paper for painting. Without any further ado, let us get into it.
2. Watercolour Paper: The first and foremost thing an artist needs to achieve the perfect control over their watercolors and water control, is to get the correct paper. Paper is a very important factor when it comes to watercolor painting. I have seen many artists that followed through classes and then is not able to achieve the same effects as that of the teacher, or what they're seeing in the video. Then you start to criticize yourself or feeling unaccomplished. But let me tell you, it's usually the paper that is the problem, and it is the paper that is the ultimate culprit why you're not able to get the same effects as that of the teacher. The order of importance when it comes to water colors is paper, paint, and then brushes. Not realizing the importance of paper is the biggest mistake that is one thing that everyone overlooks. That you go to a shop and buy paints, and even if you have the most expensive paints and brushes, it doesn't matter if you don't have good quality paper. The one thing to understand is that you can actually paint with cheaper quality paints and cheaper quality brushes, but you cannot get away with a cheaper quality paper. If you look at the works of most professional artists who work on the wet on wet technique, they use 100 percent cotton and minimum of 300 years on paper for their work. That is exactly what you need if you want to achieve the same effects as there is on the paper. With regards to watercolor painting, you need a paper that is at least 300 GSM or 140 LB. This is the thickness of the paper. When I say thickness, this edge, you can see the thickness here. That is the weight of the paper. It is really important because if you're going to use a lot of wet on wet method onto your painting, then you need the paper to withstand those washes. That's why you need a thick paper. Because water can cause your paper to go bopping or bending. You need at least 300 GSM paper. Then for your paper to stay wet long enough for you to finish with all of your better on red strokes, the next thing that you need to look into is the cotton component in the figure. So 100 percent cotton paper is the best for watercolor painting. If you're going to do some landscape and a painting with a lot of wet on wet techniques. I have to say one thing. All the 100 percent cotton paper out there does not behave the same way. They behave differently due to the ways in which they are manufactured. Some of the papers that I would suggest are Canson Heritage, and you can see it's this one. It's locked pad. It's 300 GSM, 100 percent cotton paper. There are also other papers from Canson itself. For example, this one, which is Canson Moulin du Roy, 100 percent cotton paper and it's cold pressed. Both of these are cold pressed. The cold pressed refers to the texture of the paper, which means it's medium textured. Then one of the other best papers that I like is Arches. This Saunders Waterford paper from St Cuthberts Mill, is also another great paper that you can use. As you can see, this is also a 100 percent cotton and 300 GSM. Those are the great papers that I would recommend.
3. Right Amount of Water: Now let us see what is the right amount of water that we should apply on the big buzzword or wet-on-wet technique. Here I have my flat brush from Silver Velvet. It's 3/4 inch. I have my water jar here. I will take water and I will apply onto my paper. Now I will show you what is the right consistency of the water that we have to apply on the paper. First of all, let us take enough water and start adding it onto our paper. I'm using a flat brush there. Now if you look at the paper closely in this angle, you can see that there is a lot of water flowing around. This is actually too much water because it's got a lot of water flowing around it. It's got pools of water which we should avoid. How do we know the correct amount of water that is needed on the paper? When you apply the water, make sure that you have your board tilted, whatever board that you're using to tape your paper onto, let it be tilted and then you'll see that all of the water is flowing down. That would keep the water on the paper uniform because it would flow down and would accumulate at the bottom, which you can then wipe off. But see now, we only have a sheen of water on the paper. Rather do not have any pools of water forming on the paper. This is how you know the amount of water that you need on your paper because now your paper is wet and also the water on your paper is uniform. When you're applying your paint on the paper, it would be uniform and it would not form any pools because you've got even water on your paper. Now, let us consider the scenario where you have so much water on the paper than what is actually necessary. Let's actually, pour in a lot of water onto this side. I will just show you what I mean with too much water. Now on this side we have too much water. You can see the water flowing. That's too much water. Let's say we have too much water on the paper. When we pick up our paint and we apply it, you'll see that it stays on the surface and we wouldn't be able to get the effects that we want, like we can't be getting an even blend like this one because there's just too much water on the paper and it formed a large number of pools on the paper. We have had a look at what is the right amount of water on the paper. The next thing that we need to know is how can we keep the paper wet for a longer duration of time? I have just applied the paint on this one. You can see it's uniform and this one here is where we made large pools of water. That's still here. This [inaudible] region is still wet and so we can go on painting with the wet-on-wet technique. When painting with the wet-on-wet method, one thing to keep in mind to keep your paper wet is to look at your paper, have it at an angle or something and look at it under sunlight and you'll be able to see where are the wet regions and where is it drying. Let me just pick up some more paint and I will show it to you. Here I have picked up the paint. I can see that this region here top corner is starting to dry and this region has more of water. Because this is going to dry, I would apply there first, I would apply my paint there first. Now that region is wet. In order to keep your paper wet, the key thing is to keep observing your paper. Look at where are the areas that it is starting to dry and wherever it is drying, apply your paint continuously. Even if you're doing something here and you're working around making some other shapes here and you observe that your paper has started to dry in a different corner, go back with your paint and just work on that area again. The key thing is to keep working on the entire part of your paper wherever it is drying out, don't let it dry. You might be seriously working on something at the bottom, trying to add a shape. Like maybe you're trying to add in some shapes here. You are in the middle of doing this and you have realized that your paper has started to dry, then you should immediately go and apply whatever color is there that you need to apply. Go back to that area. Don't let any part of your paper to dry. That's how you can keep working on the wet-on-wet technique for a longer duration of time.
4. How to Keep Paper Wet Longer: There are two ways in which you can keep your paper wet for a longer duration of time while you apply the first layer of water. Let me show it to you. I am applying the water onto my paper using my Escoda Aquario flat brush. This flat brush covers a large surface area of the paper. This is the reason why I use it to apply the water onto my paper. I have applied the water all over the paper, but since I have gone over the entire area only once, this is more likely to dry faster. But then if you were to apply the water multiple times on your paper, then you would get much more longer drying time than when you apply it once. So, this is one method that I use to keep my paper wet for a longer duration of time. You might have to do this process multiple times. For example, for 5-10 minutes. Just keep applying the water but make sure it's even we do not want the water on the surface to be forming any pools or large blobs of water. Just make sure that you apply it evenly, and this is why flat brush can be useful. But it's okay, even if you don't have a flat brush, you can use whatever brush, but just make sure that the water that you apply on the paper is even. You can hold your board at an angle to ensure that the water on your paper is even. Because even if you apply any large pools of water, it would just flow down and it wouldn't accumulate on the paper and wouldn't cause any large pools. So, applying the water multiple times is one option. The second option is to apply the water a few times onto your paper and then wait for the paper to start drying. This would be around 2-3 minutes. Once the paper has started to dry, you can re-apply the water. So in this process, what would happen is when you apply the water for the first time and then it starts sinking into the paper. Then it gets into the underlying fibers of the paper, so the top layer is now starting to dry, but the underlying layer is wet. Then when you re-apply the water on the top. Now the second time this water would take longer to dry because the layer underneath is already wet, and so, it gives us a little extra time before this whole water that you apply the second time is absorbed by the paper. These are two options that you can use to keep your paper wet for a longer duration of time.
5. Environmental Factors: There are a lot of factors affecting the wetness of the paper, that is how long you can keep your paper wet enough for you to work on the wet-on-wet technique. These include several environmental factors, as well as the quality of your paper like I had mentioned before. If it's not 100 percent cotton paper then it is most likely to dry quicker than a paper that is 100 percent cotton paper. The environmental conditions include dryness or the heat inside the room, for example, if your room is well heated and it's got a lot of dry temperature then your paper is also prone to dry quicker. Or maybe if you're sitting right next to a window that's open and there's a lot of wind blowing that can also affect the water on your paper and it might dry quickly. Another thing to look out for is if you've got a fan or an air conditioning that's got the fan on, that can also affect the drying time of the paper. Like I mentioned, there are several ways that you can do to keep your paper wet long enough. Keep a lookout for the environmental conditions that can affect the drying time of your paper.
6. Water Contol 101: Now let us look at the number one rule of water control. The first and foremost rule is that whenever you're applying your wet-on-wet strokes, if you want it to get a perfect blend without any bleeds or blooms on the paper, then the amount of water on your brush should be lesser than what is there on the paper. Let me repeat that once again. The amount of water on your brush should be lesser than what's there on the paper. Let me show it to you. Here I have my brush and I have a lot of water on my brush. I'm picking a lot of water, so that's really a lot of water on my brush. I'm going to drop it to this region and you will see what happens. Do you see the blooms forming? Do you see the paint spreading? This is because there is more water on my brush than there is on the paper. If we apply, at any point of time on the paper, if you apply the water and there's more water on your brush than there is on the paper, then it would create blooms or dark edges. In order to avoid that, what we can do is; you can move your brush along the side of your jar or your palette when you're picking up the paint. In this case, if you are picking up the paint, you can see there's a lot of water there. Here I am picking up my paint but you can see it's got a lot of water. I will run my brush along the edge of my palette and release all that extra water. Release all of that extra water and make sure that your brush has lesser water than there is on the paper. Now when I apply it onto my paper, see, it doesn't form any blooms because the water content on my brush and the paper is equal. This is the number 1 rule with regards to watercolor painting. Now if you want to add some wet-on-wet strokes onto your painting, you would be picking up more paint and less of water, making sure that your brush is dry or semi-dry with very little water and more of paint. See? I'm picking up my brush and I'm brushing along this side of the palette because it's partly lesser water there. Even then, I make sure that my brush has very little water and I apply that onto my paper. See? Now I get those perfect strokes that I want. It doesn't create any bleeds but rather blends along with the background because the water that I'm applying is not greater than the water that's already there on my paper. If you apply more water than paint, you're going to get blooms, and if you make sure that the water in your brush is less than that on the paper, then you get perfect blends like this. Make sure that you always run your brush along the side and release all that excess water when you are trying to do any strokes on your paper. This is how the paper looks after everything has dried. You can see the bleed here mainly because we applied a lot of water to this right side and it seeped under the tape. Again, if we apply the right amount of water on the paper, then you'll have a cleaner edge, you will have a cleaner border, and also if you apply using the water control 101, then you will also not get any blooms like this unless you want to deliberately create blooms in your painting. You can also see how those blends are standard. It did not form any blooms. To recap, whenever you're doing the wet-on-wet method, the water on your brush should be lesser than the water on your paper and then you will get a perfect blend or a perfect wet-on-wet technique.
7. Understanding Brushes: Now let us understand the role of brushes in water control. There are different kinds of brushes available out there and they have a great impact on the water control. This one is a natural hair brush, as in, this is a brush from Silver Black Velvet, this is a squirrel hair brush, and this is a brush from [inaudible] , which is synthetic. Natural hair brushes, they hold a lot more water than synthetic brushes. But we're not talking about those synthetic brushes that are said to be mimicking the properties of natural hair brushes. There are several companies which produce synthetic brushes, which are almost similar to natural hair brushes. I'm not talking about those. I'm talking about the other synthetic brushes that doesn't hold a lot of water like the natural hair ones. Let me show it to you what I exactly mean. I have dipped my brush in water and I am going to be picking up paint. I will pick up a lot of paint and a lot of water. You can see my brush is loaded with the paint and the water. I am going to apply onto my paper. Let's see how long it goes before it starts to dry. Now, it has started to dry, there. It's almost four lines, and the same thing if I try to do this with the natural hair brush. Let me load up my brush with as much of the paint and water. I have loaded up my brush and I'm going to do the same thing. You can see, it's already started to dry in the third line itself, which means that this doesn't hold as much water as this one does. When we are working on wet paper and we want to apply more and more paint on top of it, and you're worried about how much water there is on your brush, we can always use a synthetic brush because it holds lesser water than a natural hair one. You'll be able to add shapes onto your wet paper. Let me show it to you what I mean. I have my paper here and I'm just going to apply water to a small area here. I have applied the water evenly to a small area here. You can see it in this angle. Here I have my synthetic brush and I'm picking up my paint. You can see that it spreads a lot because I already have a lot of water in my brush. Whereas if I were to use the same paint, but with a synthetic brush, it applies more of the paint rather than spreading it around. This one had a lot of water because it's a natural hair brush and this one had lesser water because this is a synthetic hair brush. Keep a lookout for the brushes that you're using when you're adding more wet and wet stroke onto your existing wet paper. For the first few layers, while your paper is still wet because you just applied the water, you can go ahead and start painting with your natural hair brush. That is, you can use your natural hair brush and apply your strokes like I'm doing now. I'm adding all of my paint onto the wet paper. Then if I want to add further detailing on top of this, before this gets dry, I can switch to a synthetic hair brush, pick up paint, and add on top of it. Then it wouldn't spread too much because I'm not introducing any extra water onto the paper. Let me pick up some more paint. Even though I'm picking up the water from here, this brush doesn't hold a lot of water, so it's not going to introduce much. If you want to add shapes onto your paper on the wet part and you want it to stay where it is and don't want it to spread all around the paper, then the best is to use a synthetic brush because you would be able to get the shapes that you want. See that? If I were to do the same thing with a natural hair brush, see? My brush holds a lot of water, so it's really hard for me to get that straight line without it spreading too much because I have a lot of water in the paper. Even though you do this, the natural hair brush holds a lot of water than the synthetic hair one. So just keep that in mind.
8. Using Watercolour Cakes or Pans: Now, let us understand about using watercolor cakes. This is a palette from Art Philosophy. You can see these are watercolor cakes. Watercolor cakes take a bit longer to activate than the watercolors in tubes. It is most likely that you might be using a lot of water to reactivate those cakes. You need a lot of water to activate them and because you're using a lot of water to reactivate them, you might not be realizing that the water on your brush is a lot more than what is needed on your paper. For example here, this one, I just painted it and it is still wet. If I want to apply anymore strokes on top of this, then, the water on my brush should be lesser than what is there on the paper. But because I'm using cakes, and I have just reactivated it with a lot of water, the water on my brush is much higher than what is needed. In this case, when you're using cakes, the most important thing to note is to make sure that you remove all the excess water from your paper by either dabbing along the edge of your palette or by using a tissue and dabbing off all the excess water. Not the pointed tip of the brush but, rather, if you touch the sides of your brush on the tissue, that would absorb all the excess water on it and then you would be able to apply your strokes. See, I applied my stroke on the paper which was still wet and it did not spread too much. It did not create a dark edge or blue because it just had the right amount of water on the brush. That is one thing that you need to take care off when using watercolor cakes. Let me show you the other scenario, where I'm picking up all of the paint with the water and not dabbing it. Then, when I am applying it onto the paper, that's too much of paint and water. This edge here is going to create a harsh edge and a separation between the existing paint and the blue paint that I applied, mainly because I had too much water in my brush. Let me just demonstrate once more. Even if I take a lot of paint in my brush, all we need to do is make sure that you remove all of that excess water from the brush by dabbing it on a tissue along the side so that it's just enough paint. Then, you'll be able to do your stroke on the paper and also ensure that it doesn't form any dark edges. You can already see the dark edges forming on this one, which we clearly want to avoid. That is one thing to note when we're using watercolor cakes.
9. Using Watercolour Tubes: Now let us look at the scenario where we're using the paint from the tubes. In tubes like these and we're using paint from these tubes. Let me just squeeze out some paint onto my palette. Here is the paint. In such a scenario, it's quite easy to control the amount of water that we're using because it just depends upon the amount of water that you're picking from your glass jar. So make sure that you remove all the excess water along the edge of the jar and then you would be able to pull out paint, enough, and dilute it to get the right consistency and the right amount of water on your brush. So if you take a lot of water and dilute it, then you're likely to create some bleeds. This area here is just wet; I have just applied the yellow paint. If I take the right amount of paint on my brush, that is, lesser water than what is there on this paper. I can see in my paper that I have a sheen of water. So I need lesser water on my brush than that so I will be able to get the perfect lines or whatever strokes that I want to apply on the top of my wet paper. But if I were to add a lot more water when I'm picking up, it would just bleed a lot and create harsh edges. You can see that's too much water and this would create a harsh edge, just like this one. With the watercolor tubes, it's much easier to control than with the cakes because with the cakes we tend to forget that we did use a lot of water to activate them. Whereas, for this one, this gets activated much quickly than the cakes although we have to be weary of the paint that has dried up. For example, this region is now completely dried or there are some brands of paints which you store in your palette and it has dried and it takes a lot of water on them to activate them. So you have to be very careful of those. If you're using a lot of water, just keep in mind the water control 101 rule. That's it.
10. Tonal Value & Water Control: Another important thing to keep in mind with regards to what a control is the tonal value. The tonal value is basically different values of the color of the pigment that you're using. If you use a concentrated pigment straight from the tool, that's a darkest of the tone, and if you keep applying more water to it, then you can make it lighter and lighter until you get the lightest of the shades. Adding more water will be able to make it lighter. You see, this is like the tonal value for this one. I have not done it perfectly. This was just a rough estimate of how the tonal value would be, but then, like I said, in order to get the tones correctly, what we're doing is we're adding a lot of water into our palette to get that lightest tone. We have to be careful when we are picking a lot more water to get that lightest tone. We now have the light tone on our brush, but then we cannot apply it to a wet surface because that's too much water. You can see the pool that is formed at the end here. How do we get rid of those extra water in the brush when we're using the lightest tone which we got by adding more water? You take up the paint, so it's a lightest tone now, but then if you remove the excess water from your brush by sliding along the palate and remove all that extra water and apply, you still have the same tone, but then you have less water. I will show you one more time. Here, I want to create another lighter tone. I have added more water into my mixture and I'm now going to get rid of that extra water by sliding along the edge of my palette and removing any excess water, and then if I apply on my paper, that's very light and also doesn't have a lot of water. Just keep this in mind when you're using different tones and you want to add a lighter tone, but you obtained that lighter tone by adding a lot of water, just remember to remove that excess water from your brush.
11. Removing Excess Water: Let us now see how we can remove excess water from the paper. Here, I have got my palette, which has got a lot of paint and water and I'm going to apply this onto the paper. You can see, I am applying a lot of water and it's got a pool of water here. Now let's say I want to get rid of the extra water in this pool here. What we can do is we can use a dry brush. In order to get a dry brush, make sure that your brush is dry by dabbing it on a tissue. Then if you take your brush and dip it in that region, you will see that the brush absorbs the paint. This is because the water moves from a surface with lesser water to a surface with more water. There, if you run your brush along now, you will see that it has absorbed almost all of the water. You can repeat this process, that this, dry your brush and then if you go over it again, you will see that it absorbs all of the water. Here I had a pool of water, but I made my brush to absorb the same. Let me show it to you in a different angle. Here I have my paper tilted so that we can see the pool of water and here I have applied a stroke and there is now a lot of water that has formed at the bottom here. I am going to absorb all of that using my brush. Here I have my tissue and I'm going to dab my brush dry so that I can absorb it. I don't need to touch the paper even, if I just touch the pool of water, it'll just absorb a lot of those. Each time, I just have to dry my brush and make sure that I absorb the water. See, I already absorbed the water from the left side but it's just flowing, so let me just absorb the whole thing. I only need to touch the water surface and not even the paper. I've gotten rid of the extra water that was there on my paper by just using my brush to absorb the same. You can also use a tissue to absorb any extra water from the paper. This method is effective if you want to get rid of any extra pool of water on the paper but you will not be able to remove any excess paint and water that you applied. Like, for example, when I did this stroke and I wanted to get rid of this extra water that I applied onto the paper, this method will not work. So this is in case if you have applied a large pool of water and you want to absorb it back, this is one method to do it.
12. Controlling Water Flow with Tilt: Now let us see how we can control the flow of paint on the water with tilt. You must have seen professional artists usually paint with their boards tilted or with an angle on their paper. This is because it gives them control over their watercolor paints. Here I am going to put this masking tape under my board. You can use whatever object to place under your board so that you have an angle for your paper. I have 30-degree angle on my paper from the surface. I will show you how it helps to control the flow of the paint. Here I have paint on my brush and I am going to apply it onto the paper. When I am applying it onto the paper, this paint would only flow down, and wouldn't flow in other directions. This is the reason why artists have that angle because now you know where the water is going to flow into, that is the paint is going to flow. Imagine if you didn't have this angle and you applied the paint, then you wouldn't be able to control the flow of the paint because it could flow in any of the directions, it wouldn't flow down. Let us apply few more strokes. These wouldn't flow down but would just flow in different directions and you wouldn't be able to know which direction the paint flows in. This is the reason why artists use the tilt on their board so that you can see the paint flowing down. Here, if I would apply my strokes, they would flow down and they wouldn't flow up, only a little part of the hairs would form because there is water on my paper. But you see it flowing down. This is the reason why artists use the tilt on their board. That is to control the flow of the paint. They know that this is the direction that the paint will flow and it will not flow in other directions. This tilt you can actually use it to your advantage and you can have so much happen with this tilt.
13. Wet on Wet Strokes: Now let us see how we can get rid of the brushstroke mark on our paper. You might have observed that when you are painting on your paper, you usually get the brush strokes. Like for example, if you are painting vertically when it dries out, you will understand that this was painted vertically. If it was painted horizontally or not, you would understand after it dries up. Let me explain this to you. If you have a lot of water on your paper, let's say you have a lot of water on your paper, then when it dries out, you will not be able to understand in which direction it was painted. But then when the water on your paper starts to dry and you start applying the strokes, then eventually you will understand when it dries that that's how you applied the stroke. So the more water there is on your paper, the less visible will be your strokes, and the more the paper has dried, then your strokes will become more visible. So if a paper has started to dry and you're applying on top of it, then you will observe that you will be able to see your stroke marks more clearly. Also, sometimes while painting, showing these stroke marks is very nice. For example, if you're painting a sky and you're applying horizontal strokes, then it is good to show these horizontal strokes in the sky. Maybe you're doing some other kind of strokes and you want them to be seen, then it's fine. But otherwise, if you want a perfect blend on your paper without the stroke marks being seen, then you need more water on your paper so that the paint would just blend on your paper without the strokes being seen. For example, here I have applied a lot of water on my paper; I'm reapplying a lot of water. Now you can see that all of the strokes that I had applied is no more visible because there is a lot of water on my paper. But then when this starts to dry and if I apply any more paint, then it is going to show the stroke marks. The visibility of these stroke marks also depends upon the paper that you're using. This is Arches 300 GSM 100 percent cotton paper and it only shows up the strokes when it starts to dry and I'm reapplying more and more paint on top of my wet paper. But there are some papers out there that might clearly show the strokes even from the start just because the quality of the paper is different. So keep a lookout for the different kinds of papers that you can use. Experiment with your papers and find out what is most suitable for your style of painting.
14. Workflow on the Paper: One thing that you need to look out for is your workflow on the paper. If you're right-handed, try to work from the left side to the right side. That is if you want to add some wet stroke onto the wet paper, I've just wet this region. If you want to apply something, try starting from the left side towards the right side rather than from the right side to the left side. This is mainly because if you apply your strokes onto the right side, it is already wet, and while you move towards the left side to keep painting, because you are right-handed you might have to accidentally touch on that area. There are ways to control it, of course, but then this is an easy way to start painting from the left side towards the right side, and if you are a left-handed person, then from the right side towards the left side. Keep this simple workflow in your mind. Also, it is a good practice to try and keep painting on the paper without actually disturbing the other areas. So if it's a large painting and you have already painted something here, and you want to touch and paint something in this corner, then it is a good practice to try and practice painting that area without actually disturbing the rest of the areas. All of this comes with a little amount of practice. But I was just telling about a good workflow, which is to start from the left to work the right, so that you can work your way through the paper.
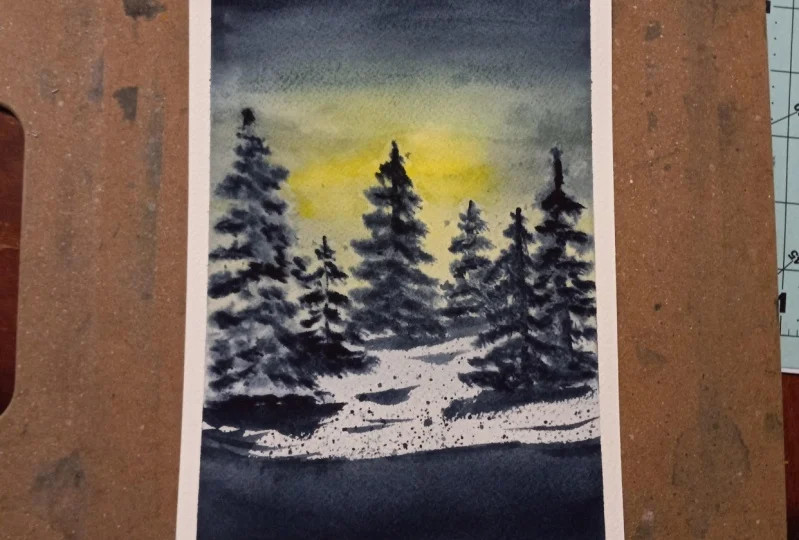
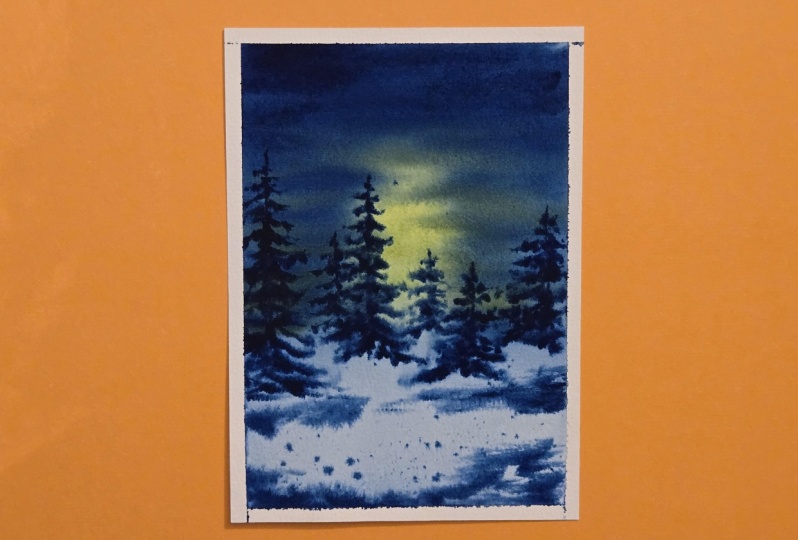
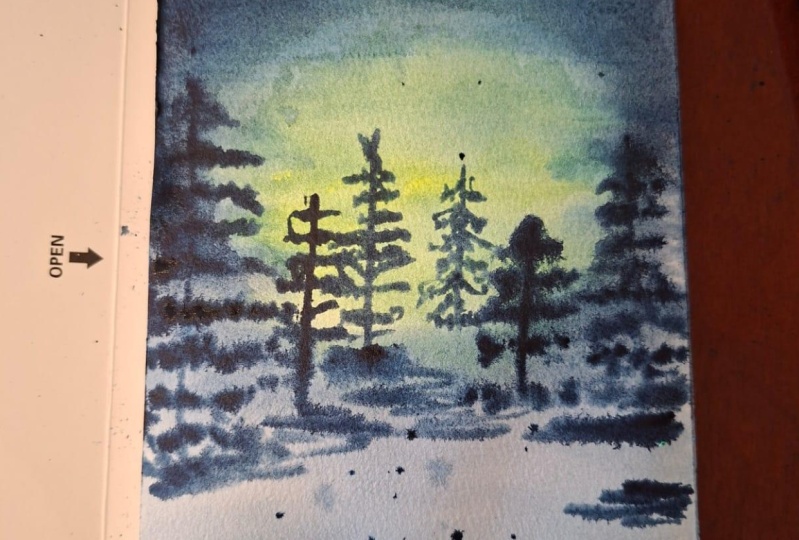
15. Class Project: The class project of this class will be to try and paint a whole painting by just using the wet on wet method and also without reapplying the water that is in one single layer, we're supposed to finish the whole of this painting. I will demonstrate one painting here. You can either paint the same thing or you can find your own reference image and paint. The key thing is to keep your paper wet until the very end and work with only the wet on wet strokes. I'm going to use my flat brush to apply water to my paper. Make sure that you apply the water evenly onto your paper until the very end and without forming any large blocks of pools of water, just like I demonstrated as to how we are supposed to be applying the water. We might have to do this multiple times in order to ensure that our paper stays wet long enough for us to work on the entire wet on wet technique. I have now applied water evenly onto my paper and I'll start painting. This is just going to be a simple and quick one just to demonstrate how you're supposed to go over the class project of this class. I will be using green. I am going to make a sap green color. I'm mixing my green with a little bit of yellow to get sap green, and this is what I'll be applying. I'm just going to apply it in the center like that. In the rest of the areas, I'm going to paint with indigo. I'm going with indigo starting from the top. You can see my top portion is the one that is likely to start drying quickly. That's why I'm applying from the top itself. I'm just drawing steady lines so that my paper would stay wet. I'm not using the tilt method at the moment because I do not want all my paint to be flowing down. But if you want your paint to be flowing down and you want to get the control over the water, then you can use a tilt on your paper. But I want my top portion to be dark so I'm applying a lot of paint towards the top. Then I'm just adding these line strokes, so that I can cover up some of the white areas that I've left when I was painting with green. I'm going with a lighter tone towards the bottom. All of the darker tones are towards the top. Then towards the bottom, I am going to go with a diluted tone of indigo. But you can see this area had started to dry so I quickly apply my paint fair so that now I've applied a stroke with my paint so that area is now wet. Just remember the key thing that I said is to keep painting on the areas where you figure that it is starting to dry so that you can control where it is getting dry. This region, now I've applied paint all over my paper. I'm just going to pick up some more yellow and I'm going to add some more strokes. The yellow mixes with indigo to create a beautiful green shade. I let it mix naturally on the paper, and create these beautiful green shades. There, I finished with the base layer. Now before this dries, I am going to add in some pine trees while the paper is still wet. I'm going with a concentrated amount of indigo. Now we have to go through the water control 101, which is to make sure that our paint is diluted and less water on our brush than there is on our paper. There's already some water on my paper, but my brush should not be loaded with a lot of water because I would create looms or would spread my paint a lot. This is concentrated paint. You can see what I've picked up from my palette. I'm going to be adding some wet on wet pine trees. I'm just adding some shapes to my pine trees and making sure they taper towards the top. That's it there, let me add some more. The whole of this painting, I'm just going to make pine trees in different levels and different types. We have to make sure that our paper stays wet. These regions before it dries, we have to stop painting. I can see that I would go and paint here, but I can see that this region is starting to dry. This is why I'm going to wet the left at first. Maybe I'll make a large pine tree, and you can see the concentrated amount of paint that I am picking up. I've added one there because this one was starting to dry, now I can go towards the center, which is still a little wet. I'm adding those pine trees in different levels so that they just look original in my painting, and maybe I'll add another one here. I've added enough of those pine trees and they're all using the wet on wet method. I can see that these areas are starting to dry. I'm just going to add maybe some quick detailing onto my snow area. Not too much, just few lines, they are starting to dry. I can see that. What I'm going to do is I'm going to deliberately add some splatters onto my painting in this region. Splatters are fine and they might turn into blooms, but we are deliberately just trying to create some beautiful texture onto our paper, just at the bottom here. You can see the paper is still wet. This is why all of these are spreading. Just adding another extra few details towards the bottom while it's still wet. There we go. The whole painting we have done just using the wet on wet method by just making sure that our paper stays wet and observing the areas where the paper had started to dry and reapplying paint on those areas. This is how we can work on the wet on wet for a whole painting. You can even do this with a larger sheet of paper. This is A5, and you can even do this with an A4 sheet. It's just trying to understand your paper. Mostly, the paper that stays wet for a long duration of time is 100 percent cotton paper. This is 100 percent cotton paper from Arches and that's why it stays wet for a longer duration of time. I also applied the water for a longer time in order to make it stay wet. My paper is now completely dry, so I'll go ahead and remove the tape and you can see that the paper has absorbed some of the water, leaving these extra marks here on the paper where I had used concentrated paint. It is looking beautiful because it looks as though the pine tree has texture and depth on it. Let's remove the tape. Here is the class project for this class, you can either paint this or paint something of your own, but just make sure to follow all the tips and techniques explained in this class for water control.
16. Thank You!: I hope you'll like this most important class on Watercolor Basics, which is the water control. If you do try out this painting, don't forget to upload it to the project section in Skillshare. Also keep in mind, which is the most important thing when it comes to water control is the watercolor paper itself. So make sure, when you're practicing the class project, to try and use a paper that is 100 percent cotton and 300 GSM paper. Also, if you like this class, don't forget to check out my 100-day project with watercolor class, which you can find on my Skillshare profile.
 Geethu Chandramohan, Colourfulmystique - Top Teacher, Artist