Transcripts
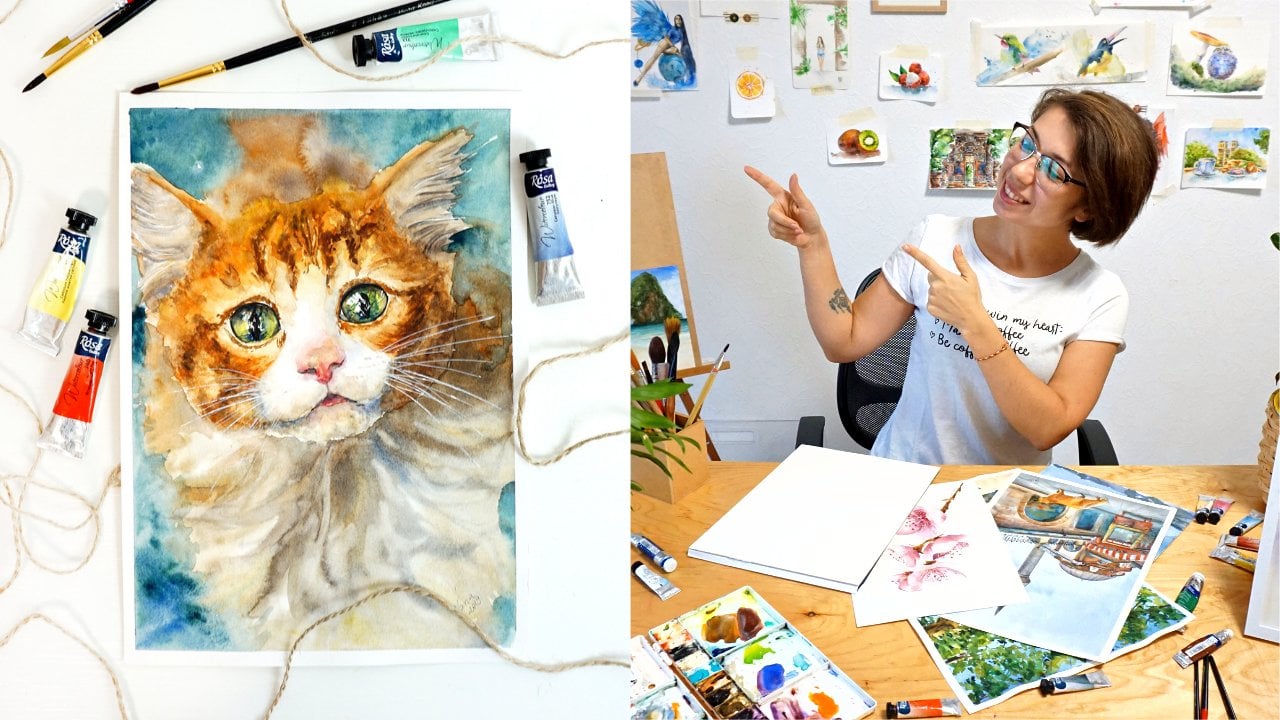
1. Everything cats! Let's start!: Hey, my name is Yana. I'm a professional watercolor
artist and instructor. I find great joy in showing and explaining what a colored
techniques to people, no matter their
age or background. I have been hosting watercolor workshops
in Thailand, Vietnam, which gave me the ability
to connect with students and find ways to help them understand watercolor
as a medium. Even those who didn't
believe they could paint found inspiration to try. And now they love watercolor. I think this happened
because watercolor is not only about rules
and strict techniques, but also about fun
and letting go. This is what I want
to show you in this course on watercolor
basics and everything in cats. So if you want to start
painting with watercolor, but not sure how, if you feel overwhelmed with all the techniques and not
sure you can do the same. If you want to spend
some quality time with your kids painting
super-simple yet fun cats. Just relax and paint
without thinking. Or if you've seen PE, love cats like I do. This course is made for you. Instead of doing
boring exercises, coloring tiny squares with
watercolor in your sketchbook, you will learn each watercolor
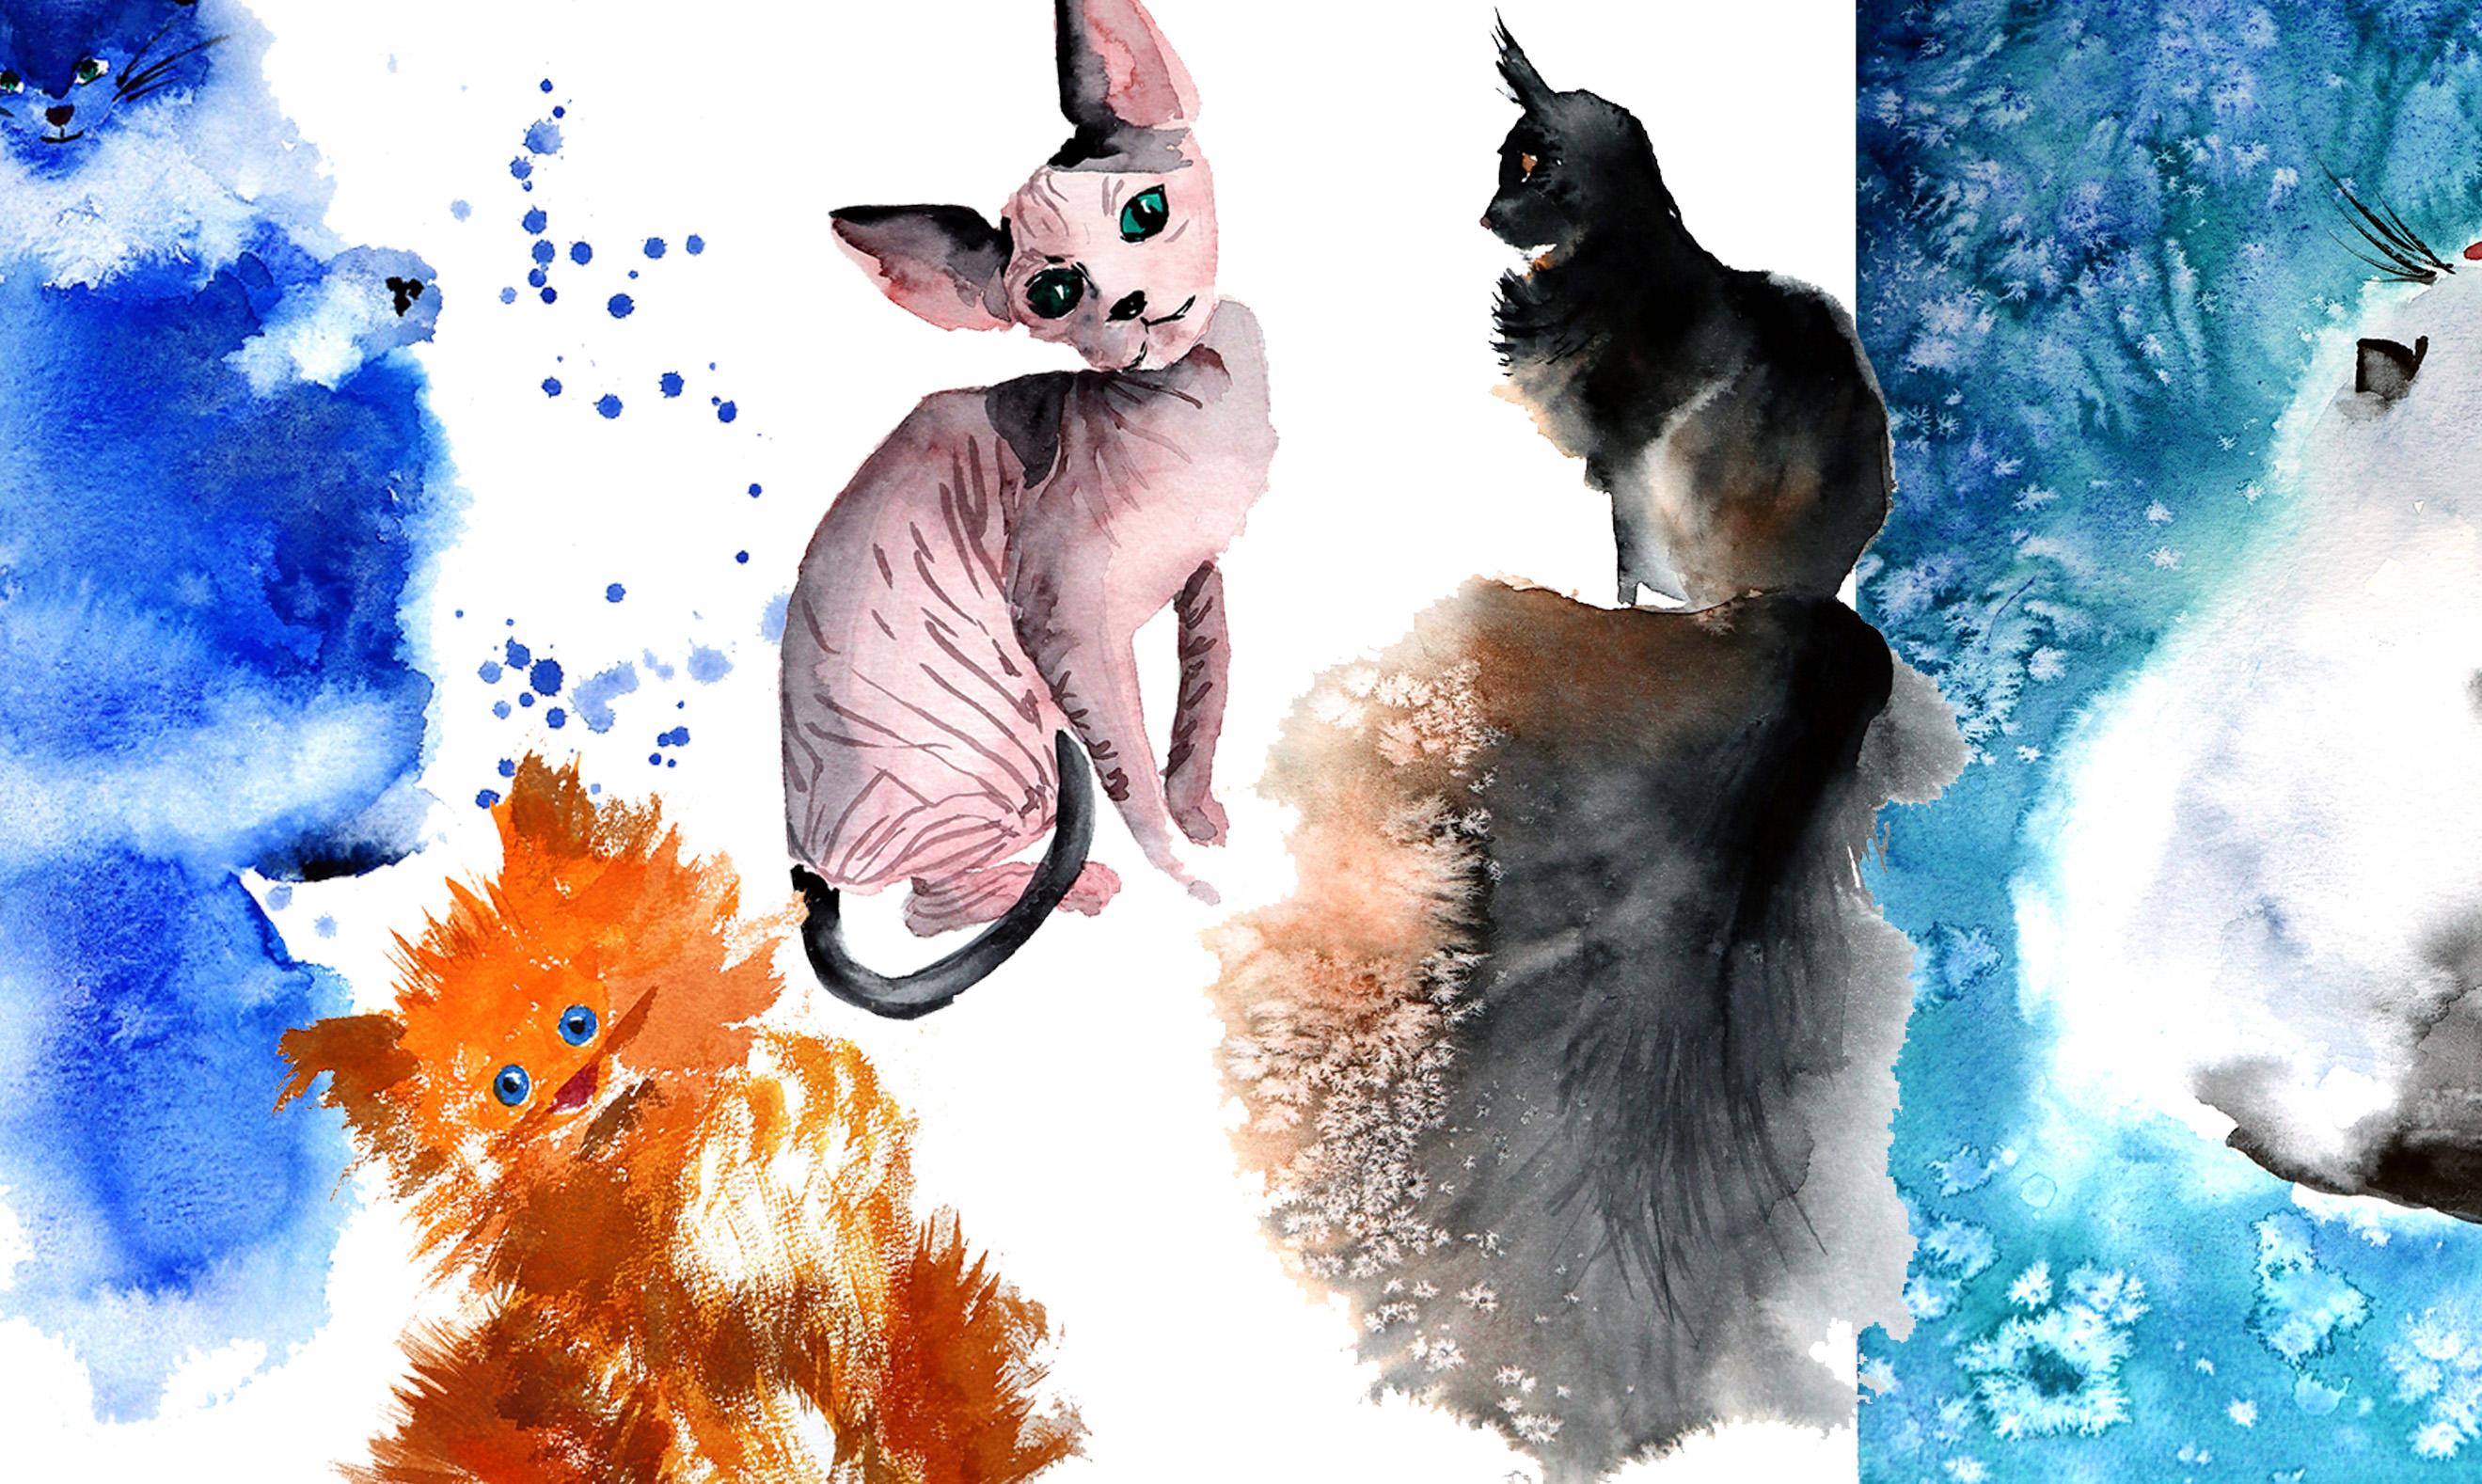
technique one-by-one, apply it in practice right away, and cats are perfect for it. Every cat in this class will be devoted to a specific
watercolor technique. So you can get familiar with it and have fun
painting the furry pet. We will create a stream ginger cats using dry
on dry technique. A whimsical cat mastering
wet on wet technique. Explore negative
space technique while creating dreamy kitten
in a starry night. We will paint an
infection and Sphinx applying wet on dry and
layering techniques. And to consolidate the
knowledge learned today, we will finish our marathon with a final project using
all this techniques, all in one painting. With this cat marathon, you will learn every major
watercolor technique, one by one, sealing the skills for the final magical
cat painting. And you either need to have any experience to
take this course. If anything, you will
gain experience by following my guidance
and playing with cats. See you inside the course.
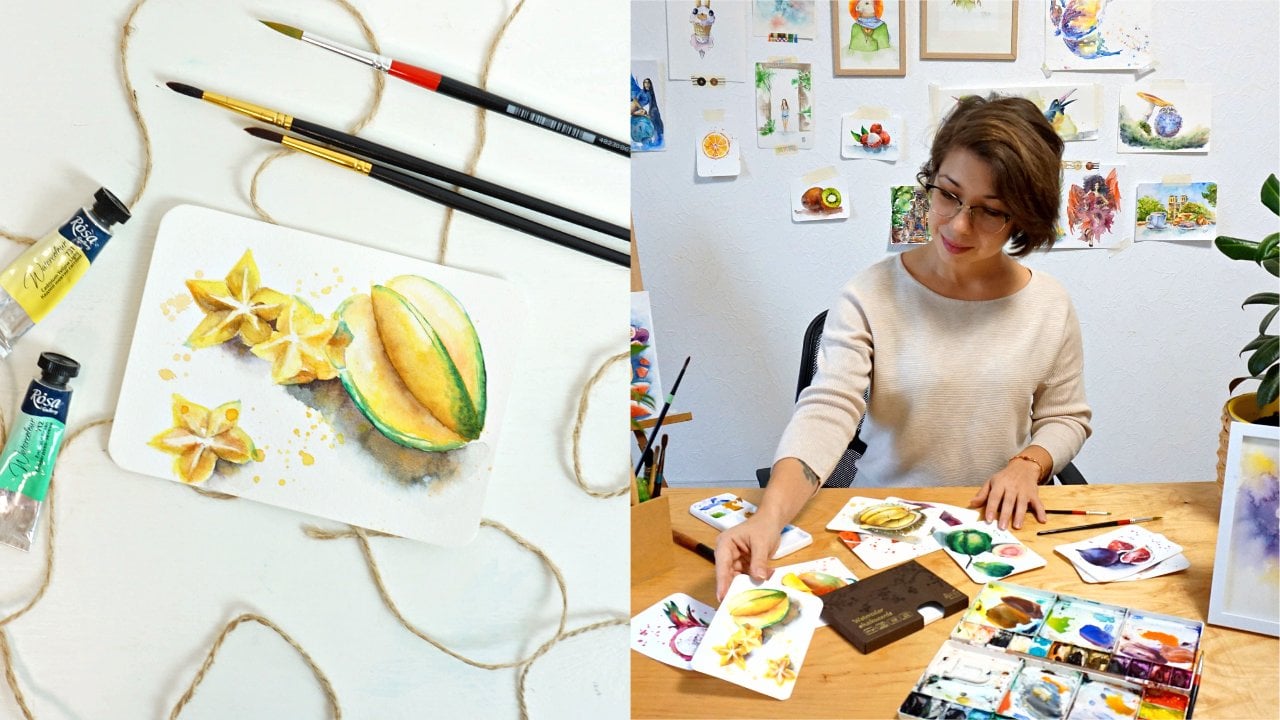
2. Art supplies to paint cats: To bend our cats, we will need just a few tools. So here I have quite a
selection of brushes, but doesn't mean
that all of them, it really depends on the size of paper that you will be using. So if you paint on a
big piece of paper, you into the big
brush like this one. I use nature on brush, but you can use
synthetic if you prefer. Like this one. This one is synthetic, also smaller and with the pointy end, which is really nice to work on. Smaller pieces and details. Iam for the, one
of the techniques, the handwriting dry technique, we're going to use a
brush like this one. If you use on a smaller
piece of paper, you might need a tiny brush like this for smaller elements. Again, this is not necessary. You might be justified with
brush like this, just one. At some point we'll do a few
sketches with the pencil. So I suggest you use a
hard pencil like this one. Have an eraser
handy just nearby. When we will work
with what techniques you will want to attach your paper with the tape to
the table or the tablet. For special tricks, we're
going to use a spray. If you don't have
one, it's fine. You can achieve the same
result with just a brush. And you want some
regular salt from the kitchen for some special magical effects
that we're going to do. Or the paints we're going to use few different colors
for all the cats. Keep it very simple. I have them ready on my part. But technically you will
need neutral black, green, maybe brown, maybe not. Orange. If you don't have
orange, you can mix it by yourself using yellow and red, pink and blue. I like to use ultramarine
blue and Indian trend blue. The difference is
that ultimately is a granulating pigment which creates a very interesting
texture on paper. But it's not always useful for specific types of artworks. And intron blue is a bit darker, deeper tone and it
doesn't granulate. So whichever you have in
your palette, we'll be fine. It doesn't really matter. What matters is
that the technique that we're going to discover. And of course, before we go paper and I'm using cellulose
paper, Kansan multiply. It's very good quality, 300 GSM paper, which means it's pretty
thick, It's pretty durable. Cold press, which means
it has some texture. And it will be visible
through the layers of paint. And you can use any
paper you prefer, cellulose or cotton for our
exercises and painting. So they really need cousin, so it's fine if you go with cellulose paper
like this one. Okay, Now we get started.
3. How to draw cats?: All right guys. So before we jump
into what a gallery, first, I would like to discuss
how we can paint cats. All the different types and shapes and forms on those cats. Let's dive into it. So first, let's discuss the difference between
shape and form. Shape. Shape is something that
is two-dimensional, like a circle, triangle, square, and forum,
on the other hand, something that has volume. It's three-dimensional,
like a cube or a pyramid. So when we are talking
about shapes of the cat, here we only discuss literally simple shapes
we're going to use to show a CAPM so it's
recognizable, right? So if you look at any of
these little sketches, you can see that to draw a cat, you really only need just
a few ovals and circles. So a big oval to show
a body of the cat. Smaller circle for the head, little triangles
for ears and legs. Well, of course,
circles, triangles. So if you look at different
position of the cat, you will see that we will
use different shapes. So for example, if
a cat is walking, the main body here
will be not an opal anymore, but more rectangular. If a cat is moving
or I don't know. Well, here, when the cat
has a very good plasticity. So sometimes the body
will be more curved. But if it's more straight, like walking or sitting, the main shape of the
body will be rectangular. Then, depending on the
position of the cat, we will use different shapes. So if the gut is stretching
its more different ovals, if we say a cat
sitting from the back, It's one big circle in the head. Also, there's importance of understanding
the perspective. So for example, if we
see a cat from the back, like turning, turning his
head and looking at us. We will see, for
example, a big tail, the back feet, but legs a and then the body
will be super short. It will be very contracted
because of the perspective. So the cat will be a bit
deformed in terms of shapes. So it won't be a
perfect circle or oval. So we need to decompress
the body to make it look realistic in terms
of perspective so that the cat
is looking at us. Tony, turning in space to us. Or for example, look
at this guy. This one. We look at it from the
top, right, like this. So it's like 90 degree angle. And we can see a cat
looking up at us. Meaning that answers a view
where we perceive this cat. Is it just a two massive
circles ahead and the body? Well, and of course
there is a tail. So here you can see
different positions and postures of cats that we
can portray in watercolor. We will, I don't
know which one yet, but we will decide different position of the cat that we're going to
paint with watercolor. I just wanted to
give you a heads up so you can see
how we can portray a posture and position and roll angle of a cat in different ways using
different shapes. I'm not talking
about forms, yeah, because to be able to show the three-dimensionality
of the card, we need to work on
shadows and values, which is a little bit more
advanced way of painting. Here today we're just
going to have fun and mostly use forums and paint. More of a nice colorful wash is instead of
three-dimensional paintings. So let's dive into it.
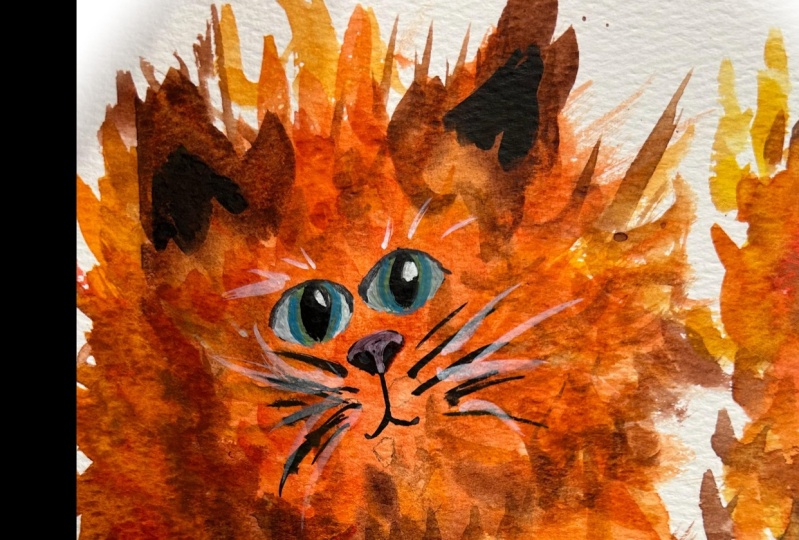
4. Street ginger cat: dry on dry technique: The first technique we're going
to explore is dry on dry. This means that
we're going to have pretty much dry brush and dry pigment directly
painting on dry paper. So we have minimum water in the brush will almost not paint, almost not release
any paint and water. And we will achieve
very sharp dry and yet interesting lecture of fluff for the cat layer. So I want to start with a
very simple shape of a cat. So let's say a cat that's just frontal like
this one or this one, the one that's just
sitting and looking at us. And how about we do it with orange color,
gender gap, right? So to get orange color, you can use a directory
from the lake over here. I have it already. Ready
from the tube or fan. So manufactured. Or you can mix your own. You can mix your own by
taking yellow and some red. Find the right proportion
of those two colors. And here we go, you have your orange mix. So what I want you to do is I want you to take a flat
brush like this one. Mixture or orange color or take an already existing
orange from your, from your watercolor set. Had a very nice and thick layer prepared here on your palette. And maybe if you're a brush, carries do much water, you can literally brings it over the tissue so that the brush gives excessive water
into the tissue. Well, we're not painting yet. Actually, I would like to mark simply where the
eyes of a cat will be. So we'll think about the composition of the gut will be somewhere in
the middle, right? So we don't want to end
up half of the body of the cat disappear is
somewhere out of the frame. So let's say the two
eyes will be here. I'll just mark them as circles. Just do simple shapes, one and another one so that I remember
where the eyes are. Maybe I'll also mark and nose. Nose will be here. Some hint on the mouth. And that's an everything
else I'm just going to do straight directly
with what guard. Okay. So there is thick
paint on my brush, no water, and we're going
in with dry on dry. With sharp moves like this. I am literally is crashing
my paper with the brush. You see that? Because it's very dry. I'm going I'm leaving
very dry marks on paper. Like so, so almost
doesn't paint. So I BEG more pigment from my palette that I
mixed over there. I go all the way close
to the eyes of the gut. I paint around them, around the circles trying to keep them nice
and clean and white. And also I will leave my nose white so that we can
cover in later on. And if you ran out of your mix, feel free to add more paint. Maybe even add a
bit of brown color into it so that your
color varieties, it's not just flat one orange tone can get
a bit darker or lighter. We're having fun here. So when you get
more fresh pigment, you will see that your
strokes will become a little more soft. Softer. That's all right. As you move with your brush and
doing those sharp strokes, you'll see that your
brush will eventually get less and less water, less humid. And this will give you
this funky texture of the very fluffy cat. And again, I'll get
some more pigment. Remember the toothbrush,
give us this feeling of Sharpen yet kept scratching my paper. Now the back, the back
body of my cancel, the feet, back legs. I want them to be a bit darker, so I again mix orange color, but I will also add
a bit of brown. For example, here,
I'll add burnt sienna and just mix
more of this color. So I don't have to
renew it. Two of them. Again, I rinse it over
here so it doesn't bring too much water to my paper. And also, you can
see that I'm not holding my brush very
close to the tip. Actually, it's somewhere
in the middle, so it's easier for
me to do this. Very rapid moves am
changed the direction of my strokes. Here. I will add a tiny bit of black just to make
the overall tone. For example, goes to the legs. And also the one in the middle, just to show that those are two. The dryer brush is thinner and more unexpected
strokes you'll get. So if your brush
carriers do much water, you'll notice that
your strokes thicker. And software as well. And now we can just
add the eyes and nose. And our first very
fluffy cat is ready. I'll take a smaller brush, get some blue color in it. And carefully paint inside of the circles that
we left white. We save them for the
eyes of the cat. Some highlight the signature. Here we go. Our first dry on
dry technique is used today. Painting the severity
funky fluffy cat that has been hanging out
on the streets quite a lot. And you have the chance
to practice painting with a completely dry brush
on completely dry paper.
5. Whimsical cat: wet on wet technique: The next technique we will
explore is wet. On wet. This means that first we
need to apply clean water or water vapor and then introduce
pigment into that place. So how about for this technique, we paint a cat that
is lying down, like for example, this one on, land down on his
back so we can see him from the top, from above. That would give us more space to play with them. What layer? So again, I will just show where will be the eyes of the council
and don't forget, they will be very small and everything else
will be the body. Okay? So as I said first, we need to paint with water literally just take your brush, get lots of water on
it in paint with them. However, I'm afraid
you won't see what I do on the camera on the video. So that's why instead of
painting with clean water, I will paint with a
little bit tinted water, so with a tiny drop of blue. Just so you can see
what I'm doing where I place my water and you can go
ahead and paint with water. So here we have his
body and the tail. Make sure you have
loss of water. And now I will introduce
a very thick big man. So I take lots of
payment into my brushes, the brush and drop it. And you can see the
magic happening. Just because we have so much
water on the background. This allows the pigment
to move around, but it only goes as far
as the area of the water. It's not going to go out. We kind of created like our nitro frame
for for the paint. The water is guiding the
paint and we can move the papers were to move it into different
directions if you want to. I'm using ultramarine blue, which is a pigment
that granulate. So that's why you can see
all this beautiful texture. More different blue colors. And of course, we forgot to carefully painting
around the eyes. Now with the smaller brush, I can sort of direct
some of the details. So take a blue and a bit of
black to it so it's darker. And I will just clarify some
of the details like ears. Also, I can change the shape of the eyes with the smaller
brush to make it more careful. So the shape is nice. And this two little buttons. And I forgot to
reserve some space for the nodes that we were
supposed to paint with pink. So I'm going to lift
the pigment and because it's the layer is still
wet, we can do it. At the same time. I would like to lift some of the big melt Here in there to
show the flow of the body. And maybe somewhere
here as well, just by pressing the tissue. You can also see a very
interesting texture that we are getting here. Also, what I would like to do is two and the sum of
the water here. And here, actually we can
even sprinkle somehow it. So by spraying some water, I am pushing the pigment into different
directions like this. It'll allow us to achieve this soft fluffiness of the cat. And if you'll like how
the paint behaves, where it goes, you can always
pick it with the tissue. Picking the pigment
will only work if you add some water
to it, like here. For example, first I add
water with a clean brush and only then I can actually
lift it with the tissue. If you don't have a spray. Little worried,
what you can do is you can take your brush and just touch the edge with water. And you will reactivate
the paint if it got dry. And move out by creating
this feeling of fluffiness of the cat, the cat. And again the edges, we can just pick them
up with the tissue. So we have this fluffy, furry cat that you can see that it's a bit darker on this side and a bit
lighter on this side. And did it on purpose. Just to have some interesting
variety in our painting. Here, I'll add some fluff
as well by softening the edge and allowing
the paint to move. Maybe add a little
bit more paint here to correct the shape. With the darker tone. A little bit of
black into my blue. I would like to go ahead and add some of those details
that I was trying to do. And it's a good opportunity
right now to create the legs of the count by also lifting the pigment
with the watery brush. This is actually one of the very common
WaterGuard techniques as well. Lifting technique. This way you get out the pigment and make the
paper from the bottom shine. Here's the second one will be somewhere here. If you have like a little pond of pigment of paint
here, for example, you can either lifted
with the dry brush, so you let the brush
soak the pigment in. Or you can do the
same with the brush, but be very careful because
if you touch too much, you actually take the
big one out as well. And the bottom T here of the bottom feet as well, by adding water, just
like we did before. I just play some accents. Maybe even do some splashes. And when the face will get dry, I will finish with the
eyes and the nose. You can use a hairdryer to speed up the process
and dry the baby. We had to wait for the
paper to dry completely. And only then we can continue. I'm painting our fluffy cat and basically finishing the parts
that are missing the eyes. And maybe I would soften the edges on layers over here and maybe make this
edge a bit softer too. So how about first, we paint the eyes. But let's make them green. So I take a small brush and green pigment and paint inside that looks more like
a ninja with pink. In order to correct or
remove those sharp edges, we need to take a wet brush and carefully
go over that edge. It might so happen that
doing so you will also lift the big month and then the whiteness of
paper will reveal itself. So it really depends on the
type of paper you're using. If this happens, you can just
add a bit more of a blue, same blue-collar used to mask the whiteness of the
paper that you just uncovered. Then I switched the brush to a little bit bigger size
and it's pretty wet. So the tip of the brush and
I'm softening the edge here. And I'll add a bit more of blue. Maybe a few areas as well, pigment and few places as well. To show that it's nice and soft. Exactly in the place where it's in between the
foot onto the belly. If the brush doesn't come out. The pigment, you can help
yourself with the tissue and just press it against the paper and lift
the big month off. Now I'll make my cut smiley. Maybe add a few whiskers. And what? We have our
fluffy cat painted in wet-on-wet technique
using one color a and also additionally using some of the
lifting technique. Picking up some of the pigment
where we wanted to make out paper shine with
its whiteness. Again.
6. Dreamy cat: negative space technique: This painting, we will use
negative space technique. This is a very
interesting technique that artists mostly used to paint white, white subjects. So for example, if we
paint a kitten that, let's say this one
that sits with its back turned to us so
we don't see the face, just a silhouette
of a white kitten. The best way to
show the whiteness of the kitten is to
paint around it. So by creating the background, we will make this
ketone pop even more. And then we can also work
on the edges to make them the edges of the cat
Fluffy to show that the firm. But mostly, mostly artists use negative space technique
to outline something that is every light without
painting inside of it. So this way you will
avoid sharp lines. Alright? To do negative space technique, we will also use wet technique. So the basics would be
to apply clean water, but only around the subject. So if the kitten is somewhere
here in the middle, we will cover it, covers the water everywhere
around the cat's, but not inside the gut. So go all the way close to it. Alright, so let's go for it. I specifically attached
my paper to the tablet, the plastic tablet to make sure that the papers
to stay straight. Because when there's
a lot of water, paper tends to deform
a little bit and changes shape, become wavy. I am attaching it to the
surface like a table or tablet is going to
really help us keep the paper straight, stretched. So clean water, generously
applying it on paper. As you can see, I didn't
really sketch the kitten. I really just imagine that it's sitting here in the middle. And I didn't draw it with pencil on purpose
because I didn't want to have any line in
between and the cat in the background so that the connection is
very soft and smooth. So if you look a little
bit on the side, you will see where the water is. If you look at the angle, you'll see the shiny
areas of the paper. And that means it's
what is water. After applying lots of
water on the paper surface, we can leave it to soak into
the layers of the paper. Meanwhile, mix the color that we will paint
for the background. And how about we do some sort
of mix of blue and green, so it's more exciting. So I take alternating blue. It's a nice granulating color. And I'll add some green to it. I mix a lot right away. Okay, So we have a nice pond
of blue with green color. And we can start as we paint, we can add different towns. More blue here,
more green there. And remember that
we are going all the way close to the cat, but not really going
inside. We keep it white. Might be a little challenging
to see because the water is transparent so you don't really
see where the cat starts, where the cat's outline
supposed to start. But if you tilt your head a
little bit and the angle, you'll see where the
paper is very shiny. That's the area
that is still wet. This is where the water is. To make this background a
little bit more interesting, we can add some splashes. Remember, if we drop
just clean water, it will push the pigment in
two different directions. So it will look like a
starry night, for example. Another cool trick
that you can use is, what do we do with the cat? It looks rather
sharp edges, right? So what we did in
the previous lesson, we're gonna do this again and carefully go
around the edge, the edge to make it bleed. But this time it's
going to bleed inside, inside our subject. Always. Here. We can even push a little bit to make it look like
there's a tip of the nose. We can also correct the
shape of our doing this. Meanwhile, we can observe old as beautiful snowflakes around
because of the salt. I feel like the shape is a little bit or light bulbs. So I'm using the same technique
and lifting it. While this is drying out. And a few more lectures
to the background. Maybe a bit more sold this to dry or use
a hairdryer to speed up the process so that we can finish up the painting. We can just leave it white. We're going to do a few shadows and draw the ears. The ears. Add a tail in hand.
That will be it. While paper is drying out in the beautiful
textures that we are getting here because
of the salt. Our special trick today. Just water that
bourgeoisie, the pigment. And also beautiful quality of ultramarine blue that
granulate and creates this interesting sugary
kind of texture where you see those little spots on paper. Now that the paper is fully dry, you can see that it
became straight again. It's stretched again
because we taped it. So that's a very convenient. And now we can paint
inside the kitten. This time, I'll use blue, but indent trend blue. This type of loop
doesn't granulate, so it does have this
specific texture with small grains in it, like we observe here
in the background. Because in a kitten, I would prefer to not have
any of those type of vector. I add a tiny bit of black
just to make it darker. Make sure that there's still more blue than
black in your mix. And before we go, I
would like to apply clean water in the middle
in the body of the cat. But I'm not going all
the way to the borders, so I'm not touching
the edges of the cut, I'm just applying water
in the middle. Like so. And now I'm just dropping
some of the paint. Here, it's sharp, so
I'm going to smooth it out with the brush. The brush here are the same. So by having water, I'm achieving this very
soft edges on my paper. And here the edge is sharp because I didn't
have water there. I was afraid that
I'm going to go too close to the border here. Didn't have enough water.
But it's not a problem. We can smooth it out with
the brush. Keep going. Somewhere here it will
be the ears of our cat. So I'm adding a bit more
pigment into this place. And also a kinda forgot to
paint the tail of the cat. So what I'm going to do, I will take when it's wet, I am marking the area for the tail and I'll
make the tail black. Now because here
everything was wet. It's bleeding inside and I
think it looks pretty cool. I'm going to keep it this way. And maybe smooth out
this section over here. And I'll add a bit darker color, the same we used before. And I'll get rid of
this sharp edge. With the wet brush. The brush is semi wet, so it's not Greek and
water because if it was two but it would actually push the layers
like happened here. But because it's semi wet, it's only removing the
hard edge, sharp edge. I will drop a few spots here, add a bit of pigment
and the bottom to just make that tail darker. The ears will be somewhere here, but I'll finish them and bit later when the
layer will be drive with semi wet brush carrying a little bit of black pigment. I just want to show some
texture on our kitten. Now we need to get a
drawing is finished. You probably noticed that what a color when drives
becomes much, much lighter when it is wet. So you can see
that, for example, the black tail doesn't look
so dark and vibrant anymore, as well as the shadows that were pretty concentrated in the beginning when
there were wet. Now as they're dry,
they're much lighter. So keep that in mind when
you paint with watercolor, that whatever layer you put after it dries
out is going to look much lighter
than while it's wet. Just put the nose over here. I will finish the ears and add a few whiskers with a very sharp strokes
with a very dry brush. Dry and dry.
Remember? And wallah, we finished our painting it with negative
space technique, which means that we
literally outlined the cat without
painting. It first.
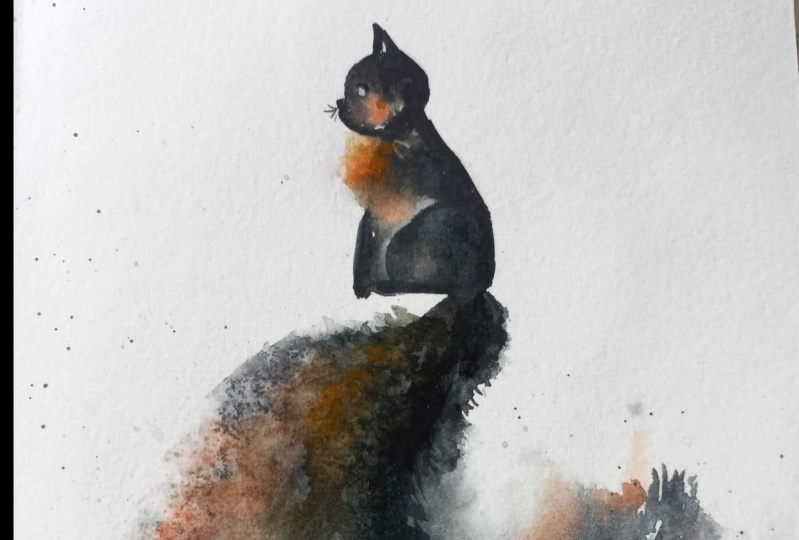
7. Affectionate cat: wet on dry & layering technique: The next technique I
want to show you is called wet on dry. And I will combine it with another technique
called layering. So the whole idea of watercolor, the main feature
of watercolor is that it is a very
transparent medium, which means that when you apply first layer of watercolor, leave it to dry and then apply the second layer of watercolor. The first one will shine through the second one because of the
transparency of the medium. This is a very
beautiful feature, which is not really typical
for any other medium. So that's why it's
very important to know how to use this
transparency in art. For this next cat will want
to probably sketch it. Since we are going to work in a bit more precise
and realistic manner. And I think I'll go
for a sitting posture, maybe like this one or this one, so that the cat is
sitting and looking at us very quickly, I'll just catch the
main features they had in the shape of
the drop. Big ears. Let's do Sphinx. We did folder fluffy ones. Now let's do a cat without. For. Then. Here will be one leg. Second leg, curved back, that is typical to cats. Back foot. The other one is hiding
somewhere defined, and of course here. So we'll do the eyes, nice big eyes, nose, mouth. And this will be very
quick outline for our sphinx cat so that we know where we're
going to lay down the page. So you probably guessed
that wet-on-dry technique means that your
pressure will be wet, it will carry but paint and we will put it down on paper
while the paper is drying. So this way we'll have much
more control over what we do. So first things, I'll
go for a pink color. I have a nice coral in my side, so I'll mix coral
with mother read. And I'll have this kind
of mix of those two. So very calm and nice color. My brushes wet, the paper is dry and all start from the ears. Paint first year. Then I'll go down to the face, paint around the eyes, and covering the
face of our cat. 0 and second year right away. Maybe I drew the sketch
a bit too large. The ears too long, so I make it shorter right now while working
with watercolor. And right away, I will add
a bit of black into my mix. Just a little bit. And I'll make this
other internal side, the left side of the
face a bit darker. Because the cat tilted. It's had a bit to the right, to the left. My left. And that's why this left
side is a little bit shadow. The inner part of the ear
is also with the shadow, so I drop it right away just to show the tongue and
I can continue. So you can see that my brush is carrying quite
a lot of water, but because the paper is
dry, nothing happens. It doesn't flow everywhere uncontrollably like it was
with. But the lead technique. And yeah, you've heard a lot
of control in your hands. You can direct the pigment or whatever, wherever you want. You can change the shapes
of what you paint. And if you add more water, you have more transparent wash, meaning layer of paint on paper. So it is very easy to navigate. Indeed. He'll be, the tail
will make it gray. That's why I left it without
pink color right now. The other leg is
going to be a bit darker because it's on the
other side, is hiding. So it's a little bit darker
because of the shadow. Then there will be more
shadow here on the back. Majorly because they have is dropping the shadow on the
cat and the cats body. And when you add this, you need to make sure
that your brush doesn't carry water in it
or too much water. Because again,
we're going to have the same thing we did in negative space technique where too much water pushed
the pigment away. So now we just need to wait for the first layer to dry and then we can apply
the next layer, which will be the best way to use glazing the cake
or layering technique. So the paper is absolutely dry. You can see that my pink color got even lighter than
it was, which is cool. I am now I just want to remove pencil lines that I
don't need anymore. Carefully going around my cat where I see pencil
line, I remove it. And there's some pencil
line inside that that is shining through
watercolor layer over here. This one, I can't move
anymore because it's underwater color and it's
just going to stay there. But it doesn't really matter because we're going
to continue adding new layers and the
pencil line will most probably just disappear and
not be noticeable at all. You can see that in the area
where I added a darker tone, it actually pushed a little bit the pigment away
and then dried out with this kind of coleus
flower effort with sharp edges over here. And I told you this might happen because the brush
was carrying water. Well, technically, I
really like this effect. It looks pretty cool to me, so I'm gonna keep it this way. Here, the brush head
less water in it. That's why it didn't
create a sharp outline. But all in all, I really like the first
layer that we've got here. So now we can add the next
one and into the process. So for what I'm gonna do now, I will take black and I
will dilute it with water. So it's very light and very,
very, very transparent. Am my brush and some water too. So you can see that my black
pigment is very transparent. And I will apply and layer here. We're here. Just to show you that because
watercolor is transparent, you can see how color is
still shining through. I'll add a little bit of this black transparent layer
on the back of the cat. Dilute the sharp outline so that you can see
that my pink pigment, my pink layer, the first one, is still shining
through the black one. Of course, this happens because black pigment is very light. I'm on purpose diluted
with water quite a lot so that it doesn't completely
covered the pink one. Like for example, right now
the layer is very dark, so there's less chances, but pink one will shine through with the semicolon brush diluted and a little bit to separate
the leg from the body. Another thing we
can do is we can take when working with
and a little bit of darker and maybe try to paint the wrinkles. I don't want it to
be. So it should. Rather. By applying those
strokes on top of already dried layer,
we create depth. And we achieve slightly
darker tones on our cat or any other
subject with your painting. And this is the best use of layering technique
or glazing technique. And in a bit more wrinkles. Notice that my lines are
not very sharp and not dry. And at the same
time, not very dark. So I'm not using like super
black color, for example, pink that we've
already used to paint the base of the cat with a little bit of black to make it not so bright,
not so vibrant. Let's paint the tail. I take our diluted black at the tail carefully. And then I take more
concentrated black from the tube and add a little
bit on the edge of the tail. So we have a bit of
transparency, black, so kind of a gray tone and a bit of very dark concentrated
pigment of black paint. And the difference
between light and dark is to notice though, you can. Smooth it out with
semi wet brush. Now you can also
add some elements to sharp. So I'm gonna delete
this line with the semi wet brush just
like we did before. And with our negative space. The clinic when they're
softening the edges of the cat. So I'm softening the
edge here as well. Being the eyes. I kind of like cats
with green eyes. So let's, let's make them green. Like an alien. I'd like to leave highlights spot on
the eye to make it stand out. And now I need to dry my brush against the tissue so it's very dry like
when we painted. Dry and dry and carefully. Work the eyes. Just to outline them. And don't forget the Irish. Oh, painting on top
of being a bit weird. So I guess I'm gonna have to make those black mark. And also with the rationale
smooth those strokes. So they're not very
sharp on this side. And maybe add a few
wrinkles on the face because it's kinda weird to
have body with wrinkles, but we can also add another color. All right, well, now
our Sphinx is ready. And we just used wet on dry technique
and layering technique. We applied what
pigment on dry paper. And then we waited for our
layers to dry before we apply the next layers to
create nice translucency, to create this shiny effect of one layer coming
through the other one. And also great in depth.
8. Magical cat: mixed techniques: So with this last project, I would like us to combine the techniques
that we've just learned today into creating
one masterpiece. So think of the techniques that we used to pay in different cats and tried to think how you can combine them
into one painting. So very quickly, I will
outline with the pencil, the last cat, the last
sketch of the cat. And now we can start painting. So first, I would
like to apply wet on wet technique on the body of the cat without
the tail first. And work on detail later. So we'll just clean water. I'm painting the
body of the cat. And now I will
apply first layer. So since I already have some of the orange mix on,
just reactivate it. And the orange. So big man just wants to go. As you can see, I'm not
covering everything. So the area of that
I made orange. Orange creates
this nice feeling, sparkling on the firm. And of course, carefully
I'm painting around the eyes. Right away. I can maybe show
some of the texture. Can intensify the color little orange. Pushing the pigment into different directions
by adding water. This is what I wanna do. Here. Just lifting technique to some of the pigment to make the paper and the whiteness of the paper shine again. Separate the bottom. I can work on. So right now I'm
going to touch on is going to already what I have in mind. Not yet. So now I'm going
to introduce orange first. Actually, I want to cover even more space
with clean water. So forgive me that I
didn't do it right away. So the size of the
tail is like this, but I cover more
space with water and you'll see why in a second. Okay. Hello, The chicken. So the reason why
I'm wanted to apply more water larger than the actual Tales was
because now we have a very, very nice and soft
transition over here. We don't have any sharp edges like for example,
we've got here. Because here the water was applied until this
place, until this edge. And then the paint
went also until here. And that's why both
water and paint stopped here at the edge and created sharp
outline with the paint. But here because
water went further away than the pigment, the pigment ended up being
very soft and the edge. So this is a trick that
you can use if you want to create the edges that are very, very, very delicate
and soft and fluffy. You can as well add
some salt if you want. My layer almost contrived
already saw it might not work. But if your paint is still, but it can work in now,
just leave it to dry. So as we drive the painting, you can see that
black tail turned into rather gray, gray color. So we need to intensify that
color by adding a new layer, which means we're going to
use layering technique here. So take some lag, go to the edge of our tale. The edge so we don't
have sharp corners. And some of the orange. I want to make sure
that the edges are those sharp edges. Nice opportunity to add
some texture to the tail. We can do the same here. Our cat, making this part a little bit darker, orange color. Then finally, we can use
Drawing Guide technique. Some pigment on a dry brush, just like we did with our first. And here we go. We painted a cat using
wet-in-wet technique, layering technique,
lifting technique. I would be very
excited to see what painting you choose to do and please do share
your results.
9. Your furry class project: Thank you for watching
their friends. Hope you enjoyed plane with watercolor and learning
techniques along the way. Your class project would
be to choose a technique that you like the most
and pays a cute cat. Don't forget to share
it with me here or in my Instagram,
y'know, travel art. I'm happy to offer an
advice if you need it. And also if you're excited to continue your cat
painting journey, I invite you to try another
course of mine were we paint a realistic
ginger cats in watercolor. You already know the basics, and this project will be
just a piece of cake.
 Yana Shvets, Professional watercolor artist