Transcripts
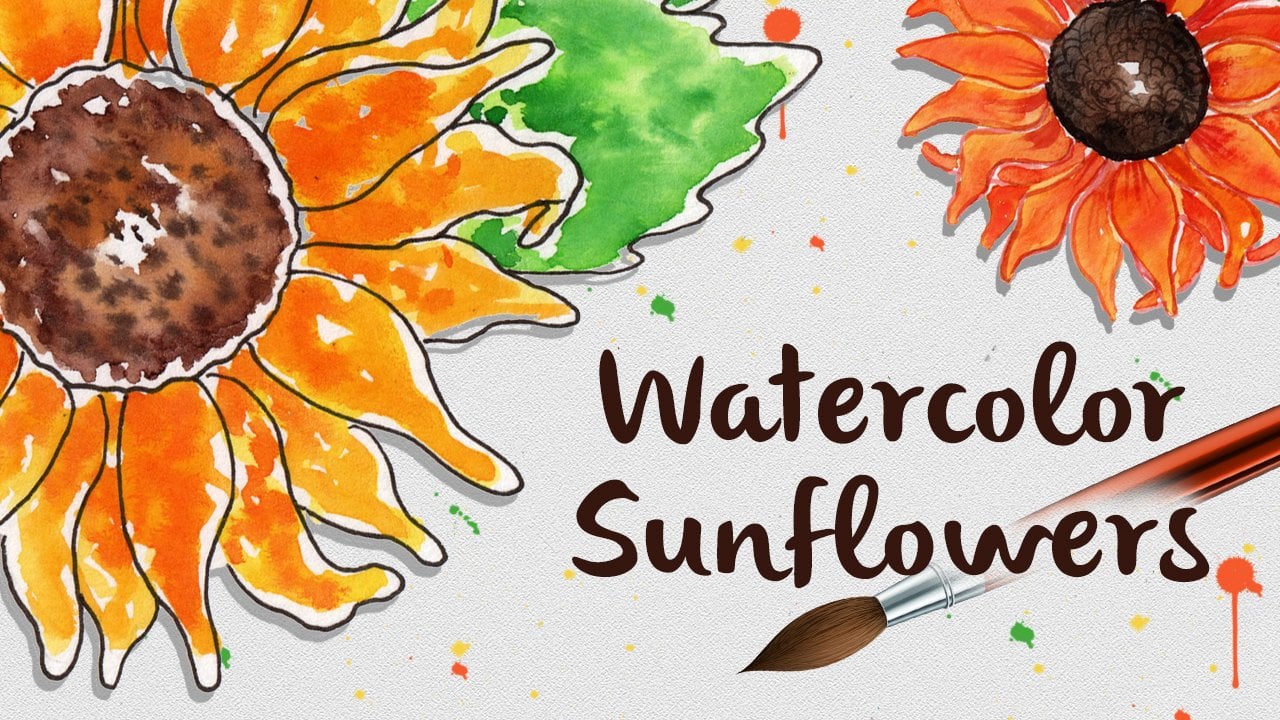
1. Class Intro: Petroglyphs are rock carvings made by chiseling or scratching the first layer of stone, leaving the later rock underneath exposed. They were created by prehistoric people on six continents around the globe. Petroglyphs date back ten thousand years, with some estimated at 40 thousand years old. The history and discoveries of petroglyphs are fascinating. As some researchers attribute petroglyphs to being the foundation of art. They depict animals, people what is believed to be tribal symbols, as well as geometric shapes like zigzags and spirals. There are even celestial and astronomic images. The true meaning of petroglyphs is not fully understood, but there are many theories regarding them. Some believe that this rock art is a visual recorded history and a way to share information. Others believe that they are religious images, very spiritual in nature, and still others believe that they are an artistic expression by the person who arched it. In today's class, we will create a small handmade book based on these ancient discoveries. Instead of carving into a cave wall with Flint, we'll use watercolor paints, and paper to create our petroglyph images. This class is broken down into three parts: Prepping our pages, painting our pages and assembling our book. We'll use a stab binding method similar to the one for my class, book arts, recycled materials cover, stab binding. We'll modify that technique to create a five hole binding. And we'll fold our pages slightly differently. We'll use a leather scrap to make the cover. But I'll also include a bonus class on making a faux leather cover using watercolor paper and paints. This class is geared towards advanced beginner and intermediate book binders, as well as beginner of watercolor artists. For your class project, create your own petroglyph pages using the layer painting methods and negative space painting method shown in class. Then bind your book to create your original petroglyph journal. Take a photo of your pages or your bound journal, and share it with us in the project section. I'm Daniela Mellen and author and artist here on Skillshare. Thanks for joining me.
2. Class Supplies: For our watercolor petroglyph journal, we'll need the supplies of both book binders and watercolor artists. For watercolors, we'll need a pencil and an eraser, we'll need a white colored pencil, when we finish our painting, a pipette, and then for my pigments, I only I'm using six today. I'm using three shades of brown, which I've included in the class supply list, with the exact shades I use, a shade of dark orange, very dark blue, and black. I have that set out on a palette. I'm only using two paintbrushes today. I'm using a number 10 and a number six. Then we'll need our pages. Here I have eight pages of watercolor paper. It's 140 pound weight, and it's cut into five by five inch squares. For the bookbinding aspect we'll need some bookbinding tools. In order to make the pages so that they open readily, we're going to use a scoring board in a bone folder. If you don't have a scoring board, that's not a problem. A straight edge ruler will work just as well. I'm also using a pencil and an eraser for that to make sure my marks are the right spot. But I'll show you the technique for that in class. This is a petroglyph's journal. I want the pages to look a little rustic. I'm going to decal the edge. I'm going to round the corners and then decal the edge. That just means that the edges aren't straight. To do that, I'll use a corner rounder. Again, you can use a pair of scissors if you don't have one. Then I have here a decal edged cutter, to cut my pages so that they have that torn looking edge. You could tear your pages as well, or you can use a pair of scissors. I'll show you that in class. For the back of the book we'll need a five by five inch piece of book board or a hard cardboard. For the front, I'm going to use a piece of leather scrap, that I'm going to cut into five-by-five inch square to make my cover. If you don't want to use leather, that's not a problem. You can just use a piece of card stock in any color you'd like. Or, for a bonus class, I'll show you a technique to turn watercolor paper into a faux leather look. This way it will resemble the animal hide, which just follows the theme of our petroglyph book. You also need some binder clips or bulldog clips to hold the pages together. Some scrap paper so that the clips don't harm your pages. A scrap paper for the spine. We'll go over this in class. Here I have some wax thread. I chose a darker color. But any color you'd like. You can use dental floss, embroidery floss, ribbon. I have an awl to punch holes. You can also use a hole punch or you can use a crocodile tool, which has the hole punches on the side as well to get your nice holes on your pages. This class is broken down into three parts. We'll prep our pages, then we'll paint our pages, and then we'll assemble our book. Let's start by prepping our pages.
3. Prepping the Pages: To prep the pages, what we do is we take our squares that are cut into 5 by 5 inches and I'm going to set them on my scoring board. I'm going to score at the one inch mark down the length of the page and at the half-inch mark. From there, I'm going to make that fold on the score line that we just made and crease it with the bone folder. The first fold is turned in just like this, so it makes an L shape. Then on the top fold, I'm going to fold it in the other direction. I'm going to fold it and then with my bone folder, I'll make that crease nice and sharp. This allows us to, when we bind our pages, we're going to put our holes should this fold and by scoring it here, we've allowed the pages of the book to turn open. We'll repeat this procedure with all of the pages, will keep them in order. If you don't have a scoring board, it's not a problem. You just take a ruler and you're going to mark the one inch mark and the half-inch mark on both the top and the bottom and then you're going to score those lines. You'll do this for each page, not for the cover and not for the back, but just for each page. We made the score line [inaudible] this way. Then when you're done with that, just make sure you erase your pencil marks. I'm going to continue to score the remaining pages. When you have all your pages complete, I repress the lines so that they all open the same way and then I'm just going to clip my book together.
4. Deckle Page Edge: In order to prep our pages, you want them all to be fairly uniform. I'll have to remove the clips and the scrap paper that's holding them together. The first thing I'm going to do is I'm going to trim the corners. I just round the corners a little. For each page, I'll do this. Then, I'll come in, and with my deckle edged paper cutter, I'll slip the paper underneath here and just cut the paper down a little and get a deckle edge. The edge is no longer straight, it's got just a little bit of a curve to it. I like that look. I think it gives just an interesting edge. You can also just take your scissors and do the same thing. You just want to create a little edge. Try not to be symmetrical just to make it look unusual. You can go in there and round the corners as well. You can also purchase a pair of deckle edged scissors to do the task. I find that the paper cutter is very quick and easy. You'll continue to do this on all your pages.
5. Sketch the Background: The next step before we start painting our pages is just to create a border. This helps me to figure out where I'm going to fill in the paint and it's not a perfect border, I just want to have a rough rectangle and I'd like the idea of being able to see some of the page behind it, so I'll just go in with my pencil and make a rough edge outline on all of my pages.
6. 6 Watercolor Background: To create our pages, we're going to do three layers. The first layer has to be the background, the rock wall. To do this, I'll take my water and I'll just wet my pigments. I want the back wall, the wall that we create to be rock colored; red, browns, oranges, a little bit of blue as well. First thing I'll do, and I'll do the same procedure on each page, is that I'm going to wet my background. We made that lop-sided rectangle for the background. I'll cover it with a layer of water, then I'm going to drop in some pigment. I'm going to start with my brown. This is the sepia. I'm going to just drop that in and let it move around. I'll add a little bit of orange. Then I'll go in with some burnt sienna as well. Once I feel like the first layer is fairly set, I'll go in with a damp brush and just drop in some more pigments. Here I have a little bit of blue, add a little bit of black as well, and then I'm going to turn my page around and let the colors bleed together and let this layer dry. It'll create a first layer that we can sketch our petroglyphs on. I'll continue this with all my pages.
7. Sketching the Petroglyphs: Now the first layer on our pages is dry. We can start sketching or petroglyphs. What I do, is I just take a page and take my petroglyphs and I'll just make a quick sketch and I'll base it based on what intrigues me, based on the shape of the page we have. So with this one, I'll just do this bird here, snakes and toph, I'm just going to make a light sketch with my white pencil and the shape of a bird. Because this bird is hollow, I'll make this line here. Then when we go to paint our next layer, I'm going to paint everywhere around the lines. I'll continue making my shapes on my pages and set them aside. I'm just going to do one shape per page. Now that I have all my images sketched, I'm going to do my first thing. I'm going to take my eraser and erase any pencil marks that remain on each page, and then I'll paint around them.
8. Negative Space: Now I'll take my brush and I'll wet it. This is my smaller brush, my six brush. I'm going to go in there with a little Van Dyke brown. I'm going to glaze over the first layer we did. I'm using the weight pencil marks as a guide, and I'm just going to paint around them. Because I still want to maintain that rock wall, I will drop in some other colors as well. Once again, I'm making sure my entire background is covered with water or pigment, and then I'll go drop in some colors, and they'll blend on their own, add some burnt sienna. I'll let this layer dry. I'll complete that with the remaining pages.[MUSIC] Okay,and we'll let all these pages dry.
9. Final Layer on the Pages: Now that the pages are dry, I'm going to go back in with my white pencil and just retrace the outline we made with a white pencil before we pay did the negative images here. This just sharpens it up. It's completely optional step. There are some marks here that I don't like. I can take my eraser, and I went to want to make this one piece here. I'll erase the marks here and then I'll just put them back. Combining the arrow here and the body as one. Same thing here, I'll erase the marks that separate the linens, and then I'll just go back in my white pencil. Now I make sketches and my pages are complete. I'm going to go in here and just decide what order I want to put my pages in the book when I bind it. I think I'm going to make this donkey or whatever it is, horse first, maybe the snake second, and then I'll just put a few in here and there. When I have the layout, I like I'm going to make sure my pages are not folded into each other, and I will re-clip my book. I have that just the way I wanted. I'll take my scrap papers. I'll put one down here on the spine and the other one I'll put up here to hold my pages together.
10. The Cover: Here, I have my piece of scrap leather and I have the blackboard of my book. I'm just going to try and find a way that it works where it gives me the right size and then I'm going to trim it. Hold it in place. Use my ruler just to reinforce the shape, and then I'll cut my five-inch square out of the leather, and my last cut over here.
11. Prepping the Book for Sewing: Now to bind our book. I have a five inch square piece of leather for the cover, a backboard, again five inch square, our pages, and then with a piece of scrap paper, I cut it five inches tall, same height as the book, and I poked holes in it, equal distance from the edges. Then in, and then one in the center. Now what I have to do is transfer the hole to the pages and the book. I'll start just with the book board and the cover first. On a cutting board with just a little rag, I'm going to transfer my template right to where I want it right on the edge of the cover on the book board, and with my awl, I'm going to go in and just pierce holes in the cover. When I remove it, on the cover, I can see those holes, and they went right through to the baseboard. Now I'm going to punch those holes with my Crop-A-Dile tool. I could use my awl, and just continue to press that hole deeper and deeper each time. But with the tool here, I can get a nice cut. I can line it up, and punch my hole through both the book board and the cover. Sometimes the pieces stick here. I just have to remove them, so I can see where I'm punching. Now I'm going to transfer the holes to the pages using the same procedure. Going to move my scrap paper to the side so that I can hold all my pages together, and then I'm going to put my cover right on top of my pages here. I'll press down where I want the holes to be. Through our first page, the holes are pierced and it goes to the second page as well, the third page, the fourth page is still there, and then the holes just become little in dense. I'm going to take each page out and cut the holes with my Crop-A-Dile. I'm going to keep the pages in order. I think I can do two pages at a time. Make sure they're lined up. Line up my holes. I'm going to put these pages face down. I'll go to the next two to do the same procedure. Now for here, since the pages did not pierce all the way from the top, I'll just go in there with my book and again, line it up, re-pierce the holes. I have all my pages here. Now I'll line up my pages once again, I can put my awl right through them to make sure they are lined up properly. I'll put my baseboard on the book and then my cover, there we go. Now I can decide if I want a rounded corner on my cover or just leave it square. I think I'll leave this one square. I'll put my protector and my clip. Make sure I'm lined up in the center here, and my scrap protector and my clip, and I'm ready to start sewing.
12. Sewing the Book: To start sewing, we'll measure our thread. We'll do 4.5 times the length of the spine, one, two, three, four and a half. I'll thread my needle, and I'll just pull it up through some of the thread. To start sewing, I'm going to start on the second hole down, and I'll start sewing in the center of the book. I'll put my needle through from the center, all the way at the top. When I have the tail here, I will tuck it into the book. I'll remove one clip to do that, and I'll tuck it and leave about three or four inches of tail, break through the book. You can pull it over here. Then I'm going to take my needle and I'm going to go from the center of the book, I'm going to go around the outside and back into that hole that we already sew through. Now pull it taut. From here, I'm going to go into the second hole and down through all the pages out the back of the book. If I'm concerned about the thread moving, I'll just find my thread and pull it a little taut. I'm going to go around the outside of the book through that whole again up top, out the back of the book, and then I'm going to go around the side of the book through the top and around into that same hole again. Then I'm going to go underneath the back of the book into our second hole, the bottom, feed that needle all the way through. I'm going to come down, feed that needle all the way through the third hole, go around the book and down into that hole again. Do the same thing on the fourth hole, so I'm going behind it, up through all the pages, around the book, and in that hole. Now that the thread is getting closer to the needle, I'll just pull it up a little. I'll go down the fifth hole through all the pages. I could go around the side of the book once again, and down through all the pages, around the bottom of the book and feed it through again. Now if I flip the book over, I'll line that up, we'll see that this spot is bare, so I'm going to follow that thread, take that thread right through there, and I'll go right through here again. Now we want to go up and around and into that second hole, the first one that we threaded. But to do that, I don't want to go all the way through the top, I just want to go where we met our thread. I'm going to feed the needle in and I've got to be careful here, I'm running out of thread, I'm got to feed the needle in just to the page where we have the threat already going through. I can see it coming out here, I just got to finagle it a little, and here's our thread. Before I tie it off, I'm going to go and make sure it's all lined up, it's not caught on anything and there's no loose pieces. Then I'm going to make a double knot and tuck it under our folds in the page. Here's one knot, and here's the second knot. Take the two threads here, clip them and then, I'll tuck each thread to the side underneath that fold we have here. Here we have our book.
13. Class Wrap Up: Here we have our completed watercolor petroglyph journal. We have our leather cover, our spine, it's bound very nicely and you can see on the back as well. We have our petroglyphs on each page and while the journal is not open flat, it does open fully. We decal the edge on each page of paper and here we have our completed journal. If you'd like to use the technique that I demonstrated in the bonus class, to make your faux leather cover. This is the one using watercolor paper and I bounded all so it looks just like our journal. It does resemble leather or animal hide, its very stiff and thick, unlike the leather which has a a soft feel to it. This is very stiff and dry. You could varnish it if you wanted to go for more of a leather look, but I think this is sufficient, and it opens the same way as the leather. I hope you'll try your hand at some petroglyphs and binding them in a journal. Please post your results in the project section, either your journal page opened up, or your closed journals so we can see the spine, the binding. Please be sure to follow me here on Skillshare to be notified of future classes, and consider leaving your review. Thanks for watching.
14. Bonus Class: Faux Leather Cover: To create the faux leather cover, what we're going to do is take a piece of watercolor paper, 140 pound. It's cut into a five inch square. We're just going to wet it on both sides, with a very light coating of water. Then I'm going to take it, and just very gently crumble it to get different shapes. I'm trying not to tear the paper. By wetting it, we're allowing the fibers to bend a little, and give and not rip. Once I have this crumbled, I'll just flatten it out with my hand. We'll start, we're going to do both sides, but with the first side, I'm going to again, go over it with water and then I'm going to add my pigment. I'll start with my darkest color here. I want to go right to the edges of the paper. I'm going to go in there with a little bit of this burnt sienna, on the areas that didn't have the sepia. Trying to get a nice pigment rich color. I'll go in there with some of this blue. Again, I'm trying to make sure there's no white little dots showing. Making sure all the pigment gets into the folds of the paper that we created, all the creases. We're going to let this layer dry. Now that our first layer on our cover is dry, I'm going to flip it over and do the same process on the back. We'll let this layer completely dry. So now the first layer of both the front and the back side of our journal cover our dry, the paper's very stiff. I'm going to just press out some of the wrinkles again. Then we're going to go in and add our glaze, as it is now, we use the same colors that we did on the pages, and so there's a lot of orange and blues showing through. Because we want this to look like leather, we're going to do a glaze of a dark brown. I'm just going to mix some of the browns together. I'm just going to pay to layer over it. This will unite all the colors underneath. I'm going to let this layer dry. Then I'll paint a glaze on the back side as well.
 Daniela Mellen, Artist & Author