Transcripts
1. Intro: Hello. My name is seen as and in this class I'm going to be going over how to make patterns Using adobe fresco painted motifs, I'm a surface pattern designer who has been making patterns for years. I worked in both adobe Illustrator and photo shop, and without a doubt, I've always found it easier to make patterns in Adobe Illustrator. The only thing Waas that sometimes I wanted to paint and use texture and Adobe Illustrator is mostly vector based, so it was hard to get the watercolor effect I wanted with it. Recently, I tried a new trick where I paint my motifs and adobe fresco entrance for them to adobe Illustrator to make a pattern, and it worked. Now I'm able to have both the ability to use organic painted motives with lots of different color blending and Teoh make a pattern using Adobe Illustrator with these 20 join me in this class and I'll teach you my process of doing that
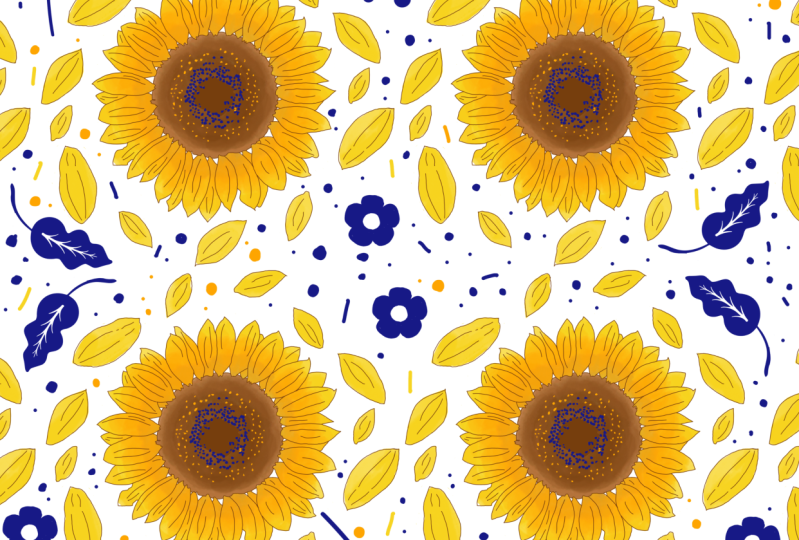
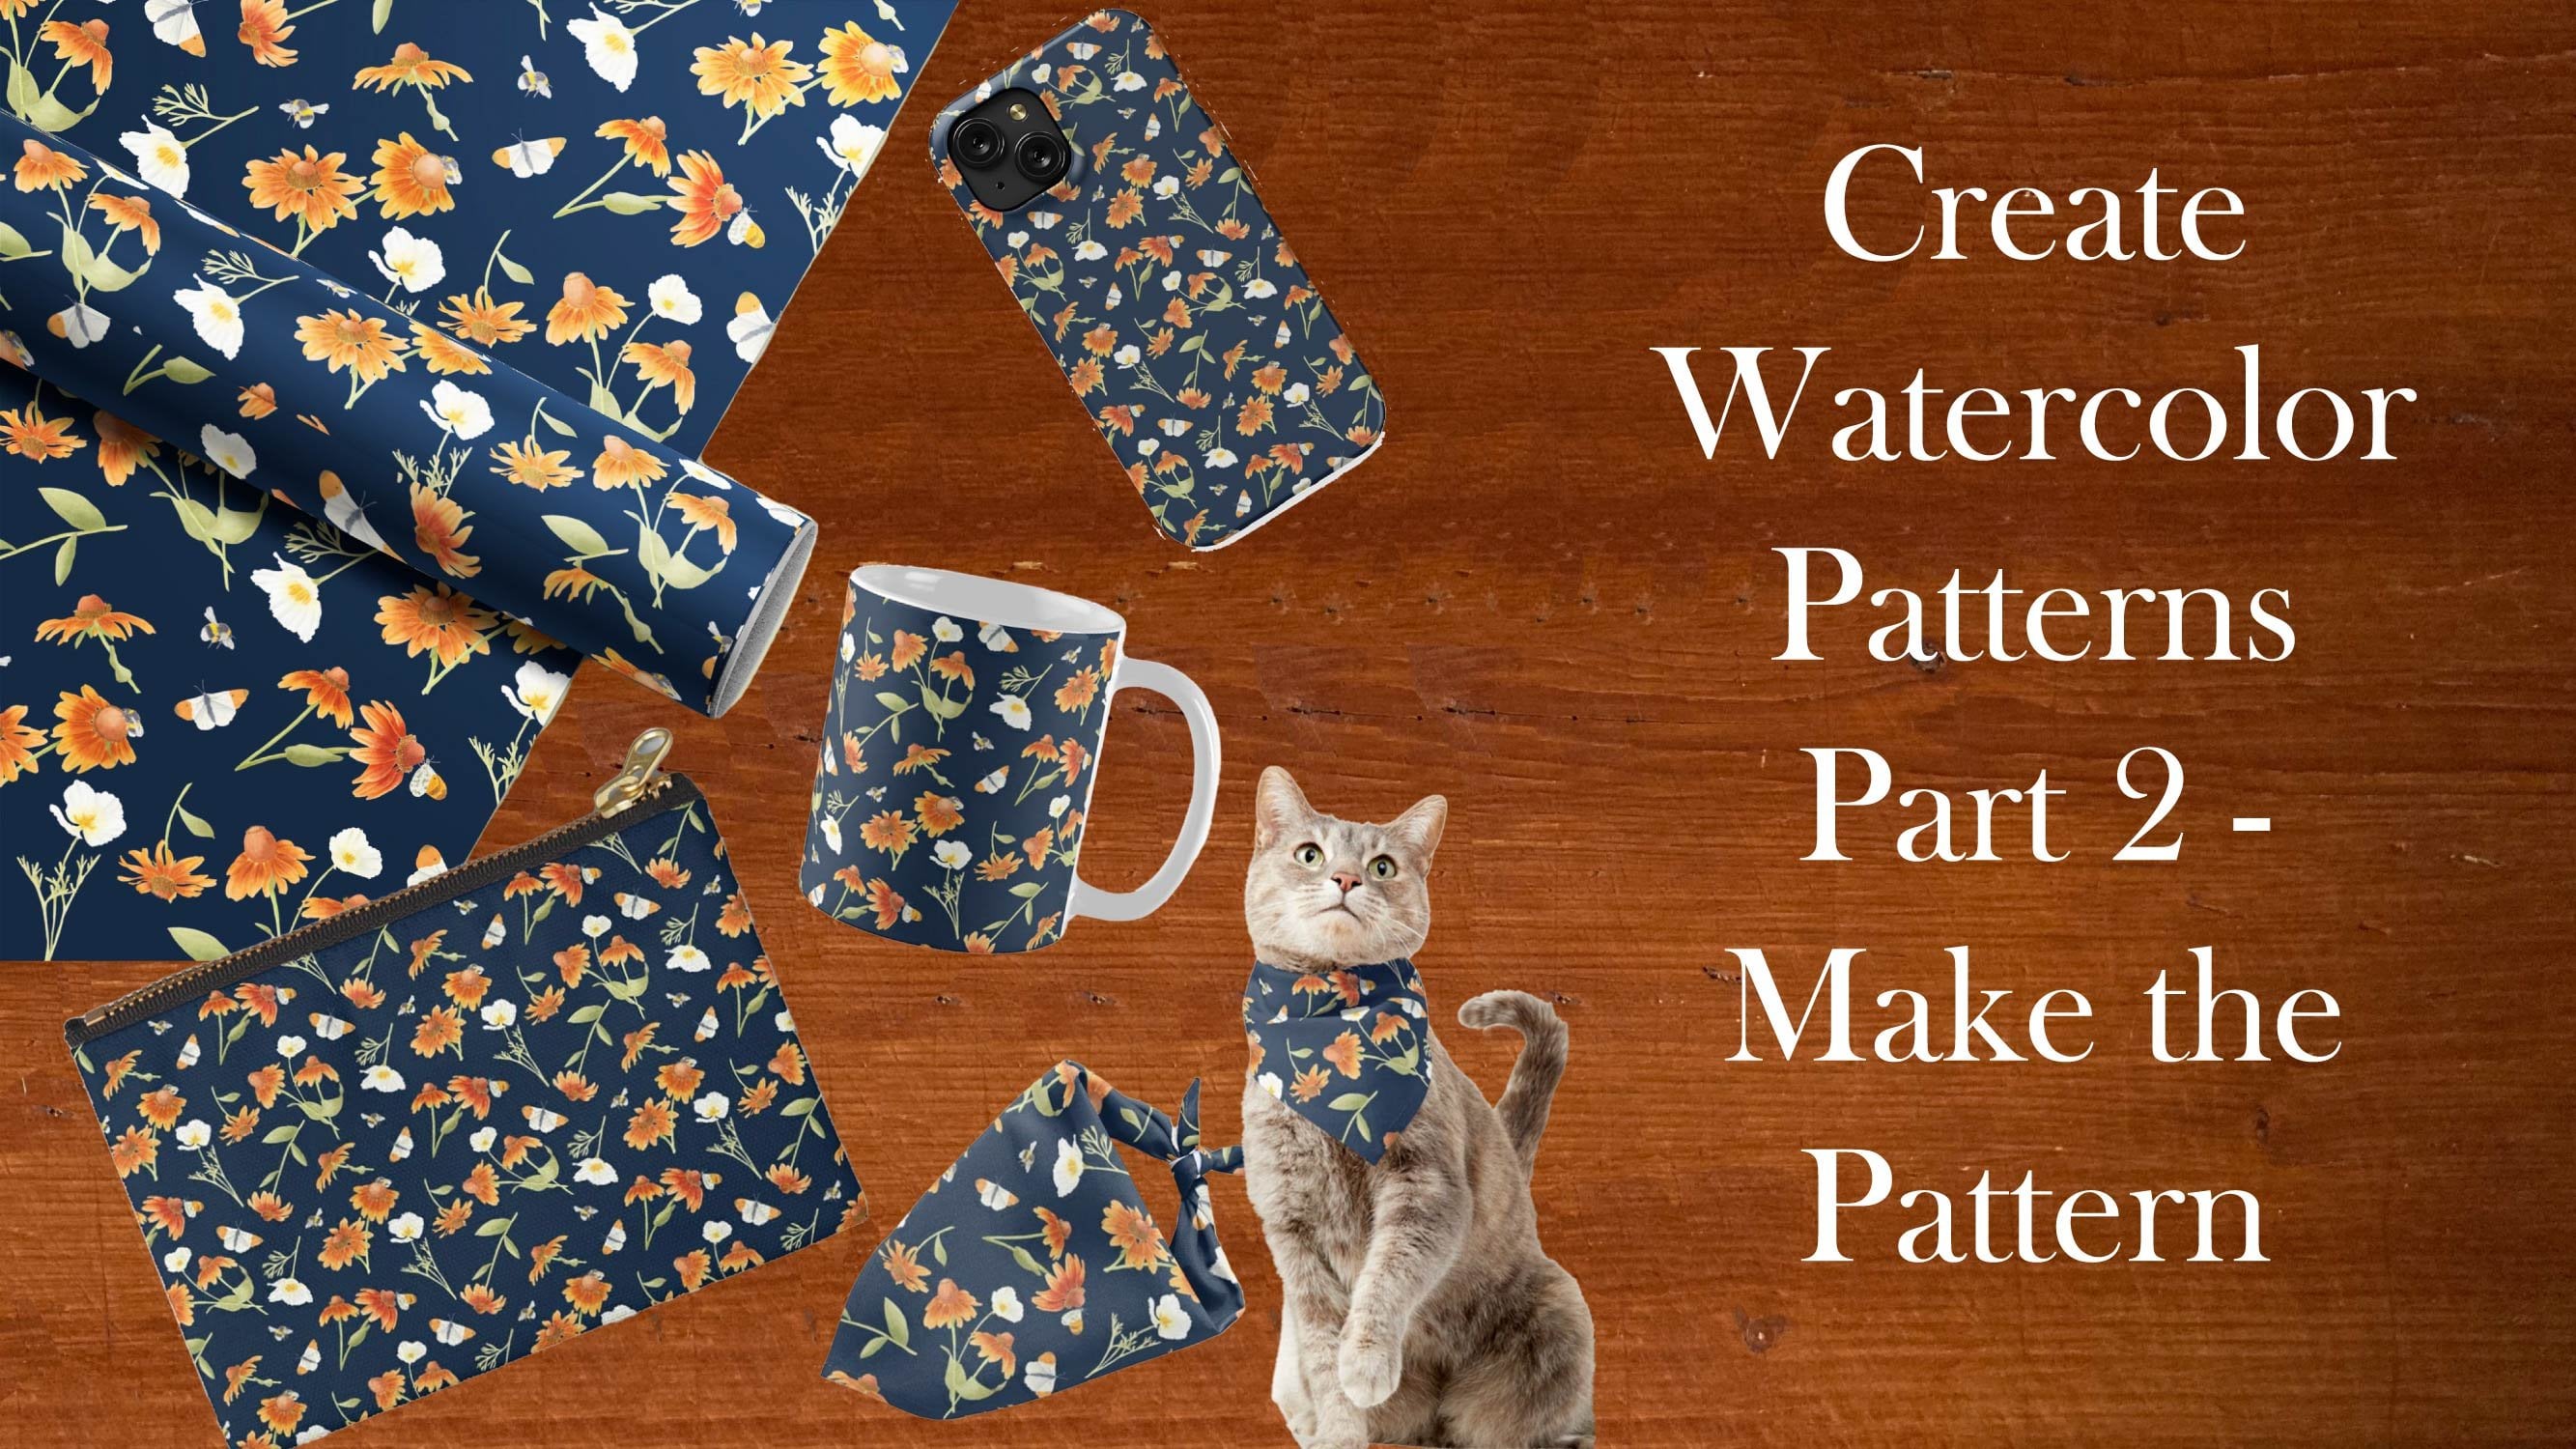
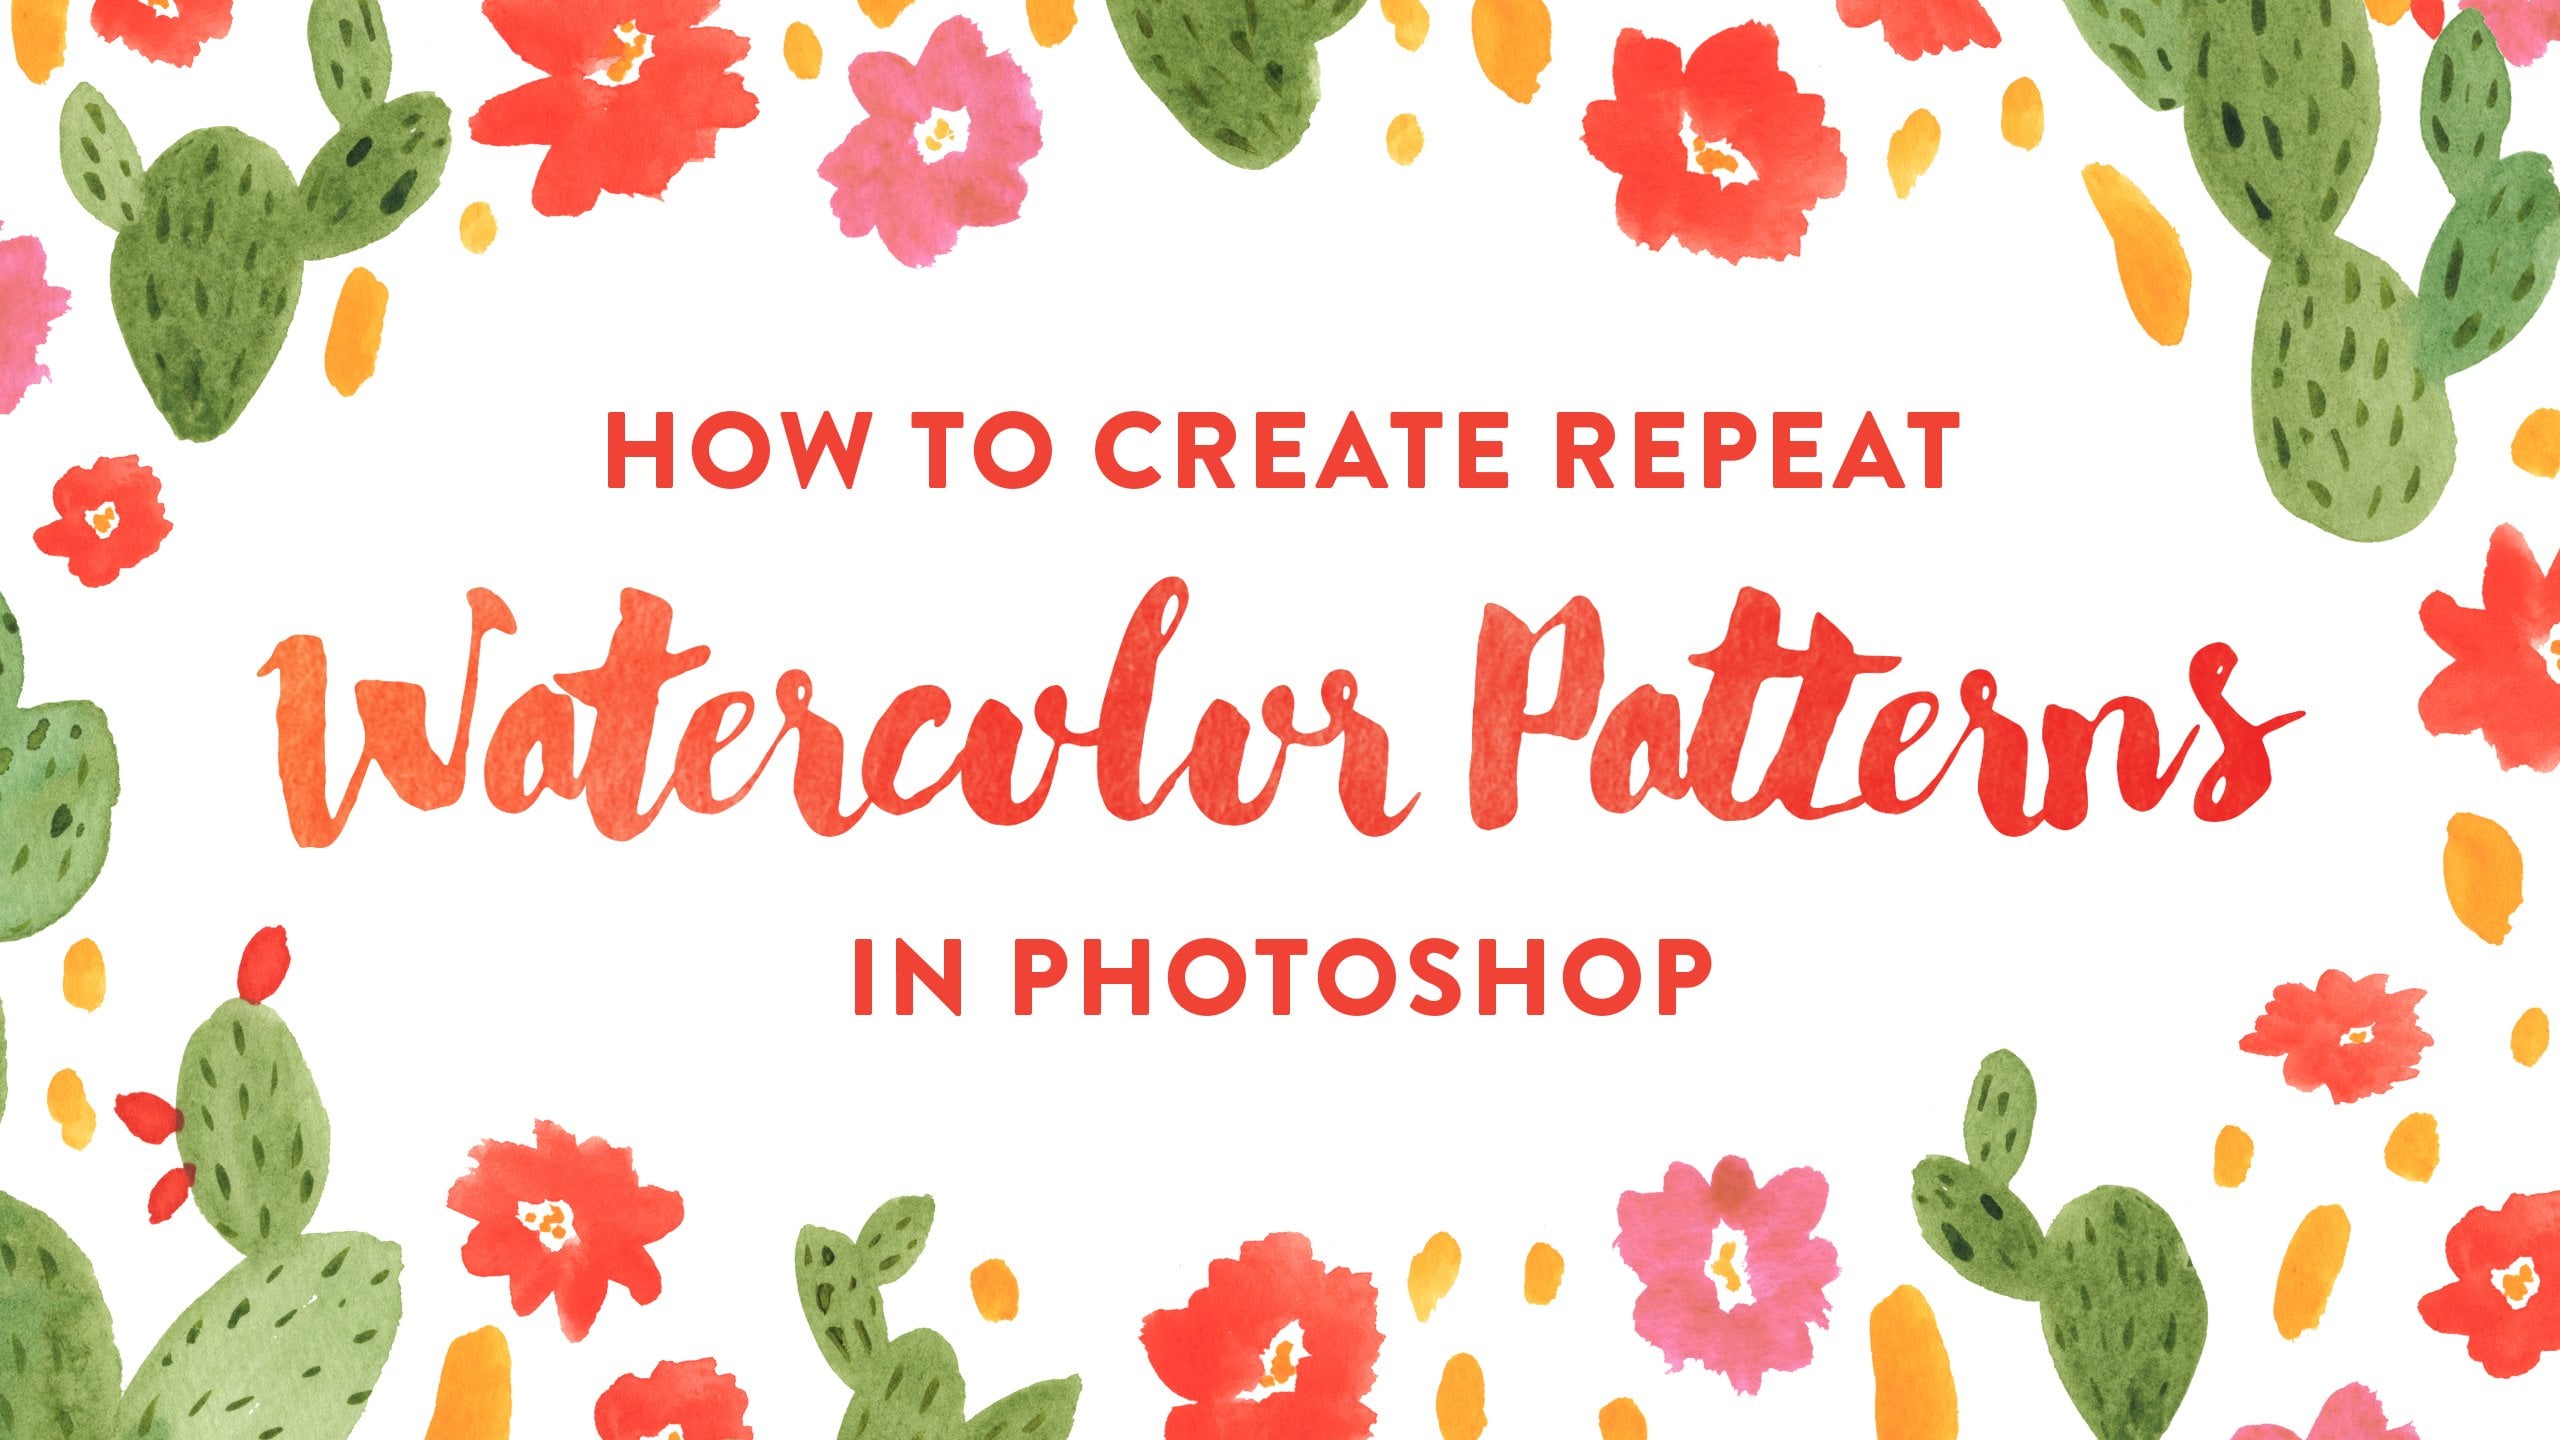
2. Plan your pattern: before we began making her pattern, I wanted to go over some of the different ways. You can go about designing it. I have a few examples with me that I wanted to use as a reference for when you begin, because it's best to have a vision in mind of how you want your final pattern toe. Look, I'll begin with this pattern here. That I picked up at a fabric store years ago and made a placement out of thistle is a great example of a ditzy pattern, meaning a small scale, dense pattern with minimal color. If you look closely, you will. You'll see that it's made up of mostly flowers with dots and between them and there aren't any leaves. And to me, that kind of gives it a retro vibe. And, um, this next pattern is one that I created. Um, it's, uh, made up of one daisy that I created in two different color ways and then duplicated multiple times and layered. Since it's only made up of flowers, it also has a very retro sixties five. Um, but their student color is there, and in this next pattern, I kind of did the same thing with layering and using two different color ways with the same motif. But because it's just sleeves and no flowers, and with it being shades of blue, it actually has more of a natural calming feel to it. And this is a type of pattern that's actually really popular right now. It's a pattern made up of multiple motifs that are placed next to each other, sell some elements are bigger, while others are more dainty in what I call fillers. Uh, surprisingly, this is actually what I consider an easier method, because tackling negative space is, um, just adding or subtracting those little fillers. And this final pattern is made up of one little flower that I actually pulled from a pattern similar to read one I just showed you. Sometimes if I'm making a collection, I'll use the same motif in two different patterns, and this is simple, but it is a bit more of a challenge because determining where to place the flowers so that they're spread out evenly requires a quite a bit of tweaking, which you'll see how I do that in the pattern making process. But the colors and the fact that It's a single floral. Give it a nice seventies five, which is kind of what I'm creating today. So for your project, I'd like you to create your own pattern. Using painted motifs with adobe fresco, you can get creative and plan out your own layout and motifs. Or you can follow along with me and make a sunflower watercolor pattern. I'm gonna be using a sunflower, and I even provided some sketches for you so you can follow along with that pretty easily. So now that you have hopefully have an idea of what kind of pattern you're wanting to make in the next lesson, we'll get started on making our sunflower motif.
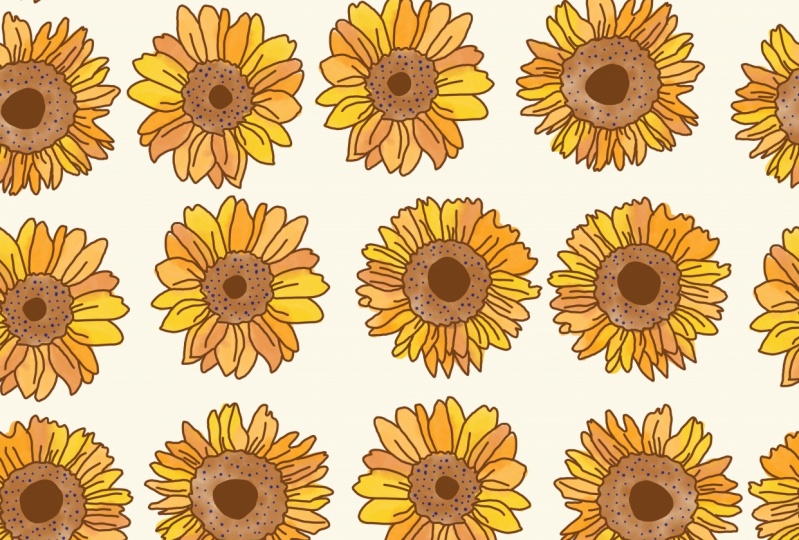
3. Painting the motifs: so we're going to start off our painting by tracing over these three sunflowers that I've sketched out already. You'll have access to the sketch along with a pre main color palette, and the resource is section in the classroom, and I'm going to trace over these sketches to create my three sunflower motifs, and you're more than welcome to follow along and do the same. Or you can create your own motifs for your pattern. And the main thing I want is for you to experiment with brushes and have fun with the process. And, of course, since we're working with watercolor, it's important to play with color mixing a bit. I did want to make note that this is not an intro to Adobe fresco or Adobe illustrator, but I will be going over the different brushes and end techniques that I'm using the best I can. Um, I'm going to start off by building my color palette off these seven colors, and I'm going to do that by using the eyedropper tool and then adding each color to my palette by using the plus button under recent in the color on the color wheel. I'll then delete that layer, and one of the brushes I'm going to be using today includes the hard round pixel brush. Since I am going to be using this for the line drawing I'll be doing of the sunflower. I want to make sure it's not too large, so I like to test out the size before sketching. I'm going to be using the live watercolor brushes for the sun flower petals. I'll be working with both the watercolor round and water caller wash soft brushes. Same with the hard round brush. I want to make sure to get the right size is ready before starting on my painting. I tend to like a water flow of 100% and I want the flowers to be pretty saturated. So I'm also going toe, have the paint flow up pretty high. That basically means that there will be a lot of paint and a lot of water. The colors will still bleed into each other. They just won't be very translucent. So I'm going to start by outlining the sketch with the hard round brush, and I will use the paint book, a tool to fill in the center, and I'm gonna keep outlining, um, and keep it in the same layer because it's gonna be the same. Color is the center Analects layer I'm going to work on is the center. I'm going to be using Navy for the little dot details, and I'll be using two different sized rushes to get Get Teoh, give it a little bit of variety. The next layer I'm going to be adding, is for the watercolor, that Opie painting in the center, and I'll want to rearrange my layers so that the navy jots air in the front. I'm going to turn off my sketch layer visibility, because I won't be needing that for reference. Once I'm done with the line drawing, my next layer will be the watercolor pedals, and I'm going to be inter changing for different shades of yellow and orange. For that, I want to make note that I'll be using the water color round brush for the majority of the sunflowers, - and now I'm ready to start on the next to sunflowers. I'm going to group the elements that go together for the first layer and add a new layer to begin the second sunflower line, drawing another thing I wanted to mention about this process is that it's okay to be in perfect with the motifs. Going outside of the lines with your pain is actually encouraged by me because I think it makes the motifs look more interesting. I'm going to continue making my motifs and in the next lesson will be ready to export them to illustrator.
4. Exporting to illustrator: when I'm making a pattern. And illustrator, I don't want to have a bunch of layer groups dragging around. So I'm going to duplicate these groups and merge the elements of each duplicate group together to make three solid sunflower layers. And I'm going to keep the original groups for reference later. But remove the visibility. Now that 33 copies air emerged, I can export them to my computer. I'll do that by going to save, publish and exports export as, and I'm going to export this in PST format and then I can airdrop it to you. My computer. OK, now it's time to open the file up, so I'm going to go to my downloads and find my document. I'll click on it and click open and illustrator, and we're going to keep convert layers, toe objects checked and click OK, and here are my motifs, and I'm gonna remove the background since we won't be using that. And of course, I just wanted to remind you that these air not vectors so they will not be edible in the same way that vector elements would be. So if you click on one of the flowers for example, you you wouldn't be able to change the color. Um, you could possibly image trace them if he wanted Teoh make them creditable. But I feel that tends to lose some of the quality of the original paintings. And I'm not really a fan of image Trace. Um, my personal preference is to just make sure I'm absolutely happy with my mood chiefs before exporting them to illustrator. And for this class, I'll be using the latest version of Adobe illustrator Sisi. It's the 2020 version, and if you've never made patterns and illustrator before, my first class, easy intro to surface pattern design goes over the process and much more detail and one last step before we dive in the making. The pattern that I wanted to go over is where I select all of my motifs by clicking command a copying them by clicking commands, see, and I'm going toe open up a new document at 4000 by 4000 pixels and paste them onto that clipboard. The reason I do this is because I want all my flowers to be on one layer. That way, if I want to layer one on top of the other. I can easily do that. Um, this step is totally optional, as you can still make a pattern with separate layers. But it's just how I work best. And I'm going to be making a lot of copies of the these motifs. So it just makes sense for me to do it that way. Okay, join me in the next lesson where we'll be ready to start making our pattern.
5. Making the pattern: Okay, now we're ready to begin making our pattern. I'm going to start off by selecting all of my sunflowers and making copies of thm. You can easily do that by dragging them down and clicking Command D while still continuing to drag. Hm. And for the first set of copies, I'm going to right click go to transform and vertically reflect them at a 90 degree angle. That way they're different from the motifs above. Then I'll make copies of thes by dragging them over to the left and clicking command E again while still selecting them. I do this so that I will have plenty of motifs to choose from when making my pattern, and I'll repeat the step one more time. And that should be plenty of flowers to truce. From now comes the fun part of making the pattern. My art board is 4000 pixels by 4000 pixels, and that's the size I want my pattern block to be. So I'm going to be arranging them directly onto the art board. - I've started by placing motifs in the center of the square and at the top and left sides going over the lines. I avoided the right and bottom parts of the square because I'm going to be copying those elements that go over the lines from left to right and from top to bottom. So I'm going to select the four flowers that are on the left side, poking out of the art board, and I'm going to right click, go to transform, move and I'll change horizontal to four thousands and still be copying to the right and have zero as vertical, then a quick copy. And now we have copies of the motifs on the right, and I'm going to basically repeat this process for copying the top to the bottom. But instead I'll be switching horizontal to zero, and I'm going to make the vertical for 1000 and click copy. So this gives me a better idea of what's missing in the pattern and where there is too much or too little negative space. Okay, we're not quite done making the patterns watch yet, because there's still a lot of editing and tweaking that needs to be done. If you want to move a motif that says directly on one of the lines that have been copied, then you'll have to select both the left and right motif or the top and bottom motif. Otherwise, it'll interrupt pattern. Creating a pattern has often been compared to making a puzzle, because it's all about making the pieces fit correctly. For the rest of this lesson, you'll get an idea of how that works, but I'll be honest. To make a perfect pattern can take me a whole day of moving things around and editing placements in the end. It's always worth it, though.
6. Testing the pattern: So I think I'm at a pretty good spot here to test the pattern. And to do that, I'll just need to make a background for the block. I'm going to click AM on my keyboard, then click on my mouth's and create a square that is 4000 pixels by 4000 pixels so that it matches the size of my art board. You want to align the square to your art board perfectly so that they're no seems in the final pattern. So to do that, you can go to window, then a line, then click on Vertical Align Center and Horizontal Align center, and that place is our square in front of everything else. So to send it to the background, you can go to right click, arrange and sent to back. Now we can pick a color for the background, and I'm thinking, I want a nice ivory. I'm going to move a couple of things around before testing the pattern. And once I'm ready to make my patterns watch, I will select the square background click command seat, a copy it than command beat paste at the very back of the art board, then for the background. You'll want to make sure there is no color for the Phil or the stroke. You won't be able to see it, but if you keep it selected, you can do that. Then you can select all of this watch and drag it over to the swatches panel. So the tests this watch will just need to make a new rectangle click on this watch, and there it is. And if you want to adjust the scale, keep the pattern selected. Click on S than click on the grave accent Key, the shift key and the tab key simultaneously while dragging the pattern out with your mouths. You can also right click and go to transform scale. If that's easier, I still feel like I have a bit of tweaking to do on the patterns, so I'm going to try and pinpoint all the spots that look off to me and adjust them in this watch. After I've done a few tweaks, I'll repeat the process of selecting the new Swatch and dragging it over to the swatches panel. Then I'll test that went out on my rectangle as well, and it's still not perfect so often. What I'll do is I'll use Theglobe brush tool to kind of highlight the area I want to fix. Then I'll do the same steps and test this watch and see that the area I was targeting has shifted. Okay, I think the pattern is much better now and we are ready to move on to saving it's
7. Saving the pattern: for this lesson. I'm going to briefly go over how I save the patterns. Watch. Sometimes I'll make a clipping mask to demonstrate the pattern without the motifs coming off the edges. To do that, you'll need to copy the colored background by clicking command. See then select all of the elements of this watch and group them together by clicking command G. Then paste that background in front of this watch by clicking command F. Then select all of those elements, right click and click make clipping mask, and that's a nice, seamless swatch. However, sometimes this method doesn't work. For example, if you try to do this for spoon flour, you'll get an annoying line in your pattern. So an alternative method is to take the colored background of the pattern and extend it beyond the corners just a bit. Then you can go to file export as, and I'm going to make this, um, named sunflowers Watch. I'm gonna save it as a J peg and be sure that use art boards is checked and click on export , and I'm going to save it in RGB color mode at 150 p p. I for sunflower or for spoon flour. That's what they recommend. And I'm gonna click. OK, and now when I go to open that file, I'll have my perfect tiles watch.
8. Thank you!: I hope you enjoy this class and got a lot of value from it. If you're completely new to surface pattern design, welcome, it's addictive, and it's one of my favorite things I've ever learned. And if you're someone who has experience and surface pattern design, I hope that I gave you some new tricks. If you have any questions, feel free to reach out, and I'll do my best to answer them. Probably. I really do hope you make the time to work on the class project because it's fun and worthwhile, and you'll find that there's actually quite a bit you can do with the patterns. Watch thank you and goodbye.
 Inez Jestine, surface pattern designer