Transcripts
1. Introduction: My favorite medium
is watercolor. Because of the
translucent paints, it can capture the most
delicate and detailed effects. Perfect for flowers. Hi, I'm Helen. I'm
a textile designer, and I love to paint flowers. I've worked as a designer
painting flowers for over 20 years
for fashion fabrics. And I now own my own
brand, Helen Love Day. Selected items are
now available from my collection at the
VNA Museum in London. Painting white flowers in watercolor can present
a bit of a challenge. You may have some
questions, Like. Can I use white paint? Can I use gray for the shadows? Should I outline all the petals? We can't use white paint as our painting disappears
on the paper. If you outline your petals
with too heavy a line, the fragility of
the flower is lost. To make matters worse,
using gray paint can make your flowers
look dull and lifeless. To capture these
flowers in watercolor, you need to have good strong observational and
creative skills. We'll be delving into just
these topics in our class. Watercolor painting,
how to paint white flowers that
pop on white paper. We'll talk about how to
take good reference photos so you can get really inspired
to start your painting. You can use your
own photos or you can use my reference and
paint along with me. You'll need the basic
watercolor essentials, paints, paper, brushes, all outlined on the downloadable
materials guide. We'll mix colors from the very basic hues so that you'll get a
better understanding of how to create the
subtle tints and tones that you'll need to
paint delicate flower petals. We'll begin painting in layers, and I'll show you
how to break down the painting into simple stages. This will give you a guide so that you'll be able to
plan your painting, making intentional
decisions about what effect you want to create. I'll show you how the
light source affects color temperature so
that you can place subtle tints of color creating depth and breathing life and
luminosity into your flower. I'm really excited to
see what you can create. Let's get painting. I'll
see you in the next class.
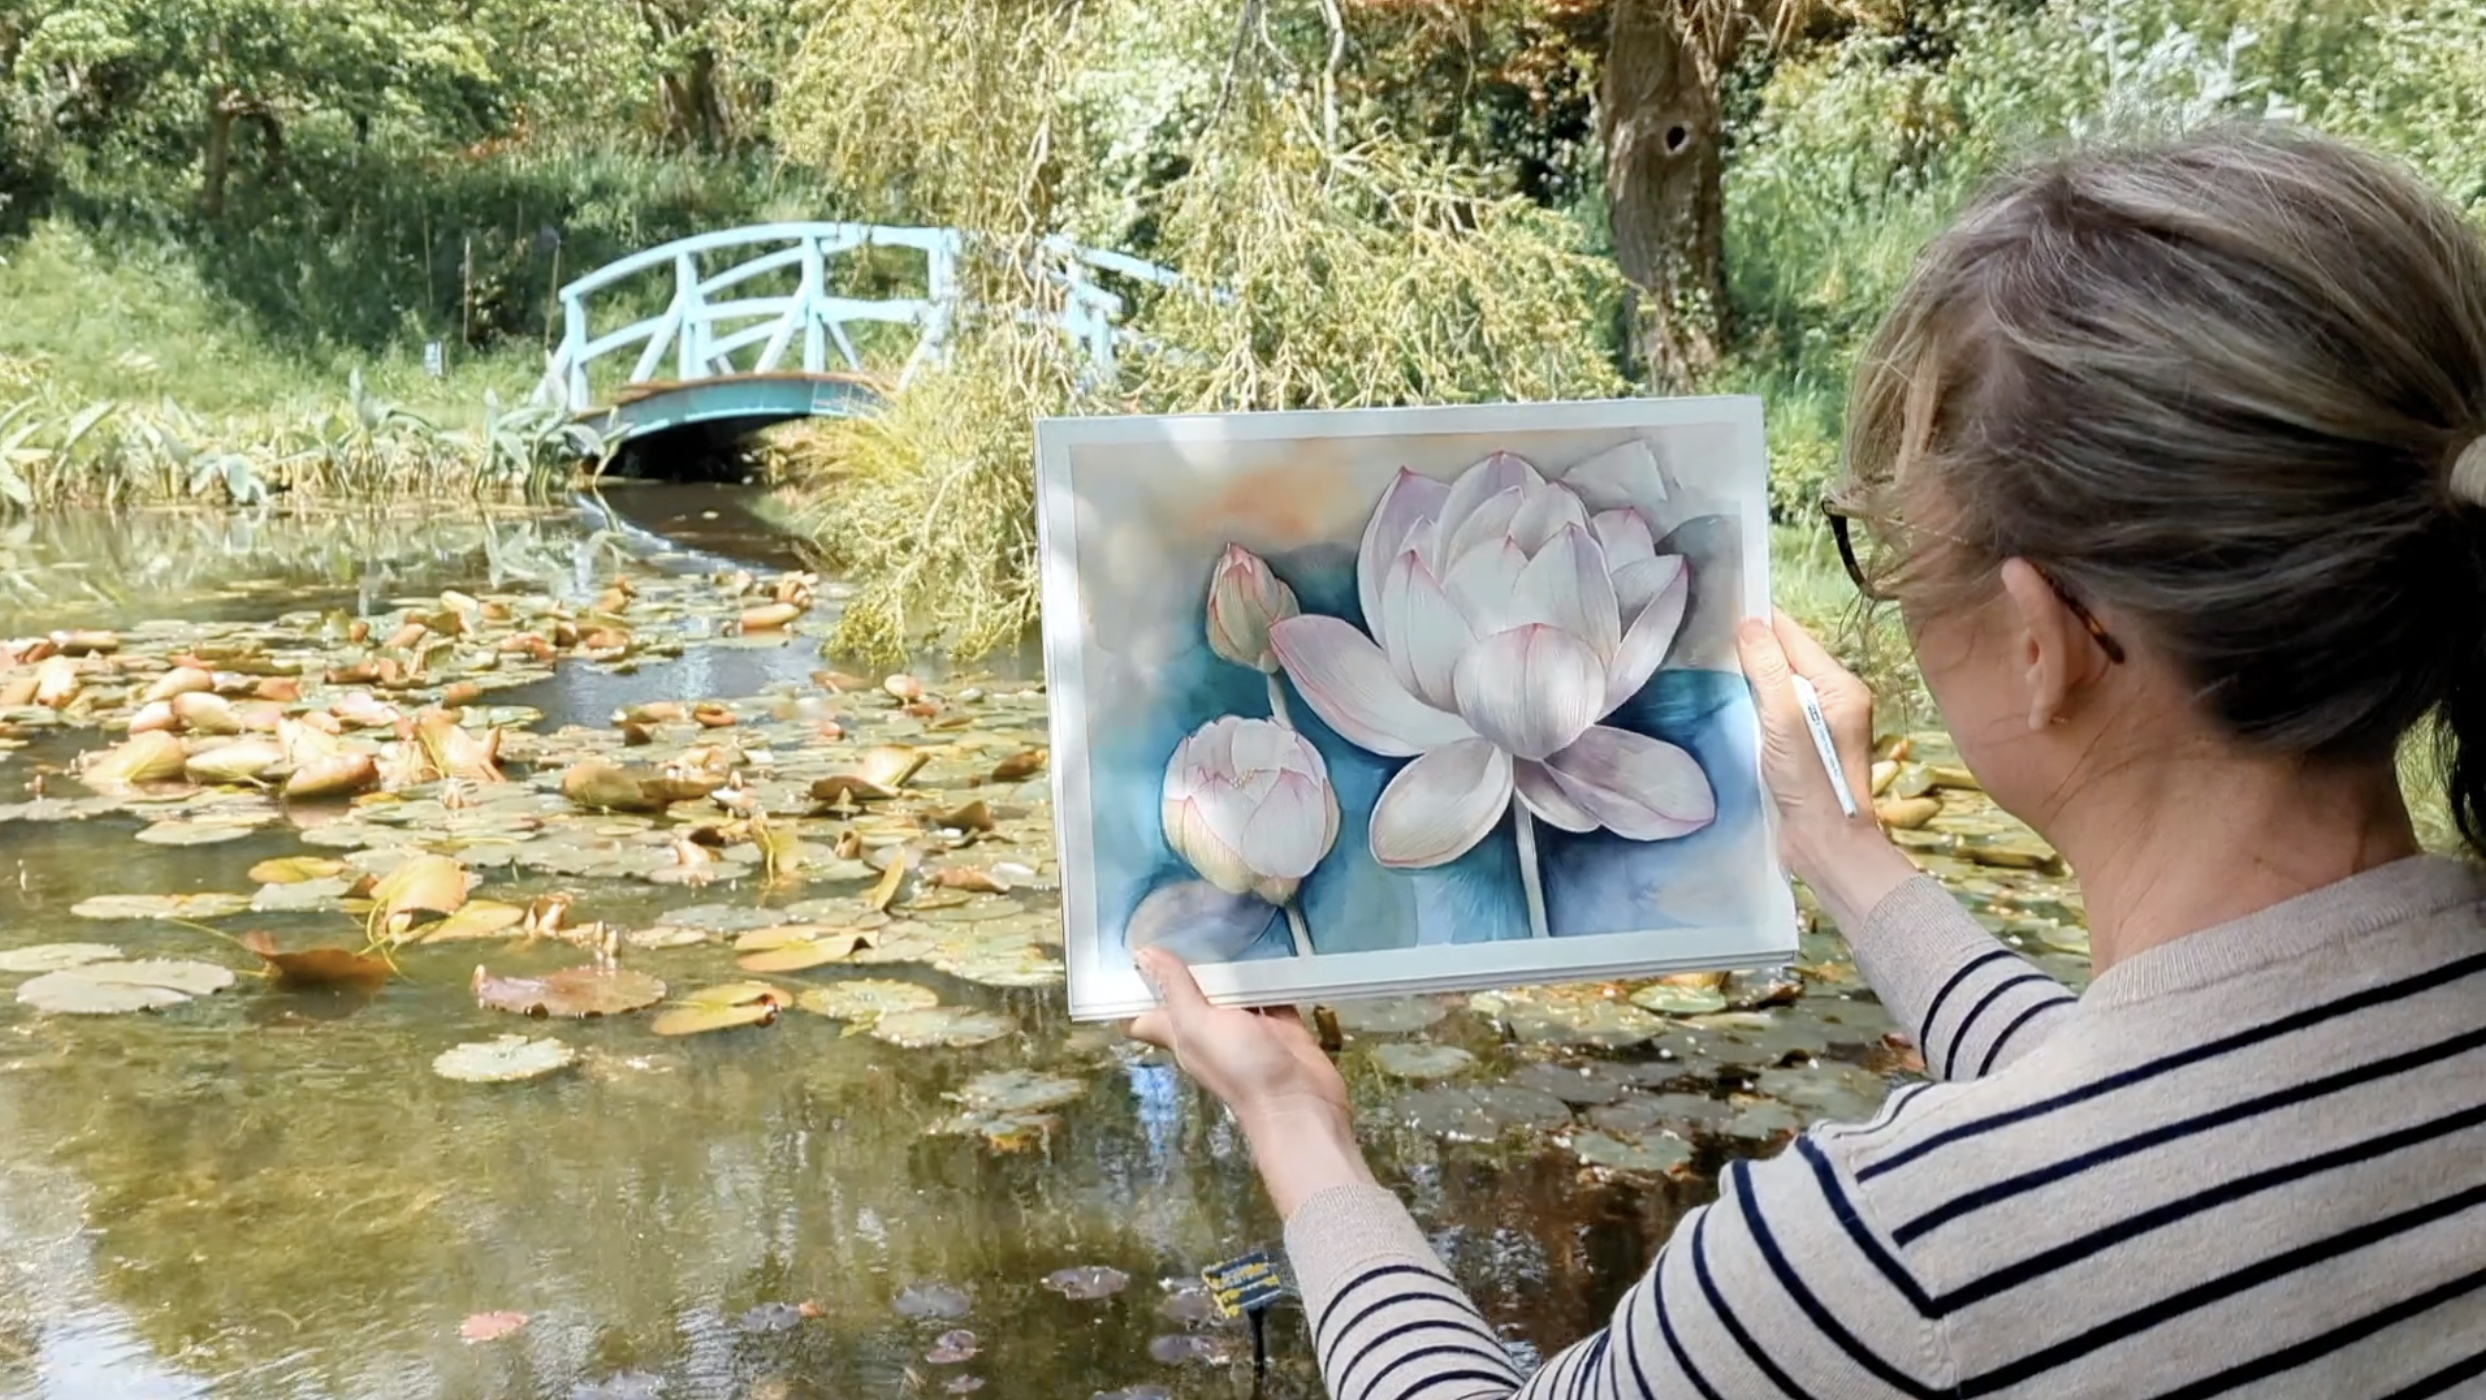
2. The Project: Welcome. This lesson is going to be all
about our project. We'll go through all the
steps you'll need to creating your own luminous
white flower in watercolor. I've prepared some
downloadable guides to help. You can find these under the
projects and resources tab. First, a materials
guide outlining my recommendations for
watercolor painting materials. Next, a couple of
my flower photos, which you can use
as your reference if you'd prefer not
to use your own. The glass slides
are also available. Now with this style of painting, it's not possible to give a
stroke by stroke instruction, like it might be with a simple
looser style watercolor. You might well ask,
where do I even begin? It looks so complicated. But we can simplify
this botanical style painting into
more manageable layers. We'll break down our
reference image into three sections, the
highlight layers, which are the very
lightest tones, the mid tones, which
are the middling tones, and the darkest tones. You can do this on
any image by simply mapping it out with a
printout and a felti pen. This way, you can
naturally build up the tonal values and
details that you want to with these three
stages rather than experiencing the overwhelm
of what to paint next. I've included as a download the breakdown of layers that we've used in this reference, which is covered in more
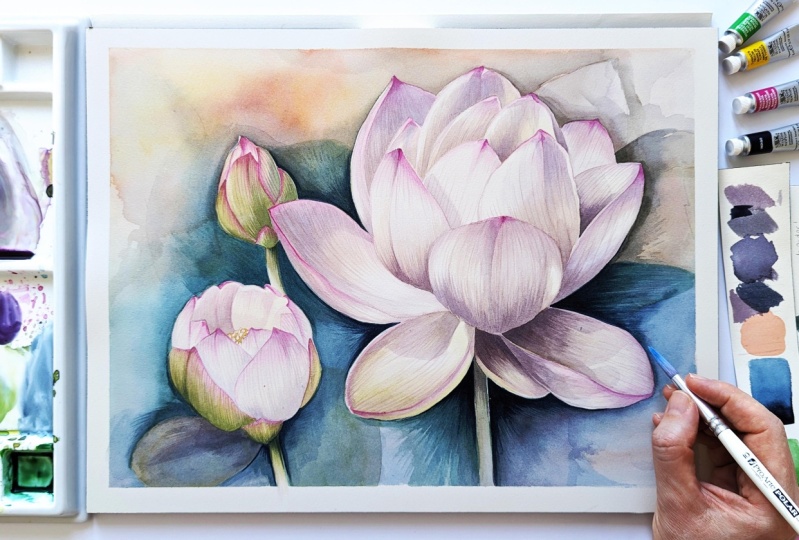
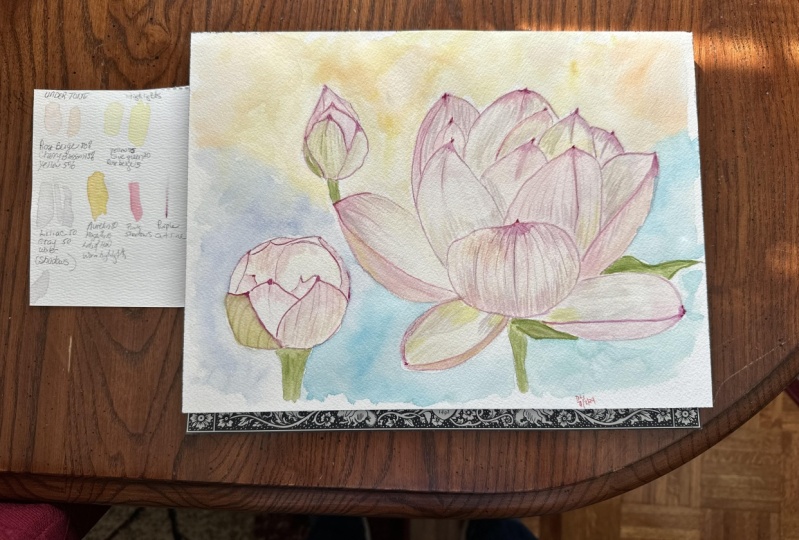
detail in the class. I've also attached my finished
project as a download so that you can see roughly what your project can look like. Once you've downloaded
the resources, we'll need a reference
flower to work from. I won't go into depth about flower photography
in this class, but we will talk about what
makes a good reference photo. If you don't have
the right photo, don't worry, feel
free to use mine. I took these on a trip to the Botanical Gardens
at Q. Painting a white flower is great for practicing the foundational
skills of observation. We notice more delicate
details in tone depth, and texture without a
bold color dominating. I'll also encourage you
to take inspiration from other artists in how they
depict white subjects. This can help us think
creatively about how we would like to
represent our reference. Okay. Next, we'll
dive into materials, and I'll explain why I
think these materials are best for the techniques that
we're using in this class. Once we have our
materials to hand, we'll start mixing some
colors from scratch to give ourselves a base of tints and tones to begin work. We'll use a simple technique
to work out our composition. I'll show you some techniques to transfer your painting to paper, either tracing or
free hand drawing, whatever works for you here, there's really no
right or wrong. Once our painting is
transferred to paper, we'll cover our flow in a
very light, even base layer. This is just to take
the very bright white off the paper to stop
it looking unnatural. We'll then add our
highlight layers, which will comprise of some color and our
lightest shadows. Next, we'll move on to
our mid tone layers and we'll build up the shadows
and strengthen the colors. Then we'll move on to our
darkest tones in the flower, adding any color pops
and the deepest shadows, building up the tones until we feel our flower is fully formed. Once our petals are painted, we'll move on to the
leaves and stems. Lastly, we'll tackle
the background if you would like to add one. The next important step is to take a photo of your
work in good light and upload it to
the project section under the projects
and resources tab. This is a creative project, so it will be personal to you. Anything goes, so
I'll be looking for excellent creativity and
observational skills. If you get stuck, you can't find something or have any
questions about the class. Please reach out
and message me on the discussions tap.
I'm here to help. As well as white flowers, there are so many other
inspiring white subjects you can directly apply
your new skills too. From snowy winter landscapes to white furred and
feathered creatures, the possibilities are endless. I'll be so happy to
see what ve painted. Let's get started with what
makes a good reference photo. I'll see you in the next lesson.
3. References: Welcome, and in this lesson, we're going to delve
into what makes a really good reference
photo to work from. We'll be looking for high
resolution images with as much detail as possible
and a clear light source, and most importantly, a flower that we just
can't wait to paint. I definitely recommend
getting out and about and seeing what
flowers you can find. You can never have
enough flower photos. Botanical gardens are a great
place to get inspiration, but you can also
use shot boat ones or even ones from
your own garden. It's best to take quite
a few photos from different angles to give
yourself a range of options. Once you have lots
of lovely photos to choose from from
different angles, which one are you going to
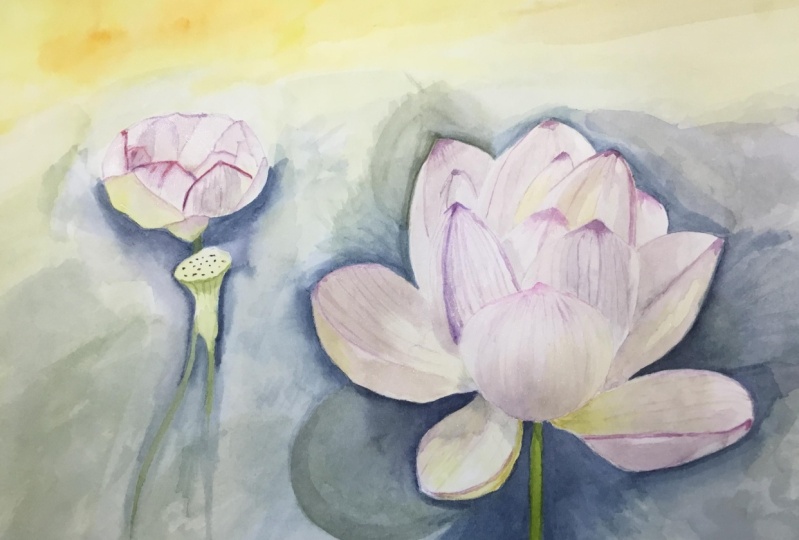
use for your reference. Here are some of the photos I've taken that will
make good options. Let's start off with why I've chosen these particular
reference images. I really like this angle, as you can see, the lovely
shape of the flower well. I use two guiding
principles when I'm choosing a reference
photo to paint from. The first is to take
a clear picture, not blurry with high resolution. You can decide this by
zooming in and checking if all the details are clear.
Why do you need this? Because the clearer
the images to us, the more details
we can accurately paint without guessing, which will create a more
realistic look in our work. Now it comes down
to the lighting. Good lighting is a must, not so dark that you
can't see the details and not so bright that the
details are bleached out. These top two pictures are quite bright and
in the first one, lots of the detail has been
bleached out by the light. Also, if you notice
in these ones, the light is quite diffused. Although we can see that
highlights and shadows, they're not as defined as they
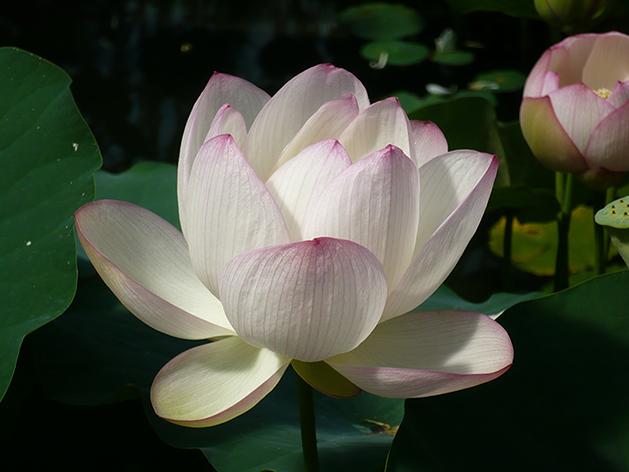
are in the last pictures. Narrowing it down to the
second two pictures, You can see they have
a bit more contrast between the lights and
darks, but to my eye, the last image seems
to be the most defined with a greater
depth of tonal value. The light source also
seems clearer to me in the last image coming
from the top left, and this will make it
easier to place tints of cool and warm colors
in the right places. Now that we've selected
our main flower, which is going to be
the focus of the piece, we can also include if we
like some birds leaves and maybe some supporting
flowers around it to set it into a scene. This will help to make it a
bit more natural and I do have some pretty images
that I'd like to include. I use the same process of selection with
these ones as well. Now, I like to print out my
reference photo onto paper. Archival map paper,
you can see here has very rich color
compared with a photocopy. So that's my preference,
but you can also use a table or screen
as well if you want to. I'm going to show you how to
break down your image into layers so that you don't get completely overwhelmed trying to paint the whole thing in one go. So to do this, we'll
need three printouts, photocopies of fine,
and a felt pen. The reason I suggest using this method is that
when I was a beginner, I always used to paint
over my highlights and over my mid tones with darker
shades than I meant to. And it's really frustrating
because the beauty of water color is preserving the whiteness of the
paper for the highlights. You really can't
over paint in white. And once you've over painted the lightness of the
paper, it's gone. So you can't really
recover from that. So it's really important not to paint over
your highlights. And this method
will train you to remember where your highlights
and your mid tones lie. So with these painting stages, we'll start off with what
I call a base layer. This is an incredibly light wash over the whole surface
of the flower. So the next layer we'll work on is what I call
the highlight layer. So this isn't the very
brightest white highlights, but this is the next layer down, and this is still
incredibly light, and it's made up of the
very lightest colors and the lightest shading. This area here will
be the base layer. And these areas here, I'm now just drawing round. I'm looking at my reference, and I'm seeing which appeared to be the very brightest highlight, and I'm just going
around them with a marker pen now
sectioning this off. So this is the area that
will be our highlight layer. And if we look at
the highlight layer, it will cover most of the
surface area of the flower. So we'll be very careful not
to paint over these areas. The next layer we'll move on to is called the mid tone layer, which will have the
mid tones in it. If we look at our flower, this area indicated here will be covered
in the mid tones, and we'll take very
great care not to paint over either our highlight
layers or our base layer. So we'll leave all of this unpainted when we're
working on the mid tones. So what we're going to do now on our second photocopy is we're going to mark out not only the
very brightest highlights, we're going to section
off all the highlights. So as you can see
indicated here, these are the areas that we're
not going to be painting, and this area, the pink area is what we will be painting
with our mid tones. And in this layer, we'll really start to build up
some strength in the colors and the shadows and our flower will be getting
quite a bit more defined. Moving to our
darkest tone layers, here's our flower with
the different layers on, and our darker tone
layer is going to be, only in this area here. So as you can see, it's a
smaller area of the flower. We won't be painting over any of the other underlying layers that are our highlights
in our mid tones. We will just be painting
now our very darkest tones. So now we're going to
use our third photocopy. And I'm going around
now with my Pelt tip literally marking out just the darkest tones
that I can see. And you can see indicated here, This is the area that we'll be painting our darkest tones on, and we'll be incredibly
careful not to paint over any of the other
areas with our base, our high light, and
our mid tone layers. We'll leave those untouched, and we're only going
to be painting our darklest layers onto
the areas indicated. I've used the
threshold feature in photoshop to determine my tones. And you can certainly try this if you have photoshop available. And I'll be referring to
these images in my class. But it's really not a necessity. You can do this just
as well by hand. If you have a reference that doesn't have that
many mid tones, and this might be
the case, especially with a very light coloor flower. You can just mark out
your highlights and your darker tones instead and
forget about the mid tones. So I'd like to talk next
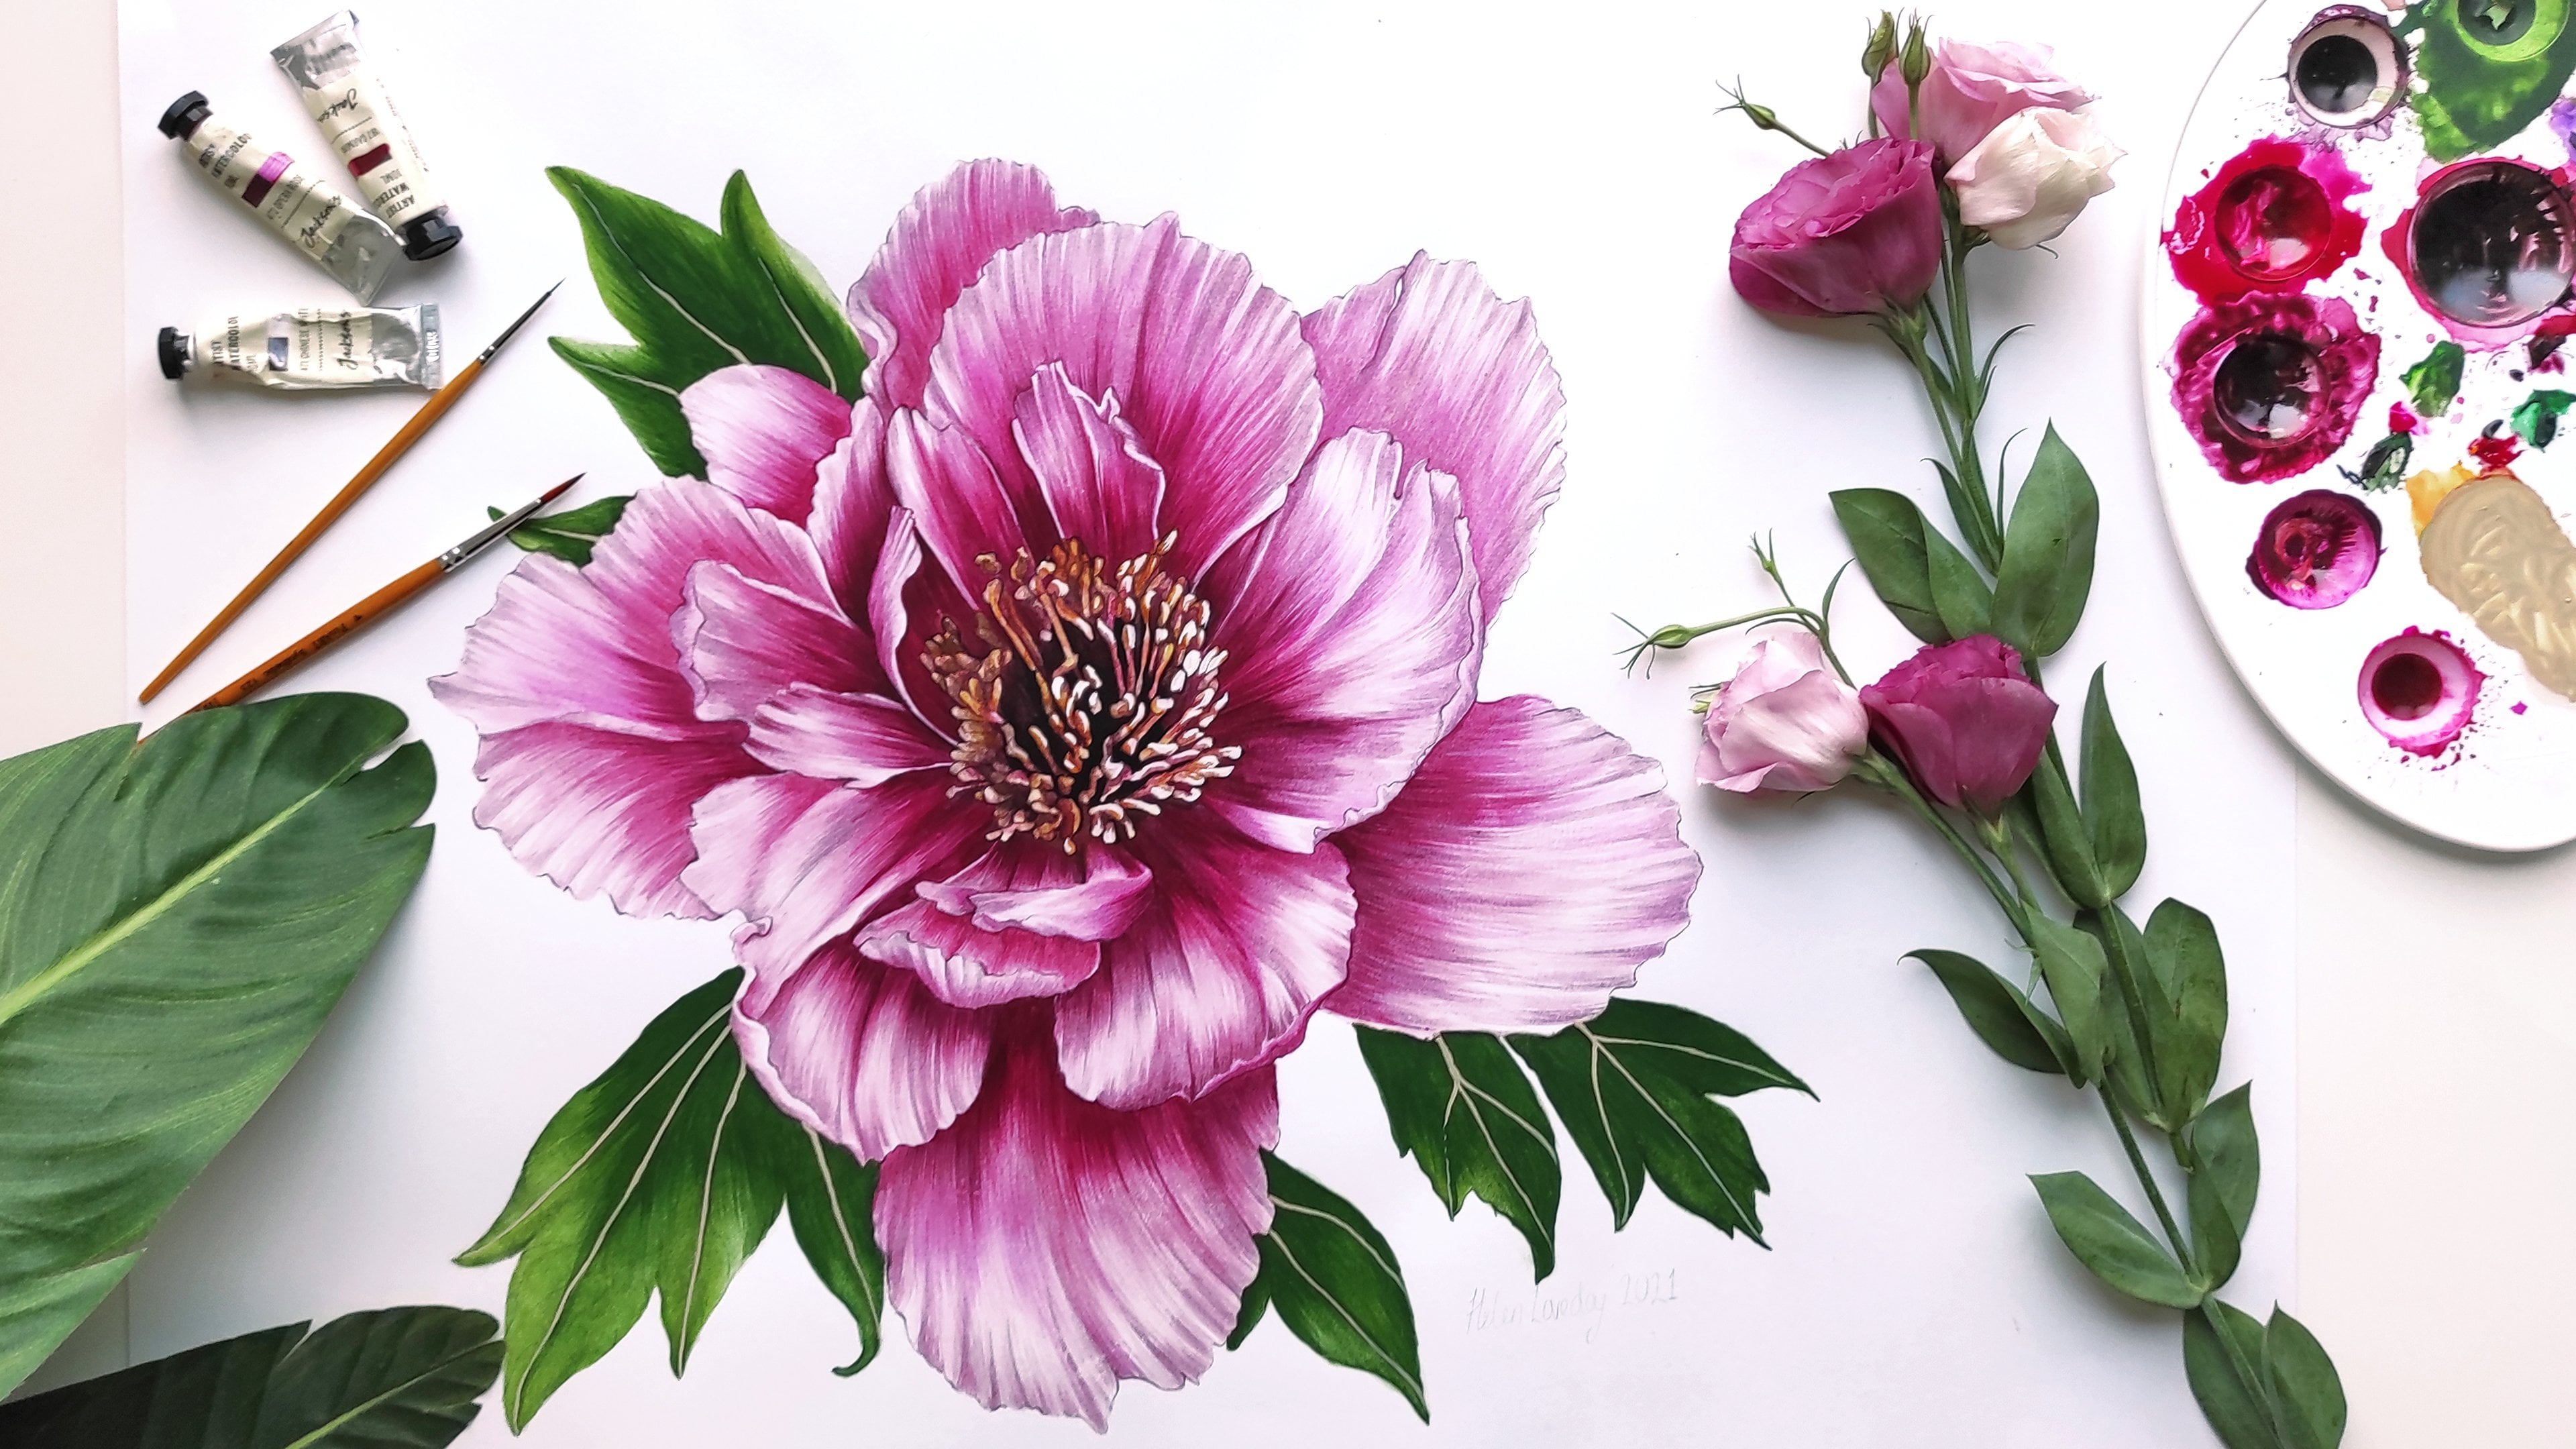
about color references. One of my favorite pictures using a white subject is
by John Singer Sargent, and it's the Carnation Lily. What I love the most about this picture is
his use of color. He hasn't just used gray
tones to depict the white. If you have a painting
that you really love, definitely check it out and just have a really good look and see what the artist has done
and how they've used color, especially in relation to using warm and cool highlights to kind of to give a
perception of depth. So now that we have our
reference flower sorted, what materials are we going
to need to paint with? We'll find out in
the next lesson.
4. Materials: Welcome, and in this lesson, we're going to talk
about what materials you'll need to get started. If you haven't already, download your materials guide from
the resources section. I think we should start
off with the paper as it's a key component in the way our painting
will turn out. Which paper is best
for watercolor? Water will buckle or
wrinkle thinner paper. As you'll be adding watery
layers of paint to your paper, it's best to go for
a heavier weight for watercolor painting. Watercolor paper comes in quite a few different varieties
in terms of the texture. A cold pressed paper has
a little texture to it, and a hot pressed paper
is pretty smooth, so imagine it's been ironed. So which paper for watercolor. I have three options here, all of which I've used before, and all of which I recommend
for this style of painting. The first one is a
cartridge paper. This is a really all
round in general paper. You can use it for painting watercolors,
sketching in pastels. It's only 220 GSN thick, which is still nice and thick, especially for a
cartridge paper. What I love about it is it has a very nice smooth surface. The next paper I can recommend
is a watercolor paper, which is cellulose based. This is 300 SM thickness, which is nice and thick. It's hot pressed with
a smooth surface, not as smooth as the
cartridge paper, but still incredibly smooth. It's a more general paper, but it is specifically designed
for watercolor painting. Lastly, the watercolor paper that I'm going to be
using for this class. This is a cotton based
watercolor paper. It's 100% cotton based. It's 300 SM thickness,
so nice and thick. It's a hot press, so it
has a nice smooth surface. The paper absorbs the
paint, so once it's dry, the colors do seem to
tone down quite a bit. But this also means that you let each layer dry
and then you build up the intensity of the
color and this gives a really lovely luminous
quality to your painting. I know that it's
traditional to stretch a paper to stop it buckling. But if you do find
your paper buckling, what you can do is use
a gummed block instead. If you paint your painting
completely and let it dry before removing the piece
of paper from the block, it really should prevent
the paper warping. Next, I recommend a
mechanical pencil with a 0.5 millimeter lead. So why not use just a regular
pencil you might ask. I just couldn't
capture the level of detail that I was after, but now I'm using these
fine pencils, I can. The same goes for the eraser. I will also use a
regular eraser, but this fine tip
one is great for precision with erasing
finer details. This putty eraser is also
something I've been using more recently for lightening up my sketch before
I begin painting. If you are a tall heavy handed
with your pencil like me, you may end up with darker
lines than you would like, and if they're accurate, it's a shame to get rid
of them completely. That is where this putty
erasor comes in handy. If you roll over
your sketch like this or just dab it
into darker areas, hey press you now have
delicate line drawing. The next piece of
equipment I'm going to recommend is an artist glove. If you use your bare hand, you'll end up leaving
marks on your paper, and this will show up as
lighter areas when you paint as you'll leave a greasy residue in areas which repels the paint. These gloves are
perfect and you don't feel scared to rest
your hand on the paper. Now on two brushes, I bought one expensive brush in the hopes that my paintings
would be transformed. This is the size three Windsor and Newton
series seven brush. I have to say, it didn't
do quite what I expected. So until further notice and
maybe a bit more practice, I don't have any
particular brush to recommend except for a round
brush with a pointy tip. Anything from a zero
zero up to a size ten, depending on the size of
your artwork will work well. A minor acrylic
apart from this one. I've also recently bought
some new watercolor paints. These are Windsor and Newton from their professional series. As I'm testing out these paints, these are all the colors I
will use in my painting, Hookers green, Magenta,
Turnus yellow, and indigo, and I might
pop in an orange later on. We'll just see how
we go. I'm using an intego which is a
very dark shaded blue, and this will be to darken
my colors for the shadows. I've also got a new
porcelain paint palette, which I really like. You can set your pans of
color around the edge and then use the central flat area for fine tuning your mixes. Lastly, a water jar. You can even use two
if you want one for washing and one for
adding clean water to your paint mix and
a blotting paper to blot your brush or to
take off excess paint. Kitchen roll works well. Now that we've got
our material sorted, let's mix up some colors
that we can paint with. I'll see you in the
next lesson. M.
5. Color Mixing: Welcome, and in this lesson, we're going to be looking
at mixing up colors. I want to play around and mix up a selection of colors that
I can use in my painting. I'm not going to be using
these directly on my painting. These will be some base
colors to work from, so I don't have to
keep starting from scratch every time
I need a new color. I'm only going to work,
maybe five colors just to demonstrate the variety of colors that you can achieve
with a limited palette. But you are of welcome to
use additional colors, whatever you have to hand. Always try to test the colors on the same paper that you're
used to paint your artwork. That way, you'll be sure
the color will be the same. Here we have the four colors that I'll be using to mix with. With tubes of paint, if you let them dry out in your palette and want to
use them again another day, they reactivate better
when you've added a little water to them when they first come out of the tube. Let's take a closer look
at our flower reference. What we'll do is first mix up a very pale wash that will
cover the entire flower. I like to do this as I think completely white
paper with no tint doesn't look very
natural even for the very brightest
highlights in our flower. Here I'm taking a little
magenta, a little yellow, and diluting it with water, and I'm going to
test this out now. I think I'm going to add a bit more pink and test it again. So now that will do for the first wash over
the whole flower. I'll mix up a tint of
more yellowy wash to start building some of these
yellow tones we see here. I'm taking a splash
to the first color, just get started with a bit of yellow and magenta
and watering it down. If we take a look at our yellow tones again on the reference, we can see that
these yellows are taking on quite a greeny tinge. These line mostly
in the shadows, so the tint is cooler than in the yellow at the
center of the flower. Here's the color
temperature wheel. The cooler colors on
the left hand side tend to recede and add
depth to your shadows. The warmer tone colors
tend to bring objects forward and are great to use around the lightest
areas of your painting. So now I'm going to mix up a greeny ellow tint using
yellow, an att of green. Adding some water now
and a bit more yellow, except I've picked up
too much on my brush, so just getting rid of it here, washing my brush and adding some more water and
adding some green to the mix and a bit more
yellow and now testing out. I think this looks nice. So I'm just going to add a
little yellow and indigo together because I
think I want even more intense green
yellow as well. Does come up too pale, so I'll add some more yellow and indigo to strengthen the color. And I'm just testing again, and I think that
does look better. So now that we have our
pale washy tones mixed, we can move on to mixing up
some grayish shadowy colors. Now I'm adding a little bit
of indigo to my palette. I'm going to take a little bit less and add some water here. Adding a little bit of
yellow to this mix, and a tiny bit of
magenta as well, and giving it a really good mix. I'm testing out this color now. I'm going to have another
go with another blue tone, so a bit of indigo,
a bit of water, and a little bit of magenta. Having a good mix around
this has gone quite purple, so I'm adding a bit of yellow. Adding a tiny bit more indigo, a little bit of yellow, and a bit more magenta. And I'll just test this
color out now as well. So I'm going to add
a little bit of magenta and now some indigo, a bit more magenta,
and a bit of water. Tiny bit of yellow. Just testing this
out on the page, and this is quite
a bit more pink. I'm going to take
a little bit of this mix and make
something new from it, a little bit of indigo, a little bit of yellow,
a bit of indigo. A bit more yellow.
A bit more magenta. Oops, quite a bit more indigo. That's very blue now. And more yellow, more magenta. I'm just trying
this paint out now. This is looking
quite purply pink, and I'm going to
have another go. I'm going to take a little
bit of this mix now and water it down and paint it
on my test strip again. Here we go. We have a selection of colors
to work from now, very pale, pinky yellow
washes on the left, and some green tint yellows, some blues and purple
shadow colors, and some pink tones for
the tips of the flowers. In this lesson, we have
our starter colors mixed. In the next lesson, we're going to start with our drawing. I'll look forward to seeing
you in the next lesson. Ah.
6. Drawing: So welcome in this lesson, we're going to be
drawing our flower. So in this lesson, we'll have a little look at composition. We'll try transferring
our image to the paper. And lastly, we'll try some
free hand drawing as well. I find it helps to print out my reference images in
a few different sizes, so I can kind of judge
looking at my paper, how big I actually
want my flower. I print out the
accompanying flowers as well, the buds
and the leaves. I'm just going to
cut random and I'm just going to choose
all the elements that I'd like to include
in my flower. I'm just going to lay
them out on my paper once I think I've
got the right scale, and I'll just have
a play around. These don't need to
be perfectly cut out. They can just be haphazard. It's really just to see about
the placement on your page. So I'm just laying
these out now. I've kind of got rid of a few because it was
looking a bit busy, and I think this is pretty much how I'm
going to leave it. So once we think our
composition looks pretty, we're going to move on to transferring our
image to the page. There's a few different
methods to do this. And first of all, I'm going to show you the tracing method. So I'm just going to take
tiny bits of masking tape and tack down my cutout
images onto my page. And I'm going to use
this trace down paper. So this is a kind
of I don't know, graphite paper, I guess. You can reuse this many times. So be super careful with this because you can get
graphite everywhere. And all we're going
to do is to draw out our image onto our paper. So I'm just going to check what's happened.
Nothing has happened. I've managed to draw
absolutely nothing, but I have made some smudges, so that's not particularly
good to start. Now I'm going to try
with a harder pen. I've now got a byrow and I'm
just going to start drawing now slightly more pressure than I could make with
the very fine pencil. I'm going to draw
a few shapes now and I'm just going to
check how that's looking. That looks too heavy
to me. Also not good. So now I'm going to use my rubber to try and rub this out. I'm going to try using my
putty rubber to rub this out and I'm going to try
rolling over it. Oh, dear. Now I'm going to show you something which you
definitely don't want to do, and that is called indenting. So I've actually managed
to press so hard through my tracing paper that I've managed to
indent the paper. Unfortunately, I've tried to carry on drawing over the top, but this will not work
because you can still see the nasty kind of
indents through my drawing, and that will just be visible even when I've painted over it, so I'm going to have to scrap
that and just start again. If you can make a better
job of it than me, which wouldn't be hard, you can definitely consider
tracing out your image. A few bits of advice when
using transfer paper. Try using a regular HB pencil. Keep checking your
drawing as you go and keep your tracing light. But visible. The other
option I'm going to suggest is just free hand drawing
your image onto the paper. All I'm doing is looking at my reference image
carefully, really closely. I'm using my very fine
mechanical pencil. I'm starting from the middle of the piece and I'm just literally carefully going round and
hand drawing my image. So one thing which is really good to make sure that your
flower petals are kind of in the right places
is to make sure that you are looking also not
only at the flower shape, but also at the
negative space around it because sometimes
that can really help to make sure that all the lines that you're making are
in the right place. I'm plussing out and
adjusting as I go. I'm using my eraser to get
rid of marks I don't want. You can certainly start
off your drawing, making use of circles and semicircles and
things like that to make sure that your petals are all in the right places and
making the right shapes. I haven't really
bothered with this one, but I am using my
pencil to measure roughly the angles of the petals and the size of them in comparison to the
rest of the flower. So there we go. That's complete now. I'm quite happy with that. It doesn't have to be an exact replica of the reference image, as long as it looks similar
enough for you to be able to paint it from the reference
image, that will work fine. So now that we've drawn
our flower and we have a beautiful depiction of our reference image on
the paper as our guide, we're now going to be
moving on to painting the very pale highlights
of the flower. T see you in the next lesson.
7. Painting Highlights: In this lesson, we're
going to be painting our highlight layers using
very, very washy mixes. We'll paint a ground wash, underlying color tints and lay down our very
palest shadows. Looking at our reference, what
we're going to do is paint a very pale wash over the entire surface
of our flower area. Now I'm mixing the first
two very palest colors in my palette together because I'm going to paint the whole
surface of the flower. I'm going to need to make up
a little bit more quantity of the paint that we made
in the previous lesson. And I'm adding a little bit of magenta and a little
bit of yellow to this. Strengthening it up a little
bit, a bit more yellow. And a bit more magenta. And I'm actually just
going to transfer it to a deeper well because I'm going to add quite a
bit of water to this. It needs to be very, very, very pale indeed. And I'm going to test out this
color now on a test strip. And you have to be patient and try to remember to let it dry. Because if you are
using cotton paper, it will dry quite a bit lighter. So I'm going to be
using a size ten brush to cover this area.
It's a round brush. My painting paper is roughly
an eight three size and my large flower covers
most of the surface of it. Start at the top
of the painting so that you're not rubbing
your hand over wet paint. Now adding the very
pale wash to it. If it helps, work
in petal sections, so one petal or group of
the flower at a time, and this stops you getting an uneven coverage with water marks in the
center of your petals. So I'm going from petal to petal covering it in as evenly
as I can at this stage. I didn't wet my
paper, first of all, because this is
such a pale wash. It actually will hardly
show on the paper. It's really just to take
the very bright whiteness away from the paper because I think that it looks unnatural. So now we've done our
ground wash. We're going to start painting the
underlying color tones. We'll now be starting to
paint a highlight layer. We won't be overpainting these small areas where the
base coat will shine through. So, if we look at our
reference flower, I'm just highlighting
the color tints to you. There's some kind of
greeny yellow tones underneath and some kind of warmer tones in the
center of the flower. So now I'm using this yellow
here that I previously had, and I'm adding some
water to the yellow mix, quite a bit of water,
because this is all going to be a
very pale layer. I'm adding a bit more yellow. Tiny dab of the
green yellow mix. Trying this out now
on my test watch. And I think this is good. I'm going to start from
the center of the flower, feathering the color outwards from the center of the flower out to the tips of the petals. I'm not going to go
actually to the tips of the petals because the color
doesn't really go that far. I'm adding a little
to my buds now. As you can see, I'm
using my size ten brush. This really doesn't have to be particularly accurate
as long as you're painting within the
bounds of the flower. You don't really
want any hard edges. Now that's finished,
I'm going to apply some very pale shadows. I'm going to add
some water to this. I'm going to reactivate
the gray mix, and I'm going to mix it in
to the gray mix next to it because I will lead a
little bit more than this, and I'm even adding in a
little of the purple gray mix. This is what I mean about not actually applying these
colors to the paper. I'm just using them
as base colors to actually mix up the
shades that I want to. Now I'm painting the flower. I'm adding lots of water, and I'm just going to try
this on my test strip now. Yes. Now it's dried. I can see. That is looking nice.
And it's not too dark. This really does need to
be a high light layer. You definitely don't want to be going in with any dark colors. So also really make sure
that you are paying attention to your tonal
map that we've drawn out. I am being very careful
not to overpaint the outside edge or the
outside edge of the petals. So I'm staying within
my pencil lines. And I found a shadow here, and I'm not going to father this out because this is
a defined shadow, which I want to keep
into this painting. Just adding a little
bit of strength now. And I'm just using some water to really feather
out this flower. So on the main flower,
as you can see, we've completed our base coat. On top of that,
we've added in some of the yellow tints and tones, and we've also started
building up our shadows. You can really start to see the form of the
flower take shape. Everything is very smooth, and there's no hard edges. So next, we're going to work a little bit more on
the color tints. We're going to deepen the
greener yellows and we're going to deepen the warmer
yellows within the flowers. If we look at our
reference again, we can see this distinction between the cooler
yellows at the bottom, if a yellow can be cool, the greenier yellows and the warmer yellows
at the very center. So I'm going to add water and
reactivate this green mix. I'm adding a bit
more yellowy green, a bit more yellow and
a bit more green. And adding some water now, and this is very green. Adding a bit more yellow,
and a bit more green. So I've watered this down. I've added it to a deeper well. I'm just testing this out
on my test strip now, and I'm just comparing it
against my reference image. So now I'm going down to
a size six brush because we're getting to
slightly finer detail. And now, wherever I'm seeing this kind of greenish yellow, I'm carefully
feathering this in. My brush isn't super loaded, but it's wet enough to be
able to flick the paint along and make fairly long
strokes along the petals. Make sure that you have
your reference image either printed out or on screen as big as
possible so that you can really see all the
details at every stage. It will really inform
your painting. So I'm adding some little
bits of detail now. I see that along this edge, it's quite a bit stronger, so I'm going to add that
in now. And there we go. So now we can see
the effect of adding these greenier tones
underneath the flower, which are the cooler tones
where the shadows lie. So now we're going to work on the warmer yellows at the
center of the flower. So if we look at
these tones here, this is kind of where
the light is shining and the yellows are really
warming up in this area. So we're going to start
with this mix again, and we're going to
add some yellow. And this time,
we're going to add some agenta to warm it up. And I'm trying this out now, is a very pale shade. I'm adding a little
bit more magenta, not quite warm enough. And a little bit more yellow, quite a bit more
yellow, actually. And I'm testing
this out again now. And I'm using the
same size brush and I'm just going to go
round very carefully now, adding the little
flicks of e the warmer yellow where I see it
at the center of the flower. So I'm blending
out the edges with water in this
feathering technique. And I'm keeping in mind
my color reference image, the carnation lily and just thinking about
how the yellows were used with that white
subject and how effective they were
for the warmer tones. So I'm making sure not to over paint any of the petals
over the petal edges. I'm just adding this in, really making sure that I'm
not painting over any area, which I shouldn't be of the
base layer. And there we go. Now you can see I've
added my warmer and kind of cooler yellow
tints onto the flower. And if you compare it
with the reference image, you can really see how the light is beginning
to be captured. And even though
it's very subtle, it's all starting to take shape. So now that our high light
layers are completed, in the next lesson,
we're going to be moving onto our mid tone colors. So I'll see you in
the next lesson.
8. Painting Mid Tones: In this sst we're going to
be painting our mid tones. When we're painting
the mid tones, we'll be building up the colors and we'll be creating
stronger shadows. If we look at our reference, we've covered the base coat, we've covered the
highlight layer, and now we're moving on
to this mid tone layer and we will be careful not
to touch this area here, which is the base coat
and the highlights, we will try very hard not
to over paint this area, preserving the
white of our paper. It's a great idea to paint
with your tonal map to hand. As you can see here, there's some slightly pinkier grays and there's some stronger
tones of pink. I'm going to reactivate
my yellow mix again, and I'm going to add a
little magenta to this. I'm reactivating the
pinky yellow shadow and adding that to
the mix as well, and I'm trying that out
now on the test strip. I'm applying this now with a size six brush and I'm just being very light
with this layer. I don't want to overdo it. So we're not doing
very dark pink. We're literally just giving the tips of the petals a
very light blush color. One tip is to keep the strokes in line with
the direction of growth. So if you can imagine that each petal grows out from
the bud and unfurls, I'm always painting
in that direction. I'm looking at my reference, making sure that I
don't add too much pink into the whiter areas, watering down my brush and pulling out the color so
that I get a nice gradient. Now I'm pulling
the color out with a more watery brush so that I
get a nice gradient effect. I'm also adding a
little on the inside of the flower tip where I see
it appear on my reference, and I'm being really careful with the direction
of my strokes. Starting from the center and
working my way outwards. I'm petal by petal, being really careful with
how much color I'm adding. That is how it's looking
now with a little bit of pink added for definition
on the edges of the petals. Now we're going to build
up some stronger shadows. You can see on the
tonal map where these shadows lie
with the mid tones. I'm just looking
at my reference. Just really going to make
sure that I'm not over painting any of these
highlight areas, that's really important. Now I'm adding water to
reactivate the gray mix, and I'm giving it a good stir. I'm adding a bit of yellow now. What I'm going for here is just a slightly darker shadow than I've used on
my highlight layer. I'm adding a bit of indigo. I'm adding some magenta,
some more yellow. Now I'm just testing out on my test strip.
That's not too bad. I quite like this color. I'm adding a bit of water to my brush to dilute
the color because I think it probably is
just a little bit strong for a mid tone. I'm just going to
test it out now on my paper. I think
this is better. It's quite subtle,
but I think we need to go subtle for
this white flower. And I'm starting to work on deepening these
shadows where I see them, blending as I go and keeping
my strokes as fine as I can, little lines, all parallel
so that it looks neat. Another tip would be keep layering to add depth
to the shadows. Because remember,
you can always add, but you can't take
away with watercolor. I'm just really carefully
blending this very watery mix down through my petal, keeping all the strokes aligned. I'm adding a little
bit of gray in this darker shading part
underneath the petal. Just have a look at
the reference and make sure I'm adding
this in the right place. As you can see, I've already
painted the top petals with my darker shading and now I'm working from the
left to the right. I'm being exceedingly careful here not to go over
my high light colors. But I do want to give
each petal a bit of definition and make sure it's separated from
the next petal. Now I've added some shadow. I see that the greens
need strengthening. This is all part of the process, and it's just about
adding a layer, evaluating and
adjusting as you go. Looking at my
reference carefully, I'm just going in with the
slightly darker green. I'm adding this in the areas
where the shadow is falling. I'm adding a little bit more
of this in the shadow here, a very light version of it. I've let that dry and I'm
even going back again and adding another layer of
this greeny yellow mix. I'm carefully keeping
my brush strokes all going in the same direction. I'm strengthening this
area of shadow here. Now I've made that
adjustment with the green. I'm going to continue
with my shadowy mix. I'm just adding a
little water now to my brush so that I
can feather out and blend this area where the lines have got a
little bit stripy. Although we want lovely
little feathery lines, we definitely don't
want it to be stripy. Another tip is to keep
the edges of the petals need when you're using
feathering strokes, you can always outline a darker shade just where the
feathering meets the edge. Careful not to go too dark, and then brush off
your paint brush so it's not too heavily
loaded and flick out the color into feathery strokes so that
it all looks really neat. You can blend that color up the shadow up carefully
into the rest of the petal. I've just noticed
something that I don't like on my
painting, actually. I made the mistake of drawing in the shadow with my pencil line, probably a little too hard. And now I'm having to
work furiously to try to get rid of this pencil line where I've marked in the shadow. So if you do need to pencil
in any shadow marks, just make sure they
are ultra light because it will be difficult to remove them once you've
painted over them. So I think I'm going to
have to put up with mine, unfortunately. And here we go. So this is what the flower looks like when I've completed
the mid tones. I've added more shadow, and you can tell it's really turning into a three D shape. The petals are lifting
away from each other. I haven't over painted
my highlights, which I'm really pleased about, but it definitely needs a bit more strength
around the shadows. So now that our mid
tones are completed, in the next lesson,
we're going to be moving on to painting
darker tones.
9. Painting Darker Tones: So welcome in this lesson, we're going to be
covering how to paint darker tones
onto our flower. We're going to be
darkening the shadows and we're going to be
darkening the color details. If we look at our
reference again, we've covered the base layer, we've covered the highlights, we've painted the mid tones. So this is really a
continuation of the mid tones, but layering in more
depth and more detail. So we'll be really
careful not to paint over our highlights
or our mid tones. So I'm adding some water to
reactivate the gray mix, and I'm adding a little
indigo now and some yellow. I'm going to be mixing up a
stronger gray shadow color. I'm adding magenta,
quite a bit of magenta and giving it a
really good mix around. I'm adding some more indigo, an awful lot of indigo. I'm mixing that in thoroughly, and now some more
yellow again to take my mix back to a
more neutral color. Add a little magenta here
and a little bit more. I'm taking a little bit of the
mix out here and adding it to a well as I've got
too much paint going on, and I'm going to add
a bit more yellow. Just trying it out
now on my test strip, and I'm adding a bit of water because that's very dark and I'm seeing what it looks
like when it's diluted. Not quite right. I'm adding some more indigo, and I've added too much indigo. Just taking some out
and mixing this again. I've added some agenta
As you can see, it's taking quite
a bit of fiddling around to get to this
color that I'm after, but don't be tempted
to rush color mixing. It really is better to
take your time and get it just how you want it before you apply it to your painting. Now I'm trying this
out on my test strip, and I'm adding just
a little bit of water to my mix because
it is very dark. This is looking quite pink. I'm just mixing a tiny bit
more indigo into this mix, and I'm now having
a look at this. Little bit more magenta
again, and a bit more water, giving it a go on my test strip and adding some more water to the mix to see what
it looks like when it's paler and even some more. Now, I think that's looking
like a softer tone of gray. After all that color mixing, I finally have the
gray that I want. The other ones have just gone a little bit too dull
and flat for me. I like this slightly
pinker tone. I think it will blend in
better with my flower. So now I'm using a
size three brush. I've gone down a size
because I'm going to be doing very delicate
detailed work for this. I'm concentrating on this area where the shadows are darkest. Carefully layering up the paint, deepening all the shadows, looking at how the
shadow is falling here, very carefully on my reference. Don't be afraid to adjust and strengthen tones when
they've dried as they will dry lighter
especially on a cotton paper because it
will absorb the paint. Just looking at
this shadow now on the right hand side
petal of my flower, giving it a little
bit of extra depth. And I'm just carefully
observing my flower as it dries and just popping out and strengthening
shadows where I need to. Checking my reference carefully to make sure that the
balance is right, still with the same
darker shadow mix. I'm going in and adding this purply pinky gray shadow where I see that there
needs to be a darker color. Now I've completed
the darker tone strengthening the shadows. Now I'm going to move on to
darkening the color details. I'm just going to go over now the very tips of the petals. You can see when I enhance the color on the reference image that the very tips of the petals all have the darkest color. I'm adding quite a bit of
yellow and some magenta. I'm adding the yellow
to the magenta. I'm adding a little
bit of indigo. I'm just going to test this out now on my paper test strip. I'm just comparing
it with my image, and I'm adding a little bit more yellow because I think
this is a bit too blue. I'm trying it out again
on my test strip. Adding just another little
bit of indigo here. It's going a little bit orange and trying it again
on my test strip. Adding a bit more yellow again and trying again
on my test strip. If we just have a closer lit, we can see the
different tones here, where I've added indigo, and
where I've added yellow. I do think this last tone
is going to work the best. With a much finer brush, a size two, I'm very, very delicately drawing
the finest lines at the edges of my petals, and I'm just feathering
that in now to blend it. I've got an incredibly
delicate line of color. Just tipping the
edge of the petal. A close up here so you can
see how this is working. I'm just doing a
feathery stroke, giving the tip of the petal and the edge of
the petal a bit more color, and I'm strengthening
it on this side. I'm drawing a very fine line. I'm just feathering it along
so it looks more natural. Here you can see I'm doing just the finest delicate detail, giving an intense
color to the very tip, and adding a stronger tip to the petal to give it a focus. I'm just doing this on
most of the petals. I'm checking my
reference though to make sure that I'm not doing
the same on every one. It starts to look really unnatural when you
just copy and paste. You really need to adjust
the technique to each petal. It's a really fine
balance between adding definition and making sure
that it's all blended nicely. So I'm just adding
a stronger tip here to give it a
point of focus, and now I'm going back
in with the pink. And I'm basically repeating this process with
each petal tip, but I'm adjusting my technique to what the petal tip looks
like on the reference. I'm not just going over and
adding the same amount of paint to each petal tip because
each one looks different. Just remember you're
trying to capture the natural variation
in the flower. And if it looks too homogenous, it won't look realistic. We've added the darker shadows
and the darker colors, and this flower is really
starting to pop off the page, so we are ready for
the next stage. So now that our darker
tones are completed, in the next lesson,
we're going to be moving on to painting details.
10. Painting Greens & Details: So welcome in this lesson, we're going to be
covering how to add very delicate details
to our painting. We're going to
complete some final delicate details to the flower, and we're also going to be painting in the green
leaves and stems. If we take a close up look
at our reference flower, we can identify some of the really delicate
details that you only notice when you look very
closely at your reference. We can translate some of this very fine detail to give our flower a
more realistic look. So I'm going to echo some of these lines we see
here on the petals. I'm not going to go as far as actually drawing
in the veins. I'm going to use an effect with the shadow mix that we already
have for these details. So I'm using my
very finest brush, and I'm literally with my shadow mix going
down and adding very, very fine lines
along the petals. So these lines are not blended. They are visibly defined lines. But they are in a
very light shade, so they're hardly noticeable, and I'm being extremely
careful to keep them very neat and go exactly in the right direction
along the line of growth so that it looks very natural and in keeping
with the flower texture. I have to say, I wish that I'd practice on the
bud because the lines on the bud
look better than the ones I've started
with on my flower. So there's a good tip for you. Start in an area that's not
the focus of the painting, practicing your fine details, and once you've perfected it, move onto your main image, I've unfortunately
done the opposite. So now we're going to move
on to painting the greens. So I'm going to use what
we have in our palette. I'm mixing the yellow
and pink together, and I'm adding some
water to the green. And I'm adding a
little bit of yellow, and I'm actually mixing
this up in a well. Adding some more yellow now. Testing this out
on my test strip. I'm just looking at some of the green on my
reference image, and I need to make it a little bit more
muddy looking, I think. I'm going to add
some pinky red to this mix and try this out
again on my test strip. This is looking slightly better, but I think I'm going
to add some red to this and a little bit more of the dark green and
a little bit of yellow. I'm just going to test it
out again on my test strip, and I'm going to add a bit of
red and a bit more yellow. And I think these colors are
quite a nice little range of brownie colors and green,
slightly muddy looking, and I'm actually
just going to mix in this dark green now from
the previous mix and see that this complements
the colors really well. And I'm just doing a final
adjustment to these colors. I'm adding a little yellow
to the bright green mix, and I'm adding this yellow
to the brownish mix. And I'm going to start painting. I'm looking closely at
my reference image. I'm starting with a
slightly lighter color, which I can build up. And now I'm carefully
blending this in with water, and I'm layering up the
color Just going to paint a little bit of
this brownie mix in now to the center of the flower. I'm using a little bit of this darker green mix at the
base where the shadow is. Now I'm going in with
the green again, and I'm adding some
green stripes. I'm adding the detail in at
this stage to the greens, and now I'm adding
in red stripes. If I look at my reference image, I can see that this veining here appears on
this greeny petal. I'm just trying to
capture this look. Now I've got some green. I'm adding some indigo, and I'm making an
even darker color. I'm adding this where
the shadows lie. Now I'm using my size six brush and I'm going
to use my mid green mix, and I'm going to paint this
little bud here and filling in some of the green now because this is
mostly a green bud. And I'm using my dark green now starting from the
base of the bud again and working
my way upwards. I'm checking my reference
carefully to make sure that I'm following where the shadows are so that I can build
up the form correctly. I'm using this red now and I'm painting
back down the petal, strengthening the red
areas where I see them. Now a bit more dark green. And there we go. Now
I finish my bud. I'm really happy with
the way this is looking. I definitely haven't
painted over my highlights, which
was the main aim. The white of the paper is
really shining through. So now that we've completed our delicate details,
in the next lesson, we're going to be adding
a contrast ground to really make our
painting pop off the page.
11. Painting the Background: Welcome, in this lesson, we're going to be adding
a contrast background so that our painting
will pop off the page. For the background, we will start off under
painting with colors, and then we'll paint
in some darker tones, especially around the
flower to create depth, and this will give
the illusion of the flower lifting off the page. If we take a look at
our reference photo and have a look at
the background, it's made up of lots of kind of pretty leaves and
dark tones and stems. So I think I'm just
going to start drawing, looking at this photo
for inspiration. I'm not really going to be
too careful about matching it exactly like I was with
the flower because after all, it is a background,
and I've taped around the edge of my
border so that I can paint up to the edge
and still be neat. But I'm just going to
start drawing now. And I'm just having a look now, and I'm just marking in some of the leaves that I've seen on the background that I like, and I'm adding a few that
aren't on the background. So this can just be loose. It really doesn't have to be any particular way
on the background. So I'm adding some
water to my yellow mix. So I'm putting on what seems like some quite bright color, but I'm just toning
this down with some red and I'm adding
a bit of water now. And I'm going to add a
fairly dark background, so it won't matter that these
colors are quite bright. They'll just be subtle shades. Be really, really careful not to overpaint your
beautiful flowers. I'm not painting
right to the edge of the flowers yet with
this larger brush. I'm adding some water to the purply gray mix now and I'm starting
in another corner. As you can see, I'm not going
right up to the flower. I'm just really loosely working quickly so that I don't
get lines in my paint. I'm adding some
indigo to this now. As you can see, I'm on purpose, painting cooler tones around the shadowy areas
underneath the flower, and I've added a warm yellowy to where the sun
is shining from. I'm carefully painting around. I'm not going right up to
the edge yet of my flower. I'm just carefully painting
around the flower. I've got a little bit
of the green mix now, and I've gone down to a
slightly smaller brush. So one way to make sure that an element blends in
with the background, if you don't want it
to stand out too much, is to underpaint it
with the mid tones of the background first and then paint the
details over the top. So as this stem is really
lying in the shadows, I don't want this to pop
out like the flower above. I want this to fade away
into the background. So now I'm using some
of the dark green mix, and I'm adding some dark
green to my digoy color. I'm painting in what is going to be a sort of
vague leafy shape. I'm now going in with
this tuquzi green color. I'm very carefully adding some depth here
underneath the flower, and I'm using this finer bruh. And I am now very carefully going closer to the
edge of the flower. I've added some
intego to this mix, and now some dark green. And now I'm carefully
painting around this bud. I am now touching the
edge of the painting, but I'm being extremely careful. I'm adding some water to
the yellow and adding a bit of pink to this and
adding a bit of red to this, which is giving me a
yellowy pinky shade, a little bit more yellow, and even a little bit
of dark turquoise. I'm making a really
browny ky color here. I'm adding it at the top
right of the painting, very carefully going
around my flower and making up some more
vague leaf shapes. I'm adding some
indigo to my mix, and I'm adding some
water to the yellow. Now I'm using this blue color, adding a little bit of yellow and giving it a really good mix. I'm going back in and adding
an even darker shade here, carefully going around
the outside of my flower. I'm back to my size
ten paint brush and I'm blending this
out with lots of water. I'm really furiously
blending now, making sure that
this doesn't have a hard edge and not too many
brush strokes are visible. I'm now working on
this leaf here, building up some shadow here. I'm using my size four
paint brush here, and I'm working on
the other side, adding some deeper turcos blue. Underneath the flower again, I'm building up
some of the depth. I'm blocking in another leafy
shape here with some green. So it could be a reflection
or it could be a leaf shape. I want it all to be a bit uncertain and look a bit watery. Now, I'm actually going
to add in a little bit of orange just to really warm up this top left area of the background where
the sun is shining from. Now that's stride, I'm
going back in again with my size four brush and
I'm strengthening this color, this shadow on the leaf. I'm adding a bit more
of green in this area. I'm toning down this
orangey color a bit using my larger brush to
do the watery blending. And now that's stride,
I've assessed it again. The background is all looking quite nice and watery to me. And I'm going in and
adding more shadows. I'm using a dark
olive green here. And I'm going around the
edge of the flower and this contrast between
the background being dark and the
flower being light. I'm really amplifying because
it will lift the flower off the page or give the illusion that the flower is
lifting off the page. So this color here is
made from red and green, and I'm using this now. It's kind of a minky
brownie color. It's still a fairly warm color. And now I'm adding some
red magentary color into the turquoise. And I'm using this darker tone
now to build up strength, even more strength and shadow underneath the bottom right
hand corner of the flower, which is the most shady area. And I'm just going
to show you now, I've noticed a small
mistake on my painting. If you accidentally
paint over an edge, you can minimize the mistake. So wash your brush clean, dip into clean water, and very carefully scrub over the affected area with the brush and then blot it
with a clean paper towel. And it should lift off
quite a bit of the paint. I'm gathering a little bit more indigo on my brush
and mixing it in, which is kind of just I can only describe as a
sludgy gray color. And building up the shadow on the right hand side
behind the flower. I don't want to use
my very cool tone, I'm using a little bit of the orange color and mixing
it actually on my paper. And now with my back
with my indigo again, I'm going round some of the shapes building up
more shadow in definition. Adding a little bit of shadow. So I'm using my fine paint brush size four paint
brush, very pointy. And I'm so delicately and carefully going
over these lines, making sure I don't over paint. So I'm using this indigo now and I'm adding
some yellow to it. I'm adding a little
bit more yellow. I'm trying it out again
on my test strip, a bit more magenta and
a little bit of orange. And trying this out now. So now that my background
is pretty much finished, it's time to let it
dry and evaluate. And I can see that
actually my flower probably needs a little bit
more shadow in definition. And now I am done. It is dry and I am
removing the masking tape. It's dry and this side
of the painting is dark. The light is coming
from this area, and it's all working together
to give that effect. So now that our flower
painting is complete, we've got one more lesson to go, which is going to
be a concluding video where we're going to kind of review our painting and see kind of what worked
and what didn't. So I'll see you in
the next lesson.
12. Conclusion: Welcome and thank you so much
for watching this class. So there's only
one more step you need to take before you're
completely finished, and that is to show
me your project. Take a photo of your
project in good lighting and upload it here under the
projects and resources tab. Once you've uploaded your work, I'll be able to see
it and review it, and I promise I will only say nice things about your work. If there is any
particular element that you would like
to improve on, you can ask me under the
discussions tab separately. I know that it's scary
sharing your work, but I promise that
it's inspiring for me and other students
who might even decide to try out this
class just because they've seen your work
and feel inspired. In this concluding lesson, we'll briefly review some key
takeaways from the class, and we can also spend a few moments
evaluating our project. So have we answered our
original questions? Let's start with
the white paint. So you can paint
with white paint, but you really don't
need to if you use the white of your
paper for the highlights. I think the beauty
of water colors is in the translucency
of the color, and white paint is opaque, use it sparingly and
for tiny details. Can you use gray
for the shadows? Yes, you can, but make sure
they have tints of color? Otherwise, your
flower will end up looking lifeless and unnatural. Lastly, can I outline all the petals to
make them stand out? Yes, you can, especially
when you're drawing. Approach it with a bit more subtlety
when you're painting. Avoid lines that are
all the same thickness, and try contouring
with shading rather than actually outlining
the edges of your petals. In the class, we have learned how to select a good
reference photo. Draw our shape onto paper, mix colors, paint tonal
values from light to dark, carefully observing
our reference, adding warm and cool colors to add depth to our
highlights and shadows, and finally how to add contrast ground to make our white flower
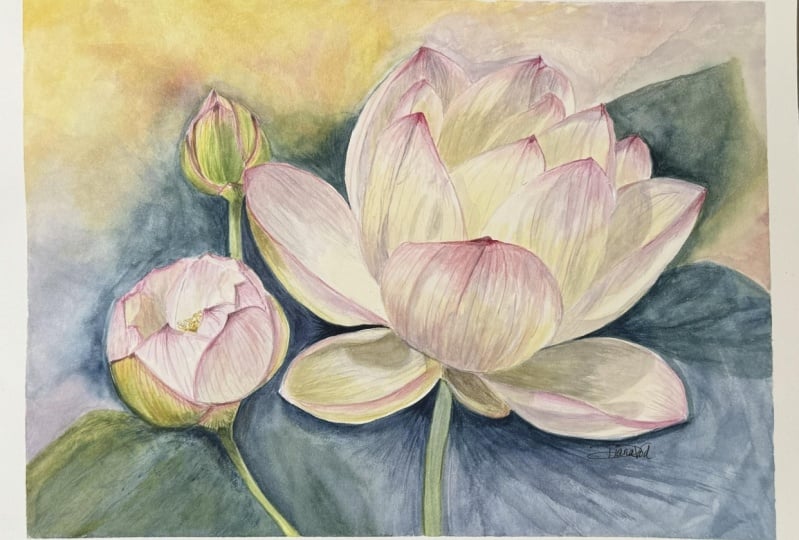
pop off the page. It's always a good
idea to come back to a painting after a few days
to see what you think of it. Looking at my painting, I
think it's dried quite light. I think I'm not completely used to painting on pure cotton, and I'll bear that in mind next time and not be afraid
to paint darker and richer colors
than I might do on a regular watercolor paper. I also think, which is an
extension of the same issue, that I could really have been a little bit bolder
with my colors. I see this violet color used quite a lot and it does
look really pretty. I also think next time I'll try not to be afraid to
use it more strongly. Same goes with the oranges. What do you like
about your painting? What could you improve
if you did it again? Note down some
points and save in your sketchbook to read before you start
your next project. I do hope that you have a white flower that
you're proud of. It's your choice, how
you represent it. You can be as
creative as you like. Once again, thank you so much
for watching this class. If you'd like to see more
floral painting classes, follow me on
Skillshare and also on Instagram and Facebook as I regularly share artwork
and inspiration. If there's one thing I hope
you can take away from this class is that you can
paint white subjects in color. So goodbye from me and
I'll see you again soon.
 Helen Turner, Floral Artist & Surface Pattern Designer