Transcripts
1. What This Class is All About: I don't know about you, but sometimes I could really use an escape from the monotony of everyday life. It's times like these that I wish I was sitting on a beach with a book in my hand or traveling Europe with my paints and my camera, but life is tricky. Finances are hard, the reality is, most of the time we can't travel the world like we want to. Hi, I'm Caitlin Schaeffer, an artist, designer and mom, but today consider me your virtual travel agents and tour guide. We are going to travel the world and paint what we see all from the comfort of our own homes. Travelers/artists of all experience levels are welcome on this trip. We will go over the principles of watercolor painting, which include, choosing a subject, planning and sketching our scene, utilizing layers and methods for adding detail to finish our masterpiece. While beginning watercolor artists can certainly benefit from the skills we cover in this class, I direct my speech toward intermediate level artists who already understand basic color theory, watercolor supplies and tools, as well as how to mix paint.
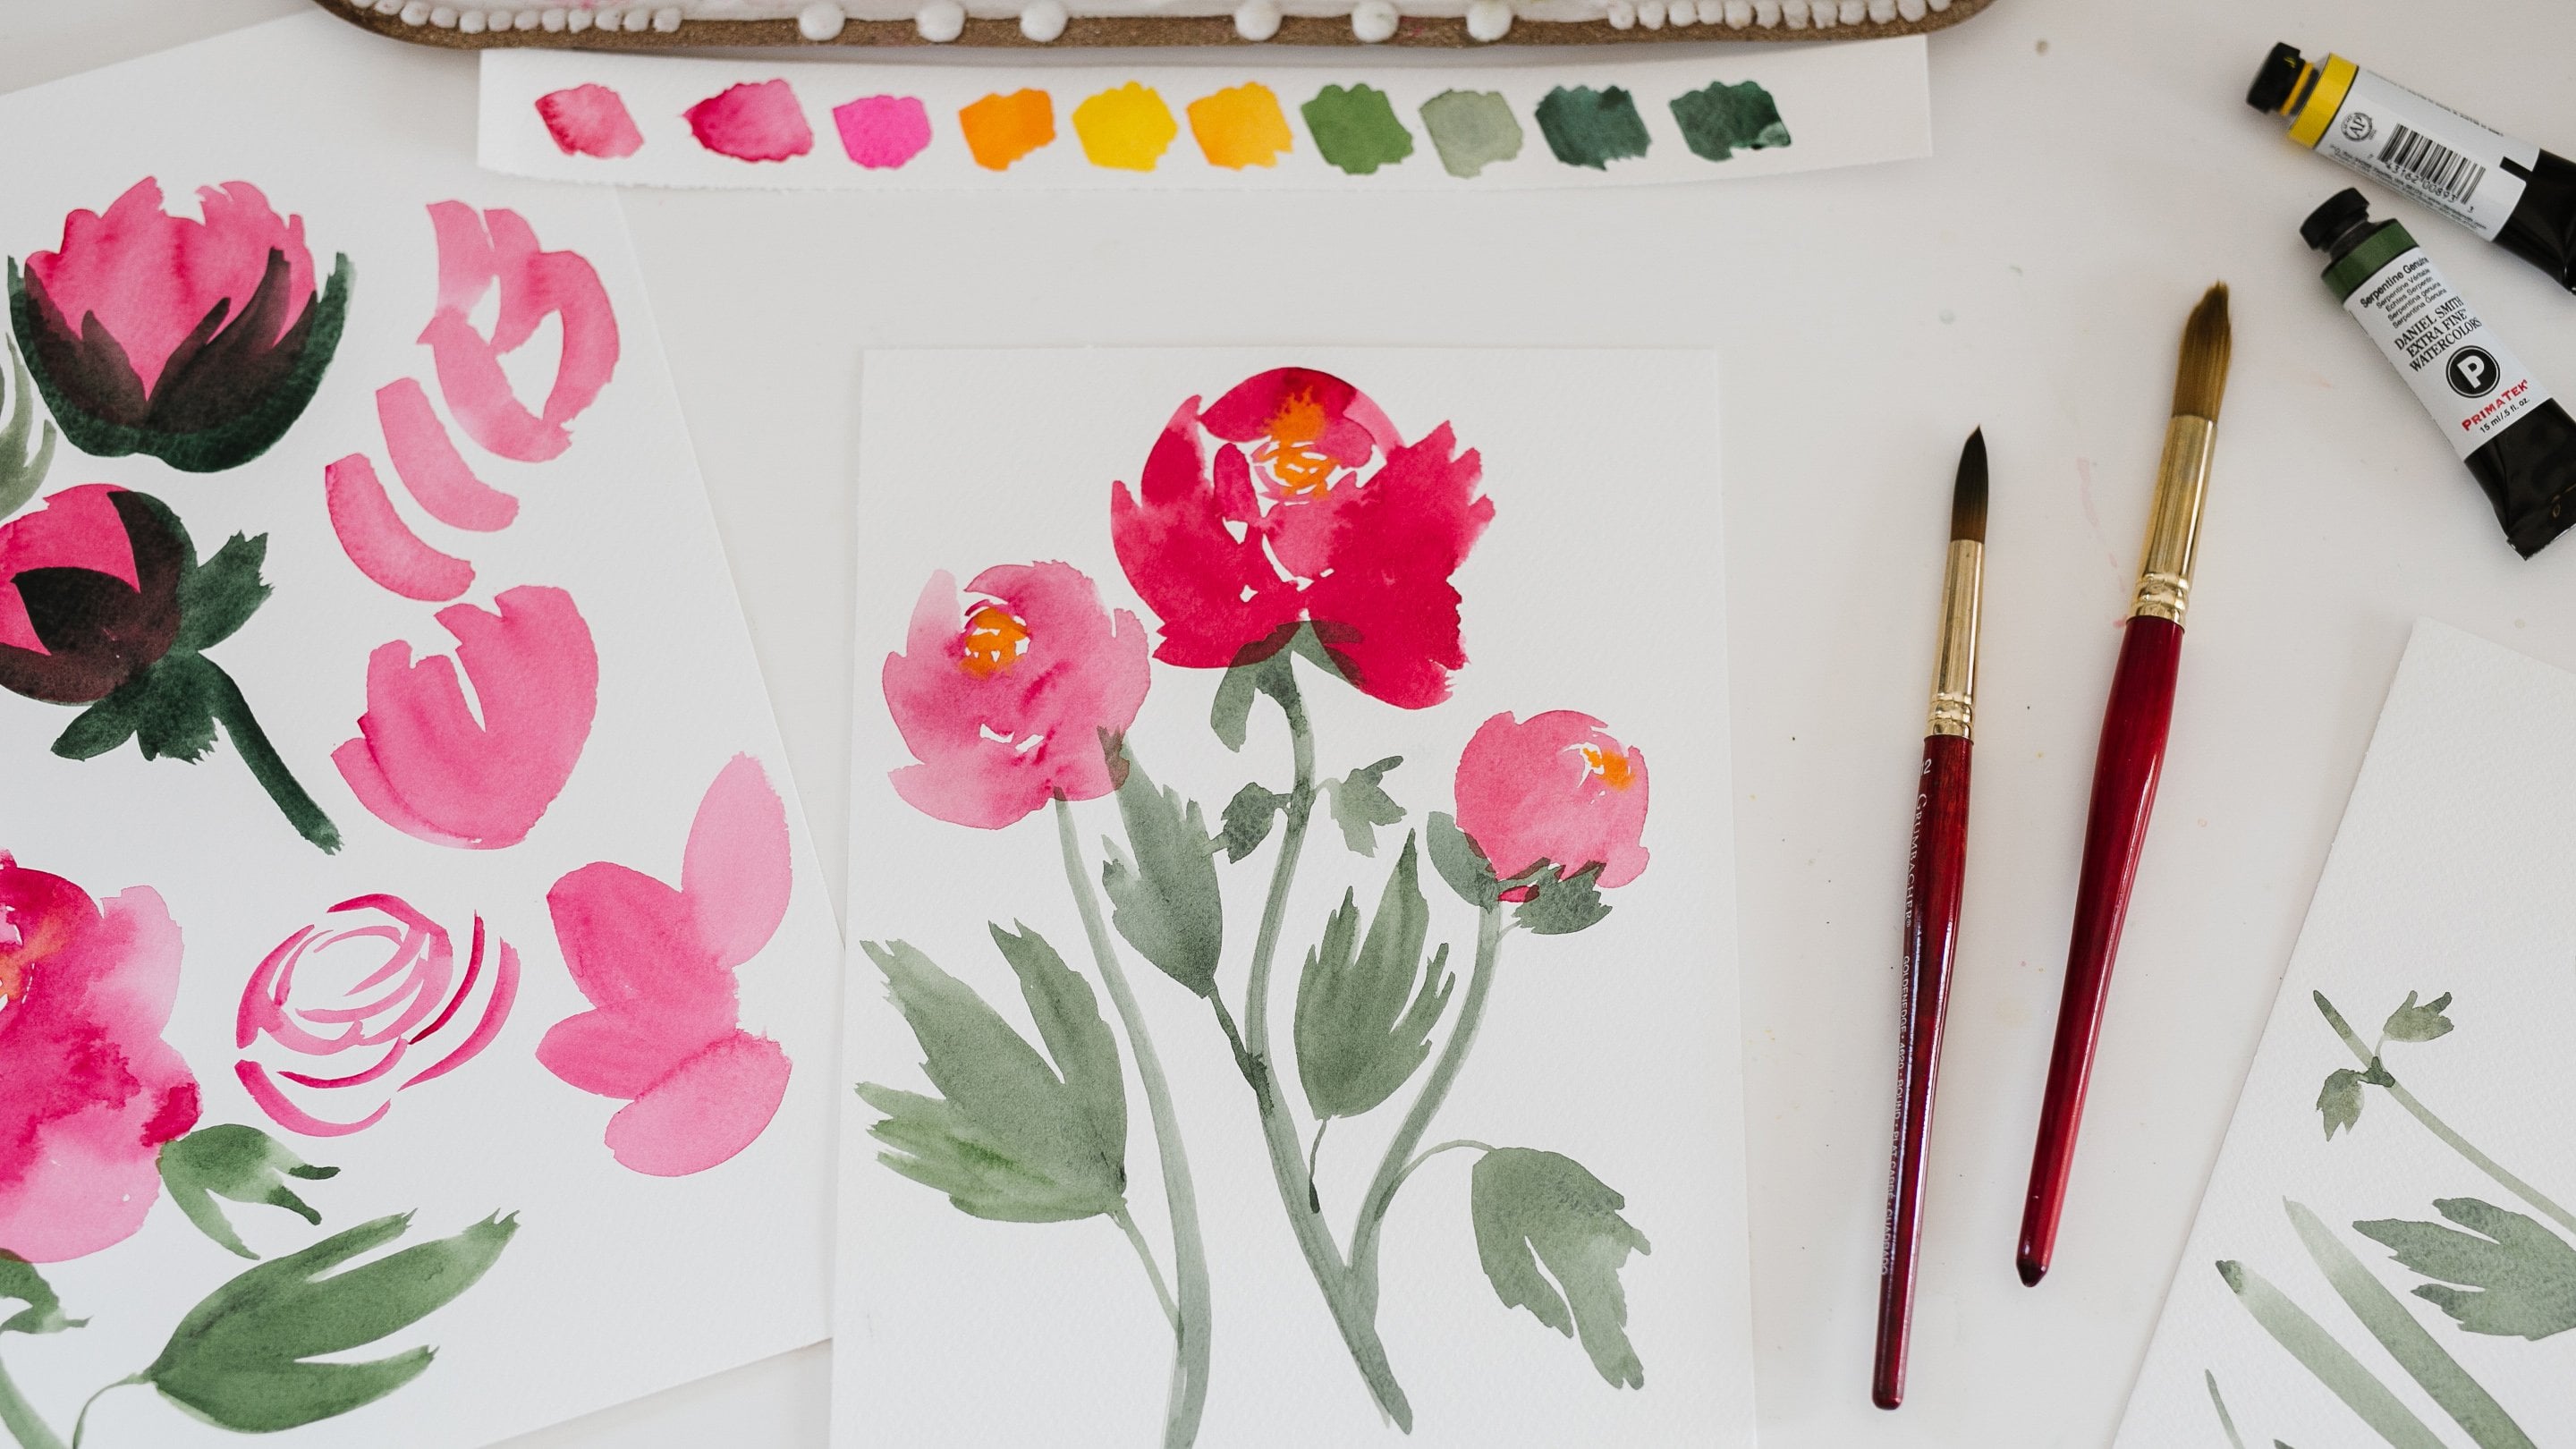
2. Supplies + Class Guide: Before we get started, we need to pack our suitcases. You will need paints, paper, a pencil, water, and brushes in a variety of sizes. You may also wish to pack some optional supplies like painter's tape, colored pencils, gouache, and gel pens. To make things easier for you, I've created a class resource guide with all of the information that's featured in this course. It's 37 pages full of amazing content and step - by - step instructions. You'll also find reference photos that you can use when you're doing your own paintings, my favorite supplies, as well as some of my favorite class recommendations. You'll also learn some fun facts about me. You can download this PDF guide in the class project section.
3. Choosing Your Destination: I want you to take a moment before we get started and close your eyes. Now seriously close your eyes. I want you to imagine that I just walked up to you and handed you three airline tickets to go anywhere in the world. Where would you go? What are the first three destinations that immediately popped into your head? I know that when I play this game, the first thing on my list is always France. I would love to walk through the lavender fields in Provence and paint them. I also would really love to go to Tuscany as well as Banff National Park in Canada. I'm going to take you on a virtual journey to Tuscany and France throughout the course of this class. When it comes time for you to paint your own landscape painting, I encourage you to travel somewhere that you would like to go. Before we get started, however, we need to find some reference photos and videos so we know exactly what to paint since obviously were not there in person. The term landscape usually refers to a painting or work of art that features as seen in nature. It usually has bodies of water, mountains, trees, basically just what you would see out in nature. My favorite place to find reference photos is Pinterest. Let's type in Provence lavender field and see what comes up. I'm going to save a few of my favorites to a travel board so I can easily find them later. Now that I have a few photos, I'm going to find a couple of videos to make it really feel like I'm in Provence. YouTube is an amazing tool when it comes to virtually traveling places. There are hundreds and hundreds of videos that people have posted to simulate hiking or walking or taking city tours. They're really popular to use for home treadmill workouts. But I think they're perfect for taking a virtual vacation. Let's type in virtual walk, lavender field, and see what comes up. I'm going to save this to my travel playlist.
4. Setting the Scene: While it's great to have photos and videos to look at while you're painting, it's even more fun if we set the scene. Since this is a virtual vacation, I wanted to feel like France, or at least as much as it can in my own, in Virginia. Let's see how we can address the five senses, that's hearing, touching, seeing, smelling, tasting. I knew I'd come up with it. Obviously, we're going to paint what we see in the picture, but what can we add to our desk or table that will help us feel like we're actually at our destination? Let's practice as if I was traveling to Banff National Park in Canada. It's often very cold in Banff, so let's practice setting the scene as if I was there. I might put on a cozy hoodie, light a pine-scented candle, or diffuse a woodsy essential oil. I think I'll play some nature sounds of maybe rain in the trees. I think I'll even make myself a nice cup of hot chocolate to keep the cozy vibes going. These small simple actions will take your virtual vacation to the next level and it will help you make some memories along the way.
5. Planning: Making Artistic Choices: I've learned through experience that the most important stage in painting a watercolor landscape is the planning stage. When paint florals, I like to be loose, paint freely. I rarely sketch things out or plan ahead, and that works for me. But with landscapes, you really need to put thought into what you're doing before you get started. I've found the most success when I break a photo down into shapes, colors, and layers. We need to make sure that we paint our layers in the right order, from light to dark, low opacity to high opacity. I've selected a photo to demonstrate exactly how I plan, paint, and add detail to my landscapes. Consider this your warm-up exercise before we attempt our final masterpiece. Here is a photo of a beautiful sunrise in Tuscany, one of my three travel destinations. Before I begin sketching anything, I like to look at the photo closely and address these questions. One, what style do I want to paint in? Is it realistic, impressionistic, abstract? Two, what color scheme do I want to use? Am I trying to replicate what is in the picture exactly? Or do I want to go with my own color choices? Three, what order do I need to paint my layers in? How many layers will I need? Since this is just a warm up, I'm going to forgo a lot of the detail and go with a looser, more Impressionistic style. The goal is to learn the steps and to get warmed up.
6. Planning: Zones + Layers: When I look at this photo, I can identify four clear zones or sections. The sky, the distant mountain range, the grassy hills with the two houses, and the trees or bushes in the foreground. Knowing where my zones are helps me decide where I need to start. When using watercolors, you cannot paint light colors over dark colors. That means I need to start with the lightest most transparent zones and end with the darkest most opaque zones. For this scene, I would start from the top and work my way down. Let me show you what I mean when I say light to dark, transparent to more opaque. In this demonstration, I am using one color, Payne's gray, one of my very favorite colors. I'm going to start off by diluting the Payne's gray with quite a bit of water. As I put this down on the paper, you can see that it's very light and it's pretty transparent. You can see the paper through the color. You can also see how it would be very easy to layer darker colors on top of it. As I work my way across the page, I'm going to add a little more paint to my brush than I did before. You can see how this creates a gradient or a transition, a very smooth transition from light to medium to dark. As I add more paint to my brush, you can see how it is darker and harder to see through. That means it's becoming more opaque. Now I'm going to show you why it's so important to plan your layers and why watercolors just simply don't work when you paint light over dark. Here are three squares. Light Payne's gray, medium Payne's gray, and a dark Payne's gray. I'm going to put a leaf-like shape in the middle of each box using one of my favorite greens, which is [inaudible] genuine. In the first box you can see how easily it paints over top the light square. In the middle, you can see how it's still visible. It still works. It's a little darker, but you can still tell that it's a leaf. On the third square, however, which is our darkest color and our most opaque. It's virtually impossible to see and distinguish the leaf shape from the dark background. Let me give you a few more examples.
7. Warmup: Sketching: Before I put pencil to paper, I like to mask off the shape that I want my painting to be. Typically this is a rectangle in the landscape orientation, which means it's longer on the top than it is on the sides. To do this, I use painter's tape or artist's tape, whatever you want to call it. Its tape, with a low tack, that means it's less sticky than normal tape. First, I use a ruler to draw my shape, then I use my artist tape to create sharp lines so that my paint can go right to the edge. Make sure you press down firmly to prevent paint from seeping under the edge of the tape. Using your zones as guides, begin sketching your subject. It doesn't need to be exactly like the photo, this is your piece of art. For example, I am going to include the building on the left, and omit the building on the right, just to make it a simple quick warm-up exercise. I like to use a very light touch with a two inch drawing pencil when I sketch. Because watercolors are so transparent, it's very easy to see pencil markings through the paint. I want to have just enough of a guide to no where to fill in, but not enough that it's super visible to people looking at the painting. As I mentioned earlier, I am going to start from top to bottom. That means I am going to sketch the skyline first, then the mountain line, then the hills, the treeline, and finally add in the details that I want, which are the trees and the house.
8. Warmup: Wet-on-Dry Layering: Before we keep going with our Tuscan landscape, we're going to take a little break to go over something very important, layering. We touched briefly on this when we were discussing light to dark, and now we're going to go into a little more detail. Here is a photo of a mountain scene in Catalina. If you look at each mountain range as if they were steps going from top to bottom, there are about seven to eight levels or layers. The closer the mountains get, the darker they become going from light gray to amid greenish-gray to a dark forest green. This contrast between light and dark can help us convey distance while we are painting. The amazing thing is that we can create the illusion of distance by changing just one thing. The amount of water in our paint. I'll start off by sketching the edge of the farthest mountain. I'm going to fill in the entire space below the line with a light wash. It helps to use a bigger brush when you're painting larger sections. Try not to over saturate the paper early on because as you add more layers, the paper might start to deteriorate and look overworked or muddy. Now you need to sit back and let your first layer dry. If you want to speed up the process, you can use a hairdryer. Add your next mountain layer by mixing a little more paint into your well. You want the layers to get progressively darker. Make sure to let each layer dry completely before moving on to the next layer. If your layer isn't light, you risk colors bleeding into one another. Wet-on-wet method is fantastic for giving dimension when painting the sky, bodies of water, and other large areas. But it is not ideal when you want to create a nice crisp line. Well, that was a fun excursion to Spain, but we better get back to Tuscany and finish off our warm-up painting.
9. Warmup: Background Layer: Now that you understand how to use the wet on dry method to create distance and layers, let's talk about how awesome the wet on wet method can be when you're painting other areas of your landscape. The sunrise in this scene creates a stunning ombre effect in the sky. It starts off with a dark rich orange, which fades into a lighter peach, then a pale yellow as the sun rises in the horizon. We can achieve a similar gradient look with watercolors very simply. Let's get started with the wet on wet method, painting our background or the sky that we have in our Tuscan hillside. Begin by mixing up the color that you want for the sky. I'm going to go with the colors that I see on the page that are similar to that, but you're welcome to change the color scheme if you want. There's no strict rules that say, "hey, you need to keep this the exact same color scheme." That would be boring. That's why we're artists so that we can create our own interpretations. I'm just mixing up some cadmium orange, putting in some yellow ocher and adding water along the way. I think I'm going to add a touch of pink just to give it a little bit more of a richness. I have this little piece of paper to the side of me that I use to test out my colors before I put them on the page. I usually just use some scrap paper. Now remember, our first layer needs to be really light so I'm going with this really light, peachy yellow tone that you see in the photo. Just testing it out on the paper. Putting down our first wash very lightly and just tracing along the curve that I sketched out with my pencil and add some water, add a little bit of paint, just keeping it really light. Spreading it around as I go. If things are looking a little too dark, like right here in the dip of the mountains, you can just lift up the excess paint and water with a tiny little piece of a paper towel and then you can come in with your brush just like this and smooth it out. All right, while this is still wet, we want to come in with our darker colors to create that ombre effect. I'm just going in the middle section of the sky with a little bit of a darker orange. You can see how the paint is spreading into the first layer of our wash. I like to tilt the paper to see how the paint can drip down and blend. And then you can just go in with the paper towel as needed to pickup any droplets that start to pop up and blend this way or you can go in with your brush and blend with your brush as well. If you go in with your paintbrush too many times, you might see that the paper starts to get a little fuzzy or deteriorates so just keep that in mind and try not to overwork your landscape. Now I'm going to come in with my darker orange and drop little paint droplets across the top of the landscape. You can watch how it just drips down and blends into my previous layers. The absorbency of your paper will really depend on how well your paint blends into each other, so you can try using different papers if you're not getting the effect that you need. I have a little bit too much water pooling in the corner. I'm going to go back in with my paper towel and lift some of that up. Quick fix. I love watching it drip down like that. I've seen some of the really beautiful sunsets in my life but not too many sunrises because let's be honest, I'm not a morning person. Painting this beautiful Tuscan landscape is helping me live vicariously through all of those people who love to watch sunrises. Maybe one day I'll wake up early enough to do it. Now, we can use the exact same method for the other areas that we're going to paint in the middle ground and the foreground. But first we need to make sure that this layer is totally dry. I'm going to come in with my hairdryer and make sure it is completely dry to the touch.
10. Warmup: Middleground Layer: We've just finished talking about using the wet on wet method for our background. Now, we're going to talk about using it for the middle-ground or the middle portion of your reference photo. For me, that means the hills and the grass. First off, now that my sky is dry, I'm going to mix up the perfect color for the mountains in the background. I'm mixing up a little paints gray with some burnt sienna to get a nice light brown for the mountains. I'm just testing it out on my paper to make sure I like how it looks and it's a little too dark, so I'm going to add some more water, and get going putting it on my page. Now, I'm going to make sure really carefully to leave a blank space around my trees and my house. I'm going to go in later to add detail there and so I don't want to put my brown wash right now because like we've said a million times, you can't put light over dark with watercolors. I'm going to make sure to be really careful to leave that white space for me to be able to go on later. Sometimes, it can be a little hard to use the wet on wet method when you're painting large areas because the paint can dry really quickly. If you're having a hard time with your layers drying too fast, I recommend using a larger brush. Now I'm just going over carefully around where this tree would be and then around where our little building is. Not exactly sure what that building is, it looks like a cute little chapel or some out building on a farm. I just think it's so charming. One of my best friends has a little cottage outside of her home where she paints and when I was looking at this photo, I just thought, oh, what a really unique and fun little building and I just picture myself with a little studio painting there. Just move around that paint until you get the look that you're going for. Just like we've talked about, watercolors always dry lighter than when you put them down on the paper at first, so don't be nervous to go back in and add a little bit more paint. When I was about 16, my dad took my brother and me to Italy, we were living in England at the time, and we went on the most fun trip ever as a family to the Tuscan hillsides and as a 16-year-old, I just didn't appreciate it and I wish that I could go back as an adult. That's why I picked this reference photo, I just dream of going back one day. Now, I'm ready to start with the grassy hills. I'm switching to a little bit of a larger brush because it's a larger area and I'm mixing up with my favorite green, which is Sap Green. I got a little bit on the top of my paper, so I'm just going to quickly clean that up. Then I'm just going to keep mixing until I get the perfect shade and bring in some of that cadmium orange for a nice earthy tone. It's not very often that I use the color straight out of the tube, so I recommend playing around with your colors so that you find the perfect one for your landscape painting. There are tons and tons of wonderful color theory classes on skill share and I'm going to include a list of my favorites in the class guide. Here's my classic mistake that I always make. I caught myself luckily. I was about to put on this grassy layer and I forgot to let the mountains dry. I'm going to go back in and with my hairdryer, clean up this little bit real quick, and then go on with my hairdryer and get it nice and dry before I put in the grass. When I was blow drying, the tape lifted up just a little bit, so I'm making sure to press that edge down and seal it so that my paint doesn't get underneath the tape. It's okay if it happens, but I'm going to try my best. You see right here, there's some highlights where the sun is hitting the hills, I'm going to have those areas be lighter than the shadows, I'm going to go in later and add the shadows. Remember, the first wash always needs to be your lightest. Following that line that I sketched with the trees and the bushes in the foreground, which is what we're going to work on next. I'm just being really careful to leave that space where the trees and the house will be. I can always go back with green later, but I'd rather not put too much too soon. I'm just spreading it out. This is where it's really handy to use a bigger brush. It lets you work quicker before your green dries. I love how relaxing watercolors are, it's just so soothing to put these washes down. They don't require a lot of thought, it's just enjoyable watching the paint spread. Now, I'm noticing that I have a streak in my sky, which isn't the look I was going for, it dried a little bit to streaky. I'm going to go in and try and fix this. I'm going to add some more water to my brush and a little bit more paint and try and smooth this out. If this happens to you, don't worry. This doesn't need to be perfect, it's a warm-up painting and watercolors are so forgiving. Because we did such a light wash, it's really easy for us to go back in and put another wash on top. You see how going back in with a little more water and a little more paint, is helping me smooth out that harsh line. I think that this will dry with a nicer gradient, more like what we see in the photo. Whenever something like this happens or it doesn't turn out quite like I wanted, I always imagine Julia Child when she did her cooking shows and things didn't turn out quite right, she would just encourage the viewers to just go with it, it happens. I'm going in with my hairdryer and drying all of my washes to get ready to paint my foreground.
11. Warmup: Foreground Layer: We've done the background and the middle ground and now you've guessed that we're doing the foreground. That is what is in the front the very front of your photo, for me this is the trees and the bushes. I've let my grass dry, I'm going to seal off my tape one more time and I'm going to go in with a more earthy green than I mix before. I'm going to add in some raw amber and see how that looks. They look like a little hint of red in the green so I'm just going to keep adding maybe a little burnt sienna, a little orange until I get this really earthy green I like how that looks. Just keep trying, you can mix up as many colors as you want, test them out and find the perfect match. That's soothing and this is a warm up so it's good practice. I highly recommend making color charts and there are some really great classes on that on Skillshare as well that I'll include in the class PDF. When you're going in, you just want to follow that line very carefully, create a nice sharp line as you're going down. I like to paint from side to side instead of top to bottom so that I don't get any streaks. Kind of like I did when I did the sky, you can still see a little bit of a streak which I'm okay with, but it's a good idea to paint from side to side so you don't get those lines across your layer. Just add a little more color on the edges where there's more shadows, and then this is where I'm just going to go in and drops more color along the edge of my foreground. Dropping in your paint like that helps create the texture of the trees. I'm going to show you how I add even more texture, mixing in a little bit of some undersea green so that I can get these highlights and shadows where the trees or the bushes whatever you want to call them, have these tufts like little clusters of where the trees are. I'm going to mix in this undersea greens some raw amber to get an even darker earthy green. Then what I do is I just go in where these little tufts of the trees are, these little rounded areas and tap it in just like we did before and this creates a beautiful texture in your foreground. Because we're doing this as the wash is still wet these drops that we're adding in they're going to spread out, they're not going to stay and keep their shape. What it's going to do is create a really subtle texture and then once this dries, I'm going to go in again for a third time to add in more texture. It's a process just go with it, it takes some patience but in the end I think you'll really enjoy the effect that it creates. See right here it's spread out a lot but there's just a little bit of texture, it's not as flat as say the grass layer above. I love it, I love these greens and the contrast between the middle ground and the foreground is beautiful. Now I need to get this to dry, so I'm going in with my blow dryer. Sealing that tape again and now I'm mixing in some more brown, some more green. This time I'm going to add in a little bit of Payne's gray to create the little tufts of the trees. You can see how our patience is paying off, we're getting such beautiful dimension and detail. This time because this is the last layer, I'm going to go in with, I'm bringing my brush over the ridge line or over the border so that we get this more realistic texture on that line. Because if you look in the photo, it's not a smooth curve just like I've sketched out. So I'm going over that line, just barely little hints to give the illusion of the leaves branching out. I'm really liking how this is looking, I'm going to go back in at the end and add even more detail but I love how this is turning out. Very loose, impressionistic, warm-up painting, such a great practice to do before we start our masterpiece. I hope as you're painting you're warm up that you're thinking about traveling the world and where you want to go. If we can't always make travel a part of our life whether its finances or work or family, I hope that we can just take a breather and use art as a way to escape, as a way to see the world. Now you can see why the planning stage is so essential in helping us achieve a successful landscape painting. Because we planned out ahead of time that we wanted our sky to be the first layer in the background and then the mountains and the grass in the middle ground and the trees in the foreground, we were able to layer appropriately and achieve the look we are going for. Now on to the fun part where we get to add details and finalize our painting.
12. Warmup: Final Layers: Now that we've finished painting our background, middle ground and foreground, I'm going to add a few more layers to the washes that look a little flat. We added some extra watercolor layers to the foreground. Now I'm going to go back and add some to the grass and the mountains. I'm just mixing up a little bit of a darker green for the grassy areas. I'm going to add this darker green where the shadows on the hills would be. Just test out this color. I like how that looks add a little bit more Payne's gray. Start going in with my brush and adding this darker color where the shadows would be, the highlights or where the sun is hitting is going to be where the original wash is peeking through. It's light and it looks just like where the highlights would be. We're adding in the shadows with our darker green over top of our lighter green. I'm just following where the shadows hit naturally on the grassy hillside. Being really careful to go around the trees that I'm going to add in later. Right here is that highlight area that I was talking about. Then just following where the shadows will go carefully going around my foreground area. Here's the darker shadow and the picture that I'm going to connect right across the field. It looks funny right now, but I promise as we add more layers in detail, it's going to look awesome. That's the fun thing about watercolors is as you're going, you keep questioning yourself, thinking, "Oh, is this going to look like the pictures, is this shadowy area going to look right?" This is where it's really dark at the bottom. It's a guessing game where sometimes you might feel like, "I don't like how this is turning out." But you just have to be patient. Watercolors, it's all about building layers. It really only comes together at the very end. A little present to yourself when it's all over. Mixing up a little darker of a color, more Payne's gray to drop-in, right along the edge where it's the very darkest. I'm going to go back in and add some more layers. Drop in wet on wet right here, so that this darker green will start spreading. Look a little more natural. Just remember that you can build and build and build, but you can't take away the start off with a light layer, light wash. Then you can keep going back in with your brush with a little bit of a darker color. You see these highlighted areas look a little too flat and that's okay. We want them to me like that. We want to go in and add more details we go. I'm going to grab a size two round brush, which is a really small brush. Right here in the picture you can see that the highlighted areas have a little more color they're not a flat green, there's a yellowish orange, light green color. I'm going to go in and add a little yellow and a little orange to achieve that effect more so than what we have right now, which is just a very flat, light green color. There we go just putting it down, being really careful not to let it bleed too much into where my shadowy area is spreading it lightly around where the tree would go. Then I'm going to leave a little bit of that light green at the bottom. Something that took me a long time to learn was that you don't need to fill in all of the white space. Sometimes negative space can, sail up. If you look at the picture, there's actually some lines in the grass that are from where someone mowed the grass. I'm going to go in and add some very light lines to show the perspective. The way that I paint these lines and paint the curves is going to help show that the hill is on a slope. Before I do that, I'm just adding a little bit more of this color with some orange and making it have that nice impressionistic effect. Then I'm going to come over here and add a little bit more color. You can see it's really starting to come together now and not looking as flat as it was before. There's that negative space I was talking about. Come back down here, the bottom, where's my last little section of flat green. I'm just doing little lines that show where the grass has been cut. It has a nice sense of movement it brings your eye from left to right and shows you that there is some movement in the grass. It gives you an idea of where the hill is sloping. Over here, I'm going to do the same thing. These curved lines will show that it's sloping down into the right. Before I can go in and add more of these lines from the grasphene mode. I need to make sure my layers are really dry. I'm going to go in with my hairdryer and give it a quick dry. Now, it's dry, I'm ready to go in with a dark green and paint those lines. You can see how the curve shows that the hill is sloping down away from the house and towards the bushes and the trees. It's a super simple thing you can do and a way to lead the eye in the right direction. A good sense of movement, really simple, has an awesome effect. Now back here in the mountains, it's looking really flat. I'm going to go in and add another layer to help it not look so flat and boring. You can see if you look at the picture really closely, that it's actually not one flat color. There are some mountains that are closer. Just like we practiced before with our picture from Spain, we can convey distance by painting the closer layers, a darker color. That's what I'm going to do. I'm going to go over top of my light brown and go in with a little bit of a darker brown. Being really careful again, to go around the house and the trees. Nothing too drastic, just barely darker than the original mountain layer. You can see how it's helping give more depth to the painting. One thing I love about painting with round brushes is that no matter how large your brush is you can paint a really fine line by holding the brush more upright because it's rounded. It has a really fine tip no matter what size it is. You don't have to necessarily change your brush size constantly. If you don't have a large stash of art supplies, you can lift your brush and point it more straight up and down. You can get a nice fine line with just the tip of your brush. As you push down, you get a broader stroke. I like how that's looking. I'm just going to add a little bit more of a layer on the right side where that other tree is standing by itself. Then I think we'll be about ready to add in our details. I like to go in and add more color along the edges and the corners where the photo shows it's a little darker. Last but not least, a little extra layer over here on this side, leads your eye in this direction. I really like how this has turned out. Spread this one a little bit more so we don't have a clump of dark brown right there. Then spread this a little bit more too. You can see how this has really helped get the painting ready. Not flat anymore, it has good movement. I'm ready to go in with my other supplies and add detail. I'm going to start with these empty spaces right here with some water colors and some gouache and finish up our painting, our warm-up painting we're almost there you guys, you're doing great.
13. Intro to Adding Detail: The final step in watercolor landscape painting is adding detail. This is my favorite part of the whole process because it's when everything finally starts to come together and looks polished and beautiful. It's also the time where you can explore other mediums to give your painting a more dynamic look. Let's take a look at five different ways you can add detail to your paintings. One; more watercolor layers. This one seems obvious, but it's a great option if you don't have access to other mediums. This works well when you want to add detail to a lighter color, but limits you from adding highlights to dark areas since you can't layer light over dark, just as we've discussed. Two; graphite or pencils. This is a fun and accessible way to add dimension to your painting. Three; ink. Similar to pencils, it's a nice way to add definition and interest to an otherwise flat scene. Make sure you use a good quality waterproof pen. Four; white ink or a Gel pen. This is especially great for adding emphasis in certain areas that have highlights. I find it especially useful when adding wild flowers or details to buildings. Five; gouache. This method is probably my favorite and most used because they are so similar to water colors, but they are opaque enough that I can layer light on top of dark. I use this most often when I'm adding flowers onto dark green layers.
14. Intro to Detail: Pencils: Here are two watercolor landscapes that I did in my personal sketch book a few weeks ago. I want to use these to demonstrate the different ways that we can add detail to our watercolor landscapes. The first thing I'm going to demonstrate is how we can add detail using just a regular old pencil or a watercolor pencil. On this scene, right here, it's a mountain scene, I am going to demonstrate how we can come in and just add little markings, give some texture to these mountains to make them a little bit more defined. Can even come in and outline in a little bit, I mean very loose. Imagine if you were in the mountains and it's not all smooth. Just some rough outline, just enough to give it a hint of definition. Maybe just a little bit more over here to keep it consistent, and you can see it's harder to view the pencil through the darker color because it's more opaque. This is where I might go in with my darker pencil, it's charcoal color. This is a watercolor pencil, so you could go in with some water on your brush later and add a little bit of water to get it to dissolve just little bit. It's just a really quick, easy way to add in some more definition.
15. Intro to Detail: Ink: The second thing we can do is we can go in with ink. Right here, I have a waterproof drawing pen. This is a MONO drawing pen by Tombow. I'm just going to go in and maybe add in some grass down here, just little markings so that it's not just all one flat color, just little patches of grass like this. I like to do it on the ridge line as well so that it's not quite all just smooth one line. You can see how just adding these few small marks is creating more interest and definition. Maybe I come in right here, add a little bit more. I like what it's doing to the horizon line. That is how we can use ink. Next is how we can use white ink. This is just a gel pen, a uni-ball gel pen. I'm going to come in here and add just some little dots as if they're little wild flowers in the scene. Little patches might come around where I have the little patches of grass as if they were including the wild flowers in them. Just a little stippling, you're creating dots. I come in here. Just to demonstrate over here with a little bit more of a colorful landscape, I'm going to come in and add some flower shapes as if they were little daisies.
16. Intro to Detail: Gouache: The last thing I'm going to do, is show you how you can add in some detail by using Gouache. If you don't know a lot about Gouache, it's awesome, I love it. It's like if acrylics and watercolors had a baby, it would be Gouache. The cool thing is that they're very light fast, which means they're very opaque. They're not transparent, unless you add a lot of water. So you can paint light over dark. Unlike with watercolors, you can paint light or dark. I use a really small round brush just to get some detail. I'm going to come in here and just add a little bit more detail close to where I have the flowers, a little bit of a lighter grass. This is unique because normally we wouldn't be able to paint a light green over the dark green background. I love this method for adding detail, it's probably my favorite. You can do as much or as little as you want. It's a good chance to add a little bit more dimension to your horizon line, just like we did with the mountain scene, can bring them up over the ridge, make it a little more lifelike. Those are my favorite ways that we can add detail to watercolor landscapes.
17. Warmup: Watercolor Details: Now that you understand the different ways to add detail to your paintings, we're going to go in to our Tuscan hillside and add these trees, this little bush, this tree, and this structure right here. I'm just mixing up a darker green for these trees and this bush. We want it to stand out against the lighter grass and the light brown of the mountains. I'm just mixing up some jada genuine,and some undersea green. Just going to test out this green, it's a little bit light, so I'm going to add some more Payne's gray, darken it up just a bit. I want to make sure it stands out really well. Looks a little better. Just maybe a touch more. Now, I will go in and start painting my trees. Now, it's important to remember that you need to start painting in the right direction. I'm right-handed, which means I need to work from left to right. Otherwise, I risk smudging this area if I start from right to left. I'm going to start over here with this first bush and just start putting in little markings, in the direction that they would be growing. When I'm painting trees, I just like to tap in the paint with little brush strokes. It makes it look a little more like leaves and just more lifelike. I have my first bush done. I'm going to head on over to the second tree that's right next to my structure. Just tapping in along the edge of the tree to establish the border, and then coming back in and adding more color throughout the middle of the tree. Now, I like to leave little pieces of white space showing, so that it's not one big blob of green. The negative space helps show your eye that it's a tree and there are some space and it's not all filled in in one big color. You can see from this perspective how the little gaps of white give it some depth. Now, the second tree has a straight edge up the top and a curved edge on the side. I'm going to go right up in a straight line and then curve on my way down. Just do these little tapping motions to get this nice effect. Almost like pine needles. Then coming on over here for this last tree, it's a lot darker than the others because it's in a shaded area of the field. Just adding a little more Payne's gray, and I'm going to just keep doing what I've been doing, tapping in, give that effect of leaves. There's a little gap right there. I'm going to tap in leaving some white spaces just like before. Now that I've finished painting the bush and the trees, I'm going to go in and add some detail to my structure. I'm going to add the most detail later with quash, but right now, I'm going put down a light wash. First I mix in Mars Black with a good amount of water to get a very light gray color. That's the nice thing about watercolors, all you go to do is add some water to get gray. I also have this color called Buff Titanium, which is one of my very favorites. It's a creamy beige and I'm mixing it in with my Mars Black and water, and you can see it's just got a nice warm tone to it. Now let me show you what it looks like with just Mars Black and water. It's definitely a lot cooler. I'm going to go with the color with the Buff Titanium mixed in, and put this down as my first layer for my little structure. Start over here on the side. The side of the building is shaded, so it's going to be a little bit darker, right here on this side. Then I'm going to come in on the front face of the building and add in my Buff Titanium and Mars Black. This is just the first wash for the structure. I'm going to add in more detail later as I mentioned before, with some quash. I'll get some nice detail showing the stonework on this cute little building. That's how I'm going to use watercolors to add the first layer of details to this landscape painting. Let's try some other mediums to make it even more interesting.
18. Warmup: Gouache and Pencil Details: We've added in our first level of detail, which is with water colors. Now I'm going to start with my gouache I've mixed up a little bit of a warm gray with my gouache. I'm going in and adding some shadow to my little structure, the side of the building that is shaded by the tree in front of it. I love gouache because it's so versatile. You can have it be very opaque, you can't see through it very much, or you can water it down and it has a more watercolor feel to it. I think that the two mediums go hand in hand so well together. There are so many awesome classes on Skillshare about gouache , and I've included a couple of my favorites in the class PDF guide. I'm just adding some detail to the top. I think it's a little bell tower, I'm not positive, but it's cute, whatever it is. Using this darker color to outline the building, and then I'm going to go in with a lighter gray and add some stone features. Outlining the door. I'll go back in with a darker gray-black later to fill in the door. This is just kind of outlining and adding in the stone thus have like a cobblestone effect. It's just so cute, I wish I could be here instead of in my home office. It's a little light, so I'm going to go in with a little bit of a darker gray. Add some more definition to the stonework. My stones are done, the outline is done. Now I'm going to go in and use this darker-warm black, it's not like a solid black, but I put a little bit of this warm gray in it to keep it similar tones. I'm just painting where that little door is. Then there's a really Darlene round window right above the door. Sometimes circles can be a little tricky to paint, but just go slow. I'm using a really awesome brush for detail work. It's a 10/0 Spotter. It's just the simply Simmons Brown that I got at my local craft store. It's nothing fancy, but it gets the job done. It's very fine so you can get really nice, crisp details and lines. I'm just adding tiny bit more of a shadow on the side of the building. I think I'm done with the gouache. You can keep going in, maybe just a little more of an outline on this roof, before I finish up with the gouache , just put a tiny bit more definition. You can keep going in and adding more detail, making it more realistic, but this is just a warm-up and I'm really happy with how that looks. So I'm going to move on to adding the next step, which is using my watercolor pencils and I'm going to add in some grass. This is a green colored watercolor pencil. The color is Moss, and it's just the perfect green for these little tufts of grass. I'm putting it in front of my building to give it the sense of perspective. It's not just floating on the grass, there's some extra details that ground the building. I don't want to floating building in this field. Then I just randomly go around the scene and add just little lines that look like grass, and there's really no rhyme or reason to where I'm putting them, just kind of sprinkling them through the fields to give it a nice texture. I like to do it around the trees, around the buildings, places that you would see more detail anyways. Then I go in lightly where the grass is, just to give it a really nice texture. When you're coloring in over a really light areas, I would use a lighter touch. You don't want a super strong contrast with the grass. We want a really subtle effect. That way it doesn't scream to you, "Oh, someone went in with a colored pencil and paint and colored grass." We want it to be not very noticeable, that's just enough to give that effect. Then I'm going in with this brown, really warm baige-brown over on my mountains just to give it a little more interests to your eye. This is the color caramel, so it's a warm brown. It's the perfect color to add detail to these mountains. I'm just going in and adding these horizontal lines, which just like with our grass, gives a really nice texture. That's perfect. I like how that looks. I'm mixing up some yellow ocher to come down into the foreground and add details where these highlights are, on the trees and bushes, and it's not going to be really noticeable, but just enough to give it a little highlight. Do you see what I'm doing right here? I'm putting some highlights over the darker areas that are facing the sunlight. I'm just using my spotter brush and putting little dots of this yellowy warm color. The sun is shining from the top left side of the painting, so I'm going to be doing my highlights on the tops of the branches and leaves. Just pay attention to where your sun would be, where the light source is, and make sure your highlights reflect that. It's very subtle, just like we did with the grass over light areas. It's subtle but just enough that it tells your brain that there's more texture here. It's not as boring, more interest, and overall it just looks more polished and finished. This was such a great warm up exercise. I hope it helped you learn the steps to painting a watercolor landscape. Now that we know the basics, the fundamentals, and we've practiced and warmed up, we're ready to pick our final destination of where we want to travel and paint a beautiful landscape masterpiece. If you're feeling unsure about any of these steps, just go back and revisit the lesson that you're struggling with. Don't forget now that we're done, we're going to start peeling are painter's tape off of the paper. I like to go slowly and pull my tape at a 90 degree angle. Instead of pulling straight up and down, I pull the tape to the side so it's perpendicular. You can see how that tape is creating a right angle from where it is taped down. This gives you a nice crisp line and reduces the amount of paper that it lifts up with it. You can see there are some areas where the paint leaked through, but I'm not going to worry about it. It's okay. It happens. Don't worry if it happens to you. Then the last step is to sign your name and look back and admire your work. Good job. You've finished up our beautiful warm up painting.
19. Project Instructions: Here are the steps for your project. Choose a destination that you want to travel to. Take a virtual walk or tour of that place by exploring photos and videos online. Make your workspace festive, create ambiance by putting on music, a movie soundtrack from that part of the world, light a candle. Anything you can do to make it seem special. Choose your final reference photo, plan ahead, sketch it out, layer from light to dark, and add those details. When it's all done don't forget to sign your name. That's the best part of finishing a painting. When you've completed your landscape masterpiece, upload a photo to the class gallery so that we can all see your work of art. I also would love to hear what your favorite part of the process was, as well as the most challenging. It's awesome to do these projects and see how you grow as an artist.
20. Project Demo: Planning + Sketching: To set the scene for my virtual vacation to France, I have lit a beautiful Lavender candle. I have a Faux Lavender plant right next to me as I'm painting and I'm listening to French inspired music.The first step, like we learned before is I need to sketch out the shape that I want my landscape painting to be. Just to make things easier, instead of using a ruler, I'm just going to trace this block watercolor pad that I have. It's the perfect size and it helps me not have to get out a ruler. I'm just sketching around it with my pencil very lightly. Next up, I need to mask off the shape with my artist's tape. Make sure to seal the edges well so that the paint doesn't seep through. Now we need to look at my photo and plan out my zones. In this photo I see three clear zones.The sky, this middle section with the grass and mountains and the Lavender field. I'm going to start sketching by drawing out the horizon line. This line right here is the very top of the mountains. Little line here where there's a dip in the mountains,and then I'm going to go back in, and this line right here is where the field meets the base of the mountains. Adding another layer, one last layer,and I'll be done sketchy my theme and I'm ready for the next step.
21. Project Demo: Layering: I'm now ready to start with my layers, my background, my middleground, and my foreground. I'm going to start with the background, of course, which for me is the sky, this beautiful sunset with clouds and sunburst it's just beautiful. I'm going to start with a really light wash with mostly water and just a touch of blue. I want to make sure I build from light to dark. I'm just barely adding any paint to my paintbrush. Going in and making sure that I leave gaps of white. Because as you can see in the picture, we have clouds. We have burst of sunshine, and it's not just one solid color, it like it was with our Tuscany painting. I'm making sure to leave little areas of white of negative space to achieve that effect. Now I'm going in and adding more paint to where the bottoms of my clouds are. It's important when you're working with a big area like this and you're using the wet on wet method that you work quickly. By using the tip of my paintbrush right here I'm pulling the paint upward to create these sunshine streaks or sunburst. When you're painting the sky, try not to overthink it. I like to use this as an opportunity to just really let my wrist be loose and not too rigid. Now I'm going in with a yellowy orange near the horizon line where the sun is setting. I've makes a little bit of lemon yellow deep with my Cadmium Orange and watered it down quite a bit, leaving little bits of white here and there, and then I will start blending it into the blue area of the sky. Tapping in just a little bit here and there. Make it look like an actual Sunset. I love this orange and yellow mixed together. It's just looking so beautiful, I wish I was in France right now. As you're painting, especially if it's something like this, it's very loose and fluid and you don't want to overthink it. I like to let my mind wander to what I would be doing if I was in France right now. It's fun to let your mind wander when you're preoccupied with something like painting of sky. I'm Just adding a little more of a darker color to where the bottoms of my clouds are. As you can see, as it dries, it's spreading now. It's drying a lot lighter and it's looking really nice and abstract and just how I wanted it. Mixing a little buff titanium with my lemon yellow deep to go in and add a little bit more detail to where the sun is setting. I don't want too much detail because I'm going for a loose look. But this is perfect and gives me just the right amount of definition. Now that my background has dried, I'm going to go in and start the middle ground. For me, the next layer is the mountains. I'm going in with a slate or charcoal color, a little bit of indigo mix with pinks gray to paint this mountain scene. I'm following the lines that I've sketched ahead of time, which makes it really easy to fill in the area. Just remember how simple it is when you're building layers like this. It's not that complicated. I'm just going in and putting a simple washed down. Just below the mountain line is a field with trees and greenery and it has this lovely yellow town. That's what I'm going in with very carefully up to the edge of the mountains. I don't want to pull down that darker paint colors. I'm being really careful as I paint up to the edge of the mountain. Putting down this nice light color. It might look a little funny right now, but as we go on with more layers and with more detail, it will look so much better, I promise. Just a patient. That's the hard part about painting landscapes is you have to be patient. I'm going to add some green to this field. Just like we did with the Tuscan landscape when we did the grassy middle ground, we put a light green down and then we went back and added darker green to where the shadows were, and that's exactly what I'm doing right now. I'm going back in, I'm adding a few more layers to make it look more lifelike. Try not to fill the whole space with one solid color. Leave little bits of negative space like we did in the sky. The last section in the middle ground is this line of trees that separates the field and the lavender field. I'm just going in and putting a quick layer of dark green, and the last player is our foreground, which for me is my lavender field. I'm planning on putting down a quick purple wash in this area, especially in the top of the foreground and as you move closer to the bottom of the page, I'm going to give more detail. I'm just spreading out this purple lavender color across the page, leaving little gaps of white here in there. Right now it looks just like a purple blob and really silly. But as we add more color and darker purple and as we go in with quash later, we will add more definition and it'll look much more like a lavender field as opposed to a purple blob. As I move my way down closer to the edge of the page, I'm leaving even more whitespace, because as you can see in the photo, there's a clump of lavender right at the front. Above that you can see the greenery from the line of lavender right above it. I want there to be some variation in the purple. Some of it is more of a pink lavender color, some of it is a deeper purple. I'm just going to sprinkle it in here and there. When I go back in later with my quash to add detail, I'll be able to add even more variation. It's time to paint these lovely little lavender stocks right at the front. I'm using a more up and down motion to mimic the way the lavender is growing in the front. Just like we talked with layers. The closer you get, the more detail you're going to see. Obviously, we're going to have much more detail in the front or foreground of our painting than we are in the distant background like with the mountains. Now we're ready to add our details to finish off our beautiful watercolor landscape.
22. Project Demo: Final Details: The last step in finishing up my watercolor landscape is adding in those final details. I'm going to start by adding in some watercolor details with darker colors over the lighter colors. To start off, I am adding in little shrubs and clumps of grass to my field and the line of trees, that separate the field from the lavender field. I'm using a really dark green that I mixed up with [inaudible] and indigo. I'm looking at my picture and following along where you can see little toughs of grass and clumps of trees and bushes. This just makes it feel more grounded like the field isn't floating in mid air. I'm now adding in the green details of the lavender stems, very loosely in the rows of the lavender. I'm mixing [inaudible] and indigo, two of my very favorite colors. A little pins gray to top it off. You can see the painting is starting to come together even without the details of the lavender flowers themselves. By going in and adding this green in the stems, makes it look a lot more like the photo. I'm now going in with a lighter green to resemble more of the stems of the lavender. The darker green helped illustrate the shadows, and this lighter green gives more definition to the lavender stems. When I'm painting vertical lines like this, I like to orient my brush vertically. It helps me maintain more control of my brush in creating a nice smooth vertical line. You can see the field is starting to come together now. It's time for my gosh, I've mixed up a few different purples that range from more of a pink to a deeper indigo purple. I'm going to sprinkle them throughout the field, no rhyme or reason. I will be looking at the photo for reference, but I'm going to do my own thing a little bit here. Not too worried about replicating exactly what I see, I want to get the feel of the beautiful French lavender field. I'm using my spotter brush, which has a very fine tip, and I'm tapping in little splotches of paint to resemble the tiny little lavender flowers. As I go I'm switching up which color I'm using so that it has a really nice transition from color to color. I don't really want there to be big clumps of pink and clumps of purple, I want them to blend in altogether. Now that I've created some of the establishing flowers, I'm going in on the stems that I've painted with my light green, and I'm adding in little dots up and down the stems to look just like the lavender flowers. Some of the larger areas I'm going in with my watercolor brush, the size two round brush, and putting in more broad strokes. I'm using my size two round brush to add in more details in the foreground. When you look at a stock of lavender, the flowers tend to grow opposite each other vertically along the stem, so I'm trying to replicate that as I paint the foreground. I'm almost done adding in all the details that I want to with the lavender flowers. I'm really happy with how it's turning out. A few more details in this front section, and I'm about done. I'm so happy with how this turned out and I just want to hop on a plane and go to France. Now that it's done and everything has dried, it's time to remove my artist's tape. Remember, when you're pulling it down to go slowly and to pull with a 90 degree angle. This will help you not pull off any of the paint. As you go slowly, it will help you not pull off a lot of the paper fibers. There's nothing quite like a nice crisp edge when you're peeling off your paint. I have a little bit of blood through the top, but that's okay. It's not always going to be perfect and still so happy with how it turned out. The last step is to sign my name and step back and admire the work. I hope you've enjoyed learning how to paint watercolor landscapes. I can't wait to see what you come up with.
23. Conclusion: You guys, we did it, we painted a watercolor landscape. We learned how to plan, prepare, sketch, layer, and add detail, that's a lot of skills in one class. I really hope you learned something and that you're leaving today with more confidence in your ability to paint watercolor landscapes. Be sure to follow me here on Skillshare so that you can be in the loop whenever I post a new class. You can also follow me on Instagram where I post plenty of behind-the-scene antics.You might even see my crazy family from time to time.
 Caitlin Sheffer, Watercolor Artist & Designer