Transcripts
1. Introduction: Hello everyone.
My name is Shaba. I'm an artist instructor
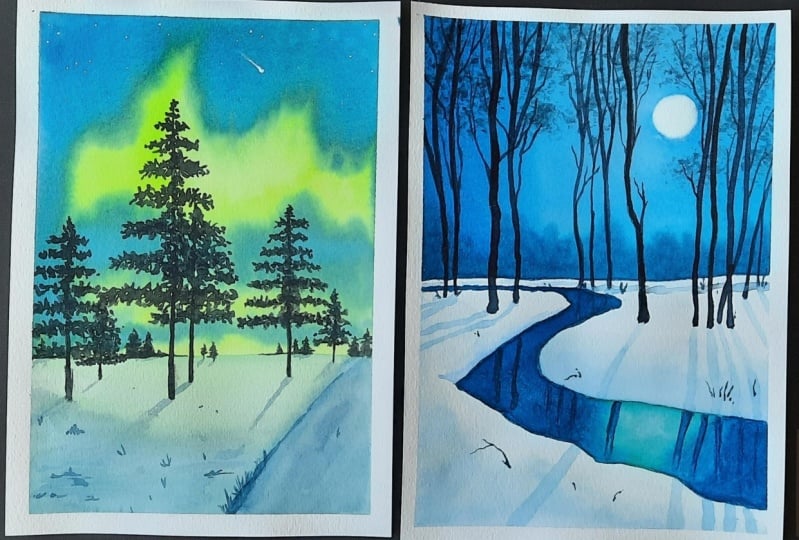
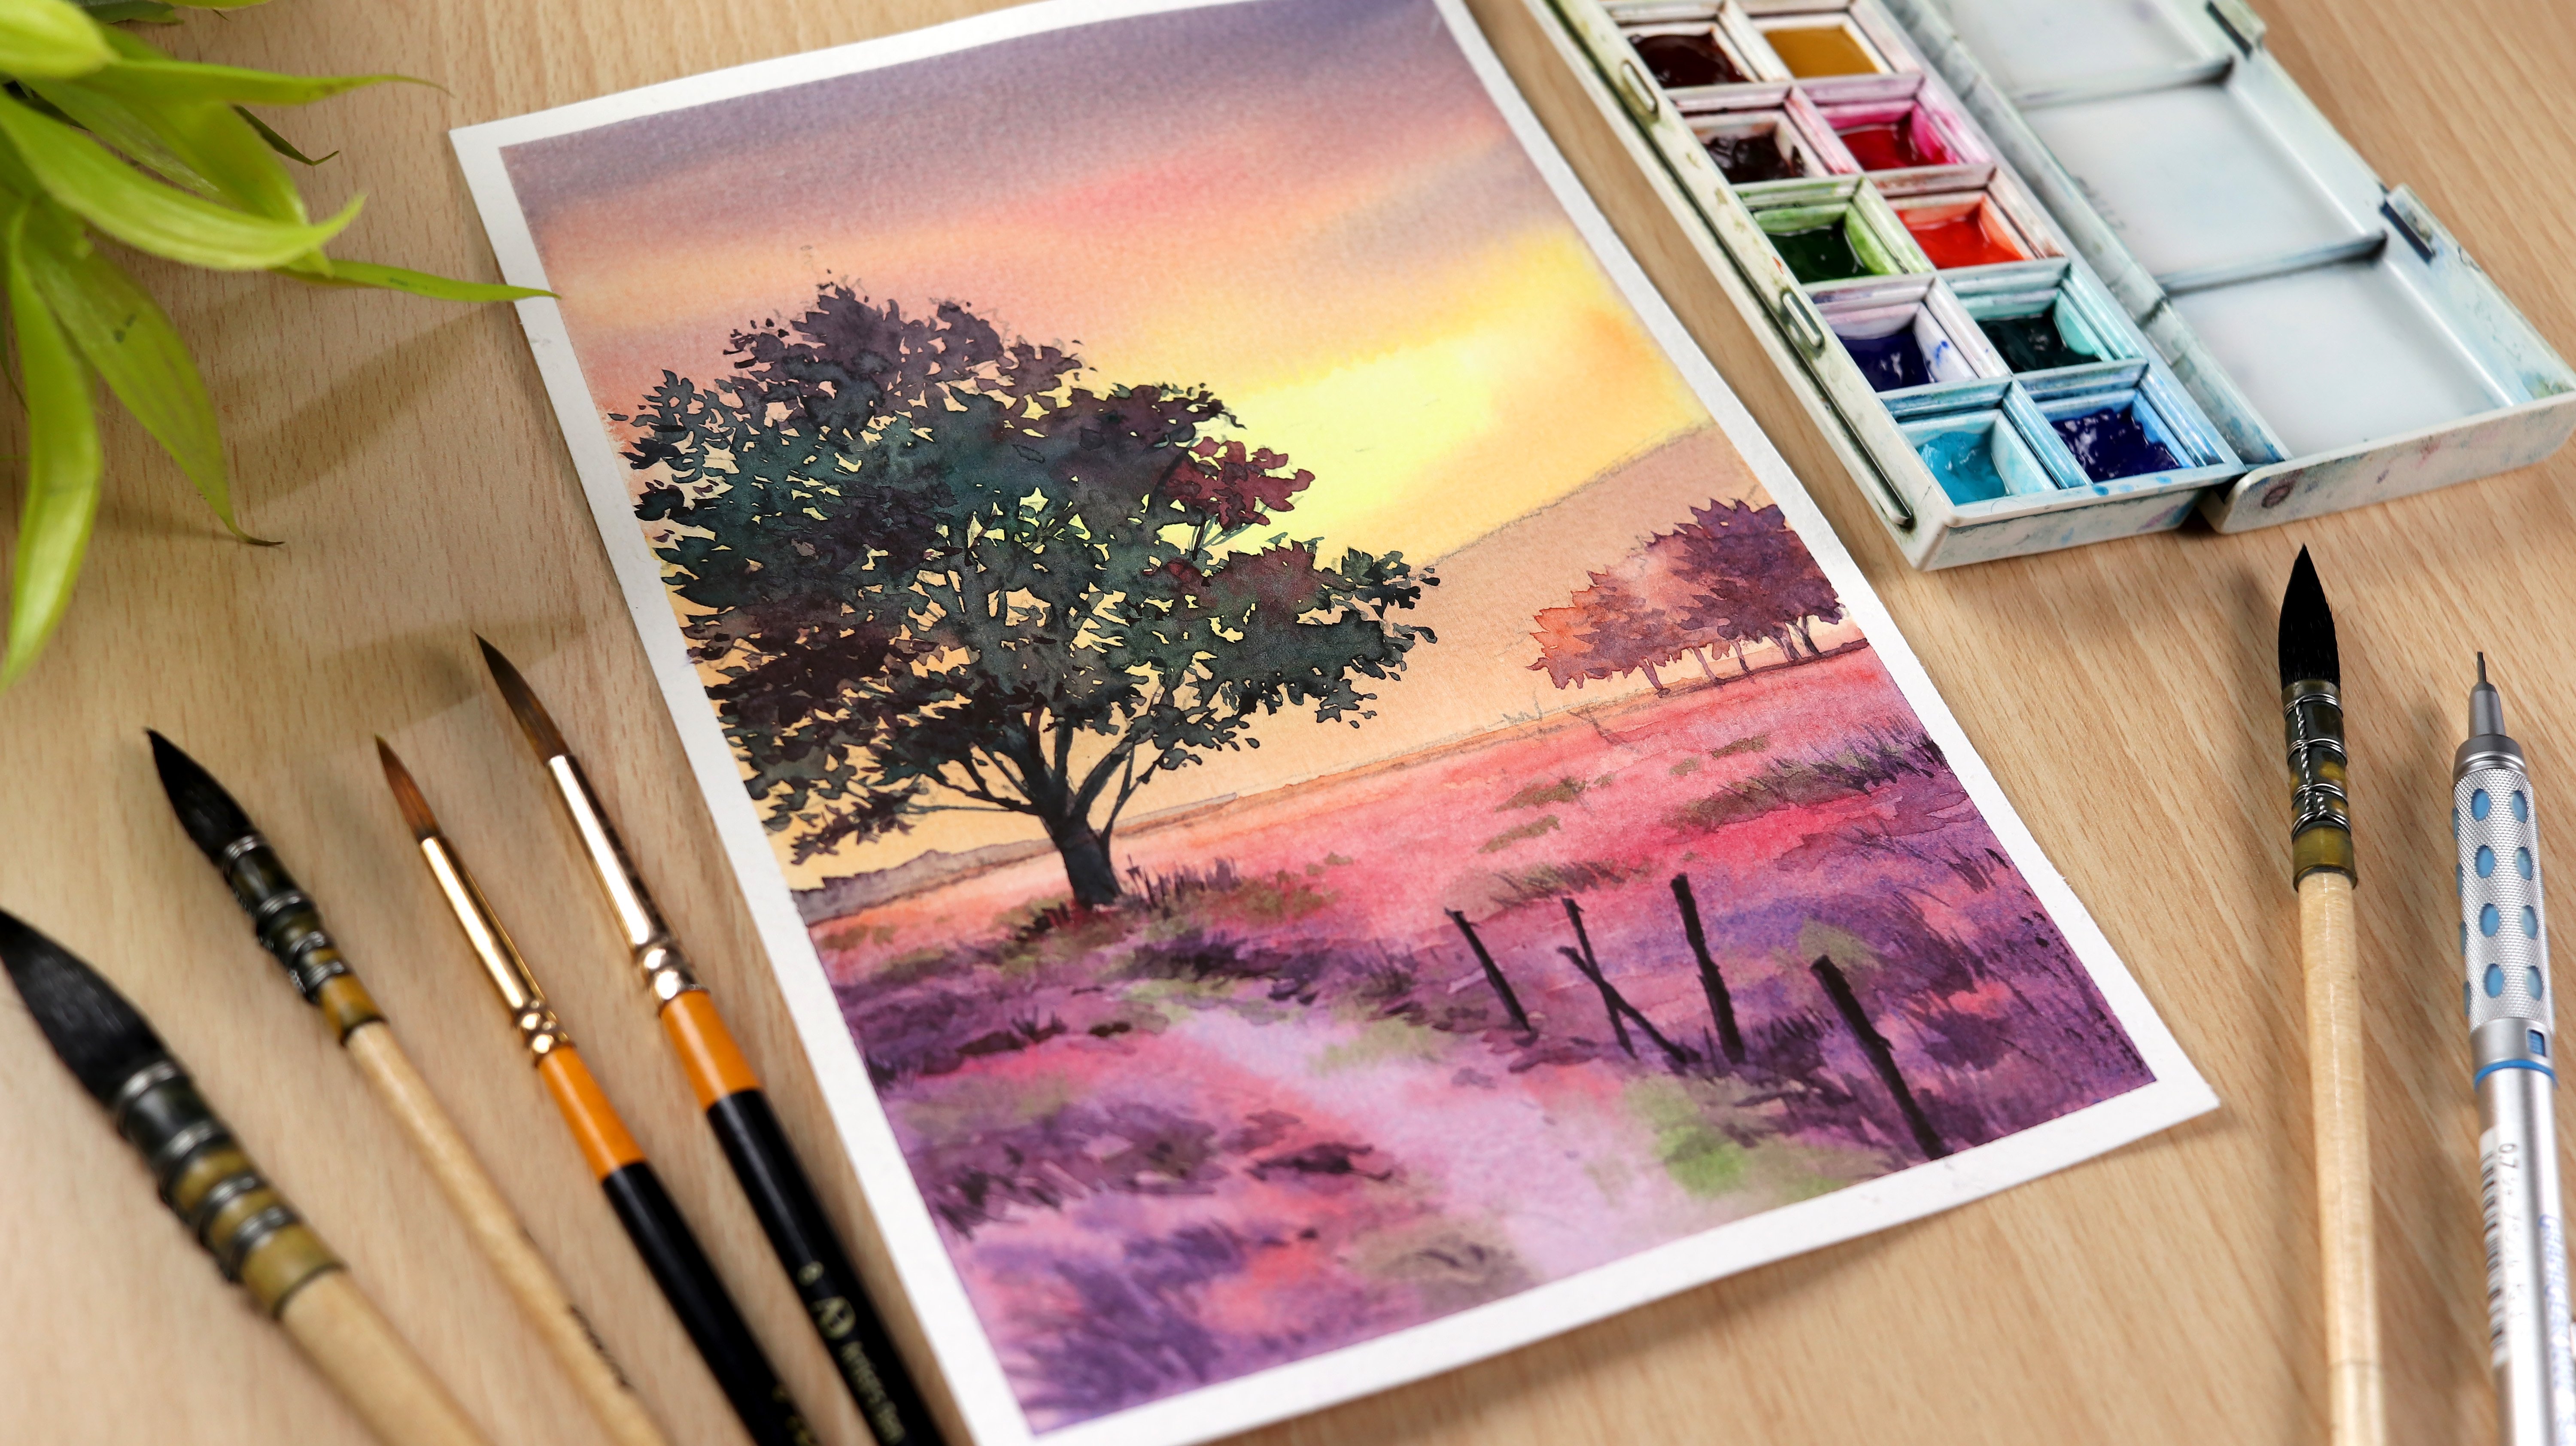
and a Youtuber. Welcome to my painting class. In today's painting class, we will paint a beautiful
night sky scene of aurora borealis
and moonlight sky. I love to do
watercolor paintings. Mostly the old rural areas, seascape landscape, birds
and animals and much more. I try to keep my paintings simple and easy so
that you can easily understand as we know that watercolor is a
very daunting medium and it's not that easy. I have used very simple steps to paint these beautiful sceneries that you can easily understand. I have included some basic
tips and techniques session to make you familiar
with the techniques required before we paint
the final painting. This class is for
the intermediate, but beginners and pro
artists can also give it a try and can end up making these two
beautiful paintings. Now you don't have
to worry because I've explained some
simple steps throughout the painting process which will add something extra to
your watercolor knowledge. I'm very happy that you
have chosen this class. Let's quickly jump
onto our next part and see what are the materials were required to make these
two beautiful paintings.
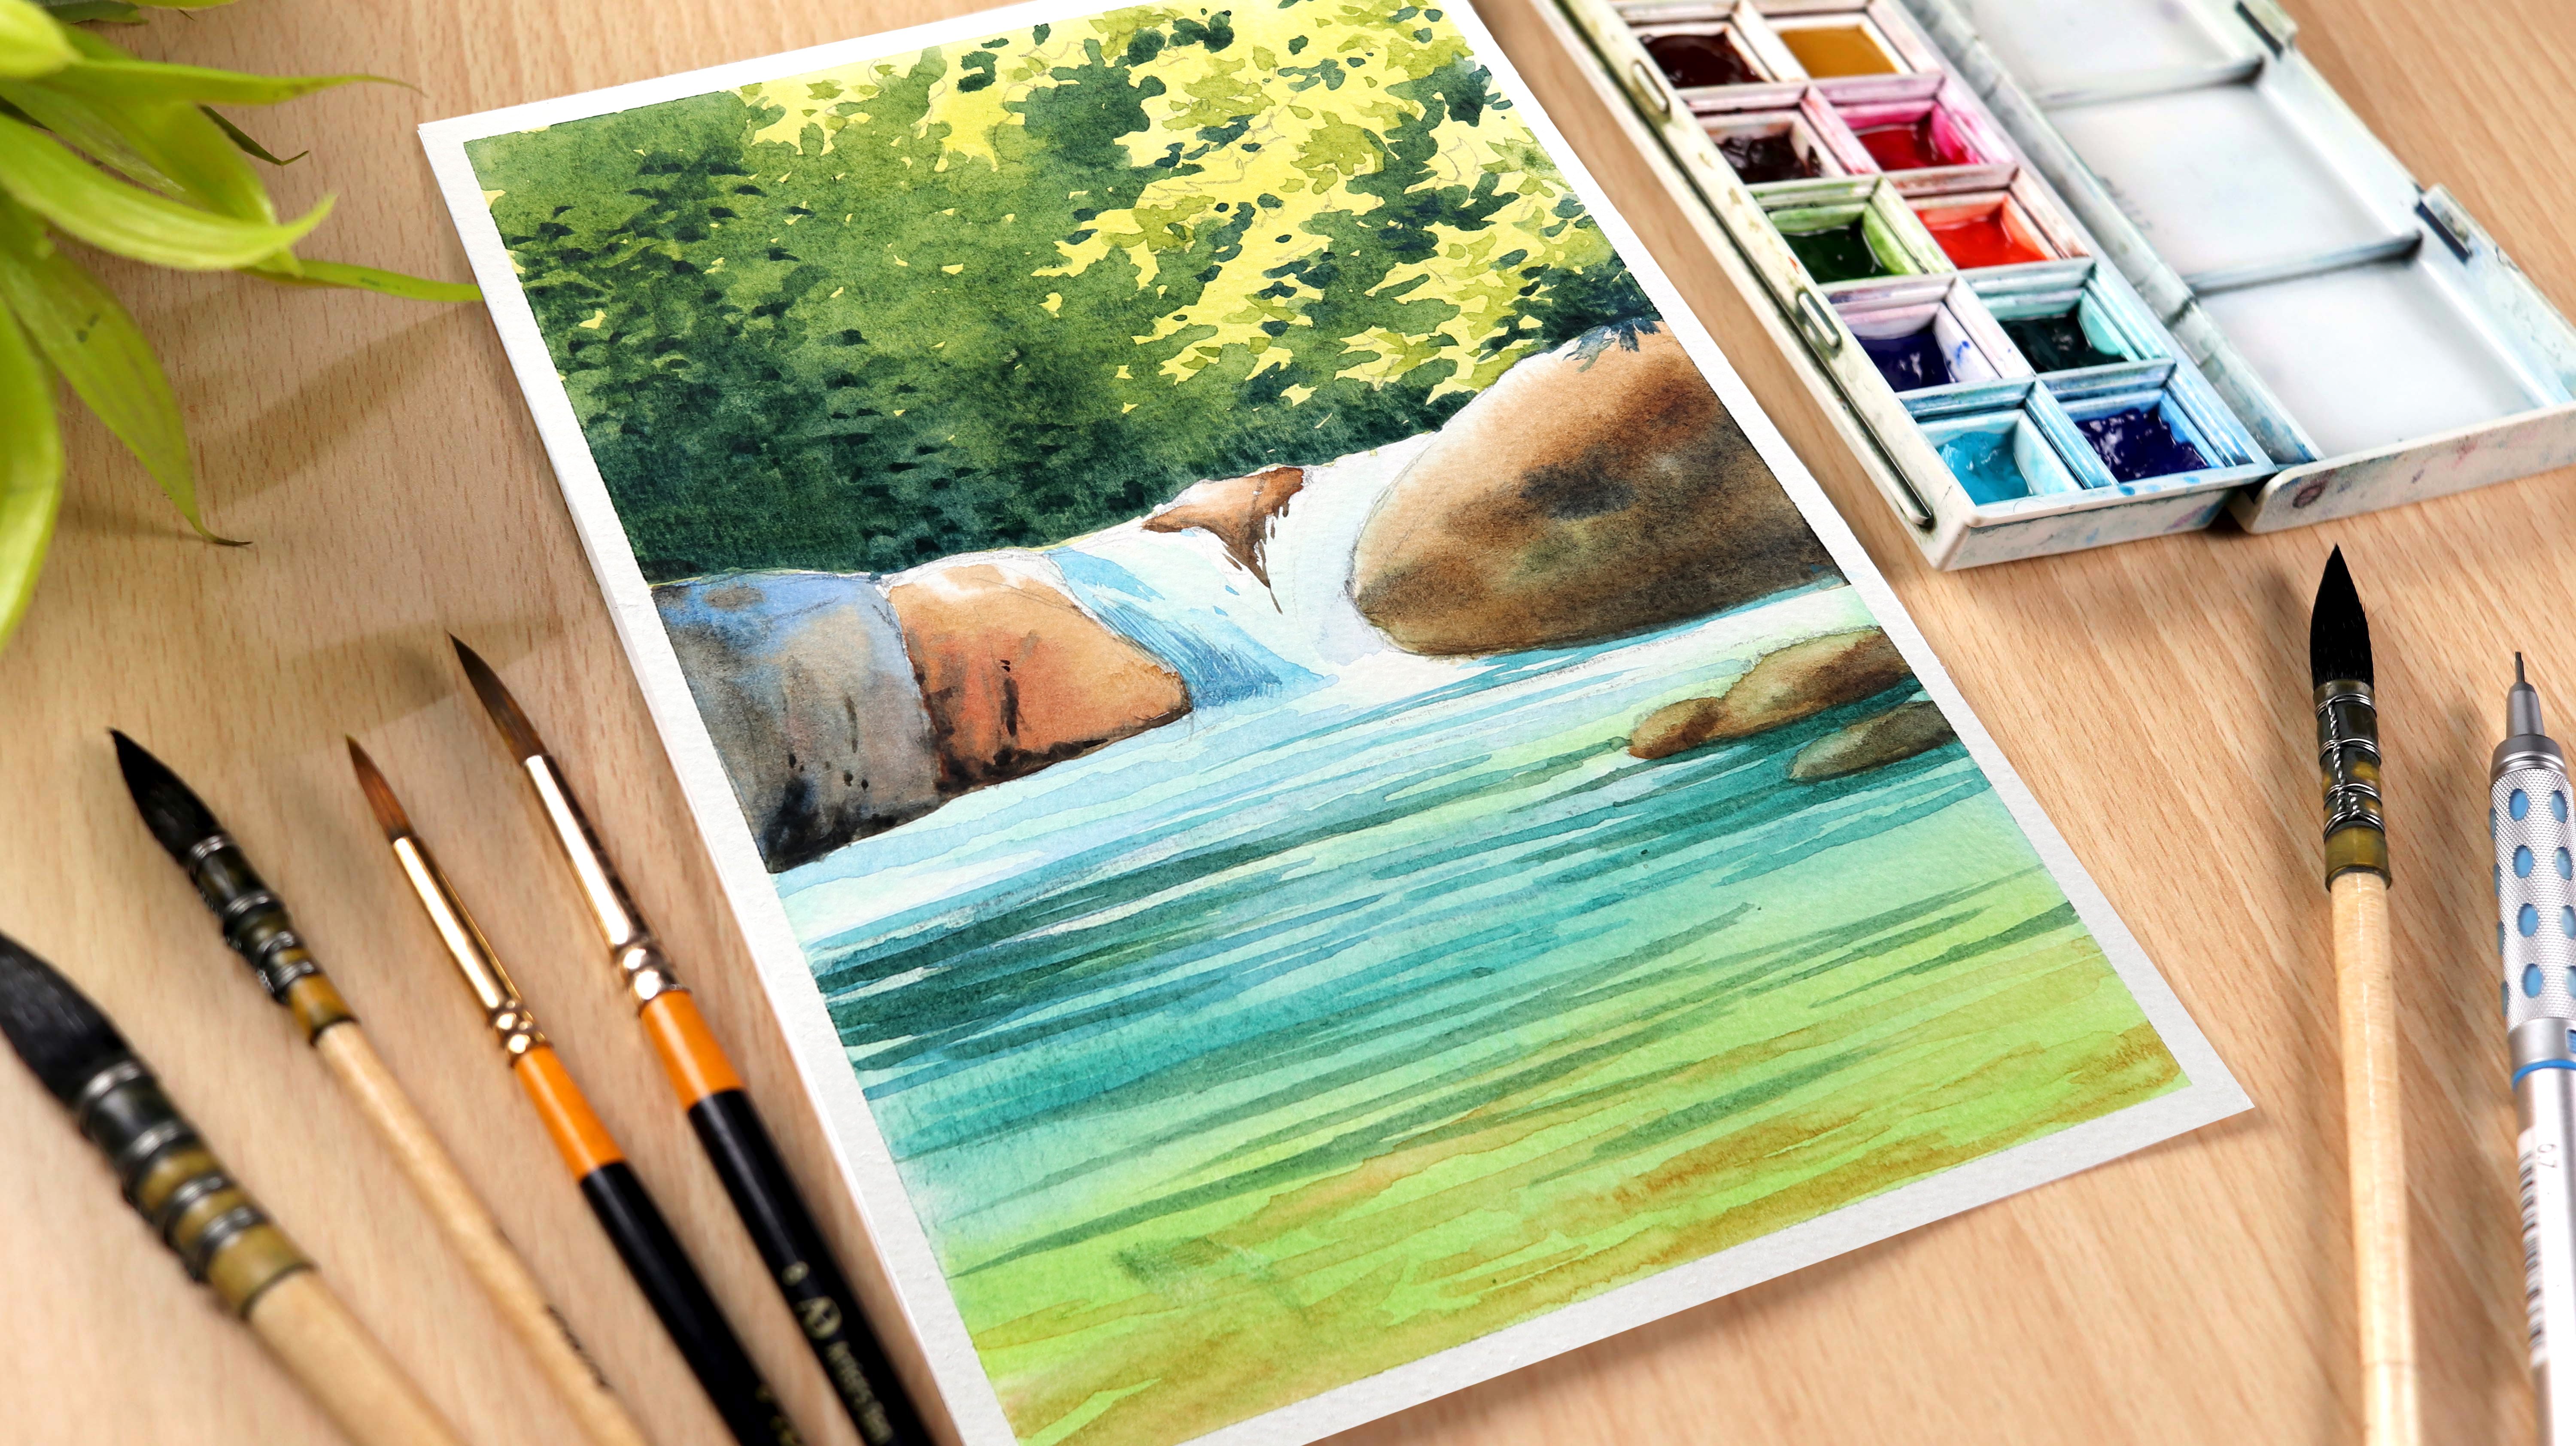
2. Art Supplies Required: Hello, everyone. Welcome back. In this part, I will discuss
the materials I use for my watercolor paintings,
starting with the paper. The paper which I'm using is Fabriano Artistico
watercolor paper, 300 GSM, cold pressed. I'm using a cold press
paper because it creates a beautiful bouquet
effect in your paintings. And it doesn't dry out soon means that it gives
you more time to work on your paintings. Now these comes in cut out
sheets of various sizes. But here I am using an, A five size sheet. The colors which I'm using are from Winsor and Newton Cotman, student grad water colors. Now these colors
are very good for anyone who wants to start
their beautiful art journey. The name of the colors on my palette is displayed
on the screen. As you can see, I have replaced the white color with cobalt
turquoise from white nights. As I don't use white in my
paintings, for the brushes, I'm using a mob brush of size 02 and 4.1 liner brush for the deals,
which is number two. These three more
brushes are sufficient to make a painting
of an A five size. If you don't have
similar brushes, you can use any brush you have. It's just that you must be comfortable while
doing the painting. For sketching, I'm using HB
pencil and a needed eraser. I'm also using a cup of water. If you want, you can
use two tubs of water, one to clean the brush and the other one as a mixing medium. This is a half inch masking tape to tape down my painting. And also a cotton cloth to wipe any extra water or
paint when required. I will also use a hair dryer to dry my painting
when required. Friends, these are all
the materials that I will be using for
my painting class. Quickly grab and join me and
I see you in the next part.
3. Tips and Techniques Aurora Borealis Northern Lights: Hello everyone. Welcome back. In this part, we
will see what are the basic techniques require to draw this beautiful aurora. Borealis, Northern lights. Here I'm using a
cool press paper, which is 300 GSM from Fabriano Artistico
Watercolor papers. Before we start, let's discuss the basic
background colors. The first color which I'm
using is lemon yellow. The second color which I'm
using is a radian green. The third color which I'm
using is ultramarine blue. For the darker tones,
I'm using intense blue. If you don't have intense blue, you can use indigo
blue or Persian blue. If you don't have
ultramarine blue, you can use cobalt blue as well. Now I'm making the colors a little light at the corners to see how much intense they
look in dilute form. If you are a binner, then it's a good technique to please
your colors at first because this will
give you an idea about the color palette
you're going to use. Also, this will help you once you start
mixing your colors. Once you're done putting
down the colors, you can just write down
the names beside them so that you get an idea about
the colors you're using. We're done with a background. Let's see, what
are the colors we require to draw these
beautiful trees? For painting the
trees, we will require a mixture of colors.
Let's discuss them. To draw the trees,
the first color which I'm using is crimson red. The second color which I'm
using is intense blue. The third color is Burn
Siena, which is the brown. Once we mix the colors, you will get a color which
is very close to black. And we can use this color
to paint the trees. We have placed the crimson red. Now let's put some intense blue. Now let's put some burn sienna, which is a brown color. Now let's mix these
three colors. Now this will give you
something close to black. You can see the colors
which we are getting after mixing these three colors
is somewhat close to black. We can use these colors
to draw the trees, and we can also apply this
color at the most dark places. Now we will make a small
miniature of the painting, so let's paint the background using a wet on wet technique. Before we start painting, let's apply water first. Here I'm using a mob brush, number two from Rustro Brand. If you don't have
the same brush, you can use any Mob
brush you have. Once we have applied the water, let's start putting the colors. The first color which I'm
using is lemon yellow. You can see I'm applying this
color in a more random way. But at the same
time, I'm trying to make them a little
sharper at the top. Maintaining the sharp
edges at the top will give you an effect
of Aurora borealis. Now let's supply viridian green in the same way we
applied yellow, and we will try to
maintain the same shape. Now let's supply some
ultramarine blue mixed with Viridian green. As we know, this is water color. We will not overdo
the brushwork. We'll let the colors flow
and blend on their own. Now this will give your painting a beautiful and natural effect. Once you're done
applying the color, it's time to add some darker
tones using intense blue and ultramarine blue while
applying the colors. We will use a straight
line brush technique. As you can see on the screen, you can see the paper
is still wet and all the breast
strokes that we are applying God blended so easily, which creates so beautiful
effect in the painting. Now it's time to add some characteristics to
the background. For this, we will apply
some darker tones of ulta, marine blue at some other places to bring the light
areas in focus. Now I'm making some
small adjustment in colors to blend them when
the paper is still wet. Friends, let's make some
trees to make a tree. First we will make a leaf shape. We will divide this
leaf shape into small parts by making
some horizontal lines. On these horizontal lines, we will make the leaves of
the tree, as you can see, ferns. We have completed
dividing the tree shape. Now let's add some tree leaves. While adding the tree leaves, we will add them in
a criss cross shape as you can see on the screen. This vertical line
in the middle is the main trunk and the
horizontal lines are the branches the
following the tree trunk, we will make them shorter at the bottom and wider
in the middle. Now, I'm using a brush
in place of a marker. Now, with this
brush, we will use the same crisscross
method to draw the trees. The mixture which I'm
using is of burn sienna, which is the brown mix with
intense blue and crimson red. While painting the tree leaves, you can make them little
wider and dense in the middle where the
branches amid the trunk. You can see how beautifully
we have completed drawing the tree using simple leaf
shape as a reference. The top portion of
the tree is crucial. Let's see how we can
draw that more accurate. Using the same technique as already discussed. We will use these small crosses and interconnect them
to form the tree shape. Friends, I hope you
have understood the basic technique to draw this beautiful night
sky background and reshape. Let's quickly jump onto our
next part where we will use these same techniques
to paint our masterpiece.
4. Aurora Borealis Northen Lights Part 1: Hello everyone. Welcome back. In this part, we will paint a beautiful, starry
Northern lights. Before we start, let's quickly
apply the masking tape. This masking tape
prevents the paper from buckling and keeps
the paper straight. It also helps in
getting clear edges and boundaries while applying the masking tape. Try to keep half of it on the paper and the other
half on the board. Once you are done applying
the masking tape, we will draw the sketch. For drawing the sketch,
I am using an HP pencil. The HP pencils are less darker, which helps getting
clear sketches with less lead on the paper. Here I'm drawing
a horizontal line to separate the
land and the sky. Now I'm drawing
some vertical lines to draw the tree trunks. Now let's use a
needed eraser to make the sketch light and
remove any extra lead. Once you are done, we will start our painting with a number four. Let's apply water to all the required areas
to make the paper wet. You can apply drops of water
the same way I am doing, and then spread it
over the paper. Once you finish with
applying of water, we will start with the
application of paints. Now let's mix the mixture of lemon yellow and viridian green. Now you can apply the
paint the same way I am doing for the sky which
is close to the ground. We will apply
horizontal strokes. For the sky which is at the top. We will apply the
vertical paint strokes. Now let's apply a little
bit of more lemon yellow. Now it's time to add
some darker tones. For this, I'm mixing ultramarine
blue to the mixture. And then we will apply, basically we have mixed three colors for
this darker shade. It's ultramarine blue mixed with idian green and lemon yellow. We will try to cover
all the unpainted areas of the sky using this mixture. Now you can bring
variation in color by adding more of Viridian
green, as you can see. Now I'm picking up some
of the colors to get the white areas for this, I'm using a damp brush. Now let's mix
ultramarine blue with crimson red to get
some dark color. Let's apply this
mixture of color at the top and at the corners. While applying paint, we will use horizontal
brush strokes. As you can see, you can see the areas where
we haven't applied. The paint looks more vibrant. Let's paint some more
horizontal and vertical strokes to draw the northern lights here. I'm continuously adjusting the paint to make the
background look more appealing. Now it's time to make the
background look more dark. For this, let's mix intense
blue with crimson red. And then we will apply
it at the corners. This paint need to be applied when the
paper is still wet. You can see I'm
continuously using the vertical paint strokes
to blend the colors. The mixture which I'm using is intense blue mixed
with crimson red. This is the reason the paint is looking a little
bit blue in color because the amount of intense blue is more
than the crimson red. Now let's paint the ground for this half mixed lemon
yellow with viridian green. You can see I'm applying a
very light wash of this color. Now let's make it dark by adding some more
pigments of color. Let's apply some ultramarine
blue mixed with an green. We will apply this color tone to the area which
is close to us, as you can see on the screen. Let's add few dark strokes
of paint to add the shadows. For this, I'm using
the mixture of ultramarine blue mixed
with Viridian green. You can also add some
perspective lines. The way I have added this will add a sense of
distance to the painting. Adding this dark color also helps in adding the
texture to the painting. Friends, we have completed drawing the sky and the ground, now let's make it dry
using a hair dryer. In the next part, we will draw some more trees and add
texture to the painting. Let's jump onto our next
part, and I see you there.
5. Aurora Borealis Northen Lights Part 2: Hello everyone. Welcome to the second part of
this painting video. In this part, we will draw the trees and add some details. Let's start with the
rigger, brush number four. For the trees, I am mixing
intense blue with crimson red. Now this mixture
is blue in color as we have not added
burn sienna to it. While pending the
tree leaves try to keep the autonomy
of its straight. Following the pencil
line below here. I'm following the same
criss cross technique that we have learned earlier. Let's draw the
trunk first so that the tree shape remains
straight as I'm moving down, while painting the trees, try to keep them
thinner at the edges and thicker as we move
inward towards the trunk. Here I'm using the mix of criss cross technique
and dot technique. In dot technique, we just have
to interconnect the dots. You can see the tree leaves are thin and sharp at the edges. Let's mix some more intense
blue with crimson red. You can see how I'm connecting the small dots and crosses
to form the tree leaves. You just have to do the same. Here I have placed some of the tree leaves
close to the trunk, which gave me an idea
on how shall I start. Let's make the tree leaves a
little dense in the middle, close to the tree trunk. Also, let's draw the tree
trunk a little wider. Here I'm using the mixture of intense blue mixed
with crimson red. We have completed
painting the first tree, Now let's paint the second one, which is at the
back of the first. If you feel this is a
little challenging, then you don't have to draw this tree which is
behind the first. Rather you draw the tree
which is close to this. But I hope you can
easily do this. As I'm showing you how to draw, you can see our tree is looking more dense as we
have two trees here. But still, our trees are
looking good in shape because we have followed the
same technique to draw this. Now let's mix some
more intense blue with crimson red to draw other trees. These trees will be small in size as they are a little far, but the technique will
be same to draw them. Here I'm using the same brush and technique to
draw these trees. Here I'm placing some
small dots so that my tree sheep remains straight as I move down
painting the tree leaves. Let's quickly paint this tree the same way we
did the first one. You must have noticed
that the tree leaves tends to get shorter at
the top and at the base. Now let's draw the tree trunk. We've completed our third tree
now let's paint some more. Here I'm drawing the
trunk of the tree first. As you can see, this will keep my tree straight once I start
painting the tree leaves. For this, I'm using the same
rigger brush number four. This is a synthetic hair brush. Now let's quickly draw this tree using the
same technique. Now let's paint some more
trees which are far. Now I'm painting a tree which is a little bigger than
the smallest one. For painting this tree, I'm drawing the trunk first and then I will proceed
with the leaves. You can see we are
painting the trees to fill all the gaps and our painting
started looking better. For some of the trees where we want to show the leaves
a little darker, you can just use the mixture of intense blue mixed
with crimson, red, and burn Siena, the trees
which are close to us. We will draw them bigger in size compared to the ones
which are away from us. Now let's quickly draw
the trunk of the tree. It's time to paint some trees at the horizon so that the sky and the ground
looks separated. For painting this
tree, I'm using the same mixture of intense
blue mixed with crimson red. While painting, these
trees try to make their base a little wider
and connected to the ground. At this part, I'm adding
some more trees to fill the gap if you want, you can also fill this gap by adding the trees to the horizon. This will serve you the same. Now let's add some
more small trees and connect them to the
trees at the horizon. It's time to add some more
trees at the horizon. For painting. These trees
just make them sharper at the top with a wide base
connecting to the ground. Let's add some more trees to make the painting look complete. It's time to add shadows
and details to the ground. For this, we will
start by applying a layer of water
to wet the paper. It's very important
to apply water to the surface only
when the paper is completely dry or else the already applied
paint would come out. The color we have
applied is a mixture of crimson red mixed with intense
blue and viridian green. We have used this color to add shadows and texture
to the ground. Also, we can add
perspective lines showing the direction
of the path. We have applied the shadows
to all the required areas. Now let's make it dry
using a hair dryer. Here, I'm making my paper
completely before I make stars. Because for making stars I'm using a Shakura
white gel pen. Which can create in
if my paper is still wet or the ink would not flow
because of the damp paper. Now let's add some stars
using Shakura White gel Pen. While drawing the stars, you don't have to make
all of them of same size. You can bring variation in them by making some of them a
little bigger than the others. Now let's add some shadows
to the tree trunks. For this, I'm using
a dilute mixture of intense blue
mixed with crimson, red, and viridian green. You can see the paint
is very dilute. We will apply the shadows
to all the tree trunks. Now I'm applying the
shadows to the snow to add a sense of
path or the roadway. For this, I'm using a mixture of intense blue mixed
with crimson red. Now let's add some texture
to the ground for this. We will use the same mixture. It's time to make some
small adjustment here and there to make the final
painting look complete. For the adjustments I'm
using the same mixture. Now let's add some small grasses and dry branches to the ground. For this, I'm using the
same mixture of blue. You can see with each breast stroke A adding life
to the painting. But we will not overdo it or else the painting will
lose its interest. Let's add some final
touches before we remove the masking tape and
reveal the final result. Now I'm adding a shooting star using a white Shakura gel pen. It's time to remove the
masking tape. Let's remove it. While removing the masking tape, try to pull it outward so that you don't end up tearing
down your paper. Friends, we have come to an
end of this painting session. I hope you've enjoyed
the painting process. If you have any
doubt or queries, you can ask me in
the discussion tab. And don't forget to share your painting in the
project section. Now let's jump
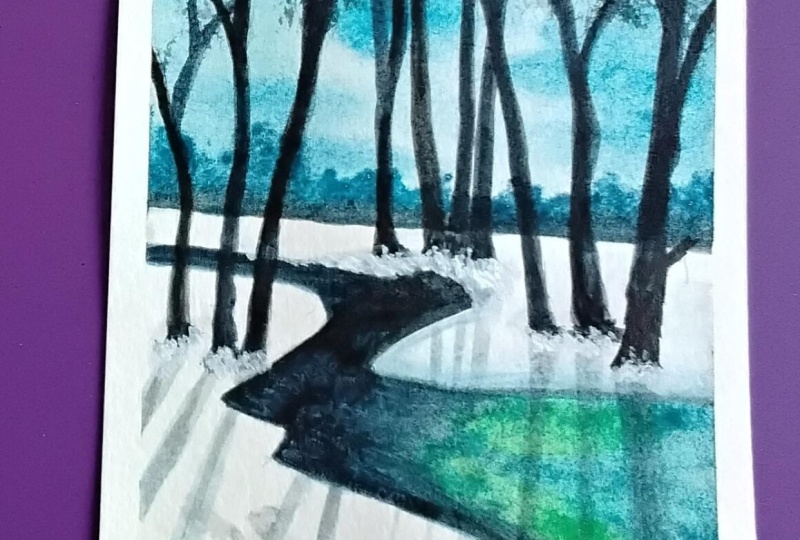
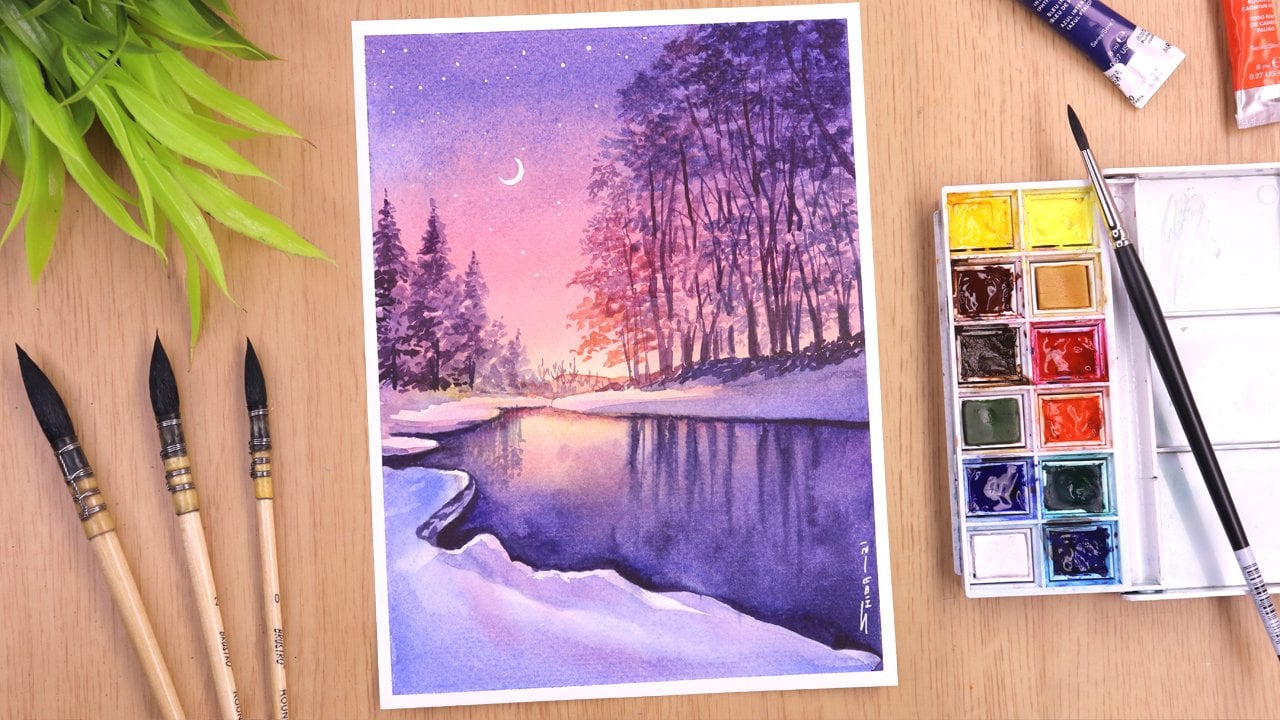
onto our next part and draw our second painting, which is the moonlight night
sky, and I see you there.
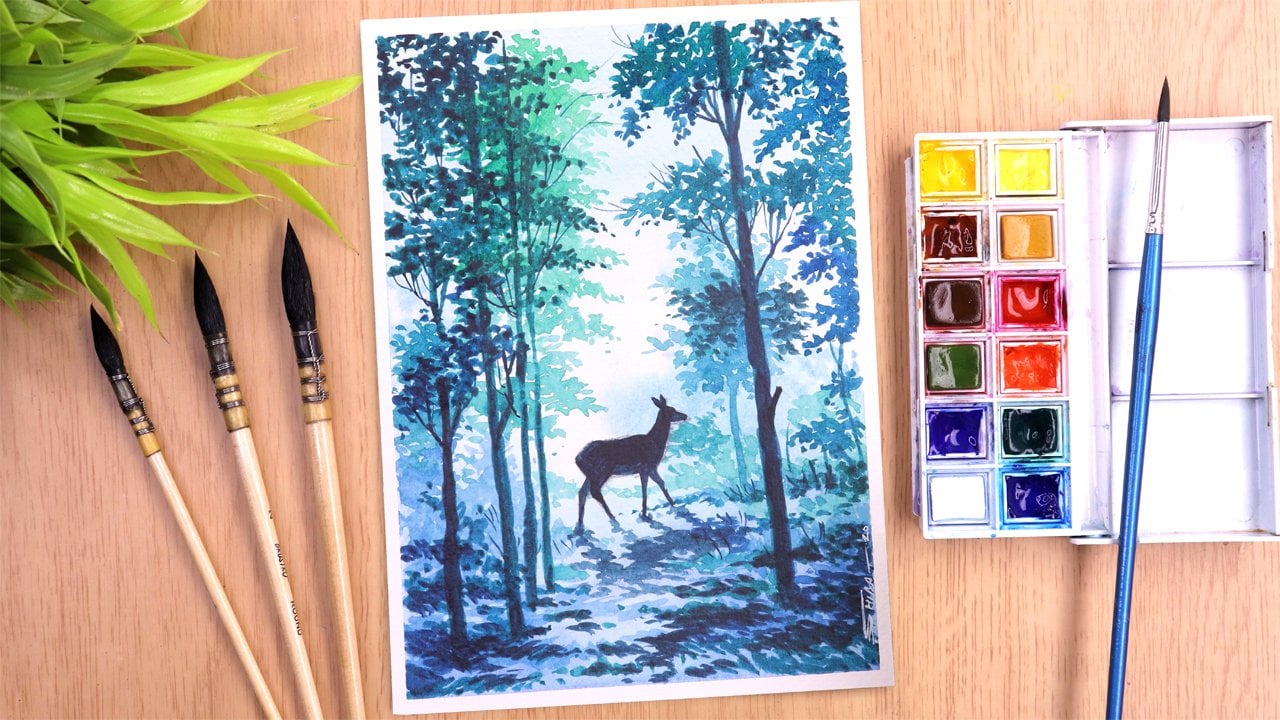
6. Tips and Techniques Moonlight Night Sky: Hello everyone. Welcome to the basics of moonlight
night sky painting. In this part, we will
see the basic techniques required to draw this
beautiful night sky. Before we start, let's discuss
the background colors. To draw the background, we basically require three colors. Before we paint, let's draw
some small rectangles. Here I'm using a pen marker to draw the rectangles
to place our colors. The first color we required
is a Varidian green. You can make them lighter at the corners to check
their intensity. The second color which I'm
using is ultramarine blue. The third color is intense
blue for the darker areas. If you don't have intense blue, you can also use Persian
blue or indigo blue. Friends, we have placed
all the three colors. Now let's see how we can use these colors to paint
the background. Before we paint, let's quickly apply water to make
the paper wet. We will not apply water to the portion where we
will draw the moon. Let's mix Viridian green
with ultramarine blue. For the first wash, you can see the paint
started running as soon as it touches
the wet paper. You can see now the portion
where we haven't applied, the water remains unpainted. This will be our moon. Let's make the sky area a
little darker at the corners, which is away from the moon. Just add a little bit of
intense blue to the mixture of viridian green and ultramarine blue to make it a little darker. Now let's take a little
more intense blue and mix it with Viridian green. We will use this mixture to draw the trees which
are in the dark. We will draw these trees
when the paper is still wet because this will give us
some soft feathered leaves. The technique I used to paint the background is a
wet on wet technique. Friends, we have completed painting the
beautiful background. Now let's make the painting
dry using a hair dryer. Now let's see how we can make this beautiful
flowing water stream. Here I'm using a
pen marker to draw, but you can use pencil as well. We have covered
the basic shape of the water stream.
Now let's paint it. We will use the same technique to paint this water stream. First, we will wet
the required portion. And then we will
apply paints so that our paint flues will also. This will give us more time to work as it will not
get dry up quickly. For the paints, I'm using idian green mixed
with intense blue. Here, I'm starting from the top, which is the darkest portion. You can see that the colors
started flowing down, so we will allow them to flow. Now let's start with
the Viridian green to show the reflection of
the moon in the water. Now we will interconnect the
green with the mixture of Viridian green and intense blue to provide smooth
blend of colors. For the lower portion
of the stream, we will use the
same dark mixture, mixture of Viridian
green and intense blue. Now let's make them a little
darker at the corners. We will use the same mixture of intense blue and Varidian green. But the amount of pigments
will be more here. I have not drawn the tree
reflections in the water. I will draw them once my
paper is about to dry. We are done with the
background and the stream. Now let's see how we can
pin the snow on the land. Let's throw the
sheep of the land. You can see that the sheep
is steeper at the edges. Let's throw the same way as we are seeing in the
reference image. The portion in the middle is the stream which we
have already practiced. Now let's supply water first to all the required areas
to paint the snow. We will use a dilute mixture
of ultramarine blue. While applying the
ultramarine blue, we will apply the
colors at the edges where it touches
the flowing stream, and slowly blend it upward. For this, the paper
should be wet. As you reach at the top, you can reduce the
amount of paint and water using the table cloth. You can see how
beautifully we have drawn this Using
the same technique, you can draw other
snow surfaces as well. Now let's supply water. And then we will apply
ultramarine blue at the edges and blend it upward when the
paper is still wet. Let's quickly complete
painting these snow surfaces. Friends, we have completed
drawing the snow, now let's see how we
can draw the trees. For painting these winter trees, we will require three colors. The colors are crimson, red, intense blue, and burn
sienna, which is the brown. We will mix these three colors
in the same proportion. This will give you a color
which is very close to black. Let me show you this
color on the paper, you can see it's looking
like a paints gray. You can see that this
paint is gray and diluted, which means that this
color is close to black. For the areas where you
want to use the black, you can use this color. Now what we can do, we
can add a little bit of intense blue to make this black mixture a
little blue in color. Which we can use to draw the tree reflections in
the flowing water stream. This natural black color we
can use to paint the trees. Let's use this
blue black mixture to draw the tree
reflections in the water. You can see the paint
is flowing a little bit because the
paper is still wet. You can note that the
right time to add reflection is just when
the paper is about to dry. So that the paint does not flow quickly and it does not
goes out of control. Now let's paint the trees. For this, I'm using
mob brush number zero. I'm using this brush to make some thick trunks and branches. If you want to draw
some thin branches, you can use liner
or a rigger brush. Now let's use a rigger
brush number four. We will draw the trees making the upward gesture so that
the base gets more paint. As we move up, the paint
becomes lesser and lesser, giving us some thin
trunks and branches. Let's paint some more trees. For this, I'm using the same mixture which
is close to pins. This mixture
consists of crimson, red, intense blue
and burn sienna. Let's quickly paint
some more trees. Now we can draw these same trees on the background
which we have painted. Now this will give
you an idea about how the trees will look when we
will paint the actual piece. Now let's quickly paint these dark birds trees
against the moonlight. If we have painted the trees. Now let's see how we
can paint the shadows. For painting the shadows, you can use a dilute
mixture of ridian green mixed with ultramarine
blue or intense blue. We will draw the shadows a little curved and not straight, as this will give
an appearance of the round edges formed
because of the snow. While painting the shadows, we will try to maintain the perspectives so
that they look natural. Now let's see how we can
paint the tree leaves. For this, we can use a more brush or any
other round brush. We'll try to make the brush tape a little uneven
but with care. And then use it to
draw the leaves. You can get some
beautiful leaves once you dab your brush straight
down on the paper. Now using this simple technique of dabbing the
brush on the paper, we'll give you some
beautiful texture. In our final painting, we will use this same technique
to draw the tree leaves. This same dab technique
to paint the tree leaves. Let's quickly add some more
tree leaves and branches. So friends, these
are all techniques required to draw the
moonlight night sky. I hope you have
understood now let's jump onto a next part and paint the masterpiece using
these simple techniques.
7. Moonlight Night Sky Painting Part 1: Hello everyone, Welcome back. In this part we will draw
Moonlight night sky painting. Before we start, let's quickly
apply the masking tape. While applying the masking tape, try to keep half of it on the paper and the other
half stick to the board. It's good to use a masking tape before we start the painting, because at the end
of the painting, you will get a clear
boundary and edges. Let's quickly apply masking tape on all the four corners
of the painting. Friends, we have completed
applying the masking tape. Now it's time to draw. For drawing the sketch,
I'm using an HB pencil. You can use HB
pencil of any brand. The brand does not matter. Let's draw a straight
horizontal line. This line will be
the horizontal line. Now let's draw the
flowing water stream. For this, we will draw
two lines in a Zt shape, keeping a gap in between where we will draw
the flowing water. We have drawn the
first a Z shape line. Now let's draw the second one. Drawing this, you
can keep the shape a little round to show the accommodation of
snow in certain areas. Here you can go back and forth and readjust the shape as per your choice for erasing
I'm using a needed eraser. The benefits of using a
needed eraser is that you can convert it into any shape
according to your requirement, and then we can erase it. We have completed
drawing the shape of the land close
to the water stream for the moon. We will draw a small round shape at the top right side,
as you can see. But here I have removed the
moon using a needed eraser. Because while doing
the water color, I will create the moon directly by leaving
that area unpainted. Now let's paint
some vertical lines to position the trees. I have also drawn some small pencil lines to indicate the branches
of the trees. Once a sketch is done, we will make it
light by removing any extra lead from the
paper using a needed eraser. To remove any extra lead, you can just dab the
needed eraser onto the paper and it will
pull any extra lead. Let's paint the sky first. For this, I'm starting with
a mob brush number four. First, we will apply water to the sky and then we will
start with the colors. I have applied drops of water. Now I'm spreading
it with a brush, leaving the areas for the moon unpainted while applying water. Don't be hard on the paper, just apply general
strokes of water. For applying the colors, we will use the same
mob brush number four. Now let's start with the. For the colors, I'm
using a mixture of Viridian green mixed with intense blue and
ultramarine blue. You can see that I've applied the paint close to the moon, but the moon remains
unpainted because we haven't applied
water to that area. Now let's apply the paint
to all the unpainted area. It's time to adjust the shape of the moon as it does not
have a perfect round shape. Now I'm adding a little
bit of ultramarine blue to the mixture so that
I get a darker tone. And then we will
apply it to the sky. Let's increase the amount of ultramarine blue in the mixture,
and then we will apply. Upper left side of the
paper to show that this area is dark and it is
away from the moonlight. It's time to add some trees. For this, I'm using
the mixture of ultramarine blue mixed
with dian green. While painting the trees, we will keep the paint a little saturated with less
amount of water in it. That while painting the trees, the paint does not
flow here and there. When we keep our
paint saturated, the paint flows but it flows
in a controlled manner. Let's take a little
more pigment of ultramarine blue mixed
with Viridian green. We will use this to
add details like tree leaves and all the portions where we want the tree
to look more dark. So friends, we have
completed painting the sky as well as the
trees at the distant. Now let's paint the
flowing water stream. For painting the
flowing water stream, I'm using the same
mixture of color, that is ultramarine blue
mixed with Viridian green. Let's supply water to
the flowing stream and then we will apply paint. I've added a little
bit of radian green while applying water
to the flowing stream. So that this gives an idea of the area where I'm
applying the water. Let's apply water to the
remaining portion of the water stream
while applying water. If the amount of water is more, you can remove that by
using a dam brush and put the excess water on the paper towel or
any cotton cloth. Let's apply a wash
of Viridian green just below the moon to show
the moon's a reflection. Now let's mix
Viridian green with ultramarine blue and apply it to the remaining portion
of the water stream. You can see the paint is quite dark with a good
amount of pigments. So this actually helps
the paint to move slow and gives us more time to direct them to the
required areas. Now let's blend the colors together to create a
beautiful transition. Now let's mix a
little wit of more ultramarine blue mixed
with Viridian green. And apply this
color at the end of the water stream to create
beautiful blend of colors. To blend the paint this way, using vertical and
horizontal strokes, you need to use the
tip of the brush. So friends, we have completed the first part of the painting. Now let's make it dry
using a hair dryer. I hope you've enjoyed
the painting process now let's move on
to our next part, where we will be adding some trees and their
reflection in the water.
8. Moonlight Night Sky Painting Part 2: Hello everyone. Welcome to the second part of Moonlight
Night Sky painting. Let's start with the
painting of the trees first. For this, I'm using
the color mixture of intense blue
mixed with crimson, red and burn sienna. While painting the trees, we will try to keep
the consistency of the paint a little
thick and saturated. Here, I'm drawing the base
of the trunk first to get the understanding of the
placement of the trees. Then we will draw
the entire tree. Now I'm using a
brush number four, which is a rigger, brush
with the long hairs. Now this brush is
quite thin and it will help me to get some sharp
lines and branches. Let's draw some more
trees and branches here. I'm trying to keep the sheep
a little different from each other so that the painting looks more natural
and appealing. It will be easy for
you if you try to draw the tree from
the base and then move the line upward so that the excess paint
remains at the base. And as you move up, you will get very sharp
lines of the tree trunk. You can see further branches. Also, I'm using the
same technique, started by painting them from below and then moving upward. Let's add some more
trees on the left side. You can see I'm using the
same technique to draw them while painting the tree leaves. Try to keep them little
different from each other. Some of them will be thin and others will be
a little thick. A beautiful balance of this will add beauty to your painting. Let's quickly draw
some more trees. It's time to paint
some branches. For this, I'm using
the same mixture of crimson red mixed with
intense glue and burn sienna. Before we start, let's adjust the trunk of some of the
trees by making them a little thicker for the branches. I'm using the same technique, starting them from
the base of the trunk and then moving upward,
making them thin. Let's paint some more branches. I hope you have understood the process of
painting these trees. Now let's quickly add some more branches before
we draw the tree leaves, you can see while
painting the branches, I'm interconnecting them
to show the natural flow. Now let's add some more trees
using the same mixture. It's time to add some branches at the top using
the same rigger. Brush number four. Let's add the shape of the tree
trunk at the base. I'm making it a little thicker. Now let's paint the shadow of the trees in the flowing water. For this, I'm using
the same mixture of intense blue mixed with
vidian green and crimson red. But the amount of intense blue will be more Before we start, let's paint the area first. Here I'm using a more brush. Number four, it's very important to be
gentle while applying water or else the
paint will come out. Now let's mix a mixture of intense blue mixed with crimson, red, and viridian green. Now let's start from the top, from the darkest part. As we move down, we will apply our colors in a more dilute
form by adding more water. At this portion, you
can see my color is looking a little
bit dilute because the amount of water
in the mixture is increased as we have already applied the
water to make the paper. We now you can see
that the colors are flowing well and we
can easily blend them. Now it's time to use a
rigger brush number four, to draw some tree leaves. For this, I'm using
a mixture of intense blue mixed with viridian
green and burn sienna. You can see I'm applying
small strokes of paint and interconnecting them to give the effect of leaves. Here I have changed
the rigger brush and now I'm using a mob brush. Try to make the tape of the
brush a little wider so that you get a wider
and un uniformed shape. Now this shape will
help you to get natural leaves once
you apply the paint. Now by doing this, you
can see that the leaves are looking more natural
and not planned. You can use both the brushes. Mob brush can be used
to cover the area fast, whereas the rigger brush can be used to draw the
leaves in detail. Now it's good if you maintain
the balance of both. Now I'm adding a little bit
of intense blue and crimson, red to the mixture to
make it a little dark. Let's use the mob brush
to draw the tree leaves. Now with a wider tip, you can cover the large
areas quite fast. You can see how quickly
we have added the leaves. If you want, you can use a rigger brush as well to
paint the leaves in detail. Now let's make some
tree leaves dark. For this, I'm using
the mixture of intense blue mixed with crimson, red, and burn sienna. Even for the branches, I'm using the same mixture while painting branches or
any straight line. It's better if we
hold our hands now, this gives us less shaky hands and helps us getting
some straight lines. Now let's clean
the palette before we start painting the
snow on the ground. For this, I'm using
a dilute mixture of ultramarine blue mixed
with Viridian green. But the amount of ultramarine
blue will be more. Let's supply water to
all the required areas. Now I'm applying the mixture of ultramarine blue at the corners. To paint the shadows, let's add some more blue. You can see that the paint
is blending so well. It's only because we
have applied the water, which is helping the paint
to flow more easily. If you want to make your
shadows look more dark, you can increase the amount
of blue at the corners. Now let's wet the area
before we apply paint. To add the shadows, I'm using the same ultramarine blue
color in dilute form. Now I'm adding a little touch of Yidian green mixed
with ultramarine blue. To increase the
contrast of the shadow, let's pan the
shadows of the tree. For this, I'm using ultramarine blue in
a very dilute form. Before we paint the shadows, let's quickly dry the painting
using our hair dryer. It's time to clean the palette before we paint the shadows. For the shadows of the tree, I'm using the mixture of ultramarine blue mixed
with viridian green. Now let's add shadows to the snow lining using
a dilute mixture. It's time to add some
more shadows of the tree. For this, I'm using
the mixture of ultramarine blue mixed
with viridian green. While painting the
shadows of the tree, we will try to run the shadow as per the round shape of
the snow on the ground. This will give an
impression of the real snow on the ground getting
wabbed with the shadow. While painting the shadows, I'm not just making
them straight, but also making them wider
as it comes close to us. Now, these shadows starts
at the base of the tree, but getting wider and wider
as it is getting away. It's only because
of the perspective. The things which are away
tends to look more narrower and the things
which are close to us looks big and separated. Let's add some more
details and shadows. Now let's paint
the reflection of the trees in the
flowing water stream. For this, I'm using the
mixture of intense blue mixed with ultramarine
blue and burnt sienna. For painting the reflections, I am painting them vertically
down as mirror images. You don't have to
be very accurate. Just try to depict the shape of the tree which you
are looking above. You can see as I
move my brush down, painting trees, strokes
become thinner, which shows the vanishing point. Now the vanishing point is
the point where the intensity of the light reflecting from
the water body decreases. At this point, we don't
actually see things. Let's draw some
more reflections. Now I'm making the reflection little faded by
applying water to it. Let's add some more broken
branches and small plants. For this, I'm using
the mixture of intense blue mixed with viridian
green and burnt sienna. Let's add shadows to the snow using the mixture of
ultramarine blue. You can see I have added
too much of water. So now I'm removing any extra
water by dabbing my rush onto the cotton cloth and then spreading the paint
to the required area. Friends, this is all
about for this class. In the next part,
we will be removing the masking tape and
revealing our painting. So let's move on to our next
part and I see you there.
9. Conclusion: Hi everyone. Welcome back. Let's quickly remove
the masking tape and reveal our painting. I hope you have enjoyed
the painting session. If you have any doubt or queries related to the painting class, you can ask me in
their discussion tab. Also, don't forget to share your paintings in
the project section. I would love to see your
work because it inspires me as well to come up with
better classes in the future. You can also rate my class
by sharing your reviews. Till then, take care and stabilized and I see
you in the next class.
 Shiba Basan, Art influencer and Content Creator