Transcripts
1. Introduction: This is watercolor,
and this is a potato. Potatoes can be made into mash. They can be made into wedges. They can be roasted, or they can be fries. It's the same with watercolor. Watercolor is an incredibly
versatile medium, but it's very easy to
get stuck into one way of using it and forget to push
it to its full potential. In this class, I share four different ways
to use watercolor. You can use it as a
pop of flat color. You can achieve stunning glens. You can create beautiful magical effects
using transparency, and you can be fun and playful through
the use of layering. Using an easy subject matter of fresh fruit or vegetables, I will show you how
to do each technique, and then we will look at how the four techniques can work
together in one painting. I'm Katherine Jennifer.
I'm an artist, designer, top teacher, and
mother of four boys. This class is aimed at
intermediate watercolorists who want to extend their use
of watercolor techniques. When you paint, you often
get into a state of flow, and you paint intuitively without consciously thinking
about what you're doing. If you want to push your
painting to the next level, it can be helpful to break down how you use the paint
and then build it back up so that your natural visual language includes a broader
range of techniques. By the end of the class,
you'll be able to paint flat, blended, transparent
and layered watercolor, and you'll be able to think more strategically about how
you use each technique, thereby broadening
your visual language as you move forward in
your painting practice. Together, we will save the world from mashed potato watercolor.
2. Project: The project for this class is to paint some fruit
or vegetables, making all four
watercolor techniques clearly visible
in your painting. The techniques are
flat color blends, transparency, and layering. Step one is to get some
actual fruit or veg. Pears are a great choice, but if you don't have pears, then whatever you've got in
your fridge will be fine. Step two is to practice
each technique a few times. I suggest that you watch the lesson on that technique
and then practice it, then watch the next lesson
and practice that one. This will enable
you to discover for yourself what works
for each technique. Step three is to do some
quick compositional sketches in which we will think about
the layout of our painting. It's important that we do this on a separate sheet of paper, not on the paper that
you're going to paint on. Once we've decided
on the composition, we will work out which
technique we're going to use for which element
in the painting. In step four, we will dive
in and do our painting, making sure that
each technique is clearly visible. Some
things to remember. This is about learning
the four techniques, although the techniques
themselves are pretty simple, putting them together into
one painting can be tricky. Bring your sense of humor, bring plenty of
self forgiveness, and don't worry if it doesn't work out well the first time. This is about breaking things down and then
building it up again, learning how to shift between
different techniques and figuring out what works well together, and what doesn't work. It's about the learning and
not about the finished piece. If you just watch the class, you will gain an appreciation of how watercolor can be used. But if you actually
do the project, you will learn for yourself
how to do each technique, which will build your confidence and you'll start to explore how you can combine
the techniques to create something that
is uniquely yours. That's where the magic
of watercolor lies. Supporting resources. If your kids have eaten
everything in your fridge, Then you're welcome to
work from my Pintrasboard, which has images of fruit on it. The link is on the screen now. In the class resources, you will also find a downloadable PDF, which is a handy visual reminder of the four different
techniques. Your finished project should be a quick photo of your finished painting
showing the four techniques. You can also share your
compositional sketches and your exercises, learning each technique
if you'd like to. I really encourage you
to share your project in the project gallery so that I can offer constructive feedback. Please add some notes about how you found
during the project, what was easy, what
was tricky so that I can tailor my feedback
in a more helpful way. If you have any questions,
feel free to ask them either in the discussions panel or inside the body
of your project. I can't wait to see
what you share.
3. Materials: Materials that you will
need for this class are some frutal age, a pencil, and some cheap printed
paper or notebook or sketchbook for your
composition or thumbnails, word coolor paints, a
watercolor sketchbook or some mid range wood color paper for practicing each technique, and some good quality d color paper for
the actual painting. I'm not going to do a
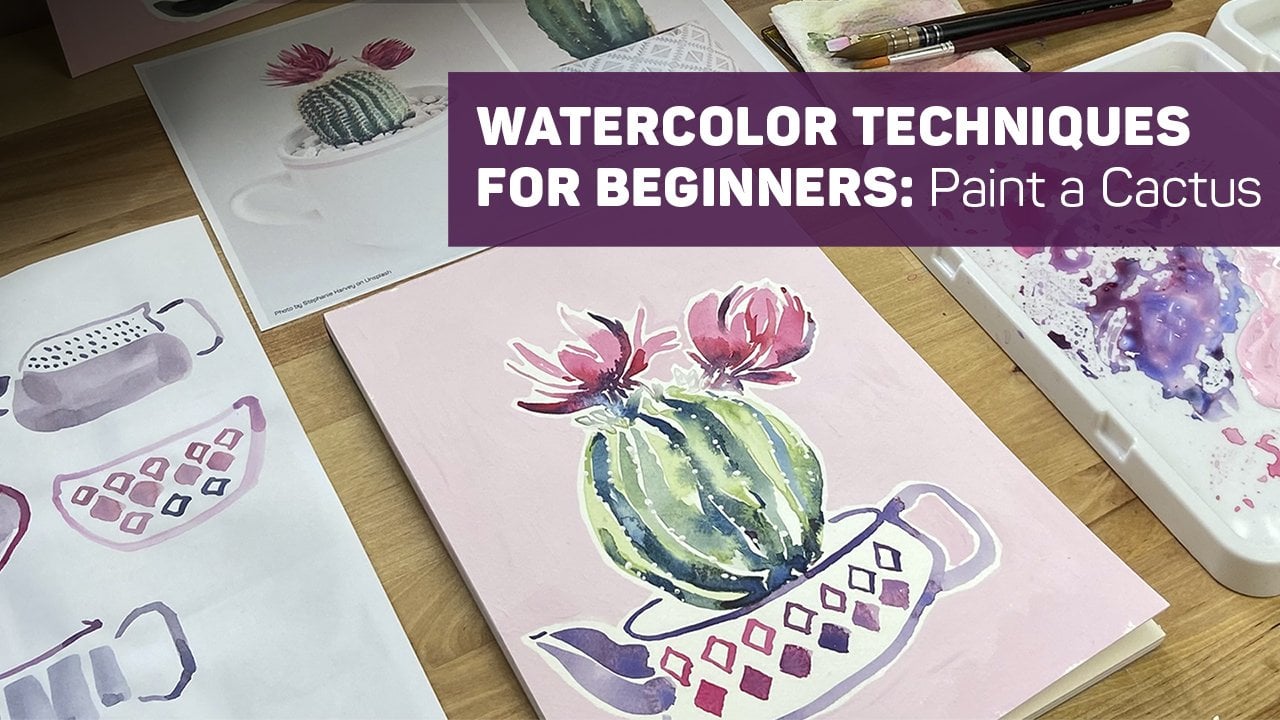
detailed explanation of d coolor paints. If you need this information, please watch my class watercolor techniques for beginners, paint a cactus, which has a detailed lesson on
wood coolor paints, brushes, palettes, et cetera. What I will say, though,
is that for this class, try to work on good
quality water color paper. You can get by with
student quality paints, but the quality of the paper
really makes a difference to how the paint soaks into the paper and what
techniques you can achieve. The best paper is archers. I use coal pressed blocks. This is expensive,
but it's beautiful to work on because it's 100% cotton and the paint just
behaves differently on archers to any other
brand that I've tried. However, if arches is
beyond your budget, then choose a mid
range paper ones I've used include the
Langford and Bockingford, and they would be
fine for this class. Also, make sure you have a large enough palette because to get these
techniques to work, you need enough space
to work the paint properly into the bristles of
your brush on your palette. I use the ceramic *******
tray from Jackson's art, but white ceramic plate
would also work fine. That's it for materials. In the next section,
we will gather some fruit to use as subject
matter. See you there.
4. Gather Some Fruit: This next part is really simple. Go and radio fridge
or fruit bowl. This just happens to be what's in our fridge
at the moment. Broccoli can be great
for practicing blends. Mushrooms are good for
practicing flat shapes. Spring onions could be
good for practicing overlapping transparent layers
using broad brush strokes. Satsumas for painting shapes and then putting
layered patterns on top and grapes are brilliant for practicing overlapping
transparent shapes. It doesn't matter
if you don't have these exact items
in your fridge. Just gather what you've got, and in the next section, we'll look at how to do
flat shapes. See you there.
5. Flat Technique: I'm not going to demonstrate
the flat technique. The aim with this is to achieve
a completely flat shape. With watercolor because of
how it works with the water, this is actually quite
difficult to achieve. The trick to achieving a flat shape in
watercolor is to have exactly the right amount of paint and water in the
bristles of brush. To start with, as you can see, I have sprayed my palette with water and everything
is nice and wet. I have also put a
very light shen of water onto my palette. And I'm going to get some
paint into my bristles. You can achieve a flat shape using thicker paint
or thinner paint. It's slightly more difficult
with thinner paint, but it is possible. What I'm doing here is
I'm working the paint into the bristles of my
brush on the palette, and this is something
you start to feel. The more you paint, the
more you get the feel for how much paint and water is
soaked up into your bristles. I can feel that it's
not quite fully soaked. I'm working it a
little bit more. The first thing is,
make sure your bristles are really well soaked
with paint and water. The second thing is when
you paint your shape, do it very quickly cover as much area as you can as quickly as possible and
then leave it alone. It's very hard to not get that little lump of
pigment at the end, but if you're quick enough, that pigment will dissolve and flow into the
rest of the paint, and that's all there is to it. So I'm soaking the pigment up into the bristles
of my brush. I'm feeling for how wet or
dry it is nice and wet, and then I'm just going
straight in to my shape, covering as much area as
possible as quickly as I can. That one had quite thick paint. I'm going to mix two colors. This is a lovely
bright lime green. If you mix in colors, try and get your mix to be well mixed so that it flows
nicely on the paper. You'll notice that I'm not
holding my brush upright, I'm holding it quite horizontal in relation to the page so that the
maximum amount of bristles are in contact
with the paper that enables me to get a big flat
shape much more quickly. It means that the pain can
flow quickly onto the paper. The little lumps that were here have flowed out into the
liquid and the same here. This one, you can see there's a bit of a lump there and there, but I'm just going to leave
it and see what happens. If you feel that your
paint brush is too dry, then you can control the
amount of water by using a spray bottle better than if you dip your brush
in your water jar. If you do this, it's
harder to control and you often end up with too
much water in your brush, whereas if you spray it, you can control
exactly how much water you're putting onto your pelt. So this one had more water and less pigment and is
therefore quite transparent. We will wait and see whether
that lump flows out. Hopefully, it will. And I'll try with one
of my darker blues. I'm taking care not to let my different shapes
touch each other. That was close,
because if they do, this pigment will run into that one and I
will get to blend. Just to recap, to
get your flat shape, make sure your color is properly mixed if you mix in
two different colors. Make sure your water and pigment have soaked up into
the brush really well. Use the brush at a nice
flat angle and paint your shape quickly
and leave it alone. Now here, I can see a
weird thing happening. It's a good idea to practice this with different colors
and you'll get to know which colors are easier and which ones are harder to
create your flat shapes with. Now, this one is not working. It's going to end up with
blooms happening here. If I come in and
try and fix it by painting over it while it's still wet, I'm probably
going to make it. But let's see. Maybe not. We'll just do that
and see what happens. Pause the video now and
have it go yourself. Try creating flat shapes
in different colors and make some notes as you go about what worked and
what didn't work. I'll see you in the next lesson where we will look at blends.
6. Blend Technique: I'm now going to demonstrate
the blend technique. This is the most natural
technique for water color. It's what it's designed for. But it still takes practice, and you can learn a lot
from experimenting with different colors and different
paint consistencies. Just to show you
quickly, these are the flat shapes now
that they are dry. The middle three have turned out really well, nice and flat. This one's got a bit
of a bloom over there, and this was the
problematic one, which actually didn't
turn out too badly, but it's got this
dark edge around it. That happens when you
have a very wet mix and the result is that
you get this hard edge. You can use that
to your advantage if that's what you're going for. Just to show you a
few other flat shapes that I've been practicing. Some have turned out
better than others. This is a really nice watery, thicker paint here.
That's a beautiful one. That's a beautiful one. You
can see that it is possible. It just takes a bit of practice. Practicing them in
different colors, different thicknesses. Once you've got that
skill under your belt, you can use that in your
paintings in a strategic way. Now we're going to
explore blends. There are lots of different
ways to create blends. But I'm just going to briefly
show you three methods. The first method
is edges touching. If I was to paint mushroom
as in the last section, and if I bring another color and I allow
the edges to touch, I will get a blend. The effect can sometimes be
quite subtle and sometimes it can be much more powerful. It all hinges on how much
water is in your mix. That yellow is a bit wetter. This blue is and you get a little blend
between the two shapes. The second method is
dropping or dragging. I I was to paint a mushroom
shape a bit like this, and I could come with
my second color. You want your second
color to be quite wet and either just drop in some color or that
nice and wet again. Do another one
This is quite wet, go back to my dark and
just drag color through. You can get some nice
blends that way. Then the third method is
the whole stroke method. So if I was to paint
a mushroom like this, half a mushroom. I want it to be nice and wet,
more wet than you think. I come in with my blue, and I just let the whole stroke touch and let it
blend on the page. This creates a really
beautiful effect and is one of my favorite
ways of creating blends. That's three different
methods of creating blends. But how do you get
those magical blends, the kind that take
your breath away. Let's explore paint to water
ratio in a bit more detail. I'm going to do
four experiments. I'm going to first explore
what happens if I mix a light colored paint with a thicker dark colored
paint and see what happens. Then I'm going to do a mix of a thinner light paint
with a thin dark paint. Then I'm going to do a
thicker light color paint with a thick dark color paint, and then thicker light
with thinner dark. I'm using an olive green, which I've chosen because it dilutes nicely into
a thin consistency, and it also thickens
up very nicely. As you can see, I'm making a
very thin paint consistency, and I'm going to roughly
use a pair shape, and I'm just going
to do a very thin Light wash of paint. I want this to be even wetter. I'm just going to
go over it again. What I hope you can see is
that it's sitting on top of the paper in a nice wet pool. Now, quite quickly,
I'm going to take a dark purple paint
straight out the pan. It's got a bit of water in it. I want it to be thick. I hope you can see, it's
quite thick almost dry. I'm going to do a
whole stroke join. The whole of my brush
was connecting with that wet, thin wet paint. I'm just going to leave
that. For the next one, I'm going to do a thin
light and a thin dark. I've got very thin light
colored paint here, going to make my pair shape. As you can see, it's sitting on top of the paper, very wet. I'm going to come in with
a very thin dark paint. To create my thin dark paint, I'm going to just
put pure water on there and just use what
was left in my brush. This is a very runny, dark same thing I'm going to
connect all the way along. It's very runny. I'm going to do that again because the
connection wasn't great. Try another one. Okay. Get a bit more water
and pigment in there. Remember that what
we're looking for is how to get breathtakingly
beautiful blends. I'm going to change the grip
on my brush that I get it as horizontal as I
can to the page, and I'm doing a
one stroke blend. I'm just going to leave
that and see what happens. For the next one, I'm going to explore a thicker
light with a thicker. I'm going to take this olive
paint, really, really thick. And you see how thick
it is in there. Using up a lot of
paint, but that's okay. That's quite thick. And I'm
going to put that down. Nice, delicious paint. Without wasting any time, I'm going to do the
same thing with my straight out the pen. You can see it's really
thick on the brush. Do a one stroke blend. And we'll see what
happens with that. For the next one,
I'm going to do a thicker light and
a thinner dark. So make my peers shape. Really sick and delicious.
Almost like go. Without wasting any
time, really Over here. Change my grip and There's hardly any
movement there because the light
paint was so thick. Going to see if I can
extend that out a bit, so it's got more to play with. Going to repeat that
one to see if I can get it a bit
more successful. Tick, color there. Maybe if I start
here with my thin so that it's got a place
to go and then do my join, my one stroke blend, I'll just leave that
and see what happens. That was fun. Over here, I've got some experiments
I did previously, and you can see
how they've dried. This was a thinner light, and thinner light with a thicker dark and it made
these beautiful blends. This was a wetter light with a thin dark and it made
these beautiful blends, both of which are beautiful
and quite breathtaking. I also did these. This was a thicker light
color with a thicker dark. And this was a thicker light
with the thicker dark. This one, the overlap
with the brush was less, and this one, I had
more brush overlap, and these are the
effects that I got. On this one, thicker light, the yellow was thick paint. The green was thinner and
wetter and I got those effects. This orange blend was this method which I was
experimenting with, and to get these
beautiful blends, the paint underneath was very wet and the paint that I
dropped in was also very wet. When I did it the first time, The paint underneath was less wet and the paint that I was
dropping in was less wet, so the pain didn't
travel quite as far. So all of these experiments
are very fun to do, and you learn a lot by actually
doing them and getting the feel yourself for what
the paint does on the paper. So pause the video now
and have it go yourself. Try different color
combinations, try different pain and
consistencies and try some with light and
dark colors together. Make notes as you go about
anything you want to remember. I'll see you in the
next lesson where we will start working
on transparency.
7. Transparent Technique: Now we're going to look at
the transparent technique. This is also something that watercolor does quite naturally, but you can get
more out of it if you use it with
conscious purpose. Before we do transparency, I just want to show
you these which have dried the three techniques. You can see some lovely
blends in here and in the, beautiful, dry
watercolor effects. I really like this. I like the paint
to equalities and the way there's a lot of
variation within a small space. Now I'm going to move
on to transparency. Transparency is
actually really easy. The secret is to have a lot of water and
very little pigment, and then to put your paint
down and leave it alone. I am going to just
get my paint ready. I've got some grapes
in front of me, and this is just to give
me some shapes to look at. I'm not actually going to try and paint a bunch of grapes. I just sometimes
find it helpful to have some visual reference
as a starting point. All I'm doing is
I'm going to paint some nice flat oval shapes. And I'm putting the paint down, letting it do its
thing on the paper. I'm leaving some gaps where I will do some
transparent overlaps. It's also fun to do
this using warm colors, and I'm going to do a
few in pinks and reds. So over here, this
pigment is too thick. So I've made a little
pool of pure water, and I'm just going
to put my pigment from there into here.
That's much better. It's all about the
consistency of the paint to get a good
transparent shape. And I'm just putting down some ovals in a
range of fun colors. Again, I'm going to
make my little pool of water add my pigment. That one is quite dark. With transparency and overlaps, it is easiest to work
from light to dark. I'm choosing my lighter
pinks to start with. I'm making a very
dilute mixture. I'm just putting down some
ovals reminiscent of grapes. I found with watercolor that reds are quite a fussy color. You can't easily mix a nice red. So if you're struggling with your palette to find
reds that you like, it might be that you
just need to invest in some other shades of red rather
than trying to mix them. I've got some initial shapes and the trick with transparency. If you're looking
for a good overlap is to let it dry completely. If it isn't completely
dry, you'll get a blend. In this instance,
that's not what I want. My paints has dried completely, and now I'm going to do a second layer where
I overlap the shapes. I'm going to choose a
slightly darker color just so that the overlap
is nice and clear. Again, I don't
want it too thick. So I still want quite a
watery mix in my brush. I'm just going to very quickly put a shape on
top of another shape. Let's darken that slightly. The important thing here is that I don't linger for too
long on the underneath shape. Because if I do, it might
lift some of the paint. So I'm just doing it
as fast as possible. Then sometimes the
transparent overlap isn't immediately apparent, but it becomes more
apparent as it dries. Go for a different hue. Also, some colors are more naturally transparent
than others. This green is
beautifully transparent, and you get to know which ones give you the best
transparencies as you practice. That's looking great. I'm going to do one
with a darker green. This one didn't come
out as a flat shape, but that's okay. That was a nice one. Okay. Trying to control that little pool of paint. I'm going to switch to my
pinks. Same thing, really. Just quickly getting one shape on top of another shape.
That was an ice one. That was beautiful. I love this orange when it's
mixed with a lot of water. It creates a really
beautiful orange shade. That's one of my favorites. Okay. That was a good one. That one had almost no pigment in it and not a lot of water, less water, and that
came out really well. This is the weirdest
bunch of grapes ever, but the point is you can see these lovely transparent
overlaps happening. That one I had too much water
and pigment in my brush, so I'm lifting out, and then I'm trying to
smooth it over. If you do too much mushing
around on your paper, you lose the definition
of the underneath shape, which is why you
want to get very quickly to the desired shape. Then I've got a couple
of very lovely, quite neon pinks, I want to try. This is Holbein
opera quinacridone, this one, and it's a
beautiful vibrant pink. Then this one is
Holbein bright rose. I'm going to give those a try. So I'm controlling the amount of water that I'm
using. Look at that. That's so fun. And
space for one here. I try not to have these
lamps. Here again. And This is the bright rose. It's not as luminous as
the Quinacridone opera. It's quite a cool pink. I'm making sure I'm going
only over the first layer of ovals that I created
because the second layer, the new ones are not dry yet. Then if you want to you can add some stalks and turn your grapes into actual
grapes, like this. You don't have to. It's just
might give you a bit of context for what if you've
painted, something like that. Obviously, I'm just playing around and that step
isn't necessary. But the point of this
is just to show you that if you use the
paints very dilute, you can overlap your
shapes and it adds a beautiful extra dimension
to your watercolor paintings. One last thing is that
you can also have a very transparent shape and
then drop in some blends. I'll just show you
that very quickly. Let's say I have a really
big shape like this. If I get my timing
exactly right, I can drop in some other
colors and the blends are very beautiful because
the underneath paint is so wet and so transparent that the blends
can flow really beautifully. Pause the video now and do some practicing of the
transparent technique. Remember that you need
hardly any pigment in your water if you're going for something
really transparent. And it's important
that you let it dry fully before you try
any kind of overlap. When you do make an overlap, do it really quickly
without scrubbing. Otherwise, you risk reactivating
the underneath layer. If you're combining a
blend with transparency, then it's a question of getting
your timing just right. Have fun with that, and
then in the next video, we will look at
layering. See you there.
8. Layered Technique: The layer technique is simply a matter of using one
color over another color, but you can do this
with intent and use it to add a fun and playful
element to your work. As with most
watercolor paintings, it's best to work
from light to dark. If you know you're
going to use layering, paint the underneath layer in a lighter color and the layers
on top in darker colors. Just like with the
transparent technique, make sure your underneath
layers are completely dry and work quickly with your top layers, avoiding scrubbing. If you do want to have
a light pattern layer over a layer, then you can create the
pattern with ink or gouache, which is more opaque
than water color. Pause the video now and have a go at some patterned layers. Challenge yourself to try and make fun and
different patterns. You might surprise yourself if you want to make some
notes as you go along. In the next section, we
will turn our attention to composition and planning our main
painting. See you there.
9. Composition: We've got all four
techniques under our belt. The next step is to work
out how we're going to use them together
in one painting. I'm going to show
you three examples of compositions you could do. The first is a grid composition where you've basically
got things in rows. In this one, you can see
I've got flat color, I've got blends here, transparency in my grapes and a tiny little bit of
layering on my lemon. This is the easiest
composition to do when you are trying to use all the
techniques in one painting. A second type of composition you could do is a
clustered composition. My tip for this would be to have the larger elements at the bottom of the
painting or in this case, bottom and side, rather than
having large elements at the top and tiny things at the bottom because that
would feel unbalanced. Then a third type of composition is a halfway
house between the two. Here you can see,
I've started with the grid and then
I've done a cluster. The thing with this
is to think about how your eye is lead
around the page. In this instance, the
grapes leads the eye in and you go in a circular
motion and back to the grapes. You can use the
stalks of the fruit to help move the eye
around the page. This type of composition
can be more tricky and you might need to think about what's in
front and what's behind. In this instance, you can
see I've got flat color, I've got transparency
in my grapes. I've got some blends, and I've got some
layered patterns. Another thing to think
about with this type of composition is your
negative spaces. Just be aware of what
sort of shapes you are creating in the gaps
between your elements. So have a quick think about which composition you
might like to use. You could do a grid, a cluster, or a halfway house. In the next lesson, we will look at how to make compositional thumbnails.
See you there. So have a quick think now about which composition you would
like to use, either the grid, the clust or the grid
and in the next video, we will look at how to do compositional thnails.
See you there. Okay.
10. Compositional Thumbnails: Once you've decided which composition you're going to use, think about which
techniques you're going to use for which element
of your painting. Then do some quick thumbnails on a separate sheet
of paper just to think through which
fruit you want to use and where you
want to place them. I'll take you
through my thinking process from when I did this. I started out really not
knowing what I wanted to do. I thought some pairs. I tried a few different
things and I realized over here was a pretty
bad, negative space. But I liked this grouping of these two pairs side
by side like that. I took that element
and did it again here. In this one, I realized that although a grouping of
five elements is good, they were too big on
my page. I want more. This is pairs, pairs pears,
strawberries, and grapes. So with that information, I thought, let me do
a few more elements. So I kept my pear duo. I added a strawberry, I thought I'll add an orange, a couple more strawberries, and then here I
would have a pear on its side lying down,
and then my grapes. I like this composition
because it's basically a grid. But I'm also
breaking the grid by having two elements
at the bottom, the pair on its side
and the grapes. I thought about which
ones were where, if I have a pair here, this is a pair, two pairs, then that's balanced
in the composition. Then with that composition in
mind, I drew it out again, and I thought about where
to put each technique. With the techniques, you
don't want to end up with all your pattern elements on one side because that
would feel unbalanced. The eye is going to go first to the most
pattern elements. I've put my pattern in
this pair at the bottom. That will contrast nicely with transparency in my
grapes over here. Then I just shared out the rest. If I have a flat color here, I'll have a blend
here in my orange. If I've got a pattern here, it'll be nicely balanced
if I have a pattern there, and then two more
blends in there. I hope this just
gives you an idea of how to do a
compositional thumbnail and then how to plan which technique you're going
to use for which element. Okay. Obviously, when I
do the actual painting, it can all change depending
on how the painting goes. But this is that in between
step from I've got fruit, I want to do techniques to
actually making the painting. Once you've decided on
your painting plan, take a quick photo of your composition of
thumbnails and the chosen one and upload
them into your project. To do this, click
on Create Project. You can upload this as your cover image for the
moment if you want to or you can just ignore
the cover image and upload this into the
body of the project. So we've planned our
composition and we know which techniques we're going
to use for which elements. In the next lesson, we
will have a quick think about a color plan for our
painting. I'll see you there.
11. Choosing Your Color Palette: It's useful to
plan the colors in the painting so that when we're actually
doing the painting, we're not thinking about color, and we can focus
on the techniques. With these kind of paintings, I have found that using harmonious colors
seems to work best, and you can think about
how you key your colors. So for example, this is
a very high key piece. Everything is very bright, and this one is more
muted and less high key. You can also use color as an element of surprise
in your work. For example, this pink
grape is very unexpected, but adds just that little
extra zinc to a painting. If you want to you can create your colors
on your palette, ready to go like this. I've chosen some
high key colors, fairly soft colors that
are all harmonious. Here I've done a couple of
little color plans just using my technique plan
and composition plan, and then just thinking
about where I might like to place each color. I don't usually do this when I actually just
paint intuitively. But if you want to
add the step in, you can and sometimes
it can help with the flow when you
come to do your painting. So now we have a color
plan, a composition, and we know which techniques
we're going to use where, which means we are ready to
dive into our main painting. This is where it gets
really interesting, a little bit challenging
and a lot of fun. I'll see you in the next lesson.
12. Painting Part 1: So now I'm just going to dive
in and enjoy some painting. I've got quite a good selection of fruit and veg in front of me, which I'm going to use
just as inspiration, and I'm going to keep
my plan in mind, but I'm also thinking
I might need to add in a few extra shapes
as we go along. So I'm going to start
with a pair over here and I'm going to make this one just
a nice flat color. This one, I'm actually
going to paint upside down. I'm going to have orange. As I paint, I'm thinking about all the shapes that
are on my page, and I'm very conscious of what my negative spaces are
also turning into. I think for this one. Bring in a nice blend. I'm also conscious to try
and balance my colors. So I'm going to make
this a pretty yellow. This is turning into
quite a nice lend on the page, as is that one. You see how I'm
letting the shapes hag each other and echo each other. Let's go to you. That's working out beautifully. It's a very funny shape. This here is quite blended
in, so I'm just going to. I need to add a bit
more depth to this. That's looking good so far. Okay, lovely. And then
the last bit will be some grapes for my transparency. Coming off here. There we go. This
is looking great. Before it all dries completely, I'm just going to increase the value of some of the
darks and to do that, I'm just going to mix up a dark. I'm using a green and a maroon. I just want to
darken some of this. Might be too late,
really. There we go. That is looking great. So now we need to let the
paint dry completely. In the next lesson, we will add the transparent elements and
start to work on our layers. See you there.
13. Painting Part 2: So, the painting has
dried completely, and now we're going to add the transparent
layers as well as start working on patent layers. This is also a good moment
to look at what we've got and work out how we
can balance the painting. For example, this side has got these two
beautiful blends, but it's quite
dark on this side. I'm noticing that I'll need to add some dark elements
on this side. Perhaps I'll add that
through pattern. Color wise, we've got some
orange here, some orange here. I might need to bring in
some more orange or some of that tone somewhere on this corner so that
it's balanced. I might also bring
in a little element of surprise. We'll
see how it goes. The first thing
I'm going to do is add some stalks to my peers, and I'm going to
do some of them in dark and some in a
fun orange color. I'm fully going to
get this one to overlap like that because it's
linking these two shapes. I want to be a little
bit darker. Lovely. Then this one, I'm going to give just a little stalk in here, just like that, which is, again, making use of
that negative space. This one, I'm going to give it a stalk coming out
of here going this way. That's fine. That's leading the eye back into the picture. Then for this one,
I'm going to do the same thing and just have
a little stalk like that. The next thing I'm
going to do is add a fun pattern element to
this big pair at the bottom. Okay, that's looking great. That pattern there
has given it a bit of a retro vibe through the orangey brown colors,
which is quite fun. Now I'm feeling like this bit up here could do
with some stripes. They are not perfect
stripes. That's okay. I've turned it this
way so that I get the end of my stripe this
side for these ones. So it's a little bit balanced. It's very hard to not get the thicker blob at the
end of your stroke, and this is a way
to balance that. Now we can come in and do the transparency
on top of the grapes. I've found that this works if the hue is slightly
different for the overlap. One there. One there. Lovely. This I can feel is too runny. Not enough pigment,
too much water. And as I said in the
earlier sections, it's all about the feel
of it in the bristles. I think we might
do one more thing and that is add a little
element of surprise. And I'm thinking the element
of surprise can go here, and perhaps it could
be another pink grape. Lovely. I could go on and
do add more detail. But for the purposes
of this class, I'm going to stop here. Hopefully, what you've
seen is that it's possible to use the four different ways of using water color
in one painting. Obviously, the way
I've done it here was very considered and controlled. And when you come to do your
own painting, hopefully, it becomes more fluid
and more automatic. But this is enough just to show that you can
have flat color, you can have blends, you can have transparency, and you can have layered
patterns all in one painting. This is a really super fun and great way to practice all
those four techniques. It's always a good idea to
look at your painting and think what parts
went well and what parts didn't go quite so well because each painting will
have both those things. In this painting,
what went well, I liked the kiwi,
that went well. I liked the retro pair, and I like the way the
variation of the color in the pattern has
brought it to life. The flat color on this Satsuma, is very nice and I like the way this blend works and
also flows into that. The flat color on that
pair worked very well. I think the surprise element of the pink works quite nicely and it bounces off the bright orange stalk
that is there and there. Compositionally
that's quite nice. What didn't work quite so well. This overlap here wasn't great, but it's still drying, so it might come out a
little bit better. The structure of my grapes
was a bit of a mess. Next time I do that, I might think more carefully about I structure the grapes. But you can see the overlaps and that's what I
was aiming for. Then the stripes on this
pair, they're okay, but I didn't really like way the paint was heavy on one side
and light on the other. However, I think by
changing the direction, I managed to control that. I don't think it's too
much of a problem. Look at your own painting
and find the bits that are good and take
those bits forward to the next painting and learn from the bits that are bad
and take that forward, but don't let the bad
bits get you down because every painting has
good bits and bad bits, and that is how you improve. And the only way you can improve
is by keeping on trying. At this point, please
also upload your project into the project gallery
and add some notes about how you found the process
so that I can tailor my feedback in a more
constructive and personal way. In the next lesson, we will wrap up what we've
learned. See you there.
14. Conclusion: That brings us to the
end of the class. I hope you enjoyed it, and I hope you now feel well equipped to extend how you use
watercolor in your own work. Doing it like this,
consciously step by step is a bit like learning scales
and alpgios on the piano. It's an important
building block which then gets used in your pieces
without you even noticing it. The harder your pieces get, the more your excellent scales and alpgio technique gets used. With painting by consciously
working on the techniques, you are developing and
broadening your visual language, which you will start to incorporate into your paintings
without even noticing. That's when your work
becomes uniquely yours and your paintings take on their own beautiful complexity. We looked at how to use watercolor as a flat element,
how to make it blend, the beauty and magic
of transparency, and the fun and playful things
you can do with layering. We made compositional
thumbnails and planned where we would use each technique
and our painting. We thought about color
and how we can use it strategically to create mood or as an element of surprise. We bravely had a go at combining all these
techniques into one painting. That's quite a lot to
have done in one class. Take a moment to congratulate yourself for what
you've achieved. If your painting didn't work out quite as well
as you'd hoped, don't let it get you down. Look for what you do
like in that painting and then take that little bit forward into your next painting. Or color takes time to master, and the only way to
improve is to try again and again and again. The joy and the magic lies in the trying in the do in the exploring and
the discovering. Be gentle with yourself. Please share your project. There's a confidence that
comes from being seen and it inspires other people
to share that projects. It also means I can offer
personalized feedback. If you would like even
more personal input, you can now book a one to one
session with me either for creative coaching or a
personalized painting lesson. If you enjoy this class, I'd be really grateful if you could leave a review
on skill share. If you go to the review section and look slightly
down on the left, there's a button that
says leave a review. It only takes a minute and I'd really appreciate
the feedback. And don't forget to follow me on Skill Share so that you receive notifications and updates when I release another or when
I run and give away. If you'd like to connect
with me on Instagram, I am at Katherine
Jennifer Designs. I'd love to see there. If you enjoy this class, take out my other classes
in School Share, there are classes on
drawing, painting, and overcoming blocks
to creativity. Until next time,
have the painting, and thanks for watching.
 Catherine Jennifer, Artist, Art Educator, Designer