Transcripts
1. Introduction: [MUSIC] Which color is a beast? It is the most difficult of
all the painting mediums. Those beautiful pans of bright, enticing colors actually harbor a personality that is fussy, temperamental, and
downright wayward. Welcome to my class.
I'm Catherine Jennifer, an artist and surface pattern designer living in Oxford, UK. I've loved painting
since I was at school, but the truth is, I've avoided watercolor
painting my entire life. When I was at university, I wanted to be a proper painter, so I focused on oil on canvas. After university, I moved
on to working in water mixable oils and
then later acrylics. To my mind, watercolor was
boring, dull, and difficult. Every time I tried,
it failed hopelessly. But in recent years, I started to see amazing
work done in watercolor. I resolved to spend
at least 20 minutes a day for an entire year
working with watercolor. What I discovered was that I
had to throw out everything I've learned about oils and acrylics and start from scratch. In this class, I have distilled
what I've learned over the year into a few
core principles or with thoughts which I
hope you will find helpful. Then you can draw on when you do your own watercolor
work so that you can experience for
yourself the pure joy that working with this amazing, annoying, mesmerizing,
magical, difficult, wonderful, medium can provide.
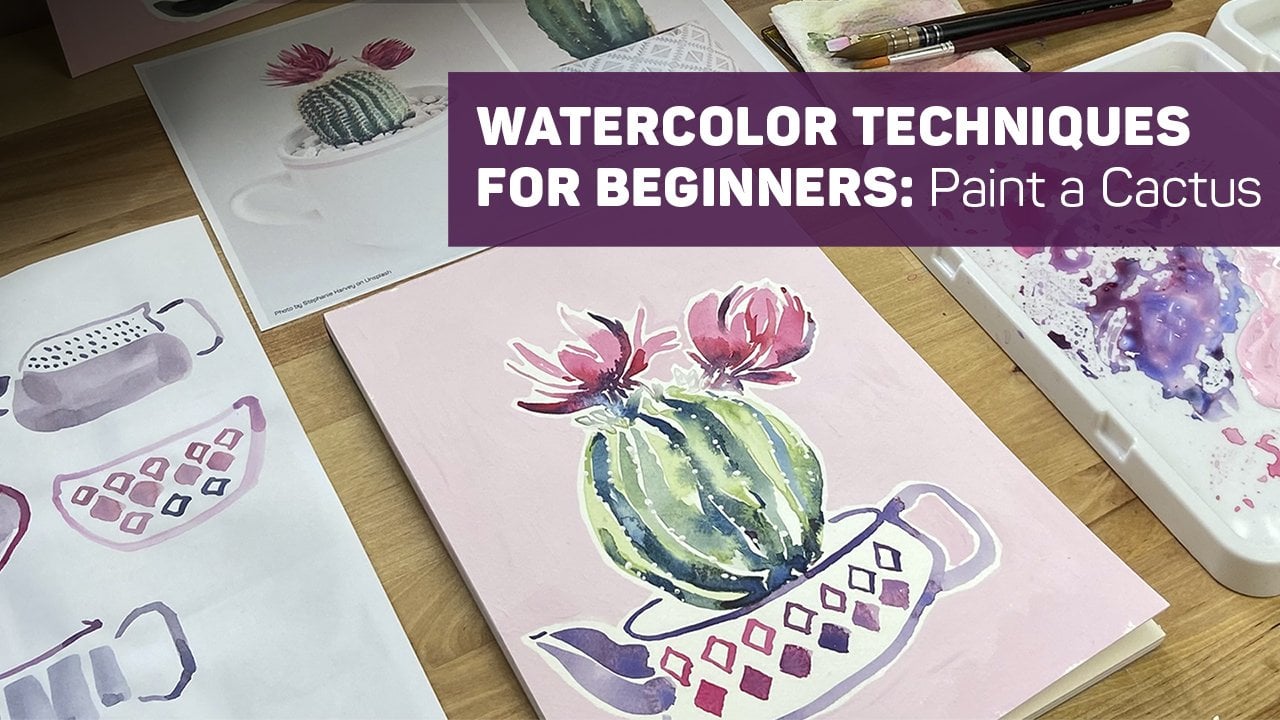
2. Project: [MUSIC] The project for this class is to try a few
warm up exercises, which I will demonstrate. These will help you
to embed some of the watercolor principles
into your own art-making. Then the main part
of the project is to paint a
torch-ginger flower. These flowers are easy
to paint and they enable you to practice all the
principles in one painting. If you look in the
resources section, you will find a PDF, which is a summary of the principles. This is for you to stick up on the wall near where you work, to help you remember
the different things. I chose this project because watercolor is really difficult. But if you learn these principles and you
practice and try them out, I hope you will discover the absolute joy that working with watercolor
can give you. To set yourself up for
a successful project, I would suggest that you
have a space ready to work, get your paints out, get some watercolor paper, and then just dive in without
too much thinking about it. As your final project, I would encourage you to upload some of the
exercises you've done, as well as your torch-ginger
flower painting. By the end of the
class, you should have a really good grasp of what a wonderful high maintenance friend
watercolor can be. [MUSIC] The high maintenance factor, I promise you, it's worth it. I can't wait to see
what you share.
3. Materials: [MUSIC] Materials that you will
need for the class are obviously some watercolors. I will be demonstrating with these Kuretake Gansai Tambi, which colors which
are just divine. I also like to use
some tube watercolors. My favorite ones are Holbein, which are really
beautifully intense. I have a few Winsor & Newton, and Daniel Smith's also great. You don't need to go out and buy super expensive watercolors. If you've got some, just have
a go with what you've got. But I have discovered
that with watercolor, you do get what you pay for. The artist quality ones have a much higher
concentration of pigment and give you much brighter,
more vibrant colors. You will also need
some watercolor paper. My absolute favorite brand
is Arches, cold pressed. I really like working on
watercolor blocks like this. They glue together at the sides, which means you
don't need to bother with stretching the
paper before you paint. Then when you finish, you just slide a letter opener
underneath to get it out. You don't have to go and
get Arches paper any, watercolor paper will do. Just make sure the
thickness is 300 grams, which is 140 pounds. Otherwise you will get buckling. For brushes, you will need
a range of different sizes. My favorite brushes to
use are these ones. This big one is sip to gold, and it's a size 14. It comes to a
really sharp point. This is a round brush. The next one I use
most often is this. It's been so used, I can't even tell
you what it is. Then I've got a number 10 round. I've also got this which
is a rigger brush, which is great for
really fine lines. Then I recently
purchased this one, which I'm still getting used to. It's a silver black velvet
brush and it's a 3/4 inch. If you do purchase brushes, just make sure you are
purchasing a watercolor brush. The other thing you'll
need is a palette. You can use cheap watercolor
palettes like this. This one actually seals. It's a good travel palette. I've got two on the go. It's useful to note
down what you've squeezed into the different
pans because you will forget. You can also use the palette that comes
with your watercolors. But I absolutely
love my porcelain, which is block, which is this. It's smooth and really easy to clean and it gives
me lots of space for mixing, which I really like. But again, you don't
need any of that stuff. You can just start with
whatever you've got. In the next section, we'll
start with the principles. See you there. [MUSIC]
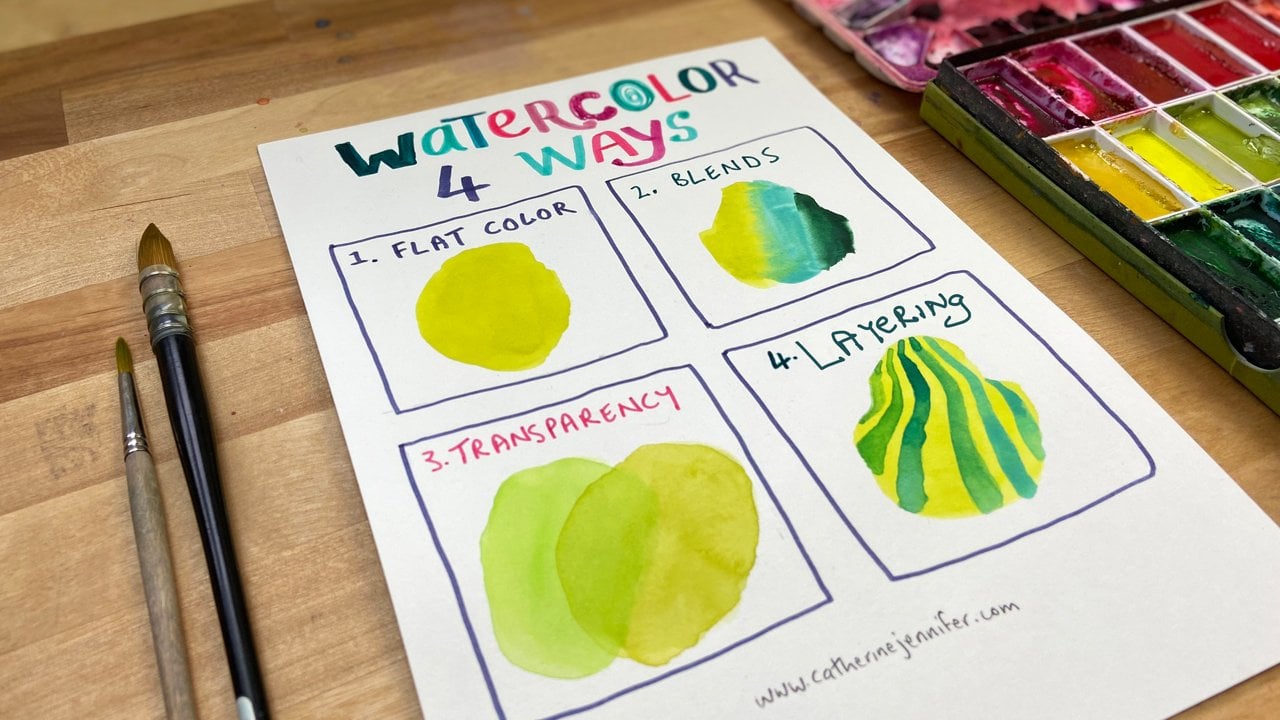
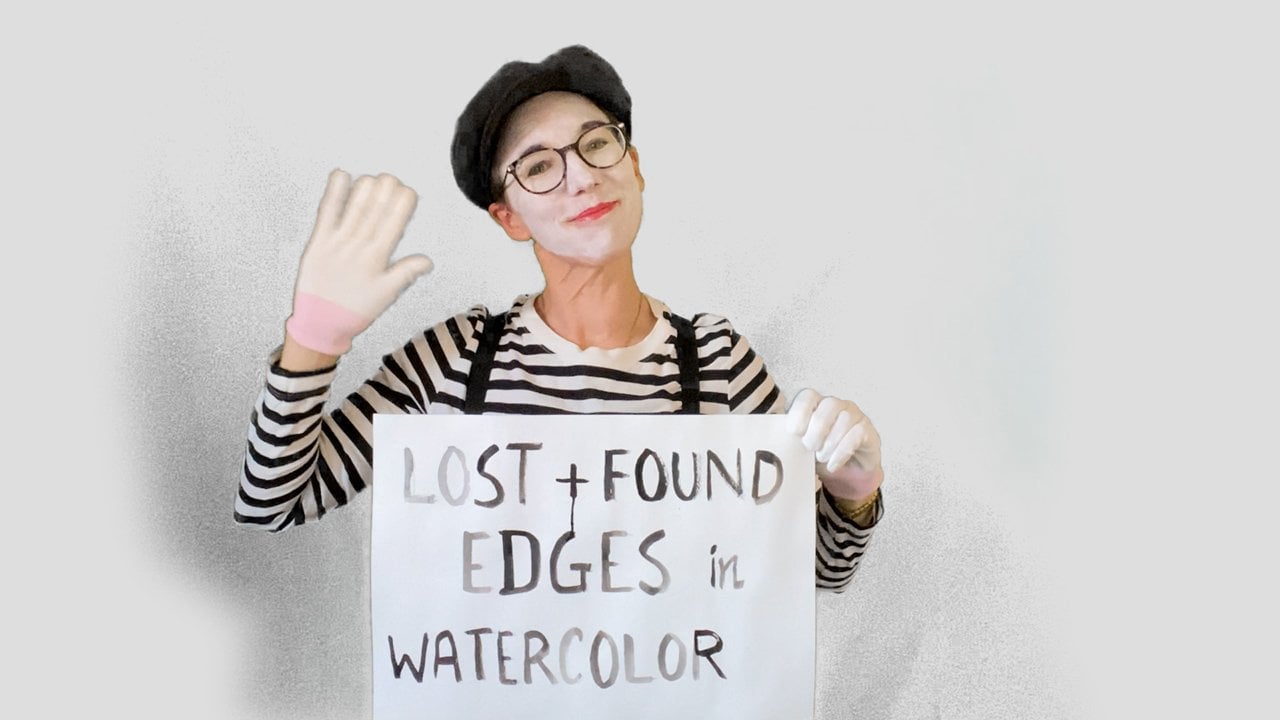
4. Principles: [MUSIC] Principle number 1 is watercolor is not like
housework, don't scrub. Whereas with other mediums
like oils and acrylics, you can layer the paint, you can slap it on, scrape
it off, work into it. The more you work, the more you build up
the layers of paint. With watercolor it's
completely different. With watercolor the
harder you try, the worse it gets. You actually have to learn
to really lean in to the unexpected qualities
of watercolor and learn how to put on your
mark and leave it alone. It's really hard to do
but don't worry because the principles coming
up are going to show you how to get the best
out of this medium. Principle number 2, watercolor is like a ballerina on the opening
night of Swan Lake. A ballerina goes on point, she leaps, she
twirls, she's heavy, and then light as a feather, all in one swift
movement and that is how your paintbrush needs to be when you work
with watercolor. Your paintbrush needs
to dance on the page. In one mark, you might
go from heavy to light, you might twist or turn
but you've got to know where you're going to start and where your movement
is going to end. Your action needs to be light
and quick yet disciplined. In the demonstration, I will show you some ways
to practice this. But if you think of your paintbrush as a ballerina
dancing on the page, you'll be halfway there. Principle number 3, watercolor is like football. When you watch a football
game and the players just suddenly gel and they pass
the ball up the field, each player only
touching the ball once, it's the same with watercolor. When I try and get into the mindset of painting
with watercolor, I try to bring up the thought of one touch football and think
one touch for each strike. It's similar to the
don't scrub principle, but the one touch
also particularly applies to the use of
color and to blends. Watercolor loves it when
you let the colors blend on the page and all you need is one touch between two colors
to get this to happen. You can also drop one
color into another color. Again, it's the tiniest
little touch is all you need and the magic just
happens on the page. So far we've got watercolor is not like
housework, don't scrub. Watercolor is like a ballerina, let your paintbrush
dance on the page and watercolor is like football, one touch is all you need. The fourth principle
is watercolor is like a newborn baby or I can speak from
experience newborn twins. Timing is everything. With a newborn baby, you have to both
anticipate what it's going to need but also watch, observe, and then react to what it does need and it's
the same with watercolor. One of the things I love
about watercolor is that it dries so
quickly on the page, which means you have
to work really fast. One of the ways I like
to work is to have a few things going on the page, but I've got always keep in mind how close to dry each thing is, knowing that I may
want to come in with another color to get
some blends going or knowing that I want it to get dry so that I can come back in with another layer on top
of a different color. I'll demonstrate some of this in a little while but for now, just remember, watercolor
is like a newborn baby. Timing is everything and getting the timing right just
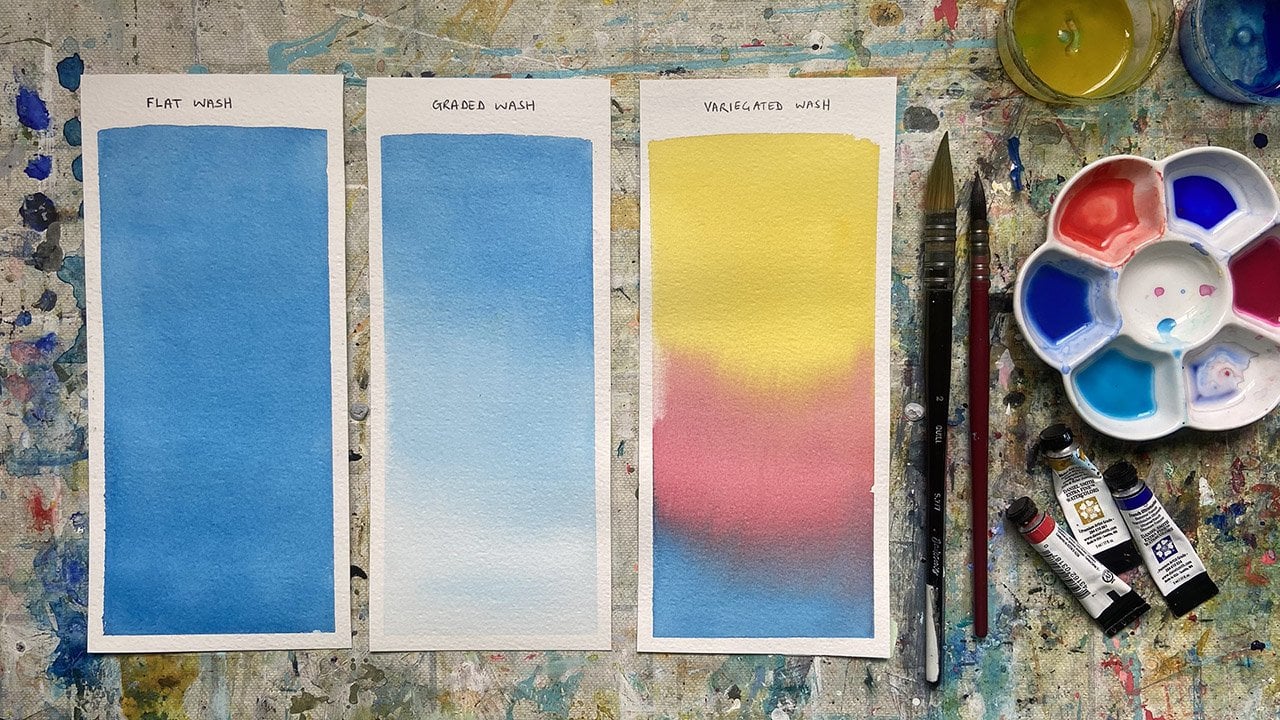
comes with practice. Principle number 5 watercolor
is like [NOISE] curry. With a curry, the intensity
of spice can vary from mild like Korma to super
hot like a Vindaloo. That's the range of intensity. But the viscosity, the
runniness has to be right. Just because you
have a mild curry doesn't mean you want
it to be so runny, it just drains off the folk and it's
same with watercolor. The consistency needs
to stay the same but the intensity of color is what you change and it's
not the other way round. When I first started
working with watercolor, if I wanted a light color I would put in way
too much water. Finally I've tweaked
that actually the amount of water is
to say the same to have the right fluidity but the
amount of pigment that I add needs to change depending on whether
I want beautiful, transparent washes or really vibrant, intense, bright colors. I'll show you some
practice exercises for this in the next section. But if you can just remember that watercolor is like
a curry and if you can get the intensity
and the viscosity, the paint to water ratio then you will be filled with
water colorful joy. Principle number 6 is that white is to watercolor like
oxygen to humans. When I say white, I mean
the white of the page. I think it's because watercolor is such a
transparent medium that your painting really
starts to zing if you allow little bits of white to show
through on the page. That's all, easy. Those are my principle. I hope
you found that memorable. Go ahead and download the PDF from the resources section and stick it up where you work. In in the next
section we'll have a go at practicing
some exercises to help embed those ideas and then we will have a go at painting
some torch ginger flowers. See you there. [NOISE]
5. Demonstration: The project for this class is to paint a beautiful
torch ginger flower. I've put a selection of torch ginger flowers into
the resources section, and you are welcome
to work from these. I've also put versions of the same flower in different
colors into the folder because it's fun
to paint them in different colors and it gives you an easy
way to practice. Before we start
painting our flower, I'm going to show you a few
warm-up strokes you can do. They are all good
ways for you to embed the principles
into your mark-making. The first principle was
watercolor is not like housework, and there's actually
nothing you can do to practice this other than put a big sign-up
where you work that says don't scrub as a reminder. The second principle was that watercolor is like a ballerina. Let your paintbrush
dance across the page. A good way to warm
up and practice this is to do a few strokes. I'm taking one of my favorite pinks from
my Kuretake paints. Think about where
you're going to start, where you're going to finish, and be purposeful yet
elegant in your stroke. Think about the
weight as you do it. I'm going to start lightly
and then I go heavy, and then I'm going to go light. I'm going to do another one. Let me use a bit of red. While you're doing it, while you're doing
these practice strokes, you can get the feel
for your brush. You can get the amount of water on your brush to
the right consistency. Then let's do another stroke. Thinking of dancing on the
page, light, heavy, light. It's just getting a feel for that movement, that
purposeful action. I like to warm up by
doing a few leaves. I quite like doing this in
one of my favorite blues, which is this indigo. If I'm going to
paint some leaves and I'm thinking like a dancer, I'm going to do a stem. That didn't come out too well. Light, heavy, light.
That's quite nice. Light, heavy, light. Light, heavy, light. All of this is great, just a great way to warm up and get ready for your painting. It's also a way to start getting your colors ready that you
know you want to paint with. You can try going in
different directions. You can also use
different brushes. This is a brush I
bought recently, and I'm still getting used to how it works
and how it feels. It holds a lot of
water, which is nice. I'm going to try another leaf. This brush is great for
large areas of color. By twisting it, you get
different angles on your leaves, which can give you a
nice sense of movement. The third watercolor principle was that watercolor
is like football. One touch is all you need. This relates both to the
stroke, in other words, one touch per stroke, as well as to blending color. If I want to drop some color in, let's do another leaf. Now if I want to blend color, I can take a contrasting color. I'm going to take some of
this beautiful yellow. If I drop some in there, literally one touch
is all you need. You can let the paint do
the work on the paper. Anytime you think of watercolor
being like football, think of one touch
is all you need, one touch per stroke. For color blending, often, one touch is enough, sometimes you want to load
it a little bit more. The fourth principle was that watercolor is
like a newborn baby. Timing is everything. Timing is really
important when you are letting your colors
blend on the page. This here is almost
completely dry. If I go into it with
a darker color, because it's almost dry, my colors are not
blending there. It's just something I
need to be aware of. If I want them to blend, I need to be quicker
with my timing. If it is completely dry, then you can have fun going
over the top in other colors. Because it's completely dry, now I can come over the top and I can start adding detail. Now in that bit, it wasn't completely dry. I'm getting that blue to fit. That is what I mean when I
say timing is everything. You've got to know how
wet your paint is on the page and react according to what effect
you're trying to achieve. The fifth principle was that
watercolor is like a curry. Intensity is everything. This applies to the
paint-to-water ratio. The best way that
I've found to learn this principle was to
paint eucalyptus leaves. I'm going to work
with this photo as reference material and I'm
going to paint a few leaves. This is brilliant as
a warm-up exercise, as well as a way of practicing
your paint-to-water ratio. I'm starting here with
just water on my palette. I'm going to take quite a
lot of my indigo paint. I know that I actually
want to paint these leaves very,
very translucent. So I'm going to
wash my brush and now I'm going to make
another pool of water here. I'm going to add a tiny bit
of the pigment to that. Now, can you see
that the size of the water is the same, these two blobs of water? They're the same
size and they've got roughly the same
amount of water in, but the amount of pigment
in each one is different. That is what I mean when I say the viscosity has
got to be right, and then you add the
pigment according to how translucent you
want your leaves to be. To practice translucency,
the curry principle, we're just going to make
some single strokes. Now that came out
almost invisible. I'm going to add a
little more pigment. It's always better to
start off with too little and then add more because
you can always add more, but it's not so
easy to take away. There's my first leaf
and it's lovely. Now I can feel that I've not got quite
enough water there. It's going to take
a bit more pigment. This control of the
pigment-to-water ratio is the key to
watercolor painting. I'm going to just paint a lot of very relaxed marks to
get these leaves down. Each time I might vary
the amount of pigment. I'm going to use a thinner brush and make
a stem coming down here. Make a stem here. It's super relaxing to
paint this kind of leaf. When you want to
learn transparency, I found this to be
the best practice exercise out of all of them. That was a nice one. Someone coming down here. I'm purposefully using
a big brush and I want to get lovely fluid strokes. What I'm going to do
is let this layer dry completely and then once I
know it's completely dry, I'm going to come back in and paint over and that will
demonstrate the principle. Now we're going to go on to painting our torch
ginger flower. I'm going to choose an image. This is a beautiful one. I'm going to use my biggest
brush and I'm going to start on the central bit with
all the overlapping leaves. What are they? Petals, I guess. This is a great way to start
because you literally just start drawing little shapes. If you want to you can sketch but I hardly ever sketch mainly because I find that
sketching makes me tense when I
come to painting. I find that I'm much freer and more spontaneous
if I don't sketch. But if you find it's just too terrifying to
paint without a sketch, by all means do a
little pencil sketch. Keep it really light and
use a really hard pencil like 4h or 3h so that you can easily
erase the pencil lance. I'm preparing my pinks. I want to get some variety of tone into my centerpieces so I'm going to do a few of
these and I just want to keep it super loose and fun. That's the main thing. Keep
it super loose and fun. This torch ginger flower is a
really good one to practice the watercolor principles
because you can practice all of them
in one painting. As you can see I'm
leaving little white gaps between the petals and that is the sixth principle which allows the
painting to breathe. I like to get a
variation of pinks into my middles and all the time I'm reminding myself
to remember about dancing. Don't get too stiff. Don't get tensed, just relax, loosen up, have fun
and enjoy the process. One thing about
watercolor is you can't always control
what happens and if you know that then you
must give yourself license to make paintings that aren't
what you hoped they would be. It's all part of learning
how to watercolor. Now I'm going to
start doing some of the bigger petals that are
lower down and so for this, I'm keeping in mind the
football principle, which is one touch
and one stroke. I'm going to do one
stroke and leave it and by doing that I'm getting a nice variation of tone
through my one stroke. I'm going to do
another one stroke. I know where I want to start. I know I want to finish, so I'm going to just go
for it and then leave it. Want to get a bit more red in. One stroke there. You can go from the bottom
up or from the top down. Wherever it's generally heavier is where you should
generally start. So I've started at the
bottom and pulled up because the weight of the petal is actually
at the bottom. Another one here. That's sometimes
quite hard to get your brush to go in
the right direction. I feel like I've got
enough of these petals. Just going to pop
another one in here. I'm not too worried about
photographic accuracy, because that's not why
I'm painting this. I want to get some nice effects. That's why I'm painting it. Now I'm going to start on
these lovely big petals. For that, now I want to
start with my light pink. As a general rule
with watercolor, it's always good to paint
from light to dark. I found that blends work better when you add dark to light. We're going to start
with these big petals. Now we want one
confident stroke. This is the football principle. We're going to come
start here and just do one really big
confidence stroke. Beautiful. Then that's not quite the right shape so
I'm just going to shape the top and then
again here we go at one touch coming in and
boom, beautiful petal. I'm controlling the amount
of water on my brush. I'm just going loosely for the shape of this lovely flower and I'm thinking of
ballerinas dancing. It's really quite therapeutic
painting in this way. Let's have a slight
variation of color. I can't actually see
many petals at the back. I started this one a little
bit low on the page. But that's okay. I'm just going to
come around here. You can see lovely
movement in here. Now timing. Before it's too
late I want to put more dark colors in so
we need to work fast. We need to not stress
and we just want to get some of these
marks in, like that. Here we've got a
shape like that. Like that and like that. Now, this is the
fourth principle. The newborn baby principle. Timing is everything. I want to come into
my flower with some deep reds and I
want to do it while it's still wet. I was too late. That's okay. What we can
do is we can add water. There I was perfectly in time. I'm going to just bring a bit of water in with a bit of pigment. Well, yucky dirty brush. I'm going to bring a bit of water and pigment into this one. Now my pinks got all discolored. I'm going to clean up
before I carry on. It's really important to keep your colors as pure as possible. I always use two jars of water. One is for the initial wash so I have a dirty jar
and a clean jar and I first wash in the
dirty jar and then I wash a second time
in the clean jar. By going over that with
a wet brush and a bit of pigment in it I've created
an interesting blend. Now I've got to work
super fast because everything is drying. I'm
going to come in here. We want to get some
variation so I'm going to change to a different red. Some a bit of this one.
Well, that's nice. I'm going to try and get
an even deeper tone. This is really all it takes to paint these beautiful flowers. These clean strokes and
confidence to go for it. Now just to add some interest
and alternative color, I'm going to again with the timing and with the football
principle of one touch, I'm going to just drop in. It's too much there, a few
other colors because it adds a lot of interest
and actually if you look carefully at the photograph, you will see there are
other colors in there. There are touches of yellow. I'm letting the magic
happen on the page. This is a lovely blend
happening there. How are we doing? Let's add
a little bit more here. I like to mix up my
oranges and reds. It's fun just to drop in bits of color and see what happens. I find with watercolor that quite often a single
layer isn't quite enough but you've
got to be super careful that you don't
overwork your painting. It is so easy to overwork
a watercolor painting. I'm going to just give an
indication of a stem down here. That's it. To make the whole
thing a little more unified, I'm just going to drop in
tiny bits of green here, just so that there's a suggestion of green
in some of the leaves, just to make it hang
together nicely. Now with the timing, I want to put a tiny bit of
dark green on that stem, but I know it's too soon. I'm going to wait a few minutes. I'll keep going with what
I'm doing here. There we go. Always stop before
you overwork it. Now, the stem is a
little bit drier. I'm going to come in
just with a hint of dark there. That's it. That is a demonstration
of how to paint a torch ginger flower. Now, I'm going to
come back to my, you can look at these
leaves and I know that everything is
completely dry. I'm going to go over them. It was another layer. I'm trying to achieve
transparency. Now, I put too much water
on my palette there. I immediately felt
it was too much. I'm using my paper towel here to take a bit
of water away. I need to start mixing again to get that
consistency right. Working on a bushes
palette like this, I find really works well because you've
got a lot of space for mixing and it's
really easy to clean. I'm now going back to my
eucalyptus photograph to use as inspiration. There's lots of
beautiful overlapping. There, you can see some
of the transparency. I didn't have quite
enough water on my brush, so I've actually got
a dry brush effect, which I wasn't intending to get, but I quite like it. What can we do here? We can
go down and overlap here. It's this overlapping magic that no other paint
has this quality. Learning how to work with it in watercolor is really rewarding. I want to slightly tinge
my paint with green. This is not always successful, so it's an exercise
you can come back to again and again,
and practice. That was a good one. That was a perfect one and you can
see the transparency. It's like blend
modes in Photoshop, like multiply or screen, and you can actually
do it by hand, which is pretty
cool, and one more. Here, my timing wasn't right. This leaf was still wet. I drew over it and now
they've smooshed together. But once they dry, that might create some
interesting effects as well. That shows you what I mean when I talk about
the curry principle. Adding your pigment to your water rather than
the other way round. Thinking about your
intensity of color and it's basically learning how to manage your paint
to water ratio. I'm going to put
one more stem down here just because
I'm having fun. I'm going to come in
with another leaf here. I want a little more. Let us see if I can
get one more overlap. I've done really nicely. Let me come down from here. Yes, that was a good one, and I can see very clearly
what is underneath. This is completely
dry under there. I'm trying to blend the
stem with the leaf. I'm going to paint
another torch ginger, this time, I'm going to
switch to a different color. For this painting, I'm going to work from
another photograph. I've changed the colors
of these in Photoshop. If you are doing a painting that is using a specific
color palette, then using the hue and saturation tool in Photoshop
is a really great way to see the subject you want to paint in the colors
that you want to use. I want to paint this in these
lovely blues and greens. I'm preparing my paint on my palette and I'm trying to get it to the right consistency. Again, I'm going to start
with the centerpieces. This time, I'm going
to go a little bit higher on my page. I'm going to just
have fun putting in these little petal
things with these blue. It's not quite so easy to vary the blues because I
don't have as many. I'm going to do a
little palette mixing of my blues and my purples
just to get some variation. Off we go again. I'm
taking great care to leave white gaps in-between so that
my painting can breathe. That's looking nice. I'm remembering to
think like a dancer, let my paint brush be light on the page and just have
fun and enjoy it, that's the main thing. Let's get back to my blues here. I want to do some slightly bigger marks as I come to these petals
that are further down. I want to start introducing
some of my green. Watercolors are very
thirsty paints. You have to wet them more often
than you think. Let's have a go
at some of these. I'm thinking of the
football principle. One touch, one
stroke, and leave it. I've inadvertently
started painting with a dark instead
of a lighter shade. I'm going to go back
to my light blue. I'm purposefully making
this blue quite intense, quite heavily pigmented, because I want my painting to be quite vibrant and
not wishy-washy. Here, you can see I
did dark and then I blended light over and it works, but it's just not quite as effective as doing it
the other way round. This next petal actually
want quite a lot of water. I'm coming here; one movement, that was nice. This one here. One movement, one petal coming down here. Get a bit more pigment. I don't want to put too many
things on the page because I don't want them to dry before
I have managed to blend. I'm going to stop with that one. Let's just put one up here. I'm going to change
color, and I want to come in with some of my greens. I'm going to come down here. I just want to get all of this
in before it gets too dry. Remember to let the paint
do the work on the page. One touch is all you need. Timing is everything. A few more petals up here and I want to just get some of this to join at the bottom. There we go. These leaves
are really fun to paint. You don't need a lot of time, you can have a go in
about five or 10 minutes, and I hope you have fun with it. I'm just going to switch over
to a smaller brush to get the specific and precise
shapes that I want here. As a general rule, I try to use the biggest possible brush for the task that I'm
trying to achieve. Because then I do less marks and the few
marks, the better. This is already dried, which I didn't really want
to happen, but never mind. Let's just wet it slightly. I'm going to come back in here, just with a slightly
darker color just to anchor and color my
flower a little bit. I love that purple. Let that blend on the page. Just going to bring
that down a bit. There we go. This here
has blended a lot. The paint was quite wet
when I did the blend, and I actually preferred
it how it looked a few minutes ago,
but that's okay. I'm just going to see what happens if I come
in with a little bit of this dark purple to add
a bit more contrast. Yeah, that's looking nice. For this one, I'm just going to do the stem
in a blue green. This one. That's it. I hope you've enjoyed watching
how I paint these flowers, and I hope you will
have a go yourself, download the pictures from the resources section
and just dive in. I hope you have fun.
6. Conclusion: [MUSIC] That's it. I hope you have
enjoyed the class and that you can take
something from it. The first principle was watercolor is not like
housework, don't scrub. The second principle, watercolor is like ballerina, let your paint
brush-dance on the page. The third principle was watercolor is like
football, one touch, is all you need and
that applies to both the paint stroke
and to color mixing. The fourth principle was
that watercolor is like a newborn baby,
timing is everything. The fifth principle was that
watercolor is like curry, intensity is key,
and by intensity, what I mean is adding the pigment to the water
rather than the water to the pigment and getting that water pigment
ratio exactly right, and that is the
key to watercolor. The sixth principle
was that water is to watercolor like
oxygen is two humans, let the water from the page show through
leave little gaps between your motifs and your
watercolor painting will spring to life. One thing to remember
about watercolor is that there's a lot
of color shift, so what you start with
when you're painting it, compared to what you end up
with when it's halfway done, compared to when
it's completely dry, those things are different. Understanding that means that you mustn't judge what you're doing while you're
doing it because come back in half an hour and it's going to look
different anyway. Good thing to bear in mind
is that you can't always control the outcome of
a painting session. You can control
that you turn up, you can control
with your paints, especially around
with them, have a go, but you can't always control whether or not
you create a masterpiece. But that's fine,
that's part of it. Embrace the things
you can't control, turn up, have a go, have fun. Don't worry if it ends up
being a mess on the page, it really doesn't matter, what matters is, did
you enjoy the session? Did you learn anything? Do you feel better afterwards? Then come back the next
day and try again. If, like I was, you are new to watercolor, then you have to embrace all those really
uncomfortable feelings that learning a new skill brings the feelings
of being a beginner, being like, I don't
know what I'm doing, I don't like what I've
made, all those things, just don't worry about them, push through, keep turning up, keep showing up,
because when you get these principles right and
you make that breakthrough, [MUSIC] water coloring
is so much fun, it's just joyful and it gives you time away
from your real life, time away from your stress, time away from your worries, so that you can
then go back into your real life
feeling rejuvenated. I absolutely love my
watercolor sessions and it really doesn't matter whether it was a
fabulous painting or not so great painting, what matters is continuing
to practice every day. If you need help with
developing a daily practice, I have a class on that, it's called the toothbrush
approach to daily creativity. Please share your project
in the project gallery, a little snap of
what you've made, any thoughts you have about the class or about the project, or about your experiences
with watercolor, I'd love to hear from you. If you liked the class,
I'd be really grateful if you could leave a
review on Skillshare, and if you want to
connect with me on Instagram, I'm
@catherinejenniferdesigns. I would love to see you there. Thanks for watching and
happy water coloring. [MUSIC]
 Catherine Jennifer, Artist, Art Educator, Designer