Transcripts
1. Welcome to Class: Welcome to class. I can't
wait to get started with you. And today, we are
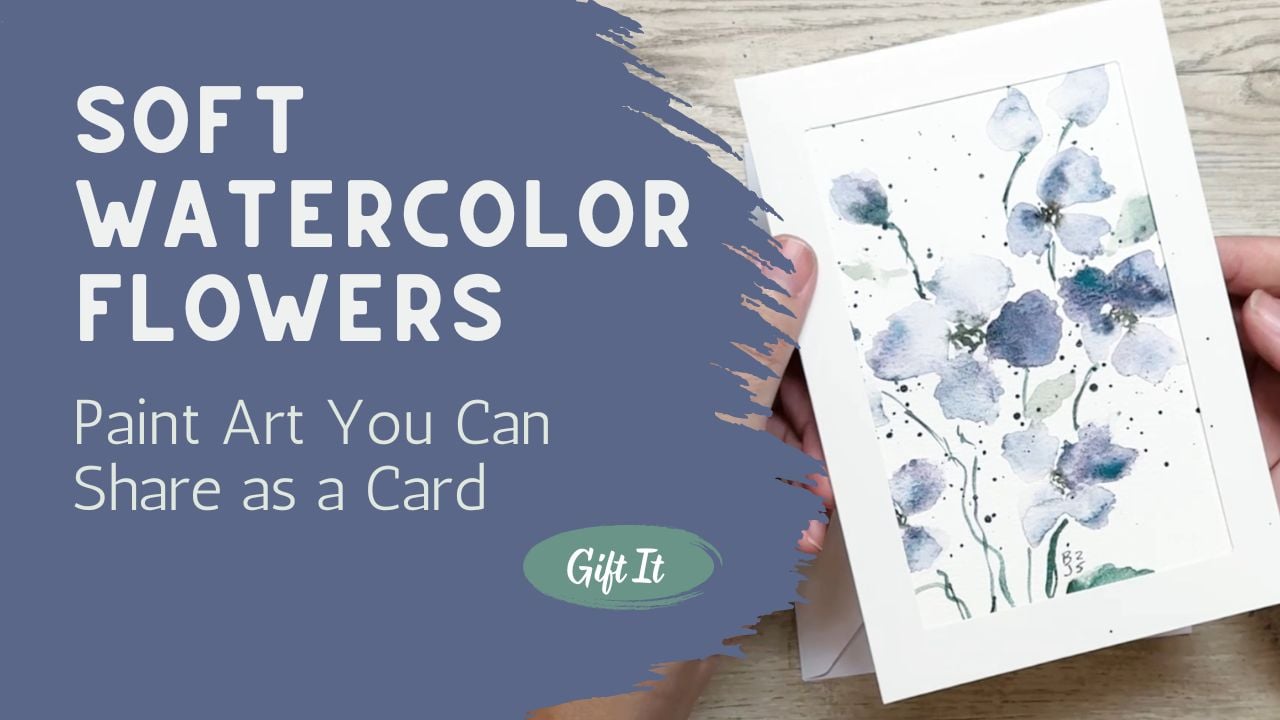
going to be working on these beautiful
little flowers, and we're going to be
making this greeting card. I can't wait to show
you everything about this and how we're
going to do it and all the extra added things
that we're going to be using to make it
even extra special. Join right along as we get
started on this from going from a sample that I had to practicing it
to a completed piece. I can't wait to see what
you've accomplished, and I hope that you upload your finished project at
the end of the class.
2. Supplies and Setup: I'd love to talk about
some of the supplies for this class first before we get into how to do the artwork. So this is going to be what
we're going to be painting. As you can see, it has
some splatter on here, has pretty little
flowers and that the flowers have multiple different colors
inside of there. I want to show you
how to do that. So let's get into these
different colors and the paper and all
the different things that I'm going to be
using today in class. The Princeton brushes are
great, high quality brush. I really enjoy these. The size six is nice
for this kind of work. And then this one is
called a liner brush. It could also be
called a detail brush. You can see that
it's nice and thin, really great for adding
in the little details. You don't have to
have these brushes. You could, in fact, have this set of brushes or any other set that
you happen to have. I just want to show you
this as an example. This set is from Transn. This set has pretty
much everything you could possibly ever need. If you're just starting out as a watercolor artist and you're trying to figure out
what brushes do what, I would recommend that
you pick up this set I also always have some kind of a cloth with me or maybe
it's a paper towel. Something that I can dab off. So when I put my paint and
my water on the brush, if I have too much paint, I can drip it off of here, or if I need to clean off
my brush a little bit more, I can always put
it onto my cloth. So always have a cloth
or a paper towel nearby. Now to talk about paper, there's several
different things. Today we're going to do a practice run and then
we're going to do our finished painting
that we're going to put into a greeting card. So I have these wonderful
watercolor pads. They're spiral. There's
two different sizes. They can come in
sets, I believe. If you don't have and
this is watercolor paper. So make sure that if
you're going to be buying a watercolor pad that it
is made for watercolor, it's really going to help
with the absorbency. These are not cotton. This
is cheap inexpensive paper. This is not something
that is a high quality. It's just for practice. But it's really
great for practicing your brush strokes or
for experimenting or to find out what happens
when you do something or what colors mixed together and what is that
going to look like? You can practice on
this kind of paper. But if you're ready
to move on and do an art project and you
really want to make sure that you have something that you can frame and feel really proud about or
give away as a gift, you'll probably want
to paint something on watercolor paper
that is 100% cotton. And this one, I always
use a cold press. It has a little
bit more texture. Let's see if I can pick
that up on the camera. See how it has a little
bit more texture in the paper than your hot press. A hot press paper is going
to be very, very smooth. I personally want to
use the cold press, but again, that is
always up to you. You can use what
makes you feel happy. I also was able to find this
great big stack of paper, and this is all
100% cotton paper, watercolor paper, cold press. Again, let me see
if I can get that. See. Can you see that
texture in there? So that's really nice to have when you are
painting in watercolor. If while you're looking
at my different supplies that I have and
you're thinking, Oh, I don't have any
of those things, please just use the paper or the paints or the
brushes that you have. There's nothing special or
magical about what I have. I want you to start with
whatever you have on hand, even if it means you're using your kids paint
brushes and paint. Use scrap paper. Just have fun. Let's make sure that
we're doing things not because it's
the right supplies, but because we're
just having fun. Now, today, I'm going to
be using Daniel Smith. Daniel Smith paint is
my absolute favorite, in most classes, you're
going to be seeing that I am going to be using
the Daniel Smith paint. Today I'm going to be
using a cascade green, an indigo, moon glow, and sepia. These are four colors that
I've already tried out. I tested them. I tried them to make sure that they would
blend nicely together, that they looked
cohesive on my paper, and I'm going to be
showing you that in another lesson so that you can also figure that
out for yourself. But if you don't have Daniel
Smith paints or you don't have paints that are in
tubes, that's totally fine. Maybe you have a
watercolor paint set, something similar to this. This is also great. There is nothing wrong with
using something like this. You do not need to use what
I'm going to be using today. The most important thing
for you to remember is that if you have a
paint set like this, spray it down or wet it
down with a dropper. I prefer a spray bottle because
it's just easy and quick. And what I would
do is just spray this whole thing down so that
it gets a chance to start getting loosened up and ready and activated and
ready for painting. I also have two different
water containers. I just use mason jars, and I'm going to
fill these both with clean fresh water
so that they're ready to go for our project. The last thing I
want to show you in our supplies is that
for today's painting, we're gonna be turning
this into a greeting card. And if you painted
something like this, which is going to be
our class project, you can cut it down and fit
it inside of these cards. These are window cards, so you can put your artwork
right inside of here. And then it also comes
with a stack of envelopes, and then you could be
making Christmas cards, or you could be making
Mother's Day cards or thank you or whatever it is
that you need cards for, and you can always have a
stack of these ready to go. Okay, I think I
have covered all of the supplies that we're
going to use for today, and I'm going to get started. We're going to do
a little sample before we move on
to our good paper, and we're also going to
test out some colors. So join me in the
next class when we test out the colors
on a little scrap paper.
3. Choosing Colors: Okay, we are going to start with a little bit of
testing our colors. I'm just going to set
these things aside. Sometimes I have scrap
pieces of paper because I've painted something and maybe it didn't work out the way I
wanted or it was a sample. I don't waste this
paper because the back of the paper is just as good
as the front of the paper. So I will cut it down into size. And here, I can even
show you I have all of these other projects
that I have worked on. I just cut them all down, and now I'm going to use
the backside so that I can test out what colors
work really well together. Okay, so I want to
be able to talk about the different colors
that I'm going to be using. As I mentioned in
the last class, you do not need to
use these two paints. You could be using
the other kind. I personally am going to be
using these four colors, but you could choose any
color you wanted to. For this class, I'm
going to be showing it to you in this color way. But I have done this before in pink or in yellow, all
the different colors. Even a beautiful peach
is absolutely stunning. So whatever color is
your favorite for today, that's the color you
should make this in. I have gone ahead and
squeezed a little bit of these different colors into
this palette that I have. And then I have activated them. All I did was spray
them with water, just gently spray them so that there's a little
bit of water in there, and they are now starting to get activated
and ready to go. Put these four colors in order for you and hoping that
maybe that will help. This first one is indigo, this is Sepia, cascade
green, and moon glow. I want to talk about all four of those colors because I think it's important for
you to understand what it is that I
am working with. Your indigo is going to
be just that indigo blue. Brush it off here
on the edge so that it doesn't drip off
of my paintbrush. Then as I bring it down, I might even just drop
my paintbrush into the water so that I
can get it to be a little bit more transparent as I move my paint brush down. The next color is
sepia and Sepia is pretty much just a
beautiful brown color. Here, I put it into my sepia and you can see how beautiful and brown that is at the top. And I'm going to bring it down, drip into my water, and then continue it down
here a little bit further. Rinsing that off completely, drying it off on my rag. Now this cascade green
is very special. This one's called a granulating
paint granulating paint means that it has
several different colors inside of the paint. It comes this way.
It's granulating, which is going to have
several different colors. I might have a brown
and a green or a blue and as it dries, it's going to separate into
the different textures of the paper and you're
going to be able to see what I mean
as this dries. Let's start it here at the top. You can see how nice
and bold it is, and I'm going to bring it down, get a little bit more water and drag that all
the way down here. I'll show you what I mean by having that be
granulating paint. As soon as it starts to dry, you're going to
start noticing that. This one is moon glow, which
is also a granulating paint. This is more of a purple
and so beautiful. This is one of my favorites
for doing flowers because you never know exactly what you're going to be getting
when you use moon glow, how beautiful they are. And you can see in here
how this has got, like, some browns and even
some golden tones, some teal, greens. Oh, I love that one so much. And then here you feel
like you can pick up some pinks and then
some purples and even, like, little shades
of blue in there. So you can do the
same thing if you are using a kit like this. Just go ahead and
open it up and say, Oh, I think I like this green. I think I like this purple,
and I like this blue. Just make your own and see
what it looks like on here. And then if at the
end, you're like, Mm, I don't know if I like
that purple with it, trade out that purple and do it again so that you know
what your color swatch is going to be so
that you know that you're going to be
satisfied with the project. So join me in the next class
where we can dive right into our class and learn
how to paint these. We're going to do
a little sample so that you understand what you're working on before we move over to
your greeting card.
4. Practice the Concept: We're going to do a
quick little quick study so that you can see what it is that we're
going to be doing. You want to make sure
that no other paper or anything that's
important is laying around because you don't
want the splatter that we're going to be doing to
land on anything else, like a plain piece of paper or another piece of
art that you've done. We're just going to make one
of these flowers so that I can show you what
it's going to you want your paint to be really
liquidy almost so that when you've got it fully filled
up that it almost drips off, the are going to be
smacking this against your hand or you could
use another paint brush, but you're going
to want to do this and splatter it a couple
of different times, brush that off and
start over with your indigo color and do
the exact same thing here. Now that you have two
different colors on here, that's going to really help
you with your flowers. Now, I'm just going to make one and I'm going to make
it a little bit on the larger size so that you can see what it
is that I'm going to do. I'm using these paint um, splatter splotches as
my paint for this. The only thing that's
on here is clean water. This is just plain
old clean water, and I'm going to dip into here from now on and just use
this for this next part. But the reason I need to work fairly quickly is that
I need to be able to use the paint that is here
on my paper as the color. That is where my color is
going to be coming from. You can see I'm just kind
of squiggling my brush around making petal shapes, not really particular
or fancy or anything, leaving some white spaces. They could be joined
together or they could be not joined together,
whatever you want it to be. Adding that beautiful
the little dots so that they blend in together. Now, I could let that dry and that could just be a really, really faded, faint
colored flower, which would be stunning. But I think what
I'm going to do is dip back into my paint. This is the moon glow, and I'm going to just add a little bit in here
and let that just bleed and blend and look how beautiful that
is when that happens. I'm just adding a
little bit of color. It's a very intuitive style of painting because
you don't get to choose necessarily where all of your flower heads
are going to be going. You put them where the dots are. Now I'm going to go
into the indigo and maybe I'm going to
add a little bit on the outside edge for the indigo. And just drop a little
bit of indigo in here. You can even move it around a little bit if you don't
like the way that it dropped. You can move it about. Because I'm working while
this is still very wet, I have that opportunity. This is a wet on
wet technique to just really manipulate
it and make it move. Now that I have that done, if I wanted to, I could use these other dots and I
could make another one. Maybe I want to add a bud there and maybe a bud up here and it's just a simple
little oval shape. You could even make maybe a downward facing bud
that's right here. I said this is just a sample, so I'm only going
to do one or two, but it's hard for
me to stop when I see those little dots that I think maybe I should be using. Just drop in some sepia into
the corners and let that bleed and maybe a little bit of moon glow a little
moon glow in there. Okay. I'm just going
to let that dry. I'm going to move over to my small rigor brush, liner brush. You could also
just use this one. But since I have this
one, I like to use it. I'm going to be using
the cascade green, again, putting it on my brush and then just wiping
off what the extra is. This is the base of the flower, so I'm just going
to draw it down, maybe jump over that flower and bring it all
the way down here. Maybe the same thing
with this one. This is the base, jump over
and bring it down here. This is going to be the
base and just arch it over. Same with this one. Now I have my stems. I'm going to use this
one for my leaves. Doing leaves, I would edit and try to make as few
leaves as possible. I've always feel that when
you add in too many leaves, it sometimes gets a
little distracting. So I would recommend
that you use the fewer, the better, and stop
while you're ahead. And sometimes that's the
hardest thing for me is not adding in
too many leaves. You can even add a little bit
of brown into this because I think that would
be really pretty to add a little extra brown color. I lift some of it up if you feel like you
got too much in. It'll blend. I'll move around. Now I think I'm going to add
in a little bit of the sepia into the center of this
flour as it is drying. I think I'm going to avoid
touching the wet parts, but you could touch
them if you needed to. Maybe I'll just add a little bit of flour coming out like that. Okay. So there's
your little bonus. It was supposed to
be a practice and it got a little carried away. But here you can see you
can make a whole bunch of small ones or you could
just make a bigger one. So there's your practice. We're going to let this
just dry naturally so that they can all
flow and blend, and then we're going
to move over to our nice piece of paper. Today I'm going to
be using cotton and we're going to be
making this one. Same practice, same principles, but just slightly different
because we're going to be making a lot of different heads.
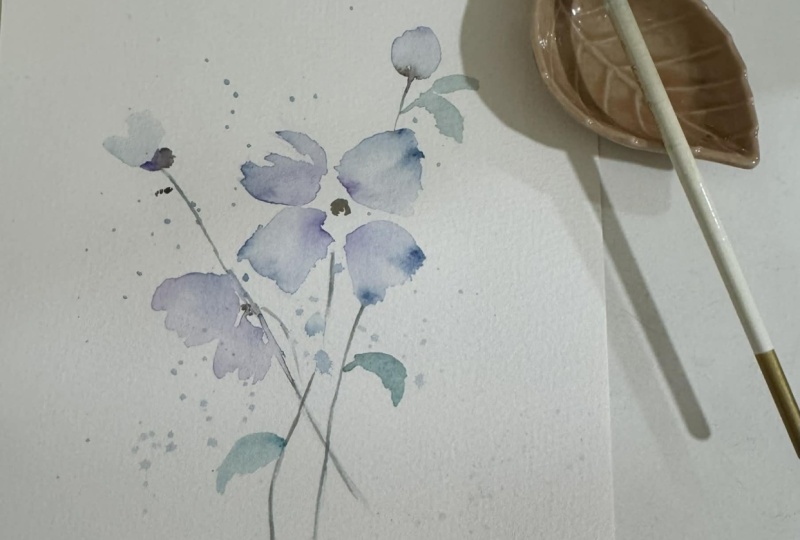
5. Painting the Florals: Our practice, you can see, is dry or almost dry and
how pretty that is with this variegation
of color because I added the moon
glow and the indigo, I really gives it a
stunning contrast of colors and a combination
of colors in here. R gives it a great
watercolor feel. So whether on your next piece
when you do the project, if you want to make the tiny ones like this or you want to make a great big
flower, it's up to you. It's your art. You do what
makes you feel happy. I'm going to be demonstrating
this one because we did practice this one
larger so that you could see the strokes
that I was making. But I think I'm going to go over and do
this one instead now. I do want to show you this one. This is something that I
have hanging on my wall. This is something
I painted a while ago that I really like, and it is painted in more
of a pink and peach color. So I did this last spring, and it really spoke
to me, and I love it. But again, I just used
two different colors in this splatter and then made all these beautiful
flower heads out of it. And this is what I mean by you do it the colors
that you enjoy in the season that you
are doing this class in because this is what I
did back in the spring, but this is so, so beautiful. And this one brings me
joy every time I see it. So I just wanted to
I just wanted you to see how different they are, but yet very similar. Okay. Again, we are going to be adding our splatter
and I need to remind you that this needs to be
liquidy like milk so that it's nice and thick so it almost drips off
but doesn't drip off. Then if you just brush your brushstroke against
the edge of your palate, that is when you
know that this has just become the
right consistency. I have enough water in here. I don't want to be having
you just barely wetting your paint that
needs to be wet so that you can really move
your paint brush around. Look how that is
almost dripping off. It's going to drip
if I don't take my time and just just
brush it off on the edge. I'm going to now do splatter and I want to remind
you that we do need to work fairly quickly with this so that it doesn't
dry on our paper. If the splatter
dries on your paper, you're not going to get the
effect that you're going for. I may not speak completely
through this because I do have to concentrate and make sure that
I am doing it. And not letting it dry. I'm going to get some
big droplets off, dip back in, get
some more droplets, maybe one more set. I like it when I get
some nice big ones. So I'm keeping the
droplets on the upper half because this bottom
half is going to be where my stems
are going to go. It's okay if they go down there, but I'm not going to be
focusing on them there. Here I am going to put in some indigo because
I like having, I'm sorry, this one is
the moon the moon glow. I'm going to be adding in
moon glow here and again, getting some nice
big thixed ones. Now, because I have a
big one right here, I'm going to make
sure I incorporate that into one of the petals. I'm going to put this
is just water on now, and now I'm just going to
be painting with water and whatever paints happen to be on on the paper
from the splatter. Always just dip in and grab
a little bit more paint, a little bit more
water. Now I drop some. That's okay. I'll just
become the next spot. Maybe that's going to be where this happy flower
is going to go. This one is just going to get
three little stems though, I'm going to put a bud up here. I'm going to put another bud up here and apparently
another one there. Again, whatever happens
is what happens, and I am completely content
with that because this is just intuitive painting and letting whatever happens happen. And it is really a fun
way of letting go. Very few times in life, we get to just let go
and see what happens. That is something that I
really enjoy about watercolor. I get to just be okay with
it and accept my fate. If it's something
that I make and I don't love it at
the end, it's okay. Just make another
one. Try it again. It's just paper and
it's just paint, and these things are completely, they're going to be beautiful
no matter how you paint it. I think I'm going to put
one more down in here, Maybe I'll put one
more over here. You see, I'm not even
really making a flour. I'm just making little
blobs and they're jagged and they're disjointed and some blend together and some don't now that they're all
wet and they're still wet, I want to make sure
that I can move right into the next spot, which is adding in
a little bit of the darker indigo right into it before they dry because
I don't want that to dry or it's not going
to blend correctly. And then I think
I'm going to put a little bit more moon
glow into some of these as well. Okay. I want you to take notice
this one has dried. This flour right there that is almost that petal is
almost completely dry. I tried to add a little bit of the indigo there and
it just stayed on top. I didn't blend like
these other ones did. I don't want to
leave it like that. What I'm going to do is paint
just with water on here, is I'm just going
to pick that up and just move it around and rewet that surface and then maybe drop in a little bit of moon glow
and let that blend again. So when I was painting this, I kept something in mind. I wanted my heads to
be on the top half. I wanted to have a grouping
of the bigger flowers, similar to this, I had a
grouping of the bigger flowers. And then I wanted to
have some buds dancing above the main big flowers. I put these up here
at the top because they're just dancing
along the top here. That was my thought
process there. Well, these are very,
very wet and I could let this dry or I can go ahead and add in my stems and not care if my green blends
in with my flowers, and I don't care, so I'm going
to go ahead and do that. But if that bothers you, then I would recommend
that you let this dry completely
before you do that. So what I mean by that is here I'm going to
give you an example. This bud is still
very, very wet. You see how it's
shiny, it's wet. You could put a paper towel
on it and pick that up. That is a very wet bud. If I touch this green
into that center, I'm going to be
getting that bleed, just like when we were
adding the other colors. It bled right up into
that. I'm okay with that. I actually like that. So I'm going to go ahead
and do that and let it go. Then I jumped over
the flowers so that this stem is coming
behind these flowers. And I see I'm just wiggling
my paintbrush as I go down because I'm not looking
for a straight stem. I don't feel like anything
in nature is straight, and so I'm okay with
them not being straight. I'll do a couple
more little stems. I don't always give every flower head a
complete stem down. Sometimes the stems
just aren't there, they just blend in because I also feel like if you put
too many stems in here, it can get distracting and
I'm not looking for that, so I will just bring in
a couple more stems. Maybe I'll just throw
them in like that, but they don't actually go
anywhere, all the way down. So now that I've
added in my stems, I am actually going to put
some of that green out here and grab some of the
sepia and some water. See how I've just changed that bright green into
this brown green. I'm going to use some of that
and just go back on top, just to add a little
extra depth and interest. No, I'm not trying
to follow the line. I'm just throwing
it in there to add a little bit of added texture. I think I'm going to
go ahead and touch the centers and create these little centers
of the flowers. Now, here I'm going
to be careful that I don't touch too much of the flower buds because
I don't want them to bleed too much
into the petals. It's okay if it
beleds a little bit, but I'm not going to
want a lot of it. I'm adding a lot of white
space so that there's plenty, plenty of white space in there. That's that. Now, if you feel like some of
these bled too much, you can always lift that up. Use your cloth to wipe it off. If you don't care for
the way that blended, just lift it up, stop
it from bleeding. But it is watercolor after all, and so I feel like that's the purpose, and
I'm okay with it. But if you aren't
you should wait until this dries before you
add on your next layer. You're the artist. You
get to choose that. I'm going to go back here
and I'm going to dip into that nice brown
that I had created, maybe put a tip of the green on here and add in
flower some leaves. I just add a little stem. I'm going to lay my
paintbrush over on the side and wiggle, I didn't have enough water
and wiggle like that. Maybe I'll do a
two for one here. Wigle down until it
looks like a leaf. Maybe I'll want one up in here. Here, I'm going to just do a little stem and
move one over here. Like that. 11 up here and here. Now, I highly recommend that you stop while you're
ahead and don't add in too many or you sometimes
can start to really regret that you added
in too many leaves. That is often my problem and I don't want you
to have that problem. So make sure you edit and
don't add in more leaves than you really need because
sometimes less is better. I'm not loving how bright
green this leaf is. I feel like that's
just a lot of green. With this paintbrush, I've
washed it in my water. I've dried it off, and now I'm going to
come in here and I'm just going to soak up some of it and just lift some
of that extra paint up. Do it again, dry it off, and just lift up some of that
extra. See how that worked? Wow. So all the other dots in here are just added interest
and they're just for fun. I'm going to just
leave those alone. You can see on this one that they're still in here
and I like that look. But that is your
project for the day. Come back in the next lesson
after this is completely dried and move on to the next part of making
this into a card.
6. Transforming Your Painting into a Card: Welcome back to making this beautiful little painting that you've made into a card. You could say, I
don't want a card, I made this and I want to
frame the whole thing, or you could say, I liked this part of the flower. I didn't really care for
this part or vice versa, so you can find the area that
you like the most and turn that part into a card and turn the rest of it
into your scrap paper. That is what I'm
going to do here. What I have is this
is one of the cards. This little mat is the
same size as this card. I'm going to use
this mat to help you understand what
I'm referring to. So I can take this mat
and I can move it around and decide what
area I like best. Do I like that as the card? Do I like it down here more? Do I like it up here? Do
I like it this direction? You get to move it around and
decide what you like best. Which direction do you
want the card to go? Sometimes even I turn it all the way on
the side and I say, maybe it's actually that
direction that is really pretty. You get to choose whatever you want and you can really see it when you're
using a mat like this. I think I'm going to choose
something in this area. Let's see. Where I don't mind that
these are getting cut off, I don't mind that
that's getting cut off. I can start to see these
leaves which I like. You can see this one plainly. I think I'm going to choose that area as the
inside of my card. As you can see, that is going to be really
close to that size. I'm going to use this pencil and frame it
out on the outside edge. So that I know where let's
see all up at the top. I know where I'm going to
use my paper cutter and I'm going to use the paper
cutter to cut out there. I'm actually going to
go a little bit on the inside because I know that my frame is a
little bit smaller. We're going to do this. Now, you might be saying
to yourself, What? I can't believe she's cutting
down that whole piece. What is she doing?
Why did she do that? But for all of these
pieces that I don't use, I'll just use the backside
and do the same thing that I've done over here and
use these pieces for scrap. There's nothing wrong
with these things and I will use all of these. I have a big stack of them. I save all of this paper, and if there's something to be painted on the back side
or even on the front side, I will use all of this. Okay. I think I've got this cut down to about the size
that I want it to be. I have my card holder. I'm going to slide this in here, see if it fits, it's
snug, but it fits. There you go. Now I
have turned it into a card I have my envelope and the last thing
I need to do is sign it. You always want to make sure that you are signing your work because that is your
way of celebrating. You're saying, I made
this, I did this, and I am proud of it and
I am ready to sign it. Sometimes I just
add my initials. Sometimes I add the year. You can put your
whole signature, do it however you
would like to do it. But that is the way I will
be signing that one for today and that is ready
to go into my cards, and I would be ready
to sell that or give it hold on to it for when
I have a special occasion. Then on the inside,
I could put in all of my notes to the recipient, and that has turned it into a beautiful gift for somebody, and they could take this out
and they could frame this inside a a wooden frame
if they so choose, or they could just
put this up on their wall or on their
mantle or something. That is our lesson for today. Come back to the
next lesson so that I can give you some tips and some tricks for the next for what you can do with this next.
7. Final Touches - Follow for More Classes: Now you certainly do
not need to do this, and it does add some
interest to it, but it is not something that
would be necessary to do. That would be to be adding some little marker
gelpen highlights to it. And I just want to show you what those kinds of
things could look like. Because you've done a
practice in the past, you can always pull your practice out and
you can say, Okay, I have a white gelen
or gold or silver. Which one looks best? What is going to be
working the best for it. You could see does adding
in some little dots. Or maybe adding in some little extras,
something like that. What is the look that
you're going for or maybe you put a little outline around the outside like this. You could do something
like that with the gold or maybe
you want to use the silver and just
really put in a line for the leaves here or like
this one and then put dots. So you can create anything that you want to
or you might say, No, I like mine
just the way it is. I am not adding anything to it. I don't want to do anything, and that would be
perfectly fine, too. I just wanted to see that you could make it extra
special if you so choose. I think what I'm going to do is go very light and
use this silver, so it just shows up just
enough and maybe add in some little dots up in here. And maybe a line. Then I think on this one, I'm just going to outline it. Just a little bit,
maybe only on three of the petals and maybe this
one only gets that much. Maybe on here, I'm going to put some dots around the outside of that one side and here too. So it is up to you what you
do with it and how much and how many details you
add as to if you like to have that or not.
But I think that's it. I'm going to end it with
that where you can pick up where you can pick up that it just has
a little shimmer to it, but not too much and just adds
a little bit of a sparkle, especially since it's a card. I kind of like to add
just a little bit of added interest. Just don't go overboard. This is another
area kind of like the leaves where you could
go overboard with it, and I don't want you to do that. So thank you so much for
coming to join me today and for making this card with
me. I hope you enjoyed it. I hope you had fun with making your practice and making
your finished piece. Don't forget to save your scraps and use those for
something else later. You can also always use these
to make bookmarks out of. So there's always
something to do with that. Don't consider
making these a waste because you are going to be
having such a beautiful gift. Um, be sure you take a
picture of your work, whether it's your practice
or your finished piece, if you've put it into card, or if you've decided not
to put it into the card. Take a photo of it, upload it to this class so that I know
that you have completed it. Tell me what you struggled with. Tell me what you enjoyed
or what you didn't like doing so that I can learn so that I can be a
better teacher for you. I would love for you
to give me a review. A review on the class
is really helpful. It lets other students know what you enjoyed
about the class, and it would really be very
helpful to have a review. If you're on social media, I am also able to be
found on social media. I don't go into as much detail in my social media accounts, but I show you a lot
of different ideas and things that you can do. You can follow me
there, you can again find those different
links on my bio. Thank you so much, and I will
chat with you another day. Don't forget to send
me a little review and upload your picture. I can't wait to see
what you've made.
 Brenda Jones, Watercolor Artist & Teacher