Transcripts
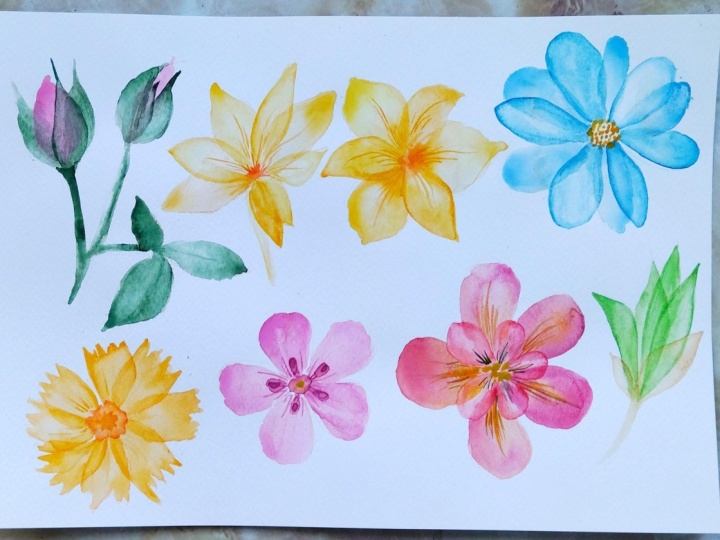
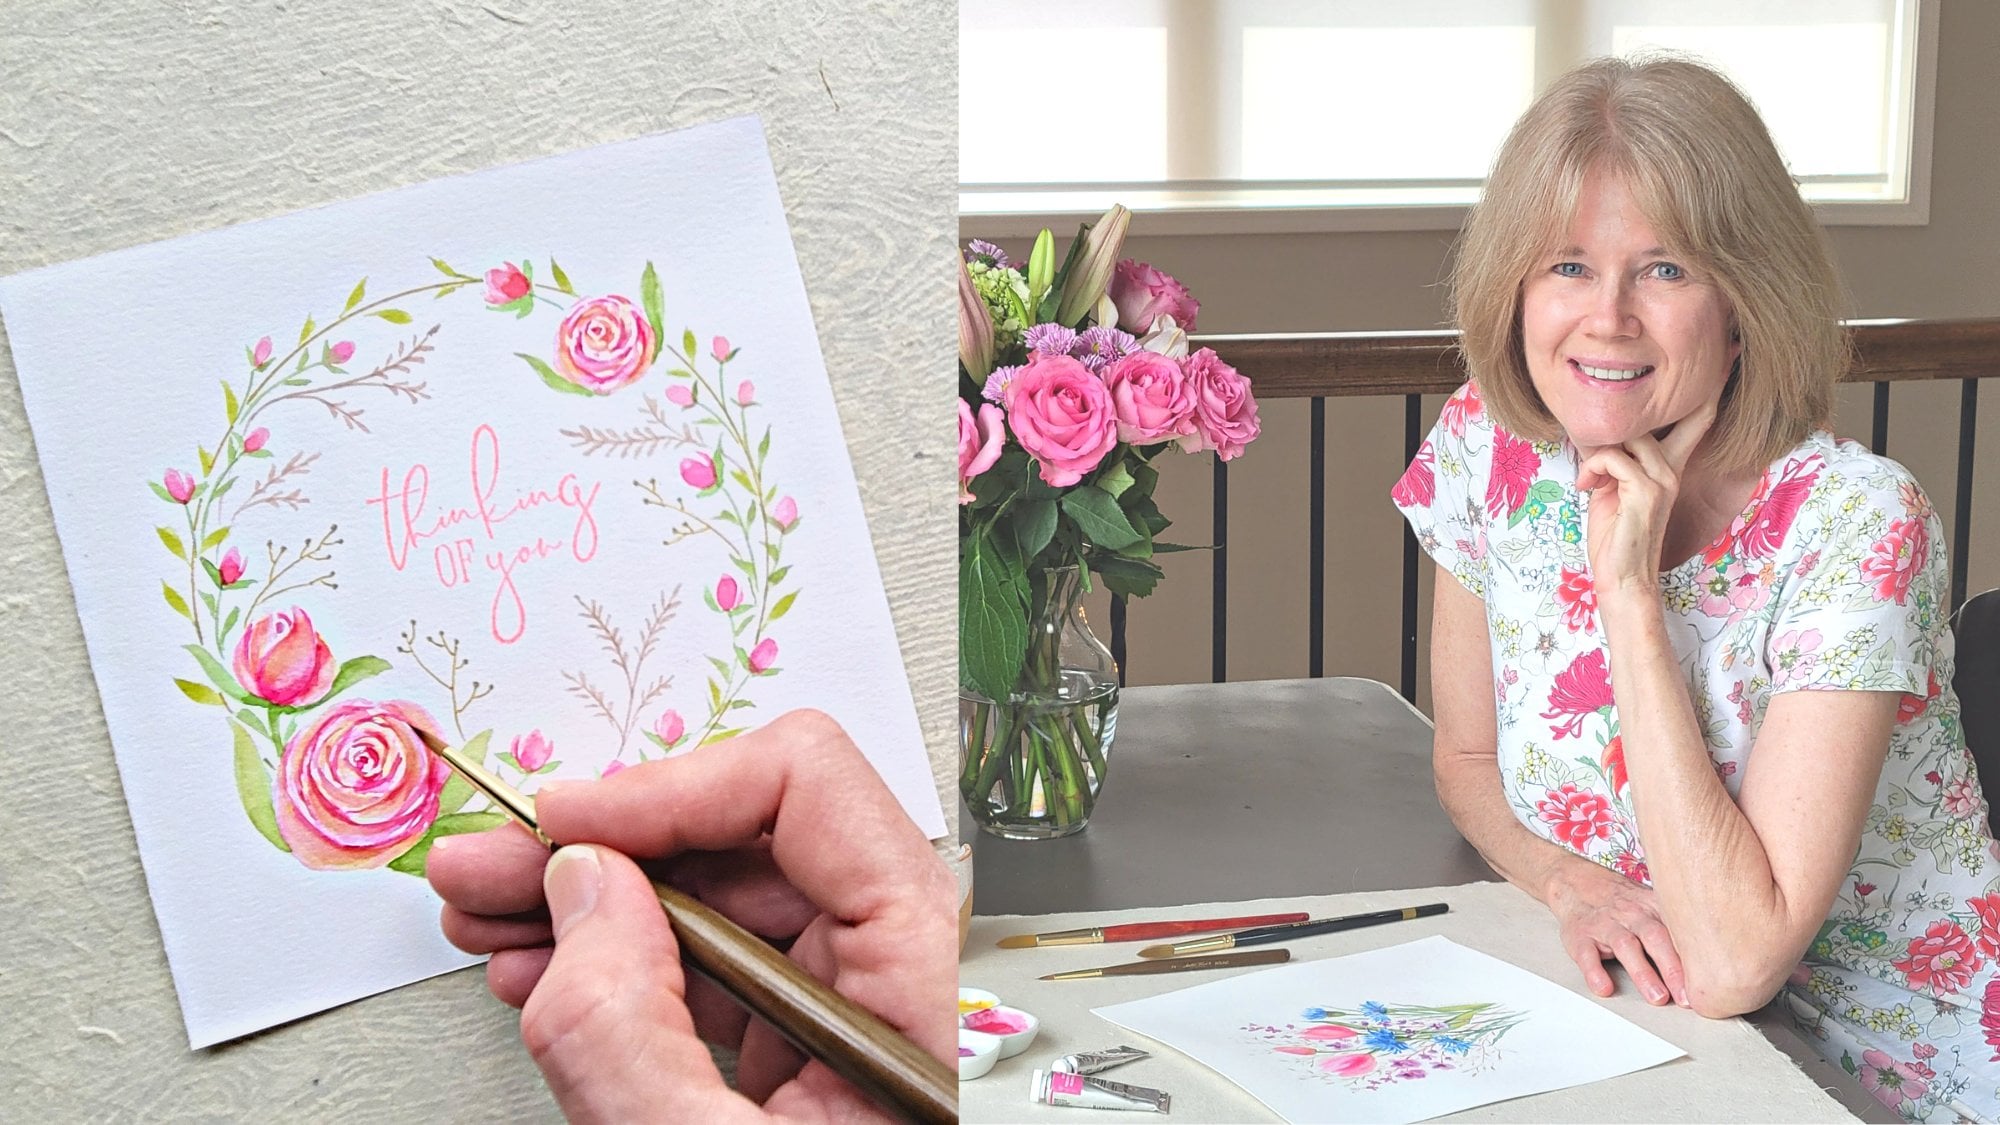
1. Introduction: Hi, I'm Ashley fish, a wash artist and surface pattern designer living
in beautiful New Zealand. When I first started painting, I really struggled to get the
shape of my flowers right. After years of practice, I have developed a
foolproof way to get beautiful florals and I can't
wait to share it with you by secret as to trace
a photo of a flower onto watercolor paper
using a watercolor pencil. That's why you can
focus on the painting without having to worry
about composition. Just get, I'll take
you step-by-step from tracing through to
a finished painting. We will learn wet on wet
and wet on dry techniques, including watercolor bleeds, how to create soft
and hard lines, adding texture and detail
into your flowers, and also how to create
beautiful transparent petals, which is actually much
easier than it looks. I can't wait to share my
signature heck with you. We can use this
technique for anything from painting animals
to landscapes. But today we're
going to do florals. I can't wait for you to join me.
2. Supplies: There are too many
supplies that you'll need to begin painting
with watercolor. First app, you're going
to need some paper. This is the paper
that I like to use. It's a 300 GSM,
100% cotton paper. It's really nice and thick and has a bit
of texture to it, which means that you get
beautiful textures in your watercolor paintings and it holds the water really well. If you're just beginning,
you won't need to use such a high-quality paper. Any watercolor
paper will be fine, but do try to make sure that
there's about 300 years or 140 pounds so that
it's not going to walk them back or to
match as you're painting. Brushes are another thing
that you're going to need. I highly recommend getting
a round watercolor brush. The beauty of a round
watercolor brush is that you can use the side of that or to create nice wide shapes and
cover a larger area. But you can also
use the point of the brush to make
really thin lines. It's a very versatile brush. And F2 are going to be buying one brush or using one
brush for your painting. A round brush is a really
great place to start. I like using the
Princeton heritage range. I often use a number
to four or six. And today I'm going to be using a number six for the paintings. For painting you will, of course, need paint. I have a few different kinds of watercolor paints that I use. When brands that I recommend
when you're starting out are the Winsor and
Newton Cotman watercolors. They are great quality in a
really good, began to paint. I recently upgraded to the Winsor and Newton
professional range. I also like using Daniel
Smith watercolors and I have quite a few handmade watercolors that debate and New
Zealand as well. Another thing that
we're going to need as something to trace with. So for my Assignat to heck, I like to use a
watercolor pencil. The beauty of a
watercolor pencil is that you can trace around your flower and then
use either water or paint to dissolve the line. Which means that
even though you have started with an outline
by the independent, no one knows if it
was ever there. To take this class. You don't actually need
a watercolor pencil. You can use an ordinary
pencil. One thing with pencil. If you go over it with
the watercolor paint, you won't be able to erase it. So you need to keep in mind, if you're using a normal pencil, that you will want to stay
within the pencil lines. Another pin that you could
use as a waterproof pen, similar to a micron pin. These are really good. You will be left with the
line in your painting. So as you trace that,
you will need to make sure that you're happy with that line before
you start painting, that it is a really
cool effect as well. You're going to need a jar of water I like to use
for big petal jar, some people will use
a mug or a glass, doesn't matter as
long as you have some clean water for activating your paint endurance
in your brushes. And I also like to
keep a paper towel on hand for wiping up any mistakes
in resting my brushes on. The only other thing that you might need for this class as an iPad and Apple pencil
for tracing your flower. But if you don't have
these, don't worry. I have photos as well as the outlines in the
resources section. So if you don't have an iPad, you can print these off
and use them that way. If you don't have a printer,
that's fine as well. You can just draw the
outline as best you can on a piece of paper with a marker and then use
that for tracing. I'm going to go over some
different tracing techniques for whether you have an
iPad or using a window.
3. Tracing your photo: I have two tracing techniques
to show you today. Firstly using an iPad and secondly with paper
and a window. So this is the Procreate
on my iPad and I have opened a photo of a flower I have taken while I
was out on a walk, which is what we're
going to trace. To make a trace, I will
click the Layers panel and the top right and click
the plus sign to add another layer on top
of the flower photo, as we don't want to draw
on the photo layer back on the main screen to exit
layers and our tip the pencil up the top to make sure I
have a solid pain selected. Circle on the top rack
to select the color. I want black. So
I'll double-tap and the black part of the circle. I'm also going to tap the
top slider on the left to check my brush size is I want to make sure it's a good size. Now that we're all
set up, up again, a rough sketch as a
guideline for our painting. To do this, I will trace around the flower to get
a clear outline. This trace does not
need to be perfect. It's just to give you a guide to work from to get
your flower shape. I'm looking right. You can find this flower
photo and the outline in the Resources tab back out the top right and
to the Layers panel and uncheck the box
beside the flower. You can now see that we
haven't outlined to work from. I'll now save this as a photo. To do this, you click the
spinner on the top-left, then click Share, then click JPEG and
save it onto your iPad. Then go and open
this up from photos. This makes it a bit
easier so that you don't accidentally draw in Procreate while you're trying to trace, zoom the photo to be the size that you want
your painting to be. Another trick is
to turn your iPad, brighten this up so that when your watercolor paper is on top, it's still easy to
see the black line. I place my paper on top
of my iPad like this. And I think you should
be able to see, especially if I cast
a shadow on it, I'll make that forget again. You should be able
to see that you can see the line
through the paper. We can now trace the line onto the paper using a
watercolor pencil. I'm going to do quite hard
line that you can see easily, that you don't need
to do a hard line. It just needs to be a
guide for you to see the petal shape and see where on the page your
flower will be setting. This outline is just
for composition, but you won't see it
in the final piece. So follow the line, nice angel. Actually, if you are
using a normal pencil, you'll want to go
really lightly. If you're using a
waterproof pin, this will show in
the final painting. So you need to make sure you're
careful with your lines. Aloof that iPad away and you'll be able
to see that we have a lovely outline that we can
use to paint our flower. This is the same
process that I use for painting animals
and landscapes. So it's a really versatile
technique to learn. If you don't have an iPad, you can use a window. This is a really easy way
to achieve the same result. Simply printed the
outline I have given you or draw your own. Take the paper with the
outline onto the window in the watercolor paper on
top and trace it that way. You can use this
technique to trace your own photos of flowers. And the thing that is
really important to know is that if you want
to sell your artwork, you can't trace photos that you have found
on the internet. Please make sure they are photos that you've taken yourself.
4. Painting your flower - wet on wet technique: Now for the fun part,
painting your flower. I'm using my number
six round brush and have my outline ready to go so that I can
focus on painting and not worry about the
shape of my flower. I've wet my brush
and a roll it in my dry watercolor paint
to pick up the color. With paint on my brush. I will go around the
age of one petal quickly so that it doesn't dry. As I paint around the edge, the watercolor pencil will blend into the paint so
that we won't see it. If you have used a dark
watercolor pencil, you may need to go over it a little bit more to
help it blend in. You can do this by rubbing
the width or painful to brush over the line gently
until it disappears. I'll dip my brush in some clean water to paint
the center of this petal. Or touch this water to the edges to ensure the whole petals wet. The next step is to enter the
paint again and use this to paint around the outer edge of the width petal to
create a darker edge. This is a wet on wet technique using wet paint
on the wet paper, which creates a
lovely soft bleed of color with no hard lines. It's really important to do the state where
the petal is still wet to ensure that we
get a nice soft effect. While the petal is still wet, I'm going to enter a
darker color and dab my brush gently into the
center of the petal. This creates another
watercolor bleed, this time between two
different colors. The paint will gradually
spread within the petal, creating a lovely bleed. As we paint to the center, we can use the jagged
pencil line to help guide us to leave the
center unpainted. As you do this, you
will notice that the paint only spreads
into the area of the page that are
already wet and won't bleed into the dry
areas of the page. We're using the same
technique for the next pixel, I will dip my brush
into the paint and follow the outline around
the edge of the petal into some water to fill
the middle of this petal. Making sure that I
take the water all the way to the edge to create
a beautiful soft bleed. Just like last time, I'm going to dip into the
paint again and use the wet on wet technique to Devis n
around the edge of the petal, creating a dark edge of the
petal and enlightened middle. And again, I would
enter the dark paint, which I will dive
into the middle edge of the petal to
create another blade. It's important to do
this one petal at a time to make sure your petal is still wet
while painting them. If you paid all the
petals together, they are likely to dry before
you get each step down. I'm going to use
the same technique for the next three petals. So I'll speed this up. Feel free to hit
pause if you need to, or replay my painting of
the first two petals. If you want to follow along. Once you have finished
your final petal, it will wait until the
flower is completely dry before we move on
to the next step.
5. Erasing and lifting colour: One trick that I thought I could show you while
our flowers are drying as how to remove
or erase watercolor. This is really
handy for when you exited the drip paint where
it's not meant to be. For this, I like to use a paper
towel or absorbent cloth. If we exit negate a
drip on our page, we can debit with the paper
towel to lift the color. I would debit with
my paper towel. Then I'll get some clean
water and pop that on top. Can you use the towel
to lift us again? You can repeat this until
the paper is clean. If you're using a
textured paper, you may need to give the
whip brush a little rattle on the page to help loosen
the pigment from the paper. You can also use this technique. But if you have painted
a petal and it ended up a bit flat with no interest. If you want to lighten
the middle of the petal, you can drop some water and
to move the color and then dab in the middle with your paper towel and it
will lift the color up, creating a pretty ombre effect. You can experiment
with how much water and how much Debbie can you
do to achieve their fit? You are after. You see that if I soak up most of the water with
my paper towel, it will almost erase the petal.
6. Wet on dry technique - finishing touches: This is looking a
little bit drier. It's not perfectly
dry, but that's okay. We're going to paint the
center of the flower now. And I think I've gotten to
do it a different color to the photo for a little
bit more contrast. I have chosen a pretty
yellow and I'm going to do a light wash over
this whitespace here. Is the pink paint is dry. We can touch it to
the edge without the risk of the pink paint
bleeding into the yellow. The center of the flower
is often a bit darker. So while my yellow is still wet, I'm going to dab some of
the color into the center. To achieve this darker effect. I have more paint and
less water on my brush. Now that it's dry, I'll add a few extra details using
the tip of my round brush. I can use my round brush on the side to create
wider strokes. But I can also use the point to create
a very thin strokes. I'm going to paint a few
stripes on each petal, with the stripes
following the line of the petal pointing all the
way towards the center. If you paint them
sideways like this, it will look a bit funny. So make sure you're
pointing them towards the middle
of the flower. I will also paint a stamen
with the side of my brush, making a thicker line on
the pink part of the petal. I also want a bit more detail, so I'll use some of
the darker pink paint. I've used this water and a bit more paint and I've
made sure it's not dripping. And I'm going to add some
pretty dots to each petal by dabbing the tip
of my brush gently. This is a wet-on-dry technique. Using the wet paint on my brush. The dry paint on the paper. You can see there was a
little white patch on the paper which is starting
to bleed a little bit. You will notice that we get
a very different effect using width on dry than
we do using wet on wet. I love using both techniques on the one painting to add
extra interest in detail. And now that's this flower done. I can't wait to see what you
have painted along with me. Please make sure you
upload your painting to the project section
so we can all take a look at your
beautiful work.
7. Transparent petals - Wet on dry: We are on to our
second flower now, and I'm going to use
the same technique to trace this daisy, the flower photo and
outline and the resources. And I'm tracing it using
my watercolor pencil. I'm going to use a slightly different technique
for this one. And we will create
some beautiful transparent petals
where they overlap. You can use any color, but I'm using blue. We will use the same
color for every petal. I've loaded my brush with paint, and first of all, I will paint the petals that are on the top. You can see that I'm
using a blue paint and a peach pencil and they
will blend together nicely. For this technique, I like to do an even wash of watery paint. I'll skip this petal here
and paint the next one. And the same way, doing an outline and water
to fill in the center. I'm making sure I'm painting
petals that aren't touching. We need some patients with this technique is we
need each petal to dry before painting over it to achieve the
transparent effect. This technique can
look quite fancy. Wagons it's done, but it's
actually very easy to do. I'll paint this first
layer of petals that aren't touching and then
wait for them all to dry. Now they are dry and I'm
going to use the same color. Again. I'm going
to follow the line of the petal around
the same as last time, but this time it's going to overlap over the top
of the painted petals. Can you see the
transparent effect? We have two petals
next to each other, so just pick one petal to paint. Having the watercolor
pencil outline really helps with
this to make sure your petals are
nicely spaced and all pointing in the
right direction. Your petals don't
need to be perfect. Imperfections are part
of the character and can help the flower
look more realistic. Once you've painted
as many as you can around the flower without
the pace was touching. Please let it dry again. We are now onto our
last layer of petals. This is the same as
the last two layers. We will follow the petal
shape around painting and even wash of color working
our way around the flower. And then we will wait
for it to dry again. Now that all of the
petals are dry, we can paint the
center of the flower. I'm using yellow again, one of my favorites. Instead of painting a round
circle in the middle, I'm going to dab my
brush like this. Even though this isn't a
realistic looking flower, I think let's add some texture
and interest compared to doing an even wash of
yellow in the center. I'll grab some more paint to dab some darker bits and you can even choose
a different color, perhaps brown or orange. I'm going to use brown to dab some tiny dots to create a pretty color
bleeds and texture. Now, this flower
has done to us is such a fun technique
and I can't wait to see the beautiful
transparencies in your flower. I would love you
to share these in the project section of
this class is that we can all see of beautiful
paintings that you have created.
8. Conclusion rode upload: Thank you so much for joining me and painting the
beautiful flowers. I can't wait to see the wonderful florals
that you have painted using my signature heck with a watercolor pencil
to trace the outline. I really hope that you enjoyed today's
class and picked up some wonderful tips
and tricks and new techniques to use in
your watercolor paintings. If you have some paintings
that you would like to share, I would love for you
to pop them into the project section so that
we can all take a look. If you're wanting to share
them on social media, please give me a tag
at Ashley for studio and also gives Skillshare
tag to add Skillshare, we would love to see your work. Please make sure you also
give me a follow so that you can be notified when I have
any future classes posted. I hope you have had a
wonderful class with me today and thank you so
much for joining me.
 Ashleigh Fish, Watercolour artist and surface designer