Transcripts
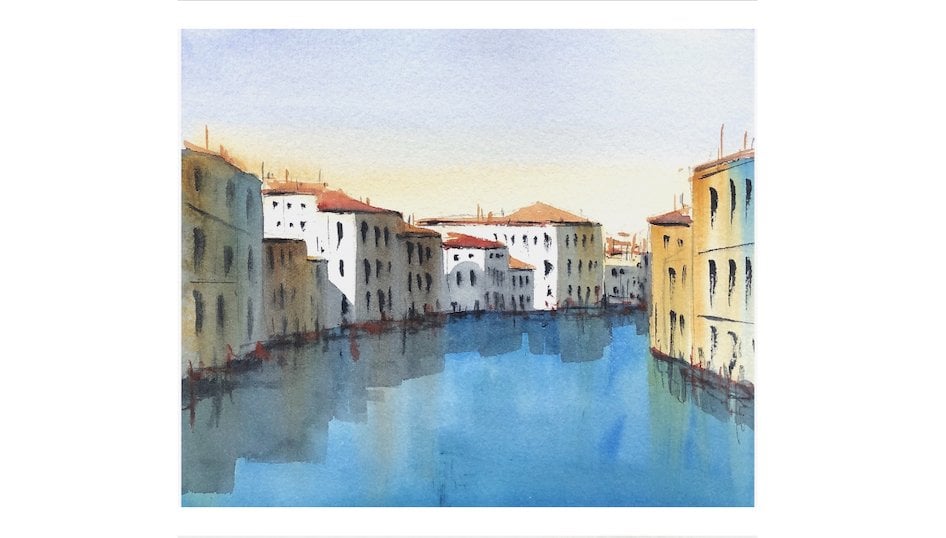
1. Introduction: Hi I'm Nadine thanks for
joining me today. A little exercise that we'll
be doing. This is it here This is a really quick one. And this isn't about producing
an amazing painting. This is about learning
some really basic skills. So for this, It's about
the importance of tone. So having a full range of tones from the
lights to the mids, to the really strong darks. And also about how much water in your page and how much
water in your palette. So we're going to do this
little foliage in the front here using by forcing cauliflowers
forcing blades. And it's really about timing. And that's something that
I'm often asked about. So this exercise is
about sitting there and adding some water
and seeing what happens and adding a
little bit more and seeing what happens
so that hopefully you're more comfortable
when you've got a really wet page about knowing when to go in
and when to stay out. So what we'll do is
we'll go through the sketch, which is very, very simple, the materials and then we'll get in
to having a play.
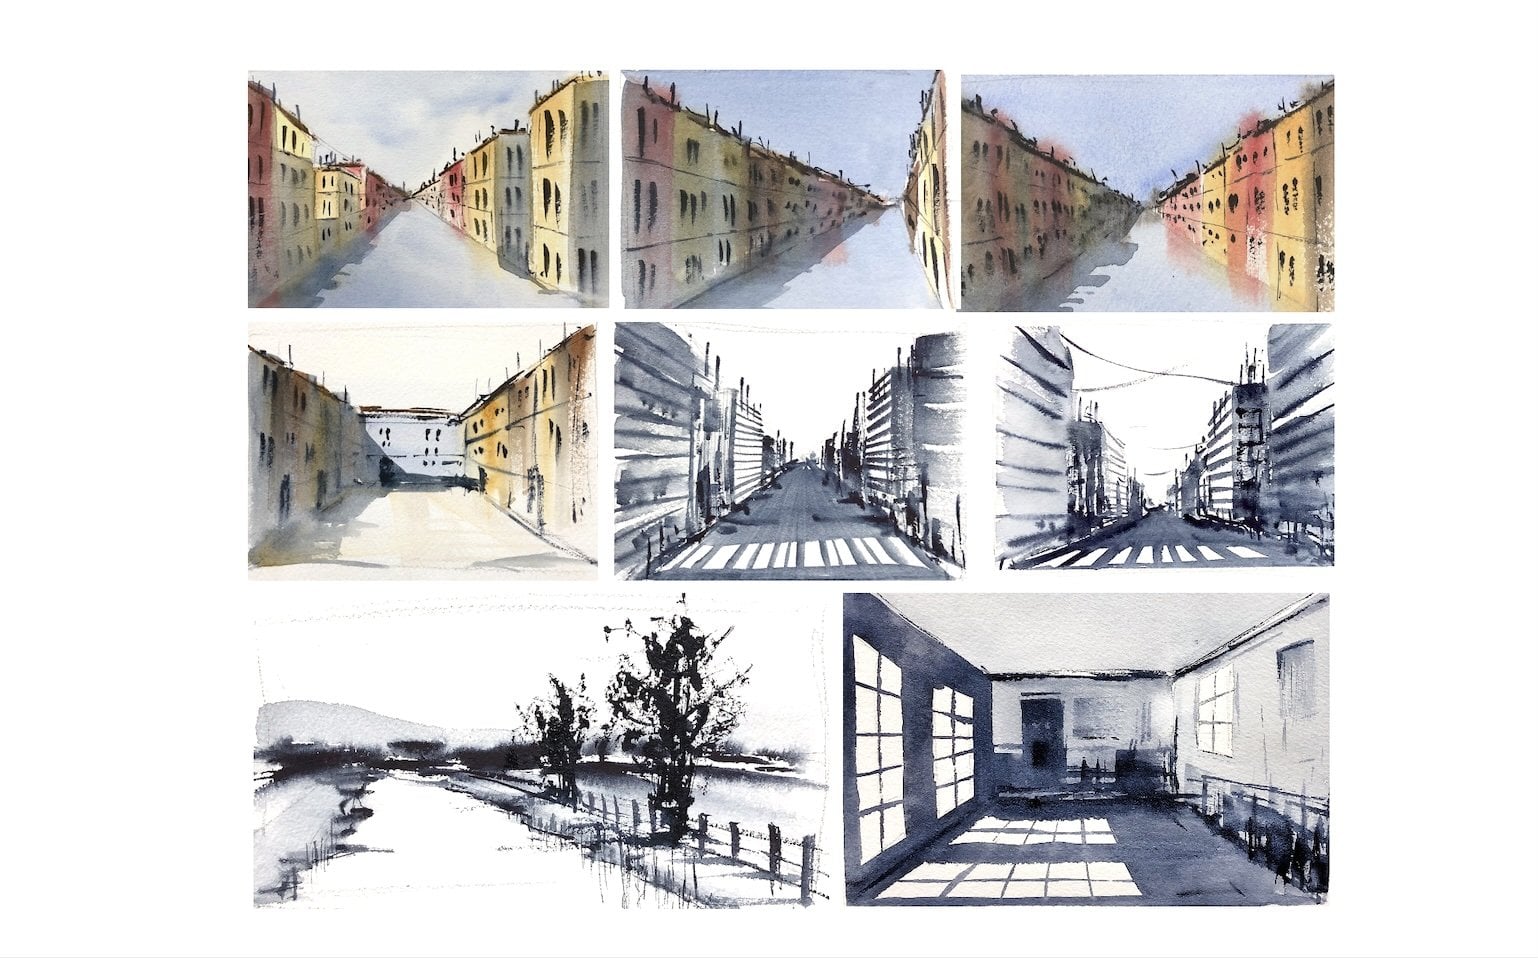
2. Materials: I'll go through the
materials that we're going to use for the exercise today. I've got some 300 gram Arches
cold pressed paper here. Mine's got a painting on the back,
so it's a little bit buckled, so I probably should've
taped that to a board. So if you've got
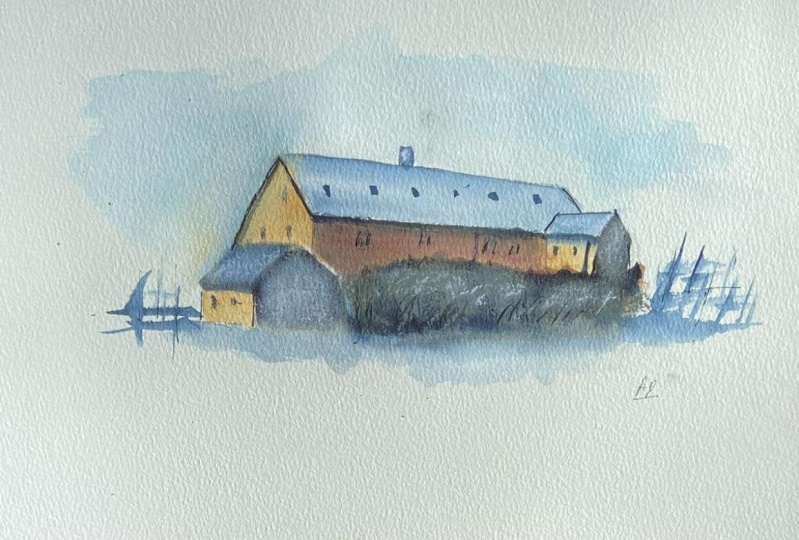
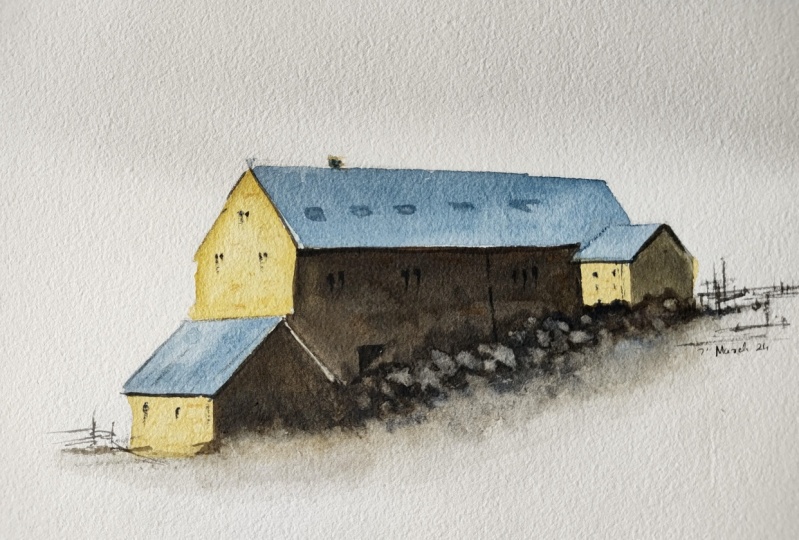
a board, you can tape it down if you like. I've got the reference photo, and a little template of
the sketch that are on the website that
you can download. In terms of paint I'm
just using for today, you can use whatever you like. It really doesn't matter. I've got some
Daniel Smith indigo and some Daniel Smith
Van Dyck brown. And then I'm also
going to be using some Winsor and Newton
yellow ocher and some burnt sienna
for the brushes. I'm just using two, so I've
got a medium-sized brush just to be able to
go the distance for these larger shapes. So the one I'm using is a Neef 4750 LP squirrel
taklon mix. It's a size 8. And I've also got a small size 2 synthetic
for the detail. Other than that, you'll need an HB pencil and
a normal eraser. I've got a palette, tub of water and I've got
some toilet paper, or some tissue to take the
excess water off your brush. I think that's all we'll
need so we can get painting.
3. Sketch: So we'll start of with the sketch. I'm just using a
regular HB pencil straight onto my
watercolor paper. And the first thing
you'll see about this, obviously it's
very, very simple. I haven't worried about any
of the detail in this at all. I will put a few windows
and that kind of thing on with the brush as we go but I don't really want to get
fussy, at this stage. And really this isn't about
so much all of this detail. It's about getting the tone right so that you
release the light. So keep it really simple. When you are drawing
something like this, that's got a lot of lines in it. I tend to get my pencil and just check the angle
of those lines so you're putting it
against the roof line to see which way it's going. Something like this garage,
it is a bit tricky. This roof line here, is heading
ever so slightly up. On the eaves here is pretty
much straight across. So I always just check those as I'm going to make sure
that I've got it right. I don't think we really
need anything else. I've got a little template of this on the website that you can download and transfer over if you would
rather do that. And I think we're probably
ready to just start painting.
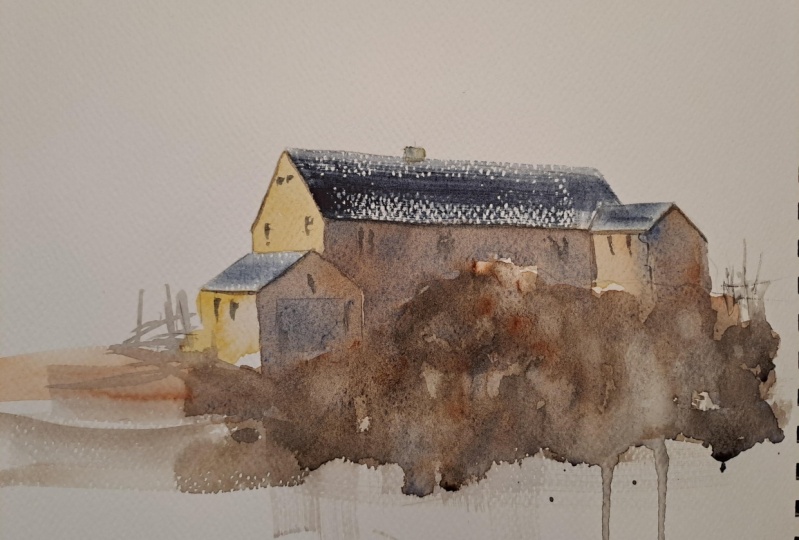
4. First Wash: We're going to come on now with some yellow ocher and
some burnt sienna. You might notice this is a slightly different
sketch because I spilt coffee all over
my first sketch. So this is take two. I'm just going to grab
my medium-size brush, some clean water here, and I'm going to make up a big
puddle of yellow ocher. So this is a really
milky consistency here. I'm going to come straight
onto the dry paper. I'm going to paint firstly, going to paint left to right, bringing it down, grabbing
some more pigment. Not enough. Now, I'm
actually going to put, I think I'm going to just put a little bit
more interest in here. I'm going to grab some burnt sienna as well and just touch that into that yellow ocher
bit more across. Just because I know
that I'm going to be darker on this side, on this part of the house. Then I'm going to switch
back to my yellow ocher. It doesn't matter if
you don't do that. I got more burnt
sienna in there, than yellow ocher through
the side of that building, then into the garage. So picking up the
yellow ocher again, when I come across here, I'm going to leave a
slight gap between the building here on
the top of the roof of that garage just because
I came in there first. I've got a lot of water on my brush. If I touch that now, it will all of that will bleed up. I'm going to wash my brush
take the excess water off. Going to drag my damp
brush roughly around I'm really interested in what's happening on the edges
here that I want, I don't want a hard line there. I just need my brush to
be drier than the page. Otherwise all of that
water will push back up. Now while that's damp, I'm going to take some
some Van Dyck brown here. Doesn't matter, you
could take some. It doesn't matter what
you take any color. All that matters is
the consistency of the paint and I want a
darker tone here. I'm cleaning my brush, I'm
just taking off the excess, getting really thick paint. And I just want to start to give myself an idea of where
all those bushes are. I'm just dropping it
while that paint is wet. Nothing too, not really
thinking about it. I'm just putting in a
little bit of pigment. Just having to be careful
that I've got again less water on my brush
and in the pigment, than is on the page because if I introduce water here now, it will all form cauliflowers, which is something we are
going to do a bit later, but I don't want to do it yet. Now I've got a really
hard edge here, so I'm going to wash
my brush again, less water on my brush and just tease that down a little bit. Now I have to come out of
it and just let that dry.
5. Adding the Roof: I'm completely dry here. Now it's been about ten minutes depending on how warm your room is. So I'm just going
to come in and put the roof of each of these in. I've got a really
milky puddle of, I've got some indigo here with my medium-sized brush
onto the dry page. Come across. I don't need to be too fussy. about this. Just give myself a little bit of a line for the
other side of that roof. I don't think I'm going to worry
about those little lights there. Take a bit more come
onto the garage. Just a little bit of
a line down there. Again, not being
too I don't need everything to be perfect. You need your verticals
to be straight, but everything else you've got a little bit of
wriggle room. I might just also just, I'm just gonna put
a little bit of a suggestion there
of the garage, knowing that I'm
going to come on with a darker tone there, then I'm going to come
out of that again and I'm just going to let
that settle in.
6. Adding the Shadows: It's been about five minutes and I'm pretty dry in here now, what I'm gonna do next
is I'm going to add the dark shadows on
the surfaces here. And I'm also going to add
some pigment in here to start working on the
foliage in the front. Same medium brush. I'm going to pick up now a
mixture of my Van Dyck brown, my indigo, I'm going to make a big puddle because
I don't want to have to keep making up
more halfway through. I want to have enough
to go the distance. A bit of the blue bit of the brown. Come on here first. Come all the way across. Now, I need to leave the
light on this face, pick up some more pigment. And I'm going to put it in
this side of the building too then I'm also going to do
the face of this garage. Again, that same thing that
I'm leaving just a flash of light between the roof,
the rest of the building. Now, again, I've got these sort of hard lines
down here that I don't want. I'm going to wash my brush. And I'm going to just
drag my brush along. Just let that do its own thing. Just rough it up a bit. Now, while this is still wet, I'm going to do the same thing now with a bit stronger pigment. So I need some thick Van
Dyck and thick indigo. I might squeeze some fresh
out of the tube because I've, my indigo here is
all really milky. I've got a nice squeeze
of Van Dyck here, but I need stronger pigment. My paint is dried up. So instead I'm just going to take it straight out of the tube. Bit of brown, bit of blue, less water in my brush than
my page like we did before. Actually, you can check that by you can just
touch the heel of your brush to a tissue to
pull out any excess water. Just chucking some dark on it will become clear why
I'm doing this in a minute. Letting it do its own thing. I might, as I come up
to this building here, I'm just going to
so it's dry there. I'm just going to put a
few little brush marks in to suggest that actually that's a shadow of the shrubbery that
we're going to have here. Now, this is a lesson
in clean my brush. I'm just going to back off
so no moisture on my brush, just softening that bit there. Now, this is a lesson in timing. What I want to do
is find the point at which when I
drop water on here, it will push the
pigment out a little bit and not spread
through the whole page because I'm going
to use the bleeds to suggest that I've got some
plants here, just tidy up. Keeping with my same brush. I'm going to start a
bit low because at the moment I probably
still too wet. But to test that out, I'm going to take just
a touch of water. I'm just going to pop a
little bit of water on there. You can see that bleed starting but it's not really holding because
I'm still too wet, so I'm gonna sit
here, I reckon for I'll time myself maybe a minute. And I'm going to try it again. Hands-off, sit for a minute. So I sat for a minute and
it still looked a little bit wet. So I sat two minutes. I'm going to give it another go. And what I'm going to do also, I'm painting flat at the moment. I'm going to, well, I've got pretty buckling paper, but I'm going to just
stick a tube up here to make sure that any of my water runs down. We're going to try
it again now after my two minutes, a
little bit of water. Just touch it into one
of these lower bits and see what happens. Now if you wait too
long and it's all dry, you'll put the water on and
nothing will happen. You'll just have water
sitting on top of the paper. So you've got to find
that sweet spot, which is the difficulty
in watercolor where you can still
make things happen. But you don't just flood it
all into one solid wash. So here's probably
still a bit too wet. I've probably got a bit
much water still in there. Here. It's starting to
do what am I after It's a matter of being
patient, testing it out, testing it out on the
lower bit here so that you don't bleed up into the
top of the building. If it's too wet, sit back. Wait another minute. Go again. If you get, if you're lines
are too severe down here, I'm just going to wash
my brush, takeoff, paint my tissue with my brush and just
drag that down a bit. I'm going to try and
force one there. Now of course, you could just
come and paint the bush in. Obviously once this
was fully dry, the reason I'm doing this, It's really an
exercise in learning how much water on your page, how much water in
your pigment and what happens when you've got
too much or not enough. So that's really why
I'm doing it this way. Just going to wash my brush and just again, tease
that out a bit. Now, if you've added too
much water and you start to lose the pigment there
while that's still wet. I still of course I can come
back in and add more pigment and then this time having less water in my brush
than on my page. So my pigment there is really toothpaste to make that settle. Now I've been in
there awhile now. I can see I've got some
hard edges forming there where the wet paper here
is meeting the dry paper. I'm quite happy with that. I'm going to come out
of that and let that dry and see what that does.
7. Finishing Off: Okay. I'm out of here 15
minutes now and so I'm, dry all through here. Well, mostly it's
still a little bit tacky but I'm not
going in there again. So that's okay. I'm going to start to add
my really strong tones, my darkest dark now. And for that I'm going to use my small synthetic brush
just a little size two. It doesn't matter what brand. I'm going to give myself
a little bit of scrap paper just to
test before I go on, I'm going to use a mixture of my Van Dyck brown and my indigo, still keeping the
palette nice and simple. So I'm going to take
really thick Van Dyck, mix it with some indigo. You can see I've got a really
nice strong dark there. Not a lot of water. I did manage to squeeze
some indigo out of my dried up tube. Ok first place. I'm going to go is
underneath the eaves here. Dark all the way
along through that building. Actually gone a
little bit too far there, I'm just going to take
off that little blip there. Washed my brush and
just soften that back a little bit on
the front here as well. Now here I don't
want it too thick, so I'm just going to paint
my tissue a bit. And just a little bit of a line, there coming underneath
the garage. I missed there. I'm just coming up to
the actual roof line. Then I want to suggest a
few windows now for this, I don't want to be, I don't want to paint
windows as such. I want to use the
shape of my brush and just make a few darks. I'm painting into my
Van Dyck and my indigo. I'm taking off the excess I'm going to come up to this
little bit here. Just put two little lines. Then I'm going to come over
to probably this side. I actually, I think my
line is not quite right. I wasn't very careful with my angle. when I came across there,
so I'm just going to soften, straighten
that up a bit. I'm gonna put a little window
in here, not on the reference. but just for the purposes
of the exercise, I'm going to take the excess off my brush and I'm going to
put a bit of a downpipe, got a big lump of paint there. Downpipe. I might put a window on the
front of the garage as well. Again, thick paint paint on my tissue because I
want a bit of a dry brush. Now I'm dry in here. We want to do a similar thing. Thick paint. I'm using the side of my brush. A couple of windows. Not a whole lot
of water on here. Maybe a three there. Maybe I'll paint, maybe
somewhere in there. There's a door. Don't really like
that so I'm going to touch my tissue to it. just tidy that up a bit. While I've got this on my brush. I'll do another down pipe. When I do these lines. They need to be straight but they
don't have to be just painted really heavily. You can have them a
little bit broken. It doesn't have to be too tidy. Now while I've got
that on there, I'm going to paint a few
little bits to extend out. So this is really
just not thinking. And putting in a
few nonsense lines around the place just to border, I guess the painting because I haven't put
other stuff in here, but I just need something
to show me where it ends. I didn't put the chimney and
so I might pop that in now. I'm just going to
take a little bit of maybe the yellow ocher. I'm not really going to paint anything particularly
significant. I put a bit of yellow
ocher on there. Then I'm going to touch a
little bit of my indigo in and just let that bleed because I don't want to
get fussy about that. Maybe a bit wider. It's still wet so I can
just drag it a little bit. I don't want to overthink it. Now. While that's drying. The other thing that I haven't
put any of the details of the tiles or
that kind of stuff. I can maybe suggest some
bricks, something like that. If I do that though, two things to be careful. Don't try and paint
in all the bricks. And the other thing, be careful of the direction. So here I got too
heavy because I am I put my angle, I didn't
put my angle correctly, so I had to make a thicker line. So do check, if
I look at my, if I look at this face, the bricks do check which way they're actually
running because you will distort your
perspective lines if you don't pay
attention to that. So all I'm going to do for that, I'm going to take maybe a
little bit of burnt sienna, my little synthetic still. I'm taking the
excess off my brush. And I'm just going to paint some random brushstrokes,
not getting fussy. Certainly not painting
every brick. Moving around. Which way did I think they
went went here. They sort of went up. I feel like I'm just going to put a, I don't like
how hard that ends there. I'm just going to,
that makes the church doesn't, just soften that back a bit. Ok. If I wanted to on here, I could give the suggestion
of those windows in there. I don't really want to, but if I do that, I don't want to
paint them all in. I just want to give
the few brushstrokes to just suggest it. Same if I was going to
draw the tiling in here, just a few lines
don't go overboard. That's probably where I'm
going to leave this exercise really about learning how
much water in the page, how much in your
palette, the importance, I think really having, having your full range of tone. So from there really
lightest tone to these mid tones to then
a really strong darks. And the other thing is
learning what shapes your brush will make
for these kind of little marks that you make
or you find that you've got a couple of favorites
that always work for you. That's I think where
I'm going to leave it. Thanks for joining
me posted pic. If you want me to have a look.
 Nadine Dudek, Professional Watercolour Artist