Transcripts
1. Introduction: [MUSIC] A lot of times
when I start creating I want to limit the
supplies that I'm using because I feel
like limiting what you're using opens up
the possibilities. You're no longer stuck
with the paralysis of, oh, no, what color do I use? What do I pick? Where do I go? What am I trying to create? You don't get stuck
when you limit yourself right up front
because now you're thinking, oh, I've got these three colors, I've got this ink, what can I make today? Let's just get to it. Today, that's what I did. I picked some colors,
I picked an ink, I picked a paper, and I said what can we create? I'm Denise Love and I'm an
artist and photographer. Today, I want to make some
minimalist abstracts with you. I've picked a few watercolors, I've picked an India ink, I have a dip pen, I have some water, and we're just creating with really a minimal
amount of supplies. I want to create a
minimalist abstract. I don't want it to be too busy, I don't want there to be
lots of action going on, I want the colors and the
marks to speak for themselves and it be very
calming and peaceful, that's where I came up with the projects that
we're doing today. We're going to start off
creating a little leaf project. We're going to move up to
some little abstracts. Then I'm going to make a
little bit bigger abstract with some wonky shapes
and some scribble, and just see what
beautiful pieces come out of our play today. I want you to relax, I don't want you to
get stressed about the page being white or
what color you should use. Pull some colors out and say, I'm going to create
with these today, just see what I
can come up with. You have so much fun at your
art table when you don't put all the pressure and expectation on yourself to create
a masterpiece. I wasn't trying to create some amazing pieces of art today, although several that
I created I was like, wow, I love these. I think by sitting
and enjoying and relaxing and creating with a
minimal amount of supplies, you'll find some joy
at your art table, you'll want to come
back and create again. That's the purpose of most of the projects that
I like to post. I want you to get excited
about making some art. I want you to come
back over and over again and enjoy the time
that you spend creating. Not everybody has all the
hours of every day to create. We have a minimal amount
of time that we can spend in-between the
rest of our work life, and our family life, and the other things
that we have to do. I want you to make the most of that time when you come
to your art table. I want you to leave energized. I want you to love the
projects that you created. Hopefully today's projects
will leave you energized. You'll have some fun. You'll have some
new discoveries in the way to work with
these materials. I can't wait to see
what you're creating. Be sure to come back and
share those with me. I'll see you in class. [MUSIC]
2. Class Project: [MUSIC] Your class
project is to create some minimalist abstracts
of your own with any of the techniques that
we're looking at in class. You can substitute the
watercolors that I'm using for any watercolor that
you happen to have on hand. I can't wait to see what
you end up creating, so come back and
share those with me. Create a couple of abstracts and come and post a project, and I'll see you
in class. [MUSIC]
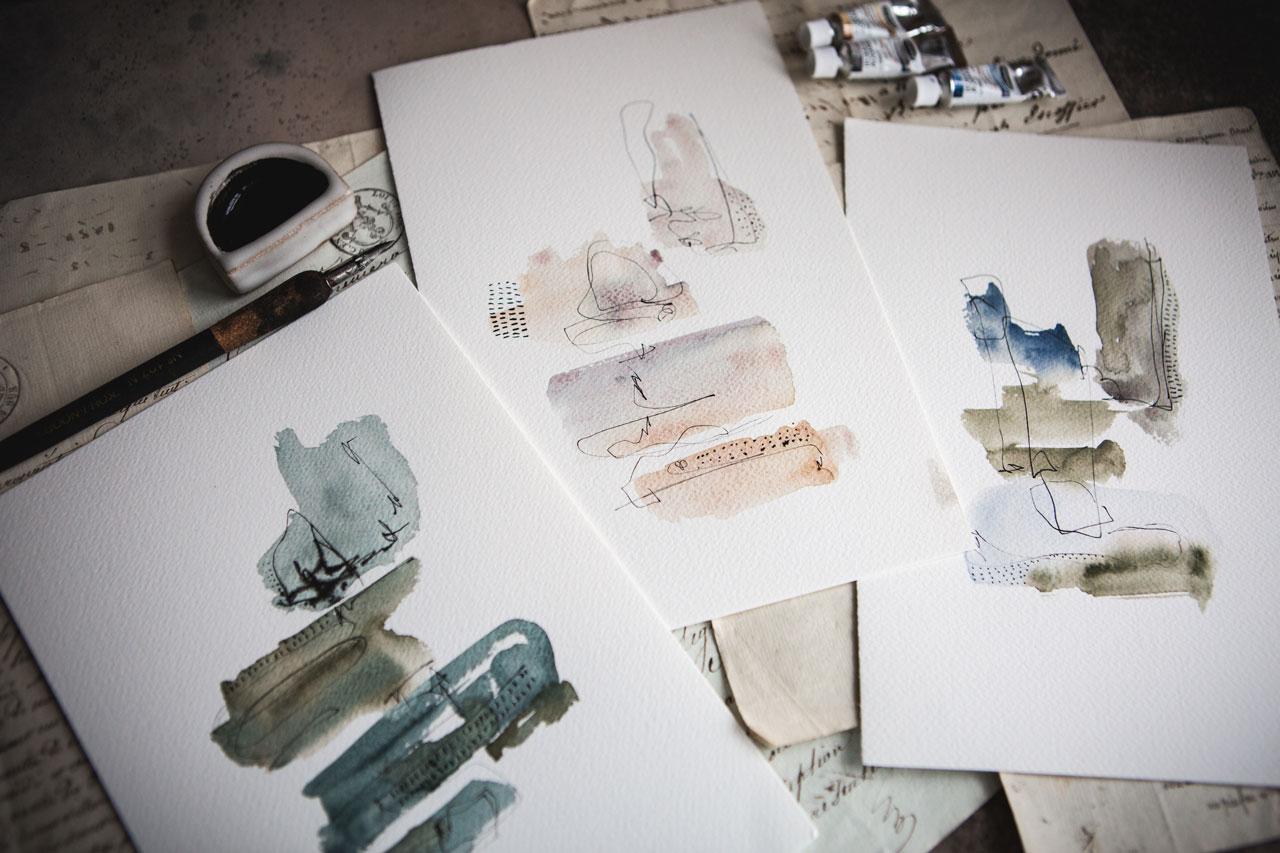
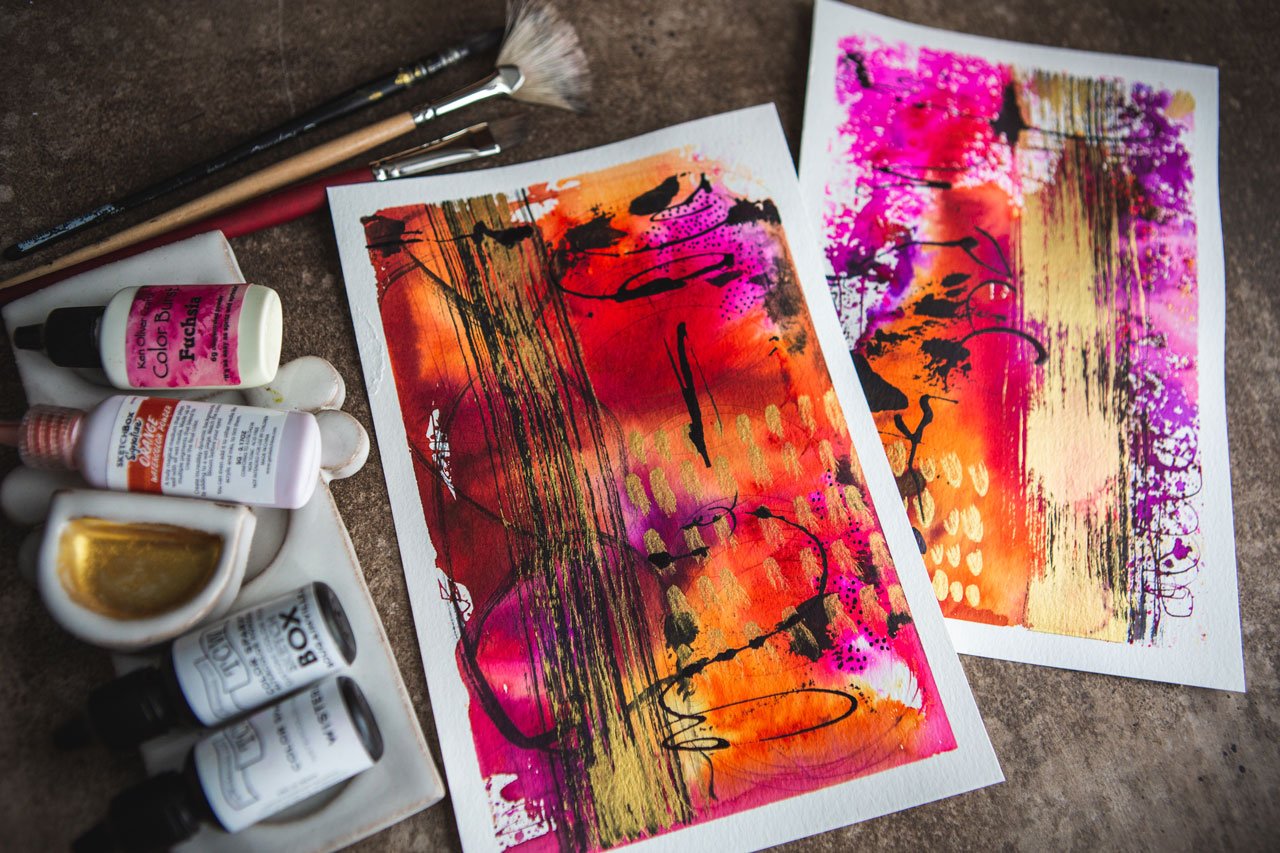
3. Supplies: [MUSIC] Let's take a
look at the supplies I'll be using in class today. I wanted to limit myself on the materials that
I was using to create these pretty
little abstracts. I've decided I want to use some watercolor and I
want to use some ink. I want to use some of my Schminke super
granulation colors because I like the colors. I was wanting some type of brown or smoky brown or indigo or something in those
neutrally colors, but the only
watercolors that I have in some of those
tones because I also have acrylic inks and my
favorite acrylic inks are these Daller-Rowney
antelope brown and indigo. But the indigo is so strong, and I really want
something soft and subtle and almost scratchy. I want it to not
be in your face. The inks are so vibrant that
they're more in your face. I want this to be a
little more subtle, and the watercolor
to fit in with the really thin light marks that I want to create on
our little abstracts. I'm going to use the
super granulation pack, and this is the tundra pack. I like this because it
has an orangey brown, a dusty pink, this violet,
pretty sagey green. There's a lot of colors in
this set that I really love. This is my Schminke super
granulated palette. I certainly could use one of these other palette things that I've got the
colors out for, and the other two sets
that I have on here are the Haze collection and
the Forest collection. Mainly I'm going to stay
up here in the tundra set, I certainly may move
around to one of these other sets that I
already have on my palette. Also for the ink, and you can use acrylic ink. You can use any type of
ink that you have on hand. I'm going to be
using Black Magic, which is India ink, and I want it to be
something black, so that's what I'm
going to go with. I'm also paper wise
going to go with the Canson Heritage cotton pad, this 140-pound cold press. I had a little bit bigger pad that I used the
last two sheets of. I had the 10 by 14 pad. This is the 9 by 12. I cut the sheets of the 10
by 14 into several 5 by 7s. Then I trimmed it down
on one of those to 3" by 6" because I thought
this was so beautiful. I'm going to create
on this paper. Experiment with your papers. I did some paper tests and experiments and decided
the Canson Heritage. Just to show you some of my very rough and
crude experiments. But I was playing with
different watercolors. I was playing with
different papers. I was playing with
different shapes, and then I was like, aha, this is the one that I truly loved and want to
create with today. A lot of times I will do paper tests and pull out all the different
papers that I have, and cut that sheet into several little pieces so that you can do that for
other projects too, and save all your little scraps, and do a paper test and say, aha, this is the
look I'm going for. The other thing I'm going
to be using today is just an inexpensive dip pen. It's a nib and a holder. Any dip pen is fine. You can use a ruling pen, you can use your Kakimore
nib if you've got that one. I'm going to be
using the cheap nib. I like it because it's
an ultra-sharp tip, and it gives me a
really nice thin line, almost shaky, which is
exactly what I wanted. Then I got a brush for the water that I'll
be putting water on. This is my soft Aqua
Raphael brush number zero. Just in case at the very end if I decide I want some dots, I've got my Posca pen. But I really feel
like the Posca pen might be too cutesy, and if I do a dot, maybe it
should be in that black ink. I always reserve this
for a just in case. I have it out just in case. That's the supplies
I'll be using in class. I wanted to keep it
simple for myself and see what I
could create today. Let's get started. [MUSIC]
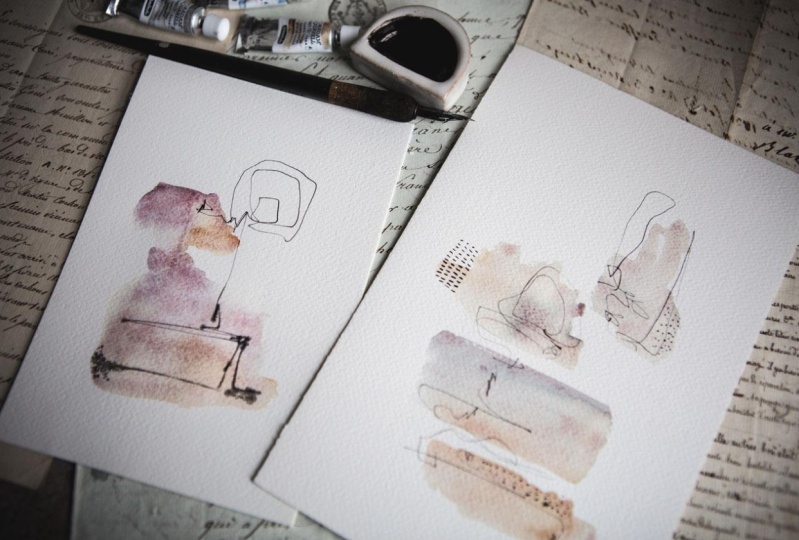
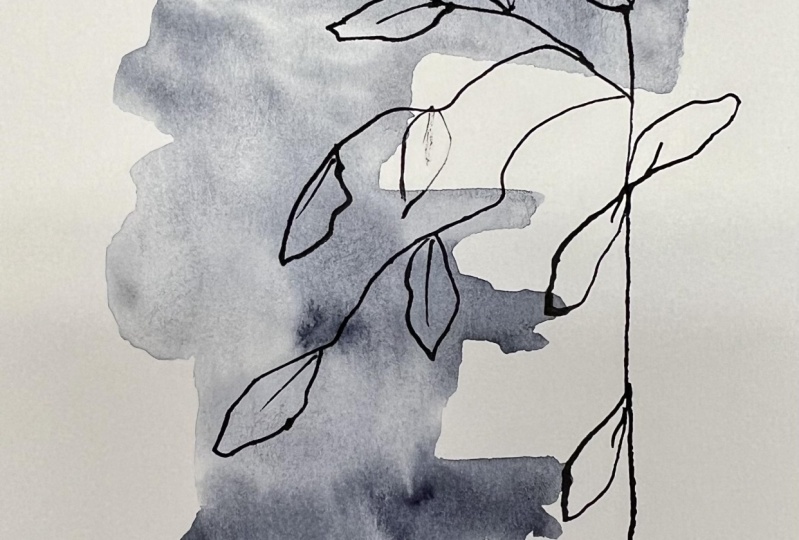
4. Small Leaf Project: [MUSIC] Thought it would
be fun to start this with a very simple leaf or vine. What I want to do
is on this paper, just create two leaves. Just let the watercolor
do what it's going to do. I'm going to put my
brush down and make a stroke and come back
and make another leaf. Then I'm going to come back with the India ink while
the leaves are still wet and draw my very thin, shaky almost vine and
some extra leaves. I want to do it while it's
wet so that I can see a little bit of the ink
spreading into the watercolor. I'm feeling that
might be really cool. I'm just going to pick
one of the colors here, in my Schmincke and I'm
going to go down and create a really
beautiful leaf pattern. Then we will come back, dip our pen in our ink. I want it to be a really thin, almost more than one line. Come up through the leaves, and then I can create
some other fun, almost shaky leaves
to finish it off. Look how cool that is. These are so pretty, let's make another one. I'm just keeping this as simple as you could
possibly keep it. But I just want to see, once these dry, I think the leaves will be
super, super cool. I'm going to pick
a different color. Maybe I'll come over
here and don't ask me what colors these
are in these sets. I just know it's the three sets, but this might be
the blue, we'll see. It's very grayish. Actually that might
be the violet. I'm not positive though, but look at how pretty that is. Before you think to overdo it, just do your lines, get your leaves in there, and then set that to the side
and just see what you get. This is a really fun
warm-up practice. Something that we
can just do early on and see what can we get. Let's just do one more. I wanted to actually be even
a little bit scratchier, let's go with this. I wasn't going to pick
one of these other colors but I'm going to
go for it anyway. That one's a gorgeous color. Oh, there we go. I
wanted that to be a little bit spreading
around in there. Oh, yeah. I'm not wanting the
leaves to be perfect. I want them to be scratchy, almost like an unsure hand. I just like the really
pretty elegance of that. Look, it's beautiful. This one I could
actually even come back because I feel
like I didn't get enough color here
on this and I could dip some more color in
there and just see. Oh, yes, I like that better. Then we can just let these dry. We're going to let
them do their thing. But look how pretty those are. They're just elegant,
they're very simple. Another thing that we could
have done is we could have done our ink drawing
first and let it dry. I actually have a
little sample here. Let's just do this
on a little piece while we're doing
these. Why not? We could do the ink first and then come back and strategically
add some watercolor. What if we did that?
Let's do the ink first. Just create. Let's just see, let's just create not doing
anything specific here, but maybe just a vine. Maybe that vine has
a leaf at the end. Maybe there's a
pretty leaf here. My goal is not perfect, even, weight lines. I really do want it to look like I got a shaky
hand or something. Let's just pick
whatever this color is. I don't know what this is,
but we're going to pick it. Look at that, that's super cool. Again, my goal is not
to have a perfect leaf because I can certainly
create a perfect leaf, but I like it when they're
not perfect and just fun. Really pretty.
We're going to let these dry, do their thing. I love the way this one is granulating out into
some other colors. That's really pretty.
This one's one of my favorite, I love this one. I did one earlier on that's also really beautiful
and my very favorite. It was using just a light blue
and it was really pretty. Super fun, very easy, simple leaf pattern just to start off our abstract thinking. Then in the next project
we'll go a little bigger and do some
different shapes. We won't do a leaf,
but this was really fun for a small project. I'll see you back
in class. [MUSIC]
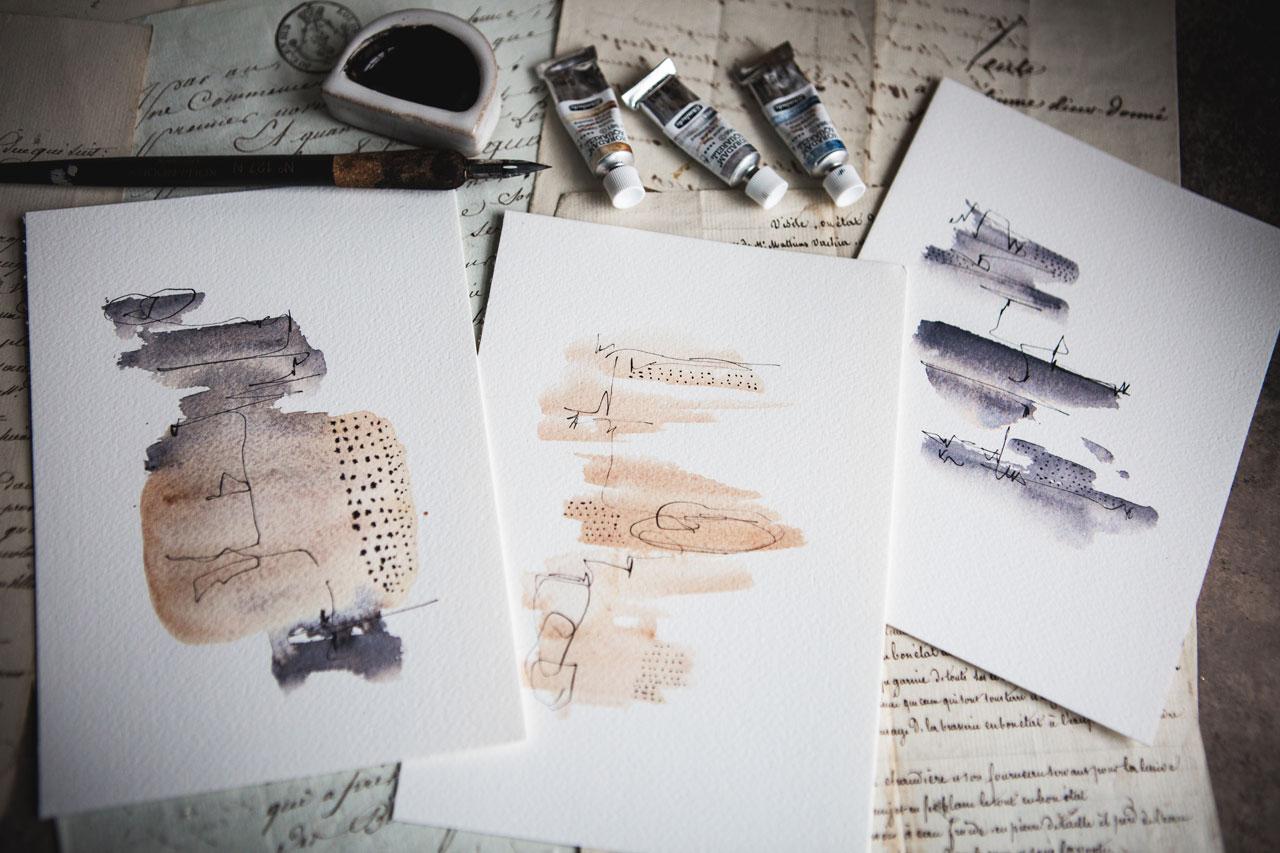
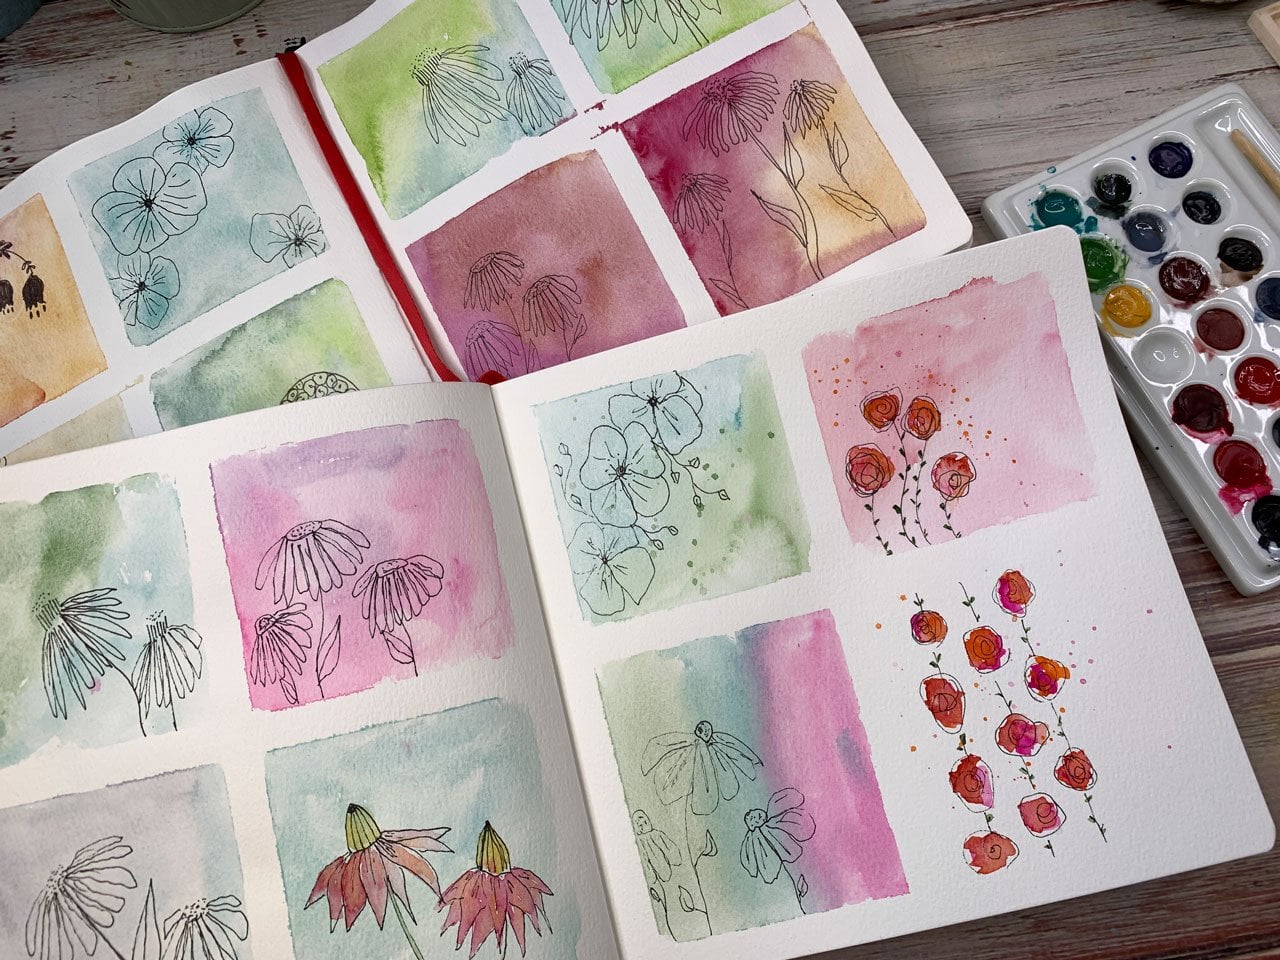
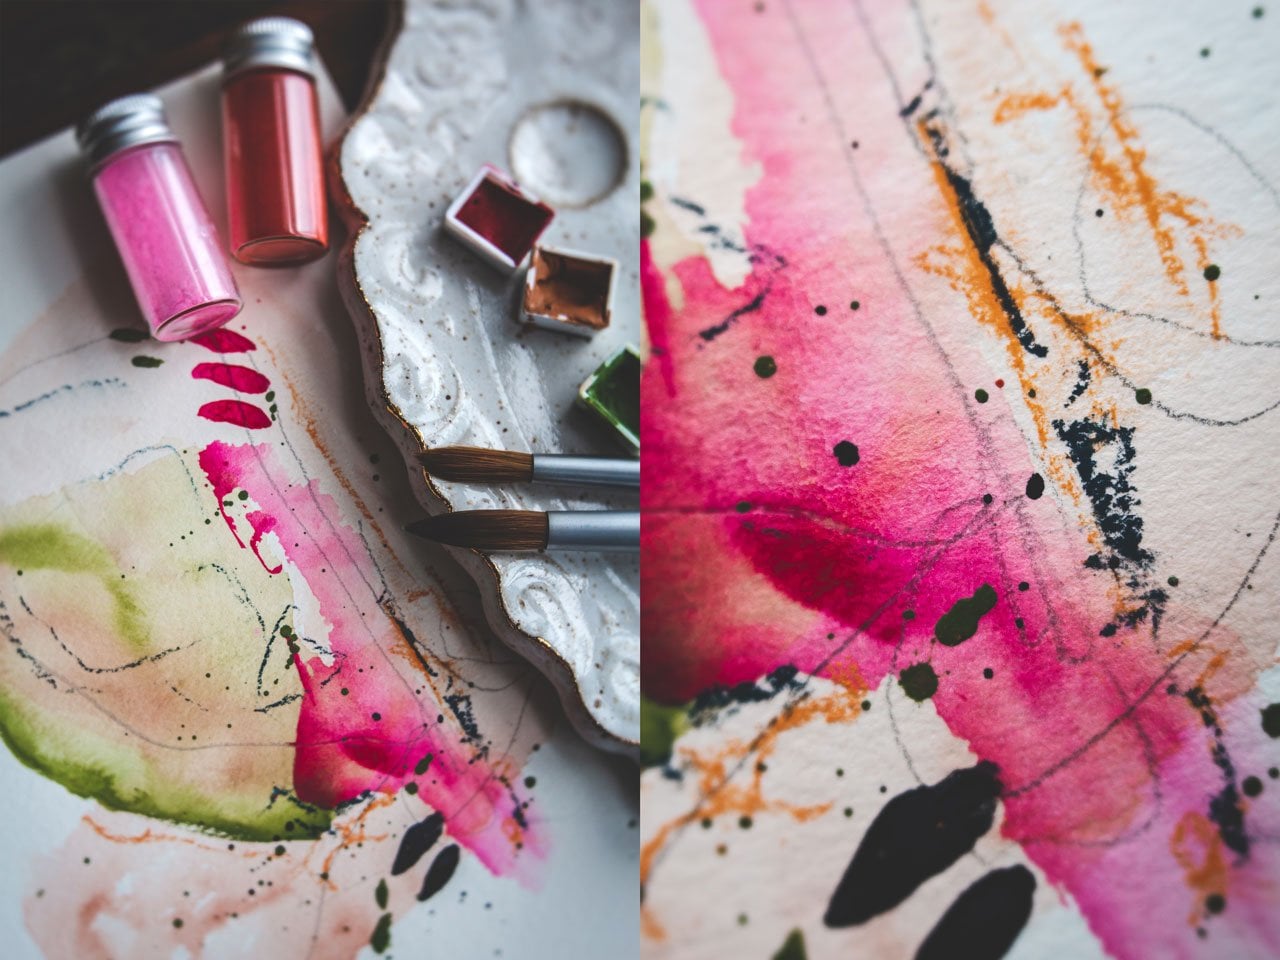
5. Small Abstracts: [MUSIC] Let's create
some bigger abstracts. I'm just going to go with a
shape and some ink lines and just see what can we get
with something like that. We can start off by
putting water on the paper and then coming back with some watercolor and
dipping that in. That's one way that
we can do this. We could also start with
a bunch of watercolor on our brush and lay down that way, but I like seeing how stuff spreads around in water
that's on the paper. I'm tipping the
paper just a little so I can actually see
where that water is. But I think it would
just be fun to say what can we create if we just did
something like this. We can put the paint on the
brush too just like I did. Actually, on this cotton
paper, kind of like the control that gave me
with the paint on the brush. There we go. Now we know, try both ways and see what's going to give
you the look you like. I'm going to paint on
several different pages because I want some of these to start drying before
I try to ink them. I'm just in my
Schmincke collection of watercolors and
now I know I like dipping the brush in
and pulling that out. Let's just do that and
see what we can get. Maybe I'll dip some
other colors in here, and we'll let that
do something fun. I've got a bunch of
paper over here. I want you to just
do a whole series. Just see what you can
create a whole series wise, maybe different shapes, maybe different sizes of paper. Dip some other colors in and
see what does that add to or change or do for
your piece if you've got other colors shining in. See and I really love what
that's doing right there. Now I feel like I'm
hitting my stride. This is why I want
you to do a bunch of these because it's going to take a minute
for you to be like, Oh, okay, this is how I
like this, like look here. Look at that one. Now I feel like we're
getting somewhere. I want you to do
a bunch of these. I want you to just try it out, put the water on the
paper, put the paint in. Maybe start off with
paint in your brush. Look at that one. I feel like I know which one is going
to be my favorite now. Let me put that one
there. Let's do one more. This is why I want
you to do a bunch. I want you to get into the
point where you're like, ''Oh, this is what I like. I've hit my stride.'' I like barely brushing the paper here with that brush
because then I get these wonderful streaks where there's no color
on the paper and you just get these wonderful
variations of colors. Look how beautiful these are. These I feel like are
almost ready for ink. These are a little bit wet. I think I love this one out of this little set
that I just painted, but I do think it's
fun to just see what can we do if we do this or what can
we do if we do that. I want you to experiment. I want you to find the
joy in the experimenting because now I can see you're
getting to a new collection. Let's not do this on
my favorite one first. Don't do your favorite first. Do your least favorite first. Let's call this the
least favorite. Let's just figure out, if we're doing some lines what do we want
these lines to do? Do I want them to be a shape? Do I just want them to
be fine lines out there? I don't want it to
look like writing. What are we trying
to accomplish? Now that's pretty cool. This one's my next
least favorite. The least favorites
are the practice ones, but see what that ink
did when it touched that wet paper there. I like that. I like watching that ink spread into
that watercolor. That was pretty cool. Third, getting around
to almost my favorite, but not quite my favorite. But it did get me to
my favorite pieces. Then when you get to where
you're like, ''Okay, I think I'm liking
this,'' start to experiment with some
other patterns. It doesn't just
have to be lines. You could have dots,
you could have crosses, you could have stars, you could have flowers,
whatever fills that moment. Whatever you're thinking
you're inspired to do like, oh, I feel this,
or do I do that? You can see where this watercolor
is still slightly wet, my ink spread way more than
I might've even liked. I'm thinking, okay,
that was a nice lesson. Now I know. Maybe let that
dry a little tiny bit longer. If you're wondering
like how you know where to put what and I just want to tell you, I don't. I just decided in the
moment that felt good, so let's try it, but I am liking it. There's no rhyme or
reason as to why I did anything in a
particular spot. I just thought, let's try this. While we're looking at this, I absolutely love
these colors together. It's almost like a really grayish lavender
like that violet, that might be the violet. Maybe the violet and
the tundra orange. I'm liking that. Now I feel like, okay, now let's go into these and see what is this
going to look like. I'm going to do
some lines in here, maybe some dots and
some other mark-making, but now I feel like I've practiced what do I want
these to look like. See now like that, that random circle-y thing
I just did, surprise. It's pretty cool. Maybe we
want some black dots in here. Look at that. Super beautiful. Now
I'm loving this. This was my least
favorite of my favorites. I want you to work your way
up to your very favorite, and just see where are we going to end up
as we get to our favorite. Then once you've made all
these little decisions, then you're be like, oh, okay. Now I know what I'm creating, I know how I want these to look. I now have a destination
in what I want. Of course, that
doesn't mean you might not get to your favorite and then totally mess it up, but you're less
likely to do that. Now you did so many that we
know exactly how we got here. We could create some more. They're not always
going to be exact to what you created first, but we could create more. Don't let that fear
of messing it up stop you from creating
your best work. Look at that. Oh, I'm
just loving this. Not about perfection, it's not about where are
you putting this or that, it's just about,
creating the moment. Look at that. Oh my goodness. I'm loving that one, I'm feeling like this
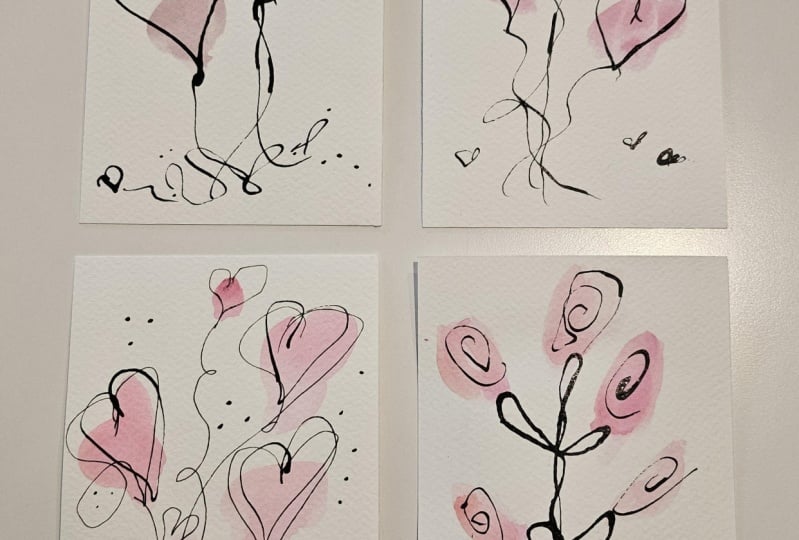
purple one is going to be just as gorgeous. Do I want to do the same lines? Maybe. Oh my gosh. This one is amazing. Look at that. Oh my goodness. This one. This one. See? This is why you work
your way up to your favorite, because now you're
getting excited with each one that you're
doing and you're like, okay, I can see this as cards. I could see this
as a whole series that you take to a gallery. I can see these as little gifts, fun things for the art fair. I can just see this as
being just something exciting that made you have a really good day
at your art table. Look at that. Oh my goodness. These are super fun. I just wanted something to
have fun with at my art table. I didn't want it to
be very stressful. I didn't want it to
be tons of supplies. I wanted to work my way up to what is it that I really
wanted these to look like, and I did it. Look at that. I started off thinking
one technique. As I was working that technique, I was like, ''Okay,
I'm feeling it.'' I thought I wanted to start with water blobs and then I did some water
blobs and I was like, I don't know, maybe water blob and some paint in my brush. Paint in my brush
was definitely it. Then we got to
paint in the brush. Gorgeous abstracts. These are gorgeous. These two, these three, these are so beautiful
that I want you to create some of these and have this much excitement
when you do it. These are super fun. I hope you have fun with
this simple technique. You can use any
watercolor you want. You could use acrylic ink. They're going to be more vivid. My choice today was to be
not as vivid as the ink, so all the watercolor and ink, cheap dip pen, nice sharp edge to get
that really fun, cool, thin detail that doesn't
overwhelm the piece, but makes it really exciting
when you get up close. I can't wait to see what your little
abstracts look like, so come back and share those. I'll see you back
in class. [MUSIC]
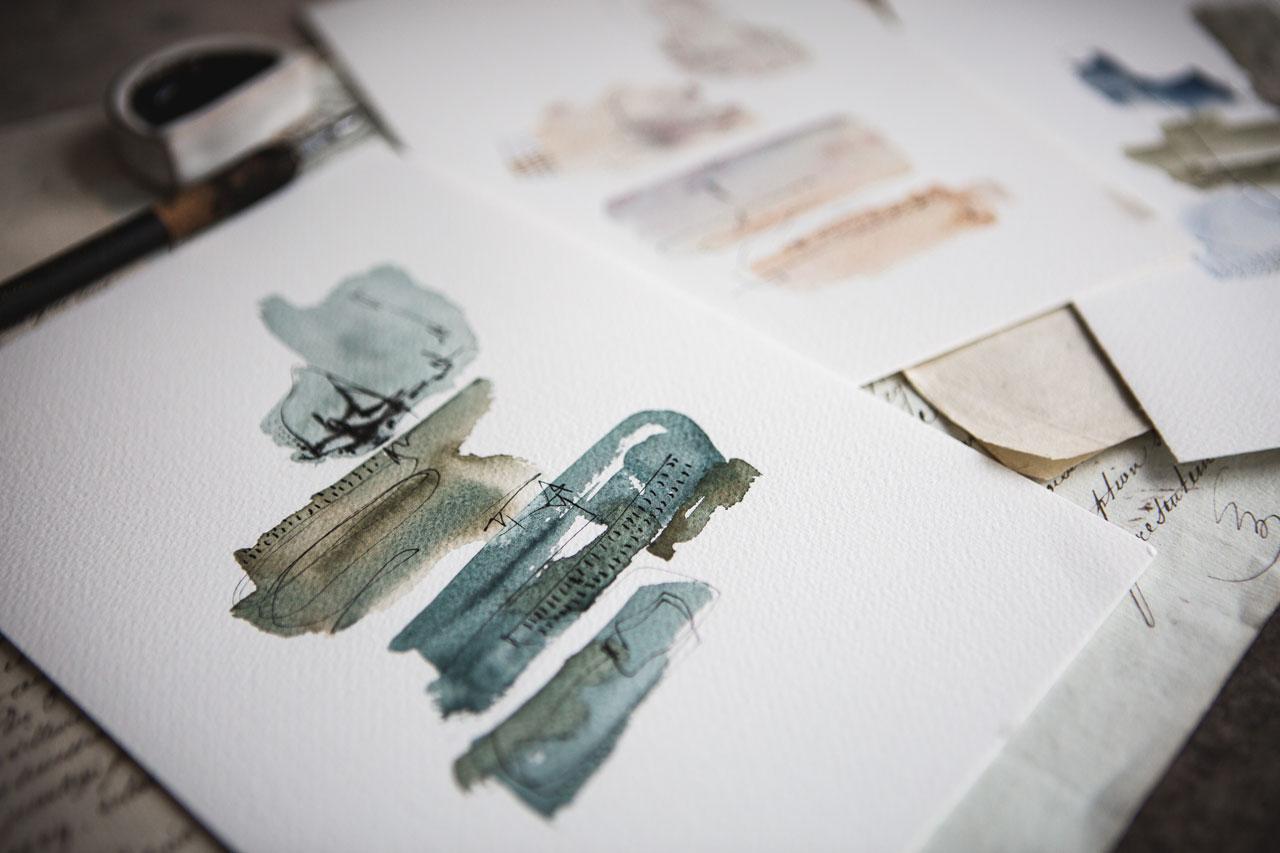
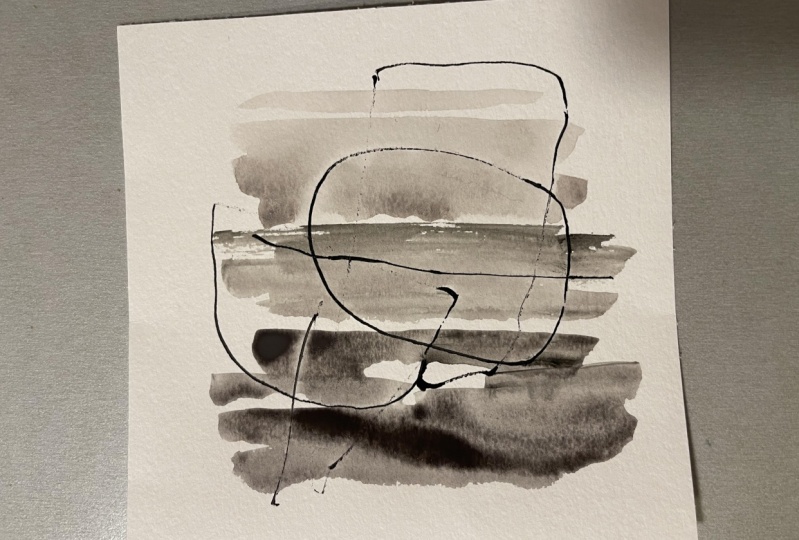
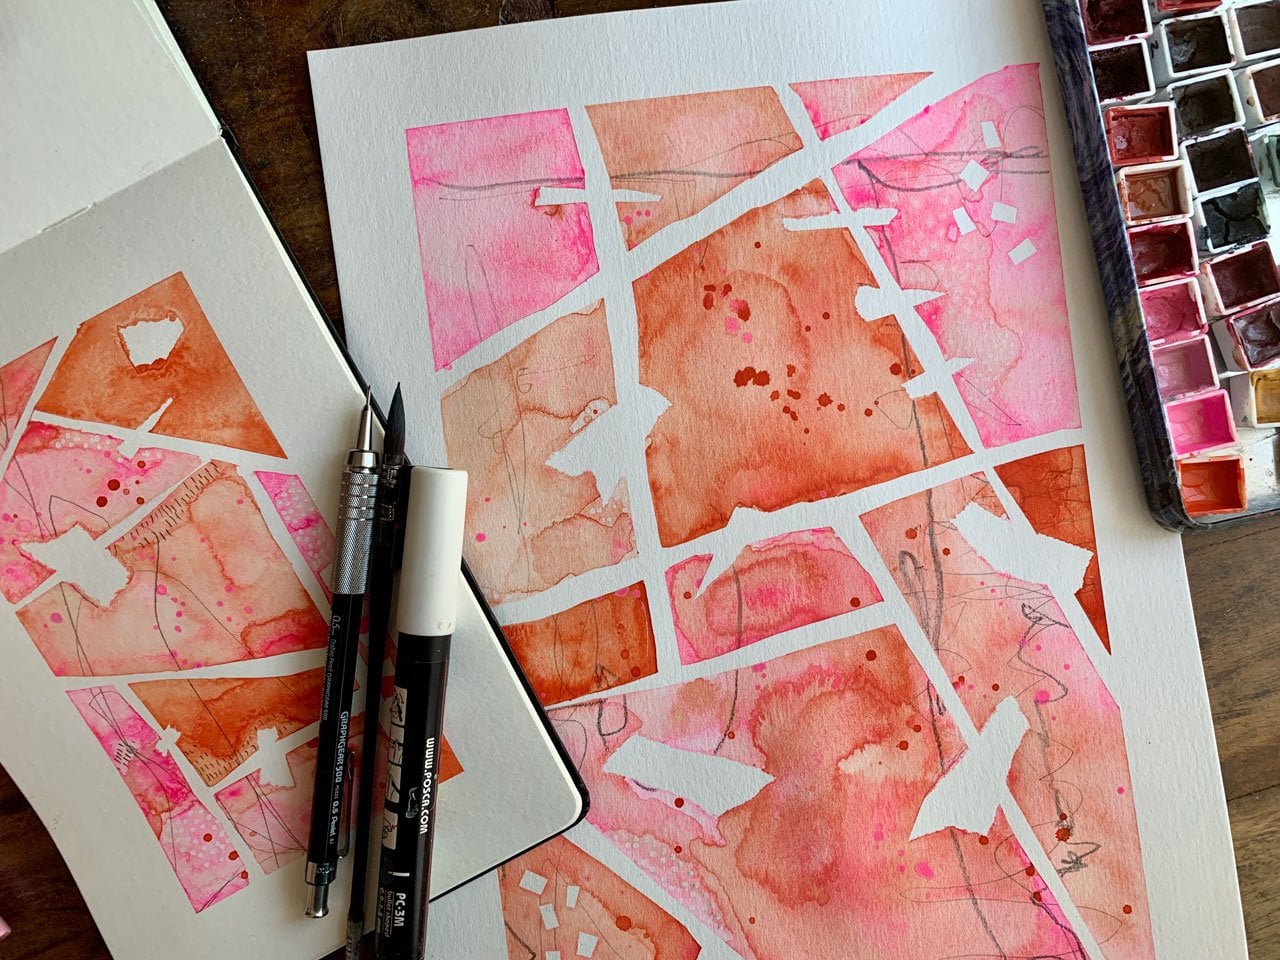
6. Larger Shapes Abstracts: I was going to stop at
those little projects. They were so much fun. But I want to go a little bit larger and slightly different
than what we just did. Let's just do some random
shapes and some scribble. Those random shapes
might look like circles, they might look like rectangles, they could look like rocks. You could just be creative there in what your
shapes look like. I'm just picking some
of my Schminckes again, and feeling like maybe I could drop some other colors in with these as I'm going. I am putting the watercolor on the brush and making marks
and things on the paper, like I was doing there on my very favorite pieces
at the end there. Maybe drop some color in here. Just push that brush
around and see what can you create and what are
we going to end up with. I want to do a couple of these. I'm going to go ahead and
paint a couple of these, let them dry a little bit so
that we can add some inks. I've got three pieces
of paper here. I'm going to set this one
to the side and let it dry. Let's pick a different one. I'm picking up different
colors on each one, just to get something
different and say, oh, I didn't expect this. Like right there,
whatever this green was, I didn't expect that. This is how we make these
really fun discoveries, is playing on our paper. No idea what I just did there. I think I dipped into that purply color
instead of that blue I was thinking,
but that's okay. That's different. All right. Now I'm just getting crazy. [LAUGHTER] Oh my goodness. Let's just get crazy. [LAUGHTER] Oh my gosh. Look at this color. We're just going to
have to look here. I think that is in the haze. I think that might
be haze black. Let me just look and see
what's in the forest, just to make sure. That could be forest blue. I think that's forest blue. [LAUGHTER] Look how
gorgeous forest blue is. [LAUGHTER] Oh my
goodness. All right. What do we want to
put with forest blue. How about this yummy green? That was like, whoa. Yes. Oh my goodness,
look at that. This is a sap green that
we're touching in here, now, why not? [LAUGHTER] Oh my gosh. Look at that color. Now I'm running
out of that color. I better be with that color was because I will put
that back on there. I'm just pushing
that brush around. I'm not trying to get
anything specific. I just was like, whoa, look how cool that color is
when we pulled that out. All right, what are you feeling? You feeling good about this?
I'm feeling good about this. Let's go back to this first one. Let's let that one dry. I am a blue-green girl. [LAUGHTER] But
this one's pretty. I'm liking this
yummy on the tundra. I hope that's the tundra say. Yes, because I feel like
I'm on the tundra here like maybe we're at the Grand
Canyon and this was a canyon, and that's the stripes
on the canyon. We're just going to scribble. Scribble don't have to mean
anything, it's just scribble. But look how interesting, fun scribble makes our pieces. Then in my scribble, I also want some dots
and maybe some lines. Because that was a
little bit wet still. That's all right. Maybe I want some lines. If I wanted lines, where would I want those lines? Whoa, maybe right over here. Look at that. Let's put
some dots over here. Now I'm looking
for some balance. Did it look balanced
without the extra bit? Drawing my eye, I'm drawing on that way. Can we draw it back this way? Kind of feeling that right
there. What do you think? Whoa, yes, loving that. I'm loving that. Let's
go over this one. Let's set this to the side. When can think, is that done? Do I need to add more to it? I'm loving the combo here, especially this lower one. You may be doing
this thinking, oh, those little lines are
just not bold enough. That's your preference. Look what I did. Oh, look at that. This is your moment. This is your time to decide, is going to make this impactful and beautiful
and finished for you. What does this
need in your eyes? It's going to look
different for everybody. That decision-making is
what's going to make these unique and beautiful
to your creating. Oh, yeah, let's do
some lines over here. Fill in that. Look at that. I am in love with this one. [LAUGHTER] What
do we want to do? Maybe we'll do some dots down
here in this pretty blue. Now see this one is way more
dry than the other ones, so my dots are nice dots, they're not spreading
out at all. I love that. You just think about letting these dry
for a moment more, if the dot spreading into the ink is not doing
what you thought it should. Look how pretty that is. I'm feeling good about
that right there. Let's do the third one. [LAUGHTER] I did one
before I was starting, so I do actually
have a fourth one. It's really fun also. This is how I test
out and think, whoa, what do I want to create, and I'm like, oh yeah,
let's make some of these. That's the one I started
with, where I'm like, okay, I can see a
little set of these. Oh, look how pretty these are. I'm doing something
similar on all of these. I'm not worried
about trying to make each one different.
But I like that. I'm not trying to
recreate the wheel here. It's okay if you do
something similar. See now that's still wet, but I actually like that, so let's let it do it some more. But this is how you come
up with a fun series. Look what that did
right in there. I could let that dry longer and I would
have liked it too. But I like that it did
some yummy smearing. Now this is India
ink that I'm using. Once the ink is dry, you cannot re-wet it and
make it do anything else. But the watercolor
you could reactivate. You have to be real careful
about what you're putting on, where you're putting it, and did you need
it to reactivate, and are you using a material
that will reactivate? Because this won't reactivate, I'm using something
that's not going to do anything more than what
I'm doing right now. Then it dries and then what
we've got is what we've got. Whoa, see, look at that. For some reason I'm just
loving that right up there. Fun. Okay. Whoa,
look at that one. I'm feeling like that
one is what I want. Love it. All right. Check it out. Let's
go a little bigger. Let's make some little shapes. Let's draw some black ink on top of it and just see what pretty little abstracts
are we going to get, if we do this? Do we want it to completely dry? Do we care if the ink
spreads in our wetness? Because this one I
had wet watercolor and I put the ink on and
it spread really fun. I thought, okay, I
like it both ways, that doesn't bother
me, I don't mind it. That's how I knew when I was going to create here if I hit a wet patch and that ink
spread, I'm okay with that. I like what it does. It adds a little extra interest, another mark or
scribble or line, or a little bit of ink
that we didn't expect. I'm loving what we got today
on these bigger pieces. I hope you have fun
making some of these. I can't wait to see
what they look like. Come back and show them to me. I'll see you back
in class. [MUSIC]
7. Final Thoughts: How much fun is it working with a very few amount of supplies? Little bit of watercolor, little bit of ink, some paper, and just go to it. How did you enjoy these simple but elegant
abstracts that we created today? I'm super excited about this. I can't wait to turn the camera off and make some more myself. I truly enjoy creating these. This is the best
time that I have up here when I'm sharing
some projects. I'm like, "Look how cool these came out." I hope you had some fun
discoveries with your materials, and you discovered some
new ways to work with it. You're like, "I like this
rather than that because I had some fun discoveries with you on camera because I thought I'm
going to start with water, and in the end, I'm let's
start with the watercolor." You discover these things as you sit and create a little series. I like to create
three or four or six. The first couple are not
going to be the best. They're going to be your, let's figure out what
we're doing pieces. Then you're going to
work your way up to, these are amazing because it's all the techniques I weeded
down in the first few pieces. That's exactly how that worked for me today
and I love it when things work out and the
pieces are beautiful, and I'm excited to
share it with you. I hope you have fun creating
these projects today. I had a great time
in class with you, and I'll see you
next time. [MUSIC]
 DENISE LOVE, Artist & Creative Educator