Transcripts
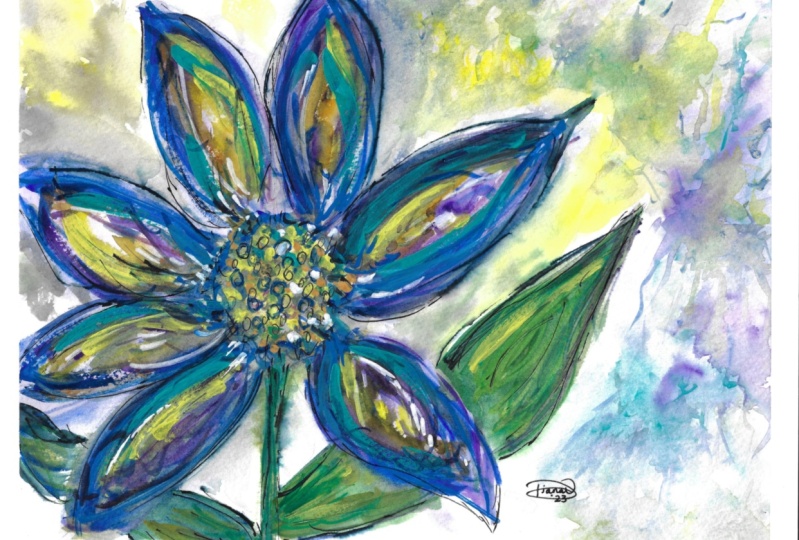
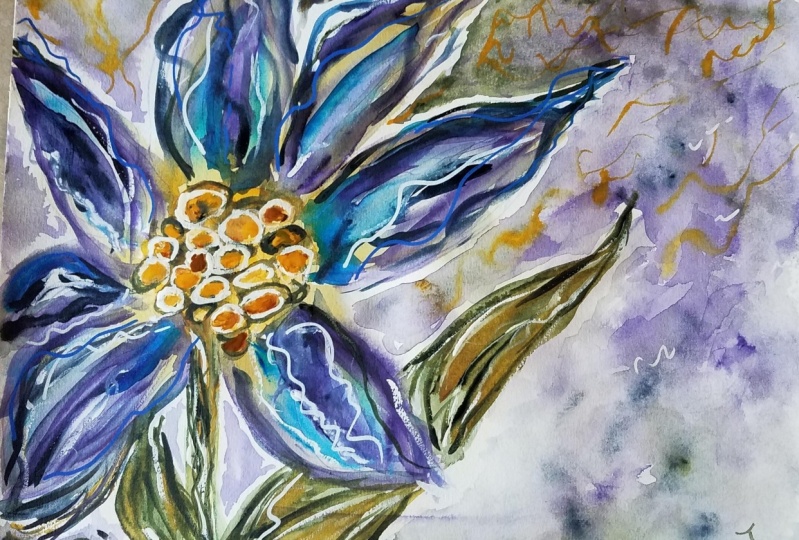
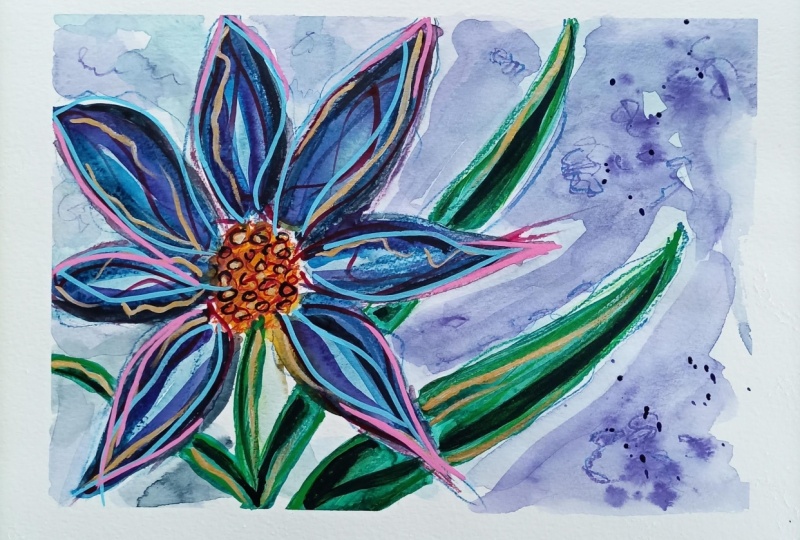
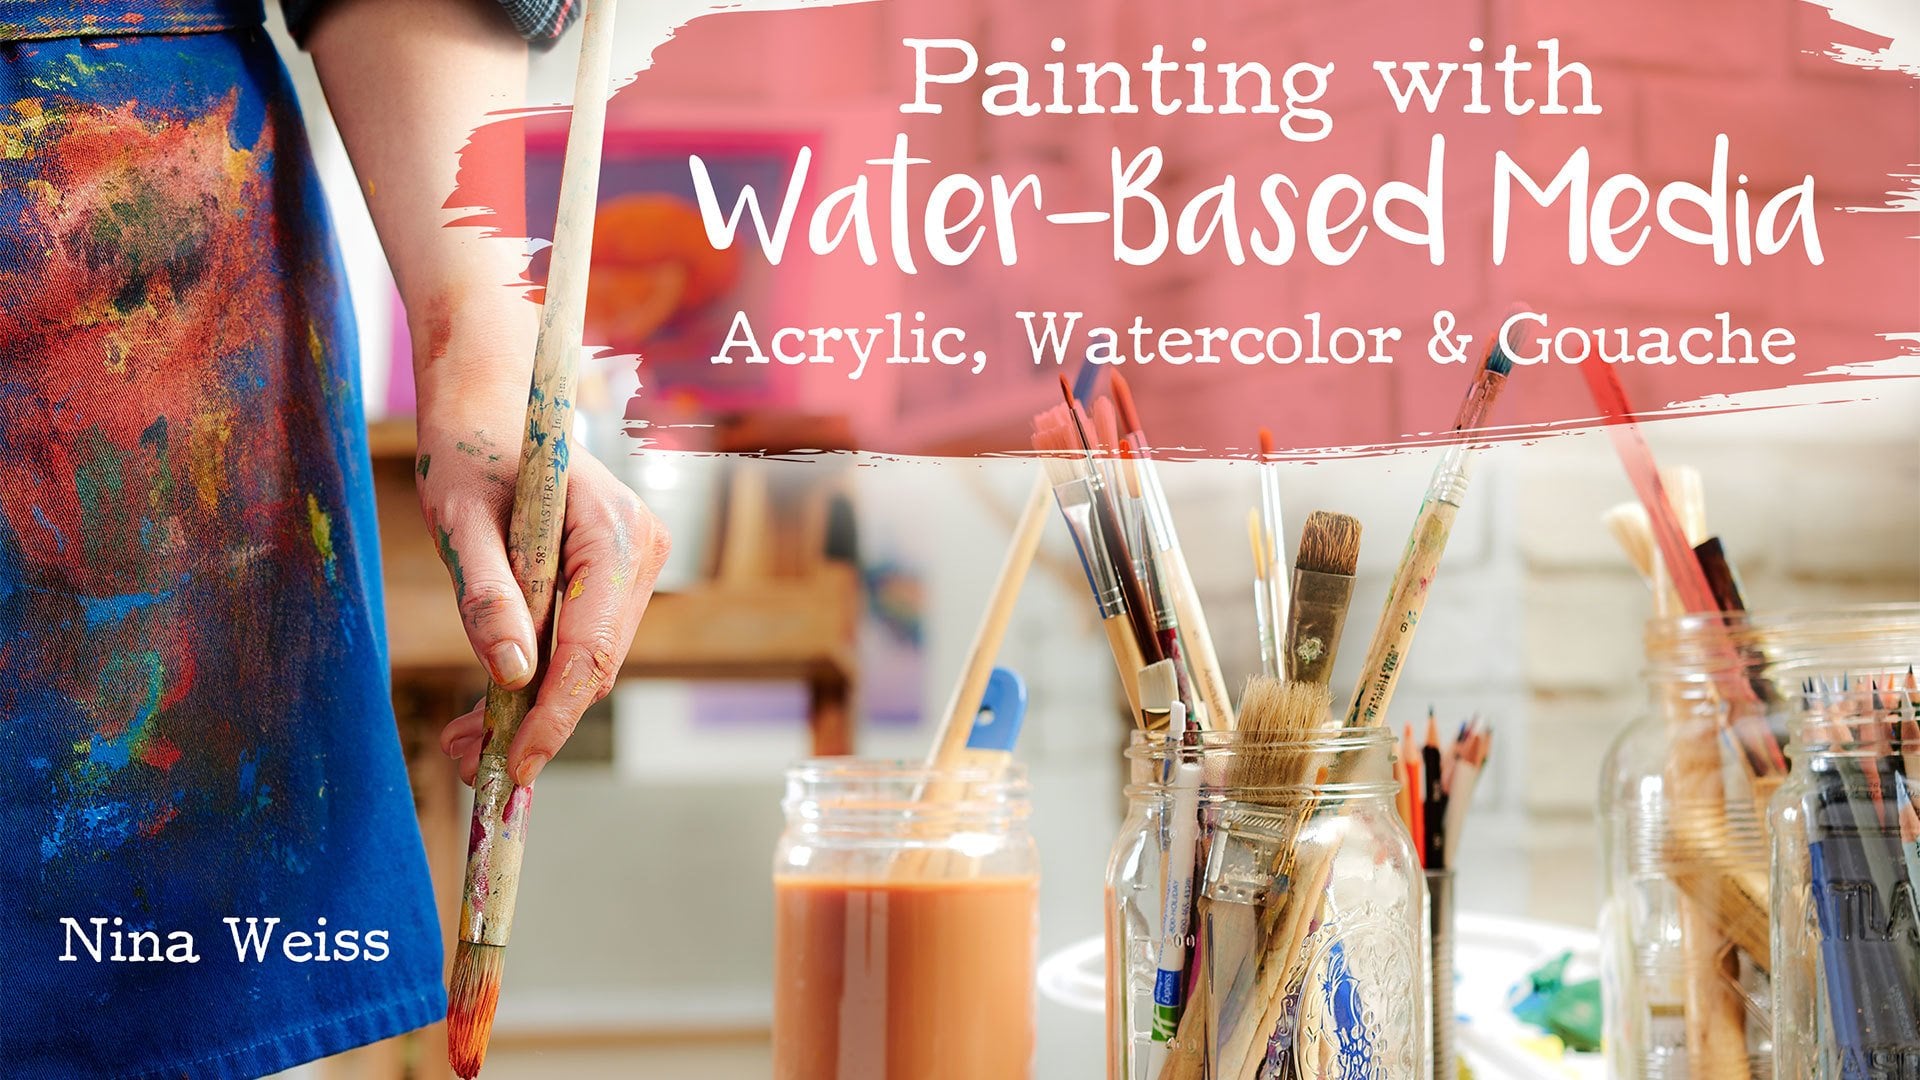
1. Intro: Hi guys. In this class, I'd like to talk to you about water-based mixed media. This is done something that I do often, but I did certainly enjoy it and I will be exploring it some more. I started out with a floral drawing and I let myself be guided by the work. I'll be working in layers, starting with watercolors. Then I'll go onto watercolor pencils, then quash, which is, as you know, in a peak watercolor. The last 10 percent of the work will be posca pens, as well as wars and watercolor pencils. I'll finish off the work with a three B graphite pencil. That said, I want you to use whatever you have on hand. Again, let yourself be guided by the work. Pencils, pens, markers, sharpies, colored pencils. I could have used any of these in this work. Think of this as an exercise. I want you to start thinking as an artist. The only rule in making art is that there is no rule. Think of the process where the end product is not the principle focus. The process is the most relevant aspect, not the end product. I urge you not to paint so as to have something to put in a frame on the wall at the end. Although it's nice when this happens, but rather let yourself go. This is how you learn. This is how an artist thinks. This is how I want you to start thinking. That said, I hope you enjoy this class. Post your projects. If you need help, reach out, I'm there for you.
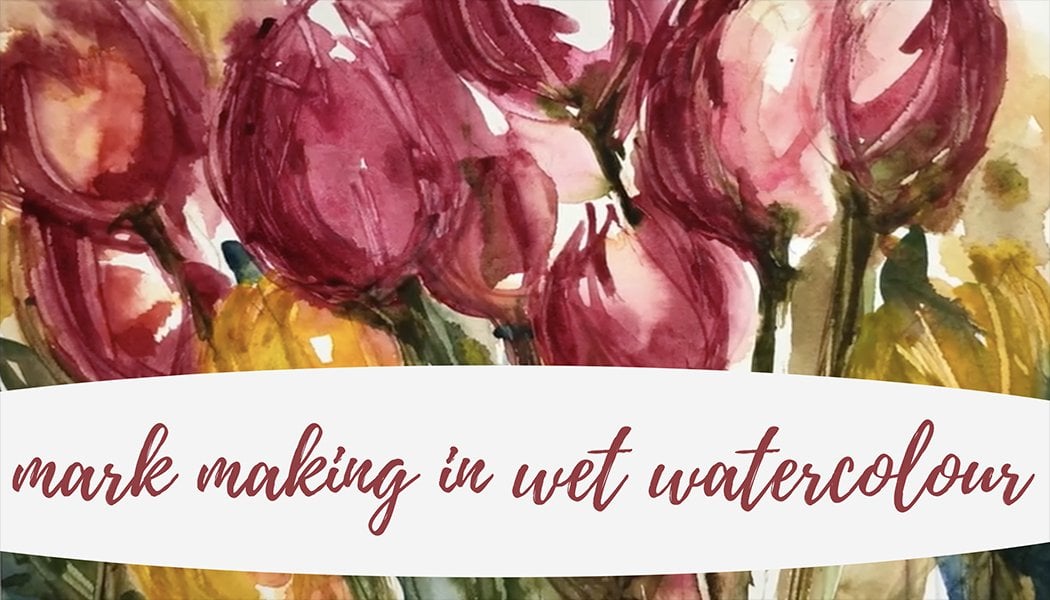
2. Getting Started : For this work, I'll be using the Arches watercolor block, working on hot pressed, and it's a 140 pounds. And the size is 10 by 14 inches or 26 by 36. Start out by drawing a very quick floral type image. Very loose. And I like to draw holding my pencil like that. That way you paint with your whole arm and your whole body, and it gives it a little snus. I always struggle to keep the looseness in my work. I'll stop there. Take my squirt bottle, wet my paper, wet my paints. That way they'll be activated when I need a certain color.
3. First Wash - Pushing Puddles : One of my brushes. This is number 6. I'm not thinking of any particular color here. And I could perfectly brand fairly light. Maybe even put some background. Like I said before, when you paint with watercolor, you have to think of it as pushing water around, pushing puddles of water around. A little bit of yellow ocher. Go and get some blues.
4. Making Marks With Colored Pencils: I think I'll use some colored pencils here to make marks. This is a Prussian blue. Just did particularly my water. Oh yes. I never know what I'm going to use. Yes. What I'm going to use next. Sort of let the paintings speak for itself. And I'll get some more, some honest that. So in orange and see exactly which color. Yeah, I kinda like that. Let's see what else we have here.
5. Building Layers : Another one of my brush, brushes. You can get a little bit of green, sap, green and purple could work a little bit of violet. That works really well with the background color. But there are kinda green. It'll bit and oppression will chew up some more yellow ocher. Try this brush.
6. Discover Inktense Blocks : Put my global because I'm going to use some ink. Ink tends blocks. And I find that the stain my hands. I rather like this. The extra water on the side. I need a little bit more going on in here. Maybe gets the ink tents I find are very good for making marks.
7. Adding Darker Colors : Let's draw a bit of CPI in there. I quite enjoy this. It's very loose. For those who have, who have taken my classes before. I'm always saying of how I've always struggled. To be loose in my watercolors. I find it's very easy to reproduce what you see in front of you. But to stay loose has always been a bit of a struggle to me. A little bit of Dart. Create contrast. Again with my colored pencil. As long as it's wet, we can keep a keep on playing in it. And I think we'll stop there and let it dry while I'm looking at destroyed here. I really don't like this green that is down there. I'll have to do something with that because the whole thing is blues and browns. Cp is yellows and then I have this little dab of green here, but I will let that dry for now and I'll see him. What I'll do next time.
8. Introducing The Rigger Or Script Brush : I think I'll bring some green up there to see what that gives me. It's always experimenting. Well, not always, but most of the stuff, most of the time, watercolor is experimenting. You have to try stuff. Did you see whether it's gonna work are not. Really is to control the water. That it's difficult. When it comes to watercolors. You know exactly how much water to have on your brush, how much water you have on your paper. What I like about an exercise like this is it permits me due to experiment. And I look for my rigger brush. There it is. Rigger brushes are long, skinny brushes and they're especially made to hold large amounts of water for a fine line detail. And always think of values when you're painting from the lightest lights to the darkest darks and everything in between. That's the one thing I find when I look at people that start painting. I myself, it took me a long time to understand values and values. It's what, it's what makes your work saying. See you as soon as I put those darks there, the light's really pop out. It's all about contrast.
9. Hard and soft edges: I think TO go get a little bit of violet. Now, if I clean my brush out completely and I just touched the violet and it will run. Let's do a little side note here to make sure that you understand what I mean by that. So if I take color, Let's do this would read here. Since it's dry paper, I will have a hard edge all the way around. So if I go in my garage and tongue from the outside, going in, wherever I touch, the water will run. And now we'll keep the soft edges. But this edge remains a hard edge. That's how you get hard and soft edges within your painting. That's what I was doing with the dark purple color. I hope that explains it better.
10. Time to get out the gouache : No, I have to see it, but doing something about this and I need to go in there and put some darks. I think. I'll try a little bit of sepia and that cobalt purple. So I'm adding a little bit of push and push. The course is, is an opaque watercolor. So since it's opaque, you can apply it or dark colors still stand out. Compared to transparent. Transparent watercolor step will not. Well, why? Again, still with my rigger brush. And I think I will add just to see what it gets us. Darks basis right in there. For value, added value. And dip into my Prussian blue. Still with my rigger brush a little bit of detail. It's important to bring their subject matter of the page. That way. It leaves room for the imagination.
11. Posca Pens And Final Thoughts : Have you ever heard or used posca pens? A Posca pen allows you to control the application of rich, opaque, water-based paint in fine or broad lines, making it perfect for painting and drawing. The markers are real water-based paint that dries permanent, therefore are very versatile. Basically. It's water-based paint in a marker. Pretty cool, right? Posca pens are actual pigment and paint with this small ball inside the barrel to shake and mix the paint to the right. Consistency. Application is similar in feel to applying acrylic paint. The paint is fluid and smooth with great coverage. It is so opaque and dense that like wash, you can paint light over dark. They are fantastic for applying highlights at the end of a painting, as I'm doing here. The marks are fast drying like acrylic paint, and the paint is water-based. It doesn't run on a painting and allows a very controlled application. At this point, the painting is almost done. It's what I call the last 10 percent and well, most of the time, it's my favorite part. It's where you add little fine details. What I like to call eye candy. At this point, I add whatever I think the painting needs to make it sing. I reworked the background by adding another layer of color. I used the technique for hard and soft edges that I showed you earlier. Using a clean brush. I let the color run, but I'm very careful interleaving dry places. I leave those little wells of light. Again, this is all about the details, the values, the lights and darks, making it interesting. And remember that watercolors dry, 20 percent lighter. So have that in mind when you apply your color. Here. I'm using ink, pens, pencils. They're highly versatile, water-soluble pencils, which create ink light color, when combined with water. Permanent, once dried, they can be worked over without effecting the previous layer. So I guess that's it, folks. A few little details. And finishing with a 6 B graphite pencil for a little extra definition. So on a final note, let yourself go use whatever you have on hand. Remember that in making art, the only rule is that there is no rule. Be creative there to try. And if in the end you happen to have something that you can put in a frame. Well, I guess that's the icing on the cake. I hope you enjoyed this class. Happy painting and please post your projects. If you need help, reach out. I'm there for you.
 Denise Comeau, Painter . Printmaker