Transcripts
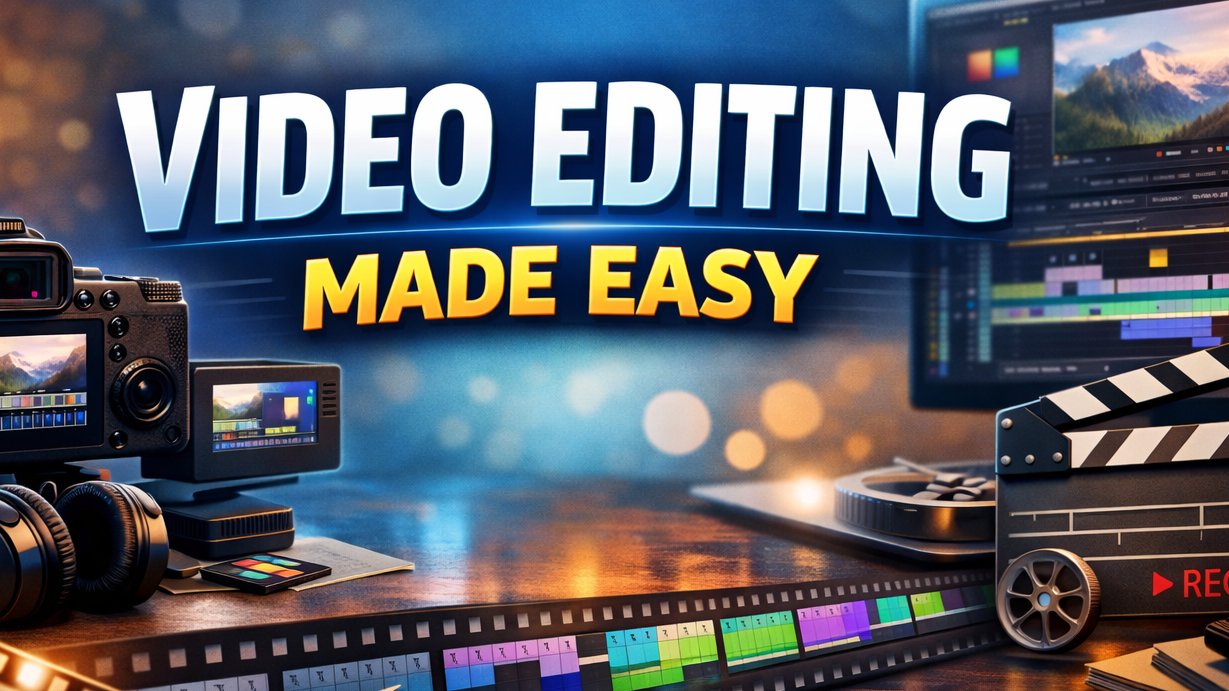
1. Introduction: Video editing doesn't have to be complicated or technical. In this course, video
editing using AI and text, I teach you how modern AI assisted video editing
actually works. You learn how text based
editing functions, how auto edits are created, and how you can cut, rearrange and refine videos simply by editing
the transcript. I show how to use the detail app to
structure your videos, apply auto edits, create
picture and picture layout. Add overlays captions and
other visual elements and turn raw footage into a
clean, organized final video. You'll also learn how to improve poor audio using a
noise reducer app, including removing
background noise, mic crackle and
uneven sound levels. I am Ricky Lahewe, a decision scientist
by profession and a hobbyist content creator. And this course focuses
on explaining each step clearly so you understand the
editing process rather than following presets. If you want to learn how AI and text based video editing
works in practice, this course will show you how. So thank you and join
me in this course.
2. Introduction To Detail Software: Hey, everyone. Welcome
to the first lecture in video editing using artificial intelligence
and text course. And today, I'm going to
introduce the app I'm going to be using to teach you
how to do video editing, using artificial to follow
the cursor on the screen. It's a huge cursor with a yellow border because when
I demonstrate the software, when I click on certain things, et cetera, within the software, it's important you
focus on the cursor because then you'll be able to follow what I'm doing easily. So the app I'm going to be
using is known as detail, and this is the app, right? This is the app. It's called Detail, and I
have already downloaded it. Now, this app, you can
download it for free, but the free version
has limitations. So what do you do? I'm
going to open the app now. What you do is you go to
the three dots over here, you go to settings, and you
get a pro subscription. Now, the pro subscription
is very reasonably priced, it's not very expensive. You can get it for
around $20 per year. So for the whole year, you
need to pay around 20, $30, no more than that. And this is such a useful app that you will not
regret purchasing it. If I'm not mistaken, in India, this app costs 12
99 rupees per year. On Android, it might be cheaper. I'm using IOS. In America, it costs around $30 per year. And accordingly, the price varies according to
geographical location. So get a subscription
for this software. Now, if you look
at this software, you'll see that there are a
bunch of things you can do. You can record a reaction
video. You can record a script. You can present slides. And this function, Import clips is what we
are going to be using. But other than that, you
can create podcast videos. You can do autoditTing head, and you can also
auto edit podcasts, and you can do live
streaming on this, too. But what we are going
to be focused on is the Import clip function. So what happens when I do this, I'm going to delete this clip
that I was editing before. Anyhow, so let's
go to Import clip. Once I click on Import Clip, it gives me three options. Import from Photo, Import
from URL, Import from files. So I can actually import
from my Photos folder. IOS on my iPad. I'm going to click on
Import from Files. And as you can see over here, I have a bunch of
video shot over here. So I'll go to this
personal finance course and pick out the
lecture known as bonds. Follow the cursor always, right? That's all I'll tell you. So I'll click on bonds.
I'll click on Open. And as you can see, I have my video in the
software right now in the app, and now I'll show you how to
edit it in the next lecture. Thank you so much. I'll catch
you in the next lecture.
3. Detail Software Walkthrough: Hey, everyone. Welcome
to a new lecture in the video editing using
AI and text course. And today, I'm just
going to or rather, in this lecture, I'm
just going to give you a walk through
of the software. Now, over here, just
follow my cursor. You have the edit
option, and you can do a bunch of editing over here, bunch of editing tools
you have got over here. You have sources,
precess layout framing. You can add captions. You can increase
speed. You can add transitions between
different scenes. You can change audio. You can add a filter
to your video, and you have a Canvas
option over here, too, which you can use to
draw on the slide, right, and you have the export
option right over here. So I'll just go through
some of these in order to give you an idea about what
you can do using this. So, for instance, layout, you can change the layout or you can do
picture in picture. You can add a different clip to this clip that is
there on the screen, and you can do
picture in picture. For instance, speed, you can increase the speed of the video. Like this, you can
drag it to a z and will increase the
speed of the video. If you're doing transitions, for instance, you can change
how the scene appears. Right now, I'll
give no transition because I am going
to demonstrate all of this in the future. For instance, if you
go to Canvas, right, what you can do is you can add an image and you can change the background color if the
video allows it, right? And you can add
images using this. So all this I'll
demonstrate later on. What I'll do right now
is I'll go back and what you'll see over here
if you click on this timeline where
my cursor is, if you click on the
timeline, you'll see that you have a bunch of
options over here too. You can record. This
allows you to record a new video which will be added to what we already
have over here. I'll just demonstrate this.
I'll click on record. And I am actually hiding my
camera right now because I don't want anyone to
see my room or my face. So I'm going to click on record. And as you can see, this
will record, right? Anyhow, it's not important. I'm going to delete this clip. By clicking on Delete, I'm
going to click on the clip, and I'm going to
click on Delete. Anyhow, so we have the
original video over here. And then, you know, in
this original video, if I click on it, you know, you can then import and adds another video to
this particular video. So if I click on Import, right over here, I click
on Import from Files, I can add this asset
allocation video from my personal finance course, which I teach offline
to this video. As you can see, you
have the first video over here where my cursor is ands highlighted in
purple and you have the second video
right on his tail. And it's highlighted in
purple right now, right? So I'm going to delete this video because
we don't need this. Then, you know, you have
other options over here, too. You can auto edit,
you can add captions. You can add music. You can add overlay, you
can add voiceover. You can add snapshot and you
can change the aspect ratio. So that's all there
is to the software. It's not rocket science. It's
a fairly simple software. And in the next
video, I'll start with some of the editing
options you have. Thank you so much. I'll
catch you in the next video.
4. Different Editing Options: Hey, everyone. Welcome
to a new video in my video editing using
AI and text course. And today, I'll show you a few things you can
do with the software. Suppose you want to change the aspect ratio
of the software, right? What do you do? Well, usually, if you're
doing it on I movies, it's a pain because you have
to do a bunch of operations. If you're doing it on final cut, if you're doing it
on let's say filma, you have to do a
bunch of operations. Over here, it's simple.
You click on aspect. As you can see, my mouse
is hovering over aspect. You click on aspect, and you can change your
aspect ratio from this, which is portrait to landscape. And if you change landscape, it'll automatically
crop some of the video, or you can change it to square. You can change it to a
square aspect ratio. So this is what you can
do with aspect ratio. Now, if you want to
take a snapshot, of this screen in order to
use somewhere, you know, maybe as a course
image if you're creating a course or maybe
something else, you know, you can just click on Snapshot, and it'll take a
snapshot or whatever is there on the screen and it'll save it to
your photos folder. If you want to do a voice
over, click on VoiceOver, go to whichever portion
of the video you want to do a voiceover on. So, you know, you can scroll through the video,
and let's say, I want to do a voiceover, starting right from
the beginning, right? Instead of doing it from
somewhere in the middle, I'll do it from the
beginning, right? And I click on the
pink microphone icon, the pink microphone button over which my
cursor is hovering. I'll click on it, and I am
recording voiceover right now. And as you can see,
the voiceover has been recorded this particular
entity on the timeline, and it's pink in color. So my mouse is hovering over it, so you can do a voiceover. In this case, I am
going to Delete. As you can see, the
delete option came up. Why? Because I clicked
on it and I can actually increase the volume
of the voiceover if I want. It has muted the original
sound of the video because the video has had
some sound rather. And if I make it 100%, and if I make the voice over 0%, so in that case, the original sound is going
to be heard by the listeners, and if I make the original sound zero and the voice over 100%, then you'll hear the voice over. And if you click on
Enhance, as you can see, you can enhance the voice over
and make it sound better. What it'll do is it'll process the sound to
make it sound better. Now, I am not going
to spend more time on this because this is
not adding any value to you in terms of using AI and text to edit
whatever video you have. So in this case, what
I'll do is I'll just click on the Voice over
and delete it, right? What else can you do? Well, you can do an overlay. What
does an overlay mean? Well, you can add text to the video or you can add
an image to the video. Let's see what it does. We'll click on overlay. I'll click on text.
What did I do? Just follow the cursor
carefully. Click on text. And the screen comes
up and let's say I want this particular
text on my video. This is a great video. So I want this text on my video, and I'm going to
click on Return. Or rather, I'm going to so I'm going to click on
save right over here. And we have the text
right over here. You can move the
text around using this box where the
text is contained. And what you can do is you can change the style of the text. You can make it kind of like this, which
is a bit blurred. You can make it look
like handwriting. You can make it look
like, let's say, bold text, or you can make
it look like an dlised text. You can also make it look
like somewhat like this, bold and tyler sized, if I'm, you know,
pronouncing it correctly. So you can change the style. You can change the color,
too. You can make it red. You can make it blue. You can
make it what is this beach. You can make it
light green. You can make it kind of pink. Just follow my curse,
right, as I'm doing it, you can pull up the
color selector, and you can select
colors from here. You can go to the spectrum and select colors from this
particular palette, and you get a huge number of options because it's a palette, and you get a huge
number of options. You can use the slider. You can increase the red, you can reduce the green. You can increase the blue and
get your own sort of color. And anything you want to
do in terms of color, you can do, and you
can animate, too. How does this or how will this
text appear on your video? Well, if you use the animation over which I have my cursor, well, it kind of pops up, right? If you use the animation over which I have the
cursor right now, it kind of, again, you know, it expands into the box, right? If you use the other
animation I have over here, well, it kind of drops
down from above, right? So you can do a bunch of different things
over here, right? And you can edit the text by clicking on the Pen
button over here. You can edit the text. Let's say I add some
text over here, right? This is a great video to watch. I click on Save. And
how did I do this? Well, I clicked on
the Pen button. And you can click on the
button with the letter A, and this will expand the text this will make the
text bigger and bigger. The more you click on it,
it'll make it bigger. You can change the alignment. You can make it right aligned. You can make it left aligned, as you can see, my cursor
is on the alignment icon, so you can change the alignment, and you can do a bunch of different things such as add
a background to the text. In this case, as
you can see, you have a background to the text, and the background
is kind of purplish. And then if you go to the delete button, you
can delete the text. That's what I'm going to do. My cursor is on
the delete button. So my finance, actually,
I'm going to check. And let's go to Olay again because we are
not done with overlay. We can draw on the slide. What can we do? Well, we
can use the pen option. This is the pen. We can
change the color of the pen. And over here, you know,
we can draw with finger, we can auto minimize, and you can change pencil settings.
I'll not go into that. So let's say we have
the red color over here and I can
write. I can draw. I can do whatever I want to do. If I want to use the marker, option my cursor is
on the marker pen. Then, you know, I can mark
text over here, right? I can mark text on the video. This is an awesome option, which very few other
software have. Final Cut does not
have this neither. Does eye movies? Neither does
Filmorkina master, right? So you can actually highlight
stuff on the video, right? Imagine you're doing
a presentation and you're doing this, right? You can use a
rubber and click on the white rubber option and
you can actually delete, I mean, not delete, but rub all this stuff that we
have drawn off, right? So there are multiple options. You have different
pens over here, you have pencils,
markers, all of that. You have the eraser, too,
and using the eraser, like I said, you can delete
whatever you have done. And then, obviously, you can use the undo button and
undo everything. So that is drawing on the video. Now, what else can
you do with it? Well, you can use overlay to add an image. I've
added the image. What it did was when
I clicked on Image, it took me to my photos folder, and Android, it'll take you
to your photos folder, too. And you can select an image and add an image. What can
you do with this image? Well, you can animate this
image, right, how it appears. Now, right now, my cursor is on no animation if I
click on Animate. Like you can see
on your screens, the picture is kind
of popping up or, you know, forming from a blur. You can use another
animation option. In which case, the
picture kind of pops up. It expands into
the screen or you can use the animate
option I have over here. You can change the
opacity of the picture. Like right now is very opaque. You can make it very
transparent and in which case, you just cannot
see it, or you can make it very opaque, right? This is what you can do and
you can also play around with the background
by clicking on the tool I have
clicked on right now, I'm going to delete
this picture. So we have finished
with overlay. Now, you can add music also. Now, there are certain, as you can see, my cursor is hovering over
these files, right? These are royalty free music provided by detail.
You can use those. You can add some other music
using files, for instance. You can add some music
using files from here. If you have music stored
on your computer, and if you add music, I'll add one of these tracks, right? So I click on this.
It adds the track. And right now, as you
can see pay another. But what I'm going
to do is I'm going to reduce the volume
of the track. You just need to click on
the volume icon over here, the oudspeaker icon, and you can reduce the volume of
the music from here, right? Or you can reduce the
volume of the media from here and increase
the volume of the music. In which case, it'll
instruments. You can do, right? What I'm going to do is I'm
going to delete this, right? I'm just going to
delete this because I don't want music right now. So you have added music. And in the next lecture, I'll start with
the real fun part, which is how to edit
the video using captions and text which
are generated using AI. And then in the
lecture after that, I'll talk about auto edits. But for the time being,
thank you so much. I'll catch you in
the next lecture.
5. Editing Using AI: Hey, everyone. Welcome to a new lecture in the video editing using
AI and Text Course, and I'm going to teach you
in this lecture how you can edit videos using artificial
intelligence and text. The first thing
we're going to do to make this happen is
click on captions. As you can see, I
clicked on captions, and now this particular
window pops up, and I'll click on Generate. Now, you can generate captions in multiple
languages, right? But in this case,
as you can see, it has auto detected
the software, has auto detected English as
the language of the video. But if you want to generate
captions in Dutch, French, German, all of these, well, then obviously,
you can do so. And you can have a
multilingual video, right? But we'll stick to English, and we'll stick to the
standard format, right? Because if some of you do
not get the pro version, in that case, you can just
use the standard format. I'll go back, right? And one more thing
before I go back, you can actually select
the model, right? You can use the Apple model, Apple's internal translation
model for captions, or you can use the local model. Now with that being
said, I'll go back, click on auto captions, and I'll click on Generate. And this is now generating
my captions, as you can see, right over here is generating my captions and it's going
to take a bit of time. And during that time, I'll click on this
particular option, which is right
over the timeline. My cursor is hovering over it. It's a pen symbol, right? And what it's doing is it's opening the edit
with text format or rather edit with
text window and tool in this
particular software. And what it has done
right now is that it has opened all the text of
the video, in the sense, the captions it generated, it has created a full
script for the video, and this is what we are
going to use to edit. But for the time
being, I'll just show you how the captions
look, right? As you can see, you have
captions right away. Beautifully done. Beautiful captions, right? And what you can do
with the captions is you can edit the captions. Click on the tool
over here and you can change the text of the captions. I don't
need to do that. You can increase the
size of the captions. You can increase the
style of the captions. You can click on different
styles right over here. As you can see, I'm clicking
on different styles. You can change the
color of the captions. You can use the color picker, the color selected
to do so also. I'm fine with what I have. And what else can you do? You can change animation
associated with the caption. So if I click on this
particular animation, the caption is appearing
one letter at a time. If I click on the
animation beside it, the caption is appearing again in a different
format, right? I can change the alignment of the caption. Follow my cursor. I'm clicking on the tool to change the alignment
of the caption. I can change the font size of the caption and the
style of the caption, in a sense, the font
of the caption. I can background coloring
if I want to, right? There are a bunch
of options I can regenerate and I can do
all of this using this. I'll just click on No animation. I'll change the color back to I'll use blue with this one, and I'll change the
style of the caption. To blue because it suits
the general color or general style of
the presentation or the video in this
case, that I'm using. So I have done all
of this. I'll click on the tick Mark
right over here, and I have my captions. Now, I will show you how to use these
captions to edit, right? And this is one of the key tools and one of the key techniques I'll
teach you is very simple. Click on this particular button. With the pen symbol. And let's say, first
thing we want to do is we want to
remove silences. And we want to do this manually. So click on silence, right? As you can see, from 0.0 seconds to 4.4 seconds,
there's silence. Is there silence? Let's check. Let's go to the
absolute beginning of the video, and let's play it. So, indeed, there
is silence, right? So I'll click on this
particular portion of the video where
there's silence. How do I do that? Well, I'll go to the three dots over here. On the top right corner,
follow my cursor, and I'll click on select, and I'll select the silence over here, 4.4 seconds silence. And I'm going to go
down and delete it. Where else is there silence? Okay, let me scroll down and
see if there's more silence. There's some silence right over here, which I want to cut. It's 1.2 seconds, which
is a lot, if you ask me. I'll click on this and
click on Delete, right? Or I can click on the
ribbon over here, the tab with all the
different tools. I click on silences, and it has automatically
highlighted all the silences. Now, these are silences which disrupt the
flow of the video. I am going to
delete all of them. That's it. No more silences, right? Simple as that. Now, let's say I want clean
cut. What does this do? It's very simple.
The clean cut cleans up everything and gives
you what you require. And in this case, it'll give
me the summary of the video. How? Let me play the summary. Regular. Now, as you can see, the video is 4
minutes in length, but this particular
summary is 49 seconds. Look at my cursor where
my cursor is, right? So if I go right near
the end of the sum. So what the AI engine of this particular tool has done is it has created
a summary for me. If I want to, let's say, I have a 1 hour long
video and I want a summary which I want to
upload as shots or let's say, I have a 1 hour long
lecture and I want to summarize it so that I can actually introduce the lecture
to people who will find out who understand what is being talked about
in a nutshell, then I'll use a
summary tool, right? And then there's the clip
tool. It's very simple. This clip tool again will
give you a clip that encompasses the most
important information you have in your video. The AI engine will automatically analyze your
video and come up with what is more suitable as a summary and what is
more suitable as a clip, relevant material that can easily explain what the
video is all about. And then you have different
topics right over here. Now, this video is about bonds. What are bonds are basically investment instruments.
People buy bonds. They lend money to governments, et cetera, so that they
can make you know, some degree of money or
some degree if they can get some degree of appreciation for their money over
a period of time. Now, what has the
AI engine done? It has created topics. It has used topic
modeling to create topics with regards to bonds. Now, look at the first
topic, bond 101. This can itself be
a short lecture. If you have a 1
hour long lecture, it'll create ten,
15 topics for you, and this can indeed be a short lecture which you can upload on different platforms. Or you have a 1 hour
long explanatory video, you can create multiple short
video using these topics. So for instance,
you can see bond 101 has information
regarding what bonds are, and it has selected three particular sentences
from the whole transcript, these three sentences over
which my cursor is hovering, and this explains what
bonds are in a nutshell. If I'm talking about
what bonds do, this has selected four different sentences
in the transcript, four different
parts of the video. And based on that, it
has created a new video, which is 15 seconds in length. Look at the timeline. It's
15 seconds in length. And what you can
do is right now, as you are editing this, you can actually either delete this
video or share this video. Let's click on share. What
does this do is very simple. I'll share this 15.4 seconds
video, which is about bonds. It's a part of the wider
lecture, bigger lecture, longer lecture about bonds, but this is a topic that is
discussed in the lecture. So what it has done is it
has picked up this topic. It has isolated this topic by analyzing all the
text in the video, and you can now save this or share
this. You can share it. You can export it and share
it or you can save it. I'll export to your
folder, local folder. I'll go back to the
transcript right? So there are multiple topics. For instance, look
at Amazon growth. I've spoken about Amazon and how Amazon has grown over the
years in this lecture. And over here, as you can see, the artificial intelligence
engine has highlighted five different sentences in my transcript which explain
what Amazon is all about. And this particular
Amazon growth story can be a lecture by itself, can be a short video
by itself, right? So that is what you
can do with this. Now, what if I want to delete
this part of the video? I think this is not relevant or maybe I think, you
know, I messed it up. You know, the way presented it was awkward
or I made mistakes. I just click on
Delete, and it's gone. Simple as that,
right? It's gone. Now, let's say I want to delete a particular sentence
from this video. So what I do is right over here, I have the first sentence. Hey, everyone, welcome to a new lecture in Personal Finance. And today, I'm going
to talk about bonds. Let's say I don't need this. People already know the
lecture is about bonds. So what I'll do is I'll
click on this lecture, and I'll just click on Delete. And let's play the
video now, right? And you'll see that once I have done this and I'll
click on Done, The first line is gone. Wait.
The silence also is gone. I played the video, and
there was a part of silence. Now look at what it has done. There. You saw what it did? It removed the silence and it removed the
first line, right? And the first line right now
is bonds. Bonds are, right? Let's go to select again, right? And we're going to click
on bonds over here. We're going to delete the entire first section of
the lecture. Simple as that. And it has divided the lecture
into different sections. So the video, it has divided into different chapters,
different sections. That is what the AI engine
in this tool has done. I'll delete the entire
first section, right? I'll delete this section too. So the first section
right now is, I'll delete this
understanding pawns as investments, right? And if I want to
delete something else, let's say, I'll delete
the second section, I can do so too, because I feel the information
may not be necessary, and it has deleted the
second section also. What else can you
do with this well? You can select all or you
can delete, deselect all. You can share the transcript. Click on share the
transcript and you'll get a transcript of the whole
video that you have made, and you can save it
somewhere, right? Or you can select
Inverse, right? You can deselect
and select Inverse. You can completely deselect whatever you've selected
right over here. Now, if you select this
particular word in the lecture, as you can see, you can share
the transcript of this, and this will send it
to your files, right? So this is what you can do
essentially with this tool. That is how AI can be
used to edit your video. Now look at the video
right now, right? The video was 4
minutes in length. Now, I'll go to the
end of the video, and as you can see, the video has been divided into
chapters, right? I'll go to the end of the video. Now it's 3 minutes
in length because I deleted and removed
two sections, right? And I can delete and
remove more sections. Now, what I can do is I can use this chapter tool to
generate chapters, right? Absolutely classified into
different chapters, right? So I'll click on Generate and this tool
will regenerate chapters. And as you can see right now, chapters have been
regenerated, right? If I want to delete a
full chapter, right? Simple, click on the name of
the chapter and delete it. Delete. And the chapter
is gone, right? So this is how you do
it on this software. You can use AI and transcripts to not
only delete portions, delete silences, delete places
where your main mistakes, but you can also divide the video into chapters
and then, you know, pre make video clips out of
each chapter or present or upload wherever you're uploading your content or video as
different chapters, right? You can do it automatically
using this particular tool. You don't need to
do it manually. It saves a lot of
time because you can easily divide the
video into chapters, delete chapters, re, you know, reorder chapters, do
whatever you want, right? And you can generate
the transcript again because like I said, I have deleted a
lot from the video. I'll generate it again
as it's generating. Imagine what you
can do with this. You can actually
create if you have a 1 hour long lecture on
let's say, Russian history, and you are planning to upload it to YouTube and
present it to everyone, you know, in the
sense that, you know, you're a content creator
who writes about history. So if you have
something like that, you can break it into
different chapters. You can edit it using text. You can remove portions, you can remove silences. And these chapters that are
created by the software, you can use them to create
different short videos. But there's another tool to create different short videos. I'll close this transcript creation tool for
the time being. You have all these transcripts. The other tool that you can
use to create chapters, create short videos
is auto edit, and that is what I'll talk
about in the next lecture. Thank you so much.
Thank you for joining me in this lecture. I'll
catch you in the next.
6. Auto Edit: Hey, everyone. Welcome
to a new lecture. Today I'm going to talk
about the auto edit AI based tool that
you can use to firstly divide your whole video into different clips.
You can create shots. You can create different
clips using this, and you can also make sure that all the silences
all that are gone. So what I've done is I've
actually re uploaded the video because I want the whole video for
the tool to work on. And what I'll do is first,
I'll click on aspect ratio. I'm going to change
the aspect ratio of this video to a square, right? And I'm going to click
on the tick Marks. And now what I'll do is
I'll click on Auto Edit. And this is a great tool. You can use it for podcast,
too, video podcast. But what I'll do
is I'll use it for the talking head or I'll use
the talking head option. Now, what you can do is you
can add background music. We don't want that. It can automatically add
background music. I mean, I can demonstrate it, but it'll be a waste of time because you know
what it does, right? I'll add background music.
It can add captions also. I'll keep the captions options because I have actually
re uploaded the video, and it can add a title. It can add titles, and it
can do Zoom cuts, right? And the language, well, it can do it in English. It can add the
captions in English. It can create the content in English or in a bunch
of other languages. I'll go back to the
auto Edit screen, and as you can see,
our Autodit setup, let's click on Continue. And this will take
a bit of time, but this is the best AI based
tool to do a lot of things. Firstly, you know, to convert your long videos
into short eclips, be it shots, I'll
create shots for you. I'll create small clips for you. And you can do a bunch
of stuff with this. And this is probably the only software
where you can use it, and that is why I'm
teaching you how to do all these AI based things that many of the other
softwares do not provide. All these tools that many of the other software
do not provide. I'm teaching you how to do
this using this software because this is
the best software in the market to
do these things. And it's not about teaching
you how to use the software. It's about teaching you
how to actually work on a project and use AI to make
the project perfect, right? So I showed you in
the previous lecture, for instance, you can delete
portions of a project, places where your main
mistakes, entire sections, entire chapters you can delete, and the AI will create
chapters for you. And in this case, using the auto edit, it's doing that automatically, it's creating a number of
shots for you as you see, and is creating
smaller clips for you and is cleaning
up your audio. It's a great tool, and
if you're using it for YouTube or wherever
you're uploading content, maybe you're teaching courses, you're doing YouTube or
anything of that sort, right, you can use
this for all of it. And it does not
take a lot of time, as you can see,
it's pretty rapid. It's pretty fast and
86% done so soon, I'll be able to show
you what you can achieve using this particular
tool, and it's done. So you have the
original over here, which is essentially the video that we have been
using to demonstrate and to explain how to use AI and what sort of techniques to use to change your video, right? And right now, if you
want to you know, have shorter videos from your longer video in order
to upload it to YouTube. Suppose you have Joe
Rogan experience, and it's a three
hour long video. What this sort of
software can do is it can actually cut smaller
portions from it. Let's look at the bonds
versus equity video, right? It's a small video,
right? How small? Well, it's 1 minute, 29 seconds. And what it has done is it has picked up a portion
of my lecture, picked up a portion of my video, and made it a clip. Hey, everyone, welcome to a new lecture in
personal finance. And today, I'm going
to talk about bonds. The bonds are they are another investment mechanism
you can use to invest, and these are debt instruments where investors lend
money to issue. So as you can see, it has
picked up a smaller portion of my whole video in order to
create a smaller video. Now, I'll use auto edit again. I'll not add background
music at this point in time, and you've seen how
it adds captions. It'll automatically
add captions. You can use you can retain
the original video, or you can use a shorter
video that it makes for you. So I'm going to switch
off captions again, and I'll show you the shots that this particular
tool can create. And as you have seen, it has created a smaller video, but it actually creates YouTube shots exactly 59
seconds or 58 seconds, you know, 1 minute, whatever YouTube requires
for shots, right? It creates that,
and you can create a whole number of a bunch of different videos
from a longer video using the Auto Edi tool, right? And you can export
these things also. Whatever you have
created, you can export. I'll show you how. It's
65% and as you can see, because I've not
asked for captions, it's doing it really fast. It's doing it really
fast. Almost there. This is the most
important powerful tool that you'll find in this
particular software. This particular app, and you
can use it to do so much, and I'm teaching you how to
do different sort of edits, different sort of stuff in this, as I mentioned in the
course prospective, in the course objectives, how to create shots,
how to create, you know, different sort of
videos or let's go down. As you can see, it has
created a bunch of different auto edited videos at this point in time, right? And what you can do is you can click on the three
dots over here. You can rename them
or delete them. And this is what it has done. It has created YouTube shots. So out of a 1 hour long video, for instance, if you want
to create YouTube shots, it's very easy using
AI because AI will automatically edit and cut different clips
and shots for you. Imagine you are making a
movie and you have the stool. I'll create different it'll
create a trailer for you. It'll create different
shots for you, right? And you can rename them. And as you can see, you
have different shots. You have 59 seconds, shots, 29 31 seconds, 29 seconds, 27 seconds, 11 seconds, you know, 9 seconds, you have a bunch of
different shots. This is what Auto
Edit does, right? And let's say you want
one particular shot, let's say, the
Amazon success story is something that you're
interested in, right? And what you can do
is you can play this. I mean, you don't make the kind of money you would
have made if you had bought equity in Amazon
in the 90s. Right? And what you can do with
this is you can change the style of the
title style because I asked Auto Edit to
title or rather to name the shots to give
the shots a name. So it has added a title
known as the Amazon story. You can change the title.
You can change the color. You can also and
write. I've already shown you how to do
all of these things. Or you can remove you can actually delete the
title or edit the text. It's called Amazon Story. Let's say I name it Amazon
story bond, whatever. It makes no sense, but anyhow, but you can see what
it does, right? From the beginning,
I'll play it again. I mean, you don't make
the kind of money you would have made if
you had bought it. Right? And you can delete this
if you want to, right? You can delete this.
Simple as that, not rocket science, 31 seconds. What I will do, though, is I will show you how to
export this particular clip. It's very simple. You
go on Export over here. Follow my mouse,
follow the cursor, go on Export, and you
can share or save. Click on save, I'll export. Click on share,
I'll export, too, and you'll be able to share it to your favorite
folder or you know, wherever you want
to share it, right? So this is what Auto
Edit does, right? And how do you get
back to Auto Edit? Very simple, right? I'll show it to you again so that
you don't miss it. You go to this particular button on the top left corner, right? You have the short clip
Amazon story over here. And let's say you want to
export something else, listen to something else,
and then export it. Well, go to this button
over here, follow my mouse, and you can get all your
auto edited videos, short clips, cleaned
up clips here. It'll clean up silences. It'll make your video awesome. But I'm going to go
back to the original because I intend to show you the basic editing
tools in this software too so that you can do basic
editing if you want to. With that being said, that's
all for this lecture. Thank you so much. I'll
catch you in the next.
7. More Editing Options: Hey, everyone. Welcome
to a new lecture. And today, I'm going
to show you some of the basic editing
tools that you have in this software because sometimes you do require
basic editing tools. Let's go to aspect and
let's make it Square. Let's click on the tick Marks over here. Follow my cursor. Let's click on the Video it's
a four minute long video. And when we click on the video, you see there are a bunch
of options over here. The first thing
I'm going to do is I'm going to trim the video. There's a bit of silence
in the beginning, see? I'm going to trim
the first 4 seconds. What can I do? How
can I do this? Well, I'll go to the
edge of the video, the left edge of the video, and I'll click on the edge. And as you can see over here, there's a arrow over here. There's a left arrow over here. I'll click on that arrow
and I'll pull to the right. Kind of like this, right?
I'll pull to the right. What does that do by
pulling to the right? It shortens the video. I'll go up to the cursor
head or the selector head. And right now, as you can see, I have removed the silence at
the beginning of the video. Very simple, not rocket
science, very simple, right? And I'll go back to the
start of the video. Let's listen to this. Here, you want to welcome to
new silence is gone. Let's say we want to remove the silence from the ending of the video because there's a little bit of silence
at the end of the video. And if you want to expand
or contract the timeline, it's very simple, right? Pinch or not pinch, rather use two
fingers and either stretch out the
timeline by moving the two fingers away from each
other or bring them closer together in order to contract the timeline in order to
shorten the timeline. In the sense that the timeline becomes can be contained
within your screen. So I have done that. Now I'll go to the edge of
the video, right? Look at it. The right edge, the ending, and
there's an arrow mark. And let's say, after
playing the video, I realize that I have to cut
a few seconds from the end. How do I do this?
It's very simple. I click on the edge and
I pull it to the left, kind of like this, right?
I pull it to the left. I slide to the left and cut portions of the video
that contain silence. Now, you don't
need to do this in this software because you
have auto edit and you have the other editing
tool where you can use transcripts to edit, and you can easily remove
silences using transcript. But in case you want to
do this manually, right? In that case, like I said,
this is a way to do it, right? Just click on the edge on the arrow and pull it to the left, right?
Kind of like that. Now, if you want to split
the video into two, now, I have my select a head
right over here, right? Playhead rather.
Not select a head, but playhead right over here,
right in the middle, right? So I want to split
the clip into two. What do I do? Well,
my selector head is here. I'll click on split. And if I want to delete
a portion of the video, simull click on that portion
and click on Delete. I'll go back. I'll undo it. So now you know how
to split, right? And other than that,
what else can you do? Well, a bunch of other things. You can go to Canvas and you can change the
background color, right? Now, in this case,
in this video, the background color
change does not make much sense because
it's a lecture, and the video basically
is a slide, but, you know, you can add masking
or you can remove masking. Does not make much
difference in this video. Click on the purple stick
mark symbol, right? You can use filters, right? You can use different filters. Just like in any other
video app, you can use, let's say, S autumn, you can use golden. You can use Sunshine, we'll keep it at sunshine. We'll use the sunshine filter. Does not make much change
because this video is not exactly your, you know, movies or a video
is more of a lecture. And then you can play around
with the audio, right? You can reduce the media audio. And if you have voice over, you can reduce the
microphone audio, right? I've already shown you this. Or you can use transitions. Now, what do transitions do? If you are moving from
one seed to another? By using transitions, you can
add some animation, right? For instance, if I add
let's say, right now, I have no transitions,
and then I decide to add the transition over which
my cursor is right now. And as you can see
this transition, it scales in, right? Or else we can add
something else, right? We can add the transition
over which my cursor is in. And in this case, the scene slides in, or we can add the transition, which is basically
where, you know, it'll use smart tools or rather artificial
intelligence to decide how to animate the video, right? Or we can use flash transitions, right, where the screen
flashes in, right? And we can change the
speed of the transition. We can make it slower. We
can make it moderately slow. We can make it fast.
So we can do all of this using the
transition tool, right? Let's play this again.
Here, as you saw, the screen flashed in because I had the
flash transition on. You can increase the
speed of the video. You can make it three X,
two X if you want to. You can do that too using
this particular tool, you can add obviously
as you already know, you can add captions
or what you can do is you can frame. What
do I mean by frame? Well, it's very simple.
You can expand the scene, you can contract the scene. You can expand the scene, contract the scene, and change
the frame of reference, and change the positioning of this content within
the entire screen, within the aspect ratio. So you can expand,
you can contract. That is what you can do by dragging and zooming
using two fingers. That is what you can do the
bonds lecture over here. And over here, as you can see, you have another bond
detailed screen. So what you can do if you are doing picture and
picture, right? You can add a talking head. You can add yourself talking
about this particular topic, while, you know,
in the background, you have the slides
with the slide content. Going on, and you're explaining it and
you video yourself, you basically photograph
yourself talking about it, you video yourself talking
about it. Shoot yourself out. And you can add that video
to this very simple. And you can change the shape of the picture in
picture, right? You can make it circular,
right? Or you can make it kind of like this where
you have two screens. So let's say the left one
is you talking about bonds, and the right one is the
presentation, right? And you can use different another option is kind of
like this where, you know, you have one rectangular
or one portrait kind of screen and basically kind
of like a landscape screen, and you can change
the shape, right? You can change the shape of the different pictures, right? You can make them rectangular. You can make them look like they are shot using a smartphone, or you can use kind
of a blurred kind of schema over here, and you can add shadows also. You can add shadows kind
of like this, drop shadow. You can add a glow shadow
between the two scenes. You can add a outline shadow or you can add an
image blur, right? That is what you can
do over here, right? And you can change
the alignment. I use the alignment
change tool over here. You can change the alignment
using this, right? Using this particular tool,
look at where my cursor is. So you can swap resources. You can do some framing. You can obviously go
to masking again. And what you can do is
you can basically go to Canvas or rather
framing over here, and you can zoom one particular clip while you can zoom in or zoom out
another particular clip. You can zoom in one clip. You can zoom out one clip. You can do a bunch of stuff
using the framing tool, which detail provides you in case you want a picture in picture sort of
scenario, right? And right now the picture
in picture that you saw contains what contains
very simply right? The lecture that I am
using as a sample over here and it's showing you essentially the same lecture
as a picture in picture, as a picture within the picture. How can you change
that? How can you add something else? Very simple. You go to sources, right? And you have sources
right over here. You can add an image,
you can add a video, or you can go to a
folder and add a file. What I'll do is I'll go to
the folder right over here. I'll add the asset
allocation file, right? So right now instead
of the bond lecture, I have the asset
allocation lecture as the picture in
picture, right? If I want to look at the bond lecture as a
picture in picture, I'll click on the bond lecture. If I want to look at the
asset allocation lecture, I'll click on the asset
allocation lecture. The lectures are where
my cursor is hovering. So I have the asset
allocation lecture. I have the bond lecture. I'll keep asset
allocation lecture. Right? I can go back
to what it was, or rather I can put the
lecture in the back, the smaller picture
in picture lecture, or I can put it to the
front right like this. Now, what I'm going to do is I'm going to go back to layout, and I'm going to
clean this up right. I have the asset
allocation lecture. I have the bond detail lecture, and I'm going to remove
all the shadows, right? I'm going to remove shadows.
I'm going to normal. I'm going to remove
all the shadows so that you can easily
understand how it looks, and I will show you how it looks essentially
kind of like this, right? And I can use framing or I can just even
without using framing, I can expand this
using two fingers. I just need to slide the
fingers away from each other. And as you can see,
I'm expanding it. I'm expanding the picture in picture and asset allocation, I have a video, which is a picture in picture, a part of the bond video, but asset allocation is
another video, right? And what happens
when I play this? Sure. Both of them
play together. So usually you're not
supposed to do this. You're not supposed
to do picture in picture with two videos. What you're supposed to do
is you can have a slide in the background and you have yourself talking
about the slide. And instead of this
asset allocation video, you know, over which
my cursor is hovering, you can have yourself
talking about bonds, talking about different
types of bonds, et cetera while
you have the slide in the background, right?
That is what you can do. But like I said, the layout tool allows you to do
picture in picture, and the sources tool allows you to add
different sources. Right now, I have to. I have the bonds lecture, and I have the asset
allocation lecture, which I have selected, right? That is what this
particular tool allows you to do, right? And you can use aspect ratios. Also, through this tool, through this sources tool, I have used the
aspect ratio fit. I can use fill, right? Look at where my cursor is. I can use fit or fail. I'm using fit in this
case, I can do framing, I can swap resources, right? In the sense, I can make the
asset allocation lecture, the main background by
using swap resources, or I can use SWAP resources to make the bond lecture,
the main background, bonds lecture, the main
background, right now, the bonds lecture is the main background slide,
background video. If I click on SWAP again, I'll make the asset allocation lecture, the background video. So that is what you can
do with sources now. If you go to presets,
obviously, right, you can use different sort of presets over here,
different sort of, you know, formats or schemes or different type
of presentations. You can play around with
this, but, you know, it all depends on which sort
of video you are editing. But I'll stick to what is
the most natural over here. So I have one lecture over here. And if you want to add,
I'll say this again, if you want to add something
new to the timeline, a new lecture, you go to
Import and do it, right? You import from
files. And wherever your playhead is, it'll
add there, right? So let's say I want to add
arts and collectibles, this particular
lecture over here, I'll click on open right
now, as you can see. Today, I'm going to talk about nontraditional
investments. It's being added, right?
It's being added. So you have one clip over here, arts and collectibles, and you have another
clip over here. So it's been added to the
lecture. Thank you so much. Here, you want to
welcome. So that is how you add
different lectures. Now, let's say I want
a lecture at the end, not at the beginning,
I'll go to the end. I'll click on Import. I'll click on Import from
Files and I'll select this commodity
investment lecture from my offline course on finance. And this commodity
investment lecture now has been added to
the end, right? To the end of the
bond signature. Por how much money. Thank you so much for cuing
lecture. And there you go. The commodities investments
lecture has been added to the end of
the bonds lecture. So depending on where
your playhead is, if you add, if you want to add, just click on Import and add. And that's the software, right? That's essentially the software. Finally, if you want to export, click on Export, and I've
shown you this before. Export sequence, you
can share a link. With that being said,
thank you so much. In the next lecture, I'll
teach you how to reduce noise, and we are going to use
the same bonds video to demonstrate a different tool in this case. Thank you so much.
8. Noise Reduction: Hey, everyone. Welcome
to a new lecture. And in this lecture, I'll demonstrate and
teach you how to reduce noise from
any video, right? And the way to do it is to download this particular
tool called Noise Reducer. It's a great tool, and I
have already downloaded it. Now, there's a free tire. I'll work for free, but there is a limit on
how much you can do, limit on how many videos you can you know, you can clean up. But I'll click on
Open right over here. And right now we are in the app and you can import
a video from camera. That is you're actually clicking a video
using your camera. You can import a video from photos and you can import
a video from files. Right now, what I'll do is I'll show you how to get a
subscription for this. And as you can see, there's this gear option on the top right corner
follow my cursor. And I have premium. Now, the premium costs
cost me around $8 or $7. And it's a lifetime, you know, buy once use forever
sort of deal. So it's a great deal
in the US and UK or in the EU region
or in Africa. The pricing might vary
based on where you are. So take a look at that, but
it's pretty reasonable. It's not very expensive at all. So I'll go back and I'm going to import
a video from file. I'll import the same bond video. And what it's doing is
directly reducing noise. Why am I demonstrating
this tool? Because it's so simple to use? No complexity. You don't need to go on audacity to clean up. You know, you have to import, and then you have to find
stuff you have to clean out. And that is how I used
to do it, you know, find areas in the
clip where, you know, there's a little bit of noise or more noise
than acceptable. And then, you know, remove
noise from the hole. Video is a far more
easier process using this particular tool. To clean it up, right? And
that is what it's doing. It's reducing the noise. Simple as that, it's
cleaning the video up. It's going to take
some time. I'll catch you in a few seconds. Now, as you can see,
you have reduced noise over here and here, let's complain and see how much work this
software has done. I'm going to piece
the volume of my. As you can see,
there's me taking act noise reduction sounds like. As you can see, Hey, everyone welcome
to a new lecture. Breathing personal finance. Bots or deep bread. There are a mechanics used to invest. And these are debts. So essentially,
the original audio had me breathing
in the beginning. That noise has been Hey, everyone, welcome to lecture. In personal finance
noise reduction has done what this particular
app has done in terms of, everyone welcome to news today,
I'm going to talk about. Breathing mechanism
Bumping sounds. It has removed the
fuzziness from the Video instrument
from the video. Investors lend money to What's You can extract audio
from video, right? So this is what
noise reducer does. Cleans up your sound, makes
your video sound awesome. So after you all the AIB it the different Editing
tools final product. What do you do about the audio? Well, Noise reducer, which
is very inexpensive. You just esta depending on how much No rocket science. You don't need to do anything. AI will do the company for
you or the government. That's all their involvement. That is this lecture. Well, next lecture, I'll
just recap everything, based on what you have done.
9. Outro: Hey, everyone. In this course, you have learned how AI and text based video editing
works from start to finish. We covered how text based editing translates
into real video cuts, how auto edits are
generated and how to organize and refine
footage efficiently. You learned how to use the detail app to
apply auto edits, create picture in
picture layouts, add overlays and captions, and structure videos in
a clean, repeatable way. We also work through improving audio quality using
a noise reducer app, focusing on removing
background noise, mic crackle and uneven sound. I am Ricky Lahiri, a decision scientist by profession and a hobbyist,
content creator, and the goal of
this course was to help you understand
the editing process clearly so you can apply it confidently
in your own projects. You should now be
able to edit faster, make informed editing choices, and use AI tools as assistance
rather than shortcut. Thank you so much for
joining me in this course. I hope you had a great time
and learned loads. Thank you. Goodbye.
 Ricky Lahiri, Content Creator, Writer and Marketing Researcher