Transcripts
1. Introduction: Hi, I'm Jake and I am motion designer. This effect we will create great. Now. We will use aftereffects application to make these VFS shots. I'll take you step-by-step so you could follow along even if you are a beginner. I did my best to make this class as short as a good. Don't worry if you don't have foolish to practice on all needed foolish to complete these effects I provided in resource tab to this class. I'll be happy to see you in my class has also your results after following all the steps. So let's get started.
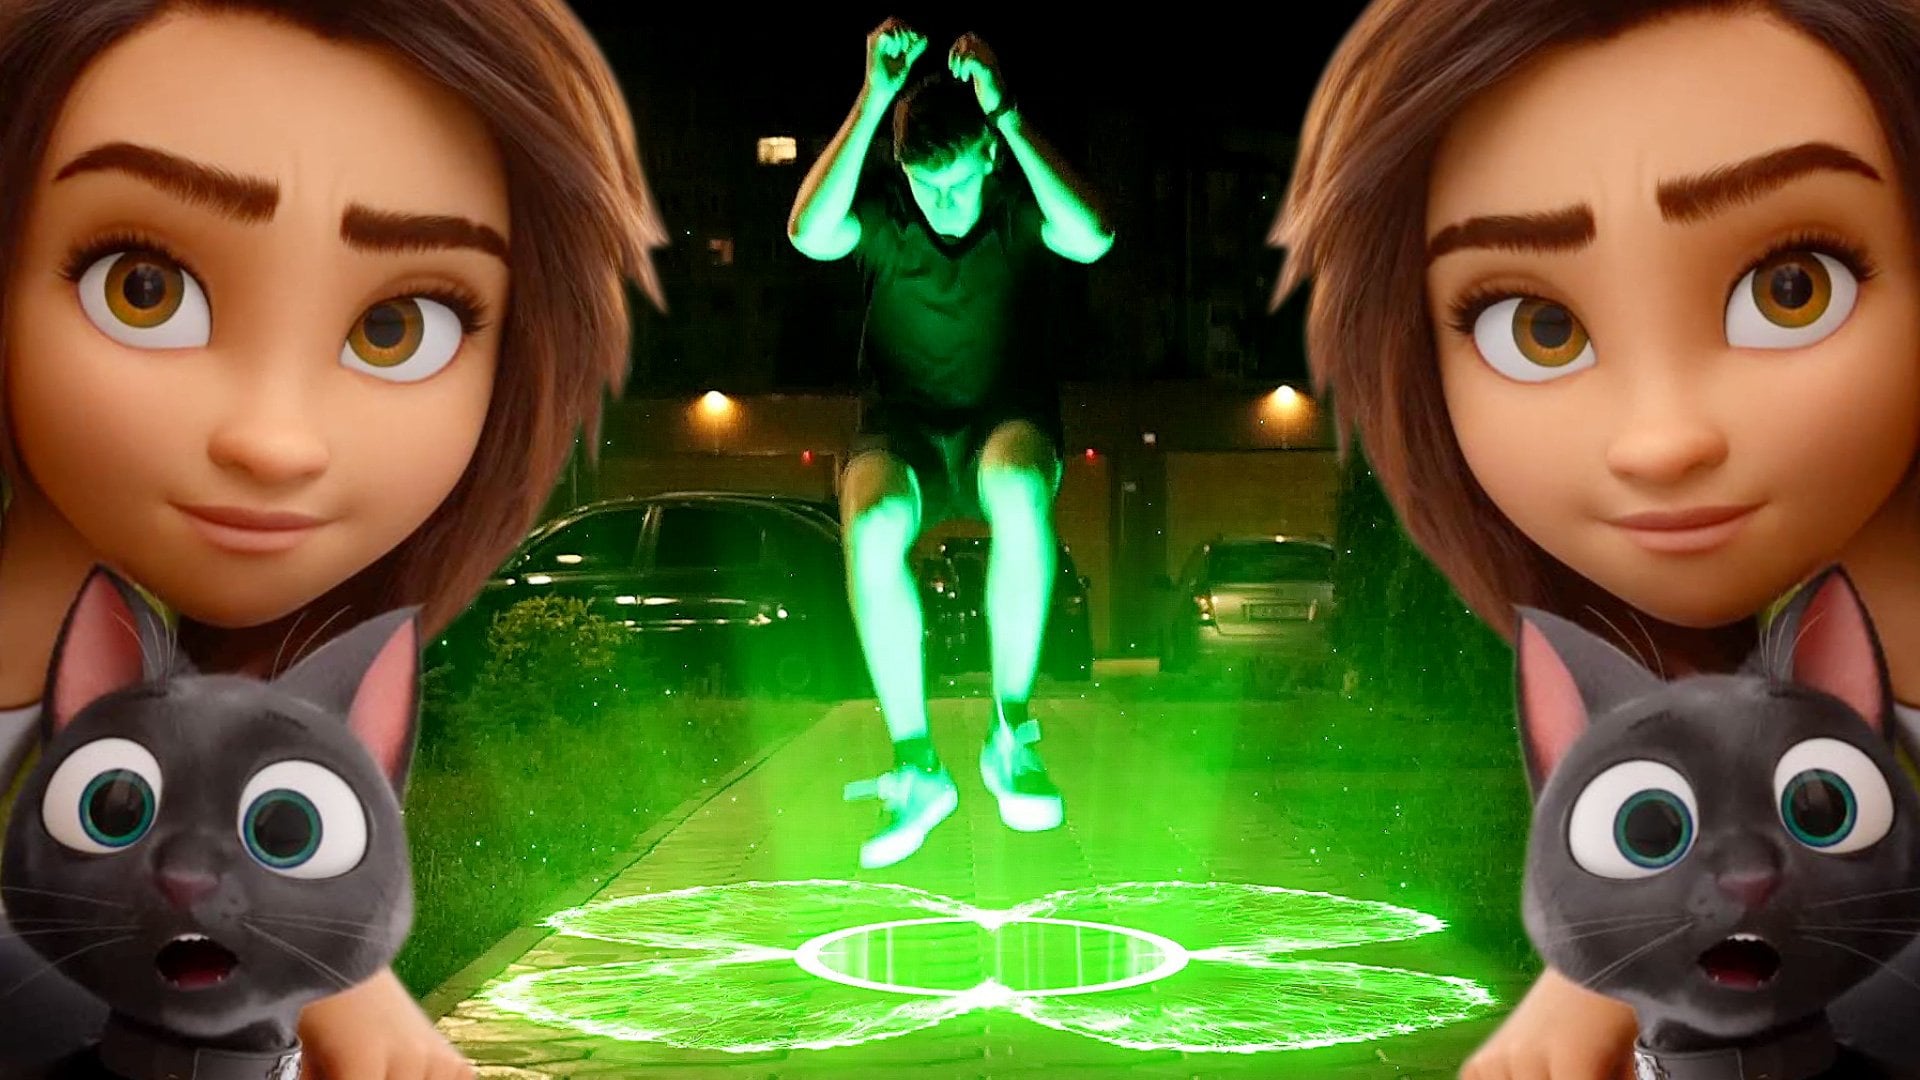
2. Light Saber Effect: Okay, so in this part of the class we are going to make our lightsaber. And this is final result, which you can see on the screen. And this is foolish wish I provided in the resource tab to this class. So let's select this saber part. Drag and drop on this icon here or on your composition, or here on timeline to create new composition. So to create lightsaber, it, you need to have external plugins saber, you can just go to video copilot.net and type here sabre. It's a free plugin which you can install on your after-effects application. So click here on saber, and here you have download files for Windows and Mac. So once you install this plugin, you can create new layer, go to layer, new solid. Let's call a saber and click. Okay, now we can go to effects and presets. Let's type it here, saber and drag and drop onto your layer. So we can set mode to screen or add. You can play around and see what you like best. For my video, I went with this green and here by clicking on these points, as you can see, you can adjust the position where you want to put your lightsaber to accomplish this effect more easily, you would need to have something you would hold in your frame. As you can see at the end of the stick, I start some white marker to see the tip of the stick. So now you can easily track with these points, select your layer, and then select your effect, and you'll see these points. So now we can set keyframes to these points. So let's click on this stopwatch with leftmost like here, and left mostly here. If you press U on keyboard, you'll see these keyframes. Keyframes, It's basically the points in time which remembers the values. So for example, this point in time, remember this value here. Now if we skip your frames, you can also for here on Preview SQL, if your frames and set to new location, you'll see that we created new keyframes with new values. And now we can just track this stick manually, frame-by-frame. It, it can take some time, but it's pretty easy to do. Here on the moments where you cannot see the stick. You want to have your line about here if the forward part of the motion where your Sabre is going. So if we enable this layer, you can see that we already have this swish motion of the lightsaber. So what we can do, we can change core size to make it bigger. Also, we can go to Customize core and change the roundness. And here and roundness, we can set to two and make it a bit smaller value. So this is how you can adjust your shape. You also would want to have a little Flickr. So as you can see, if we set to 60 will have this kind of liquor. Also, what we want to do is go to Render Settings and maybe add some saturation. I don't have so much colors and my scenes. So for my example, I could go even with one. But if you have saturated scene, you would want to go higher. So it would look much more interesting. So basically you just trach in this lightsaber like this and just frame by frame, go through it. And now we have this motion as you can see. And let's check the part where our lightsaber goes behind myself. What you can do in this part right here. So let's track our hand once again. Here. You cannot see the lightsaber. You're just guessing where it's good to be. In these parts. As you can see, you can skip few frames and just adjust position right here. So it kind of looks like this. So what you can do here, you can just select your Sabre and create a mask by clicking on this pen tool right here. And then you can do a rough mask. It doesn't have to be perfect. You just need to have this kind of mask to cut out yourself, to be on top of this lightsaber like this. Then press M on the keyboard to see your mask and click here to create a keyframe on the stopwatch and just move your mask if you are moving in your shot. By selecting this selection tool, just adjusting your position. You could also click anywhere like here, and then click on one of the points and move them separately. So let's make sure that we covered ourselves. We can disable by clicking on this eyeball here. And as you can see, it's pretty good mask. So we can just create another keyframe and just move this mask out of the frame. So let's make sure that mask follows along. So let's enable this layer. So now what we can do is to go to Render Settings and set it to mast core, and then click Invert Mask. What we getting here. We can also adjust this mask if we need. As you can see now, the mask core itself is guarded by mask. But if we increase the glow intensity right here, we'll see this light wrap around our cells, which would look a lot more believable. Lake light is covering ourselves. You can also select your Sabre layer and press F on keyboard. Here you can feather your mask. They set it to three pixels and it will light rep, even more. So you wouldn't need to go so high on glow intensity and just check your footage until the end. You also can do, let's just say that at this point in time we want to see a full lightsaber and just go back in time. We can just create these few frames of animation, like it's appearing. And here we can just click on this part of the layer and cut it to this moment and we start seeing in this part. So in next video, I'll show you how to make this transition, which you can see on your screen.
3. Transition Cut With Burned Edges: Okay, In this part of the video, we will make this transition, which you can see on the screen right now, Let's start creating our final composition. I'll click on this icon here and call it final video. Let's make it as long as your video will be. So let's click. Okay, and I already have made this saber part. Let's drop it here. Let's just select all the video files and drop it on folder to make it organized. In here, I'll name it comes for compositions. Let's double-click here and import these two images which I provided with MyClass, which you can download from resource tab. Let's drag and drop here and create a folder image. So we need to have our next shot. Next shot will be watched part, Let's drag and drop into our composition and time it well, maybe about here. Here we will have some camera movement. Let's press P on the keyboard to see our position. Then hold Shift and press S on the keyboard to see our scale. Keyframes just click on this top washes. And let's make skill a lot bigger like this. Skiff your frames. And maybe let's add a bit of movement towards your actor. And then about here, we can zoom out. Let's set so 100%. And you can press Control Alt F on keyboard to Fit to Comp or just right mouse click on it and go to Transform Fit to Comp. So in this way, we can have this camera movement. We can also select these keyframes and press F9 M keyboard. It will make smaller motion between these keyframes. Here we can select these keyframes and click on this Graph Editor icon. Here, we can select each of the value scale and drag this handle to the left. So make best moment here and slower towards the end. If you cannot see it, this kind of graph, you would want to click here and set it to edit the speed graph and then go to position. Also select this keyframe and drag this handle to the left. Let's exit this graph editor. And now we can preview this moment. Let's just shrink this work area and press Zero on NumPy. As you can see, we have some weird motion here. What we can do is to select these position keyframes. Right mouse click on it and go to Keyframe Interpolation. And here we can set, we can set spatial interpolation to linear and click. Okay, let's preview again. Now as you can see, our motion is perfect. So how to make this transition here? What do we want to do is to go to List frame of this video. We can extend this part here and then just press Control D to duplicate this saber part video. We can also go to Edit, Duplicate at the list frame where we can see our lightsaber, you can just right-click on it and go to time. Free stream. So now let's cut it in this way. And what do we want to do is to cut this layer into pieces, as in this example which you can see on your screen, we want to select this Pentel right here and cut roughly in the way to simulate the cut which I had in previous video, something like this looks rate. Now we want to duplicate this layer one more time. Let's press Control D to duplicate it. And now we can select this part of the mask and move it right here and create another point and move it like this. So in this way is you can see by the mask, we have two videos and cut it in half. So next thing which I did in my video, I just created an H click here to create new composition. Let's call it H, may be H, burn and click. Okay, now we can select and add these two images into our composition. So let's work with one of them with this burn edge here, with this pen tool, we can just click and roughly cut this part of the burned edge. Then we want to go to effects and presets and apply color key. And by clicking on this tool, we can select this white part of the image and by changing color tolerance. Okay, it looks good. Now what we want to do is to make a copy of this layer. Just, let's press R on keyboard to rotate our layer like this. And we want to have a straight line from top to bottom and then duplicate this burned edge few times. This press Control D, right mouse click on it and go to Transform, Flip Horizontal and rotate it. Then select these both layers Control D to duplicate it. Move it over, and remove this edge over liters. And now we have this edge. So as you can guess, you can just download any pictures from the web and create your image which you want. In the same way, I created this burn H, which you can see right here. So let's go back to our final video. And let's make animation for each of these sides. And let's press P and R on the keyboard to greet position and rotation keyframes to this layer. And about here, Let's rotate it and make it follower like this. Press F9 on this keyframe here. And maybe it will start a bit further away like this. Once again, let's go to graph editor and select each of these, and click on each of them and drag these handles right here. Let's preview this motion. Good, looks pretty good. Let's make it a bit longer just by extending this layer and moving these keyframes, we want to start a bit further away to have more impact of this cutting motion. Let's do the same to this left part. Press P, hold, Shift and press R to CR position and rotation. Really keyframe. And here at the end of this layer, Let's just move adore and rotate it a bit. Fall out of the screen. Once again, we'll select these keyframes, press F9, and go to graph editor. Select each of the position, drag my handle rotation to click on the keyframe. Drag by Handel. Go out from the graph editor and let's see the result. Okay, It looks pretty good. But I've noticed that we still have this light foolish, which doesn't work really. So let's just rests on both of these keyframes go to enable time remapping. This way we have still movement in our shot. But at the end, once again, right mouse click and go to enable time remapping. So it will still allow us to extend this layer, but we will also have a bit of motion in these videos, which would look more natural. It looks rate. Now we need to add our edges. So let's add this edge burned. And now we just need to match to one of the sides will start work with this site right here. Maybe disable this layer to see it better. And click here to see the transparency grid. And we can just extend it by this handle. I rotated a bit to make it perfectly. And we need to cut this layer to this moment. And here also, and let's figure out to which part we need to connect. So it looks like to this part of the video. So we need to select our burns edge and connect with this pick whip to this layer. So as you can see, now it follows the same motion, exactly what we needed. And let's also apply this edge burn. Also at the beginning of this layer, we need to make sure that it stays at right place. So let's break on top because we want to see a fire on top like this and just extend it a bit. Let's same rotation value as the burned edge. Okay, It looks good. We can also go to ash burns and change to multiply. So it would look more like a burned edge and maybe press S on keyboard and click on this lock button to be able to stretch a bit and horizontal space and move it over. So we would see more of this burned edge. We can also connect to this saber part and cut this layer to this moment. So now as you can see, we have this part of the video right here. What you can also do is to select this fire edge and go to turbulence displays, set it so size to really small value to have this turbulence displace and our fire in this way, once it will fall, we will get some a bit of animation. Press and hold Alt key on a keyboard and click on this stopwatch here we can type expression here. Below this type, It's time, multiply 950. And now we added this little detail to our fire, like it's burning. What we can also do is to go to effects and presets and apply glow effect and play with this radius effect. Enable this video here to see it better. And now we can play with the intensity as well as the radius. We want to have smaller radius. Then duplicate this globe by pressing Control D on keyboard and have a lot bigger radius like this, then you can play with the glow threshold to have more fire look. And maybe you want to have a tint effect to make it less saturated. If you want to measure for each batter. And the same way you will do to this part here of your footage. Let's not waste any time on this part. And final, what you want to have to this effect is to go to layer new solid, easier to press Control Y. Ok, and let's apply a lens flare. We cannot see it because this should be a black. Let's select it and press Control Shift Y and set it to black. Now we can see our lens flare. We can also add some blur. Gaussian blur works great. Let's blow it out and let's set it so middle here to have a nice flare, maybe change it. So which works best, this 105 millimeters prime. It looks great. What we want to do is to set it to add and rotate it a bit like this and stretch it out and maybe a change scale even further. You can also apply an effect called tint, and you can change the color which you want. I've set mine to orangeish, fire the look, something like this. We can cut this layer to this moment, press T to C, our opacity, and change it to 0 and cut it to this moment. So as you can see now we have this kind of flesh. And if you have time, you can also create a new solid at another saber effect, set it to add and give it a fence like hero was a lightsaber set to really high-value here at the beginning and few frames later, make it a lot smaller like this. And size decrease, also encouraged to this moment. So in this way, you'll have a little hint of the lightsaber at the end, which I think looks really cool. Okay, in the next video, we will make our transformation from myself to 3D model, which you can see on screen.
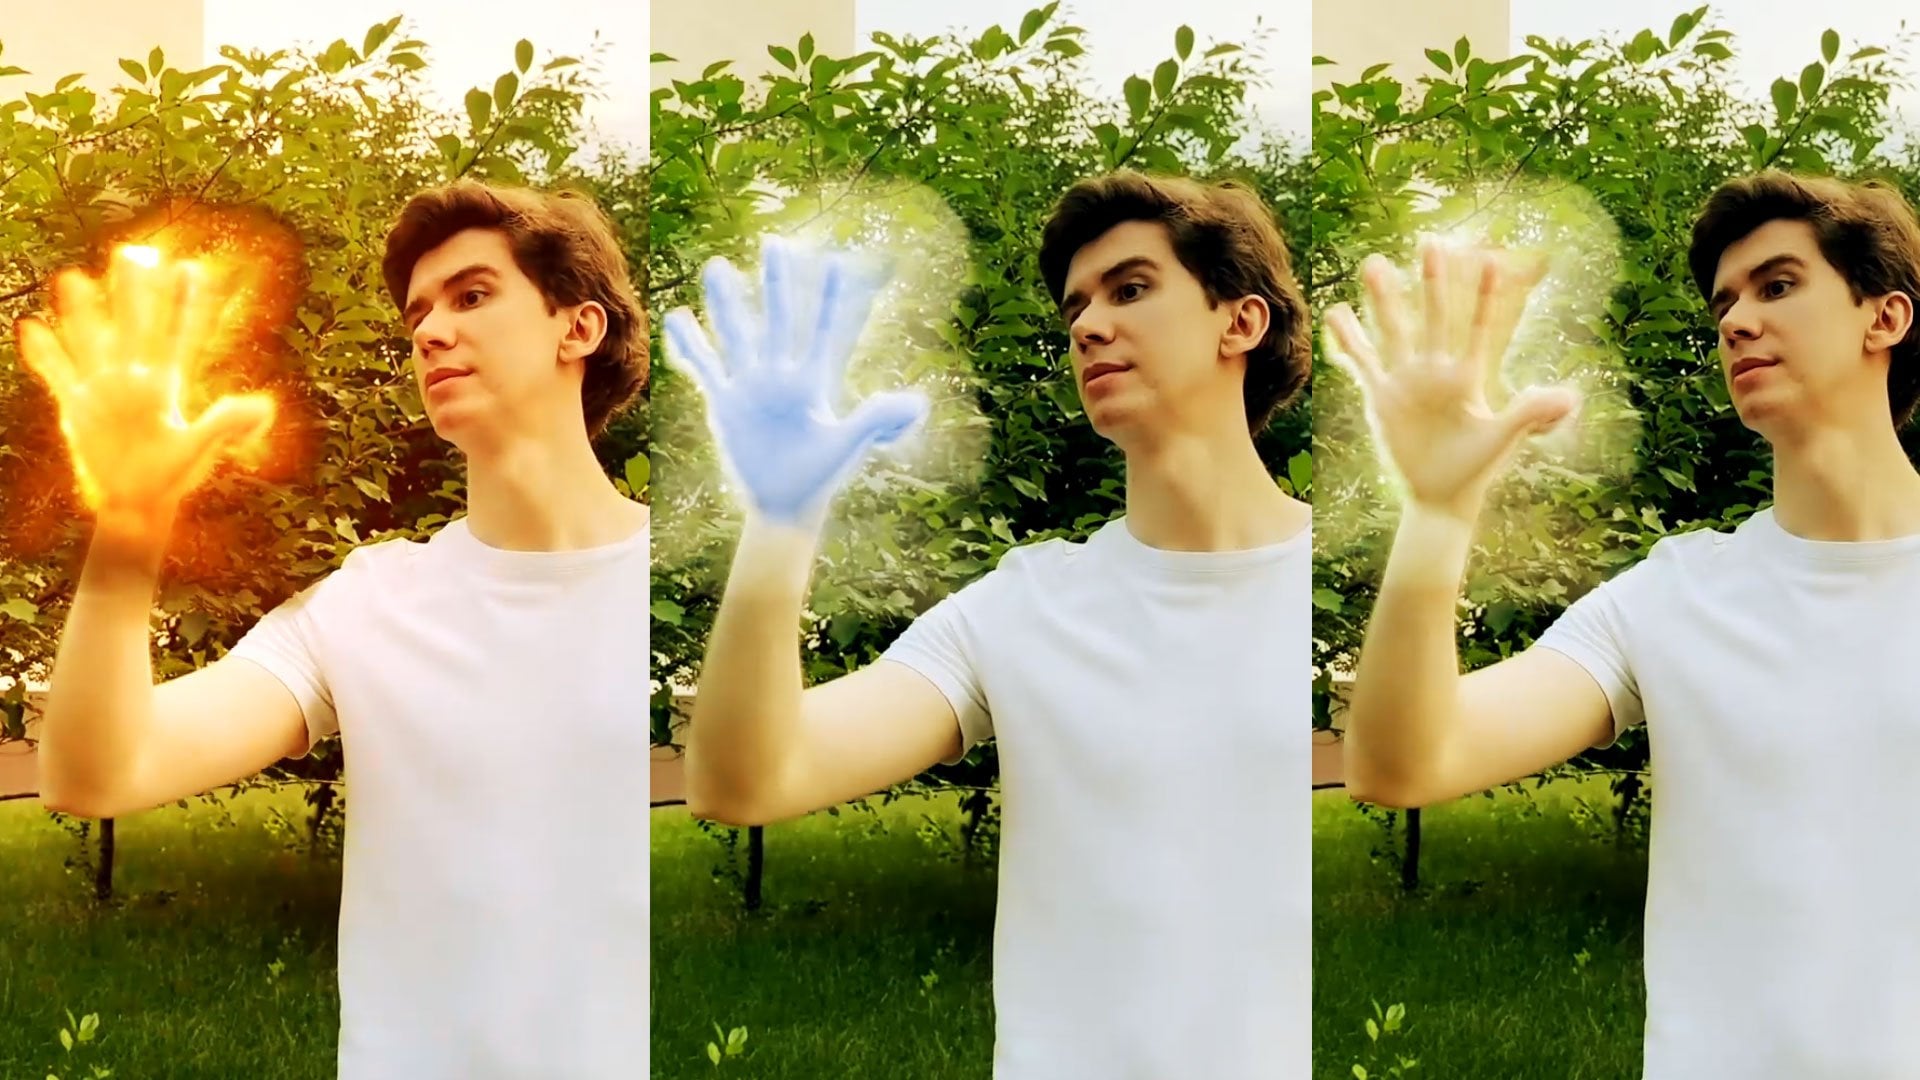
4. Transformation into 3D Model: So in this part of the video, we are going to transform ourselves into our 3D model. So what do we want to do is to drag and drop our forage. And just by the end of this video, as you can see, I filmed also the clean background, foolish. So first of all, let's place our model into our scene. For this, we need to go to layer new solid or Control Y on the keyboard. Let's call it element 3D, because this plug-in we will use, we can cut to this moment and go to Effect video copilot element. So this is external plugin which you can download on the veto HIV dotnet. So let's go to scenes setup and we need to import our 3D model, which I provided in resource step to this class. So let's go to file import 3D sequence because our 3D model is already animated. Let's click on it and just select first OBJ file and click Open. We need to click on this, use our normals. It will allow rapidly react to lights in our scene and click Okay, it can be any model which you can find on the web. And the way you are going to animate it, you can use the site, mix them all. You can just choose their motion which you want to have on your 3D model and just upload it and get your free animated 3D model. Then you are going to run your cinema 4 D application. I just quickly tell you how I did it because I understand that not everyone has the cinema 4 D application. This is why I already provide you with the 3D model so you could learn technique and you don't have to have a Cinema 4D application. And then you would want to go to a script Script Manager and just run the script, which will allow you to export an arbitrary sequence just like one which I provided. I also will provide the script and resource step if you would want to use any other model which you have. As you can see, our material didn't load. So we need to select our material and hearing diffuse channel. Just click on it and click here and we need to go to Texture folder. It will be also in the resource tab and choose this image here and click Open. As you can see, we already have our texture. Okay, also we need to go to normal bump. It will add some bumps. So let's click on it and click Load Texture and select this texture here, click Open. In this you can see we have a much more details. Click Okay, and click Okay. So now we have our model. As you can see, it already has this animation which we need. So we need so rotated and a mesh to our screen, go to a world, transform and click Create. It will create a null object which will connect to our 3D model. We can select it and got it to this moments so we could see where we are working like this. And then we can just press S on keyboard to see our scale and scale it up and press R on keyboard to rotate. It looks like we need to rotate and y and then press B to C opposition, move it closer and Z space like this. Now let's place it on ground. So as you can see, we already have this flip here. What do we also can do is to go to Layer and go to new light. We can add spotlight. You can just choose here intensity 100. We can tweak these values to see it the better luck which we want. So as you can see, it's too close to the model. Let's move it over here. And what we want to do is to pick this anchor point here, point into our 3D model. We can press beyond keyboard to easily adjust the position like this. It looks good. As you can see, our 3D model jumped too far back. What we can do is also select our world transform. We can rename it as control layer and press P on keyword, create a keyframe at the start. And here, where he's about to land. We can move it over exactly where we need him to land so they can see his start to jump from this moment. So let's move this keyframe to this point. So he stays in place and then jumps. And lens about there where I ended. As you can see, he's flipping way too slow. So what we can do is to select these lights controller, an element 3D, and go to layer pre-compose. Let's call it 3D model. And click Okay, we can cut it to this moment. And what we can do is to right mouse click on it and go to time, enable time remapping. And this way we can create a keyframe here, the start here at the end, where we will have our transition. We can just delete this keyframe here. Just select it and press Delete on keyboard. Move this keyframe closer. In this way, we speed up the animation, move it over, because here we want to have some glow at the beginning. So let's move it over. Here starts the animation. As you can see here, we cannot see our model. What we want to do is to copy this keyframe selected and press Control C and Control V to paste it. And now let's just cut this layer to this moment where I appear just like this. Let's look at it. So what do we need to do right here is just to cover this transition point. So here we can just copy some of the flesh which we already created. It is to flesh layers and press Control D to duplicate it and just move it lower here. And move it to this moment may be on top of this also. So here we will have our flesh and we can just adjust the scale of each of them and maybe just move it to the center. Also, what we can do is to change the color. This time we will go with the red and here we will have the transition point. We also would want to have this flesh duplicated. So let's move it to this transition point here and maybe move it a bit down here. So now let's add a bit more glow to it. Duplicate this 3D model. Just press Control D, select it and press Control D to duplicate it. What we can do is apply effect called find edges and click Invert. Now we can apply CC, Radial fast blur and give it over to shine. And let's apply a Tritone effect. So let's set it to add. And we already have some shine here. And let's add an effect called exposure. List these two values. And just by tweaking these two values, as you can see, we can get this kind of shine. What we want to do is to animate it at the beginning of this layer. Click here to amount in here to exposure and gamma correction. We want this effect at the maximum. So let's set it to 100%. And here let's make it a bit brighter about here when he is about to make a backflip, we want to reduce these values. Let's start with this shiny effect, set it to 0 and reduce these effects also to get something like this. And let's press U to see our keyframes. We can select them and press F9 to make a smoother animation and spurred a bit. And here we want to press T on keyword to see our capacity and animate capacity, so it would blend into original color. Also, let's lay these keyframes and press F9, and let's spread it a bit. And let's take look. So we can make this effect stick a bit longer. And just by spreading these keyframes apart. And this is basically how you can make this transition. The same kind of effect, which we apply it to this 3D model. We want to apply it to your character which you have in the scene. But before you would want to cut yourself out. So you would need, so press Control G on keyboard to duplicate your layer with yourself. And then wrote a scope yourself using Roto Brush Tool or any other method which you like. It's basically by double-clicking it on your duplicated layer. You can hold Control on keyboard and a leftmost click and drag to change the size of the brush and just run a brace yourself. Just select only yourself and holding Alt key on keyboard, you want to deselect all of wishes not as part of yourself, just like this. And then just by clicking on this next frame, rotoscoping ourself and just stayed in yourself in if the mask doesn't work properly or delete some parts. And once rotoscoping is done, you would want to click on this freeze button. We'll save this progress. Then you can also save your project and go to composition final end. Just reapply all of these effects which we apply it to the 3D model. I'll click Return and rename it to shine carpi, these effects just select one of them, hold Shift, select all of them. Press Control C on the keyboard to copy, and then select this layer where we have only ourselves and press Control V to paste it. And now as you can see, we have this effect a plates to ourselves. All the thing we want to do is to press U on keyboard, select all these keyframes, right mouse click on one of them and go to keyframe assistant and changed to time reverse keyframe. In this way, we will reverse this animation and just move to the end of this layer and select these keyframes and move it over to this part. As you can see, I didn't copy it, a possibility, but before, I'll animate the capacity, let's see how it looks. So about here we want to press T on the keyboard to see our capacity and animate it to 0 from the beginning. So we would have this kind of flesh or the transition. If you want, your can run a Skype yourself a bit more. We have more smooth transition into this flesh, but I don't want to waste your time. Let me quickly show you how it's done. But I will not go deep in the settings which I use because it's the same technique which we used just to place 3D model in our shot. We apply Element Effect, go to since that up and design input just here, 3D object. Click Open, use our own normals, and then click on the material and load our material. Click Okay of k, and then go to Transform read null object. Let's move it down. Press P, S and R, holding Shift to animate our position and maybe rotation. So what do we want to do is to set our element 3D layer to add. And then just animate your position of your 3D model, which is here on your watch. Just make it smaller and animate frame by frame your 3D model. And to add some shine, you can use just a simple layer, lake solid, apply a fill effect and draw some mask. Lake light is coming out from our watch, something like this. Read another mask, set it to subtract, then press F to make it feather, and then adjust this anchor point tool. We can set this anchor point here, also change to add. We can press S to make it smaller, to make it less bright. And then p to 0 position and also more frame-by-frame. So this is how you can add to the model onto your watch. So in this video, we just created this part here. And nice final video, I'm gonna show you how to add this web shouldn't affect which you can see on the screen.
5. Web-Shooting Effect: Okay, In this final part of the video, let's add our web shouldn't affect. So we need to add our spider web and video. So here as you can see, I'm pretending like I'm shooting web from my hands. And this is pretty easy effect. We just want to go to File, Import, File Upload that this string image we shall also will have in the resource tab to this class and just drag and drop into our composition. So I'm going to show you just one hand to not waste any time is the same for the other hand. So what do we want to do is to track our hand from this moment. You just start to shoot the web. We want to select our foolish and go to animation. Track motion. Here we have our tracker. So let's set it to our wrist here. This little square is showing what we are looking for. And this big square is showing the area where tracker is trying to find this little square. So something like this should work fine here and tracker panel, we can just click frame-by-frame to check our foolish like this. Just make sure it doesn't lose the part of the hand which you chose. Okay, here, as you can see, we have fast movement, so tracking is not great, but we can manually roughly set it to the tracker where we want it to be. Okay, it's enough. We want to go to layer new null object. We want to add some object to which we will apply this tracking data. Now we can click on this Edit Target and select this null object which we just created. And click okay, Let's cut at this layer to this moment and click Apply. And here we will have this window click. Okay? And now if we select our null object and press U, you will see tracking data. So now we want to select our image and let's maybe flip it and go to Transform, Right? Mostly go to Transform, Flip Horizontal and we want to align with our hand. We can also click here, so change our anchor point. And now if we press R on keyboard, we can rotate from this point. And now we can just parent to this null object. And as you can see here, it's stuck to our hand. What we want to do is to cut here to this moment where we are about to shoot our web. And then select our image, press S on keyboard, create a keyframe. Click here to unlock both x and y properties. Let's move this keyframe here. Let's change this value to about 0. So it would look like it's shooting from our hand, something like this. What do we want to do is to enable motion blur in our composition just by clicking on this icon here. And then click on Toggle Switches to see this motion blur icon here. And let's enable on this image. So as you can see, we have some motion blur. It will make it look much more natural. We can work a bit on this look just by applying fill effect and effects in presets, we can also apply cors effect. To make sure that our alpha channel is nice. And then we can apply rather than edges effect in this way, we will add this kind of texture change to spiky. And by changing this curve here, we can play around with the look of our web. We can also change the scale and add some texture to our web. Also, let's set it to white or off-white. Once again, the thickness you can adjust with these curves effect and with the border. But you can also select this rectangle tool here and cut a bit and just move it here and press F on the keyboard to apply a bit of feather. And this way we will hide this part sticks to our hand just like this. So as you can see now it looks a bit stiff. So what we want to do is to add some wiggle to the string. So let's click on this Puppet Position Pin Tool. We can also click on the mesh and just create a bunch of points like this. Now let's press U on keyboard to see our keyframes. We don't actually need this one. As you can see now it's highlighted and let's delete it. And let's delete this one and just make sure to select this keyframe with the selection tool. And I create a corresponding key frame here. Here we want to move it up. So as you can see, we have this nice string effect. And here just copy this first keyframe, Control C and Control V to paste it, you can also add two key frames, one up and one down. So it would have this kind of wobble, which looks pretty natural. Okay, it looks good. And now let's move to the transition part of this video. So what do we want to do is to copy, just copied this part of the video, just your beginning, select it and press Control D. Moreover, up here at the end, right mouse click in it and go to time freeze frame here where I about to pull the string. We want to move it to this part and then just select this mask tool here and make this cut in the middle. Then press P on keyboard to see opposition, create a keyframe and move it over. And now we can just place it here like this. Let's make a little jump here and copy this keyframe. Let's press F9 on first keyframe. So it will build up the momentum and also apply the motion blur. Let's press 0 number to see our preview. But we also can do is just to apply drop shadow effect. Let's set a direction to 270, so shadow will appear to the left at some softness and decreased capacity. So we would have some depth between these two layers. And the same we want to do to this part here. Just duplicate this layer and just move this part of the mask to this part in here change transition. And he made this capacity goes to 0 here. And then press P and adjust this position to this moment. And this one here too. So this is how we have perfect loop to the beginning. Thank you for watching my class. Follow me here on Skillshare if you want to learn more fun VFS, I think it's a great way to learn after effects.
 M Jake, Lets Create VFX & Cool Stuff Together