Transcripts
1. Introduction: Hi, I'm Jake. And
in this class I'll show you how to create
this cool smoke and fire Simulation using all the built-in tools
of Adobe After Effects. You don't need to have
any paid plug-ins to create this template. All you need to have
is any version of Adobe After Effects free
trial version works to this class is great for
beginners because I take my time to explain each and
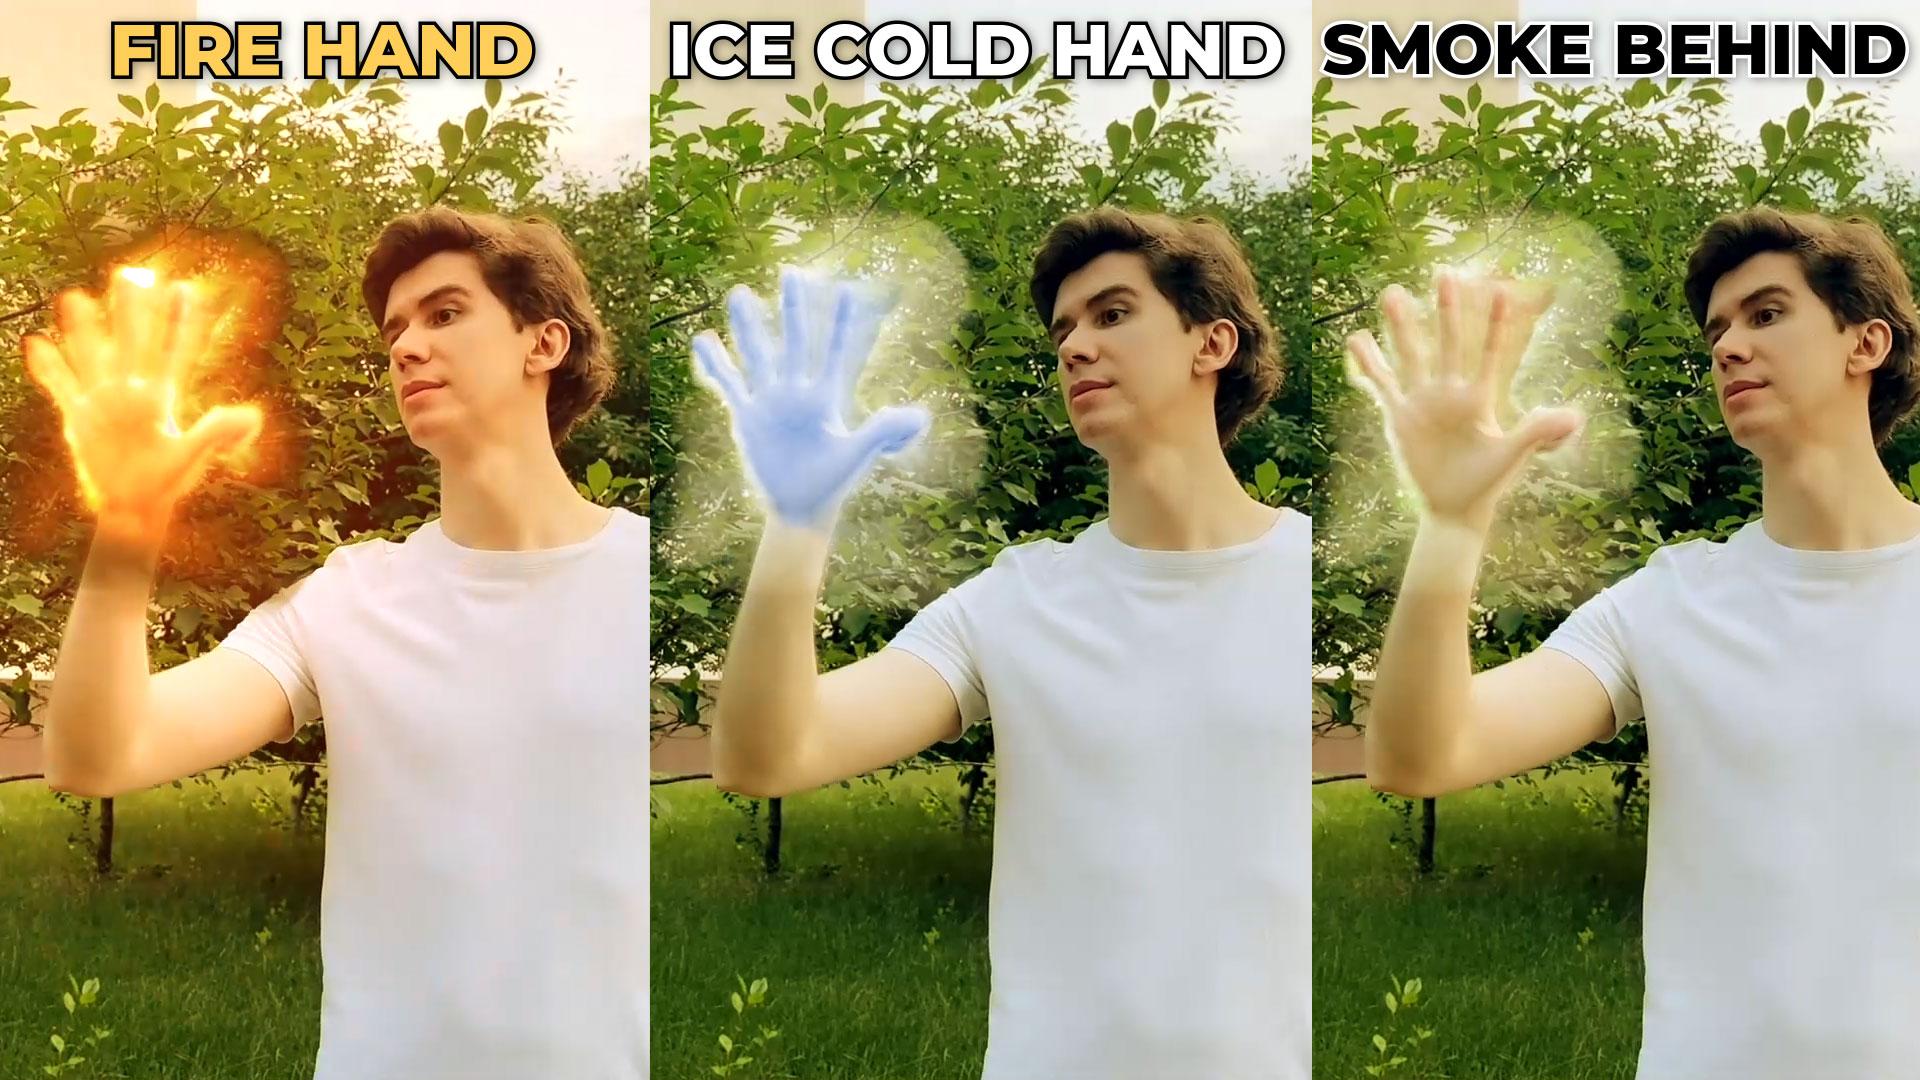
every step which I make. I'm going to show you
how you can create texts and Logo reveals
using this effect. And also, I'll explain
the ways to get ice Cold Liquid Nitrogen
look as a bonus. This class is great for experienced Adobe After
Effects users to, because I'll teach you
if you cool techniques which are not that common
ingredient Motion Design, you can just download a
free trial version of Adobe After Effects if you
don't have the software yet. And we will start
from the Basics and gradually we'll get to
more complex stuff. I think it's the best way
to learn this operator. Well, gradient interests
in Effects or PFK-1. And to complete this class, our goal is to create this
cool smoke and fire effect. I'll be happy to see
it in my class as also your result after
following all the steps. So let's get started.
2. Hand Rotoscoping: So I'm using Adobe
After Effects 2021, but you can use pretty much any version of Adobe After Effects. It will work fine. First of all, let's set
to standard layout. So your panels should
be similar to mine. In case if you
cannot see some of the panels which you
can see on my screen, you can enable it from here, from window, for example,
character, character. First of all, we need to
create new composition. We can just click here or
on this little icon here. So let's click on it
and type it smoke. Because in this
composition we will create power Simulation
of the Smoke, which pretty much will
generate smoke from any kind of footage
which you will draw em. So basically from Text, Logo, or even a video. So let's duration to maybe a 10 s. But you can set to an iteration which you
want 30 frames per second, because I've shut
my video in 1920 by ten at which is published
it in 30 frames per second. And click Okay. Also we can import our video, which you can download from
Resource tab to this class. So to import video,
you can go to File, Import File or just
leftmost double-click here in project panel. These videos will
be available to download in Resource
tab to this class. You can just select
them and import them. In our case, we want
to use this VG Video and left mouse click and drop it into this small composition. Okay, So let's see what
I've shot for this class. Basically, you can repeat
this kind of performance. If you can call
that performance. Basically I just pulled
my hand and pretending that it's covered
some kind of small. Then I blow on it and
it's Charles to the fire. So I react and run the same
kind of Video we can shut. For this effect. It would be better to shut on green screen or on blue-sky, because it will be
a lot easier to get out your hand before
creating actual Smoke. We want to show to the software from which part of
the image we want to generate Smoke is you can solve from previous
to this class, I have generated smoke from my hand and basically
it's pretty easy to do is just simple
Rotoscoping of the hand. So if you already know how to run scalp anything
in Adobe After Effects, you can skip to next video. And now let's
Rotoscoping our hand. So we would have something
to generate smoke from. So first of all,
we need to select this footage and left
mouse double-click on it. And here we can select
this roller brush tool. So let most ligand it
using scroll on the mouse. You can zoom in and zoom
out into your picture. Just make sure that
you end layer mode. Get to the layer mode. You need to select
your video and left mouse double-click on it. It will open a layer mode. Also below Escape button, you can press the button, which kinda looks like this. It allows us to open full screen any window on which we
have our cursor on. So basically let's open
this in full screen. And I'm gonna pick some frame where I can
clearly see my hand. That leftmost click and hold to select the area
which you want to use. So let's john tab of our hands. You can be a not super
precise because we can adjust this selection later. You can much even take some
of the parts of your hand. Also. You can see from
this banner here, you need to go out from full-screen mode and make
sure that in composition, you'd will set your
resolution to full. Here in composition,
set it to fall, and go back to layer Vg. And also, Let's open
this and pull stream. So till the key to
open a full three. And we can continue
with our Tracking. By the way, it's not that important to open a full-screen. Just make sure to see what
you want to Rotoscoping. If you need to make your
size smaller or bigger, you can hold Control. Key on keyword is you can
see I'm holding Control. And leftmost click and
drag to the right or to the left to make it
bigger or smaller. Also, you can hold
Alt key on keyboard. You can see I'm holding Alt. While holding Alt, you need
to let more slick and hold and draw the areas which you
don't want to write a scalp. My keys. I just want to
have this part of the hand. So basically we had just want to stop our Hand where we are pretending like our hand
is catching on fire. Ancillary these areas
which we don't like, basically by left mouse
click and holding Alt, our brush chance to read and we can just deselect these parts. We can also zoom in and
remove unwanted parts. So in my case, I
don't want to be super precise because I have a green background and
basically I can even key out a bit with
key light effect. But this is part where
you want to spend more time if you have
your own footage. But we don't want to waste
too much time of this class. So let's here in panel. Jump to next screen
by clicking on this next frame button. And make sure that it stays
on your pant entire time. So basically you can just jump, jump like this and make sure
that it stays as it goes up. So we need to apply more Of all Rotoscoping like
this, just like most league. And make sure this
your cursor is green. Which means that we
add in some areas. And let's make sure that all
of our fingers are selected. And just simply click on this next frame to
see next frame. Also, you can use this shortcut, which is Control
and right arrow. It also will jump to
next frame is in C, Control, right arrow here. So this is how you can
basically jump faster to the next frames and
just make sure that you still have everything
in your shot. I'm going to speed
up this process. So you will see final result. Just make sure to take
this part of the image, but also because this will be important
in the next videos. So make sure to take a bit
of lower part of your hand. As you can see in these parts, where my hand is
moving too fast, you'll need to be extra careful to make sure to add all of the
parts of your hands. And the more precise, you'll get this Rotoscoping, the cleaner Effects
you'll get as a result. We got this Rotoscoping
to this part where it's left's our screen. And now let's go back to this
point where we started and also control let arrow. So we will get back to previous frame and also make sure that it
stays on your pant. In this part, I know that I don't want to
generate in smoke. So basically we can
just cut this work area to this moment and to this moment where
it left the brain. Okay, so now we have this
pretty much good Tracking and we can save it. So basically at this point, if you will save your project, you're still will lose
all the Rotoscoping. This is why it's
important to click this freeze button when you
get all of your Tracking. So let's click on
this plus button. And now as you can
see, it goes through the process of raising
all of your Tracking. So are freezing
process is complete, as you can see, this banner, which means that it's frozen. And now we can just simply
go to this condition. Smoke and C are kept at. And basically we just want
to close this toggle. And also let's
make sure to be on the first frame where
it will generate Smoke. And then let's cut
to this moment. So basically, from
this point in time, we want to generate smoke and it will disappear from
the screen about here. Let's also cut here by clicking
on the edge of the layer, leftmost click and hold
and drag it to the left. Then we can just
make sure that it will start from the beginning. And we will have
this kind of Hand. Also, what we want to do is to tweak a bit our Rotoscoping. From my experience, it
worked better with the small if we will
have big feathering, something like this, so the
edges will be not that sharp. So make sure that your pants, which you rather start, will
have nuts too sharp edges. So something like this
should work fine. Also, we can decrease
the contrast like to 62 to even more feather the
edge and shifting the edge, we can just increase it. But in case if you
have green background, because in this case, or blue background, Liquid Sky. Because in this case you can just type in Effects
and Presets, panel key light preset. We can just use this
key light effect. So let's click on it and
drag and drop on our video. And it's only work if you will have this kind of
greenish background, blue sky will work fine. Also, you can see you with
this key light effect. We can just Rotoscoping
ourselves out. And it's a good idea
for this effect to save your project
because this effect, we will have a lot of complicated calculations and it may crash your Adobe
After Effects software. From time-to-time. If you will save your project, you will not lose any progress. So let's save it. You can pretty much save
it wherever you want. And here and screen gang, I just want to increase it to
200 on the screen, the mat. We can just tweak the settings. My case, I just need to lower this clip white value to threonine to get
more of my hand. This I want to, is totally super into to get out more of unwanted parts
and screen softness, I can increase to 8.4. So I will still have this kind
of feathering of the edge. But in case if you didn't shut your Video on Green
Bay round or style, Let's just select this
key light effect. It's just in that case, you just want to ship your edge. And other directionally
this and it makes sure that you'll get
less of your background. So something like
this would work fine. Once again, if you want
to get a perfect effect, you just want to make
sure that you don't get any of your background. So maybe play around with this shift edge value to get as much of your pants and as
little of your background. So something like this
should work fine. Also, we want to have
this fading here So basically we just want to
select this ellipse tool. And to select it, you
just want to let mostly and hold and select
this ellipse tool. It will get this drop-down menu, like mouse-click
on Ellipse tool. And basically you just want
to make sure that you didn't select any of layers
which you have here. So people like here to deselect it and then let most leak
in the center of your palm. Hold control to create a circle from the
center and hold Shift. It will create this
purple circle, which we can use. The color doesn't
matter because we can just simply close it and select it and press Enter
on keyboard to call it met, because we will use this
as a mask for our Hand. Basically, you can just simply click on this eyeball
to make it invisible. And here we can just
set to alpha matte. If we will slay the selection
tool and move this circle, we are cutting out the part
of different which we want. Let's set it about here. And let's add Gaussian Blur. And by the way,
if you cannot see this Effects and Presets panel, you can just go to Window and enable it from here,
Effects and Presets. Here, Effects and Presets, we can type Gaussian blur. Pretty much any blur
will do this effect. So let's set to Matt and
increase it to like 115. So we will have this kind
of fading of our hand. And now we will do the basic
Tracking with this circle. Because as you remember, our hand is moving, but our circle don't. So at this point we can
just select our mat, press P on keyboard
and create a keyframe. What is key-frame? Key-frame is basically
the point in time which remembers the
value of solid property. In our case, this keyframe. Remember, the point in
time wishes for a second. Basically it's for a second. It's been seen. If you will set our time
parser to this EEPROM and it remembers these values of
the property position. So basically these values means the X dimension and y-dimension. So if I'm going to move
in this dimension, you can see that by moving in X and I'm changing
this first value. And this is why they mentioned. This is important
because we can just skip your frames here and
move it like this. Basically, as you can see,
it's changes these values. And also it creates
this new keyframe. So basically in
this moment in time it remember this position. In this moment in time, it remembered that position. And basically this upper is trying to connect
these points. And basically it's been
seeing this how animation works inside of
Adobe After Effects. So let's make sure that it's
still Tracking are Hand. Just keep your frames
to the beginning and simply move your
circle like this. As you can see, I'm also
using this Hand tool to move around our image
and not move the circle. So this Hand tool, you can just move
around to your image. With, we'll on the mouse
you can zoom-in, zoom-out. And we selection tool. You can select circle enemies, sure that it tracks are fans. Here, our head is pretty
much stays in the place. And a bit later, we want to move it here. And it makes sure that
its tracks are fans. You can always go back on top
of some of the keyframes. Like this one is you can see it lights up blue one you
on top of each keyframe. And if you are not on
top of the keyframe, and if you change this position, it will create another one. So make sure to not read
too much keyframes. And just place your cursor on one of the
keyframes and adjust the position to get the
nice Tracking like this. So basically we just want
to cut this lower part. It will be important later for this effect to make sure
that we will still have this Tracking as much as we have this layer of our Video
and perfect this form. And we can just cut
this matte layer. So our layer, you
can hold Shift and it will snap to our time cursor. Okay, so now as you can see, we've got out our hand. And also we've
added this circle, which will cut out
even more here below. We will get this
fading below our Hand. And later it will make our
Effects look even better. Next video, we will generate
some small from our hand. So let's say these both
layers go to layer pre-compose by clicking
Control Shift C. Let's call it tab
and click again. See you in the next video.
3. Smoke Simulation: So we have our cutout
Hand and now let's create the Smoke
generation itself. So let's save our project. And it's a good idea
to save it from times, time like you to
create actual Smoke. We just want to hide our Hand. And let's create it from
simple text. So let's type. Basically you can
just like this Type Tool and create a box, type Text, select, and change
whatever font you want. In my case, I'm going
to use Montserrat, but we will use this text. Just for example. We will basically will generate our Smoke bomb hand
anyways, so great. And it Text to have
as a reference. So in Resource status class
I've included basically this is a preset to create
this Smoke generation. So basically, once
you've downloaded this cc time blend plugin, you just want to open it. And basically you just need to select these files and copied to your Adobe software so you can locate it
on your local disk. Program Files, Adobe,
Adobe After Effects, whichever version you use, support files and Presets. This is the route
where you want to install this preset
for After Effects, which will help us to be smoke. So basically just drag and
drop into this preset folder. Just like this. You can see I already habits and just simply copied
into this folder. So when you just upload these
presets to your software, you can just simply go
to Effects and Presets. Right mouse click on this
Effects and Presets panel, and click on Refresh list. So basically now we
can just type C, C times blend Effects. And if you cannot
see this preset which we just uploaded
into our folder, you just need to
save your project, close it and open it again. And here on Effects and Presets, you'll see these
Animation Presets. By the way, if you will have any questions on
any of my classes, you can just leave
them in comments section to this class
or any of my classes. And I'll try to help with any
issues if you will have it. Okay, so now we
have this effect. Now we need to go to Layer and create a
new adjustment layer. So select our Smoke preposition, go to Layer, New
Adjustment Layer. This layer, I just
want to call it copy because this
preset we will use. So select your adjustment layer and press Enter to call it copy. And just left mouse click and drag and drop on this
adjustment layer. Here is going to see we have
instance and we need to select the copy is the
name of our layer. Next thing we want to
do is to duplicate this layer selected and press
Control D to duplicate it. And let's press Enter and keyboard and call it
this layer based. Here in this brief set, we just want to change it to paste it below, just like this. With this effect on
this paste layer, we need to make sure
that we will use this current frame
option accumulation. We can set it to 100 per cent because this
exactly what we want. And let's set the blend
to composite over. Later. I'm going to show you what is the difference
between these modes. Basically, they
are all the same, the most Cold Effects you'll get only from these three options. For our effects, we want to use this composite over
because we will see our hand and also
the Smoke on top of it. So this is why we want
to use composite over. Later. I'm gonna show it
which other options we have. So next step we will create
another adjustment layer. And this one, I want
to call it VFX. So press Enter on
keyboard and type it VFX. Here at VFX layer, we actually want to
apply some effects. So basically let's
type turbulence, displace this Effects and
drop it on this VFX layer. And let's change it
to twist amount. We will set to three. And we want to create
some animation to our evolution, integrate
some animation. We want to hold Alt
key on keyboard. So you can see I'm holding Alt leftmost click
on this evolution. And let's dive here and this expression menu
just time multiply 250. So basically we will get
this kind of animation. You can see at this point, we will already can see
that with this base layer, we are seeing the original
text and something which has been
created on top of it. And it's can see we have
some kind of malicious here. You don't need to
worry about this. You can just simply change
your resolution to R0. Sorry, your computer will
handle this effect easier. And if you'll press zero numpad, you can preview
the effect itself. And as you can see,
we already have some kind of effects going on. Basically, it multiplies
some parts of our Text and creates this
kind of wiggle Animation, which we will with this
turbulence displays. But we can add more
cool stuff to it. Basically, we can just set
this complexity to turn. Can see we already have even
more interesting Effects As you can see, we have
some weird glitches here. And to not have any malicious while you
preview your Effects, you just need to set
your time course of to the beginning and go to Edit, purge, and click on all
memory and disk cache. It will clear all of our memory. And then if you will
press zero numpad, you can see that we don't
have any malicious. Every time when you see some delicious and you
made some changes, you'll need to set your time
closer to the beginning. Go to Edit, urge all
memory in this cache. Basically it will every
time simulate our Effects. And don't worry,
After the rendering, it will not have any glitches. Just make sure to set
this to the beginning. Edit, purge or memory
and this gash, in this case, you'll get the
cleanest result possible. Okay, So we have pretty
much cool effect, but we need to
make more changes. So this will look a
lot more like smoke. So basically we want to animate this offset turbulence
here at the beginning. Let's create a keyframe. We can also press
U on keyboard to see this keyframe right here. And let's jump to Lake second and change this
first value to 2,400. We can also set our temperature
to the beginning, Edit, purge all memory in this cash, and then press zero. Now, as you can see now, it creates this
kind of waviness, which will help us
to move our smoke to the right or to the left
or to any other places. So now we are creating
some kind of animation, but we want to create a
lot more smoke which will generate from texts we can create with the Effects
which called minimax. So let's select this
minimax Effects and drop it on VFX layer. Here we want to set to maximum. Let's set it to two. It should be enough
to just make sure that you are changing
to alpha and color. Because in this way,
it will generate a lot more instances
of our Smoke, not only from color, but from alpha channel as well. It will work with any kind of footage which you will drop
into this composition. So basically, we are
reading a template in which we can drop anything
below these presets, and it will read
a small promise. Next thing we should want to
add is transformed Effects. So let's type here
on the face braces, transform and under
distort transform and drop it here as well. And with this effect,
we will Show that the software where we
want to this Smoke to go. So for example, if I'm going to change this position value, first one from 960, 965, it will push our
smoke to the right. If I'm going to set here
time parser, go to Edit, purge all memory, and this
cache of K emperor is zero. You can see that we are
pushing our smoke to write this transform effect, we can just control the
wind in our Simulation. So if I'm going to set
from 960 as it was to 955, basically to value
which is below. It will move the
small to the left. So let's set it to this value and also praise zero numpad. You can see we are generating
our smoke to the left. And the higher value get, the higher wind you'll gonna
get in your simulation. But don't go overboard more than enough to use something
more like 1-10. So basically, if it
was my hand is 60, don't go like 990 because
it will be too much. So let's press zero numpad is, you can see it's a bit too much. Same thing you can do
with this second value. So basically if you will set
this value to by how it 30, it will push our smoke up. So let's change this time
parser to the beginning. Go to Edit, purge memory, this cash to create new
Simulation and press zero is can see we're
pushing our smoke up. And also if we will set more
than 540 as it was 550, it will push the small down. So this is basically how you can control the direction
of the smoke. In our case, we don't want
to push smoke anywhere. And only when I'll
blow on my hand, we want to push it
to the left and we will animate this
position property. But at this point, we don't
want to change it anything. Just remember that
here at VFX layer, here at transform, you'll be able change the
direction of your smoke. So let's set our time processor beginning or to edit
porch or Marriott, this cash and click, Okay, and also save your project. So in case it will Gretsch, you will not use any progress. Finally, it looks pretty cool, but we don't have any
texture on our Smoke. Next video, I'll
show you how you can texturize our smoke sooner. Next video
4. Smoke Texture: So to add some
texture to our smoke, we want to create a new layer, go to Layer, New Solid. Let's call it noise
because we will use fractal noise
here and Effects and Presets type here fractal noise and drop it on this nice layer. Here we need to change some properties like transform
to get the best results. You need to change the
scale property to like 50. Because as dancer Smoke parents, you'll have here, the more believable look
you'll gonna get. And also we want to create
some evolution Animation. Once again, you need
to hold Alt key on keyword and leftmost click on this stopwatch on evolution. And also let's type this
expression, Time, multiply 250. And at this point,
we can just simply hide this layer because we
don't actually need to see it. We just need to go to VFX layer and apply this effect
which Paltz calculations, and drop it on our VFX layer. And here we just need to change the second layer to noise layer. And we need to set this
property to Effects and masks, which basically means that it should watch at this noise layer and take from this noise layer Effects
which we've applied, which basically
are fractal noise. So make sure here under calculations to change
to Effects and masks. So it will see our Effects which we've
applied on noise layer. And let's press zero
numpad to see what we got. We don't have any smoke, but it will change
this opacity to 20%. You'll see that we already have this nice texture on
top of our small. So once again, let's go to Edit, purge, memory and disk cache. And let's generate some small. You can see already,
we will have this really nice Animation. And to make it even better, we need to uncheck this, Preserve Transparency
and blending mode, set silhouette luma. Discrimination of these
blending mode and disabling the Preserve
Transparency will get this really nice result with
the fading of our Smoke. Just don't be afraid
to change any values. You can always press
Control Z to undo any steps and clear the cache and see what kind
of results you'll get. For example, you can
always go to a with the 50 per cent to see
more of your Texture. As also you can experiment
with this fractal noise. And for example, let's
try to set it to 15 to get even more kind of nice texture and
press zero numpad. So once again, if you don't like any results
we should get, you can just simply
press Control Z to get our 50 per cent of scale and see if you
liked this result more. And as you can guess
with this calculations, the literal value will set here the more of the
small you'll see. And it will not fade too fast. Just make sure to
play around with these kind of values and
see what you like best. My Effects, I've
used scale of 50 and here at VFX calculations, I said to 20 per cent. If you want to get this
exact same result, which you can see on my screen. Now, we have created our
preset of the smoke. So at this point you can
just save this project and you'll have your Smoke
generation templates at anytime. You can drop any kind of
logo or texts or even Video. And it will generate some small. So basically, you
can watch this. We can just disable this
text layer, enable our Hand. And now if I'm going
to set my parser to the beginning, go to Edit, purge or memory,
this cash leave, okay, and then breathe
zero unemployed. You can see that now we are building this cool
smoke from our hand. On the next video,
I'm going to show you wish kind of moles. We have this kind of
setup and what we can do more with this kind
of Opex. Cnn next video
5. Logo Text Animation: So now we have this
really cool effect, which already worse. And now I want to show you what we can do
with this base layer. So basically we can change
this composite over to blend. So what blend means? The Blend option is
basically allows us to create a Smoke only
from first frame. So basically if
I'm going to hide my hand layer and
press zero numbered, that it generates smoke from horse spring
and then disappears, which is pretty handy
because you can create a mask on
this base layer. So let's here at the beginning, read a mask like this. Then select the selection
tool and see what we can do with this kind of
effect by creating this mask. It will not start
generate any smoke. But if we will create
a keyframe for mask path and just select our mass and move it
lower. Just like this. You can see that we can start generating smoke
from top to bottom, which is really cool. Or you can just set your time
course of two beginning on this first keyframe and move it your mask to the
bottom like this. And it will create this kind
of smoke from the bottom. Also from the right. If you want. From left, as you can guess, Let's set it's above. If you pay attention, you can
see that it wiggles here at the beginning and it's
not exactly what we want. And to fix this issue, you can just basically copy this mask selected and
press control C to copy and go to this VFX layer and press
Control V to paste, press M on keyboard
to see this mask. Let's delete this keyframe. And what we can do is to select this big web and connect
to this mask path. Basically, it will
be the Smiths path, which we are gradient
on this mask. Also, we can open this mask and connect this mask feather
to this mask feather. Here at this mass better, we want to select this pick whip and drag it to this
mask out of here. You can see that we don't
have any jiggle of our texts, which looks exactly as we want. In this way, we can just read any animation of our
Text disappearing. Or you can drop any logo
inside here and create your smoke Simulation on
top of any of your images. What you can also
do is to change this mask feather and
set it to like 50. And it's been seen, you'll get this a lot more
cleaner transition. So let's set it to zero. You can see these rough edges and if you're going
to set to 50, you'll get this really
nice transition. Once again, if you'll
see these dishes, you just need to set your
time closer to the beginning. Go to Edit, porch or
memory and disk cache. Enterprise zero numbered
to see the result. This is how easy you can create any parent of
Smoke animations. And the best part you can just left most double-click
here and Project panel and drop any kind of
Logo which you have here. And this composition,
this text layer, set this time closer
to the beginning. Go to Edit, purge all memory
this cash and click Okay, and then just press zero
numbered and you didn't see that you have this kind of animation of your Logo distributing. This is really nice
effect which you can create with this template
which we just made. But in our case, we don't
want to use this mask trick. So in my case, I just want to delete this mask or we can
just set it to none, which basically will
not use it at all. And also this mask, we
can also set it to none. So in this case, you'll
have this kind of preset, but it will not work until
you will not set it to add. In our case for our effect, which we are going to
breed in this class, we don't need this mask effect. So you can just or
deleted or just set it to now if you will want to
use it in the future. Okay, So I'm going
to delete this logo. And also let's delete
this text because we already want to create
our effect of this class. So I'm going to enable this pan, set it this time course
of two beginning, go to edit all memory
and disk cache. And remember to generate
constant Smoke, we need to go to this base
layer and go here and change this transfer from blend to composite over or
composite other. Because if we will
not change it, you can press zero or NOPAT
and see that we just read it, this kind of animation
from first brain. And if I'm going to change
it to the composite over, you're going to see that it
creates smoke from our video, which is exactly what
we want for this class. And also, as you can guess, if I'm going to change
it to composite under, it will create our Smoke
on top of our hands. But in our case, I just want
to use this composite over. In this way we can see
our Hand entire time, but it's up to you which kind
of mode you want to use. So if you want to have your
Smoke on top of your hand, just choose this
composite other. Embrace your numpad
and as we see, we have or Smoke on top. For my case, I'm going
to choose composite over because I like
this version more. And the next video, I'm
going to show you how to composite this hand on
top of actual video. And also how you can change
the colors of your smoke. So it would look more like a Liquid Nitrogen or
dark smoke or even fire. Cnn S Video
6. Wind Animation: So now we've created
this kind of effect. We can create new composition. Let's call it final
effect or final VFX shot. And clicking key. In this composition,
I just want to drop my video, which is this one. This is original video
which I've shot. And now we can just simply drop in this Smoke and position. We just need to time it well, because our Smoke is generate some like this
part of the video. So basically you just
need to make sure that it's stays exactly
on top of our hand. And also let's set it to health. Our computer will
handle it much faster. Or you can set to any kind of resolution which will be
easier on your computer. And don't forget to set to Edit, purge memory in this cash at the first frame
of your video, you will not get any religious. Let's press zero number
to see it is, can see. We've pretty much matched
our movement perfectly. So if you see that your hand
is not mentioned perfectly, just move your layer to
the left or right to see how it blends
nicely, just like this. So the next part will be to create this kind
of animation where I blow on my hand and this
smoke will interact with it. So it will look even
more realistic. So here we can see that I'm just started to make this action. So let's open at
this exact moment, the Smoke composition,
just like most, double-click on it and go to VFX layer and select this VFX layer and go to
effects and controls. So zero. Remember from
this transform effect, we can animate this
position property, which basically is the
wind of our small. You can even press
Enter and call it wind. Now let's create a
keyframe for position. And here, few frames later, we can set this 955, which basically will make
this wind go to the left. And few frames later, we can set to original value
like that, hundred 60. Let's also go to Edit purge
memory in this cache cookie. Now let's see how it looks. It's better to look here
in the final composition. So once again, porch
all memory and click, Okay, and press zero
lampshades to see the preview. So now we need to make
sure that our wind will affect our smoke as I
am blowing on my hand. So as you can see,
it's not enough. Let's go to Smoke composition. Here. We need to change this
value of the position of the wind to much higher value. So I'm going to set to 945. We can even move it a bit
to the left and select, although these
keyframes press F9, which will make this animation
go slower at the start. Then here we will have
aggressive wind to the left, and here it will
get back to normal. Maybe even later. In my case, I just want
to set here about 4 s. This violent wind. I'm gonna set at 3 s,
as you can see here. This keyframe, I'm
going to leave here. Okay, so let's go to
final VFX composition. Set our type or
subsidy beginning, go to Edit, verge or
memory this cash, Liquid K and press zero number to see how it looks sake,
as you can see now, it looks a lot better
because we can see how our wind
affects our smoke. It looks a lot better. Just make sure that when you set your time cursor to
the beginning and go into perch or memory like this. Don't just click here. You see the animation
from this moment because if you will not
calculate from the beginning, it will not work properly. As you can see. You
need to have a bit of patience to let this software calculate the Simulation
of the Smoke. Let's once again porch all of
the memory and press zero. So it will calculate
this smoke Simulation. What is cool about this? That when you'll get
to this Simulation, you can apply any kind of Effects like coloring
of the Smoke. And you'll nuts have to
assimilate over and over. So basically, now when
we are happy with our Simulation and behaving or the smoke was just like here. Now we can just throw, throw it and it works perfectly. And the next video, I'm
going to show you how to make this visibility
of the Smoke live better and how we can change the colors of
the smoke as well. See you next video.
7. Ice Cold Hand: So now we have this kind of
really cool smoke Simulation. But what if we want to see
this smoke even better? For this, it will help us
to add this girl's effect. So here in Effects and Presets, type curves and drop it
on this Smoke Layer. Here we can change to alpha channel and make it
a bit brighter like this. Just like most live on
this curve and drag it up. You can adjust
even these kind of parts of our Smoke is you
can see as a change in here. You can see a large
clearly, this small. If you can see outline, you can just drop this part of the curve if you want to blend
better with your footage. But I my case, I
like to see a bit of this outline, so
I'm going to leave it. But if you didn't like it, just drag it down like this. So I'm going to
leave it as this, drag it up to see more of the small here before and after. So basically with
this alpha curve, you can get any kind of look
of the smoke is you want. And also in RGB curve, you can add a bit of brightness. So it will blend with
our Hand better. If you're software is, we'll start work really slow. It means that you need to set your cursor to the beginning. Once again, Edit, purge all the memory and cache and click okay, save your project. Go to File Save. Ampere is zero numbered. So it will calculate. Once again. As you can see, we
have this smoke a lot wider than we had before, which looks a lot more
interesting that it was. Now it's a good idea to
track our Smoke on our hand. Because as you can see, when I blow on my pants, are Smoke is kind of
leaving our fingers. So here we need to do
a little Tracking. So select your smoke layer, press P to see the position. Just like this. Create a keyframe where
it's still on our fingers. More of your frames like this. And move it to the right, so it will still be on
top of our fingers. Just move it a bit if you need, by changing these values
and make sure that it still stays on
top of our fat. Let's set it here to original
value, which is 960. Okay, so now when it's stays
perfectly on our pants, we can continue with the
coloring of our smoke. It's really easy to create. The smoke is like our hand
is covered Liquid Nitrogen. Basically we just need to
apply Effects called plato. Drop it on the small and change this midtone to something
like bluish like this. This is basically now it looks
like it's really ice Cold. So we can just disable
this kind of coloring. Because if I'm going to set
here to Fire kind of loop, it still doesn't
look like if fire. The next video, I'm going
to show you how you can create the fire from
this Simulation, which we already
have seen an SVR
8. Fire Hand: So we already have this kind
of Liquid Nitrogen Effects. But let's read the
Fire kind of look, which looks even
more interesting. For this. We just want to disable this Tritone effect
and just simply duplicate this Smoke Animation just selected and
press Control D. So I want to see some Fire
about here where I blow on it. So maybe at 3 s and 20th brain, I just want to cut this
layer to this moment and press T and click
on this opacity. Let's move this
keyframe further. And here we will disable this
layer and set it to zero. So basically it will appear
on our screen a bit later, maybe at 4 s. And frames here, sorry, these two keyframes press F9. So it will gradually
appear on our screen here to change the color of
our Smoke is to use curves. So let's dive curves, effect and drop it here. We can deselect this
tritone and delete it. And just simply go to Rachel, apply more red green channel. Let's edit a bit more to get
this kind of orangeish look. And blue channel, set it lower. And if we will solo this layer, we can even work on this. Look more. We need to change
this alpha curve to something like this. So we will isolate
only this part which we want to make
in colors of the pyre. We can click on Reset
and basically go to Alpha anime sure to
isolate only this part. And once again,
here we can tweak these colors to get the
fire any kind of loop. And also to be this
feeling of the fire, we want to add some glow. So let's go here and type low. And under Stylize, apply
this stylized low. With this instance of the globe, I want to set our
threshold higher, something like 80
to get this kind of finally kind of colors, we want to expand the radius
to maybe something like 660. So we will get overall glow and maybe increase the
intensity to see it better. And it's good idea to go to
price your panel and make sure that you are in
32 bits per channel. Because in this way you'll get the maximum of the low quality. So if you'll set to eight, you'll add going to see
this kind of a glow. So hold Alt key on keyboards
and leftmost look here in project panel and go
to 32 bits per channel. As you can see, you'll
get much racial glow. So let's go back to
effects and controls. And let's duplicate
this low one more time. As you can see, now we
have really violent glow, which looks pretty interesting, but we want to tweak a bit, so it would look much
more presentable. About here. I want to set this second lobe, so maybe like zero and in density to zero as
well, maybe 0.1. We have this kind of violent low at this moment and create a keyframe for threshold
and intensity. Few frames later, like here, where it gets too bright. I want to set this
low-intensity to zero. So it will be not so
bright in our shot. And low threshold. Let's set it to 100 me. Let's move this
keyframe further. And here let's say
low threshold to 100. So we will get more
colors from our videos. So as you can see, now, it
looks a lot more like a buyer. Let's un-solo this layer
and see how it looks here. Okay, It looks pretty well, but we can also
change this Smoke to add or to screen
if ADH is too much. And basically it to convey this kind of finally
kind of look, it's a really good idea to change overall color
in your scene. So it's a great idea to go to Layer, New Adjustment Layer. And Edgars Effects set discourse Effects to
adjustment layer. And with this girl's Effects, we want to change
the overall feel of this scene because when we have something really hot in here, it's really good idea to have
all seen warmer as well. So here in channels, Let's go to the red channel
and increase it a bit. Then let's go to the blue
channel and degrees that a bit. And also let's go to
the BG video itself. And also let's apply some perverse effect
and make sure that it gets a bit improper
tones and monkeys, I just want to add
a bit more contrast with this curve like this, and make it a bit darker. So our fire will stand out. So let's press zero on up at to see how it looks at this moment. Soon as you can see, we
have a really nice fire up, kind of look this layer
and call it Fire. And make some changes here. If you want to get
more reddish colors, or maybe make your hand
a bit more visible? You can always
tweak these parts. So it would look even better. But final thing which
really helps to sell this Fire is to add
a really dark Smoke, is going to see you already
have really nice colors here. I really like these colors. So we've created a
really nice effect. And let's add some smoke
and degrees smoke. We can also select this Fire and press Control
D to duplicate this. Let's call it dark
smoke, to rename it, just selected and press Enter a keyboard and call
it dark Smoke. Let's move it below. And we want to set this to multiply because it
will be a lot darker. So if I've got a disabled
this Fire and disabled Smoke, we will see the dark smoke
which we are going to breed. To see this dark Smoke. First of all, we want to
delete all of these Effects, select them and delete them. And let's add new one. So we want to have
decorous as well. But an Alpha channel, we want to make it a lot darker. Also want to tweak
just like this. We want to apply a
tint effect because it will help us to see
itself a lot better. And this second one, color, we want to
select something, Our seem like darkest green
color in our scene like this. So this is basically how we
can already see our smoke. It's a really good idea to
pick the color from our scene. Because if we will set to black, it will send out with
the greenish color. It will blend with
our footage better. So once again, with
this alpha curve, we can control how
much of this tale of the black smoke you can
see any of your screen. So tweak this color to your liking to give
the results for sure thing Is works
best on your footage. Once again, we can
apply minimax effect, which will help us
a lot because it, we will enable this fire effect. You can see that we have
this kind of outline. And if we will set
this to minimum, set it to two, and change this alpha and color. You can see that we can
cut out a bit of small. We will not have this
kind of outline here. So let's set it to two. Now it's easy with a really
nice smoke and fire. And also we can add another curves effect and
drop it here on dark Smoke. Alpha channel. We can boost it as
much as we want. We can boost it really
big, just like this. Press T on keyboard. And with this opacity, we can control how much of the Smoke we actually
want to see. So let's disable
this Animation of opacity and set it
to maybe like 75. So it will blend with
our footage even by. And now we just need to have this kind of
animation where it's appearing because this
is not our Smoke works. And if we will animate just
like with the opacity, it still doesn't look real. So let's disable this
opacity Animation. Let's set it to about 75. And let's create this
animation using curves. So now let's set, so maybe this moment in the video
where it should be bright, create a keyframe for the girls. And about here at the beginning, we can drag this curve to
really low value like this. So basically we can just read this operation
of the small. Let's press U on keyboard to
see this girl's keyframe. And about here at the beginning, make sure that you don't
see any Smoke on your pad. We are getting this kind of animation which phase
in a lot better. You can also make sure that your small generates properly, just simply by
clicking on this icon. Simply remove some of the points if you don't
want to see them. So as you can see with
these points of curves, we can add this kind of
operation of dark smoke. Finally, let's enable also this Smoke below and
see how it looks. You can see it
looks pretty well, but we can also press T on keyboard and animate with
the opacity as well. So it will get a
much cleaner loop. And now let's press zero or not, but DC, this final result. Finally, we can just
tweak some brightness here if you want to see a
bit less of dark smoke. So let's set it to
a bit lesser value. So this is basically how you
can get this kind of result. And the next video, I'm
going to show you how to make this second
part of this effect. See you next video.
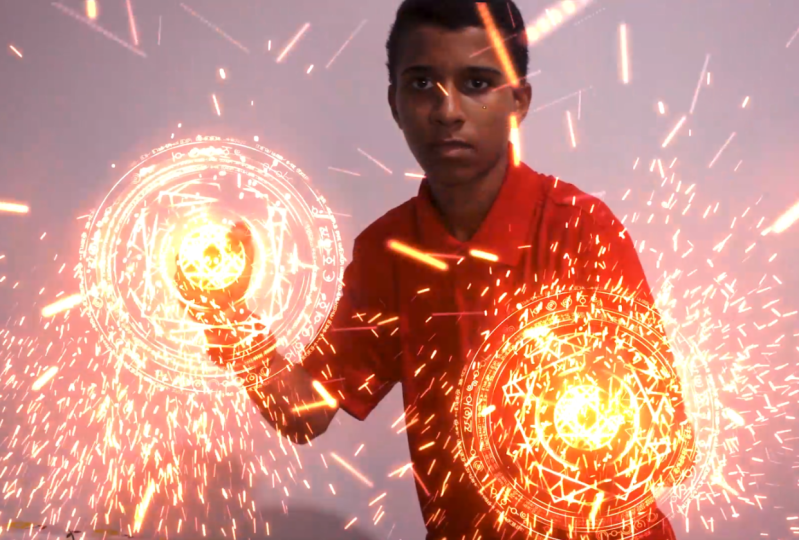
9. Fire Body: And now I'm going to show
you how you can create this last shot here.
In Project panel. You can leftmost
double-click here to import this footage
with the body and vec2, which is also available in
Resource tab to this class, is also original video. So basically we have this
video where I'm running. You can record video of
yourself running the grass. And as you can guess,
I'd use Rotoscoping to cut out myself
from the background. So that repeat this
step in this class. You can just watch first
video of this class. If you need a reminder, how to write a scalp
yourself out of the brain, then we can just simply
duplicate this final VFX shut. So let's press Control D
here in project panel. And we will read a
second shot composition. Let's rename it an open-end. So here we can
just simply delete this background
and just drag and drop our new background,
which I provided. So here let's find
the moment where I shot like light is
running across. I'm going to solo this layer. And as you can see, we have
this slide running across, like Fire is traveling
through the space. We can also apply some curves effect and drop
it on this background. And maybe let's make more
contrasty or footage. So we would see this
light even better. Then we can use this small
composition as our template. And this time we can
just drop our body. And disabled are Hand. And once again, let's say
it's time porosity beginning. Go to Edit, purge of
memory in this cache key. Let's also select
this work area. So it would render on the this part and press
zero numpad does. You can see we already have
this kind of animation. And we want to have
some transition where I'm starting to disappear from
the bottom of the screen. So basically we can just solo this layer and go to
Effects and Presets. And you can just type
linear wipe that here under transition linear wipe and
apply it onto our body. So transition completion, we can set to any value to see it. And then let's just
rotate to zero degrees. So in this way, with this
transition completion, we can create this kind of
animation of fading out. As you can guess, we can
just rotate it to one at if you want to have this transition
go from top to bottom. And my case, I've
set it to zero. And here at the start, we can see ourselves fully. So I'm going to
set here to zero. And later about here. Can you just complete
this transition? If you're going to
press U on keyboard, you can see that we created our keyframes by clicking on
this stopwatch ingredient, a keyframe here at 0.100 here. So now we can just feather. We would have smoother edge. I'm going to set mine to 150. Let's see how it looks.
It looks pretty good. We can also select this
keyframe and press F9. This transition will
start a bit later. So something like this
should work fine. Now, if we un-solo this
layer and close it here, once again sets timecourse
of the beginning, urge all memory, Empress, zero numpad to see the preview. You can see that we already have this transition of disappearing, which is exactly what we want. Now we can go to final
VFX, second shot. Let's un-solo these both layers. So we would see all the layers. This time we don't need this
simple uncolored version. We just need this
Fire and dark smoke. So let's delete this Smoke. Let's also select these
two layers. Expanded. Empress young keyboard. Let's remove the
animation for opacity. I'm going to set here
to 100% and here also. So we would see it
from the beginning. And as you can see,
we need to apply some changes because
now it's too bright. So now we can just
select our Fire and disable one
effect at a time. So we could control how much
of the fire we want to get. Let's lower this Alpha. Because we just want to have
only fire here at our Body. Rest of it will be smoke. So now we can just
apply discourse effect, which is coloring our footage. Then at some low
and another glow. And let's tweak these values. So at this point, we can just select all of these keyframes. To see these keyframes, you can just select
these both layers. Whereas young keyboard select
them and move it over here. First of all, we
just want to delete this position and disposition and set the original values, which is 962 by 40. Your also, because we
don't need any Animation. And this girl's effect, we also want to change. So let's remove this animation by clicking on this stopwatch. So we'd see this dark
smoke all the time. We can also tweak this fire to have a cleaner
transition here And we can just simply
select these key-frames. Right mouse click on
one of them and go to keyframe assistant and applied
Time Reverse Keyframes, which basically will mean that it will start not so bright, then brighter until the end. We can spread these
keyframes a bit. Here. We can just be these values as also
here in first low. You can just play around
with these values to get the brightness
which you want. So basically, by playing
with these two Effects, you can manipulate
the fire loop. In here, Video. Here, I just want to
add a bit of colors. So let's open. This
girl's Effects will show, let's lower it down. So it would be a lot warmer
and maybe add a bit of green. Here at the edge. You can see that we have a little issue. And to fix this, we
can just drop our body and Video under the fire here. And then select these layers by choosing this
Fire than holding control and keyboard
and selecting this dark smoke and it
using this pick whip, let's connect to
this body Video. And basically now we can just
select this it and press S, make it a bit bigger, like 105 per cent. And we can just
move around if you want just to cut off
this little part. Well, maybe let's set
to 100 to present. You can see what
this Body video, we applied a bit
more of highlight, but we need to also
Cartier the transition. Let's go to this
Smoke composition and here and Effects
and Presets. Select this linear wipe effect, press control C to packing. And let's also press U to see
where we need to base it. We need to base
it on pips brain. So let's go back to vinyl. Second shot. Make sure this you on a fifth frame and
press Control V, embrace you to see it. So basically if you're going
to press here control V, It will paste from
this time coarser. So make sure the same
as here in Smoke. Some are going to
press Control V, and now it will disappear
exactly the same. And as you can see
what this video, we are adding some pilots and a bit of visibility
of ourselves. If you want to have some
definition in the smoke, we can just duplicate
this dark smoke. And we can set just to
normal blending mode. If you cannot see these moles, you just click here
on toggle switches and modes to be able to see them and set it
this dark smoke to normal. We can even call it
just Smoke. This smoke. We can just change it to
more like a brownish color. And click Okay, now
let's reset this up top. Let's change the alpha channel
and maybe lower it down. So as you can see,
with this layer, we're adding this extra
details in our smoke. We can also disable this
Animation or minimax, and I'm going to set to ten. So we will cut off a bit of our smoke and have this
better transition. So you can just play around with this value if you'll need
to get out a bit more. And finally, we can
just also go to our BG layer and
animate this part. We can just click here
on stopwatch, on curves. Once we are inside
of the screen, we just want to lower
down our background. So this fire will
look a lot brighter. And then later here, we can just press U on
keyboards and partly this first keyframe,
paste it here. Finally, let's press zero
unhampered to preview it. Once we've created
our Smoke template, it's much easier to apply
to any other footage and get any results which you
want and apply on your video. Feel free to follow me
here on Skillshare. I have a lot of classes on VFX. It's been seen also
have Logo Animation, Text Animation,
animation fundamentals, more complex stuff. As also DaVinci Resolve classes. I recommend you to watch
this really short one, which is only 12 min and you'll get really cool video
as a result, also, don't hesitate to leave a review to my glasses
are comment and leave your suggestions which kind of Effects or animation you want
to learn in After Effects. Also, you can create a
project and it's been See, I review all of them
and give feedback. You can always leave some
questions in discussions here. I always trying to
answer all of them. Feel free to follow me
here on Skillshare. I post classes every week. Thank you for watching
 M Jake, Lets Create VFX & Cool Stuff Together