Transcripts
1. Intro: And welcome to this course on urban sketching
with a Water brush. My name is To, and
I'm an artist, graphic designer
and urban sketcher who started sketching
since 2009. So in this course,
I want to teach you the water brush techniques that I have learned over the years, the common mistakes
that you should avoid, and we will get some
hands on practice by sketching outdoors
because that's what urban sketching is about. To follow along
with this course, the tools you need
are water brush or water brushes,
watercolor paper, watercolor paint,
watercolor box, tissue or napkin, and a pen with waterproof ink because
we will be drawing. Before we head over
to the first lesson, I have a favor to ask of you. If you find this course useful, do leave it a review so that other students can find
out about this course. All right, Let's head
over to the first lesson.
2. Types of waterbrushes: This lesson, we will look at some common types
of water brushes. The first one here is
the pentel art wash, which is quite popular
and easy to find. The second one is a generic
water brush with no brand. I have bought this at a local
art shop here in Singapore. And the third one is the
whole bin water brush, which is my favorite
water brush, and you shall find
out why later. Take a closer look at
the pental ar quash. So I have used many brands of water brushes over the years, and from what I can
see, most water brushes are made with plastic. So the Pentl quash comes
with plastic bristles, and some companies would at the hair or the bristles with some substance to keep
the hair together. You will have to wash off that substance before
you use the water brush. And the pental ar quash
has a fine point, which is great for
painting details. This is the grip section, and this is the body with the
built in water reservoir. You typically unscrew
the body so that you can feel water into
the water reservoir. I would usually put this
under the tab to fill water in it because it's the
fastest and easiest way. Now, there is no mention how much water
capacity this has. Based on my experience,
you can usually paint two or three
sketches with it. And if you do need more water, you can always buy
extra water brushes. So this body comes with
a thicker section here. When you press the
bulbus section or the thicker part here, it should push water
out from the front. If you do not press this, no water should come out, and your water brush
should not be dripping. So the first thing to test with a new water brush is to
hold it like this with the bristles pointed towards the ground to see if
water is dripping out. And if water is dripping out even without you pressing
the water brush, You may have a
faulty water brush, and it will be great if you can return it for an exchange. Next, we'll look at this
water brush with no brand. So this is a flat brush, and this is also made
with synthetic bristles just like the other
water brushes. Flat brushes are
meant for painting and covering large areas. Most water brushes will come with a cap that you
can post behind, and this particular one
has clipped as well. So this is the removable
water reservoir. Same thing, you just
fill this under the tap. The hold being water brush is my favorite because
this can hold a lot of water compared
to the pental quash. This can probably
hold 50% more water. I also like that the
bristles are white in color and they are bigger and longer
compared to the pental ah. You can actually buy
the water brushes with different sizes for
the round point, and this particular
one is a medium size, if I remember correctly. Synthetic bristles do wear out faster compared to natural hair. If you paint often, the hair may wear out faster for
this water brushes. I usually bring
two water brushes with me out for sketching. And if I know it's going to
be a long day of sketching, I may bring three water brushes. Now, be careful when you
keep the water brushes, especially for the flat brushes because this is
not easy to keep. There are some water
brushes that come with a piston behind where
you can suck water in. I don't like that design because the piston takes up some space where the space
can be used to store water. Which water brush
do you choose will come down to
personal preference. The selling point of the pental
quash is the fine point, the sharp point, which is
great for painting details, and the selling point
of the whole bin is the large water capacity, and of course, for this brush, is the flat brush for
covering large areas.
3. Waterbrush vs a normal brush: What are some of the
differences between water brushes versus
normal brushes? Well, the design is different obviously because water brushes have built in water reservoir. But the way you use the
brushes is also different. Now let's talk
about design first. Now, these are the
pocket brushes that are that I prefer
when I'm painting outdoors because
you can keep them easily and they will just
like wooden brushes. The downside is to
use such brushes, you will have to
bring water out. I usually bring this water Mr. That can help
me wet the paint. And I can pour some
water out into the water tray here so that I can use the
water to wash my brush. So it's not as convenient
compared to using a water brush where the water
is already in the brush. If a normal brush is dirty or if you
want to switch color, you will have to wash it in the water tray before you
can pick up another color. With a water brush,
you can squeeze out water to wet the pan. Or paint. So this
is very convenient. Having built in water supply
is extremely convenient. And if you want to dilute
the paint on paper, you can just press
to add more water. So this can help you
create gradations easily. To clean the water brush before you can switch to
a different color, you have to squeeze some
water to push the paint out. And if you have a water tray, you can squeeze it out
into the water tray and also use the
water to clean it. But this will not clean
the paint completely. So that's one downside compared to using this versus
a normal brush. So now that this is
relatively clean, you can switch to
a different color. So this looks yellow enough
with slight contamination, but it's not too bad. Let's add some blue to
it to paint some grass, for example, So if you
do not press the body, water should not flow out. So this is how I would
create color mixes on paper. And if you feel like
the paint is too dry, you can squeeze some water out. And the paint will
start to flow again. I can paint the same thing with this normal brush as well. If I need to add more water, I will have to go back to the mixing well or the
tree to get more water. So that's the main
difference with the workflow with using normal brush versus
a water brush. With water brush, you can
just squeeze the water out. It's so convenient. And now if I need
to maybe add blue, I can just add it
like this because this particular blue
is quite strong, so I don't have
to wash the brush first before I add the blue. However, if I painted blue first and I
want to add yellow, then I may want to wash the brush first so that
I can get pure yellow. Anyway, regardless
of the tool you use, you just have to spend
some time to get used to how the tool or in this
case, the brush works. So now if I want
to switch to red, I will really have
to wash the brush. Otherwise, the green is going
to contaminate the red. So let me just put
some dots here. So water brushes are convenient, more convenient compared
to normal brushes, but they are more
difficult to clean. And because there is
constant water supply, it can be challenging
at times to maintain the consistency
of the pain, of the value or the
strength of the paint. Now, normal brushes in
this pocket format, It is also quite convenient
to bring around. It's just that to
use these brushes, you will have to bring
separate water source, and to clean the brushes, you will need a water tray. So these are not as convenient
compared to water brushes, but still quite convenient
because I mean, you can collapse the brushes and you can have a
little bottle like this, which is still quite
compact to bring around.
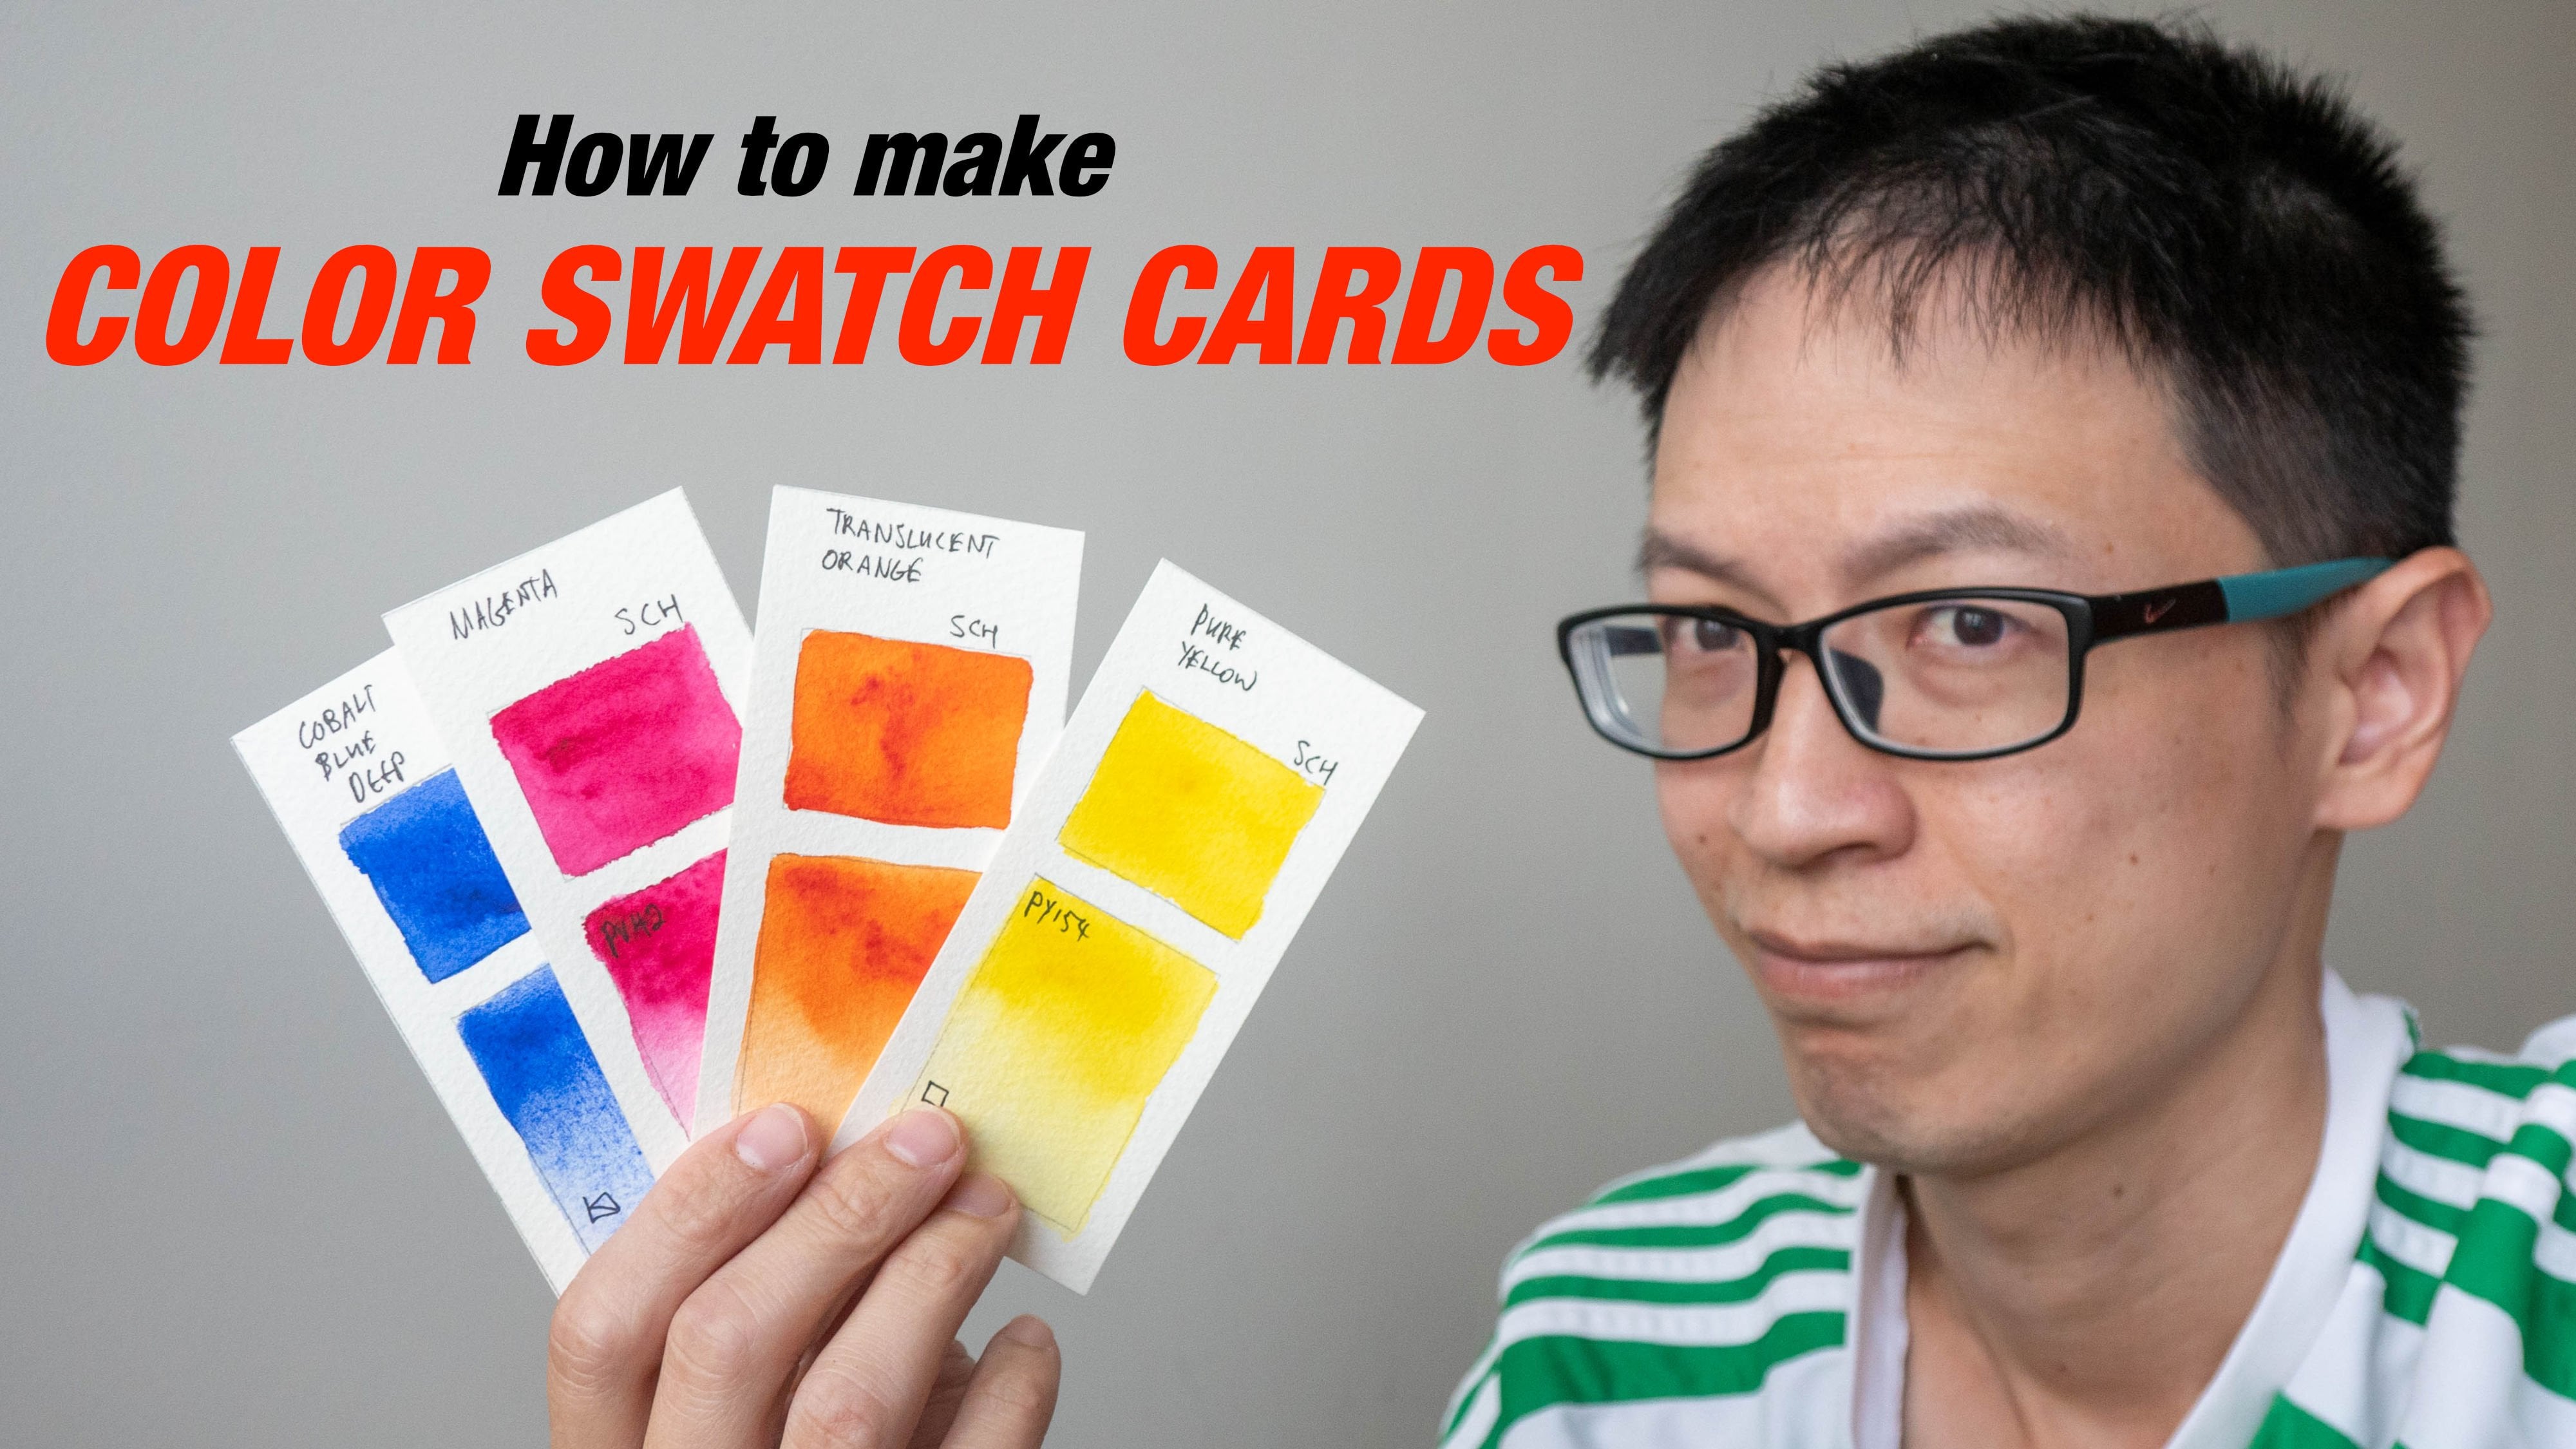
4. Painting techniques: This lesson. The tools need
will be your water brushes, watercolor paper, dry tissue, and of course, your watercolor
paint and paint box. In this lesson, we will practice some painting techniques
using the water brush. We will paint a flat wash, a gradated, diluted wash, we will blend some colors, and we will create some
dry brush effects. So take out your water brush, put some water or drip some water onto whichever
color you like. I'm going to have red here. Make sure there is
enough water here, and you may want to put some, you know, paint into
the mixing well. One limitation of water
brushes is it's not as easy to paint large areas compared
to using a normal brush. But we shall see.
For flat washes, you need a lot of paint. Now, if the color is
not intense enough, you can always add more paint. Yeah. So make sure
there is a lot of water and it will
be good to have your paper tilted at an angle so that the
water can flow down. So just continue painting
down and if you feel like there is water flowing out from the water brush that
is diluting the paint, that is where you may have to go back to the pan to
add more paint. Try to have your brush connect
to the previous shape. Yeah, Don't paint like this where the sheaps are separate. Connect the saps. Otherwise, your wash is
going to look patchy. While the wash is still wet
paint over the previous wash. If the previous wash is
dry, you will see this. Trying to control
the water flow, only press the water out if
you need the extra water. Because if you have too
much water on the paper, the areas where there
is too much water will dry slower compared
to areas that are drier, and that will create the
patchy look as well. You can see this part here
is a bit more diluted, so I'm adding more paint. Yeah. And try not to go back to the flat washes
to add more paint. Once you lay down the washes, just leave it as it is, because if you go
back to paint again, it's going to make the
initial wash patchy. So for this flat wash, this area here
looks pretty good. This area here looks good too. Now, this area has
too much water. So later when it dries, this area will look patchy
and will look distracting. So just spend some time to create the flattest
wash you can create. And try different
amount of water. For example, you
can have more paint here and just paint
using the paint here. And with your second try, you can paint with
the paint here and add water as you go and
come back to the paint here. So try two ways of painting. First by painting the flat
wash using the paint here, and with the second time, paint using the paint here with water squeeze
out from the brush. Next, we will create
a gradated wash where the color will blend
into the white of the paper. So I'm going to squeeze some
water into the paint first, and I'm going to take some
paint and put it here again. Okay. So for the gradated wash, we need to add water
to dilute the paint. So now you can see the
paint is fire print, the color is very fire print. Next, we want to
squeeze out some of the paint to dilute the
paint that's on the brush. Now that there is less
paint on the brush, the wash should appear lighter. Yeah. You can see the
water flowing down. There is this area
with the water here. So collect the water there and continue
painting downwards. If you feel like you need this
to be lighter, same thing, just clean the brush, squeeze out even more
paint and continue. Now you can see the water or the paint is becoming
lighter and lighter. Let's do that one last time. And Paint. Next, we'll
create color blending. I want to have red
blend with yellow. I'm going to paint
something like this. In this case, I'm going to add more paint here and squeeze out some water and just have
it go down like this Now, the quality of the
water color paper you use matters as well when it
comes to blending colors. Now I'm going to
have yellow here, and I'm going to tilt
the paper upside down so that the
yellow can move down. If you feel like the
paint is too dry, you can add some water. To much water. Yeah. So just try and move the paint
around by moving the paper. This will help with
the color blending. I think this looks
fine like this. I'm going to have this dry. You see the wet areas here. So this will dry
and become patchy. So with a normal brush, you can actually dry the brush and pick up the excess paint. With a water brush, the
brush is always wet, so you cannot use this to
pick up the excess water. So what I have to do here is to use this tissue to
pick up the excess water. So use the tissue
or dry kin to pick up the excess water so that this will not dry
and look patchy later. So this part here has a really dried and you can
see it's patchy. And lastly, let's create
a dry brush effect. So if your brush is very wet, the stroke will look
solid like this. So what you need to
do is dry your brush. And now you can create
a dry brush effect. Now, that this is dry, let's take a closer look. So this area, which I thought
was going to dry with hot edges actually dried rather well without
obvious edges, but you can see the
concentration of color here is more compared
to this area. So this is the patchy look
that I was talking about. So your control of water flow is important when it comes to painting a
flat wash. For example, with this area, you can
see this is very flat. There is no patchy look at all compared to
this area here. And here there is
a dry edge because this area had dry and then
I added more paint here. So if this is wet
and you add paint, then the transition is
going to look smoother. And here you can see
more patchy areas where the color
concentration varies. This is due to the lack
of water flow control. If you have more water, certain areas will
be more diluted. When there is less water, there will be more paint. This gradated wash or diluted
wash looks all right to me, except for this part here. It may not be clear, but there are some califlower
marks here because this bottom area actually was more wet and had more water, so it took a longer time to dry. And when it finally dried, it created the
califlower marks here. Which can be distracting, but sometimes it's
the randomness of the watercolor that makes watercolor charming
or appealing. This is the color bland
and it looks all right. There is no obvious patchiness
because for this one, I tried to control the water
and apply the water evenly. For the dry brush, this is
pretty straightforward. Dry your brush and
just do a quick swipe.
5. Sketching a fruit stall: And welcome back.
In this lesson, we're going to get
some sketching done outdoors and I'm
at People's Park, which is a popular neighborhood here in Chinatown, Singapore. There are several
cobbler stores here. I like the yellow
and red umbrella. In this case, it
looks washed out. There is another
cobbler store there. In the background behind
those two people. Another one here. The guy who has just
came back from lunch. You know what, Let's
just warm up by sketching something
a bit more simple. Let's sketch this fruit store. This is the scene that
I will sketch and the fruits look so vibrant. This is going to be a
pretty fun sketch to draw because we will be
painting with so many colors. And it's great to add people in a sketch as well to make the
sketch look more lively. By the way, if you
have not tried urban sketching before and
if you are a beginner, I highly recommend you check on my other urban
sketching courses first because sketching a
detailed scene like this can be quite
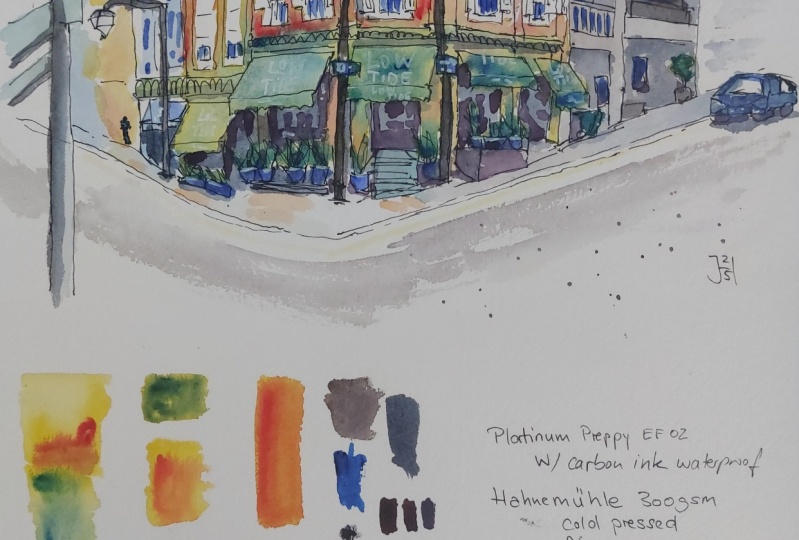
intimidating for beginners. Today, I'm using a
new sketch book. Now, before you use new supplies
and tools for sketching, I highly recommend you test
them outs at all before you use them outdoors because you
don't want nasty surprises. Sketching outdoors.
This sketch book is from Doria This is not
a sponsored vi by way. I bought the sketch book just so that I can
test this out. So the paper is made with 50% cotton and this
is hot press paper. There are 24 sheets
in this sketch book, and the paper we is 300 GS. This is an A five
sized sketch book, and this scene is
rather complicated. So I anticipate. I'm going to need a
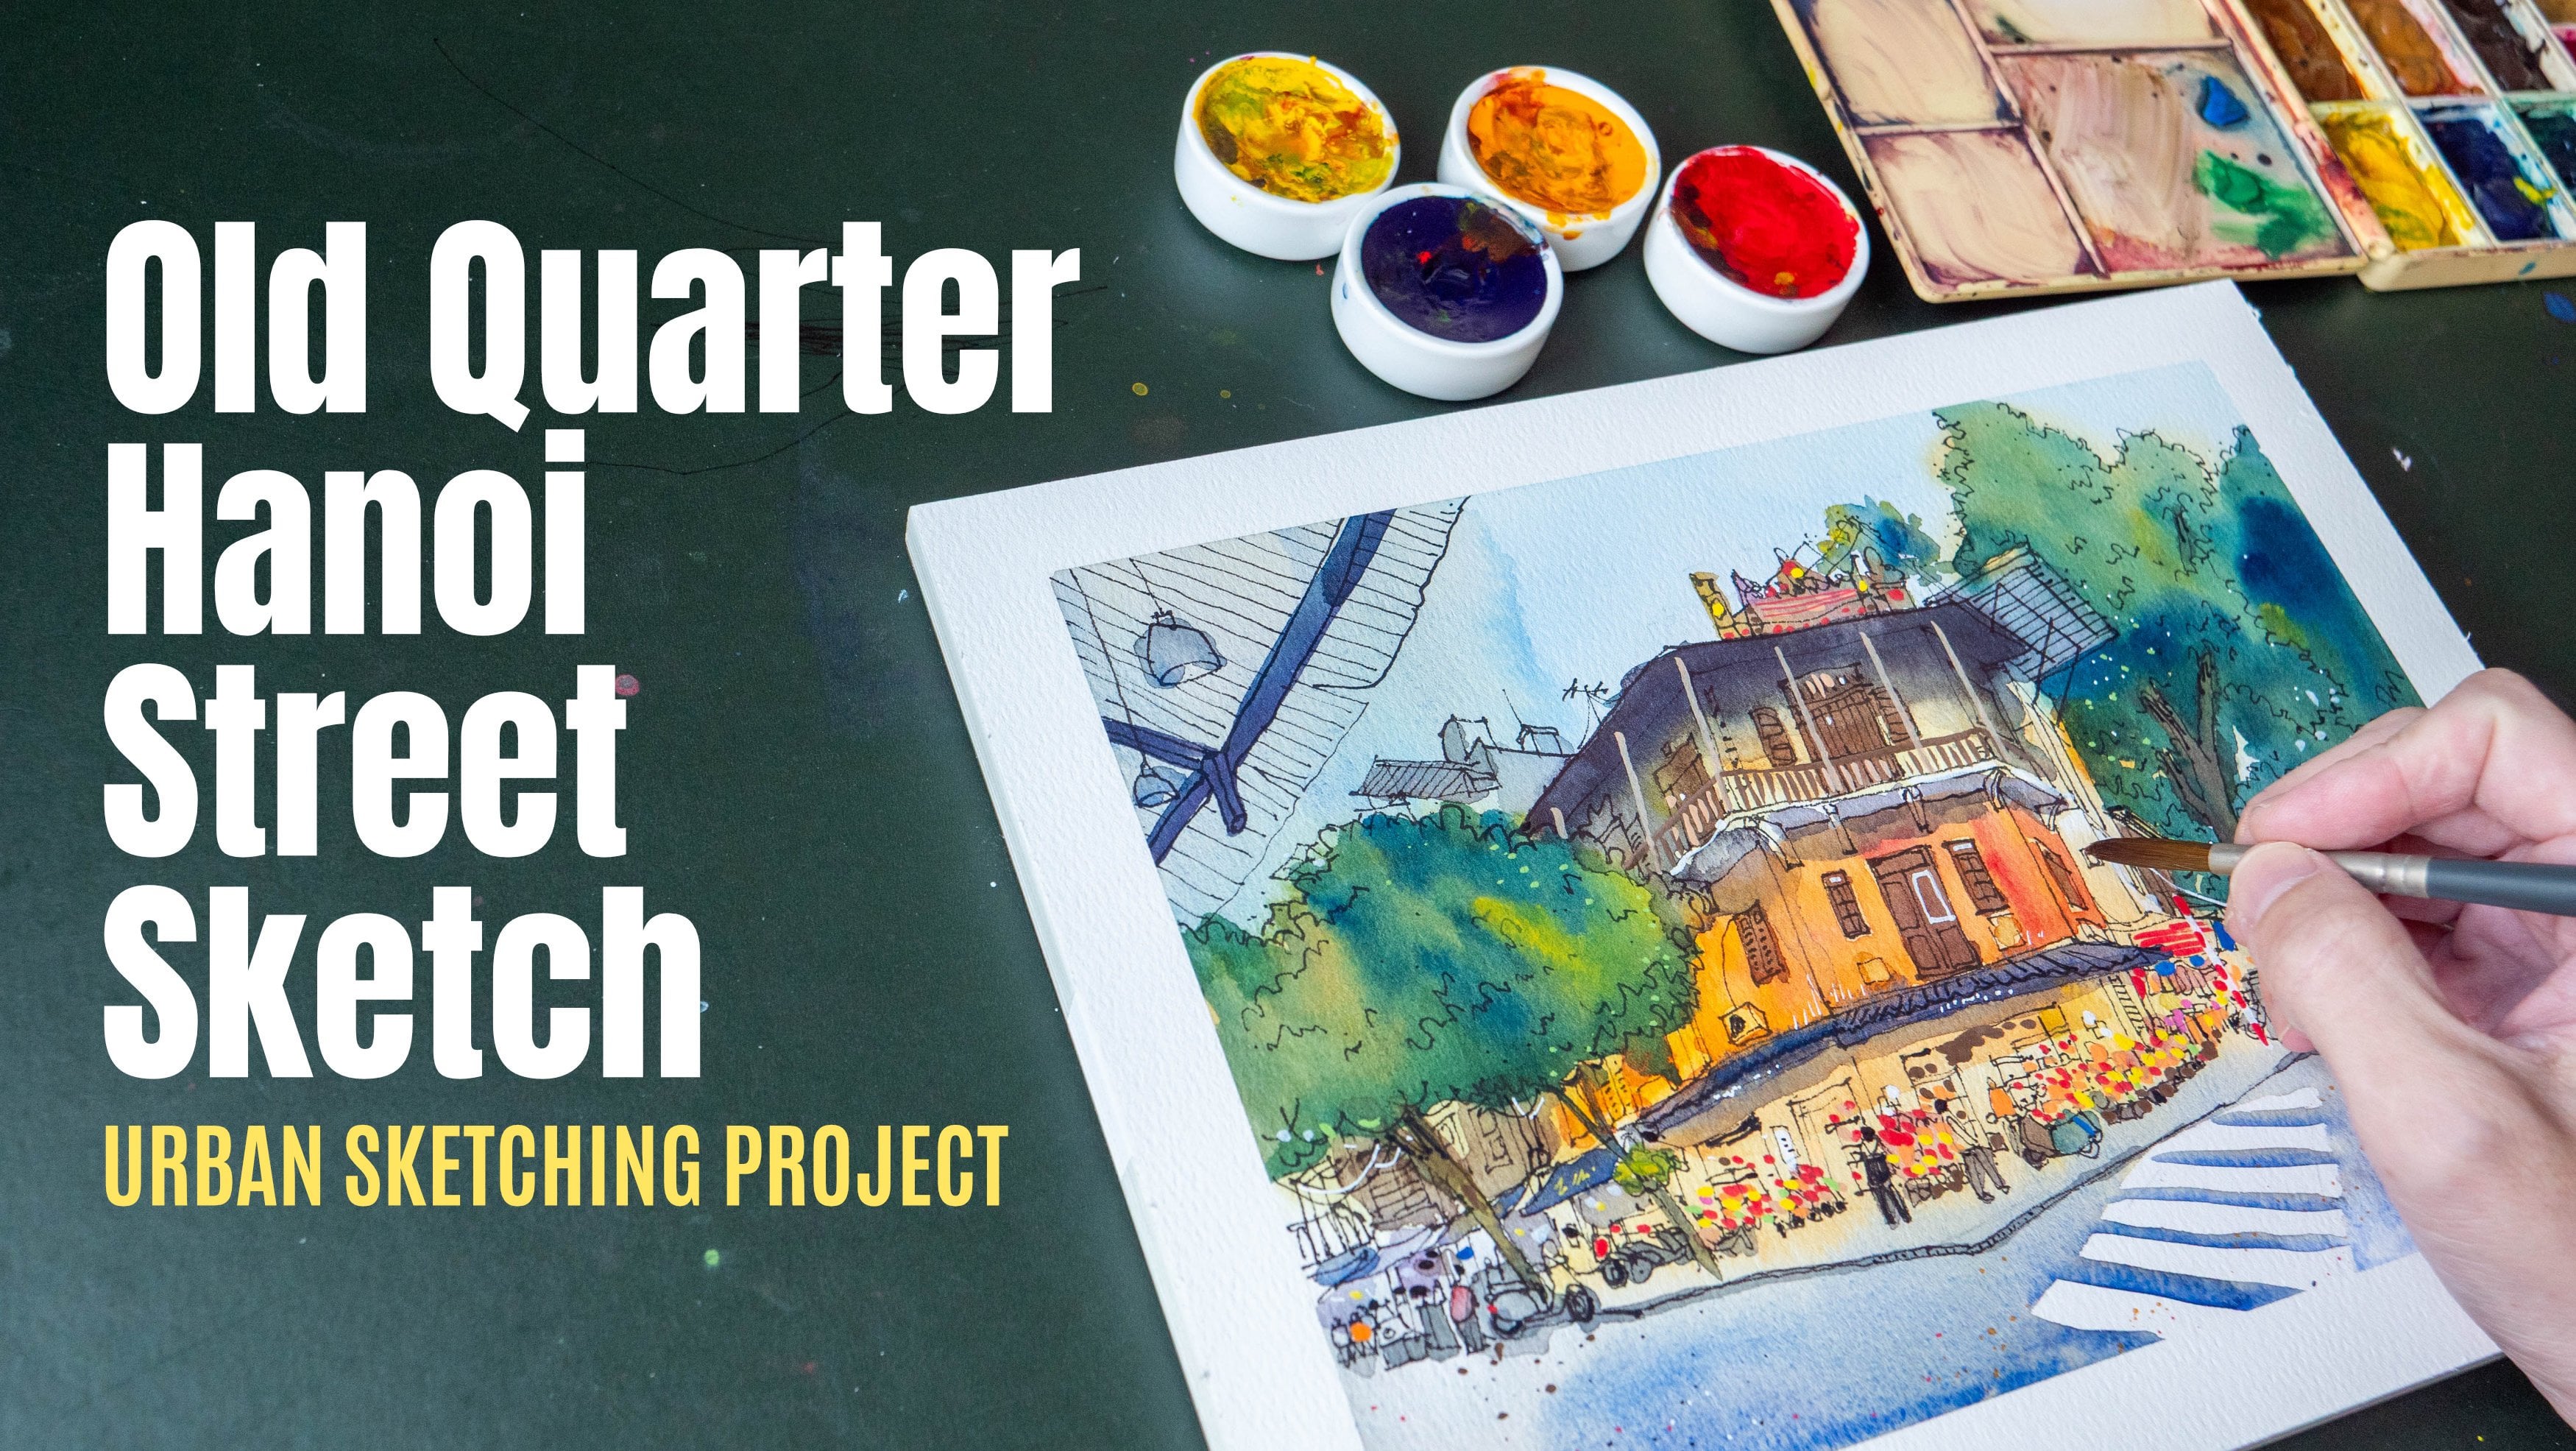
lot of time to sketch. This. Before we start, I want to show you
the completed scene. By the way, the reference photo for this scene is provided. And I would recommend you
focus on a specific area to practice not draw the
whole thing because it's quite intimidating
to draw the whole scene. So just focus on a small
area and practice painting. So this is the completed line
that I drew really quickly. I can actually add more
details but I shall just top here because the focus
of di course is not on drawing, it's on painting. And now I will attempt
to paint this. So I need to make
sure the brush is, and I'm going to start off
with yellow because yellow is a color that is quite
easy to contaminate. So this stall is selling
de ns here up front. Now this is going to be
a very sized sketch. If I have to paint and
draw everything in detail, it's probably going
to take me 3 hours, but this line only took me
about less than half an hour. Right now, I'm using
yellow to paint all the things in the
scene that are yellow. And I want to keep
the colors fresh for the fresh foods for the
very vibrant boots. If I have to add
or mixed colors, I will do so on the
paper Right now, I want to keep the colors
as fresh as possible. Pate. The nice thing about working
with water brush is you don't have to worry about water because there
is always water. And for this sketch, I
feel like I don't have to press the water brush because
the water will always flow, but it's not going to be
drip off from the tip. With some of the from the
previous ending session, I have added the yellow from the brush to the red
to mix the range. Now, if there is too much water, the color will not look vibrant, so you won't have
to add more paint. The control over how
much water there is on the brush tape
is very important. So I'm using the orange to paint the oranges or the
tangent rings. After yellow, we have green. I'm using fatal green to
mix the vibrant wings. When you are using a thalo green be careful, sorry, thye blue, be very careful because
it's a very intense color. There are some melons here
huge melons, by the way. So at this point in time, I'm already not following
the scene exactly. I'm using my artistic
license to add colors where I think they
should be added. Of course, using the scene in front of me as
reference as well. I just realized I have to paint these two dragons and my
brush is really dirty. So let me just wash the brush. Squeeze out some water. The nice thing about a
water brush with lots of water capacity is you can squeeze out a lot of water
just to wash the brush. Let's paint the
dragon ya loaf first, and then later on, we
will add the rain. This is where having the
fine point with the brush is very important because
you want to add details. And having the fine point
will also allow you to paint within certain
areas easily more easily. We have red plastic
bags here and here a take the paint out of the pin, try not to poke the paint because that
will damage your bristles. So try to use the side of
the brush and take the pain, not poke the paint. For the grace of the mixing cobalt blue teeth
with transparent of side. F people, I guess you
can use out fine Bursa. So that will give
you a nice gray like the one that I have here. We need some big gray areas
to block in the shapes. Try to use a single
color and paint all the elements with that
color first before you switch because if you
keep switching colors, you're going to make the brush
tip dirty and you have to clip cleaning this and you have to squeeze
out more water. So it's going to use
up water faster. As I tried to paint
the hair of this guy, because there is so much water, the black actually just
flow onto the face. So it would be good to
have a tissue with you all the time so that you can
paint rescue your sketch. Yeah. So it doesn't work here. I have to wait for this part
to try before I paint again. Just adding some
finishing touches. Last thing to do is to
add some splatter marks. I'm using transparent red oxide. Okay, so this is the
completed sketch. I'm just adding some
finishing touches. All right. Let's
take a closer look at this completed sketch. Drawn with ink, painted
with the water brush. So it certainly is
very convenient to use a ye brush and I have my
watercolor box clip here, which makes it even
more convenient. For this sketch, I actually did not mix the colors that much. So these gray areas
are all mixed colors. For the most part, I was
using pure color yellow. We have some greens from
yellow and yew blue.
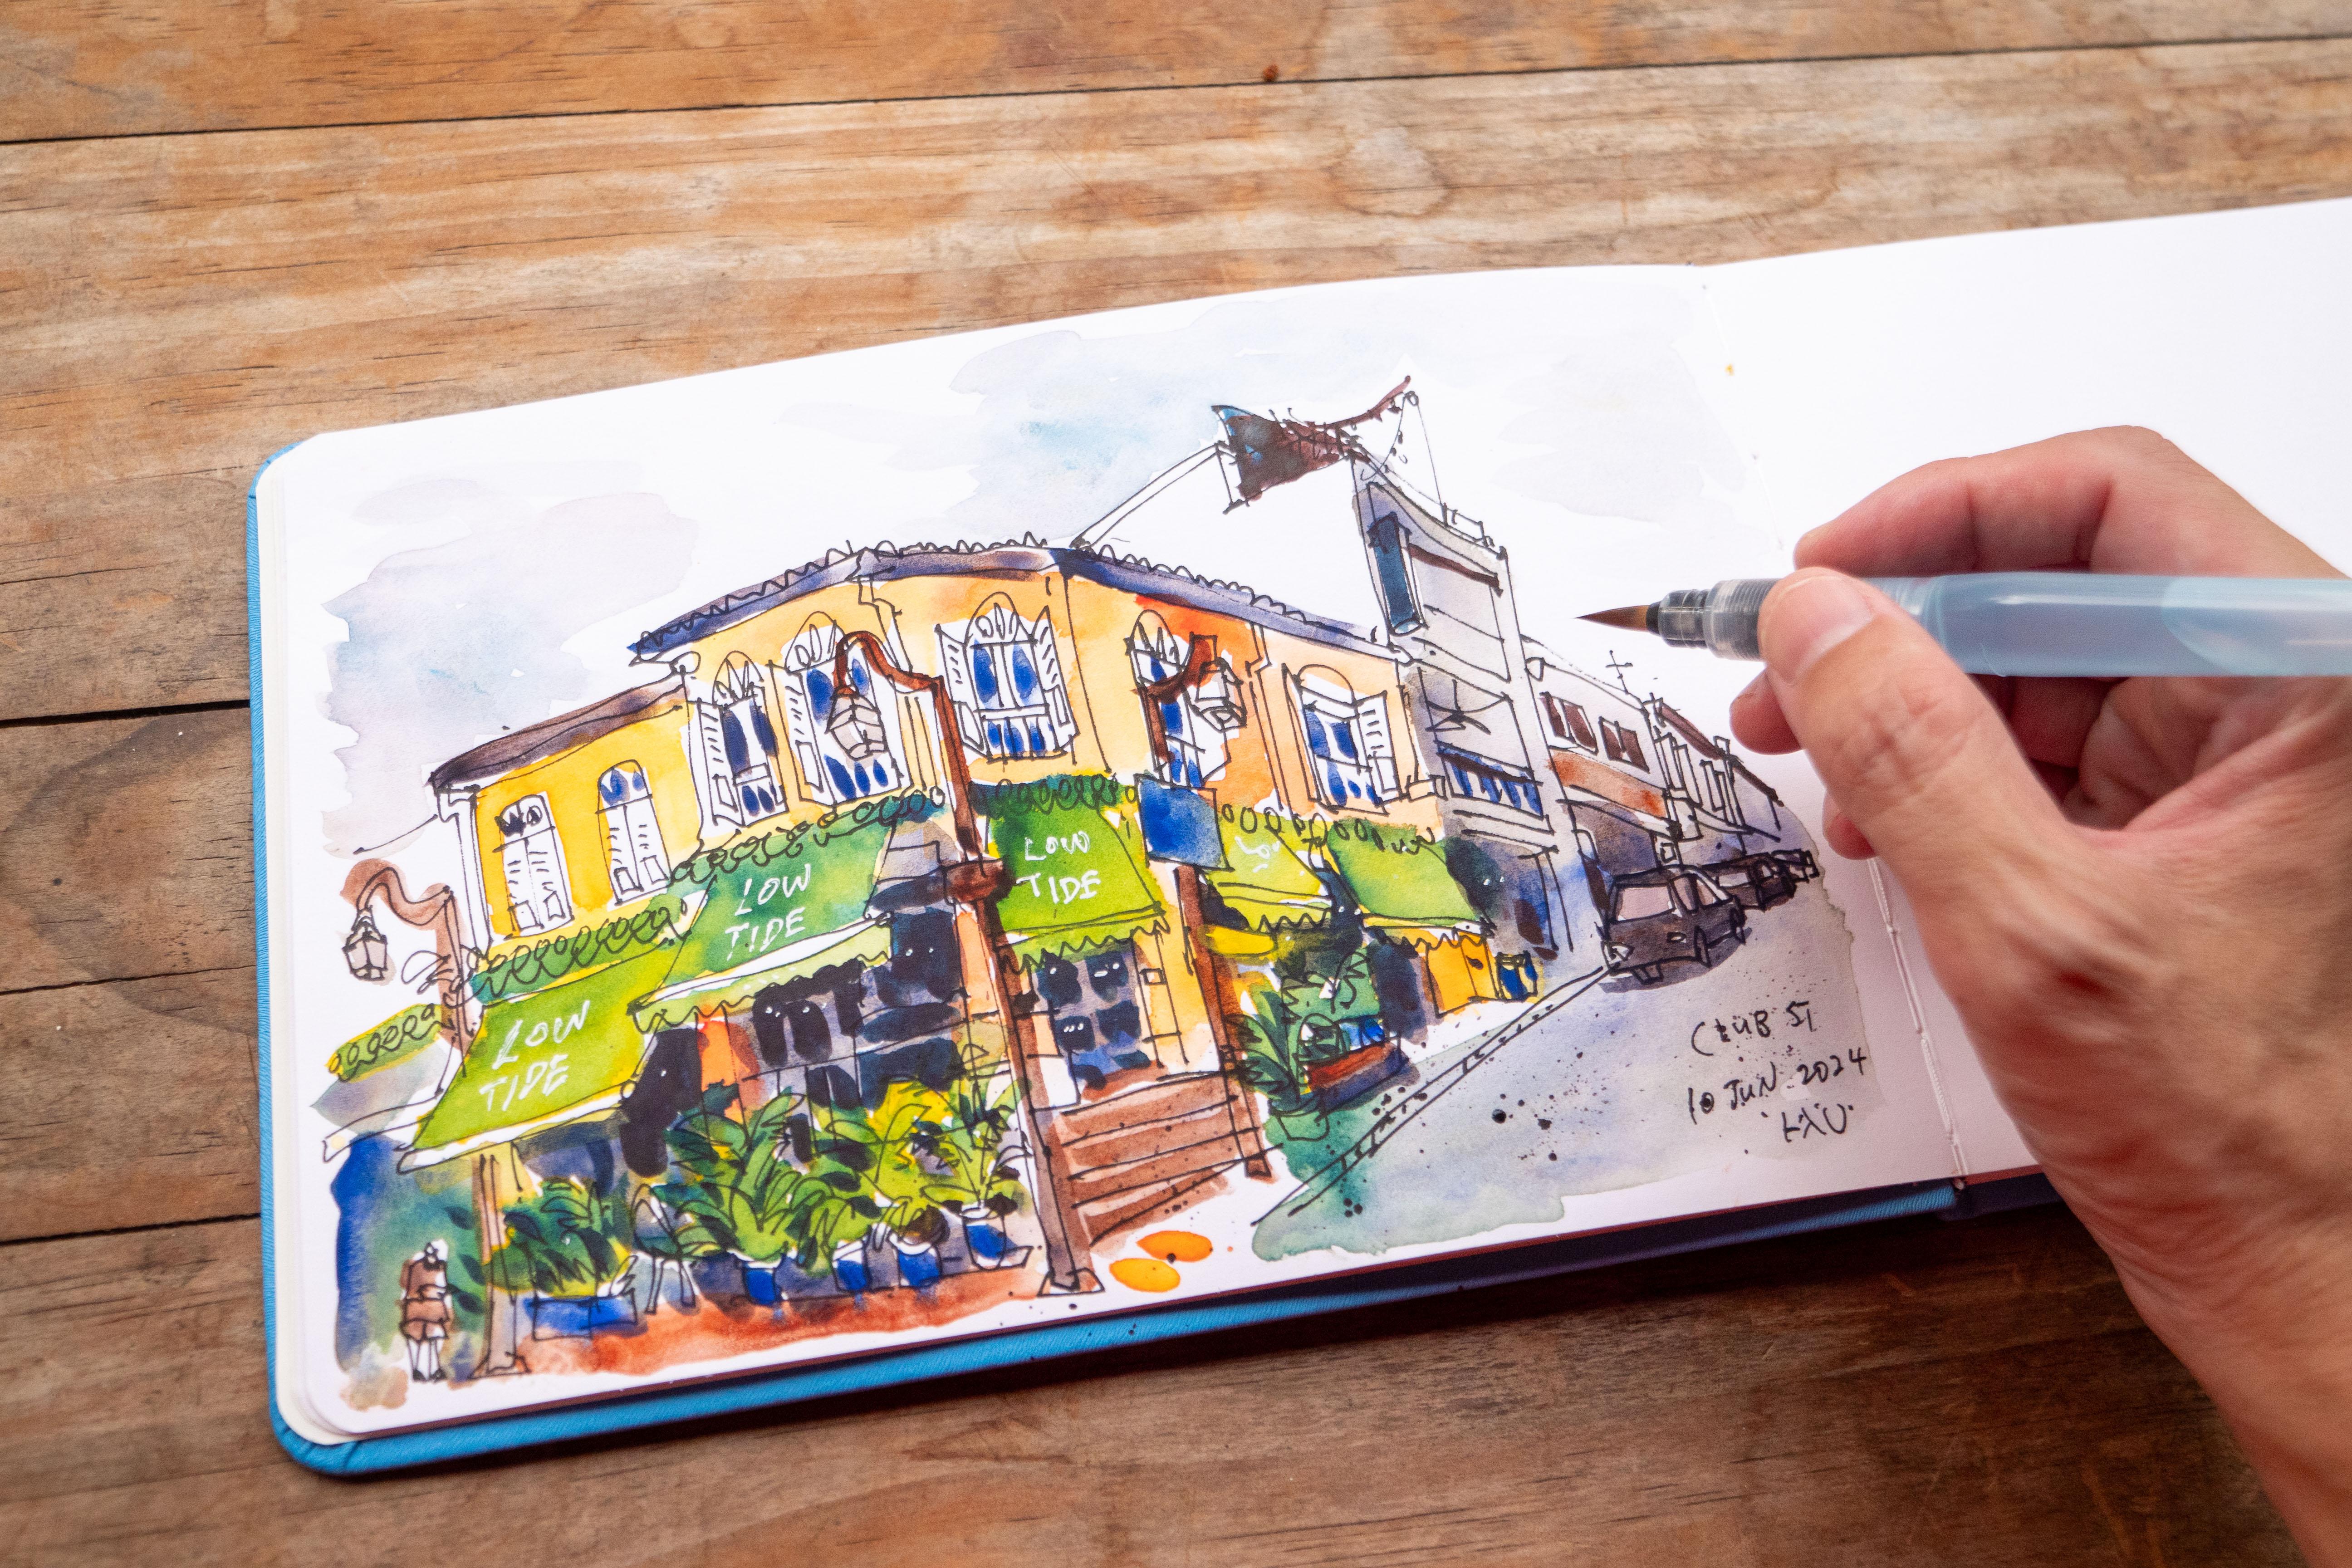
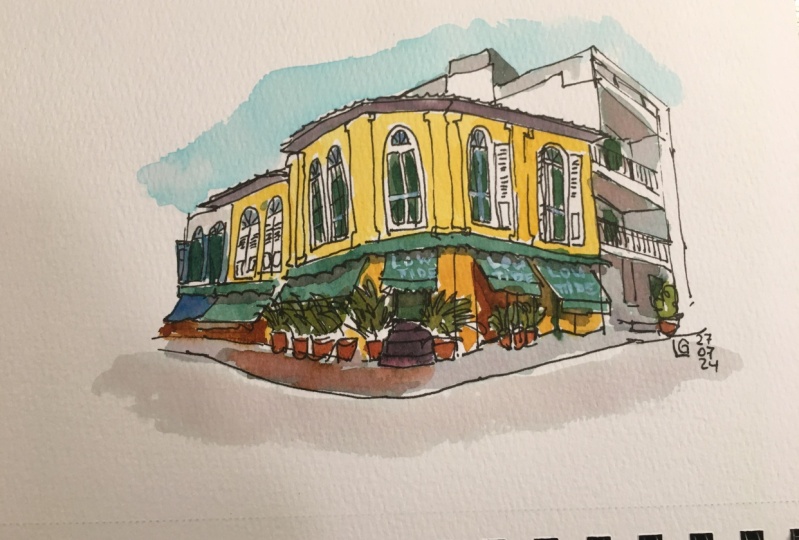
6. Sketching a shophouse: This exercise, we will sketch
this building behind me, and we will create a very
simplified version of the building to practice
our water brush techniques. Reference photo
will be provided. Unfortunately, there
are no cast shadows, so this scene doesn't
look that exciting, but we will still sketch it. Let's create the line art first. So the focus of
this course is not on the drawing but on painting. So if you want to
learn how to sketch, do check out my other
urban sketching courses. So I will create a very
simplified version of this building so that we can
get straight to drawing. So I'm going to create a
very simplified version of this building so that we can
get straight to painting. This is the completed
line sketch, and I'm going to clean the brush first by
squeezing out some water just to make sure this
is relatively clean. There's still a bit of
red it's fine number to add pat add some water
to yellow and paint. Now, there is too much water. So this is where you may want to use the tissue to dry it. But I think it's fine because the weather
today is quite hot, so they should be able
to dry quite heavily. Once again, I'm using yellow first because this is the color that gets contaminated more easily compared to red and blue. I'm using yellow to paint
over all the things that are supposed to
be yellow and green. The awning is
supposed to be green, but we can paint yellow
over it because later we can add blue to it and
it will become gen. This part here is also green. As usual, try to use
one color and paint everything with that color first before you switch
to another color. It looks like there in the is to paint here, too
much water here. Next, we want to mix the
color for the building, which also looks yellow, but it's a muted yellow. I'm going to add a little
bit of red to this paint. We have orange. I
think it looks fine. You can also add some red into the color on the paper to create color variation
to let the colors blend. So this will make your sketch
look more interesting. And that is what I'm doing. Okay. Too much red there. But it's fine. As long as the
shape is there, it's okay. This is a very busy road. So I'm trying to
control my water. I'm trying not to squeeze
too much water out. I only squeeze when
I need the water. Okay. So far so good, next, I'm going to add
blue. The blue to. The blue will go onto the
yellow to create green. So this is a very sized sketch. I'm not being very
particular about painting within the
shapes within the lines. Now, if there is too much water, some of the paint is going to
drive a bit slot or patchy. So even though I'm not
pressing the water brush, I can feel the water and I
can see the water coming out. If you have to, you may need to go into the wash there to
pick out the excess water. This is one challenge
when it comes to painting with water brush. With a dry brush,
you can just shake the brush and the water
will spell and you have a dry brush and you can use the dry brush to
pick up the excess water, but you can't do
that, the water brush because if you swept like
this onto the ground, just to remove water, the water will keep flowing. For the ground here, I'm going to have see. There's a lot of water. So I may have to, you know, I'm just going
to leave this as it is. But if there's too much water, you can see the
paint will start to blend if the shapes
touch each other. For the buildings
in the background, I'm just going to paint
them gray because they are not the high light here. The paper that you
use is important because some paper
actually will not allow you to create wet on wet techniques because the
water will just not move. Those will be lousy
watercolor paper. For good watercolor paper, the paint should
be able to flow. The color should
be able to blend. Okay. So this is the first wash, and I think I managed
to get all the most of the important shapes into the areas that they
are supposed to go in. So now I actually have to
wait for the paint to dry before I add more details. So if there is too much water, you can use tissue to
pick up the excess paint, especially for the
water that's put down. Some pots have right. I've just switched over to using the pentel quash because the
fine point here is sharper. So I want to use
this to add some blue to the pots here at the bottom and here as
well for the blue pots. And I'm going to use
this blue copa blue tip and transparent red oxide
to mix black paint the top. You can use
ultramarine and Bersa. Remember as you put the
brush into the pan, don't pock it, use
the side to pick up the excess water excess paint. So I'm using the sharp
point to paint the shapes. And I'm picking up the paint by using the side of the brush. Adding details take
a lot of time. Okay. So I think I may be
able to add the shadows now. So for the shadows, I will be using let's see. I have some green here. I have some green here. I can add red to green to neutralize each
other to get a gray, or I can use Theo blue with this one red to get
a gray or black. I can use Cb blue deep and
transparent red oxide. You can use French
ultramarine Open Ciena. So I think I may want
to use you know what? Let me just use Cb blue
deep and transparent oxide. So because I'm covering or
coloring the shadow areas. I I need to make sure that this big black shape is continuous so
that it looks great. And this also has
to be dark enough. If it's not dark enough, then I will have to go in with alo blue and a
warm red later on. Elle blue and one ray
can help with mix a black that is pretty black. With cobalt blue deep. Sometimes I can't achieve
the intensity that I want. The black that I love. Yeah. So I definitely need the darker black
for this sketch. Let's paint the lam pose
with transparent red oxide, even though it's not
transparent red oxide. There's another one here. Paint the steps. And
the lamp posts here. We have a green here as
well. Let's paint that. I will have to make
the cars darker, so let's use cobalt blue
and transparent red oxide. This looks fine. I'm painting the shadows beneath the cars to make them
a little even darker. Shadow areas under the building. Okay. So now I need to wait
for this to dry before I, you know, make certain
areas even darker. So now it's time to
mix the black black. For that, I'll be
using yellow blue. And there's one grad. Just add a little bit of alo
blue and a and a warm rate. You can use You can
use any warm rate. I'm using traqun scarlet. You can use pyro rate, pyro scarlet, vermilion. Okay. So that now that
I have the black, we can use it to
draw some shapes. It's actually kind
of difficult to see what I'm painting here. I'm not sure if my camera
can actually capture that. I'm using black. In this case, little
blue and one red to paint the black areas, the really dark areas. Some of the plants here would
benefit with black as well. This is a bit too blue, so I will want to
add some red to it. Just to make it less blue. This is so dark that
once you paint over it, in this case, once
I paint over it, I can't even see the
line up beneath. Hopefully, when it
dries later on, it will dry lighter so
that I can see the line. Okay. So believe it or not, this sketch is almost done. So once again, I may want
to add some splatters. Just to create some ture. I'm going to squeeze
out some paint here just to create
a lighter wash for the windows because white for the windows
is too glaring. The next thing I want
to do is to again squeeze out some paint
to clean the rush. I'm going to add
slight sal blue. Yeah. Very sal blue, just to add
some clouds in the sky. Especially this side here. So that hopes, that's too much. So that we can have
some contrast with the sky versus the
building because now both are just white,
and we don't want that. This part is still so
make sure not to go over. Otherwise, the pain
will bleed blend. Right. I'm pressing the brush
to get some more water. The downside of what brush because this brush tip is small, I can't use it to
paint big areas. Lastly, if you have
a white job pin, you can use this to add
high lights or details. Because I had painted the green with high value or
with intensity. When I use the white
over the green, there is good contrast. If the green is too light, then white light green is not going to give
you that contrast. I want to add some color
for the street lamps. Otherwise, they are just
white, which looks weird. Okay. So this is the
completed sketch, which took me 45 minutes
to draw and paint. So I was able to draw and
paint this really quickly because I'm using
the water brush, and I had his table for support, which really helps a lot. Another huge advantage of having a water brush is this
allows you to stand sketch and paint more easily compared to having
a normal brush. It is possible to stand
sketch and paint with a normal brush and I have
done so countless times. I just have to
click my watercolor box to the sketch book, and when I balance
the sketch book, I have to make sure
the water doesn't spill out onto the sketch book. Now, with a water brush, I don't have to
worry about that. So having a water brush allows
you to stand and sketch, which is actually very useful
in certain situations. For example, if you are in a
crowded place where there is no place for you to put your portable stool down or where there are
no seats then, standing and sketching
is the way to go. So this is my completed sketch, and I am quite pleased at how this turn out because the colors look vibrant and the
colors don't look patchy. So I managed to create the
flat washes quite well, especially for this part here, and also for the green
and for the buildings.
7. Outro: We have come to the end of this course and I hope you enjoyed the course and I hope you had fun using your water brushes. As long as your watercolor
washes do not look patchy, you are on the right track. Do send me your
exercises, projects, or your sketches so that I can have a look and maybe I can give you some critics
on how you can improve. One last thing before you go, do leave this course a
review so that you can let other students know whether
this course is any good. Thanks for following me. See you guys in the
next course. Bye.
 Teoh Yi Chie, Sketcher, watercolour lover