Transcripts
1. Welcome to Class: You ever looked at a fruit and thought you would make
an excellent character? Welcome to the club
and welcome to the mascot Malthon where
we turn everyday fruit and vegetables into
retro mascots with big personalities and
iconic rubber-hose limbs. I'm ka, a top teacher
on Skillshare, and a huge fan of lettering
and illustration. What I love most is creating good mood
designs for companies, and I had a fantastic
time branding a big supermarket
with my cuties. In this class, I
invite you to join my creative journey as we
explore two artistic world. Armed with nothing
but a drafting pencil and the cheapest
paper you can find, we will sketch basic shapes, explore emotions and
facial expressions, and build our very
own retro design kit. Everything is included
from rubber hose, arms and legs to retro mouth and those iconic pie-cut eyes. It's going to be playful
and wonderfully imperfect. And it's the best way to
train your creative muscles. Then we jump into
Procreate on the iPad. Here we use our retro
design kit to sketch our mascot before bringing it to life with a clean outline. The end of the class, you will have mastered sketching prompts, created your own set
of retro elements, and learned a workflow in procreate from sketch
to final lines. Once you understand how to build characters
from simple shapes, you can create hundreds of maskets for branding,
animation, stickers, social media, or simply for the joy of drawing something
that makes you smile. If you want to fill a
blank page with joy, this class is for you. Ready for mascot Mirthon
See you in class.
2. Your Tools and Your Project: Before we begin,
let's have a look at the tools and resources
for this class. First, the analog stuff. As I'm currently renovating
my childhood home, I found the perfect tool for this class, a
carpenter's pencil. It has a beautiful broad tip. It hardly ever breaks, and it never needs charging. With a simple utility knife, you can carefully
sharpen it yourself. While I prepare mine, let's talk about
what else we need. You will also need cheap paper, that kind that can even
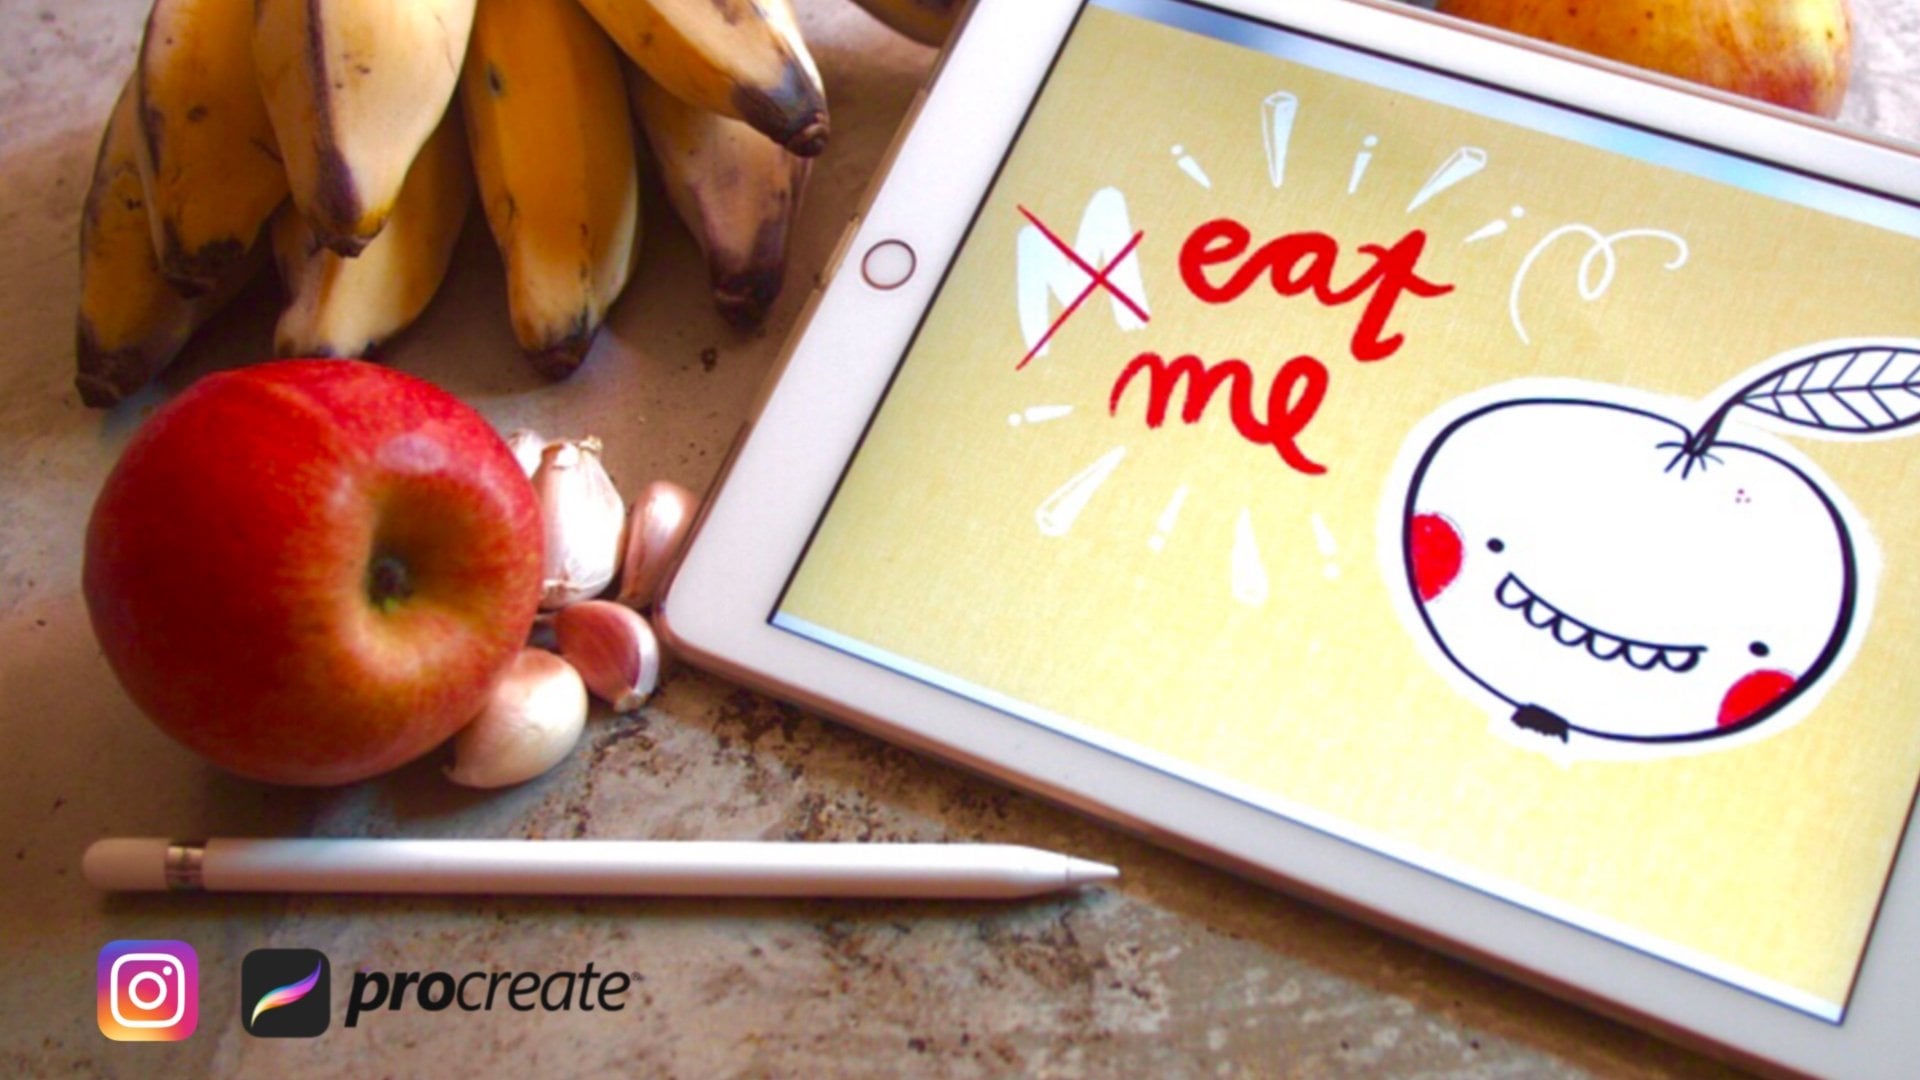
be a little thee through. This takes the pressure off and helps your hand loosen up. After that, we move into the digital world with
an iPad and procreate. The class resources, you will also find two
important downloads the iconic rubber limbs
inspiration boards and the Cutie Brush for your
black and white linework. Now, let's turn to your project, the heart of every
Skillshare class. Please share three things with
us, your analog sketches, your digital artwork, as well as a brief description of the characteristics
of your mascot. For example, Speedy
Carrot always in a hurry, Chaotic Cherry Twins or Sen Zucchini brings
calmness and um Hmm, so I can't wait to
see your projects. It's always a highlight to
see how your pieces turn out, even though we all start with
the same building blocks. So grab a pen and paper. I'll see you in the first
lesson where we will start with easy prompts to sketch the
shapes of our maskets.
3. Your Sketching Prompts: So, hello, we have our sheet of paper and a nicely
sharpened pencil. We'll begin with
very simple sketches and basic shapes to help
you develop your mascot. We'll do this the old
fashioned analog way to get a feel for drawing again. First, we'll draw a vegetable made up of a single
geometric shape. Geometric what comes to mind? It could be a rectangle, but it could also be a
circle like this one. A circle, of course, we can all draw that. It's super easy. If we add a few delicate
little leaves just like these, then you can clearly see what kind of vegetable
it's going to be. Here at the top, we add a stem, and our tomato is ready. Okay, a few water droplets. Great. Next, we'll draw a
vegetable that shoots upwards. You can imagine it as an arrow. So first, draw the arrow head. And if you add a straight
line here at the top, and one on the right side, and one on the left, and then outline it with
these fun little bubbles, it's clear, we've got a carrot. And the carrot that
battled its way through the soil naturally
has these richts too. Maybe you can draw a tiny bit off the root end at the bottom. Okay, our carrot is
ready. That's fine. Now, let's draw a vegetable
that's really heavy. First, we had the carrot, which is so dynamic, and now we need
something with mass. In other words, we are
drawing a pumpkin. I'll start with rough
sketches first. I always reduce it
to its basic shapes. So I have three ovals, and together, they
make up my pumpkin. The bigger and the more
compact you draw your pumpkin, the heavier it looks. Now I make the auto
contour a little bolder. At the top, there's
usually a stem sticking out with that funny
little cap, right? Okay. And the tendrils just draw another little funny
line with a swirl in it. Next, we're looking
for a vegetable that's made up of
two round shapes. It could be even a
fruit. It's really easy. First, we draw two small
circles next to each other. If I add a little dark
spot to each one where something can grow out of it,
you'll see it right away. These are two cherries
connected by their stems. Of course, they'll
get a beautiful leaf, too. Walla? We're ready. Oh, and they always have
those fun little highlights, too. Let's see. There's also a vegetable
with little round things. You'll recognize it right
away when I draw these small, distinctive leaves up here. Yeah, they actually look
like a little heat, and now comes the
inside of the pot. Can you see it yet? Yes,
it's going to be a pea. Number one and number two, and sometimes there's
even a third one inside. You can definitely
use that to create some great character
dynamics within one mascot. Our next prompt, draw a
vegetable that's cloudy. Sounds complicated, but all
of us can draw a cloud. So that's a good start, and we'll draw another
cloud here and here. If we add a base at the bottom, we just have to be careful that no one thinks we are
drawing a muffin. That's why we are now connecting the small clouds at
the bottom part with various lines so that the stem emerges from which
all of this grows. And here and here. Well, it's not the
prettiest broccoli, but we have a start. Now, let's find a
shape that's narrow at the top and a bit
wider at the base. I use some small
guidelines here, and now I'm trying
to get it right. Okay, not quite. But of course, this could be a beautiful pair. It really looks very elegant. Next, we need some contrast. Draw a vegetable
that's very long, and long really is
the keyword here. You'll see it in
a moment. So what could this long thing with a funny beard
at the bottom be? Yeah, it could be a leak. The color changes
in the lower third. Let's indicate that with a line. And towards the top, we
have a bit more texture. A cucumber would be just
as long, of course. And the cucumber is one of the easiest vegetables to draw. Easy peasy or easy cue
crumbery whatever. Okay. To finish up, we need something
small and round. Then we really have a bunch
of different characters. Can you guess what it is? Of course, it's a radish. And here at the bottom, too, we'll add a little line. And yeah, you see, that's the
white part of the reddish. Now you have all the
prompts I've given to you. If you still have
space on your paper, add a vegetable with a very
unusual shape to finish. It can also be a fruit, for example, a star fruit, whatever you like, literally. Once you're ready,
take a short break. In the next step, we'll select five shapes and decide on
their character traits. See you in a moment.
4. Give Your Shapes Personality: Fantastic. These are our shapes. Now, let's think about what kind of personality
they could have. So we can really build
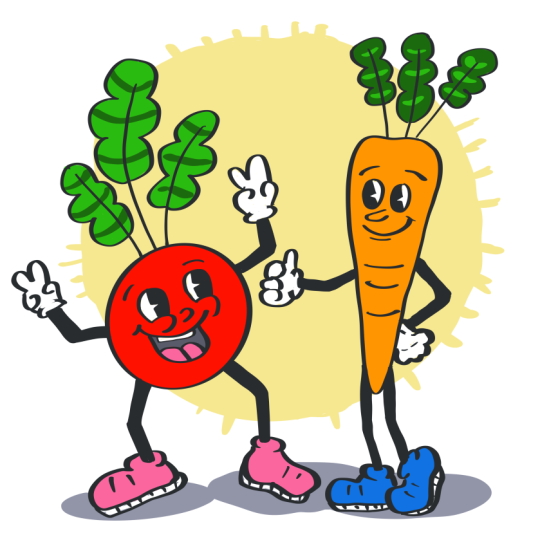
expressive mascots step by step. Take the Carrot, for example. It looks like it's about
to speed off in a flash. So draw a line right
next to the first shape you chose and write down
its personality trait. In my example, Speedy
for Speedy Carrot. Now it's your turn.
Choose five vegetables or five forms you've drawn. Then describe their personalities
with one or two words. So first, I have
the Speedy Carrot, and number two, for me, will be the cherries. They could be the chaotic
twins, for example. So what should I take next? Ah, number three, the broccoli. So this can be something
like a fluffy muscle man. Who will be number four? For me, number four is the pair because it's
so wonderfully elegant. Okay, we can write that down. And number five, that's clearly the leak because you can draw
it in a really nerdy way. Cool, right? So those
are my five favorites. You might have completely
different ones. To easily turn our
shapes into mascots, let's put together a retro
character kit step by step. First, we learn about
strong facial expressions. Then, of course, we'll
need matching face, hands, arms, and feet. But let's take it
one step at a time. See you in the next
lesson where we'll focus on simplifying
facial expressions.
5. Explore Facial Expressions: Every mascot of course, needs a matching
facial expression with a strong, clear emotion. We'll start very simply and
approach this step by step, learning five basic emotions. Now, you can draw
circles as frames to paint the face into or squares. I'll use squares so I
can mentally move away from the typical idea of
how faces have to look. So I'm drawing these
five little blocks now. So great five boxes for five emotions or rather their simplified
facial expression. First up, of course,
we draw happy. A happy face is pretty simple. To eyes and a big
upward curved mouth. The eyebrows are crucial to
draw them slightly slanted, and here's our happy face. Next is excited. Excitement also has big eyes. But the eyebrows are more
like straight lines. The mouth is the key here. For excitement, there's
a slight upward curve plus an open mouth, and you can see a
bit of the tongue. Now we have an
excited expression. The third expression is angry. It's basically happy
turned upside down. So draw a hill, the
mouth curve downward. And again, the big
eyes to make it look really angry at
expressive eyebrows. A ZD mascot might not have the mouth corners pulled
all the way down. You'll soon see again how
important the eyebrows are. If the brows sit
to the right and left of the eyes and
slope down slightly, oh, that looks very sad. Our final emotion is surprised. It has almost the same eyes
and eyebrows as the sad face, but with an O shaped mouth. You can also show a
little bit of the tongue. This makes the character
look like it's calling out. It looks almost startled. Oh, it says. Of course, you can interpret each
expression in your own way. For example, that friend
could have a different mouth. Look how it changes when I draw a wavy crumbled
line for the mouth. Now it looks sad and troubled. You see, drawing emotions brings a new dynamic into
your drawings, and, yes, you start to form a connection
with your character. Okay, that's enough for
our little warm up. Next, we'll gradually
explore the retro look.
6. Retro-Kit: Pie-Cut Eyes: Now we're delving deep
into our retro toolbox. The first thing we
are going to draw are the classic 1930s comic eyes. What makes these eyes especially distinctive is the
pie cut style. First, draw two oval shapes. The defining feature of
the pie cut style is the small pie shaped wedge
that is left out of the pupil. This isn't always an
accurate light reflection, but rather a graphic
abstraction that worked really well in early
black and white animation. It makes the character
look super lively. Because the design is so simple, the shape is easy to
reproduce and you can create lots of different
highly expressive variations. Let's move on to the next shape. Try stretching the ovals out a bit more and then
practice confidently leaving out the little pie
wedge like this and like that. Today we are taking
our time to fill in the pupil by hand so you
can get used to the shape. Great. You've probably seen
the next eye shape a lot. Draw two little mounds and give the lower
end a flatter finish. Those are the cheeks. Inside the mounds, we draw the pupil with a
super sharp pie cut. Do the same on the other side, and don't forget the
pie cut there, either. In Procreate, the
filling part is easier. Color drop, and you're done. Of course, it should
become your unique mascot. Nobody tells you how
many eyes to draw. You can give your
character three eyes or a completely unusual shape. I'll start here and draw
three C shapes inside. That keeps my forms
more consistent. Now I begin in the middle with the pie cut and fill it in. Number one is done
now number two. And that one turned out a
bit small, but still okay. Now we have the basic shapes. And in the next step, we'll add more emotion to
these retro eyes. You'll see that it's possible
with very simple strokes. Start again. Use
two round shapes. Number one and number two. Now comes a very simple
but crucial line. Draw two arcs at the
bottom of your ovals. These are basically
the tear troughs. Place the pupils in
the upper third, and you can already see that your imaginary character
looks like it's about to cry. Oh, so sad. Add the eyebrows on the
left and right, of course. For the next example, draw your two ovals again. We'll stick with this shape. Now separate the eyelids
within the forms, draw two arcs in
the upper third, curved downward like this. And then it works almost like the eyebrows we tried earlier. Oh, you'll see that we end
up with a very angry face. This one really
looks quite grumpy. However, here's another option. You could position the
eyelids slightly lower, covering almost two
thirds of the eye. This makes the character
look very bored. Now, let's look at how we can change the shape of
these oval eyes. One option is to make
the pie cuts more modern by using semi circles as
the cut out like this. And on the other side, too, you can make it more
distinctive by adding simplified lashes,
three strokes. Alright, fantastic. This brings us closer
to the batty boob wipe. With our half height eyes, that might probably look
very cute. So let's try it. For the cheeks, we can use these plush rounded
mounds and number two. Now, the lashes. Oh, see how we already
added details. We have lashes, special cheeks, and little dots for freckles. The more details, the more
your mascot develops. Okay, fantastic. Ah, come on. Let's draw a small nose. Ah, yes, here. Now we are actually pretty close
to a finished face. Super. But later, let's make the cheeks
a bit more abstract. If you taper it
to a sharp point, oops, that was a bit too
high. Let's start again. If you draw the cheeks like that and position
the eyes on them, you'll see how the character
gets a tilted head or gaze. This makes it look as
if its gaze is upwards. Okay, fantastic little nose. Now that we are talking about
head directions and gaze, let's try another example. Draw the cheeks again. Add a small nose. And to show the
character in profile, add a slight curve to the
outer control of the eyes. And on the other side, too. Now, fill in the pupil, draw a large arc and
a very large pie cut. Feel free to over
dramatize this. We want a really striking
expressive face. My pie cards turned
out a bit small here, so please make them bigger. Let's keep it like this. To finish, let's see what
crazy eyes we can draw. For example, we could
draw ghost eyes. What's special about ghost
eyes is their wobble. You can draw that easily
by imagining a bean shape. Draw two of those beans and match the pupil shape
to the outer form. Two identical shapes and
fill them with solid black. Wow, that already
looks pretty spooky. How about an eye shape for a totally lovestruck expression? Draw a cheek and put
a heart at the pupil. But don't forget the pie cut. Draw the heart at the pie cut. Done. Okay, now we close the outer shape
and add a little nose. Now we have someone who's
completely smitten. A super fan expression
is also really fun. First, the cheeks and then
draw strong arcs again. Now, the pupil need
a lot of space, so draw a big pupil
with a large pie cut. And draw a star inside. You've probably seen
that in retro comics. So this is just a sketch. If it's not perfect
yet, that's fine. Great. And some freckles. This is our set of retro
eyes with lots of options. Have a play around.
Perhaps you would like to add a special
shape to your set. So if there's space,
just draw it in, right? I think we made a great
start on our set. So keep all the different
papers of each step. We'll need them later for
our big Procreate session. We started with emotions, then drew our eyes, and the basic vegetable shapes are important, too, of course. By the end, we'll
have a huge wall of individual sets
that we can combine. So let's move on to our
next set the mouth.
7. Retro-Kit: Iconic Mouths: Next sheet is for the
retroset of mouth. Drawing a mouth in this
comic style is very simple. A gently curved line and a hint of cheeks
on the left and right. You want to draw your T a
bit more in profile, again, use a small curved line, but extend one cheek
a little more. A large tilted C.
That's all it needs. D, of course, is the opposite. Draw a gentle hill or a
downward curved line. Suggest a cheek boundary and a short line below that
indicates the chin. We've already tried
playing with mouth, so let's give it another
go with a wavy line here. And maybe make the
tongue stick out a bit. Okay, great. These are the mouth that can be
drawn in a single stroke. They become more
interesting when they are slightly open and abstract. So always imagine you are drawing a bean.
That's all you need. To make it look
like an open mouth at an upper row of teeth. Basically, a long stretched out. Like this. And to suggest
the tongue, use an M form. Now, fill it in, and an open mouth
magically appears. I'm happy I opted for
the carpenters pencil, given the size of fill area. To make the mouth look cheekier, draw a shape that looks a
bit like a sideway mango. The tip of the mango is up here. The cheek is suggested
right beside it. Now inside an M, and we have the tongue. Let's see what that
looks like in profile. We look at the mouth from
a slight side angle, so draw a curved line
for the opening. You will also see part
of the top row of teeth. Now imagine you're looking into the mouth
from the top left. Okay? We are not dentists, but exploring
different perspectives helps you to understand the subject better and gives you more options for
combinations in your set. Okay, this looks
pretty good already. One hugely popular option is the cheeky retro comic mouth with the tongue sticking out. I have to admit that I sometimes struggle
with this mouth. I often start again
and refine it. First, draw the tongue so you
know where it should sit. It should be roughly
heart shaped. Then shape the mouth
though the tongue comes out nicely.
Contrast helps. If you fill in the
mouth with black, the tongue will stand out more. Since we are in a
retro comic world, we can make it even more fun. Draw a flattened bean. With a line in the middle
and you've got a tube mouth. You can also suggest an
abstract tooth throw by drawing just only the outer shape and adding straight
lines inside. Okay. And a really
popular option is the typical
iconic wiling mouth, like the ones you see
in old animations. To draw a wiling mouth, imagine you're drawing
a vase lying on its side with a rounded
belly in front, a funnel shaped opening
plus an oval in the middle. That's it. With
these simple shapes, you have everything you need
for your retro toolbox, and you can combine them
in lots of fun ways. Next, let's see what face
combinations can look like.
8. Retro-Kit: Fun Faces: Now that we have tried
out the individual parts, let's put them together. We'll start with a happy face. Okay, we start with half
height eyes and the checks. Now, give our first
expression a huge pupil. Be generous and
remember the pie cut. Great. Well, done. Next, at a small nose. Yes. And a cute, slightly open mouth. For the tongue, imagine
DM shape. Fantastic. Okay. Now, this face looks different when the
eyes are drawn as raised arcs and the cheeks are exaggerated into pointy
little curls. Let's try that. Okay. Let's place the pupils
slightly further to the right. Again, leave out the pie cut. See how the face now seems
to turn to the right. Great. We also draw the
nose pointing to the right. And now for the mouth, a slight curve with a
big U underneath. Don't be shy when
showing the tongue. Okay. Nice. Some
freckles are great, too. Now, let's try an expression with a strongly abstract mouth. Remember the wing shape we drew with straight vertical
lines for the tooth row. Okay, yes, like this. And here we don't need cheeks. We just draw oval pupils. I forgot the pie cut. We remember it on the next one. Yeah, perfect. Okay, that already
looks pretty creepy. And, of course, you can
give it a pointy nose, too. Moving on to variation four, an open mouth with teeth. So let's draw the mouth. Yes. And the L shape.
Do you remember? Yes, like this.
And a big tongue. Well, from the way
the mouth is already, let's see how we can
shape the eyes. Okay. So, well, from the way the
mouth and eyes are placed, you can already tell the
character has a great dynamic. It looks like it's about
to turn to the right. Oh, yes, really excited. Fantastic. For the next one, we can go even further
and make the nose large. Draw a hill, tilted
slightly to the right, and place the
cheeks close to it. Overdo the outer lines as well, and don't forget the pie cut. On the other side, too, Okay. This one has a
very simple mouth, just a curved line with small hints of cheeks
on both sides. And now again, big oval
eyes. So let's see. The pupils should be positioned
slightly to the left, so they appear to
be looking left. Yes. Great. And the nose and another
smiling mouth with no teeth. Just a tongue. Cool. Okay. I can't wait to try out a face with a
whistling mouth. Okay, it will get these
almost sleepy eyelids. How will the expression change
when we draw the whistle? Let's see. Remember, for the
whistling mouth, it's just a vase shape with
an oval in the middle. And let's see. Yeah, in this direction. Okay, I already looks like
it's about to go Brett. Okay, we're getting
into the groove. Let's continue with
a simple mouth and a small double chin. And we try out another
cute expression. Place the eyes first. Then the nose a little lower, and the character will
instantly look cuter, like a little plush character. Okay, one more crazy face. This time, draw a bean and
a broken up tooth throw. These are just a
few small U shapes along the top edge of the mouth. And don't forget the tongue. Make the eyes perfectly
round at the nose, and fill in the mouth. And you will see how
wild it becomes. Okay. Finally, add the pupils to make the character
look totally startled, maybe by something at
the top of the image. Okay, this is really freaky. And even better if you hint at the cheeks.
Okay, so much fun. Now, our big nose
character could also have a love struck version with
little heart shaped pupils. So start with two arcs, yes, and the cheeks. And, of course, don't
forget the iconic pie cut. Ah, I forgot it. Okay, sorry, but you
will remember it. Now, add a simple mouth. Great. So we are nearly done. One more pair of oval eyes. And this time, we will
combine them with a very silly mouth with
the tongue sticking out. At first, the
filling. Yeah, okay. First, I draw the tongue to help me put it in
the right place. Then I draw the
rest of the mouth. Yeah, okay, not the prettiest, but work in progress. Okay. And finally, here's a face with very
exaggerated cheeks. Oh, yes, and freckles. So sweet. This time, let's make it a
super fan with star pupils. Make sure there's
enough white space inside the star so that the shape is still visible once you have filled
the pupil with black. And the mouth,
maybe a tube mouth. Okay, let's add some
beautiful eyelashes here. I'll leave some space for you to experiment with a
different expression. The next step is simple. We'll draw the hands
with a little help.
9. Retro-Kit: Rubber-Hose Hands: Okay, now we need our
beautiful Carpenter's pencil and our resources, either printed out or on your iPad so that you can use
your iPad like a light box. So hands look simple, but I actually need a bit
of practice. Pay attention. Instead of five fingers, we are only going to draw four, and the hands to
make things even simpler will be inside
those iconic gloves. So let me prepare my
tracing paper first. You can see how easily I can see through the
super cheap paper. So there's no need
for expensive gear. Smooth it once more and done. Typical for the 1930s character are those rubber hose arms. The simplification was born from the way animations were
produced back then. Just like the white
gloves our mascots wear. But the gloves serve
not only to simplify, they make the characters
appear more human. Walt Disney said
that Mickey mouse shouldn't be a literal mouse, but should appear human like. The gloves have a big advantage. We have to draw
far fewer details, and this means we can
work much faster. So same with the rubber
hose, but pay attention. The width must stay consistent
throughout one character. So arms and legs in this style should always
have the same stroke weight. Later Procreate, you can
use color drop to fill, but for now, we will
work analog with pencil. And finally, add the
glove folds on top. The next step will
be much easier when we move on to
digital drawing. Draw an arm pose, then duplicate the
arm and flip it to create the same pose
for, left and right. But for now, we draw the
same arm again but mirrored, so you can get a
hang of the style. Start with the
rubber hose shape. Okay, and then the glove. You can think in terms of
W lines for the fingers. The thumb has a
small curve here. Pay attention. Yes.
Okay, congratulations. Now, let's draw a few
standard gestures. First, thumbs up. Note that it matters which side you
view the hand from. If I hold the thumb this way, you can only see the fingers. Hold it the other way, though, and you can see the
outside of the hand. This will depend on how your character stands
or moves later on. So draw each gesture
from both directions. For the thumb thub glove, keep thinking in W shapes
again for the fingers, and the glove is complete. Now the arms, rubber hose
arms follow simple shapes. They are curved like a U or straight lines
tilted at different angles. There are no
complicated details. Okay, we've drawn a
thumbs up from one side. If your character is
facing the other way, you'll need the palm
with the fingers. Start with a thumb, then add the three fingers. Remember, you only need
four fingers in total. Those three fingers are just repeated shapes stacked
on top of each other. The more you practice
drawing them, the easier it will become. Now add a small line
to suggest the palm. Okay, that's a set of two. In some poses, the
arm just hangs down. To simplify this, hands are
often drawn as loose fists. Okay, so draw the hand as
a simple shape like this. Okay, and the arm, fantastic. I If your mascot turns its hand so that
the palm faces you, you will see the three fingers and the thumb arranged
roughly like this. Okay, so go ahead and
draw the glove again. Pay attention that the thumb hides a bit under the fingers. Okay, fantastic. Well done. Let's do another gesture. Peace. We all love peace. First, draw it one way. So it's basically
two bunny ears. Okay. The more you draw, the more you will
notice your drawing loosens up and speeds
up as you continue. Yes. Okay, the glove
is ready. Now the arm. I Okay. One pose is enough here. Later on, you can always mirror this gesture
for the other arm. So you have two times
piece for your mascot. Our final gesture
is a standard one, a kind of hello or serving hand. The whole thing should be fun. So if you stick to the template, it's really easy to get into
the rhythm of this style. And, of course, the
arm is still missing. It's getting easier to draw. Great. Are you ready? Fantastic. Now you have a solid
set of retro hands. In the next lesson, we'll
tackle the final set, the feet. So see you there. I
10. Retro-Kit: Rubber-Hose Feet: Now we reach the finale
of our retro toolbox. I've also prepared
the feet for you to download with those
iconic rubber shoes. With our cheat sheet in place, we can practice just
like we did with the hands and really
dive into the style. An important part of this class is that with every
building block, you slip a little
more into the flow. So place your sheet underneath, just like me and my super
cheap tracing paper, and let's get started. Four different feet will be
enough for us to begin with. First, we draw a character
standing straight towards us. Just like with the arms, you'll see the rubber hose legs. Remember, the
thickness or width of the legs must remain consistent throughout
your character. Fantastic. Now for the shoes, here you'll notice that we are completely skipping the details. They are big and rubbery. They always have
this huge toe cap. All of this allowed a very fluid movement in the animation. For example, when it comes
to the shape of the sole, you don't need to draw
the sole separately. Instead, we extend
our lines downward and then just draw a
parallel across it. And the second one,
just the same. Okay. Super fantastic. Next, we draw a
character facing us with a dynamic free leg as if they are about to
dance or tell a joke. The great thing about
rubber hose legs is that they only
need to be bent. First, we create a small, u shape and fill it in. There are no details at all. So at the bottom, where the shoe starts, you can see how simple
this transition shape is. It's basically a bean, okay? And the sole of these rubber
shoes is super elastic, making it easy to draw. You just need a flat bottom, and then you pull the
line upwards in parallel. Yeah, okay, like this. It's just a sketch. It's okay. For the second leg, use the same thickness
of rubber hose. I Rotate the shoe
slightly outwards. Okay. Yeah, you can see
how easy it already gets. And the parallel line. Cool. Of course, our mascot also
needs a walking pose. Start again with one leg. Okay, yes, it's really
just that simple shape. Now attach the top
of the shoe and draw exactly the same shoe
as in the standing pose. Inprocriate you could
simply copy the shoe and place it on a differently
bend rubber hose leg. You will see different
poses are super easy because you only
til the shape a little. The second shoe is almost done. Okay. Cap the sole, our parallel line, and finished. Okay, we are making
excellent progress. Finally, let's draw a
confident walking pose. If you're already
working in Procreate, it's important to use
separate layers to keep the front and the back
leg apart from each other. Now you see how the rubbery shoe shape can stretch so the
character can walk. So everything stays
nice and flexible. No details. The
dynamic walking motion actually comes from
the second leg where you can see the
underside of the shoe. This is very easy to draw. We start with our
rubber hose leg. And now the shoe, and this
is just simply a bean. So first draw the bean. Then I use the first line to separate the top of the shoe. Cool. And the second line follows the other and
becomes the top of the sole. You can represent the
underside with these lines. Oh, fantastic already. Congratulations. We now have
a full set of retrofet. And let's have a look at
everything we've accomplished. We have those beautiful
shoes and legs, of course. We have our hands as a set. So let's see where
they are, okay? Okay, here. We have
a set of mouth. We have a large set of eyes, and we've already
combined many faces. Oh, fantastic. Now we want to bring
everything together. Now it's your turn. Choose
your favorite vegetable shape and turn it into a funny mascot. But step by step, so
grab your sheet with the shapes and think about which veggie or form
you want to start with. I can't wait to see you
in a moment when we start to sketch. I
11. Procreate Sketching Session: Alright, we are now
making big steps towards the final
creation of our mascot. As you can see, my iPad is
ready and Procreate is open. The first thing you need, of
course, is your character. This time, it probably
won't be the league. I'm going to draw
the two cherries. This will give me the
chance to try out two different faces and test out some fun interactions
between them. For the rough sketches, let's use a sketching brush. I'm still in the
classic library here, but Procreate now has a
new brush library system. I recommend taking
my Skillshare class where I walk you through
the entire navigation, and you will also
learn shortcuts like this, the pinch gesture. So now let's go to the
pencil set for sketching. And I choose Pilion. Pilon is a nice and
rich soft brush. The size of the canvas doesn't
matter much for sketching. We'll import the sketch into a printable canvas later anyway. So let's start sketching. Since I chose cherries, I start with two
loose circles and quickly sketch the stems
and the two leaves. And I roughly mark where
the legs and arms will go. You can see that I've
already got them set to wave right and left. So now I move everything a
little downwards and reduce the opacity so the sketch is
visible but not too strong. Now I need a new layer
for the sketching step. With a little squeeze
on the Apple pencil, I can create a new
layer instantly. Well, as you can see, the
pilon brush looks really rich. The first cherry is drawn. The second one goes
on its own layer. However, we also have a trick. We simply duplicate
the first cherry so they are the same
size and shape. Move it into place and adjust
the position slightly. Now they look nice
and cozy together. So I'm using the masking tool to hide the overlapping parts. I use the masking tool in case I want to go back to the
original shape later. On a new layer, I add the stems, And the piece of branch where
the cherries were picked. There's also room for a leaf, and sometimes it helps
to rotate the canvas slightly to get a better view of how the elements should sit. Okay. But something still doesn't feel quite right.
So let's try again. Practice makes improvement.
Here's another leaf. Ah, yes, I like that one. Then I'll add the leaf veins. Oh, it's good. It's
just a sketch. Let's leave it
like this for now. Okay, pun intended. Now we can decide where
the faces should go. Cherries have volume, right? That means the front
circle curves towards us. Okay, this gives me a small grid to help me locate things. Fantastic. Now, let's grab our retroset sheets with
the faces and the mouth. Hmm. Let's see. Okay. I want to use the laughing
mouth because it's so sweet. Yes, this one, and the cheeky one with the
tongue sticking out. Okay, Mr. Crumpis
watching us, too. Okay? Great. He can have a tiny moment in the
spotlight, as well. It's great how well our little analog Pinterest
world works here. Let's place it next to the iPad. Okay, the first mascot gets the laughing mouth
with a visible tees. Okay, this is the mouth. And let's make him look a bit like someone from a
toothpaste advert. Then we add the cheeks
on the left and right. On a new layer, we work
on the second mascot. This one has a mouth with
a sticking out tongue. And as I told you, I always
find it helpful to draw the tongue first and then
shape the mouth around it. Yeah, it's still something I still need to practice a lot. Okay. Yeah. Okay. Good enough. It's a sketch. And the mouth, fill it in. Perfect. Now we need to clean up
all the distracting lines. Mmm Okay, and add a
little detail again. Fantastic. Next, we
need to add the eyes. But first, let's draw a little
nose on a separate layer. Okay, let's have a look at our prepared retroset
for the eyes. That's what our
retrotolbx is for, right? Perhaps I should make the cherry look
slightly to the side. So let's add the cheeks loosely and use
half fed ice here. Don't forget the pie cut, okay? You can already see how nicely everything
is coming together. Look at this. Now, in Procreate, there's a trick for the
second pair of eyes. Select them. Yes. Then swipe down with three fingers
and tap copy paste. Now you can move them around. But to be honest, I'm not
a big fan of that method. So let's delete that and draw individual eyes instead
for the cherry. Ah, and don't forget
to create a new layer. First, I move the mouth a bit. Okay. Now I add a new
layer for the eyes. Perhaps we should choose
eyes with big cheeks. They look humorous and
exaggerated. This will be fun. To make everything fit, we need to remove the
lower cheek lines. Do you still erase?
Let's erase that. Okay. Good. Now for the pupils, don't forget the pie cut. Yeah. Now we can see it better,
and we fill it in. You can see how juicy
this brush looks. Wonderful. Okay, this
is a lovely sketch. Very fun. And three
little freckles. So cute. Now, let's work on the legs. This part is easy because we're using the downloads
from the resources. Go to Insert Photo and select the PNG from
your photo library. You'll see that it is a PNG, so the background is transparent and you can move it
however you like. But first, let's
duplicate it and move it to the top. Fantastic. Now, select one layer, and then we use
this selection tool to draw a loose circle around
the legs we want to use. Swipe down with three fingers
and seleg cut and paste, and the feet will be
on their own layer. You can now see where they
fit best under your mascot. Okay, let's see. Good. Now we remove anything that overlaps the
body of the mascot. That's good for
now. Not perfect, but we will make
it perfect later. Huh. Okay. For the
second mascot, I want to use walking legs. So let's take this layer, take the selection tool, and a loose circle again, swipe down with three fingers, so like cut and paste. Once the legs are
on their own layer, you can mirror them and
make your masket walk. Make sure both legs are the same thickness as is
typical for rubber hose, arms and legs to
be the same width. You can also tilt
them and remove any unwanted parts
using the masking tool. Okay, these little
adjustments make them unique and super cute. Okay. Yeah, I like
this. That looks great. Okay, next step,
we need the arms. Again, we'll take the easy route and use the PNG
from the downloads. Go to Insert Photo and place it. Let's use the piece gesture. Okay, so select the arm
loosely with a selection tool, then cut and paste. And now the arm is on its own layer and we
can duplicate it. I position the first, here and erase
everything I don't need. Okay, now go for the second arm, and I mirror it horizontally
and bring it into position. Again, we can erase all the parts that extend
into the mascot's body. Wonderful. They look fantastic. These two mascots are now
finished in sketch form. My next step is to take
my favorite brush, refine everything, and
draw clean outlines. You can do that now,
too, on your own, or jup straight into the next lesson where you
can draw along with me.
12. Procreate Final Line Art: Our final lesson, we are using a wonderful
little trick, tap, copy canvas, then go back to the gallery and
create a new canvas. I'll print ready
canvas with 3,000 by 3,000 pixels and 300 DPI. Now simply tap edit, then paste, and walla our entire sketch, all layers merged into
one single layer. You can now lower the opacity of the sketch layer so it sits
nicely in the background. You can choose your line
brush completely freely. My brush isn't in the
Procreate library, but it's still in my
old classic library, and it's called the Cutie Brush, a Procreate calligraphy
brush that I've tweaked quite a bit and is my
absolutely go to brush. You can download it for
free in the resources. So let's get started. Please remember that
each line element must be on a separate layer. This makes it much
easier to fix things. Not every line needs to be
perfect the first time. You can always erase and refine. Take your time. So I also try to adjust
the brush size of the eraser to get
really clean lines. On the next layer, I draw the next part of
the second cherry. Okay, I find it
easier when I draw the lines like this
and connect them. And I really recommend to take your time with
a fine tuning. And now let's move
on to the stem. If you hold the apple pencil a little longer on the canvas, it automatically
corrects the line and creates a nice curve. Okay, this could sit a
bit more to the right. So I used the selection tool. Great. Okay. Hmm. Yes, like that. Fantastic. Again, I used a masking tool to hide the overlap without
deleting anything. Good. Let's create a new layer
and start with the face. First, we draw the cute cheeks with a nice confident curve. And then I draw the first pupil. Again, very important
the pie cut. Now we can make it really easy. We just use color drop, and we have a perfect fill. The second eye, start
with the cheek, so the eye sits nicely on top. So a simple curve, then the eye, the pie cut, color
drop, and perfect. So here's the little nose, and now the mouth. Okay, it connects
nicely to the cheek. With a bit of swing, we draw the lower mouth shape at the contour of the
teeth and the tongue. Okay, color drop helps again. Fantastic. Okay, that
looks really good. Now, let's continue
with the second fruit. We start with the mouth, and here I begin with
the tongue again. That helps me to find the right placement and
size without being too shy. Now, you can tell me
how easy it is for you, right, in your project. Okay, it can peek over
the cherry a bit, and then comes the mouth and with the color drop,
we fill everything. New layer, and now the eyes. Generous cheeks and
a big eye shape. Remember, big pupils
and a pie cut. Okay, let's duplicate it. And Okay, now she's
cross eyed. Okay. If you like that, keep it. I prefer drawing the eye again because it
looks more natural. So the cheek first.
Then the eyelid curve. Now the pupil Now,
let's draw the nose. Okay, very nice. And I switched to
the masking layer we created earlier and masked a part that overlapped
with the tongue. Okay, let's have a look
at the little stem. The little stem piece
where the leaf grows out. It still looks a bit odd. Okay, but well, it's a comic, after all, New layer, and I can draw the leaf. Super. Okay, let's see if we have
enough veins. All right. I'm already adding the
areas where the leaf will cast a shadow and also
underneath the stem. For the leg, we repeat
the same trick as before. Go to the wrench icon, tap Add, then insert photo and
load the retrolex. I want the leg separately again. So I take the selection
tool, use copy paste. And now I have the first pair, the second, three fingers down, duplicate, and now they are
also on their own layer. Good. Delete or hide
the original layer. And now we can place the legs
in their right position. Okay, for now, these
are just placeholders, and you will see in the
next lesson that I also redrew the legs and the
arms in my final artwork. For both sets of legs, I used a masking tool to remove the overlapping
rubber hose parts without messing
with the original. A Okay, fantastic. What is missing? Of course, the arms. Again, go to Insert Photo and choose the PNG
we download it. With the selection tool, select the hand with
a piece fingers, insert it and duplicate it. Okay, and I flip one of the
duplicated arms horizontally. Okay? Let's place it and erase. Yeah, a little tilt. Fantastic. Now the second arm position
it and erase the overlaps. In your final version, please work very accurate. Okay. I know we cheated a
little, but of course, you can also draw the arms yourself using your
sketch beside. Use the time now for
refinements. I'll do the same. And then I'll see
you in a moment for a quick recap where you
will see what I changed, what you learned, and
what will come next.
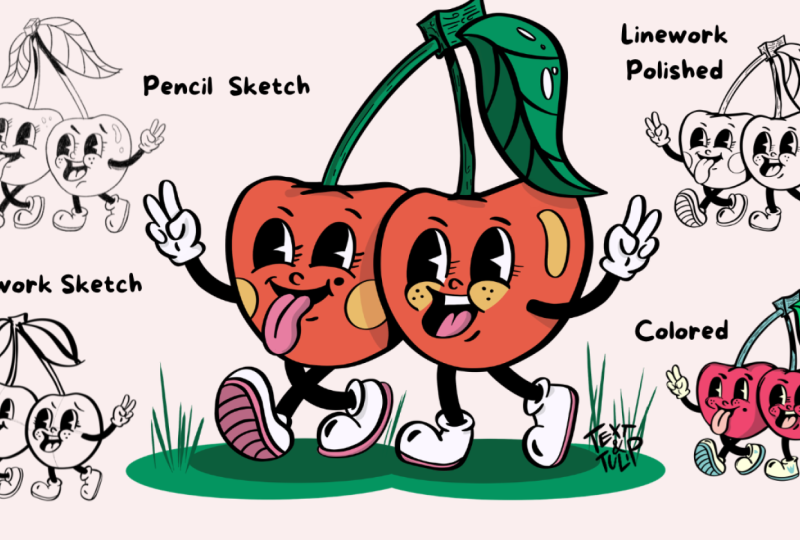
13. Wrap Up and Upload Project: Congratulations. You made it. And here you can see my
mascot final version. So let's take a look at the path I had to take to make
them look like this. In the recap, you can see all the individual steps
of the sketching process. And in the top
left, you'll notice my sketch as a reference
popping up from time to time. See, it's not just one drawing. It's always repetition. You really have to start over
again and try things out. Now, the faces come in, and here you can also see
the overlap of the tongue. What a tough part.
Very important. I adjusted the
thickness of the legs, so both cherries
have equal limbs. Let's also take a
look at the gallery. Feel free to color
your masket as well. This is my first try. Here is my final linework. And very funny, the sketch
we drew together in class. I admit the dynamic of this pace in particular is much
more successful. It looks really funny. I'm really excited to see
what your mascot looks like, especially which fruit
or vegetable you chose. Now, congratulations again. We have definitely come a
long way in this class. Have sketched basic shapes
with plenty of analog practice and explored how to express emotions through
facial expressions. You created a retro
reference set made of eyes, mouth, and the iconic
rubber-hose limbs. You created a mascot sketch
in Procreate and even went one step further by
turning it into a clean, black and white linework piece. And if you want, you can
now take your character into Procreate Dreams
and animate it, but no matter how far
along you are right now, upload your progress
as a project. You can expand it anytime, and I'm incredibly excited
to give you feedback. And your fellow students would love to see
what you created too. So see you all and your
mascots in the creative feed. That is just the starting
point of our mascot marathon, and there will be
more classes where we draw a brand new
mascot each time. So hit follow, so you
don't miss any training. Sharpen your pencil once more. I can't wait to see
you there. Choose.
 Ulrike Text&Tulip, Digital Art in Procreate