Transcripts
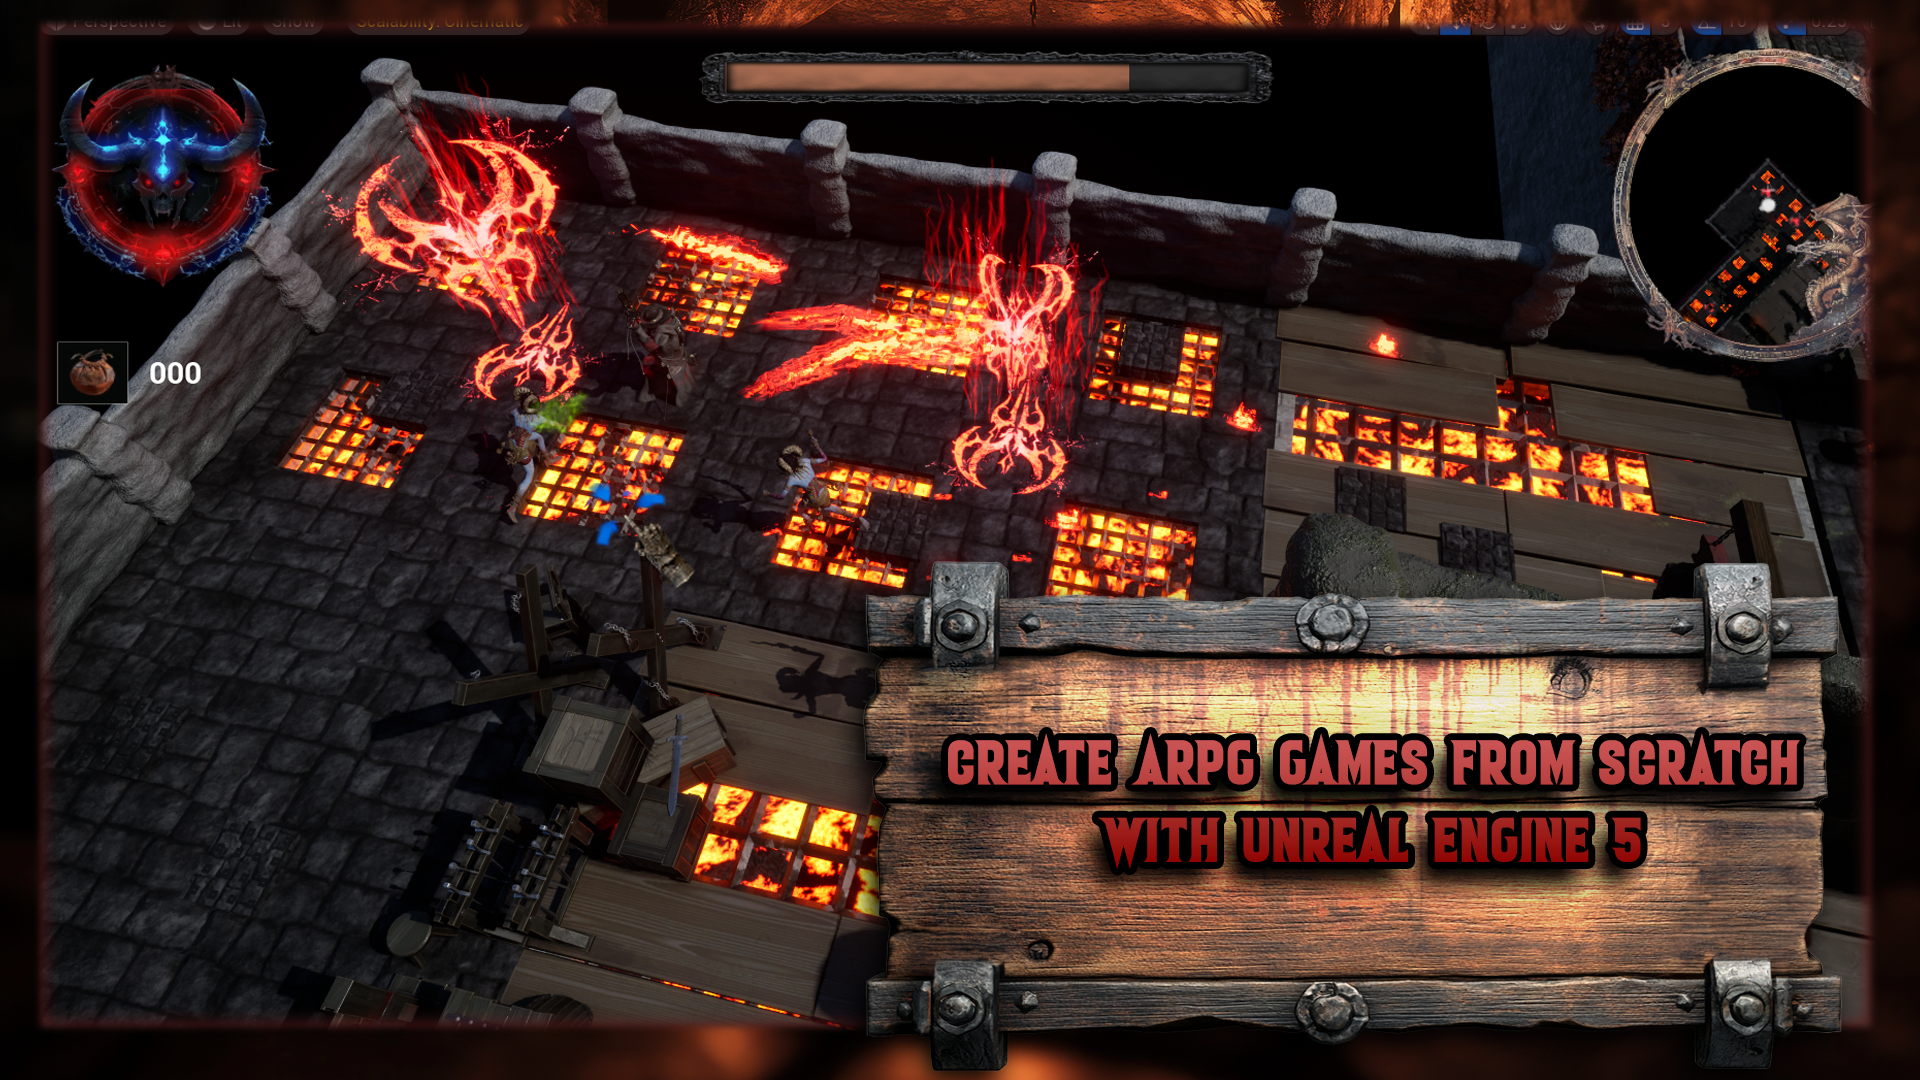
1. Game Design Workshop: UE5 Procedural Dungeon ARPG Creation: Have you ever wanted to
create your own dungeon, like the legendary Diablo, complete with relentless
enemies and epiclude, using the power of
unrealizing five. Well, now you can welcome
to game design workshop, realizing five, procedural
Dungeon, actional si creation. For your dream game
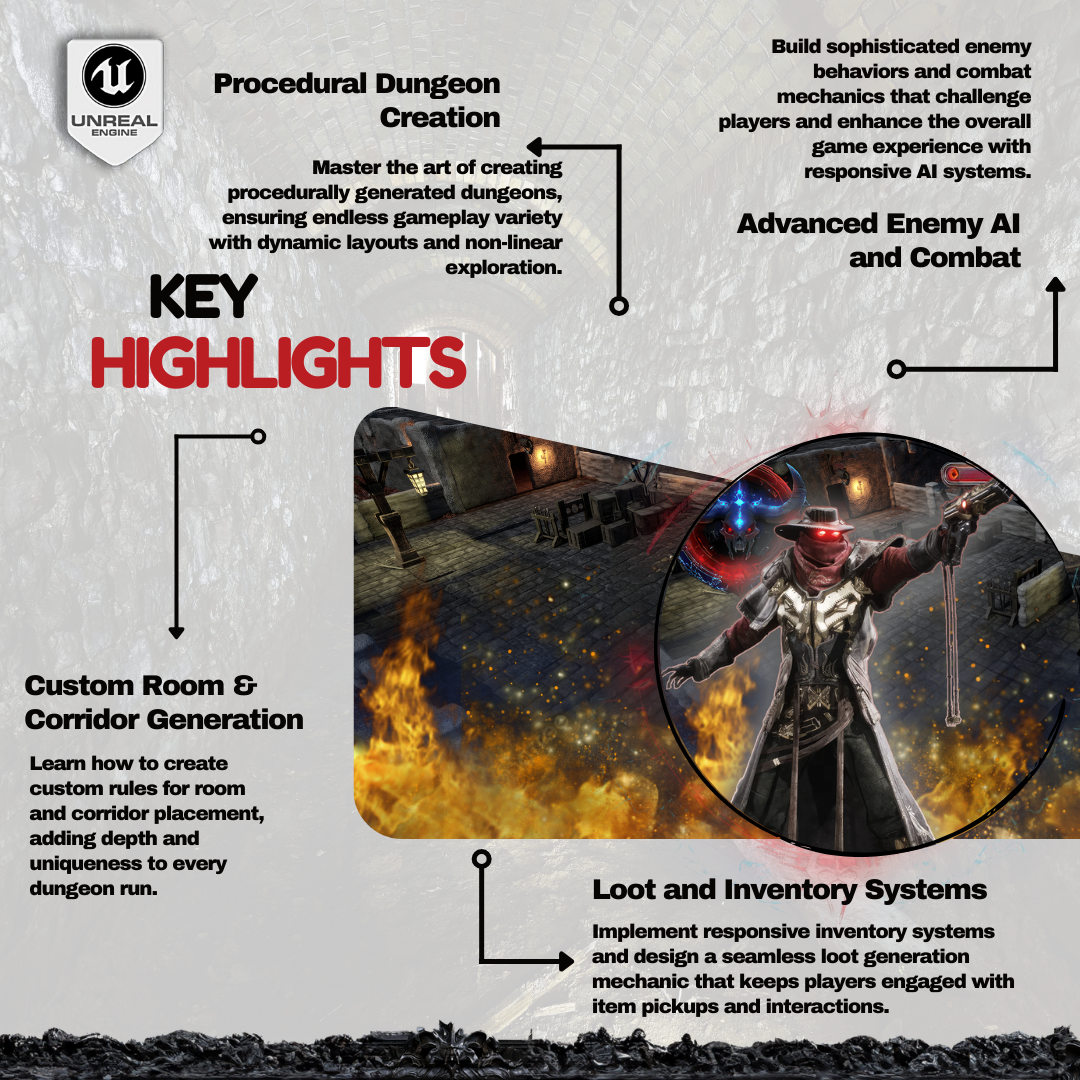
can become a reality. In this course, you learn how to design a fully
functional action LPG using advanced blueprints from dynamic tangent
generation to custom AI, interactive chest, and
inventory systems. You have everything you need to bring your vision to light. Hi, I'm Marcos, and I
have teamed up with dudo to bring this
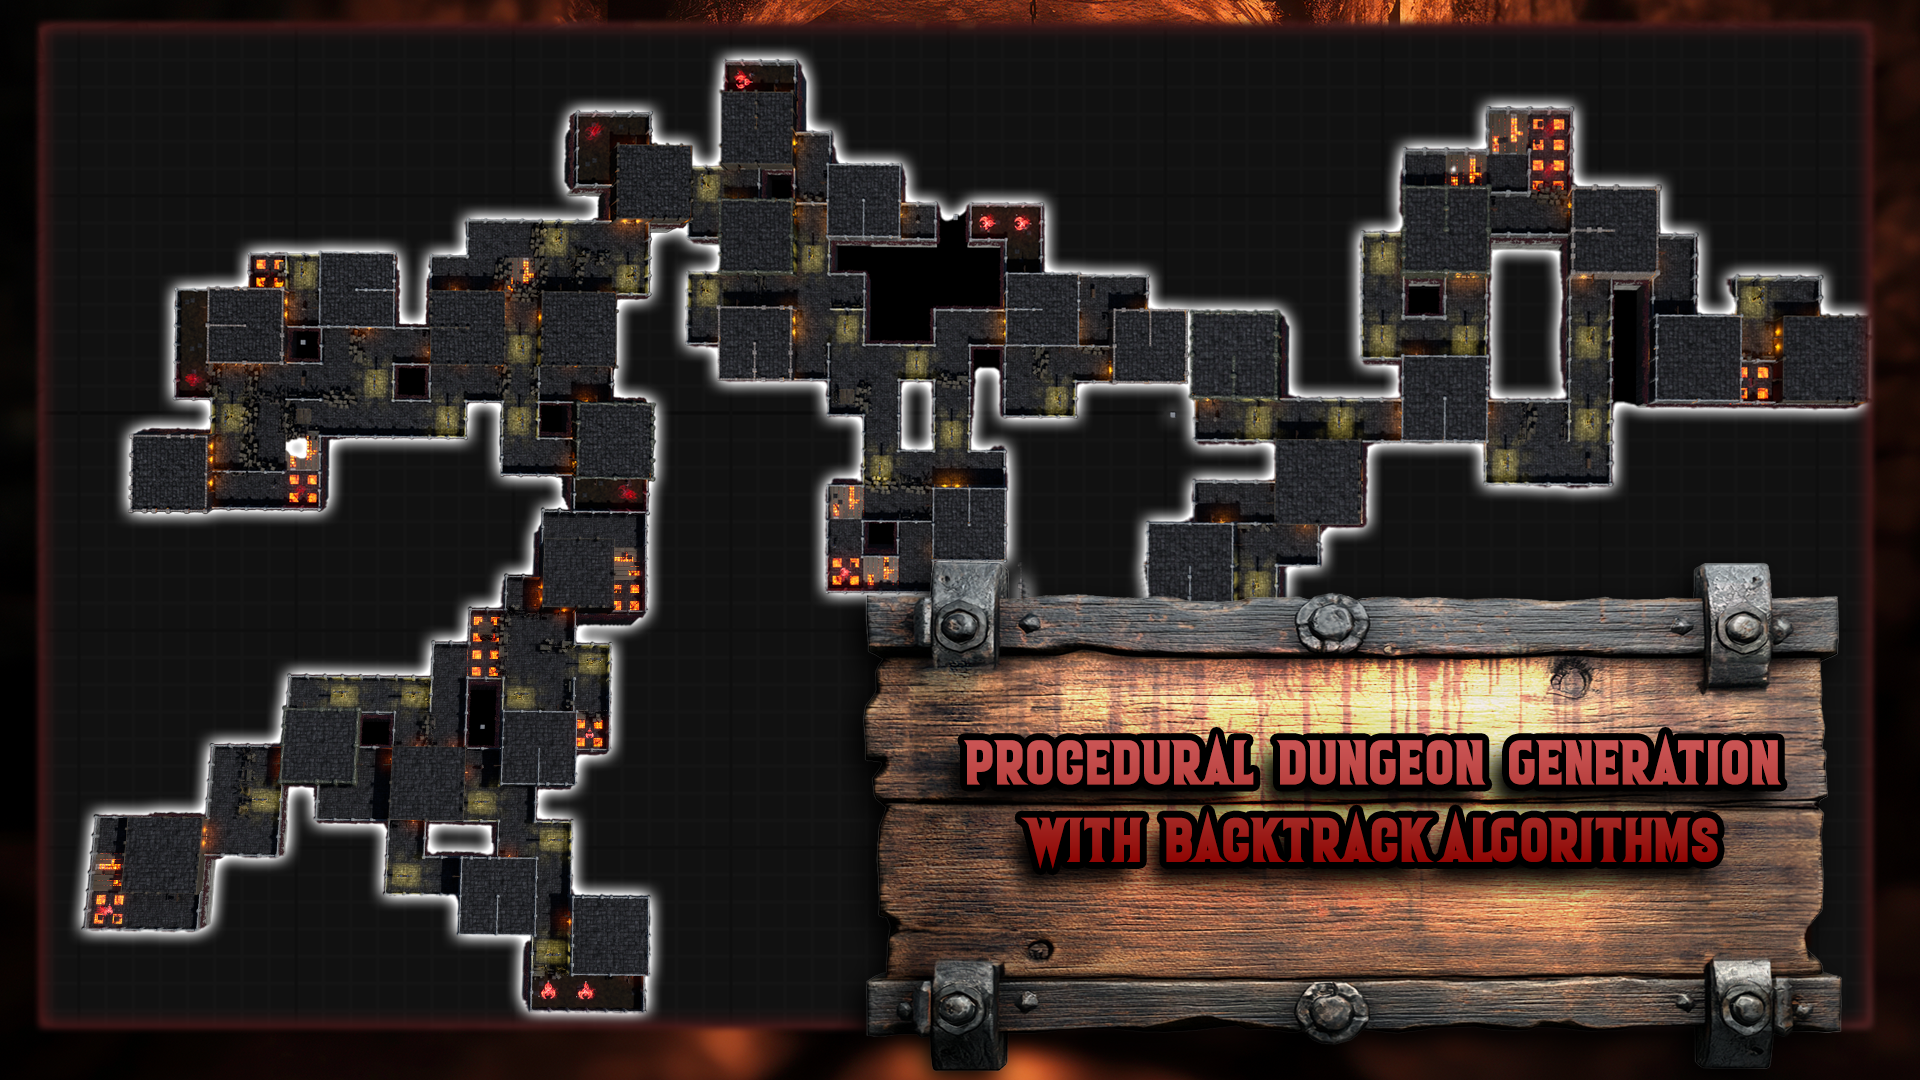
exciting course. Our goal is to create a system that dynamically
generate levels, complete with custom walls,
props, and lighting, while adding gameplay
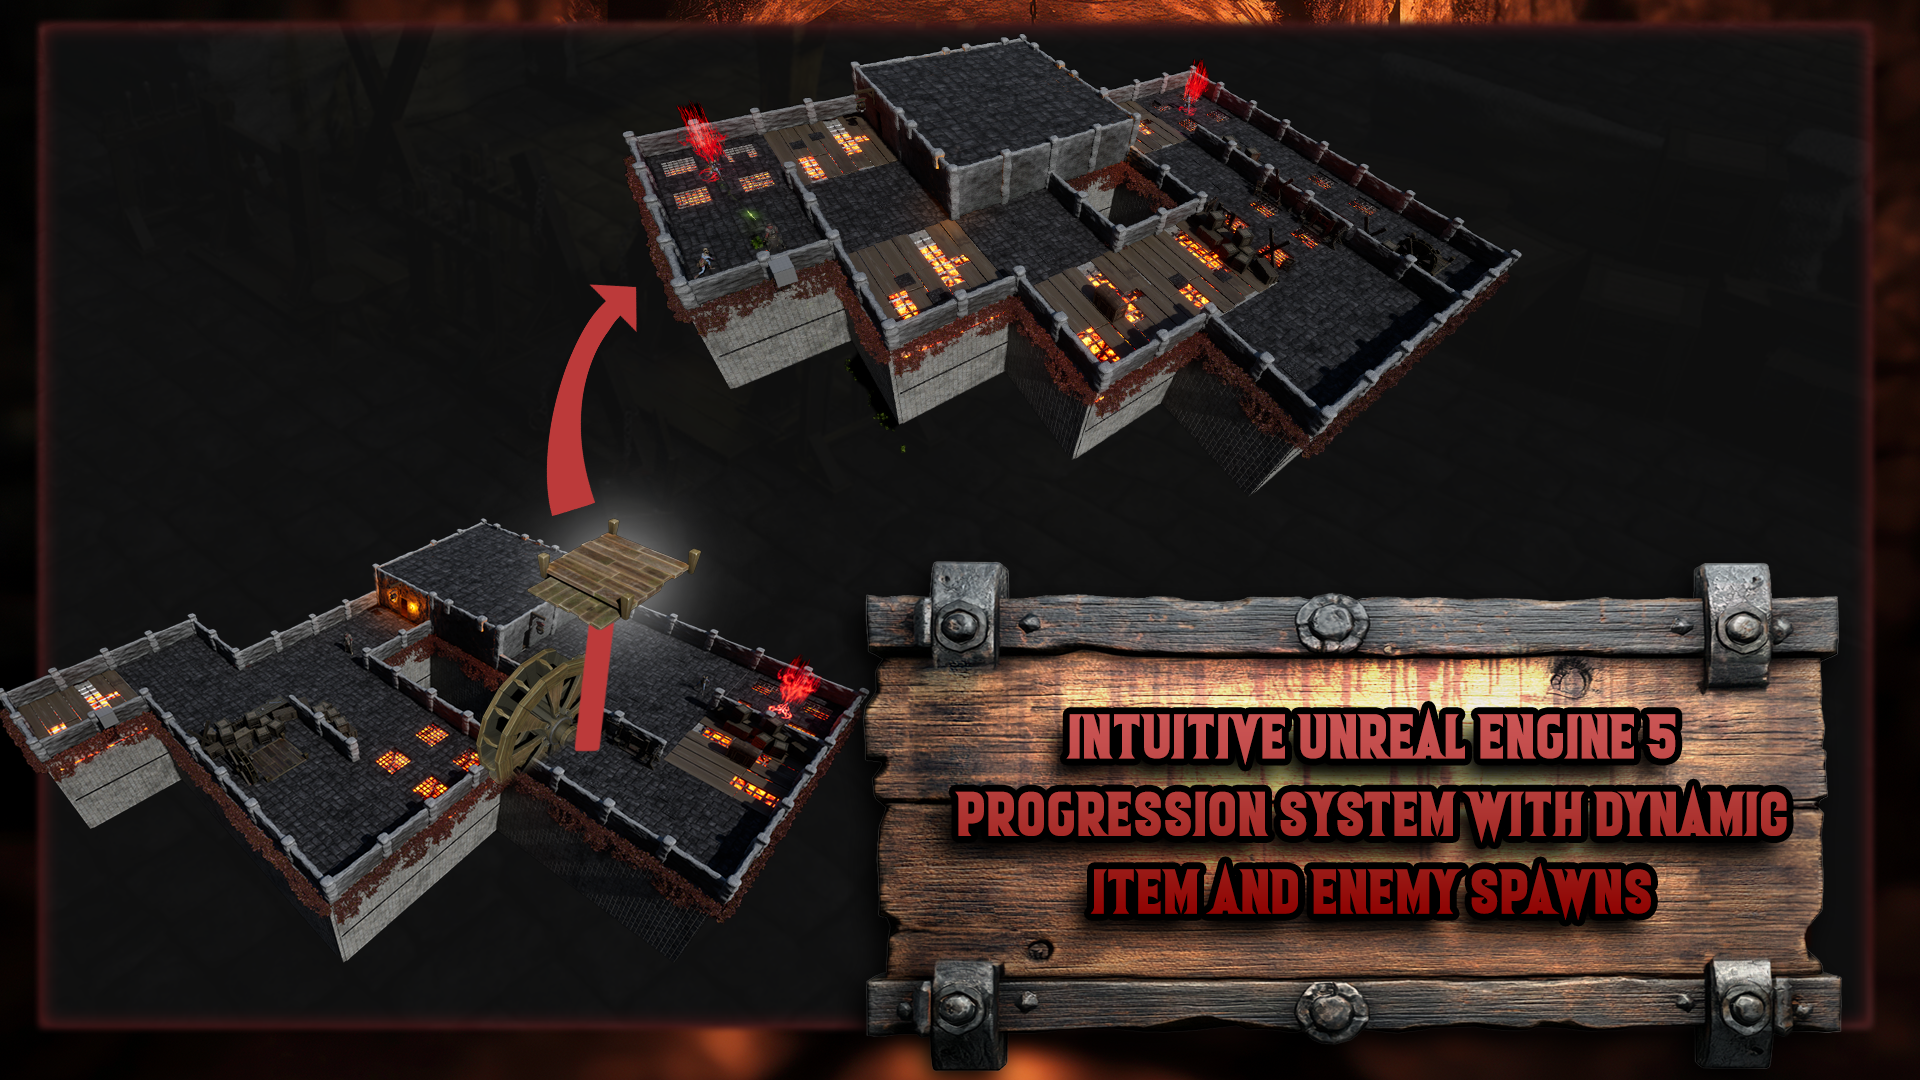
functionality to bring your game warm to life. We will develop a level
generator that uses a custom backtrack algorithm to create the structure
of the dangon. This will lay the foundation
for our procedural levels, ensuring that its playthrough
feels fresh and unique. Next, we'll build rooms and divide the level into
various categories. This will allow us to
apply different textures, materials, and props, to enhance the visual
variety of the dangon. We will add light props that
automatically spawn within the dungeon to help add ambient to the level as
it's being generated. One of the more
exciting features we will cover is the
elevator mechanic, which allows for endless level as players advance
the elevator will spawn a new generator to create the next level ensuring
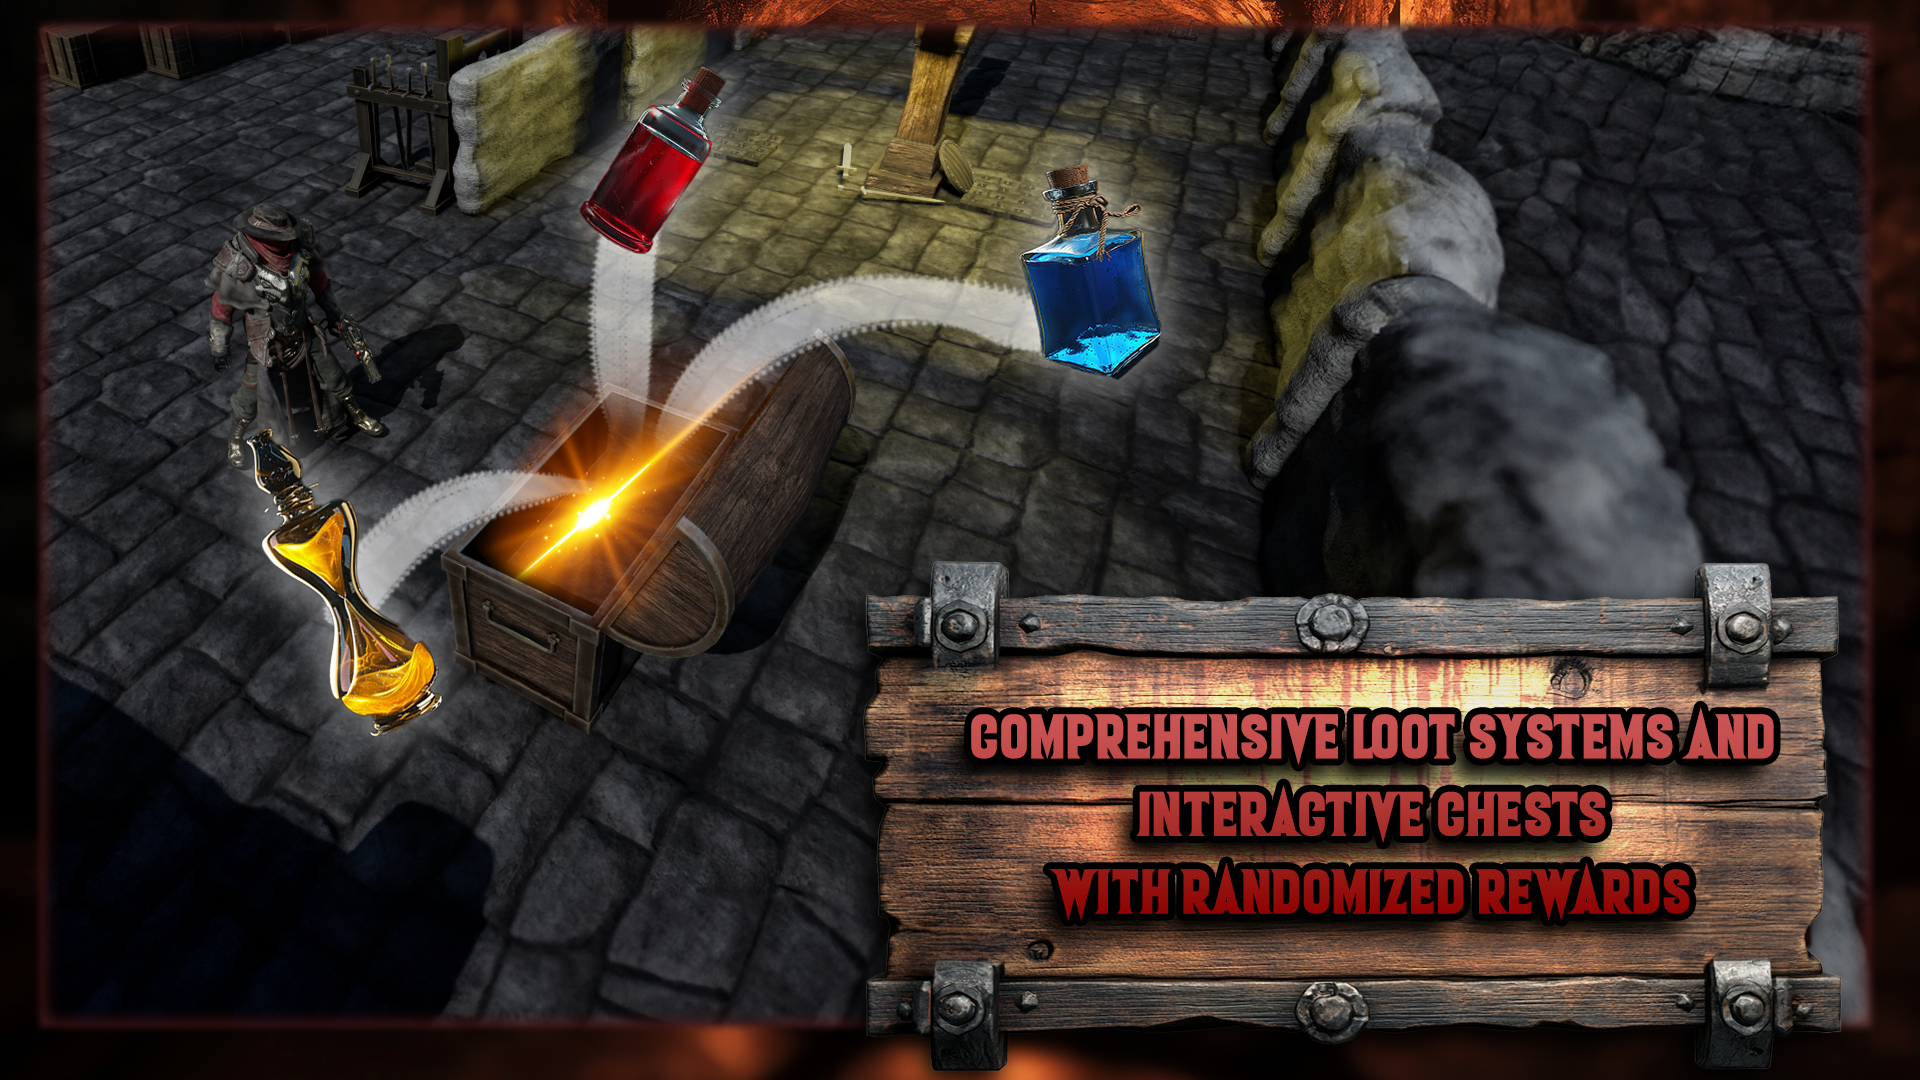
infinite exploration. We will also add drafts, chests, and a quest chest to unlock the elevator for progression
to the next floor. To make the environment
feel more alive, we will introduce
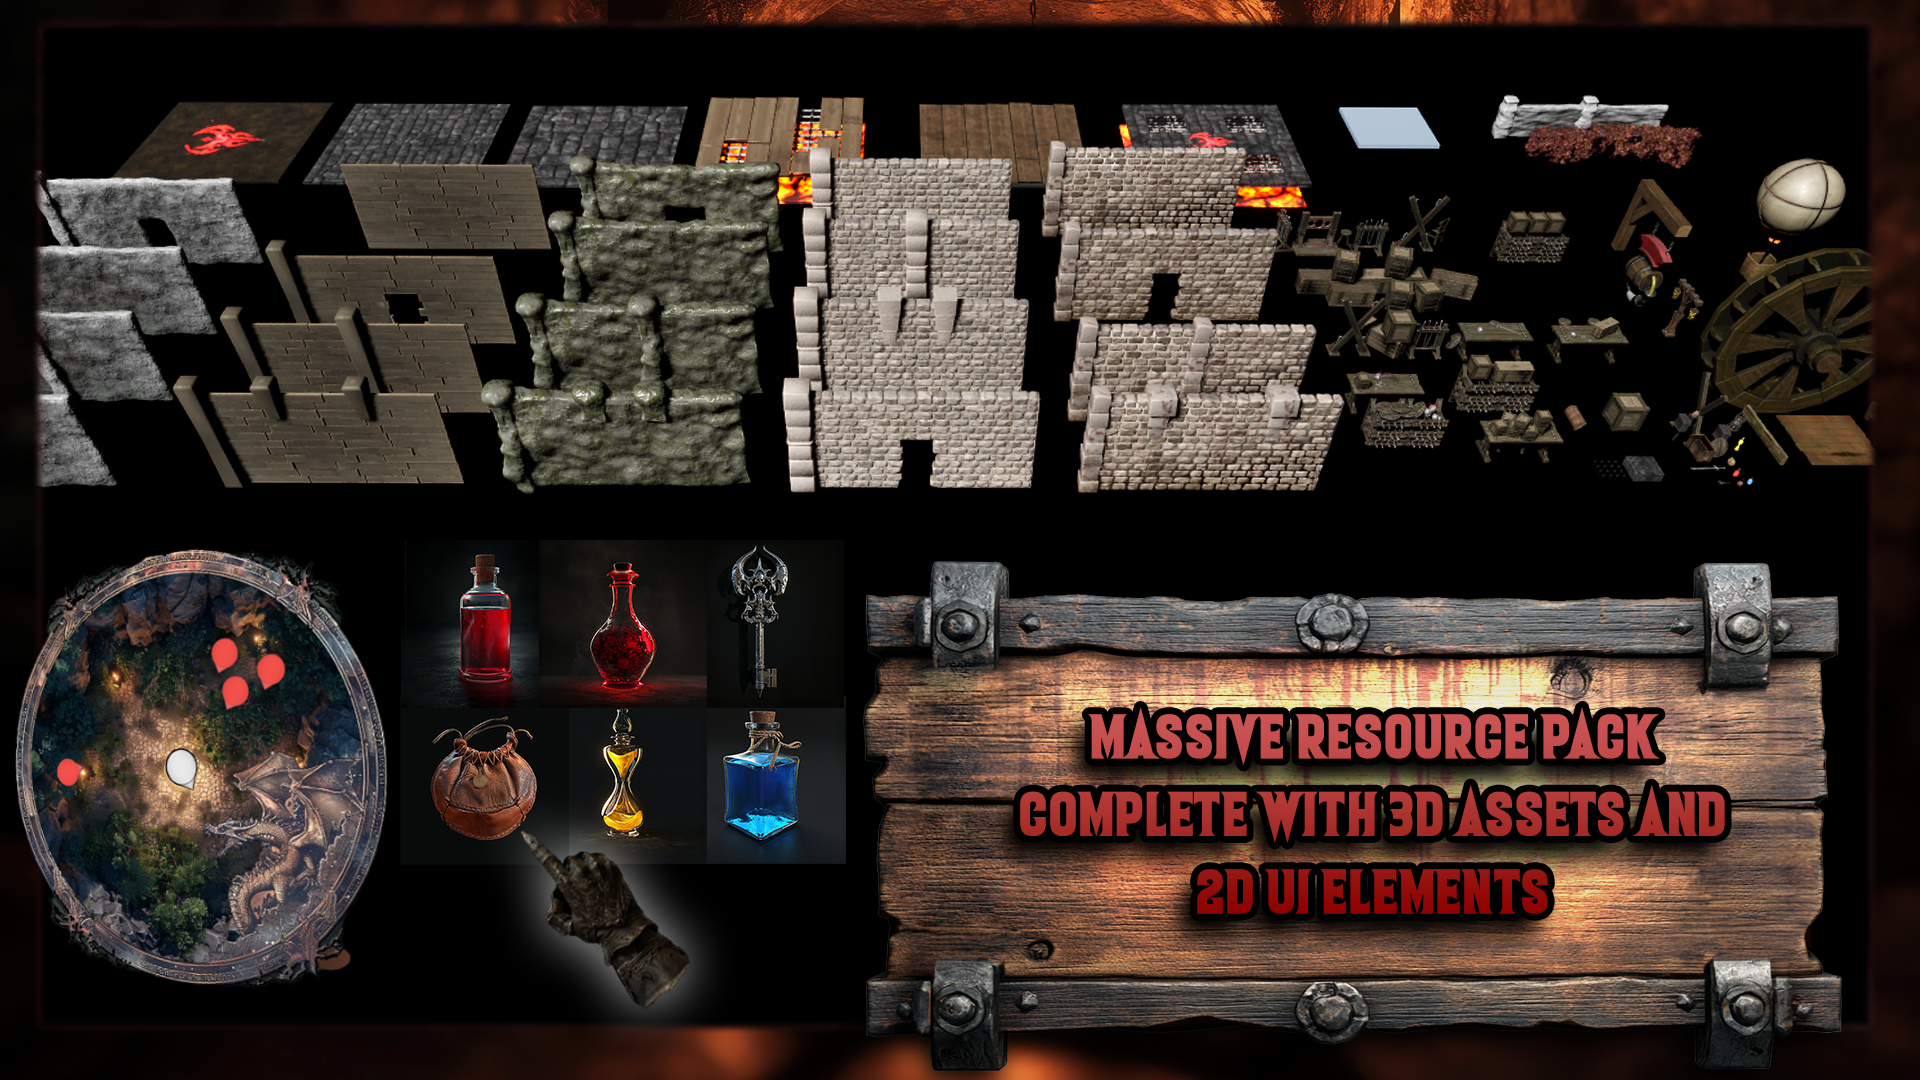
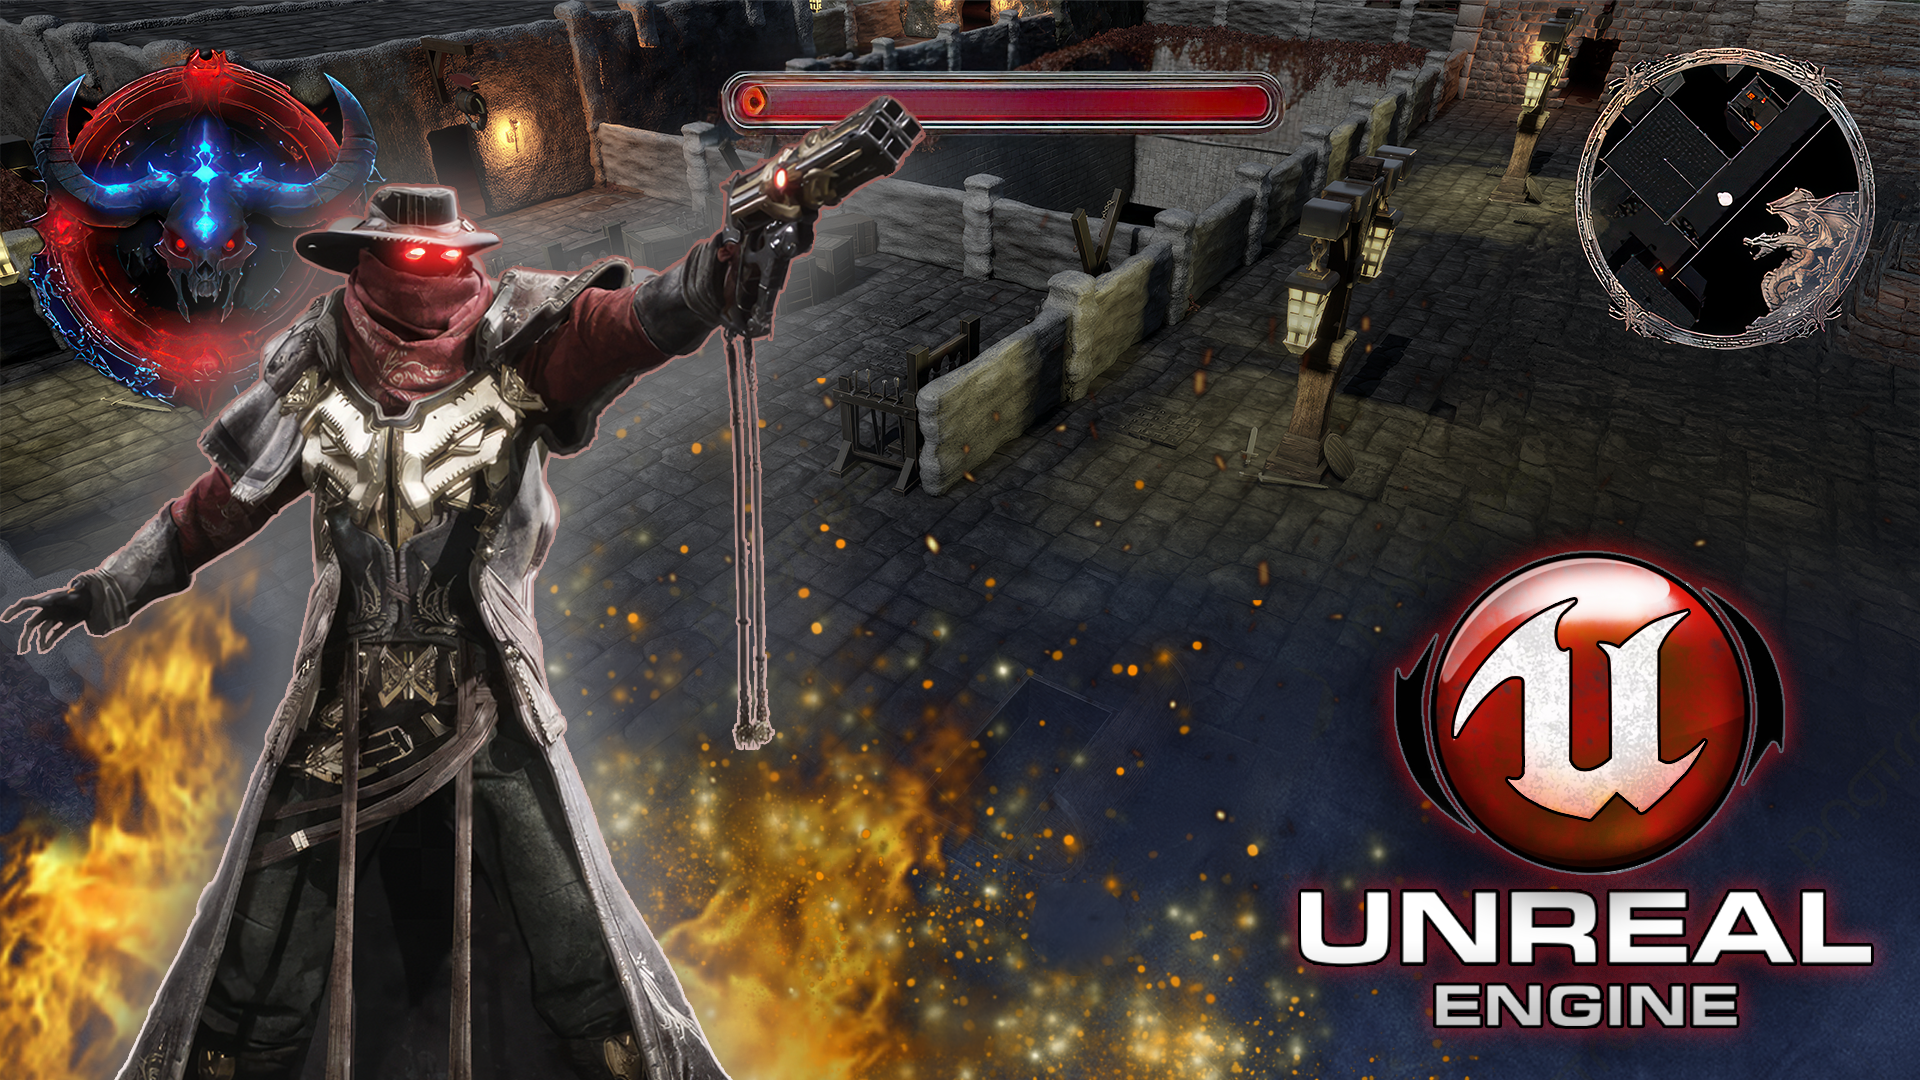
physic assets or dynamic interactions with props and objects in the game world. Moving on the UI design, we will implement
a three D minima to help players
navigate the dungeon. Additionally, we will build a basic UI system
to display health, and inventory system, and
various items like speed boost, both health and potions, all malas through data tables. For combat, we will create a character with two
primary abilities, a may attack that knock backs
the enemies and objects, and a attack to deal
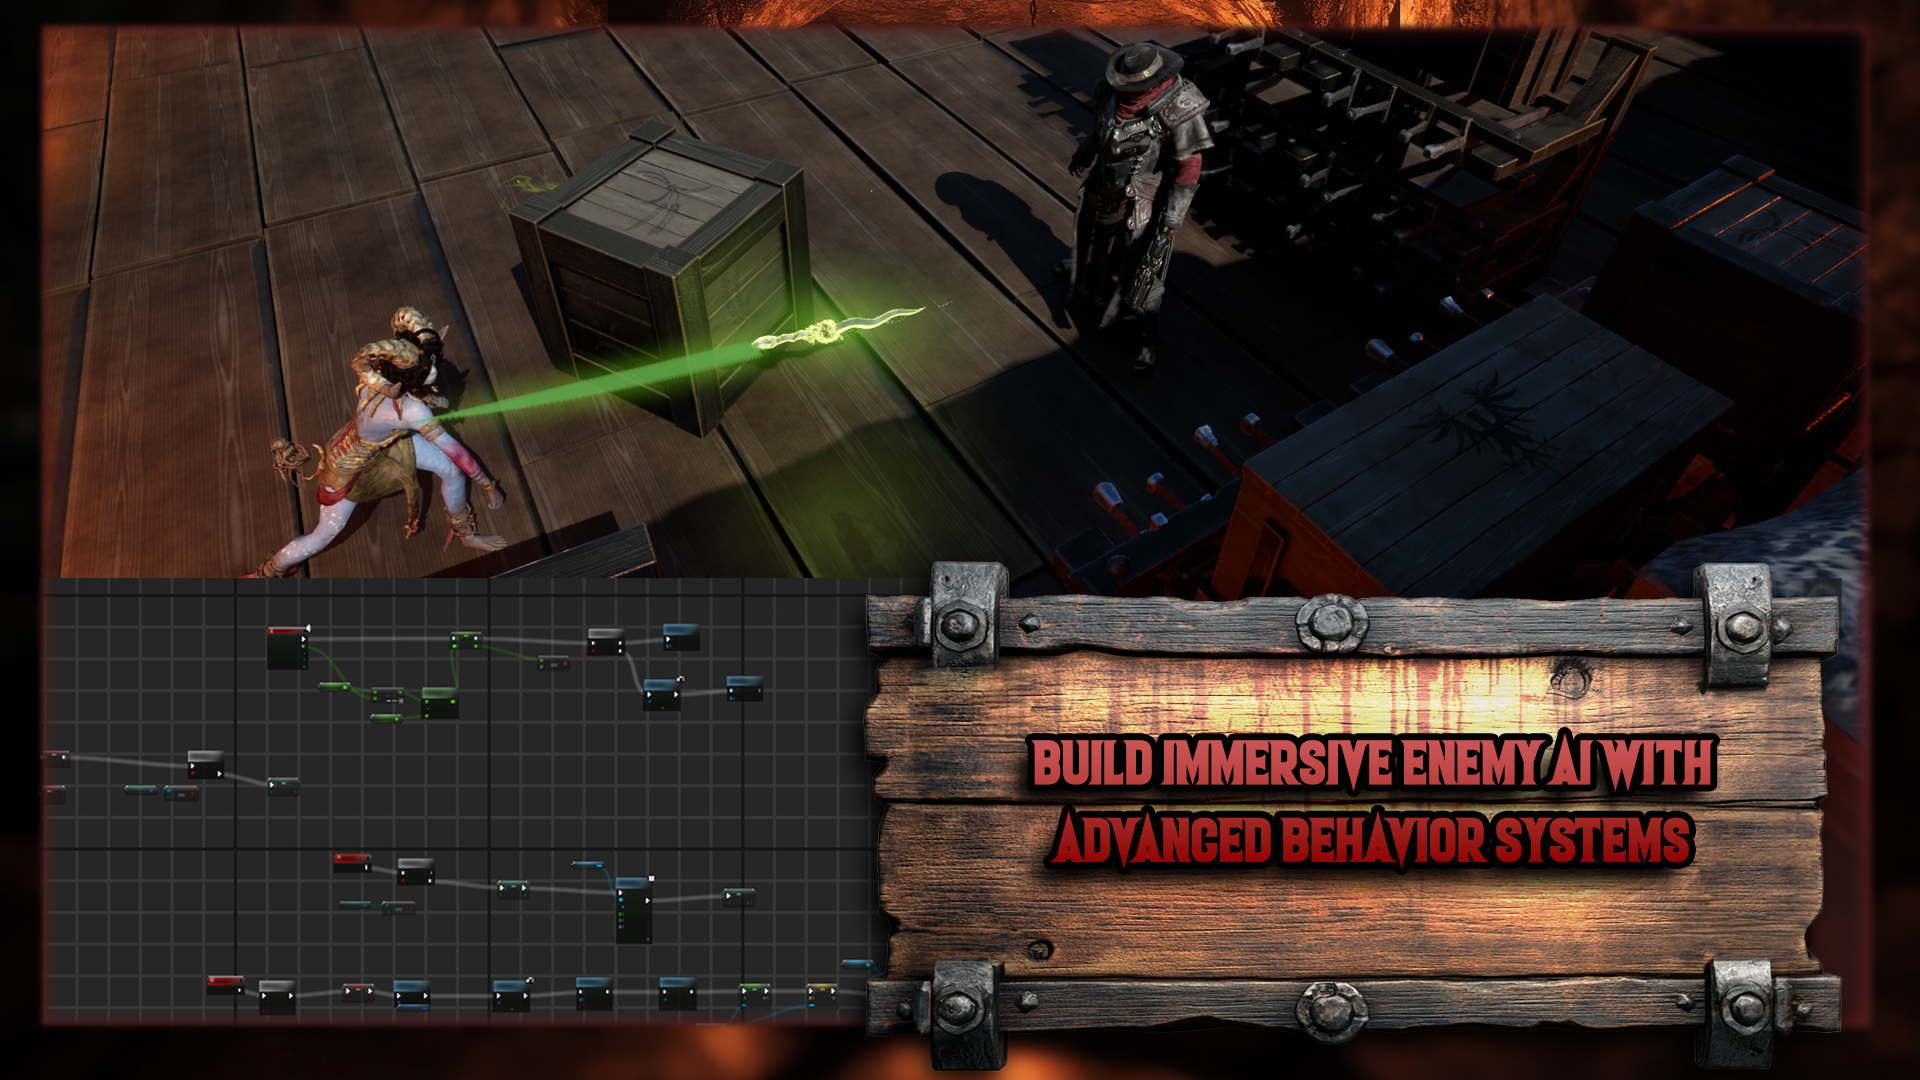
dam as from a distance. We will also be implementing
an enemy AI system, that enemies will be patrolling, shooting at the
player when in range, and repositioning themselves to maintain a tactical advantage. Wo further enhance
the difficulty. We will design an enemy building that shoots
at the player. AI enemies will guard
this structure, and when it's destroyed, AI will either panic or
aggressively attack the player, adding a strategic
element to the dungeon. In this course,
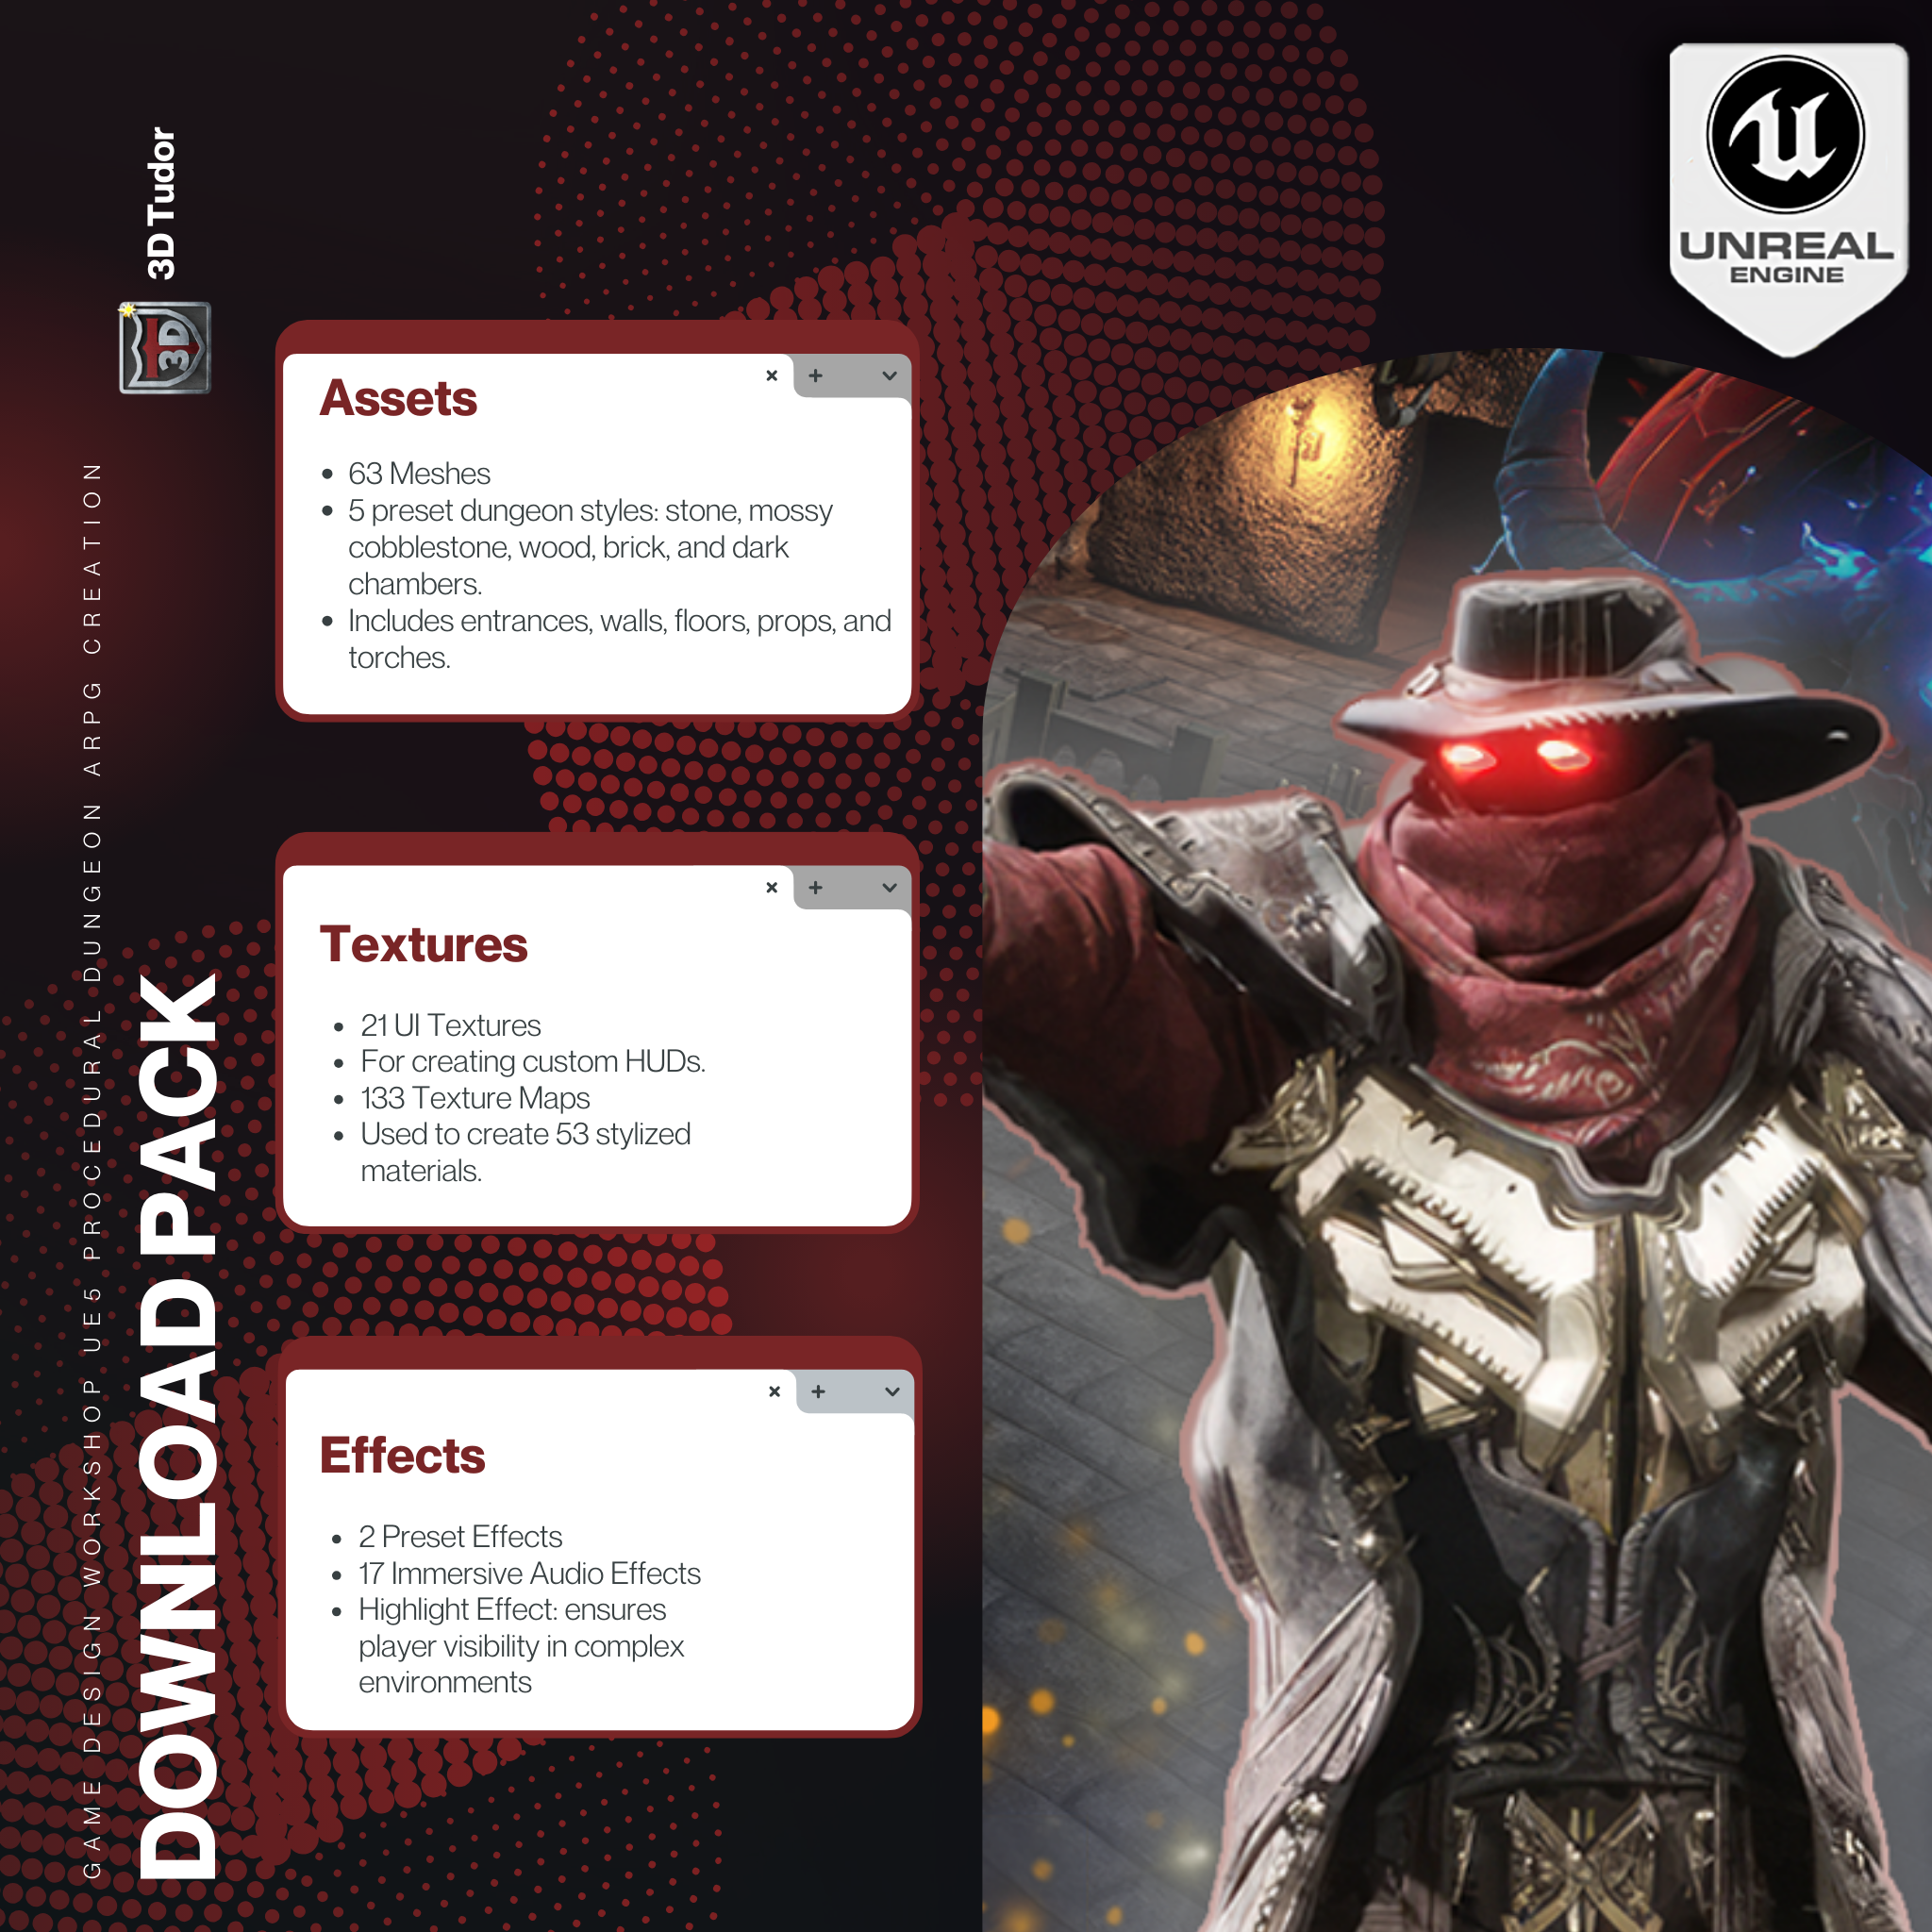
you'll gain access to a comprehensive resource pack that will elevate
your game design. It includes 21
custom UI textures, 133 tracture maps for asset texturing to create 53 materials
and material instances. The pack features
63% tile messes across five precept
dungeon styles, stone, Mossy cobblestone, wood, brick, and a darker theme chamber, helping you to integrate them seamlessly
into your project. These codes will guide you
step by step in building a fully functional dungeon
system using al engine five. Let's dive in and start creating our own procedurally
generated world.
2. Game Essentials: Hello, and welcome to
Game Design Workshop and Real Engine five procedural Dungeon action RPG
creation course. Let's explain what all
this course is about. I'm going to demonstrate,
first of all, my awesome drawing skills
in paint to do this, and we're going to be doing
this often during the course. Now, what we will be creating
is a main menu basically. That will go to be
generating a maze. But the way it's
going to be working, we're going to discuss
it a little bit further in more detail. But for now it's
going to create like snake paths that at some
point, they will end. They will not be
able to create more, so it will try to
choose another way and create another snake path
that will end to now go, and then more and more. We're going to be doing
this from a starting point, and we're going to
be going towards any direction on
a fictional grid. If that makes sense.
Now, after this, we're going to create
our own character, which will have a mall attack. Let's do a punch here. My ML attack, and
a shooting attack. Of course, the coarcor we
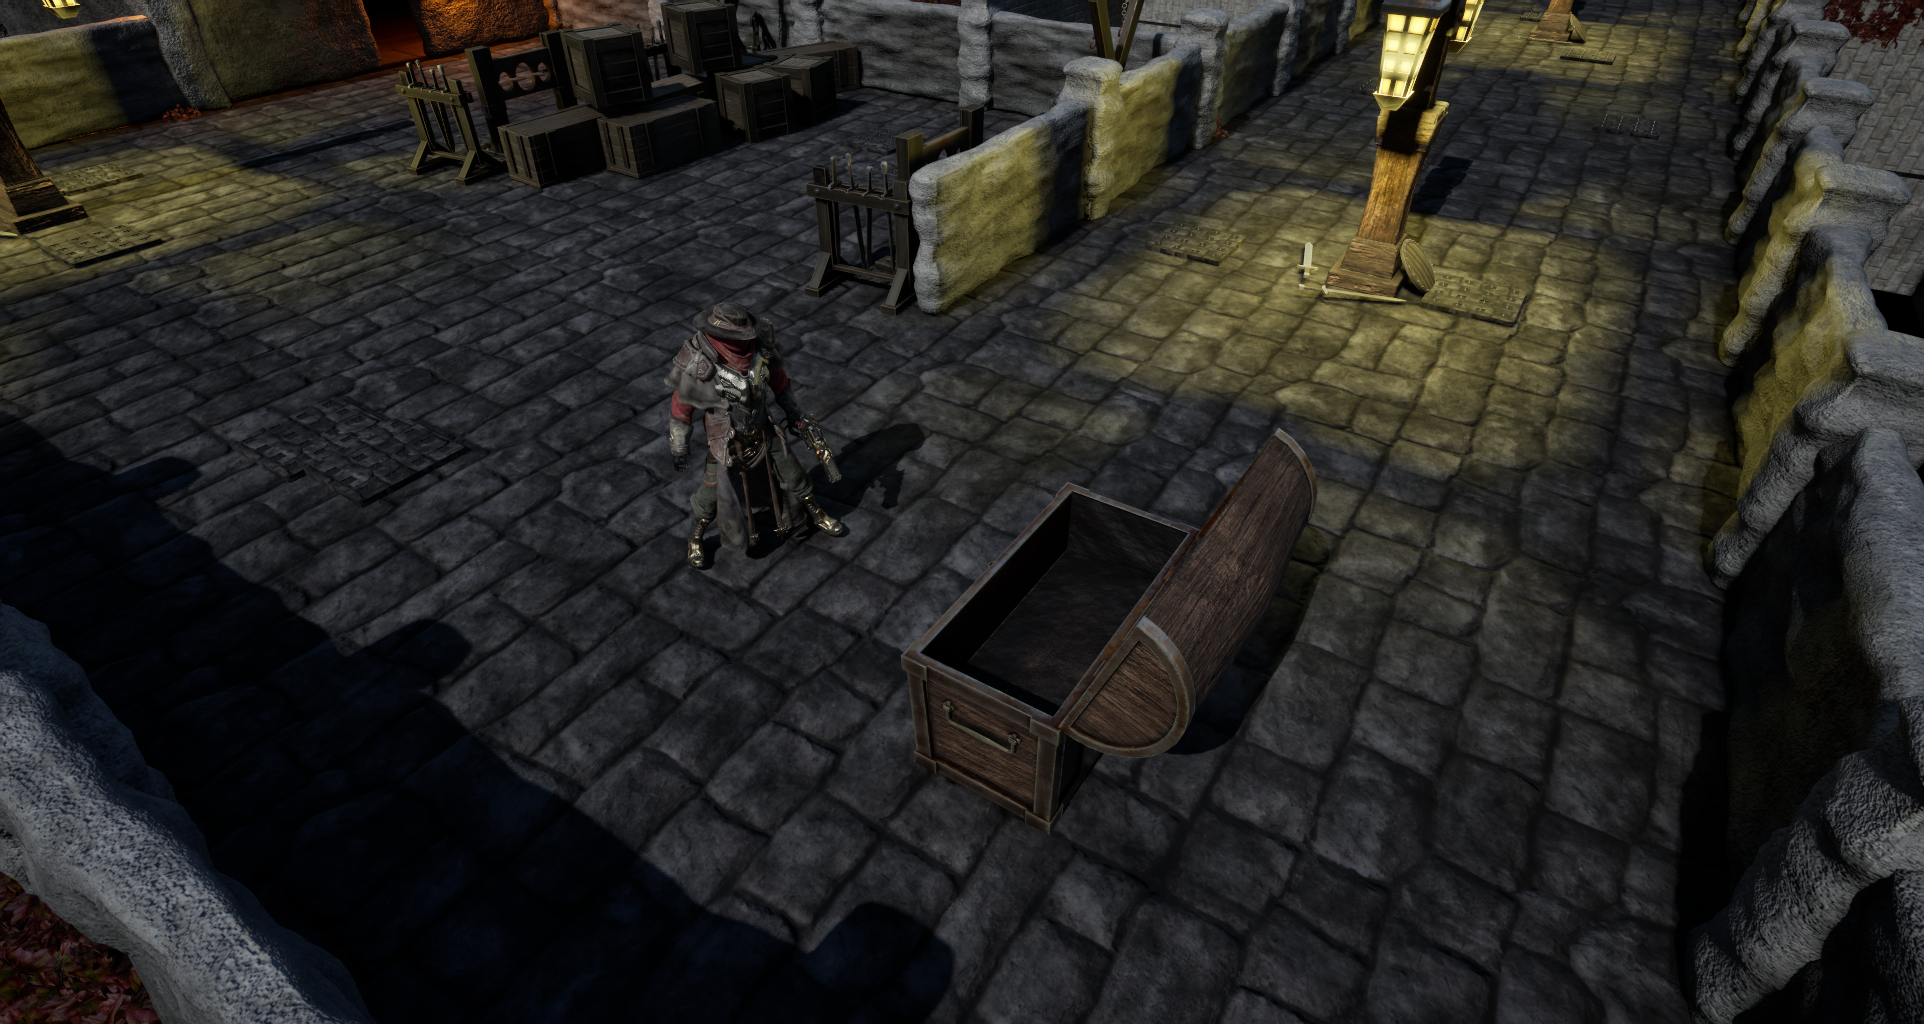
will be able to move in all directions, that's given. And also, we're going to
have a small inventory, like, for example, if
this is our screen, we're going to have an
inventory popping e here, our character will be able
to pick up some items by clicking on them or open some chests that
will drop items. Yeah, this is an awesome chess. As I told you, awesome
drawing skills. Yeah. And lastly, what we're going to do is
create an AI character. Let's put two horns on
this character that will have a range attack. It won't be a gun, it will
be something like a dagger. And we will also put on that we do on the maze
creation, basically. We're going to create
something like a tower that shoots at you when you are in range,
something like that. And basically, that would be. The AI will be guarding the
tower and will be on patrol. When the tower gets destroyed, it will run around the
maze on panic mode. And when you are in
the range of AI, it will shoot you, and when you are not in the
range, but they are agro. They will try to find
a spot to shoot at. Basically a very simple AI. We're going to be
using navigation and AI trees to
demonstrate them. But to be honest, this scale of AI and the
way we have done it will be procedural because our maze
something I didn't add. The maze when we reach the end, let's say
this is the end. We will go upwards
with an elevator and create another maze. Not smaller, bigger
than the previous one. Smaller wouldn't make any sense. But yeah, that would be. We're going to be
creating another maze. And since this is infinite, and the way we're doing it, we're going to use
a navigation volume that is going to
engulf our mazes, which doesn't make it unlimited because this does have a limit. But we're going to
be using this to demonstrate navigation
pattern AI thinks, this wouldn't be optimal. This would be for our game. It will create some
framelg, but it's fine. I think this is a good topping
point for explanations. Is there an artwork, a form of art, as you can see. We're going to continue on
the next one. Good bye. Let's begin with
creating a new level to hostile game because this level is being filled with
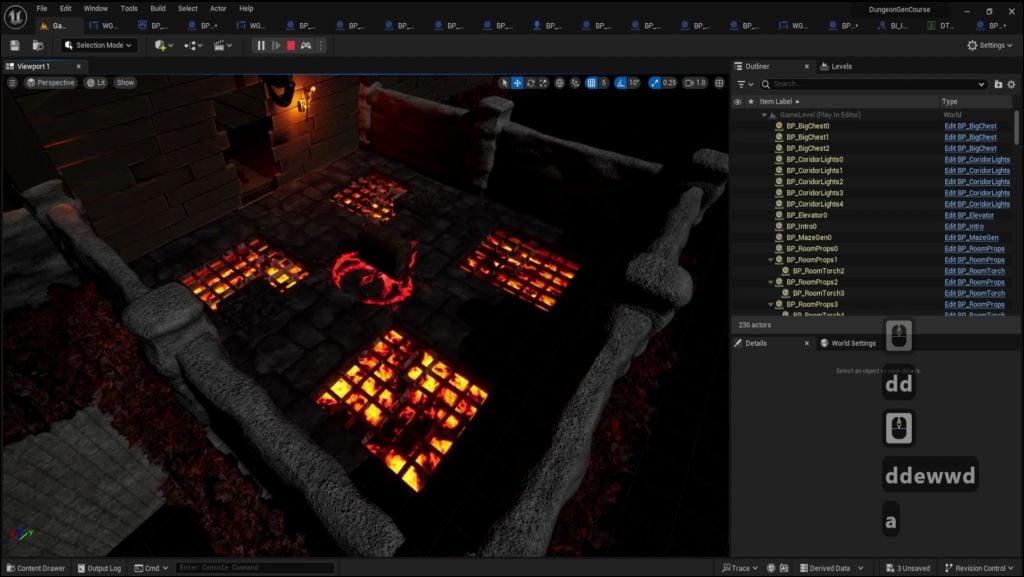
our preview assets. Now, if you are new
a few explanations, we can find the assets
that we have populated the world over here
in the outliner box. If I select any
asset in the world, it will redirect me to that
asset in the outliner. In the outliner, we can see what is inside we have placed
inside our world. L et's go create a new level. Let's go to folder maps and
right click and select level. This will create
the new environment for us that will be empty. I'm going to call it game
Level. Going to press Enter. Now, you can see that there is a small asterisk
next to its icon. This asterisk means that
this asset is not saved. We can also see it
if I change folder, for example, I forgot that
I haven't saved this asset. We can see down here that
it says one unsaved asset. We fix this, let's
press on this icon, and it will pop the
safe content menu and I'm going to save the asset. Quick shortcut would
be control saved, and it's the shortcut
for saving everything. As we can see file, Dave all. Go back to content browser, back to maps, and
let's open our level. Now, we can see that this level is empty
now in the outliner. There is nothing inside it. I I wanted to bring
something inside, but I'm not going to
use our acts right now. I'm just going to go to
this button over here and press Let's add the
directional lighting, so we can things. We can see nothing because
there is nothing to see. I'm going to also add a
shape and select a tube. Now we can see that there
is lighting and the tube. We can also see it in our
viewport. Mix the camera. And to those who have no
knowledge of unreal engine, how I did that was I pressed
right click and I moved with WA and D around, holding right click down. U and A move the
camera up and down, and the mouse rotates
like a game basically. Bat are more technical. As we can see when
I selected the cube or the lighting, the
directional light. We can see the panel
details here changed. This is details for
anything we have selected. Next to it, there is another
tab called world settings. If you don't have this
tab, you can find it in window wd settings. It might appear anywhere, but you can dock it in the
viewport wherever you like. Inside the word settings, we can find a lot of
information about the specific rules of our level. Some specific rules set
it in wall settings. We won't be bothered with
everything right now, but we're going to check
the game mood rules, which are the rules, let's say, the most important information. It's one of the first
thing that when we press play is being loaded in the
predetermined behavior. And what I mean by
predetermined behavior? If we press play, You can see the outliner is being filled
with many more things. These are necessary
things to run the game. Right now, we have the
cube and lighting, and by default, we can control with the mouse and we
can move and hover. To change all this behavior, we need to change the settings. There are various
ways of changing this behavior, and for us, we're going to be exploiting how to change it
through the game mode. Now, to achieve that, we're going to be
using a template and a lot of our programming. So we're going to go to
content drawer again and select Add and add
feature or content pack. This is a way to add to your
projects these content pack, the templates that Areal offers, if you haven't done in
the project creation. You can add the Blueprint one, the Seplus plus one, or
the starter content pack. We're going to go to Blueprint
and select the top down. I'm going to press
other project. It will be instantaneous for me. It might not be for you. I have reloaded this
information because I have downloaded them already
in other projects. Now, when it's done downloading, it will open the content
browser in a new window, and we can close
the previous one. I'm going to make
this full screen. And let's see the
new things added. It added the characters folder, which has the money kins
for the animations. I think it's a Many and Qin, and some level
prototyping tools, and a cursor folder for
the top down click. The top down folder itself, which contains a map that
requires all this to work. And inside the
blueprints folder, we can see the three
classes that we are actually going
to be using a lot. I've been using the
word classes a lot, and for those who are
new to programming, this might be confusing. For now, you can
consider classes also as templates
of programs, like To be more specific plates for creating objects
in our world, and everything in our
world is an object. For example, we have three specific blueprint
classes over here. We have the character class, and we have the controller
class and the game od class. Each of them is re programmed
with a specific behavior, and that makes it a class. And in our case right now, we are using the game old
class, which is responsible. I'm going to close
this window over here, which is responsible, as we can see in
the world settings, for the class pond, for the controller, for
the hud, for many things. Now, we're going to go
to gamed override and select the top down gamed. As you can see, it
already changed the information here
closer to what we want. If I press play, we can see the top down character
falling endlessly. If I remove the
default pawn class and use none and press play, the character disappeared
and the camera stayed where we
originally placed it. What this means through the predetermined behavior
of the game mode, when we have a
default class pawn, it will always spawning on
begin play when we press play. More information
about the game mode is that it runs per level. This means that it's
contained inside. It contains rules
for this level, but we can use it in many
levels because we might want have the same
rules or many levels. We can have as many game
modes as we want in our game, and we can always
override them over here. I use the word override because we can set
a default gay mode, was project settings when
we set for gay mode. We can find that we can put a default one that all
our maps will be using. Oh, Mode is a little bit
of complicated class. It is also responsible
for multiplayer things, and, I can contain a
lot of special rules. The ability that it has
to restart on each level. Let me give you an
example in paint, make it more visually pain. Oh. If this is our level, when we load it, we start
with the game mode. Why I say we start
with the game mode? Because the game mode runs
before the level opens. How we can clearly see this. The level itself, it has an other self contained
specific blueprint, called the level blueprint. We can demonstrate this
going to the project, and going to this
wind over here, and open level blueprint. Now, to those who are new, this is the event graph
part of the blueprint. We will explain a little
bit later more things. What I'm going to do
is this begin play. They level blueprint. This means encoding that
when the level begins, print and string on the console that has
these letters inside it. I'm going to copy this string. I'm going to go to
content browser. Go go to down blueprints, mode. If it opens like
this, it usually happens because there
is no code inside it, so it shows us the default
variables of the blueprint. The default tub. I'm
going to compile, go to open fu full blueprint. I'm going to right click
on the event graph and type given way. I'm going to paste.
Prints. I'm going to correct this A Gain mold. Blueprint. Compile, and
I'm going to press play. As you can see, it printed first a game mode and above
it, the level blueprint. This means that the order that this runs is s first
the game mode, which has all the information. We talked about, the
player controller, the player phone, everything, and then it run a
contained level blueprint. Some questions might pop to some people's head on why are we using this and why are
we not using that? In encoding, there is
something a reference. This means I want
to do something, or something else to
do something for me. In generally, if I
want to communicate something with
something else like the game I communicate
with a level blueprints. I have to have a reference. There is a reference. So, I have to have a
reference for you. One of the principles, one of the principles, actually, but one of the ways we
are thinking when we are programming something is
about the references. How can I get a
reference to this and how I get a
reference to that? There is a lot of rules. I'm not going to get
into too much detail, but that's one of the ways that we are
choosing what to use. There is a lot more
complicated decisions and rules that have to be
taken to consideration. But, for example, one thing that is important is the
reference for a beginner, that is something that they
have to get accustomed to. Oh, why are we using the game mode also and how
are we going to use it? Is we're going to
demonstrate the ability of the game mode to restart itself. This means that when we
are loading the level, we want to fire specific
things happening. And when we reload the level, forget about them and reload
them from the beginning. In a more specific example, what we're going
to be using is for the game mode to
create the main menu. Let's create a new slide. What we're going to be making
is a program that says, Dow me the main menu, the player presses, or start, and then start the game, continue with whatever we
have done, or quit the game. But when the game has ended, we want to reload this. What we're going to be
doing is we're going to be opening the level again of here. So when we open the label again, we want to show the
main menu again. But we're going to be using
the game mode to host that. I think this is
enough for theory. For this one, I'll
see you in the next with more action. Goodbye.
3. Creating Main Menu: Hello, and welcome to
Game Design workshop and real Engine five procedural Dungeon action PZ
creation calls. In the previous lesson,
we started with creating our map in
the folder maps. And then we continued with adding the template for
top down characters, and we changed the game
mode in our wall settings. We also added a cube and
a directional light, and we demonstrated the
ability, well, not the ability, but the order of operations
that game mode runs first, and then the game level runs when we are
initiating our level. Now, I'm going to delete
this strings, and also, I'm going to delete the cube
and the direction light, and I'm going to
save everything. In this lesson, we're going
to create the main menu for the widget for actually our game by using a widget blueprint. Now I'm going to go to Content, right click, create a new
folder and name it U. Inside this folder, I'm
going to right click. User interface, and
select widget blueprint. Now, what is a widget blueprint? A widget blueprint is a way that real offers us to
create user interfaces. I'm going to select the
common class user widget. There has plenty
of other classes for very specific things to do. What we need is a user widget. I'm going to call this WG. Main menu. And I'm
going to open it. Before we begin programming
the widget and the main menu. Let's talk a bit about widgets
for those who are new. First of all, we can notice that this graph looks a little
bit different than the graphs that we saw on the game mode blueprint or
the game level blueprint. The reason is because we are on the designer
tab of the widget. There is also a
graph tub that looks more familiar to
the other graphs. The reason is that
in the graph tub, we are doing the
programming of the widget, whereas the designer tub, we are doing the visual
part of the widget. O widget looks on the screen. To do that, we are using
items from our palette, and we are setting them
how we want them to look. Oh. One more thing, when we are adding something
on the widget visual side, we can see it over
here in the hierarchy. Now, let's begin with
adding a canvas. I'm going to dragon
drop it here, or I could just drag and drop it here and it will be the same. Description of what
the Cvass does. You can be found
when hovering above it and see it Opta description. But basically,
it's an element to tell where our widgets are
in space on our screen. You can have smaller
cavasse than your screen. You can have canvasses
inside cavasses, not recommended to
have too many Cvasse. Oh, let's demonstrate this. We'll bring a button here. Place it inside the canvas. I can tell it where in the canvas I want it
to be or how big. And depending on
Canvas is actually full screen canvas or
partially that cavas, for example, we can
have a canvas in a smaller widget in a
corner or something. It tells it where to be
based on this convas. Now, if I had a
second button bog, that would complicate things. Let's say, for example, I want this button exactly
below this button, and it's hard to
eyeball these things. But there are other
tools, like for example, a vertical box or
a horizontal box, right now, we're going
to need a vertical box. And inside this vertical box, I deleted the other buttons. Maybe need them. I'm going to bring
a vertical box again and do everything. Now I can drag these ptons
inside this vertical box. And how these buttons are
aligned vertically in this box. Now the size though is
determined by the box. There's many ways to change
size and everything. We got to go through a whole
UI experience right now. What we're going to
do is actually place the box where we want and size
it up how much we want it. To do this and I keep the same place in any resolution because that's the e here. We can always offset it
based on this anchor. What is an anchor?
It tells the widget where to be placed
based on this anchor, but based on this point. So if I change the
resolution right now, it tries to keep that place, but when I go to
unorthodox resolutions, it kind of loses it. That can be fixed by
placing the anchor around, and it will try also to keep it. Again, eyeballing all these
things is not very easy, but there are other
ways to do it. For example, if I select
the vertical box, and go to the detailed panel. When I select everything, again, we have a detailed panel, as we had on the blueprint, the game out blueprint,
as we have on the level, when we select something,
and we go to each details. Oh, When I select the
vertical box details panel, I can see there is an anchor. Let's start with
the anchor option. Oh. You can see there are
some preset anchor positions. What we're going to
choose is the middle one. We want to anchor it in
the middle of the screen. But as you saw, this didn't move our widget in the
middle of the screen. Try to state where it was. The reason is
because it is being offset by these
values over here, position x and position y. If I elect this thing that
that's the value to default, we're going to go to its
original pivot point. Now, what is a pivot point? It means that this box
it's er, for example, not center, but its
point that we are manipulating its size
begins in this corner. Now, if I set specific
amount of size, like the 500 by 300, maybe 300 maybe 200. Well, we want some long
buttons for example. We can say that the position x offset would be minus to 50. And the position
y would be -100. Now it's positioned in the mid because we offset
it by these values. But what if I wanted to
change the size of my widget? Now, this isn't anymore,
I have to do math again. To not do all these
actions again. We could say that the position is not
offset, first of all, recomen the alignment,
which is a value 0-1, it can actually go to
negative and above one. The alignment is 0.5 and 0.5. And this brings the
widget to its center. Align my widget on
a percentage on a value 0-1 to its
x axis and y axis. If I change the size, you're going to see it
always stays in the middle. Let's bring this
back to 100100200. Oh, compile and save. Now, we have our widget on
the middle of our screen. But our buttons are not exactly very good looking
the way they are. The one below the other, even in a minimal menu, this
shouldn't happen. What we're going to do we're
going to select both of the buttons, ose the option. And in the vertical alignment, we're going to
choose the option, enter alignment, enter
align vertically. Now you can see our
buttons look much better. One interesting take here would be that when we
select the two buttons, we keep these settings common, like they both have
these settings, so goes both of them. If I select with control
picked on vertical box, you can see these
settings disappear because Setting the wear
should be based on something. As you can see, the slot
vertical box slot is above here, and when I select vertical box, the slot Cvas panel
slot is up here. So this is setting the position inside
the Cvass where here, we're setting the position
inside the vertical box, the alignment
position or whatever. Now, there's many
more ways to do this. We could have put spacers
between these buttons. This is another. Let's
actually demonstrate this. Let's state that both
buttons are control and select the both vertically. Now, two big of buttons. I want them smaller, so
I could use some bases. Bring it here between
the two buttons, I'm going to bring another
one above the other button. We're going to bring one
below the other button. Now, if you noticed another real pull
tip that we can see, when I go put the button here, it puts this line, this blue line over here with a small R on the corner
that points towards up. This means add it to
the above hierarchy. For example, the
above hierarchy right now is on the vertical box. If I try to add it here and
it puts an arrow below, it add it to the below
hierarchy, above the spacer. But if I have the arrow up, it would add it to
the above hierarchy, the Canvas panel.
Let's try this. W to put it here,
going to release it. As you can see, it's been
added in the Canvas hierarchy. I I gages here, it will put it in the vertical
box by default on the end. I'm going to select the spacers,
and I'm going to select. As you can see, it peeled bases, and now the buttons
also look a little bit better than having
them one above the other. With this setting, we can
have everything to feel, and it works the same way. We don't have to care
about vertical alignments or any Now, these buttons should
have some text. When we add things
in the vertical box, we added 12, three,
four, five elements. But when I am adding
something to a button, let's bring to the button. So if I add something on
the button like a text, and I'm going to add,
let's say I want two text. I cannot do that because
buttons only get one child. This means they can have
only one thing inside. But there is a way around this. You can have one thing that
has many things inside it. For example, you
can have a button that has a vertical
box inside it. As we can see, the vertical box can have many things inside it. That's called children, and how many children
can an element have? Well, I'm going to
copy this text block, and I'm going to paste
it in the other button. And I'm going to go to
the first text block, change the text in
its details. Name it. And go to the other button also, and as the text block two. I think this is enough
for this lesson. I'm going to see you
the next. Goodbye.
4. Adding Main Menu to Viewport and Quit Functionality: Hello, and welcome to
Game Design Workshop, I'm real Lensing five
Procedural Dungeon action ARPG creation course. In the previous one,
we finished with the visuals of the main menu. In this one, let's start programming some things so we can see this main
menu in our game. Now, we're going to
go to game mode. If you cannot find it, it's on content tub in the Folder UI, and no, sorry, in
the folder top down, the folded blueprints, and
the game mode is here. Top down blueprints, gamede. No, I our game mode, we're going to drag a cable. Now, let's explain a few
things about this cable here. We did it before
with Print string, but we didn't say
anything about it. So what this is, this is the execution
line of blueprints. What this means, In short, is that this execution
controls the flow of logic. When an event fires, it follows this execution
line to trigger the actions that are going to be performed in a certain order. Basically, it dictates
order of things to happen. So, let's demonstrate this. If I put a print. And for the string, I'm going to put
one, and then put, I'm going to copy paste these. Put a print string two. I go to the overview
map, same level. They've selected, and play. Oh, I can see one, two, it printed first
one, and then two. Now, there is special times that this doesn't happen exactly when we're
playing with delays, when we're triggering other
events that have delays, or they have there's multiple reasons for this
not to happen in order, but they're all
very specific also. Et's demonstrate this
with an example. If I do a custom event. This means an event of my own, like begin play is a
prescripted event. It bires when the
blueprint runs. When I use a custom event, it's an event that I created, so I have to call it. Let's call this custom
event actually test. Well, I'm going to put a
print string of two here. I'm going to change
it to three actually. I'm going to call my
custom event here. Now, if I connect this two, let's play, everything will
fi collect, one, two, three. But if I put a delay here, let's say of 2 seconds
of 0.2 seconds, I can see one, three, two. This triggered here, but
since it has a delay, it will wait the amount, but this will continue. Having a delay will
not make it stop. But now we're going to enter
a limit of four loops. If I have a four loop here, now what is a four loop? L et's go it. Oh, It's a programming node that starts with an index and
ends with another index, and it does this until it
goes through all indexes. For the loop body, I'm going to connect this
here, and actually, I'm going to do it from two, let's say, this would be five. And go and press play.
See one, two, three, 45. For this node, for example, it waited to complete this node, and then it continued
to the other line. Anyway, through practice and exploring the engine
and programming, people are going to get
more verse to these things. Now, let's delete all this because we're not
going to need it. We're not going to
need a test event. And let's start with bringing
our widget in our viewport. I'm going to do this. Actually,
we need a custom event, so as event, and we're going
to call it show main menu. When we start the game, we want to show menu. Now when we double
click on this, it will lead us to
the event we created. Or if we had a function here, we will talk about
functions later, it would open the
function for us. Now, show main menu, we're going to create Because to bring our
widget in the world, we have to create it somehow. We have to have it as an entity, and the class that we're
going to choose for the widget is going
to be WG main menu. Now, Owning player, we're going to use the player controller. And what this owning
player means. Basically, if we had a
local co game, maybe, and there is some uses
also in multiplayer that you're showing widgets to other
players and stuff, maybe. It tells to the engine who
this widget belongs to. So, we created the widget. Now, if I go press clay, nothing will happen. We
don't see the widget. The reason is because when
we are creating the widget, we just made a variaa of it, made a little cell that holds the information
of this widget. We haven't said to the engine, do something with
this data data. So, the return value is
the widget we created. If we hover on the
pins of a node, we can see some more
details about them. So, would you main
menu object reference, we created a main menu
widget, which is an object. As we said before,
everything is an object. And we have a reference to it. What we're going to
do is we're going to promote this variable, and call it W G main menu. Now, we have our data,
we have our widget, and we stored it
into this variable, and we want to tell something
to this data to happen. I'm going to bring it
from the variables over here because when
we're creating a variable, it's getting stored over here. I'm going to bring this variable
and say add to viewport. This is the command to add
a widget on your viewport. Well, I'm going to
connect this here. And now I'm going to press A, and that goes a widget. I press the buttons. Nothing happens yet. But we're going to program this right now. And the first thing
we're going to program is the button quid. So, let's go to our
top down game mode, Widget main menu, and let's
go to the button quid. Now, if we choose this button, we want to do something
with this button. So we need to determine
its behavior. To do this, we have to click
is variable on the details. I'm going to click
it here and name this button also Quit. T. And now I'm going to go
further down in the details, and this list of
events has appeared. If I unclick the
variable, it disappears. If I click on the
variable, it appears. This doesn't mean that I cannot use the button
in other ways. There are other ways to use
it without being a variable. But this is the way we're
going to do it now, and it's the most common way. We're going to choose
the event on click. Or pressed. The difference between these two is that when we are click, we have to click the
button and when we release it and are
still on the button, it accepts this action. Well, pressed is that the
moment we click, it happens. No. On clicked button and. We're just going to drag
a table and say, Q. We're not going to
specify player. We're not going to
specify quit preferences, we're just going
to leave it quit, and we're not going to ignore platform restrictions
because this is not for any
specific platform. Oh, we're going to
compile and save, and go to our game
level and press play. Now if I click on Quit, release it else doesn't work, but if I click and release it
while on Quit, it the game. I think this is a good stopping
point for this lesson. We're going to see
you on the next. Goodbye.
5. Loading Screen Mechanics & Maze Spawning: Hello, and welcome back to Game Design Workshop Real sin five Procedural Dungeon
action A Psy creation course. Previously, we created
our chain of events from begin play of game
mode to show our main menu, and we created a custom event
that creates the widget, stores it in a variable, and adds it to the viewport. We also programmed the
Quick button functionality with using the conflict event, and we used the Qi game node. Now, what we're going
to continue with is the start game functionality. But before we go in to
programming the start button, let's explain a little
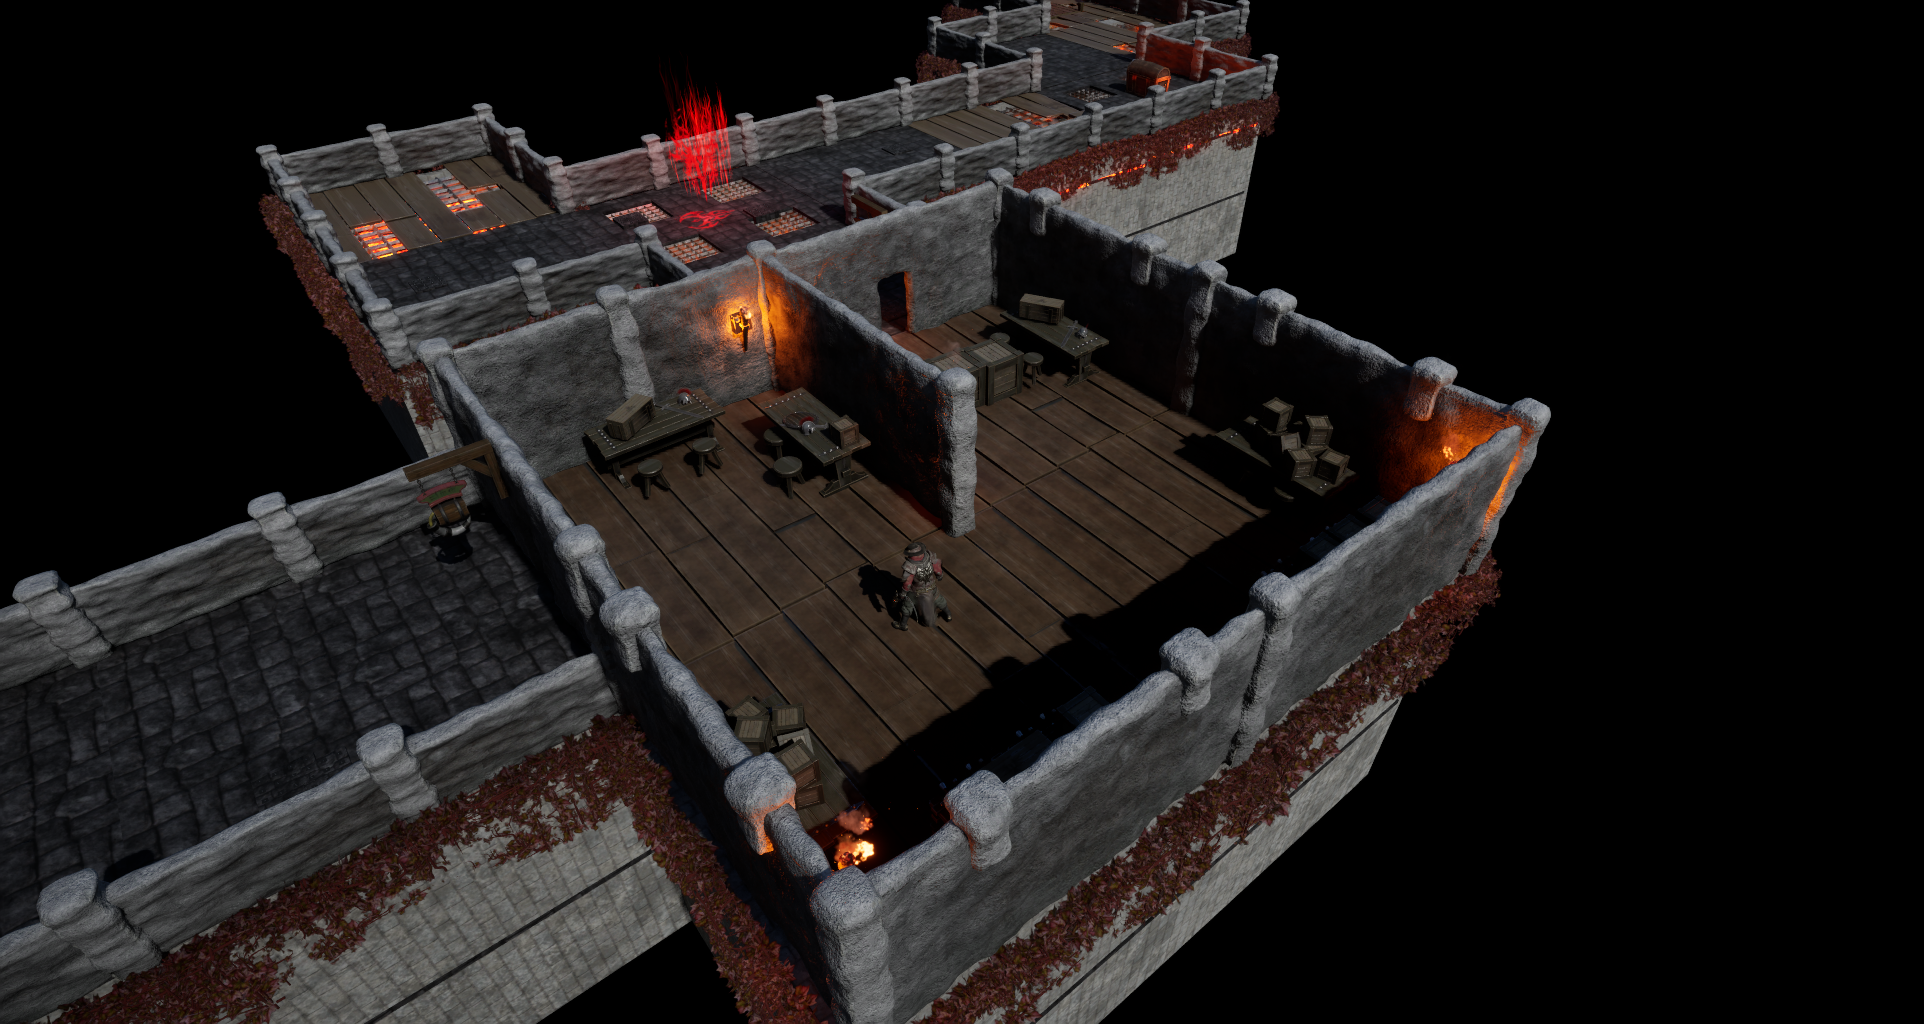
bit our system. So what we're going to
have is a maze generator. That is going to be
building the level, like whatever it likes. We'll create some rules. We will have some rules
in the generator, how it will work on
creating a level. But that level has
a start and an end. And that end will be
spawning another generator. It will go from mas generator to ma generator to mas generator, and it will have some rules and getting bigger, et cetera. So when we start a game, when we press let's say
we have the game mode, and from the game mode,
we spawn the main menu. Min menu can twit or can start. This is where we're going to be spawning the maze generator. Now, that maze generator, we need to have an option
that is it the first one, or is it someone in the
middle or in the end, that's when the player loses. So there's various
ways to do this. The way we're going to
do it is we're going to expose a variable. This is expose a variable that
is going to be ticking in. Basically, it's going
to be a bullion that tells to the maze, are you the first one or not, which is a very simple
way of doing it. Since we're going to be
spawning this actor, and every actor we're
going to be spawning it. Now, what this variable
will do for us now for the first part of our program. It will differentiate
to the maze that if you are the first, then progress the loading This is loading the
loading screen. So we will have a
bar for loading refilling as the generator is building the maze
and it's ready to play. No. Let's begin. Let's begin by creating our
maze generator blueprint. We're going to go to
content. We're going to go to content folder, and right click and new folder. I'm going to name it blueprints. Now, we start having
a lot of folders, and basically what we could do is just right click
on blueprints and set color. I'm going to set it to blue. Going to go to folder UI, right click and set color. I'm going to say
it to light blue. And you're going to need
any other folder quickly. Maybe top down folder. Going to set it to a green. And now I can fastly go from each folded folder
based on their colors. Now, inside the
folder blueprints, we're going to right
click and create a new blueprint class. Now, when I do this, it pops
the menu that it tells me, do you want to create
a template class or something from a template
that real offers? If we can s there is a bunch of classes that can be created. What we want right now
is an actor class. Basically, it's An actor is an object that can be placed
or spawned in the world. Basically, everything is an
object that can be placed, but everything has
some extra rules. The actor is the most empty one. For example, the character
blueprint that we have our top down character
has, for example, a collision sphere, not
a collision capsule, I'm sorry, and a static mesh, and a narrow to point direction. It has the movement component, which is unique to
character class. Anyway, I'm explaining to
many things maybe right now. So we'll go and create an actor. And we're going to
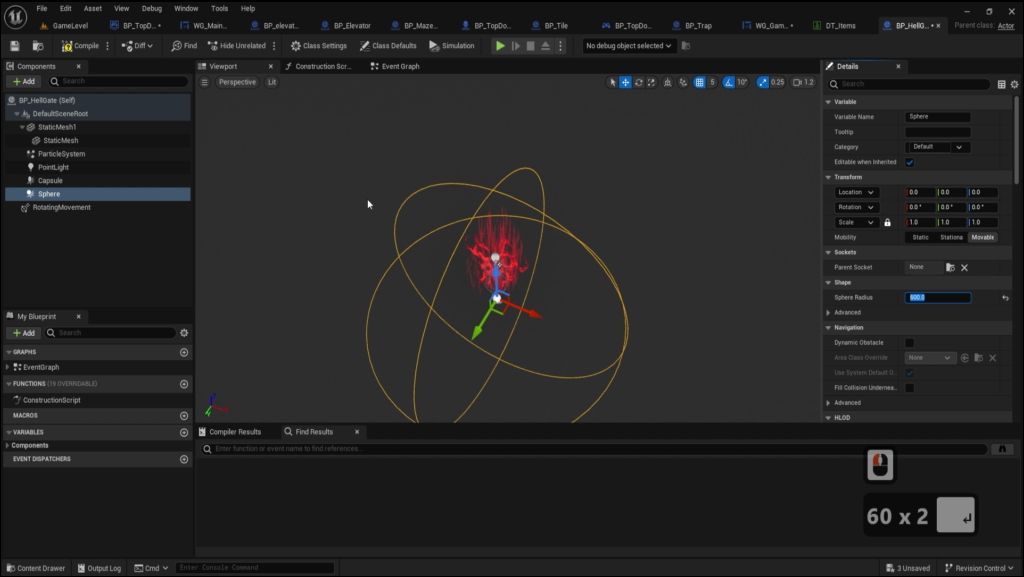
name this actor PP Mazen tape everything and open the maze generator. I'm going to put it right here. Now, the first thing
we're going to do is create a variable. We're going to go to Variables and press this plus
symbol over here. And it already made it
a bullion as we wanted to differentiate if the
maze is the first piece, or it continues to build. I'm going to name it on Tu. I'm going to name it continue. Maybe not the best name, but we'll do the job right now. Now, I'm going to go back to the main menu and I'm going
to go to the start button, that it is variable,
name it to art button. And I'm going to press on click because
we did on click on lick. We should do it on art
button. Also on click. Now, how do I bring this
actor to the world? We use a node called
stone actor from class. The class, we're going to be selecting to be the
maze generator. BP maze gener. Now, it has another option here. It's called transform. What is transform, for
those who are new transform is a group of information, it's a structure of information. We're going to talk about
anytle more about structure, but it's not a
structured variable. It's a unique variable that
contains three vectors. And if I right click
on it and split it, we can see it contains the
son transform location, the spon transform rotation, and the spon transform scale, which is three vector units. One of them is a rotator. The other two are
just normal vectors. This means, we want
to popawe this actor, but where do we want to spawn it with what rotation,
and what scale? For now, not for now, actually, we're going to spawn
it in the zero, zero, zero place of the world, zero, x, zero, y, and zero, and with the normal
rotation and default scale. Before we said that
we're going to specify this to this maze generator, if it's a continue or not. There is plenty of
ways to do this. I'm going to show you
quickly two ways. We're going to go to this spawn and from here from
the return value, we get the, the actual reference to the thing we
spond the actor we pond. I can do from here,
what I can do is set continue as you can see, the target is actor
that we just pawed. And the value, we can
set it to yes or no. Another way of doing
this, I'm going to delete this is going to the maze generator and go
to the continued variable, that it's instance edit
and it's exposed on span. This means if I compile
right now and save, go back to main menu and reselect this because it
doesn't update automatically. Sometimes it does.
I I'm going to reselect this Maze generator. Now I have this
option over here. I'm not going to tick this,
yes, going to leave it no, and when this spoons, by default, it will be off. Now, for us, this is by default
off and we want it off. When we are spalling
the maze to continue, this is where we're going
to be picking it on. So to prove that we have
spawned this into the world, we're going to go to
the maze generator. We're going to go
to its event graph, and on begin clay, we're going to bring string, and they maze as own. Now, before we live here, we should do one more thing. We are spoiling the
maze generator. But the next thing we
should be doing is removing our visual
part of the widget. From our viewpot. And to do this, we're
going to remove from part. This is the node used for it. And for target, we're
going to have self. Target usually in nodes
means who is doing this. If we go to the game mode
and right, remove from part. We're going to see context
sensitive, it doesn't exist. But if I remove this,
we can find it. As you can see it belongs
to the category widget. So this means it's
doing something for a widget. I'm
going to click it. And if I connect this here, nothing will happen because the game mode is not a widget, I will just trigger
an error or nothing. But if I connect the
widget main menu, which we have saved
in our reference here to remove from Parent, it will know that this
widget main menu, let's say we have
created five of these, and we have only
saved one of them. This one of them that
we have saved as a variable will be
removed from the parent. Now, I'm going to delete this and we're going to leave
this and remove from parent. The target itself. We
are on the widget, on pile and save,
and let's play. Ma press play, Maze gen has pone and the
widget is removed. I think this is a nice
stopping point for this one. I'm going to see
you on the next. Goodbye.
6. Creating a Loading Screen: Hello, and welcome to Game
Design workshop under engine five Procedural Dungeon action RPG creation course. In the previous
lesson, we added we actually created the
Blueprint Maze generator, and we spawned it through
our main menu Start button. We also added a variable in
the maze generator that we exposed to be able to set it when we are
spawning the maze, and this variable was
the continue variable, which will differentiate for us if this is the first piece, or is it a piece that
continues the game? In this lesson, we're
going to continue with creating the first
steps of the logic, which is to show the
loading screen or not. I'm going to delete this
print screen here, ring, and I'm going to
press B and click, or else I could have right
click and type branch, and I'm going to bring a branch. Now, what is a branch? Basically a branch
is an I statement. It is it true or false based on a condition
that we have applied. And the condition here would be. So basically, is it continuing
the maze from previously, or is it the first piece? Now, as we created the main
menu on the game mode. We need to create another widget to do the loading screen, and that leads us to
create a new widget. So we're going to go
to the UI folder. I'm going to right click
and go to User Interface, Widget Blueprints, and I'm going to select
user widget again. I'm going to name this
WG loading loading. And I'm going to open it. I to bring it over here, and I'm going to
save everything. Now, we are going to be
using a cavas again. And this is not a problem
because in any case, main menu has been removed
from a parent when we start. So having another
convas is not an issue. Not that having two convases, or e three or four
would be a huge issue. Now, I'm going to
select an image, add as background, and I'm going to
anchor it full screen. I'm going to zero
out the offsets. As you can see, it
fills the whole screen. I'm going to go in
brush settings, a new setting that
we're exploring, which is basically how something looks.
We bring a button. Actually, let's
demonstrate. Where's play, we can see that when I hover
this button changes color. So I go to our main menu and go to
designer. Pick on the buttons. We can see below the slot
and the alignment settings. We can see that there
is appearance style, which has a lot of settings to set the button
style, how it looks. Now, let's go back to loading, and let's go to our
appearance setting. So in these settings, we have this brush color. We can select an
image that we want, but for now, we're just going
to use the tint ability. Ible and turn it
to a black color. And we have a black background
for our loading screen. The next element we need is
called a progress barrel. This is another unique
element like the buttons. When we press them,
they do something. This is a bar that fills
based on a percentage. I mean a bit before we get it. Let's see to there is a style. There is also the
settings that we know, the settings that we place in the position, the anchoring, the alignment, and the style, which has a lot
of settings also. There is also below it another setting that's
called progress, which is unique to
the progress bar. If I increase the percent, you can see it fills this bar. Is Progress Martin. Yeah. And it has some abilities
to be filled based on some direction and a
lot of other options. Now, for us, we will just change maybe the fills
background and the image. So, what we're going to
select is going to be the T bar opacity. This is what we want for
our background image. And this is also what we
want for our field image. B and bar opacity. Oh, bit. We don't want the progress
part to be up there. We want the progress part
to be chord in the middle. Don't go to the
offsets of position. And for size, we
can actually bit. Let's put alignment Y X as
in the middle. Good point. Y. They 1,500 maybe 600, 1,600 or X size, and let's say 50
looks good or size y. Now, let's fat with the color. Let's fill the bar b. Let's put it in 1%. Now, I'm going to go to tint of background image and select something a little
bit more grayish. More. This is fine. Maybe put a point Alpha, so that make a ban, it doesn't, but it also does if we increased
to decrease, 2.3, you can see ban. 0.8, and something is fine. Now, if I go change the
tint on fill image, you're going to see
that it doesn't really change the color I want. This is because this is being
filled by this option here, here fill color and opacity, which is a different setting for the color of the image we apply. So we're going to change
the color over here. We're going to put it on red, a little bit darker,
a little bit more. This 2.8. Well, maybe 0.9 wine, and maybe give it a zero green also a little bit lighter
towards the orange light. Okay, I think it looks good. And now we have a
spooky loading bar or non traditional,
square plogra. Okay. Now the next element
we need is a text. I'm going to bring
a text variable, which is just a variable
that we're writing text. I'm going to anchor
it to the center. I'm going to zero
out the offsets. Size, let's align it to 0.5. S five. This one, maybe three. Three is fine. That length, let's
type the text first. In the text of arrivals. We have different options again. So in this case,
we have content, which is what the
text is inside. Below it, we can manipulate
our text our font, our polar end opacity. We will in a second.
Now, for text, let's type flo in capitals. Let's size this up to the
font that is eyes of font. I hundred and 30 forte. 35. This looks okay. A eyeballing here if
it's in the exactly, it's almost in the middle. It's fine, it's fine. Let's
change the text also. We No reddish color white
is fine, any thing. You can change the pacity
or one or the base bolt, late light, regular
to whatever you want. For our purposes, right
now, this is fine. We could go into
animating the text and fading in and fading out
through the animation tub, creating an animation,
but we're not going to do the
compile and save. And Now, how are we going
to use this bar through the game to increase
its percentage well. First of all, we're
going to name it loading bar and make it is variable because we want
to do something with it. And we want to do something with any part of the widget visual
part that we have said? We have to make it a variable. If we wanted to change the text, for example, we had
to make it variable. We wanted to change
the background image? We had to make it a variable. Oh, loading bar, it
is a variable now. Let's go to the graph, and let's bring it
to show something. And when I drag from this, I can do what percent. And this percent is value 0-1. Basically, it's a flow
variable to be set completely. As we can see that it is
the same value as here 0-1. We can set it to two, but
it won't have any effect. It below zero or above zero. So it is a zero to
one variable. Out. And this is the way
we set the percent. But when I when I
create the widget, for example, on the ga mode. I store it in a variable. If this widget had
the progress bar, this widget in case has these
two buttons as variables. On this widget, I can
calls it here g mode. I can call these two buttons from this because I
have a reference to it. C it the start button for it. I can get a reference to it. So the same way I
would do it when creating the loading widget
and storing it in a variable, I could get my
reference variable and call the start button
or the progress bar. But this is also calling
something again and again. What we will do is
we're going to create a function that has, let's go to the graph. I'm going to copy this
go into the function. How I created the function is a here functions and
press the plus symbol, and it creates a new function. So I'm going to create a
function and paste this in. So when I when I want
to all this actually, I can call this function
from the widget itself. U I'm going to demonstrate
this in a second. Now, for those who I
knew, what is a function? Well, in short, it's
a set of instruction that can be easily
called and be repeated. Like when I use a certain
set of instructions often, I can put them in a function
and not write that set of instruction every
time I need them. There is a lot of
rules about function. One important rule is that they cannot involve time easily. You cannot have delay
nodes or timeline nodes in ions can be there are things that are
called pure functions. There are things that Anyway, I'm getting too much in them. For now, let's consider
functions a set of instructions that we
can call whenever we want. And in this case, the
set of instructions we want is to set the percent
of the loading bar. Now, when I call a function, I can have some inputs, like for example, let's
bring the function here. Right now, it's just calling the function to do
whatever it does. If I drag this cable over here, it says, add pin to node. Let's do this. I created an input variable
for this function. I go back to the graph. I can see that this
function now has this in percent variable. I can do it in another way that I can add elect the
function and go down to its details on inputs or outputs because
function can have an output. For example, let's say this it as an action,
it returns true. I would have a branch
that if this happened, it returns true, if it doesn't
happen, it returns false. But I'm going too
match in detail. Now, this is the other way of adding inputs or outputs
to the function. We're going to use
this a lot later, and we will explain
it a lot better. But for now, we're going to
use this input in percent and name the
function at percent. There is no actual reason
because as you can see, this function is
the same as this. Besides that I don't want to be calling the loading
bar every time. Performance wise, it's
not really a big issue. Calling the loading bar every
time from the reference. Since we are using
the reference anyway. Is just for it
makes it easier for me to just call percent. I think this is a nice
stopping point for this one. I'm going to see
you on the next. Goodbye.
7. Adding Loading Screen to Game Mode: H. Hello, and welcome back to
Game Design workshop, and real Engine five procedural Dungeon action ps
creation course. On our previous lesson, we created our loading screen, our loading widget,
and we created the function to set the
percentage of the loading bar. We also designed at
bars and everything. And now let's go add
it to our view port. Let's go put it in our game. So we're going to host it
again on the game mode. By that, I mean, we're
going to create a event. Te show loading. And we're going to copy
paste the code here. We're going to delete this part. Actually, not all of it.
We're going to undo. Instead of the main menu, we're going to choose
the loading widget. We are showing loading, we
are creating the widget. We are storing it into
a variable loading. W underscoreding? I'm
going to connect this. It is a little bit
straighter and bring the variable Wood loading. W G. We start having aut things here, so let's start commenting. Going to select
begin play event, go to press C, and type B Anu. Then I'm going to select
the two actually. To bring them on the
side and type press C and type Widgets. I go to make it a little bigger. And I'm going to select
the show main menu. Type show main menu. And the same thing on the
loading type show ping. And I'm going to
change the color of this comment to
something like bluish. And we have started
having some order here. Now we're going to
compile and save, and this brings our
widget to our viewport. Now, where do we call this? Let's go back to
our main generator to our continue branch. We're going to
give this for now. Now, if it's true, if it's continue, we're going to see later what's going on. But if it's false,
we're going to select, we're going to find a node
called Get game mode, and this gives us access
to our current game mode. The issue here is this is a
generic Get game mode node. It means it returns a generic
game mode based object, as we can see in
the return value. So when I want my specific
game mode, this game mode, we use a node that is called
casting. What casting means? It's basically it
asks whatever we are object that we are testing if it's from
a specific class. I'm going to do ask to
top down game mode. So now I'm getting the
game de, and I'm asking, is this the game d
that is running in the game the game de that is
actually active right now. If it is, we can draw a
cable from the pure cast. If it's not, it will not purest, I'm sorry, from the cast end. Or if it's not, it will fail. Now, when I draw a cable
from the succeed part, I also have another
variable that says, S BP top down game d.
This means that we can actually directly call our top down game mode that we
are using at this moment. This means I have access
to all these variables we created and stored when
they're being created. If they are not created, these
variables would be empty. Now, let's go back
to M generator. As you can see, it has
this execute pins, and when I did the mistake before I called this pure cast. I wanted to show
that there is a way to not have this as execute. It's called convert
to pure cast, remove the execution
pins to make the node more versatile node. The cast would still fail, resulting in an invalid
input in output, sorry. What this means is it creates
a variable of success. So we can have it, for
example, in a branch, if there was a chance for
this not being our game mode. 02, for example, error code. This blueprint, and we could
have like if this is false, then say error, the game
is wrong, for example. But we're not going to do this. We know that our game
is going to be this. So what we're going
to do is drank from here and promote variable. And actually, this could
be done before the branch. I'm going to take this here. And when we promoted
to variable, it used the name as
BP top down game old. So this is very
convenient for us. And we have this reference, and we can just drag and drop it on the
variable we created. Oh, when you drag and
drop with your mouse, you can get a get or a set. A get is getting the variable, a setter is something that we are setting
the variable to. There is a quick
shortcut for this. If I drag with control
and release it, or if I drag with
lt and release it, it gets a getter or a setter
with lt. Now, rete this. From here, we're going to
select loading screen. Now, I our continue is false, then we are showing
the loading screen. If I press play now, press start game, we can see our loading
screen, here it is. We have successfully
added the loading screen. Now, let's dive a little
bit deeper in how our loading screen
is going to work and how our maze generator
is going to work. Oh, I'm going to open paint. Let's consider this
our loading bar. And as we said, we're going to be filling
the loading bar based on the percentage of
our maze generation. But if we consider
that Maze generation, let's talk a little bit
about M generation, how it will work. The way it will work
is it's going to be adding something that we
will be calling a tile. And it's going to be adding
tiles based on some rules, and it's going to
create a shape. Of a maze of whatever. Now adding these tiles and creating the ways the player
is going to be moving, for example, it's going to be
creating blocks and things. Let's call this phase one. Let's call this phase one. This would be an easy
way to to the loading, you are this percent based
on zero to maximum i lumber. This is an x not a t. So zero to max would be the
percentage of the loading bar. But after that, our maze is going to do
some other things, it's going to be creating walls, it's going to be
changing materials, it's going to be
spalling things. So that phase is a little
bit of a question mark, how big is how much percentage is going to be of
this loading bar. So what we're going to do, we're going to set fake. Let's say that this is 0.2%, this is 20%, sorry
because it's value 0-1. So this is going to
take 0.3%, for example. We're going to setting fake
percentages because we really don't know even how the computer of the player
will respond to this. Some actions are GPU based, some actions are CPU based. So yeah, we're going to be
setting fake percentages. This is usually what you see loading bars going, stopping, going up to a point with a great speed and
then stopping and then moving forward because for those who are more
advanced users, some for loops take longer. So for loops freeze
the bed there can be wide loops that freeze
completely the computer. This is where this is usually
the part when we cannot even a tub in certain
loading bars. Yeah, Anyway, it
depends on there's ways to always do this more advanced and make it seamless and be able to control your
computer completely and be very specific with a huge technical knowledge
and design part in the game. But for us, we're going
to use some basic ways. Now, I'm going to close this, and I think this is a nice
stopping point for now, and we're going to demonstrate this actions on the next one. Let's say, for example, we will have a
minimum tile of zero to a maximum tile and set a percentage of this bar to the percentage
of zero to Mx tile. We're going to stop here. I'm going to see
you on the next. Goodbye.
8. Building the Maze Algorithm: Hello, and welcome back
to Game Design workshop, And real Engine five
Procedural Dungeon action A Ps creation course. Previously, we finished
with the low Dan bar, and we explained how
it's going to be filled. We used the game
mode to spawn it. And we call this pawing our Me from our game
mode reference. Now, in this lesson, let's continue with the math required for filling
the loading bar. We're going to
create a function. We're going to name this lc calculate tile
loading. That's fine. We're going to make
this function. We're going to select
the function as it opened and l the pure. As we said, functions are like templates of code
that we can repeat often. And your functions, we talked
a little bit about them. They are for
performing operations. This means that they
need an output, and they do not have
an execution line. We can see an
execution line here, but if I bring it to the event
graph on a drag it here, you can see it doesn't
have an execution line. If we want this to run, it needs to have an output so we can connect
it to somewhere, and it requires the information
from this function. By rule, pure function
shouldn't have setters in them,
shouldn't alter data. They should only do operations. You can alter data
inside a pure function. I can put a setter here, but it kind of defeats
the purpose of the opt optimization techniques that unreal has for
using pure functions. Now, When I created
a new output, I added a float for me because I have I leave it around
with the variables. For you, if it's not a float, you can pick on the
type and go to float. It might be a bulion by default. Let's name this output two
pairs touch two percentage. No. We have our function,
we have a few function, and we need some operations
to be done here. For this, we're going
to need first of all, two variables, going
to be one variable, it's going to be and the other variable is
going to be current is. As you can see, my
variables are integer because ready explain
I was doing something, but it kept the type. For you, if it's not
an integer, again, you can click on the
type and go from Bleion or whatever
it is to integer. Now, let's bring these
two variables here. The formula to find, let's say, the percenta of the current
tiles towards the males tiles would be to divide the
current tiles with the max tiles and
multiply that with 100. What we want though
is to calculate the proportions of
the maximum tiles to the current tile
in a percentage form. So to do that, we will just inverse this division and divide the max tiles to
the current tiles. And because these are integers, and the division of
this will give a float, we're just going to make
this make the engine, consider this a float. So we're going to do
two float conversion. I'm going to copy this
conversion and connect it here. Now we're going to divide
this and multiply by 100. Now, what we have is
the representation of the proportion of maximum
tiles to the current tiles. But we want this to fill
up to the 40% of the bar, not go above 40%. So what we will do is
divide again by 40, 40 divided by this
scaling factor, and it's scaling because the current tiles will be changing, and we're going to connect
this to the percent. What does this is
actually normalizing, it means it puts it into
context A that 40 is the max. I hope this is understood. Away, we're going to continue with filling the loading
mark with this percentage. And let's actually
demonstrate this, how we're going to do it.
Demonstrate some percentages. So I'm going to drag from
here and a Wood loading. And here is the variable that we stored the
top down game mode. When I drag from here,
I drag directly from the top down game
mode because we have stored this game
mode as a variable. Oh, we're going to set percent, which is the function
that we have created. And connect this here. If I leave it as e, what it's
going to do is beyond zero. But let's say, for example, our max tiles are 20, and our current tile is. So this should fill our
loading bar to 20%. And I think indeed, 40% would be here,
50% somewhere here. Let's actually fill
it with 20 out of 20. Yes, now it built
40% of the bar, I think 50 is somewhere here. And it work correctly. Now, one more thing
we need to do, created these two variables, max styles and current tiles. What we should do is
expose them on Spaw, actually only the max styles, not the current tiles, expose it on Spaw and make it
instance edible. So when we go to our
main menu on the graph, let's compile and save,
hasn't audated it. But if I re choose
the maze generator, now we can see that
we have max styles over here with the
default value of 20. Two more explanations. What this means
the default value? When we create a variable on the blueprint on any blueprint. First of all, it requires
to compile the blueprint. So if I please compile, then we can see
on the details on the default value that
we can put any value we want for this blueprint when it is not set
from anywhere else, the value that we set for a default value will be kept
every time we pospone it. And the other thing
I wanted to talk about was the instance editable. So what spawning a
blueprint means is that, for example, if I bring
this age generator here, I brought an instance
of this class. As we talked about,
everything is an object, and classes are ways to tell objects what to do in a
preset mode of template. And when I'm bringing
them into the world, I'm bringing instances
of them. Yeah. That's what I wanted
to add because we used the Instance editable
twice already or maybe more, and there was no
explanation about it. Now, let's reset our
values to defaults. I'm going to delete
this new variable. I'm going to set
current tiles to zero, and I'm going to set max tiles. Actually, I'm going
to leave it 20 What would be our next
move right now? Our next move would be to postpone the first
tile for the maze. And to do this, we will
need a tile blueprint. I'm going to go to content. I'm going to go to blueprints, and I'm going to create
a new blueprint of type actor and name it
PP underscore file. Before we go on actually and start spawning
tiles and everything, let's talk a little bit
about our maze generation. Let's begin with this first tile that we're going to spawn.
What does this mean? Well, the way our maze
is going to be working, is going to be mapping it based on a two
dimensional grid, x and y grid. And this will be
represented by values of negative and
positive and zero. And our first style, we will consider it
to be a 0.0 tile. Now, when we want
to add something, let's say, for
example, on North, we're going to be
adding it on X is the value for and South and y is the value
for east and west. But we will make
sure of that when we are doing it in
the world directions. So let's say for North, we want to increase one, the x and the y stay
the same, or for South, we want to deca x, zero on The same thing could be done for y if we wanted for left and right
east and west, basically, it will be 0.1
and zero point minus one. That is our internal coordinate that this piece
belongs to zero point. This piece belongs to 1.1. This belongs to one
point minus one, et cetera. It can be 25. Any number, this will be our representation are mapping
the stored in a variable. Now, besides that, what we
need to when responding ile, it has a certain tie. So what we're going
to be doing taking this size and multiplying
it by by the, the location of the
mace, for example, if our first tile is 600, it occupying this space. When we add the second one, let's say, for example, north, it would be 0600 multiplied by one and
600 multiplied by zero, so it will fit exactly here. Our squares, our tiles
will be the same because 600 multiplied
by zero and zero is here and hundred
multiplied by one, leads us to the world
location of x equals 100, where this x is zero. Oh, I think this is
enough explanation for now as we go forward
with creating the maze. We will explain more things, but this is a first
introduction on the variables that we are going to create in the next lesson to
store this information. Asking you a next one. Goodbye.
9. Creating the First Tile: Hello, and welcome back to
Game Design Workshop and real engine five procedural Dungeon action RPs
creation course. So, in the previous lesson, we created the
calc tile loading, the function that calculates what percentage of
current tiles out of max is the 40% of the bar and gives
us a percentage of it. Now, we also talked a little bit about the variables and the
two dimensional grid of our maze and how
we're going to be mapping our tiles that are spawned in a two
dimensional grid. Now, let's start creating some functions and variables
that we're going to use to manipulate this data and create rules on them and
spawn the first tile. So the first thing I'm
going to do is create a function called own files. Of course, we're going to
need the continue branch, so we can differentiate if
this is the first style that spawns based on the whole game, or is it a continuing piece. We're going to use this because we're going to have
an intro piece, like we're going to
have a balloon that represents how the player
got into this maze. And when we are
continuing, that slot, that we will spawn the
balloon will be the slot that our elevator leads us from the previous level
to the next level. So when we are creating
the first tile, it has to take into
consideration that when the above maze,
let's bring paint. So if we have our
maze on level one, let's say, the zero
on the D axis zero. The next piece that
we're going to spawn, the next maze this is a maze Agent maze, whatever
you want to call it. But the next piece
that we want to spawn, wherever it spawns above
and creates itself, we want have a
correspondence with the below maze that we
have an elevate of here, and we're going to go up. So this piece over here
needs to be empty. And on the first
piece of the maize, let's say the start is here, this piece we wanted to be
the balloon that we came. We came from. Let's
go continue this. Now, this is why we
need this branch to split between two actions if it's a continue or
not in the first tile. Now, as we did on the main
menu and use the spontor node, the same thing we will do
here to sponsor from class, and the class that we're
going to use is the BV tile. We're going to split the
spon transform. Ta location. I talked a little
bit about locations in the previous explanations, and what I wanted to add was that when we
are in the level, there is a cartasian
system of x, y, and z. This is what I was
talking about that our first maze Z zero, and second maze will be
on Z, let's say red. In the world, we
have a ctsan system that we call the
world coordinates. This is a small parenthesis for those who needed
this information. Now, when we're spawning
the maze generator, we are spawning it
on 000x0, y zero. This is the center of
our word let's say. And when we are spawning
the first time, we could use the 000, but that would mean that
when we respon again a maze, this will spawn again
on the first location. So what we will do here, we're going to use a node
called get acto location. Because the target
of this node itself, it gives us as a return value, the location that the
BP maze in spawned. Now we're responding it from
the main menu, it's 000. When we respond it from
another place later, probably the elevator,
it's going to get the location of that
spone to add the tile. Anyway, let's continue. What else we going to need? So, a little bit
of optimization, not a lot of optimizing, we won't do a lot of
optimizing, but a little bit. When we are spawning
the next maze, we should be able to
delete the previous one. So it doesn't load up
in RAM and actions. For example, we'll
have a navigation grid that will be used from the AI. It shouldn't be calculating all these things in
the previous mas. For example, if we have items, it shouldn't be calculating the items if they're colliding, or physics items
shouldn't be running. So we need a list to destroy
things after we choose. And for that list, we're going to create a variable and it will be of
the type actor. We're going to type
actor and go to object types and select
object reference. Now we are going to
explain a bit later about soft object references
and object references. But we are not going
to optimize that much. We're going to be using
object references. But I digress later. Now, we're going to use this
actor, which is object. What we want to name this
list is actors to destroy. What I want to analyze more at this situation
is that as we said, we are setting this
variable to something. But this holds only one
information, one variable. But if I want a
list of variables. No, besides the
type of variable, we have also a container type, as it says in the tooltip. For example, for this one, we will need an array. What is an array? Let's change this first variable type.
We have brought this. Second, what is an array?
Basically, it's a list. It's a list of the
same data types, a collection of
elements if you will. For now, we have
a list of actors. But if I change
the variable type, it would be a list of buions, for example, or a list of
integers, a list of numbers. For now, we're going
to leave it to actor. Object reference, is the other screen, is
what I will type. Now, if I choose the set, as we can see, it
requires a list. If I use the g, it
gives me a list. So how can I add
one single actor to this list, one
single variable. The way we do it is we use a
getter and from the getter, we are using the node at arrays have plenty of unique
nodes for manipulating data? We are going to meet some
of them during this course. I'm going to connect this here. Now when this runs, it sores our first
style in this list that we're going to be actors to destroy when we move
to the next level? The second of all, the
second thing that we need is what we call
the coordinate system, the coordinate note system,
the coordinate values. For that, we're going to
create another variable, and we're going to call it es. And we're going to
change this to an point. Now what is an in point? It's basically a two d vector. Also, I'm going to change from
array to single variable. Now, if I compile, the default value is
currently zero, zero. This is what we want
for the first piece. The first coldness
that we want is 00. Now, we need to store
this somewhere. Besides the arrays, there is another type of variable
called a map variable, which is basically a
two dimensional array with some extra rules. Let's create one. I'm going to create
a new variable. I'm going to call it gon. Ngon map. No, actually, I'm going to just me, Dang map. Dang map would be better describes the type
of variable also. So I'm going to go here to
the types of containers, and I'm going to select the map. You can see it as two variables. So this is what a map is. It's like a two
dimensional array, but First type of variable
needs to be unique. L et's compile and
demonstrate this. For example, if I
add the key point, the 8.00, and I try to
add again something. It doesn't allow me,
whereas if I go to the array and add none as an
actor, I can add it again. It doesn't matter if
we have duplicates. I'm going to delete this, I'm
going to go back to calls, and actually, I'm going
to bring them up. Map. I'm going to go back to p and delete also the default
value that I added. Now, the first one will
be the coordinates. The first one I that
we have on this map. The second one would be
the tile actor itself. So I could have either
the coordinates or at the same time, the actor that I
want to reference. I'm going to type tile. I'm going to file the BP tile. I'm going to use an
object reference. I'm going to change
variable type. It's asking me to
change variable type because I brought
it in the graph. This means it's
already registered it. If I hadn't bring
it to the graph, I was just being here
creating the variable, and I go and change
the object type. You can see it
doesn't affect it. But the moment I bring
it in the graph, it affects it. I'm
going to undo. I'm going to bring
this gin here. And as for the array,
I'm going to add Now, this ad has a special rule that if you are adding something
that already exists, since it has to be the
first key has to be unique. It will override
the existing key. So this is not a fail
safe mechanic add things, but because we know
that this will run only once in the beginning of biding, because it's the first tile, this is fail safe that it
will add the correct piece. Now, I'm going to connect the
current coordinates here, and I'm going to
connect the actor, also the return value of the spawn actor to
this dungeon map. In our dungeon system, in our maze dungeon, whatever we call it system. We will have a special rule. That rule will say that on special blocks do
not spawn things. So we need a list the special
blocks, not spawn things. For that list,
we're going to use the coordinates of
the dungeon itself. So I'm going to
duplicate the current coords variable, copy paste. And I'm going to rename
it to Special rooms, for example, all
special tiles actually. Special tile. And I'm going to make it also a list an array. Now, I could have made
it a set that has the same rules as the
map or the first key. Some of the rules are the same. It means that they have
to be uniquely added. But I'm just going
to use an array since they're a little
bit easier to manipulate. I'm going to bring
special tiles with hold. I'm going to get a getter, and I'm going to add this array, the coordinates of this tile. I think this is a nice
popping point for now. The next legion, we are
going to decide and describe how we are going to
define the exit point. Where is the next piece? Where is going to be
I pawing this piece? Where is the next piece
going to be spawning? We're going to define the
Nora Southwest ordinance. Thank you very much. Goodbye.
10. Custom Direction System: Hello, and welcome back to Game Design Workshop engine five Procedural Dungeon
Action Apes creation Calls. On the previous one, we
started the chain of events, the function of the
Span for style. And we added the actors
to destroy array. We explained a little
bit about rays. We created also the
dungeon map variable, which is a variable of an
int point and an actor. And we also added the coordinates
to special tiles array. But we said that the special
tiles will be tiles to not spon we'll be holding the rule to not spawn
things in our dungeon. For example, we don't
want in the first tile to spone a turret or a chest. H. Let's save continue creating another variable for listing. This time, going
to be the list of northeast east,
Southwest variable. This be a very
unique type of list. This list over here, the MP list or the array
list or that as we said, they can be changed on run time. This means I can add
things or remove things in this list
during gameplay. What we're going to create
is old an enumeration, which doesn't matter
if you are on blueprints or on Sets plus, enumerations cannot
change during run time. It's never. But It would be a
tremendous achievement. Now. Let's see how we
create this variable. This variable cannot be
created in the list here because the list here holds
things that are changeable. For our list, the thing
that is going to be changeable is going
to be the value. But the list itself must be
created here. To create this. We need to go to Content Drawer, go to our folder blueprints. We're going to create
another folder inside there. I'm going to call this
or nums for fold. Ams. I'm going to right click, go to the category
blueprints, hose enumeration. We're going to name this Oh, go to add four variables. Going to open it,
and this is what we see enumeration Variable list, and we have this button that adds enumeration
enumerators. If I try to rename one
enumerator t four, we have new enumerator
zero, one, two, three, I try to name this zero, you'll see it will pop an error. New enumerator zero
is already in use. But this again has unique names. Now, I change 01. For example, I'm going
to keep it zero. My mistake. Put
the capital on R, it's case not sensitive. So having the R capital
doesn't really change. Now, I'm going to
delete these names. I have to provide a name. So we'll start with
the first one calling. And for North, second
one calling E for East, the third one I'm going to
call it south for S for South, and the fourth one I'm
going to call it W or West. We have northeast southwest. So this is our
predetermined list. Before we go on to those
who want a definition, a more precise
definition would be that it's a data typing
programming that allows us to define that of name constants representing
specific values. For example, our option menu, or we could have normal
easy itmare hell eculties. That is Use for programming to make our code a little bit clearer than
having, for example, a bunch of pollens,
a bunch of branches, switching on and off things
or strings or anyway. Let's continue. Let's bring this list our
blueprinting M generator, because we're going
to need it a lot. Coy should have named it
direction. E direction. I'm going to create
a new variable. I name it. Erections,
just directions. Now, we're not going to
find it easily here. So I go to ms there is a
lot of pset type actions. Now, it gives us the variable
we created e directions, which has the list of
northeast South and West. I'm going to change a
single type ibru from A, I compile, and let to
show you something. Now, as you can see, actually, we're
going to bring it, we can see it on the details. It has a dropdown menu with
our options with Northeast, Southwest, and one of them is the persist
the chosen value. But even if it has
stored all these values, one of these values, the
one that it's added to. If I'm going to
set the directions at going to be one
of these options. Actually direction, not a good name for this variable because
we're going to use this variable to define our exit point from
our spawned actor. B right now, what
we need to do is fine where our next
piece going to spawn. So I'm going to change
the name to Last exit. Oh, yeah. This is our
last exit variable. Where did we exited from last? Oh, go to compile, Dave. And now let's make
a random exit. Now, we're going to
the system repeat. It's not a bad technique, but the best also. We're going to do is
going to take make array. If I dragged from this, I couldn't get make array because this is
context sensitive. I wasn't. I type M array, it will do the same thing. But what we did was
make an array with a wild card as a variable. So, what I'm going to do is
also get context sensitive, get from ray a copy, for example, and
connect this here. So I turned the wild card
to a type of our meration. Now that we have
this array here, to delete the get or up. I'm going to back from here on and connect this
here, delete this here. I'm going to add or pins
and make it out west. But these are little
tricks for me not having to create
an array with all the directions and getting a random one that
array that I created. I'm just making a
temporary array that will be garbage collected. Now that carbach collection
is a big thing also. There's a lot of explanations. We're not going to go into it. Oh, I created an array
that it's not going to be holded in a variable
and eating up memory, for example, which would
be negligence because just a ray of R Enumeration
values is nothing. But anyway, I just
wanted to show how can we do some manipulation with nodes and get from
wildcard to our own variable. Now, what this does is
as a random from out of this dom element and
promotes it to our variable. Calls it to our last exit. So when this runs, we have decided that our last exit is going
to be this one. We can actually demonstrate
this with a print string, I connect this value here. This will actually
show us nothing. It shows us nothing because we haven't connect the
pone first tile. I'm going to connect this here. Compile. I'm going to pre. As we can see, if I press
play again and start, noth, press and
start. West again. A it's Rundo One reason you
just t to west and south. Okay. We have a North.
Yeah, it works. Gets a random, three time. I think this is a nice
sopping point for this one. We're going to
continue the next by defining the exit point, not the exit point,
the intro point, which we're going to be also in some rules.
That's it for this one. Goodbye.
11. Finding Adjacent Tiles: Hello, and welcome back to Game Design Workshop Real Engine five Procedural Dungeon
action RPG creation course. On the previous one, we
created the last exit IO Blue, and we created the
enumeration we did. And explained a few things
about enumerations. We also prove that we are
getting a random point through the Mar A
cheat over here, and right now we
don't need this, and let's continue with
the opposite exit. Now, we can make it easy
for ourselves and not have a random opposite
exit and just check all these two variables
are never the same. Other check that's no.
What we can do is just get the opposite of
what is our exit. For example, paint. If this is our box, and we
are exiting from above, the intro should be from below. If we are exiting from the east, the intro should be the west. I think it's a simple rule, and it makes things a little
bit easier for us right now. We are going to create
later some checks, so a variable is never came
with another variable. But for now, let's move forward
with what we are making. Now, to do this. We We need a way to
find the neighbors, the adjacent cells, however
you want to call it, What is around
basically our first, our first coordinates like
our coordinates are zero, zero, zero, x, zero, y. What would be the
neighbors on a cross? Cause we are building
with a cross. That's also one information
about our dungeon, how it makes the dungeon creator. Let's go
to paint again. Now, as you can see, I put arrows on the
Northeast Southwest. We don't have arrows on the
Northwest or Northeast, or this would require a
different type of building. But for us now, we're going
to do the basic of having just Northeast Southwest and
continue with this logic. Now To get the neighbors of
this current coordinates. We're going to need
another function. It's going to be a
pure function again because it's a
mathematical calculation. We're going to create
a new function. We're going to call it
wind cross base on it. This is the spelling
for adjacent. Sent. Anyway, it doesn't matter. If you keep making
a spelling mistake, if it's the constant
spelling mistake, doesn't really matter because
you can find your function. But spelling is
kind of important. Now, let's enter this function. Actually, it's open. Now, what we're going
to need is an input. We're going to need an
input of coordinates. I'm going to go to inputs, and I'm going to
select an in point. And I'm going to name this ds. As I said, ds, the in point is two d vector. That means it has an x and
a y. It doesn't have a z. So as I could e
with the transform. So I can do it with cords, but I don't want to use split
because if I use split, it looks like this,
and I'll just have to drag he from
here from here. Is going to be a mess anyway. So I'm going to recombine the two, what I'm going to do is, I'm going to drag
this here and type break in break in point. Now, it's a little
bit more clear, which will not be
in the end to be. Because what we need to do is we're going to
need to manually add one on the top
coordinates or subtract one. And also do the same or y. So we get our north south
east west coordinates. Because we will
define that our north is the plus sine of x. South is our minus minus
on the word direction x, and eat is the
positive direction on, and we is the negative
direction on y. Oh. Now, I have manually attracted
and added the values. But I need to make the points. What I'm going to do is like
how I made the make a ray. I can actually make in point. I can have this node over here that creates
another in point. Most of the things can be
created temporarily like this. Now I need this four times. Now, let's connect
everything, everything. Let's go here, goes here. We will be forced to
spagetify a little bit. I'll drag from the
y here to the 0x0y, and from the y here
to this zero y, and I'm going to do the
same with x here here, and it goes sageify. Now, what this means in
short is that we are creating a variable neu
end point with from the current position
plus one to x or plus minus two x plus one y
and plus minus one y. We have a cross location to find our neighbors
from our current point. Now, I'm going to make
a ray as I did before, and I'm going to add pins. Going to connect this
here and here this here, and going to click on the wine cross adjacent
and create an output, which is going to be an array, and call it j. Lastly, we need to connect
to the return node, the array we just
made to adjacent. Now, before we go on, let's demonstrate
what we created. So let's go in the
function on first style, and let's put a rt br again. L et's bring this
function over here. I didn't select it to be pure, I'm going to just select it now, selecting the function
anywhere that it is. On the detail stub, you can see this pure option. I'm
going to select this. For coordinates, I can use
the current cots right now. And what we can instantly
see is that we cannot connect this variable to this one because
this one is a box. Has a symbol of a box, which is our array symbol, where this one has
just a pin symbol, this rounded dot here. Oh, how can we show everything, all the element
lists of this array. What we can use is something
called a for loop for each. Now, there is a foreloop
also. Let's bring it. No one example. So what's the difference
between these two? First of all, let's
explain what they do. What they do is based
on an index that or we set ourselves or
we get it from an array. That's some action
that we can program, which is called body loop. And when it's completed, it wires the completed pin. Now, as you can
see, this ones have some different pins
on this side also. This one just gives us an index, for example, if I
put index 55-55. It means it will index, the first index that
we give when it fires the body loop would be 55. And the reason we know it's
55, because if we cover, it says executes body loop for each index from start index
to stop index, inclusive. That is the keyword, inclusive. This means that it will run 55, and it will run 65 also. Now, this one gives
us an array element. So when we're using for
each loop from an array, we actually get the
corresponding element to the index also. No, let's connect this
before the print string. And now we want to
point this A element. I'm going to connect this here. Going to delete this loop. And our coordinates are
right now zero and zero, zero on y and zero x. So it should give
us a plus one on x, a minus one on x, a plus one on y, and a minus one on y while keeping the corresponding
opposite to zero. I go to compile.
I'm on the overp. I'm sorry. Go to M level. Go to save everything
and press play. Now style game, we can see
the coordinates up here. If it's too fast, we can open some extra options
on the print string, which has all duration, some other things or advance. We, put this on. If I, for example, now, it will stay longer. Now, if we test it
with different values, let's call the ma generator, instead of the current colts, I'm going to split this. Select, let's say we
start from one and one. I should update correctly
as it did the values. One more thing before we
close for this lesson. I think we should put
some explanation find cross adjacent the order
that they are coming from. As we said, north is plus on x, and south is minus on
x and west minus on y, and plus is east. I'm going to go to the function. I can actually put
it as a tooltip, but I prefer it on the name. I have it here. Rename it with F
two in space and north North East West. I can have this and explain myself the order of which
these ones are coming. Now, I think this is
enough for this one. I'm going to see
you on the next. Goodbye.
12. Coordinate Mapping and Tile Spawning: Hello, and welcome back to Game Design workshop
and Real Engine five Procedural Dangon
Action RBC creation Course. Previously, we created our fine cross adjacent North
Southeast West function. And let's recombine
this actually. We have an input of
an int point input, and we are exporting we have an output an
array of t points. Now, we demonstrate the
ability with a foreloop of adding any coordinate gives us the neighbors,
the cross neighbors. So now let's connect this here
and actually let this too. Now, what we want is to get
the opposite of last exit. To do that, what we're going to use is this list over here. I'm going to get copy. Now, the difference
between a copy and a reference is that when
I'm getting a copy, I'm getting a duplicate
basically of the actual element. Was from the reference, I can actually
manipulate the source, the actual entity of the array. So what we need is a copy. And now we're going
to use a new node. We're going to use a select
node. Let me demonstrate it. We're going to type select. As you can see, we have
this node over here, which gives us some options and an index of a wild
card and a return value. Now, based on this
index wild card, old wildcard because it
can change to many types. We are actually going to
use the am that we have. For example, I'm going to
connect the last exit here. I auto converted. Now, this return
value is an integer because we requested a
select from an integer. If I was just going
to request select, you can see that
everything is a Y card. So we can use this node
in many different cases. No, we do a north first one, zero because arrays
are numbered by zero, going to one, two,
three, et cetera. Oh, North is zero
east would be two, South would be one, and west would be three. But based on the index that
is incoming, it comes south, it chooses two, when it's a North it chooses the
corresponding one. But the problem with this
is that if North comes, then we're selecting north. If East comes, then we
are selecting east. What we want is to
inverse these numbers. But when it's coming north, we want south, but we're
going to choose one here. When it's south, we want north, so we're going to
choose zero here. When it's east, we want west, and where it's
west, we want East. So now we can invert that
basically on the income, what we get from this array. Now to finally reach our goal on all these actions would be to say to the program that this box should have these
coordinates on our map, our two dimensional
should have the starting. Well, not the starting, but the intro block, for example, let's
call it intro. Let's actually create
a blueprint for that. Let's go to Blueprint folder. We're going to right click. We're going to select
a blueprint class. I'm going to make an actor. Let's call it BP intro
or balloon or whatever. We are going to use a balloon. This is why I said balloon. No. Since we want intra
to be spawned there, we should tell to the maze that this should be kept empty. These coordinates. So, what I'm going to do if you
go to special tiles? Oops. I already got
a mistake here. I'm guessing this happened. It shouldn't have any elements.
I'm going to delete this. Special tiles should
be a zero elements. I'm guessing this
happened because I created the element from here. I duplicated this variable, so it might have kept
it or by mistake, I might have added
or for some nation. So special tiles be empty. Now, I'm going to copy
this special tiles, paste it and rename it to stt But we're going to have
another list, again, we're going to bring this
here with control and select AD and add this
variable from get. Now, we're going to use this list when we're
constructing the maze, to create some rules to say, do not place anything
here because we might want to place some
things there ourselves, as we will do right now. Let's say we want to propone this intro tile, Put this spot. I'm going to use
again this own actor because this is the way the responding actors in the world. And I'm going to select
the in O. It's an R. Oh, let's go actually
to this blueprint. The way I went past to it
is I selected this brows, which means browse to a set, magnifying glass over here, and it leads me
to the blueprint, like if I was in another folder, that's this, ready
to the blueprint. Now, I'm going to
double click it, and I'm going to
add a static mesh and select for the
static mesh auto selected here, a tube. We have a tube. SM tube. Okay, let's leave
this tube for now. So we know where our intra is. Now, find the location. As we said, when I split
this, recombine struct. Yeah. You can split also
the vectors themselves. But what we wanted was to recombine to show that
this was a transform. Now if I split it, I can
see the location, rotation. I do have my local coordinates or a two dimensional array. But what would that translate to coordinates
in the world? Because this needs
word coordinates, cannot be spawned
based on one and two, minus one and minus two,
where in the world. But for that, we're going
to create another function, another pure function to be
able to give it coordinates, and it gives us a word location. Oh. Let's go to our functions, press this plus symbol again, and add a new function. Let's call this point location. I think that's enough. As we said, we need
another input here. It's going to get the point
ordinance in this holes. And it's going to have
an output of a vector. We have a w space of x y and z. Let's say this. Wouldn't it be great
if I can connect this here and you
could just work. But what we need to do
is going to break this. Remember when we talked
in paint about pile size, like how big is our
actual maze type? Well we're going to need
to create this variable. I'm going to press
our variable here, I'm going to change
its type integer. I'm going to name it ile is. Because I know the
size of R tiles, that 600, I'm going to type 100. This is the default value, but we can make it instance
editable and expose on spawn. So we can change. We
have different tiles, when we're spawning the maze, let's go to main menu
and graph, file. Let's update this. Collect it, and nothing happens because I have not
compiled this blueprint. And now we have tile size. We can adjust it on our own if we have different
type of tiles, 400 by 400 or whatever
number we die. I'm going to compile and save again, and return to our ma. Now, we have this tile
size that it's hundred, and if we multiply this with x, multiply it with y. We're going to vector. Actually, because with vectors. Now this is Vectors are floats. So if I just try to make this
a vector, it won't happen. Now, I can always do
a two float change, and it will create float. But real nowadays gives us
the option to go to this pin, right click and convert
it to anything I want. I'm going to choose a float. Single precision
doesn't matter for our Therefore, maybe a bigger procedure for us because we
are multiplying integers. And well, to be honest, because it's worth location and we might be
spawning the maze. I float. Might doesn't
matter or doesn't matter. Oh, from here, now
I can make tor. And this is my x value, and this is my y value. And for the z value, I'm just going to add this to the tor asi. Filling
is important. Yeah. So, since this is zero, it's going to be
adding the Z axis from our location of the actor. And the reason we are adding this is because this
is our start point. And when later we're going
to be spawning next mazes, like above and even with a different starting point than 002000, let's
say for example. It could be 500 by 600
X and some random Z. This is why we need to add
the actor location so. The next mazes that are going to be built are going to take into consideration that
their location is relative to the actors location
to the Mazes location, the Maze builder location. Oh, I'm going to put this here. We didn't specify
much this blueprint. I'm going to compile,
I'm going to save, and I'm going to go back
to this on first style, and I'm going to bring fine
tation, go to make it pure, therefore goes again,
and I'm going to connect this here and this here. Now if I play, it should spawn. We can actually see it because we have the
loading screen. So let's go to the
loading screen. Let's go to the cavas panel
and set visibility to hidden. Compile and save. There
is no loaded creen. But I'm guessing, we are not seeing it because
there is no light. Let's fix this. Let's bring light to our level. We're going to go
to the box up here that's quickly add
to the project. We're going to go to lights and add that directional light. Let's play again. Really can't see any box because our camera was not
the right place. Oh, I'm guessing
this is our intro. So somewhere around here
is our maze generator. Now, I think this is a good
stop point for this one. And on the next one,
we should start designing our tile so we
can see our first tile. Goodbye.
13. Visualizing the Maze with Arrows: Hello, and welcome to
Game Design Workshop and Real Engine five procedural Dungeon action RPG
creation course. Previously, we created the
fine tile location function, which fines based
on a coordinates, and based on our tile size, the location of our even
coordinates, the word location. Oh, we added this to our code, and we also spawned
our intro block. That should actually be
spawning a little bit higher, so I'm going to just add here
and do a vector add math. I'm going to add
to the Zaxs, 300. I'm going to connect this here. So now it will
spawn a little bit higher than the
rest of our maze. Now, one more detail before
we start doing the tiles, as we said, we need to add this to the actors to destroy array. I'm going to bring the
actors to destroy. I just going to press add. And I'm going to add
this actor also, which is the result of
spawning actor PP intro. Now let's compile and save. Let's go open our pile. Now when we open
it the first time, again, the blueprint
opens like this. We just need to open
full blueprint editor. Again, in case
anyone is wondering, this is the default values
default tub of this blueprint, can also be found on class defaults over
here on the detail. I'm going to hook this up here. And let's begin. What we're going
to do first is add some attic meshes and some
arrows on our component tub. So to see them, let's
go to our viewport. And let's press add
an static mesh. We're adding a static mesh.
Let's name this mesh. Four. And this is a static
mesh component. So it needs a static mesh entity to be added on these
properties right here, because this is what it's saying to the blueprint is
that you have a static mesh. It doesn't say to the
blueprint, which static mesh. But we're going to go here on
the detailed stab and go to static mesh property
and select our floor. Now, Is there are two floors, the 400 by 400, and the plain floor. This is a 600 by 600 floor, so we're going to use this one. Now, as we said, our north is the
positive axis on x, and our west our east is
the positive axis on y. To make things a little bit
more visual for us so we can tell which is was by just
looking at them on the map. We're going to add four arrows. Addr first. Then I'm going to copy paste. 43 times. Oh, I'm going to re
name also on arrow North arrow arrow
south and arrow west. M. Now. Because these arrows are small, let's also increase their size. I'm going to select all of
them and go to scale and increase it by one
factor two, basically. Now they're a little bit bigger. Let's rotate them
correspondingly. I'm going to press the rotator, which E, rotate
the second arrow, the east arrow, and rotate
now the south arrow. Rotate West arrow. That's all fine
and good. We have four arrows that show direction, but we are not having any
special info on what is what. So if I see this, not having tool
selected or anything, I won't be able to tell is
this north, is is West. But let's add some
text on each arrow. Text, arrow text,
selecting the arrow. Selecting the last
arrow and text. Why am I selecting them? Because when I select them, it auto adds it as a child
of the selected component. If I had selected the root, it would add it the text
components parented to the root. Now they're parended
to the arrow. So if I'm changing the arrow
direction, so does the text. Now, I'm going to
bring the texts A little bit more forward. Actually, as you can see, because the arrows are
rendered with e of two, our text, it auto
added with 0.5. So it's basically scaled one if I put it outside the
parent of the arrow. I I parented to the
root of the blueprint, not make root, just touch. You can see that it
returned to one, one, one, but the text
stay the same size. We go back and parent it to
the arrow, which was north, I see it returned
to 0.5 0.5 0.5, but it pad the size. This is because the arrow
itself is scaled on two. It was like four,
it would be 0.25, for example, Let's
demonstrate this attach. Again, I made it a root. I the floor. That's why. Here, the arrow or I'm going
to touch the text again. You can see it's 0.5. Now, if
I return the arrow to two, the text is going to
stay 0.25 because now I'm scaling while I
have this as a child. So the engine thinks that I'm thinking all this automatic math happening at the same time. I'm going to unparent it again. Actually didn't
need to unparent. Just going to one, one, A. I'm going
to rotate it a bit. Rotate opposite, so I'm
going to this also. I'm going to change on
the details the text from text to n for north. Here. Now, our arrows are on
location zero with that zero. Maybe that's not the best option because they should be a little bit higher
than the floor. Right now, they are
exactly on the floor. So I'm going to change location. I control selected
every one of them. I will change the
location to net. Or 100 or 50, just
a little bit above. 90 k. Now, for those who are new, the way I'm moving here is the
way I'm moving the editor. This means by holding
right click and using AWS T&E, move around. Oh. Now that we have n, not quite
centered here. Move it. I move it, I cannot
center it with the current grid spacing topic. But because it's ten, if I put it on five, maybe It centers okay. Yeah. It's centers better five. But if it wasn't
centering even on five, of course, I could
put it on one. I re turn it to and right now, I could just turn this off
and snapping would be off. The same thing we can do with
rotation with the degrees, and the same thing
we can do with scale controlled by
these options over here. Now, let's put more textnra, Let's name actually this
textrander a north. I'm going to go to
the other textnder. I'm going to set
it scale to one. Remember having this locked, so it scales everything on one. If you have this unlocked, you have a scale component, and be careful if
this is even scaled, I lock it, it will scale
up this accordingly. Lock it again. Set one, 11. Again. Let's bring it over here. Let's rotate it. This really know what. This should be like this. I bring it here. I'm going to change the text to West W. E one. Okay. Let's do the
east. This was the. Now, you see, because I'm
rotating even long rotate it. And this actually
is the east arrow. So, I'm going to reset it transform and rotation
and go again. I reset it by ticking on the bold arrow
here when you move something and ask
you if you want to reset it to default property
over here with this arrow. I'm going to put it this way. I'm going to rotate it this way, it this way, and we'll
let further down. W E of change to fire
again, bit more down. I think they look fine. Now, on the west arrow, let's do the correct
arrow this time. I'm going to set the
text to Ws elsewhere. I'm going to change
the rotation. Correctly. It scale to one, and put it a bit
lower down here. Filing nicely, for
the last one, South, Bring it down, S for the
text, and let accordingly. Of course, set the scale to one, and we set the location. Now we have a northeast
southwest directions to see where our possible
exits and entrances are. For example, if we
go play right now, We can see the loading screen. Yeah. So let's go to
our loading screen, go to our cavas panel, and make it hidden
compile and save, so we can actually see
what we're building. If I press play, the camera
is not looking correctly. But if I eject, press
Alt and S, for example. Not for example, that's
the shortcut to eject. I can move free again
on the editor editor. We can see the
northeast Southwest, but we cannot see the arrows. The reason is because there
is an option to the arrows. We'll show it afterwards. So there's an option
to the arrows to make them hidden in game. Well, now, as you can see, our exit is probably is on north because the opposite
south is our intro block. As you can see, this is
not exactly centered, and the reason is
that if we go to the open to the intro
block, go to viewport. You can see that the center is actually this corner over here, not the center of the square. So this is why it looks.
We don't need this. This is why it doesn't
look centered. But if it was a
tubo center pivot, then it would have
been centralized. Now, I think this is
enough for this one. Actually, let's go
show the arrows again, the hidden game variable, go to viewport, to the Ti
port, not the maze generator. Let's select all
the arrows and go to then gain option in details. I just wrote here HID, and I'm going to turn this off
the If I compile and save. Act. We can see now the arrows and
the exit is from the east, so our intro is from the west. That's it for this
one. I'm going to see you on the next. Goodbye.
14. Adding Castle Like Walls: Hello, and welcome to Game Design Workshop
underal Engine five procedural Dungeon action
Bz creation calls. Previously, we started
creating the tile arrow. We added some arrows,
we added floor, and we added some text to indicate the
direction of the arrows, based on our coordinates. Oh. How we use the
coordinates, basically. No, now. Let's start some more things
to make this a little bit more dungeon feel like
just having a floor, if we press play,
it it looks weird. Floor in the middle of the sky. So let's add some extras, make it more dungeon like. No, what we're going
to add is static mess. Be past one. Four. So
we have four of them. We can name them two wall one. Wall two. And four. Now, to this because
I had written HID, was only showing options
with HID in them. So read this, so I
can see everything. And for the static mesh for all this, I'll
select everything. And since this is a
common attribute, I can add it to all of them. I'm going to select again and
this time the 400 by 400. And actually, I'm going to
change the material also. I have to do this by selecting
each of them and use the brick lay brick clay B. I have not clue how
to pronounce this. But this is what we're using. And I'm going to select
it on everything. This material in
this floor is from the original starter
pack of real engine. Now, let's move them to
create something like walls. But first of all,
I'm going to change the scale actually to be two. Maybe a little bit longer 2.3, on height, and I need
to unlock before. Thank you. Now, I'm going to copy, copy this value and go
paste it to the rest. That's another
option that we have. We can copy even
whole option sets, like I can copy the whole property category
transform, for example, and if the other
item has the same, paste, and it
should have worked. Again, pile properties
in category, and Basal properties
in category. Okay. There you go. Works. Is. Now all of them have
the same properties. Now, the issue now becomes that because this is multiplied
by two, it's 400 by two, it creates 800 floor, not a 600 floor, which is not much of an
issue for us right now because we need the extra room. We're going to place them
on the edges, maybe. Maybe I'm wrong, maybe Our
size is not 600, it's 800. Maybe I was informed wrong. From the three D people
about the assets. But it's fine. We can just
change our tile size to 800. Let's go on We can do it at the default value on tile
size from Maze generator, at least 2800 or we could also have done
it here on the main menu. Right now, we need to do it the main menu for sure because the old old default value would have overaten it because it wouldn't
have updated here. Now, File save, complete save. Our tiles are 800. Now. Let's place them roughly. There. They do have to create a box. When we replace
them roughly and we actually make them coolly. A bit lower because
as you can see the on the same
height as the floor, the materials can overlap, and we don't want
this to happen. As it lower. Yeah,
this looks fine. Doesn't really matter.
Yeah, it's fine. Right now, we have something
that looks like walls. I eject again, it
from some side. You have something
that looks like walls. When we place the
items above them, like walls and everything, we might need to readjust
according to what we see. Let's go to maze generator and
actually tile the BB tile, actually add one more thing. You're going to add a text. Another text render.
That going to place it up here and rotate it
look at the camera. Oh, I couldn't undo
because I let lay be on. And when you're
playing on any editor, changes need a
certain combination to be saved also.
Well, actually. But when you're
playing on editor, basically don't do changes. That's one of the rules. You can. As I said,
you can save. If you have a level
that you want to play and eject and
move something around, you can and you can
actually save it. It is the button k. Let
me demonstrate this. Let's go to the game level. If I press play, I'm
going to eject right now. For example, I want
to move not this because this is been spawned
through our blueprint, but I want to move, for example, the directional lighting. Let's not the directional
light let's say it's another actor table. I want to move its location. And maybe rotate it
also some other degree. If I press K by selecting it, you can see safe state for
K. When I stop playing, it will keep the rotation and location or scale
that I have set it. Let's return this to default, and let's go back
to our blueprint. Now, back to our text, I'm going to like
this, dated actually. And for text, we're
going to be feeling it from somewhere else and
Shona increase the size. And we're going to do this
with art size from 26, I'm going to put it to 30. 40 50, 50 looks nice. I set it somewhere here
because it's going to phrase. Actually, I'm going
to it over here. I'm going to go to
construction script. Now. I talk a little bit
about construction script. What it does is it creates
things and it fis information, and it manipulates the blueprint
basically before owns. Perhaps Let's go. I'm going to get this new text, which I didn't name
name to file number. I'm going to bring it
here with control, and I'm going to set text. I'm going to connect
this first of all. For the text, I'm
going to change it to ring actually text, which makes in string to text. Now, I'm going to do a pen here, which means at the above
string to the below string. For the first string, I'm
going to have pile is Or B, I'm going to actually
create a variable tile. When I put it one word, it
didn't like it two words because we have the text
number text number, and put a t score
in front of it. Now, I can compile and
change this to lumber. Hey, I'm going to change this to the T number variable
from N to integer. I'm going to bring it here, and I'm going to connect it to B. Now, where this ty
number is going to be filled with information
that's going to be on spawn. If you compile and didn't
work at the first time, it says, can't parse
default value falls. I'm I'm not going to go into it. You can compile again,
and it's fixed. Oh. Is going to be This
is going to be filled on instance editable
and expose on spawns. When we're spawning
a tile, for example, our first tile in
the maze generator, go to our spawn first tile. St to tile. Now we have this
tile number here, and the first tile is zero. To compile and save,
let's see how it looks. I eject. Number is zero.
Now, I don't like that we eject every time. I'm just going to
bring a camera. God. Going to set it to zero, zero, zero, or a little
above. Look down. My we put here and
make it on an angle. Now if I start, it didn't do anything because we haven't set it to possess this camera. We're going to go to a
level blueprint right now, like the camera, go to
the level blueprint. Click and create a reference. I'm going to get
cooler from that, I'm going to blend
you with Blend. Connect the new target, this camera and connect
this to Bigin play, compile and seven play. And now we are
possessing this camera. Okay. So we have
tile number is zero, we have the arrows, and we
actually have some walls, which this wall is a little
bit off its this wall. What I let it overlap,
put it tight, a little bit lower.
Okay, let's play. Ad. We have our time number, we have our directions, and we have a start that
randomizes every time. Now, what we need to do is make a way to when we
have our exit from, and when we know that we
are blocked from west, these arrows so be hidden. But this is something we're going to leave for
the next lesson. Good bye for now, see
you on the next one.
15. Blueprint Communication with Interfaces: O Hello, and welcome to Game Design
Workshop and real Engine five Procedural Dungeon
action RPG creation course. Previously, we added a
few walls on our tile, and we also added tile number text that we added to the
construction script. As we said this runs before the Blueprint
spawns in the world, whereas if I had
it, for example, in the begin play, it
would run the moment. It was after it was spawning. Oh, now, let's continue with ogling our arrows based on our exits based on which side is blocked
and which is not. Are we we're going to
use actually this also to find out when I'm building the next
piece, if the previous one, where it's exit,
where where can I build actually go to do that, we're going to need a function, but we're not going
to need any function. Just in case you want to create later your own tiles,
your own maze. We're going to create
and maybe we have a maze that created by plenty of tiles. If they have the functions, actually, not if they
have the same functions, but if they have
certain addition to the blueprint that it's
called blueprint interface, they can run the same They can be used
from the same algorithm. Let me explain biting paint. Let's say we have an
algorithm that says, Let's create algorithm actually. If current tile is
equal to Mc tile, p? If it's not equal,
then pon tile. This is what we will
be creating later. When a spawn tile and I
want to toggle its arrows, since when our spawning mechanic gives us a reference to
the thing that we spawn, we could directly call a function that is
inside this blueprint. Let's say in our tile
blueprint, tile. What if I had P I'll do. And this function
wouldn't like it. If I had, like, when
I'm selecting a class, if I put it a random
box here to select from different tiles,
random classes. It wouldn't like that
I'm drawing from this and running a specific
function of this blueprint. So here is what where
blueprint interfaces come. They have a bunch of
function names with inputs, outputs, whatever
a function can do, actually, that they can be shared some classes
that we select from. So, when I'm having
a BI function, a blueprint interface
function here, I can be sending a message
regardless to the class, regardless it is not
a word regardless to the class, but I'm spawning, as long as the class has
this blueprint interface, inside it, like inherited
in its properties. I'm going to show you how
to add this right now. So basically, that is one of the uses of blueprint
interfaces. We're not going to go about
what is more optimal. There's other ways
to send information. There is event dispatchers, there is direct references, there is a bunch
of ways to do it. But what is more optimal or not? Depends on many factors. And usually it's not about the problems are
not coming from there. They usually are
collision issues. They usually are
navigation issues, the navigation mess and with AI, different types of issues create much more severe
problems in games. But always, you can
use the profiler and check where your game hiccups. Now, let's add this interface, but to add it, we
need to create it. So let's go to our
Blueprints folder. Right click, go to create
a new folder, actually. It's called this folder,
BI, Blueprint interfaces. You're going to
enter this folder. You go to go to Blueprints, right click and go to blueprints and select blueprint interface. I'm going to name
this BI plt Homes. And I'm going to open it. Now, when I open it, here, it gives us already
a new function to add. The first function
that we will add is is a function to
find the next exit. Because for where
we are, we need, first of all, to
find the next exit. So find Then we're going to
need two inputs for this. They're going to be of
the type e direction. Oh, it's already for me because it's the last
variable I created, and we're going to
name this income. Erection. And go to outputs and
create another variable. Going to be again
of the e direction, and this is going
to be the exit. Ba this function is
going to be doing things to find the direction based on the incoming
direction, where is the exit? Because we don't
want the exit to be the same as the
incoming direction. Because then we will ping
pong back and forth. And the next function
would be ogle arrows, to set the visibility based on if the path
is blocked or not. Now, as you can notice, for those who are new, I cannot place any coding here. This is because on
blueprint interfaces, we owe them on the actual blueprint that
we are adding them to. And the reason is
because we might want the same function with the
same inputs and outputs. Eva does some different maths, some different
operations inside of it. They can be working
differently on BV tile. They can be working
differently on BV tile too, but the inputs and outputs
would be the same. Anyway, let's continue. How do we add this
interface on our blueprint? To do this, we're going to go to class defaults, I'm sorry, clus settings, and
we're going to go to interfaces tub and
implemented interfaces. We're going to select Add
and call the BI Mase comes. Now, under our
functions variables and variables has been created a new category
called interfaces. If I open this, I can clearly
see I haven't compile this. I can clearly see
our two functions. The functions that
you were seeing before was a function that I tried of the record, but it didn't work out well. So yeah, these are our
two functions right now. Compile again and
it will compile. Always compile your
I class blueprint. Dave, and then close before you do things on your blueprint
that you have added it. Now, our next step
before we start fixing these functions, not fixing, but creating them would be
to create a variable to control the information of if
a direction is open or not. If a direction has access, we can go forward
or it is blocked. And as you can see, I was
already playing with this, and this is a map
variable I created. Let's start it from
the beginning aually. Let's say that, for
example, not a map. Let's say it's a
single variable, and it's going to be of
the type directions. Create new variable of
the type directions, and then select the map
variable, the map container. And the second part of
this would be a Bolan. Direction on off. This is what we created here. I'm going to call this
variable directions. Now, I'm going to need
another variable, which of this time
would be again a map, and I'm going to have
both of the sides to e d. I'm going to name this opposite. I'm going to compile and save. And for these two variables, I need to set some
default values. So I'm going to go
to directions first. I'm going to add one. I'm going to say this is west. I'm going to add another
one, say this is south, add another one,
say this is east, and I'm going to add another
one which will be north. I'm going to leave the In part, the second key as als. Now, why didn't I press
always add a add four? And then because
if one of them is north and the default
value is north, I cannot add another one. As you can see, it
says cannot add a new key because
it already exists. Now, I'm going to do this for the opposite directions also. And this would be south,
opposite is north. This would be east, so opposite is west. This would be west, so opposite is east. And this would be north,
which opposite is south. I'm going to compile and save. Let's actually use
the directions first. Let's go to our Tal
arrows function. Now, it created as an event where I wanted
it as a function. So I'm going to delete this. I'm going to delete this and go cheese the system a little bit because it won't allow me
to make it function easily. What I'm going to do to do
it past is I'm going to just add the parameter pile, go back to our blueprint. Eight function total arrows. Add something to it. Let's this. Let's add the This is fine. This, compile and save. Go back here, I'm
going to delete the output and compile and save. And now I have it as a function. Now, for our function
total arrows. Let's get the map directions. And when we are manipulating
information from the map, we cannot actually
get like an array. We have to turn to array, one of the two keys. I'm going to get ese. Actually it's keys and
values. It's not two keys. It's e and the values of Anyway, I'm going to get keys and going to or each loop of the keys. We explained a few things
about which loops before, now it's going to be a breeze. I'm going to get
direction again, and I'm going to find a value. Finding a value based
on a key is possible. I'm going to do is
connect this here, the array element
from the fore loop, and I'm finding the key
from the directions. And I'm going to get
all my arrows actually. One to or What we need is a let based
on the directions. So I'm going to connect the
north arrow to the north. I'm going to connect the
South arrow to South, to connect east
east, west to west. From this array that it's
selecting based ray, based on this select
based on the directions. I'm going to e visibility, and also I'm going to
propagate to children. And the visibility that
will be set will be defined based on the
result of the find. Now, it has two option pins. One of them is if it found the item because
there is a case of them requesting
something that is not inside the directions up. And the other one is
the value of the data. I'm going to connect
this to visibility, and I'm going to
connect this here. Base this here and uncompleted. I'm going to set completed. Return note that we
completed the function. Now, I'm going to
compile and save. And let's test
this, for example. Let's put the Tg arrows
right here. Compiling say. When I press play,
no arrow should be shown because we
have them invisibly. We have them that
everything is blocked. But if I press, let's say North
and South is open, it's going to be working.
Yeah, it is working. Oh, I think this is
enough for this one. I'm going to see you
in the next. Goodbye.
16. Finding Available Exits: Hello, and welcome back to
Game Design Workshop Re lensing five Procedural Dungeon action A Pus creation course. On the previous lesson,
we talked a little bit about blueprint interfaces, and we also created a few variables, the
direction variable, which holds all the
information for West, South east and north and the accord visibility of
the arrows in Boolean form. And we also created the
opposite directions map, which we have the directions
and the opposite of them. We also created the
total arrows function, which we are taking
the directions and looking through each
of them and finding the according the proper arrow to set the visibility on or off. Now, let's continue
with finding exit. Little steam popped
here. Never mind. So let's continue with
finding our exit. What we first need
to do is promote income direction to a variable
in case we need it later. We actually can use it
freely in this function, just because we have
this income here. Let me show you a
cool and real Now, let me show you a cool
and real functionality. If I rename this,
to be more clear, Income destinations,
let's put an S here. While I'm inside the function, I can call any input that
is coming to this function, just by typing the
e, income direction. Clearly, this is different
in a different category. It's in no category actually. It means it's inside
this function. I can call it as a variable, as long as long as I
am in this function. If I go outside this function to the graph and paste
this variable, you're going to see
it doesn't exist. Now when a variable
doesn't exist, we can right click and
create variable to make it, and it will keep the data and
data type and these things. Now, let's delete this.
We're not going to need it. Let's return to our function. Oh, connect this here. We have income directions. Our first step should be that our directions map
should be updated, that this direction is
actually a movable direction. It's free to move from the
side. It doesn't block. So we should turn the arrows on. But what we're going to do is
get the opposite direction. We're going to find the value
of the income direction, which I can just drag from
here, doesn't matter, and then I'm going
to add to the map. And why I'm going to
add, as we explained, because we are adding a
value that already exists, it just changes the value. It doesn't add a new one. So
I'm going to connect this here and set the value to true and connect
the extitution. Now, the next step we should
do is actually figure out which of these directions
is free to create an exit. What we're going to do is
actually duplicate directions. All this one exits. I'm going to compile, and
since this is a duplicate, it already has our values. Now, what I'm going to do is remove the income directions, which actually should be the
named to income direction. That many is just one. Here I live it up. Now, since we removed a value from here,
the income direction, the rest of the values should be free to continue
our Me building, like find the exit that we want. So I'm going to get keys. Now this would be only
the possible answers, and I'm going to
get a random item. I'm going to promote
this to a variable, and I'm going to call
it possible exit. This year this year. Now, we have a possible exit. Since we decided and
sorted it to a variable, we should remove it again
from the possible exits. I'm going to connect this here. I'm going to connect this here, and it will be removed. So now this will be left
with two possible exits. The next thing we
should do is add on the directions like
and by saying add, I mean updating the value
of our possible exit. And this, it will
turn it to true. So right now, compile and save, the next step would
be to ogle arrows. Since we updated the
values on directions, the The function we
created to Togal arrows, we'll update our arrows. In the end, let's
bring the output node, connected here and connect the possible exit
to the exit output. We could actually
name this exit, not possible exit.
Compile and save. Now, let's go to paint and explain what this
code will actually do. What is the theory behind it? Right now, we have a
box, our tile box, and we decide to have an exit, let's say randomly
from this side, and because this
is the first box, this would be our intro. Intro block. Now, we are finding a random
exit on phone first tile. The second piece
that we will build. Let's put it on
yellow, actually. The second piece
that we will build, will automatically
automatically. We will run the function,
of course, to do that. K that this place is its entrance and it will randomly decide one
side to continue. Let's take, for example, that it continues to up. The next piece, we'll also know that there is another exit here, and let's say that it
continues this way. Now you're seeing where
I'm going with this. It will actually end
up with going here, and it won't be
able to continue. The way we are building it
is like a snake like a worm. It creates one more exit. What we will do
is we will create an algorithm like a buck track algorithm to those who are
a little bit more advanced. What is a buck track algorithm? It means that in short
terms, it places something, it places something
until the rules say you cannot place something. There is no more
placing based on this. So it goes back and checks if it can buy another way to go. Now, this is a very
rough explanation. This is what we will do. But For us, exactly, we want go one step back. Like a more traditional
backtrack algorithm will just go from here. It found an a spot that it
cannot continue, so go back. Can you find any other
place to continue? We will actually choose a random block to
make it randomly creating dungeons branching the dungeon
in different places. Away, we're getting
too much forward. I think this is a good
stopping point for this one. The next lesson,
we can start with building this and explaining
a few more things. Good bye. See you
on the next one.
17. Algorithm for Base Maze Shape: Hello, and welcome to game
design workshop under engine five procedural Dungeon action RPG creation course. Previously, we created
the function find exit, which cos the income
direction to our variable, and does some
calculation and adds removes directions from
our direction variable. It updates the stats, which arrows so be visible, and from our
possible directions, we are removing the direction
that we are coming from. And then we are storing a random direction
from the ones left, and we are removing that as well and also changing the arrows, the directions, variables
to make the arrows visible. And then we total arrows with the function that
we created before. Now, we also explained
a little bit about our algorithm that's going
to be a backtrack algorithm. For those who need
a more explanation about thera algorithm
and what it is. Basically, it's a technique for solving problems
incrementally by trying partial solutions and then abandoning them if
they are not suitable. For our example, it will try to create to place another tile, if it cannot be able
to place another tile, it will backtrack to
a previous position, as we said to a random
previous position and try to create more
tiles from there. Now, let's start
creating algorithm. We're going to go to Even graph on the maze generator,
not the tile. We, on the BPM generator,
we're going to go to VNGraf. We're going to create
a custom event. Let's call this
custom event field. Now, the first question we
should ask is with a branch, are we done are our current tiles with
equal to our mac tiles? I'm going to bring this to here, and I'm going to connect this. The first question is done. If it's true, we're done with building the first part of our. If not, which is the
most juicy part, we should start building. Now, Our next action be to increase the
current tiles by one. I'm going to paste this here, I'm going to do a plus one, and I'm going to set
the current tiles. I we are increasing it by one, we could also add plus plus, which is increasement in, which increases by one. But this is also fine. For the next part, comes the
more difficult part because here comes a multi
question basically. And for this, we
need a function. What this function will do. The first step of our
question will be to find not the cross adjacent, but the cross adjacent
that are empty. Let's create another function, and we'll call it empty base. The spelling correctly, maybe. Who knows? No. What we will do is we're going to get our
current coordinates, and we will also get
the function that we created the find cross adjacent. And from this list that
we have explained, we're getting everything
adjacent to our coordinates. We're going to for
loop, for each loop. R and we're going
to do some tests. The first test that
we should do is, does this coordinates belong
already to the dungeon? If it already belongs,
it means it has a tile, so we shouldn't b there. I'm going to get
our dungeon map, and I'm going to get our keys, and I'm going to ask if
the keys contain an item. And the item would be the array element of
the adjacent neighbors. Oh, This is our first question. Let's put a branch.
Let's connect this here. Now, if this is true,
we should go on. And the next question would be, does it belong to the
forced entry coordinates? Like for example, the intro
block or for the next levels, the elevator block
from the previous Me. Oh, Let's see if these
coordinates also are being contained on a copy paste
this in the force empty list. Now, when we have a branch
and we have two things that we want them to be true to
continue from the true. We have the variable. Actually not both of them. Lo change this phrase to if we have a branch
and we want to check if any of the
conditions are true, we can use this or nodes. Or Boulan which means
that if this is true, or this is true to this. This means that if any of
our conditions is true, the branch will fire from true. What we want is none of
the conditions to be true, so it fires from false. Now, we need another condition, and the condition would be on how big can I build the maze? Like, what does the
max mean on x and y, I can go in the layout. For this, we need
a new variable. We're going to create a new
variable from variables plus. We're going to choose a
variable and set its name to M s and change its
type to an integer. This is an integer, of course, because there is no half blocks. There is only one, two, three, four, how
many blocks we want. And by having only one variable, we only can create not square mazes because it
will be randomly generated. But if the max aisles are kind of close to
what the maze size is, what they can feel, then
it's going to be squash. If we wanted to
differentiate between x and y and create
parallelograms, then we would need max
size x max size y. Now, for us, we need
just the mac size. Let's bring it here.
What we want to do is compare greater or moller. I said the opposite. If it's greater is this one, if it's smaller is this one. The x and the y, so we
need to duplicate this. Connected here. Oh, if we have our
current coordinates, which is not our current
coordinates right now, it's this actual array element, which I'm going to
break here because it's an in point and I
the x and y separate. Oh, if my x is greater or my y is greater
than the may size, then we are out of bounds. But at the same time, we want to use the
negative values also, so our maze branches even
from behind the star. If we start here
and we just start feeling on the positive
axis of x and y, this is our space of building. But if we start here and
there the negative also, then our size and the triples. What we're going to
do is we're going to multiply this by minus one, so we can negate it, and
we will connect this two. This is a mess. Let's bring
the positive the greater ones above and the negative ones
below and connect this here. What we can do is create some read out notes clicking
on the cables themselves. This connects here, so I'm
going to connect this here. I'm going to bring this
back and connect this here. And let's make another
one here, we here. Now, you know what? We're just
going to duplicate this is variable here, maybe
connected here. Ready they can see my mistake. Okay, because when
it's so spaghettified, it's hard to make
sense out of it. X goes here and y goes here. And this is not needed. Okay. Now it's a
little bit better. Now, what I'm going to
do is use again the or an or logical gait. I'm going to connect
to this here because if any of this is t, then It will return true. If all of them are false, it will return false, so
we are inside the maze. And one nice little
nifty trick and real has also is that
I can take these. I can right click, and I can
collapse them, function. I'm going to make it
pure and call it. Tech out of vowels. No, I didn't create the output because we
hadn't connected it. Let's put it in a variable. Let's call this out of bounds. Typing of bounce. Let's go inside and
connect act here. Compile and save. Let's go back to our get empty adjacent and create another pin in this or and connect it here. I went through a
little bit past this. Yeah, we can concrete more pins by clicking the ad
pin as I did here. I should have exed it. Anyway, let's continue. The logic is the important part. Now, we have let's say
that everything is false, and everything is according to our plan, that it's correct. And one of these adjacent
is completely empty. It doesn't belong
already to the maze. It's not forced empty, and it's not outside of bounds. Let me check really quick outside of bounds,
that nothing is wrong. If the ma size is
greater than the X. Now, that's the opposite. If the x is greater
than the maze, and if the x is
smaller, and this. That means that, for example, if x is minus ten and
size is minus five, it's s, and it's,
it's out of bound. This is correct. So,
if these are correct, we have the coordinates, but we don't have which is it, Northeast, Southwest,
where is this coordinates? We need this information also. So what we're going
to do is create a temporary variable if we go down here on the variables list. We can see now a new
option, local variables, which is variables,
as you can see, get empty adjacent that
belong only to this function. This means that when
this function runs, They are getting
their default values. It doesn't store any
information on them. Oh, since this is
a pure function, we can actually use it. What we're going to do is
we're going to call this, we're going to make
it a map first. And the first key the key will be the directions, rameration. The variable, the
second variable would be the point
of coordinates. Oh, got to bring it here. Let's name it also. A cations. Now, let's name it. A It's
not available locations. It's the valid adjacent. Okay. But we have
valid adjacent. And here we're going to add
to this valid adjacent. This value that comes
from the array. We're going to connect it here. Now, how do we know if it's
north east south or west? What we're going to
do is we're going to use a select node here. And for the options, we're going to connect
the array index. Actually, this didn't
work really well. Sometimes it doesn't give
you the options Zake. Let's do a select. Like this with a wild card, and if I connect it, still
doesn't give me the options. So, we're going to cheese
it a little bit and get the last exit from here
and do a select from here. I'm going to connect
this also here and then connect here, and remove this. This didn't work. Let's try again. Let's bring la exit and from index array, I'm going to elect We're
going to connect this here. Y. Here we have the values. Going to connect
this here first, and then I'm going
to disconnect this. This is how we bring
this selector in. Amazing. We bring
from the array. We do a select, we bring a
variable of our e directions. We connected it to the select, so it showed the options instead of having
them as variables. There might have been an
easier way to do this. Anyway, now, as we know our index corresponds to
this index of the ray, because this is the one
that we are for looping. We know that the first one
is Index zero is north. The first one is
number one is South, Number two is east, and number three is west. So we can do it correspondingly
here north nouth, east West Now, the next thing we need is
an output in this function. I'm going to select
this and from the completed of the four loop. Because if we added it here, then every time that the loop body fired
would fig complete. Actually in the first one,
it would fig complete. I'm going to connect this here, and I'm going to change the
output to a map variable, actually e directions variable that will make a map out of it. And the second one would
be again in point. So we can connect
our valid adjacent. Let's call also
valid the values. Why do I add the values
in this and not in here in this name because
if you have the same names, it can confuse the engine and it usually it won't let you, but in case it lets you, it can confuse the engine on packaging the game
on many other things. So yeah, it's better to have different names for the
local variables for the variables that are not local in your blueprint and also for the return
notes and everything. Name creation of variables
is something better done with a lot of explanation like valid
adjacent values. Maybe this should have been valid maze cross
adjacent values. More explanations on the
variable names, the better. Oh. Right now, we have
finished with this function, point empty adjacent, and
we are returning this list. We also created this
checkout of bones function, and I think it's a
good stopping point. I'm going to see you
on the next one. Goodbye.
18. 3D Lesson 17 Continuous Tile Spawning: Hello, and welcome back to
Game Design workshop and real engine five procedural Dungeon action bs
creation course. On the last lesson,
we left off with creating our get empty adjacent. We actually went
through our neighbors. We founded the cross neighbors, and we four looked
through each of them. We checked if they belong
to the Dungeon map, if they belong to
the forced empty, or if they're outside
of bounds by creating this it function over here. So, then if it wasn't
belonging to any of these, we added it to a variable
called valid adjacent, which is a local variable
in this function, and we gave this value
with our return notes when the for loop is completed. Let's continue with our maze. Building algorithm. Now, let's go to even graph, and let's bring this nice
little function that we made, which is get empty adjacent. But we didn't make it pure. Going to click compue
and now it's pure one. Now, we have this list. What we want to do
with this list is check if the last exit
belongs to any of this. So, what I'm going to
do is I'm going to find the last exit. If I can't find the last exit, then we need to backtrack, then there is no possible
way to continue because all the empty adjacents do not correspond in the
exit that we want to. The block wants to
exit from there, but the next block is
not actually valid. No, we're not going to do
the back track right now. What we're going to continue
if we find the last exit. I'm going to put a branch here, we're going to
connect this here. And since we founded our
last exit, and it exists. It means that I can
build a new block. It means I can have a
new coordinate finally. I'm going to bring
the current Cords and I'm going to connect
it to connect this here. Now that we have our
new coordinates, we need to find the location which we will spawn
the new tile. Oh, let's bring own actor class. And we're going to select
the class tile again, P tile, and we're going
to split the transform. Now, to find the
location that we needed, we created a function for this, which is called
no fini location. I'm going to connect this here. I'm going to connect this here, and we can finally
have a new block. Now, that respond
to the new block. Our tile number
shouldn't be zero. Our tile number should
be our arn tiles. Because right now, we have added one and zero plus
one equals one, so this is our first tile
with base zero of counting. The next thing we should do
is we add this to the dang. I'm going to bring
the dangon map, and I'm going to add
place this here. And going to bring the
current coordinates here and the return value from the spawn actor to
the actor of the dungeon. Also, we need to call
from here the find exit. Yeah, I mas coms find exit. We want the message
one because if I had selected the exit. We can selected this. As you can see, it has
a different target. It probably wouldn't have worked because this color
over here means that you're calling
it on this blueprint, even if I have
connected the target. But anyway, it should
be the blueprint. The message when it has
this folder over here, it means it's sending a message. Now, I'm going to
delete this, and I'm going to connect this here. And for the incoming direction, we're going to just choose last. Exit. Y. And our output value would be setting our last exit. We also need to add this
actor to be destroyed, so I'm going to bring
the actors to destroyer. I'm going to do an add on the array and connect this here. We're going to move
everything a bit. Here, and maybe make the
cables a bit less pagified. Look better already. Now, when all these
functions have happened, what we should do is
around built again. If I click here, you can see, leads
me to the start, and this will go on
until this condition is satisfied or this or
now finds a problem. Let's demonstrate
what we created. I'm going to go to
the variable My size and select a number. Let's say five. Let's actually
make this instance editable and expose on Spone, so we can set it from the
main menu on this spon. But let's update this
also Let's compile first. Let's update this also. And we have maze size over here. Maximum tiles 20, of course, we also need to call
the build event after our spawn
first style event. So we're going to call here
our build and compile. Let's p. We're going to
pre start, and it bugged. Why did it bug? Now it worked. Here here here. Why is this dead end? Have Ops Here again, this is a dead end. I'm coming from here, I'm removing this. Here. There is something going
on with the arrows. So let's go to let's
go to BP tile, and let's go to our
interface functions. I probably find exit. Let's check what we're
doing in coming direction. We're finding the opposite. We are adding that the
opposite we are coming from. We're removing it
from list keys exit. We're adding the exit, and we're toggling arrows. Income direction passes. Yeah. This is the problem here. You see, we're removing
the income direction. We're removing one
way that we can exit. What we should be removing is the opposite of the income
direction at first. So if we compiling play now Yes, we have two arrows and
it ends with one arrow. Okay, great, and it
keeps this empty. Also. We have something that
has started to create maze, a worm maze, we start from here. Let's see a few more
times if it backs out. And let's how many pieces it is. 11. How we say this maximum. Oh, I reached the end. This is why. The end. Guessing. Let's say five. So this is zero, one, two, three, or five. This is the end. This
is why it stops here. All right. No, I think this is a
good stopping point. In the next lesson, we're
going to do the Bata logic. Good bye. See you
on the next one.
19. Custom Backtrack System: Hello, and welcome back to
Game Design Workshop and real Engine five Procedural Dungeon Action ARPs
creation course. Previously, we created the start of our algorithm,
our built algorithm. We created a lot, actually. We created the
first question that is our algorithm has
reached the MC tiles. Then we added an extra tile, an extra to the
counter of the tiles. We ask some questions,
for example, if our empty adjacent
around us are valid, and we found the location
of our new coordinates, if they are valid, and
we spawn the tile. We added to the list of destroy, we add the list of the dungeon, we found a new exit, and we continue building. Now, let's continue
with our bactra loop. Oh. Now, we need to ask
some questions again. So, let's open paint
and explain this part of our algorithm
lavid in more detail. Now, let's say that we have our dungeon that
is being created. Let me copy paste this. At some point, it
cannot create more. It has tried to go, and
there is no more room to go forward with the rules
that we have up to now. So what do we do? We're going to ask a very simple question. We're going to tell the
choose 11 random block from the ones that we
have created and try to see if there is an
exit that is valid. But also, we are going to
be asking one more question that if we have
visited one block, and we continue building
from this block, bla bla bla a Roa, it's continuous building, and
it finds at the end again. We don't want to ever
go back to this block. So we will create another list that we put the blocks
that we have visited. So we will create another list from the blocks that
we're visiting, so we never visit them again. The reason is but
from my perspective, it creates a better dungeon, a more branching dungeon
than it would without it. Anyway, this is our rule. Let's go implement it. Now, to do this, we
need a new function. Now, let's go create
another function, and let's call this. Try to buck truck. The first thing we will need is to duplicate our dungeon map. I'm going to call that duplicate z. I think that's fine. I'm going to bring this
here and I'm going to bring our dungeon map also. Now, from the dungeon map, I'm going to select the keys. And I'm going to get
the length, actually. I can get a random item
from the array directly, and I'm going to promote
a local variable, the integer, the out
index, not the endpoint. And I'm going to name
this random location. Going to connect this here. Let's check if this
random location is inside our visited
actually I have this here. Locations. I'm going
to check dines. And I'm going to need
on the key to find I'm going to need I'm
just going to get. There's a reference,
I need a copy. I'm going to get this
random location. Why I do it this way? I'm going to explain
in a second. The way I'm doing it this
way is because I want to explain that if I chosen, if I had connected this here, I was going to get a new random. If I store it in a variable, then I'm getting this
variable that I stored. But if I'm getting from
this node over here, then I'm going to get a
random a new random every time something is requesting
something from the random. The same thing would have
happened if I had a random int. If I was requesting twice, then I would get two
different numbers. And all the random nodes,
like, for example, a random in range,
work like this. They will give a different value everything that is
connected to them. Let's continue. Now,
If this is true, then we want to end this
function over here. So, we're going to
have an output, and it will be of the type lean, and we're going to name it. No. I'm going to
connect this here, and I'm going to place the exit. Now, because I'm ending
the function here, doesn't mean that if
I have things here, they won't run if
this runs false. I can have many
return nodes inside one function based on where
I want the function to end. So. If it's false though, I'm going to d to the Nangon
list, our Dungeon map. I'm going to bring this here. I'm going to press d. I'm
going to connect this here. Actually, from this getter, I'm just going to put this here. Also, we need to wind we
can get the object also. And instant mistake. I don't want the
dungeon map here. I want the visited
location here. I'm finding from
the dangon map and I'm adding to the
visited location. Oh. Now, I have added to
the visited location, the new location that
we are testing if it can have an exit. Be even if this location
doesn't have an exit, we still want to add it
to the visited locations. Now, how are we going
to check if there is an exit to this one? We're going to need to open
our I maze combs and add a new function and name
this function new exit. I'm going to compile
and save the BI coms, Mas coms, and go to our tires. Now, this new
function appear here. This new function
though needs an output. We, let's add an output. It would be no exit. And it needs another output of Exit direction.
Let's call it. It's going to be from
the type directions, the enumeration directions, and now we can compile and save actually and go back tile. This is a function. It's
not an event any longer. Going to open it, and let's
create some things in here. Really, You know what? Let's
finish this part first. And then we're going to do that. So, I'm going to call the new exit as a message because we're
sending a message. It's a blueprint interface. And if it's true, I don't want a N.
I want a branch. If this returns true, then it means we have no exit, then we return no exit. We copy paste the return node. Now if this is false, we're going to be
setting the last exit to the exit direction, and we're going to be setting
our current coordinates To W is the ordinance over here. Let's read out a little bit to spaghetti pi here, goes here. Here. A little bit better. I want to do this. Okay. T up. It's always good to tie
the up a little bit. No, we're going to return this with holes.
We've found an exit. We can continue building. I think we should
connect this here. Let's call this function. Backpack, which
will not be pure, which going to be
a real function. And we're going to put
a branch over here. And we have to do
a few more things. Now, if I was going
to place, let's say, no exit alls, so we are continuing to
build with our new data. If I was going to
run from build, then it would go
through this check, which really doesn't matter, but it would add one extra
to the current tiles, and we don't want
this to happen. So we're going to create
another custom event. And we're going to call
it continue build, and we're going to connect
it to the branch over here that we are taking
for empty adjacents. We're going to continue
build from false. It means if no exit is false, we're going to be
continuing built with our new data that will
be passed in here. It will check the ordinance
that we have set up, and it will work accordingly. Now, What happens if no exit is true when
we have no other exit? Well, we're going to ask
a very simple question. Is our visited locations and dungeon map the
same length to do this. I'm going to ask for length, which gives us the
number of entries in this map or array or set? And if these two are the same, and there is no exit, then we cannot beat
the maze anymore. A we're going to blink
for the bugging sake. Me can't build. And so our code doesn't bug, we will set our parent tiles. To the max styles, and we're going to call build. This means that if the
maze cannot build anymore, set our current tile
two max styles and exit this base one of
building the dungeon. Now, when this is not when the dungeon map is not equal to the
visited locations, We should just run again
the tri to backtrack. And this won't create an issue because it won't be infinite, because every time
we are running the backtrack and we are
selecting a new point, we are adding it to
visit that locations. At some point, these two
variables will be the same. Basically they will be not the same because they will
be in a different order, but they will be containing
the same information. So it will quit and
exit our built. I think this is
enough for this one. We'll continue the next one
by filling the new exit code. I'll see you then. Goodbye.
20. Finalizing Backtrack Rules: Hello, and welcome back to Game Design Workshop rail Engine five Procedural Dungeon
Action At Ps creation Course. Previously, we created our
custom rules for backtracking. We said that if
we cannot find an adjacent then we are going
to try to backtrack. Oh, we got the keys
of the dungeon, whatever has been made. We stored the random index from this array that
we get from the keys, and we checked if it's visited in the list
of visited locations. If it is in the list
of visited locations, we are exiting with falls. If it's not true, that
there is no exit. So we go and run this again
to find another possible one. Now, if it's not true, so it is not contained in
the visited locations, then we are adding this location to the visited locations. We are trying to
find a new exit. If we cannot find a new exit, we return false and
we run this again. And If we do find a new exit, we stored to the variables, we stored the coordinates, and let's go outside, and we continue build
from a new custom event. Now, when we are trying
to find a new exit, we are checking if
the visited locations are as many as there are
in the dungeon list. So I'm sorry, by using the
length of these two maps, and if they are the same, we exit with a message that
we cannot build anymore. We set our max tiles
to the current tiles, and we run the builder again and this time it
will return from true. Now, we left here with not filling the new exit
in the BP tile. So let's go do that. Let's open our function new exit that we have created in
the blueprint interface, and let's start
creating some rules. The first rule we should have
is let's bring the branch. Let's get the possible exits, and let's get the length. Is this length equal to zero? Like, are there any
possible exits? Because if there are
not possible exits, then maybe we should just
arrows, first of all. Just in case some
arrows are wrong. And then we're going to
return with no exit. Now, in case this is not zero. This is where the
interesting part comes. We interesting might be harsh. Anyway, we're going to
get from the opposite. We're going to
select a rondo one. And we're going to set exit. I brought exit, I brought
it from the variabs, holding t and bringing it here and releasing,
which gets a setter. I'm going to connect this. Here. Now, we're doing the same thing as we're doing with find exit, but with a few changes. Now, we're going to
add directions and add the exit direction. We're going to add it to t, and we're going to
remove it again. I'm going to bring
it again. I'm going to drag a table from here. Remove the exit from
the possible exits. Next time, we can choose probably there won't
be next time because we are setting this style
to never be visited again through our
visited locations. But anyway, no, we're
going to ugly arrows, I have called the wrong
Toggle arrows in both. But yeah, it's fine. The most correct would be to do this one with
the yellow node. But, let's read the correctly. Because when we have a
yellow node, it means self. Target is self and it's
basically, that's it. It means that you're
targeting self. Even here it has self, but for some reason,
this is better. And this is this is a pin, actually, I've been referring to the pin as a node, anyway. We're talking arrows, and then we need the
return node again. This time we found an exit. We unclick this, and we connect
exit to exit direction. So now this we'll get
some information. Now, let's try in run this. As we can see. Okay. Let's
actually see it happening. Let's go to our event graph, and let's put a delay over here. Let's put a delay of 0.2
seconds. Yeah. That's fine. And let's go to our main
menu. Let's make this bigger. Let's make pile sizes. Okay, 200 might be
a little bit big, but let's say 100. Let's see size and
it would suffice, I think, ten by 10100. And if we count
the negative ones, let's see ten So play. I eject it already, and we can sed trying
to build our maze. Building a dungeon, it shows here with backtrack, backtrack. When you cannot
find another one, you see when does this shape this square shape or parallel, it tries to backtrack.
There it is. I think this is from
the last pieces, is 100 Well, from
what I can tell, I put it in the opposite. Maybe we should change,
maybe we should put this number towards this side. Okay, let's go to
this, go to our tile. This is from the north, should go from the South. L et's run it again. No. Okay. Why? I just change it. Well, never mind. Let's undo. What's going on here? It is correct. I turn
the camera around. My bad. It is correct. It backtracks, it creates Let's Let's try and
play test a bit. Let's put 1,000. Let's put this to 50. Let's put this 20.1, so it's a little bit faster. And reject and play. Ing out. Yeah. It creates a level, slowly, but it does. This won't bug. We wanted
to bug a little bit. Let's make it like we
want to put 1,000 pieces, but on a maze size of five. So this will not fit. Let's see this example. Here now it should say that at some point it
put our error message. Me cannot continue. It will build a box lowly, not a box because we
are buck tracking. It printed the message. Maze can't build more.
How I opened this. I pressed the tile key, the one next to one. So if I do this, I can
see the last messages. So as you can see, I can also see what I have been doing clicking on
background, for example. So, we have Mace
cannot but anymore. And we have these
small gaps here and over here because
our back tracking to not go It has some
visited locations, so I chose not to do this. Now, the problem that
we can instantly see is that some of the, some of the blocks, even if they have
access to other blocks, they do not have the arrow. And that's because of how
the mazes been built. We're updating some arrows, but some we are not updating. Let me give you an example
about this. Let's bin paint. Now, let's say, for example, that we are building
painter tool, we are building the first block, and we are getting this exit. Now we're building
the second block, and we are enableing this, and we are trying
to exit from here. So we're building this block. We are enableling this
and try to exit here. Now we're enaling this block. We are enableling here and try to exit here,
which we can't. So this actually
gets actually no, if it has an arrow because
it tried to go here. It cannot build, but
it found something, so there is access to it. Now, let's try to
backtrack from here. We backtracking from here,
so we are enabling this. We are tried to go this way. Oops so we are enabling this. Now, we went this way, and we are enabling this. And we want to go this way. Well, we can't. So
we are enabling this but are not
enabling this one here. So when this happens many times, as we saw, on the big
maze we just created. We can see that this
will happen a lot, and it creates a pattern that some of them
will be like this, and some of them
will be like this, and they will not
have the last one because the last
one was coming from here and it said they cannot continue or
it didn't put an arrow. It just tried to backtrack.
So, let's fix this. So, our arrows in the maze
are actually correct. But this we will do
in a second phase. Our first phase was to build a valuable based on
the values that we have, because 1005 will if the
maximum tiles are not fitting, it will always
create a boxy thing. So let's put something better. Let's put this three, and
let's put this on 20. What it creates.
I checked again. Yeah, something like this should be more of a first level. It has a small thing, and
then there we continue, we can be increasing the
starts of main size and tiles. Actually, we said too much. I think this is a
good stopping point, and we will continue
that on the next one. Goodbye.
21. Connecting Tiles Post Maze Generation: Hello, and welcome back
to Game Design Workshop, and real engine five
Procedural Dungeon action RPG creation course. Previously, we created
the function new exit, that we are finding a
new exit if possible when the maze generator requested on the Pack
track algorithm. We also demonstrated
our maze on play. And we figure out a problem
with the directional arrows. So let's go and fix this. Let's go to the may generator. I'm going to stop the emulation, and I'm going to create
a new atom event. And I'm going to name this
event decorating, for example. Well, arrows are not decoration, but this would be
basically our phase two. Now, we're going to
need a function to fix all the non connecting
connections that makes any sense. Yeah, let's actually
name it like this. Fix non Ones. I'm going to put in a
parentheses, s, visibility. Okay, so what we're
going to do to achieve this is that we're going to
take all the dungeon up. We're going to
catch all the keys. And from now on processes, we be a little bit slower
than one running of this. Because from now on,
we're going to be going, we're going to be
looking through the whole dungeon and
adding some rules. This wouldn't be the most
optimal way to do it, and blueprints wouldn't be the
most optimal way to do it. Surplus plus would be way more efficient to create
things like this. But in the sake to
keep rules separate, we can look towards we look through the dungeon many times and do specific actions. Now, there is another issue with having too many
actions in a loop. It's about how for loop for
each loop or for loop counts. There is a maximum limit that unreal detects if
it's an endless loop. If this is going for too long, unreal might be saying
this is an endless loop. So it doesn't actually
count the indexes. It counts also, it counts
the index of course, but it mostly counts how many actions are
happening inside the loop. There is also in project
settings if we go and find infinite loop. Maximum loop iterations count. As you can see, it's about
iterations that it matters. Now, I might have
changed a little bit, but if you encounter a
problem of infinite loops, increase this to
a bigger number. Yeah, I think this
is a maximum number. Anyway, that's some
extra information. I don't think we will
need to change this. I think the number
it was was fine, but let's leave it here. If you encounter this problem, there is also another way in blueprints to cheat the system, putting some delay
before some actions. But anyway, let's continue. So we're going to go through
all our dungeon coordinates. And from this
dungeon coordinates, we're going to check
for valid neighbors, basically, for valid adjacent, do they belong to a
dungeon, the next one? And if they do the neighbors, then we're going
to help our block, enable the arrow direction
towards that side. Simple action, but
there is a thing. We shouldn't be doing this
actually on the first tile. But why not? Let's do it in the first tile. Also. So, what I'm going to
do is get from the L element. If I didn't want this to happen
in the first tile, sorry. I I didn't want to happen
in the first tile, I would just equal this to zero. So if this is the first index, Don't do anything. This is basically what we
wanted to show. So if it's the first
index, don't do anything. And we can have some extra
rules if it's the 24th index, for example, don't do that. But there are other ways to enable rules like
this more efficient. Now, If we check our functions, we only have et empty adjacent. What we need is the
opposite of this. So, let's create
another function. Let's call it get F. D un adjacent. No. Think we're calling this
function from our ordinates. It needs a coordinate because we need to find
what is around here. We're going to go to inputs. We're going to select an in
point as a variable type. I'm going to name this points. No, what do we do with
these coordinates? Well, we find the
cross adjacent. We have this find socent. So we get our list of rossocent. And then we iterate through this list with a for each look. And we're going to check
if this is contained. Actually, we need
the dungeon here, the dungeon variable,
Dungeon map. And if we can check if this
contains this endpoint. If all the neighbors or
some of the neighbors are being contained, in this list. It means that they are
a part of the dungeon. If they're not, then
they're an empty spot. So, we need a map
to output this. We need to store each
variable to a map because we need the ordinance, and also we need the
direction that we know here, it's northeast South
North Southeast West. So our Index ray corresponds to Northeast
North Southeast West. Now, I'm going to create
a local variable. We're going to
name it valid Das. World seriously.
Yeah, that's fine. It's going to be of the type E. And it's going to be a map, and the second key would be in. We're going to bring this
here and select Add. We're going to do our it to get the select node because
if I get it elect here, it doesn't enable the options. Here it doesn't allow me to enable to enable
the options here. So I'm going to
bring the last exit. I'm going to do our actually from the index and AR
I'm going to the elect. I'm going to connect
the last exit here. The enables the options. I'm going to connect this here, and then I'm going
to disconnect this. Just add options. I'm going to connect
the RA element and go north south west. Now our list is being
filled correctly. When we complete, we need an output node to give our results and
make this actually. So we're going to create an output of the same
type as valid adjacent. Actually, I think I can
just do this. Output. If I drag and drop
something here, even if I drag and drop hoops. If I drag and drop this one, it would create a valid node for me. This, I don't need it. A output A output pin for me. Connect this here.
Compile and save. And let's go back to our fix no connecting
connections are visibility. I'm going to bring
this function over here, gets filled adjacent. I'm going to connect this here. And from here, I'm
going to get the keys. I have an array with
northeast south and west that I can for loop. And then I'm going to
get my dungeon mop. I'm going to find the
current array element. From this actor, I'm
going to get Actions. And add the
corresponding element, connect this here
and set it to true. At the end of this, we
so just toggle arrows, which we can do at the
end or we can do it here. It doesn't really matter.
It's the same thing. But what we should do is
toggle arrows. As a message. Because, as we said, this
might be a different tile. It might for us. Now we have a BP tile. It might be any actor. If we choose to have
the variable as actor, we won't do it now
because it will mess up the maze and it will
be t as a message. So now, let's explain
what we did here to those who didn't understand it is that since we're getting
its fied adjacent, and we are going
through the directions, we are finding that that
direction so be on. So we're getting the
directions that should be on for the current tile
that we're checking, and we are enabling them. We are telling them
on compile and save, and let's see if it worked. Actually, we haven't
called it yet, or it will not work. Let's go to the first build
and call our decorations, decorating function,
event, not function, and all our ik non
connecting connections. Now, if I play, so far away. We can see that it
created these crosses. Well, we have some dead ends that weren't supposed
to be dead ends, but we will fix this where they were supposed
to be dead ends. That's what they meant.
Like, for example, here, because when we're trying
to place something, we are enabling the arrow. This is the reason this happens. It has happened everywhere mot. So Yeah. But the first issue is fixed. The first issue that
things that are connecting to something
should always have an arrow. Now, before we go on
and fix this part that the arrows are pointing
towards nowhere when it was checking if it
could play something. Let's create the loading bar. Let's progress it and
see how it looks. So we're going to go to loading. We're going to elect the Cvas
and set it visible again. Compile and save, and let's go to our maze generator
and add our loading. We have our set percent and our culk loading
function, function. We're going to copy
paste this code here. We're going to come here, and let's place it right here. Now, just placing it doesn't do anything if we are
not connecting it. So let's connect it. This can get a little
bit closer and actually let's comment some
things all this pas. On field, spelled the maze. Us by files. Piles. Huge comment. Doesn't
make any sense. You can put whatever
comment you want. This is the way it helps me. Comments are personal. This is what I would
understand it better. Let's continue. Let's put begin play. That's enough. Let's compile
and save, and let's play. And we can see our
loading but being filled by two 40% when the
tiles are done. Let's stop. Let's
go back to loading. Let's set this
invisible den actually, compile and save, and let's continue with fixing
our dead ends. So, what we need is going to
be a function that we will call it winds dead ends, maybe. Fix false exits. Yeah, fix false exits. So let's create a function. Let's call it fix false exits. And let's enter it. A, we're going to
need First all, let's explain what
we're going to do. We actually are going to do
the same thing we did here. So let's. All of
this. As it here. But instead of cords, we will use the dungeon map. And we're going to
get keys. Keys. We're going to connect it
here, so we're going to iterate to the whole map. I copied the Yeah, I copied the wrong function. Delete this, delete this. I copied get field adjacent, but we wanted the fixed non
connecting connections. So I'm going to copy this, going to go to fix fas exits. We're going to iterate through the whole dung and instead
of get field adjacent, we will just get empty adjacent. And here we don't
have yet coordinates. So what we really do is we're going to change this
connected here, and we're going to right
click and find references, which will lead us
to where we used it. Which is here in
the build section, and we will connect to the
cords the current cords, because this is what
we needed here, but when we use it, on fixed f exits, we
need it like this. We're going to
connect this here. Now, we have the
keys of the empty adjacent and instead of t, we're going to set it to false. If I compile play,
It didn't work. And the reason is because
we I didn't connect it. So let's go back to
May Gen. Let's go to VNGraf for decorating
and get this function. Fix false exits. Compile and save, and let's p. It kind of work on some on one, or I can see two, may be more, but not on all. But this is an issue we will
figure out in the next one. I'm going to see
you then. Goodbye.
22. Bug Fixing & Decoration Blueprints: O Hello, and welcome back to Game
Design Workshop and re engine five procedural Dungeon actional Ps creation course. Previously, in the last lesson, we created the fixed non
connecting connections arrow visibility function that takes the keys of
all the dungeon, like all our coordinates. Once the field adjacent gets the keys from the field adjacent and based on the direction, we are enabling the
visibility of the arrows. Now, we also created the get filled adjacent
pure function, that we used, which
we get the adjacents, we check which of them
belong to the dungeon, and that's how our
list is being created. And now we the last thing we tried to do is
fix the pale exits. So I kind of figure
out w why didn't work. If we go to get empty adjacent, it only gets the ones that are in the bounds
of the dungeon. So the ones that are
outside the dungeon, it doesn't really get them. So we cannot check for dead ends if if they're in the
edge with this function. What we're going to do is
there's plenty of solutions. We could create a buling here to take this in check and
maybe not take it in check. We could create a new function that just doesn't
have this check, but I like to use
what we already have. In fix falls exits, we won't get the empty adjacent. We actually will get the
field adjacent again. And from the field adjacent, what we're going to do is basically very
different what we did. So actually we don't
need to delete much. But what we need is the actor
of the current coordinates. So we're going to get the actor of the current coordinates, and we're going to
get its directions. Basically, on the
tile we are in, get the directions, and from the directions, get the keys. Now, We don't need this here, but we do need this here. From the keys, we're going to be checking is a direction
that contains here. Does the direction we are
checking have a valid adjacent. If it does, it's all good. If it doesn't, then
we turn the off. But this could go false. This could go here.
Connect this here. This is a little bit of a mess. Let me hope. How can we make
this look better? We could be promoting some
things into variables. I'm just going to
untangle it a little bit. It's a little bit
clearer of what we see. From each tile, we are
getting the directions. We are getting the actor
of its coordinates. We are finding in
the danger map. We are getting the
directions of that actor, and from all directions, we are checking if each
direction has a valid adjacent. This is a little bit
heavier, but it's fine. Let's compile and save ID
connect the togal arrows, so we need to connect this. The actor that we are checking. The actor checking is in arrows, compliance save, and let's
check that this time it works. Seems to be working. Now, for a pure check, precise, because the problem
was the edges of the maze. Let's put 202,000 2000
e hundred, whatever. Huge number, so
it creates a box. So we check only the edges. They have arrows, and
now they're gone. And now we have a more clear with the arrows directions that where we can walk
to and where we cannot. So I think it's time
to begin to make this look more like a
dungeon with walls, with props, with
objectives and everything. So I'm going to close this. We're going to
return this to 20. If it looks okay, I
think it looks okay. We can have some rooms, we can have pawing
point, and ending point. So, how are we going to do this? There's plenty of ways there is ways of spawning other tiles, there is ways of spawning
rooms within tiles. We're going to
demonstrate some ways. For now, what we're going to do is we're going to
go to our P tile. Close this arrows. And I'm going to add a child actor here. U Is it actor, which basically means we can add another blueprint
inside this blueprint. For our purposes, it's
going to be used for having a blueprint that has
all the decorations in one and we enable and
disable some of them. At some point, I talked
about references, hard references, and
soft references. A brief explanation
would be that is for managing dependencies
and memory usage. A hard reference is directly pointing to
the asset or object, ensuring that it's always
loading in memory. It will occupy
that memory space, for example, let's
go to our level. Let's go to Sis Map. We can see the dependencies that it always requires to run. It requires I
haven't added much, but we can it requires the brick clay to be
always in memory, it requires the vegetation, script engine to be in memory based on the
assets that we have used, referencing on our tiles. Basically. Here the floor, the walls, everything that is
referenced by the maze and kept in a variable. If I go here, for example, and make this a soft
reference to the game mode. It means that if I run this maze generator in another map that doesn't
have this game mode. Of course, it will produce some errors in the places
that I have used it, but it will not load
it to the memory. So every dependency
of the game mode will not be loaded in the memory because I'm not
calling the game mode. If I had inside DOA
cast to game mode, which we actually have
in the beginning, that would negate it because casting would force it
to load in the memory. Will force the blueprint to load the top down game mode in the memory because I'm casting
it and it's holding it. Though if I didn't
have this cast and this was a soft reference, it would not load it. So basically, soft references hold a reference to the asset or object without immediately loading it into memory
until it's called. There is a lot of optimization
of going about it. We won't be doing that.
It's as they say, when you have an issue,
check the profiler. That's always the
rule, build it, and then check for the issues. For us, I don't think
we will have any issue. Now, we're going to
need this child actor. And it will be holding
all the references for all the items that
we need to keep them in one place and show
how we utilize them. A better way would be
just to own, for example, any props above that
we will show also in some other some
special assets. Now, let's go to create this Child actor.
We're going to go to content. We're going to go to blueprints, we're going to right
click and select a blueprint class
and select actor. And we're going to name
this BP Decorations. Let's name it BP decorations. I file, I'm going
to save everything, and let's open it. Now, I'm going to bring
it here next to the tile. I'm going to close
this because since we have a direct decorations
will be a child of tile. We have a direct access
from each other. Now I'm going to go
to BP tile and select the decorations, BP decorations. Let's go to add some walls. First of all, I'm going to add some static meshes,
all of them actually. I'm going to name
them wall let's say wall n north is wall for South, then all for eat and wall. W for West. And what I'm going to do
is I'm going to go to construction script and bring each of these variables in here. While holding
control, I'm getting getters. Just a reminder. And I'm going to make ray. Store them as information
in one array for later use. I'm going to promote
this variable, I'm going to call it walls. And I'm going to connect this to the construction
script. Compile. Now let's go set some static
messages to the walls. I'm going to select them all. And I'm going to go to our list. I'm going to control and
zoom in a little bit, wait for the disappear. Okay. We this is it. Combined 67a9 67. I think. Yeah, this
looks like it. Let's place them space them out. Oh we can space them out. We can see them here. If you have two screens, this might be a little
bit easier for you. But I'm going to have this like this. I'm going to have this. This and I'm going to be moving them wards
the correct side. Let's say this is
the correct side. I'm going to fix the
values afterwards. Really is the correct side. This is the north wall, so it would be like 90 degrees somewhere here. That's enough of visual placing. I'm going to put this
back up here back up here and I'm going to check
its coordinates 0390. Let's round it up to 400. Would it be nice minus e -400. Check Yeah. It's fine. Decorations, and
I'm going to rotate this wards this side, I think, and location will
be the opposite of this. I'm going to copy
paste the location just negate opposite ways. And I'm going to wall. Hundred 100. This would be 100
or hundred -400. Take the axis. Something is wrong. This should be the st
opposite of 400, 400 was. Now we have walls. Now.
Oh, I I compile and play. Now we have edges, some walls. I think this is a good
stopping point for this one. In the next one, of co,
we are going to clear the path. See you
on the next one.
23. Placing Walls Based on Blocked Paths: Hello, and welcome back
to Game Design Workshop, Real Engine five Procedural Dungeon Action RPC
creation course. Previously, we added
the decorations tile on top of our blupin
tile as a child actor. We used the class BP decorations
for this child actor, and we created actually
first the BP decorations. We added some walls, and we added it to an array
in the Construction script. Now, we also debugged,
to be honest, the big false exit
function that we chose to use another system to the one I described
in the beginning, which is just this time getting the directions of the tile of the current tile
we are checking, getting from the
directions if there is a valid adjacent
towards that direction, and we set the direction to be false to be off in
the visual of arrows, and we doble arrows. Now, And to be honest, we can actually
move these two f, these two functions over
here before decorating. And let's progress the
loading bar also. Our liking. Let's say that this
is another 5%, so we will go to zero point. Life. And then we
go to decorate. As you can see, from now on, we will just estimate on what an action is and how much percentage of
the loading it takes. It's up to us. It's
up to our testing. As I said, there are
more complicated ways of doing it and having
it as a percentage, but it would need a lot of calculations and much more code. Now, let's go back to
fixing our decorations, our walls, to have a basic
layout for our maze. To do this, we will go
to our B maze generator. We will go to Even graph, we'll go to decorations
now that it's empty, and let's create
another function. Let's call this basic layout. Let's call this function here. Let's enter this function. And what we will do
is fairly simple. We will call each actor to call each own child
ductor to do something, and that something would be to hide the walls based on the directions that
we have over here. So I'm going to rename this
child duct to the cors. And also, what I'm going
to do is, as I said, now that we know that this actor will be
a child of this actor, we can have a direct
reference to it, meaning that on begin play, I'm going to call fork. Yes. Actor. And then I'm going to cast to BP tile. Now, this creates a dependency. Now, this decoration needs to have the BP tile
as a parent actor. If it doesn't, then
it will not work. This is what dependencies
are basically. Oh, I'm going to promote
this to a variable. We know it's as not cast fail. It's always going to succeed. And actually, what I'm
going to do is also create a dependency on BP tile
of the maze generator. And I'm going to call
this generator blue, and I'm going to be of
the type generator. Oh, how did we call it maze gen Mazen BP maze
gen object reference. Now, why this doesn't
really though matter. Since we're going to be spawning a tile and it's going to be spawned through the
maze generator, then in memory, casting here doesn't create a lot of hussle. It does cast, which is
a heavy load because it is asking the class
reference in the class, but it will already be
loaded in the memory. Because tile is spawning before the decorations
are being spawned. Now, let's create
that generator, let's make it actually instance editi and expose on spawn. So we don't have to
cast or anything. We can just go to
our maze generator, we go to our event graph, and we go to our spawn
tile, which is here. We're going to reset this
because it doesn't update. Did I not compile? Yes, I did not compile. And I'm going to
actually, there is a B. Now, when I opened this, it exposed an owner. I could use this as self and
then here on the BP owner. Owner, then I could cast this to the generator and
do it like that. But I prefer the way
of exposing on spawn. B to our I'm going to
delete it on self. And as you can see now, it decided to update. So I'm going to do
self on the generator. And now we have a direct
reference when it's paws. There is only one tile
that doesn't have, which would be a
spoon first tile. So this needs to be
updated also with cell pon first tile, and then on our built loop. We need to update
also son actor P tile to have the generator as self. Now, let's go back
to our decorations, compile and save, and
create another function, and call this function. Let's say hide walls. Without this extra part. Okay. Now, we're going
to get our BP tile, and we're going to
get directions, and we're going to get
the keys from the keys, we're going to for
loop for each loop. Then we're going to ask
the simple question. We're going to find the
value of P. And ask, are you visible or not? Now, the problem comes when
we have our walls array, and we're going to go
through all of them. And how do we know
which wall is which? Okay, we have the name, we have them in an order. But what if I placed
them in the wrong order? W I always have to check
the order of each array, and if they correspond, No. There is another
really easy way. We can go to each
wall and put a tug, something that's called a tug. So I'm going to search
some details for tug and press the element. For example, I'm going to put
for the wall n, the N tug. And for the wall S.
I'm going to put the S tug for the wall E. I'm going to put the
ug and for the wall W, I'm going to put the W tug. Why I chose these names? Because they correspond
to our string array, basically to our I'm sorry, not string array to
our enumeration array. Oh, I'm going to
check if this one is What I'm going to do is turn this enumeration
to string basically. There is a string, and this gives us the name of de enumerator to a string value. And what I can do, there is a node that is
called component at. I'm going to connect this here. It will auto convert it to name. And select if the component has the correct tug
that we are checking, then sets its visibility. Actually ops in gain,
not the visibility. Because if we do the visibility, then it a bit less optimal. But what we have to new
hidden would be true. What we have to also do is
set its collision also. To no collision. Because then if we
didn't do that, we would have invisible
walls blocking us. What are tags? Basically, it's a system
to identify objects to create identifier for objects that is less heavy, for example, then constantly casting
two, getting all actors, and compared to getting actors with tug or if checking
something specific has a tag. It can be added to components. It can be added to actors
also class defaults. You can see there is a tag which counts for the actor tag. So the question wouldn't be
component has tag would be actor has tag compared to what we are checking
right now for components. So, a small explanation
for what we did again, we are getting each
tile direction list that has both information
if they're on or off, we are iterating
through the list. Then we are iterating through each wall for each
iteration of the list. This a loop within
a loop is called a nested loop, basically. So for each component of this loop loop through
something else, and we are checking
if the component of the wall has the tag of the enumeration that we
have converted to a string. True. Correct here. If it has the tag, it exists. And if the value is true, because if the value is true, it means that there is no wall, it means that our
arrow is visible. Means our arrow is visible, we are turning the wall off. Now, if we go and play, first of all, let's
connect this function. We have connected
actually, haven't we? Yeah, we have. Okay.
This is empty. We haven't gone through
all our dungeon, so dungeon, We're going to get the values
this time, not the keys. So we're going to
iterate through each actor, not the coordinates. We're going to loop. Then from four loop, we're
going to get operations, which will be last. Then from here,
we're going to hide. Now, we need to cast. Now you see now we
need to cast to, what we call the
decorations? PP. You can see, now I cannot
cast two BP decorations. I cannot find it because
decorations is a child actor. It returns a child
actor component. So we have to get
Actor child actor. So this is a component and it is a component
of child actor, which has cast two
BP decorations. Like this is the cell, and this is what is in the cell. I'm going to convert to
a pure cast, this one, and I'm going to hide bats. Basically, that's it. So it seems like a
simple function. It is heavy because it
has all this information, it needs the actor, that it needs a child, that the child we need to cast
to get the decoration, and inside here, we are also
doing a lot more things. So something that looks here and optimal might
not be in the end. Compile and save,
and let's play. And now we have a nice area. I think this is it for this one. I'm gonna see you next. Goodbye.
24. Default Corridor Patterns: Hello, and welcome back
to game design workshop, Real Engine five,
Procedural Dangon action BZ creation Calls. On the last lesson, we added a few references
of the generator to the tile and the tile
to the child actor, which is the BP decorations, and we created the
hide wall function, which takes essentially
the BP tile. It gets the directions from it, and from the direction it
flops through the keys, finds which keys are visible and hides the walls accordingly. And also closes the collision. Now, when we create
the maze like this, what we can instantly notice, it's that it's a
little bit plane. It doesn't have some ways
to turn right and left. It's an open area,
that of course, we could decorate with
some rooms and some props, and it would look nice. But let's create a little bit of complexity of where the
player can go and not. To do that, we're going
to upgrade a little bit our existing function
of let's stop playing. Of fixed non
connecting connection. Right now, what
we're doing is we're getting each block and saying, you block, are you tied
to any other block? And if the answer is, yes, then we set that visibility that arrow to visible
towards the other block. What if we could ask if
there is another block, and I point towards
its direction, would I create an arrow? For example, let's go to paint. A. When our blocks do this
thing over here with arrows, that they're searching
for the next room, they're creating the opposite, they're searching
for the next room, they're creating the opposite, they're searching
for the next room. And again, they
create the opposite, but now we are left with this. But if we modify
the code instead of when you have a block, then this block just
open this arrow. So we connect all
the arrows that are the Mazes trying to figure out
if there is another block. For example, if there
was a block here, and then it continued this way and never tried
to go this way, like let's say it
came from here, so we have another block here. And then it tried
to go this way. It didn't try to go this way, so there is no arrow here. So basically, we keep our snake worm like
patterns of the ma. So to do this, we actually just need to
add a few things here. Which is when we are iterating through the
available adjacents, what we will do is point that direction
on our original block. O block that we're testing
from the Dungeon Mac. Map. Then what we need to do is find that block
from the valid blocks. I'm going to wind
this value base, the value that I'm checking. From that, I'm going to use the dungeon to find
the appropriate actor. Now, I'm going to get opposite directions because we want the opposite
arrow to appear. And I'm going to wind again
from the other elements. That opposite direction. I'm going to connect here. Actually, instead of
having it always true, I'm just going to have it the same as the directions block. Now, let's clear at the lines here because
there are too many. Make this original one, we're going to connect here. Maybe have lower here also. For here, we need only
one, we don't need two Maybe we can local
variable, all this. Adjacent. Now, this isn't really necessary on
things a little bit Here. Here. Here. I don't
need line anymore. I can break. Here. Now, it's a bit better. It could become much
better if we promote this so variable and
connect to everything. But I think it readable. One, go a bit closer. I think it's much more readable as possible as
it can be right now. So, let's see if this worked. Compile. Let's first. Now we can see we have some
places that are locked off. But most of the places are. We have corridors,
we have really, there must be some
mistake because this should be available for access. Give me a second to check it. Yes, theta is, I'm not toggling the arrows
in the correct thing. I'm toggling the arrows on
the first checking block. I'm not toggling the arrows
on the second checking block. So if connect this
here actually. Could be fixed. You'll
have some dens. That reason is action that I'm checking. Oh, Yes, I'm adding to the same
direction that I'm checking. So I'm going to get the
directions from here. We want the direction to add to the directions of
the opposite block. No the one that we are
currently checking, but the one that is
responding to that check. So this add have the directions of the
field adjacent actor. Also compile and V, it works. The only thing that doesn't
work is the first tile. Be on the first tile, we are not toggling arrows. So let's go do that. We are going to go to our
function on first tile. And we're going to
drag it aection. And we're going to get keys. And each. Actually, we can we don't need
to go through all of them. We need a for loop. We can just add this one as compile and save again. And now it's much more
viable. Let's check it again. Yes, we have a nice maze
and we can see there are some walls that
create a pathing. Now. The next logical part would
be when we have our maze, we have some hodors, some paths that are
mostly can be blocked, some parts that are not locked, the next thing would be to add some rules to the eight rooms. Though, since we
want certain room to be an exit and some
certain rooms to be, for example, a chest
that holds the exit key. That would be more wise
to put first in the maze. Be, for example, if I
create a room here, then it limits a lot
where I can put the keys. That's I I said that
the keys in this box, then suddenly, the room will automatically divide these
areas a little bit better. So if I have spread
around blocks that are non viable for rooms, it should be versed in logic. Creating the whole rooms.
However, they are. Be it makes them be
able to space more out. When having a map that you have places with xs
do not place here, it limits a lot where
rooms can be built. So this is the way
we're going to do it. And I think this is a good
stopping point for now. What we're going to do in
the next one is create the elevator blueprint
and the chest blueprint, and then figure out
a way to spawn them. That's it for now. Good bye.
Sing you on the next one.
25. Room Building & Elevator Blueprint: Hello, and welcome to
Game Design Workshop and Real Engine five
Procedural Dungeon action RPG creation course. Previously, we upgraded
our function for the Pi non connecting
connections to instead of looking around each block
for a valid field location, location that
belongs to the Maze, to to be checking,
if that field, we actually do check for
the field locations, but we are checking now that
if that field location, our block that we're checking
has an arrow towards it, we should enable the opposite
arrow to that location. So basically, let's
bring paint and for example, Neda yellow paint. So for example, if our block had an arrow
towards this side, and let's say an arrow,
towards this side, and the opposite block had an arrow towards this
side and this side, Now, our block that is checking
from here to this block. This is the check
that is being done. It says, I have an
arrow towards you. Do you have an arrow towards me? If you don't, then
create an arrow. Also, if it doesn't
have an arrow and this one has an arrow, it actually turns it
off because we have set it We have added, not set because AD is a setter for maps if
the value exists. So if I don't have an arrow, then you don't have an arrow because we're getting the find from our directions in the
original checking block. Now, in this one, we said that we will
continue with creating some blocks on our entire maze that we'll be unable
to have rooms, like we have the elevator
block and the box block, the box with the key block. So it's easier to say in
the rules that when we are, let's say, for example,
we want the elevator to be on the last blocks. So let's say this is the
last box, put L here, last box, and we want second
to last, third to last. Let's say we want the
box the elevator, sorry, to be in one
of these rooms. Now, if these rooms
are being created. If these tiles, not rooms are
being created into a room, then our elevator
couldn't be in the room, and our code would crash. So it would be easier for us to set places that in the
whole maze do not create a room because we have
rules about that and leave the rest of the
maze to be able to create rooms whenever possible. Now, we will see these things in action more clearly, I think. Oh, first things first. Let's create the blueprints that we will use
for the elevator. Shelves of the blueprints. So we're going to right click
on our blueprint folder. We're going to choose
the blueprint, and we're going to select Actor. So we're going to name
this BP elevator. Let's enter elevator
and add a static mesh. And it's going to be Now, this is just for show right now, so we'll just put something
whatever. Let's put a table. Let's put this. This is big. We want something smaller. Yeah. This will we
do fine for now. This will be representing
our elevator. I'm going to compile and save, and let's create
another blueprint. AEP est. Big est. Okay. Let's open it, and let's a a static mesh. Made this static mes. We have a chest, I
think, the first one. Fine. For now, compile and save. But we have some
representations of them when we are making the rules in the
maze where to build them. Now, let's continue
with our decorating. We created the basic tiles. And since we created
the basic tiles, let's increase also
our loading bar bit. So I'm going to
copy paste this set percent c without the
c loading actually. But going to delete
it afterwards. Be from now on, we are setting a value that we want
on the pre sentence, and this time will be
5.0 0.5 because we were from the 0.45 with the fixed non connecting
and the fixed fs exits. Now, Be honest, because this will be
happening a little bit fast. We can put some
false delays here. Let's put a delay of 0.1. So we give the illusion that
the computer is thinking. Now, we're going to
need a new function, and we're going to call
this function on elevator. And then we going to
enter this function. We're already in
And what we need, first of all, is our dungeon
variable dungeon map. Now, we're going to get
the keys out of this. And to spawn our elevator, we're going to use
the last index. Which is the last tile
placed on the maze. Now, we're going to get this this this copy
of the last index, so we have our ordinance, and we're going to promote this coordinates to a
variable that we're going to call elevator location
in case we need it. Now, we're going to
get our special tiles, the tiles that we don't want anything to be builded on them, and we're going to add
this elevator location to them because we don't
want anything else to be built on the
special tiles. Now, the next thing we do is let's create a perimeter
around the elevator. So nothing will be spawning
around the elevator. So we want to actually
add the perimeter of this tile to
the special tiles. And to do this, we're going
to need a new function. And it's going to be
a pure one this time because it's only going to do some mathematical operations. It's going to be kind of a
copy of our cross tiles. It will just get the
sight tiles also. So All the eight directions
around one tile. So we're going to
make this function. Let's create a function. Let's call it in
single tile perimeter. It correct. I have not. And let's enter this function. We are already inside. Let's make it ase one
from the beginning. And for input, of course, we're going to need some t point or making coordinates
the coordinates check. Name is two ports. Now, let's go to our wind
wind cross adjacent. So we're going to copy this. And let's go back
to our function. We're going to paste
this, the down, and I'm going to
connect the cords here. Now, we have the cross. What we need basically is more, which would be a matter of
organization right now. Like, for example,
would we place them the Northeast
between the Northeast, the Southwest between
the South and West, or would we keep the same as
before and add them below. Maybe I'll do that. Keep
them the same as before, and at the new ones below. Okay. So I'm going to need or more, and I'm going to
need the plus one of the x and the plus one of the y. Then I'm going to need The plus one for the x
and the minus one the y, then the plus one ops, take plus one from the y, and the minus one from the x, and then both of them
on the minus one. Here, Now, it doesn't really matter which is which
or what we want to do. But we can figure it out. Not right now. Let's
go and continue this. So we have the spawn elevator. We added the elevator location, and now we're going to
use this new function f single but I haven't
created an output. So, let's create an output. Let's make it an array. Let's call this
perimeter tile ps. And let's connect this here. Let's go back to the elevator. Now, we're going to get
our elevator location. We're going to for loop
to this ordinates, which are the perimeter
of this tile. And now we're going to add
them to the special tile. I'm going to copy paste this
code from here over here. I'm going to connect
this here and this here. The only problem with
this would be that if one tile of the perimeter
was not in the dungeon, it would be added
to special tiles. So special tiles would contain coordinates that
are not in the dungeon. We could have used
some rules to say that if special tiles are
not in the dungeon, do something about that, but we can also filter this
here to not have that. I'm going to get
the dungeon map. I'm going to bring it here. I'm going to ask if it contains the coordinates that we're adding and if it contains them, I'm going to use a
branch to add them. If not, do not add them. I'm going to compile and save. And for now to see
if it's working, we're going to
spawn the elevator. So, we're going to delete
it afterwards because we're going to be spawning all our
props in a certain point. So, now I'm going to spawn
actor from clas for debugging, and we're going to
see what's going to be if it's spawned
in the last one, going to split this transform. Going to get elevator location. And we're going to
get Dungeon Mp also. And the Dungeon map, we're going to find the actor on the elevator
location, the tile. And from that, I'm going
to get actor location. I'm going to connect this here. And for the class, I'm
going to select. Tor. And we can leave it
like this for now. We don't need to delete it. And I'm going to
promote actually this to ribal called Elevator. Okay. That's fine. Compile and save. Let's play. And there is no elevator because I'm not
calling the function. Oh, let's call elevator. On our vent graph
in the corting. Let's start and play.
We have our elevator, and it's on our last tile. So we are starting from here, and we have our elevator here that will lead us to
the next dungeon. I think this is a good
stopping for now. In the next one, we're
going to spond our chest. Good bye.
26. Chest Key Blueprint: Hello, and welcome to
Game Design Workshop n real engine five Procedural Dungeon Action P
Z Creation Calls. Last lesson, we began to decorate our maze
with our elevator. And in this one, we're going to continue with our chest that we'll be dropping the key
for the elevator. So, what we did in the elevator is that
we got the dungeon map. We got the keys from
the dungeon map, and we got the
last index because the elevator will be
spawning in the last slot. So we added that last
slot to the special tile, so nothing else spawns there, and we created a
function to find the perimeter of a single tile by adding the eight directional
coordinates basically. So, afterwards, we added
these coordinates to the special tiles and filtered through if they are contained in the
dungeon up or not, and then we spawn the
elevator for debugging. Now, we're going to create a new function to
spawn the chest. But we're going to call
this function p est. We are not actually
spawning them, so maybe the name shouldn't
be spawn elevator. It should be create ds elevator, and this should be
create cords est. Because as I said,
we're going to delete the code later from the
elevator, this one, and we're going to be
spawning all our props in another place of the algorithm. Let's go back to creating
the cores for the chest. Now, let's get
again our Actually, we can copy paste
the code from here. We can get the Dungeon
map, the keys, and actually, we just need that. So I'm going to paste this here. And what we need is
again, last index. And we're going to
divide this I two. So we can have half where is
the middle of our dungeon? We could also do mac
styles divided by two, and it would be the same. But this is also a nice way. Just in case we want
to upgrade the maze later to have some extra tiles, for example, besides
the main body. Let's say, for example, we're
spawning some secret areas. We're spawning some
extra stuff outside of the common algorithm
that's built the dungeon. Oh, we're going to
get half of them. And we're going to promote
this to a local variable. Let's call this treasure index. And now, why am I promoting
these two treasure index? It's because I want to
check from half the tiles and above if there is a place to spawn
our treasure chest. Because we don't want
our treasure chest to be spawned on the first tile, for example, the first
two, three tiles. It might based on how
our maze is branching, and this would be one of the
omizations that happens. But We should try this to
happen a little bit less. So we're going to be checking for half the above the maze. And to do that, we're going
to be using a wild loop. Actually, let me bring
paints for a second. So what we did is, if we have the total
tiles, our maze, actually, let's this
our dungeon map. So we got the last index. This last index, and
we divide it by two. Let's say it's 20, so
now there is this ten. Now, we set this ten to be the starting of our
treasure index. This is ten. We're going to make a
Y loop that checks. If the treasure index
is equal to this half, because we won't
have it exclusive. So we want above the
half of the maze, not exactly in the
block, let's say, for example, in the in the
index that represents. So But because there is a case that this
will run endlessly, since loops, wi loops are a
little bit this needs an age. Yeah. But wi loops are
a bit nasty, let's say, they can freeze your
computer until they complete their task
because they are running on the way we are
running them right now, it's on the main thread, so it can completely freeze
your computer. So to avoid that, we will create also
tries variable. And we will say try for, for example, 30 times. Actually, what we will do is
yeah, something like that. Mac styles divided
by two basically. If this is above this number, then cut the y loop. There it didn't find
any valid location. So we're going to set
manually acation, which would be the
middle exactly. So Yeah. That's what I wanted to
talk about wi loops, that they are tricky, and they shouldn't be really
used on run time. But for us, this run
time is not exactly run time because we are
building on loading. So we are not doing
it on game run time, which FPS are an
important thing. Away. Let's do this. Let's bring the wi loop. This dangerous thing. And let's have it
for condition that measure index is equal to the
last index divided by two. If this is true, this will
be running the body loop. When this term
falls, it will exit. There is also a tooltip that explains it a little
bit better than me. Oh. Since right now we have
no other conditions to add to special rooms. This will usually
be on half plus one because we will be
increasing this by one. But first, let's
make our fail safe. We're going to make a
new local variable, going to be of integer again. Let's name this price. Let's first of all, increase this by one. And let's ask a question. I R tris equal to the last index
divided by two, because every time it adds
one, it starts from zero. When this is true, it means this has
half of our maze. So if this is true, we're going to set the
treasure index 20, and this will exit our loop. Now, just in K, well, for us, it will
be all the cases. When trice is not equal
with 50% of the maze, we will get our treasure index, we will plus one t, and we're going to
get our Dungeon map, and we're going to find the actor and we need the actor and we
need the coordinates. So I'm going to
get the keys here. I'm going to get a copy
and connect this plus one. And then I'm going
to find that actor. No, I'm going to check. Actually, I'm sorry, I don't
need the actor to check. I just need the
coordinates to check. If they are contained
in the special tiles. If it's contained in
the special tiles, I'm going to do nothing. If it's not contained
to the special tiles, I'm going to set our treasure
variable treasure index. Treasure plus one. Well, because I'm adding
before the branch, doesn't mean I'm setting. This is why I did it this
way to explain this. When I'm adding
something and checking on the special tiles, basically, if the coordinates So when I'm adding to this
index before the branch, it doesn't mean that
I'm setting it. I'm just adding to get a value, a number, and I'm checking based on that number,
something that I want. And if what I want is
not true in this case, then I'm setting that number
to the treasure index. Anyway, let's continue. Now, this y loop has
ended one way or another. If it has ended with the treasure index
zero, we need to know. I'm going to check if the
treasure index is zero. If it's true, I'm going to set the treasure index to
the half of the maze. If it's not true, it doesn't
really matter because it means that this branch has run and it has find a new value. The next thing I will do is I'm going to get the
coordinates again. I'm going to get from here. I'm going to add it
to the special tiles. I'm going to promote this ps. The get needs the age index. Else it's going to be getting
the first index zero, which would be the start block. I'm going to promote
this to a variable also and call this location. Now for debugging, let's bring our phone actor BP elevator from the eight cords elevator, let's go back to
create Cords est. Instead of the elevator, I'm going to choose
the est big est. Instead of the
elevator location, I'm just going to put
here est location. Going to delete this, and I'm going to promote
this so variable. Yes. Act. To compile and
save, and let's first play. And, but of co I forgot to
call this function again. Create core chest after
create core's elevator. Now, b miracle, it's
not working again. Oh, no, it is. Here it is. We have the chest. It's in
a corner. Doesn't matter. It's on the number
11 since 20 M. And it's ten plus one. So the Y loop worked correctly. Like if we started from zero, we need to go over here, get the key and come back
and go to our elevator. Let's create another
one. Over here, the elevator is here. Yes, where do we start? We start Here. We start here. We can see this. We don't know if the keys here, we might go through
here, we might go. It creates some valid
gameplay scenarios from what I can tell. We are starting here. We can see instantly
the elevator. Yeah, valid scenarios
over here. Okay. I think this is it for this one. I'm going to see you
on the next one. Goodbye.
27. Room Builder Algorithm: Hello, and welcome to
Game Design Workshop, Unreal Engine five
Procedural Dungeon action RPG creation course. Previously, we
created the create coordinates chest function
on the maze generator. We used the Dungeon map. We got the last
index of the keys. We divided by two,
and we stored that in a variable we
called treasure index. Now, we created a while
loop that checks that while the treasure index is equal to the half of the index, then add one to a trice
variable that starts from zero, and we are checked
if that variable is equal to half of the length. We said that if this is true, it means we cannot find a
a valid treasure index, so we set treasure index to
zero and exit the Y loop, or else, if it's not equal, then try to find one valid option that is
not in the special tiles, for us, it's plus
one since we have no other special tie
rules right now. Then when we exit the loop, if it's zero, which it means it tried to find
one and it couldn't, then we set the treasure tiles to exactly half of the index, and then when it was false, we We added the new treasure
index that when it's false, it means it found one new index. We added that index to
our special tiles array, and we added the coordinates
to the chest location. And afterwards, we spawned
for debugging a chest. Now, it's time to add these
so called rooms to our game. So we have more variety and more complex
mechanics to our maze. To do this. Let's bring paint
first and explain some things that are
needed for our logic. If for example, we
have four blocks, let's forget about
the special blocks. Let's say that there are
four blocks in our maze. The first thing we will do is if we are checking
from this room, for example, sorry,
not from this room. Let's start from the bottom left because this is the way
we're going to be checking. We're going to start from
the bottom left possibility. And we will be asking from this tile to check if there
is a tile here here or here. So nor north and east. Is there a tile on this
on this coordinates. If there is a tile, then we will be creating an array for this, and we will be for looping. Actually, it's not a lot. Dots. We will be creating a four loop with this ordinance. Anyway, inside this for loop, we will check for some rules
and actually we'll have plenty of four loops to check
for each rule specifically. So we want overdo
everything in one for loop, it will be more confusing if we have a bunch of rules here
and branches and everything, then having it separate? This four loop does this,
this for loop does this, this fo loop does this, then having it all in one. And then when this suffices, we will add it to
a new variable. Now, why I say a new variable? Because this time, we
will use a structure, a variable called a structure.
What is a structure? A rough explanation would
be a custom list of variables of our choosing to
keep them in a structure, to keep them in a format that we can get all these type
of variables together. For example, we have a bulion for asgun, for example, Agan. We have an integer for amo. We have an integer for mana. We have a float for life. For our case, it will be a
structure made of arrays And delete all this, a
structure made of arrays that will be the
coordinates of the rooms. So it will be an array of 0.0, then it will be 0.1, will be 11, it will be 1.0
if y is here and here. Anyway, No, we will
use this structure to have all the
possibilities because after this one runs for this
extra three coordinates, then this one will run
for the next coordinates, and then this one will run
for the next coordinates, and this one will run for
the next coordinates. And it will go one until it
feels that's the whole maze, and we got a list with
the possible rooms. Now, of course, our rooms
will be two by two. And for bigger amount of rooms, if we chose this system, which is not very optimal
for bigger rooms, would be like we would add extra coordinates like we
would check this block also, if we wanted a two by three, or if we wanted a
three by three, we check the below and
below coordinates. Now, let's do this. So Something familiar, first. Let's create a function. We
have a bunch of functions. At some point, we can categorize our functions to be for example, we can put the pure
ones in the category P. We created the category
of here, pure. Now we have doesn't
say pure, it says put. Pure. Okay, so we can choose all our pure functions and add them to this category,
for example. Let's do it really quick. So we are finding all
our functions that say pure and we are adding them
into the category pure. So basically, we have a lot
of pure functions right now. This is our building blocks. Let's say, and this
is our mathematics. Now, let's continue by
creating a new function, sing the plus symbol here, and call this function find possibly rooms
two by two rooms. T two by two. Now, this will be a little
bit of a heavy function since it's going to have
a multiple next for loop. So we're going to get
the dungeon keys. For each coordinates,
we are going to check If they are a valid room. So to do that, I'm going to
create a local variable, and I'm going to make it of
the type b. Id valid room. Just for the sake of it,
let's do the opposite. Let's say that the valid
room is on in the beginning. So the default value over here, we need to compile to
set the default value. The default value of
the valid room so be t. Now, we're going to
bring this here, actually, with a setter, and I could just set
it here to be true. I don't need the default value, but it could be from the
default on comping save. And now we're going to
create a new variable called R. And it's going to be
of the type in point. And the type point is
because it is coordinates, and it's going to be
a container array, and we're going
to bring it here, and we're going to clear it. The reason we are clearing actually and setting
the variable here to be true is because we're going to
be checking every room, I'm going to be filling
this information. We want this part
of the four loop to be resetting the information
before we do our checks. Because when we do our checks, when we do the rest
of the four loops, because here goes our F loop, Will be not four
loop for each loop, that will be for the neighboring
coordinates of this one, the room neighbor recordings. We need to create this function. It's going to be
a pure one again. So we're going to
be taking as we said on paint the next
coordinates x to it, the x plus one, the x and y plus one, and the y plus one to create
a room two by two room. And then we're going to for
them to check for some rules. Now, let's create this function. But before we create it, what we're going to
need basically is again a part of the fine coordinates,
the fine adjacent. So let's go to the pure
one, find adjacent. I cross adjacent.
And let's copy. Let's copy everything and we delete whatever we don't need. Oh, New function. Let's call it make two by two s. Let's make it a pure one, and let's put it in
the category pure. Of course, we need an
output would be s. Ray endpoint, of course, again. Now, we're going
to need an input, which would be cords, and this doesn't
need to be an array. It's just a single ipari
coordinates endpoint. And let's paste what we got
from the other function. Now, we wouldn't
need the minus ones. We would need the plus one. It's x plus one. It's y plus one, and it's x and y plus one. Now, we do need the original
rooms also coordinates. So, we're going to
connect this here. We're going to delete
this, and we're going to connect this also here. We have all the
room coordinates, the plus one on x,
the plus one on y, and the plus one on each of them and the original
coordinates into one array, that we output as the
room coordinates. Let's go back to our function,
find possible rooms, and let's bring this
new pure function here, which I didn't add
to the category. Now, I run the wrong function. I add make two by two
room coordinates. Here we are, and we're going
to forop through them. Now it's time for the rules, the wonderful rules And
the first question, of course, should be, do
they belong in the dungeon? So we're going to
get our dungeon variable a copy pasted here. And I'm going to ask you if
it contains this information, which is the information of all the coordinates
of the room. Now, if it doesn't contain, we're going to that valid room false because this
is not a valid room. All these coordinates do
not belong to a valid room, and this means we are exiting. If they are, we should be adding them to
our new variable, local variable room array, at and let's connect. If this triggers falls, just for a little bit
optimization sake, let's change this for each loop to for each
loop with break. What does this mean? This
means that we can top this body count
whenever we want. If the triggers, going
to put this here, this means it will not run
through the whole coordinates. Whenever it finds a coordinate that is not inside the dungeon, it will stop this check. So if we multiply this by
1,000 let's say tiles, this will actually
have a benefit on how many times
our function runs. Now, let's continue
with a sim question. Is valid room If it's true, we should continue
with the next test. If it's not true,
then we shouldn't run all other reasons that we
have to keep this room. I think this is a good
stopping point for this one. We're going to continue with the next rules on the next one. Good bye.
28. Finding Possible 2x2 Rooms: Hello, and welcome back to
Game Design Workshop Re engine Five Procedural Dungeon Action APs Creation Courts. Previously, we created our
possible two by two rooms, the first parts
of this function, and we also created the
make two by two room cords, which essentially
takes the cords that we have plus one
on the x plus one on the y and plus one on both of them to create
the two by two. Now, then we fordop, and we checked if they
belong to the Dungeon map. If they don't, we exit
our nested for loop. And if they do, we add them to the room array. As we said, we're
going to add to a structure that will
be all the room arrays. Let's continue with an
other rule right now. Let's continue
with the rule that is does is it contained
in our special rooms. Oh, we're going to
get our rooms array. Because right now, we had
them on make two by two. Right now, if it's true, we have stored it
in the room array. We're going to
overlook with break again from the true branch of the valid room
because if it's valid, we continue, if it's not valid, we quit, and we connect
the room array. We're going to
bring the special, special tiles. Yeah,
special tiles. Sorry. We're going to ask
if they contain item, any of the that we have. We're going to put a
branch to achieve that. If it is contained, then we're going to set the
valid drom falls, and we're going to break. If it's not contained,
then all is good. We don't need to do anything. This is valid room. And then we're going to ask
again when this is completed, if it's valid because
if we have braked, we want to exit and not
go to the next step. Now, the next step requires one more step than
putting some code. Requires the ST room
that we talked about, the structure of the rooms. So let's go to content. Let's go to the
blueprints folder. Let's light click and
create a new folder. And let's name this folders. And enter this folder and
right click again and go to blueprints and select
the structure variable. Now, we're going to name
this ST underscore rooms. Yeah, ST rooms. Why not? It's fine. ST rooms. We're going to compile and save, and we're going to be
adding one variable, which it already has. It's going to be of
the type ink point. And now it's going to
be of the type array. Let's call this room arts. This is one way of creating
a list of arrays, basically. We have a structure with
the list of the array, and then we create an
array with that structure. So, we're going to create a new variable in our blueprint, going to be of the type S, rooms, and it's going to be an array,
which is already is. And we're going to
name this ST mes y. Now, We are going to need a temporary variable
of a structure, if we add an index here, we can see the index is of at room cods that it
has its own elements. So to add this here, I'm going to delete this now, should be zero elements. To add this here, we're
going to create a new varia called Ros Rom actually. And what would be the
point here would be to This is an array. It
shouldn't be an array. It should be a single variable. We're confused. Why am
I seeing an array here. So structures. This is a structure variable, and it has this array inside. So basically, what we
have done is we have an array of a
structure with arrays, if that makes sense. What we need is to do
in this structure is set members in ST rooms. Cause this is the way we are changing data on our structures. We cannot if we set rooms, not sent members, set
rooms above node. There is a set rooms ST, and there is a set of
members in room ST. So if I set the rooms
ST as the variable, then it means that you
change the whole variable. If I set members, then I can change the
members of the structure. F example, if this structure had as I described before,
a health variable, a gun variable, a amo variable, then we could be
setting the members of decide what we wanted
from this node over here. For example, right now,
we have room coordinates. I want to set the member
room coordinates. We have had another value. Health. For example,
I could have select a pin the health value and not update the
rest of the list. What we need is not
the regular setter, is we need to set members. It's a unique node
to structures. If the room is valid, we are going to be
setting the members. We're going to be setting
the room we just created, the room array to be the
member of this room structure. Then what we're going to be
doing is getting our ST rooms array and add structure. So, again, we have a structure that has
inside coordinates. We store these coordinates, which is in the
form of an array. We store them in our structure, which has an array
inside the coordinates, and then we use this
structure to store it in an array of this
kind of structure. I hope this makes sense. Now, this would be basically
it if we leave it as is, but this would create a list
with all the possibilities. Like, for example,
let's delete it. I I had a room here, a room here, a tile, not a room, a tile here, a tile here, tile here, tile here. Let's make a grid. G. If I'm, we need more tile. I I'm checking this one, I'm checking And if I'm checking this one,
I'm checking this. But this one overlaps. So it has a possibility. We get the coordinates of everything basically
that is available to us. We need some more
rules to clarify this. And since we have this
wonderful structure over here, array of structures over
here that we just created, we can make another rule
before adding them. We can ask. Let's get this structure, this array of structures, bring it here, and
we're going to or or each lop with break again. And we're going to connect this. This. We're going to
bring this branch actually, over here. And we're going
to ask, if any of these coordinates are our
checking coordinates, basically, if they are on
any of these coordinates. To do this, as we can see, we cannot just check
an equal from here. Is going to disconnect
because this is of the type ST.
It's a structure. To check for a structure, we need to break. As we did let me bring actor. As we did on the spa actor the
transform, we splitted it. It's the same way But opposite. Transform
is a structure. We can also split it if we want. But because it's in a four loop, can we can even in a four loop. We can split it in here and
get directly the variable. But I just wanted to
show the break node. Let's recombine. If we have a structure that
has many elements, splitting on the four loop
wouldn't be so visually good. Anyway, let's continue with the four loop.
Connect this here. And we're going to ask, actually, we need a break here
for each loop with break. Break. Connect this here. We actually need
a branch here to ask if it's still a valid room. Because if it's not a valid
room, we should break. We are not checking
something here, but if we break here, we be breaking here also. I'm going to put a branch
here and ask if this is contained in the room. I'm going to connect. H. If it's contained, then
we are setting poldrum to holes and we are breaking. It's false, we are breaking. It tries to run
again, it's false, we are breaking and then we need another
branch with is valid. And if it's false, we are breaking again and
returning to the original loop, which starts for the
next coordinates. Now, the reason we
added the here is because this is the coordinates
that we're checking here. And we are checking if any of the rooms have this
coordinates in them. If they do, break, this is not a valid room,
continue with the next one. And now we can
connect this here. And if it's all true, if all our checks are true, then we are adding
to the ST rooms. I think this was a
lot information. We should take a small break here and continue the next one. Good bye.
29. Room Perimeter Function: Hello, and welcome to Game
Design Workshop Under Engine five Procedural Dungeon action RPG creation Course. Previously, we created we continued actually the find
possible two by two rooms. We created the structure
of the rooms array. And we did some tests. We checked if the room is
inside of special tiles, if it is break and continue
checking the next room. We also checked if our room is contained in any of
the rooms we already added by breaking the
structure that we created through the
ST rooms array, which is an array that
holds many structures that have a variable array
of coordinates. And then we checked if they are contained they containing any
of our checking room array. If they don't, we are adding it means that
our room is valid, it doesn't belong
to any other room. It doesn't belong to
any special tile, and it is inside our dungeon. Add the coordinates to our
system, ST rooms array. Now, the only problem with
problem. It's not a problem. It's a design choice
actually with this is that rooms canpawe
next to each other. For example, Let's
add a few more. Yellow consistency as my bad drawings.
They are consistent. Consist bad. So if we had
a room in these blocks, then another room
could spawn here, which I personally wouldn't like it because it creates
two rooms next to each other. They might have a door,
they might not have a, but always they will have
one wall separating, which I don't like
the possibility of not having a door actually. We could make some code if
two rooms are overlapping, two change maybe always put a door on one side
or whichever side. But I find it more
fun to learn how to create a perimeter in the
room or this as a variable. And then we can do whatever
we want for the perimeter. For example, we could
create other rules if we detect a room that we can
go across three or four, we create a corridor
between them or We won't be doing that. We will stick on our
two by two rooms. But I think it's more versatile to have know the perimeters of the two by two or
three by three or two by three or whatever rooms
that we have designed. Now, how we're going to do this? We're going to
create a function. It's going to be amazing. We're going to make a function. We're going to call this
function wind room perimeter, set room perimeter. What it's going to be
doing, it's going to be finding the room perimeter. It's going to be adding it to the special rooms and to action special rooms to
the room perimeter rooms. And we're going to
need a new variable. And we will need to
delete some walls. Now, why is that? Let's
go back to paint. We're going to be needing
when we have a room, the walls that are being
used are this blocks walls. So this means that
when we have a room, these walls, if they're
on, they stay on. So we have to find a way
to delete these walls, and just keep the room
walls that we want. Let's go do that. New function. Let's
call it set perimeter. Because it's setting everything. We, we're going
to need an input, and that would be of type array, and it would be our
room rooms array. Let's call this function
because if we don't call it, that is one run. Find it possible two by two rooms in the end
where we are adding our room ST our rooms
array to the room st, and then we are
adding this room ST to the arrays of room STs. Now, in the end here, we
so that room perimeter. Because this is the end. We said that the room is valid, so since it's valid,
its perimeter. I'm going to connect
our room array to the rooms array here and
go back to our function. Now, we know that
from this array, the last one is
the original spot. So if we go to our make
two by two room cords, we can see that third
one, the last one, we have set this up is
the original coordinates. So this is where
our room begins. This is where it starts. From this coordinates, if we get the last index, We
know that it's three. The last index three, we
could have set just three. But just in case we want to set the rooms to
be bigger, for example, four by four would be better to get the room
perimeter for the last index. Since we know that the
last index would always be our original checking
coordinates for the room. Because the rest
of the coordinates are the coordinates that
we are checking for. This is the original Oh, what are we going
to do from this? Why is this important? Because I'm going
to break this now. Since it's a two by two, I'm just going to
minus one on x, and then I'm going
to last two on x. This kind of makes it
invalid for bigger rooms? We would have to
change this amount if it was bigger than two b two. Now, what is this amount? If we go back to our paint, and let's delete this. Oh, wonderful drawings again. This is rooms. If this is 0.0. If I go minus one on x, this is the x value, this is the y value. Minus one is -1.0, x, this is y. If I go plus two,
it would be 01, two, it will be 2.0. I'm going to do the same on y. So I'm getting this box over
here, this box over here, this box over here,
this box over here, this box over here, this box over here, this box over here. Actually, because I'm
doing it on both, I'm getting this box over here, this box over here, this
over here and over here. So this would be
minus one minus one, this would be plus two plus two. How I'm going to go
through all this? Let's do the same on y. Well, up to now, we've
been using for each loops, which required an array. This time, we're going to use a nested four loop,
like a four loop, again a four each loop
for loop with break, and again, a four
loop with break, a nested for two nested loops or one nested four loop anyway. So I'm going to connect
this to first index and this last index and this
first in last index. So, starting from minus one x, we are going to be
checking the minus one y. So when we are checking
the minus one x, we're going to be
checking the minus one y up to the plus two y. Then this is going to
go to the next index. This is basically nested four loop as it was from the rest of the four loops with for each
four loops with the array. Now, what are we going
to be checking for? I'm going to be checking if our room array let's bring it. Oh, I have this variable
here. Rooms ray. If I type rooms ray, I'm going to get a
reference to this variable. So I don't need to drag a cable. We talked about this. It's
about the naming conventions, and how they must not be the
same as the variable ones. The local variables, the
input and output variables, they should all be unique. Oh, I'm going to check if this contains these coordinates, which means I'm going
to be breaking this. I'm going to be adding the
x values from the first or loop and the y values
from the second one. And now I created an
eighth point based on this two for loop, we break. I'm going to branch. Going to connect this here,
going to put this here. And if this is true, I'm going to create a
new local variable, Olim it's going to be of the type eh point. And it's going to be an array. I'm going to add. What reference, I'm going to add these two values
to that array. Compile and save. So basically, now we have
our rooms perimeter. F or loop with break was not needed because actually
we don't need to break here. There is no reason
for us to break this. So let's change
this to just loop. Or you can just leave it as
ease, doesn't really matter. Is just it does break. The way I'm moving nodes this
way is I'm holding control, just dragging, and selecting. And if I hold control
a drag from a pin, it just moves the cable. Maybe this looks
better. No way to. There is, if you are artistic
and verse with tables, there are ways to make
them look a lot better. Compile and save. And I think this is a
nice stopping point. We have our perimeter. We have the coordinates
of our perimeter. The next point, the
next thing we should do is eight the walls from the
perimeter towards the room. This is something I'm
going to do the next time. Good bye for now. I'm going to send
you in the next one.
30. Room Listing & Debugging: Hello, and welcome back
to game design workshop, and real engine five procedural Dungeon action RPs
creation course. Previously, we talked about
creating the room perimeter. So, we created a function. We got our room array at the
end of find possible two by two rooms when we actually decided this is an
ok room to create, we added this array. And because we know
that the last option of this array is
our checking block, we created some coordinates to check for the whole
ordinance from it. Towards the end, if it
belongs to the room, if it is belonging to the
room, This is a mistake. It should be on falls. If it doesn't
belong to the room, then we are adding to
the room perimeter, not if it belongs to the room. If it belongs to the
room, don't add it. If it doesn't
belong to the room, then add it because as we said, we are checking everything
around the room, all the neighboring aisles, and we are checking
also for internal ones. So, the internal ones, no, it's not a perimeter,
it's the room. And now we're going to delete the walls from the
perimeter towards the room. Because they might
have other balls, so they're not over the room, and we don't want
to delete them. The first thing we need to do
is get our room perimeter. Now, we're going
to paste it here, and from this, we're
going to for each loop. From all this, we're going
to find cross adjacent. We want to know
what is next to it. Of course, we're
going to for loop from each erection from all
the adjacent neighbors. Now we want to know which of these adjacent neighbors
is actually a room one. What we're going to
do is we could just date here a lot of
code and check if it's contained in a room and
go with more follows. But we can't make
it a pure function because we are going to use this a little bit more to check if there
is a room next to us. So, a new function, and it's going to be
a pure one this time. I'm going to create a function. I'm going to call this find We're going to call
it find room index. Because later on, we're going to need to know, it is a room, but also which room is it, since we have a
structure of rooms. A structure with
the information of, arrays, which hold all the
coordinates of each room. Then we can say, this is room number one,
this is number two, number three, number four, this array, will be
holding our rooms, how many they are, and
it has them numbered. Now, L et's continue
with pint room index. Of course, we're going to
need an input coordinates, and it's going to be endpoint, but a single type variable. Then we're going to need
the St rooms array. We're going to for loop with break this time because
there are many coordinates. A place this here. And we're going to break this because it's information
of our structure. It gives us every element would be an array of
coordinates for a room. We're going to check if
this con our ordinates. Because if this contains
our coordinates, it means that there is a room. To indicate that, we will
use a local variable. Since this is a few
function, again, a small reminder,
local variables do not affect pee functions. It's going to be of type pool, and it's going to be
a single variable. We're going to name it room. Full functions is
not recommended. Well, it counters
the point of having adding setting variables
that are external. But if it's an internal
variable, local function, it only exists in here, it doesn't really affect it. And we're going to promote
this also to a local variable. The index, which
will be room number. If we found a room,
we're going to break and now we need output. So our output would
be our found. Rom going to be of the type, and we're going to connect here. And for the next one, it would be room index. Now you see naming is weird because I
named the other one. It's going to be
of type integer. I named the other
one room number. I couldn't name this
one room number because it would mess it up. So I'm going to connect this
here and compile and save. Now, we have a fine room index and it gives us if we found
a room and the index of it, and we can continue our
set room perimeter. So do our coordinates northeast southwest
belong to a room? Find room index. It's not a pure function. Let's make it a pure function, and let's put it back on the
pure functions category. Let's bring a branch. And I'm
going to connect this here. Now, we found a room. Now we need to turn to our actor that we are checking that the actor responsible for
these coordinates that tile on these coordinates. Actually, the act. It's a tile for us, but it's a blueprint actor. Anyway. So, we need to find the actor responsible
for these coordinates. So we're going to
get our point map, and our map would
be our dungeon. But now we have
access to our tile. From that, we're going
to get our walls, I think, wall, how
have we named it. BP decorations. We're going to get decorations, the child actor actually, which we need to get actor, which then we will
cast to P decorations. Let's convert this
to a pure cast. So we can suck all these wonderful nodes
on top of each other. From this, we're going
to get components by s. And the class would be pic mesh component.
Tic mesh component. Here it is. Now,
what does this mean? For those who are new when
we are get components are everything that we are
adding inside the blueprint. So we're getting
all the components that are of type static mesh, not from the BP tile, from the BP decorations, which would be all these walls. Or now. Later on, that we will have more things. It will get a list of
all those components. For example, if we had a wall and a barrel,
let's say here, and they have the same rules
that we will create now, they will both disappear. Now, we will just make
the walls disappear. And what we will use is
the tags that we have, the tag system of S and W and E. So let's go back to maze. Get components by class, and we're going to or loop
or each loop from them. Connect that to true.
Right. Now, what we're going to do is the
hash bug has component tug. As we did on the
hide walls function, the tug will be determined
by the index of our array. We can actually go to our decorations on hide
walls, just copy paste. But now we're not
using the walls, we are using the get all components attic
mesh components. I'm going to go
back to our maze. Going to pace this year. I don't need actually
need everything. I don't need this one. I go to connect this year,
to connect this year. We need to create
a custom select. And we have the issue again. I'm going to bring
the last exit. I'm going to let from the index. I'm going to connect
the last here. I'm going to connect this here. Actually, this is
the wrong index. We want this index
because this is the index of no and wet. We're going to
connect this here. I'm going to add two
more variables, 32 more. I delete this, and it will be
north Nouth, eastern west. And now I'm going to
connect this here. Tey is connected. Yeah, it's connected. But now it's hiding the walls in our
perimeter towards our room. Now, just for the
sake of debugging, let's demonstrate
what we created. Let's get our ST rooms array, and we're going to or each loop, going to connect
it to the complete here of the actually, not here. Get things from here. Let's
go back to our make two by two find possible
two by two rooms. And here, let's add
our ST room array. Let's connect this here. And we're going to break. I'm going to ho each group. And we're going to
get the dungeon. And we're going to find
were finding each each tle, and we're going to get floor. From that, we're going to set material L et's select
a different material. Let's select this wood base, brick wall dirty, or
whatever you want. You just want to
see if it works. It builds, and it
didn't make any room. Let's make them a
bit bigger to check. Let's say M styles
50 in five size. And also check if I have
connected the create rooms. On even graph, gate,
no, I haven't. So find possible two by two rooms after create
cords for the chest. Play and we have some rooms. We have some nice rooms. Now. The next thing we need is to create some
walls in these rooms. And for example, things
like these that they create a dead end to this
room should not happen. So we will fix that
in the next lesson. Good bye for now,
Senor, the next one.
31. Building the Room Structure: Hello, and welcome back to Game Design Workshop
Andal engine five, Procedural Dungeon Action
ARPs creation course. Previously, we finished with our fine room
coordinans function, and we added a
perimeter to them also. Um As we can see, there are a few errors about it. Like we can create rooms
next to other rooms, and if we press stop and
go to our message dock, we are seeing a repeated error. So let's go through it a little bit again and fix
the errors this time. Now, I our set perimeter room, the first thing we should
change is that I created this room perimeter
to local integer, local array, local variable, local array of int points. This should be promoted
to a variable, and let's call it
all room perimeters. I'm going to delete this. I'm going to bring all
room perimeters here. I'm going to add
to this one also. I'm going to break this
and add y on y and x on x. I don't really need
to do anything else because this will
mess up the code. But we shod have a variable that at has all the perimeters. Now, the next thing
we should do is check on this error, this
message error. It says, branch
cannot access non. Access non is usually
try to access something, which there is no variable. If you click anything, it
will lead to constant macro. But it does tell us
where to look at. At this branch on base gen
on set room perimeter. Again, the branch
leads to the function. But it is on set room perimeter. So let's go on maze gen
and Strom perimeter. What it does actually
is that at some point, we are trying to find
from the dungeon map. But when we are getting from
the perimeter of the room, there is a chance that the perimeter is not
inside the dungeon. It doesn't have any tiles. So what we're going to
do is we're going to ask if the dungeon map
that we're requesting, the actor that we request requesting through the
coordinates is valid. And we're going to
use the second node, which actually gives
us a branching option. I'm going to connect
the true to is valid to the xy and the valid
to the fore loop. If it's not valid,
we don't care, and this will not happen.
The error will not happen. So I I press play
now, j. It doesn't. If a press stop, then our
message log should be clear, bring it and it's
clearly designed. Now, the next issue we're having is that
rooms are being created next to other rooms, like the perimeter did nothing. This is because I haven't
add the code yet. So we're going to go to find
possible two by two rooms. And when we are checking
for special tiles, will we also check for
all room perimeters, we're going to do
a contains here. We're going to connect
our room array, and we're going to do
an end, not an end, or bulion because either it's on the special tiles
or is it on the rooms? We don't want it to
be a valid room. If I press compile.
Let's press play. Rooms shouldn't be created
next to each other room. Well, possibly here, they
couldn't. Let's try again. More solid maze.
Yes, more solid. As we can see, rooms are
not next to other rooms. It creates this
distance between them. One tile distance,
the perimeter. Now, One thing also, we should change would be not change the material,
going to delete this. But we can add all the rooms, all the coordinates
to one array. So, I'm going to create a
new array, new variable. I'm going to call
it all room hoards. It's going to be of
the type endpoint. And it's going to be an array. And I'm going to
add to this array, all the room cords
that we are breaking from the end of find
possibly two by two rooms. When we finally exit
the main word loop, we go and break all
the est rooms array, and we add all the
coordinates that we find inside the
structure arrays. Now, the next thing we should do is actually build the rooms. So, guess what,
we're going to make a function again to
build the rooms. So in the end here, let's
create this function. Let's call it build rooms. Let's call it in the end. Because when we test, I
will forget to add it here, and let's enter this function. But before we go
into programming, let's explain what this
function should be doing. So let's go to paint for
some amazing drawings. Now, the first
thing it should be doing is healing to the tiles, like if we have four tiles. But basically, they need to reshape their walls
to be on the edges. And based on their arrows, this isn't going to happen. So what we need is actually held to each tile
that the room has, which walls should
be on and which off. No, that is the first
thing the first thing. It's not going to
be the first thing, but it's one of the things
that our function needs to do. Now, the second thing would
be to tell what kind of walls as the second thing would be, what kind of walls are
we putting in our room? Because we have a certain amount of walls, different walls. If we go to our static messes. Actually, if we go
to the overview map, there are more you change
the color of maps also. Now maps are red, right. So if I go to overview
map save selected, we can see that we
have one, two, three, four, five tiles,
different wall sets. So based on these walls, we should have five
different kind of rooms. So this is also
something this function will be responsible for. But this is another
part that we have. Function. Now, lastly, we will
add a randomizer. So if we have our room, maybe random, we can create
a wall here or here. In some place of the room, we can randomly add
one wall or not. So creating this
random wall would be the third thing that
this function does. Now, let's swap back to our map. Let's go to game level, and let's go to
our maze generator inside the bed rooms function. What we're going to need
is the ray ST rooms array, and we're going to loop for
each loop on all of them. And the first thing
we're going to do is break the structure to get
the coordinates of its room. We will also promote
the index to a variable which will
be locally controlled. Promote local variable,
and let's call this room index. And
connect this here. Because every time we
run this for loop, we are running basically
a different room. The first time it will run, the first index
of this structure of arrays will be
the first room. The second time it will run, will be the second
room, and so go on. So we can have a
rule, for example, let's say that since we
have five different rooms, that the first five would always choose a different appearance. Or to make it even
more interesting. Let's say the first two of them will be of a
different appearance, and then the rest of them would be of of the s of
some random one. So this will create the illusion that some
rooms are really special, and some rooms are more common. So let's create another
local variable, which we'll call All index. Call it wall index. That is
going to be an integer again, and not an array, going to be a single
variable. And save. Let's set this room wall
index, this wall index. So, let's check if this
is greater than two. So zero, one, two, actually, the first three
rooms would be different. And then from the fourth
one and afterwards, it would choose undo. Or we would choose number one, and it would go to
the first two rooms. But let's do three actually. So, I'm going to
select a branch, I'm going to connect it here. I'm going to connect this also. So if it's above two, it means it's greater
than our desired amount, and I will put the wall index
to a random ink in range. That would be 0-4. And the reason it's
four is because we have five different
sets of room. So 01234 is five
different options. Counting from zero as
a number as an entity, it's a little bit hard
in the beginning, but you get used to it. Now, if it's not
greater than two, then we shod that wall index. Let's say to the room index. So It will always
be room index one, room Index two, room index zero. A, Counting from zero, something we have
to get used to it. Now, we're going to read out here to connect these two nodes. Here. I think this is a nice so
point for this lesson. Since we're going to have to do a bit more complex
things later, and they will need a little
bit more explaining. Good bye for now, I'm going
to send you the next one. Goodbye.
32. Room Function & Wall Fixing: Hello, and welcome back to Game Design Workshop rail engine five Procedural Dungeon
Action Apes creation Course. Previously, we
fixed some problems that we had some errors
on the maze generator. And we also explained some
things about our built rooms. We started the function
of built rooms with going through all the
rooms with a four e l, and then we created a
variable to store the index, a local variable to store
the index of the rooms. We created one rule to
change the wall types, and now I think it's
time to continue. Now, the first thing we need
to do, the first thing. One of the things we need to do, and we're going to do
right now is decide if our room will have
a random wall, and where would that wall be? Actually, if it has,
we will decide later, but just in case it has, let's decide where would
that random wall be. No, I'm going to copy paste
this random integer range, and I'm going to
change the variable to three because our
room is two by two, so zero, one, 23 leads
to four options. Now, I'm going to promote
this to a local variable, and I'm going to call
this internal wall index. And also, I'm going to get from the break sting of rooms like this is our room
coords two by two, I'm going to get P, and also promote this
to a local variable, and call this Pile No. Aisle of internal
wall. Coordinates. Well, this is a coordinates, but we can tell that
from the variable type. And I'm going to
connect this here. For the getter, I'm going to
use the seted of the random. Again, if I had connected
here from the random, this would be probably a different number
than this because it would generate
a new random one. So I wanted to connect
it from the seted, or actually bring
the actual variable here and connect it like this would be the
same either way. Oh, now. The next thing we should
be calculating is where are our walls
based on our room index? Since this line over here
brings us the break ST room, all our room indexes. I'm going to heat it down here. We can for loop.
For each of them. And we know that the last index
is I think the Northwest, we have to check this in
where we created the rooms. Now, this is the
create coordinates find possible two by two rooms. We are making a two
by two room chords. So the last one is
the checking room, and then we add one on x, one on y, no y. So this would be the north room. This would be the north room, the north west room. Then we add on y. So this would be the Northeast, number two, and number one is, Since X is staying the same, we can call it south east, and the original value
is the South West. Of course, when I'm talking
about Southeast, Southwest, I'm talking about
the walls that will be active on the room. Like the first one would
be west and south. The above one would be west
and north, and it goes on. If you want to write it down, this would be north and east, and this would be
south and east. Basically, we need to
tell two directions. Our directions are on the tile on the tile
actor, the BP tile. What are your closed sides? Directions with the W. Anyway, so let's go back
to our built rooms. To do this, since
we know the order, we kind of figured it out the order that these are set up, we can actually reach on int and have three different
outcomes because it's a four length array,
four different outcomes. Sorry. And let's
remove the default. Now, what is the
switch? We talked a little bit about enumerations. It's the opposite of a select. You can switch on strings, you can switch on enumerations
and basically gives you a different output to run
based on the input selection. Now, For this coordinates, we need the ti sets. To do this, we're going
to get our dungeon, and we're going to fight. Now, I wanted to say something
about pint and everything. Don't think that pint is just some action that
happens instantly. These are just
functions ready for us, which are going through
the variables and checking if the variable is equal to the variable we want. It's not that a node like
this is something that is not as heavy as a for loop, for example, that goes through the same
number of variables. Anyway, let's continue. It is a little bit better. It is a little bit better. Now, since we find that, we need the directions. And we need to add is every time because we're
talking about two walls. And actually, we need
to copy paste this. There would be easier solutions to make this with a function, but for now, this
would be efficient. Now, we will also need them to turn all the
other walls off. We're going to duplicate. I have to connect
the lines again. Maybe I'll try to
make it a little bit, read out note here, goes like this, Ma, goes like this. Looks better. Move this, more down. W click here also. W click here also. We're making a bunch
of read out nodes. So there is no octa. This made it. Modes, Hideous task I might say. Let's say that the first
ones are the ones that are turned on through. There is a way to move, and the second ones are going to be the ones that
are having walls. For the first set is
always turn this to. The second set is turn the
walls on. So it's off. Now, let's figure
out the directions. As we said, the number zero is big pain again
west and north. So east and south should be off. West and North? No, I seed the opposite, didn't I east and
south east and south. Let's do first the first ones, and then we do the second ones. Now, for the second tile, the first one in order would be North and East. Is
that the second one? I forgot again, have to check. The first one is just plus x, so that's the northwest. The second one is
no on x and plus y. The second one is the south. Okay. The second
one is this one. This is two, this is one. This is three, and this is zero. No, sorry. I'm not
giving my own rules. So this is zero. This is one. This is three, and this is two. So, always having an out pad doing simple things
like this is useful. Now, The second one, we that is east south so
North and West should be closed, North West. The third 1 second
third in order number, number two would
be North and East. So this is west and south
that are on the first one, the last one would
be North and West. So this means north and east. Here we will have South
West number three, number two, will
be north and east. And East. Let's check that
each line has all the. Since this one is
North and West, this is south and east and
this one is east and south, so it's North and West. Duplicates, so it be correct. We will figure it
out on testing. So this is the part
of our function that sets on the tiles the actual new arrows based
that they are a room. You're going to tell me, yeah, but where do we put the door? Well, this is a
different subject because when we
close all our rooms, we will want to be able to navigate through
the whole dungeon. So we're going to
do this afterwards. F now, I think this is
enough for this lesson. And in the next lesson, let's try to add
our internal wall. Good bye. See you on the next one.
33. Finalizing Room Functions: So previously, we added a few things to our
bdroom function, built rooms bild room. So Bilroom function. We added the internal
wall index variable and the tile of
internal wall variable, which is an ink point. Basically, we are doing
random integer for the index, and then we are
storing that index, the coordinates of that index. Now, afterwards, we
for loop through each of our room array, which belongs into the
structure of rooms arrays, and we manually set
that which walls should correspond to which
side of the room array. Now, As we said, the next thing we
should do is to actually add this internal
wall or not add it. Not all rooms need to
have an internal wall. To do that, we are going to
further down switch on int. And T through that
switch of int. As you can see, I
connected it from the completed of this fd loop. The reason is that we are
still inside this fd loop. A this is nested for for
each increment of the index, basically for each array, we are having this
in switch on int, and we're going to
add three variables. Actually, we're going to
add four because let's say, for example, zero,
one, two, three, we'll be holding variables
for actually placing a wall, and four would be
not place a wall. And how are we going to do this? We're going to elect int. A, peak A, we're going
to a random pool. So some rooms will have a wall. So rooms will not have. But when it's peak A, we're
going to choose number four, for example, which would
be don't put a wall. We're going to remove
this execution pin, the default one because
we don't want it. And on B, actually, we need random index. You didn't name it random.
How did we name it? Internal wall index. So, here we need the
internal wall index. Great. So we have B for 0123. But which room is which
again, right now, we need to do something like
this to set the walls of the rooms because then
let's go on paint to show that go to delete needed. So we have our four
aisles that are our room. And we know that for now, there is a wall all around. Maybe this should
have been a little bit thicker. Ticker line. We'd be able to choose a
thicker line. Ticket one. So we have our walls around new style of
drawing, walls with boxes. Oh. Now, if we were on
this block over here, we could have a wall
over here or over here, it would still be available
in the whole room. And that goes for every block. We could have both
sides of each tile, one of them, but we can select one on both
sides on each aisle. Oh, As I said, we're going to be doing a
system like this again. We're going to be manually
adding the variables. But we have to figure
out which room is which. And based that this
is on our structure. We actually had that
previous drawing. Let's paint it again. I'm going so I can better. This is the third one for sure. This is zero. This is two, and this is one,
and this is two. I think this is
the way we had it. Let's check it again. I'm going to take a second
to find the function. I'm going to go to functions, find it to build rooms, make two by two s. This is what we want because
it was the pure one. Zero is p one on x, one is p one on y, one is east south, and the second one is one. This one. So yeah,
that's correct. Great. Let's go back to our build rooms and come
over here to fill the pitch. Now, since we want one
of two walls to happen, we're going to put four branches because it's either it's
one or the other wall. And to these conditions, I'm just going to make and boll connected to
all the conditions. On number four,
we need this step because it's not going
to be adding all. But we will connect
this afterwards to whatever comes next, which is actually
the wall placing. Oh. Let's bring some nodes
that we already have. We're going to need
two for the above, two for the below, another
two, and another two. This got big, but it's fine. You just need to space them out, so it's a little
bit more read blue. When your blueprint becomes a little bit complex
there's too many things. Face them out, doesn't
really matter. We have endless space,
endless scrolling. Point. Oh, let's get the
dungeon that we need, the tile no sorry dangon, from the dungeon, the
tile that we need. So we're going to
get dungon map, and we're going to find
what we're going to find? This variable tile of internal walls that we
have stored over here. Since we know the tile. We know which id on
the two by two es, which placement on the
two by two eights. We can just find
and get ections, And now we have to connect
directions to all this ad. One, two or they expand also, they become even a bigger
nuisance on the blueprint. Lets connects to False. I don't know if any
of you have played with music editors like Reason. It looks a lot like the
connects to reason. Anyway. Base them out. Now. Let's figure out
which walls we need. F zero, we are on
south north west. We need actually the
corresponding internal walls. Basically, we have this
lit a bit above us. But since it's a little
bit of a messy one, I didn't and Away,
let's do it again. We need the east and we need the north it's east or
north, south, sorry. East and south for the
top one. The next one. The next one is this
bottom over here, so we need north and west. North and west. Next one is number two. Number two, the paint here is. Number two, we need
west and south. 02 is this one West South. For the last one, we
need north and east. Nora, it's already
here for us. Epic. Now, what would
be the next step? First of all, since we changed so much the
information about the arrows. We created our own arrow system. Let's just total arrows. Let's just do that. What
we need is ST room cords. We're going to bring
it from all over the w here and type each loop. And we're going to
connect everything to e. Basically, on the blocks that are rooms on the
tiles that are rooms, or our arrow settings are
being resetd to what we want. Now, we also need to connect
this four over here, which is of no internal wall
here to the four each loop. So it keeps all this. And now that we are circling with the four loop
through the coordinates, let's find the
appropriate actor. Actually, we can just copy this because
this is what we need. We get the dung, the find, and we connect
accordinate to the find. And from here, we are
going to get decorations. The variable, it's
always on the bottom, and we're going to
cast to decorations. PPG first the child doctor. And from this, we're
going to get decoration. Sorry, we're going
to cust decoration. And we're going to make
the cust a pure cust. Again, quicker, it's
more efficient, and it helps with the nods
coming not spaghetti. Become a tower. Now, let's toggle arrows in all
these decorations. Toggle arrows message because it's our blueprint interface. I'm going to connect this here. Actually, if I yes, I have connected this to
the decorations this time. I think happened
to lessons before. But now I think we can test and see what we created with arrows. We're going to see some
arrows creating rooms, I think if everything
has gone well. So I'm not sure. Possibly this is a room. Maybe maybe we shouldn't
have removed the debaking of changing quickly
a tom generator. Let's go to even graph. Let's quickly go to the find
possible two by two here. We have it on copy, the map Dungin find. Going to use this to
set floor material. Actually going to
elect the floor for us and also set material,
bring us a node. Let's choose the dirt
this time. Compile save. Let's play, have
any dirt, eject. Okay. So we have some rooms, but Teams didn't really work. Why is that? Let's find out material now, we were here. We're toggling arrows on the co arrows are
not on decorations. This is why this is
sending the message, but decorations doesn't have any code to do with the arrows. We should be sending the
arrows to the tile directly, not the decoration.
Connect the decorations. The way it is connected was I used lt in case
you're wondering. I used pressing Alt and click and connect the line
that you have targeted. So as compile save, this time it should work because you're updating
the correct blueprint, not the decoration child. Y, here we are, and we also have some doors
that are not for granted. They are going to be later ps. Now, as you can see, the
walls of the rooms haven't updated because we haven't
updated the walls here. But the arrows are correctly. This is what we need right now. We need the arrows. Based on the arrows
on the next lesson, we are going to be
changing the walls, and it's going to be finally a wall with a room with
walls and no ceiling. We're going to fix
all this later. Good bye for now, seeing
you the next one.
34. Randomizing Internal Walls: Hello, and welcome back
to Gang design workshop, and real engine five procedural Dungeon action RPG
creation course. Previously, we added
a few more things to our built rooms. We added which wall should
be random placed through this switch over here and the variables
that we saved before, the tile of internal wall, the internal wall index. Through this switch, we
decided a random one, which would be placed, or if we choose number
four on this random int, it won't place anything. And we also used the total
arrows function correctly, after a few tries to get the arrows
behaving as we want them, the arrows inside the room. Now, let's continue by fixing which walls should be up and which walls
should not be up. Let's go to the decorations
PP and create a new function, which actually will be
kind of similar to this. We could upgraded this,
but let's make a new one. For clarity's sake. We're going to name
this function build. No. Let room walls. Room walls. And we're going
to need an input because we're going to be
calling it from the maze generator
directly here. So we have access directly to get directions from the tile. Since we have direct
access from this, we can feed it directly there. Though, this could, since
we have our parentile here. Let's not put an
information to pass. It's more efficient
to get it from here to get it from the
actual PP decorations, because we have a PP tile. Oh, we're going to
get directions. From the directions, we're
going to get the keys. As you guessed it, we're
going to hold loop through this keys or each loop. Then we're going to hold
loop also from our walls. And we're going to be checking
if the component has stug, which is the element of the array of the
previous or directions. Now, if it has tug, we're going to do but something depends on the value that
we have in directions. So we're going to find the value corresponding to
the array element, which is the mother, the host or loop. This is the mother ship
that runs the rest. Well, to be honest,
in this case, this is the mother ship that
runs all this so many times. But as you can see, it just takes a few seconds. We will see that in
the loading bar. Now, what we are going to do? We are going to set
visibility Actually, I think we are hiding them
that hidden in. Let's do both. I them in gain. Doesn't really matter.
We want them visible, and we also want them
not hidden in gain. In case they're
collision is off, we should also set collision. That's all Dante and nice, but what do we set here? So for visibility. If this is true, we want the
visibility to be off. So we need a t here. No bull. Do O, L. If this is again true, we want it to be invisible
and hidden this goes here. And if this is true, which means there is a passing, when it's true, it means
you can pass through. We need a select here. And we need to
connect this here, it's easier to find it, if it's through no collision, if it's false, collision
enabled quaran physics. Compile and save, and that's pretty much
it. Let's test it. Have we connected it
to Nope, we haven't. So going to read this. We don't need it. We need from
here how did they call it. That room walls. So walls, Now, we should have this half walls that we
have all around the rooms. Take it again. Nope, we don't. There is an issue.
Let's figure it out. What could it be? Let's check
from the maze generator. Let's check from here. We're running this, running
instance going here, and its instance it's
setting its own variables. Then we're going to add a
fake wall of a room wall. All this should be
false basically. Because if it's true, we are passing through. But have the false
means we have the wall. Let's see if this is fixed. The, the walls, not the ok, we have a wall here,
we have a wall here. I wasn't expecting the
actual walls to be fixed. Why are the walls not happening? V question. Let's
check. Stop this. Let's go back to
the maze generator, for looping, getting
the decoration toggler up to here, we know it works. Set walls, decorations for
each loop is component ops. Turns name of the enumerator. Yeah. We don't
want this exactly. What we want is to spring. We want this node.
This node returns, let's print string it for you. Here, let's connect this two, so we'll have this correct.
And compiling play. Now, it will have
some weird numbers and names. E direction. Okay. E directions, numerator one numerator
two, numerator three. Now, if it retains a very
generic name, as you can see. I to be honest, I thought it would have been
returning the byte number. But yeah. So this was the problem. Close this, so don't
need this. Here. From the array element, we need um to string, and then that string,
we connect to the tug. And it auto converts it to a text variable
a name variable. Oh. Let's play this
one more time. And we should be
able to see rooms. Closed rooms. Yeah. They
are completely closed. And I think it's time to actually put some real
walls on the rooms. Oh, let's go to a decoration
and create a new function. And we're going to
name this function. Walls. Let's enter it.
We are already in. But before we start
programming this, we're going to need a
new attic mesh here. This is because this is a room. When we are swapping two walls, we should also put a ceiling in because if it
doesn't have a ceiling, then it's just four walls. It's not really a
room, is it now? So, we're going to press add, we're going to add
a static mesh. And we're going to
name this ceiling. This is how it's spelled. I'm not sure. Another
hard word to spell. We're going to select
a static mess for it. I think there is a ctic mesh. For the material, does
it have a stone wall. By default, we're going
to go to its visibility. And set it to invisible. And we can actually close
its collision also. So we're going to go to
its collision settings. Of course, later when we
are building the game, we will be changing a lot of the collision settings and types and object types and
everything they interact with, but that's later on. Collision presets, et know. We don't want the
collision presets. We want the H. Let's put this on collision
presets custom and set collision
enabled to no collision. But when we get it visible, we should also let the collision enabled to pull collision. Now, I think this is a good
stopping point for this one. We should be filling this
function on the next one, so we can explain how our selection process
will also work. Good bye for now, S
you the next one.
35. Adding Room Walls: Hello, and welcome back to Game Design Workshop
and the engine five Procedural Dungeon
Action Apes creation Curse. On the last one. We actually managed to I to
complete the built rooms. We have one more thing to do, and it will be now. But let's see what we did. We actually created the
set room walls function, which is a function
inside VP decoration, which takes the parent tile, it takes the directions from it, it looks through them
and through that loop, it looks through the
walls array and checks which ones should be visible
and have the collision on. Now, let's go to swap walls that we created a
function but didn't complete. We also added the ceiling. And in this function, we're
going to need two inputs. We're going to be of
the type integer. It's already done for me. You're going to
change the type here, and let's name the
one. How you name it? It's the variable over here
not internal wall index. Because as we said, we have five different sets of
walls for the rooms, so we will look through them. No loop, but select
one type of them. Also, we will need
the second variable, which would be room index, but that will be used later for our hiding and
showing our ceilings when our player moves
through the rooms. So I'm going to name the
first one room index, and the second one wall Index. And I'm going to promote
room index for variable. It doesn't matter if
it runs a few times. It's always going to be
the same room index. And now we need to do a for
loop to all the walls array. A loop because we're
going to manipulating the static mesh component to set a static mesh
element to them. No. Of course, we're
going to pic mesh. And for the static mesh, we need to elect. Now, to make this a
little bit easier, we're going to go back to our overview map.
We have everything. And we have one, two, three, 45, let's make five options. One, two, three, four, five. And for the wild c, we just want to connect
the wall index. We call W index. Since we are inside the
function, we can do this. Now let's drag selectors here. Because when we are
selecting one type of wall, it has or three variations basically and one door
variation for each of them. Oh, go back here. I'm going to add one
more pin or we co paste. Then I'm going to paste. One, two, or five. Now, for the wildcard here, what we can do is
select random in range, and it would be 022 because
we have three options. I'm going to connect
this everywhere. And I'm going to also. So, why did I open the overview? It's simple because I'm
going to select one wall. I'm going to find
it in actually, I'm going to just right click. There is an option find rose
to act. Didn't help me much. Here it is. I'm going
to go to the asset, drag and drop it here. I'm going to go to
the second wall, right click, cs to asset. I would help a little bit more. Drag and drop it here,
and I'm going to repeat this process for
each of the assets. Notice that I'm not selecting the doors. This is on purpose. Doors will be placed later through code in very
specific locations. Wooden walls, Embros to asset, ros asset. Other one. Amazing how some simple actions
might take a long time. Don't ask me why
I'm always closing the content browser before
I go to the blueprints. Seems like a habit.
I should be clicking directly on the blueprints. Asset. There is the
asset. Here it is. This 12, two more sets. This 12, brows two asset,
and drag and drop. We could have somewhere
stored all this information, of a arrays of them and just
pulling them from there or data tables that would be most lovely to have
them in data table. But you know, you don't
always have what you want. Work becomes a bit more tedious. Assets, equation, content, in the tarmac capturing. Overview, asset. We are almost finally done, but two more walls to roast. Here it is one more roast. All right. No. Before we enable the ceilings, let's look if it works. But first of all, let's
go to the Mz generator. Let's go to the end
of built rooms. Let's select the decorations, and we are going to
call the swap walls. O swap walls, and we're
going to need the index. And also we're going
to need wall index. No at this time. The same name and convention
didn't really matter. Rom index to room index
and wall wall index. The reason is because
this all resides in a different complete class
in a different blueprint. So this resides in BP decorations as this res
resides in BP maze generator. So this is not an issue. This actually can be helpful sometimes to have the same name, so you know which variable
corresponds to what. Where compile and save. Let's return to our
map game level. Save everything can play. Now, we should have
walls in our rooms. Yes, we do. We have some nice
walls in our rooms. We have a wooden room,
we have a stone room, we have a mossy stone room. There is a few gaps
over here and there, but that's just placement. If you want to take some time and fix that, that would be. I think basically
from what I see, the walls need to be lowered a little bit and it
will be fine I feel. Anyway, let's go
enable the ceilings. What we need to do is go
to our VP decorations, inside the swap
walls, swap to walls. We're going to get our ceiling, and we're going to
get visibility T. And we're going to ect
collision enabled. But this time, we're going
to have a small trick. Mom, actually from here. We want to enable
full collision. We will enable query and
no physics because there is no need for the
ceiling to have any physics or any
collision physics, but we want query query
because of our click events. So, talking about
the click events, now we're starting to enter
at with the game play area. We're going to need a way
to toggle our ceilings on and off when we are
entering or leaving a room. And in this case, I'm only talking
about when we are walking inside the room. I put paint just to what I mean. I don't mean while
I'm entering here, I'm talking about
when I'm already inside and walking from a
place to another place, we will be changing tiles. So a command should say that I moved a tile,
comanul say something. And the maze, the
room itself needs a way to know if if I'm
moving out the next time, if I'm not moving inside, and it's going to be the code is going to
need a way to know that I'm still inside the room
and I didn't move outside. So for that, we're going to use an extra collision box here. Let's put it collision
box. Why I said extra. We haven't done this yet, but we will need a box for the tile themselves to tell to the player which
tile they are on. So we can do things when we know which tile they are
on. Going to increase this. Wanted to adjust barely
towards the edges. I think this is fine.
We'll see in gameplay. So, for those who are new, collision shape
shapes in all shapes. There are collision boxes, collision captures,
collision spheres, are even custom collision
shapes that we can create. But collision shapes
basically are used to determine what happens when something is colliding
with something, they can trigger physics, they can trigger anything
to do with collisions. We have consider
them like triggers, for example, and as you
get used to real engine, you get more used to the
ways we're using them. No. By default, since not every
decorations will be a room. We will set these collisions generate overlap
events to falls. So this does nothing basically. And we're going to
go to our a walls. And when we are
enabling the ceilings, we're going to also enable the collision
generation events that generate overlap events
to now it will be active. Now, before we move on, since we have done a lot of
stuff on the maze generator, go to the even graph, we don't need all these
functions open. I'm going to move the
even graph on the left, and I'm just going to close
the tab to the right. So, now it's clear
up here again. Let's see what we have made. We started by spawning
the first style, creating the loading
and everything. We built roughly the
shape of our maze. Then we fixed a little
bit the arrows. Now, let's copy paste
this set percent. But we need to increase
the loading a little bit, and we started decorating. We started with a basic layout of the bricks and walls
how they should be. And What we did here was just hide the walls
that are not necessary. And now we created some
coordinates for the elevator. We created some
coordinates for the chest. We found the rooms and
builded the room walls. Now let's increase our loading. Two, last time it was
0.5, let's say 5%. A nice value. We
did the actions, four of them actually,
two of them the same. So that would be 65%. Let's loading
screen progressing, select the cavas that visible. It's the maze. And everything else is
really really fast. But even our maze
generator would be fast. We didn't have this 0.1 delay. So, let's decrease. This
is taking too long. But let's put another
zero in front of one. Let's press play. It has
cups here, what we want. Fine. Let's hide this again. Now, what we're going to do next is not create the
doors, what we go next. Usually after
creating the rooms, we say let's create the doors. But it's not the right time yet. Actually, let's put
the delay before here. We see the acup a
little bit better. It's not the time to
create the doors, and the reason why
it's not time. When we are creating a maze. Right now, we have
all these areas. It is buggy material
here that's happening. We're going to see what's
going on in the next one. Looks like there
is two materials. I don't see a two floors. Let's check the floor,
what's going on here. We have extra. Why do we have? This shouldn't be happening. What's going on? Did the ceiling? Yes, I didn't increase
the height of the ceiling. Let's put. That's the height of our walls, f hundred, a bit lower
than the maximum height. Yeah, it was the ceiling. I go inside, I see nothing. Actually, I shouldn't
have popped go back. I can just enter here
and I can set t. And the floor. Now, maybe the ceiling
is a little bit low. But it's fine. All right. I think this is a good stopping
point for this one. I'm going to see you
on the next. Goodbye.
36. Room Doors & Maze Segmentation: Hello, and welcome back to
Game Design Workshop and real engine five Procedural Dungeon Action APs
creation Curse. Previously, we finally finished with our placing of walls and placing of what types of walls and showing the
ceiling in the rooms? How they look more right rooms. And we actually created
a box to generate overlap events when
the tile is a room. And I started talking
about the segmented areas, but we got interrupted by the ceiling that
was not lowered, got higher, not lowered. It was stayed on
before position. Now, let's talk about the segmented areas that
I was talking about. As you can see, let's say, for example, we
have a room here, and it is only
connecting to this area. This area is isolated
compared to the other areas, whereas this area is being
connected by three rooms. This area has been
connected by two rooms. This area is connecting
two rooms again. And this area over here is just a single area
with two blocks, and this is an area with one block connecting to one room. So, what if we had a way
to categorize these areas? Basically, what we will
do is that any area that connects more
than one room, we will consider it a corridor. If it connects two rooms or
three rooms, it's a corridor. If an area is single and
it connects to one room, then it's a special room, hidden room,
something like that. And the other category we can
have is that if an area has two or three aisles and
it's connected to one room. We can consider it a balcony or an edge or
something like that, which also an area
which is bigger than two or three blocks and
connects to one room. We can consider it
a special area. How are we going to do this? Well, I think you
all know the answer. We're going to make a function. So we're going to stop playing. I'm going to close
these functions. Don't need them
anymore. And we're going to make this new function. Let's call this function augmented This is
the spelling areas. I think I spelled areas
correctly, though and find. No, I didn't. I added
a dividing symbol. What we will do here?
We need to explain. This is going to be a
big function again. Let's open paint actually. I go to be a bit easier. Let's consider that
we have our mas. This fixing over here made
the whole difference. Now, in this maze, we have some rooms. And then we have some walls that are separating the areas. Make them bigger. A here, here, et's put out and maybe here or
here. This is a ect. Now, as we said, we're going to separate
some areas to corridors. Let's represent that gray. So basically, this
would be a corridor. And this would be a corridor
cause it connects two rooms. Now, the orange one would
be the secret area, and the blue one
would be a balcony. And the purple one would be a special area
because it connects only to one room and it's bigger than two or three
boxes. Let's say three. Oh. How are we going to do this? Right now, our
maze, our dungeon, will has some walls up. Oh, what we're going to do is we're going
to use this walls. Let's say, we're going to take, for example, a random area. We're going to take this one. Polar is not the
best one. Round. We're going to start from here, for example, and we're going to line trace,
what is line trace? A technique used to detect objects along a line in
the game word basically. It involves projecting
an invisible line or a visible one if
we debug it from a starting point to an end and checking for any collisions
with objects in the path. That would be a
rough explanation. So, what we're going to
do is we're going to draw a line trace
from our point. No words our cross neighbors. I think or something similar. So, what we will be
searching is which of the neighbors are
directly connected to me. They have no wall between, they have no room between actually was is the
only thing we care for. So when we do that, we're going to be
adding them in a list. But this neighbor is okay, this neighbor is
okay, this one isn't, this one isn't because
here we hit a wall, and here we actually
also hit a wall, which is the external fandangon. Now, with that list, we're going to repeating
the process and playing a little bit with
variables and adding them and removing them from lists to create which areas
are connected, and with how many
rooms they connect to. Because this one might
not be an empty area, but it is a room, so we need to
differentiate for that. No. Basically, this is
the theory behind it on what we will do. We will possibly use two
times the line phrase, one time for a first check, a second time for
a second check, but we will be explaining as long as we are creating a long. So, let's begin. Let's
pop this gameplay. And let's go back to our M generator in the
fine segmented areas. Now, of course, again, we're going to use the
dungeon coordinates, and we're going to get the keys. This time, we're going to be promoting them in
a local variable. We're going to call this
variable dungeon keys. Because we might need them along the way
and dragging cables. It's going to be a hussle since this function will be huge and will include
other functions within it. Now, from this dngon keys, we're going to get P. So, we're going to start
from our first index, which would be Index zero and
start checking from there. I'm going to promote
this a variable called Study, a local variable. And connect this here. Oh, this will be the
starting point of studying. This is the first se. We have to start somewhere. Why not start at the beginning. We're going to check
how many tiles is it connected to and
how is it connecting? Oh. What we're going to do is also create a temporary
array local variable. We're going to call it. Ray, O. I don't like this going
to me Cardy Cords one. Let's call this
study coords one. Oh, I'm going to be bringing
this should be an array, and it shod be an in point. Very annoying when you're promoting something
to a local variable. It doesn't keep in
memory because they created another variable counter before which we want
you to be using. This happened a little
bit of co, I think. Since we're, we're going to use this study array to add The study point. Because this would
be the first array, we would be feeling, and then we're going to be
testing against another array. Basically, we will be feeling
this array right now, as long as the line traces, for example, do not hit walls, really let's go a little
bit back to paint. The way it's
actually going to be working will be let's
choose a new color, let's choose is bright red. Yeah, it's be we're
starting from study, and we're going to be
checking the neighbors. So this will be one of them. This will be the
other one of them. This will be one more, and this will be one more. These two over here, this one, and this one, are
going to be added to the list because
they are correct ones. Then we're going to be
checking from this list, where do this one and
this one connects. So they basically connect
to this, this and this, and we're going to
be transferring each list to each other and testing and testing again
until it cannot add anymore, and these two lists are equal, and when they're equal, we move to the next part. Oh, let's continue. Now, we need to test for the
first two neighbors. We're going to get
study, study arable. We're going to find bs adjacent, and we're going to
overlook through that. The reason we added study before we do this
is because we want to include the study to
whatever our result is, because if you don't add it, then now we're just going to
start looking for neighbors. We're not going to be heading
for the first one again. So we added it before we
start all this procedure. Do the neighbors
belong to the dungeon. So we're going to
do a contain map. And of course, the map
would be our dungeon. Andon up, and we're going to blanch and connect this here. Now let's bring our line trace. O line trace, by channel. What means by channel? Now, we have the channel
visibility and camera. This is a collision channel. What that means is when
we went to decorations, for example, and
selected the box, when we go to collisions
and open the presets, we can see object
type word dynamic. And then we can see the
responses to this object type. This but this object type, but how does this collision respond to the rest
of the object types? Object types like visibility, objects like camera, object
types like word static. It all depends on the
settings over here? Going to go about it
a little bit more in detail later when we
are making the game, which collisions will be very important about traces
and everything. Right now, we're
just going to use the camera channel because visibility will be used
from our gameplay. And because we will
have some things turned off on
visibility collision, then we're going to use camera that's always
going to be on, like it will be interacting with whatever trace line it's
hitting it while visibility, we will close some of them. Now, let's continue. We're going to go to
our maze generator. We're going to choose
the base line camera, and we need a start
and end in this node. So, for the start, what we're going to do is we need we have the coordinates. We need to find the
actor in the dungeon. We're going to wind, and we're going to
connect this here and get actor atent To this
actor location, we're going to add A Z axis, so it's a little bit
further from the floor. Let's put this 25. It's a little bit
higher than the floor, and now we need an end. In this case, because the next
arching will be different. In this case, our end
will be our study. Because we are drawing from the neighbors from the neighbors find like this is the
coordinates of a neighbor. This is not our study. So we are starting
at the neighbor and finishing on our study block. So I'm going to find again,
I'm going to copy this. Connect this, connect this, and I'm going to cation, going to copy paste the height,
to connect this sphere, and then connect this
sphere to the end, and we do have a line trace. Now, if I wrote the bug
type, this option over here, which shows us a line, and I make it persistent and actually call this
function over here. Segmented areas
after the loading. We have to the loading then yes, play, we should see this
line appearing here. Now, this one has only
one valid neighbor, so it throws one line. It tries to throw it from the beginning from the
neighbor to the beginning. And as we can see over here, this is where it found a hit. It tells us that this
block has a wall. So in this case, we wouldn't be adding
it to the list. Now, I think this is a good stopping
point for this lesson. We're going to continue
later with the logic and a little bit our
out heat results, which is the way we are
getting the data we just, and also the return value, which is if it actually
heated or not. This is more of what it heated. More explanations on the
next one. Good bye for now.
37. Segmenting the Dungeon Areas: O Hello, and welcome back to game design
workshop and real Engine five procedural Dungeon
action RPG creation course. Previously. We started with our function fine segment areas, which will divide our
maze based on some rules, the connecting
corridors, basically, to different types of areas. We will have, as
we said corridors, we will have balconies. Away, we'll have some
different types of areas. So, we started doing this
by adding our dungeon map, getting our dungeon map keys, and promoting them
to a variable. From that, we got the first
index because we decided, that's a good place to start, and we added that to the
Study coordinate array. We also promoted
that to a variable, which is going to
be the first for loop that we're going to
get the neighbors from. About the neighbors, and when
we're going to add them, it's going to be the
Study cords one. And as we said, we're
going to for loop and do some tricks to check
for the whole area. Now, the way we are
searching about these tiles that are in
this area are divided by rooms by walls is by creating a line tras that we project from the neighbor towards
our study tile. And this will tell us if
it hit something or not. As we described,
when we used the persistent draw the
bag type persistent. We can see on our first style, but I do need to
locate style zero. O. I think the same time
as ero became a room. Possible. Before No. Hurdes. I'm a little bit blind. This one tile zero connects to this one and this one
with a line trace. I didn't have a wall this time. I'm going to just
create it really fast. I wanted to have a wall, and it has two walls. So we are starting from the neighbor and this
is our deba line, which turns green when
it has hit something. When we get this little
box and it turns green, it means it heated something and the box is the indicator. Now, we talked about
that when we use some rules based on our hat
result and our return value. Basically, we're just going
to use the return value, which is, did it hit
something or not? I'm going to press B,
connect this here and here, if it heated something,
we don't do anything. We don't want it to our
coordinates, the coords one. We're going to bring this here. Press and I'm going to connect it to false because
if we didn't hat something, it means it's in the same area, and I'm going to connect
this to the array element. Now, what I want to say a few things about is
the out heat result. If we break this because
it's a structure, if we hover over it, we can see heat
result structure. We can see has a
few information. It has actually a
lot of information, not a few information. As the heat actor, it has
the location of the heat, the impact exact impact point. It has the distance from
our start to the heat, the time it took from
the beginning of the line t race, it
heated something. And start end, of course, it has a lot of information. This is a very nice structure to use even for
debugging things, like if you have a
system of debugging, that you throw a line
trace and you want to test things for something. This is very good starting point to create a debug system
for various reasons. Anyway, I just
wanted to show this basically that there is
this, this is a structure. It has this many variables
that it can give us. Now, let's continue with our Algorithm. As I said, we're going
to need a new array of study cords so we can compare
between each of them. If we have filed all the possible coordinates of the certain area
that we are checking. I'm going to create
a new variable. I'm going to be of
the type point. B here. I'm going to name the ds This naming convention
is not the best, but we do for now. Oh, our next step is to
promote our Study Cords one, two cords two. I'm going to connect this here. What we need to do
is similar to this. I'm going to copy
paste this. We here. And what we need first,
another for loop. That bet because we want to go through every
one that we found, as we saw here, there were cases that we were adding
one, we were adding two, or there could be
cases that we are even adding four locations. We want to go through
all these locations, and then for each of them,
check for the neighbors. We need this extra four loop, and this becomes a mess four. This becomes. Anyway. Now, we need to change
a little bit the rules. Of course, we need a start and end the same like
from the neighbor to to the current study one. And the current study one is the one that we are getting the result from this
four loop over here. I'm going to connect this
point a little bit. No. As I said, we need
some extra rules, and the extra rule
would be does Study one contains any of the
neighbors we're checking? Because if it's containing, we shouldn't add it again. So, I'm going to ask
study one contains m This out this over here. A to bring it here. Maybe here we're going to talk. Make it a little bit clear
lines are connected. One. Yeah, It's spaghetti. It's always a bit of spaghetti. You can spend more time and
making it more visible, more clear to the eye. But I think if we understand the logic
of what we're doing, then it's going to be easier. Now, I'm going to need
another condition here, not condition, a node, which is going to be the m. We used it before, which
means if either one is two. Actually, we don't
want the here. We want to be if it's in
the dungeon, continue. We need a second branch actually here, going to make some room. So the second branch would be if it already belongs to the coordinates,
don't do anything. We want the pulse from this one. I'm going to the pulse here. I'm going to
disconnect this pulse, and connect this
because from this, we want to ask this
question over here. It's fine. These things pagefied. Anyway, we're going
to be keeping the study coords one as they rate that we
are adding something. And when all this
orop has finished, we're going to be checking. If the length of our dy cords one is equal to the Study Cords
two. Now, why we do this? Because if here, we added
something to this list, and Ady Cords two
wasn't complete. We added some new pieces. No, let's do this. Ranch and ask, is our Ady coords two length
equal the Study Cords one? Oh, if it's not equal, we're going to this one or two. As nothing in it. And what we are actually
going to do is the same loop. We are going to be
adding the Cords one, letting it at the Cords two. Then we're going
to check if we can add something to the coords one. And if we added something, then it will go over and over
and over until it finishes. I think this is a nice
point for this one. I'm going to see
you on the next. Goodbye.
38. Finalizing Segmentation Mechanics: Hello, and welcome back
to Game Design workshop, Real Engine five Procedural Danson Action ARPC
Creation Curse. On the last lesson, we continued with our function
fine segmented areas. We created the Study
Cords two Variable, which we promote
our Study Cords. And then we for all of
our Study Cords one. You check all the areas
that we have added. Now, we checked these areas through northeast west
south, all the neighbors, and we asked if it
belongs to the dungeon or if it already is already
contained in Study one. Afterwards, we did
our trace line system that we are checking if
we hit a wall or not. And if we don't, we added
these cords to Study one. When the four loop, the first four loop ends, which means it has completed all the study one coordinates, we are checking if our
Study two coordinates are equal to Study one, because before we did this
action to add new things, we promoted the study ones
to the Study two coords. Now, if this was When
this was false, not true. My bad. We clear Study two, and we reset it to be
equal to Study one. Then we attempt again to add to study one new coordinates, and if there are no
new ones to add, we will continue now
with the true part, which is when Study two
is equal to Study one, and it means it has
no more coordinates. The first thing we need is
to create another structure like ST rooms array
that will hold the coordinates for
our segmented areas. But since it's going to be of
the same type of structure, it's going to be just
a structure which has an array of coordinates, an array of end points. We can use the same structure. So I can just past the
ST rooms array and call it ST all areas. And it's going to be of the
variable type ST rooms, which we can rename, but let's leave it ST rooms, which is as we said, an array of coordinates. I'm going to bring this here,
and I'm going to press add. Now, I'm going to
connect it to to. Let's talk about this node over here. This needs a structure. Before we made a structure, and we said we can actually split it and add the
coordinates here. Right now, we're
going to do this. We're just going to
split and add it like this because it does work, but it's better to all
the route of making a structure and adding members to it if you are
very new to structures. If you are experienced
with it and you know when how are structures working, you could do this when
it's necessary available. The reason that I'm
saying is because structures can create issues. For example, if I go and change some things
on the structure, then plenty of nodes like
this we need reconnecting. Because when I have
split it here, it won't always
update the variables. I I recombine, we
have the structure, and if I add something
to the structure, go to the variable
of the structure and add some more variables to it, and this might have a problem. I'm going to split
it, and I'm going to bring our study coords one. And I'm going to connect
it here because study cords one and Study
cors two are now equal. But this will be creating
a list basically of our segmented areas as
it did for the rooms. Now, the next thing I'm
going to do is I'm going to clear Study coords one. And now we need to continue with checking for the
rest of the areas. Because as we did now, we started from
study block zero, and we checked, how many of the tiles are connected
to study block zero. First, we checked if they are connected, we
checked for more. Let's go play if
we get an example. At S, it mapped all
the study, one, all the coordinates
from zero points that are not connected that
are not blocked by rooms, by walls or rooms. No, we need to do this
for the rest of the maze. To do this, we're
actually going to rerun this whole thing here. But first, we need
to create a checker. I are there any more
places left to study? Because if all the
places are mapped, then this thing should stop running. Okay,
let's create that. The first thing we need
is our dungeon keys, and we're going to pull
loop through each of them. Actually, because this is
something that will be a rule that we want to check if we're going to
run this again or not. This would be and should
be or with break. Because we're going to
follow the same logic here. We're going to use a variable. I'm going to create it in local, going to be type b, not going to be an R it's
going to be single. Let's call this belongs. If it belongs, then
where does it belong? If it belongs to the rules
that we will create. And every check we are doing is belonging to the dungeon keys, then it means that we're done. It means that we have
checked all the areas. If it doesn't belong
if some check from here doesn't belong
to any of our rules, then it means that we
have to run it again, or the c A element,
the certain ordinance. No, I'm going to connect
that belongs here, and I'm going to leave it to be set to falls because when we start checking all
the variables, this is where we want it to
be off or each variable. We're going to need another or each loop with break,
going to connect it here. And now we need the
variable which has created the ST all areas. Because we're going to compare does this dungeon key
belong to any of the areas? If it doesn't belong
to any of the areas, as we said, we're
going to restart this. We're going to rake
the structure, which is the ST rooms, and we're going to ask if any of these arrays
contain directly, we don't need to for loop for each of these and
skip it contains. We can ask directly this array contains the original value. The current study value. Maybe. Oh, I'm going
to put a branch here. I'm going to put
here, and put here, and then, we're going
to set belongs to true. So this means this
value we're checking, it belongs to one area already. Are we going to break? And continue with a question that
is it belonging? Cause maybe in this check, we end up with everything false. The thing we're checking
does not belong to any area. There is a chance not only to belonging to not
belong in an area. This could be a room. Since we are checking all the
keys to the dungeon. And if this is a room, it will always trigger
falls to all the areas. So we have to ask that
does it belong to a room. And here comes the all room coordinates that we
stored in an array. So we don't have to go we don't
have to do this actually. If we had all the areas
also into an array, we could ask if it's
containing But I find it more suitable right now,
more tutorial, like, if you will, to
have it as bake ST and get familiarized with the using structures
in an array. We're going to ask
if it's complaining. And we're going to put a branch, and if this is false, not true. Of course, we need to get the current coordinates.
We have done. And now, the only thing we care is that if
this is not true, if it's not true,
we're going to add it to be the current study. And when we find block to study, we should be breaking our
dungeon keys to find the study. Lower actually out a bit. One mistake, we do need
something to true. We do need that
belongs to be to true. Then we also we don't
need to connect it. We just need to turn it through because when we exit
from the main loop, when we exit from our
dungeon keys loop, we need to ask if it belongs. We're going to use a branch, and we're going to go to belongs. If it belongs, B if it
doesn't belong anymore, as I said, we need to
re run the whole thing. And how are we going to do it? We're going to drag
a huge sable from s to the beginning of our add Add the two the calls, which actually, I'm going
to disconnect from here, just connect it like
this. Compile and save. Now, this all loop will run until it finishes all the areas. Let's test if it works, start. And all the areas are
segmented right now. Have their own arrows. And we have categories. We almost have categories.
We have them in a list. But the next thing we should
do is actually create some rules from that list
to define our areas. But that's something. We're going to leave
for the next one. Good bye for now.
39. Categorizing Areas by Size: Hello, and welcome to
Game Design Workshop and real Engine five procedural Dungeon action RPG
creation course. Previously, we created we finished with the Pine
segment areas loop. We created the part that we
are storing all the areas in one array of ST rooms fcture. And we created a
mechanism to check if any of our dungeon keys belong to any of the
areas we just created, or it belongs to a room. If it doesn't, it means we
still have things to check, and it re runs the
whole algorithm. Now, the new thing we need is
to categorize these areas. And Surprise surprise,
we're going to need a new function for this.
Let's create a function. Let's call it carts areas. Let's actually call it
find segment areas. Let's enter it. Now, the first thing we will need is go through
all our areas. So I'm going to get
the ST or areas, and I'm going to loop. Let's say it's a structure, we need to break. Now, make it easy for us. We have a simple rule
of how many blocks, how many tiles each area is. No, we can get the
length of this array, the room coordinates
of the area, and we can promote
the room actually to a local variable that
we're going to call. And we're going to
connect it here. And from our length,
our integer length. We're going to which
int because it gives us how many tiles
does this area have? Oh, we're going to have a
rule for not zero tiles. We don't need the
zero tile actually. We're going to have for
one, two, or three. And let's remove the zero. Actually, to remove the zero, which can start index from one. And we're going to remove the
or when it's above three, how will this
switch on in react? It will run the default cable. In here, we're going
to leave the default. If we wanted more special rules, we could have make
a switch on int and specify ACs we want over here. For example, we
wouldn't want four, we would need eight, we would want specific other numbers. Now, let's begin with our
rules for one tile areas. So, what we need is to firstly
check if our that case, which is an array,
which doesn't matter. Even if it's one, we're
going to get the first copy, which is zero, which is the only copy when we
have a length of one, and we're going to break this. Since it's an point, it's a
structure of two integers, and we're going to check
if they are equal to zero. Here we're going to
use the end bola, which means that both have to be true for this to fire trough. We're going to put a branch,
we're going to connect this, and we're going to connect
the branch to number one. Is this, we take libido space, we can increase the height
libit but we can work here. Now, what are the possibilities
of having one block? What could this be? So, this could be in pain.
We don't need this one. You. Bark. And o. Now, let's say we have one
block here, one tile here, one tile here, one tile here, one tile here,
actually, do that. I'm going to make
the wonder grid. No. Let's say we have
a room over here. Then we have some walling here, and we have another
room over here. This style over here might be connecting this
room to this room. This is a corridor. The other
case we could have is that, let's say, for example, it doesn't connect to this room. S. So this is le here. So we can call this
a hidden room. Let's have it in a special
option on its own, like a tile that is
connected to to one room, and it doesn't connect
to anything else. And the third option would
be the starter tile, not connecting anything and
being like a hidden room, which we don't want it
to be a hidden room. It's a starting tile. So this is why we're checking
for the first tile here. So, if it's the first tile, we should add it
to a new category, a new array of ST
room structure. Going to duplicate all areas. And I'm going all
this S corridors. This is ST corridors. I'm going to delete one of them. SD corridors, and I'm
going to bring it here. If this is true, I'm
going to add our study. I'm going to split, and I'm
going to bring study here, and select connected to true. Now, if we go and pres play, we can see that there are blocks that have arrows
towards the rooms. But the first one,
not in this case, because it continued from here, so 012 actually this is six, guessing, who is here. Yeah. Continue on
a straight line. So but there are times that we have the arrows are
pointing towards room, here, we have a perfect example. This tile connects both sides. So it has both arrows. If it was a hidden room, it would have only one tile. It would be more like this one. You have the one arrow
point towards the room, and it would be a deaden
Then we have these arrows, we can decide if our one tile study cases are
connector or a hidden room. No. Don't stop. There is a error message. What was the error message? Add movement input. Top down controller. Okay, this is because we haven't fixed the controller for
gameplay and everything. We will fix this later. Now, what we need is
this value over here, our case study, and we need
the directions of the tile. Oh, we're going to find
it in our dungeon. Dung map. And now
we have the actor. And from the actor, we
can get our directions. I I get the values. Let's go from the
values side this time. We could do it from
both directions. What we really
need is the values because we don't care if it's
north east south or west. We care of how many of
the arrows are visible. We don't care if for
the direction of them. Oh, to count how many arrows, I'm going to use a counter. I'm going to create
a local variable, I'm going to call it
counter local counter. And it's going to be
of the type integer. And when I'm going to run
my four loop on the values, I want it to start from zero. I'm going to set it to
zero before the four loop. I'm going to for each loop.
And connect this here. And the simple question is, how many of these and
how many are not? I'm going to put a
branch to connect, and I'm going to set my
local counter two plus one. No when this ends, I'm
going to ask with a branch. Is my lo encounter one. Because if it's not
one, it's a corridor. I'm going to connect
it to add a corridor. If it is one, then
it's a hidden room. I'm going to duplicate
the corridors, the variable and
name it in rooms. I'm going to bring
this here. S add. And I'm going to add to this
structure array of arrays. O study variable. And now we have categorized all our one tile rooms to be either corridors
or hidden rooms. I think this is a nice
break point for now. Well as you in the next one. Goodbye.
40. Floor Replacement by Category: Hello, and welcome to
Game Design workshop, and real Engine five procedural Dungeon action BZ
creation calls. Previously, we finished with our category of one tile rooms. We used the study that we
created in the beginning, which is the D array of
coordinates inside our STO areas. In this case, this study has only one tile since we're checking for length
and switching between them. And since we have this tile, we're checking if
it's the first tile. If it's the first tile, we are adding it
to our coordinate to our corridors
array, tract array. And if it's not, we are checking if it's a block that has
one or more exits. If it has more than one
exit, it's a corridor. If it has only one exit,
it's a hidden room. Now, let's continue with the two and three
length structures, which means that these areas have only two or three tiles. We said, we're going
to make a special category for these tiles, which is going to be
called a balconies. And it's not only that there are two or three length because, for example, play, we might be lucky and
get this example. Ch. Okay. You see this one. This one connects
Actually, it doesn't. It just connects one room. No, it connects two rooms. It connects a door
here and a door here, and this is at the end. Since it's connecting two rooms, and it's it's a three size tile. It shouldn't be a corridor. It shouldn't be a balcony.
It should be a corridor. Here, we have a secret room, and your balcony
would be this one, like one room connecting to
two tiles and by one door, and they are connecting
to nothing else. In our rule set for the two, we need to also
ask the question. Does it connect
more than one room? In this case, this local
counter wouldn't suffice. And if we are checking
if it's just next, actually, let's
show it in action. So what we're going to
need is a new counter, call it local now. A. And we're going
to start by clearing this array. It's
not an array yet. We have to select it here
two set to an array. S change variable type. Let's connect to n three. Why we're clearing Because every time we run for a new SD area, we want this to reset. Oh, we are going
to get our study, and we're going to
flop for each Now, we're going to find
cross adjacent. What I wanted to
say before is that when we're searching
for css adjacent, we might be checking the same room more than
once like two cords. Two tiles could be
going in the same room. Oh, To check this. What we're going to do
is we're going to for each loop from the
adjacent ones. So we're going to
check the neighbors. If they belong to a room. No, we're going to actually, if it contains right now because we cannot do it
with our all room ports. Because if I do a
container here, ray. What do I contain here. I want to know which room
is it being contained. Oh, I need the room one, room two, room three variables. And this is our ST, all rooms. ST rooms ray. We need our structure because our structure has that
this is room one. This is room two,
this is room three. So we're going to loop. From this one here. Also. We are not fo looping
from the rooms. You check the adjacent
because this only gives us every four loop
here will be four times. As running for every study, this one will result in
two more calculations. I think we're going
to break this. And now we can check if
these coordinates are being contained on any array
of the ST rooms. O were going to b contain. They like this here, can use a branch to check
if this is true or not. Now, the new part
comes right here. We won't just add to
this array, the index, which references to
which room number it is because index 12345 corresponds
to our rooms 12345. What we want to do is unique. This means that if if the room already
exists in this array, it won't add it again. I'm going to correct this here. S for some extra information, if this was a set, which is this again, I might
have said this before. If this was a set, it
would only add unique. That's the rule of sets. But arrays are more manipulable. We don't need to anything else. But when this is all completed, we're going to ask a branch. If our local counter array is length is greater actually
is it equal to one. Because if we ask if it's one, then we cover any other. Possibilities. If it's
one, it's a balcony. It only connects to one room. If it connects to more
than one, it's corridor. On the fourth branch, we're
going to bring ST corridors. We're going to add.
We're going to split this and bring our study. If it's not in need
a new variable, let's duplicate the hidden
room one. It's fine. The same structure. It's an
array of structure, ST rooms. We're going to name
this ST balconies. Then we're going to
add A next study. And this will define our areas that we call balconies
based on our rulers. Now, for the rest of the areas, we're going to do
exactly the same. But with one difference, if they're connected to one, they're not any more balconies. They're big areas that are
connected to one room. But we're going to call
them isolated areas. I'm just going to copy
paste this below, going to connect
the default pin, which runs with anything
below one or above three. And we're going to delete
this ST balconies. We're going to duplicate
a variable balconies, name it ST or related areas. And we're going to
bring this here. So, the areas that are
connected to only one room, they are isolated areas
when they are big enough. And the ones that
are not our coordor. But everything we have
done right now is data. We haven't changed
anything visually. If we go and all and play. We're going to see no
difference, nothing change. But we have stored the data we need to make things happen. So the next function
we're going to need in the maze generator would be
after categorizing the areas, hint them, do
something with them. And that would be for
us to add our floors. We're going to create
a new function. We're going to call
it add floors. By adding floors, I mean, we're going to change the
material that they have because the static mese
will remain the same. For example, let's begin
with the hidden rooms. We're going to get
our esten rooms. We're going to each loop. For every hidden
room that we have, we're going to find
actor Mac Dungeon. Y. We needed to
break this first. Because this is the structure. This is a fracture array, even if it has one room, it's an array of one index. We're going to for loop
through this one index, or we can actually since
we know it's one index, we can actually get zero index, then we can find our dungeon. Dungeon, we will
get state floor. We named it. And set material. For loop. Let's try to at this a little
bit, make it compact. Element zero because our
floor has only one element, and this is the one
we want to change. Which would be for
the heating rooms. Which could be selected. Let's go to our attic meshes. Let's search for one
that looks good for a. This one. With the lava. Let's make iden
rooms covering lava. I actually do need to
set the static mesh. Sorry, not the material. No, I'm going to set attic mesh because we have
different static mese. Not just a material. And I'm going to move this
here. Now, Let's go play. Have a healing room
that didn't lie. The reason possibly as always, I have an ad the add floor here. The compile and save again, and we have a iden
that is the elevator. Now, why did this happen? Be The categorized areas. We didn't here I did
asked for the first room, but the ID ask if you
contained the special areas. In our elevator, our
room perimeters, our room perimeters
are not special areas. But what we need to
do is add here or If it's the first
room or Study one is contained R A veal
areas, veal tiles. It should be a corridor. So let's compile and save again. No hidden rooms. One more time. Okay, here we have two of them, have one here that
connects with this room, and we have one here also
that connects with this room. Oh, I think this is a good
sopping point for this one. In the next one, we're
going to continue with basing the
floors on each style, and some things that have some issues like
this one and fix them. Cause we will need
to fix some things. For example, we will need to
add something to our maze over this part here.
But I digress. Goodbye, seeing you
on the next one.
41. Hidden Room Categories: Hello, and welcome to
Game Design Workshop, real Engine five
Procedural Dungeon action RPG creation course. Previously, we finished
with our generator, not our generator, but our
categorized areas function. But we added the balcony
rules by checking in how many rooms each
style is cent two, and we created an array
with local counter array, which we added a unique value, which meant that if the index was already
added, if, for example, number one was already added, it wouldn't be added again when we are
checking other tiles. If it was not connecting
to more than one room, it would be a corridor, and if it was connecting
only to one room, it would be a balcony. And we did the same
to categorize for isolated areas and corridors for rooms that are
bigger than three tiles. We also started the function
for adding the floors, and we added the hidden
floor attic mesh, and now we're going to
continue with the next ones. Oh, let's begin with balconies. We're going to need
for each low again. We're going to need
our balconies et. And we will need to
break the result. From this result,
we do need to foop because this one was
only one variable, one coordinate, so we get zero, but for here, we need to
go through all of that. So for each loop,
like this here, and then we're going to find in our t actually can
copy exactly this. Now, let's connect. For the floor, let's choose whether we
didn't have balconies. We had a dirt one. Think it's good for balconies. Here it is, this one
combined A B three A, da6b. Amazing. We're going to do exactly the same
for the next one, which would be let's
get isolated areas. Well, now for isolated areas, we wouldn't be exactly the same because we don't want
them to have butter. We want to make them a
little bit more special. Maybe in the end of them
on a bus or something. What we're going to do is
going to do a select here. For the index, we're going
to do a random in range. I 23 floors of them? A. Think for sure we should
use some here more f here. L et's just put floor. We
have some normal ones. Normals and flame, like the normal corridors,
but it's flamy. Talking about corridors. Let's make the corridor floors.
I'm going to bring them. Here. Here are corridors. Fine. We do start with
the floor material. So we'll skip this step. We don't need to do corridors. There's no reason
to add it again. But we do need to do the rooms. Perimeter ports. We could go all coords actually, and we could for. This is coordinates. We don't have break. We can copy paste
this directly here. In directly. For the rooms, we do have a wooden floor. This one Y. So combined BC D seven or three. Nuclear codes. And I think
we're done with the floors. We compile Ave. We can
actually we will we created, that's too lava. Much lava. So much. We don't have a
balcony here or here. We do have a balcony over here. Okay. We need also
to close the base. So we're going to go
to one generator. We are going to go to
categories, fine segment areas. We're going to go to our
line traces and it n. Let's go back to our floors. Make the lava ones. Oh, okay. This is why because
I mean zero, M zero, but make the lava
ones less possible. Add an extra, to
select floor again. Here gets 0-3. The level ones are a
little bit more rare. Yeah, that looks nice. What happened here? Oh,
this is a special room. This is why And I
think our floors are. Now that this part is finished
with categorizing areas, et areas categorizing and
adding the floors for them, we should progress our lobbing. Let's say this is
another I don't know. Let's put 7.72. Just for the sake of it. And we do delay Our
progress bar in this part, 0.1 in this part, goes in ank by chunk. Moves percentage of it. If we were wanting to be a little bit more
visually pleasing, we could have made a timeline
to increase from the current to to the
percent we wanted. But that's visuals for
the sake of visuals. So let's continue with
creating some doors. Cause right now, we can't really move
from one room to one. We can't even start
from the beginning. Is just doors. Nowhere. As we said, we need
some code to do that. We need to define where our door should all our maze First room? I thought it was a hidden
that didn't get the floor, but it's the rest room. Oh, what we're going to use is the arrow direction to create one door to each room
from its segment. And the For example, this segment connects to
this room plenty of times, but only once it
should have a door. This segment connect
to two rooms, it should create to both rooms. A door. This should be create. It is
connected to this room also. This is why it's
not a special area where this one is
a special area. Too much fire. But yeah having some areas would be only
fire would be also okay. Oh. Let's go create our function to create
the hidden doors. The hidden room area doors. You're going to need
function. Let's call it. She then go The first thing we need for this one
is the hidden rooms. We're going to get this.
I'm going to go through all of four inch. Loop. We're going to break
the structure. We need to find in our
dungeon, coordinates. I'm going to get a copy of
zero because it's a le tile. To find dungeon. And from here, we're going to get directions. And from directions, we
are going to get the keys. This to the flow body, make it a little
bit more compact. I want to know at which direction I have an
arrow that's pointing to wall. This case would be easy to
do it because we only have one direction that has wall, a room wall, and all the other directions
are blocked debris, other things that are
not connecting to it. So we loop this for each loop. We're going to wind the value with the
index when it's true. It means it's the only
one that has an arrow, which means we have passage. Oh, it's a door. We're going to promote this to a local variabl let's call
this local variable direction. And now we have a
direction in which our cent room tile
as a door from. Oh, on this tile, let's get We want the five neighbors get to find the adjacent and
from this adjacent, we want the current direction
from our direction. We're going to bring
this variable over here. You're going to get from the RA, select which I wrong
select the wild card one. This one, not this one.
This one is always a bully. It says so in the tooltip also. Select. Going to
connect this the index, and we have north zero, is 213. No, we can select directly the neighbor of our block that is the room
that needs the door. So we're going to find our room. Use this dungeon map again
with our coordinates. From here, we're going
to get opposite actions. We're going to find the
current opposite that we want. We're going to get opposites room. From our room, O
tile room right now, we have found it with
our cross adjacent. From our room in the direction
showing you to it the opposite and make
the arrow be on. So that means that our dungeon our player has can
walk through that. Going to connect this to
the end of this four lob, which is the keys of
the current tile, because we don't want
to connect it in the end after all tiles
have been checked. We want to connect it to the current tile
that we're checking. Play roots don't I. Hidden room again. We have a hidden room here. I I going inside here, that's supposed to be
an arrow this way. I think we all have an
idea why it happened. We have to go with ven graph
and after our loading, we should add the hidden
door areas function. Let's compile and play. Art, hopefully a hidden room. Let's start again.
No hidden room again. Here we have one. Now, again, it didn't work. And the reason simply. We added to the directions that this is on we
haven't toggle arrows. So we're going to toggle. Dave, of a heating
room to actually. Now, I actually
shows us that here, they're supposed to be adored. And also works, the rest
of them are correct. Any other heating rooms. Much. Yeah, we have a third one. I here also. It means it's working. I think this is
enough for this one. I'm going to see
you in the next. Good bye.
42. Wall to Door Swap Function: Hello, and welcome back
to Game Design Workshop, and Real engine five procedural Dungeon action A Psy
creation course. So, in the previous one, we finished with our
add floors function. We added the floors
of the balconies, with four looping
the ST balconies and breaking to the RA elements, and then foo through
the LA elements and added and set
the static mesh. Now, afterwards, we did it
for the isolated areas, also, the same exact code with
the change of we selected through random integer to be from the lava floors
or a normal floor, and we added twice
the normal floor, so it has more
chances to pspone. We can actually add
it one more time. Here. So we have three
of them and two of them. The next thing we
did is we started our hidden door
areas code function to place doors in
the hidden areas. We went through our
list of hidden rooms. We broke the struct
to get the array. We got the first index because
it's a single tile room, and we found that
tile in our dungeon. We got the directions,
and from the directions, we figured out which one is on, which means it has access. No, this means we have a door. And then when we finished, we fixed the arrows of
the opposite block, the room block, to be enabling the arrow
towards the hidden room. Now, what we need to do is create a function inside
the DP decoration, which is responsible
for our walls to add to replace the door the
wall to the door wall. And we're going to do this here because in the BP decoration, because we have the room index, which we are using to elect
which which type of wall? Actually, we actually need the wall index, the room index. So in the swap walls function, let's just promote the wall
index to a variable also. Again, for those who are
searching where we are, we are in the VP decorations. We're going to create
a function in here, and before we do that, we want from the function
that we already have swapped walls to promote
wall index variable. Because we're going
to use this to decide which type of wall
door we want to add. Now, let's create this function. Let's call it Add door. Now, in this function,
we also going to need to check that is our
single room that we are creating connected to our room because there is a chance that our single room would
be be over here, rotated, of course, but
it could be like this, based on our rules, this is also considered
a hidden room. But this room would
not require a door. Stop here, go back
to the decoration, and add an output of wall. When we run the door, let's go back to
our M generator, going to add from
the find dunge map, our tile basically reference. We're going to We need
a child. Decorations. Yeah, that's the name. And
from the child decorations, we're going to actor. And from the child actor, we're going to cast
two decorations and make this a pure cust. And now that we
have the reference, we're going to drag out. Door. We're going to connect
it here. Bring it like this. Now that we have an output, we know that have this
output of a wall. We know that when
this runs, next, we can ask the question, did we find a wall or not? And if we didn't find a wall, we will add our
coordinates to all doors. But let's not do that now. We're going to do
this afterwards. Let's finish with
our function at. No. First of all, we're going to need
the walls array. Because we want to go
through all of them. So we're going to for each. But as you know, when we
go through all the walls, we do need a direction because
we have the tug system of a element as tug
component has tug. And because we need to
tug, we need a direction. So let's add to our door
an input of E erections. Name it erection. Now, remember, this needs
bring with to string, not to bite, and we're
going to add this here. Then we need a branch. Let's go back to
our PP generator. And from our opposite result, we're going to connect this here because we are
testing through the direction of our pile
that has the hidden room. We are doing the opposite
for the neighbor. So income, and this gives us the outcome of the
I is the room. Go back to decorations. So this is the part that we need to ask if there is a war. But what we can do is
we're going to drag this here and set is visible. Or is actually not
is hidden again, hi in game yet hidden in game. We're going to put a
branch when this is true. And we're going to
select an here or b I's not visible or if
it's hidden in gain. We need visible here. No b because if it was visible, it would turn true, and
then it would run true. But if it was hidden in gain, and it runs true, it means we cannot see it. So we need the opposite. But we have this. We need to create
a local variable. Let's call this really wall. Because we have
the no wall here, and let's connect it
actually here too and set it true when our question is true. Now, a nice thing to know is that we can add
tags on run time. Let's see, for example,
if I was going through all the walls on a room. How do I know which
one is the door wall? We could go to the
maze generator. Let's show both ways, actually. We could go here,
and we will do that. We're going to add
this coordinates a new array that it was called let's duplicate s empty. It's an end point array.
This is what we want. Let's call this all ors. Bring it here and let's
add the coordinates. Of the operator,
sorry Add to array. If this is false,
if we have no wall, we add the coordinates
of our door, which is a result of our
find cross adjacent. At the same time, we
could have another array. Let's call it all
door erections. Let's change the
point to directions. But for example, if I
bring this here also and add the opposite
direction we want here. No, I I was adding
them like this, I could have two
corresponding arrays of having all the doors
and their direction. Or I could have also another
map variable with t points, and the second value would
be of eight directions. But as I said, we
can do on runt tugs. We can add on run
us to components, to actors, to whatever we want. So what I can also do is drag from the for loop
from the array element, the wall that we are
manipulating here, and add g tugs what we need to do is
a little bit weird. We have to get tags, get component tugs, and it
comes as an array variable. And because it comes as a
variable, we can actually, which is our direct
reference to this variable, can actually manipulate it and express and we can
put the ug door. Now, if we for loop
through each of them, each of the walls,
and in the end, let's make another fore loop. And request the tag list. Now, the wall that we have
this, we'll actually print it. But let's not test it. It's a waste of time. This is the way it's
programmed to work. The next thing we need is
to set the static mesh. Tic mesh. This could have got different. It's more visible,
what we connect. Yeah. I see this is for clear now. Which static mesh do we add? We're going to elect. For our index, we're going
to choose our wall index. We're going to add total
of five variables. Let's go to our
static meshes and select our doors
correspondingly. Now, I do need to check what
was it corresponding two. We're going to go to Evan graph. We're going to go
to build rooms. And from there, we're going
to go to swap to walls, which is actually
inside decorations. I could have stayed
there. And let's check. So number zero is this type. So if we go to a, number zero, we should add this type
of wall to to the select. I think this is it. All right. Combined 85a1 9f8d. Amazing. Now, the next
one. Let's go to. No. Let's go to stop walls. The next one is the wood one easy to find.
The wood one is My big mouth, easy to find. Okay. Yeah, it is here it is. I this combined b91xb. I'm not sure. In this year. Let's go for the next
one. The stone si walls. This, this was easier to find. Combined zero E CC 57. I think that's enough naming. The last ones would
be the brick walls. The brick walls. I'm not really sure
which is which, but I don't think it matters. I'll choose this
for the first one. Combined 025159 blah, blah. And the other one
would be this one. Okay. Now, based on our
later on system on how we're going to be
entering in living rooms. We're going to need some
extra collisions here that we're going to be enabling
through this function. Let's go a them. We're going to need go to the viewport
and add actually, we can duplicate
the collision box. Really quickly bring it over
here and make it smaller. Think it's fine, fine size. Maybe a little bit.
Yeah, that's fine. I think. I'm going to
duplicate this again. Go to rotate it. Going to bring it everywhere where
a door is supposed to be. It doesn't really matter
if it's precise or not. I'm going to duplicate
again, get it across. And then I'll duplicate this
also and get it over here. All of them because they
are a copy of the box, they got the same settings
that we added here. So they're not generating
overlap events. Maybe this a little bit more. But it's fine. Oh, this means that
on our door here, we should enable their lesion. And we can actually
make a simple step. We're going to select this wall. We're going to parent
this box to this wall. But we keep also naming this. Then we're going to parent
this box to this wall. Here, this box to this wall, and then this box to this wall. I'm going to go back
to the function, and from our static mesh, I'm going to get children
get the children components, not of box two, as you can see, It showed many options. One of them was to
bring a certain box. Sometimes real things, it can predict what you want to do. But anyway, on the get children, we're going to, we're
going to p each loop. Then we're going
to rash component. And generate overlap
events, true. Now why I needed to cast. The reason I needed
to cast here is because I'm going through every component that
this at mesh has. And I want for the ops. It's not a static mesh
component, it's a box component. Sorry to box. Box component. This wouldn't have worked if it was a static ma.
So I don't know. This is the reason because I don't know what type of char. It can have like 520 children. Okay, it's not good to
have that many children, but you can't do it. And it's going to
be at bit heavier. I don't know what type
of components they are. So I'm casting to say, are you the box component, if you are the generate
overlap events. I don't need to tag
these components. I don't need to name
these components. I know they belong to the walls. I think this is a nice
talking point for now. I'm going to see you
on the next one. Goodbye.
43. Door and Sigil Placement: Hello, and welcome to game
design workshop under Lensing five procedural Dungeon action RPG creation course. On the previous
lesson, we finished with the d and door areas function with adding
the doors function that we call from
BP decorations. And we also showed a way to add information about the
doors in a way we knew, creating an array and adding the variables and creating
a corresponding array, also that they're being
filled at the same time. So they their indexes
correspond to each other. We also added this function, the door that we
started to fill in with getting the direction from where we want
the door to be added. We went through our walls. We found the component
that has the tag, the wall that has the
tag of our direction, and we asked a question
that is our wall visible or not just in case our hidden room is
singled out somewhere. And we continued by electing
Actually, this is wrong. Some mistakes again.
When it was true, we wanted to set them no was to true and when it was false, we wanted to add the
tag to the component, that this component is a door. So when we want to go
through the walls array, we can figure out easily
which is the door one. So, we disconnect now
this and connect it to the falls and it's fine.
This is the correct. And then we added
the static mesh, elected the appropriate mesh, and also we added a few box component or
our gameplay mechanics. But when the When the
door is activated, we are also activating the overlap events to
our new box components. Now, there is one more
thing we should add, and I'll explain why we
need to add a static mesh. Show where is the door? Because our camera is going
to be from a 45 degree angle. If the door is in this
wall, we cannot tell. We cannot say, Oh,
here, there is a door. So there need to be something to the player when
we're looking from above, that there is a door here. To do that, we're going
to use some gals. Oh, I'm just going to
add a new static quest. It added the wall because I
have selected the wall here, but we want the CGL. Let's find the C l. Here it is, right? This is big. Let's make it a
little bit smaller. I think 0.3. Maybe that's a bit small
or a 0.4 looks fine. Remember to lock all the axis, so it scales uniformly, and let's bring it
where the would be. Base The height of
our word is 400. 93 80, maybe that's fine there. Actually, for the Cgels, I'm also going to use tugs. We could just parent
it as a child, continue with the other
wave that we showed, but let's get used to tugs. So this is S. This is two
we pasted, rotate it. I'm going to negate
the negated value. This is a North. I will check with the wall. Y. I'm going to rotate
copy paste this again. I'm going to rotate
it 90 degrees. B West position B. I'm just going to copy
this. Paste it here. I. Halfway so two. Yeah. I'm sorry.
Because this is middle. 380 Wu again. Direction. The negated 400, it's 400, and it's in the right place. What we need to do for all is or is also turn the
hidden game true. Because we want to enable
them when we want. I'm going to go too, and really, let's
go to construction c. Bring them here,
make an array. And promote this variable, all these C gals. Fine. Now I can go door and get the Cgals and
overlook each of them. Again, I'm going
to use this string this text name over here as the component
have tug If it does, we at its visibility. Visibility that the
hidden game false act. Visibility and hidden in game
are two different things. And they're opposite.
Hidden in game, yes, it means you cannot see. Visibility, yes, it
means you can't see it. Anyway, Now, we before
we do this actually, we need to ask a question. Is it possible that
we are on a wall? Cause if we are in a wall, and we shouldn't turn the C D on cause there's going to be a CD snding in the
middle of the air. If it's no wall, just exit
with no wall through. If it's a wall, go through the sea gels and
enable the correct one. Now, let's compile and save. And crash. We had
to have a crash. As we're back, let's
continue. Let's go test. The map. The level. There any secret room? Yeah, there is a secret room, have residual, and
we have our door. Oh, the only thing left to do is do it for everything else. Oh, the next thing
we should add would be the single area doors. What I mean by single areas like the balconies and the isolated
areas of one common rule. They only connect to one room. O balcony here,
single area here, isolated, we have another room. This being a nice map. Anyway. Let's add the
single area doors. When I have two different. Let's create a function first. Let's go to pen graph, iden door areas, and
add a new function. No, single door areas. As we said, we have two
arrays of these areas. We have the balconies
and the isolated areas. Well, I could do a
different amount of loops for each of them and get
over it with it like that. But there is also
another option. W two arrays have the
same type of variable, you can actually append them. This means that you're
merging them to one, because I don't want to
mess these two arrays. I'm going to create a
new local variable. I'm going to make
it an int point. Going to be an array,
and I'm going to call it tal array. I'm going to bring it here. I'm going to a pen. And I'm going to co
repaste it, do it again. So what I'm going to do is, this shouldn't be an endpoint. This should be SD rooms. No endpoints change
variable type because these
arrays are of room. No. L et me disconnect, Let me compile and
reconnect pile, and now they can be added. Now, the first no, the first pin is the array that we're
going to add things, and the second pin is the
array that we're adding. So this array becomes
a total of this two. If I had connected the balconies here and connected the
isolated areas here, it would have messed
our variable. Now, since I have this
total arrays, I can drop. For each loop for every room, because what we're going to
do is going to be the same. We also are going to
need another variable. It's going to be of integer, and it is going to
be of an array type. That's because it
needed to be an array. But I want to show over
key code like programming something over the need of it.
I'll show you in a moment. Let's name this ex. Mm. Oh, I did. But you have room
index somewhere else. I didn't like it. I'm
going to call it Index. Going to be fine. Compile and save. And actually, I think this is a good
stopping point for this one. I'm going to show
you the overkill of this code afterwards
in the next lesson. Good bye for now.
44. Single Door Area Functions: Hello, and welcome back
to game design workshop, and real engine five procedural Don action ps creation course. Previously, we created, we finished actually with
our add door function. We added the part that
we are checking when the for looping each
wall has finished, and we have enabled
our box. Our door box. We are checking which of the C gills has the component tag that
we want the direction, and we are setting
them too visible. As we setting the new
hidden two falls. Now, and we exited
with no wall or not. We also created the start of our maj generator of
our single door areas, and we explained a little bit about the append in one array. And now we're going to
continue with this. And as I promised, I'm going to explain to you a little bit of overding with this
array of integers. I'm using an array of
integers to do this because the impact
will be minimal. It's a nice opportunity
to explain some things. Oh, let's begin with
breaking our acture. So we get the array
of our coordinates, and then for loop
to each of them. For each loop. Now, we have a function called in room index, which if we open, what we are doing is going through all the St array rooms, or the coordinates of the rooms, and asking if the coordinates we are inputting
belongs to any of them. This returns us if a room is found and which
room index it is. We're going to close
this function. Now factor single door areas. Now with this,
we're going to put a brunch and connect it here. And say, if we found a
room, what will we do? If we haven't, we do nothing. But if this is true, let's do the overkey
in index room. So, I'm going to ask if this is contained. Contains an item. And the item would
be the room index. Because if we are adding a room, if one of the coords
finds a room, we don't want to
add the next block that finds a room also, we found somewhere that
we can create a door. Oh, when I do this, and I know that I want my room to be unique
in these contains. If I add to this array, can you hear of unique. This would be overkill because the reason is when
it tries to add unique, it will go through the
whole indexes first, and then it will decide
if it adds it or not. Now, as I mentioned, the sets have also
this functionality, but they are not as heavy
as arrays in adding unique. They can actually increase performance in the
adding unique part. They would decrease performance
in memory because they have an underlying system. The mechanic called sh tables. It's something deeper
in programming about memory management,
getting reference fast. Anyway, sets are better
to add unique things. Index arrays are better
at just adding normally. So here, I would
just select add, and it would be faster. Not that it has to do
with our maze now, but I think this
is some nice info. I'm going to add the
room index to the array. And we have the doors
and all directions. Since we said this two need to be filled at the same time. We're going to add to this I'm going to add
the coordinates of. I'm going to add to this also. Now, to get the direction, we're just going to select. And we do know our index
array from the brake room. We need to do the
cheat here again. So I'm going to find this select from some other function that
we have used it, and just copy it from there. I think we used it
in field rooms. I think over my
zealousy to show this, I forgot one step. We're going to we're
checking the point. We are getting all its
points. Yes, here it is. For each of its points, we should t neighbors. So get cross cross adjacent. Why and cross adjacent, and then we need to
for loop these points. Going to connect this. And this one is the room, like the cross adjacent, we are checking, it's
a room, not the tile. Not the tile coordinates
that we are coming from, but the cross adjacent. Because we know that the
tile we're coming from, it's a corridor or a balcony, not a corridor, an isolated
area or a balcony. So this is why we need the cross adjacent and
from the cross adjacent now. This one, all doors should
be also a cross adjacent, not the room coordinate. Oh, we are looking through all the balconies
and isolated areas. We are getting the coordinates
of each segmented area. We are checking it neighbors and when the neighbor is a room, then we added to the index room. We explained the things here. Now, Now we can actually get the direction because from the
northeast southwest, we know the direction
of the wall. So I'm going to do the
trick with a select. As you can see,
this doesn't work. Me again to have options to
have every direction Away. I'm going to bring
the last exit. I'm going to elect from here. I'm going to connect
the last exit and last exit and go north south east west, North South east West. Be honest, I don't think we're going to use this
variable at all, but why not have it? Who knows how you're going to think to upgrade this program. Now, all that's left to do is
actually create the doors. And to do that, we're going
to need two local variables. They're going to be again of
the endpoint and direction. But the ones over here have all the information
about all the doors. The reason we're
going to create the local ones is because we're going to filter
to just this category, what whatever we create in here. So we can use them. To find the appropriate
style and get the proper direction of
the door and the arrows. But we're going to scroll down, to go to local variables, and we're going to
add two new ones. Let's call the first one doors. It should be coordinates
of type point and the other one should be ctions
it should be of direction. And we're going to bring
them in the end here. And add exactly the same
things we added here. This looks a bit nice, this packet defining
points, but fine. Now, let's continue. Where are we going to call
the create new doors? We have three options. We have the option of creating
right after this f loop, we have the option of
creating here or here. This is the fd loop that has every tile, it's a
coordinates, it has, but let's say every tile
that is in these two arrays, which are arrays of
many coordinates. They have lists of coordinates. So, if we add it in any other
place, then in the end, it means that it will
run it will try to add the tos as many
times as all these are. We added it to the
coordinates here, it even would be worse
because it's multiplying this by how many tiles are
in its act in its debt. Ray, actually, we used an array. So the least damage we can
do is add it here because all these for each
loops that we have created are a lot
of calculations. So let's bring our doors. Here, Let's for loop. For each loop. Now we can fac. I'm sorry. We don't
need to close adjacent. We need to find it
in the dungeon. Find. And we're going to get directions and we're going to add as true, like this. What we're going to add as true is going to be the direction with the get of the index. So we're going to add the
direction with the get of the index because
these two arrays are corresponding to each other. The next thing we need
to do is dog arrows. Okay. Okay. Lower and also at the door. How we need a child, so get decorations get decorations compared
to pest and a. And for that direction, we're going to connect
this or getter. And that should be it. Let's go play. The door here. O door here. I'm guessing. They connect this. Always
the same, isn't it? In doors. Is it? In door areas. Here it is. Start again. No. Door. Right? Let's figure it out. Please. Oh, let's
go check our code. So we start, we are adding
the falcon is isolated, we are backing to fractures, finding cross adjacent, we
are adding to the index room. Keep adding to this is a problem because if
we add the same room, Yes, I we are the same room, the same room has
two isolated areas. Let's say an isolated
area and a balcony, and then it exits
it has three doors. Then it will not add, but we do need to
reset this index room. So we're going to hear it
before we select a new area. Now, we add to the exo this wouldn't cause an issue the
issue that we had though. You are creating
erections. Adding doors. Here we're getting the doors, we're getting the
direction of the door. Then we're toggling arrows
to the arrows work. This one should
have an arrow here. It doesn't. The arrows are not either. Okay. You see what happened
here, so this is north. This is neither do to north. Okay. So basically, It's here. We didn't do the opposite because when we're
getting the neighbor, overs a direction, we need
the opposite direction. Yes, of co, that makes sense. Ilan save. And this
time, We have dogs. An isolated area. Yeah. Not an isolated area. It is because we
have this over here, which is a special box. So between this and this, it considers it to have a block. So this is an isolated area, and this is an isolated area. But, we use the
special blocks also. So working closely
to what I said. So we have doors everywhere. We have a door here. We
should have one here. We have the sells that
are a little bit high, a little bit inside the wall. We can fix it quickly to our
decorations, lower them. 340. 30. That's all 30. That 30 ed. H. Yeah. We are going to be looking
from above, so this issue. That's too much. I'm
going to guess for 20. H. Cp and save. Lest again. It looks fine. Fine like this. But we do have doors, and we did have a in
the middle of our. I think we should in the
next one. I see you then. Good bye for now.
45. Connecting Dungeon Walls: Hello, and welcome back
to Game Design Workshop, and real engine five
Procedural Dungeon Action ARPs creation course. Previously, we finished with
our single door function. We also fix some mistakes
that happened during it. And what we actually did was to add a clear of our room index in the first fourth
loop before we start the coordinates of
each segmented area. Then we reversed the directions because we are getting
the neighbors. And then we use the doors
array that we create inside here to get the direction and add it to the specific tile. We toggled arrows and
we added our door. Now, let's go do this again, but for our corridors this time, which will actually be
almost exactly the same. We're going to go to our
function, single door areas, and we're going to duplicate
this and call it areas. What we're going to change is we're going to delete this two. We're going to
delete the temple A, and we're just going to
add our corridors a A. The compile and save. Let's actually added
to the van gra also. Corridor areas, doors. Compile and save,
and let's play. Now two doors here, acing moment, but it works. Now, why did it
add two doors here and didn't enable the C here? Because the difference with the collidors is
that we actually do want only one in each corridor. In each corridor segment, with every room
that it connects, we want only one door, whereas now it adds as
many as it can as it point because that's how
we have coded this part. As you can see here,
it bugged with the C gill, but we're
going to fix this. Let's stop our gameplay, go to the may generator, go inside the
corridor area doors, and let's look at the rules. Out. Every time we
are running for a different break
room, corridor. We are adding a door
and a direction. So the first thing
that can happen is that same coordinate would
have two directions. What we're going to do to fix this is that we're
going to connect and of running the doors in the end when we finish
adding everything. We're going to add it over here, which will be for each adjacent. Play. It has fixed our
things a little bit. We have one door here, we
have one door here here, but we do have a CDL here, which is the problem
that we detected before. Guessing there's an a
certain direction in this. We might might have not
put the correct tug. O was it? West west east west. So this sed which was
supposed to be east doesn't have the correct tag and crash. A back again, and
now it's fixed. And if we press play, and doors doors. Thinking because it crushed,
didn't save something. H generator, doors didn't
save the adding here. I added it again. This is why we should
always constantly save. Now we have dos, only one per corridor. It sh be All right. Seems correct. C here. This is a this corridor here. We have doors everywhere. Now all our maze and rooms are connected with
each other and they a player can navigate through all the
maze and all the rooms. Now, since we're
finished with the doors, let's increase our loading. Top, and I'm going to copy this thing here over here, base. Let's say 85 a lot. This also four loops. It is a lot of actions again. Now, what would be our next
step in our dungeon building? Well, our next step
would be to figure out the external walls, which walls are external and
which walls are internal. So, by that, I mean
that these walls over here is when we are forgetting. And this one and this
one are internal walls, whereas this one or this
one is an external wall. We want the internal ones to
change them to some props, some crosses, some tables, some chairs, some daggers, a massive amount
of props that will be blocking basically the way. But all of them, some of them, we can live as they are. It's going to be an on
random. G to do that. Let's go to our maze generator. Let's stop the gameplay
and create a new function that we will call
wind external walls, which we'll actually be
finding the internal was also, but yeah, it's a fine name. No. Again, the first thing we will need is all our
dungeon coordinates. And we're going to get the keys. Of course, we're
going to from them. For each loop. And we're going to find the cross
adjacent from each. And we're going to afford loop for each loop from
the cross adjacent. Now, what we want is to ask if the cross adjacent
is a part of the dungeon. So we're going to contain, ask it contains the map. The map will be our dungeon. And we're going to put a branch. So let's begin the logic
of when our neighbors, our neighbor is not
inside the dungeon, it's an external wall towards that direction
of the neighbor, it's an external wall. To do that. We're going to need
the walls, basically. No get. Sorry, find find
the correct pile, which is the tile
that we're examining. It's not the neighbor. It's
the tile we're examining. That is the important
one because the neighbor is
the not valid one. We're going to get the walls. A an array for that. Walls. There's no
array for that. I'm sorry. I meant
we need the child. The decoration has the
walls, not the tile. So we do need a child. We're going to get decorations. We're going to get child. And we're going to decorations
convert to pure cast. And we're going to get walls, and now we have the walls. But besides walls, we
need the direction also. So we have this S EW, and we need to switch on that, which we're going
to find the switch. This is the opposite switch. We can make it opposite here. Here. I connect this. This should be north, should be South, should
be east and the sh west. Aus right now we don't
want the opposite. And we're going to pop
through each wall. We're going to choose
the false branch because this is when it
doesn't belong to the dungeon. And we're going
to make an array. No. To promote it to variable. Click promote variable,
running this external walls. Disconnect, this and
bring the external walls. I'm going to add this wall. I'm going to create another
array of the type directions. So I co pat the all directions. I'm going to internal
wall erection. And also, I'm going to
add this information. Just in case we need it. We
might want to manipulate. We might want to change the
static mesh to all the walls. We might want to
change some of them. Maybe make a random, that changes some
of them to be in a shape that produces va, and then we will check if
that wall is in a tile that is in a special area or
in an isolated area, which we have the lava blocks. Anyway, I think this is
a good stopping point. This is how we get
the external walls, and we're going to
continue in the next one with a little bit more code here and adding a few more
visuals. Good bye for now. See you the next one. A
46. Wall Decorations: Hello, and welcome back
to Game Design Workshop, rail Engine five,
Procedural Dungeon action at Ps creation course. Previously, in the last lesson, we finished with our
corridor area doors. We actually copy pasted
the single doors, and we just changed a few
things. Actually one thing. We run the doors array
for adding doors or each find out adjacents instead of running when we finished through
the whole corridors. We also began defined
external walls function. We actually founded
all the external walls and the directions of them
and add them to a list. And as we said, we're
going to continue with adding a few more
visuals to our maze. Oh, we're going to
go to our pile. We're going to go
to our viewport, and let's try to hide this
awful gap over here. Do this. We're just going
to click a wall. We're just going to
add astatic rice. Mesh. Actually, we didn't
need to click on a wall. We needed to click on the root. So we don't make it any
root, just touch it. This walls should be
irrelevant to the other walls. They shouldn't be children. They should be
children of the root. Now, for this static mesh, we're going to vegetation
like vegetation. It's, it's demonic vegetation. It's a bit offset it. Let's rescale it. Actually do the rotation also. Let's put it somewhere here, maybe a little front. What we want is just to
hide these lines over here. Oh, we make it a little
bit, maybe lock's 1.1. This a little bit, further down. This fact that part that
it's more lash, more thick. I'll be closer to the line, so it maybe even on
top of the line. Yeah. He. We're going
to copy paste it. Am going to change rotation? One. Again. How much precise it's up
to you when it looks good, It the minimal visual, so we won't much time. Visuals. Right? I think I think
it's good enough. Now, let's give them some tags. So this side is East. So this E, this
side, North South. So it has a S. This side west. W, and this side is. All right. Now, let's go to our Ms generator and
fine external walls. Since we have the externals, we can just from our tile here. We don't need to
do the decorations because now we are in tile. We can we need to make it to
get it and being ty again. Select, this. We As, not Was for. I'm not sure how this age. No es West. O. Okay. Now, pick
on all of them. Let's go to script. Let's bring them, and let's make a some values this and
promote a variable. Let's call them on D
also for gage garbage. And way we keep
the same mistake. So this here, let's go back to me
generation and get this away. O the end. It is and we going to and
we're going to for at the end. The walls, I'm going
to set game to false. I'm going to go back to a tile, them all again and
set hidden game. True. Now, if we play, we should see nothing because this
function is not running. So you know, the drill. Now we have our foliage, but we have it everywhere. So the reason is I just set everything to
hidden didn't I. Yeah. What we want to do
is get the direction to and from this
string. Let's go. Get this year, as we did
previously on many things. I'm going to put
the branch here. And if it's true, then
only show the foliage. R. Now it's correct. Our
mace has foliage. It's much more. It's how come I will relate
this. Going to be fine. We finished with this detail. The next detail we
should do is change the internal walls to walls
that are of a different type. Oh, to do this, let's go
back to our maj generator. Let's go to our was branch. On our find exit walls. The walls, actually our
true branch. No our falls. This means that this
belongs to the dungeon, and we're going to
ask another question. If it's belonging
to the dungeon, is it also a room maybe? Because if it's a room, we
don't want to change the wall. We want to have the room walls. No, we're going to bring the We're going to bring
the all all rooms, all room calls, which
is an endpoint, and we're just going to see
if it contains not this, not the neighbors,
but this element, which is the key
that we are testing. So, this is the key a room. If it's a room, we
don't do anything. If it's not a room,
we are going to get our walls again that we have right here. We're going to f. O walls, which is a room. We're going to get
the correct wall towards the direction, so we should copy
this. Elect node. O here. That's connect it to the index of forage loop that connects to
fine cross adjacent. And we're going to
a Cs u and these two and we connect this
here and select a branch. Now, of course, what we
will do is set static mesh. For the static mesh, we're going to be ect from
random integer in range. Which would be zero to three because we have
a few extra things. One would be this
combined table I think. This is too small. This 1938 A, three, four, use this one. Next, combined 9d57 47a7. I'm pretty sure
we had some more. Okay. Here we are
combined 0d44 c17. Remind c17. And we're just going to use the actual combined
wall that we have. So of them will be just a wall. Now, an extra thing
that we do here, but we will explain later when the time comes is that
when we are on gameplay, and there is our character
is behind something, we should be able to see a
figure of our character. And to do that, we're going to play a bit with
atom depth stan sll value, it's called rendering
custom depth basically. So we won't talk about
it a lot right now. We will talk about it
when the time comes, but we should enable the options now so we
don't have to come back. When we are on internal walls, we want to see basically the
bottom of our character, and some of the assets
are a little bit taller, so through them, our
character silete. We do that, we're going
to get the static me. We're going to set
render custom depth. True. We're going to
connect this here. And also, we want to
set sencil value. I think zero. If it's not, we're going
to check it afterwards, when the time comes, we will return and
change this value. Now if I pre compile and play, We have our boxes. We have our other boxes here the internal walls became
a bit more interesting. And our dungeon got some props. Some of them are a
bit overlapping, and I noticed that this happens also with the corners
of some walls. My maybe we need to push the
walls ale bit further out. But I think it's also fine. What we could do to fix
this issue is just go to our decorations
and the location, for example, this on x, this would be a four
oh five, maybe. Yes this one, four oh five. This one. Why? I did this one. To. Maybe this fixes it a bit. Heck. Yeah, the corner
is no more visible. Here it is an equal
with the wood one. Fine, it's fine. Hetils, I think if we play around
with the values, we can figure some value that
is better for everything. But for now, we will continue
building our M generator. There is a lot to be done. We will continue on the next
one. W to see you then. Goodbye.
47. Directional Arrow Adjustments: Hello, and welcome back to Game Design Workshop engine five Procedural Dungeon Action
Apes creation Course. Previously, we added
our wonderful visuals of these plants over
here around our blocks. And we finished the
code for adding, making them visible when
they are on the edges, when they are in the
external walls perimeter, and we actually changed the
props in the internal walls, also to be abdom variation
of props that we have. Now, in this one, what we're going to do is, and I'm going to press
play to show this. We need to fix the
perimeter arrows. This means that some arrows
over here are correct, some arrows are not correct. In this case, everything
was correct almost. So here, for example, we have an arrow that
points towards here, but we can actually
access through here. And the This hasn't
happened a lot in this one, but it is an issue. We shouldn't have arrows
that are pointing towards places
that we cannot go. We fix that. Let's create a new function that
will go through the whole maze and it will test for some collision
with line trace. So we know if it
or it cannot go. Since this is the
final form of our dg, how the layout will
not change anymore. So, let's create a new function. Let's call this things. Aros. And actually, in this function, we're going to do
something different. Well, almost different. The way we're going to
manipulate our variables, to change our direction arrows. We will create a bullion
ary and direction ary, and because this will be
corresponding between them, actually an point array also. We will be able to
set the directions irrelatively to how many
or are wrong in a tie. Basically a bit the same thing that we're doing always
in a different way. So it's not about optimization
or not right now. It's about showing
different techniques. Oh, we're going to get
our dungeon variable. We're going to get our keys. Just keys. And we're going to
flow through each of them? Because we're going to go
through the whole dungeon, and we're going to find
neighbors cross adjacent. And we're going to follow
through each of them also. Like this here. Here comes the first question. Is this neighbor
belonging to the dungeon? A we're going to ask you if
it contained? The dungeon. And if it's not, then we're going to create
a local variable, a buling variable, which
is going to be an array. I'm going to call,
let's say these bulls. And when it's not, we're
going to be adding falls, of course, false because it's
not containing the dungeon, so there's no access to it. From the false. If it's true, we're going to base by channel. We're going to set for
camera, not visibility. For the start location, we're going to
need the neighbor. So we're going to find
it from the dungeon. A location. We're actually going to
add some Z height, S 25. This is our start and our end is the current
block that we're checking. Going to connect this here. We did this before, once more. I'm just going to paste. Connect here, and that's
the end of our line tat. We're going to branch. I
want to bring this here. Read it out. Out here. This is going to be
from the two branch. If it hit something, then again, we have no access, so this b will be of if we didn't hit I didn't
it, go to be on. That's the main
difference, isn't it? No. The next thing we
need is the coordinates. But we're going to
create another array. All these points or
ports or whatever. Going to be of the
type in points. Okay. And then we're going to add to it from
both branches to or walls. Doesn't really matter because they all need even
if it's false, we do need the coordinates
to turn that off. And the coordinates would
be the block that we're, the tile that we're checking. Now, lastly, we
need the direction. We're going to add
another array. I call it. Erection. We're going to just
put an e erections type, and we're going to
add need to select. We're going to copy the
select from another place. We have it here. Find external. And we're going to
connect the index of this for each loop
for the neighbors? Because based on the neighbors, we have our northeast southwest. Now, this is the
three variables. This is a different way
of doing it this time, but we have a list of bions, a list of points, and
a list of directions. No. How are we going to tell to each block to set its
appropriate directions? The way we have set it up right now that we
had not unique, but plenty of directions
in one array. This means that in each block, I'm running four
times the line as. This means each block will produce four times
the same endpoint, but it corresponds to four different directions
and four different booleans. So, let's do this. We're going to when
we finish all this, so we're going to call it
from the first four loop. We're going to
call another four. Oop. We're going to connect
our end points here. This way, it's a
little bit simpler. It is I think it is more
actions than other ways. Anyway, um I'm going to get our dungeon to get our tile. Well, find the selected
actor, the stored actor, which is tile, and we're
going to get directions. And we're going to add By the
way we're going to add it, it's very, very, very simple. We're going to get our
variable of bions, and we're going to
get our variable our array variables
bulions and directions, and we're going to
get a copy of them. And because they correspond to our arrays index,
disconnecting indexes here. A bit cliff cross. It's fine. And then we will total ROs. This would be the function
to fix all our directions. We have connected it. Now, I haven't, of course, I haven't. Fix arrows. Compile and save. Let's play and now
the arrows fixed. Every direction that
we're supposed to go, it has an arrow, every
direction we cannot go. It does not have an arrow. Great. I think this
is it for this one. I'm gonna seeing
you on the next. Good bye.
48. Hiding Debug Arrows & Creating Torches: Hello, and welcome back to
game design workshop and Real Engine five procedural Dungeon action RPG
creation course. Previously, we finished with
our fixed arrows function. We actually used a
different way this time. We stored a bunch of pulions, and a bunch of points
and directions, corresponding arrays, and to
our system of line tracing, if there is a block or not. And when we finished this, we ran our points and gotten all our actors to make the
corresponding changes. Now, we kind of
have finished with the information part of the induction with the data
management and everything. One last thing could
be to hide all arrows. So let's go to our BP tile. Let's go to our event graph and right click and
create a storm event. We're go name this event. Hide all arrows. S. From here, we're going
to get our north arrow, we're going to get
our east arrow. We're going to get our
west arrow and arrow. Actually, we should be getting the tile number also because we
want to hide this. No, we're going to set, and we're going to
connect everything to it. And the new hidden will be true. Now, let's check if we have
in decoration, some text. Don't think so. We don't
need to hide anything here. We're going to compile. Save and compile. Always
save and compile. This is the third time
that this is happening. And we are back, and we're going to compile
and save and compile, always save and compile
because in just in case it crashes, we
should have saved. Now, what we're going to do is go back to
our maze generator, create a new function, this. Let's get our maze. This time, we'll get the values because
the values are the tiles, and we're going to for loop. For each loop, and we're
going to call arrows. So now, let's call
it in the in graph. Arrows. No back and comp
compile. Let's play. And it needs to hide children. Also, so propagate to children, this will hide the text renders that are inside the arrows, we saw WS and
everything was left, and now we have more
of a game view. Let's press lit. It's finally time to see lit. Now, we won't start with the sun because first we should
light up the maze, because if I start playing
with the visibility of the sun right now and set
it for, like and one. Then when we're
looking at the maze, we won't be seeing much. It's fine, but let's
leave it in one for now, it's more darkish
how it should be. Right. What we're going to do
now in this lesson is start lighting our maze up with some custom lights
that we respond. We'll go to the
folder blueprints. We're going to click, create a new folder. Let's call this folder props. Let's enter this folder. Actually, we can move
the elevator also here, and we can move the
big chest also here. And we can move BP
intro also here. So for the maze
generation, actually, these are the three
tiles that are needed, and the rest of them are props that are doing
things for us. So, we will right click again, and we're going to
select print class. I'm going to select Actor. It's going to be BP porch. This is going to
be torch Open it, going to anchor it up here. We're going to
need a strat ques. We're going to need
a point light. And of course, we're going
to need a particle system. For the particle system,
we're going to use cascade because our particles are
cascade for the fire. And this is it from the
components that we need. I'm going to go to
the static ques. I'm going to select a porch. I'm going to select the I can see because it's This one is a big torch,
is a small torch. I'm going to select
this row bed tube. Row be tube. All right? Now, where is it here. What we need is to parent the particle
to the static mesh, so just in case this
moves together. I'm not going to do the
same with the point light, sho I'm going to do the same
for the point light also. And let's select the
particle system first. Let's use the template. We want the P fire. It is a little bit big. That's four. Right? Change the direction pen. Yes. I foot 92 axis. Which I think the pitch. And then I'm going to
go to point light. Actually, I'm going
to leave it like this because later
we're going to create some code to make it
look like it's flickering, et c. For now, we just want to add it on our
dung, on it in our dungon. Let's go back to
the Mz generator and let's create a function. Let's call it P lights. And now comes the question, where do we spone these lights? Were the place we're
going to be spawning them is next to the doors, like left and right or one
of them, or none of them. Some doors might
not have a light. So we're going to need
the room fracture. So I'm going to get S room. I'm going to get room. And from there, I'm
going to e stop. And from this, I'm gonna break. From that, I'm
going to for loop. So we do this for
every room coordinate. Now, what we need is to find
the actor first of all. For this, we need our dungeon. And from this actor, we
really need our decorations. Actor actually get decorations. And from this, we're going
to get and from this, we're going to Cust decorations. I'm going to make it
a pure cust. This. Now, F decorations, we
really need to create T, some scene points. Let's go to our
decorations blueprint. Let's go to our viewport. I'm going to close
the arrows here, and I'm going to add a scene,
which as you can read, it's just a component
that has a transform that can be attached or
attach other components too. It's just a point, basically, a point that we can define. I'm going to elect the scene, and I'm going to
move it over here. Maybe to the left to the right. Just for this one, I'm going to just change this to a door, to find that, I'm
going to select the scene again,
or almost correct. Going to place it
here, maybe here. Fine. I'm going to copy
the scene, duplicate it. We need a cross, and this
is going to tag east wall. This would be east wall A. Left. So EW L, and this would
be es wall right. Now, let's change
this to what it was. I'm to select it here, find it in the browser, left back the wall, and
drag and drop it here. All right. I'm going
to get the scenes. I'm going to duplicate them, and I'm going to
move them across. They're in the right position. They r. When we spawn, we will e better. I'm
going to name this. R one. This will be W W L one. I'm going to do the same for the north and east.
I'm going to add. To move it towards here. And I'm going to check the
offset on the other one, which was 140 for the next to it was 145. It's fine if they
are not symmetrical because some of them
will be spawned, some of them will
not be spawned. I'm going to select back
the original is it. Here it is. I'm going
to put 140 here. I go to duplicate it puts 45. And I'm going to
name this north. The tug. This is south. So this is South
wall this wall left. I'm going to duplicate them. And I'm going to and this will be wall one left, which actually are opposite. This is the right one. This is the left one. Also this also happened W. The other one W L. Not that it matters,
but why not? Oh, I'm going to
compile and save, and we're going to leave
it here for this one. We're going to have a break
and continue on the next. Goodbye.
49. Spawning Torch Lights: Hello, and welcome back
to Game Design workshop, and real Engine five Procedural Dungeon Action
ARPs creation course. Previously, we started with
our lights Maze function. We created the beginning
of the algorithm, which rooms we search and how we get the
information from them. And we also added a
few a bunch actually points to our decorations
blueprint to attach the lights. At the same time, we also hided our arrows and created
the torch blueprint. Now, let's continue. Let's go to our maze generator, and let's go to our
function maze lights. Maybe before that, let's do
another tedious task again. Let's add something more here because I know
it's not the best, but it's not the best time,
but we have to do it. And that tedious task is to
add the tugs in the scenes. No. These are the north scenes. So we're going to
go tugs tach tag. We're going to add. As you can see, I can
select both of them, and it's going to
add it to both. I'm going to select
the South ones, I'm going to add a tug, I'm going to select S. I'm
going to select the east ones, add the tug E, and the west ones on the
tug elect W. All right, the studious task is over back to the more
interesting things. Now, how can we tell
where is the door? If you remember, if
we get our walls a A, and we go from each
of them for loop. We can get the tugs. And we can check if
it contains the item, which is actually
case sensitive. So when we added this
tug to the doors, how did we add it? Let's go find this function, which would be
inside decorations a and it was capital D O R. So we're going to go here, capital D 00 R. Now, we don't need to know
where exactly the door is, where which direction
or whatever. We can just check which
door has a tag door. And from that,
because we know that the first tug is our
northeast southwest. We can get P of zero,
which is the first tug. And then we do need an
array of the lights. So let's go back to decorations. A few more tedious tasks. Let's select all of them. The order doesn't matter, since we're going with tugs,
I think that's all of them. Let's make a array.
Copy. He's this one. Ops. And they are eight, so it is correct because
four sides, two on each, eight, going to
promote this two lib. Ts, or maybe door light slots, because we might add
more, who knows? We're going to compile and save. Let's go back to
our maze generator, and from our decoration, we're going to get
door light slots. I'm going to each. If it's t, if it does
contain the door, we're going to component ug. H tug actually
component has tug, which will be the
zero tug of our door. I go to branch, the ward loop. And now because we're going
to need to rotate the light because the light has a
certain rotation on its own. We could go in
elaborate system with line traces and or
bold coordinates. But no, what we're going to do is I kind of the
values on my own, and which corresponds which
rotation corresponds. Because we only have four
rotations, basically. Each. So what we're going
to do is we're going to switch based on the name tag. And this is only
when this is true. We're going to have four cases. I'm going to remove
the execution pin, and the cases would
be our directions. All this would be north, south, east and west. Save, save and compile. Now, I'm going to make a custom, a local variable, namely light, and it's going to be
of the type rotator. Then I'm going to set it to
each of them is Southwest. And the values are
-90 for North, 0490 for for South, zero for east and 180 for west. Then I'm going to put a
branch because as I said, some of them will have a light, some of them will
not have a light, and I'm going to do, and I'm going to
pull actor class. Going to split the spoone I'm going to connect
the light rot. To the rotation.
And for location, we just need the location, the word location of our scene. So we're going to get
location and connect it here. And we should select the class, the class would be torch One more thing that we need is something we haven't
used for a long time. We need the actors to destroy. We're going to add to
this list, the lights, because when we
create a new maze, the lights actually are
expensive in performance. So we're going to delete
them. Let's go play. Let's see what actually. Let's go add this function
in the end of this line. Maze lights, and
now we can go play. And inject, and we have lights. They are too far away. Some of them are too far away,
some of them are not. This should go. 70, they're big also. Let's go back to decorations. Let's say what are
the points they are. This should be 370 was fine, I think, 370 this Why? -70. This seems internal. Away, Let's make them a
little bit smaller first. So let's go to the
spawning of them actually. We don't need to make
them smaller here. We can just make them
smaller general. When the mae lights,
when we spawn them, we reduce the scale 2.5. 55. Let's check
again how they look. They are a little bit low and they are a
little bit far away. We cannot see the relative here. We can't see the
relative to here. Of course, we can't
we're going to need to go to decorations and actually
with the values here. I'm going to put 20,
the another wet one. Put everything in for t.
This one is in for 20. Which one was the
south south one, I think it was too far away. Yes, for 20. And this one also 20.Es ones, we haven't touched falso Are there too much in. Maybe we should change
everything here to 30. 160 easily with low, so is it 81 25 or 30 or 25280, it's fine. W the other one? It is five. This is the worst tedious task. There are better
ways to do this. But this is what we
chose right now. Do we fix everything, everything is fixed,
and south water. Fine. Compile and save,
and let's test again. I think this is a nice lot. Even if they are
a bit maybe 425. If you want you can
change it to 425, it might fit a
little bit better, but I don't think it's
going to be visible. So, I think this is
it for this one. I'm going to see
you next. Goodbye.
50. Torch Flicker Effect: Hello, and welcome back
to Game Design workshop, and engine five
Procedural Dungeon action APs creation Cs. Previously, we added our
torches to our maze. We created the code in maze
lights to spawn our lights. We used the walls array
to get the component tag, if it's north south or west. We also checked if the wall is a door because
if it's not a door, then we show another light. And We use some pre
set light rotations and based on a ban on a bleant, on a bleion, we
spawned our light. And then we added to
the actors to destroy. We toil it a little bit
with where it is and how it is I'm sorry, wrong blueprint,
the decorations, through our
decorations blueprint, and we use the scene points
to set that location. Now, let's actually play a
little bit with the light. Oh. Let's actually
go to our BP torch. Dave, because it's not saved. Actually save everything. And let's go to our point light. Now, I have some
values in mind that we have tested and how
they look in the maze. I'm going to use them. The intensity would be to 258o4. So 25,804. And the attenuation radius
would be two or 37437. Now, our light
color would be of x linear F F 58 47 FF. Now you can choose
whichever light you want, but for us that worked. And L et's make the
source ride use 30. And we're going to
unselect cast shadows. So it's a little
bit more optimal. If you want, if your computer can handle it, you
can leave this on. We're not going to
optimize the lights to be invisible when we
are too far away. We just leave that to the
engine to whatever it needs. But what we will do is play
the trembling creator. We're going to go to begin play, and we're going to
add a timeline. Who c at with with the lights. Who is Queen with the lights? Was it Barbadi Was it imbo? Anyway, just a South Park
reference, never mind. Oh, what is a timeline? In short, would be
a tool that we can manipulate variables over
a certain period of time. How do we do this? Well, we
double click on the timeline, and we can see it
has a few options. What we will use is
a track of a float. The trucks of vectors and
event tracks and color tracks. But what we need is a float. Now, in this truck, we're going to shift and
click and create some points. Debit. I think that's
enough points. So our first and last point so time zero should
be value zero. And we will use the
current time length, which is five and keep it there, so time five, the value
will be again zero. There's other options over here, but the option that we do
need is the looping option. Which means that when
our timeline plays, it will play again and
again and again, whatever. No. What is this flow track that we created in these points. So these points are
basically our Alpha drive, which means that they
will give us a value 0-1. We shouldn't go above
one and two minus one. But it shouldn't be this point. Let's change this point. Let's have two lows. And then we're going
to to around and Put the lights, other spots, make it like dem, like it's rambling,
even if it's not, I don't know if this looks good. We don't need actually
have one and minus one, and we can have
anywhere we want, but if we put harsh big values, it will exponentially increase
the light too much, et. No, Maybe this is
fine. Maybe it is not. What we're going to do is
going to select them all and right click and
use the auto function, which will curve
them a little bit. So it won't be instantaneous. We're going to leave it as is, and we're going to
check it when we complete our coding here. So we're going to
get the point light, and we're going to set light. We also are going
to set intensity. And we are going to set also attenuation of set attenuation. These are the variables
that we will be changing on the timeline, which is kind of a
heavy way to do this. But for us, it's
going to be fine. We don't have that many
things in our dungeon. Oh, this is the return
of our new track. We didn't it, e n it. The name and name it Alpha. This is our light Alpha. We're going to let linear color, we're going to let and
actually another float. What is a b? A er
pisa from value A go to B based on an Alpha. Alpha drive that we created. Connected. Here here. And now let's click on a color, which actually we can
copy on the point light. I just close to the point light, and copy it here and paste. Now, for the second one, let's click on it and
type on the F F O. With more orange. We might be changing
them later if they don't look fine. We'll see. And for the intensity, we are actually
overriding this 25,000. It did seem a lot to be honest. So it's going to go from 5,000. I also put it the
light 5000-6 thousand. And from the set at
tnation radius 600-800. These actually are overriding
our settings here. So this must be the
correct values. I'm going to put 600 here. Let's compile and save. Let's go play, how they look. Too much of a change.
To much of a change. So let's go back to our lights. This color is too far off. Let's choose one near this. Maybe the orange
cancel based here. Let's see, no. It goes a little too yellow too much. It is a little too fast also. But it's fine. I
think it's fine. If you want, you can tie
around with the values and make it look better. Now more things we can do in this style in this
blueprint would be to go to the static
mesh and turn off the generate overlap events
because we won't need it. Turn off it collision
completely. We don't want it. And from the lights, I think that's it from
this kind of light because now we will add some other lights.
Let me show you. We have these
wonderful lights here, but we need to be spawning on
the maze on the corridors. So first of all, let's
create a blueprint to add this static mese. We're
going to go to content. We're going to go to blueprints, we're going to go to props, and we're going to
right click and create a new blueprint class
type actor and call it BP, Corridor lights. I'm going to open this, and I'm going to add a static mesh, which is going to be
the corridor light. Let's find mesh. We were just there.
I'm going to use This, and we have our light. Now, to make it prettier, let's add a few things. Let's add some
more static ashes, which is not going to be a
lantern. Let's call this. Shield. And let's add to more. Sh. Let's call this sort
another static mesh. Let's call this or to unparent this
because it's parented. Let's call this land post. For the shield, I think
we call it shield. I'm going to bring it over here. I'm going to choose it, and
then I'm going to bring it over here and I'm
going to change it. 2.5 because it's too big, maybe a little bit bigger. 7.7 is five. Fine. Going to put it a bit up. Now let's bring the swords. We're going to choose
the static method. Ford sword, take it out. It must be here. Here it is weapon. I'm going to add it here. We're
going to also put it 2.7. Gale rotate it a bit. I'll bring it here. Give it up. I f. Here, I'm going to get
the second sword. A sd. I haven't put the mesh weapon. Again, 0.7. I'm going
to rotate it a bit. I don't want it in the ground. Let's put it this
way. To add it here. And on the vm graph
on begin play, I'm going to bring a
reference to each of them. And I'm going to se. Game or each of them separately. I'm
going to connect them. Each of them to one hidden
game, and I'm going to do a. Now, what is a sequence? A sequence, is a way to organize a little
bit our actions. But we have to take heed
that even if it says zero, then one, then two, it doesn't mean
it will run them. It will run them in order, but it won't wait for
one execution to finish. The moment it runs
the first one, it will run the second one, and then we will run the third one. It will not wait for the
execution to finish. I repeat, because if I have
some math here, for example, that let's say line
three is needing them, then the math probably won't be completed when
line three runs. In the new hidden, I'm
going to select random b. So every light will have random combination of
these props visible. I think this is it for this one. On the next one, we're going
to add them on the map. Boo bye for now, they care.
51. Corridor Light System: Hello, and welcome back to
Game Design Workshop and real Engine five procedural Dungeon action RPG
creation course. On the previous lesson, we added our ridor light
blueprint. We created it. We added the static
mesh of the light, the shield, the
sword, the sort two. And on the begin play. We also created some code to make some of
the props visible, some of them invisible.
It's going to be random. We also added with a
function with a timeline, I'm sorry, in the BP torch, in the begin play,
a little code to play at with the
light of our torches. So it looks like the
gaggle or something. Now, let's continue with adding our corridor lights to the maze. Oh. What we're going to do is let's get the simple
rules out of the way first, and then we're going to do
something more complex. Oh, we're going to need the corridors, array
of structures. So it is ST corridors. Okay, we're going to for
for each loop from there. And the first thing we need
is to break the structure. So we have our coordinates. From our coordinates,
we need to know if this length is greater than one. Because if it's a single tile, we shouldn't add a light. It won't look good. Now, since we don't know
how many tiles there are, what we can do is we
can do a four loop, not a for each loop, but a four loop with
the last index, as the last index
of the four loop. So as many as the have, this is your last time that
you will run this four loop. But that would be
our first part. We are getting the
corridor rooms, the coordinates of any corridor, how many they are,
and we are checking if they are more than one, and if they are more than one, we are for looping from
zero to the last one. The next thing we should be checking is the current
a special room. So, we're going to ask if um if our current position coordinates is inside our special rooms. Now, to do this, we're going to get copy the
coordinates we want. And the way we're going to do it is we're going to
use this index, which is from zero to
last index of this array. But this corresponds correctly. No going to if it's
contained an array item, which is the special room. Special tiles. That would
be the elevator tile, that would be the box tile, the chest tile,
and that would be. These are the slots.
Basically, we don't want to spawn a light. Nope. Now it's time for a little bit more complicated
rule. Let me open paint. What we will have is, let's say in our grid, maze. Let's see that we spawn
a light over here. What we do is we will
create a box around it. Ask, is there any
light in this box? Actually, before we spawn it, we will ask, is there
any light in this box? Because if there is a light
in this box and we're here, We shouldn't be spawning aight. So this will help us to
space out a little bit better how our lights are going to be
spawning in our maze. So, let's do that. Let's see
how we're going to do it. We're going to use something that's called multi baseline, multi box for our example. L et's call about the
first difference. Not the multi one, but the box one between the
trace and the box. The box is like
the collision box. Traces can be done in
spheres, boxes, lined. And even we can create some custom shapes with
a little bit of effort. But for now, we're
going to use a box. And what is the multipart? It means that it can at many things and
keep them in a list. This is why our output
heats is of a type array. It's an array container. No, where do we start? Basically, we're just going
to get the actor from here, so we're going to
find in the dungeon. Gin map, so we get the current
tile that we are testing. I'm going to get actor location. This type of Dan
type war location. The reason is when we're
getting actor location, it's always in the world, because the actor is
a part of the world, where when we're getting
from a component, we want war location or
relative to the actor location, because a component belongs to the actor that the actor
belongs to the world. A way We're going to
set the start here, and this is also
going to be the end because we're not
going to move it. It's just going to for one tick, check what is around it. 00 the half size, we're going to use
the values 800, 801. Your orientation it's fine. Visibility, we're
going to check camera, and that's pretty much it
for our multi box trace. Now, from our heat results, we're going to each. But before we continue, we need to create
a local variety, which is going to
be of a ban type. Let's call it. I go to be type b.
Let's bring it here and turn it before
we start for loop. Now, what we're going to do
is break our heat result, each of our heat results
because this sal array, we're breaking each of them. What we're going to do is go to the heat actor and
request the class. We're going to get class. And we're going to
check if its class is equal to our corridor lights. Branch, Correct this. I'm going to put this here. Bring this small up. I can close this to make it
look a little bit better. And now, if it is corridor, then we're going to turn
the light note found of This actually
could go with break, each with break because it's an action that when we found
the thing we're looking for, it should be breaking. No, I'm going to connect
this to the break. From the false one, we don't need to do anything. And when it's completed, we're going to bus. Actually, we need a branch here. Else this does nothing if
we don't use a branch. We're going to bring
the light but found. If this is true, we're
going to actually first, let's check, let's
choose the light. M light, pd light. And then we're going to add to lights doesn't
work like this, but we need to get actors
to destroy and add it. Nothing that we spawn
should stay on the map. Now, for transform, we're
going to split this and connect the
location of our actor. Now, we added the lights. Let's see them on our game. They do not exist or
something didn't go well. Let's check it out. Let's
go to our function. The corridors. They're bigger than one, yes, or loop plus index of that, and if it belongs to special, if it doesn't belong
to special tiles, always the little things. Now, I've seen lights
that are tiny. E let's fix that. Let's press stop. Let's go
to our corridor lights, and let's increase
this height to two. I'm going to move
the shield again. My maybe one was the
correct or the sort also. I'm going to put this here. The other sort. Put
this here, save it one. We're going to compile and save. Going to play. This lights look. Look good. We need to move a little bit of
swords, but that's fine. This one has two swords. This one has a shield, sorts. Holes. Why is every
there two holes. Hold sod two. B it's
random and it can happen. Maybe we can put some
branch on the second sort. Connect this random ball here, so we make the second sort
a little bit more rare. Compile and save, Lwer the
soles a little bit also. It's too high. Fine. My I think this is fine because this I
saw a little bit round. I'm going to raise it a
bit. Tilt it a bit more. We want lower. I think ground, lower might be
fine, might be not. Don't see, we don't know. The lights. So it looks fine. I mean, we are going to be pi
with view, so Almost fine. Yeah, I think they're okay. But the only thing that's
missing is the light. So let's add the light. Let's go to the blueprint. Let's go to the lamp post because they're going to be
children of the lamppost, and I'm going to press add. We're going to
select point light. This is a huge point light, let's bring it here on the lamp, and let's change the settings to lumens and re use gs 500. And the color should for the 97 A one. Looks good. Now the attenuation
radio should be. 800 and the source radius 50 and the soft radius to 50. And we're going to
let the cast shadows on because I think it's fine. Now, I'm going to duplicate this light and move it over
here of both lights on light. I'm going to compile and
save and let's see it. Me. We have some
lighting on our maze, starting to get a more alive, looks more like a game level. Right. I think this
is it for this one. I'm going to see
you on the next. Bye.
52. Trap Mechanics & Damage System: Hello, and welcome back to Game Design Workshop
Real engine five Procedural Tangent Action
RBC Creation Course. Previously, we added a
few lights on Armas. Actually, we added
all the lights Mae. Um They are a bit boxy because
they're casting shadows. But I prefer to leave it
like this instead of not casting shadows or placing
them a bunch of flights. We could counter
this with placing one point light in each
side, or other ways. But for now, we're
going to leave it like this because we're going
to add a few more things. We're going to add some fog. We're going to add post
processing effects. So after all this, we can check on how
to fix the lights. Now, what we're
going to do is go to our maze generator and it's time to start bringing
some prop skin. So, we're going to
create a function. Let's call this prop owner. Let's go to the main
graph and call it. I. Now, remember when I said when we're
building the elevator, we won't posponing it there. Let's go to our
elevator, to be here. Let's cut this from here. Let's go to our
posponer and paste it. Also we need to do the
same or our chest. Come here. I'm going to get these nodes, we're going to cut
them, control C, and paste them with
control V. Now. Let's create a prop
that we will be spawning to most of the
tiles of the dungeon. We're going to be
spawning in corridors, and it's going to be a trap. So when the player steps on it, we'll be getting damaged. We're going to go
to our content. We're going to go to our
blueprints folder and our prop folder and
right click and create a new which is going
to be called BP p. Now let's open it.
Cor it over here. And before we go
on with our trap. This is the first
time we need to actually touch our
character a little bit. So we're going to go to content. We're going to go
to our top down, we're going to go
to blueprints and open our PP top down character. And we just need to do
a very simple thing. The same thing we did
with tugs on the walls, we need to do for the capsule
component of the player. So we will select the
capsule component, we'll go to its details
and go to tugs. And add the tag or player. And why we do this? The reason
is because, for example, let's say, for our
player, we will have a me me attack, me, me. I think it's a correct
pronunciation. So we'll have a me attack. And that me attack would
be spawning a collision. Be we want to check whatever
is inside our me attack. We won't be doing it's going
to be a magical me attack. No going to be a sword that
we could get the swing of it. But even if it was a sword and we could get
the swing of it. What if the sword
touched the ground? Would it trigger a trap? No, we don't want
this to happen. So we want to be able to ask, did the actual capsule of the player touch this collision? So we do it through the tug? We could go with checking casting to the player
and getting the capsule, and then comparing the other
component to the capsule? Let's demonstrate this.
Let's go to our trap. What is the blueprint?
Here it is. It should be right
here in the end. No. For all trap, we're going to need a collision. And I'm going to use
a box collision. For, let's leave it like this. The visual will change
based on our measures, and let's go to the
box collision and choose the begin overlap. No. We won't go through everything, but we will go through the
two pins that we will use, the other actor and
the other component. The other actor refers to the actor that began
to overlap with the box. And that means, as I explained, that would include the may attack if it was
included in our player. If I spawned, let's put
it here, se collision. Let's say I have it over here
to check for many attacks. Now, if this for some reason,
for example, over here, and it was trigger it would trigger the
trap if I asked if the other actor if the other actor is the top down character with
a cast, for example. But what we did by adding
this This tag over here, the P is that from this
node, other component, which means which component of the actor that overlaps
with me overlapped. If it's the sphere, it
would have this tag P. If it was the
collision capsule, sorry, not the sphere, would be the tag P. It
would have the tag P. We can ask as ug. If it has the tag P, we
can do whatever we want. Now, what we want
to the character, getting the other actor node. But in our case, let's explain how our trap is going to work a little
bit. Let me bring pain. It's time for the
awesome drawings. We should put theme music
songs here or something. Anyway, we have our box trap fates somewhere
here on the corridor, and we have our player
that is moving around. When he steps on the trap, we want to activate it. So the steps on the trap. Let's call this
duplicate this first. Hate. Right? Oh, when
the player steps on it, let's call this Phase one. Then this is activated. Now, in phase two, that we will that we will
be applying the damage, which will be activating, but attacking or maybe this should be bigger
and then activated. Doesn't matter. This
says attack, by the way. I'm not recognizing the
word by looking at it, but it says attack. So, we should ask if the player is still on the trap or if he's
not on the trap. If he's still colliding. So if he's colliding, we are going to be
damaging the player. If he's not colliding, then we won't be
damaging the player. So if I was going to, let's go back to our event to our collision overlap event. If I were to step off when
it was being attacking, then if I connected
the other actor, I have a direct reference
to the other actor. So that would mean
whatever the other actor is attack. So I need a check. Is the actor actually
on me or not? There is plenty of ways
that we could do that. We could actually
say on end overlap, and keep a reference to this and when we are
ending overlapping, clearing that reference
and going on. But I would like to
demonstrate another node. If I get the box, ask
overlapping actor. I could filter the class
to be my top down. Actor, I could get
a direct reference, like I could get the
first copy and ask, let's say, for
example, apply damage. I would apply damage
to this actor. But we're going to be using top down character
also for the AI. We actually, in this case, we're going to be
using a copy pasting. We're not going to
be using a child, but if it was a child, there was a chance that this would trigger to
that actor again. So we would actually
have to or loop. If, for example, it was
a multiplayer game, and we wanted the truck to only damage the original player. We would need to fore
loop and check if this is our player actor. Oh, we will get an equal sign. We need to cast
first because this returns an actor
object reference. Even if we're class filtering through our
top down character, this still returns an
a, a general actor. Oh, we would need to cast to of down player
of down character. And then we can if this is equal to our player
on, for example. And then we need to
cast from here also. This could be a pure cast. Both of them actually
can be a pure cast. There is no reason for them
not to be in the branch. We could also had a
tug or something else, like we could have
a variable here, a bullying that we could get and check if the buling is true. We could have a tug
to the pond itself. There's plenty of
ways to do this. This is one of them also a
lot because it has two cases, but it can be done and
won't really affect our gameplay because it's
not that that complicated. Now, what we need to
do or to complete this is to actually connect this array element or
get it from the cast. It doesn't really
matter to apply damage. And what is applied damage
is just a message that real sends to any
object basically. It's a system that
Epics provided us. Now the base damage
should be one. And I think we explained
a lot in this lesson, and we should connect all this and fell
everything in the next one. Good bye for now.
See you next one.
53. Trap Animation & SFX: Hello, and welcome to
Game Design Workshop and Real Engine five procedural Dungeon action RPG
creation course. Previously, we started creating our trap. Let's go to a trap. And we added a box collision, and we also added we called from the box collision
that begin overlap event. We donate the overlap. And we asked if the
component that is touching the trap as the tag P. Now, we said some a few
things about overlapping and how we can get a
reference to the character, get the overlapping actors. This was the important
node that we can get at any time the
overlapping actors. And then we did a heavy test to check if it's our character. And if it is our character, we applied some damage with a predetermined node that Anil has to apply mechanic
that can apply damage. Of course, we can create
our own mechanics, but why not take care of this. Take take advantage of this. I might not take care of this. Take advantage. Oh, Now, if our trap has activated, let's see trigger this time. We wouldn't want to activate again to instantly damage
the player over and over. So let's create a variable bul. Let's call this triggered. Let's bring it over here. I could use a branch bk after
this if p is triggered, but let's make it a
little bit easier and put on end bion here. If it's triggered, if it
has the component P there. If the component that
touches us has the tug P, and it's not triggered, so we need a here. No, do something else,
don't do anything. No. The first thing we should do is say that the trap
has been triggered. But now we can
start a count down with when it will attack when the trap will release the trigger
and attack, basically. It's going to be a spike trap, so it's going to be pushing
some spike towards up. Let's put a warning sound. We're going to do a sound for the player to know that
the trap has been triggered. Now, the sound would
be, let's go pounds. Here it is. I haven't checked
this. How loud it is, so headphone users warning. This sounds like
the bigger part, on a p here. This is a sound is
not a sound exactly, which is basically a class that allows you to do some
manipulations on the sound. Now, after the sound plays, immediately after the moment
the sound begins to play, won't wait for the sound to end. We're going to do a delay. Until we trigger our t rap. Let's put zero point y. Let's be generous to our player. And afterwards,
we're going to need to create a custom event. L et's call this triggered
triggered taken from the bleion, or attack. A is fine. After
that, we will attack. B if this wasn't a pon
trap and were coming out, could be an arrow trap, for example, Attack is fine. They're both attacking. We're not going to
feel attack right now. We will continue with this
logic to finish it up. Let's put it further. And after the attack, let's play the attack sound
or before the attack, will be more logical,
or at the same time. So we could put a
sequence and say, first play sound
and then attack. And after the attack, we're going to connect our plop here to get the overlapping
actor and apply the damage. And you know what,
let's reset also our trap and create a
anther custom event. Let's call this revert. So after we damage the player, or if there is no
player damage no one, we're going to delay. Let's say 5 seconds. And after 5 seconds, we're going to re arm the trap. So I'm going to call reversed. Why I call the revert. Because for the attack,
we're going to be using a timeline to
play an animation. And based on that timeline, we will be reverting it
and resetting the trap. But before we start
with our timeline code, we need something to animate because the timeline will be
used to animate the trap, and our damage being done here. Animation would be
a separate thing. So, we're going to
go to our viewport, and we're going to
static measures. Duplicate this. All this body. Let's call this. Spikes. Let's find our s meshes, which should be
the folder meshes. I really wonder what
the name that would be. The find spike think tube. Trap body, go to
get the trap tube. And for spikes, going
to the trap tube seven. Right? As you can see, their pivot point is
correct from the beginning, like our default location of the actor is in the middle of the spikes exactly
here towards the top. So they will be pro cruding a little bit from the ground
because we're going to be spawning them on the ground. This means that the ground
will be in this place here. And the spikes are showing a little bit, which is awesome. Now, what we're going to do, we're going to get our spikes
on the begin play event. We're going to get
relativeation, which means get
the location with the coordinate system
of this blueprint. No compared to the world, compared to this blueprint. But when we move them relatively or getting a location
in relative, we're talking about
this entity over here, this blueprint, all x Y
and Z of this blueprint, and distances based on this center of this
blueprint, this actor. Now, let's go back. Let's promote this variable. It named it perfectly for us. We could have specified
it spikes, but it's fine. Now, let's add a timeline. You'll need to name it,
and we're going to connect back to play from start and
revert to vers ferment. On the finished
one, we're going to switch based on the direction
that the timeline is going. As we switch on in, as we switch of the Southwest, this is again a switch
based on enumeration. This is a two value
enumeration forward backward, and we're going to
connect not the date, but the finish here. And when it's backward
and it's finished, we're going to trigger off We're going to turn
off the triggered. So this means that our
truck can be reactivated. Remember, the revert
runs 5 seconds after it has tried to damage
whatever it was on it. Now, we play the timeline, we're going to enter
the time line, we're going to add
a truck, we're going to add a flow truck. And let's put two points. The first one would be
on zero value zero, and the second one would be
on 0.2 and of value one. Going to click these
two Zoom to feel horizontal and vertical
to make our line visible. And this time, as you can see, I have chosen a value way lower than our five
second length. Now, I could change this 2.2, but I can use just
use last keyframe, which means it will use the
last point that I have dated. If I had more trucks, it would take the last
point of the longest time. Now, let's go back to nra. And here we're going
to need to add a very simple code of getting our spikes and that
relative aation. We're going to just learn from value A to B in new location. Vectors, and the A would be our relative
location, the original one. The B would be we can
actually hard code it. Let's select the spikes, and from the relative that is zero, zero, zero, basically. We want to go 20 30, 30 would be eight. 30 here. We're going to connect
Alpha to our new truck. Now, the next thing we should do is actually
own the traps. They are fine, they're working. We don't have a character yet, but our traps could damage us. But I think this is something we're going to live
for the next time. You the goodbye.
54. Prop Spawner Function: Hello, and welcome to
Game Design Workshop real engine five Procedural Dungeon Action PZ
Creation Calls. Previously, we finished with our component begin
over lap event. We checked if the if
the trap is triggered, and if it's our character, we said the trap to be triggered if it's not triggered,
we played a sound, we waited, we played
another sound and played the
animation of attack. And we forelooked to check if the player
is still on the trap. We used a timeline to animate
the component spikes, which is a static math we added and the static math of
the base of the trap. And we use the set
relative location to move the spikes through
alert and our timeline. We also used a switch
that when the timeline is backwards runs backwards
on the revert event, it should set the trap
that it's not triggered. Now, let's go back
to our maze and spone our trap.
First things first. We're going to need our
dungeon coordinates. And we're actually going
to need the keys also. I'm going to get
actually the values. I also. I'm going to
keys and the values, and I'm going to promote this to two variables, local variables. I'm going to call this dungeon. This one, promote it
also to Dungeon value. Before we go on,
let's talk a little bit about how our tap
is going to be working. Our trap spon trap, we just need the trap sponer. The first step would be to go through our
dungeon coordinates. So we're going to go
through our dungeon. Blue this time. I
don't know why. So we're going to go through
our dungeon coordinates. And we're going to
create some rules to check if it belongs to
the tiles that we want. Basically, what we want to be
checking is if it's a room, or if it's special room. Then do not progress. Do not spawn the trap. Here. Do not spawn the trap. Then, what we're
going to be doing? This let's call this
again phase phase one. Thing awesome drawing. Anyway, then, what we're going to do is
create a function that will be getting one of our
tiles to the coordinates, we have the coordinates, and we know if we have
the coordinates, we can get our tile. But we're going to get our tile. And for that tile, we're going to get the
location of the floor. From that location,
we're going to, we're going to create a box. Because if our tile is this, then there is a distance that we don't want actually
a track to be spawned because let's say
if it's spawned here, then the truck
could be like this. And we don't want
that to happen. So this extent should
take that into account. This box we'll be creating using we will see
when we create it. So this is one of the reasons. There's plenty of reasons, but the only problem with
this system right now is that if we spawn a trap and it's colliding
with another trap, we will consider this valid. Let's say it's a bigger trap. This is what we can
It's a feature. It's a feature. It
creates bigger traps. So, yeah, the only problem with this is that
this can be created. There are ways to counter it, like we can check that
if when the trap spawns, do I collide with another trap? If I collide with another
trap, then destroy myself. And then we can go to this trap spawner and say minus one to the traps
that you have spawned. Of course, this requires also something that
I didn't explain. We will have a system
that goes from zero to MC ttraps spawned. And this part, the MC traps
that we will be spawning, we're going to use
a new variable. We're going to use a variable
called the generator level, which will be how many dungeons
have we spawned in a row. So if this is, for example, one, we could spawn
maximum of two traps. If this is two, we could
spawn two plus one, so maximum of three traps or right now plus plus
three, so equals five. Yeah. Anyway, that's basically
what we're going to do. Us to that. We will create
this system to be able to use this with various
elements, not just the traps. Maybe we we want
creating the total, but maybe we want to expand this by adding some bolt
coins, for example, or a pouch or something
to be spawning randomly, and it could spawn
on a trap also. So we will use this system we will use this
function to make a system to be able to spawn
anything we want based on our generation
generator level, and some rules we will create. Now, let's go do it. Lower this. And the press step, as we said, is we're going to
create some rules for our raps specifically when
we want them to spawn them, because the rules of
when we are spawning the item is a different
part from the function, but just explain the function that we'll be spawning
on this place. Because if we spawning,
for example, coins, we might want different rules than the places we're
spawning the traps. So the first part is for the we, when we have the we,
the second part is, how many and locally
where we will spawn them. So again, we're going to need
a four loop for each loop. We're going to get
our dungeon keys, and we're going to ask
if this keys contained. With an array, go to
duplicate this it here. The first one would be
the room coordinates. A room coordinates. We
don't want it to any room. We just want it
outside in corridors, balconies, special areas
and not special areas. Sorry. The second one
would be special areas. So we don't want it or either of the if we don't want them in
each or them, we need an. We're going to press a branch, connect this year,
connect this year, make this here, and
it's sloppy but ready. We have our rule
that do not spawn in special tiles or
room coordinates. Now, we're going to need
our tile as we said, and to get our tile,
these two arrays are corresponding to each other. If I just get our values and get p and use the index
of this four loop. I'm going to get a valid index, the corresponding index from
the endpoint to the actor. Now, let's create our function, and let's call it phone. To props. You know, interactive props,
custom props, something. What we're going to
need for input is variable called Max Max props. It's going to be of
the type integer, and we're going to need
a variable of target, which would be the tile, going to be PPP tile. This is the actor that
we're going to be using get this whole actor of the t Because we are
getting this from outside. I I use the arrow. You can see, this is
a nice so feature. If I go from a function to a function to
another function, and I just want to go back and
don't remember where I am. I can use this arrow here, and it gets me to the
previous selection, the previous point that I s. Oh, what I wanted to say is we're going
to get this target, this value from here. And connect it here. Now, lastly, to be able
to spawn anything, we're going to need a new input. And this time, it's going
to be of the type actor. But it's not going
to be a reference, going to be of the type
of class reference, which means I can say which
type of class actor I want. I'm going to demonstrate this. We're going to use this
to spawn something. So when we are
spawning, from class, I can actually
input a class here, but we're going to
be setting this exactly of what type
of class I want. Now, before respond the actor, of course, we need
a few extra things. What we're going to do is
create a local variable here. I'm going to call this
counter and integer. The reason is because
with this Mx props, we can use the counter
and Max props, create a custom loop. So if the counter is equal to our x props, then we will stop. If it's not equal, then we will span. Now, the next thing we need is where do we small?
We need a location. Here, we will get
our actor location, which is our tide location. And now we have to
create our box. What we will use is a pure function called d
point in bounding box. This means at a point in this box coordinates with half size being the
half size of the box. Here, we're going to use 300300, O Z, we're going
to leave it as is. I'm going to connect
this To be honest, I'm going to add a
little bit of height. T to be on the safe side that our box traps are a
little bit more visible. I'm going to add a vector, I'm going to add a five here. This creates a box of size 600 basically because our
half size is 300, but it doesn't take into
account what we talked about. Maybe let's make it a
little bit smaller. Let's make it to fit. I do think our trap
is 100 length. Not sure how we even
check for this m3d stuff. I can't bring it into the
world and recounting boxes here because box, I think it's well right
now it's set to five, so I said it to ten, one, two, three, four, five, six, seven, eight, it's
eight. It's fine, it's fine. 250 is fine. And
now our traps will not be spawning in the edges. There is an auto option to
collegial handling override. For example, always
spawning, nor cosans, try to just colocation,
but always spawn. We can't use to help it. We try to adjust location,
but always spawn. And that will create a
little bit better spacing. Now, lastly, we need to
continue this function, but I think this is something we're going to
leave for the next time. The only thing we need
to change right now is just an edge of optimization. We're going to go to BP trap. We're going to go to our box, and we're going to go to
collisions on details. We're going to select
a custom collision. We're going to select to ignore everything except the pom. This collision only triggers
when a poem is overlapping, is colliding with it, and everything else is
getting ignored. I think this is it for this one. I'm going to see
you on the next. Goodbye.
55. Room Decoration Blueprint: Hello, and welcome to
Game Design Workshop, n real Engine five
Procedural Dungeon action RPG creation course. Previously, we started with
our own props function, and we continue by storing the Dungeon map as
a key and a value. In local variables. And then we continued
with the rules of where to spawn our traps. And we began creating the function that will
spawn custom props. We used for inputs,
the Max props, the targeted VP tile, and the class we want to spawn. We created a counter
in our function, which actually I will
disconnect this and just max props because I just don't like seeing the
line, and from here, we're going to disconnect
this type plus the bottom, and here, I'm just
going to target. And the reason I can do
this again is because this is a function
and the input values, we can just call
them as variables. Now, after the counter,
when it's true, we will just stop,
don't do anything, so the function is complete. Before that, on the false, we will be spawning our actors. Now, we will check if
the actor is valid. In case, for some
reason, it's not. It doesn't spawn, even
though we create try to adjust and and still colliding. If we had it to try
to adjust location, don't ppone if still colliding,
then we would need this. But if we have it in
try to adjust location, but always spawn, we
actually don't need this. But in case you
want to experiment, we will leave this is valid here because the way collisions
are being handled here, they need a little bit of that up in the
blueprints and with what they're colliding and
how Oh, we want do this here. What we will do is add
our actor that respond, our trap that we spawn to
the actors to destroy list. So, we're going to
need to find the list. Here it is, and let's add the
spoon actor. If it's valid. If it's not valid, then
we're done with it. What we do next is promote
add to our counter plus one. And we need to also
set the counter. Remember, control is
for is for setting. Just in case we want
to do the spoon in pons pone if it's colliding, we want to experiment
with this later. We will just add a new variable, and we're going to
call it y and trice. And we're going to increase
this also plus one. Get it also. Since
each addition, the order doesn't really matter. Now, we're going to connect
from the is not valid here. Let's add to the
original rules or or b. And we're going
to get trie plus. There is the max here, here. Actually not plus, my mistake is greater than Mx props
multiplied by two. It sweeps twice, basically. It tries to add
twice the Mx props in case the props are
not being spawning. Because our first counter counts how many
they are spawned. Our second counter X on how there have been
to spawn something. Because after a point, like,
let's say, for example, at the maze generate
or level 25, this number might be with a system that it's not
spawning when it's colliding. It would be spawning five
traps in a point, for example, or it could not spa actually, when it's not
colliding, it could not be able to spawn
after a point. There could be so many traps that it wouldn't be
possible to spawn more. So this would become infinite, and then it would
lock our loading. It will stop there
and never continue. Basically crush our game. So after this, we're going to go and connect this over here, the beginning of the branch, and it will complete
our loop with a fail safe of twice the
number of our Mx props. Now, let's go call it
in our props Spooner. We're going to bring the
spon constant props. We're going to connect
this to poles. Think yes, because if
it is our uncordinate, or if it is a special tile, we don't want something to
happen. We want when it's not. Now, I'm going to connect the dungeon values to the target, which is our piles, the
corresponding arrays. For class, I'm going to
select the trap. P trop. Let's do the Max props. Now, we're going to
create a new variable. We're going to call
it anator level. Do we have a generator level? Tiles, Max maze size, Mx tiles. No, we don't. So, we should have
a generator level, and let's bring it over here. Now what, let's make it also instance and expose on spawn, so we can progress it
when we spawn the maze. So let me remind you again, we need to go back to main
menu, go to our graph. Compile and save the ma save
and compile the maze first, and go to the main
menu, and just this. Maze. Now we have the generator level. Let's start it from level one. Let's go back to our maze. With this generator level, we're going to add it,
let's say plus one. Make it simple the first
level has two traps, the second level has three,
and it goes on and goes on. Let's demonstrate
what we created. Lets start. And let's hop up. Here we are. On trap here, one trap here, the
blending nicely. From above, we wouldn't be
to tell much well we would, but we will hide them with some fog and, some
extra lighting. An away, Let's continue with making some props for our
rooms because right now, lit, they are a
little bit empty. Let's actually show this. Let's go to our decorations, let's select our ceiling
and set visibility. To be a visibility,
sorry, hidden game. That, I think will
not hide it. O. We said a visibility
hidden game, so we can now see what's
going on inside our rooms. Now, if we didn't
have this ward light, the rooms would be really dark. Besides props, we do need to play some lightning
also in the rooms. And this time, Let's
create another way. Let's not add it
the way we did with this props, with the traps. Let's create another
way to do it. So we have plenty
of examples of how to fill blocks
basically in our maze. For that, we are going
to need a new blueprint. Go to props. Let's click, create a
new blueprint class, type actor, it's going
to be BP, room, props. Now, let's go spawn
this room props. We're going to go to
our maze generator. We're going to stop
the gameplay actually. And from the complete
of our fort loop. We're just going to copy ta
this for loop for each loop. And for the array,
we're going to choose all room ordinates. For all our room coordinates, we're going to get our values. Actually, we're going
to get our dungeon. This is, I'm going to find
the appropriate actor. So this will give us all the
actor, all the room actor. Basically, all the tiles
that belong to rooms. From there, I'm going
to own actor plus. I'm going to split
the transform. I'm going to get and I'm going
to connect it to location. For the class, we're going
to select the room props. To be honest, we need
one more variable. Let's go to our room props. I'm going to open it, open it, go to variables and
create directions. Would would be a
map of erection. And the second one
would be the pulion as we have on our tiles, and we're going to
make it incense edible, expose on spawn. Let's go back to maze generator. Let's refresh this
actually drops. And we're going to get the
direction of our tile, the directions array
and connect it here. Now, we are spawning room props actor to every
tile that is a room, and we know its directions. So we know where we have a wall and where we
don't have a wall. I think this is it for this one. So in the next, we can explain how this blueprint
is going to work. Good bye for now, S
you the next one.
56. Room Prop Spawner Basics: Hello, and welcome back to
game design workshop and R sine five procedural Dungeon
action ps creation course. Previously, we finished with
our props on custom props. We finished our loop with adding our actor to the
actors to destroy. We checked if the actor
that we spawn is valid, if it's valid, we are
increasing the counter. If it's not valid, we are
increasing the tries, which we do also when we
increase the counter. Which tries we said, it's going to be a variable. Just in case we want to switch
this to adjust location, but not spawn if
it is colliding. We continued with creating
our A rooms array. We continued with doing for each loop on all our
room coordinates, and we spawned the blueprint we created the BP room props, which is a blueprint that we created a variable,
called directions, and we transferred
our tile coordinates from our room to the
current spawned actor. Now, how we use this actor and how we will use
these directions? L et's go to this actor. The first thing we will do is that when the actor is plow, we're going to get
our direction, and we're going to go
through our values. Values, and we're going to
for each loop from values. The next thing we're
going to ask if the value is true or
not, when it's true. It means that we can
pass when it's not true, that there is a wall. Oh, let's store how many we have when we
don't have a wall, or how many empty we have. Let's call this bar empty. We're going to make
it a single type variable of the type integer. And when we can walk, we will increase when
we can walk through, we will increase this by one. Now, the second thing we do
is we're going to create another variable
this time of NRA, going to be integer NRA. Then we're going to call
this I don't know, waltz. And we're going to here, and we're going to add to it
indexes that we have walls. So now we have two
variables that we have how many empty places. There are how many
entrances, exits, pass throughs,
whatever we can walk, and we have also a variable that has how many walls exist
on our current tile. Remember, when we spawn this, we spawn one of
them in each tile. So our room has four tiles. It means we have of P
room props in every room. So every room has
four P room props, one in each aisle. In the previous time that
we spawned on torches, because the first thing
we're going to be spawning is our light. Actually, we're going to do
two things at the same time, but we're going to do it
with a sequence basically, they're going to
happen simultaneous. Oh, when we spawned the porches, we used in our viewport in our decoration in a
declaration blueprint, we use some scene points. That's one way of doing things. Another way of getting a specific location is
actually knowing the location. If we know that the center
of our blueprint zero, relatively We know some places, since we know that our
tile is 600 by 600. We know that halfway
from the center is 300. Well, let's create our
new blueprint for torch. Let's call this room torch. Instantly, I can see the old
torch we I used an at mesh. Because this should have
been the room torch me. I'm going to open the BB
torch and I'm going to change the mesh to the big torch.
This is the correct torch. I do need to get the pier fine, compile and save, and let's
go to our room porch. Created here. Open it. I'm going to save everything
in a long since I saved. I'm going to add.
Actually, you know what, I can go to the big torch. The BP torch, just
copy. These things. Paste them. I'm going to change the static
to the small torch and set the particle
at lower. Fine. And now I can also copy paste the behavior from
the event graph. The same effect. Play play from start here, doesn't really matter since
this is a looping timeline. It would if we in
some other settings. Anyway. Let's change
the lap of the light 4-5 k. Let's change the radius from 400 to compile and save. And now we have our
own room torch. Let's go back to our room props. And before we propone any actor, we can actually do
something different. We can add it as a child. I'm going to add a child actor. I'm going to name it room torch. And I'm going to set its
class to room torch. I I compa safe, now I can see inside
the blueprint. No. Question or first rule. That would be if
we have any walls. I'm going to get
my variable walls. I'm going to ask is the
length greater than zero. If it's not greater than zero, then I'm going to
destroy this component. We don't need this anymore. This room has no walls. What would be a
room with no walls? It would be a room that has
a door basically because a door and no other two
doors, one, two doors. So if you go to paint, that would be a room that has a door over here, and a door. Over here. So the rest of the room would
not have any walls for it. This will be open and
the side will be open. It has basically zero
walls to add a torch. Since our rules are
based on whether the player can
move to each side. Back to programming.
Now the next thing we need is the directions. From that, we're going
to get the keys. Actually, Here, we're going to get a random direction
from walls. Random. This, if we remember correctly, we have stored the index
of which we had no wall. So even having two
or three walls, we get a random wall
replace our torch. As I said, we need to set
relative location of this Our B, we are setting the location based on the coordinates
of the blueprint. Because we know the size of the room is going
to be inhibiting. Now, I have pre calculated some locations that I think they were correctly. You can create your own. What we're going to use
is a se For the index, we're going to get
the directions. We have a north
wall, an east wall, a south wall, and a west wall. For the north wall,
I'm going to put 40, 150, and for the East, I'm going to put -340, 50, 250 is the height, and x and y are
the x and y axis. -40 for south and 300 for x, y, and 250 for z and 300
minus hundred 42 50. Let me stay going on here. Hundred 40 50. Now, setting it in a
place though like moving this there and there and there. Well not always have
the correct rotation. Again, we have to check which should be the correct
rotation if it was here, which should be the
correct rotation if it was here, and so on. I have already done that, so we have the values, and we're going to also get the room torch and set relative. That relative
location. Oh, my God. Want to type and disobeying. No location, sorry,
set relative rotation. As you can see, I got it
from the execution line. So I can now elect the room
porch because it kind of has system that gives me some reset options
that it might fit me. And yes, this fits me extra. And again, I'm going to
select I'm going to this. Now, since we are using
two times this variable. Because I have a random here, it will get a different
value here and here. So I have to promote
this a variable. Here. I'm going to this
variable to random direction. And I'm going to bring
random direction here. Here, here. Fine. Now, about the rotations, we need 90 north. We need 180 east,
need minus nine. South and zero on west. And that would be it.
Now we would have some lights in our rooms.
Let's go check this out. And we do have some
lights in our rooms. If you want different
locations, of course, you can experiment
with the numbers, I find them or no. I think this is gonna
be for this one. We're gonna continue
on the next one with the rest of the
purpose of the rooms. Boe bye.
57. Room Prop Decoration Completion: Hello, and welcome to Game Design Workshop
Under Engine five, Procedural Dungeon action
RPG, creation course. Previously, we created our
room props begin play event. We started filling it. But we got our values
from our directions. We forelooked, and
we categorized how many walls are empty and how many we
added not how many, but the indexes of the
existing walls in an array. Then we created our blueprint
for our room torch, which is right here. We copy pasted the behavior, we changed a little
with the values, and we copy pasted also
the static meshes, the lights and everything. No. Afterwards, we created
a small function over here, but function, a chain
of events, if you will. But we check how
many walls we have. If we have no walls, then we destroy the child
component room torch that we have added
to our blueprint. Then if it is true and
we do have some walls, then we got the directions, we got the random direction. We stalled a random direction, and we said that the relative
location and rotation of the room torch by some values
that were pre calculated. Now, let's do the same for
the rest of the room items. For that, we're going
to do a switch. On int. The int index
would start from one. Now default pin, and we will
add indexes up to four. That is because
we're going to be switching based on empty, and we cannot have
nothing empty. We can have one empty, which is a room, that is like this, and we have the other room
here and the other room here. Maybe we should have deleted
the previous one, space. So the next room would be here, and the next room would
be here, the gap here. So this would have one empty, and let's begin with that one. What we are going to need
add to static measures. Let's call them thatqu A and thatqu B or A one,
but let's call it B. If we have one Mt, then my rule that I added is that we won't
have two static measures. We will have one, going to be using two in the
rest of the options. Oh, I'm going to this on end. Then we're going to
get our static mes. A M. And from this, we're going
to select from a list, we're going to elect. And for the index, we're going to have
a random in range. The range would be
zero through five. And let's add five options.
Oh, for the options. We actually have
three, but we will play a bit with their
chances to spawn. So, I'm going to go to content. I'm going to go to
our static meses. I'm going to select this table. And there is one more table. And there is this also tab. I don't think there
is any other. I think this is the
three variations. And let's play with the chances. Let's say one of them has more way more chances
than the other ones. One more has one extra one. That would be it for this one. And then we need to set
it relative rotation. We're going to do that. Ation. What we want to do
here is with a mass, iterator, just want
to change the ya. A table turning
angle every time. We're going to use at range. Going to use 600 to 360. Now, why we don't
change location? Because when we span this item, going to be exactly centered, going to be here. But what we're doing is changing the rotation just to have
a random one every time. Now, what do we do when we
have two or the walls MT? We're going to get
our directions. We're going to get our keys. And then we're going to
loop rough our walls. Of course, based
on our A element, we're going to get the
appropriate direction. Of our walls, we need to select one of
these two static measures. To do this, we're going to the index would be our RA index, because we're going
from two or one wall. So this will have one or two. I haven't connected this
when we run the third one, we will actually lete
the static mesa, the second static mesgan. Ba as in one MT, we need only one static mesh. So we do when there are only one wall basically because the other one
would have been an exit. I'm going to connect this
here. Let's continue. We need these two
static measures. In case there is only
one wall to place. This will not run
the second index, but we do not need an is valid here because there will
be no error, probably. The next thing we should do
is we're going to accept attic me even if it's A or B going to be chosen
three through this index. The next thing we should add is the select node now we actually
have plenty of choices. Well, again, it's five, but this time it's
actually five. I'm going to delete this. I'm
going to bring this select, which has five already. I'm going to connect this here. I'm going to. Here
we need a random. Andom here, zero to five. A random index, and the first three are going to be the
ones that we have added. The first three are
unique. Unique. For the rest of the three, we need this combined
match with the boxes. Then this one with the helmet. I can see that red on top of it. That's why I know it's
one with the helmet. There is one more of this, this one with the bigger boxes. This has two small ones. This one has a bigger one. I'm not really sure. Open it. Now it has three boxes. Okay. Blueprint. And now we get one of them. The next thing we should do
is at the relative location. Again, we're going to need
a select. Multi select. For the index, this time, we do need the direction. Based on the direction,
we're going to change these values to 54 north. A 54 east, but on y nth, and minus on the
corresponding x and y values. T would be the
relative rotation. R here. That rot here. Again, a selector, turn it to, we just directions. We're going with -90 090180. If we compile, go to
check on the level. And check if our
props have spawned. Yes, they have spawned.
Their corners, edges. Now we have some props
on in the rooms. I think looks nice. I do seem a bit
offset on every side. So, let's try to fix
this for a second. What if we set them to
a little bit bigger? 1.2? Also, they seem much better right now. They do feel the place
a little bit better. They do have a small gap. The tables don't do, but I find we won't be able
to really hell we're playing. We'll see if it is,
we're going to fix it. No, what do we do with
the fourth option? The fourth option would be
the option of having doors. We don't have one of them now. Fortunately, but let's say
when we had two doors, we wouldn't be able to
put a static mach here. What we will do is we
will create some boxes, we will make them boxes, and we will enable
physics to them, so the player can push but
this is for the next time, I'm going to see you then go by
58. Adding Physics Items to Rooms: Hello, and welcome back
to game design workshop, and real engine five
procedural Dungeon action rbs creation course. Previously, we created some
code for our room props. We added the code to which based on It based on
the number of empty walls, when we have one empty
wall, two empty walls, or three empty walls,
adjust our static meshes, S mesh to something else. And if it wasn't necessary, the second we, we got
it destroyed two cases. Now, we chose from the
select random mesion, both of the function, the in of events. And in the first one, we only set a rotation
because it's one item. And on the second one, we set a relative location and rotation because we want it
on the edges of the room. Now, the next thing
we should add, as I said, will be
the physics objects. To do that, we're going to
get our static measure here. Going to make a ra add a drop, and then we're going
to for each loop. We go to connect.
Here. Here. And we for loop through
our static meshes. Lest thing we do is that is and the static be one of the boxes. Have some here this.
We do have one box. Iga drop it here. And the next thing we
should do is read out here this read out here,
then that location. Now, for the word location, I'm going to actor location since our actor
is on top of our tile, and I'm just going to add a
little bit on the set axes. Like 20. It's even a little bit higher than before because
we have already added offset height
to this actor, and then I'm going to make a random point in bounding box. As we did before, and with
have size 40, 40, and one. I'm going to set
this as a location. Now, the reason I'm giving a
little bit of more height is that want to but we will enable physics
and they do have gravity. They will fall and drop in a
random location every time, so they won't look
like they have been placed in the
same spot every time. Now, the next thing we should
do is a character up on. We don't want our character
to be climbing these boxes. We just want them to
be pushed around. And then we're going to be adding one tug. We're going to. No. That component tug, sorry, and we're going to make an
array from here and put tug of H as physics item because
we're going to need this tug to push them
around with our meta. Now, the next thing
we should do ly, would be maybe Physics. Oh, not this one. Emulate me. Not enable physics, emulate me. I want this to. Now, let's make a
little bit of room. Since we have this mechanic
when we have no walls. When this blueprint owns, when it has no walls, it will run this mechanic, create basically two boxes. What we can do take a little
bit and we have already created other actor
on top of our actor. By that, we can pone
an extra boxes room. To do that, we're going to
go to the rooms that have two or three empty spaces. Because we don't want to do that the room that has
only one empty space, it going to be two clattered. But when we have two ways of exiting our tile or three
ways of exiting a tile, then having extra boxes
would be more acceptable. So to do that, we're
going to go to the completed of this four loop. Let's create a almost 30% an might not be 30%,
but we will try. So we're going to do a switch, it's going to be 30%. Switch on int. And we're going to add
and nine actually up to number nine because zero
is going to remove the old. Actually we don't
need that many. It? Because it's faster
than deleting this. Going to a just three of them. You need or nine. But we just going
don int. Range. We're actually going to let
the default for all this. Misfires. We have zero to nine, and we have zero, one, two. Everything above two
will trigger default. What does one, two, and
three P? What do they do? They actually spa
actor from class. The actor would
be PP room plops. The transform would be
our actor location. Two, one. F here from our direction, we're going to make up We're
going to add or values, North would be closed, East would be closed, South would be closed, open, sorry not closed, open, so everything basically
would be open. We use the system that we have created when
everything is open, and then this would
span an extra, extra physics,
squares, ts, creates. Now, the only problem
with this is that when we are spawning this room, Maze. We actually going to add it our destroy actors
and the matroid. We have the reference here, and let's add it auction. As to destroy, bring it here. Let's list. Now, can destroy this room, but we do not have a reference on this extra room
that we spawn. But no worries. We have a reference on this
room that's getting this and there is a very
nice bind, as we call them. There are events that
you can bind they keep listening until this hens when this happens,
they keep listening. They get a message
when this happens. Oh, we're going to drag
from here and say, No, not from here, sorry from here, from the execution line. I'm going to say,
find on destroy. Because when this actor is getting destroyed,
not this actor. When our actor that is spawning this actor
gets destroyed. This is why a drat from here and not from
the return value. We need to event. Let's say on destroyed. When our actor is
getting destroyed, we're going to this y actor. But this way, we ensure that when our actor
gets destroyed, this blueprint will
also get destroyed. Let's go let's play. Let's see if our boxes spawned. Responds, we could see a
little bit of movement, so physics are working. Now, they're not
perfect physics. We haven't played
around with values. This is a nice like we're going
to try to enter the room, and it's going to be
and the blocked it. We're going to be slow
walking through here. If we male, we will
push them around. Yeah. Talking about
perfect physics. We can't see boxes flying
all away outside our maze, even by sponing them. This could happen because the
angular dampening and mass and is not really really that
but I think they're fine. It doesn't happen often. And when it happens, it's funny. You saw this one went really
almost exited the room. Now, when we start playing,
the roof, we'll be on. So at least they
will stay there. But with may attacks
and everything, they might go off map. They will still get destroyed
when we change the level. Oh, I think this is
it for this one. I'm going to see
you the next one. Goodbye.
59. Importing Revenant & Hellgate Tower Blueprint: Hello, and welcome back to Game Design Workshop
AndreL gen five Procedural Dungeon Action
ARPs creation Course. On the last one, we
created our room boxes, the physics ones, and we
spawned them through our code. We created an array that we for loops with
our static meshes. We set the static mesh to a box. We set the word location to be a little bit higher than
the actor, so they drop. We set that the character
cannot step on, and we added a tack to them, which is pH so we can put
them with our ma attacks. We also set simulate
physics to true, so they run physics. Afterwards, we added a
small cheating mechanism, like we took advantage of
our code to add a bit of extra boxes to our room to make it harder for
our player to move, which we actually
used the fore loop from the two empty and three
empty walls in our tiles, that in the end of it, it would spawn a
roughly 30% chance. Pawn the same actor with
specific directions. It always runs the
four wall empty, and it will spawn
our boxes again. So each room has a chance
to have extra boxes, except the room that has
only one empty wall. Now, destroy these actors, since we don't have a reference
to them from our maze, we use the bind
event on destroyed, which references our own actor that the maze will destroy. So when this actor is
getting destroyed, it will destroy the
actor that it's spawned. Now, let's continue building
extra props on our dungeon. And the new prop that
we will build will be the hell gate, the tower, a blueprint that will
attack the player when it's nearby with an
automatic attack, and it will be guarded with AI. Now, to complete the
code for this tower, we would need to have the
AI and few more things. So for now, we're just going
to build the visuals for it. We're going to go
to our content. We're going to go to blueprints. We're going to go let's create another the all these enemies. Maybe traps should
be in enemies. But you can do this easily. We can go to props, get our traps and move
them to enemies. Now, when we are moving
something in the engine, always good to go to content, right click and fix redirectors. That's also when we
are renaming stuff. It helps the engine
with the redirectors. Now, what are redirectors? Basically, links and paths
for objects in our content. A rough explanation again. Now, let's go to
our Enemies folder, right click and select
blueprints, actor type, and we're going to
call this BP gate. Now. Let's add a static mesh. For the mesh, we're going
to select the ceiling. This is big. We don't want it to be that big. We're going to turn
it to size 0.5 scale, and we're going to
rotate it 90 degrees. Then we're going to
copy it and paste it. Touch it to itself and to rotate the second one
another 90 degrees this time on the y axis. Now we're going to
select them both. And for the element, we're
going to use the Mm. But the instance one,
the original one. Now, we're going
to use a particle. We're going to go to
root and a particle, which is going to be again,
cascade, not na gara. For the particle, We will need to download
our revenant character. We're going to go to epilncer. We're going to go
to our library tub, and we're going to
go to our vault. In vault, we're going
to type revenant. In case you don't
have the asset. We're going to go to
marketplace and search for revenant Aragon
Revenant here it is, and we're going to
add it to project, or actually for you, it might be add to
card because firstly, we need to add to card and then it will appear
on our library. Now, when we have
it in our library, we press add to project, we will nag to our project
gen cose the name, and we're going to
add to project. This might take a while, so I'm going to pause here
and continue afterwards. When we have added the
revenant character, a new folder will
appear to our content, which would be our
paragon revenant. From this package, we need
to set the particle system, which will be the roast. Not enough. Roast head red. Rast red. Red. There is no red and
we have to create it. No issue. Let's check
the one we want. I think it's this one. And it is a little bit small. We need to scale it and it was. We've killed it everywhere.
That's why one on x, 30 on y, 20 on that, and for
the location minus y. We need to do some changes to. I's going to be a, but there
needs to be some changes. Let's open the particle. And we're going to
delete the of spawn, which is responsible
for this glow. We don't want this glow.
Don't delete this. We don't need the emitter. Only need these flames. I and save. I. Right? Kind of one sided, everywhere. And Okay. Besides color, I
think we need to change the initial speed also. So we make it more uniform. First of all, let's
change the color. We go to the initial color tub, we select not green, not blue, but red, let's put. Missive, let's go to
do the same here, do. Is more reddish. Now you see the
different, this is like this, the more flamy. But in our blueprint,
it's more stringy. The reason is because I
changed the scale on 30 20. This is why I did the scale, so it looks more like this. I can scale it back, but
I like the stringy at. Anyway, let's go to here and
change the initial velocity. So it spreads out
a little bit more. Or distribution. We need not a flow uniform. We need a vector. The
uniform is from to max. This is one direction. This way, that's one line. But what we use is a vector. I could see it. Vector. I am on start velocity radio. Sorry, I want it to
be on start velocity. Yeah, here we have a vector. Okay, this is a vector, but it has only on
one axis on the axis. We need to increase the
bility put and here and here minus ten minus ten. So we have back and forth
from our starting point, we make it three
basically all sides. So if we go back to our well, not doing anything,
H I saved this. Yeah, it work? Let's just add a velocity con. To do that, we're going to
just right click and go to velocity in velocity, we're going to select velocity
con. This will make it. If we go back, I saved. He didn't even as it. I think I know what is happening
because I put x on one, we put this on 30, 2015, 15 looks A. I'm going to lower this also. 15 20 15 15 Yeah. It is a little bit too much, I think, go to tag it
a little bit lower. 15 it was too much. And five. As to low eight. No. Ten, it was fine with ten. Ten was fine. Let's just
leave it like this. I put also. Right? Doesn't really
who doesn't know. Let's reduce its lifetime go to lifetime and go to max 1-2 0.8. No. My 0.5, let's have it 22.5. Oh, it's even worse. I'm going to find
some new settings, and we're going to do
them on the next one. Good bye for now.
60. 3D Lesson 59 Hellgate Tower Visuals & Maze Integration: He Hello, and welcome back to Game
Design Workshop rail Engine five Procedural Dungeon
Action Apres creation course. Previously, we started creating
our Hell gate blueprint. And we stuck with the particle
of our revenant character. So I played with the values, and I found this
to be acceptable. What I did was the
particle system, I select a scale ten to
everything, uniform. And on the particle itself, I changed the
initial velocity to maximum five minimum to
minus five of x value. Y value would be five
to minus five again, and the z value would
be five constant. Now, for lifetime, I added the 0.4 in minimum
distribution and 0.5 in maximum because we
want a little bit of unbalanced up but
not so much as before. And for spe, I changed from ten it was to 20 on the
spoon setting on rate, so it spans on rate 20. And I think I also
changed the sphere. No. I left it a eight. So What are the changes, I think you should
have this by now. And really quickly, scale
of ten on rate of 20, lifetime of 0.4 and 0.5. Initial size we leave as is. Initial velocity, we change 00-55 from minimum 00 to
minus five and minus five, and on z axis five. Now the next thing was
we changed the color, of co, to red. And we added the velocity code. Now that we have our particle, let's go to our gate, and we need to add a few more variables and
variables components. We will add a, a point light. We will leave it
as for now because we will manipulate it code, probably take the porch code. We will add a capsule, And the capsule is just for collision so we can
actually eat it. So we're going to
scale it a little bit. Oops, I selected it. And if we don't need to scare, we can just adjust the values, be let's say 100 and let's say the
capsule radios would be. Yeah. This will be where
we hit our actor. Now, we're going to be using
this to hit our actor. We will go to our
static measures, select them both with control
and clicking on them, and we will go to no
collision and not generate overlap events as this would increase
our performance. Now, the next thing we will
add is a here component, here collision, We
leave it as is for now, because we're going to use this for programming attacks
and things like that. But the next thing we will
add is a rotating component. Rotating movement. What is rotating movement? It is a component that
creates rotation. It has some preset settings, but we are going to change
like instead of other than 80, if I press simulates, you're going to see it's going
to be rotating like this. And the reason is because it's
rotating the whole actor. Now, what we want to do is
just rotate this attic mesh. We don't want to be
rotating the whole actor. It's a lot of extra information that
doesn't need to be rotated. For example, the
capsule, the light, and what and even the sphere
collision that we will be the decider of if we're
engaging the player or not. So, what we will do is select
the rotating component, go to Ben graph, bring it here, on begin play, and select update component. That updated component. And we're going to
connect it here, and for the updated component, we're going to use the root
of the two static meshes, which for us right now
is static mesh one. I'm going to connect it here. If I go to viewports
and the stimulation, it also rotates correctly. So it seems I rotated the static mesh differently
than in my nodes. Because if I had it rotated in a different way,
was it like this. Do. Yeah, somehow, I messed it up. It's updating, it's in the same rotation, it's
rotating differently. These are awesome real moments. All this has happened because I changed
the rotations here. I'm going to just
reset everything. A real has an issue when we
are parenting something. I'm going to just
rotate it from here. I'm going to parent into this, and I'm going to rotate this. If I simulate. I'm just going to
change 180 here. I think it will be
fixed. Yes, it's fixed. Check both values. It depends how we
connected and with what rotation the
child to the mesh. We system to auto
change rotations on local coordinates
based on child. Anyway, now we have
some visuals going, L et's go spawn it in our maze. Oh. We left this pro spawner with spawning our
room coordinates. And after this, we're
going to for each. Now, where do we
spawn this heliate? We're going to create
a new variable, temporary variable, a local one. We're going to call it DM holes. It's going to be in point. And it's going to be
of container array. I'm going to bring here,
to connect this here. Now, what will our
temp cords be? They're going to be the isolated
areas and the balconies. In these places, we
should have enemies. I'm going to bring the temp
cords and I'm going to append and then append again. Connect the balconies hoops. It shouldn't be an in point, I should be of the structure, S room ST rooms, a change variable type, right? Because our balconies
connect this, reconnected. Because our balconies
and isolated areas are lists of
coordinates basically. So Connect this here,
connect this here, disconnect this and
reconnect it just in case. And now we're going to
break the structure and for each for each
of the coordinates. And we need some
rules on how we're going to spawn these ele gates. What are the rules
of them to spawn? The rule will be simple. When we build our maze, Well, it didn't happen. We have one here. We have some boxes that have this
symbol on. So we will ask. Does the box have any kind of the symbols because we have
one that's glowing too much, one that's glowing too low, this one that glows on and off. So we'll choose these points
to spawn our hell gates. And we will use
the same technique that we use for the lights. So they don't spawn very
near to each other. Now, let's go back
to our function. Let's stop playing,
and let's get our dungeon and wind
our current tile. Our current tile, we're
going to get the floor. Bottom, first of all, we're going to get materials. We are going to get a lot
of things from this floors, so I'm going to just read
out at the beginning. Now, if we go to our floors, for the content, let's
go to our floors. We can see that the element of the CG is the element zero, and the same applies
to all materials that can have this CG as this
dirt floor, element zero. Since we have designed
it like this, where is the maze here, and always consider element
zero, that material. Oh. We're going to ask
if this material is equal to our material
and material instances, that would be GL which is the CGL CGL in one and the g in
two of a third one. But as I'm informed, it is not used in any
default situation. You're going to put a branch. You're going to use an node, and we're going to
add an extra pin to this and connect this three. Even if it's either of them, we will know it and we will continue with
our chain of events. But I think this is a nice
stopping point for this one. I'm going to see
you in the next. Good bye.
61. Item Essentials & Data Tables: Hello, and welcome back to
Game Design Workshop and real engine five Procedural Dungeon Action Apes
creation course. Previously, we finished with our placement of our hell gates. And when start, we also
fixed. With a break point. Actually, we didn't use
a break point to fix it, but we demonstrated the break
point. Going to remove it. Resume stimulation, and we fix the issue with the empty
and null material. Now, we have some hell gates, we have pretty much s. There is a mistake here. Let's figure why this happens. Let's go back to our maze. And we are asking nowhere Yes, we're asking nowhere if the coordinates are
a special room. So we're going to put an or
here or bull in and also ad the rule that are
our coordinates contained contained
in the special rooms. Special tiles. So now, this shouldn't
happen anymore, because if it's a special
tile or it's next to a door, we're going to set the
material to nothing, empty, and then it
will not spawn. Let's check it again. This is a hidden room. This is why as no one, no gate. So everything seems correct. And the next thing we
should do is start peeling the rest of the
things like the elevator, the box, M a little bit
of our functionality. But to do that. Do need one
more thing to get ready. We need to create the items
and the droppable items, because the elevator
will require an item, the box will require
to drop items, and so on and so on. So let's begin by going to our blueprint folder and right click and
create a new folder. Let's call these items. Let's enter this folder, right click and create a
blueprint plus of plus actor. And let's call this BP item. Now, this blueprint BP
item, let's open it. This blueprint will
become all the items. And to do this,
we're going to be using something called
a data table that is for those who are
new a data table is like a collection of
data in rows and columns. It's similar to a
spreadsheet, basically. And that's why it needs
a format on the columns. And to use a format
on the columns, we use a structure. Let's go create
this really fast. What we need first to
create is a structure, so we can define our
lumes on our data table. So we're going to
use a structure, we're going to name it ST items. Let's enter it. Now, this structure will be holding the information
of our items. For example, the first
thing we need is an item name is playnam. Item name is fine. The
second thing we will need, this is an item, which
item it's an apple. Okay. And this item, what does it have for a
visual representation? It will have a static mesh, so we need a static mesh. The item name should be of
the type string or name, but string is better if we have items with dashes
and any other thing. So we need the mesh. Let's call it mesh, and it's going to be of
the type. Static mesh. Plain static mesh, not
static mesh component, and it's going to be
object reference. The next thing we're going
to need is an item sound. Like what sound
does this item make when I pick it up or
I drop it or use it. We could have two
sounds for that, but we're going to
use just one sound. So we're going to
have item sound. And the next thing we need
would be an inventory image. So we would have I Mach. I'm going to first
create the names and then set the variables. They're not going to be
static messages, of course. Items sound inventor image. Now, afterwards,
we're going to have in to a variable to explain if we can pick
this in the inventory or not. Let's call it at to inventory. Then the last actually second to last would be if the item is. So we're going to call it cab. Don't think that's the
spelling. Might need a K. I'm not sure. It's
fine. It's fine. And if it's scable, then we do need an amount also. Oh. Let's call this amount. Now, the case that
it's add to inventory. We're going to
have gold pickups. Gold won't be going
to an inventory, but it's going to go in
a counter on our screen. Oh, Let's select this
aban Let's go to sound. It needs to be of und Bound cube because
we're using sound cubes. And the invent image should
be of the type texture. Actually texture to D. The difference of texture
and texture two D is that texture is a
general category, which includes like tube maps, two detecttures, render targets, volume textures,
a lot of things. Where texture to d is specified to a two de texture
image that we are using. Oh, I'm going to save this. I'm going to close
the stru actually. We do need to set
Staab on bullion, and we need to set the
amount also on integer. So this is counting one, two, 34, and Staab is yes or no. I'm going to save
this and close this, and let's go back to our items. Oh, for our item blueprint. No, no, no, let's not go
back to our item blueprint. You go to bring it over here. We're go to pre stop to the running because there is no need for the
game to be running. Now, the next thing we need
to create is a data table, as we said, this collection of information on
rows and columns. Oh, we're going to go to
where is micellneous. Here it is, millneous, and we're going to
choose the data table. When we are choosing
a data table, it requires pick
a row structure. So we have to define our rows. This is why we created
this structure first. So we're going to
select our ST items. A, I'm going to
name the DT items. Now, let's open this. As you can see, it's pretty
much empty right now, but we could import from external source if we had a
CSV document or something. I think Json also applies. But for us, we will
just create some items. We're going to place manually their values and their messages. And what I mean? We're going
to press this At here. We're going to press
it like six times, we're going to have six items. And the first item would be, let's say, one, and we're
going to name it gold. Now, what is the row name? The row name is used to retrieve the information of every
row in its columns. We're going to show in practice how it's
going to be used, but when we fill
this data table. Oh, or a mesh, we have a pouch, I think. P, we have a pouch. And for item sound, we have a coin. Here, we have a coin. Inventory image, we
do have our pouch. It's not going to
be a two inventory. It's going to be added in
A UI in our view port, so I'm not going to
press the two inventory. And Saka blue, it's not needed since it's not an
inventory item. And for the amount, let's select one right down. We're going to create code
to change this amount, but that would be
depending on the enemy, on the chest, on
who is dropping it. Now, let's create
the second item. Well this is going to be I two. This would be our HP pot potion. Actually without s. For the static meth, we do
have a portion I think. You have plenty of potion. Everything is a
potion basically. No, we're going to
get the potion red. For the item sound, we have a bottle sound. Yes. For our inventory image, we have a red potion. Now, this will be added
to the inventory, and it is, and it's
of an am of one. Now, our code will be creating an endless
amount of stacks. But if we wanted a MC tax, we should have it as a variable
in our structure array. So, it would be an option
on our columns here. Now, for the third item,
we're going to name it. Three. It's going to have
the name of speed. Potion. And for the match, we have a blue potion. And for our items are we're going to use the bottles again. And for inventory image, we have the blue potion. Going to be inventory. But let's say that the speed potion is going to be stackable. It's going to be
on an inventory. One time use. Let's say that from
our blue potion, we want to take two
sips to end it. So I can put an amount of two. That would be its default value. When I get it into
the inventory, I can use it twice. Our fourth item would be I four. And this would be a potion
that when we drink it, it explodes, creates
an explo rage. Let's say around us, and it kills all the
target around us. Let's call it rage potion. Let's set its static mesh to this brownish brownish potion. Let's use the bottles again. And for inventory in March, we have Ocean dark red. Okay, dark red brown, it might look different
in the world. We'll see. So, we going
to add it to inventory, and it's going to be of one use. Now, for our fifth item, it's going to be I five. And let's call this potion. Because it will increase our available time
to continue playing. If the time runs out,
we're going to be dying. We're going to use
the yellow potion. We're going to use the bottle. And for inventory image, we're going to use
the ocean yellow. It's going to be
in our inventory. It's going to be
on amount of one, and it's not going
to be stackable. Oh, for a last item, let's name this I six. And it's going to be of the name E. Going to have the key mesh, and item sound Yeah, key drop here in front of us. Inventory ma should be key also. It's added to amount of one, and it's not stackable. Let's save. Let's
close our data table. And I think this is
it for this one. We're going to continue
on the next by making this item blueprint
be able to become anything. Good bye for now.
62. Item Behavior & Hover Widget: Hello, and welcome back
to game design workshop, real engine five procedural Dungeon action RPG
creation course. Last, we left with creating the data table and the
structure for the data table. We said that our item information
would be the item name, the mesh, the item sound, the inventory image, the T inventory
question that we have, the stackable question that
we have, and an amount. And then we added we
used this structure to create our data table
for the olumes. And then we filled
the data table manually with the values
that we want for items. And we created the
blueprint item. Now, let's continue with
the blueprint item. For this part of the tutorial, we will fill the components
and the construction creep. So when we propone our item, it will have the
properties we want. Oh, let's explain a little
bit how our items will work. I'm going to open paint. Let's say that this
over here is our actor. This is our item blueprint. First of all, it will have the mesh that we will
be representing it. So if this was an apple, a green apple, it would
use the mesh of the apple. Now, since we want our items to be a little bit more visible, we will also add a point
light light source, let's this with blue. This is a light source.
Well, let's correct. I corrected it. No comments. This is the lamp, this
is the light source. But the specific thing this light source will
have is that they light only this mesh and it doesn't affect the
rest of the world. The third thing we
will go to need is something to show the
item name to the player. So we will create a
widget that we will add two items that we get the name. And lastly, we will have a collision around
the item to be able to tell when our player is outside the collision or
he's inside the collision, to be able to pick
the item to be in range between the
player and the item. So if the player is
inside this collision, he will be able to pick it. If he's not, he won't
be able to pick it. No, let's go at this. We're going to need at mesh. Let's call this item mesh. You're going to need
a beer collision. Around our item. Let's
go to our viewboard, so we can see a
little bit better. You're going to
need a point light. And we're going
to need a widget. A widget, we're going to
do a little bit later. We're going to visit hide debt. And for the attic mesh,
we need to select it. We're going to go to the details
and go to the collision, and we're going to select atone. We're going to ignore everything except the visibility Ama. Actually, we not overlap,
we'll be blocking. The next thing we
should do is not let it cast shadows because it's
going to be really expensive. We're going to go
to cast shadows. We're going to turn it off. Now is the time to do the
lightning channel thing. We're going to select channels, which are the lighting channels, which of these channels
are lighting this item, and we're going to select
the channel to be active. Are we going to go
to our point light? Then we have channels up here. Let's select the
two channel two, and let's select
the channel zero. So everything in the world
is affected by channel zero. But this light will not
emitting in that channel. It will be emitting
to channel two, which our mesh is designed
to get light from. Close this, close, change the world basically and go back to our point light. I'm going to select
some settings that we have predetermined 1280, knes, Attenuation radius seven, and the rest are going
to be left like this. Lastly, let's select
the sphere and set its spear radius to 300. But this will be the radius where we can pick up the item. And this is a
fairly simple code. So what we're going to do is just quickly really
fill this code. Begin overlap event, we're going to create a
variable, a Boulan variable, calls able to pick or pick up range or
whatever, able to pick. I'm going to set it to
I chose end overlap. I wanted to choose
begin overlap. But I need the end overlap too, so I'm going to bring both. It's going to be true
on begin overlap. If our other component, it has the tug, E, which is our player capsule, and if it has the tag P, then the item to be picked up. And the same thing we're
going to do on end overlap. On a COVID haste and set
the able to pick off. And since we want this sphere to be doing nothing else
with anything else, we can change its
collision settings, also, re custom to ignore
everything except the p, which it will be overlapping. Because when we leave
everything on the computer, it constantly calculates
if a visibility heated, if a camera trace line heated, if auxiliary enemies
are going to be puns, so we're going to be
checking the enemies. But our physics bo our boxes. If we had vehicles described, it would be calculating all
these things constantly, even if the answer is no. Since this doesn't have any
physic collision or anything, we have only only instead
of querian physics. But that's by default. No. The next thing we
need is the widget. So let's quickly
create that widget. Let's go to our y folder and select right click the user
interface, widget blueprint. Let's call this W G item. A. Actually, Item widget. This word. Item word. This widget won't be
needed a lot of things. So let's fill it up really
quick. Let's open it. Is just This is from the widget that
doesn't need a convas. It's because we're
someone in the world, and we can let its
dies by our blueprint, by other places,
then the convas. But what we're going
to need is a button. And for the button,
we need a xt. And what we're going to do is we're going to
cheat a little bit. We're going to select the button going style, one its tint, and select the Alpha
zero on normal, so we can see only
the item name. And when we are hovering, we're just going to let
the tint to be at 0.1. It's a bit visibly. We see something
behind the name. Let's say when we
are pressing it, it returns to the zero. Alpha. So, we have a loop through
this three like I hovered it. It was I can see it. I hovered it, and then
when I clicked it, went back to like it
was when I hovered. So it feels okay. Now for how it appears to
the world actually want because we want this widget to be shown above static message, above anything else,
basically, that itself. We're going to be actually
showing it on the screen. We won't having it actually
spawned in the world. And to do this, we're going to go to our
widget on our item. And where Top says, where it should be in which space should it be placed in the world
or in the screen? No, we're going
to choose screen. And I have some
predetermined row sizes, which would be 240. For the scale, I'm going to just choose two in everything. It needs to be sit a
little bit higher also. Let's put it 112, it's fine. But we cannot see
the results yet. We will be able to see them
when we drop the items. Oh. Let's continue with the auto filling information
of the construction screen. This is the first time we're
going to use our data table. We're going to get data. And from the data table row, we're going to select
for Data table our data table DT items, and this gives us a list here, which we actually
will not be using, and we're going to be promoting the raw name to a variable. All the raw name, raw
name is a fine name. Now, if I compile you can see it kept its
original value of I one. But we will want to
change this externally, so we will make it instance
editable and expose on spawn. But when we're
responding the item, we can again change this item name from over
there when we're spawning it. So each of the actors that are
spawning the item can have a custom de on what
they're going to spawn. Now I'm going to promote the
outrow of ible lit item. Data. This item knows its own data. And we're going to get the
items and static mesh, which is an information
we need from our data. So, I'm going to
break the structure. And get the mesh
information connected here. I'm going to connect this here. Now as you can see if I go
to viewport and compile. The little pouch
appeared over here. Because our default
row name is I one. If I select I two, the red potion appears. If I select I three,
blue one appears. Let's check them all 56. Hey, look, okay. I think this is a nice
breaking point for now. We're going to continue
on the next one. Goodbye.
63. Animating Chest Blueprint: He Hello, and welcome back to
Game Design Workshop, Real engine five
Procedural Dungeon Action ARB Z Creation Course. Previously, we finished
with our item. We finished the code for the sorting the item data
through our data table. We used a a variable
to get their own name, and which is also
exposed on spawn, so we can set it when we
are spawning the item. And from this data, we used the data
on the mesh to set the static mesh component
of our blueprint. We also added the widget, and we created the widget, that are items we'll be
using to show in the world, which we said it will
basically be on the screen, so we don't have to
do some extra parts. It shows above any static mesh. There are other ways to do it, but it would require
to go through materials a little bit of
more complicated stuff. We are going to
enter in that domain for our player to be able to
be visible through walls, but we want do it on
the widgets right now. Oh, since we are on the items, I think it's a good time to show how we are going
to be spawning them. And I think it's time
to complete the chest, the chest blueprint
to demonstrate that. We're going to go to our props, folder props inside
the folder blueprints, and we're going to
open our big chest. Now, if you remember, if we go to our viewport, we added our static mesh
for the chest body. But we do also need a cover, I think it's called,
the top part in any case that we will be animating when we are
opening the chest. I'm going to add
another static mesh. And for its static
mesh property, I'm going to select
the chest top. And I'm going to position
it just above the chest. As you can see, the pea pot is already at the edge
of the back side. But this helps us when we
want to rotate it hops. Im flip. This helps us
when we want to rotate it. And I do need to change this to five point naps better. Yeah, I think it's fine. Over there. I'm going
to compile and save. Now, as we need it for the item, a collision to to the item
is the plaar in rage range, the same we need for the chest. So, I'm going to copy this sphere from
the blueprint item, and I'm going to paste
it on the big chest. I'm going to leave it as easy because this is the same
distance we want to use it. And the next part I'm going
to copy from here is actually the widget because it's
going to be the same widget, I'm going to paste it here. And also, I'm going to need the code of the
collisions of the sphere. I'm going to copy this, and
I'm going to bring it here. Now, these two variables this one variable actually doesn't exist in our blueprint. So what I'm going to do is I'm going to right click
on it and say, create variable, able to pick how this would
be able to open. So to change this. And this part is p y when
we can interact with it. And now by saying interact, we open a new chapter. Which is how we're going to
interact with our items. Our game is a mouse click game, or it's like a Daloclon. So this means that
when we are clicking, we want to be interacting
with what is under our mouse. Since we are in isommetric
view and angled, not going to be very
simple to do that. We're going to have
to do a few maths, a few mathematics to get
the point that we want. But after all this
calculation, calculations, what matters is that we send an event interact
to this prop, the box or to the item. And the way we're
going to do this is by using the
blueprint interface, a blueprint interface that we're going to design
for the items. Be since our items are going to be different
kind of actors, this is a nice way, an optimal way to do it. There are other ways to do it, but in these types of scenarios, blueprint interfaces
are commonly used and they're kind of
better technique. Let's go to our content browser. Let's go to our blueprints. Let's go to our BI folder. Let's right click and create
a blueprint interface op. Here we are. Let's
call it Bi item Cs. Let's open it. Let's create an
event called Inter. Now, we have this interface, let's add it to both
our blueprints, the Big chest, and the BP item. To do this, let's start
from the BP item. Let's go to clus settings. Let's go to our implemented
interfaces and press Add, and let's go select I interact. Sorry, I item comes. Now, I'm going to
compile and save, and I'm going to do
the same big chest. I did exactly the same type via interact on the item comes. Let's compile and save. Now under our functions, we have our interfaces. I'm going to open
and double click on the interact to create an event. So, when we send the
message to interact, the first question is,
is the player in range? I'm going to put a branch, and I'm going to select A to open
connected to the branch. Now, if we are in range, we need to know if
we have already interacted because
since the animation we'll be playing
to open the chest, we don't want to
reset this animation. We create another bull, a copy paste to open and
name it interacting. I'm going to bring this
here. I'm going to select a t. And I'm going to select here a and note. This means we have
to be able to open, and we have to be
not interacting. So, if this is true, this will return false
and it will return false. This is false, then it
will go to false again. They both need to be true. The next thing I'm going
to do is set interacting. Now, when our chest opens, we should play a sound.
I'm going to play sound. And we have a chest sound. And the next thing we need
to do is by the widget. So I'm going to that he then
game to the widget to do. Actually, we can also destroy this component because
it's no longer needed. After we sit it invisibly. And now we need to
animate our chest. So I'm going to
bring a timeline. I'm going to connect
it to play from start and enter this timeline. I'm going to create
a flow truck. I'm going to add to
variable two points. The first one will
be zero and zero. The second one would be, let's say, takes 1 second. A lot, let's say
point p 7 seconds, and the value would be to one. Make it zoom in. Let's use the last rain or it doesn't around
the whole 5 seconds. Let's go to update. Oh. We're going to
bring our mesh one, which is the top of the box. And we're going to set
relative rotation. Now, we don't need to store
variables or anything. We hard code this. Going to alert
theat or the Alpha, we're going to use the truck. We're going to use
the shortest path. Let's check our chest. Right now let's say 91 x. We want to go -20. Minus t. I want to go from 90. To 20. Now, a few things
we need to do is also go to our aatic
mesh of the roots body, and we're going to go to its
collision and change it. We're going to select
the custom reset. I'm going to set
everything on ignore, except the visibility,
the camera, and the pond, because we want the chest to be
blocking our way. We shouldn't be able
to pass through it. Oh, I'm going to leave the top, the cover on no collision. Actually, if we leave
it to no collision, there might be a chance that we won't be able to
click it. But we see. I wouldn't like the
player to be blocked by the open chest. But we will see
how it will work. Now, the question comes, what happens when
I open the chest? The thing that we happen is
that we will spawn the items. We can always set a prefixed amount of items to
be always phone like this. But if we have our
maze information, we can get the level of our maze and adjust
it accordingly. So, I'm going to
create a new variable. I'm going to call it maze. I'm going to make it of
the type maze generator. His Generator. Oh.
Okay. Here was, object reference,
base generator, and I'm going to expose it
on Sone and instance edit. Actually first instance edit because if it's not
instance editable, then this will create an error, like if I unclick
this to compile, it will say expose on
son but not instance it. It has to be instance editable. Again, when we are bringing
a blueprint into the map, it's an instance
of the blueprint. So if we want the value to have different numbers
on every instance, it has to be instance editable. Now, let's go back to
our maze generator. Let's find where we're
spawning the chest, which I think function on props. The beginning at big chest. Going to refresh
this. No compile. Dave. I'm going
to refresh again. And here we have it.
So for Mz generator, we're going to use health. Now we have a reference to our
Me generator in our chest. I think this is a good
stopping point for this one. I'm going to see
you in the next. Goodbye. Oh.
64. Chest Mechanics & Item Drop System: Hello, and welcome to
Game Design Workshop and Real Engine five
Procedural Dungeon action RPG Creation Course. Previously, we started our chain of events for our interactions. We created a blueprint interface that we called item coms. And inside this interface, we created a function
called interact. We implemented this interface to our big chest and
our item blueprints, and we started the chain
of events, the big chest. So after event interact, we asked if we are in range and we are not interacting
at the current moment. And if the condition applied, we continued with setting
interact to true, playing a sound, and hiding the widget and
also destroying it. Then we went and created a timeline to
animate our est top. We also created a variable
called Maze generator, which is storing the
reference to our generator, the one that sown the chest. Now, let's go to begin
play event and create one variable that will be let's call this maxed number of items. Let's set it in begin play
to be of a random in range. Random in range. Let's start
with it's a big gesture. It should drop at least
let's say three items. When some room, and
the maximum should be a maze generator level level. Generator level from
our maze generator, should be the level of
our generator plus three. So the first time it
would drop 3-4 items. Because our main
generator doesn't start from zero, it
starts from one, which if we go to main menu, we can see that on
click Start button, we spawn the first generator, we have the generator
level at one. Is finally time. Go
to our timeline, the finished event,
and on our first item. We're going to use the
spawn actor from class. We're going to split
the transform, and we're going to
get a call location. To use as a spawning
point for location. This means that our item will actually spawn inside our chest, like in the zero, zero, the local coordinates
of this blueprint, which would be we're here. But that's not a problem
because we are going to create a mechanic in our items to find a
spot next to our chest. But this code will
be on our items. No. We're responding the first item. It's going to view
of the class P item. And we have our row name, which is I six, which is actually
our key, isn't it? Because I six is the
default and it's the key. And this is the only place we're going to be
spawning the key, we're going to keep it I six, and we're going to add
it our to destroy list. To do that, we're going to get our ma generator reference. We're going to get the
actors to destroy from it, and we're going to add to this array the return value
of the spawned actor. For the rest of the items, I'm just going to copy
the phone actor BP item. I'm going to connect
the actor location, and we're going to
create a custom loop. Or we can even put it in a
for loop act to tom or loop. And you see what happened? When I have these two
connected like this, but I wanted a node
behind these two. So I just drag from here, I do or loop node, and it auto connected
what I wanted to do. But it's always good to check working if it
connections are correct. Now, for the last index, we're going to use the
max number of items. For the first index,
we're going to use number one because we
already spawned an item. So if we want to
spawn three items, it should start at one. Because if it started at zero, then we would spawn
an extra item. Now for each item spawned, we need again to add actors to destroy a copy base
this add nod here. We're going to add this
value here and bring this to the actors to destroy. Opposite this way. And the reason I need to do it opposite is when I connect, this is a wild card node. So whatever I connect to, the first thing I will connect, it will get the data
type of that thing. Here, we are returning an
object type of VP item, whereas our actors to
destroy list are actors. A actor is above in
hierarchy of VP item. So I cannot add an above hierarchy to
something in the lower parts. When I connected this,
this became VP items object where the item
object cannot be an actor, but the actor can
be an item object. So I'm going to disconnect this, I'm going to connect it
here, and then connect this. All our actors that
we're spawning are being added to the
actors to destroy. Now, which items do I
spon from raw ID, name, I'm going to select
and for the wild card, for items, wild card
random in range. Is going to be 0-4,
three to four cos 01234. And let's start with
the gold I one. Do you know what? Since we know that our
table starts with I, what I can do is use an If
I type it correctly, ring. What does a pen string mean? Means that we are a pending
string A to string B. If I put I here, and I connect the
anum integer here, and I got I and some number, and I can directly
connect this here instead of feeling all these
do elect list. And that would be our items stpone when we
click on our chest. We're going to check
that all later, and we're going to debug
everything that's needed. But for now, we're going
to leave it as is. The only part that
is missing right now is the name of the
chest on the widget. Because we have a widget here. When it appears, we
need to be a name, and widget class is non. Am on the item.
Yes, it's the same. I didn't select the widget
class on these two widgets. You're going to do it now.
We're going to name it W G. Item world. This is a widget. Pi Save on pile, and here do the same World. Dave and compile. Oh, my God. It's a default movement
because it's here and here. And goes automatically. Anyway, let's go to the widget, and let's create a function. In the graph event, of course, the event graph of the designer. Let's call this function. That's Now, this is a little
bit redundant again. I'm going to go to
designer actually first. I'm going to select the text
because it's not a variable. It should be a variable,
so I'm able to engine. Let's name it also to
the text actually item. And I could be on our blueprint and just
getting it from the widget, this part and just
dragging that text. Also here ready. Well, as you can
see, it's re done, it's the same
function, basically. But I don't need to drag the t item from the
widget this way. No, it is going to
make things a bit. Now, to set the
text on our chest. We need to bring our widget. And as we did with the child
component that we need to get what is inside the child component,
what is the actor? What is the child actor
of the child component? The same we need to
do for the widget. These are components,
widget component, child actor component,
static mesh component, even here the same, we needed to add what type of static mesh. They are cells that
hold the information, but they do not know what they're holding. We
have to ask them. To ask it, we're going
to get widget. S. And then we need to see
if the widget we got is our WG it item world,
something like this. So I'm going to cast
to WG item world. We know this is all
we're going to succeed. I'm going to convert
it to pure cast. Even if not, we do
have a success, but we would need to
implement some code. But from here, I'll just a text. Now it's here like this, easier. Less nodes. I. The more notes you have, the
more the tower can become really becoming a tower
defense after a point. So for the text, we're
going to get chest chest, and that's it. Compile and save. And from programming
side of view, our chest is ready. We won't be able to play with it right now. We won't
be able to see it. That's a bummer, but we will when our character is enabled, and we will be able to etag all this just in
case it doesn't work. Good bye for now, sing
you the next one.
65. Hidden Room Chests: Hello, and welcome to
Game Design Workshop and real Engine five procedural Dungeon action PZ
creation calls. On the previous lesson, we finished with creating
our VP Big chest. We begin with storing a variable of the number of items
that we postpone, and we find a random value
between three and Mx, which is the generator
level plus three. Then we set text to our widget. And finally, we added the spawn actor functionality
in the end of our timeline. We added the first item to be the key that we
always want to drop, and then we added that actor to the array to be destroyed. Then we created a four loop with the max number of
items as last index, and first Index one, as they are as we have spawned the first
key, the first item, and then we continued by spawning the rest
of the items and adding them to the
actors to destroy list. We created a pend
of I plus random integer 0-4 to get a random
item through raw name, because our data table
is named I and a number, and this part has
a small mistake. We start from zero when
we want to start from one and end on item five. Again, we have a range of four because our data table go to our data table items. We begin from I one, two, I six, but we want to
spawn random items 1-5. Now, since we have the big box. We can actually duplicate it and make the
small box out of it. I'm going to go to props. I'm going to go
to our big chest, and I'm going to duplicate it, and call it PP chest.
We don the big. Now, let's open this. Let's change a few settings. Let's set the minimum items to one and the generator
one plus one. So it will ppone one to two
items and every level more. And since we're
going to be spawning it In the hidden rooms, let's make a rule that this one always spawns a time potion, which on our data
table is the I five. Go back to the chest and set these two I
five instead of a key. Now, we're going to leave
the rest the same so you can maybe tspone two time portions,
doesn't really matter. And we're going to go
to our maze generator. We're going to go to proponer. We're going to copy This part, which has the rooms, but we don't need the rooms. We just need all these. We don't need directions, but we will change it.
Let's paste it here. For the array, we
need the rooms, I think, we name them. Take our arrays. Biden rooms. But it is an ST, so I'm going to disconnect this. I'm going to connect this here. I here, I'm going to break, and I'm going to
copy pace the for loop, connect it like this. O classic setup, and here on, we need to spone the BP test. We don't need the directions. We need to connect this
two pin over here. And we will put also
another rule here, going to put a branch that our current coordinates are not contained in the array
of special aisles. So just in case one
of our special aisles is considered a hidden.
We're going to say no. We're not going to spawn it. I'm going to connect this here
on the complete this one. This could also be
done in a sequence. Each sequence should run
one of these segments. But we're going to leave
it as this for now. If we go and play compile, let's see if we spawn the small chest in the hidden rooms. While in the hidden
room, here we have. There is no chest. But we do see the widget, but there is one chest. Which chest is that
I'm guessing it's that's the end chest.
Let's find it. End chest. There is the chest. Here it is. It looks
a little bit small. It is a big chest, but it
does look a little bit small. Anyway, let's figure out why it didn't spawn the small
chest in the hidden rooms. Of the gameplay. It is going to be something
simple again, probably a false branch. Yes, I asked if it contains and it has
to be containing, no. This should be on false. Let's play. I see a hidden room here, and it does have a chest, which looks the same. Now, let's fix this. Let's go to our new chest. I think we do have
a different chest. I'm not going to
search like this, I'm going to go
to meshes folder, he static meshes here, we are and there
be another chest. No. Now let's check
again, and it's here. It's not that we
added of camera. We prayed too much to
gap and it's added. I'm going to use this the
bottom and this for the top. I'm going to bring them
a little bit closer, forward. And it looks fine. Now, they did look
a little bit small. What we can do is go to the big chest and
set its e to 1.5. If that's too much,
1.25. Of the bit. Okay. No, it's not okay at all. Now, it's more ok. Let's do this for this chest also 1.25. All right. While.
Let's press play. I check and see no hidden room. This is a hidden. We have our small chest and
somewhere is the big one. Find that also Here it is. As we can see, it
spawns next to a door. We need to add the rule for the doors for this chest also. And it is a little
bit small still. It's not as impressive. The chest key should be bigger, so I'm going to make
it 1.5 below 1.5. But it did look a lot in the
scale of the small chest. That's it, Let's go to our maze. Let's go at the place we are using the directions
for the chest, which is right in the beginning on the create cores for chest. We have the rules here. We're checking if it's
contained in the special tiles. We need to bring
this functional we made it is adjacent to do. We're going to connect
the coordinates here. Put or in because if
it's a special tile, or if it's adjacent to
door, do not spawn it. Do not add the treasure index. Compiling save. We're going to play just to check the size. We know that the
rule is working. Here it is, and it's a little
bit small. It is too small. So we're going to
go to the extreme and put the scale on two, and that will be two,
whatever it is two, it is unless our player cannot pass but we're going
to change it again. Now it's fine. Just
to look at it. Our chest. Here it is, right. This is a big chest now. We can find this easily in
the corridors and spot it. This one is spooned next to
a tower, also Hell gate. Anyway, so In the next lesson, we should start creating the mechanism for
the items to drop. But before that, let me do
a really quick explanation. So we know what
we're doing next. We know what we're going
to be programming. I'm going to bring
paint. And let's consider that This
is our block again. This is our pile, and our
chest spawns somewhere here. Now, when we spawn our item, it is sawed right
here in the middle. If we see a three D V, let's say that file this, it goes down like this, and we have our chest
here, that is open. Wouldn't cover this ever, but anyway, and our
item spawns here. What we're going to create is a system that from the place
that the item is spawned, we will get a random point
in the air go polar. And from that point,
we're going to start line tracing
towards the ground. But we're going to line trace
in a radius around the box. We're going to get
continuous lines, but many dots, many
dots around the box, that we will define the radius. And when we find the spot
that we can land the item, and it will be on the floor, we're going to say that's
the place you need to go. And to do that, we're
going to do animation that item goes from
here to that spot. But that's something I'm
going to do on the next one? This is enough for now.
Goodbye. See you then.
66. Item Drop Animation Near Chest: Hello, and welcome to
Game Design workshop, and real Engine five
Procedural Dungeon action RPG creation course. Previously, we added the
small chest and we fixed some bugs that happened
during game play. We actually increased
the sizes of them also. And one thing that we didn't address was that when we played, we actually saw the widget of the big box and the big box. Big box. Here it is. What happened is
that the big box was actually in our original view. You can see that it
appeared right now. If I eject possess again
the play the game. You can see this actually is on the place
that it should be. But if I move this, I
move the box again, you can see the chest
tooltip is above it. And now we can actually
see how it would look. It is a little bit
big, but fine. What we're going to do
is just set it then, so we cannot see it by default. So we're going to
go to our widgets, the blue print item, that
visibility, invisible. And we're going to
do this for the box, the big chest,
widget, visibility. Visible and for the
small chest as well. We get visibility invisible. Now, let's go back to our item, and let's create the
mechanic we explained. Mechanic where we're going to select a point
above the item, throw some trace lines, find an empty spot, and spawn the item. The way we're going to
do it is we're going to just use a bounding box. And find the point inside
this bounding box. The drawback of this
technique is that maybe the line will pierce will
show that it's going there, but the item will stop due to collision or
something on the box, or it might even find a line
that is hitting the box, and it would say that that's acceptable
and leave it there. Um, there could be ways
that we could create some function that
we create like a circle and then
to that circle, we go like we give a percentage of plus or minus towards there. Or what we could do
is we could create some code to check
if our bonding box, point that we found
like when I throw a line from here
and it drops here. Does it belong to coordinates
from the center up to here, for example, we create a dead zone that do
not drop items here. But we won't be
doing these things. We're going to just put a box
and get a point in the box. That would be
sufficient right now. No, Let's go to our
item on our begin play. So, a while ago, I spoke about why
loops and why we shouldn't be using
them in gameplay. Well, for every rule,
there is an exception. There is some reasons
that we need to use il loops on gameplay, which will actually break
the game if they don't. For example, we have some game breaking mechanic,
like, for example, our key right now, we want to be 100% sure that it's dropping. It won't drop outside the map, it won't drop anywhere else, it will drop, and we will
be able to pick it up. Our system doesn't
really cover this, but it is an exception
that we could use a wile loop for
these calculations. I find the correct place. We need to redefine our rules, if this is taking long, if this is pzing our game, if this is doing some other things because if we didn't, it
would break the game. Now, of course, there's
other reasons to use loops inside the gameplay. Some more advanced ones would be to allocate resources, memory, and but in general terms, game breaking mechanisms could use loops to make
sure for the result. Oh, what we're going to do right now is create a
variable of type vector, which I think we haven't
created one before. This is a three point
vector, three integers, and we're going to name
this get location. Remember, this runs
in every item. When an item is spawning, this code will run. We go get it for each
target location. It's equal to zero, which is our original
default variable. This will be our condition
for a wild loop. Going to connect this here. Now, the second
variable we're going to create is our variable is, which is going to be
of the type integer. We don't need to ask it as a condition because
internally in the body loop, we will change based on
the target location, so it will break our loop. No. First thing the body
does is adding 12 ts. And now the complex things
will start to begin, a little bit complex.
It's not that complex. We're going to throw a pace. Helling is important. Yes. Pase y el. Not a multi sphere race, just a sphere trace
because the first heat we want just
one heat result. We don't want get
a list of them. No. The starting point. We're going to get
our actor location. And we're going to add to Z. Let's say 200. A bit
high, but it's fine. But now we created
this point over here. Now, for our target, we're going to get random
point in bounding box. No. Because as you can see, this
is a completely different. This requires navigation. It as we could see, it was it's on the
tab navigation, which is in the tab AI. We don't want this on random
point in founding box. Now, for its half size, we're going to use
double the size 600. It's bigger. But
this could throw it internally to other tiles. So let's use half size of
that 300, hundred one z. And we get a point. Basically, we get a point in
the ground on this level. Now, if we are up here, how do we aim that point? No, we're going to get or or, which is a direction towards and we're going to
multiply this by our range. How much up, if we are x
we're starting from here, how much up do we go? Because if it's a
direction from a 0.1, then let's say
everything else is zero, then this means in
x axis, go 0.1, multiplied by number
would be that direction. That much far away. To do this, we're going to change
this to an integer, and I'm going to multiply
by a positive number. We're going to multiply
by minus, let's say 500. So instead of up,
we're going down. And if we add this
to this point, we get our final destination
towards that point. I'm going to connect this to n. I'm going to set
radius to let's say n. So it's a little
bit big of a ball, not just a line because
if we are to hit the box, we should know it a little bit. The next thing we need is actually, what are
we going to hit? Not that if we hit. So we cannot put a branch here, say, we hate something
spawn it there. Need to know if what we heat it is what we
want, which is the floor. And do this, we're just going
to use a tug on our floor. We're going to go to our floor, which is the BP tile,
go to viewport, to select our floor, go to tugs, the tug, and let's type floor. Now h. Back again. Now that we added the tug F.
Let's go back to our item. Let's check our heat result. I'm going to break
this structure. I'm going to go to heat
component and ask if it has tug. I'm going to put a branch here. And now, it's not the only question we
want to ask if it F, but we want to ask
if our tries are also let's say, equal to. Let's try 30 times.
Not connect here. Now, it's going to be if it has F or the tags are
above 30 or equal 30. Then we're going to be setting the target location
to our impact point, which is the point, the
actual point of impact. And we could set to the location also wouldn't really matter. But why not use
the impact point? Now, just for a demonstration,
connect this condition. Just connect the
30 equals to 30. Whatever happens,
it tries 30 times, and let's go to our
game up and let's play. We're going to eject
content browser. You're going to bring
an item into the world. Do it. Again, going
item into the world. Oh, just in case you are not
seeing the spots off camera. I might have abled the
draw the bug type. So, we need this to be
persistent to see the lines. Now, we can see that this in tried 30 times to find
the floor around it. But this is a little bit
too close to the item. So let's go and
increase ox size, let's pull hundred, 600. He again. We're going
to bring another item. Okay, now they're
a bit more spread. Hey, duplicate this. Duplicating here and moved here. On begin play, you can see
the two different pin points. I think this is fine. Maybe we can make it a little bit bigger because the chest is wet the location here. Hundred hundreds. Oh, it's too big. I brought this far away. Also, you see that they're going real down below the item. This is actually because
I increase the range. Be honest, I just wanted to
show an increase of range. This could actually
work just like this. Be we're getting a
point to the item, and then we are just
going from here to there. So let's play again. This goes way too far. That value is way off. We're going to use the 300. I think that 300 was fine or the 600 was the 600 wasn't
it? Bring this here. Now it flows, the game flows. Okay, so we do need this, actually, not that
much, I need it on, let's say 50 or yeah, let's keep it on 500. And the reason is
that the reason that mine rushed is that
this wasn't running. It was actually. But when it reached 30 tri, this was not valid, that heated nothing
because let's go to pain. If we start from the top, and go exactly there. Doesn't mean that we
are touching there. It means that we reached there. Adding to that, this is this distance B is
bigger than this, sorry. This distance, 300. From here to reach to the floor. We need that extra range. I might have used the
explanation a bit, but we need the extra range to reach the floor because
we are on a slope and because needs to go through
the floor to touch the floor, not go dat at the let's connect this
fine and let's use the range 600 actually. I think it was looking better. Just one more test if it
crushes, and I'll leave it here. I don't think never say
never. I bring this here. I see nothing. This is still moving and I'm moving,
so it didn't crash. Might have turned off
the item here it is. Yeah, I turned off
the debug line. Oh. Let's try again. The item. Crash because I placed it
in the middle of the air, so it doesn't reach
the floor again. If I could eject right now, you would see that
the key is really, really far away
from the dungeon. Okay, we're going to stop here. We're going to test it
again in the next one. Good bye. See you then.
67. Finishing Item Animation with Timelines: Hello, and welcome back to
game design workshop and R engine five procedural Dungeon action psy
creation course. In the previous lesson, we demonstrated the
importance of going to endless and unlimited
wile loops and why we should use them
only on core mechanics. Now, I'm trying to
debug something. I be trying to show some
things in a very long way, like adding items like
this on run time, and especially when
they start with a wi loop is a very bad idea. Um, overconfidence,
maybe. But yeah, a lot can happen. So if I go and play again, let's do it more profession, and I'm going to go
next to the floor. I'm going to bring
the item here. The lines will actually
touch the floor. Let's find our drop. No items. Bring it here, and I didn't turn
on the bag lines. Dave, because when you're crashing, you're
losing your work. Also, when you're crashing, you need to control delete
and top the project anyway near this
he did one line, but we can't really tell, so I hoped you a lot. Yeah. I think that's fine. Let's stop. Let's go
back to our item. This is the widget. Item. We found a point to drop our key to drop our
item, any item. What's next? The next thing should be to make our item visible
because let's be honest, an item sitting there until
it finds where it goes, then just does an
animation and goes to a place isn't
really good looking because let's say the 30 ts
might take not half a second, but 0.1 of a second. O eye will catch that, we'll see the item
they're sitting and then suddenly moving. So we're going to turn our item visible go hidden in
game, then it's true. This is on the item mesh. And after our i loop, let's create a custom event. Let's make it where else. Animate item. This is how we will
call this event. Because now we're going
to play the animation. Uncompleted. To animate item. And the first thing
we're going to do is turn our mess visible. Visible. Let then false. Next thing we need is to store our original actor location, so we're going to get actor. We're going to promote
it to a variety. I call it original because we need to go going to animate
from here to there. This is from here. Now, all we need to do
is add the timeline. Now, we're going to connect
it to pay from start. We're going to go
in our timeline, create a flow truck. We're going to need
points. If the ick. The first point would
be zero value zero. The second point would
be 0.25 and one. One. The third point would be 0.5 to fast. I think it's fine. The value would
be actually zero, so we return to the ground base. And this would be our movement. Let's be it a little bit better. Now, because I had
selected this one, it was trying to
fit only this with the pre of the
previous one because I pressed the Zoom
vertical also. When we have selected
some points and we press this Zoom
pzonal to vertical, it will try to do the points that we have plus
the previous one. Now, we're going to
select them all actually. Right click. That is to auto. W to click on the top one. Maybe make the c a little
bit more like this. The first one also. That's fine. It does go a little bit higher than what we will calculate. Now, what we want is up to this point for the item
to be going up straight up, and then going towards the direction that
we want to do this. We need to that back for cation. To move the actor, not
just the item mesh, and this will be going to date. So we want to let Vector
create this movement. So this is our Alpha. Let's name this struck to movement this is
our movement Alpha. We said, up to 50%, basically, because it's
025, and we know this. Up to 50%, we want to go up
so if this is less than 0.5. We want to be going
a certain direction. O B, our target, would need to change. So we can put a select here. The condition is this ion is
our Alpha less than half. If we want to go up, it should be our
original location. L. Let's say 200 height. And if it's not, then
we should go to target. We're going to connect
the target location also. Now, let's think
this for a moment. What does our Alpha do? Because since up now, we have used 0-1. But now we are using
0-1 and again to zero. This means that when
this timeline ends, Alpha would be No Alpha s A. A would be the last point would
be the end of this leerp, because this Alpha
will go back to zero. So we don't want this in B. We actually want it in A because our target
is actually A. So this one has to change also. This would be our actual
B from below 50%. We go 0-1 0-1 would
be the plus 200. What would be the Alpha, the true of lower than this? Well, that would be
the original location. Let's go all over it once again. A If we are below 50% of Alpha, we have 0-1 go from A to B. If it's below 50%, we go from original
to our height. If it's after 0.5%, we're going from B to A, that would be our height, and going A, which would
be our target location. Now, I hope this
wasn't too confusing, but that's how I made it work. But enough of that, let's
do one more thing here. Let's add another flow track. This time, it's going to be
a very simple flow track. Also, mouse wheel doesn't really work here because
it zooms in and out. You have to have your
mouse wheel here to work, where if you have
it already here, you can just click
and let it down. No. This is going to be
a simply flow track. We're going to have two
points from zero value zero. We're going to go
to 0.5 value one, and let's not forget to
use our last k frame because both of them
are on 0.5 0.51. And what we will do is we're
going to select our items. We're going to set
its k to zero. We're going to bring it
over here and set three D. World Scale three D. Let's rec these things. Actually is a
little bit further. These two lines are not needed. We can read out here.
I get one line. Now in the new scale, we're going to let Vector. I think we all can see
where this is going. We're going to use the
new truck for Alpha or B, we're going to set 111. Oh, the item will get bigger
as it's reaching its target, and it will reach
its original size. So I think this would
be for this one. I'm going to see
you in the next. Goodbye.
68. Show Item & Inventory Widgets: Hello, and welcome to Game
Design Workshop under engine five Procedural Dungeon action RPG creation course. Previously, we animated
our drop item basically. So because since it
runs on the begin play, it will run on mob
drops on chest drops. Or if Hell towers
also drop something, this is the way the items
are going to be dropped. So we created a custom
event called animate item. We used the item mesh to set it not hidden because
it starts hidden. We stored our original location. We did some weird methods we explained to
set the location. And we also scaled
up the mesh 0-1, so it looks bigger as it's
coming out of the chest. Now, the next thing we
should do is get our widget. Actually, this could happen
in two different times. It could happen. It could happen after
the item has dropped, so we could use finished
from the timeline or before. No, I'm going to do it before the item actually
has dropped because that's how it usually happens in especially all
the Ablo games. Basically, multiplayer, you
couldn't see the items drop. Everybody was picking
them up in the air. So we're going to
keep this that way. We're going to show the widget the moment it starts the
animation, basically. And that way, it was going to be pickable from the moment we can
click on the widget. I think in Diablo, even the widgets are animated, but we're not going to do that. We're going to call
this custom event. Widget. But we do need to fill
some information here. But first of all, let's call
this show widget event. We're going to go here
that we are calling animated item when completed. We're going to do a sequence. And the first one
would be animate item. The second one would
be Show widget. Oh. First of all, let's let's get our widget. So get widget. As we said, this is a container
and the container, we need to get the widget, and then we need to ask
which widget are you? So cast to item world. W two item world and that text. For our in text, we need our item data. We need to break the structure
and connect the item name. Oh. The next thing we need is something to toggle our
widgid visibility on and off. So I'm going to
create a function. And let's call it rigid. It's going to need
an input of y. Let's call this. And in here, I'm going to get the
widget reference. I'm going to visibility
to whatever this pin is. Except that I need to
generate overlap events. To whatever the
visibility is again, and actually call visibility
like this, but remind. Also, we need to a collision end to a select here, and the selector will
be this basically. So it's true. We need query only. If it's false, we
need no collision. Why we need to do
these two steps because even if a
widget is invisible, because there is a chance that its interaction settings are still allowing for input events. By saying this, I mean, I'm turning off the visibility of the component of the widget, but widgets actually have some other settings
in visibility. For example, if we go
here and set visibility, You can see it has
visible, collapsed, hidden and non heat testable. This means that it's visible
and it's heat testable where it might be
able to click it. So why not just let
it's collision off, also to be safer. Might be a little
bit of an overkill, where for sure it's an overkill, by better safe than sorry. It doesn't add much to
it actually makes it even making less calculations. And basically, even this
actor could, even invisible, could actually receive the input and send it to the widget, so the widget might not
be even responsible. Anyway, there is a lot of
reasons that sometimes you put some extra code just to
cover some extra bases. Instead of searching, which
setting would have been off. Sometimes closing
some root settings is better than searching
for sub settings. So I digress. Let's go back to
what we're doing. So we are showing widgets, and now we have a way to toggle our visibility
on and off. But when do we want our
visibility on and off on our items on
our items widget, or us for our project. What we're going to use
is our mouse over events. But when we are over something, we're going to send it a
message the mouse over you. And when we are sending when
we are off that object, we're going to be
sending a message, A, we just the mouse
just left over you. And this will be one of our ways to make the visibility
of the widget. So the mouse hover. Other way we're going to use it is
we're going to have a button. We're going to have the left at. But when we press it, we show all the items that are
around inside our viewport. And the way we're
going to do this is by using something
called an event dispatcher. Now, how event
dispatches work in a rough setting would be they sent a message
to everything, and if that everything is listening for it, it
will do something. U It maybe one of the things, it's one of the
heaviest way ways of blueprint communication. It shouldn't be used
on constant things. It can't be used, but yeah, it's the heaviest thing of
blueprint communications. Let's just leave it there. No, how do we do this? Let's go to our controller because now we need to enter
our controller territory. So top down character, top down folder, blueprints, and PP, top down controller. No. We're not going
to mess this up yet. What we're going to do
is create an input, which is left out. And this is going to
be a steady input. We're not going to put enhanced
inputs in this project. And down here below
the functions, macros and variables, we
have the event dispatchers. We're going to click on event dispatcher and stay items. Maybe. No, going to compile. And I need to add to input. Let's call this one
items visibility. And let's call other
one Alt press. This is going to be a little
bit redundantly Alt pressed. We could just use one, but let's do it with two to make it
a little bit more clear. So, when I'm pressing Alt, I want to all ogle items. This is how we
dispatch an event. We created, we make our inputs, and we do a call for it when we want in
the execution line. But when pressed, I want items
visible and alt pressed, a copy paste is to released, and Dismiss these two,
that the to false. We're going to compile and save. We're going to close
the game controller. We're not going to need
it for the near future. Lo we can close a lot. We can close the main menu. And let's start closing this. Now, What we need to do is get a reference to
our event dispatcher, so we can find something to it. To get a reference to
it, we need the actor, the object that contains it. So I'm going to get
their controller. And I'm going to ask to top down controller
because as our game mode, our get pair
controller is general, and we want to
specify to our top down to get the dispatcher. Bind event to go do we
call it Hogle items. Event to togal items, this will bind an event
to our dispatche. We're going to
connect this here. Let's bring it over here, and let's create a custom event from the event node of the bind. Let's call this items. Or togal items mind. Doesn't matter. Let's
connect this here. Let's connect the
visibility here, and let's promote
it to a variable. Donnie that in some things
it's already named for us. Well, let's make room because we're too
close to each other. When we begin play, we are
running the animate item, and we are showing the
widget by setting its text and binding the show
or hide on Alt. The next thing we need to do
is the ho and hover binds. Well, not binds. What
we actually use are some extra functions
on our P I item coms. Oh, I'm going to add
an extra function. I'm going to call this start. Over. I'm going to hit
one more call and over. Let's go back to our item. L et's go to our interface, click on end hover, double
click on start hover. We have this two.
This would be easy. We're going to get visibility with the visibility to true, get visibility to false. Now, why was the alt
press redundant? The reason is that we
don't really need it to change the end hover
to ask if Alt is down, and if it's not down, and turn the visibility off. Because we don't want
on Ed hover when we have press Alt to
stop the visibility. And the other way of doing it, which is actually
better would be to get player controller and ask is input down. And here we can select alt or have our custom
key information, which would defeat the purpose
of having this alt press. Anyway, that would
be for this one. I'm going to see
you on the next. Goodbye.
69. Pick Up Items and Add to Inventory: Hello, and welcome back to Game Design Workshop Real engine five Procedural Dungeon
Action Arbis creation course. Previously, we finished
with the creation of our show widget events. We added the text to our widget, which is the name of our item. We also binded an event
from our game controller, an event dispatcher, that
we explained how it works. And we created the function of widget visibility that also
totals the collision of the widget component of and then we created the event
hover start and hover end and coded them
with the wig visibility. And on event hover end, we used the east input key down to check if
our alt is down, so when we are hovering an item and ending the hover,
it doesn't disappear. Now let's continue with
our other interface event, which is the interact one. Oh, I'm going to bring it
closer to the beginning. Room. You don't need these two. All right. So, the first thing
I will do right now before we start creating
the whole event chain, what we need to do
and begin play, get our widgets, get widgets
from our widget component. And let's cast to
item wt to pure cast. And we're going to get button. We don't have it because I haven't made it
a variable yet. So we're going to
go to our widget. We're going to
select our button, and button 31 is going to
be called item button, and let's make it an variable. Now, I can call it
inside the item. Get item button. And
we're going to bind on. So if we're clicking
on our widget, we are doing actually
the event intell act. Even if it's a
blueprint interface, it still has this
output delegate that we can connect to our bind. Now, first question should be, are we in range able to pick? And this would be interacting. We're going to promote
it to variable. And when it's true, we're going to set
interacting to true. Maybe make a little
bit more room. Maybe taking this further up, you can run out of space
in an endless space. Always amazing. Now, we're going to need to run a
function on our game mood. But we won't fill this
function completely now. So let's go to our
top down Holder. Let's go to our
folder blueprints and get to our game moods. We're going to
create a function, all the inventory, and it's going to have
an input of a name. Claim, and the output
would be a Ben, which would be picked. For example, if we
picked it or not. We're going to leave it as is when we're making the inventory, we're going to
start filling this. Well, let's go back
to our item and from our set interacting, we're going ad we need
the gad as to GM. Al GM of down game mode. We're going to
convert to pure cast. And we're going to
add to inventory. Now, for raw name, we're going to use our raw name. And afterwards, we're
going to branch based on if we pick
the item or not. Let's start with the. Oh, what's going to happen when we are not picking an item? We're going to play
an animation again, we're going to add on line. Going to enter this timeline, and we're going to create a
flow track. The variables. The first one would be 00. The second one would be
0.27, let's say this time, and this would be one, and the third one would be 0.6, that would be zero again. Now why longer than
the previous timeline? Because Since we have
failed to pick up the item. We should indicate to the
player that's not a new item, just in case we kill something. I don't know. Design choice, consider the design choice. I consider that it should have a longer animation because
it's not picked up, it's something to indicate to the player,
this is not usual. When you're dropping items constantly and suddenly
you can't pick up something shouldn't be the usual animation
that you see, even a little bit of time of a longer time I think
would create an impact. Now, the movement would
be really easy to do. We're going to that location. We're going to alert vector. I use this new
track for Alpha and our This final location
shouldn't be there. Our target location
would be the Alpha, the A and the target
location plus. As, let's say 150, would be RB. From where we are, we're going up and then
we're going down. And when this is finished, we're going to turn interacting. Now, if it's true, if we picked up the item, we're just going to low actor. And that would be. And this concludes our
code for our items. This is all the
code for the items. Now, we could start
with the inventory, but we do need to
make a little bit of pre work start the
inventory in our game mode. So when we are running
the R two inventory, which now I click to get
myself into the game mode, we need to have some
variables ready. One of these variables
would be our gon level. Generator level dungeon level. Yeah. It's going to
be of type integer. To fill this tangent level, we're going to go
to our generator and we're going to
go on our begin play and where we set the game mode. Move this bit here. And we're going to set dangon level to our
generator level. Bring it over here,
connecting. Now. The next thing we need. It's erroring because
it didn't compile. We're done with the
items, compile the table. I'm going to close some tubs. There are many props. We don't need this anymore. Anyway, now I can see. So we are searching for
the game old. Here we are. Now, the next variable we need, is going to be of
a map, basically. With the first let's
make it a map. The first key would be name, which means our item. And the second one
would be integer, which is going to be the amount. I'm going to name this variable. Ply. B we don't need to save
anything else for our items. We just need to
know which item it is and how many of
that item do I have? Now, we are ready to fill this function that we're going to do
in the next lesson. Good bye for now. Sing
you on the next one.
70. Coin Counter & Pickup Widget: Hello, and welcome back
to Game Design Workshop, and 95 Procedural Dungeon
action ARPs creation course. Previously, we finished
with our BP item. We finished our
interact event that we bind it also on our click of
our Widget Wood Item World. Now, when we are interacting, we are asking if we are
able to pick if we are in range and if we are
already interacting. If we are not interacting, we're setting interact true. We're adding our
item to inventor. We're trying to add the item
to inventory because we have our return value of picked. So based on that, if we couldn't pick the item, we play an animation, and if we do pick the item, we destroy our actor. Now, afterwards, we went
to our game mode and we stored the level of the dungeon through
our Maze generator. Let's compile this actually. And we stored the dungeon
level in the begin play, and we created a
variable inventory, which is a map of
names and integers, names for the row of
the data table and integers for how
many are we holding? Let's continue with filling
our ad to inventory. What we need first
is our data table. So we're going to get data. And for their own name, we're going to connect it to w name. For the data table, we're
going to use our DT items, and for our out row, we're going to promote
this for local variable. Let's name it Data. Now, we're going to
break this theta. And we're going to ask
a simple question. Is this item applicable, can I add it to the inventory? If I can't add it
to the inventory, it means it's gold because it's our only item that is not
added to the inventory. This means we need to calculate how many coins we are
going to be adding. No. The first thing the
first thing we need to decide is how many coins
we're going to add. Oh, we're going to get
our dungeon level. We're going to get
a random range. I'm going to start with one
and dungeon level plus one. We're not going to use the
coins actually in this game. What we could do is you
could do if you want, is create maybe an upgrade a shop and spawn it
somewhere or pop a UI between levels and choose some upgrades and
spending these coins. Now, we're going to
promote this variable. We're going to name coins, and we're going to
connect it to falls. The next thing we need to do is when we have our
widget to update it. No, let's begin creating
our gameplay widget. We're going to go
to I. Let click and select user interface, widget blueprint, er widget, and let's name it W G, gameplay. I'm going to open it. I'm
going to dock it over here. The first thing I'm going
to add is a Canvas. L et me zoom in for a second. Now, for our coin UI, what will be representing our coins will be
a horizontal box. And inside this horizontal
box, we're going to add an And the text. The image would be
for our pouch image, and our text would be on
how many coins we have. We're going to
select them both and set both to fill with
the difference that the text should be aligned in central alignment horizontally and cent alignment vertically. For our image, let's
select the pouch. Let o a bit more. Right? Now, let's make
this a little bit bigger. Where that our image looks
like and it's not out much. I think this pin. Let's select our text block, put 30 on it. A fo, can it fit four? Yeah, four digit is fine. Even five digit is fine. Let's just three digits. Now let's use the anchors
to anchor it over here. We might change it afterwards compared to the rest of the UI, but right now, we have it here. And let's make the
text block a variable. Let's call it points. Now, let's go back he game. And we need actually
to spawn this widget. So we'll go to Even graph as we did in
the previous widgets. We're going to create
a customer event. We're going to name
it show game play. We're going to create widget. We're going to
choose the Gameplay. Owning player is a
player controller. We are going to
promote it a variable. Let's call it W gameplay. And we're going to
add it to viewport. Now, let's go back to add to inventory and get
our reference of WG gameplay and get
our points text. Let's set text. For the text, we're going to use the coins. Our next step right now is again to indicate that our player
picked up something. Again, we're going
to need a widget. We're going to use the gameplay
widget again for this. What we're going to do is going to duplicate
this horizontal ball, but not inside it, to root it in the Canvas. And I'm going to make
it around the size. They are roughly the same size. And I'm going to
place it over here. I'm going to put some
anchors around it. You can put the anchors
outside, so here. What I'm going to do is
I'm going to revert this. Change this from 000
to picked to dots. This is a little big. Maybe we need a lower
format, or size. Eight. 28 fits nicely, and we're going to animate this. Now, to animate, we're
going to go to animations. As you can see, I
have it selected, the vertical box, not
something inside it. I'm going to press
plus two animations. I'm going to call this item, and I'm going to select
it, go to track. Because I have selected this, I can actually select
it as an element. Oh, I'm going to select
the horizontal box. And I'm going to press plus
and it transform back, and now I can manipulate
its transform over time. So in zero, zero, we're going to start here. Let's say in half a second, I'm going to move my
bar to half a second. I want to have
moved translation x up here to 61, Let's surround it up to. I'm going to keep this
location up to let's say 0.8. I'm going to place
this glass over here, and this will add another mark. Maybe 0.8 is too. Let's put it on
one. Change this. I'm going to just drag this,
and I'm going to drag also this you need to drag
this first action. We just have dragged the
point and it would make it. I would drop both of them. Now, afterwards, I need to add another value
actually here on one, which would be our y axis. Up to 1.5, I want
this to be lowered. How much Much more. Let's say here, it doesn't really matter because we're going to also fade it. But let's leave it
here, let's say 60. Now I want to add a pa track. When this is going down, this part of maybe mole point fine. I. 0.9. F 0.9, I want to
add a new track, which would be render opacity. We will go from 120. This is how we
animate our widget. But we want this to be playing whenever we are
picking up something. For that, we're going
to need a function. But we're going to continue
this on the next lesson. Good bye for now. See you then.
71. Fixing Coin Counter Functionality: And welcome to Game Design
workshop and real engine five procedural Dungeon
action BZ creation calls. Previously, we started to create our ad to inventory in
our game mode function. So, we use the data table to get our temporary from the row
name that is incoming, which comes from our BP item. Now, we started with a branch questioning if this is an item that is being
added to inventory, or is it just applicable
in our case gold? Since it's the only
pable that we have, and we created some code to randomize how
many coins we get. And we set that
value to our widget, which is actually
wrong because we need a total coins variable to
add to our gameplay widget, not the temporary the
one that we are getting. So, we're going to
promote this variable. Make it total coins. And we connect this. I'm
going to disconnect this, and I'm going to get
the temporary coins, and add them to the total coins. I'm going to set this
value to total coins. And then I'm going to use total coins to add
to the widget. We could have used this part for the next part we designed. We created also the
gameplay widget. And in the gameplay widget, where we set the total coins, is this value over here, this text over here, that
says our total coins. Now, and it has
this icon of pouch. Then we went forward and copy pasted this widget over here, reversed the order of these two, and we named the coins, we let them to say picked. We add an icon. Now, if
we added a number here, picked and a number,
and then the icon, we could have used our coins variable over here to say
how many coins we picked up. But since we are using
just an image, it's fine. We're not going to use
that variable for that. We are only going to be using it to add it to the total coins. Now, to continue
with this function. The next thing we will need, which is going to be common
in the true branch and the false branch is to update to show to the player
that we picked up something. And we created the animation
in the animation tab. We kind of work a little
bit quickly here. So this is the part that holds the animations
for those who are new. And when we click
on an animation, we get its trucks, which the elements we
will be animating. And this over here is
the passage of time, and we set what we want to be happening on each truck on
each element that we want, on the specific
category that we want. There is plenty of
categories over here. Away. So, we animated this, but to play it, we
needed function. We don't need a function.
We would create a custom event or run it
even from somewhere else. But why not make our
life a little bit easier and have it in a function that we can call with some inputs. Then programming over and
over when it's needed. Oh, we're going to
create a new function. Let's call this function item. Pickup. And let's draw from
the execution line, and they play animation. We need to specify an animation. If I click here, we won't
see any because they are in this tab over
here, pick and pick. Go to get this animation,
C connected here. And one more thing we need to do before we
play the animation, because this is it pretty much. This is how we
play an animation. Go to designer tub, select image, our
item image over here, and set is variable. Let's call this item image, and go back to
graph our function, get this item image, and rush from texture. We don't need to click
much size because we wanted to stay on
the size that we want. And this, our texture
that we need is to be but it's going to
be the input variable. I'm going to connect it here. I'm going to create the
texture variable here for us. I'm going to compile and save, and let's go back to
our top town game. We're going to get our Wood
you game play reference. I'm going to say item pickup. We're going to connect it here. And for the texture, we need a little bit more room. We're going to get
our t term data, which is the item data that
we stored in the beginning. I'm going to split this and get our inventory image and
add it to pick up item. Now, when the
animation is played, It's going to have the appropriate
picture of every item. Now let's continue
with our next part, the true branch if the item is pickable, so it's pickable. We can put it in the inventory. The first question should be, let's get our inventory here. Does it exist in our inventory. So I'm going to ask if it paints as we did with the
Dungeon so many times. And what it's going
to be containing is the raw name that
we're inputting. So row name here. Yeah. But I use a bunch. Let them here look a
little bit better. Now, let's start with a branch that it doesn't contain
in the inventory. And the next question we should ask is our item is
our inventory full? For our inventory, we
will have four slots. So I'm going to
copy this branch, and I'm going to ask if
the inventory length is equal or less less
or equal than three. If it's three, we can
still add one more. If it's four, then
going to go false. Here in false, it's going to
be very easy to complete. We're just going to
get our return node, and say the item is not picked, it will play our animation. The item has not been picked. Now, if it's true, we're going to just
get our inventory. We're going to add our item, which would be row name. And we do have from the
temporary let's bring this out. Our temporary data.
We have the amount. The next step again, should be the item pick up.
I'm going to connect this. Here, I'm going to bring this here. I think it's fine. Let's continue with
the true branch if it's already contained. No, we're going to ask
if the item is stable. I'm going to bring
this that over here. Because if it's not stable, then There is no
point to pick it up. So we're going to
bring this over here. And again, the return
node will say not picked, so the item will bounce. We are full of this item. We don't want it anymore. We we might want it, but
might be a single stock item. What can we do? Oh,
what happens if it is, and we do have some of
them in the inventory. We're going to get the inventory because that's what
we're dealing with. We're going to find our row
name. Which is our item. From that, we're going to
promote our local variable, call this viable,
rib, terrible names. It seems to be a
theme in this horse. When you're working with
more people than loo, every name should describe
what it is for basically. There should be
always updates on variables on what was
created and everything. It's a fine balance,
not overdoing it. Anyway, so now we're going to
get our tent data, amount. Well, actually, the item amount, you see Tem data, confuse me. The item amount
from our Tem data, so we're going to accept plus. We're going to add this tem
variable to this temp data, and we're going to add
our map of our inventory. Their own name. I will not add it again. I will just update it, and
the sum of this addition. The next thing we should
do is item pickup. But there should
be a step between this and item pickup that
none of these actions need. Actually, this action needs too because we're adding to
the inventory something new, which is update the visual
part of the inventory. Oh, Let's go create our
inventory on the next lesson, and this would be for this one. I'm going
to see you then. Goodbye.
72. Inventory Visuals in Gameplay: O Hello, and welcome to gain
design workshop, and real Engine five,
procedural Dungeon, action RPG, creation course. Previously, we
continued our function to add to inventory. We fixed our coins and total points variable
that were needed, and we continued by creating a function
for the item pickup. We created an input of texture. We set the brush in our item image from the brush that it's incoming from our item from
the texture of our item, and we played the animation. Now, we continued to
check the true branch, some rules and conditions here, if it's already contained, if our inventory is full or not. When the conditions
do not apply, we return with false, when the conditions apply, we add to our array or
changing our amount. Again, by just adding because it updates, since it's a map, and then we keep playing
the item pickup. Now, a better version
of item pickup would be to have it
in a separate widget and while it plays, suddenly disappears and spawns a new one when you're
picking too often. Or another upgrade. That could be a much
more detailed code with rules and everything and creating things,
creating entities basically. But now it's our time to
create a small inventory. So, I'm going to use a
horizontal box again. I'm going to place
it right over here. Actually. Let's bring it here. Then I'm going to bring we can use the presets,
always easier. And let's size this up
correctly this time. It's going to be inventory. It's going to be more detailed. Oh, for the size X
let's choose hundred, or the size wits choose 150. And for placement,
let's choose O. 50 and Y O -100. Cause I think this
is a nice place to opt the inventory in our screen. Of course, we're going
to animate it also. Go to be a very
simple animation. Let's go to animations. Let's add a truck. Let's
call this inventor. I on word, and enter. Let's create a track to
this horizontal box. I can select it like this
because I have it selected. If you're getting confused, which one is which, we
can always rename them. You know when it's
going to be the. Horizontal box,
and this would be the coins horizontal box. This would be the
inventory horizontal box. Let's go back to our animations. We can see that we
have the correct one, and we're going to add a truck, which is going to be transform. The thing that we're
going to do is the first the first second, going to be on zero
second action. Going to be on X zero. Let's say a time of p five. P 0.5 would be great. This would be 900,
I think, -900. And it brings it over here. I think this is fine enough. I it's too far away. I'm not sure. I think
it's a good place. You can place it
wherever you want, but for us, now this will do. Now, for the internal part, let's reset the animation, select our inventory
horizontal box. Let's add four buttons. One, two, three, four. Let's also name them. Why not? The B n one. And let's go one with n two. Three, and four. Now, we're going to
select all of them, and we're going to set to fiel. We're going to select the
first one to set it style, and then we're going to copy this base to
the other buttons. O our image. Let's go to our textures. And we have yes this
item frame one. Let's leave the tint
S the square is fine. Tint for the normal
one, let's leave it as. F the hover one, let's
also copy taste the image. So for the covert
one, we're going to select a yellowish tint, and then we're going to
paste the image again. For the pressed one, let's
select a greenish tint. All right. And now let's
copy paste this pile, copy, select the button,
paste and paste. Last button, paste. Now we have some visuals. Now, for inside the buttons, let's use a scale box ops and
put inside the button ide, it's a child of the button. In the scale box,
I'm going to use an overlay In this overlay, we're going to have
an image and a text. Now, really quick why
we are using each part. Image, we need for
the item image. Text, we need for the
amount, and overlay, we needed to have the ma be
behind and the text in front. No, which is actually it's done. I'm just it's opposite. I need to have the text above, I think. I should have the text. This image in let me
change it for a second. Chose the text.
Yeah, it's collect. So the text should be the second object
inside the overlay. The scale box, we're using the scale box in chance
our images are large in the box or to make
what a scale box does, it fits the inside the
container that it's being fed. It scales it to
fit the container. So Let's copy paste the scale box with its
children to all the buttons. Actually, let's
fix the first one, I'm going to delete
the pasted one. Fix first one visually because
if we fix the visuals, then copy pasting, it will
also have the same visuals. So we're going to set
overlay to fill everything, and we're going to
set the scale box. It's also already filled. Then we're going to set the
image to fill everything, and the text is going
to be bottom right. Then we're going to select
one more option down here, which is justification
where the text starts and ends to be middle. And we want, of course, the
text to be zero for now. And of course, we should change the phone to
something really smaller. The eight not that big, it doesn't reach up to the top. I think that's a nice
proportion for the number. For the image, let's
go to our textures. And I think it's funny
I think it's funny, it looks kind okay. If I select the CGL or
even the HP texture, the first texture, it seems like it's
locked or something. Anyway, you can choose
something that feels. But there are some
special rules. You see, we have a spacing
around our textures. So it fills with the
background nicely. For example, if I
bring the red potion, you can see it fills correctly, whereas if I bring let's
say this here or here, it hides the background. So I'm going to maybe maybe
the health portion is fine. This also is cool, but players will think that there is something
here to click, and they will try to click. Well, this looks more
like it's locked. Anyway, I'm going
to select this. I'm going to copy you now our
scale box because we have set the attributes,
I'm going to paste it. I'm going to paste it also
in three, number four. Now, let's select on all these images and
make them a variable. Actually, we do
need to name them. N one, two, three, the capital since I
started with capitals. Four. Now, the next thing we're
going to need is to go to our graph and create a new function that we're
going to call update. And of course, it's
going to need an input, and it's going to be name, and it's going to be a map. The second variable
is going to be an integer because
that's our inventory. Inventory. I think this the closing, we just need to the next thing we need to do is go to
our top down game mode, and from our WT gameplay,
call our inventory. Now, we can call it right here or we can
call it in the end. It doesn't really
matter because since our Points do not update
anything in the inventory, it will just do an update
without changing anything. But we could have have it here, but this is let's
say more optimal. It's not. It doesn't
really matter. But it does less operations. If we had a very huge inventory, it would start to matter. We're going to bring
inventory here, we're going to connect it here, and we have it ready to run. And this will be
it for this one. In the next lesson, we're going to complete this function. Good bye, C then.
73. Updating Inventory Visuals: Hello, and welcome to
Game Design Workshop and Real Engine five
Procedural Dungeon action RPG Creation Course. On the last one,
we left off with designing our widget
for our inventory, which is in our widget
gameplay, aG gameplay. So we added some images. We added a text to indicate how many items of
the particular item we have. We added them to an overlay
so the overlap between them, and we added that
to a scale box, which belongs to the
buttons that we added. And we added the
scale box to make the internal part fill
the button correctly. We animated our inventory using a very simple track of translation just
moving the x value, and we began to create our
update inventory function. That is in if I can
find it game mode here, in our A inventory function. So, let's start filling
this. What this will do? Let's talk it out
as we build it. The first thing that this
will do is get our keys. Basically, our item rows. And after that, we're
going to need also our values to get the amounts because we need
to update the amounts also. We're getting our keys to get from our data,
the item data. So we're going to promote
each a local variable, let's call the keys. Let's promote this
also to a variable. Let's call these values. Oh. We're going to for loop
through all the keys. I'm going to bring
the keys for loop. And I'm going to get Data row table row from
the Data table D items. Actually I'm going
to make a ray. I'm going to promote
this a local variable. Let's call this item data. I'm going to delete this
two and bring item data and at I connect the out row here. So I have an ray with
my item data also. Now, I'm going to get
my inventory images. In one, I M two,
three, and four. I'm going to make
array. Now I can go all our buttons with 14 loop. F two. For each of them, I'm going to ask a
very simple question. Is the item aca? Get here, connected to the
index, I'm going to break it. Why am I doing this and
how am I doing this? Since our items are being added to our inventory
array in a certain order, and this order is being
kept through our arrays. So but on one, we collate to index zero of our inventory
array, and so on. So, if our items
are stable or not, let's start if
they're not stable. I need the text, let's go back to designer. Let's select our texts. I'll make them
variable T, In one. Next one would be en two. Room will be t In three. E. Now of the variables, I can bring them over here in the certain order again,
one, two, three, four. W to make an array. Want
to add them to this array. Since these arrays
are corresponding, I can get an index I want
for the specific pattern I want and make it
visibility invisible. Hidden actually. I'm going
to go this to false. The next thing I need to do
is get our array element. This is going to
si a little bit. That's brush texture. Connected here, and
for the brush texture, going to get it
from our item data, inventory a unconnected here, and this part is ready. We are setting
that little lumber on the bottom to be invisible, and we are setting the texture
image to our item ture. Oh, I it is visible, we're simply going
to get our values of our inventory,
which is the amounts. And we're going to get our
texture of the texture, sorry. We're going to get the
text to fill the amount. I'm going to say text. I'm going to get our
values over here, I'm going to get copy, the value would be the
index that we are running. Of course, we need to set it visible just in case
it's invisible. I mean, the text that
we are adding a number, and then we're going
to set brush texture. That would be. That would be our function that
updates inventory. It gets our values and
keys our keys and values, and then it creates a list
of our current items. It goes through our buttons, and it applies the numbers and the images or sets
them invisibly. I think after all this, we have finished with
our inventory system. Now, I think after
eating all these things, it's time to start
spawning our character. We can start testing
some of these mechanics. To do that, we need to create some things to make the
transaction a little bit smooth. Because as we said, we
do have that loading. In this loading, we're going
to create an animation, a multiple animation truck. But we're going to
call it fade load. The first thing we will
add is our loading bar, which is going to add
truck of visibility. To truck, loading bar truck, and another kind of truck,
which is visibility. Now it's going to be hidden. We're going to select
now the loading text, of our animation at the
truck or the element. And now let's add the truck
to manipulate the element, visibility again, so hidden. Lastly, we're going
to select our image. We're going to go
back to animation, add it as a truck, add the
truck to its properties. We're going to set the render
opacity. Let's give it. Let's say 2 seconds half, 25, let's create the difference, and here it's going to be zero. So one to zero. We have this eight of
our load and screen. Let's compile and save. Let's go back to
our maze generator. Let's go near the
end. We are at 0.85. Let's set it wrong paste. L set percent. Let's wait
also a fragment of a second. Let's set it to one. Now let's call pain loading. Let's play in the animation. Now, let's create a branch here. Actually branch over here, that this condition to be
a the generator level. That equals to one. If this is the first level, we're going to do the play
animation of the loading. As we're going to
remove it from parent. So what we need now. Let's call it an event. I'm going to make
a event player. Let's call it over here. Player. And let's get our
animation and time. But we know how long
this animation takes, and let's put a lay. But we can wait until
the phaate is complete, and let's get layer on
troll and your mouse. No get set. Mouse. And this will enable
our gameplay. But the question comes, have we hidden our mouth? I think we have
not. No, let's go. The start on the begin play
when we are showing loading. We want to hide our mouse. Before show loading, we're going to set the
show mouse to false. Let's go to our loading
screen, and the widget. Let's select our cavas
and set it to visible. If all is well, nope, or not. This needs to connect
the target to the widget because it plays animate
target is a user widget. It means where am I
playing this animation. This is the animation
I'm playing it, but who does it belong?
This is what it needed. File save a press start game. Game starts. Wonderful. I think this is it for this one. In the next one error. Let's bring it here where it is. It's art movement. We haven't programmed
these things yet. This is why it doesn't
like it. Down controller. We will fix it later. But this is it for this one. We're going to continue
the next one. Goodbye.
74. Spawning the Player Zoom In Cinematic: Previously, we finished with our update inventory function, which which gets our inventory. It adds our keys and our values to separate
temporary values. We go through our keys, we add them to our
inventory data. We get through our
keys table names and add them to inventory data. Then we go through our images,
the buttons, basically, and we are feeling the
stats accordingly. And after that, we went
to our loading screen. We created a simple animation with many inputs, many
different elements. We got our background
image to fade out. We use the loading and our
text block to not use them. We set them to hidden on the
beginning of the animation, so they disappear and then
it starts to fading out. In our maze generator, we we filled our
loading percentage. And if the generator
is on level one, it means that we are
on the first level. So we're playing the
fade animation of our inventory of
our loading bar, and then we spawn our player. We actually made
just a function. We didn't actually
spawn the player yet. But after that, we got the
end time of our animation. We delayed and set
so mouse rough. And the next thing we should
do actually Get our loading. We move com parent. No, Let's spawn our player now. The first thing
we're going to need, Magine that, it's going to
be the dungeon coordinates. We're going to get our dungeon. We're going to find our
first block, to split this. It says 00 by default, and we're going to get location. We're going to add a little
bit height to that song going to press Add hundred, and this is spawning point. Now we're going to
use actor plus. The actor would be the actor. We're going to
split the transform this transform location. If we go a and play like this, what will happen is probably
we're going to see the pom. And in a huge distance also. This is because we do not have control over it,
because we spawn up pon, it's like any other actor that we spawned into this world. So, we do have a new error. In place at Max's items. What was the error? Why is it trying to Maze generator? Oh, probably inside the maze. We haven't what is our big chest pon at
props, spa, custom props. No. No. I just room out and
go directly to sp and our big chest is Here,
Maze generator self? Was it our big chest or
was it our small chest? L et's find the small chest. Yep, it was a small chest. I self. But the big chest. Probably I didn't change
this or big chest chest. We need a chest here. Here. H. Why can't I again, I can't be to default. I select it this way. I don't know why I didn't like
it the other way. And here we need a generation. So this is where we spawn
the small chest, basically. I didn't change the class. I don't know why Andel
had such a big issue. Oh, cause I had connected
the return value properly. Yeah, that's why. So let's go back to our spawn character, and let's see why we can't
play anything, do anything. When we spawn any other actor, the same, we still cannot move the other
actor or anything. Now, paws and characters have a specific ability called
being able to be possessed. And to possess something, we need the player controller. And from the player controller, we drag, which actually, as you can see in the tooltip, it attaches upon to the
player controller and gives possession to that
paw from that controller. It means you can move
this paw basically. There is a lot more
about possessing. We won't go about it right now. But if I leave it like this, then this means I can move my character while the
fade out is happening. We're going to put a delay here. And we're going to use the
enti of the animation. Now, let's go to press play, and you will see also the
camera changed over here. The camera changed a little bit, and we can actually move. So our spikes don't pierce us, it just makes us p. Let's fix this. Later this. Let's go to our trap,
go to our spikes. Since this is just visual, we should set it to no
collision physically. This is something
visually happening. We don't want it to
generate overlap events. Also the trap body doesn't need to have any
collision either. Let's go to collision.
No collision. Don't generate over rap
events, compile and save. All these little things just adopt because there
are many traps, and they're going
to be many anymore. And we fade out time,
and we can play. I is something weird
with the animation. Going to check what it is. We can enter rooms. We're going to fix
this thing because the camera right now it's weird. And as you can see, I'm
clicking over here, so not going correctly. These are issues of
a gain controller, and there is plenty of
issues we need to fix. As for this torch, for example, it easily off. Let me see. All the torches? All the torches. So L
et's start fixing things. Let's start from this torch that we see as everything we find. We should fix it instantly. So we're going to go to
the corridor lights. Is going to go directly. So props, room props. Let's go to where
we spawn our torch. A torch actually the
first thing we do. So I must be it. Roo torch. Let's change these
values to again, we are on the
blueprint room props, this first part of
the chain of events. What was the issue here? I think this is the three, 320. Let's check with
320 and everything. Pile play. 's even further. Let me just select it. I go to the child. It's a child of a child, so he can't really do that. What I can do is
find the room crops. And from there, the torch. So 20 was the wrong direction. That's 375. Let's check another direction. This is. What is this one? Okay? That's the same
direction though. This one. Found it in
Sly by clicking on it. 375. Yeah, basically,
that's the value. Okay, so 375, 375 minus 375 -75. These are the new values. Oh, let's continue. Let's check first actually. But I think now it's
going to be okay. These torches are okay
they inside the wall, but never mind that, these are already better. This is a little bit
inside the wall. But it's fine. Fine. No. L et's continue with our possession of the
poem. What happens really. What we can see is
also that when I play, I have a different
light compared to when I'm possessed and
possessing the character. Like when I eject, suddenly
the light becomes awesome, when I don't eject, the light is bad. No. Let's fix this because
it's an instant deal break. We cannot be testing like
this. It's really ugly. Let's go to our op
down character, blueprints, p down
character, the ect camera. Let's begin with adding
the exposure to the light. This means that the longer
we stay in to a light, our eye, it gets adopted, so the camera creates
an effect like this. So we're going to
search for posure. We're going to set
mean a max 2.1. 0.1 might be a little bit lower. Let's set it to one and check if we need
to lower it play. And it already got a bit darker. If I eject, we can see that the color palette
kind of stays the same, the lighting, what it creates. All this is fixed. The reason it works
here like this is because we're not
using game settings. Actually, I click it, there is not much
difference, and e V zero, where if I put it to one, it's going to get darker, and if I put it to minus one,
it's going to get brighter. Now I put it zero again. And what this is is
the de exposure level. That's what I think
E V stands for. What we need to also do
is create a small intro because it goes really
abruptly to the character. So I'm going to stop. I'm going to go
to add something. Quickly add to the project. I'm going to go to camera. Actor, I'm going to set
this position to 000 by and know what? I'm going to actually move
the up, go to press play. I'm going to reject. Find the camera.
I think this is. Cera. No, this is because
as you can see, this is 1520, whereas
our camera was on 300. I'm going to get this camera. I'm going to click to it, I'm going to pilot camera. To set it in a general
position maybe. Here, I don't know. This will be our intra camera
that goes to our player. Maybe facing at the player. And angle. Yeah, Okay. Now I'm going to press A, and it saves the position. So if I press stop, this camera is at this position. Now I'm going to go to
the level blueprint. Oh, we did have one camera. I forgot about that. I'm going to delete the first camera. Yes, it should break
the connections. And the level blueprint. I just opened it in the last. I'm going to elect the camera. B the level and
create a reference. See now it refreshed
because it didn't refresh before set camera. This is unknown because I
deleted the previous camera. I'm going to connect this.
We're going to delete this. We're going to compile and save. And here that we spawner player, I'm going to do a sequence
before the delay. And I'm going to lend you and we'll unclick context sensitive because
we cannot see it. So I'm going to select
bland view with a bland view target with bland set view
target with bland. Now, why didn't appear? It's because it's not a
really common function, and it has a requirement. The requirement is
the play controller. So if I draw from here and
get view blend target, let's view blend with target. Let's view target
with bland raising and connect this here. You can see, we instantly
got it without the context sensitive because it belongs to the player controller has
this function, basically. It's in the category player. So, the blend time would
be again our loading, our not loading, our
paid out from loading, and maybe -0.1 seconds when it ends, we have a point 1 second
to, this is my view. And lastly, we need to connect our new view target to our character because this is the target we're
going to be viewing. It's going to get
our current one, our camera, and going
to another target. Let's go test this play. And it kind of works. I think this is
enough for this one. We're going to fix
everything on the next one because we need to
fix some settings, a lot of settings to fix.
We're going to see you then. Goodbye.
75. Collision Fixes & Player Tile Detection: Hello, and welcome to
Game Design Workshop and Real Engine five procedural Dungeon action RPG
creation course. Previously, we created our
camera mechanic that we set view get with blend our original camera in
our level that we placed, and we created a reference
inside the level blueprint, which we had one previously, but we made a new one
doesn't really matter. And We also completed the
code when we are spawning to blend between the targets
and possess the player when the fade out
animation has finished. Now, we also played a little bit and found a few things while
we were moving around. For example, our player when
we are inside the room, the mouse gets a weird behavior. And when we were actually we
didn't have that example, but When we were
passing through tiles, the character was doing
a weird movement, especially between the
connection of the tiles. Now, let's deba why these
things are happening. First of all, if I eject, I can still select from
the show menu things. But if I select collisions, we can instantly see
what's going on. For example, our bushes over
here are set to invisible, but their collision is on. The same thing happens
with our sigils, which we tern them invisible, but the collision is still on. And this proves that when turning something invisible
or hidden in game, doesn't mean we are actually
closing the collision. Another issue that happens is
that when we begin to play, our exposure to light is
different than the game camera. So, let's fix these things. Let's select our
camera in a word. Let's search for exposure, here it is, and let's set min and max exposure to one
as is our in game camera. Going to save. Now, next thing, let's go to our DP
tile, select the ns. Electing the vines, and
we're going to go to the default behavior because they don't need to
generate overlap events. They don't need to be
stepped on by the character. They don't need to
have any collision. It's just a visual thing. So we can set everything
to no collision. We're going to save and compile. Now, sometimes we might get a crash while doing
things with the vines. I hope we will have fixed that on the release.
There is an issue. Let me show you. I'm
going to select an asset. I'm going to go
showing explorer. And in Explorer, I'm going
to go to Dungeon Jin course, and I'm going to go
to saved and logs us a rush log, for example. Now. In our crash log, if
we can see there is a repeat error, if
you had a crash, which is about the vines about only opaque
or mask blend mods are currently supported, and we have blend
mods specified. It's an issue with translucent as we can see about
the ine leaves. I think we will have fixed that up to the project,
but if it happens, it's just that the engine might crash while moving them or changing
settings to them. Now, the next thing
we would do is go to our decorations and
select our CDLs. They select them all,
one, two, three, four, select them all, and I'm going to go
to the collision also and check generate over piens to no and character
step on no and no collision, because this again,
is something visual. We shouldn't be looking at it. We shouldn't be
colliding with it. Well, if I press play now, those issues will be fixed. So if I go through tile, you can see much more
smoother movement, And if I go next to doors, I don't get blocked
by collision. I don't think we were getting
blocked from this any case. Now, if I enter a room though, let's try to enter a room, you can see instantly that the mouse has some issues here. I'm aiming both my character and the character
is moving below. Why is that? Again, we have set the ceiling
to be invisible. It's actually st here. We cannot see it,
but it is here, a turn off collisions. And turn back on,
and you can see it updated to show that
our ceiling is here. To turn of collisions,
and let's start our system for hiding and
showing the ceiling in a room. But before we do that, just a small change
to our camera. Let's go to our camera. We're going to go actually
to our character, our spring, not the camera. The spring is like a boom stick. It's like a stick that's
holding the camera, and it has some
rules on its own. We're going to change the
target arm length to 2,500. So we have some distance
to our character. And then we're going to change the rotation also doesn't
need to be absolute, going to be relative from -50, we're going to keep it -50, and to the Z axis,
the blue axis, we're going to add 45 to make
our game isometric view. The next thing we're
going to change is, we're going to type lag, there is an enabled camera lag that we're going to
disable because we want our character to be
always centered and not the camera change
the character. Because if we go play right now, that there is a small delay on our camera when
we are moving. Oops. I think I was mistaken
about the absolute location. Yeah. It does need to be
in absolute rotation. So we're going to
select World 45. And now, let's go back. Yep. Needed to be absolute. You can see our character moves, but our camera has a delay. It's not really center
to our character. It gets a delay until it brings the camera
to the character. So let's make it more like
ablo game without this delay. We're going to go
to a character. I'm going to select Lug again. I'm going to disable camera lug. So now, our character should
be staying in the center. We have much more control
like stop here, stop here. We know what we're
looking at. Right. Now, to begin the
system for the rooms. The first thing we're
going to need is to make a variable to our character to store where our character is. I'm going to go
to our character. I'm going to click on variables, and I'm going to
create a new variable. Let's call it ds, and it's going to
be of an in point. Now, to tell to our character that is which our
coordinates are, we need also to go to our tile blueprint and
create here another value. Let's call is. Let's change this
one in point also. The best play to store this end point would be
when we spawn the tile. We're going to make it incense
edit and expose our spawn, compile save and compile, and then go to our maze
generation generator. Let's go to the
beginning in phase one, but we're spawning our tiles, and we need to refresh this. We have tile cords. And for tile cords, we just going to use
the curr coordinates. So now the information
has passed to the tile. How do we pass it to the player? Well, in decorations, we do have a collision that we might
have used for something else, but right now we're going
to use it for this. But we have to click on generate overlap
events to be true. And for collision presets, we have it on Atom. Ignore everything except the player pon, the
pond, basically. That's our box collision
in our decorations. Now from this collision, we're going to component
begin overlap. We're going to check if the
other component has ug tug, which is the tug player, we're going to put a branch
and if it has the tug, we're going to cast
from other actor. Top down character. And from our top down character, we're going to at
current coordinates. And to get our
current coordinates, we're going to go as BP tile the reference of the tile
that the decorations belong, and get tile coordinates. And we're going to
connect this here. So, whenever we are
entering a block, now our player knows where
in which style he steps on. Now, I think this is a good
breaking point for this one. I'm going to see
you in the next. Bye bye.
76. Hide Room Ceilings Mechanic: Hello, and welcome to
Game Design Workshop, real Engine five
Procedural Dungeon action Bz Creation Curs. Previously, we stored
our coordinates, our tile coordinates
to our player. And to do that, we created a
val variable in our BP tile. There is it. Here it is, P tile, which is called
tile coordinates, and we built that
variable when we are spawning our P tile from
the current coordinates. Then we proceed to create another variable
on our character, which is current coordinates, and using the box collision
of our decorations, that we change some
settings on the collision. We created an begin
overlap event that we're checking if the component
has the tag of player, and if it has, we're giving
the coordinates of the tile. And now let's continue
using this information to create our system
to hide our ceilings. No. We are on the
blueprint coordinates. Let's go and remind ourselves
what we have created. We have added some collisions
over here that will be used to detect if the player
is coming inside a room. We're going to go to
their collision settings. We're going to go to
generate over events. Yes. We're going
to change step on, we're going to leave yes
and collision preset, we're going to put custom again and ignore everything
except the player poll. The next thing we're
going to do is we're going to select each of them and select the
begin over lap event, and the component
end over lap event. For both of them, we need
begin overlap and end overlap. There could be an
easier solution that we could bind
these actions. But let's make it a few times and get used
to adding cables. We have all the begin
overlap and end overlap. Let's separate them. So we have the end overlap together and the beginning
overlaps together. The order doesn't really matter. Again, what are we asking? Let's do the begin overlaps. We are asking if the other
component is the player. So we're going to get the
stag tag P and our branch. And we're going to copy base
this to every function. You see, I almost did
the mistake there, I almost connected to actor. This is the issues with not
binding things in actions. But if you don't mistake, you can do it in one of
the repetitive actions. The, why is west not working? Then we go see West is not working because
the connected to actor. Fine. The next question we should ask is our
ceiling visible. But that's a question
for everything, so we can connect it to all. I'm going to put
the branch here. I'm going to connect all
the t branches here. And from our ceiling variable
that I brought from here, we're going to ask is visibly. For the next part, we're going to need our tangent reference, we're going to get our tile, and we're going to get
gon it's named generator. O generator reference, and we need to create another
function on our generator. Let's go to our maze generator, create a new function. We're going to call
this function room filling hydrom sep, it's going to need an
input of one integer, which is going to
be the room index because every tile knows if it's a room and
it has an index. So if bacter decorations, when we call room here, we need to also get our room. X. No room index, how? I'm sorry, the room index is
stored in the decorations. It's stored when we
are adding the walls. We are actually enabling the collision on box component when we are adding the doors. Which box component
enable collisional. Walls R A, attic mess,
children of walls. So we are enableing
the box component, which is the
entrances. Make sense. But if we had them enabled here, then this would fire even
if it wasn't a room, and it would give an
answer of room zero. So we will close the generate overlap
event of these boxes. So my mistake. It's the huge program
not going to lie. And all our inter boxes need to have their walls
generate overlap events closed. So they only fire
when they are a room. Now I'm going to get the
room index connected here. You know, it might not look like it because we are on blueprints, but we are on a few thousand
lines of code and even more. So memory is a strong
asset for a programmer. Personal memory, biological
memory, not computer memory. Well, computer memory is
also a huge asset by itself. Now, let's go and hide
rooms C function. Let's complete this
function basic. But again, we're going to need something extra to
complete this function. That would be a blueprint
interface core. So let's go open our maze
combs and add a new function. Let's call this D. Well, this is hing basically
our ceiling because our as the command to hide ceiling comes
from the decorations. We sent to a central point. Let's say our maze because we have the room coordinates there. We hide this rooms ceilings. And then our Maze right now
will be sending a message to each of the room index
to hide its own ceiling. So it's a little bit of
back and forth information. Anyway, let's go to our maze. No, sorry, to our maze, and we're going to promote the room index of variable,
not a local variable, but a real variable, permanent variable, real.
Permanent variable. Let's call this room index. The reason we need
this is because when we are hiding the ceilings, we're going to need to know which room index we need
to hide the ceiling from. Oh. Now, we also need a player
reference and since we are spawning the reference inside
this graph, somewhere here. Magically disappear, make
it make it disappear, make it look like it
appeared out of nowhere, no. Make it disappear, basically, the mistake I left here. Anyway, to promote
this variable, we're going to right click
and promote variable. I'm going to call this. So now we're holding a
reference to our player. Let's go back to
our him ceilings, and let's get our
player reference. What we need to ask
is fairly simple is, is our current time?
Current chords. Yeah. Is our current
coordinates, that player that stands on. Doesn't belong the room
index that we are in. But to do that, we're going
to get our ST room array, which is an array with our room coordinates with all the
rooms and their coordinates. We're going to get a copy. I'm going to get the room index. And we're going to ask
if this is contained. Ray is contained in an
array, sorry the opposite. This happens when
you think ahead, we don't need to
get from the room. We need to just check if our
co coordinates are in this. Actually we do need to get. And we do need to connect the coordinate, this
needs to break. Well, because this contains an array, basically, that's why, and we're checking
the contained array if in room coordinates. I'm going to press a branch
here, to put a branch. And the next thing we need to do is from our room coordinates, we're going to ho
And as we said, we're going to hide the ceiling. Now, I connected it to false. Why did I connect it to false? The reason is because this should trigger when we
are entering a room. We shouldn't think while
we are inside the room, since our rooms are
consisted of four of these. And it means we might
have another door that it's collision
goes inside the room. I we go through
these collisions, we don't want to
trigger it again. So this should trigger only from the outside
to the inside. Of course, we could have
faced a collision like this, but Why not create
circumstances that we can use some code to check
how we can apply rules. No, let's get our dungeon. Let's find our
coords, our actor. From this actor, which
is our tile, basically. Let's get our decorations, which is the container of
our decorations actor. We do need to get
actor And from this, we're going to file a message. I'll send the message we just created in our
blueprint interface. Because if I send it
directly to the tile, and this doesn't mean that
the child actor gets it. And also if I send it to the
Corans, this is a container. It's not the actual actor. So I need the child actor. T we go and test And
we have another crash. Let's see again what
the problem is. Open to the crash. This is go to g file. We started from here. Used on non static machine
valid materials. So the material has an issue. Yeah, that's the
same issues before. It has the blend and opaque and its blend mode
was specified, translucent, and
then it's nit issue. So, we're going to fix this, going to send and restart. And as you can see, I didn't I didn't save
before I compile and save. So I'm going to do
this really quickly again of camera
alla, and it's done. Now, before we test, let's actually go and make a very simple code
to hider ceiling. Let's go to our decoration, and let's go to add our interface because the
decorations do not have it. So we're going to add Mize, Pi, PI. I have implemented it. If you haven't implemented it, just add I maze comes here. From that, we're going to go to interface and
select the heights. Let's just for now then in game. We will still have the
issue with collision, but the ceilings should be
hidden when we enter the room. Also, let's go to our ceiling
and find its visibility, the hidden in game, and let's this or it's not
hidden in game anymore. It has to get hidden
when we play. When we walk into a room. Let's play. Hopefully, everything is well. The chest needs the rule. We hit the ceiling, but we cannot get happy
because the chest needs the rule to not spawn
in front of a door. Let's quickly add this. Let's go to our maze generator. Let's go to where
we spawn the est, where we set the
coordinates for the chest. And we do have this rule
is adjacent to door. Map. We get the coordinates. Tried that many times
that it failed and it kept maybe because we
do have that rule, and that rule is correct. We checked it with the lights. Maybe tried that many times and it couldn't
place it anywhere. Maybe that was it.
So let's play again. Now sometimes the parsl
closed, where is a chest. It's not in front of a
door, maybe it was just a. Great. We're going to stop
here for this one. I'm going to sing
you in the next one. Bye bye.
77. Show and Hide Ceiling Mechanic: Hello, and welcome to
gain Design Workshop, and real Engine five,
Procedural Dungeon, action RPG creation course. Previously, we started with
our hiding ceiling mechanic. We created the ym function
inside our maze generator, which stores our current room, and it It checks if our current player coordinates are within the room that
we are trying to enter. If they are not, then we
are hiding the ceiling. And afterwards, to
hide the ceiling, we created a blueprint interface that we used in our
BP decorations. A minute. This is not it. This is it, but for now just
sets our ceiling invisible. Oh, let's animate this. Let's create an animation for
the ceiling to be hiding, and the same animation we're going to use for
it to be appearing. First of all, let's
make a variable so we can know the
state of the ceiling. We're going to call this den. On Hight say, we're going
to tell it that it's true. No. We don't need this more. We do need the ceiling
reference, but later, after we set the hidden, we're going to add a timeline. And we're going to
enter the timeline and create a flow track from 01, with time zero, zero or
zero and time 0.3 or one. We're going to use
the last key frame. It only runs up to here, and we're going to choose
our ceiling and set gale. We're going to
connect it to update. What we're going to
do is alert vectors. We're going to
connect our Alpha, our truck flow truck, and we're going to go 111-001. Of course, on the end, we actually need the set hidden. We're going to game where
we're going to get the elect, where is the select want? T. For our index, we're going
to use the direction. If it's going forward, we
want it to be yes hidden, when it's going to be backwards, we want it to be no hidden. And since we know that this is going to create
a collision issue, we're going to go
to our ceiling, and we're going to
select no collision. It's already done.
But if it's not, because I did have a crash. I'm not sure if we
did this previously, what we need to do is not
generate overlap events actually and have the collision to falls on our ceiling again. If we go and play right now, we be able to see
this animation. Y. Now, it doesn't go back. But we will fix the swaps. There was a frame
lag there. So, you can see now the movement
with no collision, and actually we did
animate it to not be here. Collision wouldn't
really matter right now. We can actually walk correctly now on the
rooms inside the rooms. So, let's continue with creating our hide ceiling functions. Let me check for a second. Why was there such a frame log? Hey, I think just my computer. Got some issues there. I can hear the tops. Oh, yeah. No. It was just hiccups
because I opened the project from
after being crushed. Right. Let's go fix our
ceilings, basically. Let's start opposite this time. Let's go to our
blueprint interface. Let's add the function. No. Function ceiling,
ceiling. D character. We said it badly named
is the theme this time. We're going to call,
which is our message. We're going to set
the hidden to false, and we're going to
reverse from end. Just reverse, not from end, because in case we go out
the moment we are entering, we don't want it to
start from the end, we want it to reverse
from wherever it is. And the same with play, and this is why we didn't
connect it to play from start. Now, when does this happen? Well, we do have the
end overlap events. Let's make them more compact. But we do have our
overlap events. We're going to need
to ask this question if what is end overlapping
is our character. We know the procedure, we
copy paste these branches. Again, binding them would
have been a better option. The way we would do it is
we're going to make an array. We're going to get our boxes, and we're going to find
on begin overlap in a for loop that has all the boxes and create a custom event that
does these things. Let's continue. We're going
to connect this here. And we're going to
connect this here. And then we're going to need
to go to our maze generator. Make a new function.
Let's call this ide. No. Roh step. We're not going to need
an input because we have stored the variable
of the current room, and after all this, I'm going to get what is the
generator here reference, I'm going to copy paste
the reference here and room set when all these are true. Now let's enter show room set. Let's find our
function hydrom set. We're going to copy it
as is without the set of the integer, paste it here. Or our get that
got disconnected, we need our current
rods Instead of hiding, we need to be showing. I. So, let's compile and save. Let's go to our game, and
let's check if it's working. I got hidden, and it appeared. But it appeared instantly. And now it didn't even work. I'm entering and I'm leaving. Got entering, what happened? We have to bug it. Entered, maybe I entered
too much and then left. No? Anyway, seems to be working. What really happened there? Is it am I still
in the collision? Yeah, probably I stayed in the collision and I
didn't realize it. So let's six the animation. Let's go to our hides
and see what's going on. A rooms so soon. Sorry, not. O going here. Let's put a break point. They goes like this, goes like this. Hs that ty S. Weird. Oh. Oh, why does this happen? It happens because I'm setting
the visibility in the end. So it does play the animation, but it shows ceiling in the end. So basically, we're going to
this as is. Doesn't hoops. Comment. We're going to leave this as e and go here and
just connect this here and make this untrue. Now we can see the ceiling
before the animation. Hiding, Hiding, Y, and we are
finished with our ceiling. Oh, this is it for this one. I'm going to see
you on the next. Goodbye.
78. Elevator Visuals Blueprint: Hello, and welcome to Game Design Workshop
real Engine five procedural Dungeon action
Pz creation calls. Previously, we finished with our show and hide
ceiling functions. We animated our our
ceilings, with our timeline. We used the set world scale
to create that animation, and then we created the show
C blueprint interface event. And we set the id and to falls. We set the hide
ceiling to falls, so we can see the animation, since we're hiding on I. On the end of forward, like on the end of ding event. And then we connected the events on our
end overlap events. We checked if it's our player
that's end overlapping, and we created the sow ceiling so room ceiling in
our maze generator, which is exactly the same code as it was in the hide ceiling. But this time we are
showing ceiling. The only difference
is that we are using the current
room coordinates, whereas in the hide ceiling, we are actually ping
this coordinate. Now, let's continue with
creating our endless well, not actually endless as we
talked about in the beginning. But it has an
endless possibility. And let's maze creation. Let's complete our elevator. Have a lot of tabs open. I'm going to just start
closing all of them. Bae the more tabs
you have opened, it actually lowers your FPS again if your computer
isn't that strong. I'm going to open the elevator. I'm going to go to
the blueprints, I'm going to go to
props, and I'm going to choose our elevator. I'm going to bring it over here. And also, we're going to
need a new blueprint. Let's call this BP elevator
mechanism. All right. Now, this elevator mechanism should actually have our
pin wheel over here. I'm going to copy this, and I'm going to bring it over here. Now, we need to
change the scale at. I'm going to unlock
this, and I'm going to set 0.4 here and here 0.3, and in z 0.4. So it's a little bit smaller,
and it's a little bit. Now, we're going to be a
little bit creative here and add two more static
meshes, actually three. For the first two, we're going to go to our meshes, and there is an x
torture device. Here it is, and we're
going to set it to this one and one more. So basically, we're
going to have this over here and over here, this one needs to be
rotated. Or close. Chains movement, it's all it looks like it's something
that's functioning. Yeah, that's fine. Then I'm going to use this mess that we have
empty and get a box. Going to bring it over here. To make it a little bit thinner. Like this, to bring it here. And actually, I'm going
to make it polar. Let's put one from the
other side, also, metrical. I do like this wheel here. Let's not make it symmetrical. I like to see this. If you want, you can make it symmetrical. I think from the above view, it's something that we will
consider it to be okay. Maybe we can make this
a little bit bigger. This axis. Also this one. It's fine. It's fine. If you want, you can
play around with this more and make
it more visible. What we're going
to do is rotating component, rotating movement. And we're going to go to
even graph, bring it here, and we're going to get
our wheel, which is, I think the plant mesh. If you want, you can this, and we're going to that
component to our wheel. L et's go to our view port. Let's go to our rotating one. If we play simulate, we can
see it rotating everything. Let me put it in the
construction script. Oh, I didn't change anything. Oh, look as you can cut
this simulate part. Let's continue from here. Now, let's go back
to our elevator, and let's change
this static mesh to our elevator platform. We do have one meth for that. Eat elevator cube here
we are. This is it. Now let's add a child actor, which is going to be
elevator mechanism. Now let's select a
site to place this. Going to select this
site, bring it over. I live here. Yeah, I think it's fine. And now we need a
few more things. We are going to need some
things to block our player. Of course, we'll be local player also not to be able to move. But why not maybe
allow him to move? It's our choice if we
want to enable this or not and have some walls that
stop the player from moving. So, I'm going to add
more static measures. All these pens. One, and it's going to be we need this elevator
plane or the static mesh. We're going to rotate this
and bring it over here. Maybe it needs to be
a little bit bigger. I think this is fine, Let's
copy and paste this here, let's paste it again
and rotate it, bring it over here, we're going to get
this and paste, get it over here. We all sides have a wall. Because what we're
going to do is when the player comes
inside the elevator, we're going to be
raising this up. Now, when we reach
the next floor, we're going to need
another static mesh. I. Not going to be a plane, it's going to be
the elevator cube 031 before we use the 026. So this would be our extending
platform because we will have a space from the
elevator to our tile to walk. So we will be extending
a platform like this based on the side that is
available from our maze, which would be the zero block, and we're going to be extending that platform towards that side. Let me reset its location. And the next thing we're
going to need is a camera. And we're going to
place this camera. I remain two E. We're going to place this
camera above the elevator. Let's set it also a little
bit to the side or the side. This side, and maybe a little bit lower. That's fine. So when we going up, we can see and we will
larp through this, so we cannot see
the maze anymore. We cannot see left and right. We only see the elevator. Here we tilt it a bit also. We'll see when we
make the animation, we will see how it looks. Now, the next thing
we're going to need is we're going
to add a collision, a box collision, but we know when the player
got in the center. And we're actually
going to leave it as is because we want to be sure
that the player got in. We don't want you to trigger
it when the player is here, we want you to trigger it when the player is in the center. Maybe we make it even
a little bit smaller. Maybe we move it towards the
button with the mechanism, a little bit here. Yeah, that seems fine. Oh, one more thing we should do is parent the
necessary components we want to the body. Let's came this body because
the body will be going up. But we don't want the
collision to be going up, for example, with the body. We don't want this to be
going up with the body. But since we're going to be It doesn't really
matter to be honest, because we're going to be
using the actor location. But you know what? Let's
do it the hard way. Let's use the body, not the actor location, because we're going to show both ways. If we use the actor location, we should detach
this child actor. So this part is on the ground, and then we could
move the actor up. But let's detach it just
to show how we detach it. And then let's move the body up. But if we want to
move the body up, then we have to
parent the things that we want to
move with the body. So that would be the fences. That would be not the box. We don't want the box.
That would be the camera. The camera we wanted
to move with us. That would be the
elevator plane, and also the fence for. Yeah. So these things would would need to be parented to
the elevator floor. I think we need to lower
this down a little bit. Yeah. It was kind
of overlapping. Oh. This is the setup
for our elevator, and I think this is a
good breaking point, and we're going to continue in the next one to fuel the code. Good bye. See you then.
79. Spawn Next Maze Mechanic: Hello, and welcome to
Gain Design Workshop, n real Engine five, Procedural Dungeon action
RPG Creation Course. Previously, we created the
visuals of our elevator. We also created the BP
elevator mechanism, which is a visual that will make this wheel rotate and be
detached from the elevator. Now, we updated just
the static mesh, which is responsible for the wheel with our
rotating movement, and we created our
structure with our body and the components because we're going to be
moving actually our body. Now, let's begin on what happens when we
collide with the e. With the collision cube. No. One component begin overlap, let's ask the first
question. Is it a player? Oh, has a and put a branch. If this is true, we need to check if our
player has the key. We're going to get game mode. We're going to cast to GM
to top down game mode. We're going to convert
it to a pure cast. And we're going
to get inventory. In our inventory, we're
going to find I six, which is the raw name of
our data table or our key. Now, we're going
to use a branch, and we're going to
connect this to, did it find it or not? Oh, we're going to connect it to true because it is a player, and we didn't find it, then it's pretty simple. We play a sound, and that's it. The sound we're going to play is something to
do with elevator. Elevator fail. Elevator fail
Q because we want queues. Yeah, that's it. If it is true, we're going to do once. Because whatever
happens after here, we don't want to
repeat it. It happens. There shouldn't be any chance
for it to happen again. Oh, the first thing we would do is disable
the player movement. But since we haven't
created these things yet, we're going to add it later. The next thing we should
do get our child actor, which is our elevator
elevator mechanism and get child actor, and we're going to from actor. We're going to keep world. But the location scale and
rotation stays the same. The next thing we're
going to do is we're going to cust mechanism. We're going to convert
it to a pure cust. From here, we want the
rotating movement component, and we're going to
that rotation rate. Two -60. S. It starts rotating the wheel, and I'm going to
set M 62 y axis. Let's actually test this. Let's find our elevator.
This means compiling. Let's actually open the
main menu and make our Ms a little bit smaller. Main menu. Here we are. And
we're going to go to tiles and let's
set this to ten. Let's say ten for now. I'm going to compile.
Let's press play. A A really small map.
I created a room. Interesting. Again,
you can see it couldn't find a place that
it's valid to place it, so it chose to be
next to a door. Our character is really,
really small. Anyway. So going for evert. This shouldn't be rotating
from the beginning. So let's go to
elevator mechanism and set the rotation rate to zero. Let's compile and save. Let's play again. It
did play the santo. O that's because we don't
have the item or right. But it's not rotating
now. Good to know. Let's cheat a little bit and add this item in our inventory. Let's go to our down holder, Let's go to our blueprints. Let's go to our game mode. Let's select our
inventory variable, and let's add I six with quantity of
one. Our compiling save. I think we live quantity to zero when there is no quantity. Let's be sure go to items, items dt, the key amount one. We have one on everything. The good thing that
I added one here. Compiling and let's play, and now we do have the key. This for sure needs a
different camera alert. A here. Here it is. And it started rotating
the wheel. That's good. Now, let's remove this
key from our inventory. Let's go back her elevator. We're going to get our inventory reference that we
have from here, I'm going to reroute under this. And then I'm going
to reroute here too. I'm going to remove the six. Now, it is removed, but if we have our inventory
open, this wooden updated. We do need to update our
visuals in inventory. From our game mode, we're
going to drag out here, and we're going to get
gameplay our widget reference, the widget gameplay, and
we're going to inventory. And the inventory would be
this the out from here. Because even if we are
just removing it here, this variable has been updated. Now, let's also play a sound. Let's copy this. Let's make let Unlock. I think this is
what we play here. Yes, elevator unlock. And now it's time to
propone the next maze. So what would be the
location of our next? Well, this depends
really on what we want. For now, I just the location
set, get actor location. And from that, I added on
the Z 2,500 unreal units. Oh. We're going to
promote this variable. Let's call this new Center.
And why new center? Because our mazes start to
get built O dungeons are starting to get built from the center towards
any direction. No, we're going to
pone a cop class, and we're going to
choose our generator. Maze gen. And we're going to split the
location and connect this. Now, we do have a bunch of options here
that we need to complete. To complete them,
we need to know which level the
previous generator was and some
information from it. What we're going to do is
again create a g of reference. We're going to make
it type Me gen. M. Again object reference, of course, and we're going
to bring it over here. The first thing we need
is our mac styles. Because based on that, we're
just going to let's say add random integer range. That would be from
let's say one, two, let's get our
generator level. One, two generator
level plus one. In this case, one, 22, then it would be one, two, three, one, 24, one, five, and so one. So we're going to
connect this here, and the style size
should be 600, it means that default
should it be 600. I'm confused. We have the
correct value on the main menu. It's 800. Why I am
stuck with 600? I don't know. M size F ma size, we get ma size. And because we are adding
an increased amount, let's always just
increase it by one. But let's do that only when our mac styles are
not fit in our ma. So like we have
reached the maximum. We're going to do a
less and we're going to multiply this from t. So, this basically is how many
tiles we can add to our maze. And if this is lower
than what we can place, then it's all fine. So we're going to do
a select maze size, I'm going to use this
for a condition, and if it's true, if this is less than
what we can fit, then we choose the may
size. We keep it the same. When we can't, then
we just add one. Let's bring it over here,
so it's more clear. We add one to the
whole perimeter. This might be fine. Now, of course, we need
a generator level, so we're going to get generator level and
add one to eight. And connect this here. Our generator is upgraded now. Let's see it in action. Do we have a wonderful crash, or is everything
working perfectly? So let's go to the elevator. So tiny character. And we're showing load and
screen. That's not good. And we've got a freeze. I'm going to control delete. This is probably
some wild for loop. That's an endless loop. I'm going to use
the task manager to and I'm going to
reopen the project. This happens often with loops. They can completely destroy
what you're making. But there is a chance that that wasn't it because
we do have our loading, and without loading, some
things might not work. Let's go back. I think this is a good
stopping point for this one. We're going to fix this on
the next one. D you then?
80. Continued Maze Generation from First Tile: And welcome to game
design workshop under Engine five procedural
Dungeon action or Pz creation calls. Previously, we started with our elevator begin
overlap event, that when we step
on our elevator, we check if it's the player. And then we check if the player has the key that he's
supposed to have. If he doesn't have it, we
play a sound like fail. You cannot proceed. If he does have the key, we do want the events
that are going to follow. So we are not sure that so we are sure that
they don't run again. To begin, we started with
detaching our child actor, which is this
mechanism over here, and we set its rotating
movement component that we have added to
the elevator mechanism, to rotate in -16 in y axis. Then we continue by removing
the key from the inventory, and we updated our inventory. We played a sound that
the elevator unlocked, and we spawned our new maze, which had some issues. And to be honest, of
course, it had some issues. First of all, we
didn't click Continue. I didn't click Continue
because I'm doing the course. So it was this continue boss
button over here that we need to click to state to this generator that we
are going to continue. If this is not the first
piece, continue building. We could also have
checked if the, the generator level
was number one. Oh, we have stored also Then I later level to the
dungeon, to the game mode. We could have been taking
it from the game mode instead of creating
reference just for this, but anyway, what we need to do is connect the
continuum to first style. Because we don't want to
show an inventory screen. I has been removed from parent. So every time that this
is going to be called, it's going to probably
produce an error, but we don't care because
we know why it's there. If we didn't want
to see the error, we could put an is valid node. Like this before
the set percent, and we will connect it
here, if it's valid, we set percent, if
it's not valid, we go to the next node. But we're not going to do this. We're going to leave
it to have an error, a controlled error.
Let's call it. When it's being called, it's about 5 hours. It's fine. Now, on our first on
our spawn first style, we need to add the code of
spawning the first style. And why is it different? Let's go to paint. Oh. When we spawn let's say
this is to zoomed in. This is out. I is
just perfect. Here. Let's say this is
our tile that begin. This is our tile that
has the elevator, so this is our platform
of the elevator. When we go up. When we are spawning the next
maze and we're going up, it spawns directly above us. So if this is the first tile, and we need to offset
it towards a direction. And tell to this style that the direction we
offset the opposite of the direction we offsetted it to is what we call the intro, where we have actually our box that will come
the balloon later. So by offsetting this, we make the center
of our dungeon, the intro block from now on. So let's go and do
this really fast. What we're going to do is create a new local variable. But we're going to call
offset direction direction. It's going to be of
the type direction. Then we're going to set a
Random item from an array. And we're going to make array to choose a
direction, that's at four, this will be northeast
southwest North Southwest, and this would be our offset. The next thing we
need is a new exit. So we're going to do a wild
loop again, getting wild. For the condition,
we're going to use our last exit is not is equal actually
two of set direction. Like this, the equal
in not the operator. While this is true, we don't want to continue. We need to find a
new random exit. So what we're going to do is that last exit to any random
value that it can assign. This doesn't need
any Let's this. Anyway, let's continue. So to be honest, the The actual maze, will not change
the center of it. We just offset it. It doesn't mean because
what we will offset now is the actual actor. So what we need to do
is actor location. We're not going to be
offsetting the tile. We're going to be
setting the generator. So when it spawns the tile, it will be offset it. That makes sense. And we're going to select I'm
going to add two more pins, and the index would be
our offset direction. Let's bring it. And now we need to make an
offset to our location. That would be get ctation. That also be required to make or row it from here. Let's split this. North would be just adding the tile tile size tile size to x and the rest
would stay the. That would be north
east would be adding the tile up to the y and the rest would
stay the same, x and ad. Tu would be negating this minus xy size, and
the rest the s. This is an awesome spaghetti, this is albonaa level. U and the opposite for the west, tile size here or y and
x and set the same, and that will be west. Now we have offset
that our actor. Now, let's copy some of the code we have below
because we need it. We need the BP spoon tile. Tile cords, let's
split this to be 00. We need to add it to destroy. We need to add it to dungeon
map, the current cords. We need the special to
add it to special tiles, and we don't need the rest. We bring this here. Our default current cords
are 00, so it's fine. Let's just quickly through the current cords
fine. That's fine. Fine close adjacent,
Northeast West, let's pop to each of them, so we get the neighbors. Let's say that the
index is equal to. What I want to do is just add the offset direction
to the forced empty. I'm going to branch here. If it's equal to north is zero, two, dou is one, west is three, A, and we're going to add two R and the array will be the hose I And now we do need a reference to
our owner elevator, the elevator that
spawned this maze. We do have a reference of
the elevator somewhere, we have the reference
of the spawn elevator. Duplicate this. Let's name it owner elevator. Very bad naming here. So what we're going to do, go to our elevator and create
a vari, call it action. Going to be of the action. Because we're going
to need it later. Let's make the spa
elevator instance editable and expose on spawn. The bactor elevator again,
going to refresh this. We have the spon elevator, going to put tel. The spon elevator, the one that spawned us and spawn elevator, the one that mazes phoning. Let's go back. A generator. A small first style. In the end here, let's get our spawner elevator
and set direction. Connect it to complete and let's connect the
offset direction. Now we have our
first style spon. Now, if I go and play, started at zero place. Going a lot of traps. I'm
going to eject hops. Please. Right? This was expected. We're going to control Al
delete close this program. And, third time is the charm. We're going to see
on the next lesson why it didn't continue. Good bye for now.
81. Elevator Animation & Sound Effects: Hello. And welcome to
Game Design Workshop and real Engine five procedural Dungeon action LPG
creation course. Previously, we finished with our event of first spawn tile. We added the offset based on a random selection
of our Maze location. Then we started spawning
the first tile. We added it to our lists, and we also because of
the crashing PD. Okay. So let me add it
really quick again. We're going to go to elevator. I did keep the directions here. O, get our spawned per
elevator, not the spawned one. We did keep this also. So we're going to get that directions direction and set the set direction to
our offset direction. Now, afterward, we tried
to play and it bugged. First of all, let's
check where we are spawning the elevator, which proponer The
first thing we do, and we don't have the
generator reference. We're going to click on
our generator variable, we're going to make
it instance editable and expose on spawn
inside our elevator. We're going to compile and save, and I'm going to refresh this. Tor, and for generator,
we're going to put self. This covers up to a point. Et's go to our event graph. Let's go to our Built
event, I think. Or, not the built. I went the first tile again because there
is a mistake here. We want the opposite of this. We added the offset
direction and I used the 02 based on our
fined cross adjacent. We do need the opposite of this. So that would be one. So south would be zero. That would be three,
and what would be two. Now, this should have
pigs are issues. Don't know if we go and best play one with the chest, wine. What is the elevator? Away. We have something.
Them is above spawned, but we are not moving. Now, as you can see,
everything cast a shadow to fix this. We're going to cheat
a little bit and we're going to open our tile, and we're going to
select our main walls, and set them to
not cast shadows. And we're going to do
this also for the floor. And the vines. I'm going to compile and save play. Bit of frame there. Let's move. Maybe we should make these
boxes a little bit smaller and make agriculture
a little bit bigger. Where is the
elevator over there? Oh, by the way, I have changed my ma size to 20
again instead of ten. I kind of of camera. So we don't have this these
huge shadows that we had, but we do have a glow. I'm guessing the glow comes from this lava underneath here. So we're going to cheat
a little bit again. We're going to go out
to where tile again. We're going to
duplicate the floor. Base one floor, a
little bit below, so it hides lava. B again. It was a nice glow to
be on I was the monkey. Demon glow. What the floor is lava, so
we have to hide the lava. And yes, I'm going the
correct direction. And now we do not
have this glow. We do not lock the player. Because the mouse
actually hits here. I can't move Oh, it's time to make
the elevator go up. I'm just checking that it's found in the correct location. Yeah, we do have d here, so I'm guessing the S&P
a nice first piece, two options here
for left or right. Elevator and the box are both right. Having some time there. Now, let's go back
to our elevator. And you have this reference. And now two things
need to happen. Oh, we're going to
put a sequence, and we're going to
create a event. Let's call this event stations, and let's call it the one. And we going to complete
this afterwards. Now, the second thing that needs the first
thing that needs to happen that we get
our player controller. So we can pull the
note that we want, which is land view
target space, something. View target with plant. Oh, plan time would
be 3 seconds, and the rest, we're going
to just give us ese. After we start playing
the animations, we're going to
delay or 2 seconds. And then we're going to create
a bulion in the variables. Let's call this condition, and we're going to set
this condition true. Now, what this
condition will do? We're going to use the tick
event to drive our animation. We're going to have this
condition over here. That's quality condition.
Little better name. Based on this condition,
we're going to be driving the actual how much our
elevator goes up. And of course, I was
joking when I said, we're going to do it
the hard way of moving the body and not the actor. We are going to be
moving the actor. It's much, much better
since we also disconnected, detached the child actor. But we will explain how it
would go for not the actor and if we were to move
the body relative space. Oh. When our elevator is moving, we want to be playing a sound. At this time, we want
to just play sound. We're going to create
a sound because our elevator might for a second. We're going to make the elevator move accordingly as the
loading part would, it would wait for the maze to complete to
reach destination. Because if we don't do that, there is a chance that the
elevator would go up and reach the destination without the
maze being fully built. And this is something
we don't want. So we're going to
have an Alpha drive, like we did on the Lerbs, like we did on the
timelines to control that. Oh, let's start with the sound. What we need to do for the sound to be able to control it. I I do a Lay sound. I
don't have control over. I don't have control over this. I only have control
over volume beach, star time, concurrency settings, which is something like you can put rules like reverb size, where it's a little
bit complete. Anyway, I don't have an actual
reference to the sound, where if I use the
create sound, D. Then I have this return value, which is a reference
to the sound that I'm playing but actually
creating, not playing yet. Because when I'm
creating a sound, I need to order it to
do whatever I want, it's just create a
variable of sound, an audio channel basic. So I'm going to
promote this let's put the sound first,
elevator something. I think it's the
elevator machine. Yeah. It's the
elevator machine cue. I'm going to promote
this so Variable. Let's call this elevator bound. And now we will start to
play it. I'm going to press. Play. And just I think
about this sound. We have set it up to be looping. So this is an endless. It needs to be stopped when
we want to stop playing it. Oh, go to save
everything. Justin Case. And let's begin with
our animations. But let's do that
in the next lesson. That is a good
stopping point for now. W to see you
in the next one. Goodbye.
82. Camera Cinematic for Elevator: Hello, and welcome to
gain design workshop, and real Engine five,
Procedural Dungeon, action RPG creation course. Previously, we created
the last parts of our beginning overlap
event in our elevator. We planted the view target with our which actually
needs self here. It wouldn't blend through any target if it doesn't
have a new target. So we blended to our new target, and we created the
start animations event that we're going to
be feeling in this lesson. We used the delay to
set the things up, our animations and
everything else, and we set the t condition
to true after that. We created to the sound, and we stored it to a variable, and we set it to play. And we explained a few things on how our elevator movement
is going to work. This one, let's begin by creating the animation.
Let's start animation. The first thing we're going
to need is a timeline. So we're going to add item, and we're going to enter and
create a new flow track. Going to be a very small
flow track flow track again, go be time zero, value zero, and
0.3, 0.3 is five. 0.3. Would be one. Let's click. Also use last key
frame. Go back here. Now, we will get our fans. Am we going to make? I'm going to connect
this. I'm going to. I'm going to connect
this to update. And now we're going
to connect this, to get c. I'm going to split. I'm going to cation. And I'm going to split the. I'm going to add x and y. Now, for our t, this is where we will learn. We're going to let float and we're going to
use the new truck. The place we want to
move them is from whatever they are
right now, to zero. To do this, we're going
to go to begin play. Delete this act,
it doesn't matter, and we're going to get the first fence, get
relative location. I'm going to split this. I'm going to promote
the b and stay this regional and that I'm
going to connect it here. Now this is stored. I'm going to go back
to the timeline, and select this for Alpha, and B would be zero
for A, not Alpha. Alpha is still our new
truck, our flow truck. So, let's see this works. C play. Object. Go to grab my character because I'm not
walking over there. I go to bring the
character here. I repossess. The command does a lot, but the fence does go up, and Yeah, it's working. So the next step is to
make the elevator go up. And for that, we're
going to use e. Now, we have our condition. If the condition is true, I to go up gas. Whereas, if we did
relative here, we would set a
relative location, and we would need the
body as a reference. And this would carry
everything else with us. But let's just use
the set a location. Oh, for the new location, We need to go between the current location
and our target location. So we're going to need to
go to begin play again. I think it's above everything,
and we're going to. We're going to be promoting
these two original it. The next thing we will do
is add to this our height, that we want to
spawn the next maze, which would be plus 2,500. But since we need to go
a little bit higher, we would make this 2,900. We have to drop, have some room to drop below. Now, we're going
to promote this. This would be our
get relative Pat. Actually not relative. Sorry. I get patient. Now, we have these two values. Let's go back to our Tiki bent. Oh, When we have a timeline, we have a vector and we go to
our origin and our target. This is our origin, and
this is our target. And the Alpha is being set by our timeline
flow truck usually. Now we need to promote
this variable that is called max Alpha. Because we're going to
be setting this from our maze generator as we
did with the loading. And based on that, that's the height where elevator will try to reach until this Alpha
gets to number one. So it's going completely
from A to B. To do this. We're going to use in constant. Which as the tip says, tries to reach a target
at constant rate. So we have a current
and we have a target. For our current, we're
going to get a ccation. And our target would be the erb, the result of the erb. For our Delta time, right now, we're going to use
Delta seconds, which makes it a little
bit frame dependable. There is a formula to make
it not dependable on frame, frame rate wouldn't
affect the movement, but we're not going
to do this right now. For C, in terp speed, which is the stepping
of this vein b, we will use 350. Now, the next thing we
should do is ask a question. Have we reached our target, because you have
reached our target, then we should stop and
revert our animations, make the fences go down. No, there's plenty
of ways to do this. We have actually we could
save our Alpha equals to one, but let's be sure that our target location is the same with our
current location. We're going to do an equal,
sorry, nearly equal. For those who didn't see
it was this bottom here, not the exactly equal,
the nearly equal, and we're going to give it
let's say 1010 and real units, which is I ten centimeter. Now we can turn our
condition also. This stick event
wouldn't run anymore. The next thing we should
do is we're going to set length target piece here. Instead of sell for
the new target, from our play controller, we're going to get
controlled on, and this would be
our new target. From the camera of the elevator, we return to the player. We're going to put a 52 here
in the blend exponential, which is It controls the shape of the
curve as you can read in the tooltip of how it goes. The next thing we need to do is we can go in the maze generator and create a new function. Let's call this this ways. And we're going to get
our actors to destroy. We're Paul look. We're going to check
if it's valid. The reason we're
checking if it's valid, is because we are even adding items that we're
going to pick up. If we have pick up the item, then it's no longer valid. So we should check for that. Then the actor, if
the actor is valid. Then we de our son elevator, which is the elevator
of the previous level. There is it? There it is. This elevator shouldn't be destroyed when we
create the new maze, because if it's destroyed when we create a new
maze and we will fall to the nothing actually
to endless void. So we need to check if
this is valid also. The reason we need to check is because if it's the first maze, then it doesn't
have this elevator. Lastly, we're going to
just destroy ourselves. A. Let's compile. Dave Dave and compile. Dave everything actually. Let's see if it's working.
To get a character. I'm going to move the character
and get the character. The elevator is here. So I'm getting busy and
the actor is not moving. This is because we
haven't set the pa. Blow What we need to do
is in our maze generator, wherever we are
actually set percent of our loading
differentiate between these two and set percent
on our bond elevator. Oh. That's something that
we will do next time. I'm going to see
you then, goodbye.
83. Fixing Camera View Blend Issues: Hello, and welcome to
Game Design Workshop and Real Engine five
Procedural Dungeon action RPG Creation Course. Previously, we finished with
our elevator animations. We completed the animation
for the fences using a timeline and a for loop to
go through all the fences, and we set the relative location based on original Z and zero. Because in our original
Z, there below. Then we continued with our t event that when
our t condition is true, which means we can start moving. We moved the actor
location thro between the original and the target at the target location
we should go. And we use the Max Alpha to drive the distance
between these two. And then we use the bay
interpret constant from our actor location towards the target with stepping of 350. Then we checked with a branch if we reached our
target, and if we did, we blend the view camera and
we turn our t condition off. Now, let's continue with
our maze generator, wherever we have the set
percentage of loading to create where
is the first one. Here is the first. This
one is set to zero. Zero, we start, we
don't need to do that. But we need to
differentiate on build. Here we actually
have put the valid, which gives us the branch basically. Let's make some room. We're going to need more room. I think that's enough,
more than enough. So we're going to read it
out here and Actually, the loading might be still valid because we don't
empty the variable. This valid is not good
enough. We need a branch. But if it's continue, but when it's, we
do the new thing, when it's false, we
do the set percent. And the new thing will get
to get the sponer elevator. And that Alpha. I
think this is 0.4, we go up to 40%. Yeah. So set Max Alpha to 0.4. Nikki little thing here, almost didn't see it, and I would be wondering
why this doesn't move. A copy branch and the setter, and the second
loading is up here. We can skip this act. Go directly 0.5. Let's go the branch, the false go to the old. The true is the new, this 2.5. L et's move forward. Let's
be s keeping some of them. Let's set here 2.7. Here, the falls to the
old to the new weight. This is correct. From Alpha, we are moving exactly to the
next from the set percent. Clear, clear enough. Let's keep 85, and
let's go d one. Actually, this does not
need to connect here. We're not pawning a player, we're not playing
any animations. We're not doing any of this. So this can end here
with actually one. So we can change
0.7, let's put 0.8. And that would be enough. Should we give it a second
thought? No, let's play. Start. Would we give it
a second thought? No. Let's play. To. Let's find the all close. Wood. And I'm getting
dz again. We're moving. We are moving and the
second maze is built. And we reach the second maze. And the first maze
is not destroyed. The music hasn't
stopped playing. We can still interact with this. First things first.
Let's stop the interact. What we do here is put
it in our collision. After the do ones, then get our box and is
enabled to no collision, which is the default value. Second thing. Let's fix
this dizziness with the camera really
makes me dizzy. Let's bring the camera
a little bit closer. L et's set inrotation to o Dios o this one, it seems. No. I think the first zero
was the making dasy one. Let's pick this out. There is the elevator.
Oh, weird maze. Hey. A little bit better. What I'm seeing I'm starting
from the opposite side. Oh, why is it starting so weird? There. D all the camera just go directly
above let's say, 800. Let's say, 600. All right. Let's out the patients. Hoo. Just going to tend the camera 98 99. I can move it easier
a bit towards here. On rotation. You got again 108. I'm going to leave it 9000600, so we don't more time. You can put it
wherever you want. I think this would be fine. Character. Elevator, which
I didn't get the character. But the floor. I moved the,
the character dropped. Where is the elevator? Right? Oh, it's even worse than ever. This Amazing. Eight, as it's recommended, is 60 -90 18. Values are we need to
fix this one also. As it's I. So I did a little bit of
research on what's going on. It's an issue with how the bland view target works with something
called Kimbal lock, which turns the screen
into turnings basically on screen far parts about Northeast Southwest
and about rotations. What happens? Let's go see. Now, going to move the
player next to the elevator. Again, on the ground. Now, we can 123
circles, basically. As you can see, it pins
almost three times. This has to do with the rots, relative rotations
and everything. What we're going to
do and it's going to work is we're going
to get our camera and rotate it on 23 times full circle. Now if we compile and go play, these fix gimbal lock
in our elevator. Elevator and almost fixed. This up and down of box elevator to this direction check of the player. And it's fixed. Yeah. But, the same thing we need to do for the start game. This go we're semicircle, let's it once this w Oh, it was the opposite. I'm going to undo the
rotate the opposite way. O. On full circle. Help. What's going on exactly here? And I'm going to
eject the camera. I was looking from here,
that's the players. The camera is in the wrong, it should be more
towards this side, which is our original camera. Let's see what I. I didn't pre Again, I'm going to move it this side. I'm going to press
K, David position. I'm going to pilot this. Looking correctly, our player. Et's I'm going to press Kate playing again. Yeah, basically, we
just brought the camera to look more from the
side of the player. Worked. You can play
with rotations until you get a movement that it's fine
for you and the position, we're going to leave it as. Let's check that the
elevator is still working. Elevator. All right. Finally, our cameras are fixed. I think we went along with
this one with the lots fixing. This was really crucial. And let's stop here and
continue on the next one.
84. Elevator Animation & Inventory Input: Hello and welcome to Game
Design workshop under engine five procedural Dungeon
action z creation calls. Previously, we finally fixed the rotations for the cameras. We can actually have
a smooth transaction and not this dishwasher machine. I don't know what we were in. And the elevator be Also Yes. And we can reach the next floor. But the sound keeps playing and the walls are
not coming down. So let's go fix these issues. And one more thing
I mention is that our previous maze
wasn't getting id. So, let's start with that
because the code for that, we just haven't called it. We're going to get
our reference. And we're going to
call destroy Maze. Previous maze, which we're actually calling it on the maze that's going
to be destroyed, so destroy Maze would
be a better name. And let's test. Like, good. At didn't get over. S. There is a little bit of gap in fine, and our previous
maze call destroyed, but not our current elevator. That's good. We don't want this destroyed because we'll
be falling nowhere. Let's continue with fixing
the rest of the things. First thing that we're
going to fix is animation. Oh, we need to drop the fences. Going to car that. As en. We're going to
name it fence. Oh. The first thing we need to
do is of the elevator sound. We're going to stop
audio variable. Now, we're going to that out because we want to
play the stopping sound. And it's elevator
something, elevator, a Q, and then we're
going to play sound. Just play. And then we're going to
connect reverse end. Now, this will
make them go down. We're not finished, though. We need to extend our platform. No, we're going to do
a switch on direction. And we're going to connect this on the finished of the timeline. Space, packs above, that it
here, I think it's fine, and now we need a
new timeline from the backwards a timeline. The backwards because
the reason is when we pay backwards, getting the fence down, no extend the platform. And we will get our
elevator plane, which is our platform, and that relative location. Now, remember, we stored a
variable called direction. And this variable we
stored when we created the first style on
our maze generation. The first style continued. And this direction was
the offset that we have offset the first
style basically. So we do have that direction, which is our exit
towards basically. So towards where is our first style that
we should extend. And this is what we're going
to do with the new location. But first, we have to the er, of, not slurp normals, sorry. Ert And we need to add a timeline. Let's say it's two
second time lees, it takes 2 seconds 00 and one, let's feed and also
use last key frame. No, we're going to connect
this Alpha, and for B, we're going to select and the condition
the index wild card will be our direction. Now, for Alpha, we need the original location
of the platform. So, we're going to go
to the begin plate. We're going to get our platform, we're going to get
relative location, and we're going to
promote it to a variable. We're going to name it
pf relative location. Maybe original platform
re doesn't matter. We're going to get this here, we're going to
connect it to Alpha, and then we're
going to add to it. Well, we're going
to add for east, north and North and West, we're going to remove
so it's going to be 300 on x or north, duplicate this, going
to be zero on x and 300 on y or east, then we're going to
duplicate this two. I'm going to connect the
platform to the prest one, and negate the x
connected to south, negate, the west
connected to west. Now, This kinda
concludes our elevator. And I say kinda
because we're going to need to change some states of the character to stand
him basically to make him not be able to move as
long as he's on the elevator. Now, the next thing we should do is bring our UI to our game. We have already created the function for it
in our game mode, which is s gameplay. And the only thing we need to
do is go to our character. Let's open this blueprint
and find be game play. And get game mode. As to down, game mode, convert to pure cast, mode this variable,
connected to gain play, this as a variable, no gameplay. And this would bring R U
Y when we start the game. Now we can see the coins. That's the only thing we can see yet because we don't have a key bring the inventory. Let's do a quick fix
to fix that now. Let's bring our inventory.
I'm going to escape. I'm going to go and open our top down controller where we used
the Alt button glue items. Now, I'm going to use the This is the bottom that will open our
inventory and close it. What we need to do is pressed. We're going to flock. When we are on A, we're
going to open an inventory, so we're going to get our inventory reference
and to do this. Going to A mode. Cast top down gain mode, convert to pure
cast, and from this, we're going to get
the A. Wig to update. Inventory. We're going
to get our inventory. And then from our
wood you gameplay, we're going to
call it animation, and we're going to
play animation. Need some room. For a fail safe. Let's also Animation. Put a delay. And then we get. And let's go to our gameplay widgets. And we need horizontal box
of this horizontal box. HB. We need to make
it a variable. Let's go back to our controller. B, inventory and enabled when we are closing, we will set it holes. Not true. Then we need to
play again, the animation. Let's connect the animation, and we do need to
connect the target, which is the widget gameplay. Get again, and this time it's going to go in
reverse, not forward. Now, theoretically,
we have an error. Os it we didn't
compile the game play. That's why. Dave
file. Let's play. I have a press one. We have our inventory, which the buttons are
not looking great. Oh, I think this is a fixed for the next time. I'm
going to see you then. Goodbye.
85. Minimap System: And welcome to game design
workshop and real engine five procedural Dungeon
action RPG creation course. Previously, we finished with our elevator mechanics,
almost finished. As we said, there is some
more few things that we need to do for changing
states of the character. But we finished with our
reverse of the fence. We stopped the music, the
sound of the elevator, we started a new sound, and then we proceed to lower the railings with the same code in reverse of the timeline. And then we created some new timeline based on the backwards channel
of the previous timeline, like when the previous
timeline finishes on backwards, then we run this, and we add the
relative location of our platform based on some hat coded values
and the relative, the original relative location. Also, we added our gameplay
which to our screen, and we made the key to
spawn the inventory, which is actually in the
top down controller. So now we started
doing more things on the controller and
soon much, much more. And we used the number one in the keyboard to flip
flop between A and B, which A means to update inventory and play
the animation forward. And with a delay of the end
time, it sets it enable, and B would be to
do the opposite, sets it disabled, and the
animation plays backwards. Enable and disable is
because we want to not be able to press keys while the
animation is still playing. Now, let's continue with fixing one of the
errors we just saw, one of the problems, which
comes when we have no images, exactly the same principle. When we have no image,
when this returns, the texture of our
item returns null, then it puts a white image. So, what we're going to do use a select on
the texture hetect. And then I'm going to connect. The inventory image here, we might need to disconnect it. But for the index
for what we need, we should check if this
image is equal to nothing. If it's equal to nothing, then we select something else. If it's not equal to nothing, we select the inventory image. Something else would be the
image we have selected here. I'm going to go here, find it. A, and then I'm going to
go back to the graph. And drag and drop it here. Now, this should have
fixed our issue. As I, it's fixing the images, and we have our key because we added our key
to the inventory. We can see a small
white box around this, which is not very pleasant. Oh, let's fix that also. We're going to go to gameplay. We're going to go to designer. We're going to go to
the first button, and there is a draw
around that box. By press G can see
the game view, and let's select the
first button again. If I change this to image, then it's fixing it. So, I'm going to change this
to everything, everything. But the hovert, depressed, and the normal, No
annoying logger sometimes. So drawn as image on everything. And I'm going to copy and
paste this tile to everything, copy, and get this
button, going to paste. I'm going to paste here, and I'm going to paste here. And it's fixed. We don't
have white border anymore. To press play. Going to bring inventory. The first time the
inventory comes, not disabled, whereas all
the other times it tabled. Let's fix that also.
Let me test it again. Sure. Yeah, the first time it
comes, it's not tabled. By default, we shod
have this bar disabled. Finally disabled, we need to
unclick enabled, basically. Compile and save, and
this issue is fixed also. Since we are here
fixing the inventory, let's also add our minimum. No, we're going to
need an overlay. Let's bring it somewhere here. L et's unc it to the
top right corner. For position, let's
go minus 370, position y 50, tie
would be 32020. So it makes a box. Now, inside this overlay, let's add an i. Re two images that
they're going to be feeling. Second image. Let's name the second image
order, make it a variable. Let's make the first
image I call it minima. Make it a variable. For our border, loss it is, we have our fantasy order
map, minimum border. For our minimap, we do
have a material, I think. No, we don't. O plain border. We have
the rendered target. What means the rendered target? No, we're going to go to
our character and add Is the capture to de component. Now, this is a camera basically, but it's not any camera. A camera with very
specific rules it targets. Well, not the targets.
It can render specific things and not
render other things. But it doesn't show
it to viewport. It's not a camera
that we look from. A camera that feeds
its speed to something called render texture
render target. So, this is our art minimum. We're going to select it in the texture target
of the camera. And let's actually set
its height really high. Let's set it to 3,000 303,000. It can capture a great
distance along us. Now, let's do one
more check that we don't actually have
the material. We do. I think we have to
pray to game again. So to close this, and now we're going
to open it again or might evolve that it be here. And now we do have the material
minimap render target. But we're going to
open for a second, and we're going to
change one thing. We're going to select
our texture sample, how it's already set t minimap, and now we're going to connect I think the opacity
mask, or it's connecting. This should be one, the
shape the shape circle, should be one, and
we're going to save. Now supposedly let's
select the material on our minimap minimum I render, and it's working. Now, this is a three D minimum, which means it's expensive But we can stay a
little bit around. We're going to fix this
moving left and right. And but we do have a result. We can't see what is around us. The reason we cannot use a traditional technique
and use textures and coordinates and everything
is because our map is being randomly generated. So we're going to
need three D minima. There is other ways
to do it also, but for us, this would be fine. I think this is a good
stopping point for this one. We're going to
continue the next. Goodbye.
86. Final Minimap Touches & Inventory Tooltip: Hello, and welcome to
gain Design Workshop, real Engine five,
Procedural Dungeon action RPG Creation Curse. Previously, we fixed some issues with our inventory appearance. We used they draw us image in our style to remove the white boxes
around the buttons, and we fix the issue with having a null variable in that texture when we're setting
the image of inventory. So we need a branch
that when it's null, when it's nothing, then just
use our image for nothing. In the code update inventory. No. Then we proceeded to add our minimum elements
in our screen, which is an overlay
and two images. The two images are
one for the border, that we chose the de
fantasy background image that we have border image, and for the material, we chose the M
minimum I material, which is a material we have made and change some things
inside the material. Actually, we change one thing, that the shape circle should
be default value of one, so the material lbs
to choose the circle because it's designed for a
square or a circle minimum. Now, let's not save again. We added to our character, render, this is
not our character. No, it is a character. Okay? So, we added our
captured component, which is a special camera
that renders specific things. And we set the texture
target to be the RT minimum, which is where the camera
feed is being projected, let's say, roughly roughly that. So, now let's filter a little bit what the camera records. Because right now,
as we can see. It records everything. We
can even see the player. We can't really see the player, but we can see the player.
The player is here. I do like that it records this. But for sure, it shouldn't
be recording poems. No, let's go to back
to our character. Let's select the camera. Let's go to our scene
capture category. Let's click on Advanced. Let's say we don't want to
record atmosphere ESPs. We don't use this actually.
We don't want the fog. Or we do. I don't know. If you want the sphere
in the atmosphere in the fog, you can keep them. What we certainly don't
want is skeletal meshes. Maybe particles that will
delete the he gates, but doesn't matter, it will keep the meshes
from the heal gates. And we leave everything else as ease. If it's taking too
much processing power, maybe we can remove
some lightning. But if your computer can handle
it, you can leave it as. If it doesn't, just keep
on checking things. Probably the lighting
Also the hidden lighting, translucency maybe. Yeah. Anyway, or you can always set the settings of your engine
scalability to lower. And that would solve most of the issues if
you have a low computer. Now, the next thing we should do is go to our character again, go to our viewport and fix
the turning of the camera. So we're going to
bring our scene capture component
here on begin play. We're going to stay absolute, which is a node which tells
to the component if it should be following
world coordinates or local coordinates. And we want to follow absolute
rotation of the world, so it stays the same. So we're going to use this, and now our minimap should be ready. Yes. Steady, but it is in
our wrong direction. Let's go to our camera and
select 45 degrees here. Compile and save,
and let's play. And now it's in the
correct direction. We could make the minimum appear the moment The larp
of the camera ends. But this will be fine for now. We're going to leave it ease. And it would be nice if we were closing the minima when
we get to the elevator, because we can see the maze
the previous maze disappear. Anyway, this is funny, because of the
emissive of the chest, the emissive material here, we can see these
waters on the ground. I don't know if they're
visible that it's a meeting. Anyway, we're going to
change some model soon. So let's pair with it. Now that we have this
system over here. Let's put a dots for the
player also to see the player. Well, let's go to our character. Let's add a paper sprite. Oh, let's go to our character. Let's add a paper sprite. And for the paper sprite. In our textures, actually, we can just select
the paper sprite and just select it from here. Out. Let's rotate it to face correctly with the character arrow
pointing as the character, and let's set its height to
2,900 and it's scale 2.1. In everything, let's
compile and save. Now let's play. We have a minimum. We have a paper sprite to show our direction
on a minimum. Wait. And since we see a lot of the chest being
spawned in the beginning, not being able to find
somewhere to spawn, let's go to our maze generator
in our create or chest. Let's divide this again by two and actually just add this new by division
to the first division. So we get to 75%, and let's connect this here. Let's connect it also here. And that would be it. Actually, is also here. And now, hopefully, est
we'll be spawning better. Pres the elevator. Oh, this is a very nice saw
compared to where we are. Promising, very promising. Now Since we are
on the UI topic. Let's add something
more to our inventory. Let's add something that
when we are hovering these buttons gives us information on what
we are hovering. So we're going to
do it very simply. We're going to add
text text block. We're going to bring
it somewhere here. Let's check with the animation. Somewhere the middle
of our inventory. That could be here, I think. We can just eyeball
it right now. It doesn't need to be perfect. Here it's fine. I'm going to
bring its anchor also enter. The center is up here. So we're just going to bring
the anchor here and set alignment 2.5 and 0.5. Sorry, should be zero
and the s be minus. No. Actually correct. Great. Doesn't matter. Size 200 because that's
the size that we need, and let's set the justification middle Why don't I like it? Why do I think that
it's A, it is complete. That's the position on x and y, and then the alignment 5.5, we didn't see that this was off. Now, let's move forward. It is a little bit
off, but it's fine. We're going to make this al. We're going to call this the g we're going to make a function. Let's make a new function. Let's say over tip, and we're going to
need some inputs. Going to be of type ability. Visibility check. Yeah. That's what we need. I'm
going to name it visibility. And we're going to
need another input, going to be integer, and it's going to be in. Now, we're going
to get gay mode. We're going to GM. Do ga mode. We're going to
convert to pure cast, and we're going to get ing. Now, from the inventory, we're going to get the keys. We're going to make them here. And from the key, we're going
to get the inventory slot. Then we're going
to ask a question. Does our item exist? To do this, what
we're going to use the length of our inventory, and we're going to
compare it with plus, one of the item
that is incoming. I'm doing plus one because
when I'm going to call them, I'm going to call them
button zero, button one, button two, button three, and the length starts with one. So this is why I'm plus one. I could just not do the zero, one, 23 and go with 1234. But let's get used to having these differences of zero count and at the same time, normal count with
cutting at one. Well, we're going to check
if this is greater or equal. And this, I'm going
to connect it here. Now, if it is greater or equal, if it's not actually,
we need this out text. We're going to
bring it over here. I'm going to set text. And we're going to
say, I'm going to set bility to the incoming visibility. Now, what happens
when it is true? Well, we're going to get table. Row. And for the row, we're going to connect this get. For that table, we're
going to use items, and we're going to break the SD. We're going to copy paste
this code over here. And we're going to
select the name here. Actually we don't need the rest, and the visibility will
be connected here, which is the input visibility
that we taken from here. This is how we made the tooltip, the function that sts it
visible or invisible. Now, where do we call it? Again, it's going to
be fairly simple. We're going to go
to our buttons, and we're going to
go down on the list and there is how we need
to make them variable. So we need them on
hovered and on hover. Let's do this for every button. Variable n hover. Hover. Go to the third
button, is variable. Let's go to the fourth
button, is variable. Let's go from inside the graph. Lectm here, it's much quicker over hover and button
three hover and hover. Let's make them a nice list. To put them in order
afterwards. Y. So we've got button
one, two, three, four, and we got hover button
one, two, three, four. Now we bring hover
function to each pattern. Let's go from zero, one to three, and
visibly on the opposite. N would be the one then I. Hoops to and hidden. And hidden. Let's comp and save. Let's go play. I should have sd it invisible
in the beginning. But when I go to other
things I go and when I go to the key, I go to the key. When I'm closing, it disappears. When I'm opening, it appears. It doesn't appear
until over something. D. Now let's set the default that it should be invisible
default visibility, let's go to visibility, and set it to hidden. And now we have our. We
did a lot in this lesson. Let's continue on the next one. Pod by for now, seeing you then.
87. Player Health System & Widget: Hello, and welcome to
Game Design Workshop and Real Engine five
Procedural Dungeon action RPG creation course. Previously, we set up a
little bit the settings of our D render component
in our character. So, we went to our
camera and we said what it should be rendered and what should be not rendered. We I clicked on the camera. I meant to click on the sine
capture to the component. We use the advanced settings of sine capture to go to
our general show flags, and we diselected BSP particles
and skeletal measures. And as we said, we can also select other
things if we don't wish them to appear in our sin
capture in our minima. Now, We also added paper sprite to represent our
character on the minimum. So when we play, we
can see our direction, we can see where we're looking
towards on our minimum. So we do know where
we're looking towards. Anyway, Then we
proceeded and changed our rule in our maze generation on the create cords
for the chest. Instead of using half the maze, we used roughly 75% of the maze and to check about where we should put
our treasure index. To achieve that, we divided the already division of last
index by two again by two, and we added that to
the first division. Oh. Afterwards, we proceeded to
add in our gameplay Widget a textbox that will
hold the name of the Hobart item
in our inventory. To do this, we we used actually our hover and un hoovered
events on our buttons, and we created a
function that takes the inventory slot based on
the button that is hovered. And we did some we created a chain of events
basically by taking the inventory from
the game mode, checking its length if it's, if it's greater or
equal to the item plus one requested
because remember, the length starts from zero, which means no item and one, which wins that we
do have an item. And then we added one on the
inventory slot because when we are saying which
button we are using, we actually have
used zero to begin. I use zero to begin. So zero plus one means one, and if we have a length
of one, we are fine. No, which we math I did here. Anyway, when we
don't have an item, we say none, the text says no, and we set its visibility, and when we do have an item, we get from our the name of the item and set
it to our tooltip. Now, let's continue with
creating the use of the items. Like when I click on an
item, something happens. And through that, we will be
able to we will be required, actually to fill some
mechanics of our character. For example, let's start
with the health portion, and when we use a
health portion, we need to add some
health on our character. This requires to have a health system that we
can add or remove health. And a visualization of
that to our player. No, let's begin with
the visual part. The way we have set
up our system for the visual part is through
a material that we change an internal
parameter to fill the material to its max
value or to its zero value. Oh, let's show how we do this. We'll get an image Well
bring it over here. Let's make it like the
opposite of the minimum. So position, I'm
going to put 50, 50 or y times x 256. 256. Maybe I'll lower
this a little bit more. Here, the anchors
also to be safe, maybe a little bit even lower. Maybe make it a little
bit smaller also. Yeah, that's why. Right? It's not lining up,
but it's problem. Our material, we're going
to use the M U I HP. This material let's
open the material. Has this HP parameter, which goes 1-0 and it changes
how our health bar looks. So this is a value
we're going to be manipulating through
our blueprint. To do this, let's go back
to our Wood gameplay. Let's make this viable. Let's call this P bar. No, it's an image and
let's go to our graph, and we will create
a new function. Let's call this date date HP. Should be an E here. Now, we're going
to need an input, which is going to be
of the type of float because we have the
zero to one value, and we're going to call this HP. The next thing we're
going to do is get our health basically, an element, and we're going
to get dynamic material. Which is a node that allows us to access and
manipulate the material of the material of anything we want
dynamically in gameplay. What we're going to do is
that a parameter by value, and we're going to
connect the value here. This actually so be p percent. Because it's not the
actual HP value. It's a scalar value 0-1, and it's a percentage. It's not like if you had 300 HP, we would return 300 HP out of 50 how do we we're
not returning the math. We will be returning
directly the percentage. The important part here
is the parameter name. This be exactly typed
as in the material. Let's go in the material,
I think it's HP value. Y. To be always safe, we can choose the
parameter and just copy this and paste it here. Oops copy. Copy and paste. What what I pasted
was actually coed because the control
it didn't work here. When I pressed control C, it didn't work for some reason. Maybe I mipired it forward. Seconds fragment of seconds. My keyboard is a little bit
sticky, old mechanical one. Now, where do we
update this value? If you remember when we made
the trap, let's go to props. Let's open the trap.
Is it not in here? S corridor it should be enemies. So in our folder enemies, we have the BP trap. Now, when we applied
damage to our enemy, we used the apply damage node. So if we go to our character, Type A damage. There is an event any damage. So this is triggered when we are applying any type of damage, and the types of damage. We could be setting creating
classes and everything, but we're not going to do that. Davis, go back to our character, and we have received
some damage. Let's create a function
to remove health. So I'm going to call it Health. R and it's going to need
two inputs, here, inputs, O will be a bulion which
says add, when it's two, we're adding, and one
float which is damage. A. The next thing we're going
to need is two variables. They're going to be
of the type of float, and one will be current health, and the other one
would be Mx health. In MCs health, we're going
to give a default value, and that default value would be. Now, we are going to set the current value to Max's
health on begin play. So let's go to our begin
play after we set absolute, we're going to set the current
value to Max's health. And then let's connect our function and remove
health to our any damage. And let's enter our function. The first thing we should
know is are we adding or abstracting damage because
damage could also be. Heal we're going to
do a minus or a plus. Minus should be on the
bottom because we're going to get Maxel so Maxel
minus the damage, and then Max health plus. Damage would be the heel. We're going to do a select. We're going to
connect our ad here. P A, we're adding. If it's not P A, it's Peak B, so we are subtracting. We're going to plump this value. But axis, clamp float. Because we want to mean max. We don't want it to go
above our MAC health or below our below
zero, basically. We're going to get
our MAX health, and we're going to
connect it to Mx, and the minimum
value would be zero. We shouldn't be
subtracting below zero. And we're going to set
our current health. Now, the next thing we should do is get our current health
divided by Max health. And that would give us that would give us a
percentage of our health. Now, we're going to
get our gay mode. We're going to get
Our widget gameplay. From that, we're going
to say HP update HP. We're going to
connect this year, and we're going to
connect our percentage here. File, let's press. They save and compile
actually everything. Let's. Let's see if it works. We're going to go to a trap. S. But right now, we are not quite sure which part of these
actions are not work. Let's begin from our trap.
Let's go to our trap. What we want to check if
we are applying damage. I'm going to start the
checking from here. Let's consider that everything
else triggers correctly, and we want to see if
it applies damage. We reach this place, so
we are applying damage. I'm going to stop
because it has a delay and to remove the
break point from here. I'm going to go to our
top down character and apply a break point
to the event any damage. Now, let's find the trap. Caps do not spawn in rooms. That's something good. A, we apply damage.
We had removed. This value is nine. A we took one damage. 0.9 update HP. B. We updating HP, by setting the value to 0.9. We do have the correct
because pasted. What? Okay, it doesn't
preview because I'm playing. I should lower our health. Remove point. Does it do it, and I don't see it. The cup has a wrong sound. Cup is playing a wrong
sound on attack. Go on attack. We're not
playing the sound here. Okay, we're playing
the sound here. This one is a correct sound. E crop. Let's go back to the material. We're connecting
this, if this is 0.9, it should be looking like this, if this is 0.8,
should be like this. Zero. Let's go and test if the default value
is zero. Does it update? Yeah, it does. But
afterwards, it doesn't. Always going to 0.9. Go to our character.
You can see we can debug during run time also. I can go to my character, I can select character. This has only one node. We won't see it easily, but if I bring it here, visible. We can actually see
it during run time. But it runs, what it does. It does move forward. I'm going to put a
break point here. I'm going to see the value 0.9. Every time the value
comes 0.9. Okay. This is something I'm going
to solve the next time. I'm going to leave it here. Good bye for now. A
88. Inventory Item Usability Health Potion: O Hello and welcome to Game Design workshop
under engine five procedural Dungeon action
Pz creation calls. Previously, we started
creating our health system. We added our image on
our widget that we are manipulating its
scalar parameter, HP value getting the
dynamic instance, which is the HP value here. Let's set this back to one. And then we continued by
creating in our character, the any damage event and the
add remove health function, which I actually did
very big mistake here. I'm subtracting and
adding a value to the MAX health instead
of the current health. Every time we are
applying 0.1 damage, we're actually reducing
our MAX health, so it's always 90%. Now, let's connect
the current health instead of MAX health. If we go check, and
this should be working. S here. Right? Yeah. It's working. Losing health big
amount of health also. And we have the correct
sound finally on the trap. We change the play sound here, after the delay, which is the time that it will
damage the character. It plays before
the trigger part, and then the part with
the spike attack. Let's continue on
our health portion. To do that, we need to go
back to our gameplay Widgit. And we're going to
need our buttons. We're going to
select button one. Actually, let's go do
it from the graph. We don't need doing
the buttons now. We know that they
exist over here. So let's go to button one, and let's press on
Let's do on clicked. And then button two on clicked
and button three clicked and button four t. Well, we do have this for events. The next thing we
need to do is create a function that we're
going to call use, and it's going to have one
input of type integer. Let's call this plot. So let's go back
to your Ben graph. In our buttons, let's
use this use function. Let's use this use function, and let's connect everything, starting 0-1, two, and three. Right now, when we
press a our buttons, they run this function
use one, two, three 0-3. Now, let's enter the function. And we will need our inventory. So we do have stored on hover, not stored, but we have used this code over here
to get our inventory. So I'm going to copy
paste that in use, and I'm going to convert to pure cast again
because when you're copy pasting the casts that are pure are getting
normal again. Now we do have access
to our inventory, and we're going to get our keys. And we're going to promote
them to our local variable. Let's call these keys. And we're going to
get our values. And we're going to promote
this to a variable. Also, colle values. Now we have access to our items
and access to our values. Now, what we're
going to do is use this item index to
get from our keys. We're going to get.
And we're going to go I index, s. We're going to get our
slot, not item index. Inventory slot, basically,
and we're going to switch Based on this name, we have to set the
names on our suites. I'm going to go to details, we're going to remove
the default pin, and the items we have for using are I think two for portion, the for time and I
five for destruction. B was this material compile and save and let's check
our items for a second. I remember the I
one was for health. There is it items. Here it is. The items. Health potions, Pet potion, potion was four
and five was time. Okay. But number one that
we're doing right now, which is number two
actually is the potions. Let's go back to our Pam
p. And when it's a potion, We need to check if our
player is full health or not. Because if the player
is full health, we shouldn't be
adding more health. But even if we do, we
should have the option to differentiate if we
are adding or not adding. Well, we're going
to put a branch. We're going to get player on. This gets us directly the
controlled pone that we are that our controller is
controlling is possessed. We're going to
past dw character, which is actually the
class of our pond, get the variables we want. We're going to connect
this over here, here, and we're going to check
if our current health is equal to our Mx
health, not set, get If these are equal, then we shouldn't be doing anything because character
is full health. If these are not equal, then we should add health
and we should press the ad. And now let's give a
value to our potions. Let's say they heal to health. If we want to be able to drink potions while hell full health, we just connect
this through here. Or if we want to be exact
that two health is missing, to use a potion, we could create more
rules over here. For us, we will keep
just this rule, and the next thing we will
do is get our values, which is how many potions
we have in our inventory. Over here, and I'm going
to get our values. I'm going to get our lot because this is an
inventory slot. And we're going to
do a minus one, which is the potion
we just used. Now we're going to check if this is lower or equal to zero, and use a branch. If it is not lower than zero, then we're going to get
our inventory again. We really promote
this to variable, but it doesn't really matter. Convert to pure cast
again, comment. Cast. If it's not zero, it means we still have portions, we're going to add
our slot item. And the minus one
from our values. But this will get
subtracted by one. I know it might be confusing
that we are adding, but adding just updates the
value that already exists. Now, we're going to update inventory for our inventory,
you're going to use. Inventory. It doesn't
matter that we use the same variable
that we're calling because these nodes are
two different things. But this actually means
that it will also cast ice. So promoting this variable would make it a
bit more optimal, maybe in construct, we're promoting this
variable and holding it so we don't call
it every time. But it's a minimal right
now impact in our game. Oh, The next thing we need to
do is update our tooltip. Which is not called
update tooltip, it is called over tooltip. We will try to set it to
visible and the slot our slot. The reason this will work
is that if we enter, we are checking if
this item exists. If we do have it
on our inventory. If we don't have it
on our inventory, then we're sending none. Let's go back to use Now, what happens when
we are at zero? Oh, what happens
when we are at zero, we need to remove
from the inventory. Oh, I'm going to get
our inventory again. Again, it doesn't matter
that I copy paste this code because even if I drag it
from this, it would again. Now I'm going to move. And for our remove, we're going to get
our keys in slot. We're going to get
our keys in slot. And then we're just going
to update inventory. No, let's go test this. Let's go to our game mode, Let's select our inventory, and let's add some portions, which is I two, and let's add two potions. Let's get hurt. Potion is working here, so I. Nothing is happening, and
let's go find a trap. I'm going to use one. But
fool, get hurt again. Too small, 90% doesn't really show and 80%
shows too much. Anyway, let's use the
potion and it's gone. One issue, the tug over here that we have the
two portions didn't show. So let's check this one out. L et's go to our gameplay. Let's go to Ben graph and not hover the update
inventory actually. We can go directly from
the function, d inventory, and we want when I'm
setting it to hidden, where it should be visible. But now, We do have
the two potions. Nothing happens, placing
on one, one left, left. Why was the one so big? I think we made it a
little bit too big. It's a bit offset it. So let's fix this two. A way, you're wondering how I did
the full screen thing. I pressed F 11. And if you press
actually shift N F 11, it makes it completely
full screen. It covers even the windows bar that you cannot see over here. But yeah, Shift F 11
covers it completely. F 11 just makes it full screen
without the windows bar. Anyway, let's fix
the visual issue. Yeah, it doesn't look good. Reason to it disappears
because of rendering rules. So this would go a
little bit to left. I think that's it. Yeah.
So I'm going to cheat and use the translation
rendering transform. Not very optimal use, but we'll do for
now minus three. So here. And let's paste it here. You can see when I click, because it's the same
type of element. Even if I click the
button also because they do have kind of the
same types of elements. I'm stayed in the bottom. It doesn't reset this, which is a very nice feature. Let's say minus here also. I think now I wanted to say they look
better, but the bulk. Yeah, because type
place is on bold. So let's change this to not
it. I don't like regular. Yeah, regular regular is
more fine. Let's use. We can end less optimizing the visuals and
everything. It's fine. It's fine is fine. Well, I
think this is it for this one. I'm going to see
you next. Goodbye.
89. Game Time Bar & Time Potion: Hello, and welcome to
game design workshop, real Engine five,
procedural Dungeon, action RPG, creation course. In the previous lesson, we
began with our use mechanic. In our b gameplay, we used the on click event on the four buttons and
created a use function, which we used an input of an integer to determine
which button, basically which slot of the
inventory we are pressing. Inside this function,
we got our inventory, that from our game mode, that we stored the keys and the values in separate
local variables. After that, based on our slot, we get from our keys
the name of the key, which is our own name, and we are switching based
on these items that we have. I two, I three, I
four, and I five. I two is the health potion. So we checked if our
player is full of health. Because if our player
is full of health, we shouldn't drink the potion. And if the health is not full, we use the remove
health function, to add two HP to our player. Then we checked the values, of the current slot, which is the health potions, to see if minus one is making
zero or lower than zero. Actually, lower than zero
should never trigger. And if we do have
potions basically, that's what we're checking here. If we do have potions or if the potions are becoming
zero when we are using, we updated our inventory
accordingly by removing or adding the
same key to inventory. And then we updated our inventory and updated
the hover tip also. Just in case it becomes
zero, so it says no. Now, the order tell us that we should do the
speed potion right now, but I don't want to start with character mechanics
exactly right now. So since we are on
the gameplay widget, let's create the time potion, which practically is
just two variables. We're going to do a
variable of float. We're going to call this parent. We're going to duplicate
it and call it Max. What we're going to
do is we're going to add to the current time a value. Let's say our one
time potion gives us 60 seconds because we are going to be outing in seconds, and that's what we should
set our current time to. But we will just
clamp, clamp axis. Sorry, clamp the float. We're going to
connect this here, and our clump would
be our Max time. And let's give max
time at default value. We need to compile for that. And that would be let's say 220. Let's say it's 220, and we're
adding a minute every time. We are drinking a time potion. And let's connect that to five. Now, the next thing that
should happen is already done. We're going to connect
this to the branch here, and it's going to check if the current value
slot has enough, and it will remove or add if it's sable, which is not sable. I think time potions
are one time use. I everything is one
time used except the potions, and
the speed potion. So, let's create the
indicator for the time, like we needed in the UI. We're going to p. We're going
to use the same technique as the material as
the health bar. So we're going to use an image. Et's set the anchor to
the middle and the top. Let's set position x -300, position y 50 size x 600, that is y 60. And I think it's
a good time bar. Now, for the appearance. We're going to go to brush, and we're going to use the mer. Instance material. Now
we have our time bar. Let's program it to do something because having it doesn't
mean it does anything. So we're going to
go to our graph. We're going to go
to our event graph. We're going to go to
the event construct, which is like begin
play or blueprints. And now we're going to use a. As the time by event. For those who are
new, what is a timer, it's basically a
node used to create a timed event that will trigger an action after a
specific duration, which, if we click Lupin can also be set to repeat
in dural intervals. And the way we are using it, we are creating a custom event, and we are binding
this event through the delegate over
here to our time. How some extra information
would be that it doesn't matter really how many times you have and where
you have them. It matters how many actions they perform because behind in code, they're kind of
considered a one timer, like there is a general
pick behind everything that just accumulate
roughly explained, not like that exactly, but let's say that
it accumulates the actions of the times. Now, in our theory,
let's put some values. So our timer is
going to be looping. It's going to be
looping every 1 second. This means the first stick will run 1 second after
the game has started. So, we're going to be
setting our current time. Every 1 second, two
current time minus one. And then we're going to ask if this time is equal to zero. Actually equal or less
than zero. Less or equal. Order shot matter in this
when I want a quick note. If it's less than zero, we're going to t to our
player game over basically. What we haven't called that, we're going to do this later. Now, just one more info. We're not going to be pausing
or I'm posing this timer, but to do that for timers, we do have a system called
Handles, Ter Handle. If I promote this variable, and let's call this
Timer ble and I Now, if I was to call this
handle anywhere, if I had access to it, I can pause or unpause timer and ask also if
the timer is posed. This is the way that
we're doing this. And there is also a
clear and invalid item. There is some few more options. I just wanted to add this. I'm not going to
use this variable. I'm going to delete it. Now we have a timer
that counts backwards, and when we are using our
item, we add to our time. Now, it won't be
updated instantly, but it will update basically instantly
because it's every second, every second, it updates, and do update it. Let's go back to our timer. We're going to need a function. And the function will be very
sim will be very similar to which we want to update HP. I'm going to duplicate this. All these update. And instead of the bar, I'm going to use the. There is a bar. It's
not a variable. Let's go to designer.
Let's select it. Let's make it a variable. Are going to bring it here. But this gives us a percent from when we are doing
the health calculations. But we need to do the
calculations here for the time. We need to bring current time,
I'm going to need x time. We're going to divide this two. We get the percentage, and we're going to connect this here. We go to delete this. And for some reason, I'm sure this value
would be the same. But let's check. Let's check. We open the instance. So yeah, this value is P value. So this is our
parameter variable. If we open the main material, we can see this is the parameter we're
filling and its P value. So we're filling
the P of the timer. No the want to blame others for naming conventions,
to be honest. But anyway, we don't need this input anymore because
we're updating in here. And let's use this function
before our branch. We're going to set
this update timer. Now, if we wanted to be
really, really precise, we could copy this to our use when we set
the current time, and it would update instantly. It's not of a hussle, but I don't think it
would also matter. We're using the potion, like the next stick it would feel. Away. Let's go cheat
to test our potion. We're going to add a new
item to the inventory. We're going to call this I five. I think five, and
going to be one. And I'm going to
compile and play. Let's save everything
before I press play. We wouldn't matter this.
We wouldn't crash in this. We haven't done any code. Oh, and it's not
working already. Oh, because we have not set
the current time to anything. So I actually use this. Yep. We can see it's
working. But we do need to set the current time to the max time in the construct. Or the other thing we can do, but then we have
to change it every time is our max time is 2:20. We can set the
current time to 220. We just use the set max time to current time and begin
play or construct, so we don't have to change
both values every time. Anyway, let's just
leave it as easy. I think this is it for this one. I'm going to see you the next. Goodbye.
90. Speed Potion & Particle Effects: Hello, and welcome to
Game Design Workshop and Real Engine five
Procedural Dungeon action RPG creation course. Previously, we added our
timeer to our viewport. We added the timer bar, and we added in the
event Construct, which is the begin play of
the Blueprints, set by event, which is an event that happens
every certain time amount. And we created a custom
event that we she to event. And we used this custom event to set the current
time -1 second. Then we went ahead and updated our bar through our
scalar parameter value, which is HP value, and we got the percentage of our current time
to our max time. Then we proceeded
with our use event to complete we act
the other way around. We made the use event
first, but anyway, so we proceeded to make the use event by when we're
using the I five item, which is a timer portion, we add 60 to our current
time, 60 seconds. Yeah, basically 60 seconds. We are clamping at our max time, and then we are
updating our timers, so this is instantaneous
update and doesn't wait one tick 1 second. And then we use the code that we have for the portions. Also. It is a common code. For all of this action, will be a common
code to check if we have other portions
in the inventory, and if we do not have
to remove it from our inventory and update the
hover the hover tooltip. Now, let's go and do
the speed portion. I three. No. I like that I drag this. The mis clicking is amazing. Now, to do this, let's go to our character, and let's go to our particles. Well, actually sets
for a particle. I have already set for it. We're going to need the P
revenant frosting head port. If that makes any sense, that's the particle
that we need. We're going to select it, and then we're going to press add, and we're going to elect cascade
cascade particle system, and it's added to our character. Now we're going to
make it a little bit bigger. We're going
to set it to two. And that's fine. And let's
go open our particle. Do a few changes. I'm going to bring
the particle here. What we want is this charring MC and we're going to change
the lifetime from one, 2.5. I'll tell you in a second why. And basically, this is how long the partic this
part of the particle last, which if we close it, we can see it's the
actual flames flames. This thing. And we're going to change also
not the size by life Yes, the size by life, we are going to disable it. It's one size all the time. Else, if we don't, let me unclick this. We might prefer it this way, but I actually don't. It seems like we
are gas powered. We don't want to be gas powered. We want to be bookie. I don't know,
something different. So we're going to not
delete it, but disable it, pressing this x here
so this disables it, and now it's more like an aura, more like an actual
trail that we're living. When we are static, it's also shows that we have this enabled. That would be from
the particle side. Let's go program this. Actually, one more
setting to the article. Let's go back to the particle. We don't want it
to auto activate. So I'm going to
assess for activate, and I'm going to disable
the auto activate. We want to activate
this. We don't want it a constant state. I'm going to compile and save, and let's go back
to our gameplay. Not our gameplay.
My mistake again, we need to stay
on the character. Let's go to event graph, and let's create custom
events somewhere. I'm going to make a
custom event here. And let's call it,
I don't know. PD. PD is a good name. So let's get our P revenant
frosting head port, and let's activate it. We also need to actually, we don't need set
active. We just need. This is just an activate node. We don't need to set active, and we're going to be
resetting it also. Now, let's make also
its visibility, iden, and let's turn it on just in case that visibility here it is. Just in case that it doesn't end and it
doesn't start correctly, so it doesn't start abruptly. It looks better. For example, what I mean
is I technicalities. Let's go painting again. What I mean is, if we have our character and our
effect ends here. Just in case the activate
doesn't start from here. For a frame, we see this. We don't want to see
this immediately, wanted to see expanding
a little by little. This is why we play
with the visibility, resetting it and
then turning it on and Then what we need to do is use our
character movement. What is character
movement component? It's specific for
character blueprints. For example, this blueprint
has let me it visible. Let's go to class settings. And see parent
class is character, which when we are
creating blueprints, if I go create a blueprint here, it asks me, is it an actor? Is it a pin? Is it a character? Now, characters and
one below pond, not in this list in hierarchy, because characters are ponds, but ponds are not
all characters. Some of the ponds
can be characters. It's like the van diagram thing, which means basically
character inherits from pond, Pond doesn't inherit
from character. And the special one of
the special things about the character is this
character movement component, which is basically for handling movement logic for
three D characters. It can be used for two d, but it's going to
be kind of hard, might need some few
plug ins. Anyway. So, this, which is
responsible for our character movement
has a bunch of settings, an endless amount of
settings, if you will. Really. Anyway, what we want from all these settings is
our max walk speed. So by default, we have it 600, and I think it's a nice speed. But when we are speedy, let's set it to
something greater. So we're going to set max walk. Speed. Let's say to 900. Then what we're going to do
is usually we put a delay. For example, we
could put a delay, and after let's say 14 seconds, we reset the max move speed to 600 back to our
original speed, and we set the visibility
of the particle, two. We could set also we could de activate or use the other node
that we didn't use, set act to negative and
then reset it, for example. But we could also do nothing, but this particle would
keep resources, very few. Depends on the particle also. So let's deactivate. Just to save a few resources. Now, this delay here
would work as a gate. Like we're going through
this, we're setting 900. If the delay is running, it won't run forward until
the delay is finished, then it can run again. But if we use a retrigable
delay, sad it to 14. This means whenever
we drink a potion, the delay retriggers
the countdown. So let's do this. So basically, if we keep
finding set potions, we keep retriggering this
14 seconds countdown. We won't be adding extra time, we'll just be retriggering
the 40 seconds. Now, let's call that
event from our use. O here. We're going to get from the
cast two BP player down, we going to get speedy, and we're going to connect
speedy here to the bunch. We're going to compile and save, and let's go to cheat. Let's go to our game mode and
change one inventory item. Let's set this two I three, and I three has two
uses by default. Let's play. And I'm
moving normally. I'm opening inventory, ice, blue bottle, I'm using one, and I have speedy. 13 seconds, 14 seconds. Actually, let's retrigger.
I'm using it again, and now it should be fo seconds. What is the elevator? Oh, Mice. Just over here, elevator here. Mice maze Dungeon. Oh. That's it for this one. I'm going to sing you next one. Goodbye.
91. Rage Potion & Particle Effects: Hello, and welcome to Game
Design Workshop er real engine five procedural Dungeon
action Bz creation Curse. Previously, we added our
speedy event to our character. An event that makes our
character move faster. To do this, we added a particle to our character
class component, which is the
revenant Frost porte And we changed a few
things in the particle, we changed the lifetime, and we disabled the size by life. So it makes more of an effect that it's moving with us,
were leaving a trail. Afterwards, we head on, and we created chain of events, we activated the particle, because we set it to be not auto activating in the details. Then we set visibility to
true as we set it to false, because we don't want it
to we don't want to see a frame that is from the
previous activation, like it doesn't activate, in the last state of the
particle, for example. Now, we changed our character
movement speed to 900, and then with a
retricable delay, which means that we can drink another potion and
reset the time here. We changed back the speed
after the delay to 600, which set the visibility to. It should be false, my bad, and we
deactivated the particle. Afterwards, we went to
our gameplay widget, and we called the Speedy event through our character reference, and we connected the
function to the rest. Of the code that is managing the ad and remove from inventory and
updating our widgets. Now, one thing that I noticed is that our speedy
even it has two charges, but it doesn't so number. And based on our code,
it wouldn't work. For example, if we
set it to stock, then we would be able to pick more potions and we could
stuck them endlessly. And if we Actually, what we need to do is create some custom code to say that
if it's the item I three, then show the stocks, which we won't do, will
just leave it like this. Or if you will,
we can also go to our speed potion in our Dt items and set
the amount to one, and that would be it. It's fixed. We don't
need to see a number. And now we're going
to do the I four, which is the potion, which will destroy everything. Well, it will actually damage, but the damage is going to be so great that it's going to be destroying everything around us. And by everything, I
don't mean the map. We don't have a detracti map. I mean killing all the
enemies and the towers, which we call Hell gate. To do this, we need
another particle. Let's choose the map this nice explosion,
bring it over here. We have this nice explosion. It is for basically
another scale, but we will increase its size and it will be fine
for our purposes. So we're going to go
to our character. And while being selected, we're going to add cascade. Ops. What's going on? Yeah, you shouldn't
type ad on ad. It just doesn't work, and we're going
to auto activate. Actually, let's leave
the auto activate. We figure size, and a big. L et's change its
scale to three. We do want it to
affect a big area. Let's actually use
a key test this. So what we will do, let's
create another custom event. All this range. And get our article or this one, one, and say activate And set that is set to true. Now what we're going
to do is go to a controller and
right click and use, let's say Base keyboard. Base bar, here we are. Let's get our character
reference. We don't have any. Doesn't matter, get home. Character of dw character
convert to pure cast or rage. And let's compile and go play. And we want our particle to
be k of the size of a tile. But if I'm pressing space. Yeah, this looks and over d. This looks the
size that we want. Now, for the range, for the damage area, like how we're
going to do damage. We're going to be using
a collision sphere. So a collision fear. Sphere collision. No. I'm going to go and set its hidden
to game to falls. And then I'm going to increase the radius to, let's say, 400. Yeah, 400 seems w. 500 seems better. But we can check since we
made the visibility hidden. A 500 is is a little
bit too much. So let's change it to 400. Let's play again. Yes,
I think visually, we are in this bounds. However, it does not matter
the distance from the circle, but from the lesion, we're going to be doing the
same damage everywhere. So This seems fine. But we're not going to
leave it like this. We're not going to use it as is. We know that the
speed radius is 400. What we're going to do
is change it 0-400. We can actually up the distance also
from where we heated. We won't do that code, but
it can be done easily. When we have a sphere that
is increasing in size. Now, we're going to
set its collision. To ignore some things. We're going to do it custom. We're going to
ignore visibility, camera, world static,
not world dynamic. Physics body, actually,
let's leave physics body also on and destructive. Actually, let's close
also world dynamic. What is our hell gate? Let me remind myself. We're going to go to Blueprints. We're going to go to
props to enemies. We're going to go to Hell gate and select its own capsule. Is a damas collision. We're going to go to
collision presets. It's a world dynamic. So we don't want to
ignore world dynamics. So we're going to
leave it overlapping. In physics body,
let's make the boxes move with our rage portion. The only thing that we
need to change now is from query to a collision. Let's start with no collision. And when we are
about to expand it, we said it's collision then. Let's say radius to
let's say one not zero. Let's put it on one. And now, let's go back to
our code and add a timeline. Not a timeline. Sorry. First we need
to enable collision. Now we're going to
get the sphere. Let's remain it to
get potion collision. And collision enabled. And choose to vary
only no physics. At, we do want physics, because we decided to put
the physics items to, and now we need a timeline. So timeline. Let's enter. Let's
create a flow track of 0.31 and zero, zero. Of course, that our
use last key frame. The next thing would be to
go to Event graph, update. Let's get our sphere collision, rate pot and sphere radius. A is connected to update. Let's learn from 12400 with
the Alpha of our new truck. Now, when we finish, we will get our that
collision again, that two ded no
collision basically. And we're going to set
sphere radius also. 21. Now, what happens when our rage potion
collision collides? Let's go to our begin over lap, of our rage pot. Let's make some room. Have this here. Put
a comment on this. Let's rage pot. Let's put a comment
in this colli. And that's it for now. Oh. Let's select our
other comp and ask is actually not the other
comp, the other actor. Because now we're going
to be checking for AI. So we're certain that AI only has the collision for their
body and nothing else. Well, the capsule component. So we're going to
check for a tug. If the actor has tug,
we're going to branch, to do the if, and then
we're going to get our actor and apply damage. And damage, we're going
to apply, let's say ten. We won't be using
the other nodes, and that would be our potion
collision, potion collision. Now, let's call this event in
our use function. O I four. We're going to call from
our top down character, the H function depends
actually not function, and then connect it over here. Let's create a cheat
put I four of one. Let's go to our controller
and delete our demag. To be honest, let's go to
our hell gate and go to our actor tug of defaults
in hell gate tug, and let's add the tug. But we don't have a health
system on our tower. We should do that next one. Let's just test our portion. A quest potion. It explodes, it disappears, and
it's all point. That is full. That's
it for this one. I'm going to see you
on the next. Goodbye.
92. Combat Music & Hellgate Combat Mode: Hello, and welcome to
gain design workshop, and real Engine five,
procedural Dungeon, action RPG, creation course. Previously, we added the
rage potion functionality. We added the rage collision
to our character, which is a sphere that will be increased in size
with a timeline. We added the reman mark and part that we increased also
in size is toto activating. Yeah, it shouldn't
be auto activating, compile, and then we completed
the function, the event, rage, which activates
our particle, says the collision enable
on the rage potion, uses a timeline to increase
the size of the sphere, and then we turn it back off. Then on the collision
of the sphere, when it collides with some, we use a tag E for enemy. If the other tag
actor has the tag E, we branched and we apply damage. Afterwards, we went
to our gameplay, called this event when
four item four is used and connected
it to our function, to our chain of events, but we remove from
inventory the potion. Now, afterwards, we
went to our head gate and put the tag E. But we decided we cannot
use we cannot test the hell gate yet
because it has no code. So let's start filling some
code on the head gate. But before we do that, let's again explain what we have here, what we have created. So, we have two static messes which represent the visual
part of the head gate, and also a particle which also represented
the visual part. And a point light to make all this a little
bit more glowy. We could change some
settings on the point light, Let's sd it to Lumens. Let's say it to 150. Let's say it to a reddish color. Let's say it to a
missive reddish. It does 1011. Let's see how it
looks. Big change. B. The range of the huge range. 600 range. Oh, I didn't change the color. What happened here? Oh, what am I? I'm sitting
in a massive to light. Yeah, that's not happening now. U you can you delete this part? Changing a missive to light
makes me look like no a lot. Yeah, let's set its attenuation
reduced to ex hundred, and let's a light to something. 0.1 green and 0.1 blue. Test. I. There is a more reddish
glow to the walls also. W I see it on dirt,
Maybe looks better. Again, we have it. Could be a little
bit more intense, but I think it's fine. Now, let's go back to Hell gate. Let's select. But
before we start coding, let's remind ourselves
what we have built here. We have a static mesh with a static mesh as a child
and a particle system. This is our visual part. What represents is the visual
part of the hell gate. Then we have a point
light that we should lib change its options, let's say a generational
radius to 700. Let's say this to us and 150, and let's change the light
color to dark reddish. With a one in bu wall so please. 05, right. And I think this would
be for the light. And then we have a capsule. The light, we have to make it a bit glowy around the term. The capsule is
where our heat box, but we can hit with the
player because we have set both of these
message of no collision. And the capsule has all collision
because it's a capsule, and we so test. We can optimize the bit, but it doesn't Then, we have a sphere collision, but we haven't
increased its size yet. What this collision
will do is that it detects if the player is
in range to fire or not. We let's optimize its
collision leave Let's set doesn't matter because
we're overlapping. Let's set it to custom and
ignore everything except home. Now, also, let's set these two static meshes
to not cast shadows. We don't want them to
be casting shadows. And we have set on
begin play that our rotating movement
updates on the static ses, so they rotate around. Now, if we compile and save, let's begin with our collision. First thing we need to do is
calculate the sphere radius. Let's set hidden
game to be not true. Let's compile. Let's set default radius
to, let's say 100. How big this is. Also, on our player, we should go to our
rage pot collision, that the hidden game to be
true because I didn't turn it. We turn it off to the size, but we didn't turn it
on to hide it again. Oh, I'm going to compile
and save the character. Let's go to play. 700 seems
a little bit excessive. It doesn't get us when we spawn, but if we move, it will start. Well, it might start because
visibility will be an issue, but it will start attacking us. Well, let's say it a
little bit smaller. We want a tile
and, so 600 maybe. Tile plus a bit from a tile. Almost almost 550, I
think will be the key. So 550 play ect. That seems nice. But it won't be attacking
us through this. It's a nice ring.
Let's leave it there. Go back. And let's do something
with this collision. We're going to choose
the begin overlap. We're going to ask
the other component which is P for our player. I'm going to put a branch. Ask the question and then we're going to
create a variable. Let's call this fire. And I'm going to
set it true true. Now, we're going to
need an end overlap, of course, from the sphere. And we're going to ask the same and it's going to be false. The next thing we should
do is we're going to change our material on
both static message. Sequence that material to be the one that we actually
have on the floor and it's glowing and
turning back to normal. C M instance. I think
it's the third one. And really hell. We'll see in game. But yes, I think this is the one. Anyway, the next
thing we should do is go to and overlap and
tend this back to normal, this would be the G M. Now, what we want to do
also is change the music. When we are in combat, we should be alerted about
it. That is combat o. So let's go to our
character and create an audio audio component. Let's ic. S. For it, we want the
variable loop for it. This lightning tiger gold loop. We don't want it
to auto activate, so we're going to
disable auto activate. And we're going to
make a custom event. And we're going to call
this play action autoyp. Action music. Some space. Now, the first question
is, is the music playing? So much over that. Playing then if
it's not playing, we're going to fade in. Let's use pings here. Let's have a pad duration of 2 seconds and start time at two. This is a two because
it has a long intro, and we want to start a
little bit further in. Now, we're going to put a gala and we're going to connect that
trough to this delay. So, whenever we are colliding, and actually when we
are being attacked, we're going to call this event. If it's playing is just
going to retrigger, our cool down to exit
combat, for example. Let's set this two 15 seconds. And I'm going to rename
this two n needs an n maybe a capital A. Oh, what do we do after the delay? We're going to fade out our
action movie. Action music. It was a movie that easy. Would be great, wouldn't it? I'm going to put two
here, without duration. I'm going to compile and save, and this is pretty much ready. Oh, let's come here
to our head gate. And now we need a reference to the character,
which we do have. It's the other actor over here. I'm going to pop character. Converted to pure cast. I'm going to play action music. I'm going to connect this here. Now we can test when we are
in range and when we are not. Oh, Let's go check
this. We have no music. Let's find the hell
gate over here. On top. It's fine. It's
playing our music. Now, let's test it a little bit faster
because 15 seconds, I don't want to wait right now, and it would be a waste of time. So let's go to our player. Let's set the legal to
let's say 3 seconds. T. There is no hell gate. L espn another ways. One over there. Right? The material did change. Let's check the music. One, two, three, stopped.
Let's go in and out. Constantly. Yep. So, our
mechanic is working. And I think this is a good
stopping point for this one. We're going to
continue on the next. Goodbye.
93. Hellgate Health System & Death: Hello, and welcome to
Game Design Workshop and Real engine five
Procedural Dungeon action RPG creation course. Previously, we created
the chain of events to check if our character is
in range of our tower. No, we checked if it
has the component P, we check if it's a capsual
collision of our character, and we set a variable
to that we called fire. Then we changed the material to a material that lops
from glowing to normal, and then we reverted that back. And we created the play action music mechanic
in our character, which starts to play with a fading or fades out
when a time has passed. Let's set this back
to 15 Might be long. Let's set it back to ten. And then we fade out since
10 seconds have passed, and we haven't been hit, so it fades out. Now, let's continue with our
health gates health system. As we use for the
character, the any damage. Let's comment this. A Music. As we use any damage
event for our character, the same we will
do for our tower, since we are applying
damage when we are using the potion and when
we will start shooting. A damage event, and we're
going to need two variables, of course, or current
health and Mx health, they're going to be integers. Not integers. I meant floats. That decimal point is important and it makes it easier
with the divisions. Any damage event received. We need to remove the damats
from our current health, not for our M. We're
going to do a minus. We're going to
connect. This actually here and this here because we're subtracting from
our current health. I'm going to clump load. I'm going to set
our current health, and the clamp, of course, would be minimum to Mx. On begin play. Let's set MC. Let's set current to Mx. Let's set a value on MC health. That let's say five health.
We need to compile. Of health. Next. We're going to
do is ask a question. Let's go back to our any damage. We're going to put a branch, and we're going to
check if this is equal or less less or equal than zero. Because we have our rage and our media attack will do
more than one damage. Our shooting will do one damage. We want to check for
less than zero, also, even if we are clamping, which makes this obsolte. But anyway, if
we're not clamping, let's do A sirst. If we are not zero health tm. No, we're going to do once. I'm sorry, I'm getting ahead. This will be all our
enemies, the do ones. Before we do once,
for we do one. Let's do something tricky
with this with our hel gate. What we will do
is we're going to reduce the size of our meshes. So it seems that it's getting smaller whenever we
are attacking it. We're going to choose
these two messes. Actually, we just need the
parent one, which is mesh one. We're going to delete
the other one, and we're going to s all a three D. What we're going to be setting it is because
we are starting on 0.5. Let's actually re store this as a variable and begin play. A a wall scale. We're going to promote
this variable. We're going to name it original. Here. Now, what we're going to do for the set healing world,
we're going to larp. Why are we going to let
because we're going to leert through the original, which would be B in our case, and one fifth of it. We're going to
divide. We're going to make this into an integer. We're going to divide it by 555. O Alpha would be the percentage of our
health and current health. We're going to divide this two. So since we're starting
with full percentage, this would be going from B to A, because every damage
will reduce the Alpha. And every time we want to change one fifth of
the original scale. And the ones, we're
going to leave for later when we have some AI. Now, what do we do on when we reached that going
to make a custom event. We're going to call this death, and we're going to
call it from here. Now, let's feel death. What we're going to do is
on a meter at location. And the location would be
our gap at p location. P meter would be an explosion. So we have the P explosion, and it's going to be
a b scale up, five. Let's stay auto destroy
and auto activate. Now, the next thing
we need to do is get our tile floor and
reset its material, not reset its material. When we go to our tile, when we have a gate, we have a sge on the ground. What we want is to make
the sge disappear. To do this, we do need
a tile reference. So on our head gate, we're going to create a tile
variable to call it pile. It's going to be of
the type P tile. I will be an object
reference compile and save, and we're going to go
to our maze that we're spawning W is our maze. Here it is, maze generator. When we're spawning the
head gates on our props, owner, which is Yes, this one, the complex one. We need to make the
variable instance editable and expose on spawn. So now on our maze, the prop where we
spawn, this is not it. When we spawn the hell
gate, did I compile this? I didn't compile. We
want to refresh this, and now we have our tile. So what do you
connect for the tile? Well. We do have it over here that we are
taking the coordinates. So I'm going to
connect this here. And we're going to
compile and save, and now we have our
reference to our tile. So we're going to get our tile, the tile, we're going
to get the floor, and material or element zero
because on element zero, we have the C and we're
going to set it to empty. It would need some more
actions about the AI. But when we have our AI,
we're going to be completing. Basically, when we attack the T, what the AI will do is automatically set
it state to attack, so it will search for the
player and attack the player. And on death, we will set
it to free basically. We'll create a behavior
that they run away, and maybe at some
point they change you back and or they start
patrolling somewhere randomly, but we will see the
Since we have our death. We actually need to
also destroy actor. Because if we don't
destroy actor, then our gate will
still be there. Now, compile and save. We have a damage portion
that can destroy this gate. Let's test it. Boom.
Yeah, works. Great. I think this will
be for this one. I'm going to see you the next. Good bye.
94. Hellgate Bullet Animation & Targeting System: Hello, and welcome to Game
Design Workshop under the engine five Procedural Dungeon Action Pz
Creation Calls. Previously, we finished with our Hell gates Health mechanic. We added the any damage event, and we created two variables, MX health and carrier health. We followed the procedure to abstract health and check
if we are dead or not. If we are dead, we are running
our death custom event, which spawns an e meter, sets the material of the
ground to zero to nothing, the CG material, and
then destroys our actor. If we are not dead, we're
reducing our size by one fifth, that we cannot check
because actually, we can't check it if
we change the damage of our, ge portion. So if I put the damage to be
how much health do we have? We do have five health. What we will do is
make it to one damage, and we're going to put
the delay of 2 seconds. We're going to make this
a little bit endless. But we can stop the play time whenever we
want 2 seconds for it. Let's find a hell gate. There is no hell gate. It's good that sometimes it
starts without a hell gate. Press a sage portion. Get No it doesn't. Because this is not davibl. Let's promote this
veble temporary. After we check for the branch. It doesn't say any else. I'm going like this here. R. Let's check 12, three. Yeah, it's getting smaller
and smaller and tight. So it works. Let's go
back to our character. Let's delete this variable.
Let's connect this to. Let's this delay. Let's sit the variable
also from variables, compile and save, and
back to our he gate. Now, let's continue to
make the head gate. Now, I begin play. We're going to need
to do some stuff. But first, let's
create the bullet that the l gate
will be spawning. We're going to go to blueprints, we're going to create a new
folder. Let's call this ab. B. Ener it and create
a new blueprint. Let's type actor, going
to be BP, L gate bullet. Now let's open it.
Let's bring it up here. Dave, The first thing we need
to add is article system. Oh. Let's go to content, Let's search for rail. Which we're going to
use this primary trail. Let's actually duplicate this. So we have primary trail one. Let's enter this
primary trail one. Let's change the
scale color life. Go to ion, constant
curve points, and let's change everything to something yellowish, reddish. Let's make it missive. This a copy this One, copy pasting available. Actually, what if we change
it to vector constant, and we make reddish? Better change to
vector constant, of all the tangents, going to be a bit more Constant, it won't
change that much, but it's going to be fine. And 11 here. And let's change the initial
color or something reddish. 55 a little bit. R. Yeah, this is good. We're going to save. Close this, we're going to go back
to our hell gate bullet, and we're going to add
cascade, and here it is. Now, we need a collision
collision, here we need. Pre collision. Let's get the party a little
bit more down. S. Collision shouldn't be
a child of the particle. Per collision should be
child of the default rot. That's fine. I think go here. Let's make it move. No, we need to optimize a
little bit of the sphere first. Let's go to collisions
of the sphere. Let's check the atom, and we're going to
ignore all except ponds. Compile and save. Now let's go to make it move. What we're going to need is a target because we're
going to timeline from our position to
the target to have at pace of shooting
of traveling. And What we do is going to
get our actor location. But the actor, we don't
want it to be ourself. We want the player paw, so we're going to get player on to connect this
get actor location. And what we're going to create is a box
around the player. Like, some of the shots will be missing the
player on purpose. L get shooting left and right, some of them will be
going to the player, but most of them will be
going left and right. Oh, we're going to do
a minus let's say 100, let's say we're
aiming at the floor. And then we're
going to be getting a random point in bounding box. An area around our player. Let's set this 200 201, and we're going to do a select. Because as we said, some of them would be going
to our player. And we're going to put this
on the actor location. Here we're going to put a random pull some of them are
aiming our player, some of them are
aiming elsewhere, and this will be our target. So I'm going to promote it to variable and call it target. I'm going to connect
this on begin play. We don't need the other two,
I'm going to delete them. I get this a little bit lower. And now we need the
actors original location. So we're going to
get actor location. I'm going to promote it to
variable original location. And now we need the
timeline, so add timeline. At this time, we're going
to do something different. We're going to use
two flow tracks, one of them to
control the distance, and the other one to control the height of our projectile. So, let's enter the timeline. Let's add two flow tracks. We could do it with
a vector track, but let's just use
two flow tracks. I think it's more clear
on what each one does, and it's easier to set them. But the first one would
be 00.0 and value zero, and the second one would be how long should our
bullet be traveling? Let's say somewhere around here, whatever it is 0.85. Maybe that's too much 0.8. Zero point 0.8. I
want the near to 75, so 0.8 sounds good, and value one. Let's
fit this here. For the next track,
let's add the points. The first one would
be zero, zero. The second one would
be at half time, let's call half time
of 0.8 0.4 0.4. That would be one. And the last point would
be 0.8 on value zero. Now, let's fill this. What I wanted to say is that
this one is the one that's controlling our distance from
the origin to the player, and this one will be controlling just the Z axis from the origin height
to original height. Now, let's go here. What we're going to
do is the a location. We're going to let vector. We're going to connect the
original location to A. And we're going to
get our target. And we're going to
add the height that we're going to be controlling
from our track two. I'm going to. We're going to connect
the track two here, we're going to connect
the track one here, we're going to
connect this here. And for the values, we're
just going to add 100 to Z. When we have finished
our timeline, we're going to on a
meter at location. Y t. This is y. On a
meter at location. We're going to choose
the particle explosion. We're going to scale it to
scale it actually 2.5 0.55. For the location, we're
going to get our target. And then we're going this act. Now, there is a chance that we will get
destroyed before this, which is when we are
colliding with the player. No, let's do that. Let's get our sphere collision, begin get the begin
over lap event. Let's ask the component. If the component has tack P, we're going to apply damage to the other, which
is the player. I'm going to apply,
let's say p one damage, and then going to copy
this meter at location. O here. We won't use the target. We will at actor location
from the other actor. Really, we can use the
sweep result and break it, and we can use the location, the impact point location. So we can spawn it exactly
where we want because the other actor will give
the center of our actor. Oh, we're going to use
the impact location, and then we're going
to destroy actor, and we don't care about this because the actor is
already destroyed. I think this is a good
stopping point for this one. We're going to
continue on the next. Goodbye
95. Hellgate Bullet Shooting & Light SFX: Hello, and welcome to
gain design workshop, and real Engine five,
procedural Dungeon, action RPG, creation course. Seriously, we finished
with our hell gate bullet. We added a particle effect that we changed a few
settings, basically, the lifetime change
color over lifetime, which we made it a constant, and then we changed
also the initial size. Next, we went and created our blueprint gate bullet
that we used an actor class, and we added this particle
and a sphere collision, which we use act. If we are colliding
with the player, we're getting the sweep
result of this collision, we get the precise impact
point and spawn pimter, and we applied one
damage to the player, 0.1 damage, and then we
destroyed the actor. Now, the way this actor moves
is that in the begin play, we're storing a target location through our player location plus a random point around the feet of the
character basically. And then we store the
original location, and we use a timeline
with a very quick, point from zero to 0.8
to reach the target, and we used the
different series, we used two different
flow tracks, one of them to change the distance and the other
one to control the height. We use the set actor
location to move the actor. Then if we didn't
reach our target, we didn't hit the
player actually, we reached our target. We use the spawn meter location
to spawn an explosion, and then we destroyed actor. Now, let's continue on our
hell gate and the begin play event to start creating
the shooting mechanic. So we're going to use
a time event again. And it's going to be
looking every 0.3 seconds. The fast shooting mechanism. I'm going to create
a custom event. Let's name it duty. And let's use a branch decide when it's actually
shooting or not. And we do have the condition, we do call it fire. We're going to use this
condition over here. Now, we don't always want
to be shooting though. This is when we can shoot
when the player is in range, but is the player
in line of sight? That's also a question. Are
we going to do a line trace? By channel or Tamela channel. And we're going to use the
actor location for art. Actually, we're going
to do the opposite. We're going to use
the actor location or end and not just
the actor location, the static mesh
location because it's a bit higher than where
the blueprint spoons. We're starting from here. We are ending there
actually not starting, we're going to get
worried location Because it's a component. We need word location
of the static metaphor? I'm going to get p
and from the pon, we're going to get location
because the pon is an actor. I'm going to use
that from the start. But we're actually
checking from the player to the tower, is it visible? Can we hit something? S. We're going to check that? That's the component that we are heating, let's break this. Hit result. Thats the component that we're
heating the actor so g E. H we heated our tower? That's only if we
heated something. First question, we
actually hit something? If we heated something,
does it have the g E? If it does, we're
going to all in class. We're going to split transform. We're going to get let's get
the static measure again. Word location. Sponse a little bit higher, and now we need to pay sound. Now, for sound, we don't
have a sound for this, but there is a sound in unreal that I find it
okay for this use, not the best one. We're going to go to content. And as you can see, there
is no engine content. We go to settings and
select no engine content. We're going to have a new
folder that's called engine. Now, it is not recommended
to change or do anything in this content if you're not knowing
exactly what you're doing. Because it can mess
the engine up, but we can't use a
sound from there. And we're going to use
the tkable window. The close one. Yeah, this one. Talk window close. And now we have our fire ready. Let's go compile and save. I didn't choose a
class, P bullet. O here, we choose an actor, which is P H gate Bullet. Let's compile and save. Way. Boxes are huge. And it's not shooting us. Why is it not shooting us? Let's go to I can stand this
music. Much for testing. We're going to go
to our head gate. Now, we have some head gates. Let's say we had more. Way we can do it is we're
going to select this one. Let's reject, select this one, and we can go here, and we can see it's selected. Let's see what it's running. It's hitting something. We cannot E, does this
class have a tag? It must have at tag. Yeah. Because our couple doesn't nor. Let's do a debug on this trace to stent the player. Let's move the player
next to a hell gate. We're hitting the player. This is while
because it can okay. So this opposite
didn't really work. So we're going to
do the opposite. We're going to start from
the mesh as normal people. We just going to show
that the opposite is usually fine too.
This time, it's not. We're going to
change the actor to, and let's p. I. Now this hitting the player
but still it's not shooting. Let's check y. What? Because we're
checking for actor, we need to check
for component as a T we do need some sound so we can check if the
shooting sound is playing. We have spit fire. Right, Let's remove
all this debugging, so we can see it a bit more clear. Let's
go to the sphere. Let's set hidden in game. Two. What else we need
debug lines off. And just for the sake of it, let's go to our character and
add do an audio component. Let's make this ambiance. Let's choose it to be
of sound ambience. I think this is it. Not sure. Yeah, that's it. Ambience, the Q, not the sound, and it will auto
activate in to activate. Let's go check. A ambient p.
We don't have a hell gate. All right. Have speed fire. It stays on the
ground a little bit, and then it explodes. Maybe we could put some code
for that, but let's not. All right. Next thing we should do. I notice that the
lighting is a little bit static this slight overs. The viewport has moved. This light over here is
a little bit static, and we do have a code for
light to make it flicker. It's in our torches. Let's go to our torches. It's cops get the torch. I'm going to use
this code over here. Go back to our hell
gate. The bullet. I close the bullet, we're
not going to need it more. Hell gate, and to put this here. I'm going to put a sequence. I put it before the time event, so we can just do these
actions in a row. Right. Now, I'm going
to go to the light. I'm going to get the color. I'm going to go to A, paste. I'm going to paste and
change it a litle bit right. And maybe more orange here, and the light will
be from density. We have it 100 150 say random. No can do random in update, that's going to be d e.
The range will be 700-800. Let's make it bigger, and let's remove some points. Let's keep that one.
Yeah, that's fine. And let's check. There's no gate. We will have one. And yeah, right now, the light, of course, it's much much
better. It does something. Read. I think this
is it for this one. I'm going to see
you on the next. Good bye.
96. Custom Mouse Widgets & Revenant Mesh: Hello, and welcome to
Game Design Workshop and Real Engine five
Procedural Dungeon action RPG Creation Course. Previously, we've finished
with our hell gate. We completed our shooting event, which uses a set time by event and triggers
the shooting event. Then we are asking if
we are able to fire. If we are able to find, we throw a trace line from the
static mesh to the player. The opposite didn't
really work for us. And then we are asking
if we heated something. Now, if it's true, if we heated something, then we are asking if that
is the player. And if it is, we are
spawning a hell gate bullet, and we're playing a sound. We also created we not created. We copy pasted the
code of our torches, which makes the life tremble. We changed a little
bit the timeline, and we changed a
little bit the values. So now, our light
of our hell gate also as an animation, basically. Oh, we're going to save this. I think it's time to start making some more
player related stuff. Oh, let's start with the mouse. We're going to
create two widgets. One for them for mouse
to over enemies, and one for them to be normal. So we're going to
call user widget. We're going to select
widget blueprint, user widget, W G normal mouse. I'm going to copy paste
and name it W G mouse. Now, we are going to go to our project settings
and search or cursor. And here we have our
software cursors, which we can override
with some widgets. We're going to add two of them. Actually, it doesn't
let us add a second one because this has to be unique. But the first one
would be the default, and the second one would
be the cross hers. As you can see, we're
choosing from set set list. Now, for our default, we're going to choose
the W G normal mouse, for the crosshairs, we're
going to choose the W G. Attack mouse, I think. Attack mouse. Here it is. We're going to close
the project settings. We don't need them anymore. They auto save the moment
we do some changes, and let's go to open
our two widgets. We're going to open the normal
mouse, bring it over here. Let's open the
attack mouse also. For the normal mouse, we're
going to place a canvas. And we're going to use an image. And we're going to go to our
mage and set its size to 90. We want it to be a box, and for the brush ema, we're going to select UI mouse. There should be a UI mouse. It seems we played
enough and it appeared. So let's choose UI mouse. Now, we could create some
complex code and make it red. But what we're going to
do is op the Canvas, go back to our attack
mouse and paste it here and select the mouse
and go to its tint. We're going to make
it bright red. And now we have a red mouse
for targeting instead of making any kind of code. No. Basically, That is
it from this part. What needs to be programmed
is the part that changes the color when we are
hovering an enemy. But for that, we need to change some code first on the
player controller. So let's not do that yet. What we should do
is finally go to our character, change the model. So, inside our top
down character, we're going to go to viewport. We're going to zoom
in a character, and we're going to
select our mesh. Now, we won't go
about too much detail about animation and meshes because we're just going to make it to work for us. It's going to be using
the paragon character, which is meant for something for a completely different use. So we're just going to make it make the paragon
character work for our skill set and our
desired abilities and gameplay. For our mesh, we're going
to select our revenant. And as you can see, is in
a very weird position. This is because we are using
the ym set of money C, which we need to change to
the reverend ym blueprint. And as you can see, it
clearly changed all. Now, if we compile
and press play, we will see a problem in
the revenue character. Let's open the
revenue character. There is some code here which
is obsolete now nowadays. The way it turns this don't exist anymore in
the project settings. So we're going to delete this
events that pose a problem. And we're going to compile
this blueprint and save it, and let's press play. So now we have our revenant
character in our game. But our weapon is
constantly extended, which is something
that is not very nice. So let's fix that. I'm going to also
lower the sound because we're going
to be testing a lot. Oh, let's go to open our
character animation blueprint. We're going to open the
revenant skeletal mesh act because persona is
interconnected. They have all the
stubs over here, which we can go to the animation blueprint or
to the level stage montage, or to the skeletal mese. We can go to each category. So right now, I'm going
to go to the blueprint, but I don't want the
BP revenant rigging. I want the revenant
animation blueprint. I'm going to select
this and open it. Right now, we are
inside the locomotion, which is inside the
animation graph, which determines on
which animation to play. Before we start
setting animation, Let's go to Evenra. The reason we got an
error to a character we are not using the
revenant character is because there is all
these casts here on event blueprint
initialized animation to cast to the
revenant character. So since it has a hard
reference, a casting, actually, not a hard reference,
I references to that, so when we press play, it checked if this
compiles or not. And it was not. So, I'm
going to delete this because we're not going to need the initialized animation. We don't need when the car BP sens blah,
blah. We don't need this. And we do not this and we do not this the plain
montage in the beginning, which is the intra montage, and I think we don't need the animation
notifiers from a montage. We will create our own probably. I'm going to delete this too. And the way we're going
to be animating is we're going to be
playing montages. We're actually going to create a huge animation graph with
a lot of functionality. So, in our locomotion, in animation graph, let's
go to the locomotion. We have the base
ground locomotion, which then splits out to anim
offset to upper body slots, and it does some weird plans that we're not
going to use a lot. Then it goes through
all of this and gives us the output pose. And what we're going
to do is go inside ground locomotion and
change the idle from idle, which is this animation that
has the gun extended buck. So we don't need this idle
with the gun extended, we need the non
combat idle loop. And we need to play it. We're going to add it here, and we're going to compile, and now our idol is with a gun down. Then let's go back, and let's enter our jog start. Now, we have our
jog forward start, but we need again
the non combat one. So we're going to get
non combat jog forward, which is FWD start, and we're going to select play, which if we click
on it, this one. Well, this is our jog start. Now, let's go back and
let's go to our jog stop, which we need again,
the non combat. So combat Jog W, and
we're going to play. And this animation has this
nicely topping animation. It will back out sometimes
because we don't have a full system,
but it's fine. Lastly, let's go to run, and here we can
see a blend space, which is actually
multidirectional for lining and everything. Since we don't going
to need all this. Let's go back. We're
going to delete this. Again, we're going to
use the jog forward no o Dog forward, non combat, between play, which is this constant
animation running. Now, let's save go
back to our game. Let's press play. We
have the new mouse also. And you can see
right now we have a better animation for
eagle walking and running. I use a Bat portion.
I don't have one. I think this would
be for this one. I'm going to see
you on the next. Good bye.
97. Physics Impulse & Melee Attack Animation: Hello, and welcome to
Game Design workshop and real engine five procedural Dungeon action iz
creation calls. Previously, we created our
widgets for our mouse. We created the
mouse attack widget and the mouse normal widget, and we added them in
our project settings to our cursor software to
our software cursors. So then we proceeded to add our Aragon model
to our character. And we changed the
animation class to be the revenant blueprint
animation blueprint and the skeletal mesh
to the revenant. We proceeded to
make some changes in the animation blueprint, which we went to the animation graph inside
the ground locomotion, and we changed in the Jog start jog stop and run to the
non combat animations. Now, let's proceed
making me attack. But before we do that, I noticed that when we are
damaging with the rage potion, we are not applying any
impulse to the physics items, which since we enabled
the physics items to be overlapped by
the rage collision, then we should do that too. So, before this branch here, we're going to put a sequence. And we're going to put a branch, and we're going
to copy actually, we don't want the actor has tug. It's a component.
Our physics objects, the boxes are components. So we're going to go
to component and has tug a component has tug. And the tag will
be H. If it does, we're going to get the
component and at pulse. If it's true. We're going
to need some more room. A little bit higher.
For our impulse, we're going to need
to give some number. What we're going to
do is we're going to split this vector to x y and z. We're going to get a
random load in range. And we're going to duplicate this two times two tra times. Actually between the first two, we're going to select
based on a random bul. This will be
connecting in x and y. This will be connecting in dead. Now, for the values, we're
going to put minus 220. And actually, this
needs to be minus 260, let's say, and this
should be minus 220, because the maximum
is closer to zero. So this value, since
we are on minus, this should be lower than this. And let's do the positive here, which would be 220
minimum and 260 maximum. And for the height impulse, let's put 200 to 300. And now, theoretically, let's also check the
velocity change. Which what it does, basically, it's like heaping
the object's mass, if that makes sense, because
physics items have mass. But it is a little bit more
complicated than that, but let's consider roughly
that it does that. So let's go play. Find some boxes
of our inventory. Yeah. They're moving,
they're getting a impulse. Now, we're going to use this code also in
our male attack. But we're going to copy
paste it at that moment. Now, to create A M attack, we need to do some
pre work first. What we're going to do is we're going to go to our
blueprints folder in our enumerations folder and
create another enumeration, which is going to be
the player state. Now we will have
most of the states, all of the states
basically in enumeration. But it's recommended
to have more than one. We're going to call
this player state. We're going to open it.
Bring it over here, and I'm going to add two states. I think the exact. Let's call the first state that. Let's call the second state. Normal, all the third state
A or when we are aiming, let's call the fifth,
the fourth state. Stan, because when
we're getting hit, we want a Mini stan to happen, and let's call the last state M. The way we're
going to use this is mostly to not do things
while being on another state. The next thing we're going
to do is go to our character and create a function
to change the state. So we're going to
call it change eight. For the input, it's going
to have an e player state. This date. Let's create a variable
of type player state. Let's call this also
player eight. Pate. E player state. And we're
going to duplicate this. And we're going to call
it Player state age. Oh, we need to be setting
these things here. The first thing we
should do is set our player state to
the previous state. And the next thing we do is set our player state the
desire that is incoming. Now, I don't think
we're going to use the previous state,
but why not have it? The next thing we should
do is actually add the state to our top
down controller. And because we're
going to be using the controller reference often, let's go to begin play. And here that we're saving
the down game mode. Let's X and Maro do the same
for the player controller. No, we're going to
get player and cast. Down to make it a pure cast. Promote this variable. Connect this and now we have a reference
to our controller. Now let's go to our controller
and create a variable. Let's call this player eight. Players eight. B player state is
already a variable. The type will be e player state. Compile save. Let's go back
to our function, and state. We're going to get our top
down controller reference, and going to state players. Eight our state. Oh, We are done with this. And the next thing
we should create is our animation
montage for M Montage. Oh, we're going to set for st, which is the animation
we want to use, and we're going to
right click on it and eight animation montage. Now, what is an
animation montage? We go to paint for a second. Oh, let's consider that we have our character and our
character running. This is a animation. Anyway. So our character
is constantly running. And suddenly we want
to play an attack. And let's say we don't want to change character
from the waste down. We want this part
to be the same. Then we can use another system
called slots. Go too big. But we can use another
system called slots, and we can say we
can say just play an animation over this part or blend it with the below part. And here where montages are. Like we're saying,
play this animation. Let's call attack one, and he extends, for example, his arm like this and to punch. Now, we will use up
to this part for us, but montages have abilities to do an attack,
too, for example, afterwards, and throw this punch if the player keeps
pressing or if not. And basically, it's
a tool that helps us create more powerful and
Not only more powerful, but it enables us to
control complex animation. For example, attack combos, special moves, which can
be triggered by gameplay. Anyway, let's go in this in. So, we're creating our Montage. Let's open our montage. Oh, we want somewhere
here, for example, to play to create a particle or to play
another animation. What we would do is to create something called
We're going to right click. Actually, we need to
click here on notifies. This is the notifier bar. And what is a notifier? Basically, it's a a marker that we can place in
specific points within the animation to
trigger some events. So, let's place an
animation modifier. Somewhere here.
All this on here, a notify, and we're going
to a new notify call it. Well, it's not
particle. It's actually a me attack our me blueprint
that we will create, but let's call it particle. Now, if I had an other
animation inside here, like I can bring this it. I can bring another animation. That was a bad example. What we will do inside here. And what we will do inside here is we're going
to create a notifier, which is actually a mark, a point that we can trigger some events that we
want something to happen. It could be sounds. It
could be another animation. For example, if I
bring an animation. Now this is the same animation. But if I bring Even
the same animation, and I want to say, do it again. I would need some thing to notifier to explain when
we go in which animation. What we're going to do is
somewhere around here, we're going to create
a notifier new. Let's call it early. Ta. And now we have
this notifier here, when this animation places
here, it triggers this. There is a way to
actually find it here. Yeah, not here. This is
the animation graph. Sorry, the event graph on to be on the event graph
on the programming part, not the animation part.
Be this is an event. It's a programming thing, so
me event notify me attack. And this would trigger
at that moment. But since we only
have one notifier, there is another way to call it. And just to demonstrate
this for now, we're going to connect
it in the next lesson. Let's go to Pen gra in
our player character. Let's create space keyboard. We're going to use space from keyboard. We do the M attack. So if we plays have this notified begin
and then notified end, and we do get our notified name so we can switch through here. There is plenty of ways
to go for animations. We will choose specific ones just to make our character work. Now, I think this is a good
stopping point for this one. We're going to continue
with building our space and play montage and
all the logic of our My attack and create also a blueprint that will be our My attack in
the next lesson. Good bye. See you then,
98. Melee Attack Blueprint Collisions & Effects: Hello, and welcome to
Game Design Workshop and Real Engine five
Procedural Dungeon action RPG creation course. Previously, we
created a custom date for our player using numeration
and having our states. And we proceeded to create a change state to our
character function. That's called change state, and we are storing the
previous state to a variable. We're setting the new state, the new player
state to the state, and we are also passing
this information to our top down controller that we created the player
state, another variable. We also created the
previous state and the player state in the
player character variable. Now, then we proceeded to
create our animation montage, and we created an
animation modifier. That will notify our me attack
when to one our particle, which we said, it's not
going to be a particle. It's going to be a blueprint
that will have some logic. Now, let's close this montage. Let's go to create our me actor. We're going to go to
folder Abilities, right click and create
a new blueprint class. We're going to be actor,
and let's call it BP. We're not going to
program it right now. We're going to go straight
to our collector. We're going to go
to our space event, Bace ball event, and we're going to switch
based on our state. We're going to connect
this on press. This is when we're going to
be able to do a mell attack. And the only place we want to be able to is when we are normal. No, then next thing
we're going to do from normal is change state. We're going to bring our
change state function. I'm going to set it to me. So
this changes our state me. Now, if I keep pressing space
bar, it won't retrigger. Now, the next thing we
should do is pay a sound. We're going to play sound two d, and we're going to
choose for a sound the fort effort swing. Efforting. We're going to use
the effort sing. The reason we're
going to use this is because it has a bunch of different wing What is this
dialogue dialogue also? Ah. Yeah, it will sound different
every time we attack. Now, let's go to our player, and after our sound, we should play our montage. And to play Armonta, we need an skeleton
mess component. This is necessary. Because who's playing this
montage? This is important. But we're going to connect here. And for armontage, we're going
to choose our ast montage. Now, before I said that we can use the notified
begin or any, it will trigger whenever
any notifier will be used. And since we have
one, we can just use this without any
notifier name and say, acto class, And this
would be our BP Melly. Or the transform, we're going to split and we need a location. We're going to get our mesh. Get location. Soccer location,
what does that mean? I think we're using
this skeletal mesh because this is where we can
get a soccer location from. If we go to our skeletal, go back to the persona and
let's go to our skeletal. We can see there is a bunch of extra things like What
is a slot basically? I mean socket, not a slot.
So what is a socket? We can go to here we are, and eye muzzle two. You can see there is a
socket over here also, which is something that we
can attach something to, like a slot that we
can place things. And it doesn't need to
be exactly on the scale. As you can see this socket
over here is way far away, which might do for us. But I think this is the wrong
arm with the and r to find the socket and R on our montage. Yeah, it's the other r, the right arm, not the left one. So we need and r, weapon r. A here
we are on r right, nd R uzle one. Let's use this muzzle one. Socket name over here. Muscle score one. Going to go back
to our character and use the socket name. Which I didn't correctly. P. Sometimes control C
just doesn't want to operate. Muzzle one. This will give whatever word position our socket
is at that state. The next thing we will do is to attach our meacor to our hd. And so our me attack
follows a little bit h. We're going to
do touch of aduch. To actor. Because we're spawning
an actor and we want to attach it to our actor. And we're going to keep word. This means that when we turn
our me attack also turns, and part actor would be. Maybe we can abuse a
little bit our our attack, our may attack, and
just turn around when we are attacking and
hitting many enemies. Oh. Now, the only
thing left to do is create a cool down
for how often we can me. Oh, Let's change state
here after 1 second. So I want to put a delay. 1 second. And let's
change state to normal. This would be a
problem if we allow anything else to happen
while we are mailing attack, because let's say, for example, I'm AM state and I
press mail attack, and then go back to
AM state instantly. After 1 second, it will
change my AM state to normal. But we'll see how
this plans out and we will do the appropriate changes. Let's go open our mainly
attack blueprint, and our abilities. Let's add a collision sphere. Per collision. Let's make it 100 and radius. Also, we need to move it
a little bit forward. Uh, maybe here would be fine. Now, why we move
it forward because the center of the blueprint
is where it would spawn. So we need this here not to be here because that would
overlap with our character. We don't care for overlapping
with a character. So somewhere here
would be lovely. Now, the next thing we need
is a cascade particle. For the particle system, we're going to use
the revenant primary. Plenty of revenant primaries. We want the revenant
primary it character. Right? Let's make it a little bit
bigger on not all of it. I'm going to talk this
x on one, and on two. Oh, this will be article. Point. Bigger. We're going to see it
how it looks on the map. Now, the next thing we
will add is a point light. Make it produce
some light extra. Let up the area when we
are merely attacking. Well, basically lit
up the floor a bit. We're going to get point light, we're going to set
it radius two. And we're going to place
it ale bit lower. Here. It lights up our area and
a little bit forward, too. Not too much because you don't
want to see our character, something starting here, and
then also starting here. You want to see like
it starts from basin. We need to change the color also to something reddish, fine. And let's go to program
this may attack. Now, we usually use destroy actor whenever
we want something. But that is also another way. We go to class default. That's for lifetime. We can see we have this
variable over here, how long this actor lives. Ero is forever.
But if we put 0.3, for example, then this
will die in 0.3 seconds. This actor, we don't
need to destroy. We don't need to
call destroy ever. What we need to do
is go to our sphere. Which collision, elect custom. I'm going to ignore everything except the pon and
the physics object. Actually, we need to
not ignore for dynamic, it's our hell gate also. On the capsule. This
is our collision. W dynamic. Oh. Now, our sphere needs to do something when it
begins to overlap. When we spawn actors, even if the other actor
pon inside the sphere, it will trigger the
begin overlap event. Oh. We need to ask other actor tag, and if the other
component do a sequence. Do this separate.
One is for enemy. The other one is
for physical P H. Two branches. We can't really feel the part of the enemy yet because our male wouldn't do damage to the
bigger knock back to our end. But we can do the physics. We're going to do for physics is going to go to our character. Going to coated. Here. We just need to add
impulse, random floats. We're going to go back
for me pace this here. It's true. A valid
object. Also check this. Just in case it's
destroyed or something. We're going to connect
here. And that would be. Actually, we need to
connect the target also, who are we buying impulse to? And that would be
our other component. Let's go test because
I think we will have an issue with the rotation
of our mell. Is me. Nothing happens because we have enabled input
in our character. Wing the end of beg play, let's get our player
controller reference, and let's say Maybe I connect the
controller reference to the player controller, target would be self. Let's compare. C,
nothing is happening. Let's check why? I
think I know why. Because the state
by default is dead, let's set it to normal
because it's our first state. Create the variable but
didn't a player state. Let's go test again. I do have sound. I do not
have a montage. O let's exit. I think again, I
know the reason. Let's go to our cast
montage and let's here, as I said before, we
need to use a slot. Right now it's on
the whole slot and it's say to do to
the whole body. Go and check in our
animation graph. We'll see that this
will not cut it because the full body doesn't
have basically a plot. But we need to do
the upper body slot. We're going to go fontage, and plot Tam. Upper body. Might freeze, but we
compile and save. It will freeze. Didn't. Do. If I stop play. Oh. Anyway, let's go
to our game play. I think this time
it will work. Yeah. I can see explain the
animation correctly. Even if the preview froze, that doesn't mean anything. There is some issues
with changing things. But we're not spawning
the particle. Is it because this is not
triggering? There is a chance. Let's tog break point here, or maybe the word
location of Mcle one? O h, triggering. Get a little bit
of soul searching, and kind of figured out
what's the problem. When I created a notify
and added a new notify, this is a skeleton
skeleton notifier, which is different
than the plan montage. Our node here. That
in the tooltip, it only works with
lay Montage Notify and not with skeletal ones. We're going to change going
to delete this M attack, and we're going to use this. Montage Nodify. We're
going to name M attack. Now it would work. Yeah, we can see how
we have our article. But as I said, we do have a
problem with the rotation. No, to fix that, we will go to our PPM. We're going to go
to our begin play, and we're going to
st actor rotation. For the new rotation. We're going to why a rotation. And the start would
be player po. We're going to do a I'm going to get the
forward vector also. Which is a vector that tells us where we are
looking at, basically. So start would be
the pont location, and n would be the location we are at plus the forward
vector to give it a direction. Another rotation
should be fixed. Yeah, it speaks. I don't like the
place it's spawning. But I I like it in some. First of all, let's
go to our play rate. Okay, I have already changed it. We should be changing two maybe two a cool down. Eight. Let's leave the enemy
rate at one point. Five and of one. Let's choose the
muzzle two location. I think it was a little
bit more forward. Even if it's in the wrong hand at the time we're
playing the animation. Oh, no, no. Muzzle one was. But let's make it tri a
bit later for our hand. Let's maybe. Dave. This better. The life is a little
bit too intense. Would make it a little
bit lower. Let's set. Right? Let's. Yeah. Looks fine. If it moves the boxes, it should be able to move boxes. Boxes in this room room again. Rooms. Is the box. There is, right? Perfect. We are moving boxes. Great. I think this
is it for this one. I'm gonna see you on
the next. Goodbye.
99. Static Aiming & Shooting Mechanics: Hello, and welcome to
Gain Design Workshop, n real Engine five, Procedural Dungeon action
RPG Creation Course. Previously, we finished
with our me attack. We created an animation
montage that we used a notifier montage notify to notify when we want to
pospone our me attack, and we use also in the
character blueprint and the space bar event to distinguish between
the player states, so we can attack only
when we are normal. We change state
immediately afterwards. We played a sound, we
played the montage and on begin notify of the montage. We spawned our VP may attack, and we attached it to the actor. Then we waited for 0.8 seconds and changed
back the state. In our blueprint My attack, We began by setting the rotation of the actor towards
where the paw is looking. And then we created the component begin overlap
event with a sphere based on our sphere collision
that checks if the actor has is a physics
object or is an enemy. As we said, the enemy
will be filled later, and that was it. And our may attack
actor is composed by a light a particle
and a collision sphere. Now, let's continue with
making our shooting mechanism. But for that, first, we need to make a me
a aiming mechanism. But for that, we need to
make an aiming mechanism. So when our character
is studying still, is passing shift, for example, we can say that the
character is aiming, so the collector can shoot. Now let's put a comment here. Let's call this M and let's create our a panic. As I said, we're going
to use the shift button, so we're going to use the
left shift on keyboards. And we're going to
create a bulion that we will know when
shift is down or not. We're going to be
setting and pals. Now, the next thing we will
do is switch on player state. Oh, which? On both of them. When are we going
to be able to aim? Well, basically,
when we are normal, or we are aiming already because the
animation hasn't finished, we should be able to aim again. What we will do though, get our character movement
and change one thing. In our character movement, there is an oriented Here it is orient
rotation to movement, which means that
the character is orienting towards our movement. When we are aiming, we don't want this
to be happening. We want it to aim where
our mouse is aiming. So we have to turn this off. We're going to rotation to movements and then
change our state. Now, I'm not going to feel
forse one because we do need the montage to play
first and then set this off, set this on, whereas here, we need to set this off
and then play the montage. We're going to set state to a. For our aiming, we're going to use the pose that we
had in the beginning, which has the gun extended. We're going to create
a montage out of this. E patient montage BE Montage. We don't need to
actually, we do need to. We need to set the slot, the default slot to be upper
body, name, upper body. Now, if we want to reset this, we can just re you have worked. It backs up sometimes. And now, now if I go somewhere
else and go back to it, it works, and our cast
montage also works. As you can see, what we need from here is actually this part that from below to A. Oh. Let's go back. Let's page. Now, there is also a
player in Montage, which is a sorter node
with less options. But we use this because it has way more
options in the end. Now we're going to use
the skeletal mesh. For montage, we're going
to select the idle one. Now, for the
lowering of the aim, you're going to
cheat a little bit. Use this montage. Normal, and our rate
would be minus one. So this will force it
to play in reverse. And after this, we're going to change our state
after we lower our weapon, where as we are
lowering the weapon, we set it to normal. The next thing, we
should orientate back our movement because we
are in normal state. Now, here later, when we
set the mouse to turn red, when we are aiming an enemy. We will also set
it to turn red in both actually turn red when we are aiming and turn normal
when we are not aiming. So when we are aiming, our
mouse will be constantly red, indicating that we can
we are ready to shoot. Let's go test this.
Let's press play. I press shift, we
can see our gun. But right now we are not aiming. So it started to moving and
just aim towards the gun. But as you can see, if we close
the sound, it's too loud. As you can see, our aim at rotation worked like we are not rotating towards
movement right now. But if I turn it off, we are rotating back towards
our movement. Now we're kind strafing, which is not bad, but
it's not what we want. Anyway, for this to be fixed, we need to get on the player controller
and fix our movement. But we're not going
to do that now. We're going to continue with
our shooting mechanism. Oh, Let's go do that.
Goo to our character. Let's put here. Hey. Let's se left house button to create
our attack event. The first thing we will
do is switch and state. Set. When we want to
attack, we are aiming. Oh, we're going to ask a
question. Is a branch. Are we already attacking? I'm going to promote
this variable, and call it a attacking. Because if we are
already attacking, we shouldn't attack again, this should be a cooldown,
else our gun will be potting like a machine
gun as fast as we can click. Oh, If we are not attacking, then we're going to
set attacking to true. The next thing we're going to
me is to play our montage. This time, we already
have a montage, it's called primarifier
made montage and some notifiers that we
won't be using, but it's fine. And let's bring our mesh. Here. Now, the next thing we're going
to do is span our bullet. And before we do that, let's just create a
function called spa. Bullet. We use this. But we're not going
to use this now. What we're going to do is
complete our ing mechanic. Oh. When we play
montage, we will spa. Bullet. Oh, the next thing we need to do the reset ho is attacking ba. We need a cool
down. So let's put a delay of let's say point. And we need to reset. I'm going to create
a customary event. And this reset. Pull it here. This needs to switch based on player state,
because for example, we want to do another
thing when we are aiming and another
when we are normal attack. For example, when we hovered over an enemy
and press click, it's different ending than if we press shift and
start shooting. Now, let's switch Of course, in both states, we
need not attacking. But when we are
normal attacking, let's set this also to stat because if we get
stunned during an attack, we should be able to
reset our attack. Now, when we are attacking normally or
when we are started, we want to lower our gun in case we are
not attacking again, like if I hover over
an enemy and shoot, and then un hover, you can stay the hand up in the shooting position,
it should lower down. And to do this, we're going to cheat again
a little bit and go for a custom event lower gun. And we're going to connect
it to this chain of events because that's
what we want to happen. If this is true, it
doesn't really matter. It's already going to We're
going to let it set do again. Oh. We're going to
call lower lower gun. In both situations normal. And that would be one part of our left mash button
shooting attack. But let's continue with the bullet, which
is the next part. On our next lesson. Good bye. A
100. Player Bullet Blueprint & Visuals: O Hello, and welcome to Game Design
Workshop and Real Engine five procedural Dungeon
action RPG creation course. Previously, we started with
our shooting mechanics. So, we created the AM
event with left shift. We set the aim down or AM is not down when we are
pressing and releasing. We are switching
based on E state. We are setting orient
to movement off, and we are changing state to
AM and playing a montage, which brings our gun to
our side, for example. Now, When we release, we play first the montage
to lower the gun, and then we change
the states back. So before the set
states our back, we know that we have at least
started lowering our gun. Now, to be honest, this
set orient rotation to movement is kind of
decorative over here, just to demonstrate
what it means that when we are oriented
based on movement, we can actually the
character turns around, where when we are not, the character stays steady
and it's more like strafing. Let me lower the
sound a little bit. That's the difference
with this variable. The one is basically strafing. The other one is follow
orientation to movement, follow rotation to movement. Well, for us, what
we will do is we're going to be constantly
rotating where our mouse is. So this actually is
not needed that. But if it stays here, it won't affect our code. Now, next, we want to use
our left mouse button. To again create a chain of events based on
our players state. Then we followed we followed up with asking a question
if we are attacking, and if we are attacking already, like if we are shooting, we are not going to do anything. But if we are not shooting,
we're going to shoot. So we said attacking to true, we played the montage of
shooting that we created. Actually, we didn't
create this was existing, that it's shooting. And then we proceed with our function spawn bullet
that we left not filled. And then after a delay of 0.65, we reset attack so
we can shoot again. But when we are on aim, we are not lowering the
gun, which is an event. We created and kind of
hacked our way to create a new code and used it
on the shift released, which is our lower gun. Now, let's continue with filling this function,
and to do this, we need to create
a new blueprint, we're going to go to blueprints. We're going to go to abilities. We're going to right click and create a new blueprint class. Now, this is not
exactly an ability, but Hel gate Bullet
wasn't an ability also. So we're going to call
this PP layer bullet. I'm going to open this. The first thing we're going
to need is a particle. So we're going to add a
cascade particle component, and it's going to be of template and Mark, there's a lot of marks. Mark il. There is two. The one is frosting, we
want the normal one. We, we have a nice
bullet over here. A effect for our bullet. Now, the next thing we
need is a collision tube. A collision sphere
actually not cube. Let's leave its radius to 32, give a lot to able to heat area doesn't matter
if we heat directly. Let's be nice to our players. The next thing we need,
we actually have it set up in our BP ML is this point life over here that we want to light the floor as the bullet is traveling. Let's go back to our bullet
and paste this light. Maybe it's a little bit big that it atonation
radius to 200. Let's bring it closer
to the bullet, and I think that's fine. Lastly, what we need is a
projectile movement component. Now, this component is as the movement component as
is the rotation component, is a component
with many options. And the only thing we need to change is actually two things. It's the rotation
follows velocity, but we want the actor to always be facing
towards its velocity. And also, we want to change the projectile gravity
scale to zero. Maybe maybe 0.1, our bullets have a
downward slope, maybe 0.1. But if it's too much
and we can see that our bullets are going very
fast into the ground, we should change
it back to zero. Now, this this projectile
movement component has a vector that
is called velocity, which means towards
which direction and how fast am I going? This is something we're
going to calculate later. But what we're going to do is go to our event graph
to our begin play, get our projectile
movement and a velocity. I'm going to this pin
and make a new variable, call it velocity velocity. What it should be. So we're
going to make it a vector. We're going to split this so only we're going to use x and. We're going to make
this variable, incense edit, and expose on sp. R The reason behind this is because we are on isometric
and with a tilted camera. And that means getting the correct rotation and look
at to find our velocity, where should our
bullet co is not as simple as a pop down game. So for now our velocity here
we'll be using the x and y. But I think this few information will be useful for later. Anyway, the next thing we should do is to check our collision. So did we hit an enemy? We're going to
select the sphere. We're going to go to
begin overlap events. And we're going to check
if the other actor first of all is valid. Because if we are shooting
at an enemy that is dying, for example, it's
going to be destroyed, we shouldn't do anything. Now, the next thing
we should ask is, does other component have tug? The tag would be e enemy, and we create a branch. And if it is an enemy, we should actually apply damage. Let's apply a damage of one. Don't forget to connect
the damage actor. Then what we're going
to do is ation. This mistake. A T, probably. And what we will use
is the mark end again, as we did on the explosion. But this time, we're going to
make it, much smaller, 444. And the location would
be our actor location. Now, if we didn't hit an enemy, we're just going to spawn Dmter. We're not going to apply damage, unless we had
destructible terrain and then going to de actor. So, we hit an enemy, we apply damage, we
spawn a particle. We don't hit an enemy, we just spawn a particle
and destroy actor. So, there would be a problem with this setup that when
we are spawning a bullet, if it doesn't hit anything, it will just go on
forever and ever. Well, not actually, but yeah. What we're going to do is go
to our class defaults and go to our lifetime lifespan, and let's set it to I
don't know, 5 seconds. I think it's enough. Now,
just to test our bullets. When we finish, I think
this would be for this one. I'm going to see
you on the next. Goodbye.
101. Player Shooting & VFX: Hello, and welcome back to Game Design Workshop rail engine five Procedural Dungeon
action at Ps creation course. Previously, we created
our bullet blueprint. Oh, we used a particle to show the trail effect
and the bullet effect. And we used the sphere to
detect collisions if we are colliding with the
environment or an enemy. And we use the
point light to show a little not white red light on the ground as the
bullet is traveling. We use the projectile movement
to set our gravity scale, and it will be responsible
for controlling our movement, our bullet speed, our
bullets movement. From its settings, we turned
off the gravity scale, and we set the rotation
that follows velocity. Our actor always always
looks towards the velocity. Now, on begin play,
not we stored. We are setting the
projectile movement velocity to a variable that we
created should velocity, and we are using
x and y from it. We have made it incense
editable and expose on spawn. When we are spawning the bullet, we will give it velocity. Afterwards, we completed
the overlap event that we are asking if our actor that we which
collided with is valid, which we are
checking, basically, if the actor that we collided, is it pending to be destroyed? So if it's pending to be destroyed, don't
do anything to it. And then we checked with
a branch if it has tag E, which means it's an enemy. So we apply damage,
if it's not an enemy, we are just spawning a particle that we do also when
we apply damage, and then we destroy the actor. Lastly, we change the
lifetime to be in, I think, 5 seconds, A 5 seconds, so our bullets won't leave forever when we
are shooting them. Now, let's go complete
our spa bullet event. Actually spa bullet function. The first thing we need to do is actually create a fake muzzle. And the reason is that if
we go to our skeletal mesh, the search for muzzle. We can see they're placed
in very weird positions. That's because they go
with specific ability, specific timing, a very
specific way to be used. So we're not going to use this. We're going to cheat a little
bit and create a muscle in a certain position that
our gun will reach. And how are we going to do this? We're we're going to
add a sine component to our blueprint and
use its location, let's call this muscle actually. Each location to spawn our
effects for our shooting. So let's go to our
viewport and the location. Actually, I do have a
location in mind that I tested and looks okay. It's going to be 128 on x, going to be -28 on y, and it's going to be or
actually e eight on Z. So this is actually
where our gun reaches and it's
on the gun point, that this is about where
our muscle should be. So let's go back to our spam bullet and using
this muscle variable, we're going to get location,
get word location. And we're going to sone
meter at this location. Let's connect this two location. For the e meter,
we're going to use last shot muzzle flush.
There's plenty of that. But I think there's only
one with that name. The rest one are local, which means local coordinates
and the frosting. So yeah. Last shot muzzle flush. Now, if we go and
just play with this, we'll see instantly a
problem with the ze flush. Again, it's the rotation that it should get our characters rotation because
right now it's opposite. And it is a little bit big also. I wanted to test the size also. So let's go back. Let's set its scale to 0.3. And the rotation.
We're going to get our capsule rotation because that's where we are looking at. But now this should
be working fine. We are moving after
we're shooting. But that's because we haven't
done the restrictions on movement and
basically the player controls in the controller. Because all our controls
are basically the mouse. So the mouse needs a little bit of code to decide what it does. Now, let's stop the
gameplay, let's go back. And the next thing
we're going to do is spawn again a meter. But this time attached. And this time, we're going
to use the muscle to. A place that it follows
because these points, these are touch points, which are the socket names
of the skeleton that we saw follow the movement of the
skeleton where they are. But we're going to spone it again on the location of muzzle. And we're going to
keep word position. Yeah, just keep word position. The rotation doesn't
really matter. And for the article, we're going to select
the last dot lush. And I'm going to
modify it a little bit because we don't
want the actual, Let's find it first,
local, Lastlh. I think this is it. I want it locked. Is there
unlocked one? Yeah, there is. A shot muscle plus locked. This is what we need.
Let's go to this particle. What we're going to change
is a very small detail. We're going to go to drug, and we're going to change the value from two to, let's say 0.5. It's a little bit more so, not so much air resistance. We're going to close
this particle. Let's go back. Might
be a little bit big. Let's check it out. We might want to hay down a little bit. Don't even eat. L et's debug this. Well, let's
go back to our blueprint. See what's going on. Okay, I haven't attach it
to the component. We are setting
which bone to lock, which bone to attach, but we're not
setting which mesh. So we're going to use this mesh. Comp save. So let's
go back and test. I think the size would be big. Shift. Ick. We do have smoke. All right. Right. It's working on all directions correctly. This is another way to make something follow
your rotation. You attach it to your character. Now, let's continue with
spawning our bullet. We're going to phone from class. We're going to split
the transform. We're going to
select our bullet. The word location should
be our muscle again. And now we need a shot velocity. Now, for now, we're just going to use just
to see our bullets. We're going to use the actually forward vector of the capsule. Let me bring the capsule here. Let's get forward vector. Let's multiply this by a speed I don't and 101,000. Let's connect to
velocity. Let's go shoot. We are shooting irrelatively
to where our mouse is, we are shooting and
our bullet explodes. So Lastly, of course, we do need a sound. So let's go here, and after we spawn our bullet, we're going to play sound D, and we're going to use the
sound the pistol sound. Now we should have
sound on shooting. Can I please check
if it damages this, which I think it doesn't. It should be five
pul, shouldn't it. So let's check this up. And I think I already
know what it is. We should go to actually
let's go to hell gate first. The defols tug. You see? We have actor tug
Es in the bullet, I ask for component tag. So shouldn't ask for component.
Should ask for actor. As tag E of the component. But now, we should be able to shoot something.
If we manage to a. There is two hell gates
over there. Let's go. Yeah. We can't destroy hell
gates. We're getting there. Oh, I think that would be a good stopping
point for this one. I want to see you on the next. Good bye.
102. Player Death Animation & Mechanics: Hello, and welcome back to
Game Design workshop and real engine five procedural Dungeon action RPG
creation course. In the last one, we finished with our spawning of our bullet. We finished. In quotations because we do need
the correct velocity. So, what we did is we spawned an e meter
on a fake muzzle. We created a fake
location that we will call muzzle in front
of our character, and we spawn an e meter there. And we use the caps rotation
to rotate that a meter, which is the emter that makes our muzzle
flash, for example. Oh. Then we proceeded to spawn an emitter attached and the attached was the mesh in
the socket muscle too. So we have our smoke following
a little bit of our gun. Our movement in our gun. Then we proceeded to
spawn our pullet actor with the location of the spawn to be the word location
of the muzzle, and then we created a fake velocity towards the
front of our character. And then we played a sound. Now, before we go on and fix our character's movement and
where it's actually aiming, we should complete the last. Let's put a comment here. Pet. Actually shoot. I would be more correct. Now, the last thing that we
need is our health system. We have created
it up to a point. But we haven't
designed what happens. We don't have our
stan. We don't have many parts that happen
after we take damage. So, let's continue
with this logic. First thing we said we will star our character when
we get some damage. And that means that
this should be also a grace period that we are not
getting stunned, else, we're going to get stand
locked when we are getting continuous
nonmag for example, for the tower that
fires continuously, or if plenty of enemies
hit us at the same time. We're going to put
a branch here, and we're going to ask,
can we get stared? Going to promote this variable, and let's call it C B. Now, actually this
is very bad name. Let's call it on cool down. If Sn is on cool down, we do, if S is not on cool down, we do something else. First thing we do is
set stan on cool down. But if this fires again,
it is from the t. Second thing we should
do is change our state. T. Next thing we should do is let's play a heat
sound. A sound two D. The reason we're
playing it only on Stun is we don't want every
heat to produce a sound, but every heat that stauns
us should give the audio. But we're going to we're
going to use the heat. Me Herm. We're going to use a Hert Mel. And then we're going to ask
a question if we are dead. Because if we are not dead, then we're going to
do something else. If we're dead, we're
going to play death, and to play death, if
we promote this arial. All this dead. Let's
call this dead. Let's create a custom event. All this death and
call it untrue. Now if we are not dead, we want to play a heat effect. So it shows visually also
that our character got heat. We do this. Let's
create another montage. Well, it's sets for heat. Actually, we need to be paragon. So we have this
heat react front. We're going to create
a montage out of. We're going to
enter the montage, the group slots to be
upper slot. Upper body. L et's go back to our character
and play her montage. Let's select our skeletal mesh. And our montage. It react front. And now, what we're going
to do is we're not going to go through this chain
of events, which is, when we stop playing the
montas, do the next things, we're going to choose the
complete and interrupted. So if something interrupts
this or this is completed, then we're going to
do something else. What we're going to do
is get our player state, which player state, because this result will vary
based on the player state, a little bit, not a lot. And if we were on
normal A or me, we want to return to
a normal position. We're going to
change state again. To normal. If we were normal, if we were aiming because it
interrupts our aiming. If we're trying to shoot and something shoot at
us, and it hits us, it interrupts our aim,
so we should aim again, and also the merely the same. And what we're going to
do afterwards is going to delay for a little bit. Let's say 2.5 seconds. And then we're going to set
the non cool down don't like this noise and s. I don't
cool, might have been a C. Anyway, compile and save. But basically, this is our countdown for when we
can get stunned again. Now, in the case we are stunned. If we didn't leave our shift. I'm aiming and I'm shooting
and I'm getting stunned. Ba this is the case when
we are on cool down. We cannot be in this
case if we have been stunned, what happened here. I connected I connected
the wrong things. Lu while it happened.
That's here. So, we are now star, we are getting on stand, and we are changing state. So when we're changing state, we cannot be on aim, so
we will be on stand. But if we are already
stand and we are aiming, then it should interrupt
our aim, whatever happens. But if we get stunned and we
are still pressing shift, we should return to our aim. But we're going to
put a branch here. And if it's false, we're going to connect
here, and if it's true, we're going to connect here, and the condition is if
we are aiming still, so aim down, if we're
still pressing shift. Basically, when we are stunned, we are not getting
interrupted from shooting. But if we are aiming and we
already have been stunned, then we get interrupted. The second time something
will attack us, we actually break our aim, which would be a hidden
mechanic inside the game. Anyway, let's continue
with our sad part, our death when we lose, whatever happens
has to happen once. So two once. The next thing we should happen, we should play the death sound, so play sound to D. Actually, it shouldn't be the first thing, but let's get that awful
sound out in the beginning. I think it's called
pain. Pain two. Well, we can choose
effort pain or likely, this one is more
aggressive, more death. Now, we should be
stopping movement here, but we haven't done
the controller part, so we're going to do it
later, and of course, change our state to death,
which is the default. And now we need to
play an animation. So, we're going to find
our death animation, so it's going to be death. As a death backwards
and a death forwards, I think the forward is better for most cases because the backwards would look
weird in some cases, but we're going to create an
animation montage out of it. We're going to change
its slot to upper body. Again, R right? Let's go back to our
character and play a montage. Let's select our skeletal mesh. Let's select the montage. And let's remove our gameplay
widget from our screen. So there's no more health
parts or anything. Top down game mode. Here we are. Gameplay. Move from parent. This will happen instant. We won't wait for the montage
to end or notify anything. What we need to do is
create a game over screen. But let's do that
on the next one. Good bye for now. See you then.
103. Mouse Detection System: Hello, and welcome back to Game Design Workshop engine five Procedural Dungeon Action
APs creation Curse. Previously, we left off with our death function
death event, actually. And we said that we need a game over which basically
to show when we die. But let's take it
from the beginning. We created the continuing of our any damage event that we
had to add remove health. We asked if we are
already on Stun, if we are on Stun cool down. If we are not on Stun cool down, then we are turning that
we are on Sun cool down, and we are turning
our mode to stun. And then we play a sound, which will indicate to the
player that we go stunned. If we are on stun cool down, then we just go straight to ask the question if we are dead? If we are dead, we continue
we are death event. If we are not dead,
we are playing an animation montage to
show that we are hit, but it can be
interrupted by walking, moving, or whatever and change. And complete or uninterrupted, we are switching based on
our state, what do we do? So basically, we created
a hidden mechanic that for our first it, when we are aiming and shooting, we return back to our aiming
so we can shoot again. But if we are on the second hit, which means we are already
aiming because it didn't change state because
we were staun, then we are returning back to normal and
interrupting our attack. Next, we waited 2.5 seconds to turn the
stun on cool down off, so this is our grace period
for not getting stunned. On our event death,
we did it once, we played the death sound, a horrible sound, and we
changed the state to death, and we played our moa of death. Now, let's create our widget We also remove from parent
the gameplay widget, so we don't see the health
part or anything anymore. Oh, Now let's create
our widget for our game over screen basically. Let's go to UI. Let's click. Let's go to user Widgets, user widget blueprint,
and let's G game over. GO. Let's open this. And let's bring a Cvass in. And a text. Write game over. Let's anchor it to the middle. Let's offset position
x two minus 175. Let's change position y two fy. Let's say size x
three and size 89. Now, let's set our size on six. It looks a little bigger. I'm going to leave it on bold. Let's type for text, game over. This actually, I
think is one word. Is up to game over or game
over one word or two words. I I like it two
words, looks better. It's a bit of set based
on the r, but it's fine. I don't think it
will be noticeable. Now, the next thing
we need would be to describe our score. Let's bring a text, and let's wrap this
with a horizontal box. Let's duplicate this text. On the first text, let's
type four base two dots. And the next text should
be let's say one, two, three, four, five, 50. Now, let's make the vertical box being able to enclose this. So let's anchor it
also in the middle. Let's set the offset minus 125. A y hundred, i should be two. It's big, but it's fine. What we can do is just let this ement both
of them on fiel. This alignment on the right, is too much center. False alignment to the right. Yeah, that looks better already. This will be for our score. Let's make a variable
of our 00 text, and let's name it score
underscore score. Is a variable. We can set it to something, and now what we need is
another horizontal box. Bring it in the cavas. Let's set its tie visually. We want it to be down here. At this part of the
screen up to here, maybe. Let's set the offsets.
All the fits here. Now, what we're going to put inside here is going
to be a vertical box. And two spaces. So we can control the
vertical box where it lines, and the space should
be one at the start, one below the vertical box. So we can check on everything. And we're going to change the
both of the spaces to 0.1. So we gave this empty
space on the sides. Inside the vertical box, let's also put two spaces and a horizontal box again
between the two spaces, and we're going to
set This box actually will be the box that's
holding the buttons. Which also need some spaces. Let's bring the buttons
and the spacers. We need two buttons, one, two. Let's bring some spacers again. 12, three, and let's select
everything to feel. Right? Now, we will change the
side ones to be 0.1 p. I think by default, this gives us a nice
basin for our buttons. Now let's choose to text
O here and one here. Let's call this main menu. And the other one, let's
call this quid game. Actually just quit. What we're going to do is go to actually, we need to these two buttons a and go and select
on each of them. The clicked event. L et's name these patterns because I have no
clue what is which. So this is the B menu, and this is the B qui. Now events are named, so this is the qui that we game. And this is the main
menu that we open level. Remember the loop we talked
about in the beginning. This would be our level name. Let's copy pasted,
it's game level. Pressing reloads everything and brings us to our main
menu and quits our game. Now, what we want
to do construct, get our T score and a xt. Let's connect it here. Our score, what we
will use for a score. Let's use our coins for a score. So we're going to get a mode. Going to cast to top down. We're going to convert to
pure cast and get our coins. Total coins. Let's
connect this here. So our score is our coins. L et's compile, and let's
go test our death system. Actually before we
check our death system. Let's go to our character really quick and change our
Mx health to one. So we die instant from a trap, and don't wait for ten hits. Actually Let's die next to this. We are not dying. Let's shape what's going on. This is because we are checking for death
here, variable dead, which we should be checking
is our life equal to dead, is our current life equal or less than zero. If it is, let's set also this dead true Now, we should be able to
die. The trap here. Oh, he died, but we can
still move, as you can see. But we cannot take
any more damage. But we do die. Now we are able to
move because we need to make a stop
movement function. But to make a stop
movement function, we need to control how we move. Also, the widget is not popping because we
didn't call it. So let's go to our death. Let's go to our game first, our widget creation section. Let's create a custom vent. Let's call this event GO. Let's copy this part from
here and the play controller. GO here. We're going to
promote this variable. Actually, we don't
need to promote it. Because we will just reset
the game afterwards. We just open the
main menu again. So we add up to view port, and then we're going to go to
our game mode and call GO. Now, we so have death screen. Yeah. Everything
is at bit offset. S. But it's fine. We can leave them a
little bit offset. This is not a final product. So I think this is
it for this one. In the next one, let's
fix our movement, which we have all this
bag all this long. Basically, what this
is is that when I'm aiming outside the map, now that we reach
this place, paint it. If I bring the message
log over here, log message log two
window A messages log. Let's clear it. How is this going to. You can see there's no error,
no error, no error. If I move the mouse somewhere somewhere
that it hits nothing. It should be producing
the error, but it's not. Where is this error ing? I really thought
it was that Now, what is going on? Why don't we have, here it is. Okay, so it was if I click,
let's read the error. Better to read the errors first. A movement input BP or a access non trying
to read property, call fun get p. So basically, we have not possessed
our pone yet. This is why this is happening because when we begin play
and we spawn the pone, we haven't possess
it yet. All right. Now, another thing
that I want to mention is if you have this texture
streaming pool over nine K, this might get your graphics a little bit bad in some places. Now, if you have a
strong computer, the reason is that
this character has four K resolution textures, and the default We do have plenty of other things
that are high textured. As you can see, this
icon over here, got a little bit
messed up this time. This is because of the
texture streaming pool. So how to fix this? We're going to press the
tile key, inx to one, and we're going
to press R dot M. Dot texture. No. I'm going to just leave it
find the command, textures, streaming is text steaming pool. Our streaming pool size. If we set this to 3,000, for example, then
our error is gone. Our textures become also clear. But this means it dedicates
three K Ram to our textures. Just remember that
this is V Ram, so this is the
video card memory. It's not the computer memory. If your video card is
doesn't have that much Ram, I wouldn't advise to
increase the size. Away. That would
be for this one. I'm going to seen you on the
next fixing these errors and parting the movement and
shooting from the mouse. W to see you then, goodbye.
104. Advanced Mouse Interaction for Items: Hello, and welcome back
to Game Design Workshop, Real Engine five procedural Dungeon action RPG
creation course. Previously, we finished
with our game over screen. We added our game over text, a text for the World score, and a text for our score. This is a little bit
offset between them, but it doesn't matter
if you want to spend some time fixing the
positions, be my guest. Now, we used two buttons for our Qi and for the main menu, which restarts our game. To restart our game, we use the open level by name, which restarts the whole
thing as we talked about, and it shows again the main menu and deletes
everything that we have done. The previous Me.
Now, for our quid, we just used a quid
game, and that was it. For our score in
begin Construct, we got our total coins
and set the text. Now, let's begin with
something more interesting. Let's go to our top
down player controller. In this controller, we're
going to find a function called get location
under cursor. I had it over in the beginning.
It's this one over here. We can find it also over here. This is actually under finger. We want under cursor, this one. We will not use under finger, so we can delete it, and whatever is used. Where it was used. So we
don't need the touch event also until it is also all right. So, what does our get location
under cursor do so far? So what it does is use the get heat result
under cursor by channel, and the channel is visibility
and traces for complex, and it gives us the heat result. How it works behind the scenes, it actually creates a
trace line from our camera to the position of our cursor on our screen and takes into account the depth and if it hits something or not. So, what we want to
do for a first step is duplicate this but
with a trace sphere, so we can increase a little bit the size of our
cursor of our click. Now, One more reason that we're going to
use this is that we want to be able to create a list that we will
ignore in characters. For example, our player. And talking about that, let's go to our top
down character. Actually let's create a a
variable first on controllers. Let's call this reference. As you can see,
it's already for me on the VP top down character. If you need to change it
to P top down character. An object reference. This is because I was
testing some things, and the last variable
has been left here. So, now that we have
our play reference, let's populate it in our top down character
on begin play. Let's get player a get. Let's set play reference, and let's connect
to play reference. And now it's populated. Our reference is populated. And let's go back
to the controller, and from our play reference, we're going to get. Camera, we're going
to get wold location. There is another way we
could have gotten our camera irrelevant to our
player blueprint. We could have used
the camera manager. And from that, we could
have get AC location, which gives us the
location of our camera. But this way is also fine, is just making dependable
to our player. And this is our start. Now, let's bring a sphere trace. Bi channel. Let's set
its radius to 20. Our end should be our location, our heat location of the mouse. But what if the mouse
didn't hit something? What if the mouse we
are aiming at nothing? So, let's have a branch
to ask this first. Are we hating? If we are heating, then
create the sphere. If we are not heating, we
will do something else. I'm going to disconnect these
things here because we are going to be changing the heat
results based on our needs. Now, what do we do when we
are not hating anything? Well, what do we do
is Mouse position, and we're going to also
on birth b to world. The relocation to word space. The reason I'm
going to do this is because when we are
not hitting anything, as we can see right now, we need to reconnect
some things. Right? As we can see right now, when I'm clicking on nothing, Our character is not moving, and we can see that the
location is over here. We can see where it's actually
thinking, we are heating. Music has to be lowered. Since when it's returning false, this actually returns zero. We need to change that. We need to be able to at
move towards our mouse. So what we will do is we're
going to add this location, the word location is some
multiply, not an add. This is the ad. It has this bass
symbol, makes it an ad. Now, we are going
to multiply though. We're going to multiply
the direction. And we're going to change
this to an integer, and we're going to give a
range to this direction. 3,300. Y 3,000. Let's consider the range of our
camera is about two k, so we want it to be at least
lower than the character, at least at the same
height of the floor. So 3,000 roughly would be fine. And what we're going
to do is promote this variable, a local variable. And let's call this itation. For example, if I'm to connect, let's disconnect a little
with the trace line. If I'm to connect
this to the falls, and then also connect it here, and get our heat
location or the output. Now, and connect this here, now we should be able to
walk towards the cliffs. At the moment I click here, no, Why is this happening? Doesn't make sense. That's
not the controller. What is the original code? It doesn't happen
because the code that is default bal tells it to only move when we
have a heat through. So if I connect this also, then we should walk
towards the cliff. Yes, we are walking towards
our doom. It's working. I can see the floor here cding. We're going to fix this later, or are we going to leave it as these? Doesn't really matter. It's just positioning
the walls of the tile. So, this is not the controller. Now, we just actually fixed that issue that if
we are not hitting, we can still move
towards nothing. But that's only
one of the issues. Let's disconnect this, and let's reconnect this and disconnect. So if we're not
hitting something, we are setting heat location to whatever our
mouse and below is. And now let's continue
with this logic. Which again, we're going to ask, did we hit something? I let's change this to
camera, the trace channel. If we didn't hit something, then it means that the
mouse heat something, but we should not pay attention to it because we
are on a different channel. Oh, this means that our location should become
a mouse heat location. So we're going to change
our heat location to our mouse heat location. Now, as you can imagine, the spaghetti here will be wonderful or a full
family course. Let's try to keep it
as clean as possible. Let's continue. As we can see, we have a heat output. Let's rename this to enemy heat. No, because the way our
system is going to work, it won't care if it's an
enemy hit or not to move, we will move regardless,
not regardless, regardless. No. What we're going to do is
promote this variable, local variable, call this. It. Enemy it temp. Because we know we
have an issue with the same names name. We're going to set here
that the enemy got not hit. This would be it if we didn't have am and if we
didn't have shooting. Now, let's do shooting later. Let's go from the point of view that we
didn't hit anything, and it's not an enemy. We're just clicking
on the ground. Let's ask, is the thing
we're hitting an item? To do that, we're going
to use a sequence. Because whatever happens,
01 is to even output, and our zero is
actually even output, and our one would
be something else. Now, this shouldn't
really be connected here. This one would be
connected here, because we don't want to
change our heat location, but we want to set our
enemy heat temp off, which is default off. So even if we connected it here, it wouldn't really matter
because by default. But let's be fair. This so be off. Now, when we are
checking for an item, we should check if our
heat actor is valid. I'm going to break
our heat result. I'm going to bring it over here, and ask if the other
actor is valid. That would be the start of
our journey to detect items. One thing we should do is
before we go on with the code, go to our interactable items to our chest to our big chest, p the chest over here also. What else are we
interacting with? The room props. I
think that's it, and the items, of course, let's go to the
items and BP item. Let's go to Big chest plus
defaults and search for tug. Let's put the tag I.
I'm going to save this, and let's put it also in chest. I for item for
interactable, I don't know. Interference, This
is the tug I chose. You can choose your
own tugs, of course, just remember to
place them correctly. Items and chests of the tag I because we can
click on them as an item. Now, I think this is a good
stopping point for this one. We're going to
continue the next with our four items code. Goodbye.
105. Mouse Interaction System & Inputs: He Hello, and welcome back to Game
Design Workshop Real engine five Procedural Dangon
Action A BZ Creation Course. Previously, we continued with our mouse location under Cursor. Function, basically
our mouse heat result that the custom mouse heat
result that we're making, and we started with getting
our heat under cursor. We checked if we are
binding something, if we heat something, and if we didn't, we are getting our
mouse position, depjecting its ring
to world location, and getting a point
towards that direction, 3,000 actually in range towards that direction and set
that as our heat location. Now, if we did hit something, we are creating a sphere
race with radius of 20 that starts at our camera and ends
at our mouse heat result. We are asking if we hit it again something because this time we're checking for camera trace. Now, if we did hit something, we're setting the heat if
we didn't hit something, we're checking the
location we're setting the location to the
mouse cursor result, it result, and we're setting
that we didn't hit an enemy. Then we will need to
do some other things, and we get the return note. But the next thing we should do, and we started doing
was our system to check if we are
hovering something or not. And the first action on this is to get our heat actor result. Also, we proceeded
to add to our chest, our box, our chest, our big chest, and
our items, the tug. Oh, this is the next
thing that we're checking after we are checking
that the actor is valid. Does the actor have the tug I. So a tug and the branch, and the letter I, and we
completed this question also. Now, let's go with
a forse branch, which would be if what we're
hitting isn't an item. What we need is a function. So, we're going to
make a function. Let's call this
function ear em elect. Cause if we're not
hitting something with i, then we don't have a target. To fill this function, we need two variables. No local ones, normal ones. We're going to
make them and it's going to be the type of act. That one would be
our previous target. Let's say we hover because
we're hovering over the items. Let's name the other
one parent over. So, what do we do
with these items? Remember, when we
made the PP item, we created these two
start hover and end hover messages, blueprint
interface messages. So when we are un
hoovering our item, we should end hover to any
items that we were holding. So we're going to
get our previews, and we're going to
get our current. And if our previews
is valid, here, then over end hover message. Then we're going to check if
the current hover is valid. And we're going to
connect the is not valid of the us hover, and of course, also
the end hover. We're going to do the
same thing for this one. We're going to copy
base this year. Bring this a bit closer and we're ending hover to whatever
we are currently hovering. And then we're going to
set the current over and the previous over to null, they are not valid anymore. We're going to connect the
not valid one also here. Just in case this is valid and this is not valid or
we cover all our bases. Now, let's go back
to our function, and let's call
this new function. Car item select on false. So when we are covering
something and it's not an item, we clear item selection. Now, if we are hovering
something, we need a question. Is our current hover the
same as the headactor? Is this equal to current hover? This this is he dactor. And if it's true, we do nothing. If it's not true, then we will get
our current hover, and we will over because it means that
we ed something new. But only if this is valid, if our last was non, then we do need to
check if it's valid. Because if it's valid, we need to set the vis
hover to the current hover. If it's not valid,
then this heat error, I would say you're trying
to set null to null. I wouldn't like it. Now, what we need to do is set our current hover to heat ace a little bit. I don't know if you
cut it. I tried to connect this year and
you wouldn't let me. And the reason is that
this is an actor, but this is a top
down character. Change. Actor reference,
change variable type. Great, no crashes. Arent Hover and Previous
be both actors. Car Hover shouldn't be
the top down character. Makes sense, I think. I'm
going to bring this over here. Of course, if our current
hover was not valid, this means we are going directly let it to our current actor. And we need to do the
start hover to this actor. But the actor knows
it's being hovered. You start interacting. We do need another function. But let's just make it
here and call it at. And we will fill it up later. For now, let's go
to Event graph, and let's go to our
enhanced input, a action AI set
destination click. Now, we're not going
to use the consilt, so I'm going to disconnect this. What we're going to use for
our interact is the complete. This means that I
have press clicked and It basically has some rules about clicking on the same frame and releasing. But basically how it works is
when you click, it happens. We are not going
to use click hold and more details than that. Actually, we are because
it's been used over here, and we will keep a part of this, but later, not now. Now, what we're going to do is we're going to check if our a, our player is valid. So we don't get that pesky
error we had all this time. I want the complete. When you disconnect
something, it disappears. The reason is because we
have this r over here that shows the rest of the options
because they're hiding. So we do need completed. Let's connect here.
Let's actually copy paste in the beginning so. Trig doesn't trigger
this pesky error. And we're not going
to use actor also. We are going to use
the stop moving, but we're going to
make one of our own. Our actor is valid, and let's continue connect this. What we're going to do
is each on player state, because we have the
player state over here, and we want to interact
only when we are normal. We don't want to
interact when we are hacking or something, we don't randomly picking items. And actually, let's use this threshold that we have.
Let's put a branch here. So if our elapsed time Is less than the threshold. We connect to normal. This means that if I'm
clicking on an item for a specific amount
of time and not releasing, this will not happen. Interact will not happen. So I just need to click and release to make it
interact happen. If I'm just hovering
with clicked rest, we shouldn't be
able to pick items. Well, actually, this way, we shouldn't be
able to pick items. If we don't use this node, we will be able to click
items like hover over the m and decide when we
release and just pix it. But let's do it that you
cannot pick items if you have it hold it. So, we're going to use
a two branch here, and we're going to bring
this interact function. Now, if we leave it like this, every time we are clicking, we're trying to interact. But what if we want to move? How do we differentiate between
these two when I want to click and move and when I want to click
and pick up something. Well, that would be simple. We have our current
hover over here. If this is valid, then
we are interacting. If this is not valid, then we are moving or attacking. A are we going to
bring this here? Ansi fy things a little
bit. Is this also? Let's connect here.
Add one more thing, we should add this question
that are we hovering an item over to the french branch over
to the trigger branch. Base the same question we
want to ask on the trigger. Are we hovering a item? We are not hovering an item. We will see what happens later. If we are hovering an item, we won't do anything
because we want to check how much time we
are holding the mouse. Basically, it's an on
release event with a ter. Well, not on release, on
pressed event with a. Something in between these two. And that could conclude almost conclude our
interact system. We do need to interact. But we need to do some
other things first. So, let's continue
on the next one. I think this is a
nice topping point for this one. I want
to see you then. Goodbye.
106. Minimum Range Interaction System: Hello, and welcome to
Game Design Workshop and Real Engine five
Procedural Dungeon action RPG creation course. Previously, we almost ended
with our interact sequence. We ended actually
with our search for items if we're having items
part of the function. But we checked if it's valid. We checked if the actor has
dug don't connect the actor. Yeah, we do need to
connect the actor. If it has duck the i, and we checked with a branch. If it's not an actor with I, we are clearing
all our selections to a function that ends hover in current or previous
hover items in both. And then we proceeded to
check from the true branch, if our current target is the
target that we are hitting. If it is, we do nothing. If it's not, then we are setting our current
hover to end hover. We are setting our current
hover to previous hover, and then we are setting
the item we are hovering to our current hover
and set our staff hover. Now, in case our current
hover was not valid, so we had nothing in target. We are just setting
our current hover to the targeted actor. Then we proceeded to go
to our enhance AI action A A set destination click. That's a awful. Okay. We used the completed branch
of the action, which has some rules on its own. And basically, we
kept the rule that if it's pressed at
certain threshold, we are not interacting. And we didn't finish interact because we do need
some extra things. And one of the extra things is that we deleted the stop moving, so we're going to
make one of our own. Oh, let's create a custom event. Let's call this stop. Moving. And let's create a bleion. Let's
call this bleion. Moving. And let's set it pals because when we stop
moving, this would drop. When we stop moving this, we want this would
would be true. And then we're going to check. O check if the control p is valid because we don't want
pacers before game starts. And we're going to add input that would be zero if the controller
point is valid. But this makes us stop moving. And why we need this variable? Well, we have this move
two function over here. We will not use it. We will make our own
function on tick event. But I digress. We
are not there yet. So, there are some other
points that we need to stop moving besides interact. And that would be
when we are aiming, when we are dying on. I think when we are
taking any damage. So, let's go back
to our character. Let's go to our aim. We do need the controller
reference here, let's bring the BP controller. Let's move a little bit further. Let's moving. Which
leads us here. Now, character, we pass, want this to happen
on any damage, and that would be after
removing some health. And the last place, of course, that we need it is on our death, put it after we play sound. Okay. Yeah, after we
place now, it's fine. Doesn't matter because
this will turn our bulling off and we won't be
able to turn it back on. Oh. We added our stop moving
everywhere that was needed. That the place we
started to talk about, that we're going to add it, and that would be the
interact function. Oh, what does our
interact function do? It checks if our
current is valid. And then we send message. Correct. And here stop moving. So basically, now, we can interact with our
things in the world. But also because we have
messed this function up, probably we won't
be able to move. Let's check this really quick. Yeah, we are not able
to move right now. But we are able to shoot and
move while we are Awesome. And then we cannot move. Amazing. It only works
outside, inside the maze, it doesn't really
work, but outside, we're getting a point that
we should be getting. Anyway, does it matter because we do have the
tools already to fix that. We just need a little
bit of extra code. We do have the resource.
I mean that we need. No. What we're going
to do is te Actually, we do need a branch,
but we just need a Let's just delete the follow. We don't need the
follow. We do need the cast destination
and only false. Because when we
don't hit an enemy, that's when we are walking. And we do not want to be
walking in any situation. We want to walk when we
are in normal state. Let's reach their state. Let's connect normal. Now if we are normal and
we are hitting an enemy, we are going to shoot.
That's easily done. What we're going to do for that is go to our
shooting mechanic. The shoot over here. And of course, we're going
to cheat a little bit again. We're going to use
this part over here because this
question is asked through our game pod controller, and we're going to
do a custom event. Call it. Two and we're just
going to connect over here. Now, from the player controller, we can call from the
player reference, shot. Now when we are hoing
over something, we are able to shoot at it. But again, to shoot at something we should
be able to move. So when we have a cache
destination saved, when we have our cache
destination saved, which is actually our heat, or cursor location,
we can set moving. And how are we going
to move since we deleted the move to, basically, which adds not
a simple move location. I think the previous one add
just the ad movement input. Actually in the function follow. Yeah, I had the add
movement input. No. Let's this function, but upgraded a little. Because we're going
to call it on ti, and this would be adding constantly a movement to
our current location. Let's do a check or x and
y of our pond location. So let's break this vor here. Let's break the location
that they're coming from. This vector over
here, of course, being the yet actor
location, our pond. A we're going to check if
this is nearly equal y is for x y with the x and y of
our incoming location. Let's at a tolerance of 15, this value being right because what we're
going to do later on means our character can have arm really extended
because of the weapon. If we bring our
mouse in this area, And it's going to be a problem because if we're trying to aim here and our muscle
weapon is here. And this creates a problem. It's going to try
to shoot inwards, and let's say, no,
this is not possible. So we will create an
area around the player, which the mouse actually
when it enters this area, moves towards this side
or this side based on some rules or this side
or based on some rules. We will have a dead zone
basically around our character. Now, let's check
if this is equal, nearly equal both of them, because if one of
them is not, move. But if they are equal, we should set moving two folds. We reached our destination. Back to event graph.
Let's call arctic event. This is going to
be called perfram, and we're going to do is valid. Our character, the
characters here. And then we're going to do
a sequence because we're going to add a few things
to this tick event. Now, let's put a branch here, rest of the sequence and
ask if we are moving. If we are moving,
then we're following. For the location, the
cache destination. Compile and save.
Theoitically, now we can walk. No. Even the previous one. And walk. I do know the reason because our clear state
bolt dead normal, which doesn't update since we haven't updated the default
state of the character, and the default state of the character is normal
because we changed it. But it doesn't, then it
doesn't update the controller. Now we so be able to move No, and the return point, always the center
of the character, which is outside, it's not. Of course, because we haven't completed that part
of the function. That part of our lot more of a. We haven't completed the
part of the function, if we if we do hit a target, and it's not an
enemy, what do we do? So let's do this
on the next one. And I'll leave you for now. Good bye.
107. Finishing Static Shooting & Aiming: Hello, and welcome to
Game Design Workshop and real engine five procedural Dungeon action PZ
creation calls. Previously, we started with
our interact function, but we ended up finishing
in the movement. We also finished the
interact function, I hope. We will check when we can move and elect some chest or an item. Now, what we did next was we created the
stop move mechanic, which actually turns our
bullion of moving to falls and adds a movement input of zero if our player
controller is valid. If our player pawn is valid. Sorry. Then we proceeded
that on our trigger, this means when we
start clicking, it keeps running as
we're holding click. U let's go over it once again. First, we check if
our player is valid, then if our ho is valid because if
we're hovering an item, we shouldn't move
towards that item. If we want to move
towards that item, if for example, we
are not in range, we could make some code here, if we're not in
range of the item, if moving towards the item, if not, what we want to do this. Oh, then we checked if our
player is in normal state. So when our character
is on normal, we check if we are hitting
an enemy with our cursor, or if we are not, we are setting the location of our heat to our
cast destination, and we are setting
moving to true. If we are we are just shooting that we created a custom event over here in shoot from the branch because
we don't need this, and it's following
the same logic. Now, back to our controller, The reason we are
setting the moving true, and we are setting the cast
destination is because our movement is controlled
by our tick event, which we asked if
the player is valid, if our reference of
the player is valid, and then we are doing a check
if we are moving or not. If we are, we use the follow function
that areal provides us, that gets the pair controller
the controlled pond, it gets its location, it gets unique direction
vector from two, and it provides that
to add movement input. We upgraded this function by checking if we reached
our destination by checking the x and y values of the destination and
our current location. And if it's true, then we are not moving anymore because we reached
our destination. And we figured out that we cannot move yet
because if we go to our um get location
under cursor function, we can see that our get
location is not being set when we are hitting
something with our trace line. Well, that logic is simply not. What we're going to do is let's get our heat
result here actually, because we're going to
need values from it. But we're going
to need to ask if is the actor that
we heated an enemy. So as tag e. But if it
doesn't have the tag E, then we're not hitting an enemy. We're going to do the logic
of hitting an an enemy later. But now for now, we're
going to connect the false to here. Maybe we need to bring
this a bit more forward. That's fine. This starts becoming a family
portion size spaghetti. But I think it's fine. Now, if we go in play, we can actually move, we can shoot Ida. But the problem
comes with aiming. We cannot aim. I can press shift and
I can start shooting, but I cannot aim where I shoot. Let's fix this. We're going to need why is this
persisting at movement in I'm just going to
put an is valid here. Hopefully, this will fix it. Yeah, no more error. Finally. Now, we will need to aim
where we are shooting. And to do this, we
actually need to create the system that we talked about that between a certain range, it will it will offset Our forward vector and
our aiming, our rotation. Let's just go and
add really quick to our get location
under cursor, pure. We need to change
this name anyway. Let's add two variables
in the return note. One of them would be a vector. Let's call this forward aim. F, doesn't it? Maybe. And then we need another vector but
rotator this time. Let's call this of Fation, which will actually
include the normal ones, but anyway, Let's promote this
two into local variables. L et's name them
of that over dame so FA and of strtation, of set. Let's set them to something. Let's set to demonstrate
the problem, actually, what's going on here, here, for our offset for A, we're going to get
our character. A reference, we're
going to get forward vector actor forward vector. And for for rotation. Let's get actor location, and let's get our heat result, which is to copy it, here it is, get our heat result, and we're going to find
from the actor actually. Rotation. No relative, sorry. Rotation, and it's going to
start from our character, and it's going to end
to our heat result. Now, to make this work, we need some code. We have to be setting
somewhere the rotation, and we will go to our e event, and we're going to go from
then one from our sequence. So, we're going to
switch on player state. Because there are some
times that we don't want to change our
character rotation. Basically, there is
only two times that we do want to change
the character rotation. It's from normal or from A. Re route here. I
can connect both, and we're going to get
our play reference and that rotation. Ca rotation. We will
need some room here. Little bit more. I
think that's fine. Oh, what we're going to do
is we're going to our inter. We're going to make it constant. This means rotate in a constant value based
on a tempo based on our Delta T. For Delta T.
Let's use the tick event. This makes it kind frame
relevant, but it's fine. And for speed, we're
going to use 100. Now, what is our current one? Well, we're going to get
our player reference. We're going to get rotation. We're actually going to
use this or current, but the target, we not
change the x and y. We will keep the same,
so we're going to this. We're going to break this. Roll and pitch will
stay the same. Yo, which is turning around, will be the only one
that's changing. So let's get our mouse location
on the occurs function. Break this. Let's connect this. And one more thing
before we are done. Let's go back to our
P top down character. Let's go to our spawn bullet and change this forward vector that we had from the capsule, which is the forwards
we our bullet. Let's get our player
controller reference. Let's get on get
without the git. No. That's not the name. Must have a get get patients Get at the result under Kersor. That's our function. But this one. Let's go to our
gt location under Kursor function.
Let's check on that. This function by default is
access specifier protected, which means it cannot be called by anything else.
Let's make it public. We can access it. I'm going to get
location under Cursor, here we are, and
we're going to get our offset forward aim
and connected here. Let's go play. This will give us some
kind of rotation. And as you can see,
rotate towards my mouse. But do you see that there is a small offset to the bullet
compared to where I click? This is because we
are on three D world, and we are trying to
target on a two d world. So at some places, it's fine, it's direct, like if
we go to this angle, can see it's direct on
the bullet on the mouse, o There is an angle
that's almost direct, and any other angle, it starts to really get offset. Now, let's go do the required
math to change this offset, make it aim correctly. So let's go back to our get
location under ers pure, and we're going to need a lot of space to drag this
way over here. Maybe it's enough space, and we're going to be
disconnecting this two. L et's begin by calculating
the direction of our muzzle. We're going to get
the player reference, and we're going to get muzzle. From our muzzle, we're going
to get the world cation. We actually just need the z here, I'm going to break this. The direction towards two
would be our heat location. Let's get our heat location. Let's also break this. Why we do this? Why we need
to find the direction? Because we need to know the
direction from the weapon to the target where the
mouse is pointing to adjust the aim
correctly accordingly. Let's do the subtraction to find the direction that minus. Now we will need to calculate the direction from the camera
to the mouse git because the camera perspective
affects how we see and aim at targets because of
our isometric view. What we really do is and we're going to convert the
location to world space. Let's connect the y also. It's kind of important. And the next location, we need is the camera,
so we get our player. We have our player here. Let's get camera. Let's get word location.
Subtract this two. Get the direction from the
camera towards the mouse heat, the mouse word location. The next step would be
normalizing this scale. Now, let's normalize
the z components of these two differences to To adjust the direction vector, considering the height differences
between the camera and the weapon and the
target because all these three are different Z axis. Now, for those who are new at math, what is normalization? Well, it's the
process of adjusting values measured on different
scales to a common scale, if that makes sense. The way we will do
this, we're going to break this result. We're going to divide. Is the result by the z, the direction of the result of the direction
from our muscle to our heat compared
to our heat and the direction result of our camera and our
mouse on the screen. And what we need to do, we
need to make it a vector. It's an element wise division. So we're going to change
this output pin to a vector. As you can see, this division became an element wise division, which is a X divided by x, A so all these
values are the same. And this will offset our algate. We do need to scale
up this factor to our camera to mouse difference, Let's multiply this with the result of the subtraction with this direction basically, and let's adjust it
to our heat location. So we're going to add
our heat location here. Since we are using our muscle. Let's use again our muzzle, to find the look at rotation
with the new offset. We're going to get
world rotation. We're going to connect to art. Then we're going to connect this to find and let's
connect this here, and let's get world. To and connect it over here. But we're not done, but
let's see what we created. You see where I click,
I actually aim. This is where the bullet
will go, where I click. But if I go to close
to my character, you can see it suddenly a
bullet came from behind. This one actually collides
with a character. We are shooting ourself. I think I can get it to
shoot from behind again. Did you see this was amazing? Also, our animation is getering. Can you see that
animation geters a lot because we are too
close to the muzzle. So at this case, the priority of the
model takes priority the rotation of the model takes more priority than the muzzle
because we are too close. If I go a little bit further
away, everything is fine. If I go too close, We
start the jittering and our shooting
becomes very bad. Now, I think this is
enough for this one. We're going to fix
this on the next one. Goodbye.
108. Under Cursor Enemy Mechanics: O Hello, and welcome to Game
Design Workshop, real Engine five procedural Dungeon action RPG
creation course. Previously, we finished with the mathematics for
our aim offset. We got our direction from our muscle to
our heat direction, and we got our direction
from our word location to from our camera ward location to our mouse a screen
ward location. We got the direction,
we normalize the Z axis from this two, and we gave it the scale of the direction based on the normalization here, and we adjusted
the heat location to account for the
weapons offset. So we added the heat location to this result, this
scale direction. Now, But we need to do fix the problem that we're having that
when we are too close, then this is targeting
is very, very offset. We need to check just
for a distance if our eat result basically is greater than a distance or less than a
distance compared to our character create
little circle we talked about
around our character. And I have a value in mind. So let's put a branch here. C the Connect this to
the branch, falls here. Let's co rep here. And what are we going to
do ask you distance less. What is it less for? I'm
going to get a vector. To do 107 here. This is the value I found out, I tops jiggling and it pops a having wrong values basically. F vector one, we do
need our muscle. Vector two, we need
the offset a location. And when this is two, when the distance is taller, so we're closer
to our character, this circle under character, because this is
radius basically. Let's connect here first of all. We will need the nodes
that we have here. We don't need the location. We just need the find look at. And this will start here. This will be forward vector. Let's bring bottom
opposite will be here. Right? We're going
to connect this, and our target is
again the offset heat. We're going to connect
to this heat over here. And this fix it. Let's go clay. And as we can see, we
can shoot close to our carter and it
will shoot straight. S. We have shooting, now we can aim where we want. We need to increase the
target size of this. It is small, it's
character length, and this is a huge thing. But now we can move
around and shoot. But we cannot shoot when we
are hovering over a target. We should to be able
to move here maybe. We haven't done the
platform extension maybe. We haven't tested
actually. We did it. We did do it, not going. We're going to deb later. What we should continue with is what happens when we are
hovering over an enemy. This is kind of important. We just don't want
to be shooting only with a pressing
shift and shooting. We want to be able to shoot with picking also, 100 gaming. So, we do have a
new heat location. We have a heat location
of a target now. Don't have on the ground, which is the mouse. If we wanted a more
specific heat, this would be the impact point. This location would be, for example, where
we hit the target. Had body. But for us, it doesn't
really matter, but let's promote this
to our heat location. So I'm going to get
the heat location. And I'm going to set it
to the impact point. Before we start
shooting or anything, we do need to check u if
we are lost basically, if we are in line of sight, because you can't be
shooting through walls. Like, Okay, this hat location comes from our
camera to our mouse. But it doesn't know
if our player has a wall between him and
the mouse and the item. So what we will do parentheses, we pick items through
walls anyway. Let's not do that
for our shooting. So we're going to throw
a line trace by channel. And the stat location
would be muzzle. Let's find the muzzle
ward location. Where end would be this bit, fino cut, rotation. Target is location. Starts are muzzle, vector. Let's add this forward vector
to our ward location phase. We do need to give it a range. So let's multiply this. Integer, which this
is a range 2000. Then we add it to
our board location. Fard in this range and at the from because basically
this is a point. So a point of distance, where in the world should
be go this distance. It has a direction
also, of course, because it's forward,
and this is how much. Ne trace might be
a little bit easy. We might be able to, never mind. Let's leave it line
trace. I would say to make it a sphere
with a radius, so we cannot shoot
through very small gaps, but fine, maybe the
bullet will collide. If it doesn't collide, but
we should ignore one actor. So go to, and the actor that we are
ignoring is our player. I get our player reference
and connect it here. Now, if we do heat or if
we don't, if we do heat, it means Basically, we don't hit means that
we didn't hit an enemy, so we should turn
the enemy he off. Actually, we don't need to
turn it off. Go back in here. Then our heat is our
underma location. Now, if we go back our
heat to our new result, which would be the
new impact point, from our gun from our
muscle to the enemy. If the actor has a
target has a tag actor, here it is, as g E. We're going to set
it accordingly because we might be hitting
other things, not enemies. We might be hitting walls. And actually, our trace
channel should be camera, not visibility because
that's the way we have set up the, the
maze collisions. Now, what we want to do
is clear items select. Because at this point, in shooting overrides, we don't want to click to be
interacting with items. We want it to be shooting. And what's left is to actually set our over vectors
and offsets, and we do need the return node also because this is an other
point at the function end. Repac this copy paste this
we need a fine glucaroation. Need a We can to recreate them. Here here. And for our rotation, let's get our actor location, our play location of the am
controllers actors location. And for our target, of cose
we need our heat location. Now, for our off set of am, we need our mcle let's
go get our muzzle. What we need is to be aiming
towards what we heated. Oh. This is not a
line trace heat. This is a sphere trace heat, what we heat it first. Oh, we're going to get this, A. But we need to create
a towards there. To do that, we're going
to cheese it again, we're going to c rotation, which target would be
this, then forward vector. Get forward vector
from these rotations, and we're going to
connect this to our offset. And
that would be it. Let's go shoot the things. And we cannot shoot
the things yet. The reason it haven't
finished our click event. No. Actually, that's not the reason. The reason is because
we haven't finished the change the mouse type de, which we'll be responsible for if we are hitting
an enemy or not also, but let's finish with the
click event because we have left very few nodes. Well, one node that
we should do is that moving falls when our
threshold is less. That's moving to we
can kick and move. True on true, false and false. So this will actually stop
the little bug that we saw. But I clicked and it started
moving never ending. Now, if I release my
mouse, it stops moving. And when I click, before when I clicked my
mouse and released it, the character kept moving. But let's finish
with our attacking. This was a small parenthesis. Let's consider this a
parenthes to do the attacking. We need to do the ursor to change from
normal to cross ers, and at the same time, change our character state
to aim basically. From our tick event, this needs to be
happening constantly. Moving the mouse, we need to instantly know if
something under us. I enemies under us. We're
going to do a branch. We're going to
bring our function get location under Cursor. And we're going to connect it. Room. Then we're
going to do once. Both or falls because whatever happens
needs to happen once, and each will reset each other. We're going to do a sequence, a copy paste it both and the first thing they
do is they reset other. Now, what's the
next thing they do? They change the mo if we are hitting
an enemy through, we're going to cross hers, which is the mouse we designed. We have overridden
with our red mouse. Is this. Here we have an issue. If we are aiming, we shouldn't
be changing the cursor, so we want to select. We're going to check if
our player state is equal, is equal in equal. Two a. If it's true, then we're going to
keep the crosshairs. If it's not, we're going
to go back to default. If I leave it like this, there is an issue with
the real D not compete. What's working. Working. All right? I think we're
going to solve this next one. And I'm going to see
you then, goodbye.
109. Post Process Stencil & Enemy Detection Fixes: Hello, and welcome back to
Game Design workshop and Real engine five procedural Dungeon action RPs
creation course. Previously, we finished with our top down
character aiming part of our This is not a game controller.
This is a character. This is a controller. So we've
finished with our part of G location under sor function
in our game controller. But if we are
targeting an enemy, then we are checking. We are actually
throwing a trace line from our hit location, which is the impact point. To towards well towards that heat impact point
from our muscle. Now, if that line
trace heat anything, it means we might have an enemy, we might have hit a
wall. We don't know. If it doesn't hit anything, which is probably
never the case, then we return our heat to our normal heat and then
next things happen. But if we do hit something, we are checking if
it's an enemy or not. So that sets the heat
enemy temporary variable. Then we went off
and clear the item select because if we had
an item on our select, we shouldn't have it
because our click would interact instead of shoot. And then we continued with setting the offsets of rotation and a from our muscle
to our heat actor. We got the forward vector of fine blue rotation to
set the forward vector, and we go from our player to our heat location to find the rotation we
need to be facing at. Now, we had some issues. We also actually finished our click event as
a small parenthesis to stop the movement when we are releasing the click because
it was moving constantly. And then we proceeded to change to change
the mouse cursor based on if we are
hitting an enemy or not, with having to do one's events based on
this branch over here, and they're resetting
each other, and we are setting
the mouse cursor. Now, what I wanted
to show that doesn't necessarily happen
every time is that the mouse can reset its position when we are
changing the widget. It can have some issues. But we didn't
manage to show that because there was an
issue with targeting. I'm guessing it's
a collision issue. We're going to check. But what we should
do as a work around, it might be fixed right now. But we're going to
set ul position. And the position that
we're going to set the mouse is the mouse position. So we're going to
get s position. And gate. It rounds up this float. It does it automatically
if you try to connect it to integer, and this will keep our
position basically in place. Oh. Let's figure out
what's going on. Why couldn't we it? Let's recreate this situation. We had a head gate
that we couldn't shoot. There is a hell gate. Let's bring the character
of the tile, the character. Next to the hell bop. Here it shoots at us. I'm going to close
the sound again. And I'm going to
repossess All right. When I select a gate,
nothing happens. So let's see what's
happening in our targeting. I'm going to get
the btn controller, go to disconnect it and
bring it over here. This dock it. I'm not sure. Undock it, maybe. I'm going to go to the function
t location under Cursor. This is the function we
want to be checking. And what we care for
is this branch over here if it can find
an enemy or not. Now, to show what's going on. We need to click on this here. It might say not the bug, but it might be also auto here. Now we can see the bug line. So we're going to
bring it over here. If I aim to nothing,
it goes correctly. But if I go to the target,
Yeah, nothing happens. I don't think it's because
we have a small collision. I think it's because I left the collision to be
explained later. But we have done
some explanations. Let's go to the capsule. What we need to
actually do is change the collision presets to custom, and we want to block the camera. We can overlap with
anything else, but we want to be
blocking the camera. The camera collision channel, which is irrelevant to
what it says camera. We just decided that
this race response will be blocking for us and
we will base our hits on. It doesn't really matter
this is why we chose cameras because it doesn't matter
what it says here. It matters how we chose
to use the system. This is just the sets
that Unreal has set, but it's wisely to use
them as they are described because of plenty of mechanics beating the engine
that work with this logic. But again, when you're
creating your own things, you can do whatever
programming you want. At least it works, and
other people can read it. Let's go press play. I think this will fix the issue. A mouse should turn
red when we find L gate doesn't have in this map, so I'm
going to try again. We'll have plenty here. Sod of truth, mouse turns red. It's like the gate,
and I can shoot read. I can open there. My health is on one, and I step on a trap. Where is my MCs
health? Begin play. Here we are. Max's health, let's say it back to ten. So we don't die instantly. If you want to be really
cruel, you can die instantly. M players can die
instantly when they step on a trap and
they have one health. Now, the last thing
we should do for our character would be to
go to project settings. That's for tencel Aston
depth stan sil pass, and instead of enable having
it enable with sencil. The next thing we will do is
go to our level and bring a post processing wrong. C. Post process volume,
and we want to select to be word world. What was the name? What we're searching for is to be infinite. Yeah, unbound this
infinite extent. The next thing we
need to do is go to our process materials. Find them. Let's add a material
to this array. Would be or process al. M post process. I think there is an instance. M pose process inst,
that would be it. And then we should go
to our character or to our static mesh custom. We need to enable this. So let's search for
render custom depth. Yeah, we want this, and
we're going to set this 21. Now, theoretically, we can
see our player behind walls. Yep, here it is. And how it works is
that our material, let's just for the
material for a second. I know. This has been explained to me. This is the instance, this. So basically, it
lurks between the Basic color, and the one that we want behind
the target to appear, B is that target. And this is decided by a
mask like this from here, which this is the part one about changing the
material itself, and this is about what
material it shows basically. So because we have
the value one, where we do have a
lot of one values, but anyway, I think is this one, if this was a different
value, I think, it would affect which
snsiil depth we said, if I have understood
this correctly. So basically, if that was a two on our character,
this should be two. And because everything
else in the world is zero, we would see the
two, for example. Or I think it just works with the one and whatever
else in the world. Yeah, I think that's it. I think everything in the world is zero. So because this became one, we can see it behind the walls. And basically, that's
it for our character. We have finished our character. So now Turn has a I and all the debug
things we need to do. Let's test one more thing. Okay, the elevator
is not working, but is the chest working? I haven't tested that?
Can we pick up any items? I have an this is the inventory. Let me use this. Is
there a chest here? No. Where is the chest? Here it is, I click on it. Now, I can't. Let's
see why for a second. Maybe if it's something simple, we can debug it easy now. Controller, we are
on our function. Why it be a collision again? Let's play. T. Let's move the acter
directly to the chest. And I is not figuring, I'm guessing you're not
colliding with the. I think it's a collision issue again. Let's go to our chest. Prints, ps big chest. We don't have a collision. We just have this chest
over here and we have set it on the bottom
part of the top one. Our mass is going
to hit the top one, isn't going to hit
the bottom one. So maybe this I have
set it to the bottom. I'm going to copy this. As you can see,
you can even copy whole groups based them. And working work, copy because it got
this group pz only. I need to copy the
whole collision maybe. Properties, as properties. It work it doesn't,
it doesn't matter. Let's just make these
collisions true. So we just want to block
everything to block the combining visibility and pom collision, as
some collision. If it's no, No going to
leave it to no collision, and it's not going to be
generating overlap events. I think this fix it. If it doesn't, we're just
going to in the collisions. Character next to the box, which is very nice
with closer music. Here. Or it doesn't. Doesn't even on the bottom here, I'm clicking on the bottom, but doesn't really do anything. So, let's copy this
collision settings and make them we're
blocking the camera. You're blocking O,
it doesn't work. Fact On both cases, is able. Where it should be working. I recheck from here. To go back here. Et's bring
the character to the chest. Again, it's not working. But now we have to test
the trace line also. We need to debug that. So we're going to select. Let's say for one frame. Let's see if we are hitting
something with the box. I eject at my acor box. It's an h. The idea I
moved the character, I moved from tile. So yeah, actually we are
hitting the box here. I check. We are hitting the box here. So the question comes, what do we ask to have
Actor Big chest has tug I Is it running up to here, let's see. I. Let's start to the box, where is the box? Okay. No, it doesn't run
this branch at all. I did a little bit of testing, and for some reason, if I connect it opposite, I connect first then zero
down and then one works, which doesn't make sense. I'm guessing it of
the object that we are each that's here
we are testing for. Not really sure why
it doesn't work. Normal way, but Yeah, this got it to work. So then zero should go down and then one f this left part. I'm guessing because
this one exits actually. Think of it. This one exits, and this one doesn't. So basically to unbug it, we could would create
a chain of events, but I think this is fine. Since it's working. I
think this is the reason I think because this one
exits and this one doesn't somehow it
makes sure that this runs before this exit. I think that must be the logic. Anyway, let's go play. Actually, I did play and tested. We have some other issues that
we will fix on the lesson, and then we will
start doing the AI. The character throw walls, nice, where is the box. I. I cannot see the tooltip, and we're going to check why. But if I click, it does open and it does row the
items all in one place. We're going to figure
this on the next one. Good bye.
110. Item Spread & Chest Widget Fixes: Hello, and welcome to Game Design Workshop
under engine five, Procedural Dungeon action
RPG creation course. Previously, we finished
with our character, and we found some
bugs during gameplay. Now, let's start
fixing these bugs. So, first of all, let's go to BP item. And in our iop, when we are searching
words drop, we are testing for
visibility. B camera. Now, let's test our collisions. Now, our item collision would be Atom, locking visibility, locking camera and war dynamic, and be weary only no physics. Now, let's go to our sphere, and again, to our settings
or collision settings. So this should be just
ignoring everything, no physics and overlapping with the character because
this is our range. Let's go to our widget, which sho have no collision. R That's have UI, but let's change
this no collision. It doesn't really matter since
we bring it to the screen. Doesn't generate overlap events. All right. Compile. And let's go to
our our big chest. Let's fix this first. Let's select both of
our meshes and they be let's say generate physics events, if it something actually knows. Let's just leave it on. Let's
go to collisions enabled. We want both of them
to be only no physics, both of them static, and let's say both of
them to be blocking all. Now, let's go back to our item and also increase the hundred. So we give it a
little bit range. Let's go and nest. By the box. Open it. Closer. The position on the
screen might be, but we cannot even
see the items. Are they all in here? They
are still all in here. This didn't fix it, might be that when we are moving the items on our
timeline over here, and the ev graphing the items. We do move with teleport. No. That's not full inventory. You don't want this one
on the animate item. O over here. Yes, teleport
is not clicked here. Might be that because
if it does a, it takes into
consideration collision. And the big box here, Like I did see the items move. It seems that they move, but in the end, they return to o. So let's go to our timeline, but we animate the item again. And on finish, let's just
set the actor location. Not update, finish to
the final destination, which I got location. Let's see if this work. There might be something
that resets it. This is next to us. Yeah, worked. So they stay there. Nice. Okay. The text
is a little bit big. Let's click on. One of them. I cannot pick up gold. No, I can. But it's
not getting destroyed. I can pick up endless gold. So the first time I pick it up, it plays the animation
of full inventory. Interesting. Now,
let's pick a potion. I do have potion, let's use it. Why keep moving? Rage potion. I picked it up, it stays there. So it seems they're not
destroying themselves. Let's fix the widget
for a second. Let's remove all these
trace lines because they're nice to see. So our trace lines
are in our wi loop. And on lens, Dave. Let's check out why they're
not getting destroyed. When I pick them,
that's game mode. Cup inventory when it falls and it's pin goes here. And not returning
picked in the end. Because we are
returning no peak in the other options when it's pickable and we are full stuck
or the inventory is full. We are returning that
we cannot pick it, but we are not that we can
pick it when we pick it up. So this should fix that let's fix the widget for a second. Let's go to I and
go to old item. Let's change the size to 21. Bold. All this bold. There any other Let's use dro it ss better and
distribute on default. Now, they should look better. That line that you see here, is because I don't have
the loading screen. Really, I don't think it's that. But let's add the
loading screen, so let's open loading screen. Also. What might be.
Oh, it is visible. You do have the loading
screen. Yeah, we do. So we'll check what
the lines here. Let's go find the items. O is the chest outside here. Picking on the
chest, items drop. You can see them going back. But for now, it's fine. I can pick them up,
I get destroyed. Is there was gold. We have a secret area. That you checked. Why doesn't. A way. Let's copy this est to
a small chest also. Let's go to the small chest. Both of these. I'm
going to go one by one. I'm just going to copy
collision, this and paste. I work. O will work. Haste only past this. This should be the
category this group, but it doesn't do it. Anyway, one by one. We should ignore
everything, block camera, and visibility, block
p, and correct. Always Jack query only, both query on, right?
That would be it. Let's go test for points. They're getting
destroyed. I think they're going to be
getting destroyed. What is that line?
It's very annoying. A rage rage rage a coin. I need the coin dropped. Hold. Here we are.
Right? I clear on gold. I got it. Great. Get the things, use them. Get the rest. I do
already have a key. That's why I can get the key. This pops up a little
bit fast, doesn't it? I do want it a
little bit slower. I can see the widget popping, but it's so fast. That's fine. Second time, it runs a little bit fast. Something I. A little bit fast. So, first of all,
the chest do not have the widget showing
when I'm hovering them. So let's pick that too. What is missing is
the code for that. So you're going to copy
paste the code from the BP item is start hover
and event and hover. We're going to copy this.
It has this function. Let's copy paste
the function first. So widget visibility,
let's go to the chest, go the functions, paste it. All variables exist,
all is good. Ops. We need to close it. Go to big chest, paste it also here, all variables are
good, good to go. Let's go to our item. Copy this. In vent graph, paste it here. Or look good. Also in chest, even graph, going to fix it here, now we should have gs
above the chest. Something when the
camera changes, I think when its glens
creates this with the chest. Then it or create some
pretty awesome scenarios. So here's the widget. And I'm clicking on the
widget and nothing happens. If I click on the chest,
something happens. Oshion. Wold Oh. Issue. The click like this. I get it. Sometimes it means
a second click. I'm guessing it has
to do with the focus. You should fix that
too. Let's stop. The bunch of errors. Let's fill them out. What visibility visibility is notability, which visibility. It. Because when I pick up the item and the
widget disappears, so we need a valid it here. When we have to pick it up,
it's getting destroyed, so the widget doesn't exist. It tries to hide itself. No problem. Let's go
here the next one. Widgets property, not valid. I'm guessing this is
the, is the same. I'm guessing that for
the same visibility, widget visibility,
collision, the widget. So this was banging out because when we were
picking up an item, it was getting destroyed, and we were requesting
to do all this. So, I think this is a
nice stopping point. We're going to continue the
banging on the next one. Goodbye.
111. Item Widget Fixes & Elevator Code: Hello, and welcome back to Game Design Workshop Real engine five Procedural Dungeon action
Arbsic creation course. Previously, we debugged
some things in the game, and now we're going to
continue with that. Now, let's select our camera. And what we should change is the constraint
the aspect ratio because this green little thing line that appears here is
because it's trying to constrain aspect ratio and the post process with the stand sil doesn't
really go with it. And so yeah, we're
just going to disable this and change the
field of view to 55, which is our camera
for the player, 55 field of view. So now If we play, we don't see anymore that lines over here to
constrain the aspectation, make it like a cinematic
and now fixed. Pop, and let's hide this
trace line from the house. Let's go to get location
under cursor inside the optan controller
and set it to the bug. And I noticed that
there is an issue. When I'm clicking on
items and I don't stop, and the box is the box. Let's say I'm moving and the officer I want
an item. No, I stopped. P. The issue that we have is
that the first time we click on the widget,
it doesn't happen, and the second time
the scroll runs, it it runs faster. So, let's go fix it. First of all, the issue with the chest, not actually about, the focus about that
the chest doesn't have a code binded to open
when we are clicking on it. The item does, like
if we go to the item, we can see that we have
binded interact on widgets. Button. Let's copy this. Let's go to our chest and
interact base this COVID. Make this a pure cast. I a custom w. Bind Zoo button. Connected here. Copy past this. Actually, we need to go to begin play first. Let's call button. Now we have this
copied over here. And let's go to chest. Base this year, Let's
convert to pure cast. Let's connect this year and on begin play, let's call the bind. Bindon. Now, let's fix the
focusing issue. We do this, we go to begin
play of the controller. Where is that? Right at map in
context, begin play. So what we want to do is
get self reference to self, so the controller,
and input Ode and UI. Both get focus at any time. The only thing we need to do is unclick SO during capture, so when we are clicking on a UI, the so doesn't disappear. Oh, Theven pile. Let's test this. There's no testing rooms. Hound. Last it has an end to it
warms, go to be music. Hey, let's bring this here.
I just didn't see it. Worked instantly. Now, what we want is this to
work instantly, so click. No, it didn't work instantly. Works now instantly, but it
didn't work the first time. Why can't they get this
cold because I'm clicking on the rage portion.
Got the cold. Now, the issue is with
the items themselves, they're not getting
clicked instantly. Let's figure out why.
Let's do it one more test. Maybe I did something
wrong. I don't think so. Clicking on the chest, opens. I don't have a time potion,
let's stay the time potion. I'm clicking, and it disappears
and nothing happens. Here. Shoot. The second time it works, even if I have Alt or just
trying to click it normal, on the item and then go to
the widget, it still works. It doesn't get the first time. I want to try the first
time going from the item to the widget to make at
things more clear for me. But I do think something to do with our code and
that's the chest. Hey, let's open from
the item to the widget. Faster. First time I click it
like this, it works. I click it like
this, it disappears. So when I press, I click. The first time it disappears. There must be some kind of wrong order operations.
We go to check.
112. Item Widget Adjustments & Elevator Functionality: Hello, and welcome back
to Game Design Workshop, real engine five
Procedural Dungeon action ps creation course. Do some vigorous testing. I kind of realize
what's happening. It's pretty obvious. But when we're selecting, when we're setting visibility, and we do have focus, we're not setting
which item to focus. So we're going to get the controller We're going
to get from our widget lot, which component our widgets, we're going to get widget. Remember, this is a component. This is the actual
entity object, and we're going to input Y, and we're going to
set focus to this. Now, another thing I noticed is because the timeline
is not playing correctly on when we already have an item
in our inventory. Because we have
connected this play. It needs to be connected on play from start because when
we are repicking an item, it cannot fit in our inventory, post to falls, or
for some reason, we cannot pick it anyway. It starts from play, and when it has finished
the first time, it never plays again
because it's finished. But we do need this
play from start here. Now, one more thing we need
is to go to our game mode, and now, I think we set this. I think we set this before, set input mode game and UI, and begin play and
not hide cursor. Also not y cursor in the
item. Did they click that? Pe I didn't. So also not cursor. When we are setting
wig visibility. The That would be, I think, Let's go play. There is the chest over there? Ileal didn't fall down, good. Tiging types, getting attacked. Oh, what's going on here? Is this visible
from the beginning? This is because of, because
I'm targeting the chest. Okay. Yeah, because it's getting when I'm
containing this. Okay. Yeah. So let's open the chest. G the key. So, it works
from the beginning now. This, I'm getting this shooting and I'm getting the items again, shooting, and it works. Nice. Playing. Now, the next thing we need to check is on
the gameplay widget. When we are playing the
animation of picking up an item. So let's go with you gameplay, L et's find the animation, animation tab, item
pick, find references. Okay, pick up item size
setting brush, forward. Let's restore state because every time it should
play from the beginning. This is needed restore state. Let's press, this
will pick stat. Et's quickly. Is the character, it is. The character over here,
tapping on some traps. Now we need to pick
items on a row. Let's pick this, and
let's pick this. And it plays mine. Here is a character that keeps moving. When does this happen? When I can't reach a destination
because it keeps trying. Right? I think we will leave this as it is, doesn't really matter. What we're going to need
to do is fix the elevator. Because right now the elevator just doesn't pop that platform, does it. We do have a key. Let's go to our elevator. Quickly go to here. Place. Ate. What happens next? No. Okay. I think this
is pretty simple. We go to the elevator
and I haven't called the Pence down. I call Pence the end of t event, which the elevator reach n. Near the elevator. And sh. Crush. Oh, I hope I didn't crush you, but there is a reason
for this crash. When I added fence down, it needs a do once
after this branch, else, it keeps playing the
animation over and over. It keeps running this over
and over very fast per frame, and it breaks this out. And another thing that I noticed is that when we are
creating a maze, we're spawning the character. And we are keeping the
reference like this. But when we're
creating a new maze, we do not have this reference. So, what we will do is go
to the begin plaent, right? And when it's continue, we're going to get
from our game modes, We have a reference on a game
mode here. Now, we don't. But we do have on the
controller, I think, a controller is no longer
here on here it is. On the screen. So We do
have a player reference. We know that for the game controller to have
this player reference, it has already been filled
when we go to level two, the bactor maze
generator, where is it? Here it is, and we're going
to get player controller. As top down. Convert pet. We're going to get payer. And we're going to set
our play reference here to this one. Go play. Everything should be in order. Elevator is closed. We already have a key.
Then crush again. Okay, after a little
bit of for searching, I realized that there
are two things wrong. First of all, in the maze, when we are creating the maze, we are spawning the player and we're holding the reference. But when we are respaing a maze, we have no way of passing that reference of a We don't
set this reference again. So the new maze doesn't
know which is the player. So to fix this, we're going to come here in
the beginning. Begin play. When we say continue, but when you're
continuing the maze, we're going to set
the player reference, we're going to get our
player controller. We're going to pop down. We're going to make it a pure
cast. I'm going to connect. Actually, we're going
to get play reference. And we're going to
connect this player reference to our player. So now, the new maze
knows about a player. Now, the next thing
that has an issue is, over here over here. Interesting. On
beginning overlap event, when we are spawning
the new maze. I did a mistake here. When I'm asking for twice
the size of the maze, how many tiles it
can fit basically. I'm asking with the plus one. So I if I add plus one, can this fit, and then I go ahead and do not add
plus one because it feeds. So I should be asking
if the current maze, and what hinted me to this is that both time
that I had a crash, it was because the maze we had this error up
here, we have created. It's the only error code
we actually created. Amazing that this
by accident heated. So we got this maze
can't build more. And when we both time
that it crashed, it has this issue. So yeah, that was the thing. It was building more
than it could handle. I can't handle more, and some of our rules over here might have said we
can't build something, some whip might have
freezed possibly. Now, let's go test one final time. And the elevator. We can still move in here, but I think it's fine, if we don't escape by mistake in the beginning when we are
entering. That would be fine. So, very bright light. You change the camera settings. I'm going on the second
maze, I'm getting the key. Let's add some more time. Let's see this endless
thing happening. That is the next maze. O. When I eject, the maze
below got destroyed. Something stayed. The big chest do
not get destroyed. Probably when added,
this should be here. There should be a chest.
There is a chest here. The big chests need to be added to the
destroyer actor list, and we have the third
maze and the getting and gesing bigger and bigger.
Let's move O side. Here. The key. A time also at the time. What is the elevator? Here. Possibly the next phase should
be bigger than this one. This actually smaller. Are we reducing in size? Are we reducing in size? Or is it bigger? I just
this one has three rooms. We have two. Let's get the kick here. Bigger I don't know. And it looks the same. One. Is the look. The key of the actor here. Three rooms. How much do we add every time? I think we do add three
blocks every time. Two. No, it's going to
be random, isn't it? One, two, three, four, five or six even eight even 12 13, 14, in 21. Two, 22 and blocks. Let's
check the next one. Done that from the
beginning, count the blocks. With the key. Any time. Let's get some time. All righty. I the player it looks bigger now, one, two, three, four, five, 1012, 14 15. 2021, 23, 24, 26, 27, 29, and eight e, f. Oh, we are adding boxes. We are adding them slowly. We can increase it if we want, like generator level
plus three every level, and it gets bigger and bigger. Now, our main part is ready. The only thing we
need to add is our AI and picks a little bit
our colors and lights. Oh, this will be e for this one. I'm going to see you
on the next. Goodbye.
113. Morigesh Character Import & AI Health System: Hello, and welcome back to
Game Design Workshop and rail Engine five
Procedural Dungeon actional Peg creation course. Previously, we finished
with our bugs. Actually, we didn't
finish with our bugs. I'm pretty sure we
will find more. But as we find them,
we will fix them. Now, it's time to start our AI, which means we have to
explain also a few things. But let's start by creating a folder inside
their blueprints. All this AI. Let's
enter this folder. And also, let's download. Uh No from here. Our Paragon character
Morgue Mies, Marie, I'm not sure how it's spelled, how it's pronounced, which
will be in our library. You don't have it, you can find it in the marketplace for free, as the same way we showed or our other Paragon
character Revenant. Oh. Let's add it to project. Is here. This will take a while. Oh. Now that we have our
Paragon character. Let's go back to our let's
check that we have it. Mortgage characters,
Audio. A hero. Right. Yeah. Everything
seems to be fine. I just checked the animations the rest of the folders, but, let's go to our folder
A, which doesn't exist. I'm going to create it again. I really thought I did. Anyway. In this folder, let's go
to our character Morgs. Characters, goes Mig. Let's duplicate this
Mortgage player. Let's drag and drop
it to the folder AI. Oh, first of all, we
have our character. AI needs a character. The second thing an AI
needs is a controller, which is the same as the player. But we're going to
click AI Controller. There we can go
Lue print and AI. And we're going to
select AI Controller. Let's name I see because we might have different controllers for
different enemies. And Let's rename the character to I one. In short, what is
the AI controller? It's designed to govern
the behavior of AI as it is for our character we decide the inputs
or our character, we decide what the
player what we press, actually, and the controlling
translates that to the character or to
the I or to whatever. But the same does the
controller for the AI. It coverns the behavior. Now, the next thing we need is an AI behavior t. Let's call this I AIP one. And what is a decision
tree AI behavior tree? Well, it's a decision
making structure. We can call it
something like this. It's a tree, organized in t with various nodes that determine
what the AI should do, based on the rules. And trees can
include other trees. They can decide to go
and run other trees, and be honest way to make complex tasks and with
an easy way to debug them. Now, the behavior tree comes with something else
that is called a blackboard, which is responsible
for holding the values. It's a template of values
for the behavior tree. It stores the data, and it is efficient
to communicate with the tree and the data
that we have stored. But to be honest, also, it's a little bit of an
overhill for our scale of AI, but we are going to use it just to show how we're using it. It's more designed for
much complex AI actions. Well, let's call this. M one. And the next things that
we're going to need is a service and some
tasks. What is a service? It's a special type of
decorator node in the behavior three perform tasks over regular intervals like do
this this amount of time. For example, we will use hos to get some attributes from our character and pass
them to the black ward. And task are the things that they are fundamental
for behavior trees. They represent every action or set of actions that
the AI can perform. For example, we're
going to be using a prescripted for example t, which is moved to location, but we can make a task. We could make a task that would be way more complicated
move to location, like it could have
many other rules. But we're going
to go deeper into task and services when
we are creating them. Because for now, we should
enter our AI character. And make it compile. To do that, that'll be
something very easy as selecting everything
and deleting it. We will also delete
the account count, the is attacking, the save
attack, the base look, the base turn, and of course, we're going to delete
the polo camera and the camera boom. But we're going to add
some things later. Now, we could have used the third person
template to do that, but it would be duplicating
and deleting a lot of things would be more
time consuming. Oh, File and save. Do this everything. We're going to close
everything right now. Have the AI stuff. And also, let's open the enemy AI controller
to even graph. The only thing we're going
to need here is the behavior t. The behavior t would
be our t. Savors. Now, this is the only code
that our controller needs around the tree. I'm
going to close this. We're going to Let's open
the AI tree. Blackboard. Now, we can access
the blackboard the AI tree these
two tops over here. We don't actually
need the blackboard open doesn't open the AI tree. Let's go back to our AI enemy and let's create
something simple. Let's say that anytime we
take damage or any damage. We will reduce our health. Oh, let's create two variables. One would be b would be floats, and the one would
be inherent health. And the next one
would be M Health. Oh, we're going to
get our C and health. We're going to
subtract. The damage. We're going to clump the
float to zero and Mx health. And actually, let's compile
and set some default values. Let's say MC health would be How many heats should AI get? Let's say three. Oh, let's put three. Health. Let's set the fall value
of current t to three. Or we can go and begin play and set the max health
to current health. Oh, we're going to
check if this is less or equal than zero,
and we're going to branch. It's not going to play a sound. D, which would be something This one. Bananas
attack Guo cup. So it's a female attack, I don't know. It
sounds like a hit. And then we're going to
create two customer events. Replicate this, one
will be called death. And the other one will be called stun character after we get
hit and still has health, we'll get stunned or stun. And if not, it's
going to die death. Now we have a system or an AI to get damaged and
or be stunned. I think this is
enough for this one. We're going to
continue the next. Bye. A
114. Retargeting Revenant Animations to Morigesh: Hello, and welcome back
to Game Design Workshop, And real Engine five
Procedural Dungeon action RPG creation course. Previously, we created
our NI enemy blueprint. We created our AI
enemy Controller, our behavior tree,
and our blackboard. Then we went ahead and
created some code. We actually deleted
first the code that was already here and
some components. And then we went
ahead and created a damage system to reduce our health
whenever we get damaged. And if it's zero, our health, we're going to die or
we're not going to die, and we're going to play
a sound and get stunned. Now, we continue
with our mechanics. We do need again
a state machine. So we're going to go
to our AI folder, we're going to write click,
we're going to go to blueprints and create an
enumerator enumeration. And we're going to call
it E AI one states. Let's enter it and
let's add some rebels. Let's say our states are patrol. If that's the spelling correct, but doesn't matter, Attack. Let's say. Let's have also a position. Sue the spelling to attack. Lots of words in this one. So now that we have the states. Let's go back to
our AI and up them. We're going to
date the variable, we're going to call it AI. It's going to be of the
type E eight, I one states. Now, let's finish with our stan event because
it's going to be easy. We're going to ask if
our current state is equal to stat and if it is, we're not going to do anything. If it's not, we're
going to set our state on and we're going
to play Amontage. Now, let's create Amontage. Go to find our animation, mote. Mortgage and I'm going
to search for t. I'm actually we need to
create montage from it, eight animation
montage, and I'm going to enter the montage and let
the state to upper body, the slot to upper body. Because we don't really
need to do much on this animation
blueprint because it's setted for this character.
This is the wrong. Now, when it opens
the wrong one, we can change it from here, the three dots over here, go to the one we want. Now, this is already
using what we kind of want in gram, everything. And in Event graph, it's all set up
for Morigs player. We won't be using the
attacks or anything, but we won't have errors either. No, let's go back, I'm going to delete
this, close this. I'm going to close
the montage also. For the montage, we're going
to choose the heat front. The two. I go to drag and drop this here. I'm not sure why there are two. The other one must
be the paragon one. Anyway. So, this is
the play montage. The montage mooch one. And we need to connect
the skeletal mesh, and I'm going to
bring again Montage. And now, why we need
the more advanced one? Because on complete, we
want this to be completed, that are state back to attack. Because whatever
happens, even if the AI doesn't realize that
there is a player near it, if a player shoots it, it sho change to go
and attack the player. Shoot towards the
player basically. Now, let's go
complete our death. First of all, whatever
happens need to happen once. Do once. Just in case it gets damaged
again and this triggers, we need a variable to
know that we're dead. We have a b. Let
call this death. We're going to set it to true. The next thing we're going
to do is play a sound. Yeah. For the sound,
we need scream. Woman scream, here it is. It's a good death sound. I'm going to a actor collision actually actocs to disable. Actor enable collision
to disable moth. Anyway, let's set actor. Pi disabled. Let's get our character movement because it's the
same as the air. Let's set walk to zero. Actually, let's set
velocity to zero also. The reason we're doing this, letting velocity and
max walk to zero is just in case our
animation graph, which is affected
by these variables, get some wrong command in the last second,
maybe something. So when we die, we
set this to zero, and nothing else we
change the animation. Now the next thing we should
do is play a montage. Well, let's find death. This animation a little bit. If we had a particle
or something and she would disappear,
that would be fine. But let's do something
more at once. I think A bar, what's his name? Revenant? As a better death. We actually used it here. So what we do is go to
our content browser. Death this is death
animation sequence forward from Revenant. We're going to duplicate this. Lubricate. Here it is. Let's move it to the folder AI, so we can work more clearly. I lost it now. Target from here to A. Here. No, I'm going
to click target, which will duplicate it also, but the target would be let's do the Arti Manan. And O source need revenant. I would be mota. Here we are going
a press re target. Let's see what we
created with the AI. It's not created here. I think yeah, it's on
content. All right. This seems fine. The skeleton is a little bit
stretched, but it's fine. I think it's a little bit. Looks okay. Oh, Dave. Now, retargeting animation
usually is not that easy, but Paragon characters
are okay with it. Most of them, like Mortgage
and what's his name Revenant. I shouldn't put it in folder AI, or now because the
folders of didn't do it. Already exists. Oh, let's rename this. Target death. Or it's retargeted death,
and we can move it. And let's the eight
a montage out of it. Let's call actually claim fine. Let's enter the montage, change the group
slot, to upper body. S, compile. Let's go back to our
enemy and play montage. Ton will be our mesh, and the montas will be
the one we just created. Now, we need to drop some items
that code already exists, of our codes could be components but copy
pasting for now we do. Not on our items, drops on our chest. I'm going to go to our chest. And I'm going to inventory. This is our code to drop items. Okay. Yeah, we
should have comment. Now, the part we need is
basically the flop here. D need the generator, but we don't have a reference.
Let's just copy this. It this x number items. Let's make it a static
variable of two. Let's set this here. And range 1-2. Setting the two here didn't
really matter, but anyway. And for a maze generator, we're just going to
create a variable, pose it on and instance edit. When respond to the AI, we can pass this reference. The reason we need the generator of course is to add to destroy. We have the chest open. We did say that this is
not added to be destroyed. But let's fix this in
another debug pass. Away. Last thing we should
do is after we I we could possess from our
controller. Do this, we go. Yes. Taller We're going to get AI controller. We're not a player anymore. We are I. We're going to Bs. This we leave us a bunch of AI controllers
that do nothing. But we could make a system that AI that gets on afterwards, uses a un possessed controller. Oh. We're going to
leave the body as dies because it's going to get
destroyed when the ma deleted. When we go to the next level, it won't matter that the bodies were left
in the previous level. They're going to get
destroyed with it. I think this is a
good stopping point. We're going to
continue on the next. By A
115. AI Range Check & Hellgate Guards: Hello, and welcome back
to Game Design Workshop, R engine five Procedural Dungeon action APs creation course. Previously, we finished
with our and death events. We created a state for AI
and enumeration of date, and we said that it be if the character is not
staun then so be staned, and we played a montage and
on complete of that montage. We we changed state to attack. Now, on our death, we do once, we set a variable
to dead. We play a sound. We set the collision, the tick, and the movement
to zero basically, and we play a montage
that we retargeted from the other
paragon character. For some reason, I still
think the name is Cabal. Maybe it reminds me a lot
of blood one character, Caleb because I know
it's not Caleb. Maybe comes Cabal in my mind. I don't know. Way. Then
after we play our montage, we instead a maximum number
of items randomly 1-2, and we flow to our
mechanic to drop items. And we do have our
a pen here that chooses one random item 1-5. And then we possess the
controller that we said, it will leave a bunch of
controllers not being deleted, but it gives the opportunity
to create a system for every new AI to possess
an unused controller. Now, let's continue with our
detect player mechanism. To do that, we're going to
need a sphere collision. Let's go to our viewport. We actually see
it, how big is it. Let's set the number
two, something like 900. I think this should be
a nice range around us. This collision will be our
range and detection of player. It's a nice area. Oh, this collision is looking
only for one thing again. So let's go to our
collision settings. Let's change it to custom, ignore everything, except ponds. But it does know
the other AIs too, they do overlap. They do create. You could advance the
code that with something. Maybe they communicate
with each other. I don't know. One is low health, another one comes and
heals it. We'll see. It's up to your imagination. No. Let's go do something
with this sphere. We're going to need
an begin overlap and an end overlap event. Let's start with the beginning. First of all, we ask if the other component is the
the player's collision. Specipally, the capsule. So as tug the other component. We did this so many times. Now, the next thing we
should do is create a variable in range, and let's set it to
when this is true. Afterwards, we're going to
throw a line tase by channel. Do we have visibility
towards the player, or is it that the player was behind a wall and he collided with the sphere. So, we're going to
start at location. I'm going to end at our player. So a location. I'm going to connect
this to the end. I'm going to set the
visibility to camera, and we're going to
break our heat result. If the other actor that
heated g. Actually, we don't have an
actor for the tag. We do have though
we can actually do an equal actor and get on again. Just check is the other
actor of the pawn. If it is the pawn or good,
if it's not the pawn, do nothing, and if it is a pawn, we're going to set
the state to attack. And now that we have the pone, we can actually ask to top down player on character
and action music. So our action starts. Now, We're end overlapping, it's going to be pretty simple. We're going to check
if the end overlap is the character or has hug P. O opponent has hug P.
We're going to put a branch, and if this is true, we're going to set
the in range to pals. A systems that we have
created here for detection. Everything could be
created also inside the behavior tree with
complex system as EQ S, which is environment
query system and other ways that we could par for line
traces in here or not. As I said, using the blackboard and the process of adding keys, removing keys, updating keys, is kind of an overkill
for such a simple AI. So we're going to do a mix of both and talking about
the environment, the next thing we need. When we are in attack mode, Suddenly player goes
out of line of sight. We need a mechanism
to be able to tell, now the player is in
line of sight, attack. Because the players can
cheese it, you know, they can just hide
behind corners, they can hide, they can
do plenty of things. So our AI should
know when it's in direct sight or it needs
to move to do this. We're going to go
to our begin play. And we're going to
make a Primer pi. For example, this
could be a service, we thing that runs every specific amount of time
and does a certain thing. But let's also because we're going to use a service
to update our information, our health, our state. Let's how because we
played with times before, we use Tiers before. The see how we can start them
and stop them when we want. We're going to
promote this hundle. We talked about the
handle at bit is the thing that
handles the time and call it handle like time. And instantly, I'm
going to pause it. For the moment it's
created, it's being posed. Let's put a time to be a 0.3. Let's set it to look. Let's create a custom vent. Name this look for player. What it's going to
be doing, going to be throwing a trace line. But we will copy from here. This is exactly what
we wanted to do. We do need this also and that equals to one. We're
going to copy all this. This is what this event will do. We're going to be
throwing a trace line from the actor to the character, it's going to be checking
if it heated our player. Now, what happens if
it is a player or not, we're going to need a variable, all is in, going to
be a bulion variable. I'm going to set it to true, and if it's not, I'm
going to set it to false. If it's true, we're going
to check if we are stunned. If we are not, we're going
to set our state to attack. So that would be our mechanism
to protect the player. Now, the next thing to do
is actually se our AI. For that, we're going to
need a few variables also. We're going to need a host location because we're going to be spawning them
around he gates. So, this is our host. I. And the AIs should
know if the host is dead. So if the player
kills the hell gate, they should do something. Let's create another variable. It's going to be bullion,
all this host dead. So now we can finish the
code of our held gates. Let's go find our head gates. Let's go to Ben graf begin play. On the sequence, we're
going to add another node. Let's go up this time.
And what we're going to do is going to make a ford loop. No for f loop. Be we need a random amount
AI to spawn random. Random in range. Now, we're going to start
with a generator level. Let's get our generator
reference, which we don't have. Let's create one for this. Let's of the type P. P maze gen. Let's expose it on spoon. Let's go to its pone, which is in our generator,
prints, Maze generator. The hell gate it's over here. The Hall gates is
big thing over here. I compiled pave, but the maze. This is the trice line. This is the Hall gate sponer. So I not found This wrong. We will check. So let's
reset this to Hell gate. And now let's put self
to the generator. Compiling Bator he gate, et generator. Let's get level. From minimum generator
maximum One. Put this on a random. Elect random. B plus one or the
generator level. Now, we need to all
characters and call plus. AI characters. At the transform I didn't expose the host
location at the generator. I didn't do the generator.
Let's connect this here. I need to expose. This is to expose
the host location. Eight. And for host location, I'm going to get location. We do we spawn them? Well, remember that random
point in bounding box. That's what we're going to use. Dom point in bounding box
with of half size of 300, one, and the center should be our actor locations give
b of height plus 40, let's say, would be our center. Now we're going to get
the generator reference, Troy I'm going to At the AI. We also need one more list of this and promote
this variety. Really change it
from actor to one, this won't be an aca be
the zombies, our AI. I'm going to connect this here. We need to just add to it. Add ops this actor. Now, what actors to destroy? Let's call this my zombies. No, it's not AI, not
the name of our AI. What I call the zombies
already and like it. What do we do with this ombies? When we die when the gate dies. You think death here it is. We want el to zombies
that we died. So before we destroy actor, we're going to I'm going to
use the M Zombies array. This destroy should be
completed, connected from here. And to my Zombies, we're
going to that host Dad all the zombies, all the enemies, we know
that the hell gate died. And this would be a. I think that's
enough for this one. We're going to continue
on the next. Good bye.
116. AI Bullet Shooting & Knockback Mechanics: Hello, and welcome back to
game design workshop on real Engine five procedural Dungeon action RPs
creation course. Previously, we created a
system to detect our player. In our AI, we added this
collision tube that is responsible on begin and end overlap to check if the
player is in range. Then on begin overlap, we went to and through
a line tase to see if our target is the player. Can we have a direct visibility to the player or is there
something in between? And if it is, then
we set to attack, and we started our action
movie, our action music. If it didn't overlap, we just set the in range of. Then we proceeded to create a timer on begin
play that we posed that is responsible
to make a system that constantly checks if the player is in a range or not. If it is, if we are not
stan, we are attacking. And this system is a mechanism
that runs over time, like a service, when we
want it and when we, we can pose it through our
handle side timer handle, which is responsible for
managing the timers, basically. Then we proceeded to finish our spawning mechanism in
our head gates for our AI, we used a for loop
with our random the gerne range of our generator level,
randomly adding one, on the level plus one, and
then we used a random pointing a random point in
bounding box to spawn our AI around our hell gate. We added them to an array
to actors to destroy on Me, and we added them
on another array to be mysombies,
as we called it. So when the When
the heal gate dies, this is not death.
Either here is death. And the heal gate dies. It goes through each
of the zombies, each of our AIs. The hey, I died. It sets the variable
host is dead, and then it ats itself. Oh, let's continue by
making the actual shooting. And the actual
shooting is going to be called through the tree. And to do that, we're going to need a blueprint interface, it can call it to any AI
that the tree is using. We're going to go
to our folder AI. We're going to create
a blueprint interface. Let's call this B I
AI. Let's open it. It a function. That's
called a tack. Actually, let's call it shoot. Compile Dave Bator A I
settings at this interface. A Ai and now we have our ot interface. Let's double click
and the event, the first thing we
should ask is if we are dead because if we are
dead, don't shoot. And if we are not dead, we're going to play a Montage. Let's go create that montage, go to on the browser. Let's go to Morgue, Morgue, and search for by Marie. B. There is a montage
primary attack a slow. Let's check it out. Here looks fine. We're
going to use this. When we are not
dead, we're going to montage advance node. We're going to use
the aceletal mesh. Again drop the here. The next thing we need to
do is spone our bullet. Let's create our bullet. Let's go to our
folder blueprints. Let's go to Abilities. Let's right click. Let's go Blueprint class door
and P AI bullet. Oh, first of all, let's add a particle system AD. My gas. Projectile. Here we are. Is the glow of the dagger. The next thing we're
going to need. The static mesh would be dagger. This perng old A M LP. We need to rotate it a
bit. Rotate the particle. Need to rotate the blade. It is smaller and particle, so let's incise to
1.5. That seems right. And does need a material. This is a magic tiger. Here we have a magic tiger. Right now it looks better. We can move it a little bit. This line, but it's fine. We won't be able to see. We
just see a glow and dagger. Now, thing we need is to turn off the collision of
this dagger because we're going to use a collision
capsule to make the collision. It won't generate overlap. It won't have collision, and that's a capsule. Actually it's unparented. Ms should be on. Let's rotate it. It's smaller. Bit. I think that's fine. Writing In this capsule only searches for pon, a collision. Actually, it does search
for walls also st, everything except protic,
block wall dynamic. Overlap on. Not really sure about the
word dynamic if we want it, because maybe we wanted to
through the hell gates. Let's leave it as easy. It easier. And the last thing we need to add is a
projectile movement. We will need to
turn off gravity. Let's set the velocity to zero. And last thing we need to
do is go to begin play, get our projectile
movement at velocity, and promote it to a variable that we're going
to export on swan. And make it incense
edit, compile and save. Let's go back to our AI and on plus after our montage. Of course, the actor would be our AI bullet.
It's not a bullet. It's a tagger but it's fine. No, We do we spawn it and
what is the velocity? Fortunately, if we go to
the behavior, I'm sorry. To our skeletal. There is
a socket called pon pon r. We can use this.
A nice location. Let's go back to our AI and
get our mesh ckt location. Here are, all the velocity. We're just going to on. Going to get back to rotation. We're going to find
look at rotation. We're going to get forward
factor. Right there. We're going to multiply which will be basically our
head of the bullet. So, let's make an integer, let's say 200, a little bit
faster than the players. That would be it. This
would be our shooting. Now, event shoot, as we said, it's going to be
driven by the tree. This is why it's a interface. So the tree can send to
irrelevant of the actor. The actor just will need
to have the inter No. We can actually go and
check some phoning. So if we go play, we get a bunch of errors in Mortgage and blueprint
and Mortgage. Oh, it's because it
hit some errors. Because I duplicated
the character, then the casting in the
Morgmention blueprint, it's actually going
to hit some errors because I duplicated
the character. Yeah. So let's go fix that. Get Morgue blueprint,
your original one. This bad way to search for it. Character, heroes, Morges, Morgue player,
delete all this. Go to the blueprint. Let's see this. L et's this. This and this. Now, it's fine. No, we can play. Let's
search for a hell gate. And we have three
AIs. O we have three. We should have one or 21
because it's a o based. Yes, because our for loop is
zero based. Let's fix that. Let's go back to our hell gate. Very basic mistake to
have happened anyway. Gate enemies. Zero to one means two. We're going to do
this a minus one. We're going to be zero to
zero, which means one. And now we have no hell gate. Again, we have a hell gate. She doesn't want us this time. Hey, we have a hell gate, and we do have an enemy there. Right? Let's shoot it.
Let's try to kill it. Actually, I'm hitting it, but it doesn't really have und. It does have sound. I just
want to close the sound. It doesn't have the tug I. I'm going to go to Atifs, we're going to go to tugs, going to add tug
E, I think, not I. I was for items,
interface, interfere. Away E is for enemy. We have the tug, we should
be able to kill one. They're dying. They're getting back up, but they're dying. The items are getting
spawned in zero, zero, zero. Let's p is it now. Let's go back to our AI
and bag that really quick. Death, here is a death, floop. Of course, this saw 000 because we haven't
set a location. Location would simply be. But they do throw items. So this is cool. Yep, there is an AI. Tweet and kill it and
see that it drops items directly at the gate,
doesn't matter. Now, if I'm clicking on it
and I'm moving the mouse, getting back up, but
it does throw items. Now, the next event
that is going to be driven by our interface
is the knock back event, which is something we
can also already test. This we can sport
it, we can go in med AI and it gets knoba. Oh, I'm going to go to
our blue interface, I AI, and a function called Because this is also
a universal message. We're going to be sending
it from our Mi attack, and it needs to be for every AI, not just this certain one. Oh, it's going to be
a grouping interface to send it to any actor. But I think this is a good
stopping point for here. We're going to
continue on the next. Goodbye.
117. Knockback & Stun Mechanics: Hello, and welcome back
to Game Design workshop, Real Engine five Procedural Dungeon Action ARPZ
Creation course. Previously, we created the
blueprint AI bullet that it is requisite of a particle of astatic mesh or our anger mesh, a particle to make it glow, a capsule that detects
the heat or not heat, and a projectile movement. To control its velocity. Now, one thing we didn't
do is tend to the capsule, but when you hit a
player do something, when we begin a lap event, what we're going to do is let's
give the other component. E, actually, we do need also, but we do need at
right now for player. And we need branches. First, we need to ask
if the other actor is valid. Is the other actor valid? Because it might be de, it might be getting destroyed
or something. So is the other actor valid? Then is the other actor player? If not other player, is
the other actor an enemy. And if it's our player, you're going to apply
damage to the other actor. Damage of one.
Let's call article, emter, location.cion
would be oration. For the emeter, we're going to use dot mortgage do Impact, which is a small cloud. Now, small green cloud. If it's if the other
actor is an enemy, we shouldn't do anything. I should just go through it. But if it isn't, we will
just form this cloud. Of course, lastly, we're
going to destroy an actor. For example, if
it's not an enemy, it's a wall, you go destroyed. After our BP AI bullet. We went ahead and
created our BI AI, which is our blueprint
interface for AI, and created two events, the shoot that we completed, and the knock back that
we're going to do now. Now, for the shoot,
this is not the shoot. This is a shoot. We are checking if the
character is dead. If not, we are
playing a montage, and we're spawning this
bullet that we created, well, ping dagger more likely. And we're choosing
for the location, the mesh pocket. Sorry, I flick. The mass socket name
weapon R and for the velocity between that and the actor location with
the speed that we chose. Now, let's continue
with our back event. No, let's bring Pack. Actually, we just double
click here in the face. We get the event, and we're going to set the
character state to one. Then we're going
to get location, hold it temporary because
we're going to move to that location towards
another place. We're going tone this
temporary location. Back. And then I want to
do other variable. Let's create it actually. I go to be of type
integer of this range. Now, our knock back might be a little bit buggy sometimes, and go through walls,
can go through places. The way we could this
would be with trace lines and some more expensive
rules and more detailed, but this will be fine. I'm going to do our random
ing in range, but in range. And let's say 100-150. What we need to do
is play a montage. Play a montage, and
let's go cre A Montage. You're going to go to
our folder mortgage. That's Mack. This one. And we're going to
create an animation montage, we're going to open elect
the slot upper body slot. Dave s and go back to our y. I can drop the montage
and this skeletal mesh, and now we have an animation. Now, as this animation happens, we're going to play a timeline. And on update, we're
going to set of location. I'm going to alert. A would
be our temporary knockba. For B, we do need a direction
that we're going to be multiplying with our back range. Convert this integer, basically, the direction needs
to come internally. What we're going to do
is we're going to add an input factor to our
print interface nba. This direction. Compiler Dave. If we go back to our AI now, we do have it over here, and we can bring it here. Now, for our Alpha drive, let's enter the timeline. Let's select the aski frame use. Let's add a float truck. Let's add two points. Let's say the time would
be 000 first point, second point would
0.5, let's say one. And this would be our Alpha. Now, when we're getting packed, the next thing that should
happen is we're changing state after the pack to attack. And we do apply
damage to ourselves. If we want to actually
want we do it. If we want the men
to not do damage, we just don't apply damage
to self This would be it. We have a knock
back. Oh, test it. Go to gain level. We do need to add
it to our mell. Let's go to our me ability. Abilities, where is the me. Well, when we begin overlap, and the other actor is E, the other actor,
and we knock back. For direction, let's get
the actor forward vector. Since this is rotating
based on the character. Now, let's continue the
test there is an AI. There is O It really
went far away. He did die. I went
through the floor. Found this too loud. Okay, so we need to fix this. Let's pause Optily. The non trying to read and possess pen there, it's okay. Let's do on it's
valid note here. If it's not valid,
it try to do it. Maybe because we
haven't possessed. Yeah. What's wrong with the knock to do with s. Actor actor patient. When we attach it to the player, let's open the player
blueprint for a second. Let's go to blueprints,
to our top character. Respond to me, we are attach it. Actor self, so no. Hold it seem to be on. Yet actor. We're playing, so we should be ping from start, first of all. Okay. Yeah, I'm not adding the temporary location
to the direction. It does a direction from this is why it returns to the
start of the map? This is why when I knock Mack, it returned to the first tile. Threw itself to the first tile itself here because I was
here and threw itself here. So it has a direction, but where in the world. I didn't specify
where in the world. We have the texturing
issue again. So our streaming full size 200. You can see that the
map here is badly textured to this, good. And let's go find an AI. There's none here. Okay.
There is an AI here. Next to it. And now
knock back works. We're knock backing AI. It's very annoying
that if standing up, but we're going to fix this. They should. It seems bugging. I'm going to figure
this out later. Let's keep doing the AI. No back is working, our shooting issues, but our nback is working
is doing damage also. Now, lastly, what we need to do before we enter our decision
T, activate all these. We need to create two
more events on our BI, I AI, which will actually let me be in
paint for a second. We haven't done this
for a long time. Oh, let's say our AI over here, and there is a wall here. And our player is
behind this wall. Now, when the AI tries
to find the player, it moves like somewhere here, let's say it gets this point. Is direction would be to
actually not towards up here, but the last place it would be going to the
place that it moves to. But we wanted to turn
towards the player. So we will cheat a little bit, and we will use the rotation
this is an R, weird R, but it's an R. The rotation
based on movement, like use the rotation
rotate towards movement. And then when we turn
this off and use the controller rotation which will be set towards the player. For the AI, will move to a point and it will turn
towards the player. And we will set turn
rate and everything in the decision and the
decision making the. The behavior t. Anyway, let's go back to our project. And Let's add these two events. Let's go to B I AI. Function. Let's call
this controller. Let's make another
one, movement rotate. Let's go to AI and
call these two events. To compile. Dave. Controller
rotation, movement rotation, We're going to get our
character movement, et desired rotation. What? O That orient
rotation to movement. These are the two. This will be off and this
would be on base them above. Connect the character movement, and this will be on,
and this will be off. And that would be
it. Our code here, it's pretty much
done inside the AI. Let's bring this up here. Also here it's alone, and that would be it. Let's compile and save.
And in the next one, let's start with
our behavior three. Bye.
118. Blackboard Variables & Behavior Tree Setup: Hello, and welcome to
Game Design Workshop and Real Engine five Procedural Dungeon Action LPG
Creation Course. Previously, we finished
with our events on AI, our BI events, our
message event. We finished with knock Back. We set our character to stun, we set a temporary location, a temporary knockback range. We play animation, and while
the animation is playing, we play a timeline of 0.5. This is about the
time of the animation and that actor
location accordingly, which we use the direction
through our mail attack, and we added to the
parent location. The end of that, I forgot
it, the press run, and to give the direction
where in the world, and we go through the
original location to be. Now, when it finished, we set our AI two attack
mode and it gets one damage, which should actually be opposite The reason is well,
it doesn't really matter. Because if we get one damage, we will be stunned. So yeah, this is
why it does matter because if we first apply damage and we go to what
is the damage event? Here it is, we get one damage
and we will get stunned. And if we are already stunned, it doesn't stan us again. So after that, we are
changing to attack. So this is why this
order matters. Now, it kind of bug
a little bit because this doesn't mean that this
will wait till the event, because it's calling that event. It's calling applied damage. I don't think it will wait. We can't put a small delay here. Of 0.1. Then to
attack, be more sure. Anyway. Then we created two other events that we are using controller
desire rotation, instead of oriented
movement that we will use to aim towards our
target, our player. And all this will happen
in AI behavior three. Now we should really full
the blackboard first. But before we do that, let me explain some things. Through the root. This is the first node that runs when we run
the behavior tree, we have some options. We have the selector,
the sequence, and the simple parallel. What we're going to be
using is selector and sequence, not more optimal. Some cases we could have
used a simple parallel, but these are the
two most common. But let's bring a selector, and let's bring also a sequence. They both you can see
these arrows here. If I bring connect
to the root two, unfortunately, connect only one. But bring another selector
just for the sake. You can see we have an
order of operations 012. This is the way it runs. So if I bring this over
here, then this becomes two. So they both selectors
and sequences run from left to right to
complete their actions. The differences between
selector and sequences that as it says in the tooltip, it will stop executing when
one of its children succeeds, when this is the opposite, it will continue from left to right until one of
the children fails. What we're going to
use for the first node is going to be elector. I'm going to here. We could have used a sequence. Doesn't really matter
because in this node, selector sequence or parallel, we can put these decorations, which means what is the
conditions of this selector. I'm digressing. Let's start with setting our variables
in our blackboard. Variables here are called keys, and basically they are
the same thing variables. But to update them, we have to do it
in a certain way. But let's add them first. Let's create b, we need
actually three bs. One, two, three. We
need two vectors. We need also an
enumeration of eight. Let's say this eight. Let's actually P
one would be dead. P two would best Host dead. Pull three would be in eight. We don't need the range
because it's going to have specific other
we do need the range. Why not? Let's have
also in range. We can use it. In a sense. Oh. The vectors should be host. Location and the other one
should be moved to location. Now, lastly, we need an actor. We need the enemy like
they are at the enemy. So what will we do
can create an object. The difference is that objects are above in hierarchy
from actors. We cannot have specific
actors as a variable here. We can't have a key type like change the object
to, for example, this case actor, but we
could have change it to anything we wanted
to be specific. But it's better to keep it
as generalized as possible. We just have to be keeping track of we shouldn't be setting the actor or the object
to something that isn't correct because it
might back out things. It can lead to crashes. So let's save this, and let's go back to our
behaviory, actually. We could have just gone
this tub and crash.
119. Setting Up Blackboard Variables & AI Behavior Trees: Hello, and welcome to
Game Design Workshop n real engine five Procedural Dungeon Action PZ
Creation Calls. Sometimes it doesn't like it if you are editing a
blackboard outside and you have it open in t
and cause some crashes. Back to our tree. The first thing
should be the lector, but it doesn't really
matter because it's only going to
run one service. Let's create on the new service. Name this service
ES, PT service. Am to PD service, get us. Open it, open it pave. What we need is n youve to receive Tick AI. First of all, let's do a sequence because one thing we don't want
it to run every time. And that would be getting the getting the player
actor as a reference. We have our variable
in our blackboard, which we have object. Let's call this player or enemy. The pair is the enemy of the
I enemy, whatever you want. Oh, we're going to
create a variable here. Going to be a
blackboard, selector. Now let's name this selector to Enemy. Let's get it here. Let's ask if it's valid. We're going to back p value. As actor this blackboard
value is an actor. We know it from Blackboard, which is object, but base class actor
doesn't really matter. And this is important
part when we are adding Blackboard Blackboard
keys to know what type of value they are what type of value
what type of actor? What type of variable, what type of variable
they are. No. We're going to check
if this is valid. I'm going to connect it here. Because if I was asking
for this value and I was asking it as vector
and it was an actor, then this wouldn't work. But there is also
something that will tell us how what it is based. Let's add the service here
to show this good chance. So I'm going to right click, I'm going to add service, and the service I'm going
to add is get starts. Now, if I select this service, I didn't expose the variable. This is also something
very important. We have to make the blackboard
keys instant editable. They should be exposed or
the tree can see them. So now we have the
BB enemy here, and we need to give it a reference our Blackboard
keys, as you can see. So which key is this? So this key would be enemy, which we know it's an
object of type actor, and we also correspond this
value to the blackboard. Now, if any of this change of events is not correct,
this will not work. This why I say it's kind
of overkill to be using blackboards for simple tasks, but it's a nice way also
to show a blackboards. Let's continue. When
it's not valid, we want to a blackboard
key this key again. As object. Because we're trying
to set it as actor. You can see it doesn't exist. So this is only one
way around, basically, we save it as object and we kind know what
type of object it. Let's connect this here.
And for the value, we're going to get there. Now, this is the one
thing that runs. The second thing
we need to do is get all our values updated. To do this, we're going to need to add a blueprint interface, we're going to add a function, going to all the get Ts and it's going to
have a bunch of outputs. But we need or Bulin. We actually need to copy
our blackboard keys. So one is dead, the other one, led. The other one is in
and is in range. Then we need one more value of E M, no. A EA I state. E A one states. Let's call this date. Lastly, we need one more, which would be type or going to be the
host location. Now, let's go back to our character just to
fill this last function. There is a character
at the top down, the AI character, A bullet. It's closed or let's reopen it. Probably through the crash. It's not closed over here. It is. That's this thing
that makes it very small. Let's bn it over here. Now, let's go to our interface, let's go to get Starts, and let's connect the
correct arrivals. In range for in range, inside for the insight,
dead for dead, host location for host location, eight for state, and host
is dead or host is dead. Let's go back for service. Let's create a bunch of
Black port key values. The eight. Get Suts state. So get stuts. And we can see what is
what? We need a dead. We need a post dead. The should all have BB in
front of them Blackport key. B inside B range. As an extra r duplicate two more times B eight and B. Now, we need to at
all these values. So let's start from that, that Blackward Kias we need
to copy paste more times. And we get the bulions, Dad, the bion the keys range. Connect this and let's
connect dead to dead to host to insight,
and range range. Lastly, let's set this
blackw key as in ation. Going to get the state here. And last that back port key as Vector and connect this
here and this over here. So, everything is set. In our BTT BT service. BTT BT task. Away. Let's close the service.
We don't need it anymore. Let's go back to three,
and we have to set. I didn't make them posed, go back to the service. Let's expose all this. We can click this I over here. We don't need to
actually click this, but we can click
the I over here. Now back to three. Let's
select the service. D they compile and now
we can set them all. BT dead is dead. OS dead is host dead. Inside is inside, I
range is in range, AD state, and host
location is host location. This will update our Our stats, our blackboard, as we can see every 0.5 with
deviation of one. I think this is a
little bit low. But maybe we should make it
around a little bit faster. To do this, we're going
to put it on 0.4, and deviation of one, and
it will run every three, two, 5 seconds, instead
of four to six. Oh. The next thing is, what do
we do with all this info? Well, I think this is a good
sopping point for this one. We passed our references, we passed our variables
to our blackboard. And on the next one, let's start programming what happens
with this information.
120. AI Patrol Behavior & Panic Mode: Hello, and welcome to
Game Design workshop, real Engine five procedural Dungeon action RPG
creation course. Previously, we
created our service to update our information. And to do that, we used function in our
blueprint interface, which is called Get Stats. In this function, we
added some outputs and in our AI character, it is, we filled this function
to pass our starts along. Then in our service, we used the appropriate
code to set the blackboard keys by getting our starts
from our controlled pon. Now, we also set the
payer pon to only be done once if the
blackboard key is not valid. Now, let's continue. Let's create a selector lector you can see, when we leave route, we get a lot more options. This can happen, for example, run equS after the first node. And we won't go
into much detail. But the first selector should
only have one decorator, and that would be a
Blackboard decorator, which means a
blackboard condition. So when we click
on the decorator, which is a rule basically
for this to proceed, we're going to use the rule.
Let's click on the rule. And we're going to
set our equery, which the blackboard
key who is not set, the blackboard key would be ad. If we are dead, we are not
proceeding through this, and it's going to abort tel. This means that anything
that's happening at it, and we continue through here, which means do
nothing in our case. Now, for our first
elector, let's use ens. This could be our
best first thing that our selector tries because it stops when the first
children succeed. So our first try to success something if we are
on patrol mode. And this reminds me,
let's go back to our AI and set our state to
be default patrol. That is it by default. That is very important because
if this is not patrol, then our sequence will
not run, I will not play. We're going to add
the corridor key. We're going to set
the black port key to be the enumeration state, and this changes the key query and is equal to
and the key value. Oh, yeah. We need to
go to the black board. F the A, we need
to choose a type, which would be AI states. All details. Now, let's set
E value equal to patrol. This is the condition
to run the sequence. If this fails, then it
will go to the next one. The first one that will
succeed, it will enter. This is the selector. Now, we're going to
do the sequence, which means two things
until one of them fails. No. The first thing
we need to do is run a task which will
get a random point. Let's create a new task. Let's call it BT task. Let's score two random location. And we enter it. Now. We're going to ta execute AI, This means when, didn't
explain this much. Here, we got a receive Tick AI, which the tick determined
from actually our timeline. Here, we have set a tick here where this receives an execute. Our exute will be
calling this task here. So let's call it actually. We can see here in tasks, DT tsk random random location. But let's fill the code. So this is the ex receives AI. Receive execute AI event. For this, we're going to need three variables from
the blackboards. Let's create three variables, blackboard value or But I'm having or selector. The rest of them. Key
selector. Keelector. The first one would
be our move to key. The second one would be host. The third one would be
our root, root host. All these need be
in front of them, just to be correct. The word key is not needed. We're going to get
our control point. We're going to get
actor location, and we're going to select. The value would be
if our host dead. Value as ban because
our host dead is a ban. F B, we're going to get
host location, actually, host location, and
we're going to get a port as vector.
Connect it here. Now, the next thing
we're going to do is point in reachable radius, and we're going to set
the radius to 800. What does this do? It tells
us if our host is dead, get a random point
around the player. If it's not dead, get a
random point around the host. And then we're going to that the movie movie,
notable movies. Anyway, Luck Kias vector, and this is a result. Now, when we are running a task, we need to finish executes. Well, not all the time, but this one requires to know
that it's a horse success. I see forse because we're not putting any conditions here. If this fails or succeeds, it doesn't matter for us. We will say that
it was successful. Our sequence can
run the next task, which we won't make
it complicated. We will just use two. For for the Blackboard key, we're going to use the move two, A, let's C. Now it's location, it's not location. No. What we need to do
is go to our task, verify that we have I have
not make this public. They always need to be public, and we can set the move
to our move to location, our host location to
our host location, and the host is dead
to the host is dead. Let's make another
sequence from here. Put a decorator,
blackboard value, and the condition would be
root is dead, host is dead. And if it's not set,
we're going to enter. And what we're going to do,
please go to wait 5 seconds. So when it's patrolling
and the host is not dead, waiting 5 seconds. If it's patrolling
and the host is dead, it will just run randomly
across our dungeon. Like, we created a panic mode. Host died, we run
randomly endlessly. This will be a panic mode. We won't me it panic mode. We will just get back to patrol, and it will panic on its own. So just to go once
over it again, we are getting our starts, and we are checking
if we are not dead. If we are not dead, we are trying to see if
we are patrolling. If we are not patrolling, we're going to be doing
something else. If we are patrolling,
we are choosing a random location around us. We move to that location. If our host is not
dead, we wait. If our host is dead, we choose another
location and run around. Now, one last thing
we should do, again, the abort self. So when the changes,
this aborts, s. And also do it in
when the host is dead, when the host dead, we abort this, we
abort the weight. An easy thing to do is CVI pass sequence over
here, connective. Here, it's going to be the
last one because between them, we're going to put shooting. And what I'm going to do is instead of
checking for patrol, is I'm going to check for stun. And if we are stunned, we're not doing anything
that would be it. We're stunned. I know, maybe you are stunned too, but that's how it works. This one is simple. And we're going to leave to at self if we change
condition from. Now, I think this could
be a nice breaking point. In the next one, we're going to do the shooting logic because if we are not patrolling and we must check
if we're shooting. And lastly, we check for stun. So, I'm going
to see you then. Goodbye.
121. AI Attack Mode & Line of Sight Checks: Hello, and welcome to Game
Design Workshop Under engine five Procedural Dungeon action RPG Creation course. Previously, we created BT
task to choose location. We created three variables, the Black port keys, and one of them is
the host location. The other one is the
move to location, and the other one is
the host is dead. So, if the host is dead, we are choosing a location
around our player. If it's not dead, we're choosing a location
around the host. And we're setting that
location to our move to. Then we proceed to finish
execute with a fourth success. In our tree, we added it after the question if
the player is dead. On our selector, the first
thing we are checking is if our AI is on state of patrol. If it's in a state of patrol, we are choosing this
random task location. We are using this task, which is choose a
random location. We move to that location. If the host is dead, we are waiting 5 seconds. If it's not dead, we keep
running in panic mode. And then we added
another condition, another sequence, if this fails. It will try to check
if we are stunned, and if we are stunned, it will do nothing. No. Let's create our
attack right now. But this time again,
we need a selector. Because we're going
to check between two things to check if we're
entering one or the other, because the selector stops when one of its
children succeeds, so it won't move
to the next one. Now, let's use a
sequence actually. Let's put the decorator
Blackboard value. Let's select the decorator, which would be blackboard key, our state is equal to attack. Of course, it will abort self. Oh. Let's get our sequence. First thing we should check is, is our actor in range. Let's list the in
range variable here. Put a decorator, blackboard. Range. That actually not set. We are not in range if we
are in a state of attack, and we are not in range, Let's get in range. To do that, we're going
to need another task. Let's set this to
surf board also. You know what, actually,
let's not set forward. If we are not in range, we are going to try get in
range whatever happens. Even if the player
suddenly enters our range, we should still go to the
position that we decided to go. It will make it look like the AI is going to do something,
we'll create anxiety. Let's go now to create our task, let's call it step
towards target. New task, in pace, and let's call this
wards and enter. We're going to use the event
execute again. Exude AI. And the first thing we
should do is just in case we have already attacked and we are rotating we have set the rotation to
rotate to the controller. We need to rotate to
movement rotation. We are sending to
our AI blueprint. This is the bullet that right
now, we're going to move, and we need to use the
orient rotation to movement. Because when we are attacking, we will use the orient
rotation to controller. No, bacor service,
this bactor task. The next thing we should
do is ask a question. So we're going to put a branch Well, the question would be, I can we reach a point
next to our player? We find a point Basically, we're going to create a
mathematical formula again to create a circle
around our character. And if we can reach a
point in that circle, it's going to be true. If it's not, it's
going to be false, and we're going to finish
execute with not success. So this will run
again. It will fail. So when the first one fails, aborts, and then all the three runs again and tries
to find another point. Oh, how do we do this? Well, let's start for
our circle formula. So we're going to get Pi. We're going to multiply
it by two or a max value, and we're going to
get a floating range. And the minimum would be Pi, and the maximum would
be i square basically, pi square, I'm sorry, two Pi, do Pi square, we would need
to multiply with italf. And from this,
we're going to get. O sine, make sure it's
a radiance and degrees, and then we're going to get a sine radiance has
to be persistent. We're going to
multiply this by 500. So that would be the
range basically. And then we need to add it to our player location
to get player on, get a to location. And we're going to I brake. Split is when we are
choosing it here. Brake choosing it with the pin. And from the Z, we're going to random rag point in radius. We don't want that for radius. We want that. Actually, this
is a radius, not the 500. It is also for x, we're going to use
this, for, we're going to use this and for y, we're going to use the sign. Now, let's connect
this to the condition, the return value if we found
it or not that location, if it's reachable
lot, and it is, we need to tell to the controller
of connection, brunch. Looking at the nodes
and looking at the code can be
difficult sometimes. We need to get this
controller and set focal point. That are
correct this year. And of course, we need
a blackboard key value, so Black board key selector. All these are MB to here and lack value as vector here. We actually do need
to promote this to a variable because
if we use it twice, and we're going to get
twice at random point. And then we're going
to finish. Access. This would be ask save. Let's make the bd key. Value public, tacking
the I or going to edit. Let's go back to our table, and from our sequence
called the PTs to target. We're going to
select this. Have I filed s now let's select this be our
move to location. Then we just need to move to. We move to location, which we have the patrol, so I copy here, which has the
variable already set. Here. And that would be
it from the side. So if we are attacking
and we are not in range, we are finding a random place. We're trying to find
a random place near the player and move to there. Until we find it, we are
stuck on this loop over here. Now, let's continue
to the next one. It's going to be
a sequence again. This one will run based
on two decoration. The one, the range
would be in range. Let's add another one or k. And this one would be also is by surprise, we need another task here. But I think this is a good
stopping point for this one. We're going to
continue on the next. Goodbye.
122. AI Navigation Volume & Pathfinding Optimization: Hello, and welcome back to game design workshop
and real engine five, procedural Dungeon action
psic creation course. Previously, we started
with our putting part of our part of our state is equal to attack on our behavior tree. So if it's equal to attack, we are checking if our
character is in range or not. If it's not in range, then we are trying to find a
step towards the character, move to location
towards the character, and we move to that location. How we achieve this? Well, we are setting our
movement to rotation. So the character moves
based on its rotation. And then we are we are getting a point
around the character. We are making some math here to create a circle
around the character, and we're checking a
radius 200 radius of 200 around the 500 radius point that we are creating the circle, we're making the circle
and from that point, get another 200
radius, basically. No, The reason we do that. I didn't explain this
much is because we don't really want to take a point around the player
and just go here. Take this point and
other 200 radius maybe we get a little bit further away
from the character. There is more chances
for that to happen. There could be more
intricate ways to do it more mathematical
formulas, more conditions. But I think this is a nice
work around for a fast result. So, after that,
if it's not true, we are returning execute false. So our tetrac on a loop here until it
finds a correct point. And if it doesn't, if it does find correct point, it sets the mouse
local focal point, and we set the
blackboard key value and finish execute as true. So we can move to that location. Then we started with
our what happens if the carter is in range
and is also in tight. Now, how this is going to go out, how we
going to play out, going to create a task, a task to wait, a task to shoot, and a task to reset shoot. So, let's start with the am, new task, print base. Let's call this Am, of course, we're going to need the recei t. Make sure that you choose the AI execute,
not just execute. We're going to send that we need the controller rotation
so controller message. And we're going to set
point from the point. And we're going to get p and
we're going to get attent. So we're using
controller rotation. We are setting the focal point, and it will rotate
towards there. So we're going to
finish execute. Now, talking about
the rotation of the controller
which is the point. There is a way to control
the rotation speed. So, if we go to
our AI character, go to character movement
and type rotation, there are certain settings here, and there is one of them called character movement
rotation settings, which is right now at 40 on, let's reduce it to 360. But this is the rate
it's rotating basically. As you can see, change in
rotation per second used when control desired rotation or orient to movement is set. But this controls the
rotation on both cases, or the control desired rotation or the orient
rotation to movement. Now, let's go back to our BT
and when we finish execute, we should force success. Let's go back to our
three and call this task. PTT A. The next thing
we should do is wait. Now, we're going to change a little bit the
settings of weight. Have a wait time over here, so we're going to
wait 0.2 seconds. We're going to give you a
random deviation of 0.1. So we can wait 2.3
seconds or 0.1 second. And that will create
a random feeling of when the AI is attacking. And here comes the next part, which is we're going
to be shooting. A new task again. Be print base. Let's call this BT task shot. Let's get the execute. AI. This is very simple. What we need to do is get our control pm and message because we have already done the
code for shooting. Now, we can put a
weight task in our te, or we can actually
put a delay here. Because after we shoot, we should delay for. Let's delay for a random range. Random floating range, sorry, from 1.4 to 1.1 0.6. Let's finish execute. I'm doing this like this and not consistent because
I want to show that there is plenty of
ways to do things. There is not one way, and it doesn't really have any difference if I
put the weight here. Then basically the
difference is that maybe this will abort
if I abort self. But the task will abort
also when I abort self. So, there's plenty of
ways to do things. It just has to work. Oh, let's call shoot. T is task shoot. And now let's reset shoot, so we need a new task to
bring base task reset shoot. And what we will
do, we will gaze it because we're going
to set the variables, let's go to the
tree and show this. We're going to set these
variables to false. So for them to be set to true. The tick needs to run again. It's going to need
to check every 0.3 or 0.5 in these numbers, et them back to true. So this is another way
to create a small delay. Now, let's go to reset shoot. Let's receive exudes. AI. We just need actually to
create two variables, blackboard keys or black. Blackboard keys elector,
and one of them will be Bp. The other one would be PB range. This gives the opportunity also when the player
moves out of range. That delay, that
delay, for example, when we get out of
range between the second gives us opportunity for more complex
actions if we wanted. So, let's go back to this
and the pluck value. Values and finish execute. As to we're setting
these two falls, and we should make them public. We can set them our AI. Three here compile. I I think I'm choosing
the wrong event. Yeah, that must be
it, so B t this set. And here, of course,
they are here. Tight in range. Basically, this is for.
123. Navigation Volume & Optimization: Hello, and welcome back
to Game Design workshop, and real engine five procedural Dungeon action AR
Phys creation course. Now, to make it move and do
all our wonderful stuff. As you could see in every
task that we needed a random point or a move
to we need a nerve data, which we actually don't need it because it can
automatically get it. But what we're going to do is we're going to
create a huge volume. This. So we need another
mesh bounce volume. Set its location to 00. Let's set its to
four K everywhere. We can increase its height by a lot because we're starting on 00, so maybe. I. Yeah, that's 30 k. If this is zero. This
is what makes our may not be able to be infinite because we cannot move the navigation me pound
volume blueprints. As you can see, it tries to
build the navigation volume, even if there is nothing in it. But we do need to
do some changes. I'm going to build. We're going to continue after. And let me demonstrate why
we need these settings. This is a huge
navigation volume. First of all, we demonstrate we need to
go to project settings, some time ation, which
is a nation setting, and we want it to be dynamic. I I press Last thing, we need to change
the recast bolt to Is it run time generation, then I'm okay. I got it from the
project settings. Now, if I press play, to see a little bit stocky. And if I choose nation, So if I choose
navigation, you can see. It's a big area. It bs navigation even
on the the rooftops. So yeah, it's a big area, and the more big arm is going to get the more areas that we have, and it's going to get messy. It's going to get really frame and all this AI
moving around it. To change this, we're
going to use something. You're not supposed to
be honest to do it like this building on land time
on a huge navigation area. But any other system
would require a lot of time and work to be
completed and splus plus. But in all fairness, it can be achieved a little bit optimization through blueprints
and everything. For us, what we're going to do, I'm going to leave
navigation actually is we're going to go to
project settings again. We're going to search
for invokers. Okay. So we're going to use this setting generate navigation only around navigation invoker. And what are
navigation in Okers? So basically, they
are they are a tool, a tool that is used
to dynamically generate and manage
navigation measures, the meas basically in a large
or open world environments. Let's demonstrate this. Let's
add it to our character. Let's go to our top
down character. Add Voker, navigation in Vocer Let's optimize it a bit
because 3,000 radius is big, so I'm going to do a
200 removal radius 400. You want the removal radius to be a little bit bigger
than the generation, so it creates like a
trail for it removes it. So let's go press play now. L et's eject. And you can see
now, the navigation mess, what is being calculated
only around our character. So, we're going to do
the same to our AIs. What is this error by
in trace by player, Because the AI exists
before the player. This an issue. Doesn't really matter.
It's a null error. You couldn't find the
player for a second. Let's replay. Actually, let's go back to our AI.
Let's add the invoker. L et's set its tile
radius 2200400. Let's actually see AI. How may I? No, we don't. But we do have a key. Let's go to the above. Dark again. My some shadows. We need to change the
came to the elevator. Better. Is there
no AI here also? There is AI. Okay. Now, we can
AI if it's doing anything. At the moment, it
seems it's staying. Oh, to deba easily,
let's go to the tree. S. And can't find, I know. We haven't said to our pons, that they're being controlled
by this basically. Because if we don't set
to our pon that they AI, they won't know it.
Think it sense. So in the detailb, in the default b basically, going to search
for AI controller. Instead of the A
generic AI controller, we're going to use our one, AIC N one, and now
they're being controlled. Let's start again, and
we do have an AI here. But again, it does nothing. This time for a
different reason. Can't find any much again. B. But I do? Oh, this is the character. My mistake. Let's
go back to the AI. This is where it needs to be. So the AI needs to have the AI control
it, not the character. So let's go play. Ha.
Let's play again. You have AI. Great.
And it does nothing. And still much find. Well, it does make sense. I'm sorry. I keep
forgetting the basics. Like autoposess A above
the AI enemy controller, that is a placed in the world where we're
not placing the AI. We would be placing if we were debugging in
a different map, but right now we've been placed or spawned because
we're spawning this AI. We, compile and save, Third time, fourth time, sick time is the charm. And let's see it not
moving it is moving. Great. Moving, but the
animation is not updating. Awesome. Well, let's fix
this in the next one. I'm going to call see you then. Goodbye.
124. Finishing Shooting Behavior & Debugging: Hello, and welcome back
to Game Design Workshop, rail Engine five
Procedural Dungeon action at Pred creation course. Previously, we
finished with our AI, and we added also our
navigation respond volume, and we added also our
navigation revokers. We also finished
with our BTT tasks. I think they were
explained good enough. Now, we had a few bugs to fix. First of all, let's go
to our AI over here, where all this AI
animation blueprint. Where all this information are
getting from the pw owner, try to get Pawn Owner. But this time, our por
owner is not a player. So this might be failing. But what we're going to do
is on blueprint begin play. We're going to try
and get Pw owner. And we're going to
ask AI AI e one, to pure cast and promote
these two character. Actually, I'm going
to as call it AI character
character was taken. And we're going to change that. Now, a. The reason we are doing this is because we want to change here, which we break the
way we have it to connect here, this goes here. Instead of get current Acceler what is this search over here? To delete this over here, and connect the character
to our character movement. And what we're going to
get is the velocity. Which is going to be in the end, and we're going to
connect this here. The reason is because
acceleration wasn't really working with the way
our charter is moving. So, we're going to compile, s, We're going to play, and now our AI is
supposed to be moving. Not doing anything.
No, no, it's moving. Great, and it's building
more navigation, as you can see around it,
it can move anywhere else. Now, let's try and attack it. It sees us, looks at us. And he did nothing,
which turned around us. Make this bug and
see what's going on. Open the game. This tab. I'm going to eject from here, I'm going to select
it, select the AI. Because the way to find it here, here, you have to
have it selected. It should say selected,
well doesn't. Okay. Let's try to
match which AI is which because there is
two here, or moves. Weights. Both are waiting. I think this one is this one. This one completely backed out, because this one keeps moving. So must be say zero. Yeah, which is actually doing nothing. Why
is it doing nothing? On return. I d shoot
it by mistake, and it's a constant check O AI of the selected the state or do we have? A is a Let me try to debug it. Okay. After a little
bit of debugging, I figure out that I have
created this handle over here, but never used it. No, basically, what
we need to do is when we begin to overlap here. And When we hit with the player, we are in range, we should start our time. We unpause unpause
time by handle, when the range in range, we start looking for our player. And of course, on death
on death, here it is, right after death,
let's get the handle again and clear
and invalidate it. It doesn't run anymore,
not even on pause. Oh, the next place
would be to go to our PT task stepped
towards target. Again, I did one mistake here. I didn't add the
player punts location. That's the basics like this
range compared to where. I'm going to just add. Add and this x this. Be when you have a point, you need to tell it
where in the world. We have been over this. Of course, the next
place would be our also did something. BP AI bullet. I'm asking if the
component has tug E, which is if the actor has dug because we have it on the actor and not on the collision tube,
the collision capsule. I think I figure out the problem where we couldn't shoot, also, we go to our BP top
down character, and when we're getting damaged
and we're getting stunned, and then we still are alive. They are. We switch
on the state. And if we are already stunned, then we go if we are pressing sift If we are not
pressing shift, we go back to state to
change state to normal. If we are passing shift, though, we go to delay and
stand not cool down, which we don't return to AM. To achieve this, we will
go to our am mechanic, will create a custom event, am So when we press
the left sift, we don't need to do this
because it's already down, and we're going to
connect this here because we don't want to
go through this test. So for the death animation of our enemy that
it was standing up, we need to go find our montage animation montage pages, and we need There is death. Actually we based it here. This animation needs
where it has this option, enable auto blend out. We don't want this. If we
want it to stay there. The same we do for some others as is the
knockb animation. So let's go to our
knock back animation and select the auto
blend out to be false. And to the death
of our character. So let's go to revenant. Find death. As death here, death doesn't blend out, and to our primary fire. We don't want it to blend out. And now we can go play test. Okay. Told me? P the tower. L the tower. Tuning at me. So T little bit it needs to follow
rotation. One more thing. Again, on the projectile
of the bullet, we go to projectile movement, we go follow rotation
follows velocity. I as put a little bit of sound. See what's going on there. Exercising. Please. It in the portions. Big chest. I already
have the key. I. Next level. I see at the Mara 50 grams. We have a bunch of
listings open closing. 60 PS, right? I think this is caused by the AI and the
navigation volume. On run time, it would be a little bit better,
maybe much better. Enemies stepping on traps, another AI. Y annoying that
what's going on here? I'm trying to move here. Hitting stand properly. But I'm heating
and it's trying to move where I'm heating. If I click, I still
keep walking. But I'm dying, I'm
getting a score, right. We do have an issue in
movement and heating. But I think we're going
to need another ground. So we're going to leave
that for then. Good bye. See you then.
125. Final Bug Fixes & Gameplay Polishing: Hello, and welcome back
to Game Design Workshop, and real engine five
Procedural Dungeon action RPG creation course. So finally, on our last
lesson of debugging. First of all, let's fix the maze endless actually not endless, but rushing of the engine. So what happens is that when we're posponing
the first tile, I'm asking the wrong question, the offsite direction, and the not be equal
to the last exit. But because we are offsetting the maze based
on the offset direction. Our offset direction becomes
basically the opposite. Our last exit shouldn't be the opposite of our
offset direction because let's say we example, move to the north one, then
O offset direction is north, but south becomes the t
that should not be equal. South becomes the tile that we're coming
from, the elevator. So since South becomes
the elevator tile, then the last exit
shouldn't be the elevator. Be when this happens, then it creates a
maze of size one and it completely breaks down the system and it causes
the engine to crash. So what we'll do is
do switch select. And let's go last exit
here so we can get this. And then I'm going
to disconnect it. From North, we need the South, F east, we need the
West from South, we need north and from West, we need east for the opposite
of the ofosit direction. The last exit shouldn't
be equal to the opposite. But when we are
exting the style, shouldn't be the elevator. So this was what was causing
the engine to crash. It had one in four chances, it's a pretty bad bug. But anyway, simply logic, it was just because we are offsetting towards
that direction. Away. Now, the next bug that
is happening is that sometimes it spawns a
maze that the next maze, the continue, you are not able
to leave the first block. And that is because we are
setting the last exit, but we are not setting
the directions. I'm not setting the directions. So basically, on the first exit, we are setting the
direction to be true. But we're not doing this I had the debug here.
Debug comment. We are not doing this here. I'm going to put this here. I'm going to move this
a little bit further. But now we have to
inform the style that your direction is open
towards last exit, and let's get last
exit, it here. So that was causing this bug. Now, we left off with some movement issues shooting
and movement issues. So let's go first to
the player controller. On mistake that I have done. Well, there's plenty
that I haven't detected, but in a project size, of course, get
location under Kursor. So in our function, get location under Kursor, I'm checking for visibility to get it under Kursor location. So when it's not
hitting anything and when it's not taking into account
the sphere colliders, this returns wrong values based on other collisions
that exist on our map. So I'm going to turn
this to camera, and this will fix that. And next come the
shooting issues. So when we are shooting, we should change, from bugging. So when we are shooting, when we are on enhance
input detection click, and it's triggered. And we are hovering
over a target, we are a normal
state, and we are hovering over a target,
and we are shooting. We should be stopping movement. Because if we are not
stopping movement, then this is turned on by before and since it's on
ti, it keeps moving. So we should be
stopping movement. And another thing that bugs out is over here when we are
doing the crosshairs. So, In the cross hairs, we are checking when right now, this is the change
needs to be done. So what we're doing is we are checking if we are under enemy, our Hursor is under an enemy, and then it changes. But if we are holding
if we are in am state, we are not changing the target. We are just setting it to
cross hairs, red target. That shouldn't be the
case to be honest because in the chance
that we get stared, one of the things that can happen is that when we get stan, AM changes temporarily to stan. So this would bg out So
what I'm going to do is going to delete this and
go to the first question and just get the
player reference, am down and do one. So if we are hitting
enemy or am is down, then we are having cross curse. If we are not, then we
are having normal cursor. So, this should be the change, and this should be a
central control point, It is better than having
it as an option here, like the first question is
the one that changes things. So let's move forward to
our top down character. And when we are aiming, we should also
stopping movement. On left shift, aim, et cetera, et cetera, et cetera. Over here, before we
play our montage, let's stop movement actually, even before These two things. We're going to get our
player controller reference, I'm going to stop moving. Now, there is a stop
movement for navigation, which is not ours, just in case you miss click and
use this instead of this. It's stop moving,
not stop movement. Stop moving. If I
call the other one. Stop movement. You see, it's a
different function. It's target is
controller when this is target is BP top
down controller. The logic behind this is for AI, and to be honest, usually, we do create our
character to be an AI, that just changes states, but that's a little
bit more advance. Now, the next thing we should do and bugs out the
game is over here, when we are resetting attack, when we are resetting attack,
we are lowering the gun. So when we are lowering the gun, whatever happens, it means that it will change
state to normal, even if we are lowering
the gun because we got interrupted or because we shot and it needs to
reset the attack. So here needs a question
Do I lower my gun or not? And this is our aim down. If we are aiming down and
it's true, do not lower gun. If it's not true,
then lower gun. There is about talking about
this branch over here, we do use it in another place, which is our damage. So when we are taking damage, we are turning to stun, and there's a chance we
are not turning to stun. Following this, if
we are not dead. If we're dead, we just
do the death things. But if we are not dead, we are playing the heat montage and based on player
state we are changing. If we are getting stunned
and we go and aim is down, we're just setting the delay and stat on cool down and
not changing anything. This means we are
staying on state stun. We don't want this.
What we want to do is be on state aim. If we're not reversing state, then we're staying stan, and this is why we cannot move at some points
fighting the AI. We're just staying stan while pressing shift, and
nothing happens. We just stay stan forever
until we really shift, and this runs towards
the other branch. So, basically, this was locking our states as long as
we were pressing shift, and this hopefully fixes it.
126. Major Gameplay Bug Patching: Hello, and welcome back
to Game Design Workshop, L engine five procedural Dungeon action APs
creation cours. Now, the next thing is that our elevator has an
issue with our camera. Have other issues, but
the most clear one is a camera because we copy
pasted post process, but it did set it
to one and one, but it didn't enable this. So we should enable the exposure on 11 on Min Max to be 11, and that fix the the lighting
that becomes too intense. Now, last thing we should
do is add our fog. We're going to go to add
things, exponential eight fog. This is what we want.
Let's read out. If we start here, we want the fog to be a
little bit lower. Let's play for a second. Now, I haven't set the things. Let's set the
details of the folk. Let's set it to -700. I'm going to increase this, be more visible because
this is so annoying. Let me close it for this.
Okay. No more things here. So, location, -700, let's
put fk density two. I know the value goes
at 2.5, but let's see. I hit Alo, let's say 22. And and that would be it. Let's set also. I'll
bed something reddish. So we have a a reddish
color to the fog. And I think that would be it. Yeah. I I please play now. It's a little bit der and it's a little bit and this goes sd. Oh, and let me toggle the arrows again because
we can see the arrows. I left that from
debugging actually. Go to the toggle arrows
where are you Toggle arrows. I debug, here we are. Okay? It is connected this
because I wanted to see what's going on
while I was debugging. It is a little bit
darker than I expected, but this will make lights also a little bit more friendly. But to see the character
a little bit better, let's go to the character
in the viewport, because character
shouldn't be that dark. Let's put a point light here. Let's call this character light the radius
character radius. And let's change this
to lumen actually. 100 is a lot, let's
say 50 the radius 50. We could have
items, for example, that increase this blo does. As radius 70, maybe 100 it doesn't shadows
from our character, 100 maybe off source 50 or length 70 a bit too much away from
the characters of 100. If you have your
view wrong ways, you might miss the
values a little bit. E. The shoe will create some shadows.
It's fine. It's fine. No. Is a little
bit weird, still. I mean, really focused
on the center. Let's change the color att
bit to something more fleshy. Here. Eight. Maybe we
put a lit bit upwards. Use this 70. You know what, Let's not light the character with this but light the floor
around the character. What we will do is go to
the channel of the light. Let it to light Channel
two, not our character. And quickly, let's
go to our tiles. P tile and go to our floor. Channel will be also
lit by channel one, basically not two, because
it's zero based, channel one. Let's see how this looks. Yes, we have a light radius, and we can increase a little bit the lightning of our map. Let's go the details 1-4. I we fos ale bit much, but everything is a
lot more visible. And when we go next shadows, we can see our light. All right. Now, No, be honest it too light. Let's put this 23.
Light into three. I a be a bit too ih. T two who seems to do the trick.
Much much better. Now, if I go and move to
another floor the elevator. Here the other side, we do have the key Pops. The character fell down, but
it doesn't really matter. I'm just going to
elevate or location. P down character, here
we are and paste. We activated the
elevator also. I. I go down, it gets a
bit brighter because the fog doesn't really follow. But what we do. Let's go back to the elevator and
begin play of the elevator, where is this Always fine with. There we are. Ps. Here we are. We're going to get all
back doors of class. We're going to get the fog fog, we're going to get
the first copy that we find because
we only have one, going to promote it to a
variable call this variable fog. On our tickvn, when we are
setting the actor location. We're going to set the fogs
location actor location. We're going to need
some more room. We're going to inter
with constant, we're going to keep
the same speed. We're going to get
actor location. That parent Delta T, we're going to use Delta. From the target, we're we're actually going to
use this exactly this.'s going to need a new
original and a new target. So I'm going to promote
this survival to original. The last one to get. We're going to set this when
the fences are going up. To be sure now. I think this start animation, this is the fences going up. So we're going to get our fog, I'm going to get a location. I'm going to set the original
fog location to this. And let's add to this
what's Maze height. We add 2900. No. 2500. That's the
elevator, isn't it? Yeah, that's the elevator
spot, it should go, and the maze is going up
when we responding the maze. This could be a
variable to 2500. That's the fog location, 22500. I'm going to copy this
plus over here to here. This, I'm going to set
target location to this. I connect this year,
connect this year. And this was play to be play. All right. And the fog comes with us. Doesn't look really like a fog, but it does give this
coloring and shadowing. O there was a huge
frame legs there. Happened. You see? This comes the issue with s. We didn't fix this. Let's
fix this for a second. Ailes. I really don't
like to see it. Where is it here. I'm going to get this floor
just move it a little bit. In words, doesn't appear from
anywhere else. It's fixed. What our fog does, basically, it's
not visible here, but it's visible towards here, so we cannot see the
end of these tiles. And the same thing
will be if we go to the next floor, go to the next floor. See the same thing will
happen in the next. First of all, it fades
out a little bit this. Now we can see the
edge of the cut, but we go here. See there's no edge cutting. There is a issues here, we can move things, and I'm guessing there's other
issues that can be fixed. This chest? I'm not in range.
Anyway, as you can see, there's of bugs.
Ready to be in range. I think we have given the
tools to fix all these bugs. Now. Another thing I increased
a little bit my FPS, as you can see, the
way I did this is, I reduced the maze volume, the navigation
volume to 1,000 now. This not only isn't optimal, but it creates a
lot of problems, a huge navigation mesh. I wouldn't use a navigation
mess for this amount of AI. Maybe I would have written
some custom movement for them to move and
lock them in axis, and not moving on the Z axis or even if
moving on the Z axis, just a simply move to
without navigation, like some line traces,
can you go there, then go there, something like
this, a system like that. Now, another way that
we could do this, I haven't tested really, but we could have
created a level, a streaming level
that we are loading, which has a navigation volume, and we change the plenty
of techniques to do, basically, maybe write a custom navigation
volume in spl plus, maybe a custom class for it, like use it in a different class that you can move because blueprints do not give the
option to move this volume. You could also nation
volumes this way because if we go to spone a navigation
volume, let's go here. Phone act plus, There is a recast Nav me, there is other things, but we cannot spawn
an navigation volume. So this is well writing in
Seps plus some class that you can spawn with a navigation
volume, maybe or again, there is different ways of
doing things basically, but the endless part, having something endless isn't really possible with
the tools that we have. We kind of cheated and created
this navigation volume, and that was it basically. Thank you for joining us in this real engine five
Blueprint adventure where we built a complete
ungine generator for a top down game, featuring enemies, pick
up items, and more. We hope you enjoy the course and learn a lot along the way. Your feedback means
the world to us. So if you could leave a review
and share your thoughts, it would really
help us improve and keep delivering the
best content possible. Thanks again for your support, and we can't wait to
see what you create.
 3D Tudor, Bestselling Blender Author & 3D Educator