Transcripts
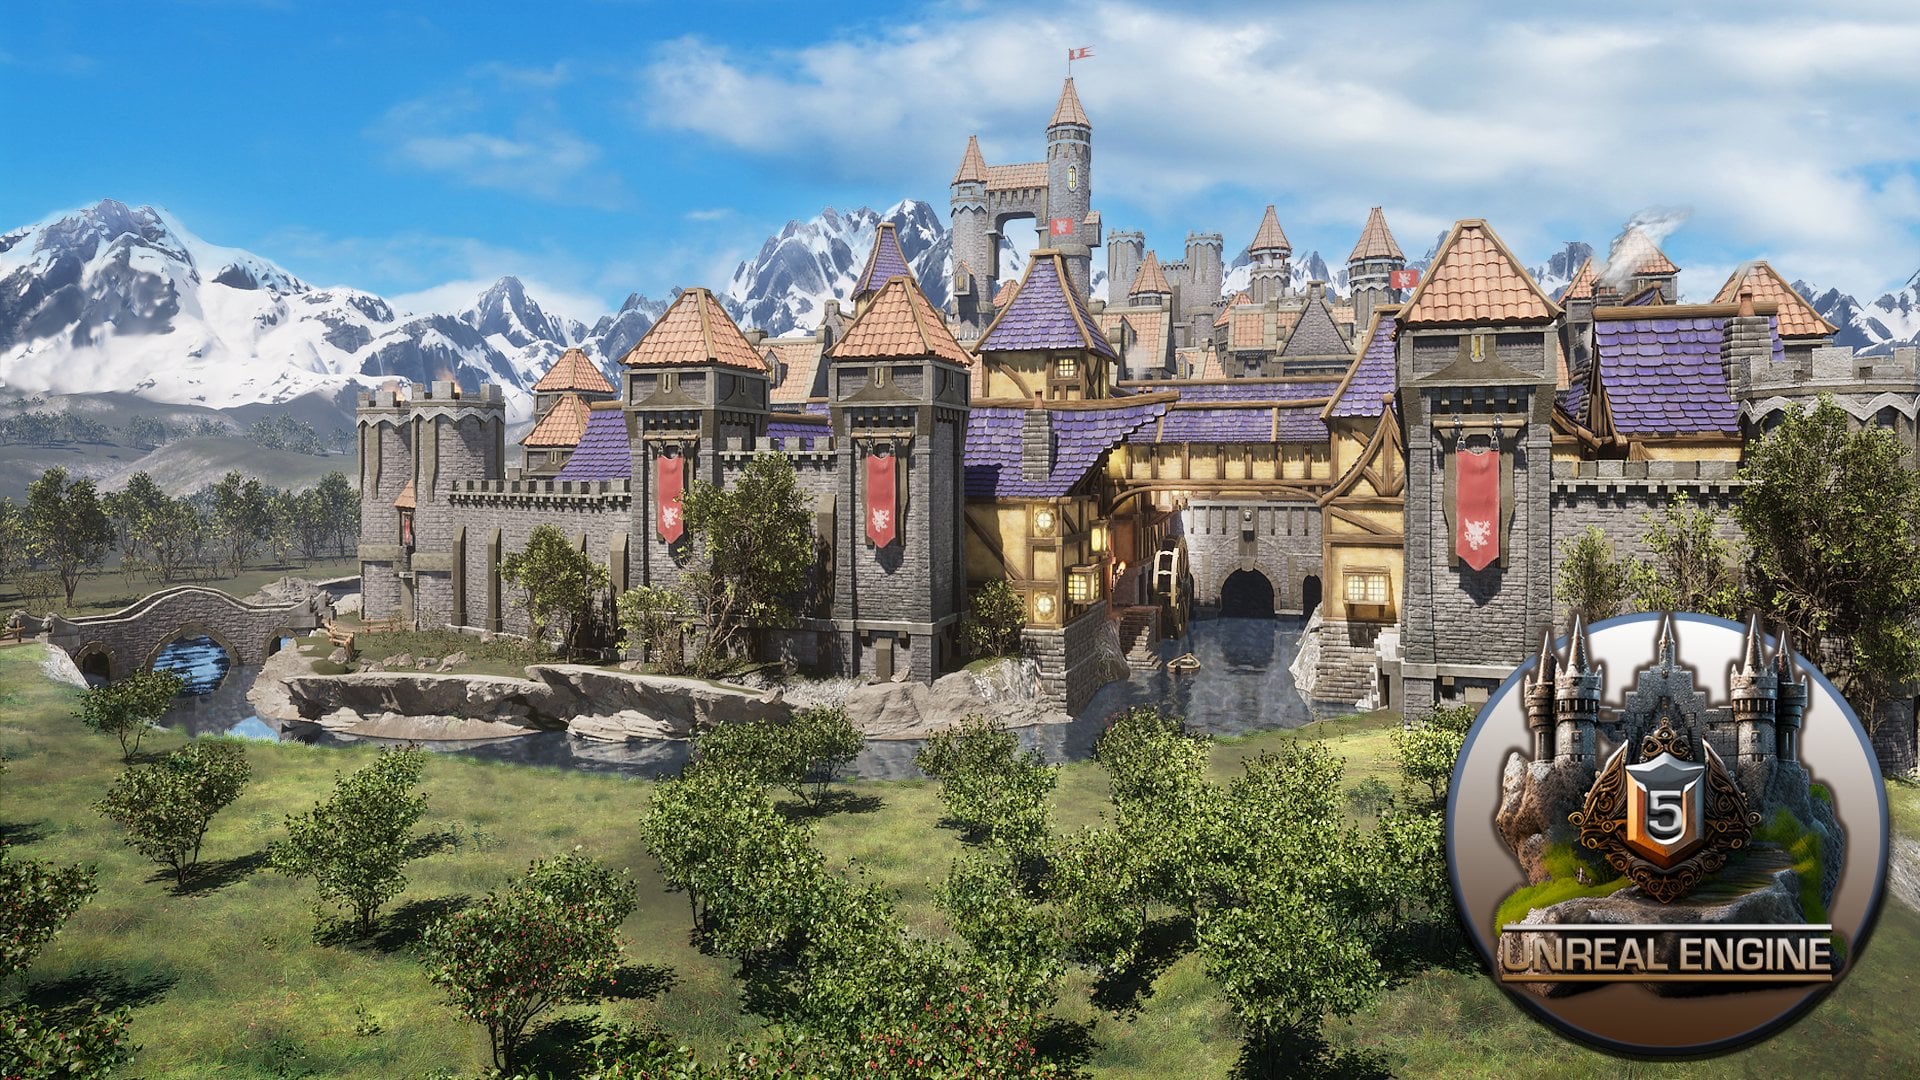
1. Intro Blender to Unreal Engine 5 Complete Beginners Guide Introduction: Welcome to our latest course, blender to on real engine five, the Complete Beginners Guide. Well, you'll dive into an exciting journey
transitioning from the amazing blender to the most popular games
engine on real engine five. This guide is beginner friendly, but also packs cool tips for the seasoned
folks out there. Follow step by step to create realistic
scenes in blender. Then bring them to life
in on real engine Five, paving your way into
game development. Whether you enjoy
three D printing, want to get better blender or Dream of one day
making your own games. This course is your launch pad. The course is split
into two main chunks. First is Blender for modeling, and next is Unreal
Engine Five for setting up your scene
in a game environment. You can pick what
intrigues you more or dive into both to see
the whole process. Kick start your adventure
with a fun viking up project, sharpening basic skills
and unveiling pro tips. Explore core tools like
Boolean operations and the grease pencil set in a solid base for your upcoming
three D modeling projects. No matter your experience level, there's something
here to learn and apply in creating
realistic models. Moving on to the UV on wrapping, learn to mark seams and
place textures just right. We simplify this tricky part, making it enjoyable
and easy to grasp. Dive into seamless textures. Understanding the pros and cons, this section turns
a challenging topic into a handy skill. Getting you ready to handle
texturing with ease. Step into a world where textures change into
unique shaders, unlock blender's node system, change in texture maps into special shaders for your model. Explore RGP curves, making your model more than just a
visual but an experience. Learn to create different
shades from the same texture. Maps tweak in colors
and the overall vibe, making shade creation for
future projects a breeze. Bring your very
own Viking hut to life with a realistic that roof. Learn to craft transparent
roof thatching from scratch. Moving from simple wheat
structures to create your own texture map using
Blender's particle system. This mini course
within the course not only provides a
solution for this project, but also equips you with a
skill for future project can, led by the Viking
tells the story. Learn to craft water
within blender. Making your Viking
seem more realistic. We'll use blender's
node system to explore different transparency
levels and water types, enhancing both your scene
and your blender skills. Rendering is where your models really start to come alive. Dive into Blender's
rendering engines. We'll be covering
both blender cycles and V. Discovering settings
that animate your scene. Learn tricks to speed up
render times with turbo tools. Understanding specifics
like the right number of samples and ideal tile size. Moving you closer to
mastering rendering in blender lighting adds realism
to your three D scenes. Learn to use blender
sky texture node to cast a natural glow
on your Viking abode. Discover a simple yet effective method to
set up lighting. Learn how to make any
scene you create in the future really pop
out on any social media. Reaching the final stretch within the blender
part of the course, the blender composite with layered rendering
becomes an art. Learn to render
different layers like normal maps and
ambient occlusion. Weaving these layers together to create a more
inspiring scene. This section not only equips
you with technical know how, but also ignites
a creative spark enhancing every
render you craft. Now moving on over to
our Unreal Engine part, our expert Lucas
will be guiding you through the thrilling things you're learning in the
next part of the course. The first thing you're
going to learn in this part is importing LTF files with auto set up. Kickstart, a smooth shift from Blender to Unreal Engine Five. By importing files effortlessly. This segment
automates the set up of textures and
materials showing your asset transition seamlessly from Blender to
Unreal Engine Five. Discover how your
blender creations integrate into UE five's
lively environment. This part preps you for the vibrant game development world. Simplifying asset importing
for both newcomers and season developers
uncover the art of realistic lighting and
real endrine five, using the Lumen lighting system. Learn to manage light sources, create dynamic cloud systems, and apply volumetric fog
for atmospheric effect. This segment demystifies
environmental lighting, equipping you with the skills to set the right mood
in your scenes, whether aiming for
a serene dawn, bright noon, or a spooky night. Explore real drones. Five, expansive world by setting up natural
engaging landscapes. Learn to use the UE Five
Water Plug in Nanite virtualized geometry
for terrain creation and terrain displacement for
natural rocks and mountain. This part lays a solid
foundation for crafting and blending expansive, realistic
outdoor environment. Perfect for novices or those looking to level up
their landscape skills. Delve into terrain. Material creation in U five, transform barren landscapes into textured
realistic terrains. Learn weight painting
for texture control, distance blending for
seamless texture transitions and techniques for large
environment texturing. This segment elevates
your terrain. Texturing skills
guide you towards creating large
immersive environment, enrich your scenes with
quiktal assets and foliage transition from bar to lively detailed
scenes in UA five. Using quisal assets, learn to select import and plate
high quality assets strategically and fine
tune material setups for enhanced aesthetics
and realism. This segment transforms you into a level designer breathing life into your own
digital worlds, unleash your creative potential in material customization. In UE five, explore the node system within the
material graph texture, tweaking techniques
and color calibration. Engage in hands on exercises. Endure real time feedback as
you tweak your materials. Laying a solid
foundation towards becoming a proficient
UE five artist. Explore color grading,
Unreal Engine Five. Enhancing your scenes realism through post processing tools. Kick start with a post
processing primer, delve into color balance, Engage in hands on color
grading exercises, and experiment with
different grading options. This segment arms you with
color grading skills. Transforming your scenes
and understanding colors impact on
visual storytelling. By the end of this
course, you'll not only have a solid project
to show off, but also the skills to take
on a new project on your own. Imagine the possibilities, the creations waiting
for your touch. Now, that's pretty cool, right? So if you're serious about
leven up your skills and diving into the world of
three D and game development, this course is your
golden ticket. Are you ready to jump
in and have a blast? Come out the other side
with some serious skills? Your journey from Newbie
to pro begins right here. Right now. So don't just dream, join us and make it a reality.
2. The Basics of Blender: Welcome everyone to Blender
to on real engine five, the complete beginners guide. And in this course you're
going to actually find out how to create a fully flushed
out model from scratch, a viking cut all
the way through, then to render it
out in blender. And then finally
on to Anal Engine, where we're going to
set everything up as an environment where
you actually be able to walk around
your own model. So let's quickly take
a look at that then, what we're actually
going to learn. So if I open up the download
pack, which is here, we'll see first of all that
we've got a reference, which is our human reference. So this is a scaled model of a human where we can
base everything off. The next thing we've
got is our textures. So in the download pack, you'll have all love
textures in there ready to use to make it
really, really easy. And I'm actually going to
show you as well how to actually create your
own thatched roofs, so you'll be able
to then learn how to create your own textures. And you'll also receive the
thatched roof blender set up, so you'll be able to go back anytime you want and
either change out how you know the
models that we've put in there for your own liking
or something like that, or you can set up
your own blend file. It's completely up to you
next on the download path, we've actually got
our viking up. This is the complete build that I created for this course. And you'd be able to
go in there and have a look and reference
anything you actually need. We're going to go into
more of this actually, as we go on in the course. So if you are brand new to Blender or to Unreal
engine Five, don't worry. We're going to go
through everything. The next thing we're
going to look at is the main image that I
rendered out in blender. So we're going to do a
full render in blender complete with water and this kind of darkness
at the back. You know the lighting, this wall that goes around there,
all of the materials. And we're actually going
to render that out. And the next one we're going to actually how we did it
in Unreal Engine five. So you can see all
of this scenery, all of this
environment including the lighting, the
water, everything. You're going to learn
how to do that as well. So it is the complete
course from starting, you know from a
cube in Blender all the way through to
Unreal Engine five, having your own game character walk around this
actual environment. Well, let's now put
those down now. We've showed those, and let's discuss the actual
Blender viewport, especially for those
of you who are new. So the first thing I want
to say is that this is Blender 3.63 should be okay actually using
anything above Blender 2.8 So those of you
with older machines, you should still be
absolutely fine. I don't think
there's anything in this course actually that
we're going to be using, you know, above Blender three
or something like that. Because most of the
actual keystrokes or the menus are pretty
much exactly the same. Now, there is a big change
coming in Blender Four, but we're actually
using that and I don't think it's out till
the end of the year. The other thing you'll notice is as I click around the screen, you will see down the
left hand side here, all of my keystrokes
are recorded. We're also going
to be using a lot of the grease pencil just to illustrate things and make things a little bit
more understandable. So just to reiterate, this
course is aimed at Begin. It's the blender and
Unreal Engine five, but it's actually split
into two with me covering the blender part and then Luke covering the Unreal
Engine Five part. So you could actually come to just the blender part
and do that or you can go to the Unreal Engine part or you can do both of them. It's completely up to you because it is a
beginner's course. We're going to take it a
little bit slower as well in the beginning and then speed
up as we move forward. So don't worry, it's moving
a little bit slow for you. We're trying to find that
happy medium and a bit later on it will be
speeding up as we go along. If it is too fast,
just actually go back rewind or actually slow down the process of
what we're actually doing. Because it's very
hard to actually find a speed that fits everybody. So the first thing then is
what we're going to do is, first of all, I'm going to show you how to
save out your file. So if you come to file, you'll come down to where
it says Save As, and then what you're going
to do is you're going to find where you're actually
going to save it. So I'm going to call this Vikings process that. Press the Enter, press
the button again and then you won't be able to
see it yet on my screen. But up on your
screen you'll have a white kind of block there. And up there it'll say where
it's actually saved out to. I think actually I can
pull that down so you can actually see that this is
where it's actually saved to. Then if you come to file
and they go to save, you'll see that it just
saves out straight to there. So you ain't got
to go and import any new file or
anything like that. If I come in now and
actually move this around, so if I just grab this
and just move it around, you'll see that there's
a little star there. That just means that it's
not actually saved out. If you see that, it just means
that you'll need saving, I would say after
every single lesson, just so you don't lose
any of your progress. All right, let's put that
back with control Ed. And now what we're going
to do is I'm going to introduce you to actually moving around the
viewport in blender. It's especially useful
if you knew to blender, you will want to know how to
move around the viewport, how to pan and all
that good stuff. Alright everyone, So
on the next lesson, what we'll be covering
is how we came up with the idea of what we
actually wanted to create, referencing, and
all that good stuff that needs to come before
starting anything. Alright everyone. So I hope
you enjoyed the start of this and I hope you're
looking forward to actually getting on
with the course. And I'll see on the next one. Thanks a lot. Bye bye. Hello everyone and welcome to the basics of Blender
part of the course. I recommend grabbing
a pen and paper or a word document and join down
these keyboard shortcuts. He'll be going through
the very basics of blender and the keyboard
shortcuts you will need. So with all that said,
let's get started. So on the left hand
side you'll kit, see I have key casting on. This will show you the keys
and pressing in real time. And this will be on pretty much, if not all, of the
entire course. The next thing I'd like to show you is any new keys we use. There will be a small animation, double peer down at the
bottom right hand corner. This will only appear
the first time we use that particular new key. And I think it really helps keep the flow of lessons
to a decent rate, both for beginners and those
more familiar with blender. Because they only appear once, they won't plow up the screen. And there's always screen
casting to rely on. Also down the bottom
right hand side, you'll see a detailed animation of anything that
needs more context. This is useful if you're new to three D model in particular
because there's a lot of jargon and technical
terms that need a decent explanation or more context of why we
are doing something. I recommend then if you need more information jumping
onto the blender website and checking out their
detailed explanations of pretty much anything
blender related. So now when we mention
blender viewport, this is actually
viewpoint. You can see it. All of this gray area here
is actually viewport. Now if we go to the UV
editing part up here, you'll see that on the left hand side, it's
now in two screens. And if I say the UV
editing viewport, all that means is just
this gray box over here. So now let's go back to
modeling and let's go a little bit further into how to move around in actual blender. So the first thing I will discuss is that the middle
mouse port, actually, if you hold it down, you can rotate anywhere within
the blender viewport. And then if you want to zoom is just scrolling in
and scrolling back. Now you can also press
control shift and the middle, mouse it down and then just push it
forward or push it back. And you can scroll
in very slowly. Now to pan, all you need
to do is you need to hold shift button and
the middle mouse and then you can pan from left to right and to zoom to the
object, which is very handy. Let's say you're really far out and you really need
to zoom to it. All you need to do is press the dot on the actual
number pad and that will zoom you right in to the object you want to zoom to. So for instance, if I'm zoomed out and I want to
zoom to my light, for instance, it's very easy then to come across
the scene collection. Click on your light, press
the dot on the number pad, and that will zoom you right in. Now the next thing we need to discuss is just
deleting objects. To click on an object
is just left click And then what you
can press is you can press the delete key, and that will just delete
it out of the way. I've just lead to my light there and
now I'm going to come across to my camera and actually delete that
out of the way as well. The next thing I want
to discuss is if we click on this cube
and we press shift D, what you'll notice if
you move the mouse now, it's actually going
to make a duplication of my actual cube. If I don't actually
click anything on my mouse and I just click
the right click button, it will drop that back in place. Now you can't see there's
actually two cubes in at the moment. We
there actually is. So we need to bring
in the gizmo. And the gizmo is basically
something that we can move things left and right, up and down,
things like that. So if I press Shift space bar, come down and you'll see
we've got one that says move. And now we actually
have our gizmo. And if I pull this to
the right hand side, you can see now we
can pull this away, and now we're able
to move this around. You can also freely
move this as well. If you press the G key, you'll notice if you've got
it selected now you can move it basically anywhere
around the viewport. You can drop it back with the right click or you can
put it wherever you want it. And then it click left click, and it will put it
wherever I wanted it. Now also why the dot, the zoom tube born is important
if I press the dot born. Now you will see
that if I just zoom mou and hold the middle
mouse and rotate around, you'll see that I
actually rotate around the origin of this actual cue. Now if I click on the other
cue and I press the dot born, you can see now
that I'm actually rotating around the
origin of this cube. Now the next thing
we want to discuss is object mode and edit mode. At the moment we
are in object mode, we can't really do a lot with this cube except move it around. Now if I press the tab on, we will then go into edit mode. And in edit mode
we can actually do a lot more things
with this cube. Up on the top left
hand side here, you will see that we've
got three different icons. One of them, this one
here is vertices, the next one across is edges, and the next one
across is now if we're on vertices and we come over to this
vertice for instance, I then if I press shift space part to
bring in my gizmo again, I then can move this around. Now if I come into edge select, I can grab the whole edge and move this around
like so finally, if I come into face select, I can now grab a whole phase
and move it around like so. Now the other thing is if we
come to our verte select, I can select a vertices, you can also select another verte or another object or something else like that just by holding the Shift
button and actually clicking on the other
vertice or the other object. Or if we come to face
select for instance, we can grab this face. Shift select the second phase, and this is how we can
select multiple objects. Now the next thing we need
to discuss is the axis. So we can see here we have a
red axis and a green axis. Now just to show you what
this actually relates to, if we come up on the top
right hand side here, where you've got these
two interlocking balls, and you click this
little down arrow, you will see that we
can turn on the z axis. Now we're just going
to turn this on, just to show you what I
mean, we turn that on. Now you'll see another
axis appears here. Now the green axis is
representation of the Y. So if I want to scale
this out on the Y, all I would have
to press is and Y. Now you can see I can scale
it out along that axis. Now if I want to scale
it out on the X, so that's the red axis, I'll press and X, and I can scale it
out along that axis, again, the same thing. And z, the up and down axis
is z, and it's S and z. And then you can scale it up
and down finally as well. This is also important if we
actually want to rotate it, because we'll rotate
it on an actual axis. What I'm going to do is I'm
going to grab the whole of this by pressing the button. And then I'm going
to rotate it around. I want to rotate it on
the Y axis, so it's Y. Then you can see it will
only rotate on the Y axis. And no matter where
put on the mouse, it will always
rotate on that axis. To click it back to where it was just again, the right click. And if you want to turn it, all you need to press
is and Y again. And then let's
give it a degrees. So all we're going to do
is you're going to press 90 on the actual number pad. So 90 to button, and now you'll see it's
rotated by 90 degrees. So just to summarize,
that is scale. And R is rotate normally when we scale something
or we rotate something, it's followed by the actual axis and then it's
followed by a number. Specifically, when
we rotate something. Normally when we
scale something, we just hit scale, pull them outside and
we'll scale it up. When we rotate something, it's normally
followed by the axis, followed by a number
on the number pad. Now the last thing I want to discuss is if we
go to object mode. Now we need a way
to actually view this a little bit easier than the way
it is at the moment. Let's first of all
turn off the z axis. And what we'll do now is we'll use the number pad to
actually view this. If I press one on
the number pad, that will go actually into the front view of our viewport. If I press three
on the number pad, that will go into the side view. And if I press seven
on the number pad, that will go into the top
view of our viewport. Now the opposite. To
get to the opposite, all you need to do is you
need to hold control. On this occasion we'll
press control and seven, and that will bring
us to the bottom, this object in the Viewport
control one is the rear of the object and control three is the opposite
side of the object. So now before we finish
this section of the course, I need to show you something
that's also very important. If we come up to the
top left hand side, you'll see you've got a
button here that says edit. And if we come down
to Preferences, one thing that you
should always do, that when you first
download a blender, you should always put
on the Status Bar, which is this button here. And if I click all of these on, you will see now if
I click them all on, and I close that down, Download the bottom right hand side, here you have all the
details that you need. For instance, we've
got how many faces, how many triangles
are actually in the scene and the objects
are in the scene. And the memory and V Ram
that's actually taken up. This is really
important if you want to get a good idea
of how much power your computer is
actually using and how many polygons and
triangles are in the scene. Polygons and triangles
you'll learn more about as we progress
through the course. And that pretty much covers
the basic of blender. And hope you'll found that
both helpful and informative, but more importantly, easy to understand now as they
say on with the show.
3. Getting Started with References: Welcome back everyone to
blend Unreal Engine Five, the complete beginners guide. And this is where we
actually left it off, absolutely nowhere, because we haven't really
done anything yet. So now what we're going to discuss is we're
going to actually discuss getting references
and where to actually start. Because you don't just really want to jump into
blender and just start creating something you actually want an
idea to work to. Even if the idea is
actually in your head, just make sure that you've got a load of references
to back it up, because I guarantee it will
help you in your final image. Things like lighting,
things like textures, how the fetching, you know, looks on roofs, how roofs
are actually built. Because we are going for a lot more realistic
approach with this. And when you come to realism, you really need to look at how
things are actually built. So what I tend to
do, first of all, I'll open up something called Purerev. Which is this here. And you can see there's
nothing in here now. Purerev is free. You can actually go and download it for free just typing Pure. They might ask you
if you want to make a donation or
something like that, but as far as the note at the
moment, it's actually free. Now the first thing I do
is I go over to Pinterest. So I'm going to put my Pinterest
board, and here we are. And what I do is I
find references based on the things that I
want to actually create. So you can see here,
I've got a Viking here. All I've typed in his
Viking House here. And most of the models that come up are actually in
three D anyway, so that's quite handy
if they're not just put in Viking House
three D model. Now the good thing
about Pinterest is when you click on On, you're going to get a lot
more images down here. And this is really going to
give you a lot of ideas. Not only how to, you know, how the buildings
actually look or give you ideas on how to
build buildings out, but also how to render it out. Maybec can see here
black background, you can see I've got
some ideas from there. You can see this one
here is a very nice one. It's very nice. Now what I tend to do now is I will grab
a lot of references. So I'm going to write Click.
I'm going to say copy image. I'm going to go back to my prev. I'm going to press control V and just drop my image in there. Now the good thing
about prev is I can grab an image and let's say
drag it anywhere I want. I can make it bigger
if I want to like. So there are many, many other things
you can do with Pub, but I'm just going to
show you the very basics. Now what I'm going to do is
I'm gonna grab another image. Let's grab something that needs a little bit of cutting
out, like this one. Let's grab this one. So I'm
going to grab this one. I'm going to drop it in pure F, so draw V like so. And then what I'm
going to do is I'm going to make sure
I've grow it selected, hold the button and then
just cut over like so. And it's actually
going to cut it out. And then I can put it in place, you can just cut out
little parts of them. Now what I tend to do
is once I've got a load of references for
my Viking building, the next thing I'm going to
do is I'm going to actually get some references for
textures and things like that. So let's put in
weathered wood like so, and we could put in
texture after it. But you can see here that
this gives us some really, really nice ideas of what type of wood we're
going to actually want. And when you get a little
bit more advanced, you can actually
use these to create textures in something
like substance painter of substance designer or
even right here in blender itself using the no
trees and things like that. All right, so now
once we've got this, so let's just grab one of these. So I'm just going to
copy image again. I'm going to go
to Pure Control V and drop in my materials. What I tend to do is I'll
have my building over here. I'll have my
materials over here. And the next thing I'm going
to look at is lighting. So if I go back to the
one that I had before, we can see something
like this, for instance, is a really, really
good shot of what a viking hut would
actually look like. We can see we've got all
of this in the background, so what I tend to
do is I tend to grab this and I'm going to make then a load of real
life Viking huts, which I can actually
base it off. So I'll, for Unreal Engine Five, we're basically building
out an environment. We can see here, this is the sort of terrain that
they actually lived in. It's very, very green now, once you've got a load of these, you can actually
save some of them out and actually
use those within mid journey or Dar and you can actually
generate some more images, which might be good
if you want to, let's say you want to create
something highly stylized, but you only have
realism to go with. What you can do is if I pull over my mid journey
and you can be here, but this is my mid journey. And you can see that
I've already put some in and already got some
really, really nice ideas. You can also see that it's
pretty stylized look this, now you can actually
go with realism, but I wasn't sure at
the time whether I was going to do
stylized or realism. Again though, we can
actually click on these, we can actually copy this. So copy image and then we can drop it into our
actual pure red. So let's drop it into here. So control, there you go. So now we've got
a load of images. And to actually wit with and build out our actual Viking Cup. But we're not done there
because what I tend to do then is I tend to
actually make a drawing. So just a basic drawing, you don't really
need any drawing skills or anything like that. It is good if you've got an actual digital tablet or you can actually draw it on
paper completely up to you. So here is the image that
I actually drew out. And you can see that
there's not a lot to this. It probably wouldn't make sense
to a lot of other people. But it does give me a nice
reference to actually go with. If I come in and just copy that, I'm going to close that down. Now I'm going to put this over
here that make it holler. And this is my main image
you actually work with, completed with, you know, either realism or you stylized, and your textures and
your actual lighting. And then you've got a really, really good idea of how to go forward and
I recommend this is how you start every single build that
you're going to do. All right, now
that's out the way. I'm going to close my pure rev down because I've already
done all of that. I recommend though,
if you want to, you know, change your
viking cut, you know, to look a little bit
different from mine, then you actually go
through this process. In fact, I would say just go through this process
before actually, you know, carrying on
with the actual cut. Well, now we've discussed
how to actually start. Now what we need to do is go
back into blender and what we're going to do now is discuss where to start in blender. So the first thing you
want to do is you want to bring in your human reference. So let's go to final. And we're going to go to Import. And we're going to go down
to where it says OBJ. And then I'm going to go to
my reference and I'm going to bring in human reference.
And there he is. He'll come in actually stood on the actual ground plane and you'll notice at the
moment is in orange. This is just because if I try and move them
at the moment, I won't be able to move them. I just need to click
on him like so. The next thing is you'll notice over on the left hand side, there isn't really
anything over there. But if I press T, we can
actually open that up. Now at the moment,
you'll see also there's no gizmo to actually move
him or anything like that. I'm just going to
press shift space bar. Come down to where it says move and then I'm
going to have a gizmo. Now the next thing you'll
notice is that his orientation, this little yellow dot is all the way over here,
not in the center of him. Which means that if I want
to rotate him, so oh y, you'll see it rotates really weirdly around this point.
I don't actually want that. What I'm gonna do is
I'm going to right click anywhere in the view pot. I'm going to go down to
where it says Set origin. I'm going to set it origin
to the geometry of my man. Here and there you'll go. Now if rotating, you'll see
he just rotates around. He's basically his own axis. Now we've got our guy in. This guy is 1.8 meters tall. And this gives us a
really good idea of how big to actually
build our gray box out, which we're actually
going to need to really, you know, kind of
lay everything out. So what I'm going
to do now is I'm just going to actually
use this cube. So I'm going to
pull this cube up. And then what I'm
going to do is I'm just gonna try and get some, you know, kind of
realistic size into this. So if I put my guy here now, we can change this
around of course. But we should leave
our guy in to at least most of the builds
actually built out. Now I'm going to do
is I'm just going to go to my actual cube. I'm going to press Tab
to go into Edit mode. And then what I'm going
to do is I'm going to come to my face select up here. Now you can press
numbers 12.3 So you can see two is edges and three
is faces at the top. But I'm just going to press
three which is faces. Go to this face. When
you're in edit mode, you have to press
shift space bar again, come down to move. So you have to do that just
once in edit and object mode. And then it should be
there, set out for you. And then what I'm going to do is I'm going to pull this back. Now I'm not going with any
particular dimensions, I'm just making this to the size that I think looks right. Next of all I need to
pull this side out. And then what I'm going
to do is I'm going to grab my guy, bring
him over here. And now I'm checking
is to make sure that if he actually walks
to the front of the house, is he going to bang his
head walking into the door, for instance, or
something like that? What I'm going to
do is I'm going to press one on the number pad. And I can see, first of all, that this cue is way
above the ground plane. It's really handy to actually
bring everything down to this kind of line
here that you can see this x axis going across. Because then you can actually
measure everything out. And you'll see that
when I build this out, if I've got a door here, the door will have to be
all the way up to there. And that's not
something we want. So we need to have this first
floor of the Viking hut, even though there is only one
floor higher than our guy, much higher than our guy, to actually enable us to
put a door in there. So if I come round
now to the top of it, I'm going to grab the
top of it like that, press one on the number pad, and then Jaws gonna
pull it up like so. And now we can see that
that's probably going to be able to fit a door nicely in there and actually
have a nice structure going around it to make
it look realistic. All right everyone, So that's
the starting part of this. On the next actual lesson, what we'll do is we'll focus on getting this
gray box finished. We'll discuss why
I'm going to put things where I am and about supports and
things like that. All right everyone. So I
hope you enjoyed that. And I'll see in the next one. Thanks a lot. Bye bye.
4. Creating Grey Boxes: Welcome back everyone to
Blanatorial engine five. The complete beginners guide, and this is where
we left it off. All right, so now we've got kind of the dimensions of our actual halt
that we're like. What we're going to do now
is build out our roof. So I'm going to come in, I'm going to grab the top of this. And then what I'm going to do is I'm going to press shift. So I'm going to
basically duplicate just the top of it
because I don't actually want this roof to be
part of this mesh here. So if I press shift, you'll see then that if I pull this up, that it's actually split
and it's left one in there. So we've got one in
there and one in there. Next of all, what I
want to do is I want to bring in a actual edge loop. So if I come to the side of here and press control like so, you'll see that we can
bring an edge loop in. Now what you can also do with edge loops is if
you press seven, let's say on the number pad, it'll bring in seven edge loops depending on where
you are as well. So if I go to this side, you'll see we get an edge
loop in there. And then you can also score your mouse up or down and
bring in edge loops like so. So there's many ways to
do it with edge loops. Now, I won't discuss actually diagonal edge loops or anything like
that at the moment. We'll just keep this
simple for now. So what we want to
do is we want to put one edge loop in here. So control, left
click, right click. And then what I want to do
is I want to bring this up. Now if you haven't
got this selected, just come over here
to edge select, make sure it's selected. And then what you
can do is you can actually bring it up like so. Now, the thing is about the
Viking huts as you saw, is the actual roofs,
they're pretty steep, you know, the Viking longhouses, they're pretty steep
roofs like this. All right, so now
we've got that. What we want to do
is we want to bring these sides kind
of down slightly. So I'm going to grab this one, so I'm going to select this one. And then I'm going to
shift, select this one. That means it'll
select both together. And then what I can do
is I can press one on the number pad and I
can bring them down. So now you'll see as
I bring them down, we've actually got
them crossing into, you know, the gray box cube. We don't really want that.
So what I'm going to do is I'm going to press and X. And you'll see when I press X that we've got a
line going across. Now if I pressed and Y, you wouldn't see
that line there. Which means that you
would be pulling them the opposite way. So we want S and
X to pull it out. And then I can just pull
them out just so they're actually going over
these corners like so. Okay, so the next
thing we want to do is I want to create
this part in here. Now, I want to bring this up now and actually
put that back so we've got something in there so
we've got our roof and then I don't know
what this is called, like the attic part of the cabin where it's
not actually an attic. So what we'll do is
we'll come to face leg, we'll grab this part. What I'm gonna do is I'm
going to press E, pull it up. But what we've done
there is extrude. Now I'm going to go back
because I just want to explain that sometimes you can press E and then Enter and not realize
you've already extruded it. And then what you'll do
is you'll press again, Enter, and then
you'll pull it up. Now what's happened there is
everything looks the same. But what you'll see
is that in here, there's actually another phase. There's another phase in there. So we need to clean that up. What I recommend, you know, if you are a beginner, just make sure when
you're actually doing extrude that you're
only extrude once. If I grab this now, you'll see it's not extruder anything. If I now press and just
pull up with my mouse, you can pull that up
nicely up to there. Now I want to bring this in. The way I'm going to do that is exactly the same way
I did with the roof. I'm going to press one on the number pad and
I'm going to press and X that scale and X
and then bring it in. Now what you can do
is you can bring it into here and then press S and X again,
and bring it in again. Now I would also recommend that when you're actually
scaling something in, you don't start with
your mouse here. So if you press S and
X and bring it in, you can see you've
not got a lot of control that it's easy
to flick it over. What I would suggest is
you press over here, get used to pressing
it over here and X and bring it in like so. And then if it's still needs
going in a little bit, you can just come back S
and X and bring it in. We're not going to do
that though, we're just going to bring it in just so they nearly actually
touch in, so All right. So I'm happy with that. Now what I want to do is
I guess I should focus on putting in my No, we're not actually going
to put in the door yet. We'll do that a
little bit later on. I'm just thinking what else I should really focus
on with the gray box. I think we should
definitely focus out with the actual base. So where is it all
going to come out to? So let's actually
focus on that now. So what I'll do is
I'll come down to my bottom and it's all about working out how you're
actually going to do something when you're
modeling most of the time. You know as you get
good with modeling, you can actually know
how to do something, but it's working out what to
use in the right situation. And there's always
100 different ways of doing something as well. So I try and work out how I'm actually going to do
something in the easiest way. That's going to save me time. So for instance, with, you know, with the layout of
this wood here, what is the easiest
way to do that? Well, the easiest way to do that is just to grab the
bottom of the hut. Pressure D, bring it
down slightly like so. And then what I'm
going to do is I'm going to come to
my edge, select. All I did was I just duplicate the bottom there and then
I'm going to grab this edge. I'm going to pull that out back. So now when we're
building the hut out, we need to think of our man here and how he's actually
going to be using this space. So it is a biking cut. So he's basically going
to be sleeping in here, living in here in
a very small kind of quarters. Probably
got no family. Probably comes here to do
his fishing or just make your own story in your
head and then you'll be able to build this much,
much easier actually. So now we understand that
if I spin this guy around, so if I press our Z 90, so you can spin things round
with the rotation bone, which is R. And I'm going to spin him
around on the z axis, which means it's going to
be facing this way now. And we can see that if our
guy was walking down here, he would have easily enough
space to come out of his hut and then walk down here. And then he wants to
walk around here. If I grab him here, I'll said
90 spinning round again. If I press one, then I can
see he's got quite a good, you know, length
from the hut to walk down even with his arm spread. So we want it kind of close
quarters, but not too close. Then what I'm going to do is
I'm going to grab my edge. I'm going to grab
just this edge. Pull this edge out like so. And that looks, that
looks pretty good to me, So maybe a little bit more. So pull it out down here. So I basically is
gonna walk down to here and then walk
down the steps. Here is a little boat
or something like that. Now we don't actually
really need to build out this part yet because
we can actually do that. We just need the main part in there to give us something
to actually work with. Now what we want to do now
is we want to figure out, now if I bring him over here, press R's dead, 90. We want to make this realistic. So is that going to be
a big enough space to, you know, have a
chimney in there. Is it going to be big
enough for him to actually live sleep and you know, work in there basically. If I spin him round,
so if I press or x 90 and laying down, you can see that if I
put him around here, this would kind of be let's
spin him around again. So Y -90 let's face him down like so.
And put him in there. Now what you can also
do is you can click this on and you can
actually see in there. Now what it's actually
going to look like now what we're looking
at here is okay. So if he's laying down
in there, you know, if we actually want to go in this building and he's
laying down in there, how much room does he have? You know, for his
little kitchen and his little stove and
things like that. I would say that
it would be good to pull this out probably
a little bit more. So what I'm going to do
is I'm going to come in and I'm going to
grab this one here. I'm going to grab all
of these round here. It's important to
grab all these. Now there is a better
way of doing that. Rather than coming in and
shift clicking everything, All you need to do
is go over the top. And then you can
just press B box Lt and you can grab
everything like that. And if I go around
there now you'll see everything's grabbed and now can just pull it
out slightly like. So let's turn off our x ray now. There we go. We don't
have one problem. Of course we've got
the dimensions right, But we don't see
our guy anymore. So let's just click
on our house. Press H to hide everything. Let's grab our guy now
and bring him back out. So bring him back out here. Let's press OltH to
bring everything back. Click on our guy,
and all we need to do now is press Olt and R. And all that's going to do
is it's going to reset him. Well, it should have reset
him to the right dimension. So I'll discuss that now. Actually, let's set
him, first of all, on his feet again,
so R and x and 90. And there you go, he's
on his feet again. Now let me show you what I mean. Then we have something called
transformations in blender. And basically what it means is it's basically says to blender, this is the transformation
that I want to reset. So I want everything
to to this size. This is the size I'm happy with. Other words. Okay, so
for instance, our guy, what I'm going to do now
is I'm going to press control A and we're going
to reset all transform. So I'm just going to open this up here and show
you what I mean. So once I actually reset
this, if you haven't got the, by the way, just
press the button and then that will open it up. Then you press control, sorry, control A and reset
all transforms. You'll see all of those
get reset to zero. Now let's say we
want to scale him. Now you'll see that
the orientation of him is actually over here. So what it did was it set is transformation
orientation to the center of the world. And it
always does that. What you need to do is when you reset the transformations, just write click and put set
origin to geometry like so. Now on the next
lesson what I'll go through is discussing how and why set resetting
transformations is important. All right everyone. So I hope
you enjoyed that so far. And I'll see on the next one. Thanks a lot. Bye bye.
5. Working with Collections: Welcome back everyone to
Blender to on real engine five, the complete beginners guide. And this is where
we left it off. All right, so why is setting
transformations important? Well, if I come into my guy now and let's say I scale him, so I'm going to scale
him to be a giant. So S scale him up like so I'm also going to move him to the top of
the ground plane. So if I press one, I'm
going to move him up there. So at the moment I've
moved the scale, I've moved the location, and I'm now going to
move his rotation. So if I press Z, turn him round. So he's looking that way now. Because we reset the
transformations, what that means is
now we can actually bring him back to
what it was set to. So if I now press Olt R, you can see that it
spins him back round alt G. You can see that it puts him right
center to the world. And if I press Olt and S, you can see it scales
him right back down. I don't know why old G always
puts them to the world. It's as though it wants
to put them back there. It could be, because where
I've got my actual cursor, let's press Alt G there. No, it just sets him to
the center of the world. So anyway, it's handy apart from putting him
back in the position. So all I'm going to do
now is moving back. So that is why transformations
are important. The other thing is that when you're actually creating
something used in modifiers, you really need to reset your
transformations or blender. Let's give another example actually rather than
do it like that. So what I'm going to
do is I'm going to press Shift, bring in a cube. And what I'm going
to do now is I'm going to pull this cube out. So I'm going to press Enter. Now at the moment, Blender
still takes this cube as actually being just
that little cube that we brought
in to start with, and it doesn't take
it as this shape. What we have to do is,
when we've actually created new shapes,
if we want to, especially if we want
to add modifiers or we want to U V on wrap
or anything like that. We should always press
control all transforms, right click origin geometry, You're going to see
me do that a lot. And that's the reason
why we're doing this, just to make sure that Blender understands this is the actual shape we're
dealing with now. All right, so let's delete
that out of the way now. Then let's come in. And what we want to do now is we want to actually create the
kind of window on here. Now before we do the next part, what we want to do
is just want to make sure your cursor is in, well, someplace not in
the center of the world. We can move this cursor from
the center of the world, anywhere we want by shift, right click in like so
it wherever we want, wherever then we
bring in a primitive. It will always appear,
always where the cursory is. So if I now press Shift Day, bring up the primitive menu, you'll see we have all of these things actually to
look at and deal with, but we're only going to deal
at the moment with the mesh. And this basically
gives you just loads of nice shapes to actually
work with and build off of. So what we're going to do
is we're going to bring in the cube like so. And then I want to actually start with this
window over here. So what I'm going to do
is I'm going to bring it in over there. I'm going to press the S bond
just to make it smaller. And then I'm going to use my guy just to make sure that it will be able to
look out of it and it looks the right
kind of scale. What I'm going to do is I'm
going to bring it over, so we're going to set
it back a little bit. So again, this is a gray box, so we just need to get
things in the right place. What I'm going to do
now is I'm going to squeze this up a little bit by pressing and X like so. And then I'm going
to move it over just so that bottom
of it sits in there. And now obviously
we need a roof. Now the roof of this come
nearly parallel, a little bit. Probably higher or lower
than this part, maybe lower. What I'll do is I'll come in, press the tab button to
go into object mode. Make sure you're on face select, grab this face, pull it down. Then I'm going to do
is I'm going to press, pull it up like so,
and then squish it in and Y pull it in. And then we're going to have to look what that looks like. I think that's going to be
round about the right size. Now you can see the back of this is not quite
touching there, So I'm actually
going to fix that. So I'm going to do is
I'm going to pull this back and see where we are. With that, I think that's
going to be the right place. Because once we've got
this big beam on there, maybe one dropping
down just a tad, then what I'm going
to do is now I'm just going to pull
this out a little bit. So I'm going to go
into edit mode again. Grab this face and this face
and then just pull it out. Give us something to work with. Pull it out maybe that far. Then what I'll do is I'll
grab the bottom like, so go into X ray mode if you need to see that
you've grabbed it up, which you have, and then what I'm going to do
is just pull it down. There we go. All right, so now what we need is
our little chimney, so let's bring in a
little chimney again. We'll keep our cursor here. And then what I'll do is
pressure day. Bring in a cube. I'm going to bring
this over my chimney. Do I actually want to square or do I want to a rectangle
completely up to you. I'm going to pull my
chimney into here. I'm going to bring it up, I'm going to put it
over here, like so. Now I imagine in this
house that is sleeping quarters may be over here off the floor
because the warmth. Again, we're dealing
with realism here. He's probably going
to have a ladder up there to actually get him off the floor into a pot because it's pretty
cold in Scandinavia. So he's going to
probably want to be off the floor and
with his heating, he's going to rise
and make it warm, nice and toasty in
the top of there. And imagining that his bed
is going to be around here. And then his little
window where he can look out onto the river is
going to be around there. So what I'm going to do is
make sure that my chimney is over here to give
him enough space to actually sleep in this pot. I'm also going to make sure that the chimney is quite
small because there's no reason why they'd have a great massive chimney
in there either. So I'm going to do
is going to press S and then I'm going to
grab the top of it like so. And then I'm going
to pull it up. So now if you're not happy
with the size, again, all we need to do is
we need to press Tab, press the S bond, bring it in. And then you can bring it
up wherever you want it. I think for now, if
I'm looking at this, if I'm going from here, we can see that if we
add an image from here, for instance, that we've
got our chimney in there, we've got this bit
of roof in there. I can see that the thing
that I've got wrong, the chimney looks nice. It's really nice. The
height of it is nice. This bit here though,
we can see that this kind of roofing it needs coming down. It doesn't
look right like that. So let's go and fix that first. Then I'm going to press
Tab. I'm going to come in, I'm going to press
out Shift and click. And what that's going to
do is it's going to grab all of the edge loops
going around there. If you press Shift
click this way, you'll see they go upwards. So wherever you're placing it, towards the edge or
the top is where it's going to follow Oth click goes
all the way around there. And then what I can do is I
can actually pull these down. I'm just looking
at the actual size and I think we need to pull
this out a little bit. So what I'm going to do
is I'm going to come in, I'm going to grab this side, I'm going to put
my X ray on again, I'm going to grab
this side like so. And then I'm going
to do is pull these out and y this time because you can see we
don't want to pull them back because you can see
that lines going that way. We want to pull them
this way. Y and Y, pull them out. Take x ray off. There we go. I think that's
looking much, much nicer. Now, the one thing I'm worried about with this is these beams that come here. I think I need to move it
just a little bit over. All right, so there we go. Now I'm going to keep my man in here, so I'm
going to press one, put him on the ground plane because I will need him for the windows and
things like that. And I'm also going to
split this up now. So at the moment we
have a camera in here. We don't actually
need the camera. We also have a light in here. We don't really need the
light at the moment, so I'm just going
to click that off. We delete. I'm going to click the camera off and press delete. And now you'll notice over the right hand side with our
collections, we have these. So I'm going to make
a new collection now, just to break it
up a little bit, to make it easier to wait with. So the first one
I'm going to click New and it'll make a new
collection as you see there. Now I'm going to, I can
actually pull this out. So if I grab this, pull it up, you can see now we've
got two collections. Let's call this one great box. This thing just makes
everything easier to work with. Let's call this one Human. Human. I'll double click it. Sorry. Human. And then we'll have one more that
we'll call lighting. If I come up against this one, right click and click New. And then let's drop
this one here. We'll call this one lighting. So we'll have another one
which we'll call camera. So click New and all this is just preempting everything
we're going to be doing. So camera 18. And then finally we'll
have one that'll call main build. Main build. Now let's grab our gray box, so we know all three of these cubes or our
actual gray box. So let's shift, select them
going all the way down. And then what we'll do is
we'll drag those and put them into our gray box like sops up. And then what we'll do
is we'll grab our human. He's already in,
you know, human. So if yours is not just dragging me
into the human one now, the best thing we can do now, because we've done that, is we can switch off
whichever we like. So I can turn off just my
human, just my gray box, just my lighting
camera or main build, which makes things much,
much easier to work with. And you might even want, when you've got the main build, a lot of parts in
there to actually split the main build as
well. All right everyone. So on the next one then, what we should be able to
start doing is actually start building out our Viking Cup. Alright everyone, So I
hope you enjoyed that, and I'll see you
on the next one. Thanks a lot. Bye bye.
6. Seams & Sharps: Welcome back everyone. To
blend on Real engine Five, the complete beginners guide. And from here it's going to get a little bit more
intense because we're going to be
discussing more complex things as we move along. Of course, this was a
really simple stuff and now we're just going to ramp
it up just a little bit, especially if you n just
be prepared for that. The first thing we're
going to do is at the moment you can see that
although it looks nice, this gray box, it's
much easier to see what things look like if you come over to this little
down arrow here. And what we want to do is
want to put cavities on. What that does is it
just puts a little bit of an edge on the sides. And you can see already it
looks much nicer and it's much easier to actually get a visual of what something's
going to look like, especially if you're trying
to create something, you know, with a camera render. Because what I tend to do
when I've got my gray boxes, I will actually normally bring in some lighting and I'll check what it
actually looks like. Now, we're not
going to do that at the moment because there are probably a lot of
beginners here. And I don't really want
to make it too complex, too fast, but that is
what we tend to do. So we build out all of
these little gray boxes. Let's say we're building
out a town over here, and we've got a town all over
here and things like that. And then we're looking, when
we bring our lighting in, how everything's
bouncing off and we're getting ideas of
where to put things. And that's generally how we do it when we're building
out any game environment. Okay, so now we've done that. What we need to discuss
now is textures. So what I'm going to do is
I'm going to actually play a short video now of
marking seams and edges. And I want you to
watch that. We're not going to be using it yet, but we will be using it in
the future as going forward. And the reason I want
you to watch that now is because what we're going
to do in these courses, we're going to
build a part of it. And then we're going to bring in our textures and materials
and put them on there. And I think this is a really
good way of keeping you invested in the course and keeping you interested
in what we're doing. Because you're actually
going to really see your Viking Halt come to life. Alright. So I'm going to
play now marking seams and edges and I'll see
you on the other side. All right everyone.
Thanks, lots. See on the next one,
welcome everyone to the shot introduction to marking seams and sharps
part of the course. So before I give you examples of what I'm actually
talking about, let me just briefly
explain what they are. Seams, you can think of like seams on a piece of clothing, like a shirt or
pair of trousers. The main job of seams
is to make sure the texture that
you're trying to place on your mesh
goes on correctly, but more importantly, gives you control of how that
texture will look. Sharps are marked like seams, but serve an entirely
different purpose. We use sharps to
give us control of how sharp and soft angles
are on our measures. This makes them look realistic. It is also important
that we do this not only for rendering in Blender,
but also sharps. Carry on through to other software or games
engines were on to use like Substance Painter or Unreal
Engine as an example. So with all that said,
let's get started. So here we are in Blender
with our starting cue. Now if I click on my Cube
and go to my UV editing, you'll see that the cue is basically unwrapped
in this actual way. So basically it unwraps
like a present. Now if I come across
and I grab this cube, and I press Shift, and then we press Shift Spacebar
to bring in our gizmo. And we move it across. And now let's say I want to
alter this cube a little bit. So what I'm going to do is I'm going to press the Tab button. I'm going to go
Interface select, click the Top Shift Spacebar
to bring in the move tool. Bring it up like so. Now let's say I want
to unwrap this. Now if I grab this
with L just to grab everything and I press
the U button for unwrap, you'll see that it unwraps
exactly the same way. Even if I reset the
transformations of this, it will still unwrap
exactly the same way. Now let's mark some
seams and see how that has an actual effect on
our actual Lumb wrap. So let's grab the top and
we'll come down to the bottom. And what we're going
to do is we're going to press control leap and then come down to
where it says mark seams. Now it's important to
remember that it's control leap to mark
seams in face lect. But if for instance
we're in edge select, so if we come to this edge, if we press control leap, you will get this
option up as well, mark seams, but you can also
right click in edge select. And you can also see we can
mark same this way as well. So for now though, I'm not going to actually
mark this theme. What I'm going to do
is I'm going to grab the whole thing with L like. So now I'm going
to press Unwrap. And you can see it Unwraps
completely different. Now let's bring in
some textures so you can see what exactly
I'm talking about. So if I press Tab, I'll come up to my
materials panel up here. And I'm going to
give this material. So I'm going to come across
to the right hand side, click on my Material button. So let's now bring the material
I've already prepared. So if I come across this little
down arrow, come on down. You can see I've got
one here called Wood. And let's click that on now, you can see what's happened. We've actually applied
our material to this object where you can
see it's pretty much a mess. The top of it looks fine, but the bit going around the
side is all bent and skewed. So if I zoom out and
I press Tab now, you can see that
the reason is that It's not actually UV
unwrapped correctly. So how do we fix
that? If we come up to edge slect, I'm
going grab this edge. And now what I'm going to do
is I'm going to right click, come down to mark seams, and now grab the
whole thing again. I'm going to press you, unwrap, and now you'll see it. Unwraps absolutely fine. You can see that
wood's looking really, really nice actually
on this mesh now. So what this does the seams do is actually gives you control of how this actual texture
is placed on this mesh. You also need to take into
account that this is, they say, an infinite loop. So if I come round and I look
at this face and this face, you can see that they're going
round if we have no seam. When I talk about
infinite loops, it's basically going
round and round. And blender doesn't actually
understand how to unwrap it, so you'll end up with
that mess we had before. Now the other thing
to take into account is if I turn this wood
around, for instance. So what I'm going to
do, I'm going to come over to the left hand side, the viewport of my UV editing, press A to grab everything, R 90, spin it round. Now the other thing I
want to show you is that where we join these
actual seams up is also really important because
you'll never ever get it perfect on here where
there's an actual seam. So let me exaggerate
this a little bit. So what I'm going to do is
I'm going to press Tab. I'm going to make this a lot
smaller and I'm going to move it into the
center of my UV map. And then I'm going to press Tab. Now you can see that
these edges don't line up whatsoever against
this other side, so this texture here doesn't
line up with this texture. And the reason is because
we've got a seam down there, and that is the actual break
in the texture yet if we come round to this side
and I spin this round, so if I grab it z 90 and now go to this
one where we can see, you can see that these
line up perfectly. And the reason is
because obviously there's no seam there.
The seam is here. So you need to take
that into account on your own measures and
objects that when you're applying textures and materials that try and put seams where you're not
going to see them. So if it's on a door
handle, for instance, try and put them on the inside where no one's actually
going to see them. So always bear that in mind when you're actually
marking your seams. So now let's discuss sharps. So if I bring in
a new primitive, so if I press shift A, I'm going to go across the mesh, I'm going to bring
in a cylinder. Now you'll notice
that this cylinder has all these little
edges around there. And let's say you want to
make a cup or something. The last thing that you want is all these hard edged
faces in there. Now there are things we
can do to sort this out. So the first one we can do is we'll bring in
another cylinder. So I'm just going to move
this one out of the way. So shift space bar,
bring in ma gizmo. Move it out of the way. Shift a, bring in a, another cylinder. And this time I'm going to
come down to where it sees add cylinder and turn up
the vertices to 100. And now you'll notice that
we do have a round edge. But the problem is
that we've brought in 100 vertices to
actually achieve that. And that's not
something we want. We want to use as
few polygons as possible while still getting
a really good looking mesh. So how do we achieve that? Well, there are a number
of things we can do. First of all, we can come
across to this right hand side. And what we can do now
is come to where it says Normals and
click on Auto Smooth. Then we can right click on the viewport and
click Shade Smooth. And now you'll notice it's
actually been smoothed off. But the problem with this is
if I turn up my auto smoove, you can see if I turn
it up all the way, it goes really, really funky. And that is because
at 170 degrees, Blender decides that these edges along here need moving off. So it doesn't give us a lot of control if we do this
on the other one, Sea grab this one,
right clip shapes, move autos, move on. You can see, again, even with
lower amounts of polygonts, we're still able
to smooth it off. But if we turn this up, we're still going to end up with the same problem as
what we had before. So how do we solve that? Well, if we come in now, press the tab button,
come to the top, grab the top shifts like the bottom press control
because we are in face select and we'll
come in and mark a shop. And now you'll notice
if I press tab that now it's got
hard edges on there. This gives us control. So this is why we
actually use shops. No matter what, I turn
this up to 180 degrees, which is the highest it goes, it will not get rid of
those shops that we mark. We can also mark shops
around the edges as well. Sea grab this one and this one. And now because we're
in Edge select, we can write click, come down, mark a shop, press
the tab button. And now you'll see you've
got hard edges on there. So it's very important
that you mark sharps where you're going to
actually want hard edges. It's also important that
you get into the habit of marking sharps when you're
actually marking seams. And then what happens is
when you join two objects together and you turn up
the auto smooth if needed, you're not going to end up
with some measures like this. Okay. For one. So I hope you enjoyed that
introduction to marking seams and sharps and as
they say on with the show.
7. An Introduction to UV Mapping: Welcome back everyone to
Blenet Ternary engine five. The complete beginners guide, and this is where
we left it off. All right, so now we're
going to do is let's actually make a start
on this part here, So we'll make a start on the
side of our actual cabin. So what I'm going to do
is I'm going to come in, I'm going to press Tab button,
Make sure I'm in face. I'm going to grab this face. I'm going to press Shift
D to duplicate it. And then what I'm going
to do is I'm going to pull it out like so. And we'll use this as a base to create all of those
little wooden planks. Now you can get textures
where obviously the actual indentations
are in there. So, you know, the gap in between each plane is
actually in there. But we're actually going to
build this out, you know, as a fully fledged model with all of those
plants built out. Now, like I said, it
does make it harder. It does make it look
more realistic. It does actually come at
a cost of rendering time, or, you know, in Unreal engine, it actually comes
with a cost as well. Because you've actually got more geometry doing it this way. So there are ups and downs
to doing this, but I think, you know, learning
blend of fully, it's better to actually
go this route. All right, so now
we've got that here. Now what we want to
do is we want to split this away from
this part here. Because at the
moment, this is part, as you can see,
of this gray box. And I don't really want that. So what I'm going
to do is I'm going to make sure I've
got this selected. I'm going to press
P, and I'm going to come down to Separate
by selection. So click this button now. Now you can see if I press Tab, we've got our gray box
and we've got the side, which is just a
plane at the moment, which is going to be the planks
of wood at the side here. Now the other thing
you'll notice is this has come in to where it says gray box, and I don't
really want that. So what I'm going to do
is click this down arrow, I'm going to see it's a cube. I'm going to be dragging my cube up to my main build like so. And what I'm going
to do is as well, I'm going to grab
all three of these. I'm going to join them together. So I'm just shift
select to the mole. And then I'm going to hover over my actual Viewport,
press control J. And that then is going to
join them all together. And it's just going to make it a little bit easier
to work with in case we end up with a load of objects in this
gray box part. So now I'm going to do is
also name it gray box. And now it's named, we should
be able to work with that. I'm not going to name
these parts yet. So this cube, which isn't
a cube, it's a plane. I'm not going to name it yet. First of all, I'm just going to build it
out a little bit. Alright, so now we've got that. Let's actually press the
button to go into there. But you'll see before
actually I do that, you can see the
orientation is over here. And I don't like that,
so I'm going to do, it's gonna press control. All transforms, right? Clicks, origin to geometry. And now, there we go, We're
ready to actually start. Okay, so let's actually come in. What I'm going to do is I'm, first of all going to grab just the edge of this and I'm going to make it
much, much smaller. Alright so, and you're like,
what is going on there? Why, why are we doing that? We've just spent all that
time not doing that. Well, the reason for that
is I want to actually make some planks and I want the planks all to
look different sizes. Because we are going on
realism as I've said here. So what we're going to do now is we're going to pull this out. So I'm going to grab this plank. I'm going to press
L, hovering over it. So if you press hell, you'll see that you can grab
the whole thing. And then I'm going
to extrude it out. So if I press now and
pull it this way, I'm going to pull it out like, so there we are. We have our first actual plank. Not looking like a
lot at the moment. Now what we want to do is
we want to mark some seams. So you just saw the last video, mark some seams first because then when we make a
load of these planks, all of the seams will be marked, which will make it much
easier to actually work with. So what I'm going to do
is I'm going to come in, I'm going to grab all of
these corners here like so. And then we're going
to write Click, I'm going to come
down and mark seams. And there you go, you've got
the little red marks there. And then what I'm going
to do is I'm gonna come around to the back, make sure I've got
face select on. Grab this face Now you can't right click when
you've got faces. What you need to do instead
is you need to press control. Come down mark seam. Now this should open
really nicely now. So again, before you unwrap
something, let's press tab. Let's press control
all transforms, right click, set
origin to geometry. And now we want to do is we
just want to unwrap this. And the reason we
want to unwrap this is because we want
it all prepared, opening properly, ready for when we actually put our
textures and materials on. So I recommend you always
do this, you know, before creating a load
of planks because then everything's done and it will
be easier in the long run. Seems like a lot of
work in the beginning, but it's going to save you tons and tons of time as we go on. So now let's go to UV editing, which is this little
button up here. And then what I'm going to do is I'm going to click on it. And you'll notice at the
moment I can zoom in to it, but it's going to make it
a little bit hard work. So what I'm going
to do is just press the dot baton and then
I'll zoom to it like, so now you also
see at the moment. This is a rectangle,
this is a square. And the reason that is because we haven't unwrapped it yet. So it's just unwrapped
it as I say, based on that plane
that we had before. But let's grab it all. So make sure I'll also show
you something else. If we press L, you'll notice it looks like it's
grabbed it all. But it actually hasn't
because it only grabs up to where the island is. So this is basically
island select. And we don't really
want that. What we want to do is put this
on edge select. And then what we're
going to do, if I grab this one and I press L, it won't actually
select the island, it'll just select
all of the mesh, Which is really handy because we actually want to
unwrap all of this. Now we're going to do is we're
actually gonna unwrap it. We're going to press
Unwrap. And there we go. You can see this
is how it's rat. And it's rat, Absolutely. Clear enough, Perfectly because when you've got your
wooden grain in here, you'll see it going up here. And then on the edges it'll actually turn round
and be going this way, which will make it
look really realistic. And that is exactly
what we want. Now I'm just wondering
whether I do want the wood grain going that way or if I want it going
the other way. I think because it's going to be hidden in the top
and the bottom here. Maybe. Maybe. Yeah.
I think what we'll do is we'll just split up this top and bottom
just to show you. So I'm going to
right click Maxine. I'm going to reopen it now. So L you unwrap
and there you go. Now you can see my parts are
here now. Why did I do that? Because I probably want these, so these two top bits
going the other way. So what I'm going to
do is I'm going to press L on each of these, I'm going to rotate
them, so R 90. Rotate them round. There we go. Now you can see that the wood grain up, we're
going this way. Which means that we're
going the opposite way on the tops of here. And that is what we want. Okay, so now we've
got it unwrapped. Now we can actually
come in and we can actually give this
some more edge loops. And the reason we
want to do that is when we've made
a load of these, we want to be able to
make them look, you know, kind of rugged, have a bit
of randomness to them. So the easiest way to do that is to come in press control, scroll up the mouse twice, left click, right click. And now, because we've
put some edge loops in, what that means is
it means that we've got a way to actually make them, as you can see, a
little bit uneven. Now, we're not
finished quite there because that's not going
to look that great. So I'm going to do
is press control. And I'm bringing in a
few edge loops like so. So now you can see we've
got a load of edge loops. So if I want to come in
now and bring, you know, this little point out, let's say this one
here, this one here. And as you can see,
it's a bit exaggerated. But you can see now I've
got a lot of options to make this really
uneven, luckily for us. But there's easy ways
to do this as well. So that is what we're
going to do now. Let's come in and what
we're going to do now is actually what I want to do is if I press three
on the number pad, I want to repeat
it going all the way across here to the end. And then I'm going
to use that as actual planks of wood.
So how do we do that? What we're going to do is we're
going to press control or transforms right clicks
at origin to geometry. And we're going to bring
in our first modifier which is going to be array. So if I go to add modifier, come down to a rate
and then you'll notice at the moment
nothing is happening now. That is because at the
moment the factor is on one, which means this
is the X factor. It's probably going that way.
If I turn this up that way, you can see now that we've actually got some planks of wood next to each other. If I come and put
this one to zero, now you'll see nothing happens. That's because it was going
the other way as well. Now, let's bring
them close together. So if I bring this
down generally, one is right next to each other. Now, we don't want it on
there, we want to move it up. But if we put it on 1.1 we don't want to gap
like that in the window, be howling through, and the guy will be very cold
if that's the case. So what we want to do
is we want to come down and bring it a little
bit closer like so. And then what we also
want to do is we want to do a little trick where we
come around the back of the. So if I alter anything
on there now, because this modifier is
on, it's non destructive. Which means if I bring this up, it will bring the
other one up as well. And that is exactly
what we want. Now what I'm going to do is I'm going to come to face, select, grab the back face, I'm going to press and y and pull this out. And the reason I'm going to
pull it out is because I want these back parts to
actually be touching. So it looks as though there's
a gap going down there, but you won't be able to
actually see through them. And that is what we
want. Maybe I've got a little bit
too much on that, so let's bring it in
Jaws to tad like. So. The other thing is
when you press in Y or R, rotating something or
even scaling something, if you press and Y
and hold the ship, you'll see it goes
much slower than just pressing it and then
just not using it. Okay, let's have a look at that. Maybe that's too little
and Y out like that. Now let's bring this in. So I'm going to do
the same thing. Hold the ship on, on
here, bring it in. They're just about
touching like so. And now we've got
no gap in there. Perfect. Now let's come in and what we'll do is
we'll give this a few more. I'm going to press three
on the number pad, so I'm going to bring
it all the way up. And I'm actually going
to go a little bit more than what we need and we're
going to get rid of them. You know, the ones that we
don't need as we go along. Now I want to do is I want
to press control now. You can actually come
over here and apply, or you can press control. So you should be left
with a few of these. And what we want to
do is we want to make sure that they're all now
not looking the same. So the easiest way to do this is to do what I'm
doing at the moment, where is just to
apply the array. And then we're
going to go in and manually just change them
around. All right everyone. So I hope you find
this interesting. I hope you're enjoying
the course and I'll see you on the
next one. Thanks a lot. Bye bye.
8. Scene Optimization: Welcome back everyone to
Blender to Unreal Engine Five, the complete beginners guide, and this is where we left off. All right, so let's now come
over to our ray and all you need to do is hover over this
and you press control A, and that will also apply it. So now for press tab, you can see we've got all
of these measures here. Now, before we carry on. The next thing we
want to discuss is down at the bottom here. You can see that it says
Blender 3.6 0.3 Just actually, what version of Blender is, I recommend that you always turn on how many polygons
are in the scene, how much memory using
and things like that. And the reason is if you're
using a lower end machine, you might be
struggling somewhere and you might not realize, but you might have
hundreds of thousands of the polygons in the scene. Now blender is pretty decent, you know, up to easily 100
hundred and 50,000 polygons. The other thing is when you
come to render it out though, the more polygons you have, the longer it's going
to take to render out. So you need to take
that on board as well. So for instance, if
you've got, you know, a building which is not
rendering out very fast or, you know, it's really chugging
along in the viewport. You need to see what the
reason is behind that. So if I come up to edit, I'm going to go where
is it preferences? And then what I'm going
to do is I'm going to come to interface status bar, and I'm going to turn
on scene statistics, seguration system memory, video
memory, Turn them all on. And there we go. Now we've got
a lot of information here. So we've got how many
verses are in the scene. Now the main thing
why this is so high, yours will also be high. It's because this is costing
a lot at the moment. If I hide them out
the way you'll see now that it
goes down to this, which is much less
than what we had. So let's just un
hiding with ol tag. Don't worry too much about this. Now, the other thing
you can see is that it tells you
how many faces, how many triangles,
how much memory you're actually using.
This is the main one. When this, you know, memory gets to like two, 3 gigabytes, something like that, you're
probably going to have a hard time actually
rendering anything out. So just, you know, there
is that to take on board. The other thing that's really
important is it tells you how many objects
are in the space. Because sometimes when
you're doing a large render, you'll have hundreds
and hundreds of objects and it's better to
render them out as layers. You know, break them
into 100 objects per layer or something like
that and then layer them up. This is what, you
know, studios do. We actually, you know, render out films, you know, like the Pixar
films, for instance. They don't just render
like, you know, all the objects are
at the same time, the render them out in layers. So this is why we use this. All right, so now
what we want to do is we actually
want to go back to modeling because we're
not actually going to be working with
our UVs for a bit. And then what I want to do is
now I want to alter these. So what I'm going to do
is I'm going to come, I'm going to grab
some at random. So if I come in and I'll grab L, make sure you're pressing L, just grab some at random. And then what I'm going to do is I'm going to shrink these in. So, and Y shrink them in. Now you'll notice
at the moment it's trying to move them all to the middle and we
don't want that. So what we want to do
is we want to make sure that instead of
being on medium point, which is this point
right in the center, we want it to be on
individual origins. Which means that it's going
to shrink them in based on each of these planks. So if I now press S and Y, you can see that they get shrunk in based on each of those. All right, so now I'm going
to do is I'm going to hide those ones out the way I'm
going to grab the next ones. So I'm just going to grab these. I'm going to press S and Y, and we're going to
go the other way. So I'm going to hide
these out the way. And then I'm going to
grab the next one, L, L and L. Then I'm going
to do is press S and Y. Shrink these in pretty small. And then what we're going
to do is I'm going to press Alternate and you'll end up with a little bit of a
mess like this. Now what we want to do
is you want to come to move each of these in or out. So what do I mean by that? So again, I'm going to come to, let's say this one, this one. Just pick any at random. And then what you're
going to do is press shift space bar, bring you move tall in. I'm going to move them out very, very slightly. Add
them out the way. And then the next
one I'm going to grab a few of these like, so make sure you're on
edge slick when you grab them like so. And I'm going to pull these
back very, very slightly. And then I'm going
to grab some more. And I'm just going to do exactly the same
thing with these. I'm going to pull them
out a little bit, but I don't want
to be influenced by the others that I was doing. So that's why I actually
did them separate like so. All right, let's press Tab. And now you can see we've
got this to work with. You can see that we
do have some problems where ones are touching
and things like that. And this is why we
made more of them. Because now what we
just need to do in is if we press tab Alt H,
bring everything back. What I'm going to do now
is put them all together. If I press L, press three, so I'm looking at the side view. What I can do now is I can jaws pull them together like so. And bear in mind we're not going to have to do this again because we're going to be using
this all around the actual Cabin, so don't worry, you're not going to have to
do this every single time. It's just getting all set up in a way that looks really nice and
you're actually happy with. Now bearing in mind if you
see like two together, you know, make sure that
everything is looking different. We'll have a good look
at that, actually, when we've brought
them all together. But you can see already we
haven't even finished yet. We're starting to get
a lot of variations. So once we actually finish
this, you'll see, oh, wow, that was actually really,
really worth doing. So let's come into this
one. This one here. Just spend a little bit of time getting these right
because we know, as I said, to look really
nice for one thing, and we're going to use this as a base for most of
the other parts. You can actually take this
a step further as well. There's two stages to
taking it further. The first stage I'm going
to show you is where you're randomizing
all of the edges. Then the second stage is actually taking it
through to Z brush or something like that and actually making all the edges
really worn and things. That's what triple
games really do. All right, so we've got
this and you can see that pretty nice already. Now what I want to do
is I just want to make sure that they're not too
thick or anything like that. And I also want to
fit them into here. So what I'm going to do is
I'm going to press three, and then I'm going to press
control or transforms, right clicks, origin geometry, and then and y and just
pull them in a little bit. I'm going to put my x ray on so I can see
whereabouts it is. Press shift space bar, go to move, then
let's pull them in. And Y, I just want to make
sure that the line up really, really nicely against here. They don't have to be
perfectly on there. Just a little bit in because we're going to put
some blocks in there, some wooden blocks going up. All right, let's take off x ray, double tap the A just
to deselect everything. And let's just bring them into place where they're
going to go so we can see now I put those there. They're looking pretty
nice already. All right. So one thing I'm not
happy about is I think at the moment that these are
a little bit too far out, they shouldn't be too far out. As you can see, we've
got some that on and some that are way far out and we don't
really want that. I'm going to come
in and as I say, just spend the time making
sure that this is really nice. I'm going to pull those
out a little bit. Now I can see they're
just slightly over and they're slightly under. And as you can see now,
that looks much better. All right, so the next
thing we want to do, we want to add in a modifier. And we want to add in a modifier because
we want to be vel off the edges of here because
the thing is about wood. It's not going to
be perfectly like a razor blade on
the edges of it. We really need to make sure that it's beveled off
just a slight bit, you know, so it looks like it's got a slight bit of weathering. What'm going to do is
I'm gonna press control. All transforms are right
Clicks at origin geometry. Adding a modifier,
bring in a bevel. Now you'll notice that looks ridiculous what it's
like at the moment. But if we come over and
turn the amount down to zero and get it back to where it was and then turn
this up just one, and you'll see now that
is looking much nicer. Now for me, I still
feel that is too high. So what I'm going to
do is I'm going to come over and I'm going to type my own figure in naught
point N naught three. Enter. And now you can see they are looking
much better now. I'm just looking around
just making sure that yes, so the one thing I'm missing here because I went in modeling. So I think when we, when you start off in your
first open up blender, you can see cavity is on here. So if I go over
here, cavity is on. If I come to modeling
though, cavity is not on. So let's put cavities on. So let's press Tab. And now you can see
they're looking much, much, much better. All right, So the one
thing I'm looking at now is I want to actually make them now
a bit more non uniform. So what I'm going to
do is now I'm going to actually press a sorry, tab A to grab them all. And then what I'm going to do is I'm going to come to Mesh. Come down to where
it says transform. Come down to where
it says randomized. Click that on, and we'll end
up with an absolute mess. But don't worry because down
here on the left hand side, we can actually click this open. And we can actually
bring this down if I set this on
zero to start with, because it does go either way. So it can go this
way or this way. If I set this
though down to zero and then put it up one like, so, you can see now they are
looking much, much nicer. The last thing you want to
do is you can see you've got all of these blocky
parts at the moment. What you want to do now is right click and
shade auto smooth. Now for those you
were using Blender 2.8 you're going to have to
right click, shade smooth. You're then going to go down
to the little triangle. You're going to open
up your normals. And you want to just set this on auto smooth and leave
it at 30 degrees. Now we can see this is
what we've ended up with. Now the one thing I think that I need to just do
before carrying on on the next lesson is just
move these up a little bit closer to each side just so
they look a little bit more. You know, there's
not as massive gap in there as this because again, it wouldn't really be like this. There'd be a little bit closer
together at the moment. The wind would
really howl through there and our guy would
probably freeze to death. Alright everyone, So I hope you enjoyed that and I'll
see you in the next one. Thanks a lot. Bye bye.
9. The Blender Asset Manager: Welcome back everyone to blend. It's on real engine Five, the complete beginners guide, and this is where
we left it off. All right, so as I said, let's come in now
and just make sure these are a little bit
tighter than what they were. So all I'm going to do is
I'm going to press Tab. I'm going to come in with edge select and just grab
an edge like so. And then just move them a little bit up so they're a little
bit closer together. As you can see now, probably the best thing to do is maybe move them all at the
same time. I am not sure. I'm just going to
move them all up, just one by one, get
them next to each other. And you can see as I move
each one of them up, we are going to get a much
bigger gap near the end. It does seem like I said, a lot of work with
this, but as I said, once you've done them all, we're going to use
this for the front and the sides, so we've got them. You can also probably stave this out and use them
in your other bills as well, using the asset manager, which even though we're not
going to be using that, I will show you how to
use that in this course. And it's been upgraded actually a lot since its inception. So it's actually very,
very user friendly now. And it's something
that you should definitely be incorporating
into your work. All right, so I've
brought these up now. Let's have a look at
what that looks like. If there's any massive
gaps down there. Double tap the Just to
have a look. I know. I think that's absolutely fine. The last thing of
course, is I just need to stretch it
out a little bit again and Y pull it out
a little bit like so. All right, so before we
actually move on then, before we actually move on
to putting textures on here, we will play the Asset
Manager short video for you just in case you
want to save out the assets as we move along. As I said in this course,
I'm not going to be saving out the assets
or anything like that, but you might want
to for yourself. And then it makes
it easy just to plot them all in the same, you know, bring
them into blender. Let's say, you know, you
created this wooden wall. You want to bring that
in for another build. Makes it really, really
easy, al right, once. So I'll play that now and I'll see on the next
one. Thanks a lot. Bye bye. Welcome everyone to
the short introduction on the Asset manager
within Blender. Now before we get started, let's take a quick look at what we're actually
trying to achieve here. If you see on the top
left hand side here, I have actually
one called Assets, which we're actually
going to create. If we actually click on that, you'll see it opens
up a new window. And within that window, we have assets on the left
hand side grouped together. Not only do we have assets, we also have actually a
material library as well. We're going to actually
how to actually put these into this group and how blender can
actually find them. But before we do that, let me just show you how
they actually work. Within my stylized assets, I have all of these assets which are from multiple courses, and I can simply drag and drop my asset
actually into place. Now the asset doesn't just
come in with the actual model, it also comes in if I click on my Materials tab with
the actual materials. So I can bring any asset in. And they should come
in nice and flat view into any scene that
you want to create. Now with the actual materials, if I actually just
bring in a cubes, I'm just going to
bring in a cue. I'm going to move it over to the left hand and I'm
going to come over to my stylized materials
and I'm simply going to drag and drop onto actual cube. And there you go. You can
see this one is glass. I've only got on
materials at the moment, so you won't actually see through it or
anything like that. But you can see that we
can just drag and drop materials onto our actual
cube and things like that. You can see that
this one is water. And you can see how easy it is just to drag and drop them on. Now, some of them, depending
on how complex they are, are going to take a
little bit longer, actually, to place on your cube. But apart from that, they
work really, really well. Now, enough for all
that. Let's go back now to a brand new blender
file and I'll show you exactly how we're going to set where we are in our blender,
actual default view. And what I'm going to
do is I'm first of all going to come up to
the right hand side. I'm going to come
across and you'll notice if we come
across the general, we have one that says asset. Now some of you might
not actually have asset, and if you haven't got asset, just click on something like modeling or
click on modeling. And you'll notice
now that we've got another one called Modeling One. And the reason is
of course because we already have one
called modeling. Now if I come and click
double left click on here, let's call this asset. Then what I'm going to do is
I'm going to right click, I'm going to pre order
this to the actual front. We now have asset
layout and modeling. Now at the moment, this is just a copy of my modeling
and I don't really want that. So what I want to
do is I want to come down to the left hand side. As I come to this corner, you'll see this little
kind of cursor appear. And if I left click and
drag from the corner, left click and drag up, you'll now have
actual two windows. Now what you want to
do is you want to come over to where this
actual icon it, see it? Left click it. And over on the right
hand side you'll have one that says
Asset Browser. And there we go. So now we actually have our Asset browser. And now you can click on
this anytime that you want. Now it's important for this
to actually work that. First, I'm going
to press Tab just to get out of my edit view. If I come over to
file and I come down, I want to do is I want
to come to defaults and I want to save it
as a start up file. But you don't probably
want it here. Like looking here in the Assets when you
first open up Blender. If you don't want that,
just come to modeling. And then what you're going
to do is you're going to go to file default, Save start up file. Now every time you
load a blender, you're also going to have
this asset manager in place. Now, how do we make groups? The way we make
new groups is you can see here we can
change this from all you can see it's on
current file and you can see there's also
an unassigned button. Now it's important that we keep that unassigned button there, because many times I've created assets and
I can't find them. And of course they'll
be in the unassigned. Now let's create a new group. So if we create one called
Material Materials like so, and then we know we can place all of our materials
in this one. It's just a little plus to
create a subgroup under all, if you want to subgroups
with under Materials, you just click the plus on the actual materials
and then it'll create a subgroup under this actual materials
as you can see there. All right, you can see there's
also a little star there. That just means that we need
to save this blend file out. Just save your blend
file out if you actually want to save out these materials once you've
actually got them in place. Now how does blend know where to actually look for these assets? Well, what you need to do is
you need to come up to Edit, go down to Preferences. And then what you need
to do is you can see over here where it
says use a library. This is where Blender
needs to actually know where to actually look,
so you can see mine. At the moment, I've
created a desktop icon that's called Blender Asset, and that's where I'm
actually a time blender to actually go and look. Now the thing is any blend
file that you create, just create a copy of
it and actually put it into this new
desktop blend file. It doesn't have to
be on your desktop, but it needs to all be in the
same file to actually work. Once you've actually done that, then we can close that
down or save Preferences, you can also do
it that way down. And now you'll see if I come
down to use the library, you will have a
problem here that we haven't actually got
anything in there. So if we go to Open Preferences, and now we click on this, and now I'm going to
go to my Desktop. And now I'm going to find
my Blender Asset Library, which is this one here. And you can see I've got all of these blend files in there. If I click except
now, close that down. And now when I come and
actually click on my catalog, you can see that I've got all of these actual materials
and things in place. This is why it's
really important that you actually make sure that you actually put
in your blend files into that directory. Now the next thing we
need to discuss is how to actually create
our actual assets. For instance, let's
create material. If I come over to
the right hand side, I'm just going to
create a cube material. Then what I'm going
to do is I'm going to make a base color. Let's just change the
base color to a red. Let's put it on material
so we can see it. And there we go, we
got our cube material. Now what I want to do is
I want to right click. I want to come down
and mark as asset. You'll notice now that it's got these books stacked together. And that basically means
that this has been saved out now as an
actual material. Now of course, this blend file hasn't been saved
out into my assets. All I need to do now
is go to file Save As, and then I'm going to
go to my desktop and come Asset Library,
which is this one. And now I need to save this out as a blend file within here. Then what blender will do is
it will pick up that this is a blend file within that
actual file, this one here. And then you'll actually have
access to this material. Now the next thing you need to do is you need to actually, let's save a Cuba for instance, instead of an actual material, let's save out an object. So all you do is
you write, click, come down to Markets Asset. And again, you'll see
now that we've got those three actual stat
books now because you have actually saved this
blend file out into your asset library every single time now that
we open blender. So if I close this down
and reopen blender, you'll see you can
go to your assets. Now we can see that we can go to our user lib, Open Preferences. And let's find our
actual blend asset, lib. Click except close that
down, and there we go. You can see I've got
all of my assets in. You can even see the ones that
aren't actually assigned. Where you can see
I've got all of these assets in place already. Now, just before we finish up, a couple of things to remember. First of all, when you go
to Edit and Preferences, you will see that this
is normally read, you just have to name it
something so it's not actually red and then you won't have any problems with it. Second thing is that once you've taken the time to actually
create all of your assets, materials and things
like that by right clicking them and markers asset, just remember to save that file out in the actual place
where you save them out. So for me it's my
Blender asset library. If you don't save out
a separate version of blender in there and you
end up overwriting it, then you will lose
all of those assets. Of course, basically
it's a blend file, just with all of your
assets in there. That's all that
should be in there. All right everyone. So I
hope you enjoyed that. A few troubleshooting
problems at the end as well, and as they say
on with the show.
10. Materials & Texture Map Introduction: Welcome back everyone, to
Blane Ton, real engine Five. The complete beginners guide. Now what we're going to be
doing is we're actually now you've learned about
the asset manager. I hope you enjoyed that, I
hope you got a lot out of it, and I really hope they use it in the future 'cause it
really, really is handy. But now what we're
going to learn about is actual textures and materials. And I'm going to actually
play here another video, because the videos that we
set up, they're so good. They set up so well that
it's actually better than me trying to re
record that again and, you know, show it from scratch. But what I'm going to do is
I'm going to play that now. And then on the other side, what we'll do is we'll actually start bringing in
some materials and textures and actually
bring in some light and see what it's actually
going to look like. All right everyone, So
I'll see on the next one. Thanks a lot. Bye bye. Welcome everyone to the short
introduction on importing texture maps and creating
materials within blender. Here we'll be going through
basic material set ups and easy ways to import your texture
maps all within blender. Then we'll be moving
on to an explanation of what maps do and
why they're important. So with all that said,
let's get started. So in this basic scene
that I've set up, you will see that I've got these three objects and
they're all UV unwrapped. So now let's succumb
to our first object. Let's say we've already marked
our seams as you can see. Now let's come up to
edit first of all, and what we're going to bring in is a add on called
Node Wrangler. And this is going to
make it very easy to set up materials
within your scene. So let's come to come
down to preferences, come over to where it
says add ons and then we're going to search
for node N ODE. And you'll see one
called node Grangler. Make sure that's ticked on. And then let's close this down. Now what I want to do is
actually create our material. So if you come over to
the right hand side, you'll see this little
football kind of icon. Let's click on the Plus. And then what that actually does is create a new material, and let's click New
and give it a name. So let's call this Wood. And because I've
already created a ward, it will come up as wood 001. If you've got 001, it will come up as
wood 002 and so on. You'll notice as well
that this has come in as a principle SDF and
this basically is the magical node shader within blender that makes it easy to import all your maps
and things like that. So now we've got this. What
we need to do now is we need to head on over
to our shading panel, which is this put on here. Once in the shading panel
you'll see basic set up, same as what we had in
the modeling panel. And now if I zoom out
of here a little bit, you'll see that we've actually got a basic
set up already. So we've got our
material output. And of course, this is where all the nodes end up in the end. Then we've got our principles, which is what I
told you about is the magic kind of blender node. And if we zoom in a little bit, you'll see we've got all of these things where we
can plug things in, or we can mess around
with these without actually a map plugged in. So now let's come and click
on our principled BSDF. What we're going to press
is Control Shift And, and that then will
open up the file of where you want to
actually find your map. So make sure you store them in a place where you know where
they are, go and find them. And then you should
end up with five maps. Normally it's five maps that
actually you can download. One is the base color, the next one down is metallic, the next one down is roughness, the next one down is height, and then you've
got normal there, normally the basic five maps. So now what we need to do is you need to come to the first one and shift select the bottom one and then that'll
select the mall. And then come over
to where it say it's principal texture set up and click that on. And there you go. They've all actually come
in and you'll notice Blender has automatically
set everything up for us. And this is part of what the
Node Wrangler actually does. Now if we zoom in a little bit so we can
see what we're doing. And now we can
actually go through some of these nodes over here. So let's zoom into here as well. And the first one we've got
is texture coordinates. Basically this node tells blender whereabouts to place
this texture on this object. You notice at the moment it's basically plugged
in from the UV. Now, if we quickly
just go over to the UV and I grab
everything you can see, this is our UV map and this is how basically this texture
is placed on this. For instance, you can see that this one has been turned round. It's going the correct way. Now let's go back over
to our shading panel, and if we plug in the generator instead to the vector,
let it load up. And you'll see now that
blender is trying to generate how this texture is actually going to go onto this object. This is useful when you're creating textures
within blender itself without maps but useless if you're actually
bringing in your own map. So let's put it back on UV. Next one, macross
is called mapping, and this basically is how this texture is mapped
onto this object. So you can see here that
we can actually move the location of our
actual texture, and this basically is kind
of moving the UV map. Now if we come, we can also scale this up as
well as you can see. So you can scale it
smaller and bigger. And it gives you a lot of
control within actually the shader to mess around with the scale
and things like that. Normally I would actually
do this in the UV map, but if there's any small details that I want
to make, you know, a little bit smaller or
something like that, I will do it within the shade. Moving across, you can see that all of these nodes over here, which are our maps, are
plugged into our mapping node. So let's come to the first one. The first one is color and basically down on the
right hand side here, I'm going to be showing you
exactly what they mean. And then if you want
more information, you can go onto the blender
website and find all of the rest of the information out about all of these maps
that we're talking about. So as I say, the first
one is the color, and if we unplug that, it's basically
what we can see is it's just the base color. Now sometimes you'll get colors where they come in with
ambient occlusion. And I'm going to talk about ambient inclusion just
in a few minutes. So if we plug this in, we can see we can
actually alter the color with other nodes that we can
kind of slide into here. So I'm quickly going
to show you that. So if we press shift A, do a search, and we'll
just bring in a gamma, which is just going
to lighten or darken our actual color. Now I've put that in,
then you can see if I bring that down
or bring it up, I can make it much
darker or much lighter. So that's something
that we can actually do and the Node Wrangler enables us to bring in a new node
and just drop it in there. So what I'm going to do
now, I'm just going to delete that and I'm
going to plug that in now to go onto the
next map is metallic, so I'm just going
to head on over. We've actually brought
in a metallic texture. So here we are in
our set up now with our actual metal
texture and material. So if we zoom in now, we can see that we have the next one down which is metallic. And we can see that if we come
and actually unplug that, you'll see that
not a lot happens. And this is because
this metallic is very closely based on the metallic that's already there,
which is zero. It's quite a dull metal. Now if we come in and we
turn up our metallic, you can see that it goes really, really, really metallic like so. And you don't have
to actually use a map to make
something metallic, all you need to do is
turn up this metallic. Now normally when
we're doing things like using this slider
here and no map, either something is metallic, so if I turn this down
or it isn't like, so we don't really
have anything in between when we're not
actually using a map. So if we plug this
back in now to our metallic and let it
load up and there you go. Now the next one
down is roughness. And roughness is basically if you think of a
sheet of glass, when you look at it, it's
not completely see through. You might have certain
scratches on there. You might have
things like smears, hand marks, things like that. And basically that is what
the roughness map does. Basically, the roughness
is determined by this map. So if I unplug this map, you can see we've got
a lot of the kind of shinier parts and
duller parts here. So let's unplug this
and then you'll see that it's all
one kind of shine. You can also see if I
come in and actually turn the roughness
up or turn it down, I can make something like ice or I can make something
very, very dumb. And this is why we use
this map because it gives us a lot of control of how much smearing and things like that and makes it
look a lot more realistic. So now let's move over
back to our wood. And what we'll do
is now we'll come down and look at our normal map. So if I double tap the quickly, that'll just unhighlight this. And then we can just zoom in a little bit and look what
this normal map does. As you can see, the
normal map always plugs into a normal node. And then we can mess
around with the strength. So if I turn this
strength right up, you can see now
we've got a lot more pushing through of that
actual texture now. Just be very careful
when using this node. You can turn it up
too high and it, it won't look very
real in other words. So try and just get
it somewhere where you're really happy with it
and it still looks realistic. For instance, you do get some
wood which looks like this, where it's really kind of
elevated from the base, but I wouldn't go, again
too high with this. Okay. So that's the normal map. And now let's move to
the displacement map. For the displacement map, I'm actually going to bring
in a new material now, so I'll head on
over to that one. So here we are with our
cobblestone texture, which we're going to use for
our displacement example. So what displacement does is it basically gives this texture. It basically pushes it out. It's like using tesselation
as you'll see shortly. But the one thing is if you're using the
displacement map, you really well, you really
need to know two things. First of all, it doesn't
work in EV, second of all, it really needs a
lot more geometry than what you would
normally have here. We've got a flat plane and we can see that they're
slightly pushed up, and you can still see that this is basically a three D texture. So how do we create
displacement on this? First of all, what we're
going to do is we're going to come over to our little spanner. First of all, what
we're going to do, we're actually going to subdivide this a couple of
times. Let's press Tab. And what we're going to do is
right click and subdivide. Click Subdivide. And now what we're going to do is we're going to press Tab. And we're going to
bring in a modifier. And what we've done
now is basically increase the geometry a lot. So let's come over
to add modifier. We're going to come down to,
it says multi resolution. And we're going to subdivide. Subdivide again and
again four times. And if you press
Tab, you'll see that it still actually
looks like this. So you can't really see all
the subdivisions on here. But when we finish this I'll actually apply it and then
you'll ale to see them. Next of all, what we
need to do now is we need to put this on cycle. If we come over here
and we change it from V and we put it on cycles. And then what we can
do is we can come down now to our material, which is this bottom here. Scroll down and you'll see
one where it says settings. And under settings you'll
have one that says Surface. And what you need to
do now is change this, it should say bump only. Change this to
displacement and bump. Once you've done that,
then all you need to do is go to your Cycles shader, which is this put in
here. And there we go. You can see now how actually
realistic that looks. And now you can actually
mess around with these. So we can really, really bump up the scale as you can see. And we can also change
the mid level like so it really push it out or you can really
pull it in as well. Okay, so that's a bit of
an explanation on there. Now as I said, I'll move over
now to the actual spanner. We're a modifiers on press
control A to apply that. I want to press Tab,
and now you can see just how much geometry
that actually took. Now you can get away with a
little bit less geometry. So if I press control Z and just bring it back and just
bring it down one. If I bring this
down one like so. And you can see that it's
still looking quite good. But if we put the viewport
level up a little bit, it's nowhere near
the level of this. If we put it on three press
control, press the tablet. And you can see now there's
not so much geometry, but we're still getting
a pretty decent effect. Okay, the last thing I want to show you is if we come back to our material shader
and we put this back on V. So come to
our computer icon, put it back on EV, and
now we'll just scroll around and zoom in to this wood. Now, what does
ambient occlusion do? So I'll put a brief
explanation down the right hand side of what actually ambient
occlusion is. But we can actually enable it by coming over to our computer, putting this on EV, and you'll have one that says
ambient occlusion. When you click this on, you can see already that we really, really get much more
shading on here, much more realism and
things like that. Now as I said, you can get textures where they have ambient ecclusion
already built in. But I find actually
doing it this way generally gives
you a better result. Now the other thing you can do is you can mess around with the ambient inclusion and
really bring it up or down, mess around with factors
and things like that. And really get kind of
the shadows that you really want on the surface
of the actual object. So that concludes
the material and texture introduction
part of the course. And I hope you all got a
lot out of it and have a much better understanding of maps and materials
within blender. So with that said, let's
get on with the show.
11. Applying Our First Materials: Welcome back everyone to
Blend Tronaral Engine Five. The complete beginners guide. And this is where
we left it off. Now before we move on,
let's actually save it out. So fail save. I haven't saved
it out for a bit, and I didn't want to lose my
work or anything like that. You can see here it says,
Save Viking Hot Course, and I hope you enjoyed the actual materials
and textures guide. And now we're actually going
to put that into practice. But what I'm going
to do first of all, is I'm going to make sure
that everything is unwrapped. Now, of course, everything on here will be
unwrapped, the same. So you can see here, this is
unwrapped, the actual same. So if I grab the next one, you can see they're all
unwrapped exactly the same. That is because we unwrap this one here before
any of the others. So we need to now make sure that everything is
unwrapped, basically. Again, to make sure everything fits in here and
everything looks different. Because at the moment,
they're all going to look the same if they're
unwrapped in this way. So what I'm going to
do is I'm going to, instead of unwrapping
them all again, because what's going to
happen then is it's actually going to unwrap
them and put these, rotate them round in the wrong way that we
don't want them, so we don't really
want to do that. So what I'm going to try and do a hover over my UV map,
I'm going to press A. And what that's going
to do is it's gonna grab every single one of these, even all of these behind. Because at the
moment, all of these are just laid over the
top of each other. So every single one of these beams is laid
over the top of there. So what I'm going
to do now is I'm going to come to UV and then I'm going to come
down to Pack Islands. And what that's going
to do is it's gonna take them all and repack them. If I click this on now, you'll see that you come up
with these options here. Now what you want to
do is you want to make sure rotation is ticked off. If you don't tick that off, what it means is it will rotate these little
top parts on here. And we don't actually
want to do that, so now we're going to do is
I'm going to click okay. And there we go. This is
what you should end up with. Now at the moment, it doesn't
really tell us anything. We haven't got any textures or materials or anything like that, so all we've got now is
a UV map that's open, but if I click on
each one of these, so let's say I pick
this one and grab it. You can see this is
what it looks like. You can also see at the moment that these are going to be way, way too small on the UV map, because our actual textures that we're going to bring in are 2048, 2048 pixels squared. And what that means is that
they're not high resolution, they're not extremely
low, they're not high, they're somewhere in the middle. So we just have to be careful that we don't want
the resolution to drop depending on how
big our UV's are. Let's first of all bring
in the textures and then I'll show you
exactly what I mean. So to do that, the first thing
we're going to do is bring in the node wrangler. So add on pin node
node wrangler. Click that on. Then what we're going to do is
go over to shading. And then what I'm
going to do is now I'm going to come
to my principle. First of all, though, we can see that this is on materials. That's fine actually, or
give us an idea of what it's actually going to
look like before we bring in any lighting. So we'll leave it on there, we're going to do, then
it's going to come over, click on my principal, and first of all, actually
let's name it. So if we bring our
material over, we can see we've got all of these various types
of the material. And what we want is we've got cracked wood,
post, dry wood. Let's have a look at
the cracked wood first. I think this is going to
be the one that it is. If I go to Wood Light, you can see this one here. If open it up, this
is going to be the wood that actually
goes over the top. So the actual roof support that holds the thatchinging
and things like that, that's going to be this wood. So it's going to be
the cracked wood. We've got post dry wood as well. Make sure you don't
use that one. That one, if you open it up, you can see it's got some green moss and
things like that. This is the one that
actually sticks in the water. They go back. And where is it cracked? Dry wood. This is
the one we want, so we're going to
call it cracked wood. I'm going to put crack wood. So now I've eaten 90. What I'm going to
do is I'm going to press control shift Tea. Once I've pressed
the principled, go to my textures crack wood. And then what going to do is I'm going to select all these. So I'm going to select one
shift, select the last one, click on Principled,
and there we go. It's put it on everything which we didn't want by the way, so we don't want to
it on everything. So all I'm going to do, I'm
gonna come to my grade box, I'm just going to
minus this off. So I'm just going to
click minus off like, so I'm glad it didn't
put on my guy as well. All right, so let's come now to this part and we can see
what I'm talking about now. The thing is because
our UV's are so small, you can see we haven't
got a lot of detail. They're a little bit
bleary like on this one, you can see it's a
little bit bleary. That's not something we want. What we want to do is because
this is a seamless texture, we can go to our UV map, we can grab everything, and then what we
can do is we can simply sally or look like. So let's put this on material, so I'm going to
pull this over now. Let's actually discuss these because we haven't
discussed these yet. So we have the first one, which is basically
the C through, which is called wire frame. This shows all the wire frame of the mesh and
things like that, so you can see all of you know, the edge loops and things
that he'll be putting. The next one is going
to be Object Mode, and this is basically just
the outline of your objects, no materials, no lighting,
nothing like that. The next one you're going
to have is Material mode. Now you can actually set this so it actually
shows the lighting, or it can just show your
actual textures and materials, which is all we want to do. And the final one then is either going to be set on EV or cycles. We're going to go
a little bit more into depth from that a
little bit later on, but at the moment you can
see that it's set on EV and it's looking fairly gray. And we can't see
anything because we don't actually have any
lights in the scene. So what we want to do is we want to just set
this on material, we want to get this right first. So now you can see that
we've brought those out. Look at how different
the wood is, and look at how it's not actually a low
resolution anymore. So the difference is if I
bring this all the way in, as you can see now looks
really, really bleary. Now this is really important
because actually we're going to send this through
torn real with these UV maps. So we need to make sure
that whatever we're doing, the UV maps look
really, really nice, and the actual texture on them looks also
really, really nice. Now, one thing I'm
not happy with, as we can see the tops of these, they're actually
going the wrong way. And I actually tried to avoid, let's look at the
ones underneath. They're also going
the wrong way. So the actual ends that wouldn't be going this way, that would be going
the other way. So one win isn't
going to grab them. And I think that they're
all these up here now, to grab all those is
going to be a real pain. So what I'm going to do is
I'm going to grab just these. I'm going to press
the box select, drag them all the way
over there, like so. And then we're going
to press control plus, if I press control plus, now you'll see it grabs
them going all the way up to the ends of these
parts here basically. Now you can press
control minus as well. Let me just show
you how that works. So if I double, I'll
get my words out. If I de select them
all with double, then I grab, let's
say just these. If I press control plus or keep going up all the way
till it gets to the end, you cannot suppress control minus and go backwards as well. If I press control and
just hold the plus. Sure. Let's try that again. Control plus. There you go. We're going all the
way up and then we've got these that aren't
obviously attached. I'm just going to
select all these like so then all
I'm going to do is I'm going to move them
down with just slightly. So just move them
down very slightly. And then I can
select one of these, press B, grab them all like so. And then spin them around. So you don't, because we're
working in two D space here, you don't need to press Y
or X or anything like that, you just rotate them. So R 90 rotate them. And now we can see they're
looking really nice. That's exactly what we want. Okay, so now we can
go back to modeling. And now what we can do is we can press Old Tage, bring
everything back. And we can finally now bring
in some actual lighting, because we're going
to actually do some work on this
material as well. So we brought in some lighting. We can see that we've still got a fair few gaps on the back of it that we
need to actually fix. So you can see, we
can see through there, but we're
going to fix that. Don't worry, we do
need some gaps down. It just depends how much gap you're actually willing
to actually give. What I'll do is I'll bring actually in
some lightning now. So I'm going to put it onto V, so I'm going to select this one. And then what I'm going to do is I'm going to bring
in a light now. So I'm going to
press shift A. I'm going to come down to
where it says light. I'm going to bring in a some. And then one going to do is
I'm going to drag my sun over here. Drag it over here. Now the sun, unlike
other lights, So I'll bring in another
light just to show you. So if I bring in a point light, let's pull this over here. You can see that at the moment, we can't see any light on
there until I get close. Now you can see the
light in there. The actual point light has
a range as most lights do. The only light that
doesn't have well is two actually the only two
lights that don't have a range is sunlight
and moonlight. And that's why they're called infinite light sources because they don't actually have a range light candles or
anything like that. It's just a light
that just carries on and on forever basically. So we want this main light
to actually be shining on our scene and we don't
have to worry how close we're putting the
sun to the actual object. What we do need to worry about is the actual angle of the sun. I'm going to do, I'm going to delete this
light out of the way. I'm going to come
back to my sun. And I'm going to
rotate it so our X. Let's rotate it this way first. And then what we'll do is
we'll also rotate it on the Z. So I'll rotate it this way. And now we have some
really, really, well, not really nice line, but we have some
lighting in there. Now as I say, no matter where
I put this, as you can see, moving it with the G, I'm not really doing
anything to the light. If I put it over here,
it doesn't matter. Because it's basically coming in all the way in this
direction infinitely. So that's something to consider. All right, the next
thing we want to look at then on the next lesson, is we want to have
a look over here. Because we have two render
engines in blender. One of them we should
be using to have a quick look at what our
actual scene looks like. And the second one, we should be looking at what it's
going to look like, more or less when it's
actually rendered out. So we'll go through that on the next lesson.
All right everyone. So I hope you enjoyed that
and I'll see on the next one. Thanks a lot. Bye bye.
12. Creating Unique Shaders: We come back everyone to
blend on real engine five. The complete beginners guide. And this is where we left off. All right, so as I said, the things that we
want to discuss. So B is a real time renderer, so no matter where I look, you can see it's
still rendering. Now if I'm bringing a
new light source as you saw it lit up
at the same time. It's a bit like immaterial mode, but with all the shadows and everything in there
in real time. If I move this guy, you can see everything
moves in real time. It's a bit like working in a Games engine or
something like that. All right, but if we
put it on cycles, we will see that now it takes much longer to actually
render something out. You can see over here
counting up to 1,024 samples. And when it gets,
it's either going to give it so many
seconds or it's just going to render up to 1,024 Now we don't really need this rendering
out to 102041. Thing you should
always put on is D Noise because D Noise
is really going to help you when I turn it round to actually render
it out much, much nicer. Even though you have to
wait a little bit longer, it's up to you whether
you put that on. I've noticed, actually,
in the new blender, this seems to take
longer to render things out than
what it did before, but I think it's rendering
things out nicer. So what I would do is
I would turn this off, get the angle where
you want to do it, turn it on, and then
you're going to have a really nice image of what it's actually
gonna look like. So you can see when
we render this out, this is what this
wood's gonna look like. Really, really nice.
Looks really realistic. If we turn around
here, we can still see now we've got some tiny, tiny little gaps that
we're going to deal with, but we can get a
real good idea of what everything's going to look like and that's
what we're doing. What we're going to do now,
I'm going to put this back onto V just for now. And you'll see a huge difference when we put this back on. As you've seen there,
everything looks much flatter. The reason for that is because we need to click on
some other options. But if we come over
here, first of all, let's click on ambient
occlusion straightaway. Now you can see that
looks much nicer. What it's doing is it's putting things like shadows in
the bottom of here. If take this off,
you'll see that shadow down the bottom of
there disappears as the ticket on and off. This is because
obviously apinclusions, basically adding all of those shadows like at
this point here where you'd have those
little contact shadows between two objects. That's why it looks nicer. The next thing you
can do is you can put the bloom on it should, if you're a bloom
from the light. So if I step this up, look, I'm actually not sure why
there isn't a bloom maybe. Let's just try bringing
in a point light again. Let's see if there we go. So if I click up threshold
down a little bit, now you can see we've
got a little bit of bloom there now. You can see if I
bring this soap, bring it down at that see. Now we've got bloom
from our actual light. If I hide this light
out of the way, you can see now the bloom
is just coming from here. So this is something
else that you can bring in when you're rendering, you know, a foggy scene or a night scene or
something like that. We want to add a little bit
of Bloom into, you know, it's a bit like volume metrics, but an easier way of doing it. All right, so let's
turn off Bloom because we don't want
that out on now. And then what we want
to do is we want to put on screen space reflection. So we want to put
this on and what this is more for
is for our water. So what we want to do is
screen space reflections on turn half straits
off, turn refraction on. You're not going to see
anything right now, but this is great for things
like metal mirrors water, it, we'll just make the
look much more realistic. So we're going to leave that on. All right, so that's
pretty much it for the EV and cycles. We're going to go
more in depth of that as we move
on in the course. A little bit later
on when we come to actually rendering
things out. But for now we've
got a good idea of what everything's
gonna look like. Now let's bring back our son. So we're going to tick
on this little eye over here just to
bring him back. And then what I'm gonna
do is I'm going to let this actual point line because
I don't actually need it. And now you can see it's
looking fairly flat again. The other thing I'm going to do is I'm going to grab my son. I'm going to put it into
my lighting like so. And now everything is in
order and you can see we've got a little bull bike on here just in case
you can't find it. All right, so that's that done. Now what we want to do
is we want to go in and actually change this
wood be cause at the moment I'm not
still happy with it. So what I'm going to do
is I'm going to come over to my shading panel. And then what I'm going to
do now is I'm going to go, but don't let me load it
up on the other side. Then going to do is
I'm going to come over to my materials. So I'm going to click on it.
Come over to my materials, I'm, I'm going to move
this up just a tad. I'm going to move my
material output over here, my principled over here. Now you can see as you saw on the demonstration
that we put to you, I think a couple of lessons ago, what all of these different
texture maps actually mean. You can also see
that they all plug into different things
within the principle. Now the thing is about
blender is you can take a texture that you've
created and really, really change the way it looks
and feels within blender. So you can actually
take, let's say, one type of wood and you could create four or five
different types of wood out of that one texture that look completely
different from each other. So we're going to cover
a little bit of this. So what we're going to do is, first of all, we're going
to bring in a color ram. Now a color ram means you can accentuate like different
parts of color. In other words, white parts on here and the
dark parts on here. We can really bring those out. I'll drop those back.
Let's bring that in first. So while there is
our press shift, bring in a color ramp,
drop that in there. Nothing will happen to start
with or it shouldn't do. It has made it a
little bit lighter. I thought it wouldn't do that. But anyway, I'm going to
bring it up a little bit, so I'm just making actually sure I'm in the
right one. What is this one? This is the base color, that's a metallic. There we go. All right, let's
bring this down. So then what we're
going to do now is we're going to bring
in an RGB curves. So let's press shift
A, RGB curves. Drop that in there. Now let's bring this back a little bit. Not so much. Now we can see just what that
wood looks like. Let's plug this back in and see where it
looks like before. That's what it
looked like before. And now we can see,
if we plug this in, this is what it's going
to look like now. Now, obviously we
haven't grown enough brown actually in there. So what we're going to do is I'm going to now bring
back out that color. So the way I'm going to do this is I'm going to pull
these over here. Now we need to have some way to bring back the color
that we had before. Who actually being
able to change the wood into something that looks a little
bit different? We want it looking
a little bit more weathered as on saying okay, so let's go to shift A, let's come down and
where we've got color, let's bring in one
that says mixed color. Let's bring that in. Let's
set this to overlay. So we'll overlay one on
top of the other like so. And then what we'll do
is we'll plug this one, this one from our
colorram into here. And then we'll replug
in the actual color. So this is here, back into this top
now you can see this one here look like
this to start with. So you can see it looks
a little bit too clean. It doesn't look rough enough
or anything like that. And now I'm going to do is
I'm going to plug this into my base color and we'll end
up with something like that. And as you see as we drag this forwards or backwards,
we have a lot control. Now if I bring this up
and make it much darker, you can see this
is the original. And now what we can do is we
can play around with this and really make it look
much more weathered. So we can play around with this, bring it right back like so. Then we can also play
around with this, making it darker or lighter. Bring it a little bit more out. So this is what we started with and this is
what we've got now. And you can see
they look really, really different
from each other. Now I'm thinking that that might be a little bit too
much on the white, a little bit too much here. So what I'll do is I'll
just bring that back a tad like soap. And now I think that's
looking really, really nice. All right. So I'm
happy with that. Now what we need to
do is we need to, actually we'll save out our wood because we
haven't saved in a while. And then what we're going
to do on the next lesson is we're going to take this
and put it on the other side. And then put it around
the rest of our cabin. Because basically we've
got our main wood now and we can use that
all around the cabin. Alright everyone. So I
hope you enjoyed that and I'll see on the next one.
Thanks a lot. Bye bye.
13. Working with Proportional Editing: Welcome back everyone to
blend to Unreal Engine Five, the complete beginners guide. And this is where
we're left it off. All right, now let's
go back to modeling. Let's have a quick look at
what it's going to look like. So we've got our lighting, let's put it, let's
get a nice shot of it. Let's put it on cycles. And let's see what
that's going to look like when it loads
up. And there you go. You can see it looks much
more hitting to, you know, the kind of Scandinavian
Viking scene, rather than looking
like fresh wood. And it's just been
built or something. All right, so now we've
checked that out. Now what we can do is we can
just go back to object mode. And then what we're
going to do now is I want to put
this into place. I'm going to put it
down into place just so it slots behind this kind
of gray box thing here. All right, so now
I'm going to do is I want to put it on the
other side as well. So I'm going to grab it. I'm going to press shift, I'm going to drag it over. I'm going to press, I'm going
to put my materials on. Just have a look,
because we've got our front and back there. And you'll notice
that the front and the back of the UV's
are gonna be different. So all I need to do now is pull that one into there, like so. And now we need this
one going over here. So shift, let's drag it out. I'm going to press 90, put it into place, let's put something
like that, Okay? And then what I'm going to do is I'm going to actually come in now and just delete some of these planks
that I don't need. So I'm going to press
one on the number pad. I'm going to go
into x rays. X ray. So I can actually see
just through this, we can see it goes up to
here and down up to here. So we'll press L, L, L, L and L, and then delete T. Let's take X ray off. Now we can see that we just need to pull
it back a little bit. S x pull it back a
little bit like so. Okay, then we're going to have a post going up here and here. We're just going to hide
that out of the way. I'm going to pull it
a little bit over, just a tad like so
just to get them nice. And even now what I want to do is I want to put it
on the back as well. So I'm going to do
is presso of D, bring it to the back and you can see all that
works really paid off now because when we put this
on now we've basically got most of our cabin
actually ready to go. Now you can see
all of this now we need to do is basically these top bits and things like that. But you can see it's looking
really, really nice. Now the one thing I
would say is that maybe got a little bit too
dark on the actual wood, but we can actually
mess around with that once we've actually got
everything in place. So what we're going to
do now is we just need a top bit on our cabin as well. You can see we need a
top bit coming up here, but I would say that it's
better to probably build the bottom of the cabin
first, so you know, the kind of beams that go up here and over here
and things like that, rather than focusing on
the top straight away because the top is harder
than the bottom anyway. All right, so let's come
in now and what we'll do is we'll start
building these out. Now, I would say as
well that we'll use the same material but on
the actual sides of it. This is another reason why we probably want to make
these a little bit lighter. These blocks here though, are going to be lighter. We should make those lighter because they're more exposed to the elements rather than
this on the inside. Again, we're going for realism. So things are on the inside,
they don't get cleaned. They, you know, they just
get weathered more and more. Whereas the ones on the outside, they tend to get a lot of sun here in them and so
they lose their color. All right, so what
we're going to do is we're going to bring
in our first blocks. And I'm going to press Shift,
Let's bring in a cube. Then what we'll do is we'll
start with this corner here. I'm going to press, this
is another reason why you want to leave
you guy in there. Because if I bring
him over here, you can see at the moment
that this block would be absolutely massive.
Way, way too big. So I'm going to bring it down, bring it into place, make it smaller, something like that. I think as the main support may be a little bit bigger
there, something like that. Okay. Let's put it down
to the floor then. What we'll do is we'll
grab the top of it. So grab your face.
Let all three. Then what you're going to do is you're going to pull it up. One thing you have to just be careful of is that you're not going to be too far out
as you can see here. This is probably too
far out, you know. Would it really
stick out that far? Maybe not quite that far. So I'm just going
to pull it back in. And then I'm also going
to do the same here. Now the front maybe sticks
out a little bit further, so I'm going to pull it back maybe to something like that. And then finally what
I want to do is I want to pull out these two parts. I want to have a bit of, you know, edging on there
and things like that. So I need to do basically the
same thing as what I did on the other side to make
it look a little bit, you know, rugged and stuff. The one thing is though,
with these posts, they don't want to
be Ben probably as much as these because
they are main supports. So it would be a lot less
obvious is what I'm saying. All right, so the first thing
we'll do is control our. Then bring in some edge loops,
left click, right click. And when I've done it, you can see I've got
seven edge loops. So it's up to you
if you copy or not. Now we've got our edge loops. And what we actually
want to do is we want to pull this out. Now the thing is you can
pull it out based like this. So you can pull them out
going all the way up, or we can do any easier way. What I'm going to do
is I'm going to bring in something called
proportional editing. So I'm going to select this on, make sure that
connected only is on so you're not pulling anything out of any of the
other measures. And now with this on smooth, when I pull this out,
you'll see that it pulls it out in a nice gradual
slope based on this. So you can see it's
pulling this all the way down and it goes like this. Now we don't really want that. What we actually want
to do is we want to pull it out in a much nicer way. So if I put in sharp,
you can see it pulls it out in a
nice nice slope. Now we do have one problem
in that it's pulling it out, but it's pulling
the back of it out. And we don't really want
that. What we want to do is I want to basically grab just this
and pull just this out. So what I'm going to do
is I'm going to come in, grab the top one Basel, top one control,
Select the bottom one, which means it'll select
all of these and then shift H. Shift H will lid everything else except the thing that
you've got selected, which makes H and shift
H really, really handy. Now let's come in, grab
the bottom of this. Let's press one on
the number pad. And now let's pull this out and you'll see we have
a nice slope now, depending on how
big this circle is, That depend on how big
the actual slope is. I'm happy with that.
And I think what I'll also do is
I'll grab the top, and I'll also bring
this out as well, but bring out nowhere near as much, maybe something like that. So it's a little bit bent.
Now we can see we've got a nice bend here, like so. Now if I press all the now
while looking at this, you'll see we've not
actually moved this. Everything stayed flat except
this bill on the outside, which is exactly what we wanted. Now the last of all, we want to also bring them out
this way as well. Again, all I'm going to do
is I'm going to come in, grab the top and troll slick
the bomb shift H on to the side view with three and then I'm going to actually grab the bott first
side view with three, pull them out like so. And then I'm going to go to
the top three, pull them out, bring it in salt H.
And there we go, a really, really
nice support there. All right, so now
what we need to do, we've got everything in
here, we need to come in. Now press control
all transforms, right click, shade,
auto, smooth, because we've got all of these
little lumps down there. And then what we want to do is we want to bring in a bevel, so add modifier, be, turn this all the way down. Turn it up one, and let's
check what this looks like. Now the thing is the
smaller the planks, the less of this bevel effect you're
going to get on there. So you can see it's really
tiny. This should be thicker. But let's come in and
put this on naught point naught naught five and see
what that looks like now. Is that slightly
bigger than there? Yes, it is. So that
looks pretty realistic. Now before we do anything else, what we really want to do is on the next lesson is we want
to mark some semes on this. And then we want
to unwrap it and then make it a little bit
jagged, a little bit. Only a tiny bit. All right everyone, So I hope
you enjoyed that. And I'll see on the next one. Thanks a lot. Bye bye.
14. Working with Mirrors: Welcome back everyone to
planet Nial engine Five. The complete beginners guide. And this is where
we left it off. Alright, so what I
want to do now is we want to mark
the seams on here. Then that'll make it a little
bit easier for us when we actually bring it over and mirror it over the other parts. Now the thing is we are
going to change this wood. So if I put it on material, we are going to change this
wood slightly from this one. I think we'll make it a little bit lighter than
this one actually. But it's up to you at
the end of the day, whether you want to make
it lighter or darker. You can see that this
one already looks nice. But we do need a little
bit of variation in those pieces of wood that are more exposed
to the elements. As I said, if the sun's
hitting it normally, it will end up a little
bit, you know, lighter. But the thing is always
like usual references that I showed you in the
beginning of this course. All right, so let's
get on with that now. So the first thing
we're going to do is I'm going to isolate this out. You can actually isolate it out with question mark as well. So if you just press
question mark, you can see that isolates everything out for you.
Making it really easy. Then to unwrap. Right now what we're going to
do is we're actually going to come in and
I'm going to grab the top and the bottom. I'm going to press
control mark seams and then I'm going to come
round the back of here. And the reason I'm doing
the back of here is this is a place where people
aren't going to see, it's right in the corner there, you know, into the actual wood. So if I click on this
one, press control, click on this one, right
click and mark scene. Now the thing is with wood
because it's all going up. You won't really notice
the semes so much, especially when it's the
corner and things like that. But it's good to get
used to marking Semes where the player or the render is not
actually going to see it. So that's really important. All right, so now
I've done that, what I'm going to do is I'm going to grab the whole thing. I'm going to press and I'm
going to go to unwrap, like so now let's
go to our UV map and we can see that these
are unwrapped, like so. Now, at this point I should
recommend that I actually do use a paid add on to make
this a little bit easier. And I will tell you what it's
called and go through that. I'm not plugging an add
on or anything like that. I'm saying this add on
does make it easier. We're not going to use
it in this course, but I'm saying you might
want to check it out. So the add on is
called UV squares, which can be found on
the blender market. And basically, it's a way to actually straighten
everything up. So you will notice now
this is the add on. If we go back to
the blender scene, go and actually put the add
on on just to show you. So preferences and let's
call it UV squares. So UV squares is the one
that we're looking at. Click that on, and
then what I'm going to do is I'm actually
going to come to this. So if I come to this
one and grab it all the way down to
there and press Olt, and you can see that straightens it up. So
why is that important? Well, first of all, let's
actually bring in some wood and then we can see why this
might be important, especially on top of the Viking cut where
you've got that beautiful, like rounded piece of wood, this makes it a little easier. And I will show
you the other way of how we do this
without actually, you know, using this add on. So let's do both ways. And then you can make a decision whether
you think it's worth investing in something
like that, Dan. All right, so let's
pull this over. Let's go to our material. And what we're going
to do is going to bring in the old
material first. So if I come in, click the down, We can see we've got
crack wood here. Now if we give it that.
And then what we're going to do is want
to click on plus. I want to click New. And then what I want
to do is I want to call this light wood. Then one going to do is I'm
going to copy this one. So I'm going to click
on Copy Material, and then I'm going to click
on Paste Material, like so. Now what's happened
there is you will see that it looks now
exactly the same. If we go over to the shading
panel, which is over here, and now we see we've
got exactly the same set up as what we had
with the other one. Now we want to do is
we actually want to, let's put it on rendered view first as we haven't got
really a lot of sunny here. What I'm going to do
is I'm just going to turn this sun
up a little bit. So I'm going to click on my Sun. So you can see I've
got this line clicked. You can either click
it here or click it into over here in the
scene collections. And what I want to do
is just turn this up. Let's just turn it up to two, and let's make it a little bit brighter just so we can
see what we're doing. All right, let's lay it load up. Let's come back to
our material now. So I'm going to click on
this, click on our Material. And then what we're
going to do now is I'm just going to mess
around with these, just to make it a
little bit lighter. If I come in and I grab
this one and bring it up, if that's actually going
to make it lighter. Let's then the overlay first. I think actually we
haven't actually assigned this save lo have we assigned this slope? Assign
it. There we go. Now it's better
now it's assigned. Okay. We actually just had
to go into object edit mode, select it all, and then
just assign it now. Can actually make it
a little bit light. So now, of course, this
is way, way too light. I'm just going to bring it
back down a little bit. I'm also going to
bring this down. Let's bring it down or
up just to get it in something it wants to be very close to what
you've already got. While looking
slightly different, it's a very hard
thing to get right. But you can see here
if I double tap the Let's have a look at
what this looks like now. I'm just wondering which
way to go with this. I think I'm definitely
going to go lighter. It's just how light
actually want it. Let's just bring back
this one a little bit. Light. So there we go. I think that
actually looks good. Let's bring it down a tad. It wants to be very
subtle like that. I think that's that's going to look about
right. All right. So now we've got that,
let's now go back over to our UV and I'll show
you exactly what it means. So if we come into here, you can see at the
moment the wood, you can see it's actually
bending around here. And this is way more
notable on things like barrels or as I said, the viking top on top of here. Now if we go in though, and come and grab
all of this, both. We grab all of this and press press Alt.
Straighten it all up. Now you can see it
actually looks really, really nice that we've actually
straightened all this up. And that is the reason
why I recommend that. That is one add on that
I would probably use. So let's just go back. So we'll press controls
there. And there you go. Now you can see it's bent back. All right, so as I
say though on this, it's not that notable. But when it comes
to something that's really a lot, it
will be a lot more. All right, so the next thing
that I want to do is I just want to show you how to
do it the other way. So what I'm going to do is I'm going to come back to this. I'm going to come
to face select. I'm going to grab one face, which is near touching
this seam down here. So grab one face like so. And then press L on the
rest of it, like so. And then what you're going to
do is you're going to press U and you're going to
go to light Mac pack. Okay? And then what you're going to do is you're
going to press and you're going to go to follow
active quads L. Okay? And now you're going to
get something like this. Let's spin this round now. So R 90 without
proportional editing on. So R 90, spin it round
and there you go. That is the other
way of doing it. I have no idea why you actually need to light
map pack it first. But if you go to follow
active quads first, it's not actually going to work. Now, the other thing is
we want to basically look to see if this wood looks
good against this wood. So is it too big this
or is it too small? But let's actually
grab the whole thing. So I'm going to press a and
then what I'm going to do is I'm going to make
it smaller like so. And then I'm going to look again and see what that looks like. And I think actually that
is looking pretty nice. Now, the one thing we need to be careful of as we
looked at before, is we don't end up with all
the same kind of thing, you know, points on here. The other thing is as
well, if you move this, so if I press, I can
move it anywhere, but if I press the X
button or the Y button, I can actually move it
along the axis straight. So if I press X, it will
move along this axis, and then I can get to
exactly where I want it. So something like that, I
think looks pretty nice. All right, so now
then the final thing before we actually move this over to the other side is to actually randomize
these parts. So if I go to modeling now, and then what I
going to do is press the question mark again
to bring everything back. Then I'm going to press the tab. And what I'm going to
do now is I'm going to come up to where is it? Let's make sure first of all that we've got
enough to actually vent. I think we have, what I mean is we want to
randomize it like this, but we don't want to
have such a variety because this is a big,
solid piece of wood. And normally on those that, they're slightly bent,
very, very slightly. So let's go up to
mesh transform, and let's come down to where it says randomized
like we did before. And let's just turn
this down to naught first and then turn one. Now let's have a look
at that now, go back. I'm going to double
tap the A as well. You can see now it's slightly bent and that is what
we're looking for. We don't want it to be straight
or anything like that. Let's also as well put
it onto our object mode. Let's have a look on that way. I think that's going
to be absolutely fine. Yeah, I think that's
good to go. All right. Now then what we
want to do is we want to put this ore over here. The easiest way to do that
is by using the mirror. If I grab all of these
basically, and then I press, let's press Shift and cursor
to selected it should, if I press seven to
go over the top, put it right bang in the
center, I'm hoping so. Let's now go to our
actual main support. Let's press control
all transforms. Let's right click
and set the origin, this time to the three D cursor. So basically when I move this, now it should move around there. So let's try our head. And it should, as you can see, it's, it may be a little bit
out, so let's give it a try. First I want to do, to see, I'm going to bring in a mirror and see if
it pops it over there. Let's add, modify it. Bring in a mirror and you can see
it's slightly, slightly out. And what that means is
it means that I need to move it slightly to
actually get them in. Because you can
see that this then is not accurate to these two. So let's grab these two. Let's press shift S now,
so cursor selected. And now let's grab this one. Right click, set origin
to three cursor. And there you go. Now you can
see it's in perfectly so. It's just based on these
and not these other two. Now I want to do is you want to mirror over to the back as well. So what I'm going to do
is I'm this time click, let's try clicking
on the Y like so. And we can see now that that is looking
pretty much perfect. Going all the way up there, it's looking nice at the back. So in other words,
the same length here as the same length here. So I think I'm actually
happy with that. Now what we'll do on
the next lesson is we need to actually move the UVs around a little bit and probably randomize
the other way. So randomize them a little
bit differently from each other because at the moment
they're going to look pretty similar and we
don't really want that. All right everyone. So
I hope you enjoyed that and I'll see on the
next one. Thanks a lot. Bye bye.
15. The Power of Booleans: Welcome back everyone. To
blend on real engine Five, the complete beginners guide. So what we're going to do
now is we've got these, let's apply our mirror. So control the apply mirror. And then what we're
going to do is we're going to split these up because we can work with them
easier if they split up. I mean, you could actually
grab each one of them and do the randomness effect on each one instead, or we
could split them up. I will actually show you
how we split them up. So if you grab all
these and you press, what you need to do is just
press and you're going to separate by loose parts. And then you can see
now that we've actually got these all split up now. We can actually grab all
of these at the same time. Now they're all split up. And then what we can
do is we can actually go into edimototabrab,
everything. And then all I'm going to do now is I'm going to come up to mesh. I'm going to go down to
transform randomize. And then I want to pull this
all the way back to zero. And then what I want to do
is I want to probably go the other way because I don't
want to move in too much. And you can see
now that we've got a slight variation in all of these and they look pretty
different from each other. Maybe that's a
little bit too much. Which means I'm going to
put a minus naught point naught naught, five like so. And then we're going to get not quite so exaggerated variations. All right, so that's that done. Now all that's left to do
is to move the UV's around. Because we can see at
the moment all the UV's are exactly the same. Again, we can grab all
of these now, press tab, grab everything, and then
what we'll do is we'll go to our UV, UV editing. And then what we're
going to do is I'm going to pack islands again. Image sorry. Uv and pack islands
rotation off. Okay, and there we go. Now let's move these around so we can see at the moment
they've packed them like that. I don't think that's
actually very good. So I'm going to bring them out, so I'm going to scale
them up like so. And then I'm going to do is
I'm just going to go around now and look to see if
I'm happy with them. I think pretty much
double tap the A. So yes, I think I'm
happy with those. All right, so that's
that part done. Let's go now back to modeling. Now the thing is
there's a lot of, let's say, boring parts on this. And we want to get those
pretty much out of the way. So we want to keep varying the things that we're
actually doing. So what we're going
to do next is we're going to do a little bit, I think of Boolean. So we're going to, you know, create the door arch
and then we're going to create the windows in here and then we can
build upon that. And I think then we'll
do the floor because the floor is pretty similar
to how we did the walls. So let's keep it varied
a little bit. All right. So the thing is let's first of all think about our windows now. They're not going to be
huge windows actually, they didn't have any
glass in this period, so we need to take
that into account. They're just going to be pretty
small because they don't want anyone climbing
through the windows really, you know, putting hands
in stealing things. So we need to consider that. All right, so what we're
going to do is we're going to bring it in a cube. And we need to think of this as the actual size
of the window. So I'm going to do is I'm
going to make it smaller. I'm also going to
pull it out so and y, let's pull it out a little bit, so let's make it a
little bit smaller. And then what we're going
to do now is we're just going to see how that's
going to fit in. So if I pull it
back now into here, so I'm going to bring my
little guy over here. What this wants to really be at head height, doesn't
want to be down here. So let's put it round
about head height so I can actually look out and
see what's going on. Either across the river or
wherever the environment is. Though this to me, maybe it should be a
little bit longer. So let's press S and Y again. Let's pull it out a
little bit more like so. And I think that's looking
pretty nice at that size. Now I'm going to do is
I'm going to press Shift. I'm going to bring this
one over then to here. And basically I want
two windows on here, or what I need to think about is my supports going down here, You don't want them
too close together, so let's maybe pull
this over here like so. And then you can see that
this one's pretty close to this one and this one's a
little bit further away, giving some variation also, the other thing is you can see now what it would be like if you actually had a game
character that was going to walk into this house. So you can see this is the
sort of scale that we've got. It's very small,
it's very cramped. You would have a
kitchen utilities here, you know, maybe
some stored food. You will have a
chimney around here, and basically then you'll
have some steps leading up to a bed probably over
this part here, you know, because we're going
to have a window there, so that's a good idea to
actually work that out as well. All right, so now let's
think about our door. So the door, let's
bring in another cube. So I'm going to press
shift A, bring in a cube. And then one introduer. I'm just going to pull it out to here. I'm going to pull it in
and X, let's pull it in. Let's press S and Y
and squish it up, because we don't going
to need it that big. And then one introdu,
I'm going to bring my guy out with the door, shift, select both of these, bring him out. And
then one windows. I'm going to press one, I'm going to pull my door down like so we can see now that that is perfectly
in the middle because We brought it in
where our cursor is. Now if yours isn't in the
middle 'cause you moved it, all you need to do is
just press click on UQ, press Shift, and
what you're going to get selection to cursor like so. And now you can bring
it out straight. All right, so now we
have a good idea, if we press one on
the number pad, how big this is going to
be, so let's pull it now. Now the thing is we
want to cut this out. So what we want to make sure is that it is
actually below this. Because it'll be easier to
cut it out if it's like that. All right, so the next
thing is if I put this in, now put it in, the idea here is that
we're going to go all the way through because
we're going to actually, our door is actually going to be inset because it wouldn't have a door where it's just
like stuck on the outside. It just doesn't
look realistic and that is not what it
actually would work like. Okay, so now we've got these, it's time to join all
of these together. Both I grab this and this, press control J to join
everything together. And then what we're going
to do is we're actually going to use a Boolean
operation now. I'll grab this one first
and we'll do them separate. Because they are separate, this is a door, these are windows. So what we'll do is we'll
go to Add Modifier, and then we'll come
down to Boolean. And then what we'll do is it says which is the object.
So what is the object? Well, the objects going to
be this pre soever come in, click on my Cube, and then you'll see we've
actually got a door. Now sometimes for you it might not work out perfect,
Sometimes that happens. And if that is the case, what you need to do is just click on fast and then that will fix any issues that you've got. Once you've got this, then
we can press control, and then we can come to our
cube and just delete this. If I come in and delete this, delete T, there's our doorway. All right, now let's focus
on our actual windows. If we come in and don't
worry, by the way, about the UV's down here
or anything like that, we're not going to see
them anyway because we're going to have some
supports and things. All right. So now let me
show you a different way, another way of
doing it, which you might actually find handier. So what we're going to do
is we're going to go up to Edit mode preferences. And then what we're going
to do is we're going to put in ball B O L. And you'll have
one that comes up that says object all tools, just make sure that's ticked on. And then what you
can do is you can come in and you
can press control. And minus, sorry, we
need two objects. So control, click on
this one control, and then you'll end up
with something like that. And you see here, it says Union, let's press controls and we'll
press control and minus. And then you'll see
it says different. Now obviously this is a better, in a certain way if
I put this on fast. Right now what I can actually do is if I
bring this out now, just the bullion, bring it out. You can see we can
actually bring it out now to where we
actually might want it. So we can also pull it back, pull it down wherever you want. And this is again,
non destructive. So you can really now put
loads of bullions in and see exactly what you're doing before actually
applying the billion. Now I'm going to keep that like that and I think this is the best way
actually of doing it. It's better to, you see
both ways of doing it. All right. So what I'm going to do is
I'm going to come over here. I'm going to press control.
Now the one problem is that when I've got
this bullion now, I don't know how to
actually bring it back. So it looks to me like this
is how it's going to stay. Now, I don't know how
to bring that back. That's the only
downside of this. For those of you out
there that know this, maybe you can put them in
the comments on the course. All right, so let's
be that out the way. And now what we're going to
do is we've got our door, we've got our windows. And I think on the next lesson, it's time just to lay out our platform where the guy
is going to be walking on. Alright everyone, so
hope you enjoyed that. And I'll see on the next one. Thanks a lot. Bye bye.
16. Creating the Base: Welcome back everyone to
Blane Ron, real engine five. The complete beginners guide and this is where we left the. All right, so let's now just
close that up a minute. Let's come to our gray box
and bring back our grade box. Let's put it on object mode so we can
see what we're doing. And now let's have a final
look at our actual gray box. Now I want to split
our gray box up. So I want this piece here
to be split from here, because I want to be able to see what I'm actually
doing properly. So what I'm going to do
is I'm going to press Tab to go into edit mode. I'm going to click on
my Plane Selection, and then that's split off now. All right, now what
I can do is I can hide the rest of
my gray box away, and I should be left with
something like this. Now, before I carry on,
I just want to check and make one last time certain. I'm actually happy with
this because I think this part here is not
actually wide enough. I think I need it a
little bit wider. And the reason is, I think
actually looking now, when we've got this
oil built out, it's not quite wide enough. So what I'm going to do
is I'm going to come in, I'm going to grab this part
here with edge select. I'm going to pull
it out slightly. And then I'm going to come
to this part here and I'm going to pull this
out more like so. And the reason I'm doing that is because actually
this part here is going to have a support on for the actual boat where they're going to tie a rope off. He also needs to
walk down here with, you know, fishing crates
and things like that. So he's going to need a little
bit of room down there, so why not make it a little
bit bigger while we can? All right, so now let's think about how we're going
to actually create all of these planks running down here and all of them
running down here. Now it's really up to you
which way you go with this. So you can have planks
running all the way sideways. So if I put on my grease pencil, you can have planks running
this way down here. And it wouldn't
be sophisticated. We're going to have planks
running down this way as well as you can see like. So now the thing is it wouldn't
be sophisticated where we've got some corner pieces in here or anything like that. What it would be is if
I just remove this, so I can come up here and click, let's click the IF
we'll click a new one. And then what we'll do is
we'll just draw it again. But what I want to do instead
is either draw it going down all the way to this way and then the
others going back this way. Or we do it the other way,
where these are going all the way up and then this
is going back that way. Either way, that's the way
we need to do it rather than any diagonal things
or anything like that. Okay, so now we've got the
idea of what we're going to do is I'm going to bring
it down this way first. So I'm just going to
pull it out a little, slight bit more and I think
I'm happy with this one. And then what we're going to
do is we're going to bring in an edge loop. So I'm
going to press control. Bring in an edge
loop, Left click, and this time we're
not going to right click to drop it into place, we're just going to
move it over so that it's just behind those
piece of wood in there. So then what we're
going to do is we're going to press control
the other way. We're going to bring it over, so it's in there. So now the thing
is you've got to remember that we're going to
have a door on this part. So actually, probably better off bringing it all the way back to where our door is actually
going to go into, which will be somewhere
around here, I would imagine. Okay, so now we've got that. We've got these two pieces. So if I come in and I grab
this with the face leg, this one and this one. So what I can do is
I can actually press P selection and split
everything off like, so making it a little
bit easier to work with. Now it's up to you
whether you want to put some wood actually in here. Because the thing is
underneath our actual model, we're going to actually have
some wood in here as well, so we might as well
actually do it all. What I'm gonna do is I'm
going to press Shift and H. So shift H split
everything off like, so now let's actually bring in some actual
wooden pots then. So what I'm going to do is I
need to split it off again. So I'm going to grab this one. And this one, I'm going
to press P selection. So there we go. This is what we've got now. Now the thing is, at the moment, if I click on this one,
this one should be fine. We can put some actual
planks going across. So I'm going to press control. Bring it up a little bit. So left click, right
click, like so. And then what we're
going to do now, I'm going to come to this one. Now if I bring in
an edge loop now. So control, you'll see it only goes up to this point here. So actually what
we're better off doing is rapping
the whole thing, so all of the islands with L.
And then press and delete. And we're going to click
Dissolve Edges like so. And then that's going to
get rid of that line there. And now I can press control and bring them all up like so. Now the thing is as well that I need to make
sure that I've got both of them selected to make
sure, as you can see here, that these planks of wood here are not the
same size as these. So I need to go back
and go back to this. Before I added them,
click on this one, click on this one to make sure
this is the selected one. Tab control. And now I'm just going
to line them up, making sure that they're around the same size as this one here. And they want to be quite thick because they're holding
a lot of weight. These things. All right? Something like that
I think is good. Now finally, we want
some more planks now, which are going to go this way. They're going to be long planks, but you're not going
to be able to really see them, so that's fine. So what we're going to
do is we're going to come to this part here. I'm going to press Tab.
I'm going to press control and bring
them up like so. Left click, right click,
and there you go. Now you can see
pretty much we've got all of our planks of wood. Now the thing is, are
these going to be more uniform then the
actual planks are, you know, Holt, I think these ones can be a
little bit more uniform. But these ones here, I'm going
to do what we did before, where we actually
split them up and then move them along
as we did before. So let's do that now so we know the length that
they're going to come to. First of all though, let's
focus on these ones. A we're going to do with these
ones is we're right click. I'm going to mark a
seam so that we've got our seam now to
split them all up. Then I'm going to
add some edge loops. So left click, right click. And then what I'm
going to do now is I'm going to split
all of these up. So I'm going to do is I'm
going to come in face select. I'm going to press L
on every other one. L, L, L. And then I'm
going to press Y. And what Y is going to
do is it's actually going to split them
all up like so. All right, now
they're all split up. Now we just need to
randomize these ones here. So all I'm going to do
is I'm going to come in and I'm going to grab
the remaining ones with L. So and then I'm going
to extrude them down. Pull them all down like so now they look
like planks of wood. And then what I'm
going to do now is I'm going to devil them off. So I'm going to press
Tab, grab these ones. I'm going to press
control all transforms, right clicks at
origin to geometry. And then what I'm going to do
now is I just need to make sure I know that when anyone
wrap these at the moment, that we will have a problem
in that we've marked a seam. But the seam unfortunately has gone through as
we extruded them. So what I want to do
is I want to press control and clear that seam, because I want them going all
the way around basically. And the seam will be on here. And then what I want
to do is I want to come to each of the ends now. So I'm going to actually
hide this first. So shift H, hide
everything else. And then what I'm going
to do now is I'm going to mark a seam down
each of these. If I come in and
grab each of these, unfortunately because
we split them all up, we'll have to just go
down each individual one. There is no way of
grabbing all of these. Well, there is actually, but it'll be quicker just
to do it like this. And then we're going to do
is press control and mark. All right, now we've got
seams marked here and here, so all of those are
pretty much done. So now I can do is I can come in control or transforms
right click, set origin to geometry. And then we're going to
bring in a Bevel modifier. Bring it all the way down, bring it up a tad. So just make sure you're
happy with these corners. I think I am. I'm
happy with those. Then what I want to
do now is I want to actually randomize
them a little bit. And maybe possibly
make them a little bit smaller and a little bit
bigger or something like that. So let's have a look first, see if I need to do that. I will actually do that. What
we'll do is we'll come in, we'll grab a couple of these. L, L, I'm going to press
and X, bring those in. Then what I'm going to do is I'm going to grab a couple more. So I'm going to press and
X and bring those out. And then I'll grab just a couple more like this one and this one. And I'm going to press and X
and make those pretty thin. So now I'm just going to
fit them all together. So I'm just going
to go over the top, just making sure everything
is fitting together. So all I'm going to do
is I'm just going to grab all of these
up to this point. I'm going to move them over
and then I'm going to just work my way along as we did
before Moving them along, I'm trying to keep them in line with this one here
because I know this is the right size so I can
move this one long. And then I'm just going to have a look at what they look like. They're looking pretty nice, But you can see we've got
a really tiny gap here. Let's see, Move this one across. You can see also that
it's actually in there. That looks pretty good. I'm just wondering now
about these ones on here, which I need to sort out. This one here, I'm going to
make a little bit smaller and x' going to move
it over to here. Then I'm going to do
is grab this one, move them both over to here. And I'm going to insert
another small one. But what I'm going to
do is I'm going to make this one a little
bit thinner and X, bring it over, holding shift and then this
one, bring it over. And then I'm going to
make a small piece here, L, let's look, L 50, bring it over into here. And then and X make
it pretty small. And we can see there, I
grabbed another bit here. I'm going to come
to that L on that, delete, this is what
you should end up with, something like this, which
is looking pretty nice. Now, the last thing
I want to do is we want to bring some of
these back a little bit. What I'm going to do is I'm
going to come in with Select. And I'm going to
grab just a couple of these and pull them back. Bring one out, maybe bring
one back just to make them a little bit
uneven. There we go. Now let's randomize everything.
A to grab everything. Mesh, transform, randomize,
Let's bring it down to zero. Let's work our way up one. Actually one look at 22
might be way too much, so we're going to
put it on one, I think one is going to do it. And then finally right click
and shade. Auto, smooth. And let's press al tage.
Bring everything back. Let's, we'll hide our
gray box over here. So let's hide that out the
way. So, and there we go. We can see what
we've got. So why I did that is because in there, the door is probably
going to be around here. So we've got these planks of wood actually showing through. And that is exactly
what we want to have. Now the other thing
is, because we've got already these
planks of wood, we could actually
use these as well. Now, how do we do that? So
if I grab this one here, I'm going to press shift, I'm going to bring it out then. And then what I'm going
to do is spin this round, so R 180. Spin it round, and
let's pull this back so we'll fit it
nicely into place. Pull it back a bit. And then I'm going to do
now is I'm just going to come to this pine here. So I want to click on this part. So I'm just going to put on, if I can actually
grab this in here, I don't actually
think I can see that. There we go. I'm going to
delete this, actually. Yeah, I'm going to
delete this out the way. So let's delete it. Let's put it back
onto object mode now. And then what I'm
going to do now is I'm going to cut these away. So I'm going to go over the top. And I'm hoping that then
I can pull them out, you know, make them
a little bit uneven. So what I'm going to do now
is I'm going to come in, I'm going to press the tab. I'm going to make sure
everything's selected with a. And then what we're
going to do is going to come to mesh bisect. And we're going to grab
it from here like so, and cut it down there. Now at the moment we can see
that it's at a slight angle, but if we come over here, we can see that this top one
where it says naught point, naught 12 whenever
you've got one. That's like a little
bit off number, so you can see it's minus one, that's fine, it's this one here. If you put that to zero, you'll see it straightens
the whole thing up. Then what you're going
to do is you're going to clear the inner or the outer. In this case it's
going to be the outer. And finally, we can actually
move around as well. As we do this, we can fill the actual gaps like so sometimes it does
this, I'm not sure. Sometimes it doesn't
fill them correctly. If this happens, basically take off fill because it's
not actually worth it. What it's done there is
it's actually bisected and I'm hoping that it's not
actually join them together. That's why I'm not going
to fill it because it'll make more of a job
for us later on, but I'm going to
leave it like that. The other thing is
what you can do is you can also move this now. So you can see
we've actually got control of moving
these out the way. So I'm going to put it
just there like so. Now finally let's come
in now and what we can do is we can actually
fill all of these faces in. The way to do that is I'm
going to grab everything. So I'm going to come
to mesh, cleanup. And then what we're
going to do is we're going to fill holes. So press Tab. There we go, Beautiful Wood. Okay, so now we need to
randomize these a little bit. So the way that I'm going to do this is I'm going to
come first of all, grab the ends. Just the ends. And we're going to do
this a couple of ways. So first of all I'm going to come to proportional editing. And then what I'm going
to do is I'm going to put this on random. And now when I pull these out, you'll see it pulls them
out very randomly, like so. So you can see we
go over the top. Sure. Is it actually doing that? There we go. It's not actually doing what I actually wanted. So scrap that we're not going to do that. We're going
to put them back. And we're going to
do this manually. So we're going to grab this one. I'm going to pull
it there, there. And what I will do
though is I'll think, I'll use the
proportional editing to get some random
rotation out of this. Let's look at that. That's
looking pretty nice. Now let's come down
and I'll see if I can actually rotate
it on the z axis. So let's turn that on seven
to go over the top And Z, you can see it's trying to rotate the whole thing and
we don't really want that. We want them nice and straight. We don't really want
too much of a rotation. Let's look at what
actually looks like. You know, that's not
actually too bad at all. Al right, we've run over a
little bit on this lesson. So on the next lesson,
what we'll do then is we'll just make
sure these are okay. And then what we'll
do is we'll actually start on this one.
Alright everyone. So I hope you enjoyed that, and I'll see you
on the next one. Thanks a lot. Bye bye.
17. Linking Object Data: Welcome back
everyone. To blend to Unreal Engine Five of the
complete beginners guide, and this is where we left off. All right, so we've
got these here, we've got them hopefully
all unwrapped on this end. We just need to make sure that they're unwrapped
on this end now. So all I'm going to
do is we're going to come in and I'm going
to grab each of these like just on the ends I'm going to press
Controlle and Marcos Al. Right, there we go. Now
let's bring these over. So going do is we're
gonna press 50. I'm going to spin them around, so 97 to go over the top. And now want to actually fit
those going down to here. And I also want to make sure they're a little bit
thinner than this, so we can see here,
this is what we've got. We want to make sure that
they're actually in there, so they're actually in here. I'm going to actually look
at where this goes up to, so I'm going to want them coming in round about to here anyway. So I'm going to do
is delete this. I'm going to delete this
out the way I think what I'll do first is
I'll squish these down. So I'm going to press S and X. Just squish them down a little
bit. Move them into place. Then S and X squish
them down a little bit. Move them into place like so. And then finally
pull them out and X pull them out a little bit. I'm going to put them against
this here as you can see. And X pulled them out. I think that's going to be okay. All right, so now what we can do is we can delete
this bit other way. So just delete and then we can move them down now
all the way to here. Now you will notice
that there's no way you can tell that these
are the same of these. But if I actually bring these over and put
those next to here, you will probably
be able to tell. So what I'm going to do
is going to press shift, I'm going to bring these over, so I'm going to Pm right
to the end of here, so it's just supporting
this part here. And then what I'm going to do is I'm going to need another one. Now you can see that this
one, they look similar. Actually, they don't
actually look that similar. But I think what I will do is I will mirror them
the other way. So let's see if I can do that. So what I want to do is I want to mirror going
the other way, and then alter
these a little bit. What I'll do is
I'll come to where is it object transform? And where's my mirror?
There it is, mirror. And we're going to
mirror them, I think. Let's try the X
that mirrored it. Okay? No, we can see
that's the wrong one, so it's going to be
the y, because you can see that this one and this
one now look the same. I'm going to go over
the top again and we're going to go to object, mirror. And we're going to
mirror them on the Y. A. There we go. That's
what I actually wanted. So now I'm going to pull
them back into place, so get them leveled up. And then I'm going
to put probably just one I'm still looking
to see. Is that okay? I think yeah. Yeah,
They're actually Okay. I'll make that one a little bit smaller and add in another one. Okay. So let's do that
little bit of work. So what I'm going to do
is I'm going to come in, grab the whole thing
with L and rands and Y, make them a little
bit smaller over, and then bring in one
more, so shift D, put that one in the middle, and then Y a little bit smaller. There we go. Now the last
thing we need to do is pull these out and rotate them a little bit
like we did before. I'm just going to pull this
back in, pull this one out. I'm going to actually do this, get some randomness in there. And then the final on, pull
it out to T. There we go. All right, let's double tap the, let's have a look
what that looks like. Fantastic. Okay, so
that's that part done. Now let's think about the
color scheme for these parts. Should they be the same as,
you know, the other parts? I think they should probably be the same as the
supports here, so I think these should be
the same color as those here. So what we'll do
is we'll come in, we'll do this one first. So we'll do this one, we'll go to edit mode A to
grab everything, and then and unwrap. Let's have a look
what that looks like. And then what I'll do is I'll
also bring in a material. So I'll bring in the same
material as this one. So if we want these to
be the same material, all we need to do is grab
all of these like so. And then we can
grab this one next. Because whatever one
you grab in last, that is the one which will take all of the
information from. So grab this one,
press control L, And then what we want to
do is link materials. And there we go. Now we can
see the materials down here. They look really, really nice. We haven't unwrapped
these ones yet, so let's come to this one A. Let's grab everything on wrap. Let's come to this
one, tab A U on wrap, and finally, this
one tab A U on wrap. And there we go. That is
what we're left with. Now the one thing
I'm looking at is I just have a look at
this and just make sure. So light cracked wood. It's got two on there. And unfortunately
what it's done is it's took this wood and
that's what it's made into. So we don't want
that. So I'm going to do is just going
to minus off this. And then it'll
lighten it all up. And then we'll have
a clear distinction between we double tap the, this wood and this wood. And now you can see just
how nice that looks. Now what we want to do
is we just want to go in and make sure
that we've not got any blurry wood or anything like that that is looking
really cool. All right, there we go. Now the last thing I
want to do actually, is just make sure all of these
are going the right way. So they're all going
the right way. All of these are going
the right way as well. So yes, that's perfect. These are going the right way. Yeah, that's looking
really, really nice. Okay, so the next thing is
that we need to bring in, we want to bring in
some steps basically, so we might as well
actually finish that off. So what I'm saying
is we might as well bring in our stone
floor down here. And we also might as
well bring in our steps, which is going to be over here. So we might as well do all that. Now first of all, what I'm going to do is I'm
going to bring in a cube. So shift date, let's
bring in a cube. And then what I'm going
to do is bring it down. So I just want to measure out now where it's
actually going to come to it. Because it should be probably to the start of this window, So it wants to be enough out where we can actually get
some nice supports in. So if we press three, you
can see that this here, we need some really big actual, you know, supports to come here and support
the end of the house. So you don't want to go
too far is my point. We also want to bring this
all the way back as well. So that's the first
thing we'll do. We'll grab this, press three on the number pad and
pull it all the way back. And then what we'll do
now is go to the front. And then what we
want to do is want to grab it all and I'm going to pull it all the
way over to here. The last thing is I
can see that I've actually not pulled
these out far enough. You can see here
that this piece of wood should be out
all the way to here. Shouldn't just be half of
it in and half of it off. Let me fix that now. So what I'm going to do is I'm going
to grab both of these. I'm going to, let me just
grab, let's say this one. So I'm going to make
sure I'm select, I'm going to grab this one. I'm going to press shift D. I'm going to pull it out here. And then all I'm going
to do is shrink it down and X pull it down. And then just put that into
place. And there we go. Now let's do the same thing
with one of these L shift. Bring it out, and let's
put that into place. All right, now it looks like it's actually being supported, albeit apart from probably
these parts on the back. So let's actually
fix that as well. So all I'm going to
do to do that is I'm just going to grab
each of these. Then what I'm going to do
is I'm going to pull them out with proportional it. Let's put it on smooth
though not random. Smooth, sorry. Let's
go over the top. Let's put x ray on
and let's pull it out all the way out,
let's say here. All right, and the
last thing I think then is just to make this
one a little bit thinner. So if I come in now,
this one with L, then press and X
without proportion, it's non again and x, bring it in, pull it over, and just making sure that it fits now beautifully in there. Now, we can already see on here, these are all randomized
as well, so that's good. Let's have a final look
round and we can see, yes, that's looking pretty nice. The one thing I
just want to check, yeah, these are nice and tight. Are they too tight up
against each other? Should there be a little
bit of more of a gap? Let's have a look.
If I press and Y, when I look, if I
pull these back, yours to Tad, is that
going to look any better? Yeah, I think that looks better. So perfect. Everything's looking
really nice. Okay, so let's now
pull this up to here, so just not quite to the
end, maybe to there. Something like that.
And then what we'll do now is we'll pull it all
the way over to here. So if I press Tab,
come in to face, like grab this face, pull it
all the way over like so. And now find that
we need our steps. Now the thing is with the steps, so we can see, actually
before we do that, we need to measure out
and see if this is, you know, in the water enough. And I think it's going to be
too big if I pick this up, it should just sit on here and come near enough
to the top of the window. I think actually
that's about right, actually, if you're
measuring it, just measure it from
there going up and maybe just to the top
of the window there. That should be absolutely fine. That then should be
enough where we can get our water in the bottom of here, lapping up against here. And give us enough for
the steps going down. Okay, Now let's bring in
our guy and pull him over. What we need to do
now is we need to work out how far this should come out on this end for the steps and how
big it should be. The thing is probably
we go over the top, make sure you've got your
cube selected over the top. Let's put it onto x ray, not that one x ray. Let's put it on. There we go. Now if I press
Tab, press control should be able to bring
it out probably to there. I think you can see that
if I bring it there, he's going to have this
to actually step on. If I turn him this
way, looks 90. Should be able to walk the
end and then walk out. If I now go back to my cube
seven to go over the top, we can see can actually come here and turn around
and walk out. Is that going to be big enough? Maybe it's a little bit, just a tiny bit too small. So what I'm going to do is I'm just going to grab all this, it, if you haven't got to grab, just press Alt Shift
and click on it. And then what you're
going to do is seven. Go over the top and try and line it up with these
pieces of wood. So I'm just going to pull
it out to there maybe. Yeah. And I think that's going
to be a little bit better. Okay, so now finally we
need to bring him over. Then I said -90 or you
can just press Alt. That'll spin him back round. And then I'll come
back to my cube. And what I want to do
is now pull this out. So I'm going to grab this seven, I'm going to press key
and I'm going to pull it out. But let's say here. And now he stairs are going to go down here. Is
that far enough out? Maybe a little bit further
and that looks perfect. All right, let's turn off x ray and let's come
back to our model. Yeah, I think that's
looking very nice. So on the next
lesson, what we'll do is we'll get the material onto the actual stone here. And then what we
can do is we can start actually carrying on with the windows now because
we've got a lot of the boring parts out of the way. And it's not so much tedious where we're actually making
just plan after plant. Alright everyone. So I hope you enjoyed that and I'll
see on the next one. Thanks a lot. Bye bye.
18. Working with Subdivision: Welcome back everyone
to Blane Ton, real engine Five, The
complete beginners guide. And this is where we left off. All right, so now
let's come in and actually think about
our stonewall. Now the thing is with the stone, we're not going to
need to worry too much about this stone on top because that's actually
going to be hidden. What we need to
worry about is the stonewall coming round here. Also, we want to give this a
little bit of a variation. What I'm going to do is
I'm going to grab this, I'm going to press
control or transforms. And then what I'm
going to do now is I'm going to actually
subdivide this. So I'm going to subdivide
it just to give me a little bit of leeway of making it you stand
out a little bit, a little bit uneven because
we don't want it to even. So what I'm going to do
is I'm going to come over to add, modify it. I recommend when you're doing
anything with sculpting, which we'll be doing a
little bit later on. Let's use the multi resolution. When we're doing
anything that's simple, like this wall or something, let's use the
subdivision surface. So let's use
subdivision surface. Let's put it on
simple because we don't actually want
to change the shape. And then what we'll do is
we'll turn up the subdivision. So if I turn up this now something like five and
then I press control A, you'll see now we've got
loads of subdivisions now. Just be careful that
you don't go too far. Because at the
moment we can see, if I go in here, it's got 5,000 5,000 vertices, 14,000 triangles,
which is quite high. So I don't think
we need that much. So let's go back and
what we'll do is before we actually
commit to this, we'll turn this down
to four press control. And now we can see
that we've got a lot less to actually work with. Now the other thing
is before I do that, what I want to do
is I want to go back again before I
actually commit to this, and I want to mark
some semes out. So what I'm going to do
is I'm going to come in, I'm going to actually
highlight this with the question mark like so. And then I'm going
to come round, get rid of all of these. Not get rid of them, but
actually select them. And then what I'm going to
do is I'm going to mark a seam on the right click mame. Then I want a seam right here in the middle where
no one's going to see it. Right click mark, same The thing is now this is
going to be quite long, but this part here
is actually going to be into the actual ground. We're not going to
actually see this, so we can actually
work around that. So I'm going to grab this one. This one right click,
Maxine. All right. Now what I can do is if I come in and I apply my subdivision, so control a apply our
subdivision and there we go. We've got all our seams
marked and it saved does a lot of work that Okay,
So now we've got that. Let's actually come
in and make add in a bevel first of all,
so add modifier. Let's first of all reset
our transformations. Control all transforms,
right plate start, origin, geometry, add modifier. Let's bring in the bevel,
turn that bevel down. It's way too high so
let's turn it up by one, just making these
edges a little bit less, you know, shop. And then what we'll do is we'll press Tab to grab everything. And we're going to
come in and add in our friend the randomizer. And we're going to
turn that all the way down like so maybe look at that. Let's right click and
shade auto, smooth. Yeah. And I think
that's going to be enough to actually
get away with. Okay, so we've got that now. Now let's think next about
adding in our material. So what we're going
to do is we're going to come to material, we're going to click new. And I'm going to put it on, I think it's called Stone Wall. So here we are. And we
can see the one that's called stone wall and we've
got one called stone. I think I'm going to
use the stonewall. The stone Yeah, it's
just basic stone. We're going to use
that for the outside. The one we want is this
one which is stone wall. And if I zoom into this, we can see but all of these beautiful
stonework. All right. Let's put that down and then I'm going to do is
I'm going to put it as stone wall. All right? And then what I'm
going to do is, well, first of all we're
going to unwrap this. I'm going to press Tab. You unwrap. And then what' going to do now? I'm going to go to
my shading panel. And hopefully, yeah, there we go, we grow
our lighting in. And then one going to
do is I'm going to come to my principled control shifting and I'm going to bring in my stone wall, which
is this one here. Grab all five of these. We've got an occlusion in there, don't worry about that.
We won't be using it. Just grab them all though. It will bring it in. You just won't know what to do with it. So now you can see
it's brought it in, but hey, what do we do with
it? We don't need that. And the reason is,
there's two ways of we will discuss
this in a bit. But the reason why
we're not using it now is when you use V, you can get ambient
occlusion in with just a tick as we
showed you earlier. But you can also do
ambient occlusion in cycles with an
actual texture, so this texture will actually give you some
ambient occlusion. Unfortunately, I don't feel
like it's as useful as doing the ambient occlusion in the actual compositing
because it will be based then on real
world lighting. So. I'm going to show you how to
do that, but at the moment, don't use ambient occlusion
in your actual material, so I'm going to leave that
out of the way like so. And we should now
be left with this. And then what I'm going
to do now is just work on the actual color of
this actual stone wall. So the first thing I'm going
to bring in is a RGB curve. So let's bring in an RGB curve. So RGB curves, I'm going
to drop that in there. And then all I'm going to do is I'm going to turn this down now. So I'm going to turn this down, well, like that over. Look because it is
wet to remember. So we need it to be a little bit kind of moist
and darker like, so. All right, that's looking good. The only thing is,
at the moment, I feel like this stone work
is a little bit too big. And I'm also looking
at this stone, This looks the wrong
way round to me. So what we need to do is we
need to go into UV editing, we need to put this onto
material which it's on. And then what we can
do now is we can do a little bit of work on here. So let's come in and let's
see exactly what's going on. I'm not going to worry
about the top and bottom. What I want to worry about is just the sides
going around here. So I'm going to come in, I'm
going to press L on here. And there we can see
this is how it looks. That is going the
right way around. Now this one here probably
is going this way. Let's have a look.
And there we go. So 90 round and now you'll
see it looks better already. And then we'll come
round to the back, which I think we'll be going
the wrong way as well. 90. Spin it round
and there we go, making sure this one looks good. This one looks good. And now I'm going to do it
and I'm just going to grab all of these
side pieces like so. And I'm going to make
them a little bit bigger, so I'm going to press
a in the UV map. Let's bring them out. There we go there looking
much, much nicer. Now, it's up to you
how you balance these. Do you want these right up to here so you can see these here. Do you want them
right up to here? So it looks like a section
being supported there. I think actually this
looks pretty nice already. Yeah, I think I'm
happy with this. I'm just looking if there's
any repeat on there. I don't really see any. So yeah, that's looking good. All right, so let's go
back to modeling now. Let's press the little question marks, bring everything back. And then what we're going
to do now is we're just going to check it on our render. We're going to pull out
a little bit, go round, double tap the A,
let it load up. Also, if these lines again in the way of you seeing what
it actually looks like, just click off these
two interlocking balls and then it'll just hide
them out of the way. Got a thing that's looking
really, really nice. All right, so what
we'll do then on the next lesson is we'll start
getting these supports in. This is the main boring
part out of the way, we'll start getting
these supports in. And then I think what we'll
do is we'll actually, we'll probably then work on
the bottom of this, you know, the steps and the supports before actually
attacking the roof. Because the roof,
what we're going to do is get the windows
in the doors, all of the supports
in the roofs are much harder to do than
the rest of this build. And I wanted to have a nice linear kind of learning process. All right, everyone.
So I hope you enjoyed that and I'll
see on the next one. Thanks a lot. Bye bye.
19. Creating Realism Within Our Model: Welcome back everyone to
Blend Unreal Engine Five, the complete beginners guide. And this is where we left off. All right, let's actually click on both of our
interlocking circles. Let's put this on Material mode. And then what we'll
do now is we'll bring in another cube shift, a cube, press the
S, shrink it down. What we're going to do is
we're just going to put a top on here, just so we have
something to work up to. We're going to put
a top on here, we're going to pull it
all the way to this end. Then what we basically want
to do is I want to make sure this is sticking out very
slightly over this side. If I come down, I can see
if I go over the top, we've got our main support here, so we want it coming up
to our main support. Press seven again over the top. So I'll just want
it just lining up. You can see that's
the main support. This is a bit that
comes out a little bit, then I'm going to pull it back, make sure it's all level. And then finally, what
I want to do now is press the dot boton to Doom in. And I want it all to measure up. So what I'm going
to do is I'm going to pull this down a little bit. Pull it to the
side a little bit. So then I'm just going to
pull it out a little bit, just so it's going
to stick out there. And then what I'm going
to do is I'm going to bring it back all the way then to here so it
sits nicely on there. Now the thing is just make sure it's actually sat on there. We don't want any
gaps. As you can see, there's a little
bit of a gap there, so I'm going to hold shift, pull it down just so it's
actually sat on there like so. All right, now what I
want to do is I want to put this on the other side. So what I'm going to
do is I'm going to press control all transforms. And then I'm going
to actually send it to the cursor which is there. So right click the origin to three D cursor if your
cursor is not there, if you've moved it, just
grab both of these. Set the cursor there again or you can grab your floor
and set it there up to you. And then I'm going
to do, now we're going to do a little
bit of work on here. So the first thing as we've
done all the way through, we're going to first of
all mark our seams out. So shift select both of the front and back press
control mark seam. And then we're going to do
is I'm going to come in, took this part down here, this is the least part
where everyone's going to see right click mark Sem. Now I want to do is
I want to actually give it a little bit of
variation down there. So I'm going to press control. Bring in some edge loops, left click, right click. I've got eight edge loops in mine up to you for
you do that many. And then we're going to do
is, I'm going to press Tab. I'm gonna come over
and add in a Bevel. I'm going to turn a
Bevel all the way down up just a little bit. Put it on an object
mode and just make sure that the bevel
is lighting up with these. As you can see, these
are a bit too much, so let's put it on
No 0.5 like so. And now they're more
in line with these. Now what I'm going to
do is I'm going to mirror it over to
the other side. So I'm going to add in a mirror over the
other side, like, so make sure that
it lines up like this one does and that's
looking pretty good. And then I'm going to
apply the mirror because I want to have variations
on each of these. So let's apply it. I don't want the variations on this
transferring to this one. So I'm going to press control A over and over my mirror
and object mode. And then finally
what I'm going to do now is I'm just going to bring in a randomized, so mesh transform random. Let's put it here enough. 0.1 again, let's
have a look at that. Maybe that's not quite
enough, maybe it is. You've got a little
bit of variation. Let's try nought 0.2 instead
I'm going to do it again. Mesh transform nought to.
Let's have a look at that. Yeah, I think that's
looking a bit better. Let's right click and
shade auto smooth. Yes, I think I'm
happy with that. All right, finally what I'm going to do is I'm going to pull this part out so I don't want them exactly the same length. I'm going to pull this one out, I'm going to grab it,
put it out a little bit. So, all right, there we go. Now we have something to wit with what we can
actually do now, is we can actually use this to create more supports on
each of these windows. What I'm going to do
is, again, I'm going to press Shift a Cube, bring it out, press the S bar, I'm going to press the S bar. So then what I'm going
to do is I'm going to actually pull this out and Y, so I'm going to drop
it then into place. So this is going to be basically one of the main supports
for the window, which means that it
needs to come down from the floor just touching
those floor parts there, and then come all the way
up into this part here. Now we can see that it needs to also go all the way through the back but
not coming over here. This is just in
case you want to do an inside of your own
cabin just like that. Now the support is going
all the way through. The other thing is if
I put this onto x ray, we can see that it's
way, way over here. Made the window
much, much smaller. So I actually want to grab
it here. Just pull it back. The window like so. And then finally I
want to probably, I don't want it sticking
out quite so much, so I want to pull it
back a little bit. And now I'm looking at it,
is I don't really want it. I think I want it a little bit thinner than
these ones here. What I'm going to do is
some just I'm gonna pull it back a little bit like so. All right. Now we've got that. What we can do with
this is we can basically pretty
much use this all around the sides of the cabin
and on the back as well. So once we've made it,
we can use it a lot. In other words is
what I'm saying. So let's actually grab this now. Press the question mark, just to isolate everything out. And then what I'm going to do is I'm going to actually come in, mark my seams again,
control mark seams. And then I'm going
to mark a seam on the inside of it here
where no one can see it. Right click, Sam, add insumentlopsleft.
Click right click. So bring in a bevel. But first of all, make sure to reset your transformations. So right click the origin to geometry and let's add in
a bevel. Let's turn it down. Let's turn it up one, let's press a little
question mark just to make sure you can
see again too much. So we'll pre on not 0.5 That
is looking pretty good now. Before I go any further. No, actually I'll unwrap
them all at the same time. Now, it's just a question of
putting these all in place. If I come to it, press A to grab it all,
and then press shift D, it means I can just
drag them over, put them in place, and then
we'll do the next one shift. Just wondering whether
to turn on x ray, press three, so I can see
where this window is I think. I don't want, you can see
there. It's way, way over. So I am going to go into this board a little dip and
then I'll do the next one. Turn off my x ray. And let's have a quick look
at that. Press tab. Yeah, and that's
looking pretty nice. Okay, now let's
have a look where else on my tab in I'm
going to need these. Well, probably
going to need some back here to actually
build up this part. I think what I'll do
is I'll actually use this one L. I'm going to press
seven to go over the top. I'm going to bring
it into place. Then I press one. Now I should be able
to, should be in the shift, bring it over. Then what I want to think is, are those in enough? In other words, if we
bring our guy here, press one again, the archways, the door is going
to be in there. So in this part here, probably I can get away with bringing them
in a little bit. So if I grab this one first, bring it in just to touch,
then bring this one in. Just grab this one. Bring it in. Just a touch, press
one. Let's have a look. Just making sure now that
they're around the same, which they are now
finally we can work. So we're going to
go that far back. He's going to be sleeping
here, so there's enough room. Just make sure that when
we put our chimney in that he's probably going
to be roundabout here. And then some logs may
be stacked top here. That's what I would say
would be the best thing. Maybe in here can hang up. You know, his coat or
things like that over here. So I'm also, you know, thinking of okay, where is
everything going to be? Are these too far
forward, for instance? I think they are a little bit, so I'll grab both of them
and just pull them in. Yours, the tab like soap. Now let's grab this one. And then what we're going
to do is we're going to now do the other
side of the cabin. So I'm thinking that we should put maybe three
supports over here. So I'll grab this one.
I'm going to press shift, I'm going to grab it,
put it over here. See, for some reason I
did that drop down and I don't want that it just there. And one going to do is I'm
going to pull it over here. And then shift D, we'll
put this one here. And then Shift, put
this one maybe here. And then one to do.
I'm going to press shift D and I'm going to
bring one to the back. But it's going to go
sideways, not this way. So I'm going to bring
it to the back. I'm going to spin
it around, Y 90. Now if you press control
three, it will go to the back. Control one it will
go to the back. Then I'm going to pull it
out and X pull it out. It will be in front of them
because we need to rotate it, I think. Let's put it back. Let's rotate it, Y X 90. Let's slot that into place, making sure it comes
through all of this wood holding shift
right up to that part. And that part making
sure it slots in again, just in case you actually have a character who's going
to come in this cabin. Okay, that's looking
pretty nice. Now we might as well, while we've got all these, actually actually do
this and this part here. So let's do the back first. While I've got it, I
might as well use it. Shift D, bring it up this time now I'm
going to spin it round, R, Y, X 90. Let's spin it around, let's
pull it up a little bit more and then making sure that it slots right
down on top of those, So we don't want any gaps. As you can see, there's
a little bit of a gap. And then what I'm going to
do now is I'm going to press seven to go up to the
top and bring it in, and X bring it in. The reason I'm doing
that is because we want it touching these parts here. We want to see basically a
little bit of a gap down here. Not that much, but a little bit. So I'm going to pull
it out very slowly. So now it's looking like it's actually fitting into
place. All right. So now I want to do, want to bring this part round
to the front as well. So what I'm going to do is
I'm going to grab this one, bring it onto the front, and then I'm going
to pull it back into place or do I want
to put it Yeah. I think actually I'm going to put it just
in front of these. I'm going to pull
this just in front. Yeah. And the thing,
that's going to look a little bit better. All right. Now we've done that, Let's
just pull this part out so we can finish this or grab it all the way over there out and we'll pull it out
a little bit more. And there we go Now everything's fitting
together properly. And also it's based on realism. You can see it's looking
pretty realistic. That one thing is
that this probably shouldn't be all the way
into there. Let's fix that. I'm going to come
in, grab this one X, pull in, It's touching
there, Is this one touching. That's a look,
let's pull it over. It's a long way in. I'm
going to pull it there. S and X holding shift. Move it over.
Holding shift again. S and X may be maybe there. Let's have a look. Yes, that
looks much, much better. All right, so that's
looking good now. We've got our bevalon, we've
got everything done in here, except we haven't
done the randomized. So let's grab them all,
because we did them all together because we
duplicate them in edit mode, which means now we can come to mesh and come to transform, randomize them a little bit and turn this
all the way down. So we're happy with
it. So even naught point one's probably going
to be a bit better tab, right click, shade,
auto, smooth. And now we can actually join the material with this one here. So if I put it on material, I can actually
grab all of these. So including these as well, because they should
all be unwrapped. Let's grab this one, control L, and then we're going
to link materials. Now if we go back to here
now you can see again, I need to take off
this material piece. I'm going to turn off
crack wood, take it off. And then what I'm going to do is I'm going to grab both of these again and see we've also not all wrapped, which I
thought there would be. And we're going to
minus off this. And then I'm going to
do the same with this. Minus it off. All right, now let's some do them all. So if I press a I'm
wrap wrap like so. And then I'm going to do
the same with the UV Rap. So now there is
also something that at the moment this is
a massive plank award. Should it be a massive
plank award? Probably not. So what I'm going
to do is I'm going to split this up as well. I'm going to split
it up the easy way. So I'm going to come
to the back of here, come to the back of here, select them, Control,
plus going all the way up, round about there. Then what' going to do
is I'm going to press Y. Split them off. Press just to move them and then
if you right click, it'll drop them back in place. Press A to grab everything. And then what you're going to do is you're going to go to mesh, clean up, fill holes. And hopefully now we should have a little tiny bit of a
gap there which we have. Now what we can do is we can just pull those
back a little bit. If I press Tab again, x ray mode, grab this
control just once. Now what you should be able
to do is just pull it back a little bit and you
should have a nice gap in there. Same with this one. Then Tab, grab this control and then pull it back your a little bit. So there we go. Now we've got a broken piece
of wood which actually looks a lot more realistic
than it did before. All right. I'm happy with that. Now the next thing we
need to do is just make sure that this wood is looking
not to low resolution. You can see here, High
resolution. High resolution. Low resolution.
Let's sort this out. First, I'm going
to grab them all. Go to UV editing. I'm going to press
to zoom into it. And then one going to
do is I'm going to come over to my UV map A to select everything,
to pull it all out. There we go. All right everyone. So what we'll do then on the
next lesson is we'll make sure that these are also
not low resolution. And then I think we'll make a start finishing these windows. Al right, everyone.
Hope you enjoy that. See on the next one.
Thanks a lot. Bye bye.
20. Optimizing Meshes: Welcome back everyone to
blend on real engine Five, the complete beginners guide. And this is where
we left it off now. I think before we carry on, let's actually grab these again. Let's pull them out a little
bit more because I feel like they're still a little
bit low on the resolution. Now they look better if we're
looking at this to this. Now let's come to these ones. Grab everything A to
grab everything and then pull them out like so. And now they're looking similar to the resolution
of the other parts. Double tap the A,
and there we go, we've got clear distinction
between everything. And it's looking really, really nice now, just making
sure everything's okay. All right, so we're not
going to worry about the Boto bits because the
bottom bits actually have a little couple of pieces of wood that are going to go
down and support those. Now I think before we
actually start the windows, let's get this part
in here though. This part in here, pretty
much, exactly the same way. So what I'm going to do is
I'm going to bring in a cube. Shift a cube. Let's
bring it over. Because you've been,
Matt, by the way. You need to press
shift space bar again to bring in the move tool. Let's bring it over, press
the S. I'm thinking that we will then this round
an easier way. Let's just get it
into place first. And we're just
going to press, we don't want it as
big as this one, we want it a little bit smaller. I'm going to do is just
get it in position first. I'm going to put it
down to the flow post. Definitely want to be
down on the floor. All of the posts do these bits here don't need to
be quite so low. Then let's bring it up. Now if I bring it up,
shift spacebar move, let's bring it up to the top where it's going to
slide in like so. And then what I'm
going to do now is add in some edge loop control. Make sure there's one
in the middle on these. So you can see now I've
got one in the center because I'm going to actually
use that to bend this. What I'm going to do now is just going to come in, first of all, grab this one all the
way down to this one, shift H, hide everything else. And then I'm going
to grab that center one and just work one up. And then we're going to
do proportional editing on and we'll put it on. Maybe shop. Let's do shop. Let's press one on
the number pad. You should just be
able to see that line. If you can't see the line, it might be better
if you put it on. I'm thinking, I'm wondering whether just to isolate it away. Yeah, I think I'll do that. So what I'll do is
I'll press Shift. Isolate everything
out of the way. Now, press Tab, and
there's my line. So now I can actually work with that going at the moment like this. I'm not
happy with that. So I'm going to try
coming round and putting it on there and I'm going
to try bending this in. Not happy with that either. I don't think that's a
little bit too much, it's not quite what
I'm looking for. So I'm going to change, I want to change it to sphere. Let's try that. Bring it in. Yes, that might be bare. That is bare. I'm happy
with how that looks. The shape of that
is really nice. Now let's press Olah. And you can see that's
all being kept the same. That's exactly what I wanted. Press tab, bring
everything back durable. Tap the A. Put it
onto object mode. Yes, there we go.
That's exactly what I'm looking for.
Something like that. Now we've got our gray box in the way. Let's
hide that other way. And then what I'm going
to do now, I need to mirror this over
to the other side. I'm just going to
make sure first of all that things like
this aren't happening. So you can see it over there. You can see that it needs
pulling up a little bit. It is out far enough,
so that's good. So it just needs to be
a little bit taller. So what I'm going
to do is I'm just going to grab the top of this. I'm going to press
tab x ray, select. Grab the top of this one
on the number pad and just bring it up very slightly as a microproportionalitings on. For this I'm going
to turn it off now. Now I'm going to do
this, I'm going to press control all transforms, right click to origin
pre de cursor. Let's turn off the x ray. And then what I'm going to do now is I'm just going to go to modeling just so I can actually put this
over with the other side. Let's come in, add a modifier. I'm going to add in a mirror. Then what I'm going to do is
I'm going to add in a bevel, so I'm going to turn it down. And it's probably
going to be on not 0.5 Let's put it on
object mode so I can see. Let's turn off x ray. So yes, that's looking
absolutely fine. All right, so let's
apply the mirror. Not the devil control,
in fact. No, we won't. We'll actually shift H, isolate everything,
and I'll just actually mark a seam
in the control. You can see now as well that this workflow is really fast, so you should be able to
speed up your workflow now by doing these actual
operations in this set order. All right, we've got that there. Right click, shade,
auto, smooth. Let's supply now
our mirror control. Let's go in with a. Let's come over to mesh
transform, randomize. Turn it down 0.1 0.1 down 0.1
Let's have a look at that. Yeah, and that's
looking pretty fine. Now what I'll do
is we'll just go back and bring everything back. So I'll teach at my
gray box once more. Yeah, I'm thinking that
looks pretty good. So now all I need
to do is I need to actually apply this
material the same as this. So I'm going to grab this one. This one, press control L, and we're going to
link materials. And then I'm going to
come to this one tab, you unwrap, and there we go. That's looking pretty
good without really doing anything to it all looking
different as well. So really happy with that. Now I'm just looking
at this one, making sure I'm happy with that. Okay, everything's done there. Now let's think about
bringing in our window, something a little
bit different. Okay, so first of all, we need a plank of wood. So same as what we've been
doing all the way along. We have got a bevel on here, so you could probably just the windows get away
with just stealing this one. So I'm going to press L
Shift, bring it over. Yeah, we'll actually focus more now on taking things
we've already built. It's going to make it much
easier in the long run. Okay, so we've got this,
let's press to separate it, let's grab it now, press
control all transforms, right, the origin geometry, rotate it x 90. Press three on the number pad, and what we're going to do
is make it much smaller. Try slot it in there. Now one thing I can
see I've missed. I haven't missed. I've
probably just moved it. I'm going to just
slot that into there. I'm going to make it
a little bit bigger. Said the other thing is I need to make sure it goes all the way
through the window. You can see that
ledge is nice there. Just the back of it
that I need to do. So I'm going to grab
this one. This one. Pull it all the way
back into there, making sure it doesn't go past this point here
so I can pull it back. Jost a little bit more then. One way to do now,
because I missed this, is I need to move this
over to this side. I'm going to grab just
this one here, 50. Put it into place, There we go. There is our windows. And then what I'm
going to do is because obviously this is
the same as this, so I'm going to grab this, I'm going to go to
the UV editing, and then I'm just
going to press a and just to move them
back to modeling, and now it's going to look
completely different. Maybe that looks a little
bit too crazy actually. Let's actually go back
to UV editing and let's put this on material so we can
see what we're doing and not have
that craziness. I'm going to grab it,
press, there we go. That's looking bad, okay? All right, let's go
back to modeling. And now what we're
going to do is we're going to grab this one, press A, I'm going to
move it up shift D, move it up into there. And then I'm looking
at how much space I've got between the window. And I think actually that's
a pretty good space. Okay, now we need to
bring these over to here. So I'm going to press
shift D, Bring them over. There we go now, because we don't need
the inside of these. So if I grab both of
these, press control J, the inside of these, if a
press shift H is not needed. So all of these are not needed. Now honestly send
it into unreal, It ain't going to make a big
difference leaving these on. But sometimes if you're
making, for instance, a mobile game or a VR game, you need to be really careful about how many
polygons you have, but mainly how much UV space
you're actually wasting. Because even though these
are seamless textures, this is still costing data processing
power because they actually have a polygon and more than that they
have an actual texture. Because what we're
finding nowadays actually with the games engines, is the textures
and the materials that are really costing. As far as performance goes,
performance heavy games, it's normally because
not of the polygons, it's normally because of
the textures and materials. Now I know you know you've
got anite in real engine, but it can only do so much and it's mainly
there for polygons, not textures, so we just have
to take that into account. The way you should
do is anything where it's not actually
going to be showing, in other words, where
no one can see it. Just make sure that you're
cleaning them up and you're not actually keeping
like these polygons in place. Well, let's press delete on these polygons, leave
them out the way. We should be left with
something like that. And then what I'm going to
do is I'm just going to grab them all and I'm going
to re unwrap them. So unwrap and then I'm going
to go into UV editing. And what I'm going to do
is I'm going to press tab, old tage, bring everything back. And I just want
to make sure that they're in line with
the rest of the bill, which I think they are. Okay. Now let's go
back to modeling. And what we'll do
is we'll create the little windows in here. First of all, though,
before doing that, I just want to make sure that they don't look all the same. So what I'm going
to do is I'm just going to turn the
randomness on once more, so I'm going to grab them
all with a. I'm then going to go to Mesh
Transform Randomize. Then just turn it
back the other way, so minus n 0.1
something like that. And now this should
look a bit different. All right, now that's done. Let's think about then we need a plane in
the back of here, because this is going
to be our window. And then we need some
messing in there as well. Let's do the plane
first because then we can see where our messing
is going to go up to. What I'm going to do to
do the plane is I'm going to grab this here. And this one here, I'm going to press to join them all up. And what I'm going to do is
I'm just going to take this, press the Y button,
split it off. There we go. There's
our actual plane. And now we need to do is just make it a little bit bigger. And you'll notice we have
got an issue with this. Let's have a look at this
issue is let's pull this out. And I think it's
just that we've got more than one kind of base on here or it's because
it's non maniform. Either way, let's clear it up. Let's come in and put
it in limited dissolve. There we go, cleared it up, straighten it all
up and now we can just put it back into place. Now I should be able to use this one over the
other side as well. I'm just making sure
if I go onto x ray, it's all in there so you
can see it's in the wood. Both. And it's in here. So we're not going
to have any gaps. So what I want to do now is just put it over
the other side. So shift, bring it
over this side, put it into place, and there
we go. Alright everyone. So now let's bring these round. Let's press the tab. Double
tap the A. There we go. Alright. The next one then what we should do is we should get our little windows in here. And then I think what
we'll do from there is we'll work actually
on this door. And then we'll be moving on probably to the
supports down here. And then finally the roof. Alrightveryone. So hope
you enjoyed that and I'll see on the
next one. Oh yes. Before we go, let's actually save our work so
we don't lose it. Alright everyone.
Thanks lot. Bye bye.
21. What Are Normals: Welcome back everyone. To
blend to under a engine five. The complete beginners guide. Now let's do our actual window. So what we're going to
do is we're going to, first of all, bring
in another cube. So I'm going to press Shift
Day, Bring in a cube. Also, there is something that you should
know at the moment. Our cube comes in at 2 meters. Now if you want to
bring in a cube, and it'll be much
smaller than that, so let's say you want
cube to come in size, instead you can bring in, it'll always come that size. Now if I delete this
pressure day, bring in Q. We'll see it comes
in at that size. So it just makes it a little bit easier to work with sometimes. Now let's make it smaller. Let's bring it up
into the center up here, make it even smaller. Make sure that when
you're putting it in place that it's going
to be in both sides. So in other words,
front and back, Just in case you know you're doing the
inside of it as well. Let's then I think
make it a tad smaller, so make it a tad
smaller like so. And then let's pull it out. And Y again, we're not going
to need the sides of it, but we are going to put it
all the way into place. So if I press three, I can see it's way
over this side. So I'm sure going to
straighten up a little bit. Probably going to make
it a little bit smaller. Sorry, it still looks a
little bit too thick. So let's press, make it
thinner and y pull it out. Put it into place, so making sure it's going
through front and back. And that looks absolutely back. Now let's spin this round. But before we do that, we may as well mark all our
seams and things. So shift H. Now on this one we're not going
to need these ends. So we're going to
come in straight away and just delete
those ends out. Delete pass. What we're going to do is mark
a same straight down here. So we don't have any infinite loops or
anything like that. Contro mark seam. Now let's add in
some edge loops. So control left click, right click, tab Ltge. Bring everything back. Hide
my gray box out of the way. And this is what we
should be left with. Now let's press Shift. Let's rotate it
around, so r x 90. Let's make it smaller on the z, Z, bring it all the way down. And then what we want
to do now is we want to shrink this
down a little bit. So I'm going to press, shrink it down so it looks as though
it's fitting in there. I want to make sure
it's still at the back. And then what I
want to do is press and Z and just pull
it up into place. So now let's pull it over here. And then what we're
going to do is we're going to add in a modifier. We're going to
bring in an array. We're going to set
the array to zero on the X and move the Y up, not the y, sorry,
the z cross like so. And the reason why it's,
by the way the z should be up is because I didn't reset
the actual transformations. If a press control
all transforms, you'll see now the
z is down there, right clicks the
origin to geometry. Let's set the z to zero now. And then it should be the y. So let's move them across, making sure they're
evenly spread out, or are they evenly spread out? Now the other little
trick you can do if you move the array when
you're in object mode, you'll see we can
move it like that. But what you can also
do is you can go into edit mode, grab it, and when you move it now, or move something of it, it'll actually move them all together. Let's move that. And
you'll also see that the orientation
stays where it is. If I move this in object mode, the orientation moves with it. As you can see, sometimes
that's actually handy to know. All right, so now
we've got that, it's handy to know because you might want to rotate something around a orientation once you've actually
moved the array out. So it's handy for things
like staircases or, you know, where you've got
a circular kind of array. Okay, so now let's think about joining all of
this up, I think. So we'll join it all up. Control, sorry, control
J. Join them all up. And I forgot. Now there is
another way, by the way, of applying all of the
modifiers at once. So if you've got
loads and loads of objects and you're not sure
which one's got modifiers on, then what you can do is
you can come to object, come down to convert, and just convert to mesh. And now you'll notice
when I press control J, that actual array
has been applied. So we've got no array
on on modifiers now. Okay, so now we've done that. Let's go in and add in a bevel and let's
put it on object. I'll just look and
see what I'm doing. And you can see here the bevel, it's hardly anything
that I don', well, I do know why
it's doing that. It's doing that
because I need to reset all the transforms again. So control right clicks,
origin to geometry, turn this down zero,
turn it up one, turn it down, so not point
naught three. Let's try. And that's actually looking
pretty nice like that. Now we need to make sure that all these are bent a little bit. So I'm going to do is I'm
going to grab all of them. Come to mesh. Come down and where is it
to transform and randomize, turn all of these
down, not point n one. And you can see it's
way, way too much. So let's put it on
0.3 Is that there? Yes, that's much better. All right, so now
I'm going to do, is going to right click,
shade, auto, smooth. Then I'm going to move them
over to the other side. Now I don't want them
looking obviously the same. I don't want them
looking like that. So what I'm going to try and do is just mirror them
on the other side. Let's have a lock at where
the orientation is first. If I press a x, it's going to be
on the local axis. Let's go to object
mirror x, local axis. There we go. Now they should look different to the
other ones, right? Let's join these both together. Now, control J. Join them both together. Tab. Now we're going
to unwrap them, Wrap, let's put it on material. We haven't assigned it
a material yet now. The material on these ones is
going to be my Wood light, though I think I can
bring that one in. Let's go to Materials Light and let me see if this is
the material I want to use. So I'm going to go to shading. Then what I'm going to
do now is I'm going to come to my principal ship. I'm going to go back
and we got a light. So we've got a wood
light here, grab, grab, all of these will tap the. We can see that we do have some issues
with the lighting here. It shouldn't look like that. Now, this can sometimes happen that we're
going to go back. We can see the look
fine, like this. Actually the wood
looks really nice. But when we go to
this for some reason, shut and look like this,
Sometimes this does happen. Now let's think
about fixing that. The first thing you can do
is you can check these. So what you can do is
you can come and see if the normals are facing
the correct way. The normals is basically which way the texture is pointing. So textures point either
outwards or the point inwards, if they're pointing inwards. When you bring into
a Games engine, you'll end up with invisibility and you'll be able
to see through it. If they're pointing outwards, then it will render
to the camera. So that's what that
actually means. Now if we come down and
we put face orientation, you can see that on this one the face orientation
is completely wrong. In fact, anything with red, we want to be changing that. What I'm going to do,
I'm going to grab everything with B. I'm
going to then press Tab. I'm going to press A
to grab L of the mesh, press shift, and that's then he's going to
spin most of it round. Now the problem you'll have is, for instance, these, you can see we've still
got issues here. Sometimes we actually
have to go in and do it manually,
which we can do. But let's come to this
and what we'll do is we'll grab this one. And this one I'm going
to press shift N, sorry. Pressing the wrong one, shift. And then what we're going
to do is turn around to the inside. There we go. Now let's come to this one. I'm going to grab this,
just this one gift. Bend them around to the
inside. And there we go. Now let's turn off
base orientation off. And then what we're going
to do is come to rendering. And now we can see these
are absolutely right. Now, generally this I think
has happened because of the fact that we've
actually mirrored this on the other way. That's basically why
this has happened. If sometimes this does happen, just try grabbing yours, this. Don't control, click this, Try pulling it out a
little bit and see if that fixes it. That's not fixed it. So what we're going to
do is we're going to go to Material Material. And what I'm going to do is I'm going to rotate this round now. So I'm going to grab
it all our dead 180. Spin it round now. Let's see if that's
fixed. It, there we go. All fixed. Now if you've got a problem
with the back of it, you know if the back of it, if it's in the cabin, just replace the mesh. In other words, come in, Delete this mesh so you can
grab it from here. Control click to here. Then what you're going
to do is delete bases. Now what you're going to
do is you can't fill it. It's not that simple. Shift click, shift click. And all you're going
to do is right click and come down
and you'll have one that says bridge
edge loops. There we go. Now if I turn this round, let's see if it's
actually works. So we're going to press A, sorry, we're not
going to press A, we're going to grab this 180. Let's see if that's
actually fixed. I'm really hoping it
has. No, it's not. Let's grab them all. Let's actually unwrap them A. Grab them all. Unwrap. Let's
have a what they look like. Now. We've got a
problem where they both actually look in that way. And that's not why I wanted
I'm going to actually go back and I'm going to
spin them both round and see if that actually
fixes lighting issue. It's a book, by the way. It's not actually something
that should happen, there's no reason
for it to happen. Look, let's turn this
one round as well. 180. There we go. Let's fix that material. Now, finally on the next slide, and what we'll do is we'll
actually fix this material. Not actually as nice
as, as I want it to. So I'm happy with, I
think it just needs bringing out a little
bit and making it a little bit darker also. We haven't I don't think oh yes, we've actually got a bevalon. So it's just that basically
I think also it's because the actual woods
going the wrong way, so I need to rotate those
around in the UV space. All right, everyone. So
I hope you enjoyed that and I'll see you on the next
one. Thanks a lot. Bye bye.
22. Fine Tuning Our Shader: Welcome back everyone to
Blenetonreal Engine Five, the complete beginners guide, And this is where we left off. All right. If I grab
all of this now, I'm going to go over
to my UV editing. And then what we're going to do is I'm going to spin this all around and now let's have a look what that
looks like it better, albeit probably the UV's
on these are too big, so let's make them
smaller and have a look. Are they going to be
too big or too small? Let's make them bigger,
going both ways. I think actually that looks much better when
they're smaller. Although we have got some
repeating as you can see, and we don't really want that, maybe we've got too big. So what we're going to
do is just bring it out and get rid of
that repeating. We put it, there we go. Enough resolution
without it repeating. Yes, they are
looking much better. All right, so now
let's go to shading. We should be able to see
them like this double tap. The, the more I'm going to do on the shading panel this
time is I'm going to bring in a RGB just to give you some control
over how it's going to look. Because this actual data can also be transferred
into Unreal Engine, which you'll find out about. So what I'm going to do is I'm going to bring in an RGB curve. So search RGB curve, this is the one that's
basically going to make it, you know, darker, lighter. And then what I want to do
is bring in a color ramp. And the color ramp is
going to be the one that accentuates the different colors within the actual texture. Now I'm going to do is bring
in a color ramp, color ramp. So what I'm going to
do now is I'm going to bend this very slightly down. Then what we're going
to do is I'm going to put this up a little bit and I'm also going to put this on a nice brownish color. Bring that in a new, maybe a little more yellow. Bring it out a little bit like so bring it brown's.
I bring this one out. I'm going to make this
a little bit darker, I think too much. We've also got to think as
well that this is going to be also for the roof parts
that hold all the thatching. I'm just wondering
whether this should also be I don't want to
really bring that out, so I want to bring in a B. Okay. So that's brought out
those lumps and bumps and things like
that have probably going a little bit too much. So I'm going to go back then. What I'm going to
do is I'm going to make it a little bit darker now. I think I'm happy with
that. I just may need it darker bit to light. So let's press shift and we're
going to look for a Gamma. Bring that in now with the gamma should be able to bring it down. I'll bring it back. Yes,
that's looking much nicer. Maybe I've got a
little bit too much. Then what I'm going
to do is just play around this a little
bit of control. Then finally, we'll
just saturate it out a bit because it's a
little bit too yellow. Saturate out, we just need a U. And saturation mean remove
some of the yellow tone on it. Saturation that in then if we just turn this
saturation down, you can see now we can
wash that out just a tad. I think now they're
looking pretty nice. Let's have a look what it
actually looked like before. If I grab this one here, this in the base color, this is what they
look like before. And this is what
it looks like now. So you can see a huge, huge
difference between them. All right, so now we've got that. I'm very happy with that. Now we need to focus on
the back parts here. These back parts here.
So let's do those now. So what I'm going to do is
we're going to come in, I'm going to grab both
of these with face Lex, grab this one and this one. And then what we're going to
do is I'm going to press, I think I'll actually
split these up from these. So I'm going to just
going to press Selection. I'm going to put on object
modules for the time being. And then what we're going
to do now is going to come into the press tab A, make sure we unwrap them. I'm going to minus off.
Then this light crack wood, you can't do this in eddy modes, so just doing an object mode. And then we're going
to press new glass even though it's not glass. It's just something
where we know, okay, this is for the
windows control shift. And then what we're going
to do is go back and we're going to look for glass,
which is this one here. Bring them all in, there we
go, double tap the eight. And now we're going
to do is just have a quick check what it
looks like, rent out. And there you go. You can
see it's got that really, really nice look of actually having some
depth inside of it. And that's exactly
what we're going for. All right, so let's go back to modeling mode. There we go. Let's say that I work, let's now do something
a little bit different. So what I'm going to
do is I'm going to first of all grab both of these. I'm going to come in shift,
click, shift, click. I'm going to press, and
then I'm going to press Y to take it away from those. And then I should
be able to move it. Then all I'm going to do now
you can see non manifold. Which means that if I
comet triangulate this, let's go into click
triangulate faces. This is all of the
actual points. What do I mean by
that? If I come in, you can see all of
these points are. And what it means is that
this face is an engon, but it has non manifold edges as well because it's bent
in and things like that. We don't actually ever want engons really in
any of our bills. We want to make sure
that we avoid engons. In other words,
we're the polygon at four sides and then a
triangle at three sides. When you send it through
to Unreal engine, it always triangulates
everything. So just be aware of that. If you ever get a
mesh that comes into, you know, your blender file
and it's all triangulated, you might not actually want
to work with triangulation. So if you don't, let's just
triangulate it for 1 second. So I'm going to come
to face legs again. Right click, triangulate faces and then what we're
going to do is right click tries to quads. So you can see that we can change all of those
triangles to quads. Now when you bring a mesh in, sometimes it won't change all
of the triangles to quads. But it will change, you know, the majority of them
that it can to quads. Just to make it a little
bit easier to work with. Normally what that means
is when you've brought it from a different
software into blender, a model, it's normally triangulated because that's just what happens when
you bring it in. There's also an
option as well if you want to triangulate when you import something in to make sure it's translated either way, we don't actually
want it like this. We want to work with
just a basic door. So all we're going to
do is press Delete. Come down limit to dissolve. That's going to get
rid of all of those. Now all of those little vertexes are gone and now we can actually make
a start on our door. So what I'm going to
do is control law. I'm going to bring in
enough planks of wood, first of all, to make our
door left click, right click. Now the reason I bought in four is because I
want to have a kind of Viking S look on
these two parts here. And this is where the door
handle is going to be. Now we've done that,
what we need to do is bring in
some orange loops. So control left
click, right click. And we're basically
doing that just so we can have a little bit of
variation in the wood. Looks a little bit different. And then what we can
do is we can just come in right click, mark a seam. And now we can split
these off pretty easily. If I come in now, press L, L and L, Y and there we go. There is our actual in doors. What we can do now is we
can actually pull them up. But before we do that,
what I want to do is I want to grab this
one and this one, and I'm going to use this to make that little
pattern on the front. So I'm going to press Shift D. I'm going to bring it out like, so I'm going to put
this on object mode. And then what I'm going to
do is I'm going to come in, press one on the number pad. Actually, before I do that,
let me just split these up. Selection, and now I'm
going to grab them. Press control transoms, right
click to origin geometry. And then what I'm
going to do now is I'm actually going to create, you know, that Viking look. In fact, we'll do
that on the next lesson because
we're in our time. And I'd sooner focus that next lesson on the door as well. All right everyone, So
hope you enjoyed that. See on the next one.
Thanks a lot. Bye bye.
23. Cleaning Up Meshes: Welcome back everyone to
blend Intron Real engine five of the complete beginners guide and this is
where we left the art. All right, so what
we're going to do now is we're going
to come into these, we're going to press
one on the number pad. And then what I'm
going to do now is I'm going to come in and press K. K is going
to give me a knife. Now the knife is great for
cutting a round things. For instance, I can
come in and cut a hole in my mesh like
so if I press Enter now. And then what I can
do is I can actually delete that hole out of the web. Now the other thing
you can do with the knife is make what
we're going to do, which is this kind
of Viking type, look through our door. If I come in, I
grab all of these. Once it gets to the
end, press Enter. You'll end up with
something like this. Then what I want to
do is I want to come in shifts like them all. Just grab them, bring them
out shift, bring them out. Then what I want to do
now is I want to do it on the other side. So all I'm going to do is I'm going to come in with K again. I'm going to, this time go down the other way, press Enter. And now I'm going
to bring these out. So I'm going to press
shift D, bring these out. I think actually I've got
too many there right now. I just want to make sure
that I've not got so many. What I'm going to do is I'm
going to press L on this one. Let then I just want
to make sure that if I move this one I've not
got any behind them. Now there is another way
of checking that as well, so I can grab everything. Mesh, cleanup. I want to merge by distance, merge, it means that
there's none behind there. If you turn this,
what will happen is you'll start actually
merging these vertices. So if I keep turning
this up lock, you'll see that it
all merges into one. But when you leave it on just
you know where you bring it in in as it will
actually just check to see if there's any vertices actually sat behind
any of these. Very, very handy. All right,
so now we've got that. We can actually delete
these out of the way. So let's delete vertices. We should be left with this, which is already looking
pretty nice as you can see. Now how do we turn
this into mesh? Well, the first
thing we're going to do is we're going to grab these. I'm going to press
and I'm going to follow it along the
y axis, so like so. And then what I'm going
to do is now I'm going to basically bring them out. So the way to do that is
I'm going to grab them. Press control all
transforms right, clicks the origin to geometry. Then' going to do is
going to come into my modifiers and we're
going bring in a solidify. And you can see now that
once I've bring it in, my solidify and bring
it out a little bit, it'll start to bring them out. Now the other thing
is the offset here. We need to actually
probably use the offset. Because if we're not
using the offset it, let's have a look. See if it's actually
keeping it in the center. What I'll do is I'll put it onto x ray lights. That's
not really helping. So what I'm going to do is I'm going to grab both of these. Press shift H, hide everything
else out of the way. Then I'm going to press one. Now I can see if I'm
using my offset, this can't actually
that anymore. I'm going to grab this and this. I'm going to make
around with offset. Now, thickness
offset, the can see that I can need to
set this probably to zero. Yeah, to zero. There we go. Now
you can see that it's looking a bit better now, if I come into this part, I'm going to squish
it up a little bit. Next, let's have a look
what is going to look like. I'm going to turn this off. I'm going to grab
both of these now. Put them into place.
Then the final thing I want to make sure I've done, because the door is going to need a top
and the bottom of it. But as far as that goes, I think actually
looks pretty nice. I'm happy with that. All I want to do now is pull this one, so the front one, into the back. Then I want to squish
this up and Y ph. All right, is
looking really nice. Now, while we've got that, we might as well do the door. We might as well
split this door up. So let's split it up
from the rest of it. Selection, let's sit up. And then what we can do is
control all transforms, right click origin to geometry. Then what we're going
to do is we're going to press a and then we're going to pull it back with
pull it back like so. Now we can see we get somewhere. And then we want
to do, of course, is we want to actually
randomize it. Again, a mesh transform Randomize all the way down to maybe even 0.1 I
think will be good. Look at that. Let's right
click, shade, auto, smooth. Press one. Yeah,
we can see we've even got like differences
on the tops of them. Exactly what we're looking for. Now let's get this into play. So if I press one, we can see now we've got something
where we can put it so we can see I'm going to make it a
little bit smaller, then I'm going to press sens
there just to bring it out. There we go. That is
looking pretty good. Now let's make sure
that it's in the door. In the door, like now. We want to obviously unwrap this and we want it to look a little bit different
the way it is now. The other thing is we've got a bevel on there at the moment. Who you want you bevel on there. That's the thing you
need to ask, because you can actually hide
it out of the way. This one here, you can see
whether you want it on, you can see the edges here, They get squished in or you might want to reduce
what the Beverly is at, It's on a moment 0.5 Do we
want to change the angle? Because if I change this angle, where is it going to go now? We can change the angle. Is it going to level these? That's the question. Yeah,
I don't think it is what? I'm going to take the
bevel off a minute, then we're going to
apply the solidify with control a modifier. Turn this all the way down. Then I'm going to put it on
0.3 But I'm going to set, I'm going to reset
transformations. There we go. Right clicks
the origin geometry, then I'm going to turn
it down even more. Naught point naught, one. Turn it down even more. And now that's what
I'm looking for. So we've still got that
knife edges there. And it doesn't look
like it's been hit, you know, over and over again. But we've still got that
slight bevel there as well, and that's what
we're looking for. All right, so now
we've done that, what we want to do is we want
to put it on the next one. So I'm going to press shift, I'm going to bring
it over this one, I'm going to press
one just to make sure I'm lining it
all loop properly. You can see it's probably
a little bit out here. So I'm jaws going to pull it over, holding the shift bone. Jaws to tad pull it. Holding the shift, there we go. That's looking pretty nice. Now, the one thing I did forget, I need to hide my
door out of the way. And I need to remove all
of the backs of these, because we're not
going to need them, no one's going to see them. So I'm going to do is I'm
going to grab both of these, double tap the seven
to go over the top. I'm going to go into
wire frame now, and this is why wire
frame is so useful. And then what I'm going to do is we're going to go into face, I'm going to press
and I'm going to basically drag it just
on the edges here. And now you'll see that we've grabbed all of the
backs of those. We can now press
Delete and Faces. So now let's go back
into object mode. And what I want
to do now is just grab all of the
tops of the faces, so, and what I'm going to do now is just
delete those as well. We don't need those, so delete and bases,
and there we go. All right, so finally let's join these together
now. So control J. And then what we want to do
is now bring in a material. Now we can go over to here now. And what we can do
is, at the moment, as you can see, we've got
light cracked wood on them. We don't want that. Let's put new and let's have a look what the material
is going to be first. So if I come to here textures, now we've got one that says iron and we've got one that
says metal ornamental. Now you can see this is the mel, so this is there just in case you want to put a
nice metal work on your door or
something like that. I don't actually want
to use this one. I want to use, where is it? Iron. So this one here. So if I open this up, this is what the
iron looks like. Now, straight away for
me, the iron on this, it's a little bit too dark. It needs to be tongued
down a little bit more on the silver side rather
than this dark iron. So I'm going to fix that. I'm going to put
this down for now. I'm going to call
it iron like so. And then what we'll do on
the next lesson is we'll actually get the iron on
there and get it set up. Not just for these parts, but for all the other parts as well that are gonna
be made of metal. All right everyone, so
hope you enjoyed that. Stay on the next one.
Thanks a lot. Bye bye.
24. Creating Metallic Shaders: Welcome back everyone to
Blane Naral engine five. The complete beginners guide. And this is where we
left off. All right. So we've got our on, let's
go over to shading panel. Let's now put this on. We'll put it on render.
Actually, let's see what it looks
like on Render. I might need my lights in here, so I'm going to press
Altates just to bring some light in so I can
actually see what I'm doing. And then what I'm going
to do is I'm going to press Control shift. And then I'm going to bring in my textures which are under
iron or four of these in. So. And we can see there, this iron doesn't look like anything because I've
not rubbed it yet, so. So didn't add any
seams in as well. Let's go back and do
that. So first of all, I'll just put this
on material mode. I'm going to hide my
door out of the way. I'm going to come round
to the backs of these. What I want to do, you've
got no backs on them. So actually, this might
be easier to unwrap. So if I come to them, press tab, Hey, you unwrap. Let's see what they've
unwrapped like. I have the unwrapped
like anything. I can see the iron slightly
on there now as you can see, but it's very, very
dark for one thing. So the first thing I'm
going to do is bring in a gamma just to line up so
I can see what I'm doing. So shift we might get
rid of the gamma after anyway, drop that in. Bring it down. Just now you can see it's very low resolution, so
we need to fix that. Let's go over to our UV editing. We're going to press dot
to zoom in, spin it, round one we're going
to do is we're going to press pull them out. Now we can see that's
looking much nicer. In actual fact, it's
looking really good to a point where the
other thing I would say is let's put
it on to render, have a look to see
if it looks like actual metal because at the
moment, is it shiny enough? That's the thing
that I want to know. All right, let's go over to our shading panel and we'll do a little bit of work on it. Let's see if we can. First of all, I think I'm
happy with the color. It's just the metallic
that I'm happy with. If I unplug this, then turn
the metallic all the way up and see now we've still not got a
lot of shine on there. Let's unplug the
roughness and turn the roughness all the way
down to where it should be. We now we can see we've got
all of these bands on there. That's not what we
want. We know it's not the metallic so we can
plug the metallic back in. It is the roughness. That's
the one that we need to fix. All I'm going to do, I'm going
to plug in the roughness, then I'm going to bring
in an RGB search. Rgb, because you can also use RGB curves with your actual
roughness channel as well. Now if I bring this all the
way up or all the way down, I've got a lot of control now over how metallic
it actually looks. All right, that's pretty nice. Just wondering now if
I make it a little bit lighter or darker? A
little bit darker. So now I'm wondering
whether I should bring back those
brown parts in it. So I'm going to put
this over here. I'm going to bring
in a color Ram also. This is good practice because basically what you're
doing here is as well, is you're actually learning
how you can bring in any texture and basically
change the material. That's really good.
And you'll also learn how to then send through these textures
that they've been set up in here through
to Unreal Engine. Now let's bring up this first, and you'll see that
we can bring in some real darkness there. Then let's come with this one and you'll see as
a bring this one up and let's make it
a little bit brown. Ever come to the color?
A little bit brown. Wash it out a little bit. Now, I think we'll have
to insaturate this now. I'm just going to
pull that over there. Insaturation, drop this in. What I'm going to do
now, I'm going to bring down the saturation. Just add in a little
bit of brown on there. That's probably too much. So I'm just going to pull
it back a little bit. I'm going to darken it up
a little bit, bring that. I'm still not happy
with that, so I'm just going to go back to
where I had it before, like this color here, bring
it back a little bit more. Rs needs to be a
slight tinge of brown. Think that's looking
much more like it, like the met that they would
have been working with. You can see that slight
tinge in the light. Now let's just saturate
it out a bit more. Yeah, I think I'm happy
with how that looks. All right. That is looking much, much better than we did before. And now I'm going to focus on is just how much shine got on this. Can see as we're moving around. Yeah, that doll kind of shine. All right, I'm happy with that. Now let's go back to modeling. And then what can do is
I can grab these now, press actually
bring back my door. And then what I'll
do now is I'll actually work on the door. So I'm first of all, we can see we've
got a lot of seams here that we don't really
need with the door. I do want to keep the
tops of it just in case you want to use this
door and anything else. What I'm going to do is
I'm going to actually probably just take
off all the seams. So I'm going to press
control, clear all the seams. And then what we're going
to do is I'm going to come round to the back. I'm going to press
old shifting click, going down each side of
these right click cosine. And then what we're going
to do is I'm going to come to the top of each one of these. Then we're going to do is you can see we've got some issues in there as well which
I'm not happy with. What I'm going to do is I'm going to actually isolate this out because we can see
we've got cross cross. Yes it is. We can see
the crossing measures on there and we're going
to leave those off. Delete bases, I'm looking is any other issues with the lighting on here? I'm going to come down
to the bottom now. I'm going to delete
those up as well. So delete bases then what I'm going to do is
I'm just going to check to make sure that there's no
other measures behind these. I think what's
causing it is there's a little bit of crossover
between all these. As you can see, they're actually crossing over and that's
what's causing this. What I'm going to do is I'm
just going to grab this one. I'm going to press and X and you bring it in very slightly. And then I'm going to do
the same on this one. I'm going to come down to
here next. Bring it in. And now you could have fixed
most of that, which it has. That's what's the issue there. That there was just
crossing over a little bit too much and now I just
want to fill these in. So if I grab them
all with a mesh, clean up, fill
holes, there we go. Now let's come in
and mark our seam. I can mark a seam on
top of each of these. I can mark a seam
on all the bots. I can press control mark seamow. I should be able to wrap these. Now this W, let's see what
color is going to be first. So we'll unwrap it first. We're going to press Altage then to bring everything back. I think that color
the same as these, probably going to work better
for us, I think it will. Let's double tap the, let's
put it onto render view. Let's just have a
look at what that looks like. There we go. That is looking pretty nice. All right, so the
next thing then we should focus on with the door is we'll focus on getting
the door handle into place. So I think we'll do
the door handle next. Let's just put it
onto object mode, ready for the next lesson. And then what I'll
do is just save that my work. All
right everyone. So hope you enjoyed
that and I'll see on the next one. Thanks lot.
25. Working with Pipe Joints: Welcome back everyone to
Blend and Unreal Engine Five, the complete beginners guide, And that's where we left it off. Now one thing I didn't notice is the fact that this door is huge. Absolutely huge, and
we don't want that. So what I want to do is I
want to press one on the pad. I want to put it
onto x ray view. I want to press S and's D and just squish it
down a little bit. Let's pull it down now. And that there, it's a lot more like the size that
we should have, our door. We can see we made our door kind of here up to this point. Now on the inside of here, we're actually going
to have a top to this, so don't worry too
much about it. As long as you're happy with
the size of your door now, which I think can I'm just going to hide
this gray box out. And then what I'm gonna
do is just grab a door. Pull it all the way back. Pull it all the way
back into where it's going to go. Gonna
be around there. Then if we add this
angle, for instance, you can see just the top of
the door and that is perfect. All right, so happy with that. Now let's bring out
just this part. I'm going to duplicate them, because I want to
leave my door there, so shift, bring it out. And then what I want to do now, I want to bring the guy to the front of the door
spinning around. So is there 180? And what I want to do now
is create a door handle. Now the reason I put
my guy there is I want to know where I want
to put my door handle. So what I'm going to do is I'm going to come to my door now. And I think my door
handle wants to be roughly around
this area here. So if I grab both of these and I bring
them out, so shift D, pull them out and
then water press is delete and limit
to dissolve that, then we'll straighten
everything up. Then I can press S, pull it in, and then and X pull it in. Then that's the beginning
of our door handle. Now of course, we
need to pull this out and turn it into
an actual door handle. So the way I'm going to
do that is first of all, I think I'll extrude it out. So let's extrude it
out. Pull it out. Now, the problem we
have is it's attached to this one still and it has the bevel on. I don't
really want that. So what I'm going to do is
I'm going to grab it all. Lp selection, Grab
it now, control. Lal transforms right
clicks a origins geometry. Come over to my bevel. I'm going to just take that off. Then we should be
left with this. All right, so let's pull it
out a little bit further. And now we want to do
is we want to actually manually bevel these edges. If I come in, grab
each of these edges, that one in there, and then what I want to do
is I want to press control and pull
them out like so. Now I want to give it
a few bevels on it, so if I scroll up my
mouse wheel twice, you'll end up with
something like this. Left click, drop that in place. Now it's important you don't do anything here. Don't
click on anything. What you want to do is now you want to come over and
change the shape. If I now change the shape, we can actually change
the shape inwards. We can change the width as well. So if a hold shift, we can actually pull it out
a little bit more. And you can see that we've
got a lot of control now over how we
want this to look. Now the one thing is I would say that we can also as well change
the amount of segment. If I click this up, you will see that we can change how
smooth this actually looks. So think something like that. Yeah, that looks
pretty nice like that. So what I'll do now is
now I'm happy with that. I'll grab the center
of here and then I'm going to do is I'm
going to insert this to get a kind of
a back plate on this. So I'm going to press Insert. So now it's important when you in Sir, you don't
want to go too far. We're crossing these
vertices over. You want to be very
careful of that. If you do cross them over, make sure that we merge them. So if you've got
any crossed over, just right click both of them. Right click, Come down to merge and you want to
merge them at the center. So I'm not going to merge mine because it's
not crossed over. Just in case you do that. All right, Let's pull
it back with E. So I'm going to press,
pull it back. So now, the door handle. Let's create a door handle. I'm just looking to make
sure I'm happy without this. Looks, I think I'm
happy without that. Looks, I'm just wondering
whether this is thick enough. Let's come in. And
if I press on here, you'll see it brings
it in like that. But if I press less, you'll see that we've got a little bit more control over it. And it brings it in
a lot more evenly, especially when I click it, you can see that
we've got offset even on here, evens it all up. Old Es will do that for you. I think actually that's looking a little bit more chunky now. A little bit better. All right, so now we want to start our actual handle in
the center of here. So if I press shift,
here's its selected, then what I want to do now
is bring in my handle. Think with the handle,
the easiest way. Probably do this, maybe
as with a pipe joint, you could do many ways.
You can do it with mesh. You can do it with a
curve, you can do it with a pipe joint.
There's so many ways. But I think I want a
little bit more of a square look to this rather than the one I made previously which is
a bit more rounded. What I'm going to do
is I'm going to go to Edit Preferences in extra, I think it's on the
extra extra objects. There we go. Click this one on. This is an in built one
again. Let's close that down. Now what we can do is we
can press Shift a pipes. There we go. Pipe joint. What we want is the pipe elbow. It will come in like this. First of all, you
can say it's got tons and tons and tons of
vertices on Nero polygons. Now the thing is as
well, if you move this, if I click off this,
that actual menu disappears. It
doesn't come back. So what I want to do is
I want to press delete. And we'll go to
mesh pipe joints. Pipe elbow. The problem with pipe joints, using
those, they're very, very handy to use, but
they don't have a, they're not really
non destructive. In other words, as soon as I have finish this
and click off it, I can't actually go in
and alter it again. That's one of the downsides. Whereas curves and mess,
you can obviously do that. Let's come in first of all, and turn the radius down. Let's put it on 90 degree angle. Let's bring the start
something around there. Let's bring the end
something around there. Can I scale all of it? I'm just looking if I can scale. I don't actually think I
can scale the whole thing. You can rotate it for sure. Let's rotate it on
the Z, wrong way. -90 we go and let's also bring down
the number of divisions. Now the thing to remember is with divisions you still want
to keep that roundedness, so let's put it on
something like 14. If I go lower than that, you're going to lose a lot
of that roundness. So I don't really
want to do that. I think something like
this should be okay. Now, as I said, the problem
is now once I scale it, I've lost everything else. So you can see how it
disappears is the issue. Now let's scale a little bit more and we'll put
it into place. So if I pull this out now, the thing is, remember he's going to put his hand on there. This at the moment
looks way too thick, so we're going to scale
it a little bit more. So I think now dad is looking
a little bit better now. Of course, we need to put
this on the bomb as well. We don't just want
it like that or we could have it like that,
but I don't think so. We want to proper door handle. What I'm going to do is
I'm going to come in, I'm going to grab
the bomb of it. So I'm going to press Tab, then control all transforms. Right click, set our region three cursor because my
three D cursor is there. Add modifier. Let's
bring in a mirror. So let's put it on the Z. Then what we can do now is we can actually bring
these together. If I bring this down, you'll notice when I bring
it down, touch them. They just overlap. They're not actually touching
as you can see. But if I put in clip in, bring them down, let go of them. Now they're actually
clipped together, so it's important that
you actually put on clipping and it's also
important that actually let go. All right. I'm happy with that. Now, let's do this part here. Well, I've got it,
so I'm going to grab this, grab this part. Control. There we go. I think I'm happy
with how that looks. Now let's write click
shade or to smooth. Yeah, that's looking
pretty nice. All right, let's bring it
out a little bit as well. So I'm going to grab
all of this round here. Bring it out. Now finally, let's apply
our mirror to control the one problem
you're going to have is you will see if
I open this up. But if I hide this away, sometimes you'll end up with this filled in
with the mirror. Sometimes on here there will
be this part filled in. Just be aware of that because
it might cause your issues with your UV's and
things like that. So try and just check to
make sure you've not got that part filled in or everyone,
so let's all teach that. Let's come up to,
let's save it out. And then what we'll
do on the next lesson is we'll actually get
this in the door, get all the materials on. Yeah, get the door
handle on here. Then finally, we can actually
work on these side bits, these top bits and
things like that. And I'm thinking then we'll come down and work on
our way downwards. And finally, after that, we can actually make a
start on the roof. The roof actually, as I said, it's one of the hardest parts. We will be going through how to create the
faching as well. So that will be really,
really interesting. But once you've got all like, kind of nailed down
all of these things, now it should be much, much faster moving forward. All right. Every one. So
hope you enjoyed that. Say on the next one.
Thanks a lot. Bye bye.
26. Finishing the Door Handle: Welcome back. Everyone
blends one real engine five, the complete beginners guide, and this is where we left off. All right, so what
I'm going to do now is just going to
isolate these out. So shift H, let's isolate them out so we can
actually work with them. And what we need to
do first of all is of course we actually, with metal, you really
don't need to worry so much about marking
seams and things. The one thing we do want
to do though is just make sure that we've not actually
got this back plate on. So delete faces and just make sure that there's no plates in here or anything like that. And now what you can simply
do is you can grab them both. Make sure we've got no modifiers on either, just making sure. So what I'm going to do is I'm going to join
them both together. So actually I think first of all we'll just put a bevel
modifier on this one. So control or transform, right click to
origin to geometry. And also we've got a few
issues with the mesher. As you can see, I want
to actually fix that. So what I'm going to do
is I'm going to come in, we're old shift click on here and then old shift click on this one and this
one, right click. And I'm going to mark a sharp Now, why am
going to do that? This means that now
I can come over and control how sharp
each of these are. So if I right click now
and put it on plates move, we can see we end
up with something like this that is not ideal. We still want a little bit
of sharpness on there. So let's come on and
put shade auto smooth. Let's come over to
our smoothness now, which is a little
triangle over here. And let's turn this up slightly. And as you see now, as we
turned it up slightly, it actually smoothed
out those edges. Now the reason that works is
because we have these shops, if I come in and just
quickly control clear, sharp, you can see now that we end up with
something like this. So if you look at this one
in comparison to this one, it is night and day. All right, so we
don't want that. So let's actually put in
the shops again. So right. Click Shop. There we go. That's looking pretty nice. Okay, so now, as soon as I join this up
though, with this, you're probably going
to lose that smoothness because it sets
37. So let's see. So I'm going to grab
this one first, and then what I'm going to
do is I'm going to come to a modifier, add modifier. Bring in a bevel, I'm going to bring that down. Bring it up slightly ninth, three, let's try that work. No, 0.3 way too much. Not point. No one that looks
about right to me. Okay, let's apply
that with control. And now if I join
this with this, you'll see that it
loses that sharpness. So if I press control J, you can see we've got back
straight what we had before. And we don't really want that if we join it round the
other way though, this one with this
one, this one will inherit the smoothness
of 37 degrees. So if, let's press control J. And there we go. There's the
smoothness now on there. All right, so we can see
that's looking pretty nice. Now what we can do
is instead of both, we come in and we put it onto material so we can
see what we're doing. Instead of, let's take off the material first.
So minus it off. Let's then give it the metal. So if I click this down arrow, we can put it on iron like so now what we can do
is we can grab it all. Press press U, and instead
of just unwrapping, let's smart UV project, which means that
Blender is going to try and unwrap itself, basically,
that's what it means. It's actually projecting it
based on certain things, which way things are facing. Let's try Smart UV project. Okay, there you go. You can see it's
actually done a really, really nice job
of unwrapping it, albeit we've got, I think, a lot of crossover. So I think what's happening
here is we really need to just move the move
here a little bit. Now you can see though there's a big seam down here and
you might not want that. I don't think we're
going to be close enough up to this door
to actually note it. As you can see, you
can't see it here, but what we are going to
do is go to UV editing, press the tab button,
press the button. And what we're going to
do is make these smaller because I think they're
a little bit too big. So if I bring them in like, so let's have a look at it now. Put it on material,
and then we go, now you can see
that's looking much, much better than
they did before. Now let's go back to
modeling. Let's press Altage. Bring everything
back. Double tap the, and now let's put it
onto rendered view and have a look at what our
door handle looks like. And there we go. Looks
really, really nice. You might even want
to put some bolts in here and here
just all depends. But the rule is basically the closer you're going
to get to an object, the more detail you
want to put into it. If you're never going to
get close to an object, don't put any detail into it. You'll see many games where
they've just got a plane as mountains and things like that if you managed
to get up there. And the reason is
for that because it's just not worth
putting the effort in, and it's not worth
the processing power, you know, that goes into
putting those things in. All right, so now
we've done that, what we can do is we
can hide our gray box. First of all, I can actually
get my door handle. Delete this door, because it's just a duplicate
of the other one. And I can now bring
it back into play. So if I put this now into there, holding the shift born, like double tap the,
and there is our door. All right, now let's think
about these side bits. So what I'm going to do is I'm going to cheat a little bit. I'm going to grab with edge. Let this one and this one. And then I'm going to do
is I'm going to press Shift D, bring them over. I'm going to drop
these into here. Then what we're going
to do now is I'm going to steal another
couple of these. We've got windows in here, so we just need to be careful. I'll probably get
from this side, so I'm going to grab this one. And this one I'm
going to press Shift. Bring them over. Steph,
let's go over the top. You can see the
slightly out there. So I need to fix that. Let's
bring them over into here. I want them in the middle. I don't want a great
big down there either. I want to bring these
two in as well. Middle, there we go. Press tab, double tap the Hey, looking good so
far at the bottom, on the door and the top.
So I think we will. I think we'll do
the bottom first. So all I'll do is I'll bring in, I'll grab my door, I'll press
Shift as cause to selected. I'll press shift and
let's bring in a cube. And the cube came out 2 meters. And I think that I'm
not actually sure, cause me modeling actually. I'm going to turn this down to 0.5 make it a little bit
easier to work with. Bring it down, bring
it down to here. Then I'm going to
pull it out and X. One way to do now is I'm going to pull it
back a little bit because we don't want it
actually sat in there. We want it just on
the edge there. Want to make sure that it's a little bit flush
against the door. Then I also want to make sure that it's not sticking
through here. I'm going to press and's
Ed and bring it down. So now let's pull it
back a little bit. Grab this here. Then I'm just going to
put an edge loop in here. Control. Let's click,
click, grab this face. I'm going to first of all,
pull it out a little bit. Just pull it out just to give it a little bit
of a ridge there. Now let's think about
the top of the, the top of the door wants just
like a beam going in here. What I'm going to do is I'm
going to cheat a little bit. I'm going to grab
the top of here. Bring it up right
to the top there. Then I'm going to
press pull that up. I'm going to press
dot to zoom into it. Then I'm just going to lift this up just a little bit more. Then going to do is
I'm going to pull this back into there. Then we go, well, our main beam, our main beams
going to be above that. We've got our beam on there. So let's put it
back a little bit. Then I'm going to press L, grab the whole thing
shift, bring it up. Then one going to
do with this one is I'm going to pull it out, make it a little bit
bigger. Look at that. Yeah, that's fine. Except this, I think, needs to be pulled
out just a little bit more. All right, all
these are together. So we can press shift H. What we can do now
is we can just come in and delete the sides off because we're not
going to need those. Even this little tiny side here, we're going to need that delete. I'll do the same thing on here. You might want to
leave this one just in case you're going to use this
door for something else. Now what I'm going to do
is we're going to add in the click wrap. Okay? And now what we want to do is we want to press tab ol tag. And now we just decide
which color we want it. So let's get rid of
a grey box again. What color do we want these? I think we're probably going
to want them like this. So I'm going to grab
this, I'm going to press control L link
materials. There we go. And then we're going to do is come back to this because you can see we've got a lot
of bluriness on there. Again, that means they
have unwrap properly, and that can sometimes be down to not resetting all
the transformation. So control reset transforms
origin geometry, tab unwrap, and now they
should unwrap much, much cleaner like Soap. Now the next thing I
want to do is just make sure that the resolution
is high on these. Looks like it is. Yeah, it's
very high on all of them. Yeah, that's looking
pretty nice. Okay. So that's the door and
the arch pretty much done. Of course we have this bit
to do and then we can make a start on the supports
for our actual cabin. Let's have a quick
look what it looks like on rendered view
as we go around. So I'm going to point my camera. Yeah, look if we're
probably going to need some extra lighting
in there because you can see that the sun is
pointing this way. Let's turn that sun round so our way's point it down here. Here might need to actually
zoom out over here. Let's actually do that.
Let's put it on material. Because you can see my computer is stuttering a little bit, So let's press arms, head. Move it out.
Something like that. Let's put it back on then. Now we should have a nice view
of what it's going to look like in a little
bit. Let it load up. There we go. We can
see it looks really, really beautiful. All right? You can also see that we need to put a plank of wood in there
as well. All right everyone. Let's put it back onto material. Let's save it. And I'll see on the next one.
Thanks a lot. Bye bye.
27. Creating Realistic Supports: Welcome back everyone to
Blent's Unreal Engine Five, the complete beginners guide. And this is where
we left it off. All right, I think what we
need to do first before we do anything else is just level
these off. I don't think so. Look, they've not actually
been leveled off. So what we'll do is
control or transform. Right click, set
origin to geometry. And then we're
going to do is just bring in a quick bevel. And that's looking pretty
good in comparison to these. Let's have a look at
the smaller one here. It could be the case that we might need to split those off. So if I come in, grab
this one selection, split it off from the other one. And then what I can do is I
can reduce this down like so, no point, not three. Reduce it down and then that's going to look
a little bit better. You will notice as well, at the moment I'm not
actually applying my bevels. I'll probably apply them all at the same time when I've
finished the actual build. You will also see here as well that this isn't looking right. So let's put that
down to cereal. Let's put it up to
one. And there we go. That looks a bit better
than what it did before. All right, so that's that done. Now what we want to
discuss is we're going to be doing the
bottom part here now. So all of these supports
that go along here. So what we're going
to do instead on this one is we're actually
going to press shift date. We're going to bring in a cube. We're going to bring
this cube out, make it a little bit smaller. And then what we're
going to do is we're going to press S and Y and just pull it out,
something like that. And this is basically just
going to be there so we don't have to keep remaking blocks of wood and
things like that. So what I'll do now is I'll
press control All transforms, right click storage
into geometry. And then we're going to
actually mark seams. So we're going to mark a
seam on the front and back. Control mark shop, mark seam. I'll also remove those shops
as well, just in case. By the way, if you ever
come across it where you've actually marked a shop and you can't actually see it there, you can actually come up to here and we can go
down to where it says shops increases and
seams if a turnop seams here, you will see that it now shows those shops control clear shop. All right. Now if I put
that back on with seams, now you can see the
seams are marked. Now I'm going to do is I'm
going to grab top of here, right click, and I'm going
to mark a seam on there. And finally what I'm going
to do to this is control or transforms right click
origin geometry. And then I'm going
to add in or is it a bevel, I'm going
to turn that down. Turning up one because it's quite a big piece of wood,
Something like that. And then finally what we're going to do is I'm
actually going to unwrap this as well and make sure it's facing
the right way. So a unwrap. And then what we're
going to do is I'm going to put the material on which is going to be,
let's have a look. We'll put cracked wood.
We'll put that one on. We'll just look at the material now and make sure
that it's okay. So we can see that that's quite
high resolution on there. So that's absolutely fine. Now we've got that,
we can actually change this wood out
whenever we need to, but we've actually got a block
now to actually work with. And that is the most
important thing. Because now what we're going to do is we're
actually going to, before finishing off
this door up here, we're going to actually start creating these parts under here. Now this does leading on
to the next part as well, which is the blender
asset manager. As I showed you earlier, it's a good idea actually, if you, for instance, take this part, or let's
say we'll take these two, these two, this part here and this part here, and
this part behind. And you pull them
out and you make a copy of them, and
you save them out. Then as their own
individual assets, the same with the door. The same with the wood. And what that means, same
with the planks of wood even. And what that means, let's say you're creating the
entire town here. It's much easier to
break it down into modular parts with all these parts that
you've actually got. And then you can create many, many houses for the Vikings. Or it's really good
if you want to bring them in, you know, to another blender project that you're working on or something like that. So just
remember that. Just use that as
effectively as you can. All right, so what I'm
going to do now is I'm going to start
bringing this in. So I'm going to put this just over to the left
hand side like so. And the reason I'm going
to do that is because I want to actually make a copy
of this every single time. So if I pressure D, I'm going to bring it over now and you'll
notice even pointy, any more edge loops in here. And the reason I
haven't done that is because I don't know where I'm going to shrink it down
or make it bigger. So the first thing
I want to do is I want to put this one under here against the wall like so. And then I'm going to
pull it up to here. So I'm going to then lift it up just so it sat under there. So everything looks as
though it sat on there. And then of course I'm
going to push this back, so I'm going to come in face, like push this back. So all right, so that's
the first part we've done. Now I think that we should have four of these really,
really big planks. I'm just looking at
this edge as well. I think I'm just going
to have to pull it down a little bit. So. But then what we're going
to do now, I'm going to pull this over to this end. So if I come in, probably the easiest
way to actually do this is we could
either do it really, really accurate or not accurate. There's, you know, whichever
way you want to do it. I think actually we'll
do it a little bit inaccurate and the
reason is we don't, it's not like a modern building. It wouldn't work like that. So we'll just press shift D.
We'll bring one over here. And then what we'll
do is we'll press shift D. We'll bring one, let's say here,
and shift D again. And then we'll bring one, let's say here with
a bigger kind of, you know, gap between this
and these other parts here. All right, so now
we've got that. Let's actually use this again. So what I'm going
to do is shift D, bring it out, I'm going
to spin it around. So I said 90. Then what I'm going
to do is I'm going to make this a little bit smaller. I'm going to fit this
into place here. I'm going to squish
it into S and X, pull it in, put
it in the middle. And then S and X pull
it into place like so then what we're going to do now is just bring
it up so it's sat on there. And you can see that's
looking pretty nice. Do you want to pull
this down a little bit? I think actually that looks good. So we'll
leave it like that. Then all I'm going
to do is shift, bring it over S and X, so just make sure it's near
enough touching those edges. And then shift D, bring it over. You can see this one's
even smaller, so S and X. All right, let's double
tap the and there we go. That's looking pretty good. Now what I would say is I
would first of all put in the other blocks
of this before we actually do any unwrapping
or anything like that. I'm going to do is I'm going
to put in another beam. Because what we're
trying to do here is think about how this
thing is supported. So at the moment we
can see it's pretty well supported going
all the way out there. There are some pieces missing
here, as you can see. And we will need support
of support in there. Because if we don't
do that, obviously it's supported by nothing. These planks of wood are
just floating in the air. So if someone's, you know, looking underneath it
or something like that, we want to make sure
that it's accurate. So what I'm going
to do, I'm going to grab these and I'm
going to press shift, I'm going to bring
them over like so. But with this one
going over there, we don't actually need
this one in here. So we just need
these two in here. I'll delete this
one out the way. And there we go. Now we can see that's really starting
to come together. That's looking pretty
accurate for what we need. Okay, so now let's think
about the other parts. So I need a big
part of the back. I'm going to grab this part. I'm going to press, in fact I'll grab this one, press shift, and then I'm going to do
is I'm going to put this at the back 90. I'm going to press one. Now
the thing is about this, it wouldn't be in one block. It wouldn't be one
long block like that, it would be broken into two. So I'm going to put
this back here and I'm going to look where
is this coming out so we can see
if we pull it down, move it out a little bit. So then what we'll do is
we'll grab this one again, pull it up to next to it. We'll tap the, there we go. And now let's pull this
one back into place. I'm going to grab
just this face here, back there we go. All right, that's looking
pretty good so far. So what we'll do then on the next lesson is we'll
get the arches coming down, get all of this bit built out. And then what we should be
able to do is just change all of these UV's so they
all look really nice. And put a little bit of randomness into them all as
well. All right everyone. So hope you enjoyed that and
I'll see on the next one. Thanks a lot. Bye bye.
28. Speeding Up Our Workflow: Welcome back everyone to Blan. It's Naral engine five, the complete beginners guide. And this is where we
left off. All right. Now let's just bring
this one down. So we're going to bring it down at the bottom.
Something like that. And then what I'll
do is I'll grab this edge and I'm going to
pull it that way a little bit. I'm thinking whether
to make this, I think I'll do it that size. And then I'm just going
to grab it all with edge. Just making sure I don't
forget these edges. L and then shift. I'm going to pull
it over to here. And then I'm going to grab
just this face on here. So I'm going to press three
on the keyboard. Pull it out. And I'm just going to make
sure now that they're not actually sunk into the wall. So I'm going to grab this, this three, let's pull them out. So now they look
like the more or less properly on the wall. All right, so now
we've got that, Now we need to probably pull
these back a little bit. So what I'm going to do is
we're going to press Tab. Grab each of these. I'm just going to
pull them back a little bit because there's
no way they'd need to be that chunky we're going to do is make the actual main support. What I'm going to do for that is I'm going to, again, come in, grab each of these pre shift and I'm going to pull
them back, let's say. Then what I'm going to do is
I'm going to make a support. Now that goes down and
looks in this part here, that's exactly what we want. It looks as though it's actually being supported
with something. Again, I'll come in,
I'll grab this one. I'm going to press Shift
D to bring it over. I'm thinking that it's probably going to be nearly
to the side there. So then what I'm going to
do is I'm going to bring it down now, going
to hang on there. And what I'm going to do
is I'm going to bring it up all the way up. We can also bring it out back. Well, it actually fits
right in this part here, but we don't want to sticking through the floor like that. In other words, we need
to make this a little bit thinner if I grab this part and just pull it
up a little bit. So that actual angle
finishes right on here. And then I can bring
this one down, so that now finishes
right on there. And that is looking
like a good support. Now of course, you can see
that we do have a problem in that all of the ends are
going to stick out there. But we're going to deal
with that part in a minute. One, first of all going to do is I'm going to now
make more of these. So I'm going to press Shift, bring it over the shift, then shift, bring them all over. Give us some supports
on the bottom of here, so okay, that's looking good. Now I'm just checking to make sure that these are support on can see is
a little bit of a gap. We don't really want
that, so what I'm going to do is just pick
this up a little bit. So there we go. That's looking really nice. Okay, so we've got all
of our supports in now. I don't think we need, you know, another support going this way. I think this now would be
strong enough to support that. All we need to do now is just
to get rid of these ends. As you can see,
there's some ends on there that we
don't really want. So I'm going to do
is I'm going to press control seven
to go over the top. I'm going to join
all of these parts. Control G. Then what we're
going to do is I'm going to press tab A to make sure
I've grabbed them all. And then we're going to
use the bicect tool again. So if I come in now, use the bicect tool
going across there. Now remember the one that
says no point or naught, something like this, naught
0.2 Just set that to zero. And then what we're going to do is we're going to clear the, either the inner or the outer. So it's the outer in this case. And we don't actually
need to fill the gaps or anything like that because we can't even
see in there anyway. All right, so this is
pretty much done now. But what I need to do now
is I could probably join all of these together and do
them all at the same time. That might be the easiest way. Or do them separately.
It's completely up to you. So what I'll do is I'll come in, I'll grab all of these. Remember, the one
good thing is that they've already all
been UV unwrapped. So that's going to
save us a ton of work. Now let's join them all
together with controlce. Then what we can do now, we can isolate them out with shift H. Now I can get rid of any
parts that I don't need all of these parts here. As you can see, I'm not going
to need these parts here. Not going to need,
you're not going to need the backs of these either because that's actually
touching the wall. So we can get rid
of all of those. Delete pass now there are some more parts that we can see that we're not
going to need. We've got all of these
ones in here which we could actually also delete off. You notice I've kept these parts because they're still
visible to the player. Now we've already got rid of these because we
didn't fill in those. Now what we'll do is
we'll just go to x ray and then I can grab each of
these on the inside of here. Take your time. This, make sure that you get the right
ones that you want. All we're looking for is
that little dot there. As you can see, that is how
I'm actually selecting these, just that little dot like so. And then what I'm going to do
is I'm just going to press Delete and Bases, there we go. That's pretty much
done for that. Now let's come in and give them a tiny little bit of
randomness on them. So what I'm going
to do is I want to basically subdivide them, but I don't really
want to being in a subdivision modifier because
then will be too much. So what I'm going to do is
I'm just going to press control left, move them along, and then just control and
just work your way along, basically bringing in some
edge loops. So that's those. Now when I've done those,
what I do is I just hide them out the way and I'll
just work my way around. But you can see how
fast we've actually built this in comparison
to other parts. And the reason,
obviously, for that is because we actually made
that piece of wood already, which gave us all of the
UV's and everything. These parts, they're not even going to be bent
or worn or anything. They're too huge and they're
too supportive to do that. But the other parts they can be, so we'll just put some in here. It's a bit tedious, but it's
well worth it because it will make the build
look so much better. As I say, the next stage to
this for triple A games, just if you take it
in something like Zbrush and you're going along the edges and making them
really rough with sculpting, and then you gain a
high and low polyp that a real nice mesh. And then finally,
you would take in substance pain to
paint it in there. And that is taking
this one step further. All right, so now
we've got that. Let's hide these out the way. Let's now bring in
the randomness. A mesh transform random. Then this all the way down
to near enough zero we go, I think that's
looking pretty good. It's on very, very slight, which is exactly what we want. Then what we can do
now is we can come in, we can right click,
shade, auto, smooth. And now we can actually
move out these UV's. I come in now to my UV space. Uv's press tab, nearly
UV islands like. So we don't want to rotate on, so just take that off look. Okay. And then all we want
to do now is make sure that all of these are the same scale based on the size of them. The easiest way to do that
is UV, average island scale. And you can see now
it shrunk some down, made some bigger
based on the fact that some of these woods
are a little bit different. Now the one thing I didn't do is control all transforms right. Clicks the origin to geometry. And now let's go to UV
and islands Look okay. And now let's actually
bring these out. So if I press S,
let's bring them all out and let's make sure we're happy with the
resolution of these now. So I can see pretty happy with all of
those, how they look. And yes, they're
looking very nice. All right, so now
let's press our tage. Bring back our actual scene, let's hide that out of the way. And we can see now we're really, really
getting somewhere. Okay, so what we'll do on the next lesson is we'll start putting all of the
bolts in here, and then I think
we'll make a start on the actual stairs that
are going to go down. And then we can finish
off this door and make a start on the hardest
part of the roof. Alright everyone.
So hope you enjoyed that. Say on the next one. Thanks a lot. Bye bye.
29. Adding Bolts to Our Structures: Welcome back everyone to
blend Unreal Engine Five. The complete beginners guide. And this is where we left out. All right, so now let's
start with some bolts. So what we'll do
is we'll come in. Oh, we've also got a posts
as well to put in there. And when I did these posts, what I actually
did was I actually made a little bit of a
groove on all of these. So let's actually try and repeat that as
well now as well. So we'll do our bolts first, and then what we'll
do is we'll add in these posts on here
because they're the main things actually
that support it. Let's first of all make a bolt. So I'm going to do that is mesh. I'm going to come to UV sphere. And when you bring
in a UVs sphere, if I hide this other way, you'll notice that it has tons and tons of vertices and we
don't really want that. So let's press tab. Delete that other
way, ship date. Let's bring in a
UV sphere Again, let's open up our Ad Sphere. And what we want to put this on, let's say let's put this on 18. And let's put this on
something like 14. Let's now put it onto object mode and right
click and shade, Auto, smoot. And there we go. Now we can see that's
looking a little bit bare. Okay, so now what
I'm going to do is I'm going to come in and I'm going to delete
the bottom part of it. Now the easiest way I've found
is just old shift click to select them are going
around delete and faces. And then grab the bottom bit
with L to select the island. And then press Delete
and vertices just to make sure there's
nothing left over. The reason I use vertices as well delete
vertices is because you end up with a lot of
entities in your scene. If you're not
careful. They're like just little vertices that
don't really do anything. They're just when I
first start modeling, I just end up with all
these little vertices all over my scene and projects. And I know how to get
rid of those now, and I know what the issue is. All right, so now
let's grab this, let's make it a little
bit thinner like so. And then what we're going
to do is we're going to put these bolts in now. So I'm going to
press on the wrap, so I'm going to press
a over on my UV map. I'm going to make it
a little bit smaller. And then what I'm
going to do now is I'm going to go to modeling. And then I'm going
to come in now and add the iron onto there. And you can see that looks
a very, very nice bolt. All right, so let's make it a
little bit smaller like so. And then what I'm going to do is I'm going to spin it round. So I want to spin it
this way round first, so r x -90 So Lth,
bring everything back. And then what I'm going
to do now is you can see my bolt is a little
bit hidden at the moment. So what I'm going to do
is I'm going to come over and I'm looking,
Where did it go? It should be under
spear, this one here. Pull out. And you can see
it's way, way too big still. So let's pull it out
a little bit more. Let's make it much,
much smaller. So something like
that sort of size. I think it is actually
quite a big support. Maybe a bit bigger,
maybe that sort of size. All right, now let's pull it into which place
it's going to go. We want it to hold these parts and the bot parts it's going to be
holding in here. So all I'm going to do now, I'm going to pull it
back onto the place. Press dot to zoom in again, make sure it's
actually in there. And then on going to do now is I'm going to put these bolts in shift in another bowl. Instead of pressing shift D, I'm just going to join them
both together with control J. And then all I'm going to do is press Tab and grab this.
I've just got this one. I'm just going to
move it over here. Move it over here
shift, shift one more. I think we would have two
on there as well shift. I don't think they would have
left, just this bit here. I'm just going to
press shift again. So now the next thing
I tend to do is I tend to come in and I'll move them. Now the easiest way to move
them is if you put on x ray, you see through there, you can grab this one. And if you move it with now, it will actually just move
against that axis already. So if I put it,
let's say over here, you'll see it's
still actually in the wood because I've
got my view straight on. Because I've got my
view straight on. Which makes it really
easy actually to do this. So I'm just going to play
around with them now. Move them into positions
that I want them. So something like
that, like that. And finally, move this one down a little bit. So there we go. All right, so now I want to put in some
more at the bottom, but I don't really want
to just copy these because then it'll
look too obvious. So I'll just bring
them down again. I'll just bring this one
down and I'll put it into place wherever it's going
to go for it there. I'm going to again press
one, a number pad, and this time
instead of pressing, all I'm going to
press is Shift D and then just put
it wherever I want. Even easier. There we go. All done. Very nice. Okay. So now I'm thinking right, where else do I need bolts? I'm probably going to need
some bolts here. One here? Yeah, the side of there. Yeah, I'll put those in now. So what I'll do is I'll
just grab this one shift. What I'll do is I'll spin
it around so R dead 90. I'm going to press three
on the number pad. I'm going to put the press G
just to put it into place. I know it's behind it, so I need to just
put it in front of it so we just making sure it's popping
out in the right place. And now we can see that it's
in the wrong place, like so. And then I'm going to do is we're going to
press three again. And I'm going to
put on my x ray C through there. No, we can't. I might, yeah, there we go. Let's put on our wire frame. So I'm going to press shift D, put it there, and then shift
D, Let's put it there. Let's put on object mode now. And that's fitting in perfectly. Now let's grab all of these. Let's press shift D,
bring them all to the other side like so. Then what we'll do is
we'll spin them around. If I spin them around now
you'll see that the other don't they actually move on individual axes
which is good. Just make sure you've
got individual origins on D hundred 80, then them round, put
them into place. Make sure the poking in there, let's put it on
the turnoff x ray. It's either way too far in. I'm just going to
pull them out a little bit and then I'm
going to check these on the other side making
sure they're not too far in. I think they are a
little bit too far in. I'm just going to pull
them out a little bit, so All right, there we go. That is looking really
nice and pretty. We just need to unwrap them all now if I grab them
all now just to make sure they look different and I come to UV editing and what I'll do is I'll put
UV and where is it? Pack Islands. Islands.
Okay, there we go. Now that's looking pretty good. Let's have a look at
our materials now. They all look very different. There we go. That
is really nice. Okay, now let's go back to modeling and let's take stock of what we've actually got
here. Let's go to final. Let's hide our gray
box out of the way. And then what we'll do is we'll just put it onto rendered view. A quick look at what
we've actually heaved. We can see under here now
that's looking really nice and supported and it's really
starting to come together. Now we've got that,
let's actually turn our sun a little
bit because it's a bit too straight on say
let's turn it that way a little bit now we should be able to
see a little bit, bear what all this is
going to look like. Yes, that's good. All right, so what we'll
do then on the next lesson is we will finish the
top of this door off. And then we'll start with the
steps going down to here. And then hopefully
we should be able to eventually start on our roof. Now what I'm going to do is, I think before actually
starting that, let's do something a
little bit more fun. What we'll do is we'll just
put the main beam across here and just make a start
then on these parts here. And then I think we'll go back here just to keep it, you know, a little bit fresh and
easier to slog through. All right, so let's
press Oltge to bring back our actual great box. And what I'm going
to do is I'm going to use this then to actually create the top of
our actual roof. Now I'm just looking to make sure that I'm happy
with how this looks. A little bit later on,
what we're gonna do is we're going to actually
bend this roof in. But we're not going
to do that until near enough, the actual end. Okay, so let's use this log
that we've already got. So what I'm going to do is
I'm going to press shift, I'm going to duplicate it. And then I'm going
to move this up to the top up here of my house. And what I'm going to do is to put it right in the center. I'm going to grab
the top of here. And then I'm going to come
in and you can see that I can grab both of
these lines like so. Then I'm going to press
shift S first to selector. That's going to put it
right in the center. And then I'm going
to grab my log now. And then what I'm going to
do is I'm going to shift S and selections
curposer keep offset. And then what I'm going to
do is I'm jaws going to pull up and now we're just
going to move it up. So we're going to move
it up into place like so I'm going to move
it then to this end. And this end we're
going to actually have, you know, two
crossing points over. So we've got to be
careful how big this is. It wants to be big
enough to look as though it's supporting
a lot of weight, but not big enough where
it's actually going to cross over on the posts and
things like that. We're also going
to have a load of support on here as you've seen. So I think we'll pull that
in place for there for now. And then what I'm
going to do is I'm just going to grab
the back of it. And then what I'm going to
do now is I'm going to, I think I'll work
on the back first. So if I bring in some posts that are going to
come down here. Down here and then I can see that I'll need
one going across here. So I think working
on the back will make it easier to
work on the front. So what I'm going to do is
I'm going to grab this post again D to bring it over. I want to bring it
straight into the middle. So all I'm going to do is
press shift elections cursor because we've already
got our cursor there. Let's pull it back then. And then one going to
do is I'm going to rotate it round now on the x, so our x 90, so and then we're going to
make it a little bit smaller. And then finally one going
to do is I'm going to pull it in place wherever I want it. Which means it's
going to probably be on the top of this here. So all it is now is just getting it into place
wherever you want it. The thing is with
this, we want it actually popping
further over the top, so actually coming up
a little bit further as the Viking style that
we're actually looking for. So I'm going to grab
the bottom of it. We're going to
actually pull this up. I'm going to pull
it over, and we want it hanging over here. So now it's up to you whether
you want to actually I'm going to cut this little bit off to actually make this
actually hang on there. So we need to make sure that we're pretty exact with this. So I'm going to pull it down
a little bit further maybe. And you can see our
roof is going to have to come out
slightly as well. Don't worry about
that at the moment. All we're trying to
do at the moment is just get this into place where it needs
to go, pretty much. We want it in a straight line. So you can see here,
this is dictating. You can see the
straight line is being dictated by how this
is moving down here. In other words, if
I pull this down, let's say to this angle, that means that this angle
then needs to come down. We get a better idea of how far this needs to come
down into place. You can see it should
realistically come down to there. And then what we
can do is we can grab the whole thing and lift it up like so. And then lift it to the side. And then finally if I press
control one, pull it back. Now, so because we
want it crossing over. Now what I'm going to do is
seen as I've got this here, it's not the right
size or anything, but it does give me, you know, a kind of scale, how to do the
roof and things like that. So what I'll do
now is I'll simply press control light or
transforms right click. And I'll set the origin
to my three D cursor. So then that's right
in the center. Then what I can do
is I can come in now and add in a actual mirror. That's mirror on the other side. And then we go,
we've pretty much got what we're actually
looking for there. That's exactly what
we're looking for. So we can now see we've
got something to wit with, we can see that We're
going to have to cut this a little
bit, as you can see. So this going down
here needs to be cut. And I think actually
I can work with that. The one thing I would say is it's probably not
thick enough this end. And probably as you can see here just coming
out a little bit, you can also see on the bott, so look, the bombs
actually is pretty nice, so we'll leave it like
that on the bottom. All right, so let's
bring it, where are we? Let's bring it up a little bit. So what I'm going to
do, I'm going to grab this face and then what
I'm going to do is I'm going to make sure that instead of it being
global as you can see, if I pull this up,
it's going to pull the whole thing up
and bend all of this. Now, we might actually want
that on this occasion, but if you don't want that, instead of doing that, what you can do is
put it a normal. And then we can actually
pull it out like so. And make it look a lot more
kind of realistic, I think. All right, so I'm
happy with that. Now what I need to
do is I need to come in and apply this mirror. Because the mirror at the
moment means that these are crossing over it in this way. And we don't really want that. We want to add a little bit of realism to make this
a little bit real. They won't be exactly the
same on each of these parts. So what do it mean like that? Let's supply the
mirror with control. And then what I'll do is
I'll come into this one, I'm going to pull it back
a little bit like so. And then I'm going
to pull the front back a little bit like so. And can see that's looking
a lot more realistic. Now, let's deal with this part first before we move on anymore. So what I'm going to do is I'm going to grab all of these. You can see that at the moment
they're joined together, they don't actually have
a mirror on them either. So that's something
that we need to fix. So what I'm going to do is I'm going to come in
and I'm going to grab both of these on L L, grabbing both of them.
Press control one. And then what I'm
going to do is I want to actually use my, um, where is it called? Look, we're going to use
them bisect and we're going to cut along this
line just below it, but you can see just
below, like that. And then what I'm going to do
now is I'm going to check. So when I move around, I can check now that
it's all the same. Now as long as I
don't click on this, I should still have this open. And I'm not going to
actually fill this. Because if I click fill, you can see it doesn't fill
it in very well anyway. I might as well fill
that part in myself. But what we're looking
for is just to make sure that this is sat
on here like this. And it's just going to
add a lot more depth of realism to the bill. Because the thing is
the actual thatching of the roof is going to
come over there anyway. And so I think I'm
happy with that. I'm just going to
clear the fill off. So I'm just going to
take that half a minute. Al right now I've done that one. Were I want to do is I
want to grab this one. Now the reason, by the way, I didn't grab them
both at the same time, is because if I cut that, it would actually cut this off as well. So just
be aware of that. What I'm gonna do now
is press control one. I'm gonna come in
with my bisect. I could also mirror that
over this side as well. I could do it that way or I could just come
in and bisect it. Let's come in and bisect it. We'll just make it
look a little bit different from the other one. Let's come in, grab it here. And then all I'm going
to do now is I'm going to clear the other side,
so clear the outer. And I want to obviously move
this a little bit closer, so I'm just going to pull
this a little bit closer. Now you can see the angles
a little bit out here. And this will be either
one of these angles. It's probably going to
be this one's over. Look, I might have gone
a little bit too far. I think that looks fair. All right, so that's
looking pretty good. Now let's fill in these parts. Now when I fill them in, obviously I'll have to
re unwrap these as well. If I grab all of this here, what I'm going to do is
I'm going to press Alt. And, and then what I'm going to do is I'm going
to right click and come down and put it onto
faces, right click. And we're going to make these. And there you go, that's
filled that in nicely. Okay, next of all, let's fill in the rest. So we'll just come around now and quickly fill in the rest. And then what we'll
do is we'll get the wrap control shift or is it 1 second shift click
going all the way around. Sorry, Ole to fill them in. Basically you've got
two, you've got that fills in the entire
face or you've got Altef that will try
and actually make some polygons in
there. Right click. And then on face, right click tries to quads. And there we go. Now let's
do the same on this one. So I'm going to come in al
this one at the same time Ole. Then what we'll do now is face click quads. Grab this one. Control, select this one. Note, that's not going to work. We're just going to press, actually we could press C, which is a circle select, and just select them
all going down. Now to make this bigger, you
could just scroll it out. To make it smaller, you just
scroll in minus them off. You press the middle button and you just click to
actually select them. Right click, tries to
quads, and there we go. Now let's actually
undo these again. So what I'm going
to do is I'm just going to grab them all. So I'm going to press you
from what I'm going to do now is I'm going to make sure
that I'm happy with this. A little bit more
blurred on here. One going to do, we're going
to go to UV, grab them both. And we can also see
that we do have a problem now and the
problem is being caused. That's why there is that because
this has been taken off. We need to go in and we need to add that on to all of these. Right click, I'm just, this one click,
I'm just looking, where is the seam on
the inside of here? Let's have a look. Let's just hide that
one out of the way. There isn't one in
the inside of here. I'm just going to press
Alt tag, bring it back. And then no longer
to shift click, shift click the press just to zooming to get on
properly. There we go. So right click and marxme, then we'll just go
round to these two. Same thing again.
Alt shift click, Oli click, right click markem. And then we can press a
two select, all to wrap. And now they should wrap absolutely perfectly,
which they have now. Let's just check to
make sure that we're happy with the resolution. Let's just make them
a little bit bigger. So, yeah, there we go. That's looking
absolutely fine now. Okay. I'm really
happy with that. I'm going to save out my work. And then on the next one
what we'll do is we'll just get these in place, probably over to the
other side as well. So bring it over here
and then we have a real structure to actually
start or build with. And then we can
actually start bringing in the actual roof out to here. Alright everyone. So, I
hope you enjoyed that, and I'll see you on the
next one. Thanks a lot. Bye bye.
30. Creating the Roof Supports: Welcome back everyone, to
bless Neal engine five. The complete beginners guide. And this is where we
left it off. All right. So now let's think about
bringing this part over now. On the front, I'm not going
to have it crossed over, that's just going
to be on the back. So what I'm going
to do is I think I'll put this one in place. So I'm just going to press
shift, bring it over. I'm going to put this in place. So here. Yeah, something like that. So you can see it's coming
out very, very slightly. Now, the other thing we've got to think about on this one, it needs to come through
a lot further forward. So we can see that this part
is not in the right place. Let's bring it out slightly
past this part here. So this part wants
to go slightly past. And then one going to do is
I'm going to come in now grab this one and I'm going to grab just the front of it with
face select like so. Then I'm going to pull
this out just onto there. All right, so we're really
getting somewhere now. Now let's think about putting
in our other pieces first. So first of all, we want to this part up so we can see here that
this is in no way, shape, or form right now. So what I'm going to do
is I'm going to grab, there seems to be two in there. Let me just check.
What is that one? That's our actual roof. So let's grab our roof. And I'm going to hide my gray. In fact, it's all part
of the same gray box. So let's just hide this part of the gray box out. And
there's our roof. So that makes it easy because
we can actually use that. So I'm going to do is
grab both of those, press P selection and then I'm going to
hide my gray box now. And I should just be
left with my roof, which is what I wanted, really. And then what we're going
to do now is I'm going to come through the sides here, this side, and this side. And then I'm going to
lift them up into place. Now obviously they don't want
to be hanging out of there. So I'm going to do is
I'm just going to press, and if it comes up where you're pressing and X and wanting
to squish it in like this, all that means is
you can actually, normally you can bring
them in together, but it just means it's
because it's on normal. So just set this on
global and then and x, and now we should be
able to bring them in. While they're not coming in. Look, they're not
coming in at all. I'm just wondering, is it
on a mirror or something? It's not in a mirror, so
I don't actually know. But all I'm going to do then, because that isn't doing that, I'm going to just bring it in manually to the top off here. And then we actually have
something to wit with, you can see I've gone
a little bit too far, the I'm just going
to bring it out and now you can see that's
covering that bit in there. Now this side of course
isn't doing that, so I'm just going
to delete that off. So delete basis then. I'm just going to make
sure that I'm happy with this bit before I
do anything else. Because this is mirrored
over the other side as well. I can actually come here and
then what I can do is I can come in and grab this
going all the way down. Shift control select. And then all I'm going to do is I'm just going to lift it up. Lift it up. And I'm wondering do I really
actually need that on there? I think actually
rather than do that, I'm going to actually put
another piece of wood. I'm just wondering whether
to put another piece of wood coming this way across. I'm thinking to make
it, it would have probably a piece of wood going across here supporting
these as well. It's a very thin sliver of wood. I think I will do
that. Yes. What I'll do is I'll press Shift. In fact, we can use this
log here that we have. We'll use this log,
I'll bring it across, and then I'll join it
with the other one. And I should be able
to mirror it in what I'm going to do, so
I'm going to put it here. I'm going to press, so I'm
going to drop that into place. So I'm going to make it
a little bit chunkier. I'm going to put that there, and then I'm going to
grab the end of it, pull it all the way across. And there we go. Now I
want to split this up. What I'm going to do is I'm,
I'm going to grab it here. Click control left click. Let's drop one in there.
Control left click. Let's drop one in
there. Let's grab both, all of this now. And what we can do is
we can split this up. If I grab all of
this shift click, press Y to split it up. Now if I press, you can see it's all split
up from each other. Now finally what we can
do is we can grab all of them to where it says mesh, cleanup, and fill holes. And we should end up
with a little break in each of those. That's
what I'm looking for. But double tap the A now. And see that's
looking pretty nice. Now, we don't want to join this up without doing the UV's. Let's do the UV's first. You can see at the
moment, I don't think we have any seams on
certain parts of this, so the best way to do this
is maybe smart UV project. Let's see if we can
get away with that. Yes, we can. Now you
can see that's looking pretty nice, All right? I think I'm happy
with all of that. Now. The one thing I'm not happy with is if we come
over to materials, we can see light crack wood. And these are not
light crack wood. What I want to do is I want to turn these to light crack wood. So let's turn them down
to cracked wood because these are on the outside
and we already know that on the inside we're
going to have it pretty dark on the outside, we're going to have
it light crack wood. I'm going to also do
these. Double tap the A. There we go. I think I'm pretty happy with how
that's looking for. Sure. All right. So now
we've got this roof. Let's go back to the roof now. Just making sure it's
fitting in place. As you can see. It just needs probably dropping
down below that now. So I'm going to come
back to my roof. What I'm going to do
is I'm going to make sure I can see in there. I'm going to put on x ray and I'm going to
put it on object mode. Now I can see in there, so I'm going to grab
my roof like so. And then all I want
to do is just pull it back and lift it
up a little bit. I basically want to
try and put it so it's actually below that because we're going to cover
this up anyway. We just want to
make sure though, the roof below this little seal that we've got there, and
I have turned that off. Now what I'll do is I'll
pull this part out into place and we'll end up
with a little bit of a gap you can see down there,
but don't worry about that. We're going to actually
cover that up. I'm just now if I should
get rid of that gap. I know it seems a bit
tedious, I think. I think I'm just going to
pull it up a little bit, but making sure it's
accurate is important. Okay. The other thing is as well that we're going
to change this roof. We don't need to do a little
bit of sculpting on it, so it might not be something that to worry about too much. All right, now let's
go back to modeling. And what I need to do now is I need to put this
roof over the other side. So what I'm going to do is
I'm going to add modifier. Let's bring in a mirror. Let's right click and set origin 23 cursor. And there we go. All right, that's that
part of the roof. Now let's start thinking
about the front of this roof. So this part here is not
going to have this part. It's basically going
to have another part coming out of here. What I want to do is
while I've got this, I want to shrink these back in. What I'm going to
do is I'm going to grab the top of here. I'm going to make sure that I'm probably going to be
on normal, let's see. And then what I want to do is
I want to bring these back. You can see for some reason they haven't got the
mirror on anymore. What I'm going to do is
I'm going to come in, I'm going to delete this one. L delete, says grab
this one again, Make sure the orientation
is in the census. So set origins, three D, curst, add modifier, bring in a mirror. There we go. All right, now let's bring them down. Now the important thing
is when we bring these, But you can see at the moment, if I come in and select
this is this one here, press one to go to the front. You can see that
they do it wants to line up near enough
perfectly with this, yet be pulled in here. You can see grab that again. I need to do some work. And pulling this back like so. So this is how we want
it because on here we're going to have a
bigger front part on there, but it should look
something like that when you've
actually finished. Once we've done that, then now we can actually put
a front bit on. But before we do that now we've basically got
these in place, we might as well
unwrap them all. So I'm just going to go in, I'm going to actually
apply my mirror. I'm going to go to this
one. And the mirror has been applied on
that one as well. And then we're going
to grab these, both, a smart UV project. Click Okay. There we go. Just make sure again, you're happy with the
resolution of the wood. And now let's go around to this side and we'll do
exactly the same thing. So a smart UV project. Click Okay. There we go. The one that I might not be happy with is just
that one there. I'm not actually sure maybe
we can get away with it. I'm just checking the wood resolution in
comparison to this. It seems very nice. All right, so I'm
happy with that. Now, on the next lesson then, what we'll do is we'll finish
this part on the front. I think we'll do this
part on the front first. That then will lead us then into creating this part
on the inside. And then we can look at
the actual, you know, making the roof look like it's actually made up hay and things like that.
All right, everyone. So I hope you enjoyed
that and I'll see on the next
one. Thanks a lot. Oh, before I go, let's
remember to save it out. All right, everyone.
I'll see on the next one. Thanks a lot. Bye bye.
31. Introduction to Curves: Welcome back everyone to Blane
or Unreal engine five of the complete beginners guide and this is where we left off. All right, so now let's actually get on with the front of this. So what we're going to do is
I'm going to create a block first that's going to
actually sit on here. So I'm going to press shift A. I'm going to bring in a cube. Unfortunately, we can't use
the log we've already got. Let's bring the cube forward. It should be straight on, so parallel with here. And then what I'm
going to do is just fashion this into what I want. So I'm going to pull it back perhaps to something like here. And then what I'm going
to do is I'm going to pull this back a little bit. Probably. Yeah,
something around there. I think we can actually
make something with this. We might need to extend it a
little bit, but we'll see. Let's then bring it down. I want it to come down here, off to the top of here. And then I'm going to extrude, pull it out like so. And then and y pull it in like, so then I think I'm going
to put a top on it as well, like, so. All right. That I think is going to
look good for the start. Now let's think about creating a nice flow for the actual Viking
part that comes out here. What I'm going to
do is I'm going to press three on the number pad. I'm going to bring
in now a curve. So we're not going to do this with pipes or
anything like that, we're not going to really do
it with mesh or anything. We're actually going
to do it again. There's many ways of doing this. We could also do it with
the grease pencil as well. That's another way of doing it, actually, that might be the
way of actually doing it. I think I'll show
you this way first. And then for the other
one, I will show you the other way. I think
that's what we'll do. So first of all, we'll come
in, we'll go with curve, we'll go down to a path,
and we'll bring in a path. Then all I'm going to
do is pull this over. I'm going to spin
this round then. So R Ted 90 and that's just so you
can see what I'm doing. It's pointing that
way before and now it's pointing parallel to us. And then and x pull it
in and x pull it in, I'm just going to get it into a sort of place where I
want it so we can see. Now now a lot of the time when we're working with these
and we're moving it, we can't actually see what
we're doing when we move it. As you can see,
what you can do is you can actually
not turn that off, where we can put it onto
wire frame, I think it is. Now, wire frame is
not going to do it. Let me see if I can
actually turn that off to make it a
little bit easier. So I'm looking at turning
off the X, Let's see that. No, it's not going to do that. So let's turn the X back on. Yeah, I'm going to leave it. I'm not going
to worry about it. I think there is a way, but
I'm not sure. All right. Once we've got it there though, you'll be able to see what
you're doing anyway with it. Okay? So now we've got it. What we're going to do is
we're going to first of all, bend this into some
sort of place. So I'm going to click on the first actual
little part here. These are called handles. Now on I'm going to press
this shift space bar, bringing the move tool. So now you can see
when I move this down, let's put this on global, Just make sure it's going
the right way. You can see that that curve
is going something like that. And then I'm going to
pull it up like so. And then I'm going to
pull this one down, pull this one up, and then
pull this one across. And then what we're
going to do is I need probably a little bit more
to get the right shape. So what I'm going to
do is I'm going to grab this one and this one, and I need another
part pouring in there. So I'm going to right
click, subdivide. Then you can see that we've
got another part now to actually work and
get a nice curve. Now I'm not completely happy
with this because of course, it needs to come out more
like this, more like this. So now we can see we've
got that nice shape, maybe that's what
we're looking for. We'll see once we actually bring it out and actually
turn it into mesh. All right, the next thing I
want to do now I've got this. But what can I do with it? It just looks like
a piece of mesh. A couple of ways of doing this. First of all, the
first way of doing it is bringing out
the extrusion, so you can extrude it
out like so this is one way of doing it to
get a kind of thickness, but that is not the
best way of doing it. As you can see, we end up
with a lot of problems. The next way of doing it
is we can use the depth. But the depth will again, have a few problems in that it's just rounded and we don't
really want that either. The easiest way of doing
this is first of all, reset the transforms
right click, set origin to geometry, and then what we're going
to do is add in modifier. So let's add in a
solidify modifier. In fact, we're not
going to add, then what we're going
to do is go back and we're going to
extrude it out. Now let's extrude it, and you'll see now it's
coming out. Very nice. And finally then what
we're going to do is come in and add a modifier. And this time it's
going to be a solidify. And we're going to pull
that out a little bit. So pull out the thickness, and now it looks really
weird at the moment. And that's because we
just need to right click And what we're gonna do is
shade flat. And there you go. Now we've actually got
something to work with now you will see we've got a lot of polygons going
around here as well. Maybe that's not
something you want. If that's not
something you want, what you want to
do is you want to, let's say it's for
a mobile game, you don't want quite
as many polygons. You're going to go back to
your curves and you can actually turn this down into being very, very low polygon. So the higher you turn this up, the more actual polygons you're
going to get around here. Which means that it's going
to look super smooth. The problem is I can't put it
on shade or too smooth yet. And the reason for that is it's because it's not
actually geometry yet, it's just actually a curve. All right, so now
we've got that. Let's go to the side view. And what I want to do is
I want to shape this now into, you know, how I want it. The other problem you can
see is I've just seen that, actually forgot about that, is that you can see
it's now out of place. And the reason for
that is because our actual thickness has
just pulled it over. So what you want to do
is just set this to zero and then it should
put it back into the middle because
it's just offset slightly when you bring
in the solidupie. Okay, so that's looking nice. Let's see now if
we can shape this into a little bit
of a more viking S. I think maybe to
bring all these back. You can grab them all
at the same time. Yeah, I'm thinking that's
looking a little bit nicer now. The other thing you
can do is you can come into the bottom of it. If you press S, you can see nothing happens. But if you press old test, you can see we can
actually bring it out. And that's exactly what we're
looking for. All right. So I think I'm happy with that. Now what I want to do is what I'm going to do is I'm going to keep that
the way it is. I'm just going to pull it
out slightly on the bottom. So I'm going to turn up, first of all, my
resolution a little bit. It's a little bit
too low for me. And then what I'm
going to do now is I'm going to apply my curve. So in other words,
this is still this. I want to apply my curve now. So what I'm going to
do is I'm going to go to object convert mesh. And now it's actually mesh. All right, perfect. Now let's right click and
shade. Auto, smooth. And now you'll see it works. Let's bring in a bevel as well. Add modifier, bring in a bevel. Let's also reset
the transformation. So control all transforms. Right click the
origin of geometry. Now what we can
do is we can come in and bring this bevel down. First of all, bring
it up very slightly, probably to the
same size as this. There we go. Now let's
finally bring this out. So what I'm going
to do is I'm just going to bring this out slightly there. I'm
happy with that. And then all I'm going to
do is put an end on this. Now the thing is when
I've clicked on there, I need to put this on normal
so that I can pull it out. So I'm going to press,
pull it out and then push it in a little bit. Let's have a look at that. I think that's
going to look good, except I need to pull it
out a little bit more, I think, just to
get it straight. Yeah, I'm just wondering
whether I'm happy with this. I think I'm just going to
try something else as well. What I want to do is I
want to grab all of these. Grab all of these. I just want to see
where it looks like. Then I'm going to
press for Insert. Bring these in, and
then press Enter, and then and Y,
and bring them in. But I want to make sure
that I'm on global and X, be there that it's
not coming in. Let's put it onto
medium point and X. Let's have a look what
that's going to look like. You might want that, but it hasn't worked for
me, I don't think. All right, I'm going
to actually take that off and go back to
what it was like. I think I'm just going
to keep it like that. You might want a little
bit of a ridge on there as well or something
just to actually, you know, accentuate this
part a little bit more. Now remember though, I am going to put another
piece on here. So there's going to be
another piece of wood that's going to come up here
and loop through there. Which I'm going to show you all about on the actual next lesson. And I'll show you another way of how you know how to
do actual curves. All right everyone, So
I hope you enjoyed that and I'll see on the
next one. Thanks a lot. Bye bye.
32. Adding a Touch of Viking: Welcome back everyone to
Blane ton, real engine five. The complete beginners guide, and this is where we left off. All right, so now
what I want to do is I want to actually put
the next piece on here. I'm also thinking that this needs to be a little bit
wider at the moment. It's a little bit thin, so
that's easy enough to do. All we have to do is nx and we can actually pull
it out like so, and now it's looking
a little bit thicker. Let's actually pull that
into place as well. There we go. I'm
happy with that. And the next thing
I want to do is being as I've got this bevel on, I want to make it a little bit even as well of the moment. It's a little bit too uniform. We do is going to go
to mesh transform. Let's go to randomize. Let's turn this down as we've
done many times before. Maybe not 0.1 is even
going to be too high, so I'm not going to be
happy with how that looks. So what I'm going to do is
not three, let's try that. Even that might be a
little bit too much. I'm just wondering, instead of doing it on the whole thing, if I can just do it on the line. If I grab this line here, this line here, this
line and this line, and let's try making
it a little bit. Even just with those mesh
transform randomize, let's turn it all the way back. Let's see what we're
going to get with this. Pretty much the same thing. Yeah, I'm not happy with how that's actually
looking like that. I don't actually think
I'm going to do that. What I'm going to do is I'm just going to
grab one of them. I'm going to give
it one more try with another way which is randomize on the
proportional editing. I'm going to press three
to go into side view. Then I'm going to do is I'm
just going to press three, I'm going to grab this one. Then the inner a
bit of this press slightly g, very
slightly, slightly. We don't want much
of this at all. Then we made it a
little bit uneven. Now on that side, at least control three to
go around the other side, can see it's a little
bit wobbly here. That's fine then I actually, that's good enough. I'm happy with that. Okay.
Now let's think about then, this other bit, that
intertwined into here. What I'm going to do
is, first of all, I'm going to bring in a plane. So what I'm going to do is
I'm going to press shift. And let's bring in a plane. I'm going to spin
this plane round, so R Y 90. I'm going to press three then, and I'm going to bring
it up onto here. All right, so now what I want
to do is I've actually got something over here
called the grease pencil. Now once we've added our plane, what we need to do is
if we bring in a curve, bring in a Bezier curve, The curve will come over
here. As you can see. What we want to do then
is we want to go in edit mode and we want to
delete all of these out. If I delete them, delete, So press the tab button, sorry, keep an edit mode. Press three now
on the number pad and go down and actually
bring in my drawer. Also make sure that I'm
actually on surface. And the next thing I want
to do is I just want to hide this part
probably out the way. Because if I draw now, so you'll see if I draw, let's say draw from here and
then bring it over here. So what it'll do is though, it will draw over this surface. And that's not something
I really want. So what I want to do is I want to just delete that
out of the way. So I'm going to grab
them all a deletes. And then what I'm
going to do now is I'm going to go to three. I'm going to hide this
out of the way, so hide. And then what I'm going
to do is I'm going to come back to my curve, which should be, let's
search for my curve curve. Let's do that again. So what we'll do is we'll press sur shift curve as your
curve. Bring it up. Delete it out the way, make sure it's on surface. And now we should fail to draw in an actual curve like
so. And there we go. Now we've got that.
It's drawn on the surface of this plane,
that's why we used it. If I delete my
plane out the way, now I'm still going
to have that. And if I press voltage, I should now have something that I can actually work with. Okay? So that's the
other way of doing that. Now if I come back to this and what I'm
going to do is then I'm going to bring that down without proportional editing on. And then we're going to
rotate it round art and X. Let's rotate it round,
bring it into place. And then let's bring
this one back. And we can see we've
got this one here. I don't think I need
that one there. So I'm just going to
delete verts. There we go. Now let's bring out this mesh
to give it some thickness, exactly like we did before. So all we're going to do is
we're going to com control or transforms right clicks at
origin, geometry extrude. And then we're going to
add modifier solidify. And I'm going to give
it some thickness. I'm going to set this to zero exactly the same as
what we did before. And then right click and
we want to shade flat. Now you can see
that with this one, we actually do have
some problems. First of all, we can see that
this is twisted too much. So we can see that it's
too close to this one. Instead of doing
that, we want to do is want to grab
both of these. Right click subdivide. Now I should be
able to move this down without affecting
that one too much. Now you will also see that on here got a little
bit of jaggedness. So you can see this here. All you want to
do is press and X and we can actually
smooth that out like so. All right, so let's grab
all three of these. And we can also smooth them
out like so, like that. The right click and smooth. You can also smooth out
the tilt of curves. There's a lot of options there, but we're not going to go
into too many of those, okay? So I'm happy with
how that looks now. I think that's
looking really nice. So what I want to do, I want
to just shrink this part in. So tes, let's shrink
this part in like so, and then that's
looking pretty good. Okay, so now what I want to
do is I want to convert this. I want to make sure
I'm happy with how many polygons it's got in. I think I'll turn them
down just very slightly to something like
seven or eight. Now the thing is as well, I always turn them
down to seven or eight because I feel
like when it's set at, you know, 12, it's a little bit too high no matter
what you're doing. Okay, so now I've got that.
What I can do is now object come down to convert and I'm
going to convert to mesh. And then what I'm
going to do is I'm jaw going to make sure now
I'm happy with it. And then I'm going to
join it up to this one. So if I grab this one, then this one press control J. It should inherit all of those levels that we
actually put in there. Right click, and we're going
to shade auto, smooth now. And there we go. Now let's
make a top for this. So what I'm going to do
to make a top for this, I'm going to come back
to this part here. I'm going to grab this part. I'm going to press Shift D. And we're really trying to speed up our workflow now by
doing all these things. Just making sure
that everything's being sped up by using mesh. And, you know, all the things that we've already
got in the scene. In a way that helps. Okay,
so now I've got this bit. I'm going to press and y, bring it down,
pull it out and X. So, and then what I'm going
to do is put this into place, press E, D, pull it down, See that it's not going the way
I want dead again. If that happens, there we go. Now let's just
bevel off this top. And I think then we're
done with this part. I'll grab this one control
B. Do I want it like that? Let's first of all right, click, shade, auto, smooth. Let's also bring in
a bevel for this. What I'll do is, in fact I'll reset
transformations first. Then I'll bring in my
bevel and I'll turn it down one that's probably
a little bit too much, so not 0.05, double tap the
eight, and there we go. Now the moment of truth
is when we actually bring in our material. Once we brought in our material, I think also at this point, I can actually get rid
of pretty much all of the gray box except the
window and the chimney. So what I'm going to
do is press a tag. I'm going to grab
my window, press L, grab my chimney,
press L selection. And then what' to do is I'm
going to come to my gray box. Now just to make sure it's that, that I've grabbed which looks
like the gray box to me. And then what I'm going to
do is just delete it out the way. All right. So now we're not going to mess around with the gray
box anymore and we've pretty much got
everything in there ready. We might need to. One thing is if you've got too
many gaps in here, sometimes you need
to put some planes behind the back of here just so you can't see
straight through the building or
anything like that. Now let's put it on
material, let it load up. And then what I'm
going to do now is I'm going to actually
do this part first. Now I'm going to come in,
I'm going to press a, I'm going to press
U Mart, UV Project. Okay. We might be able
to get away with that. It all depends. Sometimes
you do, sometimes you don't. What I want to do now is I
want the light material. So I'm going to click
the down arrow. Light crack wood.
And there we go. Now let's have a look. So you can see here that I
would say very important, the way that you look
at your wood grain. I would say this wood
grain honestly should be going up and round, maybe instead of sideways. Look, if this one's
going sideways, this one needs to be going down. That's the thing that
you need to think about. Every piece of this must be going sideways all
the way around. Even on the bottom,
should be going sideways. It send that out. You can see that this
bottom part isn't going sideways, so we
need to change that. We need these both going up, which they are, so they're fine. It's just the bottom bit. And then we'll move
to this bit as well. Let's come in UV editing. Let's press dot to zoom in, let's put it on Material. And let's come in and change
the bottom bit first. If I come in now I'm going to grab just the
bottom bit on face, select A over the UV map. 90. Spin it around. There we go. Now that's
going the right way. Now we just need to
think about this one. If these are going sideways, this one would probably be
going sideways as well. What I'm going to do
is I'm going to come in out shifting, click, grab all of those R 90, spin them around like so. And then what I'm going
to do now is we can see though the I'll spawn round. All right, with this one may be easier to come in and
just mark a scene. So I'm going to come in, mark
a seam on here and here. We thought we could
get away with it, probably not going to be able to right click Seth,
bring everything back. So we've got a seam marked
on the bottom shift. Shift click, right click, mark seam L, U wrap. Now it should have unwrapped. Now if I press shift H should
be unwrapped. Tap eight. Have a look, it should
be wrap the right way. Now, we did say that these are going to be going sideways, so let's come in and
grab all of those. Let's spin them round. So let's make sure the bottom bit as
well is going the right way. In fact, the bottom bit doesn't matter because it's
stuck on there. All we need to do now
is change this one, and this one R 90. Spin it round, and there we go. Now you can see it's actually
looking pretty nice. Okay, so I'm happy
with how that looks. The one thing, I'm just
looking at the resolution now. I'm going to fix that as well. So I'm going to press old
page, bring everything back. And I'm just going to
make sure that all of these now five, press A on, these are UV scales, so I'm going to make sure that the average island scale is on. Then what I'm going to do is
I'm just going to make sure that I'm happy with these with one last check and then
I'm going to press ol tag, Bring everything
back, double tap the eight and have a good
look at what that looks like, especially on my rendered view. So have a look. Yeah, and I
think that's looking good. All right, so now
I want to do is on the next lesson is I want to
actually fix these parts, make sure they're okay. And then finally I can move
on to the inner parts of these and actually finish
building this out. All right everyone, So I
hope you enjoyed that and I'll see on the next one.
Thanks a lot. Bye bye.
33. Creating the Thatching Supports: Welcome back everyone to
blend on real engine Five, The complete beginners guide, and this is where
we left it off. Okay, so now let's think about bringing some materials in on these that we're going to do. I think on these it's better to actually mark our seems out. It's going to make it
a little bit better. I also think that this part
here just needs to pull it out a little bit because I'm
not quite happy that angle. So what I'm going to do is
I'm just going to put myself where I don't actually
know where that's gone. Here it is normal. There we go. Yeah, it doesn't look
like it's going to do it. If you ever have a problem where you can't
actually move it, just go into the side view. So three. And then press G, and then you should
be able to move it into place to where
you want it like so. And you'll see
that it just keeps it straight because
we're actually just moving it like parallel on kind of a two D plane kind of thing when you do
that. Now I've got that. What I want to do now
is add in my seam. So what I'm going
to do, very simply, grab the bottoms and tops of these and then I'm
going to press Controle and mark a seam. And then for this what I'm
going to do is I'm going to press Ol shift and
click Ol shift, click. I'm going to actually
do these independently. And the reason for that
is I think we'll get a better wrap doing it that way. Now remember I did tell
you about the UV squares. This is the perfect
place to use that add on right click mark seam. Now if I grab all of this, press U for wrap, you will see that we end up with pretty much a mess
on the outside of them. And when I come now to
add in the material, you will see that if
coming light cracked wood, you can see all of
this bending here. And that is what I
was talking about. It just doesn't look right. Would it really be like that? Or would it be flowing all
the way around up to you? Which way you want to do it? The top bits, of course.
They're absolutely fine. It's just the side bits
that we need to fix. So what I'm going to do
is I'm going to come in, I'm going to grab
this one first. I'm always going to grab
it near where the seam is. I'm going to grab this polygon L. Then what I'm going to do is I'm going to press
and light pack, okay? And then you again and
follow active quads, okay? And let's see if
that's fixed it. And now if I grab this, press G, bring it in, you'll see
if I spin this round now. So R 90, that it actually flows
going all the way around. And now I'm just going to
make it a little bit smaller. Let's have a look
what that looks like, making sure that I'm yeah, I think it's still
undoing it a little bit. So let's pull it out. So S and X, let's have a
look what that looks like. That looks even worse, So
I'm going to press S and X, pull it in and I'm going
to press, pull it out. Yeah, it's not looking right. I don't think I'm
happy with how that is. I think I'm going on this. I'm going to have
to keep it as was. I'm just wondering if I should
under it a different way. If I grab this
one, going all the way around to here, press three. I'm going to grab this one going all the way
around to here. And then I'm going
to do instead, is I'm going to press and I'm going to go to
Project From View. And let's have a look at
what that looks like. Maybe that is the way to go. Yeah, I think I'll do
it that way instead. I'm going to grab this one
then all the way to here. I'm going to grab this
one all the way to here. I'm going to press
Project From View. I think I'm going to
go with that instead. Because I think that
just looks better. And then the one thing
that I'm looking at is this resolution
on top of here. Let's have a look
how big that is. I'm going to grab all of these
going all the way around. Then what I'm going to do is
I'm just looking at that. It's going all the
way around there because I didn't mark
a seam in there, so controle markem,
then regrab them now. L, L, L and L and then
on' I'm going to come in and make the UV bit
bigger like there we go. That's looking just
Tom's bear now. All right? So I'm
happy with that. Bring everything back,
double tap the A and just make sure before moving on that everything is how you wanted it. Okay. That's done.
Now let's think, before we do this front bit, actually what we'll
do is we'll bring in what they call like
supports that come in here. This means then
that we might need to alter this bit slightly. So let's actually have a look at that. Let's go to modeling. To actually do that, what
I'll do is I'll come in, I'll press shift day,
and I'm going to bring in a cylinder. So let's bring in a
cylinder at the moment, the cylinder will come in on 32. I really don't want that.
It's way, way too high. Let's put it on 14. Let's try that. Let's
then bring them down. Let's pull them out.
What I'm going to do is I'm going to bring
them to the edge where they will be
poking out first. If I bring them over here
and then drop them down, something like here, I can see at the moment
these are way, way too big for the supports. I'm going to bring my guy over. I'm going to pull
these down then. And then I'm going to do is I'm going to make them smaller. Now, make them smaller in a
thick stick, I would call it. That is what it would look like. Something may be like this. Then what do is now
I will grab this, I'm going to pull it up like so, and I'm going to pull
it to the side and then pull it up and then I'm going to look
at the thickness. Once I've actually got that. You can also see that at the
moment the angle is wrong, don't worry about that
or anything like that. I'm going to pull it in,
pull it up into place, and they need to cross
over quite high up. I'm going to put it
up, cross it over. Maybe that is a bit too high. I'll just pull it down a little bit there. Something like that. And then I'm going to
come to this part, I'm going to put
this into place. This part you can see
pretty much going to go in place like so we don't want
it covering the window. I'm going to pull it back up
the back into place again. Okay. Now we've got a problem with this part here,
as you can see. In other words this.
It needs to be a little bit closer to
the roof at the moment. If I press one and
go to wire frame, you can see that it's not
quite level with this. You can see it starts off
all the way down here. What we need to do is we
need to come to the top of the press one again. I'm looking at this line. Is this running parallel
these two lines? This is my stick,
this is my roof. I don't think so. I
think we need to pull it a little bit into
place like so now. Are we going to be able
to get away with that? Is this going to be too much? That's the thing. Now
we need to check. Before we do anything else,
let's put it on object mode. We can see this is how
it's going to look. Let's go into this log now. And then what I want to do is
I just want to press S and X and see how far we have to move it in
to get to that point. We can see that we have
to move it all the way in the roundabout there
to get to that point. Instead of doing that, what
we can actually do is we can actually drop this down here. And then what we can do is now we can actually bring it up. If I bring it up and
then bring it in, probably going to look much,
much better like that. There we go. All right. That's looking much better. That's looking like
it would support it a lot better than
what we had it. Okay. Now what we want to do is we want to actually
bring in some more sticks. First of all though,
let's make sure the first stick we have
is done correctly. So what I'm going to
do is right click, shade, auto, smooth. And then I'm going to
make sure that I'm happy with the size of these. I think they probably need
to be a little bit thicker. So what I'm going to
do is I'm going to grab it going all the way around the outside shift click. And then what I'm going
to do is press Alter ness and pull it out like so. And then I can actually change the thickness without
moving the whole thing. What I'm going to do is
I'm going to pull it over around about here. Now I'm going to actual come
in and I'm going to use my sector to get this
perfectly right. If I press one I can come in. Now I can hide this out. The weight H for hide. What I want to do is I
want it this direction. I'm going to come in,
I'm going to press A to grab everything, mesh bisect. Then I'm going to do
now is I'm going to cut it down this way. I'm going to move it down. I'm going to actually
clear the outer instead. And then all I'm going to do now is just rotate that round. I think it's the X.
Actually rotate it round, pull it down there. That looks nice. Okay, so now I want to do
is the same with the top A. Let's go in for the bsect again. Mesh bicect there. I think that's
absolutely perfect. Okay, Right, let's press
tab, old tage then. What we can do now is
on the next lesson is we can actually fix these a little bit
more and actually array them over to
the other side. All right everyone, So I
hope you enjoyed that. And I'll see on the
next one. Thanks a lot. Bye bye.
34. Refining Meshes for Realism: Welcome back if we want
to blend it to Unreal engine five of the
complete beginners guide. And this is where
we left it off. Now before we go any further, let's actually add
an end on here to add an end on here one and
do is I'm going to press, and the reason I'm
going to do that is because once I've pressed, I can actually straightway
adding a seam like so. And then I can actually
triangulate this if I make sure I'm on face right click,
triangulate faces. And then we can go,
tries to quad there. We end up with a pretty
nice end on that. Let's do the same now
on this one as well. So we're going to come
in, grab the end of it. Shift click, control mark seams. And then what I'm going
to do is I'm going to right click and triangulate
faces on face lick. Now the one thing I need to make sure before actually doing this is I should have made done the ends first.
I'm going to show you. Before doing that,
what I'm going to do is I'm actually
going to level this off. Because you don't need
to level the rest of it. It's just the ends of it
that you want beveling off. I'm going to press control and just bevel it off very slightly. So now you will notice
that because we've got the bevel from before that it's not
going to be right. So what I want to do is I
want to turn this down. First of all, like so and
then all it's going to do is just level off that end and that is what we're
actually looking for. All right, so now let's
go to the top one. And you'll see now
because I've done that, it will make it harder
to level this off. So if I come in and
I go to this and I try bevel in control and see how it's
messing around with it. We don't actually want
that. So what we want to do instead is just
want to press Delete. And you want to limit
to dissolve that. And then you can press control B and bevel it off in that way. And there we go. Now we can
actually fix these ends. We can also remove the seam here as well.
So let's fix the ends. First I'm going to do triangulate
faces, tries to quads, and then what we're going
to do is just remove seam, right click, and clear seam. And there we go,
That's that bit done. Now let's do this one as well. First of all, I'll
clear the seam. Right click, clay sam, face late click, right click triangles
faces right to quads. And now finally what
we're going to do is add insumedge loops along here. Control add insuloopsf,
click right click. And the reason I've
added edge loops in now is because once
I've brought them over, we need to have a little bit of a distinction between them. We don't want them all looking the same or anything like that. Also, they are
actually going to be, we can't do them all
at the same time. So I can't mirror them over. Well, I could, but then we'll
have to actually move them, so we might do it
that way as well. Let's first of all
though, array them along. So what I'm going to do
is I'm going to come, I'll reset my
transformations first. I'll control all transforms. Right? Click the origin
geometry Add modifier, and we'll bring in an array. And I'm going to
set this x to zero. I'm going to move
then the y over, and then I'm going to
increase the count. And hopefully we should be
able to get to the end. Now you can see at the moment, this is how it's going to look. So if I bring this over though, I can actually bring it so that it's looking a little
bit better than that. Oh, let's have a look. We can see that we've got one going right up out of
the middle of here. It's probably not a
good idea to have that. So we might need
to move this one slightly to the
left or something. That's probably going to
work much better for us, but we're not going to
worry about that right now. The one thing we could
do is we'll just move them slightly over and then it's going to make this
one a bit easier to move. Okay, so happy with that. Now let's come in and
what we'll do is we'll set our orientation now
to where our cursor is. If your cursor is not there, just grab your roof because
that is set to the center. And then what you
can do is you can just press right click, set origin to geometry. And we've got a mirror on there. Actually you can see, because we have that mirror
on there, though. We can move our cursor
straight there. So shift cursor, where is
it? Cursor to selected. Now you'll see that
this I can actually right click and set
origin three D cursor. And now I can bring in a mirror. So that mirror now you can
see looking pretty good. Okay, so that's that part. Now what we want to do is
we want to actually apply the mirror and we've got
everything already marked seams, everything's done
pretty much for us. The only thing
that we need to do now is just make them look, you know, not all straight,
like perfectly straight. That's not what we want.
So what I'm going to do is I'm going to apply
that mirror control. And then what I'm
going to do now is I'm going to go over the top. Then I'm going to do is
press Tab, hopefully. Oh yeah, we've got
an array on as well. So what I want to do is actually want to apply that array. So control apply the array. Now we can actually
ready to work on these. Now the one problem I've
actually not thought about is yes, I can
do it like that. We can actually come into
face let go over the top, I can grab this first one with L. Then what I can
do now is I can come two my proportional
editing, which is here. Let's put it onto smooth. Then what I can do is I can
move this now over very slightly and then I can grab this one with L.
Make sure you press L. Move this one over as well. And then we can just
work our way down these. Moving them over slightly. Now we don't want to
all looking the same. When I bring this one
out, I'm going to extend L move this one over. Normally you have something tied around there.
It's up to you. When I've showed you
rope, if you want to tie something
around there as well, you can see that this
one and this one, now they look a
little bit different and that's good on this one. Then I'm going to go
the other opposite way, L. Then we'll just
work our way down. We'll go the opposite way
this time. Yeah, we will. We'll go that way,
not so much L, and then we'll just
work our way down. I'm just giving him
some randomness, finally L. So now we want
to straighten these up, I guess a tiny little bit. So what I'm going to do is
I'm going to grab this one. And this one, I'm going to straighten them
up a little bit. I'm going to grab this
one then, And this one. And maybe straighten them
up this way a little bit. Grab this one, this one. Brain them up a little bit. This way we look what
that looks like. Actually, I think that's
looking pretty good. I don't think we need
to do anything else. Right. The next thing
we need to do now is randomize how these look. Now we can do this
one of two ways. So we could actually come
in, grab everything, and then come to mesh
transform and randomize. I'm going to turn this
all the way down. Let's see what we
can get out of that. Sometimes it works out
well, sometimes it doesn't. So if I press Tab
now you can see we've got a lot of
little broken parts. That's not what we want, so
we don't want to use that. I'm going to save
out my work as well. But what we want to
do then instead is we want to just
grab one of them, like, so let's try
setting this to random. Let's go up to the
top now and see if I move this like so. Is that going to work
out better for us? I think actually it is. I'm not going to
worry too much about the brokenness of
these at the moment because I know that I
can actually fix that. Okay, so now we've got
something like that. Now let's come in and
grab each of these. And what we're going
to do is we're going to go to vertex, move vertices.
Now, there you go. Now you can see it's
actually smooth them out. Now the one thing is it's smooth them out a
little bit too much. You can see we've
gone from here. We don't really want to
smooth them out so much. We know, now that works. So what we'll do now is we'll work our way along Now just
randomizing them a little bit. So if I go over the
top, I can just basically come in
and randomize them, especially down near the bottom. I'm going to move
that chimney out the way I'm because then I can
see which ones are broken. So I know the ones we've done, randomize this one
a little bit more. I'm old shift clicking and
just pulling them out. Now we go. All right, now they're looking pretty nice. Now we can come in and what
we can do is we can come in, L, L, L. I'm not grabbing
the ends of them. If you grab the ends of them and you try and smooth them off, it is going to
smooth everything. So it's going to make
them smaller as well. So we don't really
want to do that. What I'm going to
do now is mesh. So let's try this one. I'm not actually, so that's, let's just smooth
vertices. There we go. You can see here it's
smoothed off the end of them. We don't really want that. I'm going to turn the smoothing
process maybe up a tad. Let's have a look at what
that's looking like. They are looking actually
pretty good, all right? I think I'm happy
with how they look. The last thing I want
to do is let's see if I can turn up my auto
smooth a little bit. There we go. Yeah. Okay. So I'm happy
with how those look. They look much, much better
than what they did before. Now, the last thing
we want to do is before we actually finish
is we want to grab these. Now again, what we want to do is we want to put this onto, let's say let's put it on shop. And then what I want to do is I want to just hide
this out the way. And I'm just going
to show you one. And we'll do this
on the next lesson, where if you just hide
this out the way, press one on your number pad. Hide this one out the way
as well. Now, press one. Grab these, press
tab, there we go. And what I want to do now
is just lift that one up. And we want to lift them up, so I'm just pressing
very slightly. So we might as
well finish these. Actually, we'll
make the lesson go. A little bit over, Hope. Okay, so let's now come round this side, bring this one in. Finally we'll do these two. Should have a look at those. Tap should be even
look at realistic. Now the last thing and on the next lesson to
finish these sticks off, we're going to alter,
obviously these because these don't
actually look right. You know, they're all
actually nearly enough. Perfect. We don't want that. All right everyone.
So I hope you enjoyed that. Stay
on the next one. Thanks a lot. Bye bye.
35. Sculpting Basics: Welcome back everyone to
blend it on real engine Five. The complete beginners guide. And this is where we left off. All right, so now
let's fix these parts. So what I'm going to do
is I'm going to come in, grab these, I'll still use this. I think what I'll do though
is I'll put it on smooth. And what I want to do
now is just go to three, or control three to go
to the opposite side. And then I just want to pull
these out, grab this one. I might be able to
just get away with just yeah, like that. There we go. I'm also going
to pull this a little bit, so just making sure I'm happy with these and
that's looking good. Now let's go to three
this size then. I'm just clicking
on one, actually, because I can't get away
with just clicking on one. I'm just pulling
some of them out. Just moving some of them along. Now, the one problem
we've got with this one, as you can see,
I've gone a little bit too crazy on this one. I'm just going to grab it, press just going to lift it over. They've gone a
little bit too far. That's way now actually this helps because the more
you mess around with them, the more randomness you're
actually giving them. It is actually help. So now let's look at these, none of them in the side, but the thing is we haven't
got this over there. I'm going to actually
mirror that over now. Right click the origin three D cursor that's in
the mirror mirror is here. There we go. Now we can see
where we need to move these, so we've got a fair view
on this side to move. So I'm going to grab this one. We're going to actually pick up, looks fine, work our way down. We can see we've got a lot
of problems with these ones. There we go. All right. Now let's make
sure, one last look at those just to make sure
we're happy with them. I think we are. I'm
just wondering if I can go in and pull these on the X. Yeah, I think it's not
going to actually pull them out. There we go. Have a look what
that looks like. Yeah, I don't think
it's a look, actually. Actually maybe worth doing that. Well, I'll just go back in. Put that back, and then we'll do is turn proportionaling off. I'm just going to
see if I can do them all at the same time. At the moment, if I press and X, you'll see it's going
in that direction. Let me see if I
can put this onto normal and then
press and X. Yeah, let's put it onto individual
origins now. Process and X. And you'll notice now
they go all that way. Process and Y, though. Now we can see we can
actually start to pull those out a little bit just to make them a little
bit more rounded. They look actually better. I think I'm going to pull
them out a little bit more. What I'm going to do
then now I've done that, is I'm going to just controls, go back, grab everything. And I should be able to do
them all at the same time, in an easier way if
I grab all of these. Not that one. I know it seems a bit tedious the amount of work
I'm doing for this, but at the end of the day we
want it looking right and sometimes the more time
you spend on doing these, the better it's
going to turn out. Now got all those, let's
press and Y, and X. Was it need them on
individual origins? We need it onto normal and
now we should press and Y. There we go, pull them out. So let's have a look. We can see we're gaining some
distortion on some of them. And I don't really
want that pretty much only some of
them as you can see. But what I'm going
to do instead is I'm just going to
press controls head. I'm just going to press and see if I can actually
do it that way. You can see we're still getting
some distortion again on the slop on some of them. See if I can actually
smooth them off now. So I think I'm going a little
bit too much on those, so I'll go a little bit more in. I'm going to leave
them like that. Think they look fine. I think I'm just doing a
little bit too much on this. All right. Let's
leave them like that. Now, let's think about the next part which
will be, of course. Bringing in the
textures for them. Now we already have the texture for it which was on this window, so if we can see them go to this window, we've
got wood light. So what we want to do first of all though, is unwrap them all. So a, grab them all and
we should be able to, no, we can't actually
unwrap them yet. And the reason is
because we haven't got an actual seam going down
the backs of each of them. So let's put that in first. I'm just wondering whether they'll be able to get away with that because I'll have a
scam going through here. Let's instead just go
to Smart UV project. Click okay. Let's go to UV editing now and see
what we've actually got. We might be able to get away
with doing it in that way. Let's now bring in the material. So bring in where is it? Light cracked wood, Wood. Light. There we go. Express tab. Let's spin all of these round. So R 90 and let's have a look. And there we go. We can see, actually that's worked
out pretty good for us. All right, let's just
hide this out the way. Yeah, I think that's worked
out pretty perfect, actually. Now, the one thing and
I just want to make sure is that the
resolution is the same. You can see it's a
little bit blurry. So what I want to do is
I want to come back to them and I want to
bring them out. So bring them out a little bit. Just bring up that resolution
just a little bit. Okay, that's looking good. Now let's attack
the actual roof. With the roof, what we're
going to do is we're going to do this a little
bit of a different way. We're going to go to modeling and then what I'm
going to do is just put this on material for now. And then what I'm going to do is I'm going to grab my roof, press control all transforms and you can see that I've
still got the mirror on. I might as well add
the mirror already. So again, I can come to object convert and mesh
that side of the mirror. Now I can press control
all transforms, right clicks to origin geometry. And now we're going to bring
in a multi resolution. Bring in a multi resolution. We want to keep it simple. And we want to bring
it up to like, I don't know, six,
something like that. Now we've done that,
what we can actually do is this is
actually subdivided. We can't really see it
here, but it is subdivided. What we can do now
is go to object, go to sculpt mode. And now I should be
able to draw on this. Let's see, there we go,
Actually draw on it. Now the one thing I'm going
to do before doing that, I'm just going to put an
object mode because I will get a better view
of where it looks like. And the other thing is I
actually want to draw on it. So draw, I need to
make my pen probably. I'm probably going to put clay on it. Actually, clay strips. Just have a look at that.
Yeah, the clay strips are going to work a
little bit better. I'm going to do
now, I'm going to actually bring in
some clay strips. And what we're trying
to do here is make it look a bit like, hey, that's going to be
underneath it always go this way, by the way, sideways. Because that's how
you're going to get this effect the
best way like this. And what we want to do, once
we've got this on there, we might want to turn
this up a little bit because you can see it's
a little bit too blocky. So I'm just going to
press Simple again. There we go. We can minus it off as well by pressing the control button. So you can minus it off as well. I'm just left clicking and
minus off any bits I want. So you can see here is
a little bit too much. We want some of the parts going over these actual
sticks we've made. Hey, let's minus this
down a little bit. All right. Look at that. That's looking pretty good
If you hold the shipboard, you can also smooth it off. Now, you might want to have it a bit more smooth
than what I've got. It actually though, if
you will smooth it off, I'm looking at the smooth brush. I don't think I've actually got control over how smooth
it's going to look. But what I can do is
instead of doing that, I can actually simplify
this once I've done it. I think what I'll do is
I'll leave it at that. I might do a little
bit more on this one. I'll bring it up a little bit, make it a bit more random. Then what I'll do is
I'll bring my brush down now and just get it a
looking a bit more. Okay. I think that is looking
pretty good for this side. Yeah, I think that's looking
pretty good for this side. This part here, look, it
needs a little bit more. Especially let's
really pull it out down here, we'll hide this bit, the amount, So all right, that's looking pretty good. So this is basically going
to be our actual hey, which is going to be, which
covers this part anyway. We might even be, we might be
able to get away with just putting it in just so it's overlapping a little bit
on these parts as well. Hey, would stick over there, don't go too far down so, and then just pull it back
with control a little bit. Get that bits being a
bit of a pain there. Remember, you can also
alter the strength as well, just if it makes it
a little bit easy. I think though, that's looking good because
we're going to have kind of hay underneath. I'm just making sure
I've got it all. We have missed a little bit there as even out as possible. There we go. All right, so what we'll do then
on the next lesson is I'm going to save
but my work again, on the next lesson
we're going to do exactly this on the other side. And then more dear is I'll
show you how to smooth this off 'cause I think when
we go to smooth this off, it's a little bit too, too much. There is a brush
on here, I think, which is the smooth brush there. It is smooth, we can
turn down the strength. Now if you turn it down zero, you'll see now when I come
in **** holding shift, I won't be able
to smooth it off. But there's an
easier way of doing it without smoothing this off. It actually, I think
we will do that. We'll just smooth
it off like this. I think it's going to work
much, much better for us. All right everyone. I hope you enjoyed that and I'll
see you on the next one. Thanks a lot. Bye bye.
36. Turning Sculpting into Mesh: Welcome back everyone, to
Blane Unreal engine Five, the complete beginners guide, and this is where we left off. Now what I want to do is,
before I actually smooth it, so don't actually
smooth it off yet. I'm just going to go back before smooving it. Should be there. And what I'm going to do
is I'm going to add in my material before
actually doing that. And then I'm going
to get a good view of what it's going to look like. Now, one thing you can see is that this is going through
to there a little bit. Just make sure you don't go
too far over because you can see when you actually add
it pulls off of this one. So just be careful of that, what I'm going to do
then I'm going to come to clay again. And now I'm going to make my
brush a little bit bigger. Now I'm going to
start doing this. One's Yeah, clay strips. That one Clay strips. There we go. All right. Let's add in some clay strips. I'll just add in a bit
of a bulk in the bottom. So then what I can do is come
in with a smaller brush, start doing the other bits, and then I'll make my
brush now smaller. And then come in and actually see we've got some
break in there. If you ever get any breaking,
just smooth it off. You can see it's probably yeah, it's because I
already put that in. So I'm going to smooth
that off a little bit. Make my brush a
little bit bigger. I want to be careful
on that bit. I'll turn, so where's my
smooth smooth. There we go. Let's turn it up a little bit. Move that off. There we go. Just so it's not so
lumpy like that. All right, so now I can
come in and go play strips. I think there's a little bit, maybe a little bit
too much on that one. This one really
touched that much. Okay. I think actually
let's look really good. All right, once you've got that, then what you need to do is
you need to now come over to object mode and you'll see
this is what you end up with. And we can see that
our level of viewport, we need to turn that
up like so when then we've got all of that
wonderful detail that we had. And then what we're going to do is we're just going to press control and apply that. Now what we can do is
we can shade auto, smooth, and we'll end up
with something like this. You can see we've still
got some jagged lines, but let's see first what our actual hay is going to look like once we've
actually got it in. What we're going to do now is, and we're just going to press tab A to grab
everything you unwrap, because they are planes that
should unwrap pretty well. Now the one thing to think about is when you're unwrapping this, is that it's going to take
a little bit longer because it adds actually a
lot of polygons. Now if you find it
where your computer is crashing or
something like that, just bring down the
amount of polygons and that should fix that.
Now it's unwrapped. If we go to the UV
map, you're going to see this is why it took
a lot longer to unwrap. It's pretty dense and
that's the reason why. Okay. So now we've got that. Let's come in and add in
a new one and we'll call this straw like so. And I'll just change
that because for some reason I've got
my cap locks on straw. And then what I'll do
is I'll go to shading. Now I'm going to
press control shift, and the one I'm
going to bring in is going to be, let's have a look. I think it's crack wood. Hey, here's some hey, hey straw. There we go. Let's bring it in and
let's have a look at what that looks
like. There you go. You can see just
down now is that actually looks double tap the A. There we go. It's
looking pretty good. Now the one thing we can
see is that this wood, for some reason, got
unwrapped in a weird way. So we'll fix that, but
let's have a look now. See if we need to make this
straw a little bit bigger. But I think the straw may need
to be a little bit bigger. As you can see,
I'm also thinking, with the hay, I don't think I'm actually going to alter it. So what I'm going to do
is I'm just going to go over and put this on material. I'm going to go
over to, I'm just looking at my guy to see
how big my straw is. Actually, I think it's actually
fine looking around it, having a good look in there. I think actually
the straw is fine. I don't actually think there's
anything wrong with it. I don't think I'll alter it. Just make sure yours is okay. I'm looking at the back as well. I think what it is
is it just needs moving off on some of the parts. What I'll do is I'll come back
to my sculpting mode now. I should be able to
just move off any of these big BP lumps that
we've got in there. I don't really want those in. I'm just moving up. All right, now let's
look at as you can see, and I'll come around this
side exactly the same thing on this big lines. There we go. All right, that's looking good.
I'm happy with that. Now let's go back to modeling. And then what we can
do now is we can actually go into object mode. We can take another look now
around the other side where there's actual light on there and can look from
this point of view, double the, just make
sure I'm happy with it. Now you can see we've got
some deep shadows there. Generally, these
deep shadows are showing where there's
a lot of lumpiness. If I click on this object mode, you'll see that these
big lumpy bits here. This is what we actually
need to get rid of. Again, I'm going to go
back into sculpt mode. I'm going to, I've got these down a little bit more because a little
bit too much, I think. Then we'll go back
to Rendered View. Look, I think that's looking
actually better now. Again, there's going to be
thatching over the top. Not something to
worry too much about. You're going to get some
shading on there, of course. The other thing is we
could flatten it all out as well if we
really needed to, but I think we're going to leave that for now. I think
I'm happy with it. And let's actually move on. Let's put it onto object mode. So if we have got a lot of lump, what we can also do as well
as we can actually come to this and just use
a modifier as well. Let's use a smooth modifier. Smooth you go. Then
what you can use, you can really turn that up, actually smooth it all off. That might actually work out
a little bit better for us. Yeah, I'll give that just one
mass try and that's a look. There we go. Now you can see most of those shadows are gone. Yeah, we'll actually do that. So I'll do is put it
back on object mode. Apply that. There we go. That is part of the
roof actually done now. We need to work around to, Let's make a start. I think on the back we'll make a start
on the back of this, what I want to do is I
want to obviously put a different piece of wood
on the back of here. I'm going to mainly
use this part here, I think, to create
this top part here. All right, let's
do that now then. What I'm going to do is
I'm going to come in, I'm going to press Tab. And I'm going to grab a
few pieces of this wood. I should actually,
we'll just grab it all and I'll just
bring it all out. Shift. I'll bring it,
put it on Global. Let's put it onto a medium
point. Let's pull those out. Now let's press to separate
them separate by selection. And then what I'll do
is I'll come in now, grab these, make sure
I'm in edge select. I'm going to grab
this edge, this edge, this edge and this
edge link vertices. And then I'm going to press
control or transform. Right click the origin geometry. And finally now I'm going
to put this on Material, and I'm going to
turn this around and hopefully this will
look different to this. Let's have a look, R, Z -90 Let's pull
it around to here. Let's pull it up into place. Let's have a look what
that's going to look like. Double tap the A. I think for
this I'm going to actually move my lighting around the
back shift D to duplicate it, part 180, then I can have a look what that's going to
look like a look. What I want to make sure
is that it's looking different from the
wood I've already got. I don't want it
looking the same. We can see that's looking
very different already. That is exactly what
we're looking for. We can see we've got a bit of an issue in there,
but we'll fix that. All right, let's go now
to Material mode again. The other thing is about
Material modes as well. You can also put on scene lights when
you're actually working in Material mode, which does help a lot. Okay, now let's grab this wood. And what I want to
do is I want to make sure that it's forward enough. I want to bring it
forward into here. And then I think I
want another piece of wood just going along the
top of a top of here. I think that's going
to look be like that. Yeah, I think that's
what we'll do. Okay, let's go with that. So I'll put another
piece of wood in here. So what I'm going to do is
I'm going to put my cube. In fact, can I get away? We still have that anymore? I think actually I got rid of the I think I got rid of
the big plank of wood. Actually, never mind. We can use another one or
create another one even, but for now, we'll go around and fix all of the little
problems we have as well, Okay. Let's grab a plank of wood. Do we have a plank of wood I can use and probably get away
with using this one. Although No, I don't want
to use that one actually. Because I can actually get away. Yeah, this one. To
look too similar. What We'll just
create a new one. Shift gets to selected. We're not going to need that
many more planks now anyway, so it makes no difference. Let's make it a
little bit smaller. Let's bring it down into place. Let's press S and X and pull it out into place like we don't
want to going too far. Let's then just center
it up a little bit. Let's press control one, so we're around the back of it. Center it up a little bit bar, then S and X, pull it down. Now all I want to
do is just make sure I'm happy with
how it's sat on there. So it should just be sat on here like this and maybe
a little bit of a gap. And then what I
want to do is grab the top with face
select, pull it down. So we're not going
to do too much work on the back of here actually, we're just going to put a shield in there, which
we're going to do. All right, so now
we've got that, let's think about
isolating this out. Shift, isolate it out. Let's add in a seam,
Control mark, seam. Let's add in some edge loops. Left click, right click. Let's now also control
transforms origin geometry. Add in a bevel, bring
the bevel down. Pretty much everything we've just been doing before, like so. And then let's press
a, you unwrap. And finally, then let's
bring in our material, which is going to be
the light crack wood. And let's have a look at that. That actually is the wrong way. So we have to go this
time. It's done that. I don't know why,
but has it done it? No, it's not actually
unwrapped properly. Why? And that's because I've got an infinite
loop on there. I didn't mark a Sm across
there, so good job. We saw that actually.
So mark Sm. Let's grab it all then you
on the wrap, there we go. Now it looks, runs better. Now we need to do is just to mesh and what we'll do
is transform, randomize. Turn it down there, old tag, bring everything back. There we go. All right, that's looking pretty nice. Now let's think about this part here because
I'm happy with this part. I'm going to go
back to modeling. What I'm going to do
is press control one. And I'm going to cut away all of this now we just want
to cut this away. And then before we
cut away though, we probably flip it round and put it on
the front as well. So what we'll do, we're
running out of time now. We'll actually save
about our work. And on the next lesson
then we'll actually take this and put it
round this side as well. And then that we'll get
that part done as well, but you can see really
coming together. Now, the other thing
is before doing that, I should also make
the top of this door. So we'll do the top of the door, bring them over, and
I'll unwrap this one. Because this one's kind of annoying me when it's
looking in that state. Alright, everyone. So,
I hope you enjoyed that and I'll see
in the next one. Thanks a lot. Bye bye.
37. Finalizing the Main House: Welcome back everyone, to
Blanton real Engine Five, the complete beginners guide. And this is where we left off. But the first thing
we want to do is, first of all, you
can see where is it? This is actually stuck in
this piece of wood here. We don't want that, so let's
pull that out a little bit, and let's get this lined up
so it's nice and neat It is. Let's then move onto this bit, which is really annoying me. So let's actually
unwrap this one again. Rap Let's see if it actually
unwraps nicely or not. Yes, it has. I'm just thinking it's a little
bit blurred there. So, let's go into
the UV editing map and we can see that we do have an issue here and we don't
want issues like this. You can see it's because we haven't actually marked
a seam on the end. So what I'll do is I'll press Tab shift H, Isolate it out. And then what we'll do
is we'll mark a seam. We'll mark actually
this out properly, because at the moment
you can see it's a mess. It's the seams everywhere on it. Best thing to do, control clear a seam and then just come
in and remark the seams. So I'm going to be
out shift and click, going all the way around here. So right click, mark a seam on the bottom where
we're not going to see it. You might be able to see just
a little bit of the gap. Alright, so I'm not going
to leave the bottom. Instead what we're
going to do is mark same on each of these, then mark scene, and
then we're going to come around this side and
do exactly the same thing. Chip click, going
all the way around. Right click markem. Now let's try on doing that. So you unwrap and there we go. Now it's wrap perfectly. The one thing we need to do is just split it
out a little bit. So a pull it out like so. And that's the best thing about working with seamless textures is that you can get away with doing just that I've just done. Of course, you're tied
to a UV map if you're, you know, painting your textures on in substance
paint or something. So you have to be
really aware of making sure that all of the measures
are exactly in line. So in other words,
average island scale really comes into
effect at that point. And the other thing is if you're doing something
like this Viking T, if you use just one texture map, you can imagine that
it's going to be a very low resolution texture. So to get realism, seamless textures are really, really good for doing that because you can actually
upscale the textures, but what they're bad at is
actually putting, you know, loads of edges and cavity
masks and things like that. So there's just both ways to take into account when
you're doing this. It's probably bare overall and most games out
there we'll be using UV mapping
because it gives them the flexibility
of putting a lot of, you know, normal maps on top, baking things off
and stuff like that, which I would look into. If you really want to actually
create a ten game asset, then they are the things
that you need to know. But we're not actually going to be covering in this course. We're hoping to do
that in the future. All right, moving on, let's
go back to modeling them. And then what we're
going to do is press ol tag, bring everything back. I'm gonna hide this tall
because it's actually in the way I'm going to press and just to hide it out the way. And then what I'm going to
do now is I'm going to cut this away first before putting
it over the other side. So I'm going to
press control one. And then what we're going
to do is I'm going to press tab A to grab everything. And I'm then going
to come in with where is it, my mesh sect. And I'm going to cut it probably from something around here. And then what we're
going to do is we're going to press a again. I'm going to cut it this time, not that I'm going to
come to mesh sect, I'm going to cut it
something like this. The other thing is if you
press space bar as well, you will be able to move that. That's also really
handy to know. I'm going to cut it
round about there, so I'm just making sure nothing is stuck out on the sides
or anything like that. And now finally
we've got this side. So now all I can
do, because you're never going to see the
front and the bag. So we can freely be able
to use this piece of wood. So if I come over press shift and then just
bring it to the front, the front should be
exactly the same, near enough, so we can just
slot that in the front light. So, and there we go. Now we can see our
cabin is really, really starting to
actually come together. Now before I forget, what I want to do
is cut this away. You can see here that
it's fine on this bit, but not fine This bit here is where it's from this
bit that I need to finish. Let's finish that now. Okay, so what I'll do
is I could use this. Actually it'll be
easy to use this. What I'll do is
I'll press Shift. I'll grab this part and
I'll pull it out to there. Then I'll hide this part. And then what I want to
do now is I want to put this part here because we've
already made it pretty much. I'm just wondering if that's
one mesh. Let's have a look. Is it one mesh? No, it's not. That's great. So I can
I can press Shift. I can pull this out, so I can drop this into
the front of here. So slot that in. The one
thing I can see on this part. Yes, I've got a bevel on
this, so that's good. Now the one thing is you can see that this and
this looks the same. I might just change that just to make sure they're not dead. Hundred and 80. Spin it around. Then what I'm going to do now, probably because we only need a little bit in this bit
here as you can see now. Well, if you can't
go into your model, you need to press five
on the number pad, just so you can actually spin around and actually go in there. All right, so now
we've got that, Let's press shift,
let's bring it out. 90 and all I want to do is
just put a top on there. I'm not worried
about this fitting in nicely or anything like that. I'm just going to put a top on just in case you are
going to walk in there. And all I'm going to do is ship move it over to the other side. And I'm going to just rotate it. Then Y 90, let's
rotate it around. And now they look different. And then finally then let's use this piece of
wood that I've got. All I'm going to do,
I, let's have a look. If I press one, probably going
to take three, maybe four. What I'll do is I'll
just grab these with Edge select Selection. And then I'm just going
to grab the rest of them. Make sure that they're not
attached to these ones here. She'll end up deleting
those as well. Delete and then I can spin these round control or transforms
the origin to geometry, R x -90 R x -90 Let's slot that into
place there into there. And pull it out. Now we can
see we move into there. I just need to pull it down. So let's look how far
we need to pull it down, maybe to the. And then what else I'm going
to do is I'm just going to then move it to
the side like so. And now if you look, even if you walk in there, that's all actually fixed. Now the last thing I
want to do of course, is as we can see, it's actually hanging over here.
Don't really want that. The other thing
is, can I actually bring it down a little bit now? I think I probably can actually. So I'm going to bring it down. I just want to make sure it's not going to be
poking through there. I think I'm wondering if
I can bring it this way. That's gonna look
bad. Yes, it does. That looks bare like that and
we can't actually see it. We can just see this
part through that. Which is fine. That's fine. You're gonna have
a little piece of wood that that anyway. All right, so now what we
need to do is we need to just delete these ends because we
don't want all these ends. So old shift, click,
delete and bass. And then edge select delete. And finally now we've got
the actual door is finished. Okay, that's looking good. Now let's climb to the back now. And what we'll do is
we'll actually start on our actual shield. We'll quickly just
start our shield. And then what we'll
do on the next lesson is we'll finish off our shield. So I'm going to do is
I'm going to first of all create a cylinder. What I'm looking for in
this cylinder basically, you can see here if
I go over the top, that we're going to
have a line here, a line here, a line here. But what that tells me is that if we're
creating some wood, for instance, on our shield, we want to keep it even. So in other words, we don't, we want it to be on
an even number and we want to have enough piece of wood here to make it
look like a shield. So I would say
let's go up to 18. 18 means I'd have a piece
of wood going down here. A piece of wood going down here. So this looks about right to me. What I'll do now is
now I've got it, is I'll spin it round, R x 90. Spin it around, make it a little bit smaller to the size
where it's going to be. So you can see at
the moment it's a little bit out of here and
I don't really want that. So what I'm going
to do is I'm going to put my cursor to the center. Ships cursor to selected. And then I'll just move this
ships selection to cursor. Now when I pull it out, it should probably
be in the middle. And that means then
I can pull it up, but now that's in
the right place. This is what we're
actually going to use to make the shield. To do that all I'm
going to 'just going to press and Y push it in and get the size
in cog for my shield. I think something like this, although it needs to be probably a little bit thicker like that. I mean it is an ornamental
piece with the Us in ball, it would be a big shield but I think it would
look pretty good. So we'll use it like that. Now that I've got that,
I'm going to pull it out. And then what I'm
going to do on the next lesson is we're
going to shape this and fashion this
into an actual shield. And I'm going to show you
exactly how to do that. All right everyone. So I
hope you enjoyed that. And I'll see on the next one. Thanks a lot. Bye bye.
38. Creating a Viking Shield: Welcome back everyone to blend. It's on real engine five, the
complete beginners guide, and this is where we left off. All right, so with our
shield, first of all, we want to make it
a little bit better than what it is at the moment. So what I want to do
is I want to come in and take just
the front of it, so I'm going to grab just front. I'm going to press Shift. And then what I'm
going to do now is I'm going to delete just
the face on here. If I delete and
come in and delete, where is it only faces we
should end up with that. And then what we're going
to do now is o shift click. And I want my actual
wood going down. The ones I'm going to just minus off are going to be this one. This one. This one.
This one and this one. And then what I'm going to
do is I'm going to right click and I'm going
to bridge edge loops. And you should end up
with something like that. And you can see this is
already our wood old shift. Click on each of these
F to fill in the face. The same thing on this
side to fill in the face. Now if we want to bend this out, this shield out, we can really bend it
out from the center. If I put my proportional ten on, you'll see if I bend
on, bend out like that. That's not really what we want. What we want to do is we
want to actually bring in some more topology
to actually work with. So what I'm going to do is
I'm going to come up to a little select, I'm
going to grab this one. And this one I'm going
to actually press J. And what that's going
to do is actually form some more topology for me. I'm just going to
work my way down. Now I'm just adding
in topology on this, because that then is
going to enable me to make a much better job of actually pulling this
shield out and making it, giving it that kind
of rounded look that we're actually looking for. So just go in and
make sure you've got topology going
all the way over. Now what I'm going to
do now, I've done that, is I can come into
the center of it. And what I can do is
I can actually pull it out now with
proportional editing. So you'll see if
I pull this out, now we get a really, really nice slope that
we're actually looking for. All right, now once
we've done that, let's come in then and
grab each of these. Going vertically
or horizontally. Right click and mark seam. And this for them
will be the wood. And now what I can do is
I can split these off. So I'm going to grab
each one individually. So grab one, miss one, press the Y button. And then now what I can do
is I can actually split, I'm going to split these
off from this side, so then we don't do is press P selection.
Split those off. Now the one thing that I
didn't think about before doing that is I forgot to actually make another
one of these. And the reason I want
to make another one, of course because I want
to have the inside. But we can actually fix that. We can do that a
different way as well. So I will show you both ways, but it's probably better
to keep this before splitting it off and use
this for another part. But I'll show you that. Let's first of all
deal with this. So what I'm going to do
is I'm going to press A, I'm going to press E, I'm
going to pull it back like so. And you'll see we've also got that curve on the
inside which is important if you actually want to use this shield
in something else. Now let me just take
portion editing off again, pull it back a
little bit like so. And there we go. Now all we need to do actually now
is press control. Ul transforms right click storage in geometry,
add modifier, level it off, and there's your actual near enough,
you shield wood. Actually dumb. That's
looking pretty nice. Let's put this
down a little bit. Not point nth three, try that. Yeah, that's looking
much better. Like, So let's right click,
shade, auto, smooth. There we go, That's
looking good. Now let's come in and show
you what I meant with this. What I'm going to
do with this is I'm going to grab
the front of this. I'm going to press shift, I pull it out. Then I'm going to do now
is I'm going to press ins. Center bit is going to be like the metal
part of this shield. Then I'm going to do is I'm
going to press controller, bring in a few edge loops to
give us some more topology. And now I'm going to
pull this all back. I'm going to grab it all first
and then pull it all back. Do this here. Now I want to do is
I want to go in with x ray and I want to
grab that center part. So I'm going to grab that
center part like so. Then what I want to do
now is pull this out. We proportional editing on, but it's over the
top of topology. So let's pull it
back now and see if it's going to be over
that wood. Yes, it is. Okay, good. That's exactly what
we're looking for. Now what we want to do
is we want to bring in one more piece. One more edge of it. You can see it's a little bit out still. I'm just going to
put it back on to also put it on an
object mode to see if I can actually seethe
something a bit better. And I'm going to pull it
out a little bit more, I'm hoping then, yeah, it's getting closer, so I need to pull it out a
little bit more. There we go, with x ray off. All right, there we
go. Let's pull it out just to tad bit more. Perfect. Okay, that's
what we're looking for. Now what we're going
to do is we're going to come up to the top. We're going to press control. Bring in another edge loop, but this time just bring it
down slightly because that's too thick and it's too
thin. It brings it in. And then what we're
going to do is going to press out shifting clip. We're going to pull this out, so we're going to pull
this out a bit. And then what I'm going to
do is I'm going to pull this part out, pull it out, press I pull it out with E. And then finally bevel
control B. Bevel it off. Now you'll see it's
not beveling, right? The reason for that is
because we just need to come in, all transforms, right? Clicks a origin to geometry. Then we should be al now to
bevel it off as you can see. Now the final bit
of the shield we need to have going from here, here, from here, here, and then probably from
this bit to this bit, and then this bit. Then what I'm going to do is I'm just going to
miss one there. As you can see, I'm going to now extrude this out as well. So I'm going to press E.
Extrude it out. There you go. Now let's right click and
she shade auto, smooth. Now what we need to
do is we need to just get rid of these parts here. What I'm going to do is
I'm going to come in old shift click going all the way around
the inside of here. It's going to take
it all the way around and then I'm going to do the inside
of here. Shift click. Then one going to
do is I'm going to do the inside
of here as well. Right click. And we're
going to mark a seam. Now we should be able to
come in now with face select and just grab this face, this face, this
space and this face. This one. Doesn't work
because we grass seam. Let's go in slight
click make now. Let's see if that's
going to work. All I can do now is
delete. There we go. We've end up with a really, really nice now, let's come in. Pull this forward a little bit, just so the wood just
touches it like so. And then what we need
to do is we need to just pull this bit
out for this bit. I'm going to come in, I'm
going to press Shift Click. Going around this way. It goes all the way around.
Instead of pressing, I'm going to press Olds without
proportional editing on. And then that is going
to pull that out for me. As you can see, that is
what we're looking for. Now the final thing is we need the metal going around
the inside as well. Ol shift and click, you can see that we've not
actually got any metal going around this part because all we've done is
pulled out this part. We have a number of
ways of doing this. I think the easiest way will
be, instead of doing that, to grab this line going
around there, pull that out. And then what we'll do
is we'll bring it in. So I'm going to press
and bring it in, and then I'm going
to do now is press and pull it back
along this axis. This axis will be the Y, and I'm going to
pull it back Rst. In at the edge of the wood. So there we go. All right. Now I can actually
get rid of this because I don't actually
need it anymore. So I'm going to get
rid of this, deletes, and there is our shield that
we should be left with, which is looking pretty nice. Now I can think about what materials I'm
actually going to put on it. I think with this shield
we'll use the darker wood. And I think with this we'll use the metal that we've got also. Let me just have a
look what other colors we have textures. We've got mod metal, Oriental rope,
stone, thatch wood. I think we'll use
on this is We'll use the on that we had. Yeah, we use the iron again. I'm going to now turn
my mouse around. I'm going to texture this. Now what I'll do to texture this part because it is metal, I could probably get
away with just L U, Smart UV Project, Click
okay, Material Mode On. And then what I can do is I
can come now add in the on. So then for this bit, what I can do is come
in and add in the wood. So I'm going to grab
all of this wood. Might be project click okay. And then we're going to be using the cracked wood like
so there you go. You can see it's looking
really, really nice. Actually, I don't think I need
to do anything with this. I think the metals
looking absolutely fine. You could go in and make
the center of here. I think I'll show you
actually how to do that. We'll make the center
and these sides, we'll actually make
them a red metal. So what I'm going to do is
I'm going to press plus new. Actually I'm not going
to do it on there. I'm going to actually do it on this metal down arrow
because I already made one. I'll call it material. Then what I'll do is I'll
copy this one down arrow. Copy material, paste material. And then what I'll do
now is call this red On. Then what I'm going
to do now, I'm going to go over to
my shading panel. I'm going to click
on the red iron, which looks like this. Let's press so we can zoom in and have a
look what that looks like. Let's double tap the A so we can actually see
what we're doing. What we want to do now,
we just want to give this a red tone on there. I think we could probably do that with an overlay and
a color. Let's try that. What we're going to do is
we're going to bring in color. Let's think about
this mixed color. Could we do it
with that or could we just do it with a color ramp? I think we'll just try
a color ramp for now. I'm going to press
shift a color ramp. I'm going to drop that in there. And then what I'm going to
do now, I need to actually, first of all make sure that
this has the red iron on it. So I'm going to click
all of this and I'm just going to then
grab these ones. I'm going to come in and you can see at the moment I'm
going to have a little bit. I think what we'll
do is on the next lesson we'll do this
because there's a little bit more to this than just simply grabbing
one of these. So we'll do that on
the next lesson. All right everyone. So I
hope you enjoyed that. And I'll see on the next one. Thanks a lot. Bye bye.
39. Creating the Chimney: Welcome back if one to
Blane Tony engine five. The complete beginners guide and this is where
we left it off. All right, so what
I'm going to do, instead of just trying
to grab it like that, I'm going to come in, I'm
going to press Old Shift and click right click, Marx scene. And then I'm going to try
and do the same here. Old shift click. Is that going to take
it all the way around? No, it's not, so I'm going to hide my wood out of the way. That then should give
me a better idea of selecting all of the. So I'll think what I'll do on this one is if I
come in and just select it going all the way
around here so we can see, let's see if it's going to
select it. I'm just wondering. Yeah, this should be
split off from this. I think it's just joined here. What I'll do is I'll
just come in and I'll see where is
this joined up to? It looks as though it's joined
actually to everything. That's probably just because I'm just looking
where it is joined. I think it's joined here. I think we'll do before doing that to make this nice and clean because we can see we've
got some flashing there. And that flashing
means generally we've actually parts over
the top of each other. I think it's a good time
to actually show you this. Come to mesh, clean up, merge by distance, Open this up, turn this all the
way down to zero. And then turn it
up very gradually. That's a little bit too much. Let's put in sharp
edges. It down. Yeah, it's a little
bit too much. So what I'm going to do is
I'm going to put this on not 0.2 let's see if that, yeah, that's not
getting rid of it. Let's clean up again. It's not going to
do it that way. So mesh, cleanup,
and where is it? Decimate, degenerate, dissolve. And I think the reason
why it's not working is because of the fact that these are
supposed to be over. So in other words, we're
extruded amount but kept the other faces there and I think that's what's happening. If I press old ship,
click on this one, on both of these,
press control control. Plus you'll see actually
goes all the way over. That's not really what we want. So what I want to do is I
actually want to fix this. So what I'm going to
do is I'm going to press Ol shift click. Going all the way around here. Ol shift click. Take
it all the way around. I'm going to press Old ship. Click. Oh, click. And then I'm going to do
is, I'm going to do that on the same of these,
just these three. And then we're going
to press control. And then that will take me
all the way up to there. From there then I can actually press Y and hide
those out the way. And it should now be left
with these parts in here. Let's just put it onto
object mode so we can see. So we can see now we've got some faces in here that we
shouldn't actually have. So you can see these faces here. These faces are
basically faces that we don't really need and
they're caused in flashing. And we don't actually want that because that's going
to be obvious when we actually come to you put
in this in the scene. So if I hide that now you can see there's nothing
behind there. That's what we want to see. Now I should be able to come in and I should be able to alter ship click, right click markers. I should be able to now
come into this part and delete these places as well so you can see
these ones here. And let's get this cleaned up
so it's a nice clean mesh. That one, the inside. Let's x ray, we go select selected. Let's come in and grab this one. Delete, There you go. Now you can see that's
clean. Let's come in now. ****, click, right
click, mark Acme. Let's take F x ray. And now let's bring
back the actual metal. Now the thing is if I
press shift H now you'll see these don't actually
have a edge on them now. Now it's important
that we do give them an edge because when
we level them off, it's, it's not going to level
off the inside up here. So yeah, it's probably better
that we give them one. So all we need to do is
just grab each of these and then work your way around
grabbing each of these. A little bit of problem
solving as well. I mean, you know, things don't always work out
the way you want them to. It's important that you
know how to fix problems. That's the main thing. All
right, so now we've got that. Let's press Lth. Bring
everything back now, I should be able to select this part here, and then
these on their own. Let's have a look
if I can do that. I'm going to go into, so let's now see if I can just
attach the red on to it. Let's press Alt. Ah, bring
everything back then. So I'm going to press tab Alt. Bring everything back.
Put it on Material mode, and this is what we
should be left with. Now, if I go to my red iron, when I actually alter this, yes, it should just alter that. Now I'm going to do is
I'm going to give this a red. Let's see
if I can do that. Give it a red. Is,
then let's turn. This red up a bit. Not too much. I only want a tiny, tiny bit. I'm going to actually have
a look at my lighting. I think maybe a little bit more. Let's see, I don't want
to lose the other part. See, that's the issue I've got. So I want to keep this
red spots in there. And what I'm going to do
is actually I'm going to put this on a little
bit of a red as well. Drop it back a little bit. Yes, that's what I'm looking
for. Something like that. It still looks metal, but it looks like
it's had a little bit of a red kind of put into it. All right, so I'm
happy with that. Now what we can do
is we can actually join all of this together. So this one and the
wood press control. J. And I'm hoping now
I can actually yes, it's got rid of the devil. So I need to go back
and I need to make sure that my bevel is on here. And also there's
a bevel on here. Add modifier devil and go
press control all transforms, right click in geometry and then drop that bevel
back just a tiny bit to 0.3 Try that, the
pebble on there. Yes, that's looking pretty good. All right, let's grab
both of these two. We're going to go to
object convert to mesh. So we can just apply both of those Febles
press control jades, join them together, Right
click shade or to smooth. And now we can finally
finally get our shielding. That took a little bit
longer than I thought. I'm sure it didn't take me that long on the first
one I actually made. But ah, there we go. All right, so that's that part done now we have to think about, let's think about what
we're going to do next. But we pretty much have
everything done on here except thatch in which we're going to
leave near to the end. And these steps and
the actual chimney. Now we might as well get the chimney first
actually because the chimney pretty simple. They wouldn't have
had fancy chimneys or anything like
that in that time. The only difference is I just need to know where
I want to put it. So I'll think I'm just going to pull it over that
way a little bit, just so this pokes out there. And I think that's
going to be fine. Then what I'm going to do is
I'm just going to come in, grab the center of the chimney, press the e bond to bring it in, and then drop it down like so. And then I think finally
what I'll do is I'll pull maybe this bit
up a little bit. I'll just grab this bit, shift space bar to move, pull that up a little bit. And then finally,
all I want to do now is bevel it
off a little bit. I also want to split
off this window as well, so I'm
going to grab it. Lp selection control or transforms right
origin to geometry. Add modifier, the bevel, down it up, one maybe. I think that's
going to look fine. And then finally what
I'm going to do now is probably going to
need some seams on this. I'm going to go
back to modeling. It's a little bit harder
to work like that. The tons, tons more
as you can see. Then what I'm going to do
is just isolate this out. With shift H, I'm going to
come to the bottom of it. Let the other way, again, if you're going
inside your cabin, you want to keep this going all the way
down to the floor. We're not going to do
that in this, of course. And then what we're going
to do now is mark A. Same. So I'm going
to come in, grab the bomb of their control. Mark, same. I'm going
to come in there. Oh, click, right
click, mark. Same. Now we're probably
going to have a problem with the top of here,
how it goes together. So what I'm going
to do is with this, I'm going to mark a seam
just on those parts. Right click, mark, same. And then I'm going to mark a
seam just on the back here. Right click mark, same. This means this should unwrap a present and these little
flaps should be there as well. Last of all, I think that's it. Yeah, we need one on the
inside of here as well. So right click marking. You can't see it there because the actual bevel tied in it with a tape off,
you can actually see it. All right. So now we're going to do
is we're going to press a U on the wrap and then we're
going to go to our stone. So where is it? Stone
wall, there we go. And then what we need to
do now is first of all, we need to bring back the house, we need to double tap the. Then what we want to
do is we want to make sure that this is looking
kind of like that. So you might find the used a little bit of
smaller rocks and things, but just make sure you're
happy with how this looks. So what I'm going to do is
just fiddle around with that. I'm going to click
on it in, put the A, I'm going to actually
grab it first and then going to do is I'm
going to spin this round, R 90. Let's spin it round. See if I'm happy with
that. No, I'm not. So I'm going to
spin it back, R 90. I'm actually happier now with
how that looks because it's got rid of that yellow
part that was in you. All right, That's
looking pretty nice. I don't think we need to
do a lot more with that. I think that's
actually good enough. Okay, now what we want to do is we want to, on
the next lesson, maybe before we do the window, I think actually we'll
move onto the stairs and make that a little bit different and then come back
to the window. But we're actually
really moving on now. We've nearly got
all of the house completed and of course then we've just got
the thatching to do, which is really, really
interesting part of it actually. And then finally we can
actually look at to bringing in some water and composite in and
things like that. Alright everyone. So I
hope you enjoyed that. Say on the next one.
Thanks a lot. Bye bye.
40. An Easy Way to Create Stairs: Welcome back everyone to
Blend Tonia Engine Five, the complete beginners guide. And this is where we left off. All right, let's go back into modeling and let's have a look then I'm going to save that
my work first or I forget. And then what I'm going
to do now is let's start looking at this bar here. So first of all,
because we've got this, we might as well use them. What I'm gonna do is I'm
gonna grab this one. This one. This one and this one. And then I'm going
to press shift, I'm going to drag them over
The what' going to do is I'm just going to put them into place on the top of there. Now of course we
can see that again, if I stretch, these maybe
causes some issues. Actually what I'm going to do is I'm going to press S and X. Hold them in a little bit and I'm hoping that I can
actually get them thin enough without causing
too much distortion on them. Not from the UV. It's not that distortion on the actual
warping of the wood. We don't want to warp
too much and it hanging over there very
slightly at the eight. Let's have a look at those. I think actually they're
going to be absolutely fine. One thing is I can see that
this and this are the same. Let's try spinning this over. Then what I'll do is I'll
press selection, grab it. Now, control or transforms
that origins geometry and now spin it on x
180. Spin it over. Now just make sure
that the level again, that act, that
looks pretty good. Now actually that's turned out better than I
thought it would. I'm just doing that. Okay,
that's looking good. Now let's think about our steps. With steps, it's
important to know, first of all, we could use
one of these pieces of wood. But then we'll actually inherit all of the randness from there. Now you look at your own steps, how steep you make your steps. You don't want to
make them too steep. So in other words, we don't want them where you know
it's going to be, let's say down here, that
is just too big of a step. Generally, you want
it around the shin. Think of steps as
having a much higher, you know, step up. But actually they
don't, they're normally around the shin,
somewhere around there. So you can see just above
here where the shin bone is. Should be absolutely fine. Now I'm going to
put them over here. And then what I'm going to
do is I'm going to grab this press shift
S first selected. And what I'm going to
do is bring in a cube. I'm just going to
remake these steps. I'm going to make them a
little bit smaller because we actually want them to be
a little bit thinner, said a little bit thicker
than these because obviously they are steps
said something like that. I think going to be fine. Then I'm going to do is pull
these out and then I'll have a look at if they need
to be changed anyway. And X, let's pull them
out. Put them in place. I'm going to put it to there're
going to now grab it end. I'm going to pull it out there. Don't worry, this top step
going to be hidden in here anyway. Like that. And then what I'm
going to do now is I'm going to check yet
another step in, right about here,
just under here. I'm just checking to
make sure that I'm happy with the
size of the steps. The other thing about
steps is when you do them, you want to make sure
that your guy can plant his feet on them without
actually overstepping them. Steps wouldn't be like that. You can see here the need
pulling out a little bit. It's a little bit too
thin on that way, so I'm going to pull
it out a little bit. Thing that's looking
about right now, let's bring our guy back now. Put his shin against there. So if I press three
just to go inside view, I'm looking shin, I'm looking at where the
step is going to be. I think actually that's going to be about
the right place. Control all transforms
right plate that origin geometry,
add modifier. Bring in an array zero first. And then what you're going
to do is pull your Z down to the bottom of his
foot and then move across. Move across were holding the
shipborne and there you go. That should actually
be very nice steps. Now if we can increase this now, you can actually have steps going down to where
the water mark is. And the other thing is this is the point now where you can actually bring them out
where you want them. So in other words, I want
my step be in line with this and I also want it to
be in line with the wall. In other words, this height next to the wall. So
how do we do that? Well, it's all a matter of just playing around with the array. The first thing I'll do is I'll do where it wants to come up to. If I put my X ray on,
can I see through there? I can see this is where I want it to come
up to roundabout. This is the end
of the wall here. Let's pull it out to
that. If I pull this out, holding shift to the edge
of the wall now you'll see near enough near the
edge of the wall that off put object mold on. Let's pull it back a little bit. So I'm going to pull it
back, yours to there. And then what I want to
do now is bring it down, let's bring it down here. Now what we're looking for is looking how step
these steps are. Now there is sometimes a point where you want your steps to
probably have more in. I'm going to put more steps in. And then what I'm going to
do now is bring them back. Let me see now if I
can line it up so if I hold the shift and bring it back to the and then
bring it up here, now you can see how
that's working out. You'll see they're
a little bit steep, but they look a
damn sight better than what they did
when I first did them. All right. So I'm
happy with the steps. So now what we can do
is we can go back here. And then what we
want to do now is we want to first of all
mark our seams on this. So I'm going to isolate this
out with I'm going to mark my seams in before
doing anything else just to make sure
save myself all that work. So control Mark Sam, I'm going to add
some edge loops in. Left click, right click. And then what I'm going
to do now is I'm going to Altate, bring
everything back. Click on my steps,
apply my array like so. And then finally what
I'm going to do now, I just want to make them
a little bit uneven. So all I'm going to do
is grab everything. Same thing as we
always do, mesh, transform, randomize,
and just turn this down. The non uniform does doesn't really seem to do
anything normal as well, that really doesn't
seem to do anything. Let's turn it down one more. Let's turn down the normal. I think I'm going the other way. Let's put it on there. Let's now mess around
with the seating. Get some better variation. I don't actually
want to do the ends. I'm looking now. I'm happy with how
they're out a little bit. They're not particularly flat on the thing we do is now
those parts of them, I'm just going to see if I can actually grab
the tops of them. Shift selecting, shift select, control select, siftlect control select, all the way down. What I want to do
is just press and see if we can actually
flatten them out in anyway. What I'm going to
do is now is press sensed, that's going
to pull them up. It's going to plan them
out. Pull them up. So I'm going to put on
individual origins and see if that works a bit. Sensed. There we go. Let's flan those
out a little bit. I think, yes, they
look much better. Steps. All right, so
now we've done that, What we can do is we can
grab them all, press Unwrap. Then what we can do, we can grab this one, just select these, Press control L. And
then what I can do is I can link, where is it? Copy modifiers? Yes, we'll copy and
modifier and then we'll also copy the material. Copy material as well. See that these anum
wrapped properly. So what I'm going to do is
control will transforms. Right Click the origin
to geometry tab. The reason they wrap
because I forgot, I forgot shift click. Shift click going
all the way down. Yeah, that'll do it if we end seam on the back and it
won't know where to end. Right click, maxim. Now let's try a rap
and there we go. Oh, what a difference
that makes. Okay? Let's just
make sure now we're happy with how these look. And I think I am happy
with those steps. Those steps look pretty
good now. All right. So that's the steps done now. We can actually move on
to making the support, so making the support that
goes up here into the wool, that's going to have
a support here, we need the support underneath. And we just need to make
sure that basically all of it looks as though it's actually supported into the
ground and not just, you know, stood on there with nothing
holding it together. All right, so let's
save our work and then we'll do that
on the next lesson. All right everyone,
hope you enjoyed that and I'll see
you on the next one. Thanks a lot. Bye bye.
41. Creating the Stair Supports: Welcome. Make everyone to blend
it to Unreal Engine Five, the complete beginners guide, and that's where we left it off. So now let's think
about this part here. So the first thing I want to do is I want a piece of wood going from here to here to give some support
to all these steps. The next thing is we're going
to put actually a block of wood which should be
underneath these steps as well. So each block of wood is going to be underneath them steps. I should have really done
that when I did the array. But hey, Ho, I forgot. So let's not worry too
much about it now, let's come to this one.
Let's press Shift S. Krista selected. Let's
press shift A in a cube. And let's bring our
cube down over here. Let's press seven
to go over the top. And then what I'm going
to do is I'm going to press and X, bring it in and I'm going
to put that into play, and X bring in a
little bit more. This is basically
a support beam, so it's not the main support, so don't worry too
much about it. Let's press and
bring it down then. What we're going to do now, I want to bring it up to here. I'm going to come in
face Select press three to go to side view. Pull it out a little bit like
what we did with the roof. Pull it up maybe to the. Let's grab this one and see where we're going
to be with this. Let's pull it out,
let's pull it down. It's already fit in pretty
perfectly on there. Now the one thing you want to look at when
you're doing this, of how part to pull it is we can see there's going to be a
slight step over there. If I just isolate both of these. How, Just for a minute.
So shift H press three, now you can get an idea of what we're
actually looking at. So what I'm going to do
is I'm going to come to the front of here
again, press three. And what I'm going to
do is I'm going to drop this down so that they're all pretty much the same
on a little bit of a step. And then the same on
this one as well. So I'm going to press three,
a little bit of a step. So that's looking pretty nice, and I think that's going
to be about right. The one thing I'm
looking at is this, do I want to make this
a little bit more? I don't think so
actually. I think both of these are a dumb, right. I don't think I
need to mess around cutting this or
anything like that. I think that's exactly
how it would be now. Because this is a
straight support. There's no way it's
going to have a lot of warping on or
anything like that. But one thing it
would have on is a little bit of a Bebbleight. Clicks, Origins,
Geometry, Add modifier. Bring in a Bebble. Turn
that down, put it at one. And then let's come in now and grab this side,
this side control. Then I'm just going
to mark seam in the back there where
no one can see it. It's a right click and
mark seem like so. All right, so that's
that part done. Now let's press tab Lt, Age, bring everything back. And now we want to do
is we want to work on the actual main
structure coming up here. So what I'm going
to do, we have to, first of all remember that a water is just going to
be above this level here. So this is probably where
it's going to be up to. If I look on the
scene I just created, my water was actually
just just below here. So actually this part of it
was actually in the water. So just to consider that when
you're actually building this part I'm going to do now is going to go
to press shift date. Bring in another cube. I'm
going to bring this cube out. I'm going to press seven
to go over the top. On' going to do is I'm
going to press bring it in and then and X bring it in. I want this to be
slightly thicker than this one here because this is actually going to
be supporting it. So it needs to be quite a fairly strong beam
to support all that. And then now I'm going
to put it there. I'm going to pull it
up just above this, so I'm going to pull it up, do something like that. Maybe then I'm going to do
now is I'm going to pull it down at the
bottom of the wall. If I press three, you can
see it's going to come down to there. Pull it down to there. Like I think that's going to be strong enough
to actually hold this. Now I think it's a little
bit on the thick side, so I'm going to
bring it in a bit. I also think when
I'm doing this one, I want to also think about it's not put into anywhere
this thing at the moment. That's the problem
I'm thinking of. It's not really
hold onto anything. It wouldn't be strong
enough just to hold all of the steps
and against the. I don't think that actually
it might be strong enough if I pull it
over a little bit, so it's just against
the wall like that. I think that actually might work out a little
bit better for us. All right, now we've
got that wall. I'll press shift, and
I'll duplicate this over. And I'm going to put this near enough, down to the bottom step. Then what I can do is now
I'm thinking I can put another plank of wood going over here. I'll
grab one of these. I'll press L shift,
bring it over, and then 90, make it smaller. Put it into place, so
I'm going to think. Roundabout there.
And then it can actually be attached
to this part as well. So I'm going to pull
it back just a little bit like so Yeah, I think that's that's going
to actually probably give more support than
what I had it before shift put it into here. Yeah. That's just going to
look there because it's going to be able to be supported
in there then as well. I think that will
support this for sure. One thing I think is
that I'm going to need a couple of
blocks in here now. At the moment, all I'm
doing, as you can see, is I'm just figuring out where I need to
put these things. I'm also going to put it on
x ray, both of these parts, and then I'm just going
to pull them back just so they look as though they're actually
attached to there. I'm also going to do the
same on these parts as well, so bring them back there. Just poking out of there. There we go. Yeah,
that's looking good. Now, let's think about
our blocks of wood again. I'm going to bring
in, I think actually what I'll do with that is
I'll just grab one of these. I'll press shift D, then we'll do is I'll squish
this down and Y, we haven't got a lot of
things to worry about on this too much then I'm just going to put that in place
roundabout there now. It can actually have something
supported in the wall. So I'm going to pull this out there, That's how I want it. Okay. It's a little bit too level
with this at the moment. I'm just going to grab it.
Move it down a little bit, and then shift D. Duplicate
it up for this part up here, it's going to be under there. Now finally what can do
is I can press shift D. I can bring it over, line it up with my steps. I'm going to line this up. If I press control seven,
I can go over the top. And I'm going to line this
up in the wall like so. And then I'm going
to pull it down. So it's just touching
that step like so. And then I'm going
to pull it up, making sure it's in the wall. Is in the wall, not quite. I'm going to grab it
into the wall like so. And then finally I
think I'll just put out a little bit and Y lit
out a little bit like so. Now pretty much goal of these. What I need to do now is I need to really
mark some seams. So what I'm going
to do is I'm going to grab all of these. I'm going to press Shift Age
to isolate everything out. And now I'm going to go ahead
and mark all of my seams. I think also with these parts, I'm going to make
them a little bit slightly bent as well, so that means adding
in some he loops. So control click, right click. We've got a bevel
on there already. So what I can do
now is I can grab this one and this one which
shall grab all of these. And in fact, we'll
grab this one. First control all transforms
right click origin geometry, grab this, sorry, this one. Then this one control
L and we'll just link copy the modifiers like so. And I'm going to put that
down a little bit as well because that I think
is a little bit too high. 0.05 look, that
one's looking good. It's just this 1.05 Yeah, that's looking much better. All of that looks
good right now. Now we need to do
is do our seams. I'm just going to
come in. We need to do our seams because
they're just blocks of wood. We could probably get away
with just a UV project. Bring your material
and we're going to have it cracked wood. And you can see, so
be able to get away. We've not actually
unwrapping a thing, which is also candy. Now, let's grab this one. We'll do the same thing,
a UV project. Okay? Pick the little down
our cracked wood. We'll tap the A. We'll
tap the A. There we go. Okay, that is, that is
looking pretty good. Now, one thing I need
now is just to make sure that we warp in these
a little bit control, let's bring in some edge loop. Same on this, same on this
one, same on this one. Also, we need to
split these off L, L, L and L election. Now we need to do is just warp them a little bit. So I'm
going to grab all these. The reason I split
them off is I don't want them tied to
these parts down here. So you can see that
this part here as well. I don't want to tie these because I don't
want to warp those. Now what I want to
do is just come to mesh transform, randomize. Then turn this all the way
down to not 0.1 There we go. Maybe even not point no, 5.5 That looks perfect now. Okay, I'm happy with that. Now let's think about
these parts here. These parts are fine.
It's just this one. I' want to press L, I'm going to do is I'm
going to press three. I'm going to press wire
frame and x ray on. Now what I should be able to do is you can see that this
planket here at the step. Then I can press
shift D and I can actually just put it in
place like so shift D, it should put it
against the wall. So I'm just pressing shift
D. And moving the mouse, shift D, mouse them all the
way down to the bottom. Now if I put it back on, turn these off, put it back on. Material should
end up with that. Now if I grab all of these, just these ones here and
this one at the top, press Smart UV
Project, look okay. And now they'll all be
different wood as well. Now just on one final look
round, just making sure. I'm happy with all of
that. I think I am. So I think what we'll
do now is we could join all of these steps
together with each other. Once I've grabbed them,
press G. I can see it all comes away with each
other, which is great. And then I just want
to go to object, and I want to convert this to mesh because we have
got a lot of modifiers. Press control J,
and there we go. There is our steps. Now the next lesson, then what we'll do is
we'll put in the metal, these metal rivets that
are going to be in there, hold in the sole together. And then basically we've
done with the steps and we can probably move on then to the post actually after that. All right everyone. So I
hope you enjoyed that. See on the next one.
Thanks a lot. Bye bye.
42. Creating the Posts: Welcome back everyone to
Blane on real engine Five, The complete beginners guide, and that's where we left
out. All right, rivets. The rivets actually aren't
going to be that hard, so all we need to do is
take one of these rivets, so this one here, press Shift. And we're just going
to split it off. Selection. And we also
want to move it from here. So control transforms,
that was all transforms the right
origin to geometry. And now we can put
this in place. Now it's important to put these in a place
that makes sense. So we don't want any on top of here or
anything like that. That would just be
silly. Let's put them in a place that really
makes sense though. Somewhere like that we need probably a smaller rivet going
down each of these steps. So not quite a big one. So we can see here,
if I press three, I'm going to press shift D and bring it over
and put it there. I'm going to press Shift D. Bring it over and put one there. Move it to the side a
little bit, probably. And then Shift, put one here. Now I'm looking for
is back behind here. I'm going to see I'm probably
going to need this rivet. Another rivet in here.
Because this rivet can go all the way through
everything but this rivet. I'm just wondering whether I
need one in there as well. I think that will
be enough on here. We just need one more on there. I'm going to press three and
then what I'm going to do is I'm going to put a smaller
rivet just done here, make it a little bit smaller. And there we go. I think
that's going to be fine. Now, let's go three again. And then what I'm going
to do is now the steps. So I can see where
the steps come, which means I need one
smaller rivet in here. First of all, I'm
going to press Shift, drop a rit in here and
then just pull it back a little bit so it's nice and level when we do the others. And then three. And then
all I'm going to do now, we can see that I'm going
to have to pull them back a little bit more shift, put it in here and then
just drop it back in place. And then I'm going to
press three again. And then we're going to
drop this one over here. And then shift over here. And then this one we
can't actually see, we just want to tiny
rivet over here. Now, I did do shift then. I'm just moving. You can see it did pull
it out a little bit, so I'm just going
to put it in place. All right. Now we've done
all the rivets on there. Basically the steps are done. All I need to do now
is grab all of these, join them all together, and
then just re, wrap them. Control J, join them altogether. Now they should all different. Which, which they do. Perfect. Now I've done that.
I can join them to my steps with control J, like so, right leg auto, smooth. And just make sure they
are happy with your steps. Now let's have a quick look at what we've
actually done so far. So what I'll do is put
it on to rendered view. Yes, there you go.
You can see it's looking really good.
Really, really good. It's going to look a lot
there once we've got the actual thatching on there and the actual
window in there, and also we've not got any realistic lighting
in there or anything. We're not going to do
that near the end. You shouldn't bring you worry about your lighting or
anything till near the end. And then you can actually
start on going and fix things. All right, so now let's put
it onto material view and now we're going to do is
just these actual posts. So I'm going to
create the post now. Now the thing is with the posts, we need to put them on here, they should be supporting
pretty much each of these. So this is where the
posts are going to be. I'm going to do is I'm
going to come to this, grab this face here, shift the selected just to give me a starting
point shift, bring in a cylinder. I'm going to keep it on 18. I think 18 is actually
going to be good. I'm then going to bring it down to get the thickness I want. So we can see here. How thick is this
post going to be? Let's bring our little guy over. The other thing is as well. How high up are they going
to be, completely up to you? I think at the moment they
need to be pretty thick. I think something like
that might be good. I think the height wise
maybe something like that. I'm thinking I
like the high ear. I think that's
about right because he could put his hand on there. But I think the actual thickness maybe a touch too
much old shifting, click, old test to bring it in. Yeah, that's much better thing. Now we drive these down just
below where the wall is. I'm going to bring down to here. Then what I'm going to do
is I do this one first. I'm going to press control
on the top of it just to get that post like
end auto smooth. And then what I'm also
going to do before actually moving on is I'm going
to grab this one. Old shift and click. And
then come down and grab this one with old shift
click, right click marking. Now again on these we have
actually got some end guns. As you can see, we don't
particularly want engons. All we can do is we can grab
both of these right click triangulate faces and then right click again and tries
to quads. There you go. We've actually
sort of those out, albeit they're not actually
the cleanest topology, but they're just an end
on the actual cylinder. Just get out of the
habit of leaving end guns in your scene,
is what I'm saying. Okay. So now we've done that. We need one more seam that
I actually forgot about, which we're going to
put on the back because it will still be
an infinite loop. So I'm going to grab
the top of here, I'm going to come
all the way down. Then the bottom,
where actually is it? Actually, I don't
need to do that. I can just grab it here. Look right click, box Sam. Then what I'm going
to do now is I'm going to bring this
over to this next one. So if I press one, I can see exactly where
it's going to go. And then what I want to do
is shift, bring it over, and then shift,
then finally shift, bring it over. All right. Now what we need to make sure
is if I go over the top, I can see that the miles away
from where they need to be, I'm going to pull them
in right up to those. Now on my build you might want to actually take
a chunk out of these. You can see on these that
we've still got the Bevlon, which means that I could join
up all of these control J. Then what I could
do, I can grab, let's say this one and this one, and compress control plus no, that's not, that's
the union control minus that's actually
the wrong way. Thinks think I've grabbed
them the wrong way. Yes, I have. The problem
though when you're going to do that is you're going to
actually get rid of these. And I don't want
to do that, so let me just do a different way. I'm going to add in a bull, the boolean is going
to be the there we go, Let's put it on
fast. There we go. I think that's going to look a lot better if I
actually apply this. Not there we go. Now you can see that's
looking a lot more realistic. It's just a simple operation
and it's actually looks as though it's cut away
that in these posts. Now we've got this one to do. So let's come in. I'm just going to hide these
posts and have a look. Yeah, there we go. This
is actually perfect, except the way the
wood looks there. We just need to change that a little bit, but we'll
do that in a minute. Let's press saltage.
Let's do this one first. I'm going to grab this one. I'm going to add in a boule in. Then I'm going to
click on my post. I'm going to click on Fast. And then I'm just going to press control And I have to
hide my posts away. See, they're actually cut away. Now what I'm going to do is I'm just going to come
to each of these, I'm going to come to
this, then this one. This one and this one. I'm going to press on the rate, there we go, on the
rate pretty nicely. And I'm going to do the
same with this one. This one is going all the
way to the end up here. Control click, split it off.
I didn't mean to do that. I can see on this one
we've got a seam there. Whatever reason we don't
want to seem in there. Let's take out this
right click seam. Let's try that again. Click on this one control, click this one P now for some reason it's actually spin
it round for some reason. So let's have a look
at you editing. Yeah, it's because it
couldn't fit it in there. The easiest way is we just
want to spin this round 45. That's going to
get back straight. There we go. That's
looking nice now. Now let's look at this one
because we've also got to do this one because
it actually marked a seam on there and I
don't really want that. Let's clear the we're going
to go then here on the round, make it smaller, then -45
just to put it right now. I'm just looking down these, just making sure I'm
happy with the Yeah, and I think they're looking
very, very nice now. All right, ol tag,
bring everything back and let's go
back to modeling now. And then what we're
going to do now is on the next lesson
we'll be actually creating these posts
generally because, you know, the water has
been at them and stuff. The posts should be probably a little bit wider
on the bottom. Also, they're all too uniform. At the moment, it would have
a little bit of difference, not a bit lot, because
obviously they're posts. But we definitely need to make sure we're putting
that in place. All right everyone. So I
hope you enjoyed that and I'll see on the next one.
Thanks a lot. Bye bye.
43. Creating More Complex Shaders: Welcome back everyone to
Blenet's real engine five, The complete beginners guide. And this is where we left off. All right, so first of all, let's come in and bring these. So we're going to grab this top press control plus press one. And then what you
want to do is you just want to bring it
down a little bit. And the same with this one. So we're going to
press L control just to grab that other bit. Press one and then
what we'll do with this one is just lift
it up a little bit. And now you can see if
we drop this one down, L control one, bring
this one down. Now you can see the
look a little bit on uniform and they
look a lot better. All right, now we need
to add some edge loops. So we're going to go in control,
left click, right click. I've added five in this one. Control, left
click, right click, left click, right click. And let's click right click. And there we go. Now let's
grab each of the bombs L, L, L and L and then make sure that run
individual origins. And then also make sure
proportional editing is on. Now when I pull them out, should be able to pull
them out a little bit, making them slightly
thicker at the bottom. Now finally what we want to do is we want to make a little bit, we want to make them a
little bit like uneven. So what I'm going
to do is I'm going to come in and try this first. I'm going to come
with this one L, I'm going to put
this onto random. Then one going to do is
we're just going to pull this up a little bit. Then that's going to
make it a little bit uneven as you can
see on the top. And I'm going to do
the same thing on this L, then this one. And that's looking
pretty good, I think. All right, the
next thing then we need to do is we need to
get some textional these. And then let's see what
they actually look like. First of all, we're going to
do the main part of these. They've got to see
on them already. I'm going to do is I'm
going to grab all of these. Actually, we don't need
to grab all of those. We can, actually we can. We'll do, then what
we'll do is we'll come to new material and
we'll call it Post. Then we need another
new material which we're going to call Top. Now let's go back to our post. Let's save out our work. And then let's go to shading. What we're going to do is grab our principle control shift. Go back and what
we're looking for is the one that says, where is it? Wood, post dry wood. And we've got log ins, so we've got post dry wood. Let's bring that
in. We don't need our AO or ambient occlusion,
so let's bring that in. And now let's have a look
at what those look like. We can see where is our
water level going to be. Our water level is going to be around here which means that this green stuff needs
to be pulled down. Let's go to our UD editing now and then what we're going to do is we're going to
stretch these out probably. I'm just looking at the
moment, it's green. Then these posts need a
little bit of work as well. What we're going to do is
we're going to press a Y. And then I can move
that slightly down, just above the water level. You can see there's a lot
of shine on these bottoms. And that's what we want
because that's where the water is going
to be lapping up. But the actual post themselves, they look a little bit dull, so we might need
to bring them out. But before we do that, let's actually do the
post tops as well. So we go to shading
control shift. And then what we're going
to do is we're going to go to our logins, select them all con principled. What I'm going to do
now, I'm just going to move the material
output over there. I'm going to move the
principled over here. The first thing I'm going to
bring in is an RGB curves. Let's also put it onto
rendered view at the moment, just so we can get
a very good idea what they're looking
like right now. Then what I'm going to do now is I'm going to actually bring in a RGB, RGB curve. Let's drop that in there. Let's turn this down just
slightly to start with. Then what we'll do
is bring in a color. I'm just going to move these a little bit further over here. We're going to bring
in a color ramp. Shift color ramp. Let's drop that in there. And then I'm going to do now, I'm going to put this black
on a little bit of a brown. If I bring this lighter, I'm hoping I'm messing
around with this over. Look, post top. I'm messing around
with the post top, not the actual post. What I'm going to do is I'm
just going to copy these. Control C, go back to my post. I'm going to drop
these in there now, control V and then
just pull them, I'm going to grab
them both again, pull them, drop them in. It's not going to work
so I'm going to plug this one in here. This one. In here, So, all
right, there we go. Now we're going somewhere now, let's move this
down a little bit. And then what we're going
to do is just put this on a nice browny color, so
something like that. And then what we're going
to do is we're going to work on the Uin saturation. Now shift bring in a Uin saturation and it doesn't look right right
now, don't worry. Saturation, let's bring that in. Then finally a gamma shift,
let's bring in a gamma. Bring that in then. What I'm going to do now is I'm going to turn
up the gamma to 1.2 and then I'm going
to work on this bit. First of all, I'm going to
make this a little bit darker, going to look now
because I've lost. There we go down, we're
starting to get it back Then I'm thinking that
I've gone far with this. Maybe put it around here. I'm actually
wondering, should be using the color me back. Yeah. Thinking that also I've
lost the green on there. That's my issue. Let me just let me just turn
down this one first of all. Yeah. I think I'm going to
just bypass the color ramp. Just 1 second. I'm
going to work on it. I'm going to bring down this, bring it up, the green's
probably a little bit too green. I'm going to bring down
saturation a little bit. So then I'm thinking, let's see if I can ken
them out a little bit. So let's see if I bring up now. So, all right, it
looks like we've got a lot of that brought out. It's just this green I want
to take out of the equation. Let me just go back. I think actually what we'll
do is we use a different one. We'll use color shift. Let's go to color. We should have one which
will be color attributes. Let's try. I think what we'll do is we'll bring in another color ramp search. I'll just have another try with that, this up a little bit, put it on the fighter, a little bit of a
brown tinge, I think. Now that is actually starting
to the color I want to, albeit with the color this one, put it on a little
bit of a brown color. Now, I need to tone
this down a little bit. Now, reduce down how much green is in there to bring
this back. You can see it. Does that, I think I can
reduce this screen down a bit. Let me just have a look and see where it looks like from before. Plug this in green. At the moment, this
one in like that, right now, it's a little
bit too much brown. If I can come to this one
again before I do that, I'll just see if I can alter
it a little bit there. Then what I'll do is
I'll change this color. Bring it back slightly, a little bit more
brown. All right? I think that double tap, the looking a little bit beat, I need to bring
back the saturation a little bit too washed
out at that point. Something like that
looks much better. All right, that's looking
really nice as you can see now. It really, really
goes with the scene. They really all fit together. Yeah. I think I'm happy with
how that looks now. All right, so now
we've done that. What we'll do then
on the next lesson is I'll just some a bit so you can see
exactly what I did. It's all about just
messing around. You can see we've really,
really toned down that green. Before we continue, I'll just show you what it
looked like before. So this is what it
looks like before. Really green here. The posts I don't think,
really go well with it. But now if I plug this, not that one, not that one. Plug it into there.
Plug this one into there. There we go. This is what it
looks like before, and this is what we did after. So you can see we've really, really toned down
that green to a point actually where it's nearly
nearly disappeared. Now, what we could do now is we can grab all of these
and pull them up. And instead of doing
that, what we can do is we can overlay the colors, which we'll do on the next one. And then we have a
lot more control over what we're actually doing. All right everyone,
So I hope you enjoyed that and I'll
see on the next one. Thanks a lot. Bye bye.
44. Starting the Main Window: Welcome back everyone.
To blend it to Unreal Engine five of the
complete beginners guide. And that's where we left off. All right, so now let's bring
in a color mixed color. Let's drop that in there. And then what I should be able to do is I
should be able to plug this in now and
plug this into here. And it should give us our color back if I bring
this down to there. So that's basically
what our color is. Now what we want to do is
we want to overlay this, our new color onto the top
of our existing color. If I plug this into here, so you'll see nothing happens. And that is because I've got
this factor all the way up. So now if I drop this bag, the more I drop it back, the more it's going to
take that green down. As you can see, that is
what we're looking for. So I'm going to drop it back, drop it back down to
something like that. And now you can see
it's looking much, much nicer than
what it did before. All right, So I'm
really happy with that. And on top of that as well, we can still come in and let's say we turn our
saturation down zero. It still has an effect on that. The other thing we can
do is we could also, as well as doing this mix, what we can also do is
we could also put in saturation after this and
do it that way as well. So you can have like as many of these as you want
when it comes to color. And as long as you set
them more properly, you can change them
on the fly as you can see or make it lighter
as you can see. I'm just going to put
that back to what it was. Is that where it
was on? No, that's what it was on. There we go. I think though, that's
looking pretty nice. All right, so now let's
come to these parts here. Again, probably
going to have to do some work on the
post ends as well. Let's see if we can. So what I'm going to do is
I'm going to come, first of all to my post ends, I'm going to grab
each one of these. We don't need to do the bombs of them because no one's
going to see those. Let's actually assign these
and then what we'll do is we'll just take off these two because these
are what we did wrong. And then I'm just going to
plug this back into color. And then what I'm
going to do now, you can see already we actually
have post ends on these, albeit we need to put
them in the right place. If I grab all these, go
over to my UV editing, you can see that these
are the actual post ends. Now if I press Tab, making
sure I grab them all, you can see they're all the same posts and we
don't want that. What we want to do is we
want to split them up. So I'm going to grab
this one first. In fact, I will grab them
all because I'll make them smaller first. Let's
do it the other way. I'll just grab this
one. I'll shrink it down, put it into place, grab the next one L
put it into place, drink it down, and then
I'll do the next one. You'll see now that, because we've done it like this, that all of these posts are actually going to look
a little bit different. Now, we'll go to the last one, L S bring it to
here. There we go. Now, all the posts look
actually different. Now, let's go back to our shading panel now,
because we will see. I think that these are a little bit on
the light side now. I do think that folks
would look like this. Anyway, the one problem
is that they're a little bit too light. What I'll do is I'll just
bring in a gamma because we don't want to do
loads of work if we don't have to, let's
bring in a gamma. Then what I'll do is
I'll put this on. Let's say 1.2, There we go. I think that's going to be
enough for our post sense. All right, that's been
made a little bit easier. Let's have a quick look up
where we are at the moment. Now we've got pretty
much everything done except we need
our Viking boat. We need the thatching
on the actual roof. If we're taking an image
from here, of course. Do we want to make this, this actual chimney
when this loads up? Do we want to make it a little bit taller than the rest of it? Or are you happy if
we go round this way, for instance, round
something like that? Are you happy with the height
of the actual chimney, just something to consider? I think everything else
is looking pretty good. I think now it's time
to move onto the window and then we're going to be
onto the harder things. All right, so let's put it on to material mode and let's
actually come in. And what we'll do now is
have a look at this window. Now, a lot of the things
we've already built out, we're not built out, but we've built things similar
to them before. So it should be pretty straightforward in comparison
to what we've done before. All right, so let's
come to our window. I'm going to keep it this size. I think I'm happy with that,
All I'm going to do then. Is I'm going to press
I. I'm going to bring it in and then I'm going to press and pull it back like so it's going to
be a pretty small window. Now what I want to do is
I want to press I again. So now you will see that we
do have a problem there. In that when I try and
bring it in again. As I told you, when we insert, sometimes these will cross over and we really
don't want that. So what I'm going to do is
I'm going to press shift D. I'm going to pull this out and I've got
proportionality on. I don't want that on, so
I'm going to pull it out. And then what I'm going to
do now is instead of that, I'm going to grab this one and this one and we're going
to actually merge them. Right click. We're going to
merge vertices at the center. And then what I'm
going to do now is I'm going to be level off these. Now when you come
and grab all these, you want me to be vel them off? If you press control,
you'll see nothing happens. But if you press control
Holt, and control shift. And there we go, control shift. And now we can see that we can be level them off
into a nice window. Now if I just pull this
out, so if I press, pull it out like so, and then pull it back into
place, now we can see. How big do we want our window? You can see for sure that this at the moment
is way, way too big. So I'm going to
shrink it down with, so I'm going to pull it up and I'm just going to look
at how big that window is. And I think actually
that window is going to be about
the right size now, putting it back
there. All right. Now the reason is that we
need to build this out now. So we need to bring some wood, you know, along here and
basically build this out. But what we also
want to do is make sure that windows
back into place. So let's do that
first, actually. So what I'll do is
I'll separate this off and then I'll grab my window control transforms the origin of geometry
modifier add. And we're going to
bring in a bouillon. And the Bouillon is
going to be this. And then what we're
going to do is put it on fast press control. And then I'm hoping if I
hide this out the way. Yes, we've got a little bit of a window now and we
can actually go in, put it on face slate, pull it back a little bit
like all right, so that's a good start
to our actual window. So what we'll do now is we'll actually start
building this out. So the first thing
I'll do is shift S. First, it's selected shift, let's bring in a cube and we'll put the cube
round about here. And we'll actually get this cube set up ready for the
rest of the wood. If I bring it down to
there, for instance, what I want to do, I
want to bring it up, so I want to then
make it a little bit smaller so I'm going to grab
it going all the way around, old tests, bring it in. So then what I want to do is I want to
isolate this cube off. Now, shift age, let's
isolate it off. And what we'll do is
we'll press Control. We'll mark a seam down
the back of it as well. Click then what we'll do is we'll press
Control transforms. And we'll reset the
transformation. And set the origin of course. And then we're going
to bring in a bevel, bring it all the way down, maybe bring it up one. Let's have a look
on the object mode. No point, no three. Then finally we're going
to press a U on wrap'ing. Just bring in some edge loops, so All right, that is a piece of wood
that is basically done. Now We can press Alt, this wood. Now we can use, let's grab the whole thing. Let's not do that.
Let's press Alt. Grab this piece of wood shift. Now we can actually use this Y 90 to create the
rest of this window. We're going to make it
much easier for us. Now, I think it's
important when we do in this window that we
actually make sure, first of all, that the pieces of wood that
are going to come on here over here,
they're actually done. Before we actually
put these sides, we just want something
there to give us an idea of where it's
going to come out to. Okay. I think what
we'll do now is we'll save our work like so. And then I'll see you on
the next on everyone. Okay. Thanks a lot. Bye bye.
45. Adding Realism to the Main Window: Welcome back if you want to
blane on real engine five of the complete beginners guide and this is where
we left it off. All right, so now let's
actually create then, this carry on with this window. So what I'm going to do
is I'm going to come in, I'm probably going to
use this part here, so I'm going to grab this, and I tend to do this a lot. I'll take a piece and
I'll use it actually, to create another
piece, basically. So what I'm going to do is
I'm going to press shift. I'm going to bring that out. And then what I'm
going to do now is I'm going to press and pull it out along this x axis. So, and then what I'm going to do now is I'm
going to just solidify it. So I'm going to
split it off first, LP selection, grab that piece, control
all transformations. Right click that original
geometry add modifier, and we're going to
bring in a solidify. Let's then bring
the solidify up. So you can see already it makes it very easy for what
we're trying to do. Now what I'm going to do
is I'm going to put it in just in front of
this block on here. And then I'm going to
pull this block back. Let's pull this one back first. Or we could
just shrink it. It'll be easier
probably to shrink it, so I'm going to grab
the whole thing with L and then and X,
let's pull it back. And I'm going to
pull it back all the way just in front
of this post here. And then what I'm going
to do now is I'm going to come back to this part
and pull it down. So I'm going to grab
it in edge select. I'm going to put this
onto normal to get the right direction and then
I'm going to pull it down. Something like that.
And then finally we're just going to fit
all this in together. So I'm going to come in, grab this post, grab the top of it. And then I'm going
to pull it up again. I just want to make
sure that this part here is in front of here. So I'm going to pull this
out a little bit more. And I can also see that, yes, a little bit
more. There we go. I can also see that this is probably this is either not wide enough or this post is too wide. Which waver way you
want to go with it? I think for me I'm going to grab this edge and I'm
going to pull it back. In fact, it's not
because of that, it's because of the thickness
of the thickness of Yeah, I'm going to have to pull
it back a little bit. I think I'll just
grab this edge, pull it back and then pull
the whole thing back. Looks even get away with that. It's still a little
bit of the same. What I'll do is I'll
grab the whole thing, a and then and x, There we go. That's done the trick.
Okay? So that's looking pretty nice like that. And now I need to do
is I just need to make sure none of this
is poking through, so this is not poking
through, which is good. I'm going to decrease the
thickness down a little bit, then a little bit too thick. I'm not too worried
about this part poking through because
I'm going to fix that. There's a few ways
we can fix it. We can just pull it
down if you want. That might be a good
way of fixing it. What I recommend
always, if you can, if you press three, just to use the bicect, because it will
give you a nicer, a nicer finish to it. So I'm going to use bicect, I'm going to cut it
right about there. And then what I'm going
to do is I'm going to fill that inside of it like so. And you can see now that
looks much, much nicer. All right, with this
end then what I want to do is I want
to bring this end up. So I'm going to come
back to this one. I'm going to grab just this end, I'm going to pull it up and I want to make this end
a little bit different. So what I'm going to do
is I'm just going to pull it up roundabout there. And then what I'm
going to do is I'm going to apply my solidify. So control eight,
apply the solidify. I'm going to bring
in a few edge loops. So control, let's
click right click. I've brought in 12345. And then I'm going to bring
in a few edge loops here. So I'm going to press
control. Bring in a few. One right in the center. I do want one in the
center, like so. And then what I'm
going to do now is I'm going to
pull this one back. So I'm going to grab this, I'm going to pull it back like so. And I'm going to smooth
all of this out. Now I can see that I do
have a little bit of a problem in that this doesn't seem to be
moving correctly. If I move this, now
you can see it's moving in a weird kind of shape. It's not actually
following the normal. So sometimes if that happens, you can actually get away
with putting it on local. And that sometimes
works on this occasion, unfortunately it's not, so I'm just going to
put it on global. Now what I'm going to do
is I'm just going to do it by freehand like so. And I just want it to
be a little bit of a curve is all I'm
looking for here. So not too much. Just a little
bit of a curve actually. I'm going to put that one
back. I'm just going to have this part and just decrease how much
this one's curved by. So then what I'll
do is at the end, I think I'll just
bring the end in. Not that I think I'll
bevel it actually Concho B, just to
finish that off. Yeah, something like that. Just to make it a little bit of a and ornamental top to it. All right.
Now we've got that. What we can do is
we can actually come in and mirror all
this over the other side. So I'm going to grab
all three pieces. And one going to do is I'm
going to, first of all, they've got bevels on them, so I might as well apply
a bevel to all of them. So I'm going to press
control L and then one we're going to do is
link copy modifiers. And then if we're going
to object mode now we can see that they've
got that bevel on them. Now, before we join
them all together, let's just make sure
that we've got it on convert and mesh
and then control J. Join them all together
and now find the. What I want to do is I want to mirror it over the other side. Now I'm going to grab
the center window, I'm going to press shift
S and then not shift S. I'm going to press
control all transforms. Right? Clip set origin to
geometry and now shift S cursor selected and now can grab this part and put it over
the other side mirror, over the other side going
to be on the white. And that's because
I didn't write. Click and set origins Three
D. Cursor. There we go. Let's turn off the X. That is looking pretty nice
now as you can see. Okay, we've got that. I'm just looking now, making
sure that everything's fitting in together,
which I think it is. And of course, on this
bit we'll have to make one part of this a
little bit thinner, but let's do the
top of it first. So what I'm going to do
is I'm going to come in, I'm going to grab the
top of this select. Then what I'm going
to do is I'm going to press Shift, Duplicate it. Then I'm going to
press, bring it up and this is going to be probably a
little bit too thick. I'm going to grab all of it. Then I'm going to press
Alternans, just to pull it out. If Alts works, actually,
in fact, I didn't grab it. Alt Shift and click, going all
the way around, then Olds. No, it's not
actually doing that. For some reason. I'm going
to instead grab this one. And this one I'm
going to press and Y, I'm going to put it
onto medium point. And Y, now we should be
able to pull it out. So now we can see that I
need to drop it back down, so it needs to fit
nicely in there. We can also see that
this little pole is in the way, and
I don't want that. We can also see that this
part here needs to come out. For this part here, I'm just going to
grab the front of it. I'm going to pull it out like, so there we go. That's looking pretty nice. Now all I want to do is I just want to move this
pole while I'm here. So I'm going to come in,
grab this part old shift click and then just put it on to smooth on proportional editing. Just move this to the side and then maybe put this
one on the other side. I'm going to see if I
can grab just this part. Move it to the other side, and I want to see what
that actually looks like. Because you can see it's
quite bent on this part now. I don't particularly want that. So let's have a look way
it looked like before. If I press seven to go
over the top controls D, let's move it the
other way then. I think actually it's going
to look better there. Just look too much
going the other way. So I think that way looks much, much better. I think
I'm happy with that. The other thing, of course, is you could have moved
your window over, but I think actually
it looks a little bit more realistic with,
than being bent like so. All right, so now
we've got that. What we need is now we need a part that's going to
come down, this part here. For that, I'm going to
steal this part here. I'm going to just duplicate
this L and then shift D. Bring it over without proportional editing
on because it will stretch it out in a way. Selection, grab it. Let's turn off the
mirror because we're not going to
need that control. All transforms right? Clicks at origin to
geometry. And now shift. And we're going to shift, we're going to put it
selection to curse. And that's going to put it right bang in the
center where we need it said 93 on the number
pad to go down. And then what we're
going to do is we're going to put
it, we'll want it, which is going to be
roundabout here now and Y. And then finally I can pull this out and put it into place. Now that's looking pretty good. I'm happy with that, finally. Now, for the last bit, what we're going to
need to do, this is okay, this will
look like wood. Anyway, I'm just wondering
whether I need another part on here just to
break it up a little bit or I can get away with
leaving it like that. I think what I'll do is for sure I'll make some
triangles on here. Just some wood on here.
I'll make the window. And then on this bottom
piece down here, we'll just steal some
of the wood from here, working with everything
we've got, basically. Let's first of all though,
before we do that, let's just come in and make sure as you can see we've got
actually no seams on here. So what I'm going to do
is I'm going to come in and just mark my seams just before I apply
that mirror control. Mark seams and then
come to the back of it. And then I'm going
to do Alt Shift. Click on here, you can see it's not gone
quite all the way up. You can also see that because we actually applied that bevel, it's actually made it a
little bit harder for us, so Alt shift click and this is why I don't actually
apply bevels, unfortunately on this one. I actually forgot though, just in case you do do that. See as well, it's gone
all the way around. So yeah, this is a
problem that we'll sort out on actually
the next lesson. So we'll do this on
the next lesson. It just causes a few issues. It's nothing, no big deal. But that's why you
leave your bevels, you know, not actually
applied the modifier. All right everyone,
So hope you enjoyed that and I'll see
on the next one. Thanks a lot. Bye bye.
46. Adding Materials to the Main Window: Welcome back everyone to
blane tonal engine five. The complete beginners guide and this where we left the art. All right, so let's
go into here. Let's isolate this
bit out first. I'm going to grab this,
I'm going to press shift he, isolate
everything out. I'm actually, should be able to work with this
once up, great like this. I can actually press
question Mark, then isolate it out even more. And then what I can do is now I can come in and
work on this part. So I'm going to just grab
this little corner in there. And then I'm going to go all
the way down to the bottom. And I'm going to grab the little corner in this side here. I think we had it on the inside, so I'm just going
to grab it there. I'm hoping we had
it on the inside. Yes, we did, That's perfect. Right click mark seen. All right. So the seams
are marked on here. I'm hoping that this part here doesn't cause too many issues. Because sometimes when you open them and they have
an indentation, you'll see it might
cause some issues. So let's first of all wrap this, press you for unwrap. Let's go then to UV editing, and have a look at what that
looks like on the UV map, and we can see it
looks like this. So let's see if it
has any stretching because that's pretty important. What I'll do is I'll bring in my cracked wood and I think
it's cracked wood light. And let's have a
look to see if it has caused any issues on there. And actually that's not too bad. The only thing is they
both look the same. And the other thing is
that I'm probably going to be better off just moving
these a little bit. So there you go. It
looks tons better. Okay, so now let's come back. So ol tag and let's just
see if we can actually just unwrap these easy way
smart UV project. Click okay and let's just
see what that looks like. We can see on this one as well. We do have an issue, always
look out for these things. So you've got an issue here
that might just be because of the devil that might have cut it off because it's
actually in here, not too much of a big deal, I'm going to leave that as is. It's basically not actually
something over another one. It's to do with the fact that
we've left the bevel on. So as I said, it does
cause some issues. All right, now we've done that. Let's go over to modify it. We'll apply the mirror and then what I'm going to
do now is I'm going to grab all of these like so I'm going to grab them
all in the UV map and then I'm just going to move them over and now you'll see that
they're all pretty different. Make sure you're
happy with them. Now finally, let's
come to this part. Because what I want
to do is I want to come and grab all
of this control. Click down to here,
Press control plus, and then you'll just grab
that bevel going around. And then all I'm going to do is pull it back a
little bit like so. And then we're going to do
the same thing on here. So grab this one control. Click the top one control, and move it back. There we go. All right, that's
looking pretty good. Now let's grab the center part. So I'm going to grab this part. We've got this part
here, actually, let's grab both of
these together. L selection and then this part. And this part I can join
together with control. Control all transforms right
clicks a origent geometry. Adding a modifier,
bring in a bevel. Let's just make sure the bevels been put on properly,
which it has. Then what we'll do now is
we'll apply R wood light. And then finally
tab U, B project. Okay. And let's just make sure we're happy
with that wood. Yes, and that woods
looking pretty nice. Now let's think about
this part here. So we're going to steal
some of these probably. Let's steal these ones here. We always seem to
use these ones, so I'm going to grab this one. This one. This one. This one, and this one. And then what I'm going to do is I'm going to press Shift, bring them out, and
then spin them around. We should be already,
if we have a look, we should be on global on here, R X 90. Let's spin them around. I'm not worried about
this bit at all, I'm just worried about getting them in place at the moment. And we can see that I
have picked too many. Not a problem. Let's
bring them up like so. And let's fit them into
place, jawed in there. Just popping out of that. Now, at this point, actually we can nearly get
rid of our gray box. I'm just going to hide
the gray box though, out of the way. For now, what I'm going to do is I'm going to pull this back. We're going to keep some
parts of the gray box, most of it can
actually disappear. So I've got this part now and I'm going to split
this off as well. So P selection, hoping
not have not moved that. Let's grab this control or transforms rightly so,
original geometry. And then what we're
going to do now is just spin it round so I'll 180 just to get the other side and then
fit it into place. Now you can see it's way,
way too close to there, so I need to pull it
back. There we go. Now we can see that's fitting in pretty nicely. All right. The top part. We could also
use that for this back bit. I'll think what I'll do is
actually I'm going to grab, I think, yeah, I'll
just grab all this. So I'm going to press L, L and L. And then I'm
going to press shift D, just to duplicate it up. And then what I'm going to
do with this part is I'm just going to delete
this part here. Delete basis, then I'm going to press three
to go into the front of it. Grab this part and all I'm going to do then I'm
going to keep it. All I'm going to do
is use my bisect. If I come to mesh bisect, let's cut it across right about there so you can see what's happened
here with the UV map. So I just need to check that I'm going to hide
this part here. I'm going to come in then
to my piece of wood here. Let's have a look at
this. And there we go. We can see that's
a bit of a mess. Smart UV project Clic. Okay. And then we fix that.
And then all I'm going to do now is Alt,
bring back everything. I have my gray box once more. And then I'm going to
pull this bit down. So I'm going to split
this part off now. L, L, L. And let's
press selection. And then control A all transforms right,
Plex origin geometry. Spin it around again,
said hundred 83. Let's get this in place now. I'm hoping, yes, it does, It does fit. That's perfect. But now I'm just
going to pull it in front of this part here. It does mean, of course, that I'm going to have
to pull this back, make my Booleion again, if I'm putting this
on here, I wasn't going to put this on
here in the beginning. I'm just going to
remake my Boolean. First of all, what I'll do is
I'll actually cut this out. So I'm going to press tab A. Let's come in with our
bicect again this way, so just make sure it's not
poking through That's perfect. And then I'm going to cut
it this way and I'm also going to make sure that I
re unwrap these as well. So now I'm going to
come to Mesh Bicect. Let's just put it
down there as well. And then we'll grab
the whole thing. A smart UV project. Click. Okay, there we go. That looking pretty nice. All right, so now what
I'm going to do is I'm actually going to bring
back my gray box. Now Al, let's have a look
where it actually comes to. So I can see it's coming round about there. We
need this straw here. So what I'm going to do
is I'm going to come in, I'm going to take
the parts I need. Now if I grab this
one and this one, I'm going to press Selection. And then what I'm
going to do is I'm going to probably grab this. Going all the way around here, I'm going to press shift, click, shift, click,
shift, click. Which ain't going to work.
So what I'm going to do is I'm just going to
press selection. Now finally what I can do is
I can actually come in to, I'm hoping I'm just going
to press to move it out. Yeah, I think I've got actually everything I need out of there. And obviously the
window needs to go back here. All right. I can delete that other way now. Delete. And then
what I can do now, I can come in and
use these parts to create that actual window
part that we needed. What I'm going to do is I'm
going to take these parts, I'm going to come in,
I'm going to get rid of these delete bases. All I'm going to do now, I'm
going to grab both of these. I'm just going to
press, pull them out. Then what I'm going to do is I'm going to fashion
the top off here. Before doing anything
else, I'm just going to fashion this part here. So I'm just going to press and then I'm going to take
these away from these now. So I'm just going to
grab both of these Y, and you'll see now
they're split. And then all I can do is I can just pull these
out a little bit. I can actually bring these
into now a wooden part. So I'm going to
press shift click, then shift click,
And there we go. And then we can just
make that a little bit bigger and then just pull
it back into place like so. And you can see already
that's looking pretty nice. Now we can also see we've
got some flash in there, but we're going to
hide that out the way with these pieces of wood. We can also see that
I need to bring up my roof a little bit with the, hey, that's no problem.
We can do that as well. Or we actually cut these
a little bit more just to hide them a little
bit bare because we've only got a plane to
work with on here. What I'm going to
do is actually, I think I'll put another
piece of wood in here. I'm just going to hide
these out the way just to see what I'm working
with. Hide those? Yeah, we can see that.
We're probably going to need this wood pulling forward, So I'm going to pull it
forward a little bit. So what I'm going to do now, I'm going to put
this into place, but this is going
to go in place. So there we go. Then once I've actually
unwrapped this, if I can grab all this now
with a You Smart UV project. Click Okay. And
then let's put on the wood cracked
light. There we go. Now we're really
getting somewhere. Okay, so now just this window. So what we'll do on the
next lesson is we'll actually billion this
window into this part. We'll create this window. And then finally we'll
finish off the roof. But we Nila there guys.
Nila there with this part. And you can see already
if I double tap the, it's looking really,
really nice. Alright everyone. So, I
hope you enjoyed that. And I'll see on the next one. Thanks a lot. Bye bye.
47. Finishing the Main Window: Welcome back everyone. To blend. It's on real engine five, the
complete beginners guide, and this is where
we left the art. All right, so now
we've got all this. Let's actually bull
in this in then. So what I'm going to do is just going to make
sure that goes through the whole
thing because that'll make it easier for us. So if I press and
X pull this out, just make sure it's going
through the whole thing. And then what I can do now
is I can grab this part, pull it back a tiny bit, grab my wood now. And let's go over to modifiers. We've already got a
bevel on, that's fine, adding a modifier and we're
going to add in 1 billion. And then the bullion
object is of course going to be this to put on fast. And then what I'm gonna do is
apply the bullion like so. And now when I hide
this out the way, we should have a perfect hole. Not going to worry about
these parts here at all. See, the UV is a
little bit messed up, but it doesn't
matter because this is going to be my window space. So what I'm going to
do now is press Lth. Bring back this
part, and then let's bring this over here so we
can actually work on it. Okay, so let's actually come in now and work on this part. So we can see that
if we pull this up. So first of all,
let's press press Shift and we'll bring this out. We'll make it a little
bit bigger like so. And then all I'll do is
I'll grab this part here, press the eye button
and just bring it in. Now again, when
you're pressing eye, just make sure that
these don't cross over. We don't want these
parts crossing over. The other thing is, yeah, I think I'll leave it like that. Actually, what I'm going to do then is use this
as the window. So I'm going to press shift D. I'm going to pull
this out like so. And then I'm going to
delete the center here. So delete bases, and I'm also going to delete
this one as well. Delete vertices, and I should be left with
something like this. Now the next thing I
want to do is I want to fashion these little wooden pieces that are
going to come down. So I'm going to grab this
part and this part and I'm hoping if I pull these out now on the x value
that they should come down, I should be able
to line them up. So I'm going to do is I'm
going to press Enter and Y, and just pull them out like so. And then I'm just
going to come in, grab the tops of each of
these, pull them down. Then finally what
I'm going to do is I'm going to join these up. So I'm going to join
this one and this one. And then right click, I'm going to merge
vertices last, last, then do, I'm going to grab this one and this
one right click, merge vertices at last.
There it is. Okay. And we should end up with
something like this. And now what I want to do is just pull them out a little bit. X, sorry, y. Pull them out a little bit, line them up with this one going over here, and there we go. All right, now it's time to
split all of these parts up. So I'm going to grab these two. I'm going to grab this one, this one and this bottom one. And we can see now if I press Y, press all of those are split up except these bottom ones because they're still
joined with there. So I'm going to press
Y on both of those, and now everything is split up. All right, let's split this
up then away from those. I'm going to press selection. Pull out the way,
then with H. And now I'm working
just on my window, window frame here. All right. So now I want to just
make sure, first of Y, if I press three, I need to pull these out a little bit
more as you can see. So I'm going to come in
both of these and y, just pull them out a
tiny fraction more. So then what I'm going to do is I'm going to add
them the modifier, it's going to be a solidify, I'm going to pull it
back a little bit, and then I'm going to add in another modifier which will be a bevel, there we go. You can see it's
looking pretty good. Okay, so let's pull this into place now and have a look
what we're looking at. Something like that and
that's looking good now. I just want my window
on the back of it. So all I'm going to
press is al tag and I'm going to bring
back this part here. I'm going to press
control or transforms, right Click the
origins geometry. I'm going to pull that
back into place now. And now finally
all I want to do, put some wood on here. Now, we don't need
a lot of wood on this part because it is
a pretty small window. So all I'm going to do then, I'm going to steal
this part down here. I'm going to come, I'm
going to come into this, I'm going to grab this one. This one and this one. I'm going to press Shift D, and then I'm going
to bring it up. I'm going to spin it round
so R dead hundred and 80. I'm going to press selection and then I'm going
to grab it again. Control or transforms right
click, set origin geometry. And now what I'm
going to do is I'm just going to put
this into place. So let's move it across three, let's just put it in some
place. See what it looks like. We might only want
one part on here, as you can see. We might
want it like that. Let's have a look what
it looks like if we get it into place of
something like that. Let's pull it into, let's have a look
what that looks like. Actually, that's probably
going to be absolutely fine. I think what I'll do is
I'll just try squishing it. Said's pull it
down a little bit. Yeah, I think that's looking a little bit better. All right. Now with three, what
I'm going to do is I'm going to bisect
all of this off, so I'm just going
to grab it all. Unfortunately, there isn't
a shortcut for bisect. You just have to do it by hand, which is a pain sometimes. But as is the way mesh bisects, let's go down this way. And then let's have a look
where it's going up to now. That should be Let's just
have a look inside there. Yeah, let's look
in the Fine now, even though it's
going in slightly down, it's absolutely fine. Now I can just press UV Project. Click. Okay. Spin
them around, so r 90. That's absolutely fine. Now now what we need to do is we need to copy this window. So we can see here, if
I open this back up, you can see if we
go to materials, it's, we can see, if we go to materials,
it's glass. If I come to this, this on glass and then I'm just
going to unwrap it. So a rap. Now, finally, let's
come to this wood here, and I'm going to grab
the whole thing. Not that wood. Yes,
this wood here. And we've also got
a modifier on this. I'll have to apply these
sled fi first, so control A, and now we can grab it and
then just press UV Project. Click Okay on these
smaller parts, you can really get away with
a lot more as you can see. Definitely unwrapping these in this way doesn't really
matter too much. Now we want our windows to
be this light wood again. We're going to come to material, put it on light cracked wood. Let's have a look that
might be resolution. Let's make it a
little bit smaller. A, Bring it down a little bit. Double tap the A. Let's
move out this cursor shift. Right click. Yeah, that's
looking pretty good. Now, the last thing is that we want to make sure is this roof. So we can see at the moment that the roof probably
going to need pulling up a little
bit into that space. I think if we pull
it up anymore, it's not going to look right. I think we're going
to have to cut these parts away a
little bit more. I'm just looking
where that is now. I'm not going to be using any, just somewhere around there because it needs to be some hay. So it's gonna come
down to there. I think they'll pull if
we pull it up past there, you can see it's not
going to look right. But let's come round now
and what we'll do is, again, we'll just cut
these off a little bit. So what I'm going to
do though instead, I think I'll actually
hide all of this just so I can actually see what I'm doing. So I'm gonna hide this. I'm not, I need that one. So what I'm gonna do is
I'm gonna now press three. I can't see this. Can I see
it in wire frame though? If I pres it on wire frame
to hide this out of the way. And I'm looking just to see
if I can actually see this. I can see it here. There we go. That's what I'm looking for.
I'm going to hide these out the way you see
this part on here. I'm just going to
hide everything. Actually, let's just hide
everything out the way. And there we go. This is the part where we
need to go before. So what I'm going to do
is I'm going to come in, I'm going to press eight, make sure I've
grabbed everything. I'm going to go to
mesh and then bisect. I want this to be as close
to this as possible. So I'm going to bring this up. I'm going to press Space
Bar just to move it a little bit like so and release. And now I'm going to do the
same thing on the other side. So I'm going to
grab it like that. I'm not, I'm going
to come to mesh, I'm going to go to bisect and
then I'm going to grab it, but I'm going to grab it
the other way because it's going to make it much easier for me mesh and the cut
going to be about there. So all right, now let's actually see if we've
actually got that right. So let's pull this over, let's
put it on an object mode. There we go, there in there. That's very nice.
Let's press Alt. Bring everything back tab,
bring everything back. Double tap the A, and I'm just
looking down the inside to make sure anything is visible
and no, it's not fly. All we need to do now is
just to give the straw. So I'm going to pull this out. I'm going to press Tab, Unwrap, and then come in and I'm
going to put it onto Draw. So now finally I'm going
to go to modeling Al Tate, Bring back everything
or question mark, I think we press
question mark on here. That's put it on. There we go. Now one thing I would
say is this straw on this is needs to make
it much smaller. So I'm just going to
go back to my UV. One way to do is press
tab A to grab them both and then A and
make them smaller, just so that the right
same size as here. There we go. That's
looking pretty good. Now finally all I'm
going to do is I'm just going to press right click, subdivide, right click
subdivide, subdivide, subdivide. Then all I'm going to do now is just put proportional
editing on. I'm going to grab one of these. I'm going to bring in my, I'm just going to pull them out just to make them
a little bit uneven, just to add to the effect just pressing pulling
them out, not too much. I'm making them even, so. All right, there we go. That's looking perfect. Okay, so let's come
in and save our work, and then let's go
back now to modeling. Let's have a quick
look round because basically the roof is finished. Accept the thatch in, so I can put this on
rendered view now. And there we go, looking
very, very nice. Now, as you can see
on the next lesson, then what I think
we'll do is I think we'll work on the
little Viking boat. Then after that, I
think we'll actually make the water and
the part round here, and finally then we're
onto the actual roof. All right everyone, So I
hope you enjoyed that, and I'll see on the next one. Thanks a lot. Bye bye.
48. How to Model Boats: Welcome back everyone to
blenders Unreal Engine Five, the complete beginners guide, And this is where we left off. Now I recommend probably
for doing the next part. Let's put this on
material first. I probably recommend actually taking your guy
pressing control C, opening up another blender. So let's go right click blender. Let's open up another one. I'm going to drag this over
onto the other screen. And what I'm going
to do is instead I'm just going to make this
over on my new blender. So I'm going to press control V, and you'll see my guy comes in and he's actually
on the ground plane. Let's right click, sorry. Let's press shift
space part, move to A. And then what I can do
is that can actually put into place like so. And I recommend doing
this because it just gets rid of all the junk,
everything that's in there. And once you've done
it, you can just press control C control in the old blender and put it straight in. So
let's do it that way. So what I'm going to do
now is, first of all, I'll recommend that for these little, you know, ring boats. I would definitely
get some references. I'm going to show you a really, really great way of
actually creating boats. The way that I'm
going to show you, once you've actually learned
it, it's going to make it. I'm not going to say simple because making boats
is not simple. But it's certainly going to make the process much, much easier. So let's make a start to that. So the first thing I'm going to do is I'm going to press shift. We're gonna start with a
plane. I'm gonna pre seven. What I'm going to do
is get my dimensions for my actual rowing boat. Now the thing is
about rowing boats, you'll see that
you need to allow a little bit of scaling
because the wood is obviously going to
come out and make it a little bit tighter in there than what you
initially thought. The other thing is
you need to think about where your guy is
going to sit normally, the back of the boat, if
I spin my guy around, ours hundred, 80 normally
sit around here, somewhere like that with
the end pointing up here. What I'm going to do is
I'm going to come in now. I'm going to pull
the end of it out, jif face bar again, pull the end of it out, and then I'm going to pull it back. The other thing is
it's a viking boat, so it's going to be a
bit longer than normal, so if we pull it out
a little bit more. So now the last thing to think about is that when
you pull it in, you need to allow, so
you've got some room, so you might need to still bring this out even more
than what we did. Now let's bring
some edge loops in. So the first edge loop
I want to bring in, it's probably going to
be down the center. So control, left
click, right click. And the reason I do
that for is because I basically try and mirror
it over to the other side. It makes things
much, much easier. Next of all, what we're gonna
do is gonna press control. And we're going to bring
in some edge loops. So left click, right click. And now finally
we on to actually making this actual,
you know, boat. But what you want to
do now is you want to come over to
proportional editing. You want to make sure that
you're probably on sharp. Let's give sharp a try. I'm going to come
to this top part, grab both of these edges and then and X, and
let's bring them in. And then what we're
going to do is we're going to do the same
thing on the back. I'm going to press and X, but I'm going to bring this in. So, and you can see
already now we've got a pretty nice looking boat. What I'm now going to do is I think because I've got
a bit of a size in now, I'm going to actually
grab the front of it. Just pull it out a little bit. I think that's looking a bit better than what
we had it before. Now we've got the main, the main shape of this. Make sure that you're
happy with it. You might want to
pull these bits out if you grab this process X, pull them out a
little bit like so. Once you've got that,
what you can now do, you can actually start
creating the rest of the boat. I'm just making sure before I do anything else that I'm
actually happy with it. And sometimes you'll find that you can probably play
around with this too much, but I think that's
looking pretty decent. All right, so the next thing
we want to do now is we want to actually
bring this part down. We want to mirror over the
other side as well as it said, it's going to make it
much easier for us. So I'm going to grab
the front up here, grab the back up here, press Delete and Faces. And then what I'm
going to do now is I'm going to press Tab Control. All transforms. I'm
not going to reset the transformation
because it's going to put it right in the
center for me anyway. I'm going to come in then
and add in a mirror. So now let's bring
this side of it down. So what I'm going to
do is I'm going to grab all of this going
all the way around, not these two on there. And then I'm going to do is
I'm going to press three, and I'm going to press E
then and pull it down. So E, z, and pull it down. Now you'll always
end up with the boat probably looking longer
than what it should do, and you'll always
probably end up squishing it in a little bit,
so don't worry about that. So once you've pulled it down, you'll now see we have a
boat like this and we have, you know, coming
all the way down. But if I brought these in now, I won't have anything
to work with. What I'm going to do is
I'm going to press control R. Bring in some
edge loops like so. And these edge loops
are going to be used for the wood that
comes across here. So you can see at
the moment we have this is the thickness
of the wood that's actually going to come across as the actual planks of
wood that are going over. So maybe I'm probably
going to need a few more, so I'm just going to
come down, I'm going to increase it here like so. And I think that's
probably going to look a little bit bare, so they're going
to be relatively thin, these bands of wood. Because it is after all, a rowing boat next of all. Then what I want to do
is I want to bring in the back and I want to
bring in the front. So what I'm going to do
is I'm going to come, I'm going to grab this one here. I'm going to press
three, and then I'm going to bring it in like so. Now you can see it's not
coming in the way it wants. I'm going to just change my
proportional, let it in, let's try it on route
and see if that actually brings it in
a little bit nicer. I don't think that's the
way I want to do it either. Let's try linear. I want to basically make it a little bit rounded, so I'm
going to change it. Let's try the sphere
that you can see. It's not exactly what I want. What I'll do instead is I'm going to grab
the bottom of it. Let's see if I can bring it in. I want it to come basically round like
this instead of this. Let's see if I put
it out on the top. Yeah, that might
work actually a bit. I'm going to bring
it in like that. I think it's going
to work much better. Then I'm going to
do is I'm going to the top out
this part as well. I'm going to squish it all in. I'm going to come
with the top again. I'm going to bring it out. We want it, I'm thinking, I'm going to want it
roundabout there. And then what I'm going to do is now is work on these side. I'm going to take
off proportionality. Now, I'm going to bring this
in exactly I want it now. I want it like this, like this, like this, like this. That is looking better. Obviously it's not straight. Let me see if I can
straighten it up just so vert vertex t. Let me see
if I can bring this up. Click on the wrong one
vertex vert. There we go. Now the problem is that
when I brought that in, now you can see it's
bent it a little bit though I think
I won't use that. What I'll do instead, I'll try, and I'll also try putting this on individual origin and Y, let's try it on D point. Yeah, I'm still getting
the same problem. So what I'm going
to do is instead I'm going to smooth
this up by hand. Now remember, this part mostly is going to
be hidden anyway, but I think that there
is looking quite nice. The back of it is
certainly looking nice. Now, the last thing we need
to do now we've got that. We can see. However, we do have a problem in that this
is not going to touch. So you can see here, this
all needs bending in. Now, it all needs bending
in as well as that, it's pretty thick at the moment. I'm going to do, first of
all, I'm going to press a, I'm going to press and's head
and just squish it all in. And then what I'm going to
do now is come to the side. I'm going to grab
these two points. Let's see if I can do it. With that, I'm going to
try putting proportion, it's non press one and
I'm going to bend it in. I'm hoping that I can actually bend it in to
where I actually want to. So you can see here, I don't want it
bending in like that. I want it bending in the other
way. Let's try bending in. There we go. That's what I want. I'm going to work
my way around now. You can see now that's
looking pretty nice. Now the thing is
we've got to do this, as you can see, a little bit of a time to bring it all in. I'm going to press this control
seven to go over the top, and then I'm going to
bring this bit in. We've also probably have some type of clipping on as
well on our actual mirror. What I'm going to do is I'm
going to grab this one here. This one here, control seven to go over the
top. Bring it in. Don't worry, we're going
to smooth it all out after bring it in, bring it in. Just keep working your way down. Now, bringing it all in, don't worry if the
touch, because we have got the clipping on. Let's have a look now.
Coming down here, I'm here and I'm going to
bring in now the back finally. I think we can get
that bit in as well. All right, so let's have a
look what we've got there. We can see if we put
shade auto smooth on this is what we've actually ended up with now At
the moment we can see it's still a little bit rough and that's
not what we want. But on the next lesson, then, we'll smooth all of this out. All right everyone. So I
hope you enjoyed that. And I'll see on the
next one. Thanks a lot. Bye bye.
49. Adding Realism to Our Viking Boat: Welcome back everyone to Bleen. It's Naral engine five, the
complete beginners guide. And this where we left off. All right, so now we've
got pretty much our boat. It's going all the
way down there. The one thing we need to do now, I would think is lift this up. So it needs to be slightly bent. As you can see at the
moment, it's pretty flat. It shouldn't be like that. It should be bent
up a little bit. So what I'm going to do
is I'm going to come in, I'm going to grab this top part. I'm going to press three
to go inside view. And I'm no longer going
to do bring it up. And then I'm going to come
to the back and I'm going to do pretty much the same
thing, but not quite as much. Come to the middle,
bring it down now, and I'm hoping that I need to probably grab this one
and this middle part. And then press three
and then bring it down. So still trying to
keep that smooth line. And then we're going
to come to this side. I'm going to lift it up. I'm going to come to this part, bring it down a
little bit like so. And then I'm just
going to come in and just move this part slowly. So now we can see we're
really starting to actually get somewhere
with our boat. We just want this bit to be relatively flat
going across here. So now let's flatten
this bit out just a little bit because it
is a little bit round and it should be a little
bit more flat this, so all I'm going to do is turn this off and then I'm going to grab this one control,
click this one. And then I'm just
going to press S and Ed just flatten this
out a little bit. And now it's looking
much better. Now finally now we've got the
actual shape to our boat. Let's come in and
add in a smooth. So we're going to add
in this smooth here. And all that's just going to do is smooth off all
of those parts. For us, we don't have to worry
about this part anymore. This part all going to be done. We're going to actually
remove this part, so it doesn't even matter. Now let's actually come in
and what I'll do is I'm not going to ply my
mirror modifying yet. What I'm first of
all going to do. So I think now before moving on, I just want to pull this
bit down a little bit. So I'm going to press
three on the number pad. I'm going to pull this
out a little bit. And then what I'm
going to do is I'm going to pull both of these. So both of these three. Just gonna pull them down
just a little bit like, so just making it a
little bit more smooth. All right, that's looking cool. Now let's say come in. And what we need to do now is we just need
to make sure that we're happy with these
lines going over here. So in other words, these are going to be the
planks of wood. And they're going to go all
the way around to the bottom. So you can see they're good
coming up here like so. But this part here, is this
part going to be okay? In other words, do I need
to move this down slightly? As you can see, now that's
looking a little bit bare. Move it down. Move it
down just very slightly. So now we can see that wood is coming up really,
really nicely. And now we're just going
to fall into the back. And I think actually the
back is looking fine. Okay, so now let's come
in and grab this one. And what we're going to do
is just work our way along. So shift clicking
control, click in. And the reason we're
doing this now is just so we can actually
mark our seams in. And that's going
to save us a lot of work because we have got on there on right click markers. Okay. Now what we're going
to do is split them up. So if I come in, grab L, L, L, I can press Y G, and there they are.
They're all split up. And then finally, what I want to do is I want to
split this off now. So I'm going to grab this one. This one, press the Y button. This part will come in
very important later on. Okay, so we've got
that, now let's think about actually
bringing in a Solidify. So what I'm first of
all going to do is I'm just going to delete. Delete it, sorry. Split
this part out of the way with selection. And there we go. You should be left with
something like that. And now let's come back to our main wood and this is
what you should be left with. And you can already
see it's the start of actually making
the double tap, the a, our actual wooden boat. I'm not sure why. Oh, it's because
I've got smooth on. That's why it's
split them all off, I think before I split
them all off, Yeah. I need to I need to go back. So before I split them all off, let's just go back a minute. So before I split all of
these off, there we go. Now let's apply our
smooth control now. We can split them off.
Don't made that mistake. Alright, let's press Y
now. And they should. If I split these
off, there we go. That's what we're
looking for. Okay, now let's split this one off. Y. There we go. And now what I want to
do is I want to actually solidify these. I
can split this off. Now if I press Selection. There we go. Let's
come to our vote now. And then what we're going
to do is we're going to add in a modifier, bring in a solidify. And let's turn this solidify up. So if I turn up the thickness
like so that is perfect. And then if I bring in
a bevel on top of that, so bring in a bevel,
there we go, there. Is your boat looking
really, really nice? Now, at this point, you've
still got a choice whether you actually want to change
any of the wood. In other words, if I
come in and I grab, let's say this one and
want to pull it up, you can see that I can actually mess
around with the wood. Still use proportional editing. So if you use
proportional editing, rest the board, you can see now we can still actually
mess around with them. So if you've got any kinks or anything like that that
you're not happy with, make sure that you fix those now before moving on
to the next section. All right, so now the
inside of the boat, this is the bit that
we need to fix now. So the first thing you
want to do is you want to grab this part, going
all the way over. And you want to pull it
over to touch without proportionality on touch the
other one and then release. And then what you'll have is
you'll have the mirror now, actually bringing
them all together, and that's exactly
what you want. Next of all, what you want to
do then is you want to make sure that these pieces of
wood are fairly straight. And the reason for that is
because these are going to form the inside of
the actual boat. So if I bring them down like so they don't need to
be perfectly straight, We're not looking for that
or anything like that, we're going to bring them down. So now remember as
well with the boats, we don't want a lot of randomness
actually pointing them. And the reason for
that is they're, the boats are going
to be done very well. They have to be water
tight on top of here, so you're not going to
have any randomness, any broken parts
really on there. If they did have something,
they'd make sure they fixed it or they'd
just sink basically. So not going to have, you know, broken parts or, you know, all this
is going to be really random or anything, not like the wood on the
house or anything. All right. Once we've done
that, then we need to make planks of wood in here. So what I'm going to do
is I'm going to press control two, left
click, right click. Control R to left
click, right click. I want to keep an even
number going across here. Control can see the difference,
the gaps between them. They're not going to be the same because of how we've done it. That's why we did it like that. So they're going to be
slightly different, as you can see, the control. Finally, one on here
probably control. All right. Now, now that we've got that, what we can actually do is
turn these into planks of wood and then we can actually
put them into place. Because obviously
we can see that our guy needs to be stored
where there may be. So he's actually stood on,
he can sit on there as well. Let's actually fix that now. So what I'm going to do
is I'm going to grab this part here, a
mirror control. So now we've got that.
Let's actually come in and probably not going to
need this line down here, So I'm not going
to need this here. I'm going to follow it
all the way around there. So what I can do is just
delete and dissolve edges. So now we just need to create this piece of wood once
actually put in place, so if I grab it all,
I can bring it down now you can see that
looking pretty good. You can see that the
thickness of this top one, especially this one here. You can see that the bevel on there is a little bit too high. So I'm going to turn that down. Let's bring that
all the way down. Turn it up to No, 0.1 maybe something like that. And now it's looking
a little bit better. Let's turn it down to 0.3
maybe a little bit higher, not 0.5 And there we go, that's looking perfect now. And now you can see this
is fitting in much better. Now what we need to do
is we need to go over the top and we need to
fit this into play. So if I press said and
go into wire frame, can I actually see
through there? Got a better view of it. The other thing is that the thickness of the boat
probably needs come out. Let's press said
and go into solid. So you can press
siding solid mode. What I'm going to
do is I'm going to increase the thickness of this. We could also as
well offset this. Let's have a luck, if we offset a little bit, what happens? I think he'll move
the whole thing. That's oh, no, it doesn't. That's good. That's very good. That is exactly what we need. I'm going to bring that out. Then I'm going to increase
the thickness of this. So and then that's going to hide away anything apart
from this top bit. So now I need to
make sure that all of this is fitting into place. So I'm going to come
to this part here now. I'm hoping that you're
able to follow along here. I've tried to make it
as simple as possible. I'm going to pull
this up like so. And then finally
I'm just going to pull that bit up as well, and that's looking
pretty good, All right? I'm just making sure now
that nothing is sticking out the sides or
anything like that. I'm happy with everything
and yes, I am. Okay. So now let's make the planks of wood
going down here. So pretty much the same way as what I did with
the other part. So I'm just going to grab
each of these planks of wood going down here. So I'm going to mark
a seam on them. So right click, mark seam. Then all I'm going to do is
I'm going to check de select. So if I select all of them, so if I press A on them
and then come to select and come down to check a de select and just select
every other one. I can then press Y and
split them all up. And then what I can do is I
can now add in a modifier. First of all, I'm going to
write click shade, auto, smooth press control
all transforms right. Click to origin, geometry, add modifier, bring
in a solidify. Let's bring it down a
little bit as well. So I can see it
dropping down there. Let's then bring in a bevel. And we can see now that is
very easily how we did that. We can also see
that we're probably going to have to pull
this down a little bit. It's probably set a little
bit too high still, and we'll probably have to pull that out now a
little bit as well. But I think this
now is about right. I'm going to do, I'm just
going to finish this off by just turning this bevel
down. It's too high. Not point, Not not three. Yeah, that's looking much bare. Then what we'll do is we'll put, bring this together.
Bring this in. They're on here. We haven't got the mirror modifier anymore. So I'm just going to have to
grab both of these sides, press S and X and bring them in. And then I'm going to just
make sure I'm cleaning up all of this area so I can
come in, grab this one. And this one I can
press S and X. Always the case on boats. You will have to do some actual manual work just
to bring them in. S and X, bring them in. And this one, this one X, And then finally on this one X, this one, this 111
little point there. If we've got another one, that one there, that's one. Now let's bring this part in, grab them the mint. What it is is just
the planks together. That's why you end up with
two points because they're actually very close to
each other. All right. We brought all those in and
we've ended up with our boat, and we've ended up with a guy, if we put him now,
standing up on there. And we've still got
our top part here, so don't worry too
much that it's going to be a little bit
higher up than that. It's also going to
look a little bit thicker than what it is at
the moment, so that's fine. And then all we've
got to do is put this part on here
and make our seat. All right, everyone. So
I hope you enjoyed that, and I hope you learned a lot. And I'll see you on the next
one. Thanks a lot. Bye bye.
50. Creating the Keel: Welcome back if you
want to blend on. The real engine five, the
complete beginners guide, and this is where
we left it off. All right, let's do our top now. So we'll do the top first. So at the moment
when we've got this. So what I'll do is I'll
actually take this part here and I'll take this
part here, actually. Is the mirror on? Yeah,
the mirror still on. So I can just take
this part here. And then what I can do is
I'm going to just press Shift D and I can
duplicate that. I should be able to then
just bring it up like so. And then what I need
to do is now I need to pull this out and kind
of put it into place. So what I'm going
to do, I'm first of all increase the
thickness of this, and actually it's
increasing all of the thickness because I
need to split this first. Let's split it off.
Election. Split it off. I've actually increased
it all before. Actually. Yeah, there we
go. Let's try that again. Okay, That's the
bit that I want. So I'm going to
press Shift and D, pull it up and then
I'm going to press P election. Split it off. And then what I'm
going to do now is I'm going to grab this part. Control all transforms and then what I'm going to do
is increase that solidify. So we've got an actual edge, you can see that's
way, way too much. So we need to bring that down. And bring it down perhaps there. Then all I need to do now is
just pull these parts out, which is relatively easy
because we've got all of the parts already modifier, so non destructive basically. So let's pull these out, let's pull this
across a little bit. Let's also go to the back and make sure I'm
happy with that. So I'm going to
pull the back out a little bit. All right. So I think I'm happy
with all of that now. I'm just looking on the inside. I just need to bring it in. Actually, I need to
bring the inside in. I did forget about that. So let's bring the offset a
little bit in and then what we'll do is we'll make it a little bit thicker
now because you can see it's a little bit thin. Pull it out just a little bit. So then what I'll do is I'll just bring this
bit out a little bit. So if I can grab its edge, one edge, select the edge there, bring it out, novel one. Let's look around the back. I'll bring the back
out just a slight bit. Double tap the A
and there we go. All right, so we're
pretty much done now with the actual
main part of the boat. Now let's think about the, I don't know what it's
called, the hole, the stern, I'm not sure what
it's called, but it needs to come all the way
down here and across. Now to do this, what we're
going to use is probably, I think what we'll actually, I think we'll start
with the grease pencil. I think that'll be
the easiest way. So the way I'll do this
is I'll bring in a plane. I'll spin my plane
round so Y 90. I'll make my plane big. Not that big, but bigger. I can actually use
something to draw on. I'm going to use it
right about there. Then what I'm going
to do is I'm going to bring in a curve, I'm going to bring
in a Bezier curve. I'm going to press Tab. And what that's going
to do is it's going to allow me to come into edit mode. I'm going to make sure that all of the curve is selected with a. Then I'm going to
press delete vertices. And now what I can
actually do is I can come over and actually draw. I'm going to also make sure because we're in a new blender, we're just going to make sure that we're drawing
on the surface. So just this one here. And now I'm free to come
in and draw this round. So what I'm going to
do is I'm going to draw it going down and I'm just going
to stick it next to where I want it to come, going all the way
around like so. And then where we want it
to come up at the back. So now I'm going to do
is I'm going to turn, this has already a
curve as you can see. But one problem we've
got is it hasn't got many vertices
between here and here. We need to add in some more.
So what I'm going to do is I'm going to come
to my selection. I'm going to grab this one. And this one I'm going
to report subdivide. I'm probably going to
subdivide it again. Subdivide, and then I'm
going to grab this one. And this one, I'm going
to right click subdivide, and then I'm going
to grab this one. And this one I'm
going to right click subdivide and subdivide again. There we go. Now I've got a lot of curves to
actually work with. Not many of the bottom, but
the bott is relatively flat, so I don't really need
to do a lot with them. Now what I'm going to do
is I'm going to press Tab. I'm going to come in and I'm
going to come to my curve. I'm going to open up geometry. I'm going to put in the extrude. And then what I'm
going to do now is I'm going to come
in to my solidify, adding solid bit like
we've done before. Right click, shade flat, delete this plane, you're not
going to need it anymore. And then finally what I'm
gonna do is just bring out this part here. So I'm going to bring
out the thickness. I'm going to set this
to zero, the offset. And then we should end up
with something like this. Now we can see what work we've
actually got to do here. First of all, some of the parts are going to have to
be a lot thicker, some of them are going
to have to be wider. Now generally on
the boat you can see near enough which parts are actually going
to have to be thinner. The first thing
though, I tend to do, is I'm going to get the shape right first before
doing anything, let's get that shape right and then we can
actually work with it. So you can see here, it's
miles away from the boat. You can see that this part here, not really what
we're looking for. What I'm going to do is
I'm going to come in. Right click, subdivide,
I'm going to start from the top and then I'm going to do is I'm going
to work my way round. I'm probably going to use a smooth on the proportional
editing and I'm going to bring it up and you can see it's starting to
look much, much better. You can see that this part here, it needs rotating round. You can pull these out without proportional editing on.
You can pull it out. Then what you can do is
you can pull this one out, then you can rotate this. If we rotate this now, we can actually make sure
it's nice and smooth now. Okay, now let's work our
way down portal editing on. Again, bring these into place. Working your way
round, it's going to take time, just
be aware of that. You can see also that this is losing its shape
a little bit. I'm going to show you
how to fix that as well. Bring it round now. This one here, you
just delete that. It's going to straighten this
up automatically for you. Delete tes, see how
straighten it is now. Then you can just
work your way around. Same thing on the bottom W
tend to do is I'll get in the right place and then I'll
just delete some of these. If I bring this up now, I can actually come in and
probably delete this one. Delete vertices, rains
it all up for you. Now let's finally work
our way round to this. Then let's pull this out
a little bit like so. Let's then rotate this. I'm Joe going to pull this down. I'm going to rotate it
then where I want it. I'm just wondering if I'm
happy with how that is. I think I am now. Let's pull this part out. So I'm going to do is I'm
going to grab this center of here. Let's pull it out. We want it now. You can see that sometimes it pulls them out in
the wrong direction. This is because a test is
actually based on normals. So what we have to do
is we have to go after. If you notice, if
you press and X, you'll notice nothing happens. And that's because, well, it's not designed to
actually work like that. That's why we can't
actually pull it out there. What we need to do
is we need to pull that out actually after now. The other thing is I can see
here that might need to draw slope that round a little bit like so I have to
slope this one round. As you can see, that's not
actually looking right. I might actually just pull this up a little bit just
to even it off. I'm happy with the
shape of that. Now I just need to do
the shape of this one. I'm going to come in, I'm
going to press Alter Ns. I'm going to pull that out
a little bit on the end. So now let's think
about how many actual, what's the resolution
of this curve? You can see it's very high. So what I'm going to do is
just going to turn this down maybe eight on this. And then what I'm going to
do now is I'm going to press Tab Object convert
mesh. And there we go. All right, so now we can come in and fix the parts that
we're not happy with. So for instance this part here, what I'm going to do is I'm
going to come in O shifting, click, rubbing it
all the way around, make sure proportional
editing is on old test then and
then we can pull it out or just the born, let's see if we can
pull it out that way. Not really happy with
how that's coming out. I'm just going to try a
few different things. Let's pull it out, like I think actually I'll pull it
out just on this axis x. And there we go. That's
looking much happy with that. Now how that looks, I'm actually right click,
shade, auto, smooth. Yeah, I think I'm much
happy with how this looks. And then I'm going
to do the front now. X and X. Pull this
out a little bit. There we go. That's
looking pretty nice. We just have to be careful
that we don't move into territory of more fantasy based. I just have to be
careful of that. I think I'm actually okay
with that right now. All right. We've pretty
much got this now. The one thing I would say is maybe this is a
little bit too thick. So what I'm going to do
is I'm going to come in, I'm going to press
Olt shifting click. It should go all the
way over then and then old and I should be able to decrease that thickness
a little bit. There you go. You can see that'll just looks
so much better now, like, so now the final thing I
want to show you is how you can actually alter any part of this once you've
actually done this. And we're going to be doing
that for the roof as well. So we'll show you that
on the next lesson, we'll get all of this joined up, make sure that you're
happy with it and before we put our seats
in or anything like that. All right everyone. So I
hope you enjoyed that. And I'll see on the
next one. Thanks a lot. Bye bye.
51. Working with Lattices: Welcome back. You've
E to blender ton, real engine five, The
complete beginners guide. Now let's come into
these parts here. Let's just make sure we're
happy with this flow. I think it's, it needs bevel in a little
bit more if we can, but let's bring up the
bevel to 0.5. There we go. And then what we're
going to do is we're going to grab
the whole thing, not the guy, we're going
to hide him out the way. We're going to press box select. So to grab everything then
all I'm going to do is go to object convert and mesh. And if it's gray, you just need to make sure
you select one of them, so one of them is yellow, Object convert, mesh control J, join the
whole thing together. Right click shade or to
smooth control or transforms. Right click, set
origin to geometry. I'm going to press shift
because the selected. Now let's add in a lattice. So what I'm going to
do is press shift a, come down to one
that says lattice. And then what you
want to do is you want to bring it out like so. Now it's important
that you don't alter this in any way in edit
mode, that's very important. But what we're going to
do now is we're just going to pull it out and Y and then we're going to
move it over and then and Y, just making sure that the whole boat is actually in there. And then what we're going
to do now is press three. Bring it up a
little bit and just make sure that your boat
actually fixing it. Then what you're going to
do is you're going to come over to the lattice
options over here. And what you're going to do is you're going to turn
up the resolution. So if I turn up this one, you're going to put a line down the center of it. That's fine. Because that means
then we can actually bend the center of
the boat if needed. And then main one we want though is this one
going over here, because this one then determines how we can bend our actual boat. The more actual points
you have in here, the more sloping you
can actually get. All right, so now
we've got that. Let's actually come
back to our boat now. And what we're going to
do is we're going to add in a lattice modifier. So modifiers add lattice. And then what we're
going to do is we're going to pick the lattice, which will be the
lattice here, of course. And because we haven't altered this in any way in edit mode, the lattice, I mean, so
it's still in object mode. It should not stretch a ship
out or anything like that. If you have scaled it in
edit mode or anything, it will just distort
the ship straightaway. So just bear that in mind
when using the lattice. All right, so now
what we're going to do is we're going
to press three. And what I'm going to
do is, first of all, I'm going to go into edit mode. I'm going to go
with box select and just show you how
powerful this is. So now I've grabbed this, I can actually pull all of this down. Or I can come in and
put this on to smooth, and then I can pull it
down all at the same time. Like you can just see how much we can actually
pull this down, get in the shape that
you actually want. Now the main thing I want it for is I want to pull
out this a little bit. So I'm going to go to
seven, go over the top, because I'm not happy with
how this is working out. And then what I'm going
to do is press and X and pull it out like so. Now you can see that is
looking really nice. It's not really altered
this, but we've got a really nice shape
to our boat now. Mine wants to come in and
just pull these parts down. If I come in, want
to pull these parts down a little bit like so
have a look round there. You can see now it's
looking so much better. Finally then I'm
happy with my boat. All I want to do now is I want to come in and I
want to apply this light. So I'm gonna go to my boat. I'm want to press control and then I'm going
to leave the lights. Now the lattice we'll be using
with our main house build a little bit later
on just to bend all the roofs in and things
like that to make it look, you know, that more realistic. Because generally on, you know, straw buildings and things, they're not going
to be straight, they're going to be bent in a little bit with
the weight of the, you know, the beam
on top and things. Okay. So I'm happy with that. Now find what I want to
do is I want to just make this last part where the
guy is going to be sat on. I'm just checking
to make sure all of the little parts are done. Is there anything
that I need to fix? Is there anything in these
little gaps and things? Because I certainly will be using this boat in other things. Okay, so I think I'm happy. What I need is then
just something, something along here
for the guy to sit on. All right, so let's bring
our guy back first. So I'm going to press old H. And generally with the seats, they're gonna be quite simple. You know, they're going
to be probably breaking a lot and things like that. Let's press shift,
let's bring in be, let's press the Bom. Let's press S and Z. Just to make it the right scale. Let's pull it back to here. And pull my guy back to there. And then what we're going to
do is going to lift it up. I'm going to press and X
and pull it out into place. So I'm thinking that probably not going to go
all the way over there, probably a little bit too big. Certainly want to put it
under here or hundred there, so maybe I'll leave it. Let's have a look. Let's
see where it looks like. Yeah, I think that looks good. All I think it needs now is something to actually
support it into the floor. Again, something
very simple as well. So all I'm going to
do is I'll grab this, I'll press press
tab control two. Left click, right click. I'm going to pull
these out then. So and X, let's pull them out. I don't want proportion I did to them when to pull these out. So and X, pull these out to
where they're going to go. And then what I'm
going to do is there want to press control B. And what that's going to
enable me to do is just form the bottom parts of where this is going to be
really, really easily. And then I'm going
to just go under can the underneath of them. I'm going to grab
the bottoms of them. Then the bottoms off
here in face Lt. And then we're going to
press and bring them in. Now you will notice
I'm going to actually just hide this out
the way a minute, so I'm going to hide the boat. So shift H, you will notice we're going press not really, bring
them in very well. And that is just because we've not reset our
transformation control. All transforms right
Click origin geometry. And then I bring them in and now you can
see them much better. Now let's bring them
down a little bit, just so we can see where we are. Let's press Tab Olah. Bring back our actual boat. And then what we're
going to do now is we're going to look at the
bottom parts of them. I've still this, I've still
got the bottom parts grabbed. All I can do now is
press Enter AlternS and not alter necessary
on individual origin. Bring them out like so. And then and we can put
them into the floor. So it's as simple as that, just to make that all right, so I think I'm done
pretty much with this. What I'm going to do now is
just join it altogether. So let's join it altogether. In fact, before we do that,
we need a bevel on here, a Bevel modifier mean. So let's come in and
press control again. Ultransforms, right click
the origin of geometry. Add in a Bevel
modifier. Turn it down. Turn it up a little bit. I think that's a
little bit too much, so I'm going to put it on. No, 0.5 Yeah, and I
think that's perfect. And then what I'll do is I'll
apply that with control. Join it all together
with control J. And finally I'm
just going to press control C and go back
to my original build. So let's go back to
the original build, which is this one here. And I'm going to press control
and bring in this boat. Now you can see at
the moment that this boat is absolutely huge. We don't want it
that big, but all I'm going to do is just
scale it down a little bit so it's actually much better actually than
the one I had before. Going to put this
in place, going to make sure my
guys fitting in it, so I'm going to put him
down so it's going to be stored from there like so. And you can see now that's fitting in really, really nice. All right, so now let's just rotate this
boat round again. In fact, we'll reset our
transformations first. So control all transforms, right? Fix origins, geometry. And now if I need to get it
back to where the one I had, I can do quite easily. Let's pull them into place. Let's pull it up
where it needs to go. And there we go, double
tap the A, save it out. And on the next lesson then, what we're doing is obviously
texturing this boat. And then we'll be doing the
rope part, going up to here. And finally then just the
outside of the scene. Alright. For once, I hope
you enjoyed that and I'll see on the next one.
Thanks a lot. Bye bye.
52. Creating Rope: Welcome back everyone to
Blane Unreal Engine Five, the complete beginners guide, and this is
where we left off. All right, let's come
to our boat then. Let's actually grab
all of our boat. We're going to press U Smart
UV Project and click Okay. And let's just pray that
everything works okay. I'm thinking that
probably this part is not going to
work out that well, but we're going to fix
that as we move along. First of all, the now
we've unwrapped it, let's actually bring
in our material. So we're going to bring
in the cracked wood. Let's bring that
in and have a look what that looks like now. First of all, I can
see going along here, pretty much most of the. Let's have a look. I
think the resolution, first of all is the first
thing we need to sort out. I'm thinking that
this wood is okay, but this wood needs
changing as well. So what I'll do is
with this wood first, I'll just change
it just to give us a little bit of variation
on the actual boat. So I'm just going to
come in, grab all of these parts and I'll re unwrap them and then just
do this part again. I'm just going to
grab all of this, that one like Stow
and then you project. Click Okay. And then
what I'll do is I'll just put plus down arrow, light crack, wood, click a sign. There we go. You
can see already. Now it's starting to look
a little bit better. Now let's come into
this part here. So I'm just going to
grab all of this. I want to press you. Click Okay. And you can see now already
that's looking much better, albeit this is going
the wrong way. Well, it's not going
the wrong way. The problem we've
got with this is, is that the wood should be sideways up here,
not going this way. And also this bit
underneath you can see that it's going to go right either.
So let's grab all of this. Let's go to UV editing, and let's start fixing
this up a little bit. We can see here this
is the main issue. But let's go back to our boat. What I'm going to make sure is, first of all that
this part here is rotated without
proportional editing on. So I'm just going to rotate
it and then I'm going to grab these two parts, L and L, Just move them over. Then I'm going to
come to these parts and then pull them out. So that should have
fixed this part here, so it looks much, much
nicer than it did before. And then we want this
part going round here. Let's see if I can come in
and mark a seam on these. I'm going to mark
a seam on this. Luckily for me, I haven't actually leveled
this off as well. That is going to make it
much, much easier for me. Shift and click. I'm going to level them off as well after. So let's go round
to the back of it then I'm going to grab this one. And this one, right
click mark, same. Now what I can do is I can
come into this one and let's see if I can get
these going the right way. So what I'm going to do is
I'm going to press you, I'm going to go to light
Mac pack. Click. Okay. Then we pressure you again. Follow active quads. Lick. Okay. Now should follow it going all
the way around. And you can see just how much
better that actually looks. Yes, that's looking
tons, tons bet. Now let's go round
to the other side and do exactly the same thing. So I'm going to come to this
side to press L U again. That add on really
helps actually on the, because it's just one click. I'm going to press
light Mac pack, okay? And then you follow
active quads. Okay? I'm going to
spin these round now, R 90. And there we go. That is the boat
looking really nice. Now, these parts here, you can see a way way too low. We can also see if I think
that's got a bevel on, it's just this one without
a bevel. So I'll do this. First of all, I'll
grab all of this part, separate it out,
control all transforms. And then what I'll do is
just add in bevel on there, make it a little bit smoother. I'm going to turn it
all the way down. Turn it up just a little bit, maybe that's even too much. 0.3 Let's put it on said, let's put it onto
material preview. There we go. Okay. Now let's think about this part
here is all okay. Except for some reason
this part in here, I don't think I
actually wrapped it. That's what I think
happened with that. I'm just going
to pressure you. Smartv Project, click okay. I also didn't put the
right material on it. Let's assign that. There we go. Now you can see it's looking
loads better on that. Now this part here, all I want to do is
I just want to grab, I'm just going to
do this part here. First, I'm going to press
you SmartV Project. Click. Let's have a look at
that. Looks like, I'm thinking that
looks pretty good. I'm just going to work
my way round now, grab all of these
going all the way down here on this one. Then all I'm going to do
is going to grab them all, press the S, but scale them up. There we go. Now it's looking
nice, is looking good. Just wondering whether the top
of it change the material. Let's just assign that material. Does it look right?
That's the question. I don't actually think so. I'm just going to put it back. I'm going to actually
grab this one here and just move
around a little bit. That looks pretty good, I think. I'm happy with that now. I'm just wondering whether I've gone too much on
the size of these. I'm going to actually do it once more because I think the wood is looking a
bit too high resolution. I'm going to do is I'm
going to grab all of these. I'm going to press the S
but and bring them back down a little bit.
Yeah, there we go. That's much better. Now. Now I'm thinking that the rest of it's
looking pretty good. Double tap the just have a quick look round
making sure I'm happy with everything that
I've done on there. Thank you. So now I'm going to do is
I'm just going to go to object, convert to mesh. Join you all together, control. I actually, I don't
think if I press yes, I don't think I'm
actually going to reset the transformations again. Because I've rotated it, so I shouldn't need
to do that though. That's pretty much done. Now let's think
about tying this up. So the first thing I want to do is we want to get
a post to type with. So what I'm going to do
is I'm going to pick this back post, this one here. And then I'm going to
do is going to press control plus control
plus control, plus I'm going to press shift. Split it off. I'm going
to press P selection. Grab it again. Control,
Layol transforms right, clicks the origins geometry. Then I'm going to put
it just round here. Round around here. And then I want to put
it in now through there. Of course, I don't want
it quite as thick, so I'm just going to shrink
it down a little bit as well. Put it into there,
and I think that's about the right size. Yeah, that looks good. Now let's think about our actual rope. Really easy to do
rope, basically, most people what they'll do is let's sort of just put
our cursor to here. So selection cursor, They'll go shift and they will go to mesh. And they'll see that they've
got one called Taurus. And they'll use that for these rope in ins,
things like that. Really, really bad idea. One, really high on polygons. Two, it's not non destructive, which means anything you're
going to do to the Taurus, it's going to have, you
know, an immediate effect. You can't play around
with anything like that. When you shrink it
down, you're going to get a weird size in and things, getting all the Tauruses to be the right size shape
is really hard, so not very handed to you. So the best way to do
it is actually shift a curve and just
bring in a circle. We're going to make this
circle smaller then. And then what I'm
going to do now is I'm going to come
down to my curve. I'm going to go to geometry. And then what I'm going
to do is I'm going to turn up the depth. Turn up the depth like so. And now I actually have a
lot of control of this. I'm going to press
Tab. I'm going to grab everything in here. Right click, subdivide. And that then is
going to give me enough to actually work with. Now we can see as well that this still is a little bit too thick. All I'm going to do is
turn down the depth of it. Then I'm going to press
S just to put it in place and now you can see
that's looking pretty nice. All right? It might not sure, actually, it might be
a little bit too thin. Let's make it a little
bit thicker. There we go. Let's press shift D.
Bring one up, shift D, again, bring one up like so. And then I'm going to
press shift D. I'm going to bring one
down into the center. I'm going to pull it out, so double tap the
and there you go. You can just see how
easy that is to do. I'm going to put it
out a little bit more. I'm going to reduce
down on this one the depth just a tiny bit, just so it matches the
other parts like so. And from there then now
I can use these again. So this is the best
thing about it. We can actually join all these together and move them
all at the same time. But I'm not going
to do that yet. What I'm going to do first
is I'm just going to come in portional editing on. I'm just going to move
them around so I'm going to actually
grab all of them and show you another
technique as well. So if we press Tab now, we can pick any one of these and move them around independently,
which is really, really handy when
you're working with row just to make them all
look a little bit different. Like so we can pull
them out a little bit. So we want to be
all pretty uneven. We don't want them looking
even or anything like that, We're just playing
around with them. Now, there, look that's looking, are, there we go. Now, while one is a piece of rope that's going
to come out of here, sliver down to here, and actually hold this
part in place. We're going to do that
on the next lesson. I'm going to save out my work. Save it. Now we're nearly
actually onto the part where we're actually going
to be creating the water, and also we're going to be
creating the outside of it. And we need to
change this wood on here because it doesn't
actually look right. I think it needs to
follow it along. And it's just going to
make it look a lot better. So we'll also sort
that out as well. All right, everyone. So
I hope you enjoyed that. And I'll save it. I'll see you on the next one.
Thanks lot. Bye bye.
53. Adding Textures to the Rope: Welcome back everyone to
Blentoonreal engine five. The complete beginners guide. And this where we
left off. All right, let's fix this boat
then, before we go on. So what I'm going to do is
I'm just going to come in, I'm going to grab
this part here, going all the way over
to this part here. And what I want to
do is I want to basically straighten this up. But I'm going to
show you another technique that you
can actually use. Instead of doing
the light map pack, you can also grab this
one and grab this one. And then what you can
do is right click and straighten on the X, pull out. And then this one and
this one control slick. This one strain on the X, pull it out and then pull them together so they're
relatively thin. And there you go. That's the other way of
actually doing this. And all I'm going to do is
I'm just going to press Tab to grab everything and
just pull it out like so. And now you can see that's
looking pretty nice. Much better than the
other one actually. Okay, so we've done that. Let's do this other
side then as well. I'm going to grab this one. Grab this one, this straight on the X and this
straight on the X. Pull them out a little bit to grab everything and
make them larger. That's looking good.
That's that bit done. Now let's go to model in
because it's going to be fiddly working with it
in that small space. And then what I'm going to
do now is I'm just going to grab this shift and I'm going to drop this down over the top onto shore boat to hold that
in place and pull it down. Then instead of actually trying to make it bigger or whatever,
I'm just going to go in, I'm going to make sure I've got proportional editing
on and I'm going to press G. Just pull it out into, there we go. You can see that's
just a breeze to do now. I'm going to do it, I'm
just going to press shift D. I'm going to rotate
it around a little bit. So the way I'm going to do this, I'm just going to grab this one, pull it out it all down. Just make this look a little bit different from the other one. And then we'll have a
bit of rope going from here up into here. All right, so what I'll do
is I'll shift selected. I'll bring in now a
curve and I'll bring in, actually we have got path is there. All
right. We've got a path. Let's press S just
to scale that in. And then I'll just rotate
it around a little bit Y. That's the other reason why
I've used this in naurus. Because it does make it much, much easier to make this part. Now what I'm going
to do is hopefully if I grab this one
and grab this one, I can press control L and I can copy modifiers
maybe let's press control can actually
copy link object data. That's not what I want exactly, I don't think I can actually link That I'm going to do is
I'm just going to come in. I'm 0.180 0.18 So I wonder actually if I can
just join this with this, if it will actually do that. Yes, it does. All right,
let's do it that way then. That made it pretty easy. All right, so let's bring it in and what we'll do is wind it round when you can see. Now we've actually got the
right thickness as well. And then what we'll do is
we'll just press for extrude. We're just going to
extrude it up into place. So, and then have it going
into there somewhere, just disappearing, so, and
then lift it up a little bit. Now let's lift this bit
up a little bit as well. So we're going to
press lifting it, so it's actually looks as
though it's tucked in there. And this one here,
I think it is. There we go on, So okay, that's
looking pretty good. Now let's fix these parts
first before we move on. So I need another one in here. Right click subdivide
the can press, I can pull it, might, same for this right
click diivide, pull it much tighter.
That's look. Pretty good. Let's
grab all of our rope. Now let's join it all together because then we can
actually press control J. And then we can actually
bring down all of it all at the same time on the resolution because we don't want
to 12 as I said. Now thing with rope, we can probably get away with something like six because the texture is going to hide a
lot of it anyway. Once we've done that, then we
can come to object convert. Where is it to mesh? Now I'm going to do is I'm going to come round
the back here. I'm going to add in seal shift click to do it like
this with rope, right click, mark seam. Rather than going in and
trying to mark UV project, I think it'll be better
like this old shift click, right click L to hide
that one out the way. Then come to your next one, which I'll do this one here. This one here, shift
click, right click, Make L hide out of the way. And then let's do this one here. Slide out of the way. And I'm just going to press Tab. I'm just going to press shift dates just to
hide everything else, just to make it a little
bit easier for me. Right Mark. I'm going to come to this one. Right click and mark, we don't need to do this, just goes down to an
end, so that one's fine. Grab this one, press the zone in Now we'll just do underneath, right click markem, The
bottom right click mark Sem. Now in these parts here, we'll probably do this
one's right click. All right, so now
we've got everything. Let's press Alt, bring
everything back. Now we're going to do is a, we're going to bring
in a new material. This one's going to
be rope like so. Then we're going to go
over to our shading panel. Control shift on the principled. Come down to where it says rope and we're going
to bring them all in. Let's press the dot
one to zoom in. And you can see they
don't look right. And the reason is, obviously we've not unwrapped them yet, so we can see that they
look like something. Let's press Tab.
Let's press wrap. And what we're doing now is
we'll go to our UV editing. Make sure that this
is on material, so just press head, make sure it's on material,
preview, which it is. And then what I'm
going to do now is obviously I need to
turn these round. First of all, I'm going
to make them larger. You can see what I'm working at. What we're going to do is I'm
going to grab all of these so L pin them round. So r 90. I think we're going to
have to probably do these at an angle
as you can see. The need to be way, way bigger as well.
We'll do that first. So what I'm going to do is I'm
going to pack the islands, average island scale
UV pack islands, make sure rotation
isn't on, okay. And now we can bring
them all out at the same time. We're
happy with the rope. And there we go, we can
see that's looking much nicer with the rope. We're going to have
to come in and, you know, mess around with the colors and things like that. So let's actually do that now. So I'm going to go
to shading and what I'm going to do is I'm going to bring back everything else. So ol tag bring back
everything else. And then what I'm
going to do now is I'm going to put it onto
just rendered view. Well, tap the and I'm
just going to get a nice view of it like
so you can see here. This is what it looks like. Let's hide our guy out the ways just so we have a good look
at what it looks like. Let's zoom in a little bit. And now what we'll do is
we'll come to our rope. This one here, double tap the A. Now move these over. The first one we'll
bring in near up, Always the same in RGB curve, Let's drop that in, let's
make it a little bit darker. I don't actually
think we're going to need to do a
lot of other work on there, load up. Think actually that's going to be good enough if we aren't
doing anything else. As it's loading up, you can see you'll just
jump in a minute. But you can see now that's
about the right color. I think that's looking good.
I'm just looking round. I'm just making sure I wanted to have some
stretch on here. You can see at the moment it doesn't look stretched
or anything. So what I'm going to
do is I'm just going to go to material preview. I'm going to jump into this. What I want to do is I just want to move these round
a little bit. Going to check that
actually before finishing but before applying them, what I'm going to do
is I'm now move this. It looks a little
bit more stretched. There we go, in there, we've got a problem in that it doesn't
really look stretch. It needs to be
pulled out this way. Just wondering about this part, whether I need to do a
little bit more work on it. I think to move it
out a little bit, I think that's
what I need to do. So click, let's come here. Let's also actually
press Control minus, I'm going to grab
it here as well. Going round here if I can. That way I want to
go around the sides. Come on around the
sides. There we go. Control. Plus, there we go. Let's just keep going
a little bit more. Let's see now if I can
actually smooth this out. I'm going to go to where
vertex and smooth vertically, moving out, moving out a bit. Let's turn it up another one, another one, another one. Now we can see it's
starting to get somewhere. The one thing you do
need to do, of course, is you need to press
alternS without portion editing on just to scale
it back up to what it was. There we go. Now we can see
that's looking much better. I'm still not happy
with this bit here. I think this bit needs fixing. So I'm going to come in control
to maybe this point here. And then going to
come to met vertex, move vertices rotate
a little bit. I think, there we go.
I'm going to press alter ness, bring it out. I think I've rotated
it the wrong way. Just going to rotate it back. Alternate, bring it back
into the styles it was. Now I'm going to have
to just move it. The problem again
is the rotation. That's what I'm having
when I rotate it this way, you can see it's
moving that way. So I'm just going to press
and then rotate it again. Then I think what I'll
do is I'll actually just wrap this part then just
to make sure it's right. But you can see now
it's looking bed than where it was
before for sure. But let's grab this L let's
go to our UV editing. Let's spin it so
it's the right way. And then what we'll do is
bring it all the way out, make sure it looks
like this one. Which it does now. Okay, so that part there took a
fairly long amount of time. Now let's double tap the. Let's go back to modeling. So that is our boat put
there on the next less. And then what we'll do is
we'll bring in our water, we'll bring in our mud. And finally we'll bring in this round circle that's round the outside,
this stone wall. And then after that, we're
onto the roof, finally. All right everyone.
So we enjoyed that and I'll see
on the next one. Thanks a lot. Bye bye.
54. Blender Remesh Modifier: Welcome back everyone to
Blane on real engine five. The complete beginners guide, and this is where
we left it off. All right, so now
we want to do is we want to bring in our water. So we want to bring
in our water, bring in the wall,
put in the mud. And then finally we can
move onto the roof. And then after that we're on to compositing. Pretty
much finishing. So let's first of all bring in, I think we'll bring in a circle. We'll use a circle for this. And then what we'll
do is we'll leave, I think actually
we'll put this on slightly higher then 32. And the reason is it's
going to be really big and we don't want
any blocking us on it. So what I'm going to do is
I'm just going to put on 50 like so I'm going to press
seven square over the top. And then what I'm going
to do is pull this out. I'm just going to
get this in place. So I'm going to pull it into kind of this sort of
scale to start with, just so we can get a nice image
of what we're looking at. And then what I'm
going to do is I'm basically going to fill this in with F. So you need to press
Tab to go in Teddy mode, make sure it's all selected, then press the button,
and there we go. Now the next thing I
want to do is I want to bring it down to where
it's actually going to be. So we did say when
we bring it down, it wants to be probably just
about just above there. And we can see our boats
actually sat in the water. The boat and I might
need lowering down, but we'll look at
that in a minute. Okay. So now what we
want to do is we want to actually bring this
down to create our mud. So I'm going to do it and simply you're going
to grab this. I'm going to press Shift
D, just to duplicate it. And then what I'm going to
do is drop that down there. And then finally what
I'm going to do is how deep do I want my water?
I don't want it too deep. I want to be able to see
the mud on the bottom. Now I'm going to do is
I'm actually going to grab the sides of this and then I'm going
to pull them up. So Z pull them up. Just press said again
if it's not on there and just make a side
for that, like so. And then finally
what I'm going to do is now I'm just going to make these sides for
the actual stone wall that's going to be round there. And the way I'm going
to do that is I'm going to press and then Olt and pull that out like so we don't want it to be too thick or
anything like that. Now the thing is we can see that it's not actually quite
high enough on here, so I'm going to have to
pull this up a little bit. So I'm going to do Alt Shift
and click, pull it up. And the reason I'm doing
the wall at the same time, I'm just wondering why
it's pulling it all up. Shouldn't be doing
that. I think it's because it's attached
to that in some way. Let me actually just
delete that other way. So delete faces. There we
go. The water underneath. And the reason I'm doing this
is because I want to get the materials for this
wall and the mud on first. So all I'm going to do now is I'm going to come to my water. I'm going to separate it out with selection. Separate it out. Now I'm going to do is
I'm going to come back to this part here,
this part here. And now I want to do is
I want to come round to the back of it
and mark a seam. So I'm going to mark a seam, going around the edge here
and then going around here, right click, mark a seam. Now let's think
about the inside. So I'm going to just hide out
the mud just for 1 second. So hide that out of the way. And then we going to do
is I'm going to mark another seam around here. Now the one thing I'm just making sure that
this is solid mesh, so I'm going to come in now. Shifting, click, right
click, mark a seam. What I'm looking at is making sure, yeah, that's
what I thought. Can you see how this
is on the inside? So in other words, because
we extruded it out, it didn't actually
put front on this. So all I'm going to do is, oh, click around here
and then I'll shift, click around the
bottom right click, and we're going to
just bridge that. So we're going to look
for bridge edge loops. There we go. That's
what we want. Now, I'm hoping it will wrap and unwrap
this part as well. So let's see how
well this works out. So the first thing we're
going to do is I'm going to press Tab and they're going
to right click shade, auto, smooth control
or transforms, right click, set
origin geometry. Now this part here is
when you really are happy that you've got
a seamless texture because this is a big wall. So what I'm going to do now is going to come round
to the front. I'm going to bring
in a new texture. I'm going to call it wall. So I'm going to also do another texture which
I'm going to call mud. So okay, let's hide
the water out the way. Let's bring in our mud back. Hide this. And my
mud's not there, so I'm just going
to recreate that. So holt shifting, click
and then selection, split that off, and now
we've just got this mud. Now the way that we want to
do this is we want to have a little bit of displacement with all those rocks
and things like that. So the way I'm going to do it is I'll show you an
easy way of doing it. Because the thing is if
you jaw subdivide this, so I'll show you both the
ways that I'm talking about. If you come in and subdivide
this and turn this up, let's say let's supply that and you'll see we
end up with this mess. Now, this is no good if we want to send this
through to unreal. It's not going to
work out too well. It's kind of bent measures topology everywhere, and
we don't really want that. So an easier way of doing it
actually is just to go back, take this off, let's close that. And then what I'm going to
do is I'm going to come, I'm going to grab the face. I'm going to press, I bring
it all the way in like, so control R to bring
in some edge loops. So left click, right click. And then all I want to
do is I want to just actually give this
some depth now. So I'm going to grab
the whole thing. Press pull it up very slightly. And then what I'm
going to do now is press control all transforms. Right? Click the origin
geometry, add modifier. And now we're going
to go down to one that's called a re mesh. And there we go, now we
can see if I apply this, we've got a really, really nice mesh to actually work with. And if we want to
subdivide it again, it's really, really easy. Now what I can do is I can write click shade, auto, smooth. And now find the one
we're going to do is I'm going to pull
this out a little bit, so it's actually in the wall. Double tap the N to modify it. And we're going to bring
in this time a displace. Because what I want to do is with this, I want to
give it, you know, some unevenness to
the actual ground, but I don't actually want to go in and sculpt everything out. So I'm just going
to do it this way. What I'm going to
do then is come to the texture icon down here. And we need to pick what image we're going to
actually base this on. In other words, how are
we going to displace all of those polygons and we're going to pick
an image for that. So click New, let's
call it mud. Like so. Yeah, it's an image on movie. Sorry. Let's put it on
to, let's try marble. I think that's going to
work out really well. Now you can see at the moment, this is really all over the place. We don't
really want that. What we want to do is we
want to come back now to our modifier and we're going to turn down the strength of it. So we can see if we turn
it down very slightly, we're already now already getting something
that's pretty nice. Now at this point, actually, we can come in and we can grab all of this
before we finish. So shift H, we can grab all
of this going round here. I basically want to delete
the bottom part here. So what we're going
to do to do that is I'm going to press one, I'm going to press Z
to go into wire frame. And then what we're going to
do is I'm going to press B, and I'm just going to grab
the halfway point here. And I'm going to press
Delete and Faces, we should now end up with
something like this. And now when we press Tab, press the Z bone,
go back into solid. You should end up with
something like that. Now you can see it's looking
a lot more like actual mud. Now let's give it a
little bit of variation. So if you go to turbulence, can now make it a little bit
more turbulent practically. Let's see if we can, I'll
actually smooth it out after, but we can mess around with
these changing the scale, I'm really making
it look like more. So you can see
that's much better. Now, this will have
a direct effect on our actual water as well
because we actually use refraction and it will
be refracting off of the bouncing back up as well. So it's very important that we actually get this part right. All right everyone, So I
hope you enjoyed that. And I'll see on the next one. Thanks a lot. Bye bye.
55. Creating a Water Shader: Welcome back everyone to
Blend Tonal Engine Five, The complete beginners guide. And this is where
we left it off. Okay, so now we've got
that where we want it. Let's actually bring
in one more modifier. And what we'll do is we'll try and smooth this
off a little bit. Add modifier. Let's bring in
a smooth and there we go, we can see that's looking
loads better now. Now let's supply these
by going to object, coming down to convert to mesh. And then what we'll do now
is grab all of this prep. Going to take a little
bit longer because there are a lot of
polygons in here. And then what we'll do is then we'll put our actual mud on. If yours is computer crashes
or something like that, just reduce the amount of subdivisions that you've
actually got in here. There we go. It's wrap now, so now we can come in
and we've got our mud. So I'm going to minus
off wall in object mode. I minus it off, come back to shading and then what we'll
do now is control shifting. And I'm going to
bring in my mud. Mud is here. All four of
these. Bring them in. There we go. Now we
can see we do have one problem in that the
UV map is probably tiny. So what I'm going to do is
go to UV probably also, you can see how it's wrap here. Not really happy about that. I'm going to
go over the top. And what I'm gonna
do instead is, and we're going to do project
from View. And there we go. Now what we can do is we can bring this out and let's have a look at that looks like and see that looks pretty
nice actually. Look a pretty good job. Alright, so that's my mud. Now let's come in. I'm
going to press ol tag. I'm gonna hide my water out the way I'm going to
work on my wall. Now we've already put the
seams in and everything, so all that's left to do now
is bring in the material. First of all though, I will minus off the
mud on this one. We don't want that
on, so minus it off. And then what I'll do
is I'll press hey you, And let's see how this unwraps. So it unwraps like a banana. Maybe we can work with that, or maybe we need to
straighten it all out. So we'll actually probably
straighten it all out. I'm just going to put
it over here for now, so I can actually straighten it. And then, you know, I'll bring in the actual
material first. So we'll go to shading panel, we'll go to our
principal control shift. We're going to bring in, bring it in the principled,
there we go. And we can see that again, it's tiny on here, so
we need to fix that. So I'm going to
go to UV editing. What I'm going to do is I'm
going to grab all of these, pull them out, and then I'm
going to straighten this up. So I'm going to grab this one. This one, I'm going to click
straight on the X. This one. This one, I don't think you can do altogether because it'll think it will just straighten them like so they're
all on just one line. I don't think we can
do that. I'm just going to come in control. Click now, going that way. Right click, straight
on the X one. This one is going to
follow down there again. So I'm just going
to come round here. Right click straight
on the X and then A. And then let's grab
this one here. Not A and X. Make sure we're happy with that. You can see it's still a little bit blurred even after all that. So I'm going to make it
a little bit bigger. Now we can see we're actually
going somewhere now. Let's actually have a look
on our rendered view. Let's have a quick look what it's going to look
like on rendered view. We can see that we
really want it to be similar to this wall
that we've got here. Let's just see if we
change this don't wall. What it's actually
going to look like, is it going to look bad
with a stone wall on? I actually think it's going
to look bad like that. So you know what? I'm going
to leave it like that. You can use the other
one if you want. I'm going to use my stone wall. The one thing I do
need to do now, I've got these, is just
bevel off this slightly. So I'm just going to
grab both of these. Press control B and
just bevel them off. Very slightly like so. All right, so now we're
actually on to our water. So I'll take bring
in your water. Now let's think how
we're going to do this. So I'm going to first of
all create a new material. And then what I'm going to
do is I'm just going to call this water like so. And I'm going to go to my
shading panel and I'm going to put this onto render. I'm going to double
tap the eight. Then what I'm going to do
is I'm just going to delete the principle which
should make it go black. Which I'm going to bring in first of all
when you're doing water. First of all, before
you do anything, just bring in a couple of noise and that'll then give you the ripples and
things like that. Let's bring in a Musgrave. We can also see on here, we've got textures on here, and this is where
you're going to find all of those Noise. The first one I'm going to
bring in is a musgrave. The second one is going to
be a Noise noise texture. And what I'm going
to do now is I'm going to actually
mix all those in. Let's sur press shift. I'm going to go with a mix
that's not the right one. I think it's mixed color, actually color. There we go. And I'm going to leave
that mix as well. And then what I'm going to
bring in is a color ramp. So let's bring in a color ramp. And then we'll slot them all together and see what
we actually get. The next one I'm
going to bring in is let's bring in a refraction. The light of course, refraction. And then we'll
bring in a glossy. Then we'll dictate how
actually shiny our water is. Then we'll bring
in a mixed shader just to join these two together. Then we'll bring
in a transparen, obviously, so the water
can be see through. What we'll do is we'll bring in another mixed shader to
join these two together. We'll just actually
copy this one shift. Then we'll bring in an emission because
generally with water, it's nice if you do have a
little bit of emission to, you know, lighting
it up because it's glistening off the sunlight. So I find it just it helps. So shift a, let's
bring in a mission. And then finally,
I need another. I'm going to add these two together rather
than mix them up. So I just want to add them
into the mix as you will. So let's go to add shader. All right, So now let's
try, first of all, coming in and what
we'll do is we'll do the Musgrave
and things first. So I'm going to put this, put them on the one's
hand pointing out at the moment because then
will help you actually. Because then you can
go in and change them. Let's put this on 9.1 N 0.70 and leave the
next one on two. And then we'll go
down to the noise. The noise will on 12.82 0.8 no, 0.675 and we'll leave that zero. Now on the clamp on the mix, we're going to put this
on N 0.317 And then what I'm going to do now
is I'm going to join the height from here in the A, then the Fac from here into the. Now I should be able to plug these in and actually
get something. Let's plug these in,
and there we are. That's what we're
getting right now. Now, you can actually
mess around with these and you'll see
exactly what they do. But basically it's adding ripples to your
water and things. So let's plug in the rest
of the things now and then we can actually
go back to this. So now I'm going to
plug in my color ramp. So I'm going to plug my
color ramp into there. And basically what
this color ramp will do is it will determine how dark or light the parts
are of the waves, which will then give
you more control over, let's say you've got
some really sharp waves in there and you want
to control those. This is the way you
do it and the way you do it is if I turn up this, you can see now we've
got more low parts and less high parts and
also the high parts. If you don't want them as
high as what they are, all you need to do is click on this one and bring
down that white. So if you bring it down, you'll see that will automatically
just drop these down. Drop down the contrast
between dark and light, which makes the contrast
between low and high on height also
come more in light. All right, so now
we've got that. Let's go to plug in my color into the roughness
of the refraction. Now with refraction, we can
think of this as a straw. When we put it in water, we see that we put the straw in. And it changes the angle of
where it is in the glass. Looking from the side,
that is the IOR. So the OR for water at least should always be
one point or 50, so you don't really want to mess around with that,
is what I'm saying. Finally, then let's come
in this into the shader. Let's put our glossiness
into the shader as well. And the glossiness I'm going
to set to zero for now. And then if you want to
add some glossiness, you certainly can do. Okay. So now with the mix
shader, let's put this on. Not 0.892 and based on what this is doing is it's mixing the glossiness
with a refraction. And then you're able to
control it with this. So it'll either give
more of refraction, more of Glossinus
or the actual same. Now let's plug them into
the mix shader again. So I'm going to plug
this into the top. I'm going to plug my transparent
then into the bottom. And then what I'm going
to do is I'm going to plug the emission
into the bottom. And then I'm going to plug
the mix shader into the top. The mix shader on
here, I'm going to put 0.658 something like that. And then what I'm going
to do is wait till the next lesson before I plug all of this in. All
right everyone.
56. Basic Camera Setup: Welcome back everyone to
Blane turn, real engine five. The complete beginners guide. And this is where
we left it off. All right, so now let's
actually plug it all in. So I'm going to plug all of
this in, let it load up. And we don't have
anything right now, so maybe that's because
the strength of the emission is set way too
high. So let's put down No. 0.2 Now we're getting somewhere. Let's put this on the type of greeny blue or
something like that. Now let's have a look
what we've got also. Let's make sure that we're on
the right setting as well. We'll go through
a few other sense before we alter some of this. Now. Let's now go over these
options we're looking at. The moment the cycles
is using our CPU. I don't really want to
use my CPU because I feel my graphics card is good enough to actually be able
to use that within Blender. What I'm going to do
is I'm going to come over here and I'm going to come to Edit Preferences. And I'm then going to go
to Where is It System? And I'm going to put mine
on optics X now Uta, you can see I can
use mine on Cuda. I can also use my
nine CPU as well. I'm going to click that on. They should swap between them. I'm hoping they do. I'm not
sure if it does do that, but I'm hoping they do. Now, the optics is the new cycles x. I'm
going to click that on. That should be the fastest
rendering that I've got. Also, while I'm here,
I'm going to change my undo steps to 150 just to make sure if I make a mistake then
I can go back. A lot of times I'm going to
do is I'm going to close that down and actually
let's work on this water. Now, one of the
problems that we've got is why this
water isn't working, is of course, that I didn't
put anything in displacement. Let's grab this out, let's put this in displacement. And now we're actually starting to get somewhere,
as you can see. Now the other thing is I'm
just going to turn this off for the moment so I can
actually see what I'm doing. And there we go,
now we can see at the moment the transparency
is way, way too high. I'm going to bring that
back a little bit. Now we're starting to
really get somewhere. Let's bring it up a little bit. The more we turn this up, the more f it's going
to be basically. We're going to bring
that up just so we can see some reflections
underneath here. And now we can actually mess around with our water
if you want to. So you can also mess
around with this, can make it more flat
or more wavy like so. And you see already
this is looking quite nice now as I
said with this ramp, now you can see that we can change the way the
water looks slightly. This is like the micro
detail, you could say. Let's also click on this
and we'll bring it down. Bring it up. It's
changing slowly. Bring it down a little bit. Now let's change this. You can see the
refraction then from the sky will be slightly
blue, then the glossiness. Let's bring this up and
you can see, well, I mean, it's very white and shiny. Now, we don't really want that. You can see they're
nice and shiny. We actually, we
want some glycine, the water, but not too much. So I'm going to turn
it down a little bit. Then I'm also going
to turn this color, maybe a little bit
on the blue side. Now I'm just going to look
at the scale of this. I'm going to slowly work my
way up and turn this down. I think that's a
little bit too high. I'm just going to come
in, start from there. Yeah, that just tons bad. Now you can already
see it's looking pretty realistic. All right. I'm happy with that now. Now I'm going to
look at my scene. I'm happy with how that looks. Now the transparency color, I think I'm going to be
happy with how that looks. I'm looking at bringing it down slightly and
then the emission. Turn this up one, maybe
a little bit too high. Let's put it, let's first
of all put this on white. Then what we'll do is we'll turn 0.5 It gives it a little bit
of an extra glow in there. As you can see, even
though it's low, that I think is close. Look, I think that's my water. Pretty much done. Let's
have a look from over here. I think this is a
little bit too low. Now, I'm going to come over, turn this up a little bit more so I'm going to actually mess around
with this as well, getting it to where I need. I think I'm happy
with how that looks. Render will show us if we need to go in and change anything anyway,
but I think for me That's going to
look pretty nice. Now the one thing we need to do now is we need to just set up a quick camera just to get to the point where we're actually going to be rendering it from. And then what we can
do is we can put our final background
part in here. And then what we'll do on the next lesson is we
can start the roof. And after that, then we can start actually
rendering this out. What I'm going to
do is I'm going to go back to modeling now. Modeling, Yeah, there we go. And then what we're
going to do now is I'm going to come and
set up a camera. So I'm going to
bring in the camera. I'm going to press Shift A, bring in a camera. Just press Tab. If
that menu comes up, Shift A, bring in a camera. And then what we're
going to do now, I'm just going to set up my
view where I want it from. So let's say something out a little bit.
Something like this. Maybe just so we've got the
actual scene in there now. You can see at the
moment, once I press now, control shift control,
Holt and zero. You can see now my camera
comes to that view. Then what you want
to do is you want to scroll your mouse
wheel in twice, three times maybe to
get the view here. Then you're going to press,
what you're going to do is go to View Camera to view. And now we can actually
scroll our camera out in. So it's just an easy way
of setting up your camera. Now I'm going to do is
I'm just going to press control shift and zoom it out. And just put my
camera into place. I want it, I think something
like that actually. I just want to make this
a little bit bigger. So what I'm going to do is
I'm going to grab this, I'm going to grab my water, and I'm going to turn
off camera to view off. And then I'm going to
do is I'm going to scale this out a little bit just so that part there is covered
in these two corners here, like so double tap the. Now if I put my
camera to view on, I think that's going to look a much, much better view now. All right, let's
turn this off now. Let's go there. I just
want to pull my mud out. Double tap the
making sure it's not poking over which
it is by the way. So I'll just pull it back in. Double tap the. All right. So now we know where
our camera is. We know that basically from this point to this point is where we're going to
need our background. So if I click on this part, what I can do is I
can come in now and grab this Point tab. And now what I can
do is I can come out of the camera view press tab. And we should have
saved out though, so you can see this here. If I press control, we should be able to go
now all the way around. And what we're going to do from there is I'm going
to press shift, duplicate it, Pull it up now so I can go back
to camera view. I can pull it up
now out of the way, and then I can press
and Z and pull it down, and this is going to
be my black backdrop. Then what I can do is I
can grab the whole thing. Press Selection tab, Grab a
again control or transforms. Right click. Set, Origins,
Geometry, right click. Jade, Auto, smooth. And now we have our background. We just need to now bring in
a diffuse on our background. So all I'm going to do
is, and we're just going to put that part, I have no idea why that part, I have no idea how
that happened, but how did this
part go like that? Either way, I'm just
going to come in and hopefully I'm just
going to delete it off. Delete faces off. Now let's come back to this part here and what
I'm going to do is, and we're just
going to take that off and I'm just going
to put black background. I think I'll just put it on. I'm just going to
go into the shader. And where is my
principal there it is. Just going to remove that. Bring in a diffuse,
go down to shaders, and you'll love all
of these shaders. Pick the fuse, then you're just going to plug that
into your surface. Finally going to
put your roughness on 0.5 85 and then just
turn this down to black. We should end up like
that with no shadows. What I'm looking
for is no shadows from this on the back of here. That's exactly what
I'm looking for. All right, back to modeling. Let's go to Camera View. Let's press Tab. Let's see what our render is going to look like when we render it out. Press just to hide that. Of course, this is
just the premal test and we can hide those parts
out of the way as well. Let's hide our guy
out of the way. You can see already
looking really realistic, and it's looking like it's gonna be a really, really nice scene. Now, remember, we've not
sorted any lighting now. We haven't got a
thatched roof on there, we haven't done any compositing
or anything like that, and it already looks this good. All right. So what I'm
going to do is I'm going to go to material. I'm going to come to file. I'm going to save it out. And I'll see on the
next one, everyone. All right. Thanks
a lot. Bye bye.
57. Blender Particle Systems: Welcome back if you want to
blend on Real Engine Five, the complete beginners Guide. Now let's think about actually
creating our, that troop. We're finally onto that time. So what we're going to
do to do that is if you open up your download pack. So if I come to download pack, you will see within that
download pack under that you've got a
actual blend file. So open that up now, once you've opened that,
I'm going to pull it over. Should end up with
something like this. And the reason I wanted
you to open the blend file is I've actually gone in
here and actually created, well, not created, but brought in some of the actual wheat. You can also see that the wheat actually has some colors
already put on there. You can see if we go
to the shade in panel, that it's just a
simple color ramp coming off of the
veroni texture, just to give us some
variation in there. Now I would suggest that if
you're creating your own, which I'll show you
about in a minute, that you just actually
do it this way first. And then once you've
got the hang of it, then you can go in
and actually create your own in your own style. Now if we go into art, actual grain, so if
I press dot on here, you will see it's a very, very simple technique
of doing it. So all the person's done that created this was
actually created a stem. And then they created some,
I don't know if they're called pubs or
wheat parts of it, and then just stuck
them on the end of it. Now what they also did was they created a few
variations like this. So when I first got this, this is how it came in.
All of them like this. This one here, if you're
creating your own, I wouldn't create it with
this much bend in it. I would keep it in skin different lengths to
these a little bit. We're a little bit bent, but this might show up a
lot in the actual render. We're going to actually
use it this time. Now what you want to do is
when you create your owners, you want to actually put
them in a line like this. So you can see at the moment when I click on each of these, the orientation is up there. So there's the orientation
orientation here. We don't actually want that. So the way to do it like this
is what you're going to do, is you're going to
come in and you're going to either do it by hand, but there is an easier way. What I'm going to do is I'm
going to grab all of these. So I'm going to press just
to grab all of these. And then what I'm going to
do is I'm going to press seven to 12 at the top tab. And then all I'm going to do is I'm going
to make sure that I'm on wire frame. And then what I'm going to do is grab all of the bottoms of here. Now why I've done that, If I
come in now and I come to, let's say this one
and I press Tab, I can press Shift
cursor to selected tab, right click to origin
to three D cursor. I can do the same, I'll
just do four of them. So shift S cursor selected, right click to origin
three D cursor. And then the next
one, tab into mode. And we're just
going to do exactly the same thing with
just four of them, so you get the idea Tab, shift S, and then right click. So now you can see that on these four we have the origins
down at the bottom. Let's just put this on
the object mode again. And now I'm going to
do is I'm going to pop my cursor in the
center of the world. So shift S cursor
to world origin. And then one way to do is I'm
going to grab these four, so B grab these four shift S. And then cursor
to selections. Cursor Not selections. Cursor keep offset selections. Cursor. And then what
it's going to do, we're going to put them bang in the center of the world for us. And that is exactly
what we want. So you want to get all of them put in the
center of the world, like I've done this one. Once you've done that,
you want to make sure that they're no longer
in the center of the world. So I'm going to grab
them. Shift space part. Going to move and then
I'm going to move them over here, lives stone. All right, So that's basically
how you would do that. I'm just going to
move mine over here. I'm going to save mine
out because I've already got this file saved
out somewhere as well. So I'm just going
to save it out. So file save suggest
you do the same. And now let's look at
what we've actually got. So now you know how
to make them and you know how to put
them in place and now you need to know how to turn them into an actual roof. Now the first thing
I'm going to do is I'm going to grab all of these. So I want to grab one of them. Press B to grab
them all like so. And we can see at the moment, mine my orientations
are over here. For some reason I don't
really want that. So I'm going to have
to go in, I think, and change all the
orientation of my own. I think I actually moved them. I'm actually yours.
Should all be. Yeah, yours are
all also be here. Let's give it a try
with them over here. That's how you get
them into one place. So I'll show you as well when
we actually bring them in, how we change that
orientation over. But first of all, let's get
them all in the right place. I'm just looking
where this wheat is. Okay, That's that one. Let's grab all of these
like so with box select. Let's just close
that up a minute. Let's make a new collection. And we'll just call
this collection wheat. And from there we
want to open this up, scroll down to the
bottom, grab them all. And then what you
want to do is just scroll up to the
first one you see. And drag them all, and
put them in wheat. In wheat, now you should have all of these actually
placed in there. Now this is very, very important
because we're going to base our actual particle
system on a collection though. It's not going to be
based on just one object, it's going to be based
on a collection, which makes it much easier to put all of these in
at the same time. All right, so now
I've done that, let's actually bring
in our emitter. So the emitter is
what's actually going to be emitting our particles, and in this case,
it's going to be our actual wheat or straw. So let's press a and
we'll bring in a plane. And then what we'll do is
we'll make the plane larger. I'm going to press control A. All transforms right,
set origin to geometry. Now I think what
I'll do with all of these is I'm going to press B and then what we're
going to do is we're going to write clip set
origin two predcursor, all the origins now on, all of these should
be set over here and I think that's going to
work out fine for us then. Now I want to do
is I want to make sure that I've got
my emitter selected. And then I'm going
to come over to this icon here which
says particles. Click that on Clow, let's click the plus Pm, which will give us a
new particle system. Now if we come down, let's actually, first of all, to make this a little bit
easier for ourselves, you will be on modeling or
you might be on layout. If you're on modeling, then just switch it to layout. And what you'll see
now is that you should have this line, this timeline going down here. This is the animation timeline. If I press Space bar now, you will see that
we actually have some animation of our
particles a bit like snow. Now you'll see that it also
goes all the way up to 250. And this is basically how many
frames this is based over. So you'll see once
it gets to 250, it'll simply restart again. Now we want to use this to actually bring in our own straw, and this is how we're
going to do it. So I'm going to set this back to zero so you don't need to worry. If it's actually
on perfectly zero, then what I'm going to do is I'm going to go over the
right hand side, make sure I've got my
particle system clicked on. And the first thing I'm going to do is I'm going to
change the gravity. Because the moment
it's just dropping down and we don't
really want that, what we want to do is kind
of float up in the air. So I'm going to come down to
where it says field weights. I'm going to put the gravity
here, this gravity on, not 0.1 And now if
I press space bar, you'll see that
they kind of float up before dropping back down. Now I might put that
on a little bit lower, so not 0.5 And let's try that. Because I want them to
float up a little bit more rather than just drop
down. So let's try that. Yes, and there we go.
That's absolutely perfect. Now you'll notice as well that when they get to the top
here, they start popping. And the reason for
that is because over on the right hand side, you can see that we've got
this from frame start one, which is down here,
frame end 200. Now you can see once they get to 200, they start disappearing. And the reason that
is is because we have the frame end at 200, let's say it's 250 to
match our actual timeline. And now you'll notice
they won't actually start disappearing right until the end when it just restarts
the actual particle system. So you can see now
exactly the same Now, the other thing you'll
see is that the pop in, and we don't actually
want that either, because we want our wheat to stay around a little
bit longer than that. What I'm going to do
is I'm going to set the lifetime to 150 instead. And now you'll see
it's going to take, once it restarts that
it's going to take much, much longer before they
actually disappear. And you can see they're actually starting to drop down as well. Now this might be
the perfect set. We're going to come back
to this, so don't worry. And now what I want to do
is I want to actually, instead of adding all these
little balls like snow, I want to actually
bring in my what. So what I'm going to
do is I'm going to come down to where
it says it's render. And this is the
part where you want to change where it says render as this halo at the moment
is these little balls here. We want to change it to collection, not
object collection, because we've put all of our
wheat in one collection. Now we've also got
our plane in there. I don't want that in there as it's going to actually
render that as well. So I'm going to drag it
and drop it all the way down till it's on the left hand side and not
part of this group. So if I close this group up now, you'll see our planes, not
even in the actual collection. That's what you want to have.
Now if you come down now, you'll see where you
input your collection. So instance collection
will be what? And now when I press Space bar, we can see we have wheat, albeit tiny, tiny what. Now let's just turn our scale. So let's put it, let's just think if I
can do it like that, and this is why we
actually need to move it. So at the moment, you can see that it's over here. So
I need to move this. If I grab all of my wheat, let's press space bar,
shift spacebar to move. Let's grab the wheat. Let's move it down and see if
everything moves. I'm going to put it down
there. Let's press space bar. Let's start again. Yeah,
it's not all going to move. So what we need to do now is we actually need to move our, what, what I'm going to do
is I'm going to press tab A. And then what I'm going
to do is shift space bar, move seven to 12 over the top. And I'm actually going
to move it into place. Now if I move it all
the way over here, just don't worry about
actually miss some net. Let's put it on wire frame. Let's move it that way. Don't worry if it's overlapping. All we want to do is
just get it centered. Something like that.
As you can see. Then what I want to do now
is I want to press Tab now. I should be able
to move it without moving the hole of the
gray. There we go. Now if I press Space Bar, you'll see that it
actually works, albeit it's all shooting up. If I put this back on material, now double tap the A, and let's press Space
bar. And there we go. We have wheat
dropping up and down. Great. It doesn't look
what we need yet, but it's part nearly
there, actually. Nearly there. All
right everyone. So I hope you enjoyed that
and I'll see on the next one. Thanks a lot. Bye bye.
58. Rendering Out Our Wheat: We come back, everyone
to plan on real engine five of the complete beginners guide and this is
where we left it off. All right, so let's go back
to our actual emitter. And then what we're
going to do is, first of all, we can
see a couple of things. Let's go down and sort this out. First of all, we don't want
to use the old collection, just make sure that
that's not on. And you also make sure that
it picks them at random. So when it picks them at random, it's basically going
to pick anything out of the actual collection
and put those in place. If you turn the whole collection on your E, it puts them all. Like it just basically
picks the whole collection. So we don't actually
want that, so just make sure it's clicked off. All right, so now
what we need to do is let's scroll up a little bit. Now at the moment, you can
see that the lifetime is 150. That's what we say at, and this now is looking pretty good. So now what we want
to do, we want to mess around with the rotation. So let's put the rotation on. Let's press 712 at the top. And you'll see now
that we actually start to double tap the eight. Getting straw in a certain way. Now let's come down and actually put the scale randomness. So what I'm going to do is gonna turn this up very slightly, then I'm going to
turn up the scale. Let's turn up the scale now. And now what we're
going to do is going to turn up the randomness. So what we want from
this realistically, is we want the straw
going all the way down. So, you know, when
you see the straw, it's going to be down here and the backs of them
are going to be down there. Except it is going to be randomized a little bit.
What do I mean by that? It's going to be
bent a little bit, you know, in random,
in random areas. So if I come down to rotation, what I mean by that is
if I randomize this now, now you can see that we've got some random rotation in there. We're actually going to turn
up the random phase as well. Now we can see we're
actually getting somewhere. Now, the next thing
we can see is that, although we've got straw
when we go over the top, we can see that, you can
see how it's randomized. This is probably a
little bit too much. Actually, I'm going
to turn this back just a little bit back. So, because I do want it poking mainly towards
the pack now, the next thing is we haven't
got a lot of straw yet, so let's bring in more straws. What I'm going to do
is I'm going to put this number on 6,400 back. So now you can see we've got a much more ecent
amount of straw. We've still got
some gaps in there that's important that we do
have some gaps in there. We don't want the straw
just to cover everything, because we want it to actually
see through a little bit. But you can see it's looking pretty nice now, very varied. And actually I'm pretty
happy with that. The one thing that you need
to think about, as I said, you can see that this one here, so this one that's spent a lot, we can see a lot of that. So now let's put
it over here and let's actually have look. So I'm going to
grab this timeline. I'm going to bring
it up. And then what I'm going to do
is I'm going to look round there now and make sure that I'm
actually happy with it. Yeah, actually I think this
is looking pretty nice. The one thing that
I'm looking at is the randomness along here. So what I'm going
to do is I'm just going to turn down the
randomness a little bit. I'm going to then
just press plate. Flatten that down
as you can see. Now that's what I'm looking for. Flatten these down a little bit. As you can see, now they're
looking a little bit better. So if I go over the top again, now it's looking a
little bit better. Let's turn up the roundness a little bit more and
see where we are. With that, we'll let it restart. Now I'm looking at is this
part here as you can see, they're still tongue
down a little bit, not load sticking out. There you go. Now the
one thing I'm not happy about is these parts here. They're a little bit
too black on the edge. What I'm going to do is
I'm going to two material, we can see here, where is it? Let's go to this material. Let's go to this material here. So we'll go to shading, and then what I'm looking
for is the ends. I don't think it's this one. I'm going to look at the next
one and it's this one here. You can see on the
material here, the ends of them are pretty dark and we don't
want them so dark. So what I'm going to do is I'm
going to come to my black. I'm going to just tone
it down a little bit. And then what I'm
going to do is I'm going to pick this yellow. If I click on this, I've got a color picker, I'm going to put it on
that yellow like so. And then what I'm going to do is I'm going to darken this. Now if I bring this down now, we can darken those parts and it looks just much much
nicer, more realistic. All right, so yeah, that's looking pretty good. Now, the one thing is,
once you're happy with it, then what we're going
to do is we're going to actually put a camera
over the top of this. So first of all, I want to
just pull these out the way. So I'm just going to
press shift spacebar. Bring in my move tool. You're just going to
move those out the way, hopefully then when I
start this off again. So I'm going to press Space bar. I'm just going to
make sure they're in the right place still. You can see yes they are. And then the next
thing I want to do is I want to
hide the emitter. I want to hide the emitter from both the actual camera.
So in rendered view. And in object view, so I have a good view of what
this is going to look like. So if I come over to my
particle system, again, we have got one under
render where it says show emitter,
just take that off. And then we should have one under a little bit further down, Viewport display
again, show emitter, turn that off and there we go. Now if I double tap the, this is what you
should be left with. And you can see that's
looking pretty nice. All right, so now
we've got that. What we want to do is
now we want to set up our camera to be
over the top of it. If I press seven, what I'm going to
do is I'm going to bring in the camera shift. Let's bring in a camera. Yeah. I want to make sure
that's not clicked on, so I'm going to go
to collection shift. They bring in the camera. You can see there when they're bught the camera just brought in hundreds of them because they basically put it
in the collection. We don't want to actual that. Alright, so now I want to do is I want to bring
this camera up. So, and now I want to do is
go over the top, press zero. Let's go into layout actually. Now let's press zero. Let's zoom in a little bit. And then what I'm gonna
do is I'm going to set this camera up to
be the right size, because at the moment
it's 1920 by 1080. We don't really want that.
So what we want to do is we want to set the
camera over here. It would be 2048. By 2048. Then what I'm going to do is
I'm going to zoom out now. Now I'm going to
do my camera out. The way that we
zoom camera out is we come to this pot
and we're going to actually change
the focal length. There we go. Let's bring
it out a little bit. We just want to make sure
everything fits in there. And now I'm going to do,
I'm just going to come around and grab this
and move my camera out. I'm going to go
over the top again. I'm just going to
move it across. I'm going to zoom
out a little bit more holding the shift. We can also move the
camera this way as well. If you come over to
where it says location, we can move it along the X. That will make it a little
bit easier like so. All right, so there we go. Now the other thing that you need to know is if you click on your hay again and come over
to your particle system, you've got one here that says seed. We can change them round. So basically now we can
create our thatching. Now I'm going to supply the thatching in
the texture files, but this is how we
actually make it. I thought it was
important that I showed you how to
actually make this. Finally, the last thing
now that we want to do is now we've done everything that we need to
do is we need to light this. Because if we bring this
into the render channel, you will see that
it's pretty dark. Now, the thing is
when you lighten it, you want to make sure that
when you bring in a light, it's actually evenly lit. So if I press Sir, shift A, I'm going
to bring in a light. I'm going to bring
in an area light. And then what we're
going to do is I'm going to bring that up. And now you can see it's
actually not lit very evenly. And that's because we need to make this a little bit bigger. So let's come over
to our light now. And let's just turn
it up like so. And now you can see
that it's evenly lit. Now what I tend to do is, well, it's because we're
using an area light, it's probably better off
if you use a disc instead. That always makes it
a little bit better. And the other thing is we
can turn up the size now, and we have a lot
of control of this. We've also got the power then to turn it up and you
finally got the color. Now before we do anything else, let's also make sure that we're
on actual blender cycles, so make sure you're on cycles. You can see on here as well, I've got this turbo render, the thing, the add on
that I was talking about. This is really, really handy. It's going to speed up
your process so much. I will show you this a
little bit later on. I'm not going to enable
that at the moment. What I'm going to do
first of all though, is go to Edit Preferences. Come to system and just make
sure I've got optics X on. Click both of those on, and
then let's close that down. Let's also go to
Edit Preferences, and I'm just going to
turn off my add on. I'm just going to turn off turbo just so it's not there anymore. All right, so, and then
what I'm going to do now, I'm actually going
to rend this out. Now if we come down and let's we'll render it out a
pretty fairly low value. So first of all I
want to put noise on and then what I want
to do now is come to where it says performance and I want to turn
this tile size down. Now the thing is, if
you're rendering out on a GPU or a CPU, generally a CPU will be higher tile size and the GPU
will be lower tile size. So you want to have this low if you're rendering
out on your GPU. So I tend to put this on
64, something like that. Now at the moment,
we can see that the maximum samples
for rendering is 4,096 This is a control how actually how your image
is actually going to look. In other words,
it's going to take more time to render
out each tile, which means that
you're going to get a better render because it's mainly going to be working out all
of the light paths, so basically how the
lights paths are not fit. So I'm going to
leave that on there. I'm going to change this to
GPU compute and there we go. And then what I'm going
to do now is I'm going to come down and just make sure
I've got everything else on, so I've changed my tile into 64. I'm going to use spatial
splits because I'm gonna be rendering out
this a few times. So it says longer build
times, faster render. So it means basically
it's going to keep this information around. So you can see
persistent data here. Take that on, it means it's going to take a bit
longer to build it, but then it's going to
render out much faster. So it's going to do a
lot of calculations on the front end and it's going to keep the data around for the next render.
Really important. Now the thing is now we're
basically ready to go, except when we're
rendering these, we really want to be rendering
out not only our color, but we also want to have an ambient occlusion and we
want to have a normal map. Because if we're going to
bring those into into blender, we need to make sure they're actually going to be working. So they're the ones
that we want on. Because in this situation, ambient occlusion actually
is going to help out a lot because we have a lot of depth to this and that's
really going to help. Now, you can also render
out displacement curves, all kinds of different mats, but the ones we're going to
be focused on are those. But if I now come to
this little box here, you can see that
we've got a load of different things down here. And on the next lesson I'll be showing you how to use them. Before I go, I'm actually
just going to save that out. And then I'll see
you on the next on everyone. Thanks a lot. Bye bye.
59. Creating Texture Maps in Blender: Welcome back everyone. To
blend to Unreal Engine Five, the complete beginners guide, and this is where we left off. All right, so now let's think about bringing in some of these. So basically when
you render out, it's going to
render out a color. So that's the first thing
it's going to render out. But we also want to render out an ambient occlusion and we also want to render
out a actual normal. So if we come up
here, we can see that we've got normal
on here like so. So we've got these two ticked, we've got our combined ticked, and we've got normal
ticked on as well. Now let's actually go over our render and
then all we're going to do is render image and let's over look what's
going to happen with it. So now we can see we're actually going to
get it rendered out. Now we do have a couple
of problems here. First of all, you can see that it's going to
take a long time to do 4,096 so I need to reduce that down just to actually
show you what I'm doing. The other thing is we can see that we've got a
great background. We don't want a great
background because this needs to be completely
transparent. So what I'm going to do
is I'm going to close that with the X. We'll
close that down. It will just close this box, the blender render box. It won't actually close, you know, the actual
file you've got to open. Now let's come in and make sure that we've got where is it? Let's make sure first of all
that there isn't any here for I'm looking to make sure that we've
still got feed through. Let's come over now to our
options which is this. Here. I'm actually, yeah,
cycles, there it is. And I'm looking down
where it says film. And I want it to
say transparency. Transparent on there we go. We now have got transparency. Now let's come up and
make sure that this is on 2048 instead or even
let's do it 1024. That's going to be
pretty quick. It's not actually going to
be rendered out, it's not going to be nice and crisp or anything like that, but the main point here is just showing you how you can
actually get them out. So now what I want to do is
I want to make sure, well, when I come to rendering that
I'm actually on wireframe. Always put this on wireframe. It's going to speed
up your render because in the end of
the day, at the moment, you're rendering in the viewport
and then you're going to render in the viewport as well
as rendering out a render. And you don't want that, it's putting too
much on the system, just make sure that you
put it on wireframe. Now let's go to file. Let's save it out, make
sure nothing crashes. Let's go to render, and we're
going to render an image. You'll see it's
going to be much, much faster than
where it was before. As you can see,
you can see also, there's now where transparency. You can also see that
this is going up now to 1,024 Now the other thing I want to show
you at the moment, you can see you've got combined
here is the normal map. So if they click that on,
you can actually see it actually creating beautiful
normal map for us. And the other thing
is I can actually come up now and put this on ambient occlusion
and we can also see now we're actually creating
an ambient occlusion map. Now the thing is we
need to know after this how we actually
bring them all out. In other words, how do
we actually export them out as individual files. And that you're going
to actually learn about in then, in the next lesson. Because I'm in the
next lesson, sorry. I'm going to actually
speed this up now. So I'm going to pause it
here and we're going to wait till this is finished and
then we'll come back to it. Welcome back everyone. So this is what we actually
ended up with now. Now from there we can
actually close this down. Then what we're going to do
is we're going to go over to our compositing, open it up. What you're going to
do is you're going to come to the top corner here. In fact, we'll actually
get rid of this one here. So what I want to do is I
want to drag down then that, we'll close that other way. Then I'm going to drag
a little cross that comes over here to get a cross. I'm going to close this box
then with the end button. And then what I'm
going to do now, I'm going to change this. This at the moment is on
these, what are they? Not even sure what
those three are. Find what they are. I can't
actually find what they are. Compositor at the moment. What we want this on is the V, not the UV editor, image editor. This is one we want
it on and we want to click this little down
arrow Render Result, And this is what we end up with. So you can see now really the color looks
really, really good. You might want to
make it a little bit brighter. We can do that. Anyway, that's no problem. Now what we want to
do is over here, we want to use nodes. And there we go, There
is our rendered layer. So this is the image
at the moment. Now we have actually, you can see we've
got our normal, we've got our AO, and we've got a noisy image. I don't
know why it does that. Now, with the main image, this has already
been cleaned up. It's already been denoised.
Remember as well. Something to think about is
that this, at the moment, is only 1024, so it's a very, very small actual image. If we were to make this 204-84-0906 it's going to look much, much
clearer than that. Now, we're just going
to do a few things on this composite. And the reason is because in the main actual render that we're doing for the
actual Viking up, I'm going to go a
little bit more in depth into the composite. So what we want to do is
we want to first of all, come over and we want to
actually send this out. So I'm going to go to Image
and I'm going to save our I'm going to put it on 16, I'm going to turn
the compression up to 100 because you'll see here if you
have a bit amount of time to turn
best compression. No compression with
fast file output and 100 maximum lossless compression
with slow file output. In other words, the best image you're going
to get is with this turn up to 100 and you
want 16 bit color depth. Because when we send it into a bottle shop or
something like that, it's going to make it
much easier to deal with when you have a lot
more color depth to it. All right, So now
I'm going to do is I'm going to save this out. I'm going to call it,
if I come over here, I'm going to call it thatch. Thatch. And the other thing, what we want to make sure
that we do is we put dash. Let's try that again. And then color, and then G. It needs to be PNG because it
needs to have transparency. All right, now we've done that. Let's save it out.
So save as image, now let's go and
find that image. I'm going to look
where I put it. Here is our image. Here it is here. Now
we obviously need two. We need the ambient. We
need the normal map. Let's just put that
over there for now. What we're going to
do now is we're going to change this over four. We'll do the admin
inclusion first, so drop the admit inclusion in. Now you'll see, first of all, we do have a few problems here. First of all that we've
got black on there. In other words, the
Alpha's not plugged in, so let's plug in
the Alpha like so. And the second thing is you'll notice it's got a lot
of noise on here, so we should denoise this
shift a search noise, let's drop that in to the
admin inclusion there. And now you'll see
working it out. So it's working it all
out and once it's done, we'll get rid of all of this. And now you can see just how clean that
actually looks now. So now we've denoised it. Now let's go again
to File this time, sorry, image and save As. And now we're going to
click on the color. I'm going to click 16, put it up to 100. And now what I'm going
to do is just change this to a like so image loading in. Now we've got two files now, one is the ambient occlusion
and one is the color. So the final one pretty
much the same thing. All I'm going to do now
is plug in the normal. I'm going to plug
it into the image. And then the image
into the image here, let me think about it. It's running through
the noise as well, so it just needs a little
bit of time to set it up. There we go. There's the
actual normal as well. So we've got a normal, we've
got our ambient occlusion, and it's the same thing again. So all we would do then is image save it out
exactly the same way. Now you're pretty much done. So what you should
actually have. So I'm going to save this out, I'm going to go to
modeling first, so, or lay out, it
doesn't matter which one. Save this out and then you've
got this for next time. So I'm going to go to
file, Save it out. And then what I'm going
to do is just close that down 'cause I
don't need it anymore. And now you should have
those three images. Now there isn't three here because I didn't
save out the normal. Now what I would do
is I would take both. We zoom in, I would take
these three images, put them in Photoshop, something like that,
and have basically, you want 12 images, so four
for each one, so four color, four ambient inclusion and four normal when you've changed
the seed on each one. So you go, you actually take, do all of the images
for each of these. So one color, one ambient
inclusion, one normal, change the seed,
Save them out again, surrender, save out again. And do that four times. That then will give
you four variations. So now if we go to our
textures, that's roof, and I zoom in, you'll end up with something like this
where they're all different. And you can see here I put these all on the
same map as well. So I took the four
ambient inclusion and put them on the same map. That is what you
want to do because then now you can
actually bring these in to our actual scene
here and we can actually start creating
our actual roof, which we will do on
the next lesson. All right everyone. So I
hope you enjoyed that. See on the next one.
Thanks a lot. Bye bye.
60. Creating the Thatching: Mike, we want to bend it on real engine five of the
complete beginners guide. And this is where
we left it off. Now what I'm going to do
is I'm actually going to hide this part back away. We're in our main
file again now I'm going to hide these sons
out the way as well. And what I'm also
going to do is I'm just going to hide these
parts out of the way. And the reason I'm doing that is I want to just get to the house. I want to just get to this house because that is the part
I actually want to bend. So you can see I've
got my house here. Now, the other thing is I don't
want to bend the chimney. The chimney doesn't really
need bending it also, I'm going to hide
that other way. And then I've got
everything else now. I could probably just bend
everything except the shield. Let's not bend the
shield either. The one I'm going to
do is now I'm going to work on just this bit here. And so to do that
I'm going to grab everything like so I'm going to shift select
just one of them. And then what I'm going to do now is I'm going to come in, go to object, and we're going to come to
convert and mesh. And what that's going to do is just going to make sure that everything's applied as
far as modifiers go. I'm going to press control J, Join everything together,
and there we go. All right, now let's reset
our actual orientation. So control all
transforms, right? Click the origin to geometry. And then what I'm
going to do now is I'm going to bring in a lattice. So if I press one or three, what we're going to do is
I'm going to press shift, bring in a lattice. So I'm going to make the
lattice a little bit bigger. I'm going to put it
into place again, don't move the
lattice in any mode, Make sure that it's all being
done in the object mode. So then I'm going to come
over to the lattice, I'm going to increase
the number of the V, bring them down here. And then I'm also going
to increase the W. So that then will enable me to actually pull these parts
down in the center. All right, once I've got
that, I'm going to go back to my house adding a modifier. We're going to pick
the lattice Lattice, of course is going to
be this lattice here. Now we can go to our lattice. I'm going to press tab, I'm going to press B. I'm going to grab it
here, for instance. And one going to do
is shift space bar. Bring in the move
to all one going to do then is just bring
this down a little bit. Now you'll see that we do
end up with some issues. The rest of it is dropping down, but loads of it is
not dropping down. This beam across here is
not really dropping down. The reason for that is because
if I go back to my house, we'll see first of all, that my lattice
isn't on there for some reason. There we go. Let's put it on
place. You'll see as well that my lattice
needs to bring it in. So I need to bring it
in. So I'm going to press and X, let's bring it in. So let's go over the top, making sure that
it's all in there. Pull it over, perfect light. And let's also bring
one in the middle. So we'll bring one
in the middle. So now let's come
back to our house. So if I come to my house, you'll notice on this
beam going across here, there is no edge loops. Which means that I
can't bend something in with no edge loops. So
I need some edge lops. I'm going to press control,
bring in some edge loops. So I'm going to do the
same on this part. So control, bring
in some edge loops. I'm also going to do the
same on these main beams. So control control. I'm not even worried about how many edge loops are
bring at the moment, because I just want to actually
get this Dentons Place. So now if we go back
to our lattice, press three to go
into side view. Now if we grab all of
those that we did before, so grabbing all of these, then all we're going
to do is pull it down. And now you can see
we've actually got some ability to
pull this down now. I'm also going to put
proportion editing on, and then I'm going
to pull them down. Opening this up very slightly. Now, that's still too much. And the reason is because now I've got proportion editing on. I need to just grab
a few of these, like this many here
now can actually work. Pulling it out very gradually. Now you can see we
very little work. We've actually managed to bend that house in a little bit. Now, if I come back to hiding my lattice out the way,
let's have a look at that. And you can see
that's looking pretty much exactly where
I want to see. This is bent a little bit, all of this is bent here. The rest of it is
looking really nice. All right, so now let's press or tage, bring everything back. And now I can do is
come back to my house. I'm going to apply that lattice. So control apply the lattice. Come back to my lattice now, and delete it out of the way. Now what we can do
is we can actually start work on putting
the thatching on. So what I'm going to do is
I'm going to press shift A. I'm going to bring in a plane, so let's bring the plane over. And then what I'm going to
do is I'm going to bring in my actual texture. So I'm going to come
into material new, I'm going to call it thatching. Then I'm going to go
to shading panel. I'm going to press control shift and I'm going to bring in the, that bring all of these
in for some reason. Yeah, there we go. Now
we've also got in there, remember we've got an
ambient occlusion. I'm going to cheat a little bit with ambient
occlusion because in blender the principle doesn't actually work with ambient
occlusion too well. We have to do this in
a roundabout way Now, first of all, I'm going to
press Dot just Doom to my. We can also see at
the moment that we can see straight through it and we don't
really want that. What we want to do
is you want to put the Alpha over to your Alpha. You'll see that we consider it. Let's press seven
to go over the top. Let it load up, and this is
what you should be left with. Now you can also
see at the moment that this plane that we've got, UV map, let's put it onto
material mode at the moment, just so we can see
what we're doing. Then what I want to do is
actually want to unwrap this. I'm going to grab this
plane, press tab wrap, then we'll end up with
something like that. Let's come over now
to our UV editing. And then what I'm
going to do is of course going to
make this smaller. I'm going to press S
bring it into place. I'm going to keep it
I think as square. I think I'll be okay to keep. And the reason I'm going
to do that as well because I'm going to do a
little bit more work now. And I'm going to press
dot to go over the top. And I'm also going to
put this on material. All right, so now
you can see that we do have a few
problems in that. First of all, we've
got only one of these, and second of all, we need
to have four of them. That's the first
problem we've got. The second problem we've got
is that this, at the moment, as you can see,
it's pretty flat, so we need to
actually raise it up. And then the third problem
we've got is we need to bring the ambient occlusion in and
mess around with the color. But let's deal with
those one step at time. So first of all, I'm
going to press shift, I'm going to bring this one over so I'm going to grab them both, then shift and then split them. Are so let's come to the first one then.
This is the first one. We've got that already
in the right place. So let's put the next one
into the right place. So all I'm going to do
is I'm going to press and X and move it over
into place like so. And then come to the next one. And then we're going to
press and Y this time. And move that one into
place like so and Y. Then what we're going
to do is come to the last one I'm going to press, I'm going to grab it first. I'm going to press a,
put that one into place. So now we can see that
we've got different ones. So we can see that we've got different ones in each of these. We can also see that for
some reason I've got a little bit of a
color issue there. Let me just see if I've got
that. I'm rendering as well. Yeah, it's not there
on the rendering, so that's good. We don't
need to worry about that. But let's go on to material now. And what we'll do is
we'll cut these out. So I'll come to this one first. I'm want to press the
tap on and then I'm thinking it'll be easier to actually give it
some depth before actually what I mean is give it some subdivisions before cutting it out. But I think
I'll do that. So what I'll do is I'll
come to all of these. I'll join them all
up together now, so control J because I
can split them up later. And then I'll press
Control or transforms, rightly storage in
geometry, add modifier. And we're going to bring
in a subdivision surface. I'm going to put it onto Simple. I'm going to turn it
up to perhaps four. Let's press control A
now. And there we go. Now we've got something we
can actually work with. Now I'm going to do, go in
and come with the knife. So I'm going to come
in with a knife tall. Let's start with this one and
all I'm going to do is cut them very roughly around here, like, so I'm not even going
to really worry about the points at the
moment because I know I can actually fix those. Now if it's sticking, all
you can do is hold control, then you're not going
to get that anymore. You'll see the
magnetizing doesn't actually come into place if
you hold in the control, but if let go though, you'll see it magnetized
to each other. These all I'm going to
do is just going to come in holding control. Just work my way round. The reason we're
doing this, which looks a lot of work
but not a lot of gain because then we can lift up certain parts of the and
randomize the rest of it. And it will give
it a more depth. That's why we're actually doing
this work our way around. Just some of these will
make it look tons better. Long run. I'm going to
magnetize on there. I'm going to put a control
work my way around. We should be heading back here. This one is. And
you can see there, I've got that one going back. If you want, you
can just move that once you've actually finished,
I'm going to come to here. Put it on there as
the end to button. I'm just going to go in and fix this one because you can
see it's hanging over. So I'm going to come in,
put, grab both of those. Subdivide the, grab this
one while I'm over the top. Just press G without portion, I'll just be able
to move that one. Now you can see that we
do have a problem there. I'm going to do this
a different way. Instead of that,
I'm going to again, press a come in with
my knife again. And all I'm going to do then
is just bring it to there. Enter. And then finally
I can just delete that. Delete dissolve Russ,
is that going to do it? Dive that edge as well? I'm going to do edge
and there we go. All right, so that's
pretty much it. Now the thing is, once we'd
actually done the knife, what we should have
done is we should have actually marked
our seam instead. Because now at the moment,
going to make it a lot harder. If I come in, grab all of this, I need to come in now, grab it. Going all the way around with old shift click and you see
wants to do Alt shift click. It tries to take
it all over there. So made a little bit
of a mess there. So all I'm going to do now is
come in with control Click. Just making sure press
Alt Shift click. I've got it going
all the way around, so I'm just following it
all the way around now. Shift click, Following
it all the way around. You can see that it's
gone through there. See, take that off. I'll just come in, grab it. Going all the way
around. In control. Click. See it cuts it out there. I don't
really want that. Just make sure you got
it going all the way. This is a bit tiresome now. I should have really
put my seams, one side actually
put it, never mind. I'm not going to take
too long anyway. So control click way through and then old
shift click all the way. And then I'm just going
to minus these off. Middle mouse button,
so make it smaller. Middle mouse, minus the
mouth, middle mouse. Now we're going to right click and we're going to mark a seam. We've got something like that. Now finally we can come in, we can actually grab
this part here. You can see that when I've
grabbed it with face, we've got a leak in
there somewhere. In other words, we've got a tiny bit where we've
actually marked a seam. In other words, it's
got to see missing. So clear need to
find where it is. Now I've just got
to go around all of this looking where
the tiny part is, where I've not
actually got it on. Where is it going to be? My way round here. That one there is a little
bit close. Where is it? There it is, there
it is, right click. All right. The one that was
a little bit close here. I think we can get
away with that one actually. Now let's try again. If I come in L now, there we go. Elite basis, that's what
we should be left with. Now finally we'll leave that. Now what we'll do is then on the next lesson is we'll
come to the next one. We going to do exactly
the same thing. Then what we'll do is we'll
give these some depth. I'm going to save out more work as well. All right everyone. I hope you enjoyed that and
I'll see on the next one. Thanks a lot. Bye bye.
61. Adding Depth to the Thatching: Welcome back everyone to
blend it on real engine Five, the complete beginners guide. Now let's see if I can do this one a little bit better than what I
did for the last one. So I'm going to do is I'm
going to come in and I'm going to grab the whole thing so I can see what I'm doing. And then I'm going to press
the button to bring my knife. I'm going to start from here. I'm going to hold the control B, then I'm going to
work my way around. I'm hoping that this one works out a little bit
better the last one. And I'll actually be
able to mark the seams before finishing because that then will save me a lot of
work going around here. And you notice on this one I'm making it a little bit tighter. Now we know what we're doing
can go through each one. I wouldn't recommend going
down each one of them. That will take a long time, but as many as you can, just make them a little bit uneven. You're going to get
a lot more depth out of it if you do it this way round. And I think I will show you before we do the
next one what we're actually going to do with these and you're able to move on while I'm actually doing
this on your own work. Okay, here, back up again. Home enough troops. So
let's put it on there. That's the end. There we go. Now it's not actually
going to mark my same as we can see Now
it might mark a seam. If I didn't have everything
selected and I did this, that might be a much
better way to go. I think because I've
actually learned that. Now what I'm going to
do is I'm going to press controls head and
take all those off. I'm going to double tap the A and now I'm going
to do insteadies. I'm going to come in
and do that once more. Because I think going
to make it much easier if I come
in like this way. So I recommend don't do what I've just done
and do it this way. I think at the end of this
it's going to save you a lot of work and we're okay. We can actually see
what we're doing anyway. So that's no problem. Probably better
actually, when it's all when it's a black like this. Better actually than what
we were having before. The thing is about the thing. You can get the, with the transparency,
that's absolutely fine. But getting the thatching
to look like it has depth is much, much harder. We use a few things like
the normal maps and like the ambient occlusion
that's going to add some depth where you can
also use this statement. But that's normally very costly. So we tend to try and avoid
that because we want to keep actually as low and
optimized as possible. Now you will see on some of
the games like Ano like that, where they have thatched roofs, there won't be much
depth to them, especially with the
trees on there. You'll see it's just mainly for, like a long away, but when you go close, they
don't look that good at all. It's all depending on
what type of game you're actually creating or what
view you actually want. Going for hyperalism, of course, and it's very close
to the camera. You want the thatch in
looking as good as possible. Now let's come back a center. And it still didn't do,
it didn't work out. So I've done that twice now. I don't know why the
knife to doesn't do that. Maybe let's have a look. If I put the knife toll on now, there's no options even there. I'm not going to worry about it. Then what I'm going
to do now, I'm going to come in, double tap the A. What I want to do
is I want to come in and actually grab this now, old shift click going to old shift click it going
all the way around. And then I'm going
to come in and fix the issues that I've got. So we can see going all
the way around here here we can see pretty much probably going to even have to do
it as I go along. See middle mouse,
get rid of all that. Lets out a little bit. I don't know why it doesn't, no ability to mark a scene
once you've used the knife. I'm not sure if that's
part of the options. Maybe I'm missing it. You might want to put it down
in the comments. I think what I'm
going to do now is I'm going to cut
all of these out. I've showed you how to do them, I'm going to mark
all of the scenes. And then once I've
actually done that, then I'm going to come back and you'll see that
they're all done. All right? Every once I'll see you once
I've actually done this, we're here, they are, all done. All right, So now I'm not
going to be in the UV anymore. So what I'll do is I'll
go over to modeling and then what I'm going to do is I'm going to grab them all. Now A grab them
all. Right click. And what I want to do is we
want to triangulate faces. You're going to
triangulate faces. And then what you want
to do is you want to come in and tries to quad. I think we'll do it that way. What that means is now
it's actually triangulated all these little parts that
we don't have any end guns, non manifold edges where they bent weirdly or
anything like that. And then what I'm going to
do is now I'm going to come, let's say to this edge here. So I'm going to come
to this edge here. And then what I'm going to
do is I'm going to actually come and put it onto
functional editing. And now if I press G, I should
be able to bring it in. Just lift up some of these. I probably don't want them
lifting up like that. So I'm going to do is I'm
just going to put it on sharp instead and lift them up. And now they should
be able to come in, lift all of these
up different ways. Lift up the facts, but end up with a lot of
different variety. But let me just look
at this one now. One's looking pretty nice. Now I'm going to do is I'm
going to come into this one, I'm basically going to
randomize it a little bit. So I'm going to come to random, then I'm going to
lift this one up. A bit of randomness. Then I'm going to
come in and actually use the sphere on it. I'm going to lift it up. Then I'm going to do,
finally I'm going to go to shade, to smooth. I'm just going to make sure that I'm happy with how that looks. It probably needs pull it out. Just a little bit
of more work on. I think I'll start
smoothing this off as well, so I'm just going to be careful
now when I pick them up. Okay, there were you think the let's put it
onto our rendered view. Let's have a quick
look at what that's going to look like.
So let's render out. You can see we've not got the
material done properly yet. You can see it's a little
bit shiny because we didn't make a roughness or
anything like that. So we need to turn
down that material. But I'm just getting a
good idea of what it looks like and you see it's
looking pretty nice. Okay, let's go back
to material preview now Let's do the same thing
then with these ones. I'll do them pretty much
all at the same time. I'll put it on and there
is I'll just lift up these so, and I'll work
my way around now. Eat up the process, it, it, hey, last one I think on these this time I'll do the randomized last here. What that looks like once and then we'll do is
on the next last. And now we'll actually bring
these out a little bit, looking a little bit like
this one. All right everyone. I hope you enjoyed
that. I'll see on the next one I'm
going to say about my F and I'll see on the next
one. Thanks a lot. Bye bye.
62. Creating the Viking Roof: Welcome back everyone to Blends. Unreal Engine Five, the complete beginners guide, and that's where we left off. Now let's put it
on object mode and have a look at what
these are looking like. Then what we'll do is
we'll come into these now. And I'm going to come in
and start lifting these up. So I'm going to start
lifting these up, making them a bit less
flat as you can see. Something like that. And
I'll do the same one again. Actually it's better
probably me being in object mode because
you're going to see a little bit of a
better view what I'm actually doing like this. On this one, it might seem
a lot of work doing this, but they'll definitely turn
out less flat by doing this. All right now or do is
we'll come and put this onto random now is
I'll grab this, I'll pull out this, I'll
do the same thing on this. One thing on this one is now you can see we've got some chunks there like that. We
don't really want those. What I'm going to do is
I'm going to come on, smooth them out a little bit, not too look at that. Let's put it back on material. Now, double tap the
A, there we go. There looking pretty nice. Okay, so now we've got those. Now we want to do is
we want to come in and I'm just looking to make sure that that smooth
hasn't gone too much. You can see here probably
gone a little bit too much. Sometimes that can happen, let's check it again and make sure that we're
happy with them. Let's write click
shade or too smooth. We can see we've got a few edges on here we don't really want, we don't want them too
broke around here. What we can also do is
come to Gulp model them. Be careful on the edges because sometimes you can't get
the edges to go right. So just bear that in mind. Do the middle parts of them, making sure everything's
nice and smooth. I think they're actually
going to be fine now. Okay, next of all, what we want to do is you
want to go over to shading. And now we want to
actually mess around with the roughness and
things like that to make sure that they're
going to look good. First of all, let's sort out the roughness and the metallic. So I'm going to put them in, I'm going to come in to my roughness and sometimes you
can get away with plugging in your color,
in your roughness. So I'm going to plug
that in. So let's see what that's going to
look like and you can see that's looking pretty good. I'm going to make
sure that metallic is down to 01,
that's down to zero. I'm going to double tap the so I can see what I'm looking at. And then what I'm
going to do now is this ambient inclusion. Let's bring in an
ambient occlusion. What I'm going to do is I'm
going to bring, first of all, in a color ramp
shift, a search ramp. Then I'm going to
bring in a mix color. I think that one. Yes it is. That then I want
to put on overlay. So I'm going to click on this, put it onto Overlay. And then I'm going to
do is I'm going to plug in my ambient occlusion, color, plug into the A, plug
it into the bottom, plug in the color, and
then plug in the overlay. So now I can actually bring in the ambi and
inclusion into my actual, hey, and you can see how much better that
actually looks now. Now the next thing is
that you might want to do is you might want
to change color. If I put this over here, over here, you might want
to change the color. Now, I don't actually think
I need to change my color. I think actually they've
worked out pretty nicely. But if you do,
we've done a lot of previous work in this course. You should be able to bring
in a human saturation. You should be able
to bring in a gamma. You should be able to
bring in an RGB curves. I'm going to put these on and just see what they look like. Now the way I'm going to do this is I'm going to go
to material mode. I'm actually going to go
into modeling as well. It's going to just make it
much, much easier for me. And I'm also going to split up everything so I can actually
just work on my house. I'm going to leave
my light in there, but I'm just going to hide
the chimney out the way. For now. I'm going to
work on this house. So I'm going to do is
I'm going to grab these, now I'm going to press
a grab everything. And then what we're going
to do is we're gonna come to split so we can see
if we come to mesh. Let's go to split. Split was on here. What I'm going to do is come
to mesh and we've got separate by loose parts. There we go. And then I
can grab all of these. Control all transforms rightly origin to geometry on the mall. Now let's spin them around 90. Then what we're
going to do is start getting these into place. First of all, we need to make sure that they're not too big. As you can see, if I put them that they're probably
going to be too big, so I'm going to have the
round about that size. And then I'm going to put
the first one into place, so I'm going to
rotate it round Y. Rotate it round. Let's
rotate it a little bit more. If you need to get
at the right angle, press one on your number pad. Then what you're going to do is you're just going to make sure that on the Y level
with my roof. So now what I'm going to do is I'm going to put it into place. I'm going to press, put it in and what I'm going
to do is just pull it up and I'm going to
put this on normal. And I should be able
to put this into, place it back, pull it up. Now what I'm going to
do is, first of all, before I do anything
else, I'm just going to put this
on rendered view. I'm going to double
tap the A and now I should have a good idea of
what it's going to look like. And you see that's
looking really nice. Now we've got that into
the right direction. What we need to do now
is we need to come in and add a few more
of these on top. Now what I'm going
to do for that is I'm going to go
back to material. Now I'm going to take
the angle of this. I'm going to open this up. We can see that we've got
an angle of 74.4 degrees. What that means is now I can copy that come into
each of these. So this one here, 104. That's four for some
reason to item. And we'll come to this,
look at the rotation. There we go. This
one here, control. Let's go now to this one. Then let's put in control
V. Let's go to this one. You can see all we're doing is now putting them
at the same angle. Now let's actually
put all of these on. You can see some reason I need to put it
onto Global first. Then I can pull them back, dropped them in place, and
then I can move them up and down, That's content. The thing is we
need to make sure that we're mixing these up. We need to make sure that
they're being mixed up. The other thing is
we need to make sure that we're moving them. Normal can go big there. Don't particularly want that,
is going to pull them up. All right. Now we've got that. Let's pull this one up
a little bit as well. Now let's put this on,
let's get this one place. What I'm going to do
now is I'm going to take this one here. I'm
going to press Shift. All I'm going to do is to
pull this out a little bit, put it over here,
and just move it down over the top
of this one here. And then I'm going to do
the same with this one. Shift one going to do jaw. Going to make sure happy with
it before continuing on. All right, let's
double tap the A. Let's have a quick look
at what we've got here. Let it load up. There we go. Really nice looking
Hey on there, okay. We've got a little bit
of a shine on there, but we can sort that
out no problem. As I said sometimes
with the roughness, just the light I
think shining off it. So we should be fine. Now, one other thing that you need to consider when you're doing this. If we go to our cycles, you have got one that says
light here and under advanced, or is it the light paths here
we are this transmission and transparent when you're
dealing with trees or even, hey, you might want to turn
these up a little bit. What it allows is more
light to actually pass through through
the backs of these. Sometimes I'll turn
this up to like 20. What it'll do is they'll let
more light pass through. Especially good if you're dealing with things
like leaves and things. Because what will
happen is you'll put a few leaves on and then you won't be able to see
through the back. You'll just be black. And we don't really
want that. All right, so what I'm going to do now is some jaws going to come round. Have a look at this view from
the side. Let it load up. What I'm looking for here, once it's loaded up, just to make sure that it's not too flat
so you can see it, we've got kind of
lumpiness here. That is what we're looking for. The next thing I'm going to do before we do
anything else is I'm going to take a quick rendered
view of our actual scene. Now I'm going to press the
little object mode here. I'm going to come over
to my ear, Cycles, because I want a quick
rendered view of it cycles. I want to turn this down
something like 500. And then what I'm going to do is I'm just going to press zero. Now I'm going to take
this quick render. So I'm going to go to
Render Render Image, let it think about it
and render this out. And then we go, we've
got nothing set up here, so it's got to just get to 500. It shouldn't take too long.
We haven't say anything up. I think before I
do that, actually, I'll have to actually
come in and fix. As you can see on
the next lesson, we need to probably
fix all of this. It might be just the fact
that I've not actually come in yet and fixed it
properly. All right. Ever one. So I hope
you enjoyed that. And I'll say on the next
one. Thanks a lot. Bye bye.
63. Blender Turbo Tools Addon: Welcome back everyone, to
Blenetsnial engine five, the complete beginners guide. And you can see here that
we've ended up with a lot of problems with our roof. And the reason is because, one, we've got on the
wrong saying, and two, probably the roughness value is not going to work like this. So I need to sort that out. What' going to do
is close that down. And then we going to
do like we did before, we're going to go to
Edit and Preferences. We're going to go to System. First of all, make sure
this is on the correct one, which it is not ours. And then what I'm going
to do now is I'm going to go to then I'm going to make sure that my de noising
is on on renders, which it is as you say, and put it on 500, let's put it on 1024. Let's also come down
then and make sure that over look let's come
down to performance. Make sure that this is on 64, make sure spatial splits is on use curve so it makes it more Ram used
but faster render. So put this on if
you've got a lot of Ram and persistent data. Now let's come in and
render that out Again, I'm going to make
sure as well that I'm on wire frame instead, I'm going to quickly
render this out now and see if there's any
problems with the image. You'll see it'll start up. I'm going to pause the video and I'll come back
when it's done. Okay, I'm going to
pause it right now just to show you
that we're still getting some problems with this. Let's try a few
things. First of all, I'm going to close that down. Did render and then
what I'm going to do now is I'm going to go
into my shading panel. I'm going to comm two
these parts here. These are the parts
we're having issues, See that probably got a
lot of shine off of those. What I'm going to do instead
is I'm going to press zero, go into my camera view, Put it onto the render settings. Let's see where that
shine is coming from, so we can see we've got
loads of shine on there. I'm going to zoom in from here. I'm going to move my mouse up. Let's now see if we can
get rid of those things. First of all, let's come
in and see if we alter, or is it the light paths? Let's put this down to 12. If that alters it at all, then I don't think it will
let some plug. Now, our roughness, there we go. This is probably going to be the problem with the roughness. So I'm going to do
is going to turn my roughness went up to the
plug it in a little bit. That's tell me it's
something that's a problem with my roughness. What I need to do is now
I'm going to plug in the color, my roughness again. I'm going to come in and put
this transmission on the 20. Again, what I'm going to do
is bring in an RGB curve. Rgb curves, drop that in. What I'm going to do
now is pull that down. Get rid of it way
down in better. We've still got a
little bit of Shine. Let's try it way down to that. I'm actually going
to plug this again. I just want to It renders. Yeah, there we go.
So it is the actual, the roughness I'm going to do is I'm just going to zoom
in a little bit more. I'm going to pull this
down all the way up. I don't think we want
too much shine on there. Anyway. Something like that. Now, let's have a, have
a look at the side now. We can see that's looking
pretty nice from there. The one thing probably need to do is move these
down a little bit, pull them out a little bit, rotate them a little bit
and things like that. But I think now I'm going
to be happy with that. So what I'm going to do is
I'm going to do one more re render and I'm going to show
you something else as well. So I'm just going to put
this onto wire frame. Now we've done that, what we're actually
going to do is we're going to put this
onto wire frame. And then what I'm
going to do now, I'm going to render this
out once more but this time I'm going to use
the add on that I talked about which is the turbo, the pay add on by
recommend getting it. Now I have showed you how to actually render it
out on your own. The only difference is when
you want to pay render, all you're going to do is
you're going to turn up the render the maximum samples. You're going to turn this
up. Once you've turned that, then you're going to
get a better render out of it though it's basically everything
can stay the same that we've fitted on here. You just need to turn that hole. Now let's come to
Word Turbo Tools, turn that on, let's
close that down. And then the only thing
I'm going to do now is is set the scene cache folder. So set the key
scene cache folder. We're going to set it to
thatch roof. Click Okay. And now this is probably
going to be ten times faster rendering than
what we had before. So if I come on over now to
render render Turbo tools. Now let it load up, let it think about
what it's doing, and as soon as it's done there, it'll actually start
rendering. Here we go. And as you can see now, the speed at which this
thing goes is very fast. So we can see now that
hopefully with that, that roof now we should get a lot more variation
out of our thatching. So you can see only a
lot more variation. There is nowhere shine or
anything like that in it. And it's looking
really, really cool. Now, the one thing we want
to do now is we want to actually create it so it's
not looking all the same. So we want to put
bits over here, and then we want to have bits sticking out and
things like that. Alright, so that's pretty much done and now what
we'll do is we'll go back and what
I'm going to do is I'm just going to put
this on object mode. Then I've got my four
parts over here, 1234, I'm going
to grab this one. And then I'm just going to press Shift to drop that in there. I'm going to grab this one. I'm going to press shift D, I'm going to drop that.
There's something like that. And then, yeah,
let's grab this one. So we're going to
press shift D also. I'll mirror this one as well. So if we go to object, the red line going across. So this is the way
that it's going to go. So I'm going to go to object, we're going to mirror on the local x and then is going
to spin that round for us. Same with this, then if I
press shift D, bring it over. I'm going to make
sure that these are all down a little bit, so we're going to actually put
some over the top of them. Okay, Like that. And
then what we're going to do now is I'm going to
mirror this one as well. Object. Let's convert
mirror the x. There we go. All right, let's pull
this back in place. A few bits sticking out here. I don't think we actually want
those a little bit there. I think they'll be okay.
Just a little bit. Then what we'll do now is
we'll bring this over shift, let's bring it over to here. Pull it up a little bit. And I'm just going to go in
and edit this one. So I'm just going to
pull it out, move in, so I'm going to come
in, grab this one out. So then I think we'll do one more render now just to see what
that looks like. When we've done that, what
we'll do is we'll actually pack this roof and then put
them all over the other side. All right, so one more render. Let's put it back on wire frame. Let's save that old wave
just in case it crashes. If blend is ever going to crash, by the way, it's always going
to be when you render it. All right, let's go to Render
and render all faster. Now let this load got a bit of a light
issue on here. It is. A little bit of light, I think that's
coming from there. That's not going to be our
proper lighting anyway. You can see these bits
look really nice. This bit looks a little
bit flow would say. So we need to put some more, and pull some more
out on these parts. Now the other thing is at the moment we have two
light sources in here. Never a good idea to
have two light sources, but we'll do on. The next lesson is we'll get rid of one of the light sources. We'll set up a bit of lighting. And then we'll just
get this front part right and then we can put
it on the other side. All right everyone, so
hope you enjoyed that. I'll see on the next
one. Thanks a lot. Bye bye.
64. Finishing the Scene: Welcome back everyone. To
blend to Unreal Engine Five, the complete beginners guide. And this is where we left off. Now let's come in and
put it on rendered view. Let's actually delete
this, light sauce. So we'll see now
when we delete it, yes, we should end up
with something like that. You can still see that this
part here is lifted up. So you can see these
parts are really lifted up in comparison
to the back of here. But we need to
actually fix these. Now what I'm going to do is I'm going to first of all come in, I'm going to put it onto
material view so I can actually do let it load up and
then once it's loaded up, now actually work with this. What I'm going to do now
is I'm going to come in and I'm going to
put this over here. And then I'm going to come in
and just grab all bits up. And then I'm going to do pretty much the same thing on these. I'm going to come in, grab them, make sure they're
lifted up a little bit. I'm going to come to this one and a bit pull
down a little bit, thinking I probably need
another one on here. I'm going to grab this one put into place and
then bring it out. Then I'll come, let's go to this one shift
and we'll bring it up. I'll just pull this up
a little bit as well. Press pull it out, making it very uneven. Now, let's grab this one again. I'm going to press
Shift. I'm going to turn it round this time.
So I'm going to bring it out. And then I'm just going to
put this on Global and then -90 this one into place. Have to rotate it
around a little bit. Get it into the X and pull
it up place where I want it. I think that's
going to look good, except it's probably going
a little bit too far down. I'll just press the bone, shrink it down a little bit. That's a little bit be going
to do is I'm just going to pull it up this bit in now. I'm going to do is put
that on the other side. She hundred 80. And I'm also going to
mirror on the x again, object mirror local axis
x because it's that red. Should be able to put
that in place as well. Now what we're going to
do is one more render, just making sure we're
happy with everything. Sometimes you get a
little bit of issues, you see with these parts
sticking out like so. Sometimes that does cause
a little bit of an issue. But let's see what
we actually get. Let's go to render it
onto wire frame render, let it render out again, fell on a low actual quality. This, I'll show you how to do the high quality
with this as well. Now we're going
somewhere as we can see, this one which is
now a little bit, we need to pull this
one out a little bit. I think just to
get it all looking a little bit nicer than what it is, we'll do that now, go back now, wondering
why this one probably, why this one is stuck
through more than this one. Let's come in, grab this one
at the back. This one here. This one here is our
put, pull it forward. We might need another
one over here as well, just to puff it,
our little bits. At the moment they're
looking a little bit flat, what I'll do is
I'll grab this one. I'm going to pit, put
it back on normal. All this is now is
just fiddling about. Really fiddling about it, trying to get to look
nice and realistic. Let's pull this one
out a little bit. There we go. The last
thing I want to do before rendering it this
time is go to object mode. What I want to do now is
just check my normals face orientation that we do
have a few problems, just in a few parts. What I'm going to do is
I'm going to come to this, I'm going to grab it, I'm going to press a shift just to spin them all
around. And that's fine. Now let's turn off base
orientation of what did I miss? One there maybe? Yeah, the inside of the best having actually better look at this, I'm going
to grab this one. It round on the inside, go
around the back on the shield. That's what I wasn't looking at. The spin them round'sk
all way around, you can see they're
red because it's the opposite side because they aren't doubled up or anything. Okay. Now let's do one more render when
we've turned that off. So let's go to render. Let's see what we
have this time. This is the thing that
takes such a long time with the rendering as
well. There you go. We can see that's
looking pretty nice, but a lot of lumpiness. Now this is looking good. All of it is looking good, except this is probably pulled out a little bit
too much, I think. And then we're ready to
go over the other side. We need to pull this up as well. We can see should really
be going under there. This top bit looks good. Everything looks good about
as said, this bit here. All right, let's close it down. Let's do those final tweets. So we can see this
probably pulled out a bit to pull it back in and we'll over look
what that looks like. The other thing you can do when you're happy with
something is probably give these a little
bit of depth as well. But we'll go on to
that in a minute. Finally I've got that, Then
I'm going to do one more render before I move it
over the other side. As I said, it only takes 25 seconds or something
like that to do each render with
the turbo tools. We can actually
afford to do that. If you are just rendering, then obviously you're not going
to have that luxury. But now we can see it's getting a little bit better wondering, am I happy with how that looks? Yes, I think it's looking a
little bit more realistic. Okay, let's close that down now. We've got that. What we'll do is we'll join it all together. So what I'm going to
do is I'm going to join all of these together. So, and I want to make
sure I've got everything. So I'm just going
to press control J. Join them all together. I can still move
them out if needed. And the other good
thing is now I can smooth all of these little
parts out of the way. We can see we've got these little chunks in here like this. I can come in and grab it and still move it out of the way we don't
want them stuck out. And they're easier to see now because they are poking through, so you can see much easier
to see back through. Okay. So now we've got the mol. What you can do if you want
to is you can come to add modifier and bring
in a solidifier. Just add a little bit of
thickness to the bombs of here. That sometimes helps a lot. All right, so next of all what I want to do is put these
over the other side. So I'm going to press
control all transforms then. What I'm going to do
now is I'm going to, making sure I've got those. I've got one
missing. Yes I have. I'm going to join that to the
rest of them. So control J. Then what I'm going
to do now is again, I'll press control
all transforms. And what I'm going
to do now is I'm going to pum in the
center up here. But I want it down
this main beam here. So I'm going to grab
this main beam. Shift S cursor selected,
Grab my Hey again. And then I'm going
to do is right click origin to three D cursor. And now I should be
able to mirror this, so add modifier mirror over
the other side. There we go. We grow over the
other side as well. Just making sure
everything's fitting. Now, everything's sticking
now as it should be. But one thing we can see is that the stuck out
exactly the same place. I'm going to do, I'm
going to apply my mirror. In fact, I think, can I
split the mop, look at data? There was an option
on mirror where should be able to
change the flip. There is, let's see the flip. Any of these are
actually quick and we're going to move
this up, actually. If that's what's causing
the problem, try and flip. Because it needs
a mirror object, I think that's what it is. I don't even think
I can move it over. So I'm just going to leave that. What I'm going to do
then is apply my mirror, Then I'm going to go
over the top seven. I'm going to come in
with a wire frame. One going to do is I'm going
to press grab all of these. Going to the sensor
that's grab all of those And I want to
mirror them all over. What I want to do is I
want to come to me mirror, it's going to be Xx. Doesn't seem to have
gone all through. The reason it's not gone all through because I've not grabbed them all. I
need to grab them all. Again, not grabbing them all, I think because I've
got this solidify on, I'll do is I'll press Tab. I'll apply my solidify,
Apply my Smooth. And we'll try that
again. There we go. We should have grabbed them all now let's try that once more. So let's try mesh mirror. Let's put it on global as
well because then it's the green which is y mesh mirror. Y local axis still have an issue actually grabbing everything.
Let's come in. What I want to do is I
want to make sure that I've grabbed all of this. We can see for some reason
actually going all the way through if I press control
seven and come to the bottom, wondering how I
can grab all this. Actually I'm just
going to come in, try and grab it. Going
all the way through. And then I'm going to do
is I'm going to press grown face that might be in
Yes, because I've grown face. Grab the whole thing
through the whole thing. Then I'm going to do is press. I've got proportional and on that I'm just going to press now, make sure
that I've pulled it. Now let's finally try
me mirror on the wine. That's what I wanted. Now
let's pull this over. And now should look
different on each of these, so you can see each
of these tops, if we put in an object mode, now looks different
from each other. That is what I'm looking for. Okay, so that's
now looking good. I'm happy with all of that. What we'll do now, then
on the next lesson, is we'll actually sort out
the lighting ready for creating our propernda All right everyone. So I
hope you enjoyed that. I hope you've learned a lot. We're near the end of this
part of the course now, and I'll see on the next
one. Thanks a lot. Bye bye.
65. The Blender Compositor: Welcome back everyone to
blend it on real engine five. The complete beginners guide. And this is where we left off. All right, so now let's
come to our world. So we're going to go to shading, and what we want to do is
bring in some proper lighting. What I'm gonna do is
we're going to go to object, put it on world. And the first thing
I'm going to do is I'm going to keep
this background, but I'm going to bring
in a sky texture. I'm also going to put
this on rendered view. And then I'm going to come
in, let's search for sky. Now, a lot of the time I use the sky texture
rather than the HDMI. Because I think actually
a lot of the time you get a lot more control over it because HDMI basically
when you bring it in, it's just some
lighting that's taken from a place and some of the HDMI's aren't true HDMI
lighting on top of that. Getting used to using
the sky texture is actually a pretty good idea. What I'll do is
then I'll come in, I'll plug my sky color
into my color like, so you can see we end
up with like this. Now what we're going to
do is the sun intensity. Let's put that 0.3 let's put the sun elevation
on 30 degrees, let's put the sun
rotation on 120, like so. And then let's come in and
we'll change the air quality. 1.2 I recommend
coming in and messing around with all of these
on your own because they do do a lot of
different things. Let's change the ozone to two. All right, Now we can get rid of this other sun that we've
got. Delete the sun. We can see straight away that intensity is way too
much. But let's come in. First of all, turn deep
background down a little bit, so let's think about turning
down the sun intensity, which is this one here. Sides bro 0.1 There we go. Now you can see
that that's looking a lot more realistic
than it did before, albeit it's probably still
a little bit too bright. So I'm going to press all teach though and bring
back everything. Let's have a lot of that
looks like still too bright. So I'm going to turn down, I'm going to make
sure that I've not got any light point in light. Bringing up the
light crack, let's see, not going any
lightning in there. What I'm looking for is a sun. I have got another sun in there. I don't think I actually have. We've only got that
light source in, which means then if I
turn this down to zero, yeah, we've still got a
light source in there. And I'm wondering where is
that light source coming from? And I think if I
come over to yeah, turn down the sky
texture down to zero. There we go. Now let's
turn this up a little bit. We want it now. We get in some really
nice lighting. All right, that's
looking pretty nice. Now the one thing
is we're not going a lot of shadows in here. That's one thing
that's bothering me. So I can see now if I
turn up my son intensity, there's my shadows coming back. Let's turn it up to
one, maybe two now. That's well then this one. Now we get in really
decent lighting to turn this down once more. Then maybe turn this up. Get the light in the
way that I want it. And you can already
see now this, hey, looks really good.
Now we've done that. Okay, let's get rid of our guy. So we're just going to
delete him out of the way. We're not going to need
him in there anymore. I think pretty much
We're ready now. Go and take our final render
and then do our compositing. Yeah, I think I'm happy that
around a little bit more. Yeah, I think I'm
going to go with that. That's what I'm going
to go Not 0.3 and the intensity on not 0.1 Okay, back to modeling now. Let's put it back on wire frame. Let's do a quick render, see what that looks like, then we're over to compositing once we've
turned these up. So I'm going to tell
you to show you how to turn both of these up. Well, the first
thing we're doing to do is the compositing, then we'll go into
turning up how much, how much detail is in
the actual render. Okay, so you see
it's initialized in execution, then it denoises. Now you can see
it's been denoised. That's what you're left with. Now, let's close that down, and let's go over
now to composting. Now you can see on our
composite, we have this already. Now, we need more than this out, so we will have to
render it again. But let's get this set up like
we did with thatch roofs. So let's pull this over, let's
press end to close that, let's come down to this side. Then what we're going to do is we're going to pull
this one down. So I'm also going to come to this one and
pull this one down, so we should fill up with
something like that. And then over to
here, we're going to go to the image editor. We're going to put this
on Render, can't see you, render, just type in
render, you render Result. Here's what you
actually left with. Now, before we start messing
around with any of these, let's go over then and render
the things that we want. So we want ambient
occlusion for instance. Let's come over here. The main one we want is
the ambient occlusion. We definitely want
that. We're definitely going to want a diffuse,
just the color. Now, we don't want to mess around with any of
these other ones. You can see we've got a lot of layers that we can
play around with. Now we've done that, Let's
give it one more render. So I'm going to come to file, I'm going to save it out
to render with turbo. Let's render it out. Now what we're going to do when this is rendered now you can see
that have come to combined. I've got an O map that's
actually being done. I've also got a color
that is also being done. Can see how flat this is, just the color, nothing else. And you can see that
this is the color, as you can see, doesn't
look like anything good. This is where it looks like
all they're brought together. Now, if we go back
now to compositing, I've come back to
my compositing, you will see we have,
we have thin color. If I plug o in, you're going to get
something like that. Plug my diffuse color in, you're going to get
something like this. Now, let's fix all of these. First all I'm going to do is I'm going to
just pull this out. This is diffuse. Now with the diffuse, maybe it's got a lot of noise. If it has the noise, bring that in t that in there. Thinking about it. Let's see if it actually does anything. I'm just going to
plug it in here. You can see it has actually done some work on
the actual noise. So let's plug it back
in. That's good. Now let's come in now and
do ambient occlusion. So I'm going to press shift D, and then I'm going to join in my ambient occlusion and I'm going to put
that in the image. We're going to noise
the ambient occlusion, let it load up, and you'll see this looks tons, tons better now As you can see now looking
really, really nice. Now we need to have a color ramp on the
ambient inclusion, because we need to be
able to alter some of it. What I'm going to do is I'm
going to just pull this out. I'm going to bring in
a color ramp shift. This will give us control
over the ambient inclusion. Now if I drop this in, can
see now I pull this up, let it load up, then we will get some work done
on that. There you go. Now you can see how much ambient occlusion
we can bring in. Now sometimes what I tend to do is rather than go
through the noise, I'll put my ambient
occlusion straight into my color ramp and it's
going to work out much, much faster than when I
bring this up and down here. You have a lot more control
over how this looks. You see now we've got
a lot of ground X. Can also bring in
another one down here. This then will
give us microtlts. We can also make this a
little bit darker as well. These are like the
midtones area, so I have a click on there. We've got a lot of
mid tone variation. Now I'm going to turn
this down a little bit, but now we've got
some mid tones, we've got some dark areas. And I think that is going
to look pretty nice. Now let's plug in now this into let it think about it
and load it up. There we go. Now we've got our color, we've got our ambient inclusion. Now we need to basically
overlay everything, multiply, everything I'm going
to do is I'm going to multiply these two, the Color and the Amc shift. Let's go to, we should
have a mix there. Let's put this multiply there. It is going to do now, I'm going to drop in my overlay, my overlay, my image.
Let's pull it over. Drop that into here, will do is put the
ambient occlusion in here. I'll plug it in. All right, let me think
about it when it loads up now could have a lot
of ambient occlusion. As you can see the low,
nice that image is looking now you can see the difference
that it's actually made. Now let's turn down this bit. We'll prey on No 0.8
Turn it down a little bit and then we'll take away some of the ambient
occlusion as you, because it's probably a little bit too much ambient occlusion. Let's put it down
a little bit more, not 0.9 Now what we'll do is we'll work
on our actual color. We can bring back
some of that color. Now the way we're
going to do that is we'll do an overlay. I'm going to do this one.
This one is my color here, as you can see, diffuse color. I'm going to bring
that up there, and what we're
going to do is I'm going to make another
one of these. I'm going to shift
that in there, but this time I'm going
to have an overlay. Let's go down, put
it on an overlay. And what we'll do then
on the next lesson, is I'll show you
how to bring back some of that color
if you want to. But you can see now it's
looking really, really nice. All right everyone,
let's save out our work. So file Dave, and the best thing is this is not even the best render
we're going to get. So we're going to do a better
render than this as well. All right everyone. So
hope you enjoyed that. Stay on the next one.
Thanks a lot. Bye bye.
66. Final Render: Welcome back everyone. To blend, it's run real engine five, the complete beginners guide, and this is where
we left the art. All right, so now what
I want to do is I want to do the color. So this color here is
going through a Noise. I'm going to drop this
then in the bottom of A. Then I'm going to do is
I'm going to plug in the ambient occlusion and
the color already there. Let it think about it. And then let's bring some of
this color back. There we go. Now let's drop
this all the way down. And you should see
that it's on overlay. So that color should come
back through as you can see. Now let's see what
this looks like. If I bring this up open, it brings in that color a bit. I think I'll tone this
down a little bit. I'm just making
sure I'm going into here and I'm just going
to lighten this up. So what I'm going to
do is I'm going to pressure day search RGB. He got that in. Let it think about it. Now I can lighten it up on the colors. If I come in, bring this up
here, let it think about it. We should get some of that
color coming through. There you go. Now we've got some really, really beautiful color. Now what I'm going
to do is I'm going to I think we'll bring down this bit when that's brought some of that color back
and then I can just maybe maybe tone
it down tiny bit. Yeah. I think I'm happy
with how that looks now. Moving on, what else
can we do with this? Well, the next thing
we can do is we can actually sharpen
up the image. What I'm going to do
is I'm going to look for a filter filter. And at the moment this is on soft and we don't
want that on soft. And what we want it on
is diamond sharpen. And I'm going to put
it on diamond sharpen. And what I'm going to do is
we're going to drop this. There's going to come
up loads of way, way too high as you
don't want that. What we're going to
do is put this on. Not 0.4 What that looks
like it, think about it. Probably still too high. It's probably too
high resolution, so let's put it on 0.2 if we
only want here a little bit. Let's see what that looks like. Also, with this, you're going to have to
probably come in, turn it down a little bit, because it probably will
be way, way too shop. Now the final thing we can
do is the whole scene. So shift a search RGB, we're going to bring
in an RGB curve. And this then is going
to take all of this from basically change our
scene to how we like it, so we might want it a little bit lighter or a
little bit darker. Let's come in,
lighten it all up. There we go. Now you can
lighten up all you've seen, you've got a vast
control over it. Turn this down a little bit. What I'm going to do is I
want to see the part in here so you can see this do not as visible
as I'd want it. What I'm going to do is
I'm going to come maybe to my color ramp and I'm going to turn this part or
this part down. So I'm going to pull
this back a little bit, let it load up, see a little
bit more light in there. That's not really done that. Instead of doing that,
what I'm going to do is tone this one
down a little bit. Just a tiny bit. There we go. We can see a little bit more
in there now as you can see. All right, so I think now
this is pretty much perfect. So now I'm going to do is
file if I'm my work now, we're going to go back
to modeling finally. Now what we're going to do
is we're going to come over to our cycles render. And what I'm going to do is I'm going to show you the both ways. So first of all I'm going
to turn off the turbo, I'm going to come
to edit references. Turn off the turbo that down. Now we're going to
do is I'm going to show you how to render
it a bit higher. If I put this on, let's
say 3,000 samples, so the minimum time limit
zero disables the limit, I don't on this on also
the noise threshold, if you put this up higher, going to give you a
much cleaner image if I put this on No
0.1 for instance. Now I'm going to do is
I'm going to render this. I'm going to come
to render image. You'll see now when
I render this out, should take much, much
longer than it did before. And you can see it's rendering
it out 3,000 samples. As you can see, it's
going to take its time, I think once it gets
to the bar at the top, and we can see also the time, 20 seconds at the moment. You can see this
is what it looks like, you know, isn't it? Then we'll do all of the calculations for
the compositing, which it is doing now, and there is, that's what
you end up with. That's a really,
really nice image. Now let's show you
the other way now. So I'm going to close that down. Then what I'm going to do
is I'm going to come to edit references on my turbo. Click that off and
now I'm going to do, I'm going to put this
onto file output. I'm, I'm going to put
samples up to ultra. I'm going to turn
down the very dirty. We don't need that on anymore. Then what we're going to do is we've got some transmission. We've got some
transmission on there. We've got a little
bit of emission because we've got it
on our water here. And then we've got
subsurface scattering. But we haven't got
any of that anyway. Now, we don't need any
interior lighting, we don't need any animation, we don't need any real glossy. And we can enhance the
transmission as well. Okay, so everything now
is pretty much done. We haven't got any
volume in the scene, any fog or anything like that. So now I'm going to do
is I'm going to turn, where is it my render
on 3,000 samples. Let's put it to 4,000
Then let's go to render. Let's say file first
render and we go, let's wait for it
to start rendering. Hopefully, let's see
what this looks like. Now you can see much slower in the rendering because taking
in a lot more detail, now it's actually creating
a lot more detail. It's actually spend a lot longer on sampling each of
these little tiles. Give us the best view,
you can still see. We've got a little bit of noise. Let's have a what we
end up with after this, we should end up with
a nice crisp image. We can even turn
this up a little bit higher as well. Finish. Once it's finished we'll
have a good look at it. It's done the noising now
it's doing the compositing. As you can see here, the
image that we end up with, this is what we end
up with, really, really crisp, nice image. Now you might want to
come in and just tone down. Let me have a look up. Tone down, so if you
come to pumps in, you might want to tone
down the sharpen, you might want to tone that down a little bit. Nice spare image. But actually I'm thinking
this is a really, really nice image and not a lot of really
need to do with it. So now what we actually do with this is this is
going to be now send through to Luke
and he's going to show you the next
part of the course where you'll actually be setting this up ready
for Unreal Engine. Sending it through to Unreal. Getting everything
set up in there. He's going to show you
loads of tips and tricks. And once it's in there,
you're going to have a final render of Unreal Engine
in Unreal engine as well. With all the environment,
all the trees, soils, rivers and all
that sort of good stuff. So I hope you really enjoyed
this part of the course. And if you're only doing
the blender course, I hope you enjoyed
this part even more. All right everyone. So I
hope you enjoyed that. Happy modeling everyone. And I'll see you
on the next one. Thanks a lot. Bye bye.
67. GLTF Blender 3D Scene Export: Welcome everyone to Blend
the Toon real engine five, the complete beginners guide. And the last lesson,
you finished it off with Neil by setting up a nice environment
and just making sure that everything looks nice
for the render set up. Now we're going to go ahead and actually set ourselves up for the export off to the
unrelentin part basically. So let's go ahead and
get started first. First I'm just going to go ahead and go out of the
rendering mode. I'm just going to go to
the default Material mode just to make sure that I'm
not stressing over my GPU, just my computer in
general doesn't need to compute everything in
regards to the scene. And I'm going to
go ahead and see which parts I want
to export out. For example, I don't
really want to export out the platform
and the water. The reason being is
that we're basically going to be setting
ourselves up with a new scene for the hut. Let's go ahead and get
things out of the way. We're not going to
delete it, We still want to keep it within
a blender file. We just want to make
sure we hide it. So the easiest way for
us to do that would be to just simply select
one of the objects, click H, and that
just hides it away. If we were to look within
the top right hand side, you can see that
actually just hides it basically clicks the
eye off the object. We're going to go
ahead and do the same for these bottom
pieces as well. We're just going to
make sure that the hut is being left as is. Like best thing
would be to maybe just expand this a little
bit and scroll through it. And I'm just making sure that everything
is set up nicely. Yeah, there's nothing
else that needs to be hidden away.
That's good for us. The next thing that
you need to be checking is going to
be just to double check that every face is
facing the right way. You already pretty much covered it with Neil
in regards to that. But it's best to double
check it just in case with just object basically, before you're exporting
it out to Unreal Engine. Unreal Engine itself
is not going to be rendering out both
of the sides and instead it's just
going to render out just basically one side to save up in regards
to the performance. The easiest way for us to check that would be to
just simply go on the top right and just make sure that we have face
orientation enabled. Then we can just scroll
through and check out it looks in regards
to the roof itself, you can see that one side is
blue, the other side is red. That's okay in this
particular case because the reason being is
that we are going to be setting this up as a separate
type of material which is going to have two faces enabled in regards to
the material set up. We're going to come back to that later with an unreal
engine itself. It doesn't really matter
in regards to that. Yeah, the rest of the
object looks quite fine. Let's go ahead and keep it. I'm going to go ahead and go
out of the face orientation. Like the final thing
that we need to do is just pretty much drag it
across the entire section, like so we're going to
select the entire thing. And actually one more thing, in regards to the
top of the roof, we need to make sure that it is separate as a
separate object. I'm just going to
make sure that it's only the roof that's separated. The easiest way for us to
do that would be just to focus on the roof itself. So with this selection
within an object mode, we're going to
click on the slash. And this allows us to basically isolate
this entire object. And I'm just making sure
that no other objects are being part of it.
This is quite important. The reason being
is because again, we're going to set
up a new material for this type of a roof. Yeah, I think that's pretty
good is let's go ahead and select this entire
type of a machine hut. Let's go ahead and then go onto the file upper
left hand corner. Then we're going to go ahead
and go on to the export. And we're going to select LTF. Usually I prefer to do the FBX, but GLTF allows us to actually
export everything out, including the materials
that this object possess. It's a very nice type
of format to use, although it's not always the
best in regards to exporting because not every program
supports it properly. And even on real engine itself actually had some
issues before in the past, but now with the newer version it seems to be
working quite well. It gives us much more
options to set it up with, but we're going to
come back to that in a bit. Us things first. Let's go ahead and
go over the set up, the format itself, we're going
to keep it as binary GL B. The reason being is
if we hover over, it even says East support
the files over with this. So let's go ahead and keep it. And then as for
the other things, let's go ahead and
just go through them. We don't need Custer
copyright settings or remember the export
settings for now. We can keep it as is. I'll show you how to save
out your preset later. Let's go ahead and
go over the include. We're going to basically only include the
selected object, otherwise the entire
scene would be exported including cameras and
things that we don't want. Then we're going to make
sure that we actually, since the selected objects
are going to be exported out, we don't need to worry
about visible object even though we hidden
some of them away. These objects basically allowed us to just drag it
across and select this entire set up as we only need to have
selected objects. Then as for data,
we can keep it as we don't really need to
worry about these ones. In regards to the
simple freely set up, we might want to enable
custom properties. For example, in certain
cases where we have a sub naming for example, or some extra parts, but it doesn't really
affect the mesh itself. Moving on, we have
a transform stab. Let's make sure that this
is actually ticked off. The reason being is
that Unreal engine itself is also using that value. As you can see over here.
Similar to Blender itself, it also uses that
value for upwards. We basically don't need the y
plus up ticked on for that. Then afterwards
data, we've got to make sure that the mesh
is set up properly. So we're going to make
sure that the mesh has applied modifier
is turned on. The reason being is in case
we have some modifiers where subdivision or beveling, for example, subdivider,
it's important that these are going to be applied
right away afterwards. Otherwise, in case some
of the modifiers are just left as is and not applied
directly onto the object, they're going to
be basically not exported through to
the Unreal engine. Let's make sure that
this is enabled. Uv's. We're going to
make sure that the UV's are enabled as well, because we want the
textures to look exactly the same normals. We're going to make sure
that the normals are set well, then vertex colors. Although we don't
have vertex colors, it's better to just keep it on. In regards to tangents, we don't really need to
worry about that. By the way, Attributes, Loose edges, loose points. We don't really need to
worry about that as well. It's not going to
affect our mesh. Then going back to another
tab, to the material tab, we're going to go on
to the materials, then we want to make sure
that this is set to export, the image is set to Jpeg. This is the best format
to use in regards to this GLB format. Basically, there's practically
no other options actually. In this case, the JP four
quality should be set to 100 to make sure that there's no compression issues in
regards to our textures. Then we got ourselves
PBR extensions. This is mainly for if we're
using PBR specular by defaulto were using
the metallic PBR type of a set up with roughness
values and whatnot. So this is not applicable
to us. Let's go downwards. We're not adding any of the
lighting within the scene. We don't need to worry
about this animation. We didn't add any animation. But in case you were to have
animation within your scene, you might want to
consider having this on. What I would recommend you is in general with this
type of format, even to just have animation as a separate mesh as it
really helps you out in regards to just breaking the mesh apart and
making sure that there's no like artifacts or any sort of issues when
you're importing your scene. Basically. Yeah, because we're
not having any animation, I recommend you to just
stick these off licks, pinopping is before
we export it out. We're just going to go ahead
all the way to the top. There is something called
Operator settings. We were just going to click
on a plus symbol over here. And this will allow us to have a preset of this type of set up. We can just call it GLB, object Export,
something like that. It is really up to
you how you call it. As long as you know that
this type of a set up is for basically meshes and mesh
collections of environments. Yeah, let's go ahead and find ourselves a place
for the set up. A nice way of doing it would be to just use
arrows over here, for example, to just located
where you want it to have. But what I personally
prefer to do, actually I'll just show you
a quick, real nice trick, is if you go on
Windows, for example, you have a bar at the top which if we were to click on it, it gives you the full location. You can click control
C to copy it and go onto this and click control V. It's not necessary to notice, but it's my personal
preference in regards to when it comes to like
navigating and everything. So usually just keep
a folder of where I have my basically
project and whatnot. And going back and forth
through that really helps out when you just are able to copy the location
and just paste it in. And now we can click Enter and it will go into the set up. There you go. All
right, so now I'm going to just keep
the name as is. Yeah, let's go ahead and
click Export LTF 2.0 And it might take some time
depending on your computer and your processing
power basically, but by the end of it,
you should have yourself a nice Viking process
LB type of a format. And we're going to use that to basically import it into
our own real engine. Yeah, we're going to continue on with this in the next lesson. Thank you so much
for watching and I'll be seeing in a bit.
68. Introduction to Unreal Engine 5 and UI: Welcome back and run
to Blend the ton, real engine file.
Complete beginners guide. In the last lesson,
we finished off by getting ourselves a
nice export file, which we're now
going to be setting it up with an Unreal engine. Before doing that,
I'm just going to go onto Epic Games Launcher, which you should be seeing
something like this. If you're not seeing anything
in regards to this set up, make sure you go onto the
Unreal engine with in Epic games and you should
go onto the library. Within here you should
see engine versions. Within this Unreal
engine version, you should basically
get yourselves a 5.3 0.1 If you're
not seeing that, make sure you go and click
on this Plusimble over here. Otherwise, you're
not going to get yourself the setup
that you need. The reason we're using 5.3 0.1 If you were to click
on this Plusimble, by the way, you
should be able to get yourself the latest version. I'm not seeing the
versions because I already have them installed. So I'm just going to go ahead
and click X to remove it. Anyways, if we're using the 5.3 0.1 you're not going to be able to
use the tessellation, which we're going to be
using later down the line. But all in all, you
should still be able to get all the
set up required with the version of 5.2 as it
already has nine nite and most of the functionality that
we're going to be using within the set up,
this environment. So yeah, let's go ahead
and get right into it. We're going to simply
click Launch to open ourselves up with the
Unreal Engine Launcher. After a bit of a loading time, you should get yourself within the Unreal engine
project browser. This will allow, if you have any recent projects
that you worked on, will allow you to open them up. If you want to start
a new project. You'd go into any of these
other tabs and we're going to go onto the game tab and we're going to select Blank. The reason being is
because it allows us to get a very fresh type of start. Or actually, if you
would like to have yourself a project where
you're able to walk around, for example, within the scene, you could select yourself with a third person type of set up. It will still allow you to get a new level set up which
we're going to be setting ourselves up for the sake
of this type of a project. We're just going to
keep it simple and we're going to keep
it blank basically. And yeah, let's
go ahead and find ourselves a place
to save the folder. So we're going to click on
this pattern over here, but I'm going to find the location for where
we wanted to save it. I'm just going to
select it over here. Then the next thing that
we need to do is we need to select ourselves
with a project name. While naming the project, you can't have any spaces, so just make sure
you separate it with either capital letters or
underscores, basically. Actually, yeah,
we're going to just call it something like, yeah, underscore would
be something like that. You can't have the underscore at the start of the sentence, but yeah, you can use it
to separate the words. Final thing that we should
probably talk about is going to be about
the project setting. Make sure that we
have a blueprint. As usually that's
the right way to go. The target platform
is going to be set as desktop quality preset as maximum to get the best scaling. Then we don't really
need starter content or tracing for the moment. We can keep them off
for the tracing, we're actually going to
be using Lumen instead. We don't really need
tracing in this project. Lumen is basically
a lighting type of a set up which allows us to get a really nice global illumination
within the environment. We're going to talk a little bit in regards to that in a bit. But now though, let's
go ahead and launch a project and get
ourselves a nice set up. So this is what we're
going to see as a default type of a level. Unreligion itself has a lot of functionality, a lot of tabs, and a lot of overwhelming
information in general. To help with that, I'm going to go ahead and play a couple of videos that will help you to just familiarize yourself
with the program. Feel free to follow along, or if you're more familiar
with the program, go ahead and skip that
if you feel like it. Although I recommend you
watching it regardless. Since I do believe
that it would help in regards to better understanding
the Unreal engine itself. I'm going to go ahead and play introduction to Unreal Engine Y. Hello and welcome everyone
to Unreal Engine Five, basic tutorial video in
which we're going to introduce ourselves to the
Unreal Engine Five software. Unreal Engine Five is an engine which was firstly developed
as a game engine. However, these days
it's been widely used within other
creative fields as well, such as architecture
and film industries. But even with all the
versatility and design changes to appeal the other industries, a lot of the core design for the layout has been kept
as the game engines. Right now we're going to go
through the set layout so it would be easier to follow
along the future lessons. First things first,
we're going to start off with the
upper left corner, and within it we'll
find the Safe button, which we can use control
in S to save our project. This, however, will only save the current level if we're making changes outside
of the level itself. Let's say we're having a
material or an asset edited. We'd have a different window
that we're working on. And we'd have to save
this independently. So it would have a safe button
or we can click control S, and that would save the window that we're
working on only. So basically if we're working
with different window, we need to make sure
that we save that out. And then afterwards, if we're making changes for
the level itself, we need to save this
out afterwards. So if I were to change this, we can only have it saved by clicking control S
And saving it out, you have made a new level. You'd be prompted up with naming it and
selecting for where your location is going to be for the level after which
we have select mode. By default, you're going to
be within a select mode which you'll be able to use to make selections for
within your asset. You can also go ahead and use this to change it into
landscape, foliage, mesh paint, and other
types of modes just to change up your workflow depending on what
you're working on. But by default,
most of the time, let's say 80% of the time, you'd be working
on a Select mode. Moving on, we have
quickly add the project. This bottom will allow you to add more assets
into your project. The simple default ones
that you'd normally get within any type of
rendering software. Basic lights, shapes, and
such, can be found here. If you want to search within it, you can click on it and search
for light, for example. This way would be able to see all the assets with
light within its name. What you need to
keep in mind though, is that when you click on it, you need to make
sure that your mouse stays the same within
this icon over here. Otherwise, if I were
to, for example, drag my mouse to shapes and
then search for lights, you'd notice that it only searches it within
the shapes location. Whenever you're searching for an asset from within this bar, just make sure you keep the mouse table within
this icon like so. Next up we have an icon that
if we were to click on it, we'd be able to
have some options for creating blueprint classes. Blueprints work
similarly to a prefab. However, for the
sake of introduction to a real engine five layout, we don't need to get
into it too much. The next one, we have
a level sequence and massive sequence that we can add from this
button over here. This is used when
we're going to be needing to set up our
project to be rendered out. But again, let's move on
with the rest of the layout. We have a play button. This will just start
off the project. And if you have a third
person template for example, like I do, it'll just set off your character
to be played out. It will also start up all
the simulations and whatnot. So this makes it really nice to just check
out your project. And when we click Play, we get to be loaded
in within our level. And now we get to
walk around it and actually experience what's it like to be within
our build it level. We can jump around, we can run around the way
we want it to be. And it's actually
quite nice to see what we're like within
our own built level. We also have this
free dots over here, which if we were to click on it, we have some additional settings simulating the entire project. This will just allow
you to hit Play button, but without actually needing to lose control
over the edit mode. Again, we don't really need
to go too much into it. But basically this section over here will play and
stop your project, after which we have platforms. But this is only for
when we're breaking out our entire package as a game. We don't really need
to worry about this. Let's go ahead and
move on. After which we have a Settings button. This will include a settings like Project Settings
and plug ins, which can also be found within this upper left
corner over here. Basically, this just make sure that everything
is in one place. We don't really need to
go through it as they're usually not needed for when
we're creating or seen. Anyway, moving on, the Outliner. Outliner will have everything that contains within your level, so it'll have all the
assets within it. Right now, if I were to select any type of an asset
from within this level, like this one over here, it'll right away make a selection within
our outliner as well. After which we have detail. Step detail style will give you all types of options for
your selected asset. It'll include all the type
of information that it requires to be placed within
the world, for example. Firstly, we have transforms. This will include the
scale, the rotation, and location on this
specific asset. We also have the type
of static mash it uses, as well as the materials. Each type of asset will have its unique type of
information set within it, which can be found
from detailed stab. After which, if we go down
to the bottom left corner, we get ourselves Tu
drawer Arc plug log, and CMD quantum drawer
is by default, hidden. But if we were to click on it, we get it opened up. Now if we click on anything else outside of the
content drawer, by default, be hiding it away. We can also open up
the content drawer by clicking Control in space, You give us an easy access to where our files are located. The content drawer is
basically a file manager. You keep all your
folders, all your assets, for not only the level, but for the entire project
of the Unreal G five. We can also dock
the content drawer by clicking on the
button over here. By selecting it, we simply make sure that they're always going to be within this location. And even though we click
off the content drawer, it is still going
to be within it. Now we can easily
undo this step by simply clicking on a
disclosed minor tab. And we can open up the
contra and draw well, just like we used to like so by clicking control in space. The output logs
are pretty useful for whenever we want to
find out some information. If something is
giving us errors. If our work is not
focused on coding, we don't exactly often use this, so let's go ahead
and close this down. Dmd is useful every once in a while for whenever we
want to make a command. Right now, I'm not going
to go too much into it, but we can make use out of
it and do things like taking high quality
screenshots or getting a different type of view
within our viewport. Okay, so now we walked all
the way around our window, now we're finally
going to go ahead and talk about what's in
the middle of it. By default, could I get
ourselves a preview? Going back to the content
drawer within it, we need to enable
certain settings. By clicking this barn over here, we'd be able to view the type of different
folders that we have. Usually, I recommend
you to enable the Show engine content
and show plug in content. Get more out of our
Unreal Engine pipe. After you enable it,
you get yourself a folder other than a content
folder with Chest Engine. This will have all types
of presets and plug ins which we can make use out of and speed up our
creative process. Something to keep
in mind though is that this is not
part of our content. So basically this is already
within the Engine folder. If we were to change any
one of these folders, we'd basically be changing
it for Al Engine five. Meaning that even if you
create a new project, the things that we
change within it, within this section are going to be changed
throughout the entire, all the other projects as well. That is why by
default it is set to hidden to make sure that
none of the content that is set by Al
Engine five itself is changed in any way and messed up throughout
all the projects. But we can avoid this by
simply knowing that we can't change anything within
the engine folder itself. It's better to, whenever
we make use out of this content folder is by simply making a copy out of
whatever is inside. And then dragging it out onto your content
drawer just to make sure that all that we use is only set for
the project itself. This way, we can make as
many changes as we want without ruining the entire Unreal Engine five
content files. That is going to be
it for Unreal Engine, the UI introduction guide. Hope you got a lot out of it and will be quite useful to you going forward in the future for your Unreal Engine projects. And now let's get
back to the course. All right, I hope that the
video was informative. And now in the next lesson, we're going to continue
on familiarizing ourselves with the
entire project. And I'm going to play a viewport navigation
type of a guide, showing you what's actually inside of this window over here. But yeah, we're
going to continue on with this in the next lesson. So thank you so much for watching and I'll
be seeing it a bit.
69. Introduction to UE5 Viewport Controls: Welcome back even to
Blendeton Relenged five, the complete beginners guide. In the last lesson,
we let ourselves off by familiarizing
ourselves with the UI and just getting ourselves opened up with
a new project to work on. Now we're going to
continue on moving, and in regards to just familiarizing ourselves
with the viewport itself, I'm going to go ahead and play a quick video
in regards to that. Yeah, I'll be seeing in a bit. Hello and welcome
everyone to Unreal Engine five Basics Guide for
the camera motion. We're going to start off by introducing you to
the camera type of motions with in
Unreal Engine five in order to help you and
follow along the lessons. Easier to start off within the metal section
of the software, we have a perspective
camera view. By default, using this, we can move our camera around. The main thing that
you need to remember for when you're moving
your camera around is that by holding Alt and even
one of the mouse buttons, you'd be able to make
a certain motion. For example, by holding
Alt and left mouse button, you'd be able to rotate
your camera around like so by holding old and
middle mouse button, you're able to pan your
camera around just like that. Finally, by holding old
and right mouse button. If you were to scroll up
and down using this motion, you'd be able to zoom in
and out of your view. Alternatively, you can simply just scroll your mouse wheel and in or out of the
project like that. Now if you want to zoom in
towards the selected object, what we can do is if I were
to select this box over here, for example, I can
click the letter, It would zoom in right
onto the object. We can use this to rotate
our camera around and simply see on level with the object
selected as the center. If we were to select
a different one and click with zoom in onto asset. And if the act is larger, like this ground playing
over here, for example. If we were to click it would
zoom out and make sure that the camera view has the entire
selection within our view. This is pretty good
for whenever we want to zoom in
onto our selection. However, you do
need to be careful. If, for example, were
to select a sky and click it would zoom
out all the way, and we don't really
want this to happen. Make sure that before
clicking though, your selection is not
something like a sky sphere. Now if you want to have
more control over camera, and let's say you want it to be similar to a first person game. What you can do is
by holding Lick, you'd be able to enter a camera movement mode within
your editor right now. If I were to hold Lick, I can simply rotate
my camera as if this was a first person a game. Now what's nice about
it is if we were to hold click and use WASD, we'd be able to move
around our acidic. So by holding Lick
and would be able to go forwards by holding right click and we can go backwards. A to go left and D to go right. Also, if you want to go up
directly or down directly, you can use the combination of Q and by holding right mouse
button and holding Q, I can directly
dissend outer level. Similarly, by holding
right click and holding, we can go up the
level just like that. Now if the camera is a little
bit too fast or too slow, we can make use of this icon
in the upper right corner, which says the camera speed. If we were to click on it, we can use the slider over here to set the speed of our camera. For example, if I were
to set it to one, I'd have a really slow motion
and we'd be able to have a really fine control over where our camera with an
editor mode is. We were to set it up to eight, we'd be able to go really fast up and
down, just like that. But by default it should be
set to something like four. There is a value underneath
it which is set to one. If we were to set it
to two, for example, this will multiply
our four speed to be all the way to eight. Right. Now if we were
to go up and down, you'd notice that
it is way faster. This is quite useful for when we're working
with different scales. I personally only
recommend you to use this value or when you're
going up and down in scales. For example, if
you're working with planetary skin of scaling, we want this to be increased
to for example, like 14. And then this way we'd
be able to go all the way out real
fast out of a level. But by default keeping
it at one and simply scaling this up and
down will do just fine. Now within the perspective view, we also have a couple of
other perception modes. Those would be seen on the upper left corner off the window for
perspective camera. Right. Now we have set
it to perspective. We can change those to be top, bottom, left, and right. What these would do is
basically it would help you get different types of use for our level right now
because I'm set to bottom. If I were to set it to left, if you don't see anything, we can always make use out of the letter and go back onto
the level just like that. This is quite useful
for whenever we're creating environments
and assets. And we just want to make
sure they look good and proportional to rest of our level and from
all sides of angles. Again, by default, this
will be a perspective. If you do want to change it to be into multiple cameras though, and you want to see
multiple of them at once, we can click on the upper right. Within our view mode
button over here, click Maximize or
Restore viewpoint. This way we get three
different viewpoints, all from which are different
types of perspectives. Now other than the perspective, all the other ones will by
default be set to wire frame. If you don't want
this to happen, we can always set
them to be lit, especially when
designing a level. This a view might be quite handy to go back onto one view. What we have to do is locate our perspective camera and click on this button over here. Within this perspective view, we can also change the way our camera perceives
the entire level. Right now it is said
to be default of Lit, which means that all
the shading would be seen with proper
shadows and whatnot. In order to change that,
we'd have to click on it. If we were to, for
example, select on Lit, which would show
you all the level without any types of shadows. We can go ahead and do that, we get to the result. It's also something
like a wire frame, which you'd see in other cameras if we
were to click on it. We see the types of
geometry that we'd have. It's quite nice to know,
especially if you by accident, sometimes lick on one of them and you don't know
how to get out of, you can always go on this
button over here and select Lit After which we also
have show Icon over here. This one will get you
different types of visualizations for your
respective camera. But what you need to know though is if you have something
that's a little bit off, like for example, I
have my grid right now, which is barely visible. But is often quite useful for when we're
creating our level. But if this is not
visible, for example, if I have this turned off with this button over here
and I want it on, but I don't know which
one exactly it is. We can always go ahead
and click Use Defaults. And this will bring back
all the selected defaults that is usually set up
by the default template. And that's pretty much all there is to the camera controls. I hope you enjoy the video. Now let's get back to the course and welcome
back everyone. Hopefully, we're able to learn some interesting things in regards to navigating
within the view part. Now we should be able to just go in and navigate through this. Just a quick tip. We can not only just change the
camera speed through here, we can also just
scroll our most wheel. Just zoom in and out. In regards to the set up before. In the past versions, they used to have a camera speed set up a bit differently, where the mouse wheel whilst moving using right
click and W keys. Mouse wheel would have its own settings in
regards to the speed, but now as you can see in
the top right hand corner, we're changing the speed
whilst we're moving. That's pretty nice in regards to just working with larger
or smaller terrains. This is a nice type of terrain, but we're going to
set ourselves up with our own custom type of terrain, which is going to be
a very nice type of, a very simple type
of one that's just going to work really well
within our hot environment. Yeah, we're going to go ahead and do that in the next lesson. Thank you so much
for watching and I'll be seeing in the van.
70. Basics of Unreal Engine 5 Scene Lighting: Welcome back. Ever run
to blend the turn, real enter pipe the
complete beginners guide. In the last lesson, we
left ourselves off with familiarizing with the entire
setup within the viewport. And now we can really control ourselves within the
viewport itself. But we don't want to just do
anything within this level. We want to create our own
level in regards to do that. In regards to doing
that, what we need to do is we need to create
ourselves a new scene. For us to do that, we're
going to go ahead and click on File on the
upper left hand corner. We're going to click
on the new level, and this will give us
a couple of options. We want to just simply
create an empty level. There is an option to
create empty open world, but this will allow
us to just work with partitions and whatnot to set
up for that kind of case. We just want to create
a simple environment. We don't need anything else, and we're going to
work our way up in regards to setting
everything nicely. So let's go ahead and do that. We're going to click
on Empty Level. We're going to click
Create, like so. And you can see that
it is pitch black. Before doing anything though, I recommend you click
and control S to save it regardless of
whatever level you're having. The reason being is that if you were to start creating
something within this level, nothing is going to be saved. And sometimes it tries
to save out level, and it gives you
an error because there was no file prior to that. The best way of fixing it is
just to make sure that you save out the new level
that you just created. And when it automatically
saves everything out, it'll be saving
within that file. So let's go ahead and name this. You can call it fishing hut
or something of the sort. It really is up
to you in regards to the level with
the scene level. Just make sure to not have any spacing in between the
name as this is the way a real engine works to basically everything
within engine. Yeah, we got ourselves
a fishing hut level. We saved this, and as you
can see, it's pitch black. For the sake of the examples and explaining everything
the way it works, I'm going to quickly
create ourselves very primary shapes and then we can work our way from there. So what I'm going to do is I'm going to go onto the
upper left hand corner. We're going to quickly
add the project. And then there is an option
called Shapes, the Ego. We're going to go ahead and
go into shapes and we're going to add a
single cube like so. And then we're going
to go again onto the settings and
add a simple plane. We've got ourselves
a plane and a cube. The plane is not quite visible. The reason being is that
we need to upscale it. So what we can do is we can click R to go into
the scaling mode. You can see the gizmo changing. The plane is still
not being ticked off. As you can see within
the right hand side, the plane is still selected. Just make sure to
have it selected and then use the part in the middle. Seems like my speed of the camera is a
little bit too high. So I'm going to
click to make sure my camera is back onto the selection, which
was the plane. This is going to
be in the middle. I'm also going to take down the camera speed to
a reasonable value. Something like two
should be. All right. Actually, it seems like there
is a bit of an issue for some reason in regards to the way the camera speed
slider is working. I'm not sure why
that's the case. We can always use the mouse
wheel to scroll up and down, to change that up, just to make sure that we
have a nice setting. Anyways, going back
to the scaling, let's go ahead and
upscale this quite a bit. And you can now see the
cube disappears actually. And we can click to just move this entire
set up downwards. You can see the blue
arrow over here. We're going to
move it downwards. So it is very similar to what you saw within
Blender as well, so there's not much to change. And now we go to sell
this type of a set up which is not visible by
anything at the moment. The reason being is that
we need to add a lot of pings to the environment
to make it more visible. Spin spurs is what
we're going to add, is we're going to click
on a plus symbol. We're going to go to
the light section and we're going to add
directional light. Directional light as you can
see over here right away. Add this type of a gizmo which actually spawned
underneath the set up. I'm just going to drag it up
real quick and we can see ourselves with a gizmo
that's looking pretty nice. And you can see it
because the shadow is being portrayed over here. You can see the light
source is basically coming from this direction.
That's pretty nice. Now, as you can see, the shadow itself is
actually quite dark. Although this is set up
with Lubin technology, which basically
gives us the fault, a nice global illumination, This is still not
quite realistic. It's not going to be
quite as realistic if we look at it from a
distance and whatnot. The reason being is that we
need to have something in the back room to get more lighting basically
within the scene. So for us to do that, we're going to click on a
plus symbol over here. And instead of going through
all of these tabs over here, we're going to make sure we keep the mouse at the
top of this tab. Then we're going to search
for sky atmosphere. So we can just type in sky and
we can add sky atmosphere. So the next thing
that we want is we want to make sure it's not
completely pitch black. And the way we're going to do that is we're going to add some, we call exponential hide folk. This will also will also
help us in the future to get some distance type of a transition in regards to
the color grading basically. We're going to talk a little
bit about that in a bit. Let's go ahead and
just simply add and see what it does to our scenes. We're going to click on
this ad symbol over here. Now what we can do,
instead of just going for all of these
settings over here, we can keep our mouse
at the top of the tab. In this case, we can
just search it for fog, exponential de fog. We're going to select this one. The reason we wanted to buy
the way to keep our mouse at the top is
basically because the, if we, if we were to have it somewhere
within one of the tabs, then it's only going
to search for the tab. As you can see over here, I'm searching for light
within cinematic tab. It's not going to find
me any of the lights. That's pretty much how it works. We added ourselves
exponential height pok, but as you can see over here, it doesn't really do anything. And the reason being is that it basically
needs a couple of parameters tweaking by default it's not going to give us much. If we were to go onto the
exponential height Po, then go onto its
details tab over here. We can simply scroll down
and we can increase the, for example, fog density
to see what it does. It's still going to give us
this type of background. The reason being is
that it actually needs to be set up
with the environment. There is a ways of doing that, but for now we're
going to just learn of the basis of the
exponential high fog. For example, we want to
increase fog in density. We can simply scroll it
up, which by default, maximum is going to be 0.05 We are going to be able to change that up to something
like ten, for example. And we can see the
difference that it makes in regards to the way it
works within the scene. If you want a higher value, basically you can write it
down to yourself and you're going to get yourselves
a nice higher value. You can also click on this
button over here to reset a value to default
type of a set up. And it's going to
bring you back. Now though, we're not
going to be touching exponential debug. We just need to make
sure it's added onto our scene and we're
going to basically learn how to make use out of it in
future lessons when we have a more of an environment set up because right now it's not
going to work quite as well. The next thing that we
need to do is we need to add ourselves
a Sky Atmosphere. Let's go ahead and
do that. Search for Sky, sorry about that. It's going to click on
the Search for Sky, and there you go,
Sky Atmosphere. We're going to click
on it. And you can see the way it works. It gives us a very
nice type of Ceta. By the way, if we were not to have exponential height fog, it would just give us a
black type of a plane. So by having
exponential hight fog, it basically it gives us a
nice transition as well. So make sure if you're using sky atmosphere to use it
with exponential height fog, our voice is not going
to work quite as well. That's that the next
thing that we should be talking about is going
to be volumetric clouds. By default, the sky, if we were to just add it with the sky atmosphere is
going to look quite plain. We want to add a little
bit more of a detail. If we were to click on the plus, we're going to search for
sky and we're going to get ourselves a
couple of clouds, actually, sorry about that. We need to look for, not sky, we need to
look for clouds. So again, I need to make sure my mouse is above the
tab. So there you go. We're going to go ahead and
search for volumetric cloud. Add that in, and right
away we're going to get this type of a result. We're going to be
tweaking that in a bit. But now though, we're just going to make sure that we have a nice type of a
preset for us to use. We already got
ourselves nice, light, nice atmosphere, but we
still don't have ourselves, everything quite as well set up. The reason being is that
we don't have it set up. In regards to the
basically embed inclusion looks quite bright outside
but as you can see, the shadows that
we're getting from the light is actually
quite dark over here. The reason we're
going to fix it is basically to make sure that it looks a little bit
more realistic. Way we're going to fix
it is by going into adding to the project and
searching for skylight. Were Search for
Sky, there you go, Skylight, we're going
to click on it. And you can see the
type of difference it makes without the skylight. And with skylight you can
see it actually gives that ambient type of lighting within the shadows within
the darker corners. And it just makes it
look so much better. The only thing
though is that once we start moving the light, it actually updates
quite nicely. But to make sure it updates
properly and everything is set up with dynamic
type of a set up, what we need to do
is we need to make sure that it is set up with a. If were to go onto
the skylight itself, it is set up with the
mobility of movable. The reason being is that if this is not set up with movable, it's just not going
to be dynamically updated with the
lighting overall, It's basically not
going to work as well. I actually recommend
you to do that for every single one of those
objects that we created. Basically, for the
lighting set up direction, lighting, let's set
it up as movable. This by default should
be set as movable, as is sky, atmosphere, movable. Sky, light, movable as well. Yeah, everything is movable. Now the only thing
that we need to do is basically grab all
of our objects and basically have it in a one chunk to make sure that it's not just scattered like
this in between objects. Because as you can see, cube and plane is set up as
different objects, but it's still
like in the middle of these because
the reason being is that the outliner is actually set up with an
alphabetical order. It's going to be able
to basically just go in alphabetical order and the plane as you can see in the middle. For that reason yes, what we're going to
do is we're going to grab an object at the top. We're going to hold
shift, we're going to grab the object at the bottom. This will grab
everything in between. Now we can simply hold control
on plane, tap on Cube. And we have all the
lighting source, the things that affect
the environment with in regards to
lighting selected. We can now click on this
plus symbol over here, which will create or
sell us a nice folder. The only thing that we need to do is just simply rename it, which we can do so by
simply double click on it. Si to work the alternative way. Oh, they're going out, works. The alternative way for
that would be to just right click, elect,
edit, rename. Or as you can see over here, the easiest way would be
to just simply click two. That's usually my way
to go for renaming it. Think it's the same shortcut
in Blender as well. So it's a very useful
type of a shortcut. By clicking two, we can
just rename it to lighting. Click Enter, and now we
have ourselves in nice set up for the entire environment.
That's going to be it. From this lesson,
we got ourselves the basics of what
environment needs. Within Reengine, we're going to move on
into creating terrain. So we're going to leave
that for the next lesson. Thank you so much for watching and I'll be seeing in a bit.
71. Terrain and Water Base Setup: Hello, welcome back to Blend
The Turn Real Engine Five, the complete beginners guide. In the last lesson, we
created ourselves a couple of assets which allows us
to light up the scene. So we created
ourselves, the clouds, the directional light source, which gives us some
nice shadows over here. We also got ourselves
nice atmospheric lighting with some help of
Exponential hight fog and of course the skylights. All of these are necessary
for the basic set up of the scene. That's that. We also got ourselves some really nice type hop cube and the plane which we're now going to go
ahead and delete it. I'm going to hold shift
select both of them like so. And just delete it. Just
like that actually. That was the skylight.
Sorry about that. This was the sky
atmosphere which gives us that blue tint
over the horizon. The next step is going
to be setting ourselves up with a nice terrain
for us to read that. We're going to go on
upper left hand section. We're going to go from
the selection mode to the landscape like so. This is giving us a nice grid. We can just sum out
and even see how large this is in comparison
to the cubes we had. By default, it's going to
be giving us a very nice, great type of a set up. If you do want to have a
larger type of a set up, we could go onto the components section
over here and just add more detail through
just having eight by eight. We could have more
because right now it's all those larger
green squares. These squares over here, actually just basically
eight by eight, this is going to be what's causing us to get
this type of result. The quotes over here
which says 63 by 63 are actually the ones that are going to be in the middle. The smaller squares,
it should be 63 by 63, which will give us a nice value. If we were to increase that,
it will also increase, for example, the
overall terrain. Just keep that in mind,
the scale itself. Let's go ahead and
keep it 100 by 100. By default, the main
thing that we need to know is in regards
to setting this up, it is going to be
simply if we were to scroll down over here. If we were to scroll up, it's going to be at the top enabled edit layers that need
to be ticked off. The reason being is that
we're also going to be adding a water layer that needs to just have
this option ticked on. Yeah, that's pretty much it. We're going to go
ahead and not worry about it too much in regards
to the rest of the settings, we're going to click Create. That's going to give us a
very basic type of set up. With this, we can now have the option of sculpt over here. We can salt, we can
raise up the terrain. We can also hold shift
and raise it down. We're going to go back
to this in the bit. Going to go ahead
and click control, because what we actually need is we first of all need
to set ourselves up with a body of water within
Unreal engine itself. There is a very nice plug in which needs to be
actually enabled. We're going to go onto
the Edit tab over here, Search For Plug In Tab. And you should get yourself a very nice tab that
will allow us to go onto the search bar on
the upper corner and just type in
water by yourself. Water experimental, although
this version is 0.1, has been like this for a while. I don't know if you're
updating it or not. The water itself and the water material is actually
really good for any scene, whether it's stylized or not. Let's go ahead and enable it. Click Okay and then make sure
to just restart the engine, which you basically get
prompted up to do so. Anyway, let's go
ahead and do that. I make sure you have the levels
saved up, just like that. After getting the
version restarted, the engine restarted, we
can search for water again. We can see that it's
actually right now, enabled. That's good for us. Let's go
ahead and close this down. Let's make sure to get
back onto our scene. Just double click on the
fishing hut level so to get back onto our environment
now the way we're going to set ourselves up with a nice type of a
scene within here with a nice water pond is we are going to just simply click on a complex
symbol over here. Now we can search for water and we're going to find
ourselves water bodies. The one we're looking
for is actually going to be called Water Body Lake. There you go. Were to
just simply click, this is what it's
going to give us. By default it's actually
of the terrain. We're going to make sure
that we lower this down. You can see that it actually
makes the entire terrain confront conform basically
to this overall set up. We're just going to put it down to the ground level,
just like that. Now let's go ahead and talk about the way this set up works. If you're not able to
bid the way, move it, just make sure to tap on
the icon in the middle. And that'll select
the water body. Then you can move
the entire section. We're just going to move it just a little
bit to the side. Now we've got ourselves
splines to work with. Let's go ahead and talk
a little bit about that. We can simply grab
one of the points. We can move it around so we can make the lake
much, much larger. And then if we want to add
a bit of an extra shape, what we can do is we can click on this spline and select
a blind point here. This will give us a nicely
point extra to work with, so we can create a somewhat
of a squash type of a look. I might even add a
bit of an extra here. The overall set up that we're going to be
working is basically, we're going to go and use this section over here
to have a nice hut. And the rest is going to be
mainly visuals around it. In this section over here, we don't want to
use too much space, actually, we're going to
work with a small area. The rest of this is actually going to be
just four visuals, for example, from a
distance and whatnot. And that's going to be
looking pretty nice. Yeah, what I mean
by just making sure that we have an overall
type of a set up for where we think the house is
going to go for the fishing is we basically want to
make sure that this area, the section where we have
most of the detail in regards to the overall set
up for the water, basically right now, we also can use the splines next
to those blind points. There's a couple of points
on both ends, basically, that allow you to
control the way the blind interpolation works by simply just doing
something to extreme. You can see it gives us
some interesting results. We don't want to do
anything too extreme, but we want to just let around
with the shape a little bit and get ourselves
something like. So I think that's
looking quite nice. We are also trying
to get something more of a straight forward. So the reason being is that we have a nice straight
up of a platform, so we want to make sure it
goes nicely with one another. In this section also seeing
some water also over here. For some reason I'm
just going to grab this water and just
slightly uber it like, so it's going to be
quite all right. We don't need to worry
about the terrain itself in regards to the way
it's being interpolated. The reason being is that once we have the landscape
itself selected, we can go onto the
landscape mode. You can see the actual
reason we needed to use the edit layers ticked on when we
created the terrain. We can go on to scroll
down a little bit. There is a section called
Edit Layers at the top of it, you can see that
edit layers is now being applied on top
of the layer section. If we were to start
editing over here, you can see that it
doesn't actually work in regards to the editing. We're going to need to
fix that in the bit, which is going to
be quite simple. We just need to go
on top of the water, right click and select Create. This will create a layer
even above the water layer. Now if we were to just sculpt, we can see that it
actually sculpts within the water itself. And it doesn't have
any constrictions in regards to where
the water displays, but that's what
we're going to use in regards to the
sculpting of the terrain. This is going to be layer one. We can keep the name
as is actually. Before doing that,
we need to fix up the way this water
looks like because as you can see over
here, it's stylized. It's not something that we
need to set ourselves up with more of a serious and
more realistic looking type of environment. We're going to be
needing to adjust that. But actually, there is a lot of things to talk about in regards to the water set up itself. There is a lot of options. I will actually show
you scrolling down all the way over here or to
just select water material. There is a lot of options and it's a
little bit overwhelming. So we're going to go ahead and do that in the next lesson. So thank you so
much for watching and I'll be seeing in a bit.
72. Fixing Water Color for Realism: Welcome back everyone
to blend it. Turn Real Engine Five, the
complete beginners guide. In the last lesson,
we set ourselves up with a basic water body, and we're going to
just simply switch up the color a little bit to make sure it looks a
little bit better. And then afterwards,
we're going to bring in finally our fishing hut. Yeah. Before that, we need to make sure that this water is just not going to give us a
completely different style. It looks way too stylized. Yeah, let's go
ahead and fix that. We're going to go ahead
and select the water. Then within the detail stab on the bottom right hand corner. We're going to have
a lot of options. One of which is going
to be if we were to scroll all the way up, there is an option for starters, it's a little bit too deep for a water, for we're trying to do. We're going to search for
depth within the settings and scroll all the way up until we get these
settings over here. So yeah, we're going to
change up channel depth. If we're going to change
this to something like ten, we can see what it does and
basically creates us a swamp. It's a little bit too thin, but I just wanted to
iterate on what it does. We have two options actually. Advance fixed water depth and terrain curve settings,
channel depth. Make sure to use the
second one over here. So I'm just going to type in an option of something
like 200 that gives us a much better looking type of a water for this
type of depth like. So the other thing that we want to change is
actually going to be within the same area. We just need to
delete the depth and actually maybe
find it ourselves. We would be better this way. It's going to be the
same terrain actually, I will just use my
mouse and just make the detail a way larger so
we would be able to find it. Yeah, there you go.
Terrain curve settings. If we were to enable it,
that's what we were changing. We're also going to change
the curve of ramp width. We're just going to change, go ahead and change
it to something like 2,500 Let's see how
this looks like. And it looks way less steep. And that's actually
going to be a bit better for us in
regards to the set up, otherwise it was a
little bit too much. We can still change that with our terrain set up afterwards, which I'll show you how to do. But all in all, this is going
to work out much better for our steepness going back in regards to the
settings, there is a lot. We're not going to
cover every single bit, but we're just going to
cover the basics of just controlling the water for our entire terrain,
for the environment. Next thing is going
to be the color, to just make sure that this water is a bit
more realistic. If we were to scroll
all the way down, we have a water material. This is exactly what
we need to change. But before changing that, what we actually need to do
is we need to just click on this button over here to
find the content itself. To find the material instance, in case you're not able to
access this type of a folder, just make sure to
go to the settings with content browser and just enable show engine content and show plug in content
with Posadas enabled. You should be able to
get into this folder, which is the default
engine type of settings. We don't want to change this
material itself because if we were to change it
and create a new project, it's actually going to change this entire material every
single time, basically. If we were to save out changes within this material instance, it would affect a
project as well for us to make sure we don't
have that type of an issue. We're just going to select this. Hit control C, Control B. Create a water
material, one material. Then within the left hand side, we're going to just
scroll all the way up until we find
ourselves to content. We're just going to hold our material with our
left mouse button. Click and hold, then drop
it and select Move here. Now we can go onto
the folder and we can see that we created
ourselves material instance. We can actually create
ourselves different folder. We can just right click
and create the folder. We can call this
one of the effect is part of the visual
effects to be honest. So we can just drag this
onto the effect folder. Now, have ourselves water material type of
material instance. We're not quite done
in regards to that. We still need to
make sure that this is being applied
directly onto our water. We can now select
the water itself. And where it says
Water Material, we can click and hold and then drag it onto the water material. This is a way we can
hover over the name. And it says a lake One. That's exactly what we're using. We can now double click on the material instance and we can see a bunch
of parameters. We don't need to worry
about all of them actually, we just need to
worry about a few. What I'd like to do is
because the preview itself is not going to give
us the right type of a look, is I'd like to just put
it the entire set up. Of the material
instance to the side. And so we could see the material view itself
on the front like so. Then the next thing that
we need to do is basically scroll all the way down
within the detail, stab within the material
instance until we get to scroll global vector
parameter values. This is where we're
going to be changing the color of our water. We're going to
enable both of them. It's not going to
change anything, but it will allow us to basically
edit out this material. We're going to now go
ahead and select this. Actually, as you can see, this looks quite bizarre in
regards to the set up. The reason being is
that by default, this type of a value is actually being controlled
a little bit differently. What I mean by
that is if we were to click on these
arrow over here, we can see that the
values are quite high up. The R is ten, is 150, is 350, and A is eight. These actually stand
for colors RGB, red, green, blue, and the last
one is going to be alpha. This is what controls the absorption value itself overall. If we were to change this to something like
a smaller value, you can see that the more and more is being basically
absorbed by the water itself. If we were to change it
to almost a zero value, it's going to get very, very absorbent the water and we're going to
be able to barely see anything what's under
the material itself. Now, this might look a
little bit too much, but actually what we're
just looking for is mainly the absorption
value in regards to how fast it goes to the depth and how little the bottom
of the lake is visible. Basically, it really depends on how clear the water
you want it to be. The bluish tint itself
is way too much for us. Let's go ahead and
fix that. We're going to just drag this down. In regards to the blue itself, you can see it starts giving us a much more different
type of a color. It gives us a bit more green. The reason being is
that the green now is the dominant color
in absorption value. It's giving us a nice set up. I'm going to go ahead
and change it to something like value of 85. Yeah, for blue we're
going to use 85. For the alpha, we're
going to use the value of 0.05 something of that sort. For green, this is also
a little bit too much, so we're going to
lower it down until we get something like so by
increasing the value, by changing it to a value of 90, we're going to get ourselves a nice balance between
green and blue, but it looks too crystal clear, it just doesn't look
quite as natural. What we're going to do is
we're going to go ahead and increase the red
value over here. Well, changing it past
a value of 80 gives us a transparent look. That's a little bit too much. I'm going to change
it to a value of 60, gives us still that
bluish type of a tint, which makes it look like
it's clear type of a water. Overall, it gives us a very nice type of a look
of a transition over here. But the water itself is still
not looking quite good. The reason being is that we have another value to
make use out of. This value is going
to be scattering. If we were to go
onto the scattering, you can see that by
increasing this value, we actually get an overlay, a overlay color within the
set up absorption before what it did is basically
it changed up the color. If we were to change it actually a scattering color to zero
or a values close to that. The absorption is basically changing the color
based on the height of how close the terrain
underneath is what's scattering. This is, it gives us
an overlay of a color which allows us to control how the water looks
like overall. Basically, at the top, this is the main color setting that we
need to change that will allow us to get a very
nice type of a result. We're going to change
this to a value of maybe one or maybe 0.85,
something like that. Quite like this overall setting. Then we might need
to tweak a little bit in regards to these
settings over here. Yeah, I'll increase the
green just a little bit. As for blue, I'll just lower down the blue
value over here. We're getting this a look. I think that's actually
quite all right. The reason we're getting
also this blue tint is keep in mind that
our sky is blue. When we're looking at
it from the side angle, we can see a lot of reflection
and that's going to give us that blue tint as well. When working with water,
you might want to sometimes just grow
from the top down a view and just adjust
this a value l. As I said, this is 0.85 That's
going to give us a very nice type
of a clear looking in water of a large ocean. But at the same time, I
think it's going to give us a way more realistic
type of a look overall in comparison to
what we had especially. Yeah, we're going
to keep it as is. We might need to adjust it
later down the line as we start getting more and
more into the settings, into the environments
and whatnot. Now let's go ahead and keep it. One more thing in
regards to the set up. If you're not having
reflections and whatnot, go onto the upper
right hand corner. Go to the Settings tab, and there is an option called Engine Scalability Settings. This is going to be by default, should be at the very
least set to Epic. If you're not having
any reflections, make sure to set it to epic. If you're having any problems
with the performance. However, make sure
to lower is down. Even setting it to a low value, you can see that it
doesn't look quite as bad in regards to the water
reflection general plot. And it's still going to give us a much better performance in regards to the overall scene. Up to you start changing
up the engine settings. The scalability
option should pop up in the top left hand
corner of the gee port. You should be able
to click on it and click back onto
Epic, for example. And should give you the results that we're going to
be working with. Maybe I'll be going in regards
to the engine scalability, in regards to the settings, but that's going to be going
down as we go along since the main reason is because I'm using the recording software, so it's going to be a little
bit slower on my end. Do bear that in mind. And yeah, we're just going
to go ahead and leave it. As in the next lesson,
we're going to continue on with the set up and actually bring in ourselves with the Viking hut
that we created. Thank you so much for watching and I'll be seeing in the bin.
73. Importing an Asset Collection to Unreal Engine 5: A welcome back everyone to blend the turn real engine to
complete beginners guide. In the last lesson, we set ourselves up with
a basic type of a water that looks
a little bit more realistic than what the
default water look like. Now we're going to finally
import ourselves the hut within the scene and
work from there first. First, let's go ahead
and right click. Let's create ourselves
a new folder and we can call it something. Let's go ahead and
double click on it. Now let's go ahead and find ourselves the folder
that we had ourselves. Let's go ahead and
find ourselves with the file that we had
set ourselves up with. Viking hut, course process LB, That's the one
we're looking for. Let's go ahead and
drag and drop it into our older with an
unreal engine like. So this is the menu that we're
going to get in the past. The menu itself was
quite manimalistic. We didn't have a lot
of control over it, and it was hard to use
the format itself. But now the real engine made it super nice and simple
to make use out of it. Let's go ahead and talk it over. And just go over the settings on what we need
to set ourselves up with. Yeah, a lot of
settings to go over, but we can start, go over these menus over
here to help us out with. If we were to go to
general, for example, we can set ourselves
up with general names. For example, The name
itself doesn't actually matter because everything is named correctly as it should be. The offset uniform scale, for example, could be changed. But luckily, we were using a reference for a proper scale. We're going to keep it as
one for this overall un, we're going to go ahead and move from animation sequences. We're not going to need anything in regards to this
because we didn't have any of the animations,
The materials itself, we're going to keep it as is
because the materials are basically set up
properly as they should be, the skeletal meshes. This is again going to be
with dynamation sequences. We're not going to need
anything in regards up. Let's go ahead and move along. Static meshes though,
we are going to need to work a little bit
in regards to set up. Let's go ahead and have a
look at what we need to change the force
all meshes type. We don't really need
to do anything in regards to that because by
default it was static mesh. We're going to keep
it as is import LOD. That's not going to
do anything for us. Vertex color option, we can
just replace it to black. We didn't have any
information on our set up, so we can just keep it as is. Even though we did
export it out with the vertex information again because we didn't
actually used it, we don't need it in regards
to the build itself. Let's go ahead and go
over the settings. I'm not being one
of the settings, I'm just wondering
why that is the case. We might, yeah. I'm going to go ahead
and click on all just in case and see what is
happening with that. We're just looking
for the build tab. I realized that there is actually another build tab
If we were to lower down, there is a lot of
options so let's go ahead and go over them. Within the static s meshes the build tab there there
is an option for Nanite. Let's go ahead and enable that. This will just make sure
that everything with our scene within our hut basically is going
to be set as Nand, which is going to
increase the performance. It well generate live map UVs. Let's make sure that
this is enabled as well. These options are good to go. Just going to go ahead
and scroll down to see if we need anything else. This seems to be
quite all right, just making sure
that everything is okay in regards to the settings. There's nothing else
in regards to that we need to change
for the static mesh. But if we scroll all the way
down to the texture side, we're going to
need to change it. Actually, I'm not sure
if we're able to see it. Yes, we are able to see it
in texture stab as well. Let's go onto the texture
stab and what you'll see is there is an option called Clip Normal Map Green channel. This needs to be Tik toon. The reason being is
that by default Blender uses normal maps that are called open GL
type of normal maps, which are rendered
slightly different in comparison to Unreal
engine normal maps, which actually uses a direct
X type of normal maps. And in order to convert
one to another, you basically need to use
this option over here. This will allow you to get
the right results basically when importing it into a real
engine from blender itself, then the rest should
be quite all right. Yeah, let's go ahead
and import our mesh. I'm just going to also make
sure that we have this ton use the same settings
for subsequent files, which will basically
make sure that this is saved out for another use. Let's go ahead and
import it, like so. Going to take quite
a bit of time because it's importing
all the textures, all the materials
and static meshes, everything at once basically. Let's go ahead and just
wait it out a little bit. It's a lot of other things going on while sloading,
like preparing shade. As you can see that
bottom right hand corner which just finished off, that's that right away. What we can do is
we can straightway, just grab all of the static
meshes and just put it in the scene and see how they
would look like for us. We can simply go onto
this setting over here, we can select a static mesh. Make sure that the stick on. Now, all the static meshes
should be within our view. Within the filter stab, I only have static meshes ticked on. Now if we were to just go for the static mesh and have
everything selected. So I'm going to select
one of the meshes to make sure everything else is
selected within a folder. Then click Control A.
It's only going to be selected within the filter
stab or static mesh. Only the static meshes are going to be selected
from this folder. Now we can go ahead
and click and drag and drop it into
the scene like so. And then we can also rotate it, which by the way,
before doing that, just make sure that the
rotation snapping is enabled. With this set to ten degrees, we can just rotate
it and snap it to 90 degrees in like that. I'm going to raise
this by clicking. I'm also making sure that
nothing is di selected. So I'm just going
to go ahead and with this default selection, just switch it
over a little bit. Put it out just like that, and make sure that this is a little bit more in the water. I'm going to drag
it out actually a little bit more so we
can just play around with the shape of the terrain in a bit and
fix how this looks like. Yeah, that's pretty much it. In regards to the set up, I'm going to make sure I check how it looks like underwater. We don't, yeah,
we need to fix up the boat a little bit in
regards to how it's touching, but even so it doesn't
look quite as bad. All right, We're going to basically just check
how it's been imported. I'm now going to take off
the static mesh and see that everything is imported properly. As you can see, if we were
to go on to the normal maps, we can also switch to flip green channel
over here as well. Within the detailed stab, if we were to scroll down, there is an option. If I were to find it,
is a lot of options. Actually, I'm going to
make this a little bit. You can just simply grab
the top of the tab and just drag it across like
should make it larger. Or alternatively, you can just click on this
button over here, make your window larger and
this should help you out. Advanced, There you go. If you go under the Advance flip green channel, should be Ton. This must be T, which you should have it if you had imported it in the
same way as I did. That's the most important part. Yeah. Overall it's
looking quite all right. It's definitely looking a little bit different in
regards to the set up, but we're going to
be fixing that. We have some issues in regards to the way
this we looks like. Although it needs some work In regards to the way it looks as you can see from
the other side, actually it is set
up as two sided. Seems like the blend because we exported
out from blender, It gave us the two sided version or going to go inside and see, Yeah, it seems like
the insides and outsides are set up with
the two sided material. I can even go into
the material itself, which I'm going to
talk about in a bit. Just going inside, it
seems like it's actually, yeah, the material itself is actually two
sided. Two faced. Before when I was
working on this project, it was by default giving
me the right set up. So I'm not quite sure
why decided this time to give me the
two sided option. By default, importing it into a real engine gives
you just one sided, which is better for
the performance. So it's a good practice to
not have that a set up. I will show you how to fix
that in the next lesson. No, first of all, let me go ahead and check
if everything is alright. This seems to be black. I'm not sure why
that is the case. It might be due to
the light for sits. Let's go ahead and switch up the light direction to
see how it looks like. I'm going to click and hold
control an L on my keyboard. And then we can go
left and right, basically to adjust rotation. It is a very nice
shortcut to know, and it allows you to just
rotate the angle going left and right and get the direction in regards to how high the sun
is by going up and down. Basically, you can
get a nice dawn type of a look as well
if you want to. We're just going to position
our sunlight to be going from this direction over here as you can
see in the gizmo. Yeah, this is
looking quite nice. I'm not quite sure why
this is looking so wrong. I'm going to go into the
blender real quick to see, this seems to be the same wood. I'm going to go ahead and
check why that is the case. It even seems to be
using the same material. I'm not quite sure
why it's doing that. Let me just go ahead and
see if there's an issue. Yeah, it seems to be using
the same material even. I will go ahead and click
on this button over here to reset the
material value. It doesn't seem to work. And I will go then back to the blender real quick just
to see what's going on. There doesn't seem to
be any duplicates for the faces. Seems to be. All right. Going to go to face normals real quick
to see what is happening. It seems all right.
Actually, I'm not quite sure why is going on or actually, let's just make sure
that this is not, it's a little bit bizarre. I'm not quite sure why
that is happening. So there is also an issue in regards to this
blackboard and yeah, we're going to have to look
into this in the next lesson. So thank you so much watching and I'll be seeing in a bit.
74. Fixing 3D Asset and Reimporting Scene to UE5: Hello and welcome
back everyone to Blender Turn real engine Five, the complete beginners guide. In the last lesson,
we left ourselves off by importing a mesh
into the scene. However, we do have
a couple of issues. First of all, we have a bit
of a dark area over here. Let's go ahead and see
what we can do to fix it. Every once in a while
you'll encounter certain issues which requires you to go back into blender, let's say, and adjust and
tweak certain parameters. Let's see what the issue with
this specific section is. We're going to basically
identify which area this is, which is going to be
this exact section next to the status. I'm going to simply
go back to Blender real quick just to see
what the issue might be. For starters, I'm going
to just select it. I'm going to zoom in and
I'm going to again check if the face orientation is
set up properly, which it is. Another thing that what we
can do is we're going to simply go into edit mode. We're going to select the
face one of the pass. We're going to
make sure that the proportional editing
is ticked off. Then I'm just going to
just simply go up and down and see if there's any
our additional faces, maybe like a duplicate of a phase next to
it, there's none. The alternative thing that
we can do is in order to check and see the issues, if we were to hit Tab,
we're going to see that the Bevel modifier
has not been applied. But I'm going to check
the other boards and I can see that this has
not been applied either. I know that this
should not be an issue in regards to this
type of a board, especially when we have the
same type of parameters, modifiers should
not be an issue. Then finally, what might be causing an issue
is going to be, if we look at
transformation tab, if you don't have it,
click and by the way, just to enable it and you
should be able to see it with the move tool. You should be able to see
the transformation which will allow you to see the scale. That's what we want, basically, if we were to have the selected, we can see that this is
the scale that it has. If we go to this one, we can see that the scale
is set to a negative value. Actually, I believe
there was the same issue with this section over here, which we can also see that it's also a negative
value over here. And if I were to go, yeah, we definitely have an issue
with this sort of a set up. The way we're going to fix
it is by simply going back on to Blender, having
everything selected. We're going to click
Control and A, which will allow you to apply certain set up like location,
rotation, and scale. I'm going to simply select
rotation and scale, apply them like so
actually that seems to give us this a set
up which yeah, we definitely don't want, especially for these
boards over here. I'm not quite sure if we should be flipping them
over for this one, but let's definitely make sure that we flip
them over for this, we're going to go
into edit mode. Hit a select it all it shift, and that should
recalculate the normal. If it doesn't do it for
you, make sure you have this option inside ticked on. Then afterwards we should
be having everything. All right. Just in case though. Will do it. Yeah, this side
seems to be All right. The other side but
this one was black. We'll keep it though as is. Yeah. Let's go ahead
and select everything. We're going to go
ahead and click File, click Export, and click LTF Id. Before then we're going
to go ahead and have the precess we selected
previously, we had before. We're going to just overwrite the existing file
and click export. This will give us the overwrite
for the GLTF file as is. Then we could go
back to real engine, We can find the file
and just simply drag the file into the
content browser link. It should have everything
saved up with this marker on. Let's go ahead and
click Import Now hopefully it just re imports everything
while we're waiting, I'm just going to
give you a quick tip to not do a different
type of import. You might be sometimes
if you're just playing around right clicking and seeing what it has inside of
the static mesh options. And there is an option to
say to have it re import. This re import option
doesn't usually work quite as well with the collections
with multiple items. It puts everything
inside one item itself. I recommend you not using this reimport option and just
do it as I have shown you, which is just dragging an object into the counter
browser. And there you go. It updated ourselves
with the set up. The issue was with the scale. Now, another issue that
we have is going to be, if we go inside the inside, you can see it has material inside and outside of the mesh. This should not happen. We can better see it over here. Actually, this
should not happen. The mesh should not have any type of a set up
within the inside of it. And the reason being that it's
done as a common practice is simply because it really
helps with the performance. The renderer does not need
to render the object wise. How do we fix ourselves
with the boards over here And we got that sorted. We still have a
couple of issues. First of all, the
roof itself has this sort of a look and it
obviously needs to be fixed. Also, another issue
might be with intercoster material being
phase from the inwards, you shouldn't be able to
see this type of a look. You should see through it, especially when going
inside of a material. For example, the
space of week, year. The reason being is that
the real time renderers need to be a little
bit more optimized in regards to making
it run a little bit better for the
environments and whatnot, especially if you have a
playable character and whatnot. We're going to learn how to do that in the next
lesson though, since we need to talk a little bit in regards to the
materials themselves. We touched the water, which was quite a
complicated material, but it was just
adjusting the values. Now we need to actually
pitch some bits and round, and at this point, it would be better to have a good based understanding of materials and
material instances. Yeah, next couple of
lessons we're going to just go over that and yeah, thank you so much
for watching and I'll be seeing you a bin.
75. Material Basics: Hello and welcome back everyone to plan to turn real engine, The complete beginners guide. In the last lesson, we left
ourselves off by fixing the areas with certain glitch sections
within our structure. Now we're going to
continue on and actually talk a little bit
in regards to the material, so we'll be able to tweak them ourselves a little bit
more For us to do that, we're going to go over the basics of material
and material instances. Yeah, without further ado, let's go right into it everyone. Welcome to the basics
video for Unreal Engine, in which we're going to cover
the basics of materials. For starters, in order to create ourselves a basic material, I'm going to write click
within the content browser, and I'm going to select
material like so. By doing that, we're able
to create a elsa material. And we can at the same
time, rename the materials. I'm just going to
call this material, so going to click Enter, then I'm just going to
double click on it in order to open ourselves up
with a material graph. This is the thing that
we're going to spend most of the time tweaking and
adjusting the material, which will be then
applied onto our assets. Maximize the window itself. I'm going to go ahead and click
on this button over here, which will expand this entire
window and make it a little bit more clear on what
an of content it has. Most of the screen is covered
with a material graph, which will allow us
to add nodes onto it. If we were to click
and hold right click, we're able to pan our
view around within it. If we were to use
our mouse wheel, we can zoom in and out. Finally, we can make use
out of it to click and tap on a node using
our left mouse button. Currently, we only
have one node. This is the one where we connect basically all of the
information for a material. It will contain all the
necessary inputs for a material. If I were to zoom in, we can
see that we have base color, metallic, specular
roughness, and so on. Some of the material inputs are not highlighted in
the same way as over. The reason being is that based on the type of material
setting that we're using, we're going to be able to have different options
for it by default. For example, we're not
able to use capacity. We can change that through
its property stab. Speaking of properties,
if we look at the bottom left hand
corner of the window, we can see that we
have detailed tab. The detail tab will show us
all the options of a node. Based on the selection
that we have currently. We have the material
result node elected. This will allow us to see
all of its properties. For example, I'm not
going to go too much into it as it has quite a
lot of advanced options. But for example, if we were to scroll down using
this potter over here, we can see a lot more options. I'm just looking right now for something called blend mode. If we were to changes from
opaque to masked, for example, we can see that the
capacity mask gets enabled, allowing us to
make use out of it along the other material inputs. So I'm just going to real
quick go back from mask to opaque and continue on with the overview of
the material graph on the top left hand corner. What we have is we have a
preview of the material itself. Right now it's currently
set as a ball, and if we were to hold left
mouse button and move around, we can see it rotating by
using our left mouse button. We can just rotate it around. We can use our mouse wheel
to zoom in and out, so, and we can use our
middle mouse button to pan around this type
of camera as well. It's a little bit different in comparison to material
graph controls, where the right mouse button
is the one that pans around. In this one, using middle mouse button allows
you to pan around like so. Then we also have a couple of useful options on the
bottom right hand corner, which allows us
to change between assets like so we
have a cylinder, we have a sphere, we have a simple plane cube, as well as we can also
set ourselves up with a custom type of a mesh which
we currently don't have. So I'm just going to click
Continue as Is and move on. I'm going to go back
onto the sphere. And also we have options for the type similar that we could see within our game viewport, which is we can change
the lit mode to be unlit, for example, to see
only the base color. We can also change the show to allow us to
see grid, for example, or to disable the background
completely to not get as distracted while
working on our material. Then we also have perspective, which will allow us to
change the camera view. And we also have
Viewpoort options, which again, is similar
to what you would see. Within the viewport itself. It allows us to keep
it real time to change the field of view
and options like these. Again, I'm going to leave
them as is 99% of the time. You're not going to be touching them as the default viewport will allow us to see the material we're
working on just fine. We also have a toolbar unique
to the material graph, which are located
at the top section. We have Apply, which
will allow us to apply all the settings directly onto material and update our mesh that we have
applied that material onto. We also have search, which
would allow us to search the node for the specific
type of an item. Clicking home will allow us to get back onto our result node. We don't have a hierarchy
which would allow us to work with more complex
type of shaders. We also have live update, which would allow us to get real time update
for our game view. The one that we'd like
to remember the most probably out of this entire bar is going to be clean graph. If we have a big mess in our material and
some of them aren't, some of the notes
wouldn't be even used by clicking on clean graph, you'd be deleting them. But just make sure
to make use out of that when you know
that the material that you created doesn't have
the unused nodes that you're planning to use
later on, previous state. Hide unrelated stats
and platform stats all help with a more in depth information for when
you're creating material. But we're not going to be
using them much often, but let's not get
into that too much. Speaking of stats, we do have
stats at the bottom bar. By default, it will show you all the necessary
information such as the amount of Shad samples that is being used and
the shaded account, we'd be able to tell how
heavy it is on performance. All right, so going back to
the material input node. Based on the type of input we're placing into these values, we'll get different
type of results. The ones that we
can have options. The basic ones is if we
were to write Click, we can search for all
of the nodes that we can add onto our
material graph. I'm just going to
search for constant. We can see that
we have constant, constant two vector, constant free vector and
constant four vector. We're going to talk
about that in a second. But now though, I'm
just going to select constantly so we
can see that we get this option which
essentially will allow us to change the
value of our nodes. If we were to directly plug
this into the base color, we can see the direct
results of the material. It takes a bit to load up, but we can see that
by default the value 00 will give us a
black type of a color. However, if we were to
change this value to a one by clicking on this
type of A value over here, or alternatively, if we
were to select this node, we can see that the Details
tab has now changed. We can change the
value over here. If I were to click on this one and change this to
a value of one like, we can see that the base
color has now changed to be a completely
white material. One thing to worth
knowing is that everything when it's going to
be on the right hand side, it's always going
to be an output. When it's on the left hand side, it's going to be an input. Right now this is an output. I'm able to click and hold left mouse button and connect
it to a base color. Or for example, I
can connect this to a roughness value
which will make this completely rough
and no glossiness would be applied
onto this material, making the material look
quite flat on this occasion. Whilst working with these nodes, you need to consider that also in order to move
them out of the way, you can click and hold control and holding
left mouse button, you can and drag it out like tap on a screen
and then release it. And that way we're
able to remove the flow value completely
from the node graph. One more thing to also consider, you can make use out of it in order to switch up to values. For example, if I were
to connect both of these to the roughness value
and the base color, and I want them to be
onto another value. What I can do is I can lick
and hold one tap on a screen, get myself a new value. And now while holding
control, I can tap on this. And now both of these
connectors are going to be reconnected when I release
my left mouse button. Now you can see that
they go 1-0 and it turns my base color to a value of zero and roughness
to a value of zero, which in turn makes this quite
a shiny type of an object. Now going back to the vectors, if I were to delete
this one, for example, if you want to get ourselves
a different type of a color, what we can do is when we
hold one and tapo graph, we can create our
cells a constant one. When we hold two on a
graph and tap on a screen, we can create our cells
constant vector two. Then finally we
can click and hold Pre tap Ono graph and create cells a
constant vector free. What this will mean is that
it'll touch two values at once onto
constant vector 2.3, values at once onto
constant vector three. However, if we look at the
outputs that it gives, it's giving us three different
outputs within this graph. What this will mean basically, is that one output will
combine them both, while the other one is going
to give us a value for x. The third one is going to
give us a value for y. The same applies to
a constant three, whereas the first one is going to be a combination
of those three. The second one is
going to be red, which is going to
be a value of x. The third one is
going to be green. A value of y, finally, is going to be a last one, the value of the blue
output over here. By the way, in order
to move the graphs, if we were to click and
hold on a top section, we can just simply
move them around. So now what's
interesting about X, Y, and Z is that each
one of them have the color value
assigned to them. As I said before, X
is going to be red. It's always going to be red. In a unreal engine software, what this will do is it's also
based on a three D space. For example, if you
look at the bottom left hand corner of
our preview sphere, we see that the z is
going to be going up, xy is going to be going
forwards and sideways like so. These values not
only help you to get more additional information and also represents the
three dimensional space. Not only if I were to change
the x value, for example, 0-1 we can see that the
entire color changes to red. We can see this within the
preview bar over here. If I were to connect all of these values like so
onto our base color, we can see that it changes the
entire material to be red. What's nice about it is that by just simply
combining these values, we can simply get ourselves completely different value to our material by changing
this to a 0.5 For example, changing the y value
to a 0.5 as well. We can see that we
get this a result. I will change these two to one. For example, you get a brighter. Yeah. By changing them
to a higher value, we can see that it gives us a brighter type
of a color as well. Yeah, by having
these x and y values present both of them at once, we can see that it combines them and changes the
color completely. We can make use out of
these flow values to actually get a custom
color out of our material. We can also make changes out of this using a color picker by clicking on this constant
option over here. First of all, let's go
ahead and make sure we select the float,
the node value. And now we can click
on this box over here, we can see that we get
ourselves a color picker. And essentially, yeah, we can change the color
to anyone we want. For example, I want a
blue color or a pink one. We can click okay, and we're going to get ourselves a pink type of a material. Now that we're done with it, I'm going to click Clean Graph. So to clean up my unused nodes, I'm going to click on a
top left hand corner. Click Apply to make sure that my material shader
is being applied. And if we were to
close this graph, we can see that
material has been made. Basically, we can create
ourselves a shape. Let's go ahead and create
a sphere within our world. I'm going to just simply click and hold and then drag it
onto this object like so, and get this sort of a result. So yeah, that's pretty much it. In regards to the
material set up, that's all it takes
in order to set ourselves up with a material. I hope that the video has been helpful and thank you
for watching. All right. I hope that the video was
informative and you've learned quite a bit in
regards to materials. Now, in the next lesson, we're going to continue on and learn a little bit in regards to
the material instances. Thank you so much for watching
and I'll be seeing you, thank you so much for watching and I'll be seeing
you in the bit.
76. Material Instances: If we were to write,
click on our material. We can create ourselves a material instance by just simply clicking on
this button over here. Essentially what it'll do
is it'll create a material that gets its information
based on the material itself. If we were to click off of
it to get material instance, we can simply apply
this onto our object. I'm just going to
click on this one. The control to make a duplicate, put it to the side and
simply drag and drop this material onto
this object like so. Essentially we'll see
that they are identical. And we can click on the material instance
to see what it is, which will show
us the preview of the material within
this preview window. It will also show us
that this is that the parent of this
material instance is going to be this
one over here. It allows us to make
use out of one material to create multiple
material variations. Right now, we don't
have anything. I'm going to go
and double tap on this material to open this up. Essentially what
we'll need to do is we just simply need
to convert some of those options that
we have applied onto our material and make
them as parameters. For example, by right clicking
on a roughness value, we can select convert
to parameter. And it will allow us to
make a choice on the name. If I were to call this
one roughness like so, we can just simply have a
parameter name as roughness. Now if we were to click
control on S to save this out and apply our material, so we can go back on
to material instance. And now we see that we have a value for roughness
by default. It's going to be ticked off. If we want to make
adjustments to the value of this material, we need to make sure
that this is ticked on. This, allow us to
make changes to the material
instance parameters. Essentially, if we were
to change this to a value of one and make this
completely rough like so, we can now close this
down and see that this material is now a
different roughness value. One is shiny and although the upper one is using
exactly the same material, it's going to give us a
different type of result. If I were to go onto material
and take it a step further, I can right click
on this base color. I can change this to a
parameter and call this color. So I can now close this down. Let's make sure we save this out so I can go back onto
material instance. And I can see that we have
a color option over year. If we were to tick this on, change this to a
different value. So close this down, we can see that we
have a different type of result completely. But if we have a look at
the material instance, the parent is still the same. It's still being used in
the same kind of way. This allows us to make quick changes to a
material itself. It also allows us to save up on the performance of
our game engine. One thing that I'd
like to say as a quick tip is if we were
to go back on the material, for example, we change this up to a value for a parameter. But there are certain
shortcuts that allows us to create parameters
right off the bat. By clicking and holding
S on our keyboard and then tapping on our
screen on our graph, we're able to set
up crater cells, a constant one node, which then automatically
gets changed to a parameter. So I'm just going to
change up the name to something like
metallic for example. I can set this up to a metal also if you want to change the
naming, for example. Afterwards, what we can do is we can change it
within a detailed tab. By simply selecting this and
changing this over here, we can have any
name that we want. Metallic, I can call it Valuel. I'm going to click
control to save this out. Which if we have a look
at it, close this down. The original material is not going to be
changed because by default the metal
value is set at zero. But if we were to go on
to material instance, we can change the
metallic value. Finally, one thing that
I'd say I'd like to mention is that if we were to make this window a
little bit smaller, what's nice about material
instances is it doesn't require us to compile anything
to save out material. And we can just simply see the changes within the material instance
right off the bat, if I were to enable this
metallic value and change this into a value
of one, like so, maybe I'll change the
roughness to a value of 0.3 We can see that
we automatically, straight off the bat,
change the values. And we can even click and hold on these
parameters like so, and change them up like so. It gives us direct
type of a result onto our viewport,
which is quite nice. Yeah, that's pretty much it. In regards to the
material set up, that's all it takes in
order for us to set ourselves up with a
nice material instance. Yeah, we can create
multiple materials, material instances out
of a single material and it'll give us a completely
different type of results. Right now, I'm
just applying this to this type of sphere and changing the color
to any type of a color that I want basically. So yeah, thank you so
much for watching. Now, let's get
back to the video.
77. Fixing Roof Thatching: Hello, welcome
back. Every room to blender to and real engine pipe, the complete beginners guide. In the last lesson, we talked
about how to fix a couple of mistakes in regards
to some visual clinches. And we're going to go ahead and talk a little bit in regards to how to set it up as a proper, real time rendered object. We wouldn't have any
issues in regards to the object basically
being rendered twice. What I mean by that, if we look at the
inside of an object, we can see that it has textures. And normally for real time
render that's not quite right. The reason being is that it
would increase performance. It would require the render to basically render
out textures twice, and we don't want
that to happen. What we're going to do is we're just going to go
on to materials. We're going to make sure
that the material is ticked on within our filter, within our T folder. Then we're going to go ahead
and enable that one by one, which is going to go into it. Well, first of all, let's talk
about the material itself. We can see that it creates
this set up from Blender GLTF. Basically, that's the
type of format set up that's going to
be creating it by default for that
type of a format. Meaning that all
the materials will be just attached
in the same way. On the right hand side, if I were to grab it,
this one over here, we have the default
material set up, which basically gets all
the information inputs. Then afterwards, we have
this entire section, the default body, if
you double click on it, we can see that it actually has material function within
material functions and it has a lot more inside and is basically
set up so it would adhere to every single type of
a format so it could pick up textures and
materials in the proper way. Yeah, it's a good set up. Quite like it, we don't
really need to go into it. It's quite a complex
type of a node, but what we need to do is
just simply understand that it goes basically the textures go on
the left hand side and outputs that connect to the main material go
on the right hand side. As you can see over here,
we have a normal texture, we have a roughness value which might look a little
bit interesting for you. The reason being
that it's being like this is if we were to
double click on it. It's actually tries to set
up in a packed format. What I mean by that is if
we were to click these off, we can see that the
green channel is being acted as a roughness
value on the top section. I'm just clicking
everything off except for the green channel and this is what is being used
for the roughness, the rest of them are
being basically ignored. Yeah, the reason it's being
done like that is in case some of the GLTF formats do you use those
packed up textures? They would still
always be properly processed and that's
exactly what it's doing. Yeah, as for normal maps, the normal map is just
casually placed in, over here. As for the roughness value, one thing is that if we'd have like
metallic, for example, Embdeclusion, they would
try to be a similar format. And it wouldn't be just
black and white basically, but it would still
behave in the same way. Okay, so now that we have
a basic understanding, we're just going to
go back on there materials and all
we're going to do is just tick off two sided material on the bottom left hand side, this selected, which is
going to take it off. We're going to close it down. We're going to hit
yes to save it. Let's do another one,
actually, real quick. We're going to go onto glass. We're going to select
this material. We're going to take off two sided click control
to save it out. Now it's not going to
pop up with a message. We can close it down safely. If you go behind it,
you can see that the window is actually
being just one side, which is exactly what we want. A way I'm just going to go
for every single one of them and do that
easier way would be to just simply grab all
of them like hit Enter and then it's going to open up every single material
we have selected. Just like that. We're
going to go one by one and basically and take every
single one of them. I'm not going to
close it down because I'm just going to
do it all at once. Just like that. I'm going to go through
all of these materials. I'm not worried about the straw roof either at the moment. Yeah. Just making
sure that overall, the set up is nicely
done like that. And the final one. All right, Now that we don't like that,
let's go ahead and close it. And it yes to basically
every single pop up message. Just like that At some point this should stop
popping up. There we go. Now if you go inside of
this pillar, for example, we can see that it's not being
two sided, which is great. The only thing that we need
to fix now is going to be a fatched roof. Let's
go ahead and do that. The straw roof set up properly. What we're going to do is we're going to first of all select it so we know which
material that is. Then we're going to go on the
bottom right hand corner, we're going to select the
patching one, basically. We're going to go
ahead and click on it and we're going
to actually just crap this and drag it to the right hand side so we can actually see what
we're doing with it. I'm going to do it a
little bit more actually, so we could have
some space to work with first things first. What we need to do is we need to make sure that it's
set up properly. What I mean by
that is that right now it's not set up as
a transparent material. We need to make sure
that we select it. We go on to blend mode and we
go to change this to mast. There is another
alternative variation for that and that's going
to be called translucent. What translucent
does is basically, actually I will show
you right away. I'm going to turn
on translucency. There is something
called opacity. I'm just going to
go ahead and drag and drop it to opacity like so. Going to hit control
and S to save it, as you can see
over here already, we're going to get ourselves a nicely transparent
type of a roof. The downside of this though, is that we don't
get those shadows, those nice shadows to
help us break down the surface on the wall itself. That's quite unfortunate. There is ways also to fix lighting a little
bit in regards to making sure that it's a
little bit more PVR to enable metallic
specular roughness. And that's actually quite easy
if I were to just go down, if we were to change
this lighting mode to surface translucency volume, you'd be able to make use
out of the PVR set up. But again, it's not
quite optimized in regards to those shadows
in this particular case. So what we're going
to do is we're going to go back to blend mode. We are going to
change the blend mode to mask mode instead. And as you can see, it went
back to normal opacity. The reason being is that this time it's not using opacity, it's actually using
opacity mask. So we're going to first of all, hold control and just drag
this out from the opacity, which allows us to remove
this type of a link. Then we're going to
go ahead and add opacity mask onto apacity mask. And it's going to
work quite well. And the reason it's working
quite well, by the way, is because by default the text, this texture itself had
alpha set up within it. What I mean by that is if we
were to open the texture up, we can turn off the RGB
and have only alpha, and we can see that this
is what we're using. Basically within the material, alpha is being attached with the transparency
basically within the texture. The way it's being used is
also quite interesting. I'm not going to go
too much into detail, but basically the base color
is also set up, the alpha. If I were to actually
go into this, the opacity mask is being
set up from the alpha. This is what's being
used basically. Yeah, that's pretty much
just in regards to that, not going to go again
too much into detail. They are set up in a way that basically
allows us to make use of the texture alpha with the opacity mask
or opacity itself. Then afterwards, we're going to go ahead and see
the difference. By the way, in regards to the mask and
translucent the mask. If we were to click
control to save it out, it's going to give us a much
better lighting shadows. Let's go ahead and
minimize this. And we can see that the
shadows are much nicer. Now see the way it breaks down the roof overall, it
looks much better. Downside of this though
is now that we have it, we have certain issues with the alpha texture not
being properly set up. What we're going to do is
actually we're going to go back onto the material set up. We're going to
locate apacity mask. We're going to hold M
to tap on the screen. That's going to give
us the multiply. We're going to attach
what we had with opacity mask by holding control
from opacity mask to a. Then for the value, we can just write in the
value ourself ourselves. With the newer version
of Unreal engine, it basically allows
us to add values into the node stem cells before you'd have to add a float value. But now it is quite simple to do by just changing
the value over here. Yeah, if we were to just
change this to something like, for example, ten something extreme attached
to opacity mask. Click control, you'll
see that it'll basically add more
whiteness around us. The reason being is that it just multiplies
this overall mask. I'm not sure if it's quite as visible with this, but
that's what it does. Maybe it's not strong enough. But if we were to
lower this down on the upper end to something like 0.1 and click control on S, you'll see that actually
shrinks the entire mask down. Let's give it some weight. Actually, it's a
little bit too much. It removes the entire thing. I'm going to set it up to
a value of 0.4 And that, from what I remember, gives
you the right result. You basically need
to experiment in regards to how sharp the
mask you wanted to have. But once you do it like you should get yourself
a better result. It's still giving me a
wide type of sections. I'm trying to figure out
why that is the case. But before doing that,
let me just go ahead and go underneath to check
how this looks like. It seems like like it's giving us a nice type of a set up. But just in case,
I'm going to go ahead and go onto the material, going to select the two sided. So it would basically give us the material from both sides. Go ahead and save
this out to see how it looks like. There you go. We're going to give
us a nicer type of a look to fix this
particular issue. What we're going to do is we're just going to
close this down. We're going to select
the plane for the roof. I'm going to look quite there in regards to the
set up of the roof. And the reason for it is because actually I'm going to click to make sure we
hide away the selection. So we can zoom in a little
bit and see what is up, has those wide borders. The way I'm going to fix it is actually going
to be quite simple. We're going to go onto
the hatching material. Back onto it, I'm going to
find the texture for it. Going to double click on it, which will go into the detail, stab what it's doing.
The real engine. It's basically giving us a set up that's a little
bit more optimized. We need to make sure we fix
up the compression settings. If we were to go on to the compression
settings over here, what I'm looking for
is one of them would be user interpage two D.
If we were to change that, that should give us a better, doesn't seem to want to work. I'm trying to figure out
why that is the case. In certain cases, if I were to go back on
to the texture mode, in certain cases the Mp
generator unfiltered doesn't seem to want
to work as well. What we're going to do is we're
going to just change this to No my maps and see if that
fixes it and there we go. It seems to do much better job. Yeah, that's going to be it. From this lesson, we're
able to fix up the roof and it gives us a much
better type of a look. Now we have ourselves
some nice shadows, and we don't have any of those white edges
going around it. So yeah, that's going
to be from this lesson. Thank you so much
for watching and I'll be seeing you a bit.
78. Environment Planning and Landscape Tool Overview: Alone. Welcome back in
room to blend the turn Real engine five to
complete beginners guide. In the last lesson,
we lost ourselves by creating a nice set up
for the roof hatching. And we've fixed our issues
with the white type of edges. Now we're going to
continue on moving and make sure that
this time we're actually setting ourselves
with some planning and preparation for the scene and environment development. What I mean by that
is before you do any, before you actually get
into the environment, you need to think
about certain shots, especially the main shot itself. Even if you were to make a video or you are planning to use the scene
in a playable character, you still need to decide
where the main shot is. The reason being is
that you want to usually open it up
with that main shot, or you want to get to that shot, eventually develop it throughout the scene where it opens up. And you're able to actually
showcase the environment and get a good impression
from the set up. The easiest way to
do that is actually by just simply moving
the camera around and getting the shot
to be in the right of way The shot that I want
to have is going to be, actually, it might be
easier to just show by drawing it down a little bit. If we were to have a shot a
little bit from a higher up, from an angle like we're able to just basically
have it downwards. And this way we're
able to see what's on the ground of the
platform over here, we'll be able to get a
nice composition this way. We're also able to see both angles of the hut.
That's kind of nice. And this way, yeah,
it's able to just lead us towards the main piece which is like the
entrance a little bit. And just the corner with the boat itself is
nicely broken up. All in all, it's a well
set up type of a post. But we also need to consider, for example, what we're going
to do with the background. We don't want the
background to be just sharp edges over here. We want to make sure that we have certain, for
example, hills. We'd want to, for example, break up this environment
over here a little bit. We want to make sure that there
is some slight elevation, maybe a couple of
rocks over here. Then we also need to consider the lighting itself as well. For example, we got some sun
coming off from the side. We need to consider
where it's coming from. This particular case, what
I would recommend you do is actually not only
set up the composition, but play around with
the lighting itself. Once you get the
right, so an angle. So I'm just going to
get the right angle. I'm also, while holding
right mouse button, I'm going to just use
my mouse wheel to slow it down so I could get
the perfect type of shot. So once I'm happy with it, what I'm going to do
is I'm going to click control one to save it out. Now once I actually
move around the camera, I can click one
and it will bring the camera back to
that original shot. So it's very nice
and useful to have, especially when you're working with certain compositions
and whatnot. You're able to just
look around and whatnot and then click one
and get back to that shot. You can have actually
multiple shots. You can click control two, control three, and then you
could just get it back. So for example, you
can have it from the top down view
like control two. And now I can click two and
get back to that shot 12. I can click between
those saved up shots and it's very nice
for me to get them back in. That's that. The next thing I want to talk about is
again, the lighting itself. We touched it a little bit, but we've not considered the actual direction
of the lighting. If we were to click
and hold control an L, we can move the sun
basically left and right. That will allow us to
control the lighting itself. We can also move it up and down. To have a nice direction
of how high the sun is, I would recommend you having it just a little bit
off to the side, coming from the right
angle a little bit. So we could have those
shadows help us to basically highlight some of the form within the hut itself. And this is going to
be quite all right, I'm going to play around
with it just a little bit more, something like this. I think we'll do the
trick. There you go. Now that we have shadows, like we also need to
consider basically how it's going to affect
the entire set up. So what I mean by that is we've got some shadows
coming over here. We also have a bizarre
shadow coming this way. We might need to change the
angle in regards to that. Some of the shadows are
interesting over here as well, coming from the staircase. That's actually
going to be quite nice and it's actually going to highlight the both for us
in this area over here. That's going to be quite nice. We're going to be playing
around with the shadows, actually, when we're
placing down the forms. What I mean by that is when we're going to be placing
the objects down, some of the shadows will be basically reflected
onto the ground over here. And that will help us to get more additional detail
onto the hut itself, which we're going to be
working down the line as well. But now though, let's go back
into the setup and we're going to now get ourselves
in regards to the terrain. Yeah, what we're
going to do is we're going to go ahead and open ourselves with the
landscape over here. We're going to make sure that we're working on the layer one, just make sure you
have this selected. Now we're going to
talk a little bit in regards to all
of these tools. The ones that you
need to know the most are basically
the scalp tool, as we'll talk about
that in a bit actually. But the main ones
are going to be the sculpt tool and it's
going to be flat tool. These are the ones that
you're going to be using it, you're going to be giving you basically most control
over the terrain. Let's go ahead and
dive right into them. The scalp tool
works quite simply. Once you have it selected, you have some brush settings
on the left hand side. If you scroll up a
little bit like we have the brush type which
will allow you to change up the alpha, you
have the brush follow. We're going to keep
it with the default, there's no need to
change it because we're going to be just playing around
with the flat tool itself and get the
right results. Tool strength is the one
that will basically affect how fast it will increase
this type of set up. You can, by the way,
clear control to undo your landscape filling. Then you have the brush size and brush follow
for the brush size. I would recommend
you, instead of just using this
slider over here, I would recommend you using closed brackets were
to be in the viewport. You can use those
square brackets to basically make it
smaller, make it larger. So you can see the brush
size moving off the fall off usually I would leave
it is it really depends on the size
of the brush using. What I mean by that
is if I were to be having a large brush, I would usually want to have
a bit of a smaller fall off. Which in turn, if I were
to make it smaller, for example, if I were
to make it to zero, you can see that it actually
just tries to raise it up without any transition
within the area. Basically, that
might be quite nice, but usually I try to avoid the
brush fall off being zero. At the very least, I try to
get it as a 0.1 and that would avoid basically giving
us those type of artifacts. The way that the landscape
actually works is quite interesting because we're
using height map data. It's actually creating adjusta values up into up and
down type of positions. So we're not able
to make any caves or anything of the sort. Which actually will change
the brush follow back to 0.5 which we can do so by clicking Recite
to Default Value. These bottoms over
here are quite useful when you want to
get the original values. What I mean by that by going to the high values is if we
were to, for example, create something like this,
we can use the race tool and actually just erase
this high map value. So it will give us
the default value. The reason we're
having actually like transitions over
here and whatnot in regards to the ocean is because the water itself is creating
the high map value. We're not able to edit it. And the reason for it is because the water basically is overlaying with one another, but it's actually being
placed in another layer. What I mean by that
is if I was to be in the original layer and
was to sculpt over here, then if I were to go back to layer one, I would
try to erase it. I could not erase this value. The reason being that this data, this high map data is being
saved up in another layer. I would recommend you to
just be cautious with that. Make sure you always
work on layer one. And I'm just going to go back to eraser, go back to layer one, I'm just going to just
delete this area over here just to get the default value
going back to layer one. Quick trick, quick little thing to know as well is you can also lock down the upper layers so you're not going to be touching them once you're
happy with the water, for example, you can
just lock it down and not adjust it and it's going
to be quite all right. In regards to the whole set up, you can now go back to the
layer one, go back to skull, and we can really quick adjust the overall
values how this, for example, is
touching the boat. The bottom of the boat
is not quite right. We need to fix that, but we're actually running out of time. So we're going to continue on with this in the next lesson. So thank you so
much for watching and I'll be seeing in a bit.
79. Landscape Adjustments in UE5: Welcome back to the blender
to on real engine pipe, the complete beginners guide. In the last lesson,
we left ourselves off by planning a little bit in
regards to the composition. We have a couple of
shots now set up, and now we're going to go ahead and actually go into
the landscape mode, which we also talked a
little bit in regards to just how the brushes
work a little bit. One thing that I
did not mention, that I totally forgot is
if you were to use sculpt, you can also hold shift and actually invert the value and it actually starts
going downwards like so it's a useful information
to know a little bit, but mainly the way I use the skull tool is just
to get the right height. And what I mean by
that is we're to make this brush
quite a bit smaller, I usually just use it to bring it out to
the right height. For example, this
one is all right. And then afterwards,
actually a little bit to high which is totally okay
because the next step that I usually do is going
to flatten tool like so then I'm just going to use the Platen tool to
get the right value. By default what we can do is we can click and hold on
a top for example. And it will grab the value of where we clicked originally. And we'll start dragging out, or dragging down,
for that matter, all the other areas. And we can just use that
in a way to erase it. We can just fix up the height, position of the terrain. This is very useful,
especially when combined with one of
the tools within it. It's called a Platin Target. If we were to select
it, we basically get ourselves the value that we
can set ourselves up with. This value will be able to be used within the
entire terrain. By default it's set to zero, which if we were to
click it will actually drag the terrain down
because that's where the original world
zero location is the. We can also click on this
partono here, eye dropper. We can select to the side link. In this way it'll actually bring it to the site
just like that. In regards to the grid,
we can now use this to just get ourselves
a nice site. It's actually a
little bit too low. I'm going to click
control and I'm going to make sure
that the grid is using this pipetual is
just the right area. Just the right angle. I think that's
perfect. In regards to the height, it be a
little bit lower. So what I'm going
to do is I'm going to just assume it
a little bit more, lick it again, which has
a bit of a lower value. Alternatively, what we can
do is just we can write down the value ourselves
a little bit lower. So I'm just going
to delete this. 264 might be quite all right, or maybe 260 doesn't
seem to want to do it. 210 again, there's not
actually updating 263. I'm going to go back to
that value. There you go. I'll change this, 262. Let me see this value there. That's perfect value
I'm looking for. I'm going to use this
value to, basically, you can see the grid
where it would be, where it's trying to set up the value for
the flattened tool. And I can just use
it to get myself a nice type of a solid
ground basically. We're going to use this to help us with in regards to that. Actually, I'm not going
to spend too much time in regards to this positioning. I'm just going to get
a generalized idea of how I want my set up to be. I want some bit
of elevation over here going off to the side. Then I want some hills off to the side to make sure I break off that straight terrain look. What I'm going to
do is I'm going to go onto the sculp motor. I'm actually going to
zoom out a little bit and I'm just going to go
and tap it real quick. Just help us break down
this entire set up. I'm going to worry
about that in a bit. I'm not going to worry
about this entire section, but what I do recommend you
do is with the terrain, you eon to go around the edges going upwards
or by holding shift, you can just go downwards and you can just lower
this entire section. And that actually helps us to break off this
entire terrain. Look, I'm not too worried about these quarters because this is not going to be my focal point. I just don't want them
to be seen just in case I'm doing like a sort of a turntable or
something of the sort. They're not going to be quite
as visible in comparison. So you can see over here,
they're going to look much nicer in regards to the edges in comparison to
what we had before. I'm going to click control
that a little bit. You can see edges
are way sharper. And we can click Control Why? By the way, to redo the steps, we got these fixed up. We're going to go back
onto this area over here. I'm not going to worry
about the set up too much, but I do want to just
make sure I know where we want to have just
the right fixes. The reason I'm not worried about the overall elevation too
much at the moment is mainly because we're going to be adding a testillation
onto our terrain. That's going to be
in the next lesson. But for Nado, let's go ahead and play around with the value. I'm going to go back
to the flatten tool, going to take off the
flatten target this time. And I'm just going to just play around with how
this looks like. That's a little bit
too much, something like this. A little
bit too little. I think this is perfect. They
are a little bit floating, but I'm not too worried
because they're underwater and I think it's
going to be quite all right. Something. There you go. I'm just going to
bring this outwards a little bit so all this
looks quite all right. Now in regards to
the background, we also need to, well, first of all get some elevation over here as well so we could consider how it's going to look like and maybe some
elevation over here. Now want it to be a
little bit higher up, could have another level. I'm going to use the Sculpt tool to bring this out a little bit. Going to use flatten again
and just use that as a base for bringing it
up for the Platen tool. Just like that we're
able to sculpt out a nice high transitions. I'm not worried about
too much in regards to the overall set up
of the landscape. We're going to get ourselves some material for the landscape and then we can worry about
all the small detail. Now we just need to
make sure that we have a nice type of a set up. Maybe I'm just going to
break this up a little bit. Over here. Over here, I
don't like this shape. I'm going to just
bring it outwards, like going to make
a smaller brush. And just help me break
this down a little bit. Like I'm going to click one,
see how this looks like. And actually this looks all
right from multiple angles. Okay, I'm quite happy with that. I think we're going to cut it short in regards
to this lesson. The reason being
is I don't want to add too much detail in
before adding material. We're just making sure that we understand where the terrain ends and where it starts
and how we're able to break down the form a
little bit already. It's looking much
better. Maybe we want to help us flat down
the top surfaces, for example, over here just to make sure it doesn't
look as rounded like so. But other than that,
there's not much else in regards to terrain set up, we're going to be tweaking that once we get like
multiple objects within, especially with the
foliage and trees, which will help us to break
down the surface overall. Then we can go in
and out in between the foliage and the
landscape itself. Now we're going to leave it. Is, that's going to be
it from this lesson. Thank you so much for watching and I'll be seeing you a bit.
80. Landscape Displacement in Unreal Engine 5: All, welcome back. Even
to blend the turn, real engine five, the
complete beginners guide. In the last lesson, we
left ourselves off by just tweaking a little bit in regards to the
background landscape. We need to first of all, apply a tessellated
material which we're going to first of all
enable for us to use, for us to do that
the Unreal Engine 5.3 as an option in which will allow you to use
tessellated nite of a displacement
within the landscape, but it's more of an
experimental type of a feature. It's okay if you
don't want to use it, but it will help you to
break down the landscape. If you're willing to
follow along with this, you're going to
basically need to tweak a couple of
engine settings. It's actually quite easy to do. We're just going
to go through it and I'll show you
what to do exactly. We're going to go to
the content folder and what we're going
to do is just simply, we're going to right
click on one of the assets and we're going to go on to Show in folder view, which should open up, sorry, show in Explorer. There you go. If you were to click on that, you're going to open
yourself up with the folder view of
an actual project. Then we're going to go back one, We're going to go on to the main area where it has complete folder
within your project. We're going to
double click on it. We're going to find
the Fault engine. And this one over
here, Fault engine. We're going to double
click on it to open it up. If you're not able
to open this up, you should be able to
just right click and click open and select Notepad
or choose another app. You shouldn't be able
to find yourself a note pad within the O pad itself. You're going to need to
find the renderer settings. This shouldn't be too far off. If you were to just scroll
down a little bit over here until we get to the area where it says
Engine Renderer Settings, this is the area
where we need to be. There's a couple of options
over here, basically. We're just going to go on to the last one where it's
a shadow contract, scale equals 0.8 We're going to click Enter to
get ourselves a new line. Now within the resource pack, I'll make sure to attach this. You should have yourself a landscape tessellation dot file. We're just going to
copy these two options over here that will allow you to tessellate
the nite landscape. And basically it'll enable
the tessellation itself. We're going to go ahead
and just select both them. We're going to hit
control C to copy. We're going back to
default engine set up and we're going to paste it in over here just like that. We're going to have
nloestllation equals zero and it do tessellation
equal zero as well. We're going to now click
control to save it out, which I just totally forgot. Actually, we need to now
relaunch the project itself. I'm going to go ahead
and close this down real quick so we
could restart it. Basically the project. I'm going to go
ahead and close it. I'm going to make sure that
everything is saved out, save Selected, Make
sure you do that now. Once we're done with
that, just make sure to go back onto default engine. I click control as to save it. You can now close this down. We're still going
to make use out of this dessellation that
I set up for you, but this is going to be
within the engine itself. Go back onto the project now, and I'm just going to
find the right one, which I think it was the
hot project over here. The reason it's not
showing up with the thumbnail for me because
the last time I used it was it ended up
crushing it for me a little bit.
That's all right. We'll just give it some time
to compile all the shaders. There you go. We open
ourselves up with the project. If you're having this
error, by the way, with the water collision, all you need to do is just
go all the way to the end and just click at entry
to the fault engine. We just actually wear anything. Let's go ahead and do
that and close this down. And I'll be fine right now. We're going back to
our fishing level to make sure everything
is working well. Again, we need to make a
couple of extra tweaks. And what I mean by
that is within a text, we also have something
to write within a console at the bottom left
hand corner of the project. What you'll notice is there's
Enter console command. We're just going to put
our commands over here. We're just going to copy one of them and put them in over here. Then we're going to put
another one over here as well. Control V to paste it in. And put it up. Now it should, I'm just going
to make sure I check that dot or destllationI allowed. Elation. There you
go. All right? It should be okay. So now that we have
it so we can finally make use out of displacement
for the landscape, since we're going to
be setting ourselves up with the landscape
material right away. I just want to test it. If
the desselation is working, we're going to right click. We're going to create a new folder for
just the landscape. We're going to go into it here. I'm going to create a new
material just like that. We can call it
landscape underscore. Mm. That's the material
we can go into it. I'm just going to simply
use the displacement. At the bottom, we see
ourselves, the displacement. There was this
option beforehand, but now we're actually able
to use it within a landscape. I'm going to hold, I'm
going to tap on a screen. I'm going to then
create a simple noise. I'm just going to
search for a noise within the bottom
left hand corner with the texture
sample selected. I'm going to find
any random noise, actually doesn't really matter. And I'm just going
to go ahead and attach the red value
to displacement, just like that for now. I'm going to go ahead and click
control S to save it out. I'm going to go ahead
and close this down. And I'm going to open
ourselves up with the landscape itself.
Stop on the landscape. Go all the way down until
you find all the way up. There we go. We got ourselves
to the landscape tab. We're going to find ourselves landscape material and we're
just going to drag this down over here and
let's see how this will affect the set up. Right now, it doesn't seem
to be doing anything. The reason being is
that we actually need to scroll down a little bit until we find enable N.
We need to enable this, now we need to click Build Data. Once we're done with
that, it should give us some nice displacements
within the scene. What I mean by nice,
it's going to be quite a mess since we just
are only using the noise. But you should be able to
see something like this. I'm wondering what's going on over here. Might
be, there you go. It's quite a mess at the moment. It looks very fuzzy
type of a landscape. We're obviously not
going to be using that. I'm going to right
away fix that. This was just a simple test to check if it is
working, which it is. In the next lesson
now we're going to be actually setting ourselves
up with material. But before doing that, let's
go ahead and fix this, a mess, because
this is very messy. I'm going to go ahead
and just delete it. Click control to save it out. Make sure that there's
nothing there. Now, close it down, and just
as a security measurement, we're going to click
on Rebuild Data. Rebuild data will, basically, you'll need to rebuild
data every time you make use of the set up and you
adjust the displacement itself. Now that we've done
it, we got back to the normal landscape itself. Yeah, in the next lesson,
we're going to be actually setting ourselves up
with a proper landscape. So thank you so much for watching and I'll be
seeing you a bit.
81. Creating Landscape Material: Hello and welcome
back. Ever run to Blend the turn real engine five, the complete beginners guide. In the last lesson we
left ourselves off by enabling tessellation
for landscape, for us to be able
to make use out of displacement texture maps. And now we're going
to continue on and set ourselves up with
the landscape material. But before doing
that, we, of course, need some materials
to make use of. And for that we're going to go onto the
upper left hand corner, we're going to go onto
Quicksell Bridge like so once we get it within it, we're going to meet with
a lot of materials, a lot of different
assets which we are able to use within our projects. It's part of real engines. All everything you see
here is going to be free. You just need to sign up
using your own real engine. Once we're done
siting in who we're going to be able to have
access to all of it. The ones that we're going to
be looking for are going to be just the textures themselves. There are models
decals and there are textures that we're able to use from Quick Still Bridge. We can just simply for now, search it within a search bar. The one we're going
to be looking for are going to be dirt. Actually, we're going to be looking for a forest
type of material. Let's go ahead and
type in forest. We should be able
to fight it like the one we're looking for is
going to be forest rocky. If you're overwhelmed with
everything at the bottom, you can also categorize that
we're looking for surfaces, that those are going
to be the materials. Let's go ahead and click on it. There's going to be
more categorization, but at the bottom we'll find basically all the
materials for some reason. Maple tree trunk, I don't think it's in the
right category actually, but it is what it is. Let me just go ahead and
actually I will type in a little bit more in regards
to that forest rocky. I'm going to type that in
perhaps this one over here, that's the one
we're looking for. Nordic forest ground
pine rocky is a very nice typo texture which
contains a bit of grass, a little bit of some stones. And it's going to
be working very well with our Nana displacement. The medium quality, it's going to be by default,
it should be by default. Let's go ahead and keep
it as medium quality. This is where it's
basically going to allow us to keep a
nice bit of detail. I think it's in two or
2048 by 2048 resolution, there is high and
highest quality. We don't really need to use
it for a landscape purposes, especially we can keep
it as medium quality. After you have done
selected that, you can just simply click
download over here to. But it's not highlighted for me because
already downloaded. Then afterwards I'm going to
click Add onto the project. After it's done downloading, you should be able
to go on surfaces. You can see that it created
basically a new folder called Mega scans surfaces,
forest rocky pine. That's actually exactly
what we're looking for, That's that we're now going
to go ahead and actually add an extra bit of a material. The reason being is
that we'll need to break up the surface
a little bit. Let's go ahead and
actually close it down. At the top, we can
just click on the axis and we can just delete the
keywords, just like that. We're going to search for
stone, just like that. To scroll down a little bit, maybe Nordic forest
detail stone. I think that's the right one. Yeah, it looks like
it's the nice one. That's the one we're
going to be using. Nordic forest
detail rock course. Let's go ahead and add it into the project just
like we did previously. If you're not able to
see it within here, for example, it's still
within rocky pine ground. Although I'm pretty sure
you can see that it already added a folder onto our content. But it didn't just open it up, so I'm just going
to click again. And you can see that now it
just went into this folder. So we can definitely know that it actually opened up
within the folder. That's a nice little trick. You can just click the
button again to just basically get into
the same settings, sorry, into the material
that was just downloaded. We basically got ourselves
two materials to work with. We got detailed stoned and
we got for rocky material. Now these are set up
with material instances for just simple material uses for like
objects and whatnot. They're not set
up for landscape. We need to actually
make use of them and set up ourselves in
regards to the landscape. Set up, the way we're going
to do it is first of all, we're going to grab ourselves, the material landscape
that we had. I'm going to go back
onto the content, going to open ourselves up with the landscape material
master material. Yeah. Yeah. Let me just
go ahead and do that. I'm going to open that up and I'm going to make
it actually smaller. Going to go back onto
the forest rocky pine, going to grab all
of the textures, color map, normal map, and one that has
everything compacted up. Going to just drag those
free into the material. Just like that, we got
ourselves the material, the textures that
we can now reuse. The way we need to reuse it is actually going
to be quite simple, but to simplify it for us, instead of just using this
as a normal material, let's go ahead and
make it a material. Material attributes allows
us to basically contain multiple information of
textures within one bundle. And it actually will allow us to manipulate the landscape in
a much easier type of way. Let's go ahead and do
that with the landscape masked material selected
for the options. Let's go ahead and select
Use Material Attributes. If we were to have it selected, you can see that it makes
it smaller into one, but at this point we
cannot actually add it. It's not compatible with
just normal textures. What we need to do is
actually we need to set it up as material attribute. Out of these textures
that we just add, what we're going to do is
we're going to Chlick, we're going to search
for material attributes. There should be an option called Make Material Attributes. We're going to go
ahead and add this in. And you can see
this is basically the same as what we had before. The upside of this though, is that it allows us now to connect it directly to
material attributes. Now we can actually
just attach this. This is actually
going to be quite useful because we'll be able to blend in multiple materials through just
material attributes. But we're going to
get to that in a bit. Now though, let's go ahead and connect everything
as it should be. This is a default base color. This one is a normal map, quite obvious color, and now we have
ourselves as material. This, on the other hand,
is a little bit different. You can see in the naming, it says P at the very
end, underscore RDP. And what this means
is basically it means that as it stands in the same way RGB stands
for at the very end, it helps us basically
to identify which channel represents
which stands for occlusion. R stands for roughness
and DP stands for basically this would
be the red would be occlusion Green would
be the roughness value. Blue will be the map. By using this analogy, we can just simply connect that in. Let's go ahead and do that. Occlusion, we're going to go
ahead and add this in and roughness over here,
finally, displacement. We're going to add it over here. Although, yeah, let's go
ahead and add it for now. We're going to clear
control S to save it out. We're still not quite done in regards to the
landscape material, we still have quite a
few things to work on. First things first is, well, actually let's go
ahead and right away set it up for
the landscape. As you can see, it's quite
a mess at the moment. The reason being is it's not
properly set up just yet, We're going to find ourselves, the landscape master material. Instead of using master
material itself, we're going to right
click and we're going to create a
material instance. This will allow us to just have more control over the
landscape itself. Instead of just calling
it underscore instance, we're just going to
call it basically landscape underscore M. I just help us with
identification. Let's close this
down real quick. I'm going to select
the landscape itself, going to just add it to the landscape material just to replace it basically
to what we had. Should load it up. Which it doesn't seem to
want to load it up. I'm not sure why that's the case now is happening over here. This seems to be a
bit of an issue. Seems like I made a
slight mistake over here. I'm not sure what happened. I'm not sure what's
happening with this. I'm going to leave it as
this is a bit of a yeah, there was a spline
issue with the water. Why that happened,
I've not touched it, but anyways, going
back to the landscape, it seems like since the
water is not changing, it kept the same as it was. I'm going to leave
it is basically, but actually I need to fix
this landscape right away. I'm going to go ahead
and do that real quick. Since there was some.
I'm going to make sure that landscape
layer one is selected. I'm not sure why that
happened, to be honest. I'm just going to go ahead
and fix that real quick. Just overlay at the top
so the water doesn't get on top of it. Just like that. All right. Landscape landscape
material right now is properly set up. It doesn't have a ni
displacement S yet, but we need to sort
that out right away. But now though,
let's go ahead and go into the mass material. Again, I'm going to
actually maximize this. We need to have a
certain control over the displacement itself. The easiest way to
do that is just simply have a multiply value. I'm going to hold tap on the
screen and I'm just going to attach the displacement
onto it like this time. Instead of just changing
the value over here, we're going to hold
and tap on the screen, which will allow us to get a float value,
that's a parameter. This will be shown within
the material instance. Now we're going to just
call it this place in one since we're going to have multiple materials as
best to just have it like we're going to keep a
default value zero for now. We don't really need
to worry about that. We still have a lot of work actually in regards
to setting it up. We need to be changing
up the scale. We'll need to work in regards to a couple of other
parameters which we're going to do so
in the next lesson. Thank you so much for watching and I'll be seeing in a bit.
82. Fixing Material Scale and Color: Welcome back everyone. To blend the tone Real engine five, the complete beginners guide. The last lesson we left
ourselves off by creating a nice basic material attribute
that will allow you to, if I were to save it this
out and show you the compiled that will allow you to have a texture on your map. For some reason it seems
to have broke down set up. I'm just wondering
why that is the case. I think the reason being
is that it actually, the texture itself is
being set up properly. But for now, we're just going to take off the
displacement map just to see if that was causing
the issues basically. Yeah, that seemed to
have been the case. The displacement
wants to start using, it actually offsets the
texture a little bit. We're going to learn how
to fix that up in a bit. Well now though,
let's go ahead and fix the scaling issues. Since right now
it's a little bit, probably, it's not
the right size, we need to make it a
little bit larger. In regards to that, let's
go ahead and work on that. The easiest way for us to do that is if we were
to just right click, search for a texture coordinate, find ourselves coordinate. We're going to enable that. We're going to then
make use out of this to have some control over the
material we're going to hold. We're going to
create a multiply, we're going to hold and tap on the screen
to create scale. We're going to call
this one scale one. And we're going to attach
one texture coordinate to A and scale one to. Then we're going to attach
everything to UV's. Basically, that's what
controls the scale of this attach to everything. The default value that
we're going to use is 0.1 I find usually works quite well in
regards to the scale. We're going to click
control and to save it out. Now let's see, the
scale of the landscape. Here you go. It's going
to look like that. It might not be quite
the right scale in regards to the
set up chess yet, but we're going to work on that. We can now go actually into the landscape material instance. Which we can do so by clicking
on the material instance with content browser Landscape
folder that we created. We now see that we have
an option for scale one. Let's go ahead and enable it. We don't see displacement
one by the way, because the reason being is that we just disabled it
for now, permanent. For the moment actually, I just realized that
it doesn't have it completely because I
did this entire step. So let me just go ahead
and quickly set up. I'm going to just make
sure we have it over here. I'm going to click control
S. Anyways, we have this. Let's go ahead and go back on to the material instance
which has scale one. I'm going to increase
this to something like 0.3 I think that that
looks quite nice. We need to adjust a couple of
extra parameters actually, in regards to the set up. Yeah, let's go ahead and
actually do that right away. I don't quite like the color for this with this type of lighting. It doesn't look quite
as nice actually. After we're done
with the landscape, we're going to be fixing up the sky since
it's way too blue for what we're trying
to achieve for a more realistic type of a look. Anyways, going back
to the landscape, we're going to be adjusting
the texture itself. Now for us to do that, we're going to go on finding
the way the texture is. We're going to open ourselves
up with the textures. We're going to find
this texture over here, texture sample the color. We're going to
double click on it. Once we get within it, we are going to find if we were to scroll down
adjustment stabs. The adjustment stab
is very useful for when we want to
have quick adjustments. Just make sure you
have this opened up basically to see the options. Yeah, let's go ahead
and work with them. The one that's quite useful is going to be
for status brightness. Actually, I'm going to
put this a little bit to the side like so
just scroll down. There you go.
Brightness will allow you to just darken it down. If you were to just darken it, you can see how much dark it
gets, basically potitture. I want this to be something, maybe I'll set it up as 0.67 so that looks quite all right in regards
to the upper settings, we're not going to be
touching them actually, we're just going to
be using RGB curve. Rgp curve will allow us to basically sharpen up the image, were to go the upper
way, bleaches it out. If we were to go
in a positive way, it will basically just
sharpen everything down, it makes it look much darker, richer type of a soil,
that's quite nice. We're going to set this
value to be the value of 1.8 just like that. We get ourselves
this type of a look. Yeah, it's going to be
looking much better overall, going to give us a much
richer type of a soil. But of course, we're still not quite done with the
landscape itself. Let's go ahead and
leave this texture is, let's go back onto
the landscape itself. I'm going to actually save
this material instance, going to go onto
the upper section. The next step that
we need to do is basically we need to
set ourselves up. We would have a nice way of
breaking up the surface. One way of breaking it
up, as you can see, it's very tiled up, The
pattern is quite obvious. One way of fixing that would be, for example, to use
multiple textures. You can have multiple textures to help you
break that down. But even so, that would
still not be quite enough, especially if you have
something more in the distance, it's going to be
still quite visible. In regards to that,
we need to make sure we fix that up a
little bit as well, but since we're
running out of time, I'm just going to
really just check the overall set up with the epic settings to see how
this looks like. In regards to the settings, we seem to be getting some
jagged edges over here. I'm not sure why
that is happening. I might need to just restart the engine in regards
to the water. It would be hopefully
fixed for now though. Let's go ahead and finish
this lesson up then. Yeah, in the next lesson we're going to work in regards to how we can set the
material to be looking much better in
regards to the distance. Yeah, that's going to
be it for this lesson. Thank you so much
for watching and I'll be seeing you in a bit.
83. Distance Based Blending for Nanite Tesselated Material: Hello and welcome back everyone to blend the ton, real gin. Five, the complete
beginners guide. In the last lesson,
we left ourselves off with a texture that we basically adjusted the scale and a color for it a little bit. We darkened it down
to fit or theme. Now we're going to move on and actually set ourselves
up with a little bit more of a bit more of an
advanced type of material that will allow us to blend in the materials based
on the distance. The reason for it is because in the distance when we look at it, we see the tiling quite a bit. But once we get close up, the tiling itself is
actually not as visible. It gives us a very nice detail. The easiest way to overcome that would be to create cells. A material which would scale differently based on the
distance that we're looking at. What I mean by
that is if we were to just actually
go into material, there is a very nice type of a node called distance blend. If we were to write Click, we can search for distance, We can actually test it out. Even real quick, we can do so. I'm going to just simply make, actually I'm just
thinking what the best way to show that would be. It'll be best if you just show it using this
material over here, since we need to create
distance blend for it. Anyways, using distance
blend will allow you to change the alpha based
on the blend range, based on the distance you
are from a certain texture, basically, for you to
make use out of that, what you'll need is you'll
need to use this as a T value. But for material attributes, there is a special
note for that. We're going to search for that, we're going to search for
blend material attributes. That is, there you go,
Blend material attributes, We're going to put in a
result for out over here. This will allow you to
blend material attributes. We only have one
material attribute. A moment, we're going to go
ahead and just attach to A. As for the B, we're going to get ourselves a
different value, the upper material attribute. What we're going to do is
just we're going to copy this entire section we
already created the material, we don't need to recreate it. I'm just thinking
if we should set it up with displacement
right away or not. Actually, we're going to set up the displacement
real quick first, since I don't want
it to be left alone. As we're going to attach
this to displacement, I'm going to set the
value to a value of 0.1 I'm going to first of all
click control and save it out. I'm going to see how
this terrain is being affected since it should be lower down now because
of the displacement. You can see that displacement
is working quite well, although it's a
little bit too much. I'm going to actually
change this up to be a, maybe a little bit
of a lower value. But we can also adjust
this later down the line. Actually, I might keep, it might be quite
all right as is, but we need to
definitely raise up the overall scale
for the landscape. The way we're going
to do it is actually within the material itself. If we were to go to
the material itself, there should be an
option for displacement. Displacement. And
there is a center. If we were to increase something
like one, for example, once we save this out, it should give us a
different base position at lower it down even more. So that's not what
we're looking for. We need to actually set
it up to 0.1 maybe. Let's go ahead and
test this out. Let's see how this looks like. It's much better. I'm wondering if I can have it as a negative value.
Doesn't seem to. Let me, I'm going to have
it as zero point, actually. I'm going to have it as
a zero value over here. See if it works out
well enough for us. There we go, we're getting
a really nice result. As you can see, some rocks are coming out of the
water and whatnot, and it's actually
behaving very nicely. We still need to make some small tweaks in regards
to the overall set up. We're going to do that though, once we're set up with the
landscape material itself, since we adjusted the
displacement now, and we actually set
it up properly, let's go back onto the settings. Let's go on to actually copying this entire
section as we did before. Now we have it like, so
let's go ahead and hit control C control and put the
other material over here. Now, there is one issue
in regards to the set up. That is going to be
displacement value. What I mean by that is
we probably might not want to have displacement value
over here to be the same. Because this is actually named the same way as
this one over here. We might need to adjust it, but I'm not quite
sure if we need to. We're going to
check it in a bit. I'm just going to right
away just attach this to B and see how it works. The only thing that
we do need to change though is going to be scale one. Because this is going to be
the same, exact as this. We need to make sure that we are having a different
parameter here. We're going to have
this selected. We're going to hit
F two to rename it. And we're going to
call this scale two. I'm actually going
to go ahead and delete it from displacement map. Displacement value.
From the search power over here on the
left hand corner. This value, we can leave
it as 0.1 Actually, the thing that we
need to finalize is actually going to be
the distance blend. This needs a couple of values. It needs blend range
and start offset. As you can see both
in the brackets, that means it's there
just a string value, simple type of a
value like this. We can just simply click and
hold and tap on the screen. Cast one, distance blend range. Attach this over here. I'm going to copy this
control and hit two. Could actually just
rename this a little bit. This one is distance blend
offset, just like that. It just saves me a
couple of times, a couple of seconds just
rewriting this name. I'm going to attach
this over here. I'm going to set both values
to one and we can play around with the values
themselves within the bid. With that, we're
basically going to be affecting the range and offset. It's going to help us
get a different result. Basically, once you start
going further down, it should change the value of B, this one over here, And default values 0.1 I'm not going
to be changing it here. Can actually need to now attach this to
Material attributes. Save this out to see what we're getting in regards
to Material instance. Once it's saved out, we can go to Material instance
now based on distance, it should give us different
results. This is scale two. It's going to be a little
bit larger if we go here, we should be able to
see the difference. I'm going to actually
change this value to 0.01 or something like that, is to see the difference. Basically from a
distance you can see that it gets very large. But once we get closer, it should actually give
us the right result. Or actually, I'm not set up the distance blend,
offset and range. So let me just go ahead
and do that real quick. For the range, we can set
it up to something like, well, once we increase it,
you can see the difference. Basically, this is a little
bit too much, actually. I'm going to look at
it at a distance, you can see the way it works. Basically, once you get closer, it'll start transitioning
to that first value, the first scale which is 0.3 I'm going to leave this
values 5,000 Basically, I think that's a good
value for the offset. The way the offset works is it basically allows
you to scale it. If we were to change it
to something like 500, it'll basically
allow you to have a, let's put it this way,
the sharper edges, the way it offsets. Basically the mask
with the blend range. It will have a distance plus
it will have a nice offset. But the offset itself
over here will basically allow you to have a nice transition
between the two. And if I were to have like
something like sharper, it will have more of
a sharper transition. So that's that I'm going to have this value of
something like 550. I usually, that's
the value I use. I find it to be the right one. So as you can see, it looks
quite nice for a start up, for a close, but for
the further shorts it's a little bit too large. So let's go ahead
and change that. We're going to change this
to a value of 0.1 like so. Now that we get closer,
we're going to see one. And once we get further down, we're going to see a
different type of texture. It's a very gradual
type of transition. We might need to
even change to a 0.08, something like that. It might be quite all
right. There you go. Just because it's further down, it doesn't mean it's going to be quite as notable
that they're larger. The reason being is
that because they're further away and once we start adding
foliage and whatnot, they're going to give us a
nice scaling proportions. It's just going to look like larger rocks in the
distance and whatnot. But closer up it's going to still be looking
like pebbles, like So all in all, that's quite nice for us. That's pretty much it
in regards to setting ourselves up with the distance
blend for the texture. We're now going to be moving
on and actually adding ourselves another
type of a material. Actually, before doing
that, we need to make sure we click on rebuild data to make sure that the displacement is
properly set up. It's not going to be using, let me just move around
the camera a little bit. If you see dark
shadows just move around the camera
in the refreshes the screen, basically
the visuals. Now it should be
quite all right. You can see that these rocks
have a nice displacement. But up at a distance
they basically, I'm not sure if it's visible, they'll have different
type of displacement. But I think by default it's just using actually just
one displacement. It's not like automatic
type of transition based anomic tessellation in regards to which
displacement it uses. Yeah, it's still quite all right because as we get closer up, we still get some variations
for ones for example. All in all, it's actually shaping up to be
quite a nice material. Again, we still need another
variation for this material. So we're going to work on
that in the next lesson. Thank you so much for watching and I will be seeing in a bit.
84. Setting up Nanite Landscape Material Blend: Low will welcome back and run to blend the turn
real engine five, the complete beginner's guide. In the last lesson, we left
ourselves off by setting up a nice landscape distance
blend type of a effect. And it's quite an advanced type, but it definitely gives us a much better result for
the overall environment, especially when we're doing
like large scale projects. This is a very neat trick to do. Now, we're going to basically
set it up for the use of multiple materials so we could actually paint our landscape. For the set up, the way we're going to do it is actually going to
be quite simple. We're going to go onto our
mass material that we created. We're going to just duplicate this entire section over here. And we're not going to
touch this bottom one. This bottom piece, That's
going to be easier to just simply redo
it from scratch. So we're going to go ahead and copy it like click control C, then go downwards and
click control V over here. We're going to switch off a
couple of parameters though. First things first, this scale
one needs to be changed. I think we're using
scale one and scale two. So we're going to go ahead
and select scale one. We're going to click
two to rename it. We're going to rename
it to scale B one. And the same for
displacement as well. We're going to rename displacement
B one. Just like that. There we go. We got to sell. I set up, we just need to
change up the textures. It's actually super
easy and simple to do. We're going to minimize
this window just like that. We're going to go to
the content browser. We're going to go onto the
Megascans folder surfaces, and we got ourselves the stone detailed stone
type of a texture. It's pretty much set
up in the same way. All we've got to
do is just replace those texture samples instead of just dragging it onto
the material graph. What we're going to
do is we're going to select the color, for example. Then we're going to
select the color in the content browser within
the texture sample detail, stab within the material. We're going to click on
this symbol over here. And that just replaces the texture from the selection
of the content browser, which in this case we had
a selected as base color. We're going to do the same
thing for the other one, normal map to select this, going to replace it. And then this compact
texture as well, we're going to go ahead
and replace it like so. Now that we've
done it like this, we can go ahead and basically copy this entire section and just set it up for the
distance based blending. Let's go ahead and do that.
We're going to hit control C, control V off to the
side connected to B. We just need to change up the scale B one to
scale two. There we go. All that we're left to
do now is just connect this type of material with the one that
we have over here. The way we're going to do it is we're going
to right click, we're going to search for
landscape, a layer blend. There you go.
Landscape layer blend. Let's go ahead and select it. By default is going
to give us nothing. The reason being is that
within a detailed step, we have array options. We need to go ahead
and click Add Element, and Add Element again to
get a couple of them. Like so it says none layer None. The reason being is that we actually need to
change the name. If we were to click on
this arrow over here, we can open up the index and we can change
the layer name. We can call it, in this
particular case, to be grass. The first one would be called
the grass, for example. The second one which
we can change by clicking on this arrow
over here to extend it, we can call this 1 stone. Just like that, we can
connect one with the other. Just by the way, this landscape layer blend only works with
material attributes. Make sure to always use
make material attribute and set yourself up
with nice materials. Yeah, that's pretty much it. We're also going to
change the blend type from weight blend type
to height blend type. It's a, it gives us a nicer transition between
those two materials. Basically, we're
going to set it up like grass and height stone. We need now to grab ourselves
the height information, we're going to grab the one that gives us a smaller size,
this one over here. We're going to grab
the default value from this section over here, instead of just grabbing
and dragging across. So we can totally do that, but as you can see, it just goes all the way through
all of these nodes. It's actually going to
make it very messy. As a quick organizing tip, what I recommend you doing is rich click and
search for reroute. There is something called add name reroute,
declaration node. This is a very useful type of a node as it allows
you to create a custom type of organizer that allows you to
connect to one end. And then I'll show you how to connect it to the
upper end as well. So I can just call this
one displacement one. So I'm going to connect the blue value to the
input which is over here. Then basically the next time we want to use this type of node which now contains
the information coming from the texture sample. What we can do is we
can just right click, we can search for re, route, not reroute at this point. We call the displacement. This one is going to be
called displacement one. As you can see, it's under
named reroute type of a tab. So just make sure to
grab it from here. Once you create it from there, you basically only get
yourself an output. You're never going
to be able to change the input unless you're using
it from the original one. As a quick tip as well, You can also double
click to go back to where to see
the original one, to find it from there. Yeah, that's a
pretty nice set up. It allows you to basically grab some nodes and just
make sure you organize them. Basically, you
don't need to drag it across all of the
upper nodes like that. We're going to basically do the same thing for the
second one as well. We're going to right
click. We're going to search for reroute. We're going to add
reroute declaration node, We can call it displacement two. We're going to connect it from the blue value. Oh,
sorry about that. Actually, I think,
yeah, I need to move it up a little bit
higher for this one. This one is the one
that's smaller in size. Since that's the
way we set it up, I'm just going to
move it over here and leave it then move all the way to the top
Reichl for displacement. Again, displacement
to this time. And just put it up very nice and neat type
of functionality, we can put it into
material atrophies. Now there might
be an issue where if you're using more textures, it might not be visible. The reason being is that
you need to go onto the texture sample
when you're using it like that for the landscape. And you need to change
the sampler source from texture acid
to shared warp, just like that, we
pretty much need to do it for every
single one of them. Shared warp will
basically allow you to use multiple materials. If you want to have
more than two, you basically need to do it. Or that whenever you're
creating a landscape, basically we can select
actually multiple of them. And we can just go
to Sampler Source and click Shared Warp. Just like that.
I'm just going to do it for every
single one of them. We can hold Shift as well, we can just drag
or selection like so we can grab and
select the shared warp. Yeah, just like
that. We're going to get ourselves a nice set up. We're going to click control
and as to save it out, give it some time for
it to actually save it. Then we're going to close
this master material. We're going to get this
type of black met. We're going to for sits, make sure we update this. So the easiest way for us
to do that would be to just reset this to default
property value. Then we're going to drag
it out again onto it. The reason being we're
doing it is because what we need to do is we need to go
onto the landscape mode. Now in order to
actually paint out, once we get it onto
landscape mode, we need to go into the
paint tab over here. Then at the very bottom, you should be seeing the
grass and stone type of layers with non set up. If you're not seeing that
just I recommend you to just again reset the
landscape material. And you should be saying it, you might want to try to save out the master
material as well. Again, Yeah, it should
update itself in this area. Once we have, all
we need to do is just click on the plus
symbol over here. Set it up weight blended layer
with normal. Click Save. It should give you a
folder, shared assets, it should be all right and we're just going to do it for both
of them. Just like that. Once you've done it should find yourself with layer
has no assigned. It seems like there is an issue. I'm just wondering
why that is the case. I'm going to try. I think it's because
of the Ninit set up. So I'm going to go
ahead and just table it real quick and enable it that
I'm going to build data. Again, I think that's what
might have been causing it. It's still giving us
black type of set up. I'm just wondering
why that is the case. We might need to rebuild data.
Let's have a look at this. Will work out data,
rebuild data. Go ahead and give
it another try. The reason why this might
be happening is mainly, I think if we go to
master materials, I made a small mistake for this. That might be something
to do with displacements. I'm going to go
ahead and actually remove the displacement
from the larger group. It might sometimes just take up too many
displacement information. I'm going to go ahead and
just take it from the bottom. In regards to the displacement
going to save this out. Going to see if this works. Now it doesn't seem
to want to work. I'm trying to figure out
why that is the case, Going to try to rebuild
this data again. If this doesn't work,
then I might need to reset the layer information. The way we can do it is
basically we can just select the shared assets I have for because I already
had some issues. And we can just go
ahead delete it. Forcefully deleted like now. It should be giving us
back to square one. I'm going to make sure that
this time I'm selecting the original layer for my edit layers as it might
cause an issue as well. I'm going to add them in
again, just like that. This time it seems to
be working much better. It's not giving us a preview, but it doesn't matter because
it seems to be giving us, I'm going to select
stone and I'm going to tap on this area like so. And it works, that's good. Basically, the way
we paint it in is when we select either
one of the layers, we can just start
painting it over. And that works quite well. We're going to use original
layer for painting, similar to height
map information. We can overlay multiple color information
or multiple layers. But I recommend
you to stick with just one layer for painting whenever you're
doing the painting. Otherwise you can
overcomplicate yourself. We're only going to be painting on the original layer basically, and that will give us
some real nice results. It seems to be, believe
you for a moment. I'm just trying to figure
out why is the case? Yeah, think it's
because I need to just update the tap on
other chunks like so. And it just updates itself. I'm not sure why
that is the case, but basically we
are just trying to apply some stone
onto other chunks. It just pies other
chunks as well. Yeah, just going closer, you can see that they
have tessellation, both the stone and rocky
surface basically. All in all, we're
much done with this. It was a very complicated one. I hope you were able to get it working and now we'll be
able to basically paint them over and make ourselves
some really nice type of textures and just make a nice landscape overall
painted within the scene. Yeah, that's going to
be it for this lesson. Thank you so much for watching and I'll be seeing in a bit.
85. Painting in Stone Material and Creating a Puddle: Let me welcome back everyone to Plane Ton real engined five, the complete beginnings guide. The last lesson, we let
ourselves off by setting up a nice material for landscape so we can actually blend in
multiple materials at once. Now we're going to
make use out of it in order to grab our sells a nicer visuals for the
scene vertically one. This, a blob obviously is not
going to work out for us. We need to mix it
in a little bit. Nicer, what we're
going to do is, well, first of all, I think we need to adjust a little bit the
brightness of the stone. We're going to go onto the Megascans surfaces,
detailed stone. Let's open up the texture. We're going to just simply put it actually to the side like so, so we can see how it looks like. We're going to change
up the RGB curve, I think, see if it looks nicer. Yeah, this definitely
actually adds a gritty type of a
look, quite like this. This is definitely blends in nicer with the rocks as well. I quite like in that we might
need to lower this down, the brightness a little bit. Just a little bit. Not too much. We still want it to be a
separate type of a stone. That's quite nice.
Okay, now let's talk a little bit in regards to the painting for landscape. Within the landscape mode, we can select paint using
the paint weight data. We're going to make sure that we are on just the original layer. We can paint either
grass or stone, depending on the selection
within these boxes basically. But by selecting grass,
I can just paint it over By holding shift
by the way and s, I can just invert that basically painting in this case because we only have
stone at the bottom. It's just going to try and
invert everything into stone. It's quite nice. In regards
to this overall set up, there's not much else to say
other than tool strength. I recommend you setting up the tool strength
to be quite low. 0.1 should do the trick. This way you're able to
just nicely blend in the values just like that. We're going to gradually
blend everything in. I'm going to hold
shift a little bit, just tap it across. So let's break up this area. Just like that. Maybe
we want to set up like a path going off
to the side over here. We're going to set up a very simple type of
a look just like that. I think that looks
quite all right. One other thing to
say is going to be in regards to the biggest
recommendation I would say when doing
this is actually going to be just make sure to avoid circular type of patterns. Because we're using
the circular brush, it's easier to click
and hold it and tap it, but at the same time that would not look quite as organic. So make sure you shape it out just a little
bit in and out just like that because you're
using lower strength. If you're using 0.1 value, it's going to be nicely
blending in with other type of rocks and
whatnot. So that's quite nice. If you're getting
these rocks over here, you'll just need to make
sure to basically go onto the landscape and rebuild the night data,
which we did before. Now though, I'm going to give it a quick couple of taps
through these sections, that's going to be
quite nice overall. The other thing that we can do using this is
if you click one, we can actually set
it up nicely within next to these shore
areas over here. By clicking and holding, we actually need
to hold shift for this since I am
using grass still. Just going to, again going
to tap at the upper section. The reason being
is that we don't want those circular patterns. I'm just going to
remove it a little bit. Looks so much better
in this section. We can also use it over
here on the slopes as well. Recommend you doing
that as well. Maybe I'm going to in
this particular case increase the strength
a little bit, value of 0.5 just to make sure
it's a little bit faster. Just like that going across. So now I'm going to go
back to the value of 0.1 with the grass selected. I'm just going to quickly tap it throughout
these sections. Looks a little bit
off with the shadow, not sure why that was. It wasn't just
updating properly. Just like that. We might
need to come back to it depending on the set
up for the foliage. But in regards to this area, we're just looking to break
it down a little bit to make sure it doesn't look
too circular to round it up. I'm just tapping multiple times. Help us break down the surface. Maybe holding shift again, get a nicer, more organic,
type of overlook. In this particular case, maybe because the slope
is not as step, I might want to leave a
little bit of an extra grass, but this is a little bit too much the, that's much better. Going back to
sculpt for example, we can actually, I think we can lower this
down a little bit. We need to go to layer one for that, going to click control. I seem to have made a bit of a mistake in regards to that. I'm not sure why that was caused the entire section
to actually go down. I'm not sure why
that is the case. I think it's because now
just turned off completely. We need to actually go
back to the selection, select it, and
click rebuild Data. That will give us the right
set up again. There you go. That's much nicer for us. Just make sure to update the shadows a little
bit. There you go. I want this area to be a, a little bit more with water. I'm going to go to
the landscape mode, going to sculpt mode, layer one. And I'm just going to lower
this down a little bit. We have a smaller
size, a bit too much. I think that's a little
bit too much actually. But we need to rebuild data
again to see how it looks. In this particular case, this is somewhat just playing around with the values a little bit, seeing how it looks
before and after since the displacement data will always switch up how it
will look like regardless. For example, like a puddle
like this might be quite nice, but I'd like to ideally lower
it down to a lot of amount. I like how this
turned out though, as it makes it look like it is like a small
puddle over there. Just left over like
this overall set up. Let me just go ahead and go back and try to fix
this real quick. The water looks a little bit
too dark in this section. Let's just go ahead and fix
it by just simply tapping it. We'll just basically
reset the entire section. I'm going to go
slightly under water. Going to use the flattened tool. Select the flattened target. Just grab it somewhere in
the middle, just like that. Going to click controls in, I'm just going to lower or raise it up a little
bit, just like that. I think that's going
to be quite all right. I think that should be okay. Let's go ahead and
rebuild the data. Let's see how this would look
like within the landscape. Going to selection mode,
selecting this again, rebuild data going to
mess around too much, since I just wanted a little bit of a puddle section over here. Maybe a little like
a stone on the side. Once this is done,
hopefully there you go. We'll give us this result. Now the puddle is
actually completely gone. This is not what I wanted. Just going to click
control Z a little bit. Yeah, this is a
little bit too much. Going to go to the
landscape mode again. Actually, I'm going to
click Control Z again. It should bring us down to not sure if it's
working properly. I'm going to click
Control Why many times? And just select this and then grab this and just lower it down manually to something like 40. Then I'm just going
to lower the size of the brush and just
manually doing it like so just like that, that's going to be
quite all right. That's going to
be okay. Let's go ahead and rebuild the data. There we go. Something
like that is going to look quite
nicely for us. The puddle itself might have a little bit
too much absorption. I think I'm going
to leave it as is. There's a bit of an issue over here which I want
to actually fix. I'm going to go ahead and do it. Fix it real quickly. Yeah, I'm not going to worry about it too much in regards to this section, spending a little bit too
much time just taking the small values which
we shouldn't do. Going to go ahead and finish off real quick with the clips. There was one more
other area that I wanted to finish off
in regards to that. When we're looking at
this section over here, if we were to click and just hide the selection
out of the way, this entire section,
it needs more detail. If you imagine how our
foliage is going to be, we don't basically want
the area to be just brown. We're going to have like plants and whatnot in the background. But this area over here, they might have a
couple of rocks, but we're not going to have as much of foliage and whatnot. We definitely need to break down in regards to how this looks. Yeah, Again, just like
we did over here. We're going to do a
simple type of a set up. We're going to go
ahead and go to paint. Just grab stone and I'm
just going to go ahead with a stronger tool strength that it's quite all
right actually. I will want the puddle
to be more transparent. I'll need to increase absorption
and that will affect how this coastline will
look like. Real quick. I will just go
back to the water, go on to scroll all the way down until we get
to water material. Then I'll lower down the absorption value
alpha over here. Just go ahead and
it's a little bit too much, actually increase it. There you go just a bit. I think that's much better. Overall. Looks very colorful though I will remove
the blue quite a bit. Why it's so green actually
there just increase the value of the absorption
value much better. Okay, now we can see
how this looks like. We can already see that
it's more transparent. So we need to break
down the value in regards to just
how this looks like. I'm going to select grass this time and I'm
just going to go with a will shrink to 0.1
It should be 0.1 already, but it wasn't giving
us the right choice. Just trying to figure out
why that's happening. I'm playing around
on a layer one, that shouldn't be the case. Let me just go
ahead and actually remove this entire section. I'll just select back to
layer, I'll grab grass. Start playing around with
the values a little bit. Breaking it up the surface
just a little bit. I'm going to hold
it means that yeah, might have made a
mistake drawing this in the wrong section. So let me just go ahead
and grab the stone and I'm going to hold shift
and just delete it from this section.
Sorry about that. If you're having the same issue, just make sure you just lock down all the layers
except for one. Now you should be able to add in this selection
just like that. Going to go back to
the grass to strength 0.1 I'm going to just break down the
surface a little bit. All right, here you go. All right, that's
pretty much it when it comes to the set up
of the landscape. In regards to maybe I'll
just add a little bit of an extra stone over here. Just a little bit of ways of breaking down
basically the surface. Just a couple of random
patches over the sections. Maybe over on the
side over here, well, you can have it for sure. There you go. All
right. Not too much. Too little, Quite nice overall. Adding a bit of an extra
over here as well. There you go. Breaking it up a little bit, just like that. By clicking one, we can see that it actually
looks quite nice. Okay, that's going to
be it from this lesson. Thank you so much for watching and I'll be seeing in a bit.
86. Tweaking Lighting Parameters: Welcome back everyone. To blend the turn real engine of five, the complete beginners guide. In the last lesson, we
let ourselves off with setting up a nice
landscape terrain. Now we're actually going to work a little bit in
regards to the lighting, since we already have ourselves a nice type of a hut set up and we got
some land to work with, as well as some reflections. We now need to make
sure that we are having an overall good
aesthetics in when it comes to the environment and
the landscape and whatnot. Yeah, let's go ahead and go
back to the selection mode. We're now going to go
ahead and start off probably if we were to just make this outline
a little bit larger. We're going to start with
the direction, lighting. We already set everything up
in regards to what we need, but we've not touched it too
much in regards to tweaking. Let's go ahead and
do that right away. For sits, what I tend to do with insensitive for light
ten is way too much. I either set it up
to three or to six, depending on a type of an
atmosphere I want to get. Setting up to six in this
particular case might be quite okay and that's
going to be quite all right. This is giving us
some nice detail. Also the light color, we need to give it a slight yellow tint. The way I do it, I just
slightly tap it over here, like maybe I just
increase the blue. It's only minimal type of an extra tint you can barely see in regards
to all the new. But that extra yellow type over look actually a little
bit more might be. All right, Bit of one
extra is going to go a long way for the realism when it comes to light
bounces and whatnot. Yeah, that's already
looking much better in regards to set up source light. This doesn't really
affect it, actually. For this particular scene, we are going to keep
it as is by default. But it usually helps
with certain shadows on. Yeah, by hovering over, you can see that the
default sun values 0.5 357. Let's go ahead and leave it
as is source soft angle. I think that actually
helps to soften, does not help to
soften up the shadows. Mainly used for point lights and whatnot for this
type of a set up. But the actual light is not going to give us
much of that effect. If we want, for example, the easiest way to
fix up, for example, if we want more of a hot type of a surface or cold
type of environment, whatnot, There is a very
nice type of a set up. If we were to click
on Temperature, we can just lower this down
and it's going to give us a very hot looking type of sun. Or if we increase it,
it's going to give us more cold type of a set up. Recommend the fault is this one. I recommend you just
increasing it a little bit. It will give us a nice blue, make it look a little bit
cold environment or whatnot. And I think that's
going to give us a very nice type
of overall set up. Next thing is going to be
exponential height fog. We touched it a little
bit, not too much now, if we were to set it up e
value something like two, we can see how the fog
is being affected. Before doing anything like that, what I'd like to do is
go all the way down and enable something
called volumetric fog. This volumetric
fog will allow us to just basically
get a very nice overall set up for the light interacting
with the fog itself. It will basically be
affected by the environment. And that's going to give
us a much nicer type of a set up if you
want to, well, let's go and increase the folk density a little
bit more to something like 0.5 If you want to adjust
the color itself of the fog, you can by just
going to folks in scattering color and
just changing it up, you can definitely get a really nice type
of an airy result. Even without the volumetric fog, you can still adjust
it and make it a little bit more stylized. Let's put it this
way, for more nature, I like to get a bit more
of a green type of set up, so that will definitely add in. I'm just thinking
how much of green I'm looking for at this moment. I think something in the middle is okay, Something like that. It's going to be quite
nice now if we were to change it to something
like 0.2 Actually, let's go back to default one. It's going to give
us this a look that's way too much of green. Let me just go ahead and
lower this down there. Actually, I'll just
make it a little bit more bluish. There you go. That's much, much better
before we can see that this is what we're getting with the scattering color being zero. This is with, and you
can see the difference. The type of fog
density that we're going to use is
actually going to be a value of 0.1 There's
also a fog height falloff. Basically controls in regards to the vertical
type of a cut off. You can see the
difference in here. We tend to leave it
to quite a low value, something of a value of 0.3
We'll do it quite nicely. I just realized now
that we adjusted it, we definitely need to fix
up the scattering color. I'm just going to
lower down this value over here and just make
it only a little bit. That would be default
value over here. If we change it to a
little bit more of a bluish greenish tint, it will give us a more
airy type of a look. We can also, if we don't
want too much fog, use the fog maximum
fog capacity. And that'll basically
control how basically it'll be affecting all the way in a distance
for the fog itself. So if we have like things
like way far away, it's not going to be
completely covered up. If we set it up to a value
of something like maximum of capacity of 0.9 we'll go
ahead and do that actually. But you can see in
a distance how it just helps us to break off the overall depth in regards to the environment because
once in further away, they're going to have
more fog and it's just going to give us
much, much better look. It'll definitely
help, especially when we're setting
ourselves up with extra polish and more things going on with this environment, which we're going
to do in a second. For now though, we
also need to worry about in regards to
the sky atmosphere. Let's go onto the sky
atmosphere real quick. The sky atmosphere
will allow us to affect the way the
sky is looking. The easiest way to
control it is simply to scroll down and find
yourself light scattering. This will allow you
to just control general lighting
type conditions. So if we were to, for
example, change it to red, you can see that it turns the entire set up into more
Martian looking. For example. I'm going to actually just
lower down the overall value. Make it look a little bit gray. So you can see before. Now if I were to just
lowers down just like that, it'll give us more
gray tone to the sky. I think that's actually going to work out really well for us. Now look at the entire
Exponential Highfok needs some tweaking as well. Because the values for the
colors overlay one another, they always need to be tweaked. Once you tweak one, then
you need to tweak another. That's usually, I might
have just tweaked a little bit in regards to ray light
scattering a little bit too much to increase it
just a little bit, make it more, and there you go, that's a much nicer
type of look. Now we can go back
to exponential height fog and I'm going to change this to be
more of a blue tint. You go, looks much better. This is how it looks like before you can see the sky
and everything. And this is how it looks. With all in all, I think it looks quite nice. I might change this to 0.09
just to lower this down. Or 0.07 I think that's going
to look quite all right. We haven't talked much about the starting distance actually. There is an option or start distance over here and there is an option that will
basically allow you to, if we were to
increase it all the way and maybe a couple of zero, you can see that the fog disappears basically
off at a distance. This is quite useful for
when we want to sharpen up, for example, main
parts of an object. I'm going to click one
to go to the main shot. And I'm just going to
increase this by quite a bit. Actually I'm not sure how much though. This
is way too much. So something like 11, 7,000 seems to be doing
quite well for us to. I'm not worried about
anything in the background, I'm just worried about
the main composition. And if I'm doing a turntable, I'll probably do something like this since that seems
to be quite nice shot. If I had a camera
looking from downwards, so then we need to worry
about the horizon. But that's an extra
step I think. Go ahead and just focus
on this area over here so I'm not going to worry about anything in
the background. Yeah, all in all, that's
pretty good so far. There's also a couple of options in skylight that I want to
talk about a little bit. The main one is going
to be intensity scale. If we have shadows that are just not as dark, we
can lower this down. For example, this would
basically affect how well it interacts with the overall background and
lightning and whatnot. You can also increase this, just brighten everything
up if you think it's a little bit too contrast
in regards to the shadow, honestly leaving it to a value of one or
even lowering this down to a value of 0.8
is quite nice for me, so I quite like the
overall result. In regards the rest of the
settings for Skylight, I tend to keep them as is. Just setting up it as dynamic movable
object will give you nice results based
on your source of skylight and your
clouds and whatnot. And overall set up
basically for other areas. In regards to the
volumetric clouds, there's not much of an option. Portionally, we have a layer, bottom layer height and whatnot. None of them do too much
other than in regards to Finkego layer height is quite nice to making
it at clouds, To making it less fluffy or
more fluffy if we desire. There are ways to
alternate with them, but honestly having just
some background type of clouds just like
that is Lenty. We're not going to
be touching that. We can also, if we're looking
for the cloud material, there is a cloud material
over here which would have to set up similarly to what
we did with water source. But honestly, I quite
like the overall set up. The default clouds are
quite nice as they are. Let's go ahead and
leave them as is. Yeah, that's pretty much it. When it comes to lighting
up the environment. We'll need to tweak up the
post processing itself, but that's only going to be done when we actually touch up the entire environment with the foliage and
with certain props. Which by the way,
we're going to be looking into in the next lesson. That's going to be
it for this lesson. Thank you so much for watching and I'll be seeing in a bit.
87. Selecting Quixel Assets for the Scene: Welcome back. Ever
Road to Blend it, turn real engine pipe, the complete beginners guide. In the last lesson, we played
it around a little bit with the lighting and I realized
that it looks a little bit, maybe a little bit
too bleached out. We're going to be fixing that in post processing in a bit. For now though, what
we're going to do is we're just going to avoid using the high correction that
it has that the scene has. Basically, whenever you
go in a darker area, it adjusts the overall
brightness to fit the theme. You can see it adjusting it
and getting it brighter. But once we leave
out of this area, we can see that overall exposure basically gets tweaked out
based on that real quick, what we're going to
do is we're going to go to show upper
left hand corner, or we're going to click on Lit. And then we're going to
take off game settings. Then we're just going to play
around with the EV 100 and we're just going to get
ourselves a value of minus one. That's going to be a
little bit better for now. Yeah, we're going to
leave it as is now. We're going to go onto
the Qui Crystal bridge. Let's go onto the add
button Quiksil Bridge. Make sure you have it logged in so you'd be able to
grab some assets. We're going to, first of all, grab assets that we should get to break off the
surface a little bit. So we're going to grab a rope. I'm just wondering
which rope should grab. This is a nicely
tangled up rope. I'm going to go ahead and
add it to the project, like I already have
it downloaded. All of these assets are going to be kept at medium quality. We don't need Nit, for example. Nite would have a
Orch resolution. It would be way too much in regards to
performance overload. We don't need that.
We can keep it as simple, medium quality. We're also going to get
ourselves this rope as well. Actually, let's go ahead and
grab added to the project. The next couple of things
that we need is going to be, actually let's go ahead
and take off the search. We're going to search
for a wooden fence, that's the one
we're looking for. We're going to make use
out of that. There you go. Let's go ahead and add
that in to our project, then let's have a
look at the next one. We need a couple of boulders. Actually, let's just go ahead
and find a couple of them. If we type in forest boulder, we should find a
couple just like that. And I'm trying to look for
the ones that I actually by myself and I don't
know what happened. It just turned blank
for some reason. Let me just go ahead
and re log for the crystal bridge for Bolder. Ask me to sign in now. I'm going to go ahead and resign it to see if it fixes the issue. There you go. All
right. Let's have a look for a forest
folder again. Let's see if you
find some good ones. I'm going to make use out of the ones that I already
had previously. Since we already using those
rocks within the scene. These ones over here,
they have more of a grayish type of a look. I'm thinking of using that
same type of a set up as well. I don't want any mossy
actually stones. I think I'll just use these
ones brighter ones as well. Lichen lichen forest boulder
and mossy forest boulder. Let's go ahead and add a couple of them. We only
need two of them. We're going to be setting that
up with foliage actually, which we're going to do
later down the line. But we might as well keep them as part of the Fred assets. Once we have
downloaded, just make sure you add it
onto your project. Going to make sure it's added. Click it again once more and it already has it
within a project. It's not going to do anything
in regards to the set up. Another thing that we need
is maybe like an old bucket. Just as a quick thing,
I'll go ahead and just grab the old bucket that
looks very nice for a set up. I'm going to grab it over here. Just as a quick thing, if you scroll down, you also
have related collections. It's very nice and simple
to make use out of. If you click on it, you're able to just search through
related assets. I recommend you checking
that out as well. Also type in Middle East, I think it's called
type of collection. That might not be the case
if I type in something like a barrel, for example. Let's go ahead and
type in a barrel. We should find ourselves there. A couple of nice barrels, We're going to grab both of
them basically on the reason I'm grabbing this one
and this one is both of them have a darker
type of a tone. This one, for example, would
be a little bit too bright. And this one looks a
little bit too aged. That's why I'm
grabbing this one over here and this one over here, as they're fully rusty, they're going to be looking
quite all right next to a more watery
type of an area. If we scroll down there, we've got ourselves medieval village. We can even search collections through left hand side
over here as well, and you should be able to find yourself a medieval village. I really like this
type of a collection. I think it's a really nicely
made type of a set up. We're going to,
from here, actually grab ourselves wooden wheel. We're not going to be setting
it up as a wooden wheel, but it does look
nice as a shield. We can make use out of this
type of a prop in a way make that it doesn't look
nowhere as fancy as we had before with this
a shield in the back. But if we were to be re, using this all over the place, it would perhaps look a
little bit too repetitive. This more generalized type of a prop is going to work
much better for us. Another one is wooden wheel. And let's go down a little bit. I'm looking for a bench. Actually, this time we can't
seem to be finding a bench. So I'm going to go
ahead and go up, going to search for bench
myself. And there you go. That's a nice, actually
says put in table, but we're going
to be using it as a bench since it's
nice and mossy. Or the scene, it'll be
looking really nice. Okay. And then we're going
to look for a ladder. The reason we're using a
ladder is mainly to break off a bit of a surface
on these sections. So let's go ahead and
find one of them. I'm not sure which one, which the images themselves
don't tell much. But if you look at this
section over here, we can see that it says size and it gives us
a human reference. This one is a small type of
a modular wooden ladder. That means that we
could probably stack it up, one with another. This one is a higher one. I think we just need
this one over here. We're going to go
ahead and add it in. That's going to be it for us. Actually, let's go ahead
and close this down and see if we have
all the free assets. We've got 11 items in
total to play around with. You can see the
naming over here, and you can just quickly search them up and
just grab it yourself. Also, it has a reference
ID at the bottom as well, of each one of them at
the end of their names. So just make sure that
they match, basically. Honestly, you can
use your own ones, you can play around with it. But I'll show you some
real nice and simple ways of just building up your props and getting
ourselves a nice type of a hut. Basically, we're running
out of time, though. We're going to continue on
with this in the next lesson. So thank you so
much for watching and I'll be seeing you in a bit.
88. Unreal Engine 5 Quixel Props for 3D Scene: Welcome back everyone
to Blend the ton, Real engine Five, the
complete beginners guide. In the last lesson,
we left ourselves off by getting a nice prop
set up over here. And now we're going
to continue on moving with this
type of a set up and grab a ladder onto the side.
Let's go ahead and do that. I'm going to hold, just
duplicate it also. Let's not forget that in the future we'll need to delete this to make sure that not
part of the render. I'm just going to go
ahead and just click. I'll just move it
to the side click. There you go. That's placed
directly at the bottom. Going to maybe move this ladder. It's quite all right. Maybe you can make
this a little bit smaller actually,
just like that. That's quite okay. Now let's think about in regards
to the positioning, should we put it
right in the middle, a little bit off to the side, or how do we do it? Actually, let's make sure that
we are touching the edge. So I'm just putting it a
little bit more to the right. Main reason actually. I'll put it on the other side. Yeah, the reason is because I want to get like some
shadow coming this way on this beam onto this pole. If you click one, we
can click and hold, just see and visualize how it
looks like and you can see a nice way it's warping
around this beam over here. And quite like this
overall outcome, let's go ahead and keep it. This might need a couple
of extra barrels. I'm just going to duplicate
this one over here. Going to duplicate it again. Rotated to the side 90
degrees. Put it off. Maybe like that. If we want to rotate it now that we rotated this onto the side, what we can do is we
can change the gizmo from world position to local
using this button over here. Now we can just
rotate it nicely. I want the hole to be
visible, to be honest. It's quite a nice detail. Let's go ahead and keep it now. As for the upper
end, I will actually turn off the local gizmo, so I could actually just
push it down a little bit. I think that's looking
quite all right. Let's actually check.
If I were to put it over here, let's check. Let's click one and see how it looks like from a distance. I think that looks
quite all right. Let's ignore the shadows because they're not
really good way zooming in when we're
doing it like that. Well, holding right
click, I'm zooming in. You're creating a lot of
artifacts actually on the side. This is looking actually
quite all right. Worried that there
might not be as nice shadow shadow just
popped up over to the side. I'm not sure why
that was the case. Yeah, the shadows
seem to pop out, that's not quite nice. I'm just going to check
actually real quick if, yeah, I totally
forgot one thing. We're going to select all of the three D assets
within the static mesh. We're going to right
click and we're going to select them to be as Nan. This will help us optimize
the overall scene. I'm hoping it'll also help us to keep the shadows
off from a distance. If it doesn't keep the
shadows, that's all right. We can also work with that. But there you go, We're getting some nice shadows now
coming onto the hut itself. That's much nicer overall. In regards to this set up, we'll need an extra bench
over here as we talked about. We can set up a bench
like so just like that, we're going to make it
much, much smaller. I'm going to move
it to the side. I'm going to click,
going to make sure it's not being placed. I'm just going to manually
just drag it down. We get to this position. This is way too
large of a bench, so we're going to
make it much smaller. So something like that. A little bit. A little
bit still too big. We're going to make it, so
that's quite all right. It also helps us to break off
the entrance a little bit, so I think that's okay. Let's just make sure
it does not float. I'm going to turn off the grid, this extra tuning, I'm going to turn on back the
grid so I wouldn't forget. Yeah, it looks much
nicer when this is being broken up a little
bit in regards to the edge, you can see it
being much better, but it's still not quite there. I don't like the
way it's set up. I'm going to use this wheel
which is going to be used as a shield and just put it
off to the side like that. Something just going to
lay down on the side the scale we need
to make sure it's quite a bit smaller. Something. And that is looking
actually quite nice. Maybe I'll just use a local
gizmo to just rotate it to the side just a little
bit like so it wouldn't be completely
diagonal to the wall. Yes, that looks
very nice for us. Just making sure
that the gizmo is set back to the world gizmo. We're going have any
issues in the future. This is looking really nice. I'm quite happy with the result. Let's go ahead now and
actually set ourselves up with a we'll actually grab a bench and put
it off to the side. I'm not going to be
using this bench over here anymore because I want to make sure that the scale is accurate to the previous one. I'm just going to grab this
bench over here, hold a, put it off to the side, maybe something like this. Just like that over here
is quite all right. I'm quite worried
that this bench is not sticking properly
into the ground, but I think it needs to be. Yeah, it needs to be rotated
just a little bit like, So there we go. Might even just
rotate this a little bit to make sure we
offset this too much. I'm going to turn off
the angle snapping. Yeah, this is looking quite nice, making sure
it's all right. I'm going to turn on back
the snapping objects. Let's grab, actually all of
these objects over here, including the rope hold old, put it off to the side. So let's play around with
the shape a little bit. The reason being is that because it's not as much in a corner,
it's more in the middle. We need to make sure
it's properly set up. What I'm going to
do is I'm going to scatter them a little
bit more around. Maybe a little bit more off to the side bucket
can go like this. To make sure they're
not too compact. I'm just going to grab
this rope and put it off. So I think that looks
quite nicely together. Just like that, it gives
us a nice a shape, a circular shape in regards to the overall silhouette
shape at the base. We get this a breaking point. I think that looks
quite all right. We need to just
maybe play around with a little bit of an
extra in what we have. For example, we had an
extra rope. There you go. This section rope can go off onto the side
going to hold old. And just put it off to
the side. Just like that. Actually, I'm going to
click to just put it off. Maybe rotate it off. I'll just put it
over on this end. Here you go. In
regards to this edge, we definitely need to
have a bit of one extra. Let's just think in regards
to how we want to set it up. We can, for example, just grab those smaller
barrels over here. Going to grab it like
going to hold old, move it off to the side. Just like that hold I
put off to the side. This now gets in the way. So I'm going to move
it off a little bit. The edge, this is actually, I'm going to push a little
bit off to the side, so I can just lie. This type of role, I can maybe duplicate this
one a little bit like. So now I'm just going to rotate it randomly just to see
what it looks like. Something like this, like
this will do quite nicely. This one can just be like, this one can be a little bit of to this side. There you go. Well, I think that
looks quite nice. We might as well grab
actually like a rope, something of the
sort push off onto this just to have more variable in regards to the height
between those two barrels. Just like that. But
as you can see, there is an issue
with this being a little bit off to the side. But if I push off over here, it's a little bit further off. I might get away with this. Think that looks
quite all right. Actually, let's
go ahead and keep it going to click one just
to see how it looks like. We might need to push it a
little bit back to the back. There you go, Much better. One thing that we're
left to do is actually this rope is way too small
now that I look at it. This one over here
in particular. I'm going to make
it much larger. I'm going to push
it off to the side, that's going to
look like it's on. Then this barrel over here, that's looking quite nice, might even get away with just sliding it downwards
a little bit. I'm going to make sure that
the grid lock is turned off. There you go. That looks
much nicer overall. In regards to the fence, we
have a couple of options. We have this pole over here, we have this one over here. Think will need a bit of an extra lesson in
regards to the set up. So we're going to
continue on moving with that again within
the next lesson. Thank you so much for watching and I'll be seeing in a bit.
89. Planning Prop Placement for UE5 Environment: Welcome back everyone to
Blender turn real engined five, the complete beginners Guide. Last lesson we grabbed ourselves a couple of
quick sell assets, which we're now going to be
able to make use out of, and set it up within the scene. Before doing that,
what I recommend you doing is actually
to just grab all of these assets and putting it off to the side somewhere
within an environment. Which really helps you out
when it comes to the overall set up and just visualizing what size the props
are and whatnot. Actually, the best
way for us to do that is within the three
day assets folder. If we were to just go onto
the static mesh filter. If you don't have
that, just make sure you have this enabled over here. Yeah, we're just
going to grab it. I'm checking the wooden fence. Some reason is not loading up. Oh, there we go.
I'm just going to go ahead and click
the delete for now. What I'm also going to do is I'm going to use the grid snap tool. I'm going to change this
to something like 50, so it would be more manageable
in regards to the size. Then I'm just going to start
placing everything down, what I have basically
in regards to this, to see and visualize how this
entire set up looks like, just a couple of rocks. I'm going to place rocks one next to each
other, actually. So it wouldn't be in our way as much since we're not going
to be using them just yet. Of barrels over here as well. Barrel size for example, it's a little bit too small. We might need to increase that. The bench is a little
bit too big actually, we might need to lower that down just by visualizing
how it looks like. Under our lighting
conditions and whatnot, we're able to identify
if it's going to look good or not
within certain areas. For example, this one
is ladder over here. We can see the height of it. Right now, I'm just
visualizing it real quick. I'll be putting
this down so we can see how tall this is in
comparison to the house. I'm going to click control
Z to bring it back down. Now finally, once we have the overall idea on how
big these assets are, wanted to make sure that they're actually at the same height. This sparrow looks a
little bit too small. We'll need to adjust
that in a bit. We'll also change the
snap size to five. We'll have more control in
regards to we're replacing. I usually keep the grid lock
on as it helps me who just not spend too much time just placing the object
exactly in the space. Okay, now that we have
all the assets up, let's go back onto
the hut and let's talk a little bit in regards to the replacement of
certain assets. I'm going to actually grab these assets and put it off to the side
a little bit more. Going to hold control and just make sure that the
sphere is not selected. And then just put it up a little bit closer,
just like that, so we could see
everything in the hut and all of these assets. Okay, the main
issues when it comes to this type of a set up is in regards to how
empty everything looks. We have main straight edges
going along over here. We'll need to break this down. So we probably need to have a certain amount of props
over in this location. Over here, we can have a ladder coming from
this section over here. The main reason for this
ladder would be to just get some nicer shadows casting on the plan wall that's
right behind it. We've got some
windows on the side, so we're just going to have it a little
bit in the middle, maybe a little bit
off to the side, depending on how the
shadow is being casted. Then this section over
here would require certain because the wall, as you can see over here, is quite a bit plain. I should have maybe zoomed in. When talking about this, I'm just mainly looking at the props that we
have on the side. For example, this
ladder over here. I can see the height of it in regards to, for
example, a bench. We could set it up to be next to the entrance
somewhere over here. Like the reason being
is to just help us break down this
angle over here. It's like 90 degrees,
it's too perfect. We need to just able to
use some of the props to just help us make it look a little bit more
organic. That's that. We also got a couple
of fences for example. This area over here
is more organic. It's the opposite
of Ridge basically. It's too organic, it's too soft. But by using those fences, we'd be able to, for example, help us get that bit of
sharper angles over here. We'll work on the type of
fences and we might have something behind the fences
themselves like some props, maybe bushes or something of
the sort that we're going to be setting up with
the foliage itself. And in regards to the
props themselves, we've got a couple of
shields, for example. We can just put it over
here next to the set ups. We do have, for example,
the back side as well, which if we were to look at
it the back side over here, we'll need to work on in regards to certain
props as well. For example, the props
that I'm looking for would be placed maybe over here just
to help us break it down. The bench would be over here and it would
be like a fence. Let's not forget the fence
that we just talked about. The fence would be
over here as well. Even looking from this angle, we'd be able to get ourselves a real nice type of a set up. But that's just
general compositing of where we are imagining
like items to be in regards to helping basically this overall
composition of the house. To just make sure
that we don't have those sharp edges going
straight and like angled in 90 degrees and whatnot to
help us basically make it look and feel more
organic and make it look a little
bit more realistic. Now that we have overall idea of where we're going
to place the props, we now need to talk about how
we're going to place them because it's actually
important to set that up. We're going to grab
barrels, actually like. So we're going to grab a
bucket and a rope as well. This rope over here,
we're just going to duplicate a whole old,
put it off to the side. So actually we might need to just pick them
up a little bit, wrap them up a
little bit closer, and we need to worry
about the size. Now actually I'm going to put it up a little bit to the side. What we can do, a very neat
trick for this is if we were to click the
button on our keyboard, actually puts everything on the ground and placing
them nicely on the ground. Again, clicking button on the keyboard just places
everything downwards like so. These ones might need
to be done individually or might be placing
them in the ground. I'm not sure why they're
not moving, to be honest. There you go. That might be something to do with
collision. I'm not quite sure. Now that we have them, everything placed
down on the ground, let's go ahead and fix
certain scalability issues. For example, this
barrel, in comparison, is going to be way too
small to that per barrel. So let's go ahead
and scale it up. Let's turn around, turn
it around and see, yeah, it has like a nice section,
that white section over here. I'm going to go ahead and
avoid that a little bit. It's actually a little bit
too large now for a barrel, so I'm just going to make
it just a little bit smaller. There you go. Now let's go ahead and
start placing the objects. The way I'd like to
place these objects is if I were to just
show you visually, it's going to be instead of just randomly scattering like
this or this, or this. Instead of what I
tend to do is I tend to try to get a
nicer overall form. So we'd have a n
larger type of a prop, and then next to it it
would have a smaller prop, and maybe even a
smaller prop over here. So this way we have
like a sort of a Jagger type of
edges going around. That helps us again,
break down the surface like it forms of let's say
like a triangle and whatnot. And this is especially good
in this particular case. The reason being is if I were to show this in the
section over here, we want to get more emphasis on the
overall shape of the hut. And that's going
to be quite useful for us because we're
going to basically have a prop composition that leads towards
the main section, basically of the hut, the overall structure,
and whatnot. And it just makes it look
so much nicer overall. Keeping that in mind, we're
going to go ahead and work with what we have with
the props and whatnot. We're going to have
a single barrel that's a bit larger over here. We're going to have a
couple of barrels over here forming that said
triangle going upwards. What we need to do now
is we need to just focus on how it's going to look like from multiple angles. Although by clicking on one, we can see that this is our
main angle, which by the way, I can see that it's not looking quite as
nice because we're going to just grab all of them holding shift and just
click R or sorry. And just rotate them
a little bit like so put them off a
little bit to the side. Now let's see how it
looks like there. That looks much better.
We still have that angle. I can click, sorry x there. I can click to zoom in
from that same position. So it wouldn't affect our perspective. It
wouldn't warp it. It has that an angle. So I'm quite happy with that. But now the main issue is in regards to those props
looking quite the same. They're duplicates, obviously, so they're going
to look the same. But by just rotating this
one around a little bit, example in this direction, we're going to have a completely
different look to them. They're quite noisy,
they're quite messy. They're not going to
look too identical. We're not going to just
look at small detail. For example, this one
and this one over here. It's not going to
be quite the same. I'm going to use
this bucket to place a smaller prop over here that's going to
be looking quite nice. And to help us with that
even more, actually, I will grab these props and just make them just a
little bit smaller. That's too small. At this point, I'm going to turn
off the scaling and just do it myself by hand. That's much better
if we click one. And I'm going to
click, click one, click and hold to zoom in while holding
right mouse button. That is, we're going to
see how it looks like. That's looking quite nice. That's already
looking quite nice. Maybe the bucket
is a little bit, needs to be centered off, the bucket is a little
bit too wide for me. I'm going to click
and I'm just going to squish it up a little bit. Actually I'm going
to click control. Instead of taking
off the scaling, I'm going to make it smaller to 0.125 It's going to give
us a much nicer control. One thing that looks a
little bit too empty, so we're going to use this rope. The rope itself
is way too small. I'm going to increase it in comparison to this rope
over here on the side. It's going to look way too thin. So now that we look at it, it's going to look
much, much nicer. I'm worried that
the rope itself, maybe it needs to rotate it
a little bit to emphasize on its shape a little
bit. There we go. We got ourselves, I think,
a very nice type of set up. Maybe maybe I'll grab these, by the way, whilst
selecting everything. If you select this
as a last object, you'll have the gizmo
on the last object. You can now click
R or you can just rotate this a little bit like going to click one to
see how this looks like. This is looking much better, but I don't like this is a little bit. I'm
going to check again. This is overlaying this
entire form over here. So I'm just going to go the
other way, actually one. And there we go, That's
looking much better. You can see that
these forms are not being left behind in
regards to the set up. What I mean by that is to just grab a little bit closer
the forms themselves, they still have a nice
emphasis on one another, so this one is going inwards and this one
is still visible, so they're nicely packed up. Whilst at the same time it's forming this sort of
a shaped triangle. I would maybe consider putting something of an extra over
here as an extra prop. Like something short
like maybe like one of those fence sticks. But all in all, I think
it's looking quite nice. We don't need to state over
do in regards to the props. We don't want to make it
too messy and whatnot. We just wanted to be
looking part of it, since this is going to
look quite all right, I think everything
is going to be okay. Just thinking in regards to the other props that
we need to set up, for example, off to the side
we might need to consider. I will actually increase the scale just a little
bit. There you go. That's going to
look much better. All right? No, that's not
something that I wanted to do. I'm going to actually
disable the scaling mode. Going to increase
it just a little bit, something like that. I don't like that the
hole is not visible, so I'm going to actually
rotate a little bit. That's actually quite okay. Yeah, that looks quite
all right with me. Let's go ahead and now move on to this other section over here. As I talked before, we'll need some ladder and we'll
need some extra time. Actually, we are going to get on with this
in the next lesson. Thank you so much for watching and I'll be seeing you a bit.
90. Fences and Rope Color in UE5 Scene: Welcome back everyone
to Unreal Jed five, The Complete Beginners Guide. In the last lesson, we
let ourselves off by placing a couple of
props within the scene. Now we're going to go ahead and actually add a little
bit of an extra. We'll be adding pens,
but before doing that, I'd like to just
grab this shield and make use out of it in
this corner over here. Main reason is, although
it's not going to be quite as visible
if you click on one, it's still going to help us out in regards to just getting a bit of an extra
detail or this area. I'm just going to go
ahead and do that. I felt it was a little bit too empty in this section basically. Now, this might look a little bit too similar to
this other one. What I'm going to
do is I'm going to turn on the local gizmo. I'm going to turn it around. So that should give us a
very nice type of a result. There you go. We
might even rotate a little bit, so much better. All right, in regards
to this fence, we're going to go ahead
and grab the post. And this fence over here,
we're going to hold Alt, We're going to put it off
to the side just like that. And then we're going
to start thinking in regards to how we can place it over and how
we can set it up. By default this
already has a post, this first one, but
as you can see, we have an extra pole
and that's actually going to be only used
at the very end. What we're going
to do right now, we're going to hold Alt, we're going to just
drag it out across, so we're just going to
connect it until we get to the right
type of a set up. And that looks quite all right, let's go ahead and keep
it now what we also need to do is we need to basically
maybe grab another one. We're going to hold Alt, we're going to push it
off to the side. Just like that. We've
got our selves set up. Now what we can do is we
can select all of them. We can click and we
can just rotate it, make it look a little
bit more organic. We can also example select this one and then holding shift,
selecting the middle one, in which case the
gizmo is going to be within the middle object. That's actually, the gizmo is going to be on
the post itself. And this way we can
just rotate it a little bit and make the shape a little bit more
organic basically. Just like that. It's not exactly straight
bit of an extra. In regards to the set up, I'm just going to put this up. All right, We need to
stretch it out actually. Even like this would
be quite all right. I think that's quite okay. Maybe a little bit closer,
maybe something like. So either way it's going
to look quite all right. The next area for the pens
can be the back, for example. If we were to just
grab all of this, just like that, we can, we
can push it off to the side. This is not quite as visible, especially if we click on one. But it still helps us to
just break up a little bit, that tension that surface just a little bit
more over here. I might have forgot to
grab the 01 as well, so I'm just going to go
ahead and delete it. Going to grab all of
them by holding shift like a quick tip is going to be. If you were to click
control to group them up, you can now basically select them and select them back up. And if you click to go
out of the game view, you can see there
are green borders, meaning that basically this
is the entire selection. It's much easier to select them overall with the selection. Then we can just, for example, make a nice type of
offense over in this area. It's like that. I'm not too keen about
this one over here. I'm going to hit shift
to ungroup them, make a couple of adjustments, something like that, perhaps. That looks quite nice. I'm going to go ahead and select them all. It control again
to group them up. Now everything is
grouped up nicely. Let's go ahead and now look at the back side a
little bit real quick. I'm going to click one actually, just to see how it looks
like from the back. Yeah, we definitely will need
some foliage at this point. Since we have a little
bit of extra time, let's go ahead and actually talk about the foliage itself. But actually going to leave
that for the next lesson, because I just
remembered that we need to adjust the rope
itself a little bit. What I mean by that is that it's not the same as this
rope over here. We're going to be playing around a little bit
with the color itself. We can either go into
this rope over here, find the material,
find the texture. And we can just, for example, increase the
brightness over here, and it's going to be
looking much more like bleached out and
whatnot. That's quite nice. We're going to set it
to a value of 0.51 0.5 We might even lower down
the vibrant for example, or actually increase it vibrant less in this
case is basically, it allows us to have a
more color variation. It's not quite as visible
in this particular case. Let's not use this one.
Let's use the alternative. The one that I'd like to
also talk about is going to be if we were
to change a hue, you can see changing color by simply shifting
it off a little bit. Like can get, for example, more of a tin for
green and whatnot. If you want to go
to the other side, what you'd have to do
is basically you had to go to 360, which
is the upper end. And then you'd have to basically lower this down from
the other side. And just like that
we're able to get a little different
tin before and after. That's a little bit
too little thing like that perhaps would be better.
That's more of a purple. I don't quite like
that to be honest. I'll keep it closer
to the default. Yeah, but just changing
the brightness of thinker was quite all right. Going to click. Yes. Going to also go back to this
rope over here. Go into the extra for it. Find myself, go to brightness, going to just increase
it a little bit. Yeah, that looks quite nice. All right. I'm quite
happy with the result. Yeah, in the next lesson, we're going to start working
with the foliage itself. Thank you so much for watching and I'll be seeing it a bit.
91. UE5 Foliage Mode for Asset Placement: Welcome back from
to plan the turn, real engine five, the
complete beginners guide. In the last lesson,
we'll ask ourselves off by adjusting and
tweaking some of the color values for the rope and adding a bit of
a fence in the back. Now we're going to go
ahead and actually just remove these poles
and all the pros. We're going to
keep the rocks for now because we're going
to make use out of them. But the rest of the props,
they're not really needed, They're just going to get in our way when we're going to be setting ourselves up
with the foliage. In regards to the
foliage itself, we need to do is
actually we need to go back to the epic
games launcher, because these trees are still quickly part of
the Quicks bridge. So we need to go
to the marketplace and we need to find the trees. They're permanently free. They're not needed to be
purchased or anything, but they still need to be
gotten from the marketplace. If you just type in black
older, there you go. I misspelled. It doesn't seem to want to give me a
black older with a gap. You're going to find
yourself a quisgascan trees, they have a inside. You can click on the
yellow icon over here to find a lot of
extra that they have, including variations
of trees and whatnot. But I really do like
the black elder. Go these trees over here. Just make sure you download
them and add it up to the project and they
will be quite well. I'm going to go ahead and
after downloading it, I'm going to add
it to the project. Let me just go ahead and find it over here. One over here. Going to go ahead and add it to the project.
Just like that. While I'm waiting,
I'm going to go back onto the Epi games, or the Unreal engine itself. I'm going to go onto
the Quiksil bridge. In regards to the foliage, in regards to the
smaller foliage, that is not the trees. We can find all of them within the breed plants
section over here. Let's go ahead and open
that up and there's a bunch of that for us
to make use out of. The ones that we're
going to be looking for is going to be
European spindle. They're really nice
type of bushes. We're also going to be
looking lingonberry. It's very nice to help
us add a bit of a color. It'll make it look like person is growing some
berries in the area. I'm just going to
go ahead and add lingonberry as well as
the European spindle, just like that. There we go. We got ourselves a nice set up. The thing that we need
to also do is we need to transform this into a mesh. We're just going to grab
all the cat meshes. I'm going to just open
up the St meshes. Going to select all of them. I'm going to just turn
it to just like that. It'll take some time for that. We just give it a second. I'm going to check the
marketplace back and should have added the
trees already for me. That's quite nice. I'm going to take off the static
measures for now because the reason being is
we have some foliage in here. I'm going to show
you how to set up the foliage with the
rocks actually first, before we do that, we're
going to go onto the content. Check the black elder and
it should have foliage. Simple. When that's the
ones we're looking for. We also need to
go onto geometry. Actually, I'm going to go onto the static meshes
within a black elder. Go select it all.
Going to right click and I'm going to
turn this to a Nant. Going to wait it
out a little bit. Actually everything
is already turned to N is, so that's good for us. All right, so yeah, we're pretty set to go. Let's go ahead and talk a little bit in
regards to setting up the foliage itself within
a top left hand corner, we're going to change the mode from selection mode
to foliage like. So we should have a lot of
extras right now that we added our own stuff in
regards to the foliage, but we're going to
leave them for now. Actually, they're not loading in with the thumbnails.
I'm not sure why. What I recommend you
doing is I actually recommend you to closing
down the browser bit. That is, once we get ourselves to rocks from this
area over here, I'm not able to
select the rocks. The reason being
is because we're not in the selection
mode anymore. Let me just go ahead and find the rocks from mega scans, free, the assets, forest Boulder, that stuff for Fort Boulder. I'm going to, first of all, just make sure that night
is enabled for that. We're going to just drag and
drop this into where it says foliage type is going to
drag and drop it over here. Going to drag and
drop another boulder. We have two boulders
in this massive list. Now I'm going to go ahead and close down this content browser. Actually, before doing that, I'm going to go to
selection mode. I'm going to delete
both of these boulders. I'm going to go back
to foliage mode. Now, finally going to close down the content browser.
Just like that. If we want to open
it by the way, we can click control space and just talk it to the layout. Just a quick reminder, let's find ourselves the
boulders like So I'm actually going to select on
one of them, doesn't matter. Going to control A to
have everything selected. And I'm just going
to tick it off. Just making sure that
everything is ticked off. Basically, whatever is
ticked on is going to allow us to place it
within the scenes. I'm just going to
have both of them selected at the bottom of this. With those two selected, we're going to have
additional options. We have random that's
going to basically affect how it's
rotated around itself. Basically it's by
default it should be on, it's going to give us
more organic look for the plants although they're
more or less duplicate. Then in regards to
ground slope angle, that's quite important whenever you're working on larger areas. It wouldn't basically put it on the slope by just simply
tapping on the screen. You can see me placing
all these rocks. If you want to remove
it, you can hold shift, which will turn my brush into eraser and we can just
remove it just like that. One thing to consider is
in regards to the density. If you have a density
that's quite high, it's going to be giving us that, going to click control
that to do this we can also change up
the pain density over here to something
like a value of 0.1 and it would give us a
more scattered around pattern. There's a pain density at
the individual basically, in regards to individual
foliage as well. For example, if you
use multiple assets, you want some of them to be spawned less and some of
them to be spawned more. You can use this
option over here. In regards to the density, if we were to set up to 50, it will spawn even less rock. That's quite nice for us. Now in regards to the scale, let's go ahead and set it
up something to point 1.1 that's going to give us
some nice rock erations. There you go. Let's have a look in regards
to the offset placement, I think it actually
looks all right. I'm going to keep it as
is a line max angle. It's not really needed for actually one where
we're looking for is going to be a random pitch angle or something like rocks.
This is quite needed. We can set it up to
something like 180 and it will basically rotate the
rocks around completely. It'll give us more
randomized type of a look. That's exactly what we want. I want more rocks in regards to this beach area over here. Maybe something like some
types over here as well. Just couple over here. Maybe some by this area over here. I'm just
scattering around. When I'm working with
regards to rocks, I'm just going to
zoom out a little bit for the explanation. Usually second, I usually try to cluster
them up a little bit. For example, we have some
rocks in this section over here next to
this slope over here, maybe some rocks over here. And then the section over here, this section over here, maybe here as well. There is a puddle that
we have over here. Maybe we'd have a larger
rock over in this section. Generally, we don't want
this to be just like a lot of cluster
type of a set up. What we want is we want to
basically have it set up in regards to just having more broken up parts
from a distance, it would look like it's there as part of multiple clusters
of objects, basically. If that makes sense.
I'm just going to go ahead and continue on
with the placement. We might need a
bit of an extra in regards to the density
going to change back to actually 80 and just going to start adding a
little bit more in regards to that bit of
that over here as well. Up over here, maybe a little
bit of an extra here. We need to click one and
see how this looks like. This one needs a bit
of an extra here. In regards to this
section over here, what we can do is we
can select single, which will allow us to within
this section over here, which will allow us to
basically put rock one by one, we can just start placing them. And actually, sorry about that
being placed all at once. We also need to go upwards
and we need to select. Instead of all selected, we need to change the
cycle through selected. This way we're going to start
placing rocks one by one. Basically, placement seems
to be little bit too low. But that's all right, because
I'm actually just planning to change the scale for
this minimum scale. I'm going to change
at 2.8 maximum to 1.5 something like that. Maybe I'll get nicer rocks in this section just like that. I think that looks quite nice. Maybe we need a
couple of rocks over here help us break
down the surface. In regards to this section, maybe I'll get like an extra
rock that's almost perfect, but not quite. I
don't want this rock. This rock looks a little
bit at, around it. For me this might
be quite all right. Actually, quite like this. Actually, maybe like a
couple of rocks over here. I think that's
perfect. Yeah, we're not going to worry about
it too much, actually. There you go. A couple of
smaller rocks as well. Let's not forget about that. Let's go ahead and change
the scale to 0.5 and 0.6 We'd have more controllability in
regards to the scale. We're going to just add them up. Here you go. Like that. I don't like this rock. This looks all right. Yeah, that's pretty much it. When it comes to
the rock placement, we're going to leave it as is. We can always do it
a little bit more. If we want to make
quick selection, quick adjustment, we
can also do that. We can go ahead and
go on to select mode. We can select one of
the rocks, for example. We can make that larger. We can just treat it as an object basically
with the select tool, just like that can make
this rock nicer looking. Let me do the selection. Actually, I just needed to press G. Going to go ahead and
use the World Scale. This does not seem to
want to rotate it in the same way that I'm
trying for it to rotate. It's all right. I'll just do it like,
so there we go. We got ourselves a nice set up. All right, so that's going
to be it from this lesson. Thank you so much for watching and I'll be seeing you in a bit.
92. UE5 Foliage and Tree Placement: Welcome back. Ever run
to Blend the tone? Real engine five, the
complete beginners guide. In the last lesson
we left ourselves off with I set up for the rocks. Now we're going to continue
using the foliage. In this case, we're going
to go ahead and make use of the foliage for the actual trees and
the bushes and whatnot. Let's go ahead and get
started right away. We first of all just select
the rocks that we had before. I'm going to go ahead
and select them both. Just selected, nothing else
should be selected for now. Then we're going to go ahead
and hit control space. We're going to go
onto a black elder. Although as you can see, some of the foliage
is already in here, it's not the case for the trees. The reason being is that
the trees themselves are actually put it upwards. The trees themselves actually, they have multiple variations and they usually don't go inside because for that
reason you don't need to overwhelm the list. What I mean by that is if
you go to the foliage, you see that there's
pivot painter and simple wind pivot painter is more of a performance
heavy type of a tree. We don't need to
worry about that because the ones that
we're going to use is going to be more quantity
in regards to the trees. So we're going to make use
out of the simple wind. Let's go ahead and set that up. We can just grab a
couple of trees. And I'm just thinking in regards to the amount we should grab, I think we're just
going to grab the first five and that should
be enough for us. Actually, I'm going to grab
the number six as well, since it is a nice bush. Let's go ahead and grab that. And number five as well. In total, we got ourselves
seven items selected. That should be more than enough. We're going to grab it, drag and drop it into the section. So it's going to compile
all shaders for us. We can now go ahead and
hit control space to close this down window and ourselves, the trees that we just had. In this case, it might
be just easier to use the search functionality
over on the top. If we were to just
type in black, we should be able
to find it like. So what I'd like
to do is firstly, I like to select everything
I just like to enable it. I'd like to just use
paint tool to just brush everything in which is going to be a lot of foliage. But just bear with me because it just
loads everything in. Basically just prepares
all the shades so that I have it done. First of all, before
doing anything else. Now we can go ahead and click control z and actually
work with what we have. First things first,
I just want to know how much density there is. It seems it is quite dense. I'm going to click control said going to set the
paint density to something like 0.01
Let's go ahead and see, this is still quite a lot. Let's go ahead and set it
up to 0.001 There you go. That looks much
better in or set up. We're going to now just foliage in regards to where
we're making it for now. We're going to actually talk
a little bit about that. I'm going to place a couple of trees just for the reference, like talk a little
bit about it, okay? First of all, in
regards to the trees, we need to consider
what kind of a scene, what kind of composition
and shot we're having. Because we're having a
shot from this angle, it's going to be necessary to also interpret how the shadows, for example, are
going to be hitting from this side over here. Because we have also the sun
coming from the shadows. If we place tree for example, over here are basically cast from this direction
onto the house. The reason why this
is important is because it also allows us to get some additional shadow
detail on onto the house. It makes it look a
little bit more lively, especially when attention
goes towards the hut. Because the trees, if
we have a look at it, also tend to have a bit
of a motion in them. By default, they should
have some nice motion. There you go, they're moving, so do the shadows with them. That is pretty nice overall. If we were to place a tree,
like maybe over here, we think of actually
moving the shadow at the side just so we'd
be able to catch that shadow on the side. So I'm going to hold control L and just move it
off to the side. Just a little bit
too much, maybe. I'm wondering if the tree
itself is all right. It might be a little
bit too close. Going to go ahead and hold
shift. Actually delete it. Going to go to the single mode
and just tap it once more. This is looking much better. Going to actually
go to Select mode. Select the tree going to hit to make sure I see which
tree we're working with. I'm just going to play with
the shadow a little bit. Going to turn off the angle
mode a little bit as well. Actually goes something like
this is quite nice maybe. Maybe this tree is a
little bit too big for us, so I'm going to actually make it smaller and get
it closer to us. Just like that. I think
that's much better. In regards to the world set up, I'm going to be playing around with the position a little bit. Maybe behind the rocks
would be better. If you click one, we can. We don't see the base
of the tree as much. They're hidden
away by the rocks, which is exactly what we want. That's very nice for us. I'm just wondering if it's
actually all right or if we need to make it even smaller. We don't need to exactly
cover this itself. We can just cover the
side of this area. And it might be quite all right and I think
that's quite okay. Something like So then we need a couple of
trees in the back, so let's go ahead and
play around with that. Yeah, I think it'll be
looking quite all right. Some trees up on the edge over here,
some trees over here. Just make sure not
to do it too much. In regards to the set up, just like we talked about
in regards to the rocks, we're going to want to make
sure that we have cluster, we'll have a patch of trees over here, of trees over here, maybe a patch of trees over
here some bit over here. We just need to make
sure that we don't just cover the entire section because that will
just make it noise noisy and it's not going to add really anything
to the scene. Just make sure to avoid that in regards to the whole set up. Okay, let's have a look overall in regards
to the cluster. We can have a couple
of clusters over here, we can have some over here. Probably what we
think that we should have talked about is in
regards to the scale, we should have changed this to something like a minimum of 0.8 That would have given
us much nicer set up. I don't like this
tree. I'm going to actually start going with a single mode and start playing around with
that a little bit more. All in all, I think this
is looking quite nicely. I quite like this
overall design. I just need a couple
of trees over here which I'm going to use
the paint tool again and just get some bit of clusters
over here just like that. Nothing too fancy. That's going to be
quite all right. I'm not too worried
about other areas. For example, we can actually just do it with
this entire section, but again, it's not going
to be quite as visible. Yeah, I'm not really
too worried about that. I'm just mainly worried
about the shadows being reflected and whatnot, the trees being reflected
from the river. So this area is where
I'm worried the most. This area a little bit, perhaps, especially when we're
doing like a turntable. Yeah. It is going to be
visible quite a bit. I'm going to go ahead and
just quickly add some trees. Again, not worried too much
about in regards to shape. My primary focus is going
to be around this area. This is mainly to play
around with the shadows. A little bit like even
over here for example. I can just do a couple
of them as well. Since we're using Anite, it's not really too
much of a power to add them in in regards
to the performance, so I'm not too worried
about that either. I think all in all,
it's looking nice. I think we might need
to tweak some tree. Let's have a look on
the main angle shot. I'm going to look over
here, for example, maybe we need a couple of bushes over here. Let's go
ahead and do that. Going to go to the foliage boat, going to go to the single, maybe too large,
something like that. Going to actually select this over here. Going to hold Alt. Should be able to copy
and duplicate it, making this one
bigger a little bit, so this one smaller,
just like that. Going to click one. See
how this looks like? I think that looks quite nice. Overall, this is
looking quite nice. All right, once we're
happy with the result, let's go and actually we
need to add berries as well. Let's go ahead and
find the berries. We should be able to find
something in regards to that. There you go. We found
one of the berries. I'm going to go
ahead and enable it. Actually, I'm going
to delete the search. Select everything selected. There you go. Now, everything is going to be selected whenever. We're going to be able
to make use out of this. I'm going to just place one over here and see how
this looks like. It doesn't seem to
want to add it, it's actually preparing shader. Let's just give it
a moment. There you go. Where are the berries? They are actually quite small in comparison. Want larger ones? I'm wondering if there are
larger ones, it might not be. I'm going to go ahead
and go to selection. Just select every
single one of them. Go to scaling and change to
something like ten by ten. Let's see how this
would look like. There we go. They're
actually looking quite nice, although a little
bit too large still. Let me just go ahead and pick
this up to seven by seven, something of that sort.
Should be. There you go. Perfect. Now, we can just go ahead and place a couple
of berries around. I don't like one of the bushes. It's not giving us the
berries, probably. This one over here. I'm
just going to add it in. So to select this one that was
not giving us the berries. To go ahead and delete it, I want some berries a little bit, actually I want them to
be a bit bigger as well. Going to go ahead and select
the bush in the middle, going to make it
much larger over like person to the bench. They might look closer to apples or something of the sort. We need to be careful of that. Alternatively, I don't see any other type of
berry that we can use. I'm just going to go ahead and go through every single
one of them with a single if there's
anything that I'd like, personally. No, not really. Okay. I'm going to go
ahead and undo that. Yeah, I'm quite happy with that. You need to move up
the bush a little bit. Actually, this purple one, this pink one is going to
be fitting us quite nicely. Oh, this is the one
that we're looking for. Actually, this is definitely something we're going to add. Going to make sure I
move it to the side just so this is way
too big actually, going to make it smaller
to put it off to the side. So there you go. We got some very variation. Now that is very nice for us. I'm quite happy
with that result. Yeah, that's pretty much
it when it comes to that. Now it comes to a little bit of a color grading and a
little bit of that set up, we're going to work actually. There is a bit of an
empty space over here. We'll put in, I think, some of the berry bushes, but the ones that don't
actually have any berries over here, probably
something like this. Pain density can be
a little bit higher, so I can put it to 0.3 I think. All in all this is
quite all right. All in all though. Yeah, I might need a couple of extra berry bushes over in this end. This is a bit too
close to the water. Let's see how this looks like. This is looking quite nice. Let's have a look at
other sections as well in regards to our mega
scans freely plants. Yes, we definitely
need to make use out of this one
over here as well. We're going to continue though with this in
the next lesson. Thank you so much
for watching and I'll be seeing you in a bit.
93. Tweaking Foliage Values: Well, welcome back everyone
to blend the turn. Real engine five, a
complete beginners guide. In a last lesson, we left
ourselves off with a nice set up for the berry bushes and we got some
polishing as well. Now, we're going to
continue on with this. Yeah, we're going
to go ahead and find the European spindles. Let's go ahead and
find them real quick. I'm going to first of
all select everything. Just select, make sure
everything is selected. European or I just talked
in urine, they popped up. I'm going to grab I think
like a row like this. A row like this. That's going
to give us a real nice type of a set up just
like that because it has small bushes and has
larger bushes and whatnot. Let's go ahead and try it out. Just in this area here,
that looks pretty nice. Let's go ahead and increase
the paint intensity to 0.008 It seems like, wondering why that's the case. These were berries.
Actually, no, no, no. That's not what we're
looking for though. Let me just find
which one this is. Click on this one, that's not
going to help me, actually. I think what we can do actually, to identify which
one is giving us those red leaves is we can
make this list larger. Just like that. This way we should be able to
see which one is which. Actually we can just
go into it and just double click on them through
the mesh itself there. That's the one that's
giving us the red. I'm going to go ahead
and untick that. I really don't want this to take the attention off
from this entire section. We're going to set up the
pain attention to the 0.01 This gives
us a nice set up. Going to change the scale
variation to point 8.1 0.21 0.2 This is going to
give us a nice set up. So let's go ahead
and add a couple of bushes over in this section
over here just like that. Don't seem to be adding
the upper ones too much. Wondering why that is the case, It seems like only one is
being quite large one. I'm just going to
go ahead and change the list the size of the scale. There you go. I think this
one is the largest one. I believe we're going to go
ahead and take this off. Other ones are way too small. In regards to
paints, I'm going to change this 2.1 instead. Give us a nicer 1.5
Even there you go, that's more like it going to go ahead and actually
select both of them. Change the scale to be
2.2 0.5, just like that. We're going to get ourselves nice type of leaves just
like that in this area. We will need to change
overall colors of them. Let's just give it a second
just adding the shrubs next to already large type of
environmental rain points. Maybe this areas, well, maybe I'll make it a
little bit smaller, a little bit too much, something like that works quite nicely. A couple of shrubs over here, maybe some by the water.
That's quite all right. Maybe some in a corner
over here as well. See how that looks? Quite all right. Again,
we need to go now and change the color of them because they're
way too bright. Let's go ahead and fix
that. We're going to go now into to look at it, into the material instance. For that, you'll
notice that they have a billboard as well as just
a normal material instance. We're going to first of all, fix up the material
instance itself. We can go and change the
color overlay, basically. That will darken them
down quite a bit. We want them to
be darkened down, and I'd say color
variation as well. We can have a little bit
of a color variation, 0.048 Actually, that's
not really needed. Let's go ahead and
take that off. But just darken them down. Actually, it looks
quite all right. I'm just worried now in
regards to the billboards, if they're being
used or not, because they have Nat enabled, they should not be
using billboards, but I'm not quite sure they don't seem to be using
any of the billboards. Which by the way, the
billboards would be basically whenever you
zoom out far enough, they would give you
a different LOD, within the name you
could see LOD one. And then there is,
if we look at it, it was like every single
one of them has LOD one. But within the
static mesh itself, they would have basically
multiple meshes set up. And based on the distance,
you'd have a different set up. Again, that's not seen in here. I'm going to also go to
the texture itself even. Go onto this sect, I'm going to remove the saturation quite a bit like something like this. That looks nice. They're quite deep green
type of luscious bushes, I think that's
quite nice looking. The roughness value,
I'm not quite keen about the roughness values. I'm going to go back onto the material instance I saw there was an option for
the roughness intensity. I'm going to zoom
in a little bit and increase this roughness there. Something like that.
That looks much better. Don't look as glossy.
They don't look as shiny. I think for these bushes, they look more
fitting. There we go. In regards to the
trees themselves, if you want to change the color, there is actually a super
easy and simple way. I will show you how to. Let's go to Content. Let's go to Black. Adder is an area where it says, I think it's within the fog, won't be within the
Follage geometry perhaps. No, that's noted.
Material textures. I think it's instead
in MS. Presets, we were to go into that,
I can't seem to find it, I'm just going to
put it in a search. Power foliage. There we go. That's what we're looking
for. Ms. Presets. It's within MS. Presets. Ms. Foliage material,
Global foliage actor. That's what we're looking for. We need to just drag
and drop it somewhere. It's not going to be
visible within our scene. Going to go out to
the selection mode, select this and basically
put it somewhere. It does not matter where. What we can do with this
is basically control, for example, wind strength. If one super windy section we can do so it's a
little bit too much. I'm going to click
controls that I think the default one is quite okay. Speak controls, basically,
it's nice in regards to that. Then there is season strength. If we start increasing it, you can see the leaves to
be changing the color, which is nice for us, very fortunate, if we want to have a little bit more of
an autumn type of a look. If we set it all the way
to a very high set up, we can get ourselves a
nice type of a look. For example, right now
I'll set it up to this. I'll set up the brightness to be just a little
bit brighter. Yeah, I'll set it up, this a little bit lower
off the saturation. Something like, although now the strength is a
little bit too much. I'm going to lower this
down, the brightness. What I'm trying to
do is basically, I'm trying to make sure that
we get certain calibration, but I don't want to Autumn look, I want to just make it
look like the leaves themselves are not
overly nutritious. Say in regards to
like they're not getting maybe enough
sunlight or something because this is not a
particularly sunny area. That's what I'm trying
to get out of them. And I think this looks
white. All right. Let's go ahead and keep
it is although, Yeah, might just increase it to
something like let's say three. Then I'm going to change this to East brightness a
little bit too much. There is help. That's something close to what I'm
looking for actually. It's actually exactly
what I'm looking for. It's a little bit too much.
I'm going to lower this down. Health seems to have
allowed us to change the tint of the leaves
to the right amount. It doesn't seem to want to
change now. The strength? Yeah. I think the health and the seasonal strength is actually they go
something like this. There are different parameters. Basically, if we
were to change this to zero or the seasonal
strength and just use health, actually do them both, like this was the default. Try to lower this down, get something like this. There we go. Yeah, that looks perfect. That
looks pretty good. I think actually just a bit of a higher value to match
up with the bushes and whatnot will look
quite all right. A bit of a lower,
just like that. We can even change the bushes to look a little bit of a
different tint as well. That's exactly what I'm
going to do actually. I'm going to go onto
the mega scans. Fred plants, European spindle, going to change this
up a little bit. We're going to use
the hue to make it a little bit more brown. Here you go.
Something like this. Quite like this set up, maybe not as much. It seems like they
might need to be a little bit brighter actually. Now, after this, let me just go ahead and change
up the brightness over here, change saturation a
little bit up as well. The type of blending
I'm looking for is similar to the overall looks, but since they're lower down in regards to how much
lighting they're getting, I don't want them to
be as green actually. The saturation should
be quite a bit lower down and they should
look something like this. That looks quite all right. The berries over here,
they're being grown by a person that is going
to be quite all right. This one is way too
big of a berry. Actually, I'm going to go
back onto the foliage, select this large push and just make it just
a little bit smaller. Out there you go, of an issue. I'm going to look how it
looks like from a distance. From a distance, it
looks quite all right. I'm quite happy with the result. There we go. There we have it. We got ourselves some
adjustments done for the trees and everything.
I'm quite happy with that. Now, we can also tweak down the wood and values
themselves within this hut. The reason being is because
it didn't actually transition anything in regards
to the set up within blender for the
curvatures and whatnot. So we're going to
tweak them up a little bit ourselves
with real engine. That's going to be it
for me from this video. Thanks so much for watching
and I'll be seeing it a bit.
94. Material Parameters for 3D Assets: Welcome back and
run to Blend it, turn real engine pipe. The complete begins guide. In the last lesson, we left
ourselves off by setting up a little bit more of a variation within the colors of the trees. And now we're going to
continue on and actually get a little bit of an extra out of the textures that we
have within the hut. Before doing that
though, I'd like to ideally just move
this downwards. We already have it grouped up. The reason being is that just by seeing it from a distance, it was just blending in with the overall
silhouette of the bush. And I didn't quite like
that. Another thing that I'd like to do is get a
couple of bushes over here. So I'm going to go
to the foliage mode. Should already have a
couple of bushes selected, so I should be able
to just paint it down and it should give
me a really nice result. I'm going to click, which within the selection
mode actually, I'm going to just move this
out of the way entirely. Wouldn't get in
my way like that. I'm going to go back to the
foliage mode real quick. The foliage mode, there you go. Just going to add, it's not quite as visible
with the set up. I'm just wondering
if I make sure that this tree is a
little bit smaller because the shadow is
a little bit too much. Perhaps. I'm going to
go ahead and grab this. It is down maybe control
L I'll just lightly something like this perhaps. All right, this
looks quite nice. I'm quite happy with the result. Yes, going back to the textures, let's go ahead and play around
with them a little bit. First, we can go straight
away into the materials. I'm going to just simply
find the materials themselves within the parameters like so with another hot folder, we're going to just
go into cracked wood. I'm going to actually find which one is being
used by correct wood. I'm going to make sure I get a nice reference
out of that. I'll just go into the
crack wood myself. And the thing that
we can't do with in here is just by holding M
tapping it on a screen. We can just simply apply and multiply a value
to the base color. And I can set this up
to be something like 0.5 Let me just go ahead and see which one is
being used up now. There you go. That's
what's being used up. That's looking quite nice. A little bit too much, perhaps. 0.7 So this is going
to look quite nice. The reason we're doing it within the material itself, by the way, is mainly because there are multiple areas where the
same texture is being used. For example, it's best if
we were to just do it, so just by using a
simple multiply, we're able to darken this down, which already is
looking pretty nice. But ideally, I'd like to
also add a little bit of, a little bit of a
contrast to the wood. What we can also do
in regards to also adding this multiplier
is we can right click, we can search for contrast. There is something called
chip contrast RGB. We're looking for the RGB to
preserve the color value. We're going to put this in here, added to the base color, and we're going to hold one. And then we're just going to add the contrast by hovering over. We can see that the
default value is 10. By changing this to one
or ten to get an extra, we can see the type of a
result that we're getting. This is a little bit too much. By changing it to 12.5 doesn't seem to
work quite as well. I'm just wondering why that
is the case there ago. It's actually very
sensitive type of value by just changing it to 0.1
it's going to give us this. Something like this
perhaps would do it a little bit better if you want to see how
it looks like before. We can click and we can
select Star Preview mode, that will show us how
it looked like before. Then we can click and select Star Preview
Mode on the contrast. That's going to show us how it looked like
afterwards, basically. Now let's go ahead and
click control and Save, just to see how it looks
like visually on the scene. That's how it's going to look a little bit too much
in regards to the color. What I'm going to do
is I'm just going to lower this down
even more actually, 0.2 Let's go ahead and try
this out a bit better, definitely, much
better than before. I'm just wondering if we need to add even more contrast
to this section. We might need to do that, actually we might
need to do that will change this
back to 2.5 I will increase the multiplier value
to just brighten that up, although 0.5 is way too much, I'll change it to 0.3
Let me just go ahead and save that out. There we go. We got to sell a nice set up, maybe a little bit too dark. Going to change this, 0.8 We go looking much
nicer overall. I quite like this
overall result, to be honest. Let's
go ahead and move on. We're going to now change up the timber in
our upper areas. I'm going to actually just
copy these three notes since they're quite
nicely set up already. Going to hit control seat. Copied, closes down,
and I'm going to look for cracked wood this time. Actually we're going to go
with light cracked wood. Let's go ahead and double
click on it to open it up. I'm just going to move this
out of the way a little bit. Too much, my opinion.
There you go. Something like that.
I'm going to hit control control V
to paste it in. And putting the
base color through, just like we did before. This is pretty much the same reason being is
because it's being a little bit affected too much
to save it out with a value of 0.01 on the contrast. There we go. That's looking
quite nice, actually. A little bit worried about
saturation or the main wood. We can actually fix that. I'm going to go ahead
and click control. I'm going to go back
to light crack wood or cracked wood in this case and desaturate
the value a little bit. Right click. If we were
to search for saturate, you'll find desaturation color. That's exactly what
we're looking for. We're going to
attach it like so we should be able to just
attach it to the base color. So this is a little bit too much in regards to how much we
are setting it up with. Some going to attach a value zero is not going
to do anything, but if we set it up to 0.3 it's going to slightly
desaturate it. Let's go ahead and
do that like so. And that's already looking
much, much better. Maybe a little bit
too much. So I'm going to go ahead and use the value of 0.2 again, maybe too much value of 0.1 quite like the
overall result. I'm going to go
ahead and just copy this entire set up again,
just like we did previously. This time with the desaturation
going to hit control C and go on to Wood
light this time. Let's go onto here, I'm just
going to paste this in. Over, move it a little
bit to the side. Move this entire section, like paste this up. Just like that. Bringing
it into the side. Hit control to save it out, which is basically
connecting everything out. I'm not sure which one is
where this is being used. I'm just going to set
it up to 100 just to give us a wide
type of an output. Every go we're
being worked with. Over here going to hit control to undo,
going to save it out. And I'm going to
increase the contrast a bit or actually turn the
saturation to a zero, change the contrast to 0.05 The control
in to save it out. Let's see how this looks like. This looks much nicer. A bit too much too. Let's go ahead and put
it as 0.04 There you go. Something like, although
I will desaturated a little bit value of 0.1 Go
ahead and give this a shot. Yeah, I think that looks
quite nice, actually. Overall, let's go ahead
and keep it all in all. It's already looking
pretty nice. We might need to adjust these
wood log ends at the top. Just going to think
about it a little bit. Yeah, we definitely
need to do that. I'm going to find myself, these posts over here. We're going to open that up. Actually, before doing that, I'd like to change up
to post themselves. Going to open that up. Going to post in the same type of set up as we did before. Just putting everything
in just like that. Click and control to save it out at the contrast is
a little too much. Let's go ahead and change
that up to a value of 0.1 something like definitely
looks better like that. The other thing
that we need to do as we said is post top, let's go ahead and use that. We just need to
multiply it actually, we don't need to worry
about anything else. Going to go ahead and hold m, tap on the screen and
set up a multiply with a value of point
0.8 should do the trick. Let's go ahead and
check. This looks like the control
in to save it out. All right, maybe it's a
little bit too little. 0.5 There you go.
Something like that. Now it's way too little. Let's go ahead and
increase it, 0.7 I think that's quite all right. Okay, I'm quite happy
with the result. The other thing
that we need to do is perhaps change
the rope itself. The rope itself is
not quite there when it comes to the set up. Let's go ahead and
fix that real quick. Going to paste in what
we had previously. That's the same type of set up. It's going to paste
it in the base, set it up with the base
color, just like that. The control to save it out. Let's see how this looks like. Now this looks much better, although I need to
probably increase the chip contrast to 0.04
and the saturation to a value of 0.2 just to
match everything else on the sides also probably not the best idea to
change the brightness. For that, I'm going to
keep it as a default. Actually, one might even make it brighter just to match
our ropes over here. But all in all, I
think that's quite all right, what we need to do. The final thing that
I'd like to mention is going to be changing
up the normal maps. It's actually quite
easy and simple to do. I will show you how to
do that. We're going to go onto the light crack wood. We're going to find ourselves
the normal section. Over here, we're going to write, Click next to the normal
section, pine flat normal. This is a very useful type of
a node to make use out of. I'm just going to hold control actually going to attach
it to the normal, going to attach a result. So I'm going to make use out
of the flatness going to actually drag it off by default, zero is the default value. If we change it up to a
value of one, I believe it, or value two, this is a bit
of a bizarre type node, but we're basically
increasing it. We're going to get lower normal. But if we set it up
to something like minus ten in regards
to the normal value, you can see how normal
is being amplified. This is a little bit too much
in regards to the set up, but just by looking at it, we can see the
difference it makes. Let's set it up
to something like 0.2 a value of minus two, and see how this
would look like. Just like that, we're
able to get ourselves a very nice type of a set up. If it's a little
bit too much still, I'm going to go
ahead and actually, yeah, a little bit too much. Going to go down to
minus one value, See how this looks like. There you go. That's quite
acceptable for the result. Going to go ahead
and just copy this. Actually. Going to go
onto these wood beams. Basically, they are being
used as well in here. I'm going to check
the wood light. I'm going to paste
it in as well. Just going to make use out
of it in here as well. Just as an extra intensity, we don't need to
use it too much, but it definitely helps
with the overall set up. This one, actually, not
sure this is cracked wood. Wood should be part of the. I'm going to give
it a quick test. Actually, I'm going to just add a base color of zero just
to see which one is which, since I'm getting
myself confused now at this point there, these are the ones I'm actually not going to go
ahead and do that. Increase it just a little
bit -0.1 a tiny bit. I think they look quite nice. A small ones, we don't
need to overdo them. The ones that we're
looking for is going to be cracked wood.
This one over here. Let's go ahead and go into it. We're going to just paste it in. And right away we're just
going to do the same set up. Minus one should be pretty good. Actually, let's go ahead
and test it out again, I don't know which one it is. Let me just go ahead
and add it, base color. See which one is
that? There you go. That's the one we're looking for because it is the planks. I do want to set it
up not as noisy. This is way too noisy. Let's go ahead and set
it up as minus point. Let's say two. Let's go ahead
and should be all right. Actually, still a
little bit too much. I'm going to set it up to zero. Going to see how
this looks like. Yeah, it's way too little. Minus one -0.1 0.1 There you go. All right, let's have a look
at the Moment of truth. There you go. Yeah, it's
looking quite nice. I'm mainly focused about different directions
of lighting. So looking at this section
and this section over here, all in all, it's looking nice. Yeah, that's going to
be it from this video. Thank you so much for watching and I'll be seeing in the bit.
95. UE5 Post Processing and Color Grading: Welcome back everyone to
Blende Tune Real Engine Five, the complete beginners guide. In the last lesson, we lost
ourselves off by setting ourselves up with a nice
vibrance of colors. And now we're going
to continue on. And actually before moving on, I'd like to change up this texture over
here for the stone. And we're going to
do it really simply. We're not going to even touch
it within the material. I'm going to find the
stonewall base color. The reason being is that unlike the other materials that
we're using the same texture, this one is only being
used for the platform. There's no other material that's being used
within the section. I'm going to go ahead and
actually make use out of it as just a simple
texture set up. With that in mind, I'm
going to go all the way down until I
get to RGP curve. I'm just going to increase
quite a bit like so. And maybe lower the brightness
just a little bit like so. And that looks much
better overall. All right, the next thing
that we need to do is we need to get some nice
color compositing. The way we can do
that is first of all, we need to take off the exposure
that we had previously. What I mean by that is
that if we go to Lit, we had an option
called game setting. We see what it looks like with the normal
default settings. Let's go ahead and enable that. This is how it looks like. In regards to the
overall set up. It looks way too bright, but let's not worry about that because we're
going to be adding in our own post processing
effect which will allow us to control the exposure
in the right way. Let's go ahead and
do that. We're going to click on the
plus symbol on top. We're going to search
for post processing like so post process volume. We're going to add
it into the scene like so we're not going
to worry about the size. The reason being is that usually by default,
if we just add it in, everything inside of
this box would be having all of the post
processing effects applied. But instead of what
we're going to do is we're just going to simply go and make sure that
this is set as unbound. If we were to search within
the search power for unbound, just like that,
we're going to find something called
infinite extent unbound. This will allow the
post processing to be used throughout
this entire level, even if it's not within
this box over here. So let's go ahead and do that. We're going to close
this down and write. First thing that we need to do is we're going to set ourselves
with a nice exposure. Let's go ahead and
type in exposure. We're going to find metering
mode. Let's change this to. The reason being
is by default it uses an eye correction based on the brightness
and darkness of the scene. But now we're going to
manually set that up. If we were to set this up
to something like ten, you can see it brightening up. And we're going to get
ourselves a very nice result. We might need to increase it
a little bit more like so. And there we go.
We're going to get ourselves a very nice
type of a set up. All right, so now we can go ahead and actually
play around with the colors and do some color grading in regards to
the overall scene. We're going to close this
down and we're going to scroll through all of
these settings over here until we reach the point where it
says global over here. This is where it starts with. In regards to the calibrating
overall of the scene, I'm going to click
once so we can go back to the default type of a set up. I'm going to turn on saturation. And let's talk about in
regards to how it works. By taking it on, we're able to now make use out
of the saturation. In regards to the global tab. What this does is
we have ourselves a bar which will
allow us to basically control how saturated it is
in regards to certain color. For example, if I take
it off from green, you can see that
everything turns gray. The reason being is that most of the leaves are getting taken
off with the saturation. I'm actually just going to
use this opportunity to take off a little bit of
the blue overall, we could get a more
realistic look. There is another bar at the bottom which is
basically a multiplier. If we were to increase
this, you can see that everything gets saturated. If we were to set this to zero, everything gets desaturated. Going to set this a value of one of 1.81 0.08 There you go. I think that's going to give us a more realistic type of a look. Yeah, usually when we're
working with color grading, what I'd like to do is
whenever enable it, I just go through the
settings and check for the maximum and minimum
and see what they do. For example, in regards to using the color circle
for the contrast, you can see the type
of effect you get. For example, if you turn
it all the way to blue, all the way to
green and whatnot. I want this to be towards
this area over here. I'm just going to get it like. So then the contrast itself, we're going to
sharpen up the image, so we're going to increase it. And you can see the type
of a result that we're getting actually out of
it, which is pretty good. All right, the next thing
is going to be gamma. We can just increase it. I'm going to go ahead
and go around the circle just to see what type
of a set up I want. I want it to be more
of a bluish tint like, so something like this
is looking much better. Going to increase this
a little bit as well, although it washes
off the color. So watch out with that. That
is looking much better. To counter that, I'm
going to change the gain and just going to lower
this a little bit. I will increase
the multiplier we can see that actually helps with the brightness and
darkness and whatnot. I'm just going to use this to get ourselves a very
nice type of a set up. Actually, I will just lower
this down a little bit. We lower the gamma as
well a little bit. There you go. Just small tweaks like that makes a
huge difference. Then moving downwards, what we have is actually
going to be with, in regards to shadows
and highlights as well. I'm going to just
minimize these like so. And we have shadows, mid tones and highlights. I'm not going to touch in
regards to each one of them, since we can spend a long time adjusting and
tweaking all of them. I'm just going to show you
basically what highlights do. But basically,
shadows will affect the color gradient in regards
to the shadowy areas, in regards to the darker areas. Mid tones would do the
mid values and highlights will do basically
the brighter areas. Yeah, we can make use out of it. For example, saturation
within the highlights. We can increase, for example, saturation or decrease it. Actually, that's probably not the best example for
this particular one. Let me just go to reset it. If you want to reset it, you can actually do it properly other than just clicking
on the spot over here. Just get a click
on this and it'll reset it back to the default
value if you want to do so. Or alternatively, you can just stick this off and it'll
do the same thing. If we were to go to
Gamma and pick this out, it doesn't seem to want to do. The reason being is that there's many bright areas in
this particular case. But even so I'm actually seeing certain white patches
that I do want to darken down a little
bit using gamma. I'm going to lower this down. Yeah, that looks much better in regards to the overall set up,
I'm quite happy with that. Um, within this area, we also have something called highlights minimum, and
highlights maximum. If we were to lower this down, you can see that the
minimum brightness, basically we're
getting a nice result. I'm going to change
this a value of 0.3 something around
this maximum. I can probably leave
it as just one. That's going to be
quite all right. There we have it. We got
ourselves the entire set up. We can click now on and
see how this looks like. I know that message has been in the way for all of this time. I could build old levels, but sometimes it just
breaks the game. I'm not quite sure why in
regards to this version. I'm just going to go ahead
and disable this message. Going to check what it says. Disable all screen messages. That's what we need to write. There you go. All right,
we disabled that. It doesn't really matter
because the reason being is that to get
the final result, I'm actually just going to
click one to make sure we are in the right position
to get a final result. What we can do is we can go onto the upper
left hand quarter. We can simply click on a
resolution screenshot like so, I recommend you increasing the screenshot size multiplier
to at the very least 1.5 That will usually
give us a good result. The reason being is that it'll basically upscale
the overall set up. I will change the scalability in this particular case
to cinematic as well, so we could get the best results in regards to the quality, although the performance would be quite heavy on our computer. But when we're
doing a screenshot, it's going to be
quite all right. Let's go ahead and
now and capture this. You can also include buffer visualization
targets as well. This would help for example, if you're planning to do
some Photoshop adjustments or alternative tweaks
afterwards within your photo, this would be quite useful. But all in all, once
we're done with that, we pretty much got
ourselves a nice image. Let's go ahead and see
how it looks like. There we go. Oh yeah,
that's going to be it. From this course, we went
through the entire set up from scratch for making this
type of a Viking hut. And it turned out
to be really nice. We also ended up creating an entire environment for
it with in real engines. So I really hope you enjoyed this course and I'm hoping
to be seeing you soon.
 3D Tudor, Bestselling Blender Author & 3D Educator