Transcripts
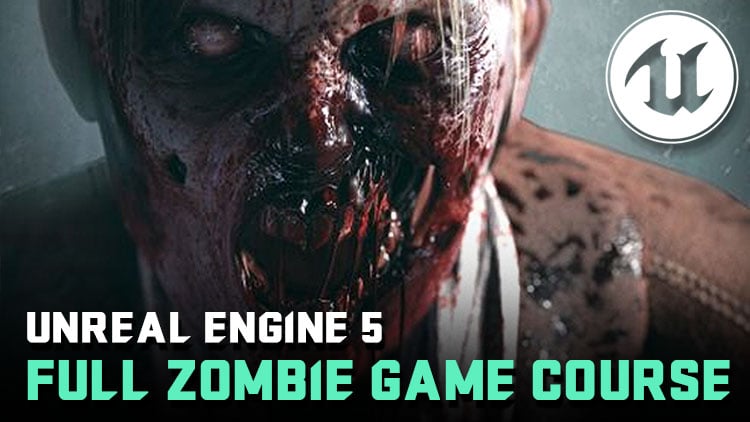
1. Course Introduction: Do you like all those cool
zombie survival games? Have you ever wondered
or dreamed about creating your own
zombie survival game? But always something stops here. You don't know how to
code or create 3D art. Now, in this course, there is no need to know any coding language like
C plus plus or Java. We will use the
completely cordless and rearranging pipe
blueprint system. We are going to create a complete zombie
survival game prototype by the end of this course. In this course, you will
learn how to create first-person character
from scratch. We're going to add weapons,
movement, animation, sounds, muzzle flashes, and everything that one
FPS game needs. After our first-person
character is completely setup, we will start the fun part, making our own zombie AI from 0, you will learn how to create behavior trees, third
person animations, great zombie brain, including haunting around the level,
chasing our player. In the final two chapters, we will add m OPEX help x, and we will define
the game rules. When you complete this course, you will have a full zombie survival prototype
like this one. So if this looks interesting
to you, don't hesitate. Enroll now and let's
shoot some zombies.
2. Downloading Assets: So before we start working on the game and we need to
download these maps. So we'll be using CT sample, basically unreal sample project
from their matrix demo. And to download this, we're going to go to
our epic browser. So let me pull it up
to the main monitor. And from a previous video, we just installed and launched the launcher and then installed some
Android versions. And to find our samples, you can simply go to
this sample stab. And in here you're going
to see bunch of stuff. You can, of course, of course, scroll down and see all
the stuff that they offer. But we are mainly interested
in this city sample. And it's pretty straightforward
to create search. You can just click
Create project. It will ask you, in vitro folder you want
to put this project in, and that's about it. Then it downloaded it
for you and install. And it will take a
long time since this, this project takes
around 100 gigabytes, think a bit less, but
90 or a 100 gigabytes. So it will take some time, but after downloading,
you can open it up. So if the matrix
demo is too big for your computer and you
don't have 100 gigabytes, you can go in the
marketplace, go under free. Click on the permanently
free collection. Wait a little bit and go on
the second page over here. Let me go to the second page. Here. On the second page, you can use this
rural Australia. Also, you can use the downtown
modular pack or this one, city park environment
collection, which is pretty good. It doesn't matter the
environment pretty much that we're going
to use in this video. But if you don't have
enough storage for the matrix demo scene and if your computer
can not support it, I highly suggest you that
you use one of those three. But this one, the CD park, I think, is the best
solution for you. So don't stick with the
matrix demonstration. I'm going to use the
metric demo scene because I think
it's pretty cool. But my computer can handle it. If your computer
cannot can do it, Just use the CD park
environment collection. This is my suggestion. And what you'll need to do to kind of open this map
that I have here, which is kind of more
performance since it's a smaller version
of their really big map. Usually due to operate is just
go here. Click on Levels. Filter only the levels
from the content browser. If you don't have
this content browser open and click Control
Space to open it. And it's called contra power. And if you worked with earlier version of Unreal,
you wouldn't have that. So that's kind of a new feature. Or you can also go to Window content browser
and just open one of the brothers. That's
what I have here. Basically, I've
filtered by levels. We're just going to
type Smart City. And here we have
this map and you can open it up and it should
be way more performance. And if you have some
issues with lag, you can just turn scalability to medium or low or
something like that. So yeah, that's basically it. This map will only
work until five. So if you're trying to use
the antidote for Central, that you might
have some troubles opening this up because I don't think it's
backwards compatible.
3. Night Time: Now let's try and
edit totter since we have a night scene instead
of this midday ones. So first thing that
we're going to do is find these BP night mode blueprint and we
could delete it. But for now, I'm just going to disable a few of the events. And the reason for this is that BP night mode will start to automatically change the weather when
we play the game. So we don't want this to happen, so you can have more
control over it. Next thing I'm going to do is just audi electrolytes since
we won't need disliked much. You can see it a
bit in here and on the buildings sensor tonight you don't get much of that
direct harsh lighting. So for now we're just
going to put it to 0. Next, important
things is that we need to go into these processes. We tried to change some
stuff for us globally. And we want to change this
because we want to have our scene without some
harmful exposures. So exposure to basically brighten up or
darken your scene. Making an effect of your eye adapting to
light or lack of light. So we want to disable that
so we can type exposure. And let's just disable
everything in here. And then let's do the same here. So here it's already done. And then we have it in here. Here we go. Just want this exposure
compensation and Min and max. Let's put all of this to one. I can see are seen
as a bit over lit. But we're going to fix
that when we go to our skylight and highlight kind of gives us that
overall the lighting, kind of indirect
lighting from the sun. So we had the direct light and
then we have this skylight that kind of light
it from our sites. And in here we see this 50. So that's a bit too much for us. Now. As you can see, we have full
control over our writing. And I think for this maybe
0.3, we should be fine. Yeah, so this does not look bad. The next thing to want to do here is you want to play
around with the sky. So if you click on the sky, we see this asymptote. Well as disabled that sky
is still a bit brighter. That is because we have this
exponential height fog, which is basically adding forgone light for go
over some distance. Or I guess exponentially. So let's click on our
fog and try to darken it so we probably don't want complete darkness of the fox. Is this kind of complete dark, but maybe something like this. So you can kind of see
some light on the horizon. And this is kinda fine. But you can work more with this. Maybe we'll leave it like this, but we can also work more. If you click here and
go to visual effects. In here, we can find
some stuffs so we can add the sky atmosphere. I don't think we
have it in here. Let's see. Yeah,
we don't have it. There is also another tool that's my fixer and it's called
environment light mixer. And this kind of Andrew's
way to kind of quickly help you add some stuff
in your scene. So it automatically detected
that you had direct flights, skylight and exponential fog. And it kind of lists
too helpful in here. But another thing
you could do is click Create, created a top. So these alarms like Mr. things, you will need atmospheric light, sky, sphere and
Volumetric Clouds. So let's just create
volumetric clouds in here. Now we have these clouds that kind go over the
sky and they are maybe a bit too light for
the night tonight. So I'll just type the Cloud and find our volumetric clouds. And let's see if we can kind of play around
with some settings. So let's do the groundwork Beta. This is probably
for the shadows, but we probably won't see this because we don't have the
directional light here. So let's look at the clouds
and first theatrical changes. The height of our class. We can put them real low or high. We have this, this
is kind of the, the thickness of the clouds, so it's not the height, but I want the class to
be really thick or not. And that's kind of
it for the clouds. I think this is related
to the planet radius. So if you have a 3D planet or kind of
a sphere of the planet, you can calculate change if you wanted to go all
around the planet. So we would have to determine the radius and kind
of play around with. But for now we don't
actually need that. We have the material of the
cloud which is kind of high. It's hard to preview. But let's try to
change this a bit. And we should see
change in the albedo. So this is something that I would like to
change to make it a bit darker since they were a bit
too light in the beginning, but I still don't like the look. They look more like smoke. So to change that, Let's make it a bit more
bluish or something like that. And let's also change this. And we also have
the wind vector a. This is kind of how fast I it will move in
certain directions. So RGB, which will
be x, y, and z. Let's leave this one for now. This would be the
details on how to create the nighttime
in city sample. So keep in mind to kind of
start editing the lighting. You would first have
to set exposure TO one just to make it easier
on yourself to recreate it. And you have to disable this. So when we click Play, it
doesn't edit it for us. And also forgot that I think the sky dome will
have to delete this. So let's try and delete it. Let's delete them
and click Play. We can see our sky is fine. So before we had our sky dome that we just hidden the editor, but it was actually showing
inside the project. It's kind of the basics on
how to create nighttime. In matrix each sample.
4. Setup The Game Area: So now that we have CD
sample downloaded and open, Let's create a duplicate
of this map and then kind of get it ready
for our shooter level. So first thing first, I already created duplicating, named it custom app. And the reason for this is just for the sake of time
sensitive to take a long time for this level
to duplicate and open up. Basically, to do this, you will just pull smart city level and just
hover over an empty spot. And it will ask you if
you want to move it copy or advanced copy and
you'll click on copy. And just to just create a
duplicate of your level. This faith, we kind of
screw something up. You can always go back to our original level
so it's foolproof. So now if I put it here, if we can see Move Copy
and advanced copy, and you should just
click on Copy. So now that you have
this second level, before we go into
it, you can click, right-click and then rename. Right now I cannot click it
because I'm inside the map. After you do that, you should
see something similar. Maybe in a bit higher quality. So I changed the
scalability to medium just so we can get
smoother experience. And you can do that too if you have any performance issues. If you also see here
it says something like streaming pool and
there is some number. That basically means is that your video memory is foresaw, or at least limit is false. So what you can do
is click or open up coastal command and
type streaming poor. Click on swimming pool size. And in here we can set maybe, I think default is 11024, we can do 2048. And this way you should increase your
strength both sides. But of course you
can kind of matrix similar to your video card. If your video card
number is maybe 4,096, you cannot put it or
more that basically, that's kind of basics, basic for this level. Now if we play, we'll see
we can actually do that. Let's click Play. We should see our character and we should be able to kind of walk around. And this is all fine. Of course, we are going to change
the main character. But for right now we can
live with her where she is. And that's kind of the basics. In the next term, we're going to play around a bit
with the lighting. So how can you get
different lighting modes? A bit with post-processing. So how you can get this kind of matrix
field, stuff like that. But yeah, that's
basically got to change how this level of
fields when you play with it. Another thing is, in
our world production, if you have any
problems again with, with lag and stuff like that, you can open a real production, which if you go to Window, we can find here I'm
going to partition. This will give you these styles
and these tiles for you. What is loaded then not
loaded in your level. So right now if I
go to the edge, we can see here are pointers
shown us to where we are. If I go here, we can see
nothing is loaded after this. It's the same in
here. So we have this white tiles and everything
in this vitals is loaded. So if you have any issues
with the performance, you could select maybe, maybe these tiles
around and then click, right-click and then unload. This way, we're
just going to have these four tiles in the middle. And then you can work with
that instead of all of these different types which will increase the
performance requirements.
5. Duplicate Objects: So now let's do a bit of a level design and
try to block out the area and close it off so our character cannot
freely walk over the map. So first thing
that we need to do is just kind of
limits the areas. So I think the area
before it was a bit too big for what we need. So I unloaded all of the cells around except
these four cells. So we can have only this
area to be playable, maybe even too big, but for now, we can recreate it. Tunneled your cells. What I did is just selected
cells that are loaded. Click, right-click and
then unload select itself. You could of course
leave them there, but then block out just
the part that you need. But this way you can kind of be fair which parts
you are working with. After you downloaded the cells. Let's start working
in the level. So first thing, first, to move around in the level, you can hold right-click
and kind of look around. And if you could
click AWS, say D, You can basically start kind
of moving in the level. Basic like a flying
object in a game, you can kind of
cruise in the level. Next thing, if you hold Alt
and then click right-click, you can move forward
and backward. And if you hold the left-click, you can kind of look around this more traditional
modelling tools. And if you hold middle click, you can pan left,
right and up and down. So that's kind of more, more
traditional moments style, but I like these, these free-flowing
Cruz type movement. Now that you know how to move, Let's try to add
some blockade here, so character cannot go in here. So let's click plus in here. Go over to the shapes, and
let's pull out the plane, and let's put it in a level. Now the plane is way too small, so we'll need to
increase the size. And to illustrate the scale, you need to go to
these details panels, which you should get when
you click on an object. If you don't get it,
you can go to Window and click on Details and then you can have up to
four data panels. I'm going to click on that, go to scale and type a number. I found 40 to be a
nice number for this, I should click the WA
or R on the keyboard. You can quickly scroll through the different types of
manipulation of the object. W is this movement
or translation of the object that
is moving it up, down, left, right, forward, backward, or x, y, and z. And then on E, you go into the
rotation mode so that we can use this to kind
of rotate in place. And you can also scale it
from here if you recall. But it's less precise here
you can type in exact values. So depends on what you're doing. One will be more
useful than the other. And of course, you
can access all of this in here and you
can also just go into selection mode if you don't want to manipulate an
object that you click on. Now that you kind
of put it in place, you will need the material. So let's type brick. Just find one of the materials
and put it on object. So this is kinda
just make it look decent and then also block out or character when
we try to go in there. And this we can do
on multiple parts. So now that we have one object, we can hold Alt. And if we pull, we can
duplicate the object. So you can see it's
still in here, but just have a
duplicate in here. And you can see that the
back is see-through, so we want to keep that off so the player can not ever see that
side of the object. Let's see if you put
it in the right place, maybe something like this. So Altis, one way to
duplicate the object, maybe you can put it to
you in a bit higher. Another thing that
you could do is click right-click in here. If you go to edit, you
have this duplicate. Or also control the
which shows in here. So there is multiple ways. I think the ALT is the easiest
one because you can do it too while you're
manipulating objects. If I click E, it will also work if I click E
and then hold out. If I move any of these axis, it'll create a duplicate. And as you can see, it left
the original volume here. So depending on what you need, it can be really quick way
to just duplicate stuff. So now that we know
that let's call it out, pull it in here, set it in
the right place. That's fine. Let's put it in here and let's
move it elsewhere in here. I don't think we can
pass through here, so means we need to
close out this part. So let's see how
we can close this. Maybe leave it in
there and then create, duplicate and rotate
something like this. Let's duplicate this one
since it's not rotated. Now let's find, I think there is one more place, but let's see. There is this. Let me
just see if replaced. They're not. It's if the object has
one-sided material, you can maybe sometimes. Sometimes it will be harder to see if there's material or not. So we feel that place
and that's about it. Okay, so let's
hold Alt again and just duplicate. This way. We have Oliver
areas blocked out. Our character cannot move. So the subjects that
metal casket difference. So now our player
cannot move outside of this area or even
see what's outside, which is nothing right now. And yeah, this is kind of the
way that you can manipulate your level and edit it in a
way that suits your project.
6. Organizing Assets: So now let's add some
acid star project. So first let's open our content browser or not
content browser epic launcher. And then here we can
see our Vireo versions. And the first thing
that we're going to do is go to marketplace. And let's type in
those three ropes. And we should get this
industry prompts back. So this is the first thing that we're going to add a project. And you can see this button out the project and
then you select it. You can find our production, which you see the sample. Now you can see for me that I already have this content added. Click the project, you'll
have it downloaded. So let's try to find it here. You can see it in here. So
we're going to use this to basically populate our project. To add some stuff since CD sample or matrix at the sample has some
stuff already in the scene. But since we are making
it more compact like a smaller area of the
city will be visible. We can add more and more detail. So this is what we're
going to use it for. Another thing that we need to do is just organize
our staff a bit. So I added some new assets that you're going to use it use, and that's this FPS games. So if I go here, this
is a new folder. And to create a new folder,
you can just click, right-click and
click on New Folder. And here you can add all of your new assets
to make it easier to to basically organize. We can also maybe put
disinterested props back in here, but it's not necessarily
sense if you have it in here. We can know exactly
which plug-ins or assets we add the
term marketplace. And then in here we can have our custom characterised by
Parnes map, stuff like that. Another thing that you can do is if you go to the marketplace, Let's look back. In here. You can search
anything that you want and you can basically
try to download it. And I sell products if
I type environment. And you can see everything
that is in here, but let's say we
just want a free stuff so you can click Free. And in here you can
see everything at is free with your search. Another way to search for
assets would be to click on free or have around three tab. And then you can
clip cap of games content-free for them
and stuff like that. So if I click Epic
Games content, we can see here every in the
topic specifically added to some kind of examples or their
metal humans in here I think they also have
their paragon acids, which are high-quality
assets from their game that is no
more in production. You can see it in here. And they are really
high-quality. So if you ever need some
high-quality characters, you can search it in here. And you can find a euphoric
fantasy or sci-fi characters, so you can find
them all in here. Okay, now that we have added this and created a new folder, the first thing that
I did is just move the customer app in here. And you can do that too
just by just pulling stuff from one
place to the other. Now the reason I did
this before is because it's a kind of takes
some time to do it. For example, what
we could do is, let's say for some reason
we want to migrate is subject to a new place.
We can just do this. And then if you click More here, it will move our asset
to another place. And it will also fixed
reference sense this, for example, this
asset or references some textures since
it's a material. So that's kinda what
I did with the map, only takes way longer. After after I moved the map, I also had some customer service that you have some
access to later, but their weapons
and characters. For the weapon, we have
this AK and we have three simple materials.
To import this. You just, you can click just
import and find our folder. Or what you can also do is just open the folder where
you have all of your stuff. Let me see if I
can show it here. So you can just open a
folder and then just click on the asset that you
want. And in particular here. That is another easy
way to do this. After you add your assets
or when you click to cover. In here, it'll ask you to
click on some input settings. And for most of the stuff, you can just leave it as it is. But let me open up a
character and show you something in there. Let's say you want to add some new animations and
you have animation FBX. If I try and hover
animation here, but you have to do is first disabled
materials and assemble textures and students
on time for that. Then in here you just want
to disable important mesh. And then in here
we want to select the appropriate mesh for which urine mentioned
is used for. Right now this is
not right since I'm importing the animation
for our arms. So you have to change
this TO AK-47 arms. But this kind of
example, if I click Import and maintenance
will be imported. And after I imported
this material is empty, so I had to import my textures. And let me flip
in mind material. And in here there is an easy
way to just input materials. You can just select
multiple of them. Then just move and hover and there'll be imported
quickly in here. Of course you don't need them. We don't need them here. I just see these two. And our roughness needed
just to be inverted. Sometimes you have to do that
and to invert your texture, you can just click,
Right-click and type one minus in this node
best to just inverse. So if it's, let's
say a light gray, it will convert
it to a dark gray or black to white
or stuff like that. And then you just connect. And if you click on one of the nodes and you
have multiple nodes that have multiple
textures inside of them. More compact, you can just
read how they are set up. Usually, you've named
them from left to right. It will be RGB. So we have occlusion,
which is unbent occlusion, so that's r. Then
we have roughness, which is our roughness, and then metallic,
which is metallic. And they go basically RG and B. And the last one
is not on the map. And for most of the stuff, I did the same thing. The only special thing
would be the arms, where I added my animations. In here we can see some
animation playing. And the rest is
basically the same. So if I open my arms so you can see the same
texture, same setup. If we go to, let's
say female zombie. You can see same thing,
same setup only thing that the materials for this
asset will be different. So if I click in here, you can see that this
material on here, the metallic and
smoothness. And smoothness. If you ever see the
smoothness or glossiness, it is the same as the
roughness only inverted. So in here I just had
to endure that also. Usually don't have to invert acid roughness,
but depending on, on software that you're using, sometimes it's converting France of software to the other. You have to invert some masks and some things are
named a bit different. But you can see here
metallic and smallest one is the other issue. And that's about it. There. Let me click No here. And in essence that is about it. So we also have some
muzzle flashes, which are not that important. That's basically something that you might use for our guns. And another thing, if you're
a moving hold folders, you might notice that when
you move your folder, Let's say I move this
startup in here. It might stay in
here and then you have to startup folders. But if I open this one in
here, it would be empty. And the reason for
this is radioactive. It doesn't mean that
this folder is empty, but there is an invisible
file that basically tells this folder that
some file is removed. So that's sometimes styles. And to fix this, you just click, right-click and then fixed
separate directory folder. Now that we created, all of these fish have a
nice structure where we have our marketplace assets and our customer assets
in our FPS game that are all in one place and we
can easily work through them.
7. Editor Overview: So now let's kind of go over some basic movement and
editor options that we have. So open your map and try to just click and hold right-click
and see what happens. So this is the basic
like locked view or locked position camera
view where you can kind of look around but stay
in the same position. If you hold left-click, you
can just kind of go left to right and then move forward and backwards relative to
where you're looking. And try to click right and hold it and then click left-click and try to move around and
it'll start pairing. And this is kind of simple way where you can only or
just use your mouse to move around while
they're holding the left and right-click to try to just release the left-click. And now we're again looking
around, click, click, and then we append and again, hold only the left-click. We can move forward
and backward. And also we can use
middle-class Japan if we don't plan to
hold the boat buttons. So this is one way to kind
of move around in the level. Another thing that
I like to use is W, SAD if, if that is
easier for you. So this is kind of more
gamified view to move around where you're flying objects that can
basically go anywhere. So while you're
holding right-click, you can just W SAD. And that's kinda
the basic thing. Another thing if you
don't hold luckily, but just click, you can select
any object in the scene. So if I click in here,
we can click on the car. Let's see if we have
any object in here. And if you click on the object, wanting that to
happen is you have this salt finer and you'll
have your objects selected. The outliner,
basically frogs are the objects that are in
your level currently. And after you click
on an object, you will get these
details panel opened, which gives you all the details
for this specific object. If the object is on
Blueprint class, you will also go
to this option to open the blueprint is
currently selected. So if I click this, you can see this blueprint,
this opened. And in here we have three tabs. One is viewport, the other
is Construction Script, and then we have an
event graph and graph. This basically I place for you, you're going to put all
of our logic into view. Parties just a place
where we can have all of our objects of static meshes
and objects that you have, your blueprint or static meshes are created usually
inside the van, real or not inside but
outside the boundary layer in some other software is usually created by an artist
and important in Unreal. So you can see here that
if I double-click on this selected object,
just a static mesh. Static mesh, meaning it doesn't have any bones so
it cannot deform. And it also has some materials. We can double-click open it up. And this is actually
material instance which, which gives us a
trial to material. Meaning that it kind of get some properties
which you can customize, but you cannot customize
all the nodes. Let's double-click it again, double-click and
double-click again. And this is kind of
the base blueprint. So everything, all of these are different materials are created from this original material and then you can
create variations or add on top of the
original material. It gets a bit complicated
on these big projects. But if I close this up and minimize this and
open up our project, you can see some really simple
material which is argon. So we have this output, which is just the result node. And you have all of the
different ways that you can view your material. And then you have your texture, your albedo color texture, similar, different textures
for the glossiness. And then your normal
for faking detail. And it basically usually
they're named appropriately, so you can just put them
inside the right right nodes. Another thing to make
your life easier is usually if you have some object or an asset that
is in the Content Browser, you can find this magnifying
glass that if you click, it will usually lead you
to where that material is. So this one is inside
the instance material, barricade prop and then content. So that is kind of
an easy way to just access something that is
inside something else. Also, if we look in here, we can see that
this static method has this magnifying glass. So every time you see this,
that means that it is in the browser and this will
lead you directly to it. Another thing that we
need to go over is this. If you click in here, a drop-down should pop
up with some tabs. And the one that we're interested in is this
Level Blueprint. And in here we have the same logic that
we looked at before. So we have our Event Graph. We do not have the
viewport because the library is kind of RW part. You can look at level like one big main blueprint
and then you can kind of hierarchically put some stuff inside of it and then on
other stuff inside of that. So if our level is
one big Blueprint, then this one is kind of another blueprint that
is put inside a level. And then inside this
blueprint you can have other blueprint,
stuff like that. So you can kind of create
a hierarchy at this level. Blueprint can reference anything that is
inside the levels. So at any point, I
can click in here, click, click, right-click,
and then create a reference to our ground
that I just clicked. This is one place that you will probably
use to add some logic. And the other blueprint
would be characters may be some objectives if you have
collectible stuff like that. So that's basically what
you're going to use to add some functionality
inside their game.
8. Placing Actors: Let's now go over some
stuff related to Andrew, this hierarchy or classes. So I'm going to go to
our FPS game. Here. I'm going to click, right-click and then click Open class. And here we can see some
basic classes in Unreal. If you click our classes, we can see every class
that is present in unreal. But we can see that if you
click on this drop-down menu, we can see that there
is more classes are shown when we click that. The reason for this is that
some object inherits from our other objects and which kind of creates
a relationship got to call the parent
class relationship. If you click on actor
and click Select. Now we created a simple actor, actor blueprint, or a blueprint that can be placed in the world. So if I move this, we can
see how we can just place it in the world and it has
its location transform. We can rotate it,
stuff like that. If you open it, we can see
simple structure where we have our blueprint and then we
have our default scene root. And then we can put anything
in here that we want. The next class that we are interested in
is this Pawn Class. So if I type Python, we can see this point is
actually a trial of an actor. That means that **** inherits
everything that actor has, and then it adds some, some of its own logic. So Actor basically lets
an object transform. It can be placed in the world, manipulated, and it can also hold other objects inside of it. And **** can be possessed or receive
input from a controller, which means control can take control of the poem and then whatever you click
on your keyboard, stuff like that, the
point will receive it. Or you are kind of the
mind of that bond. If I click on the panel,
click select, and open it up, we can see that everything
stays the same, but we have this on possess
the unknown possess. So what happens if some
patrol possesses this Uponor? Controller stops
possessing this control? What happens? So that's something that you will
not see in our actors. If I open this clicker
here type process, we do not see those
two things in here. So there is some
new functionality that we get in our pond sloping. Now, we could use upon to
create a character because we have basics that we can use, which is we can possess
that the **** and then we can also add
our own controls, gravity, stuff like that. Now, we couldn't do
that with an actor, but you can do it for it upon. Now. It will be a highest love to do
everything from scratch for the, for the characters. So what you can do is find unreal template for a character which is inside
actor in Saint Paul. And we can find in here and
what this class out as is. So it can be put in the scene. We can, we can basically figure out what this class can do
based on the hierarchy. So we know it can be
placed in the route because it's a
child of an actor. We know it can be possessed by controlling because
it's frowned upon. And then we can hover
over and see that it includes some
ability to walk around. Now it's a bit more complicated. That description
does not cover it, but we have these simple setup. So our character has a capsule. This capsule is used for
collision with the world since using the collision on the character would be way too
expensive and hard to use. Use kind of simplified version, which is just a capsule
around the character that the character move around. We have on our
component that you just referenced
to wear for this. Then we have our mesh, which is where we put our character, our animations,
anything visuals. So for the logic and
the physics, Demetrios, invisible, at least for
this character component. But for any visuals capsule and is invisible and
the outer components, so there we do not
see them unless we specifically try to enable
this to be visible, but we do not see this. So this kind of
evil, this is more logic-based for the physics. Then we have our character
movement component. And the component is
something that can be attached to a blueprint. If we have an actor,
actor could have a component that is a
camera actually can have a component that is
something else if I click odd. So you could have like
a sphere Component, audio components, I forget that. So blueprints can
have a component, but they also have
the inheritance structure that we talked about. Where our character is
actually a child of a pawn, meaning that the
character is also upon. So if I click, right-click here
and type possess, our character has all of
the functions that upon has and add some new stuff. And then point has aldi. Staff that actor has, but it adds some new stuff. So that's kind of a hurricane. The component can be
attached to blueprint, but it has its own
functionality. And this character moment
component basically is an ideal solution for
the character and has much more than
just movement. So we have our
walking, jumping in, falling, network stuff,
swimming, flying. How the subject
interacts with physics. There is bunch more
stuff that you have in here that you can basically just tweak a bit and your
character already could be working with some
basic blueprint to have to add them later,
which we are going to do. These kinds of basic hierarchy. And the components are important
because you can create your own custom components and add them to your character. If you want, you could
create like a component for, let's say figuring out maybe
staff relating to cook, collecting something may
be items, stuff like that. So you could add
your own components and then build your
character from there. Or you could also create your own hierarchies from objects and other
decadal a player, maybe I want to create a trial from this so I could click
Create Child Blueprint, which means that parent of this class is actually my new
blueprint or my character. And the parent. This blueprint is just an
instance of the character, meaning that this parent
classes character, but anything that we add in
here will be reflected here. So if I click out cube, compile and save
our blueprint or a new trial blueprint will have everything that
this, this guy has. And we can add some more. So there is kind of a hierarchy
that you can build with your own custom,
custom blueprints. This is kinda the
basic hierarchy that you should be aware of. And this is a good
way for you to figure out how different
stuff in here works. There is some other important
blueprints like Game Mode. So if I type game
mode, we can see that we have an
octal, we have info. So it says that this has this base class of an actor that isn't met her
physical protection. The virus is present for
the manager type classes. So this in for his
trial of an actor, but it doesn't necessarily have any representation in the world, but it has to have some
underlying structure of the actor and things with district and create
something like a game mode. So if I click on gamma
base, click Select. This is usually used to be
attached onto your levels. If I go to rural settings, in here we can see Game Mode. In here. I could select
my new blueprint, one. You can see it in here. And it basically holds some
information related to your current mode of the model that you
have in this level. So let's say you have like
dead metrics that much, that much more custom roles. You'd probably put
those rules and how you calculate some stuff. The score esophagus,
you will put it in a game mode because
Game Mode is safe to use for multiplayer games because it is only
existing on the server. So there is some stuff I get. So there is a lot of
stuff that you can just figure it out by typing here. If I type controller, you can see here controller, which we can create and then add our default player
controller class. Meaning that when the
player drawing is this map, he'll be given this
player controller, which maybe has some inputs
when you click something, or maybe some rules to respond and it needs to
possess stuff like that. And you can of course
see the structure. So a lot of objects
are derived from actors actually is
almost as base classes, the object, but the object
is the true base class which everything
derives from it. So if I minimize the objects, we can see that everything
basically disappears. But yeah, there is
bunch of stuff, but for most things you won't
be won't need to know it. Since there's some
very specific stuff that you'll probably never use. Here. We can quickly
see active components. So if I open this, it's called new blueprint tool. You should be able to now go here and type a
new blueprint to. And you can see that we
can add this component and this component might add some functionality
to our blueprint. So yeah, that's kind of the
basics for how Bowlby's work.
9. Object Hierarchy: Now let's see how we can place actors in the libel
and manipulate them. So first thing that I'm going
to do is let's go up and click on our skylight
and I'm just going to increase the brightness. We can see everything
a bit better. Now we can use our
industry props back. And let's click on meshes and let's see what
we hear in here. And let's try to manipulate
and put it in the scene. And it's just going to be
for the test, not the start. To start at a level editing. So first things first in your browser to add an
object in your scene, you just need to click and
hold the object and maybe wait a second sense our mesh is not compiled and put
it in our level. Let's wait a second.
So DMF needs to be, or shredder needs
to be compiled to. This only happens first
time that you open, reactivate the mesh,
but after this is done, it will be cached. And now every time
you open the project, it will be fine. So let's delete it and now let's try to
put it in sin again. So first thing that
you'll notice is that it is snapping on the surface
where I'm hovering over. And that is basically Andreas, I'll just snapping feature where it kind of helps you to play
subjects who don't have to. You don't have to place it into the floating
into the air and then try to position
it so I can just quickly position it
wherever I want. And another thing that
we can look is that our floor is nicely snapped, but let's say we put it in here. Then we have this problem. And figuring out how exactly to place it and not overlap,
it might be hard. So one thing that
you could do is move our object a bit up and then click
Enter on your keyboard. And what will happen is basically your object
would just fall to the ground and try to snap onto the bounds
of the objects. So this is a good way to just
quickly put something on the ground without
thinking much about it. Another thing that you can do. So let's say that we select some object in
our content browser. In our outliner. Let's say we are not
sure, very subjective. So let's say right
now we have this box, select the treatment and
we don't know where it is. A quick way to find where your object is to just
click F on your keyboard, which will automatically focus on your objects
wherever you are. So if I'm, let's say
over here I click f. Let's just focus
on my object. And when you are focused, if you hold Alt and
click left-click, you can just go around your
object or hold Alt and click, right-click and you can
zoom in and zoom out. And which kind of can
quickly help you to get that classic field of manipulating an object that you will see in other software. Another thing that you need
to go over is the gizmos. So here you can see the arrows every time you click on an object will get these arrows somewhere. So it's, it's kind of a
pivot of the object wherever they the middle point is set or the point is
set on the objects. Depending on the object,
it might be in the middle or it might be at bottom part. So you can see for this object
it is set in the bottom. So when you're snapping
onto something, it will attach automatically
where it needs to be. So this is a good
thing when you try to pull an object in the
scene and just let the unreal out of place feature set the objective
in the right place. If this was a bit up than our objects would be
in the ground a bit. So that's where you
find the period. And you have these three
arrows and each row represents when I access
from the 3D plane, which can also see it here
because this is a global view. You can orient yourself
with a various x, y, and z points. So be careful of Louis XV. Green is y and then x is red. And if you click on
any of these arrows, you can move it at the
appropriate taxes. And you have this white
circle in the middle of which basically lets you move out
three-axis at the same time. Let's click Control Z. And then you have these
lines in-between that basically let you just
move it on two axis. So this is really good. If, let's say we have this
objects on the floor, we want to move it on x and y, but we don't want
to do maybe this. We can just click in here and then you can
just move it down to this kind of colliding onto
the surface and more easily, it gives us more options
to modify our object. Now, quick way to change
your Gizmo is W, E, and R. So if I click ENR, We can see how we
change our gizmo. And if you click E, we get this gizmo, which basically
lets us to rotate. Our object. Basically works the same way. We clicked on the side, but you don't have anything in between. So we cannot rotate it to the
two axes at the same time. And then we have r, which looks more similar
as the first gizmo, which is basically our scale. And you can of course,
scale everything uniformly, or just two axes
at the same time. So it's this back. Now you probably
noticed that our object is snapping when
you try to move. The reason for this is that
we have are snapping enabled. If you disable this,
we can see our object now moves smoothly
over our surface. And this can help us kind of more position
stuffing the real-world. If our game is not minecraft
like in the real world, everything is kind of misplaced, rotated a bit so we don't
have perfect angles. You can use this to better
position your objects. Let's bring this back. We have the same thing
for the rotation. If I click here, you can see sniping at a ten degree angle. And of course we disable
is it's smooth rotation. You can view all of this if
you go to our Details panel. And when you have
your object clicked, you can see everything
in your Transform tab. And if for some
reason you don't see these details panel,
you can go to Window. And in here we have
details and then d does. And this will basically
open diseases panel. And we can actually see
what happens when we try to move our objects
on the two axis, we can see how our x
and y is changing, but our z is not same
extinguisher for scale. So for scale, one means it will just double in size,
is 0.25 minutes. That knife, you try to
move it just one step up. It'll be 0.25 or larger
than the first one. So it'll be 1.25 the scale. And we can see it in
here. So it's going to z. So that's basic, basic
object manipulation. You also have in here
this select objects. So if this is, if you
don't want to see, the kids may just want
to maybe select objects, search where they are,
maybe analyze something. And then you can
right-click or WE IRR on your keyboard
and more everything. And you can use Q if you want to go to the
select objects, I usually don't use it. So W, E, and R, because that's
another thing that we can look over is this
coordinate system. So if I click on movement and
try to rotate my objects, you can see that now my object or my gizmo
is a bit rotated. The reason for this is that now we're looking at an
object in local space, meaning in the object space. So this rotational velocity
be applied on the gizmo. And this can be helpful
if you want to move your object independent
of the world rotation. So if I go back, we can see here how I cannot move it in
this direction of the box. But if I go to local
coordinates, we can, maybe for some reason I rotated there is a wall
and this needs to be kind of going up
and down the wall. We can see that this
way we can kind of get more precise or smooth
and moist in the world. While in this move, you'd have to do
something like this. There is some practical uses, depends on what you want. Depends on what you want to do. For now, let's
reset our rotation. And other to move
this box a bit, the useful for Caterpillar and embrace and so to
put it to the floor. And those are basically
most of the useful stuff. You also have the camera. This is your canvas speed. So when you are
moving like this, if on this slower or faster, we can also move your
mouse scroll wheel as I'm scrolling forward or up
and I'm getting more speed. And you can also click
in here and change your camera speed if you want to traverse your
level faster or slower. Now, the last thing
that we're going to go over is grouping how we
can group your objects. So let's say we want to add a
box on top of this subject. Now let's rotate it a
bit and we can stick. Our pivot is not exactly
on the bottom of the box, so you get kind of see-through and we don't want this
because as you can see, this happens where we
can see through the box. So it's more readable the
top and then click End, and hopefully this is
well-placed, that is good. Another thing that
you can do to make your life editing the level easier is if you have objects that should
move like a group. So that might be, Let's
say these subjects, you can see here, when I
click there, just one object. And this is called
packed level actor, but we won't use this a
bit more complicated. They use it in the city sample to combine multiple assets. So here we have probably like
ten assets or something. But if you have multiple assets, which you can do is click on massive hold Shift and
then click on the other. And now we can see that
the two are selected. But what you can do
is click, right-click and then click group. And this way, if I click outside of it and
then click back again, they are grouped into
a kind of wanting. So every time I
tried to select it, we're going to, we're
going to get both of them. And of course you can
click, right-click and then ungroup or unlock. But we do want to
carry it combined. Especially for something like
this, if you want to have, are just groups grouped and then duplicate it on multiple
places in the levels. So let's say I want to hear another type of this
object in here. What I could do to duplicate its holdout and then
move on any of the axis. And I'm going to
create a duplicate. And now let's say we want to
rotate this, put it in here. We easily create a duplicate without putting these
objects again and trying to set them up the
same as it was in here. Another way to duplicate
would be to click, right-click Edit and then duplicate or click the
shortcut Control D. Now I really like this
metal very holdout and move because you can easily just create multiple duplicates
really quickly. So as you can hold Alt while rotating,
creating a duplicate. This we can just really
quickly work in your level. Combined SAT. And of course you can add
another object in here, click, right-click, and then combine
or right-clicking group. So we can add more
objects into your group. So yeah, this is
kind of the basics of editing and manipulating
objects in real.
10. Chapter 02 Introduction: So in this section, what you're going to
do is we're going to add the movement to,
to our character. So we can see that
we can move forward, backward, left and right. And you can see we
can look around. And you're also going
to add this camera and you can see how it's nicely
set up with our hands. You're also going to do some
abilities like trumping. Starting with the animation
blueprint for the character. So this is going to
be a fun section. You can see that we are going to actually start working with a character and start
adding some mechanics.
11. Creating The Character: So let's start creating
our character. Let's first go into our content and FPS game here we are going to basically keep
all of our meshes. So let's go to characters. And we have this main arms, which we are going to use when we create our
character blueprint. Go to Character and
click right-click. Here, we can click the
blue button class. Then we're going
to click character and character, if you remember, is basically a trial of the poem so we can
possess it and it has some movement
options that you'll help us basically
move the character. So let's name it BP character, or let's name it
BP FPS character. And let's open it up. Now and here we can
see a few things. So this blueprint character comes with some pre-made stuff, which is capital components, which is also the
root component, meaning everything else
would be attached to it. So there is kind of
a hierarchy that is created when you started adding stuff into
your blueprint. An object has to be
a real components. So this capsule
component is root, and you can see that here where it transform has only the scale. And this scale scales every
day that is attached to it. The capsule, the
computer does not have to be throws component. But for a character, it is set as default because the character has to have some capsule that
you manipulate. Moment when you go forward, backward stuff I get
because you don't want to have mesh itself be the event. The next thing is the arrow. And the out of just points to y. Where the forward
these and mutually. In other management we
will use X as follows. If you look here,
we can see that x is pointing the same
way as the arrow. This kind of further
evidence when you put everything in here and you never you never confused
where the Florida's. Then we have this mesh. And by the way,
these components are already in the base
character C plus plus class. That's where they are added. You can see here
edit in C plus plus. That means that we cannot
delete them from here. So they are kind
of set by default. So if you don't
want to use them, you can try to maybe
disable or something. But foremost characters,
you will want to use these three components so they're automatically
added here. The character component
is where we'll put our arms and it's basically just the
visual skeletal mesh. So we talked about
the Static Mesh which cannot be deformed. And then we can Skeletal
Mesh where if I click here, we can see all of the
skeletal methods that exist. Here, our arms, they have bones. So if I open it in here and
then go to Scott and three, we can see all of the
bones that are from which this hand is created and I can rotate it and those
bonds and the foreign, the mesh in this
kind of difference between skeletal and
static measures. Let's close this in here. We also have this
animation class, which is where we're going
to put an unmeasurable bit so we can manipulate, which really makes me it's
currently playing on our mesh. Last thing that we have is our Character Movement Component that you talked briefly before where you have other
stuff for movement. There is some default settings. So after we add some
logic to our character, it would already by default have some options for movement, but we can further customize it. So how far our
character can trump? What is the max speed
of the character or how hard it can slow down the
gravity, stuff like that. So there is bunch of
stuff that we have in here that will add it later on character. We also have this event graph, and it basically works
like C plus plus. So the structure is the same. So you add some nodes and then connect
them from the other. And then when you click
this compile button, it'll try to kind of convert your logic of the
blueprints into the logic of the engine that it
can understand and understand the same
thing when you try to compile or build your
code in C plus plus. So the same logic applies. So you click Compile and then everything is converted
and you can try and play. Your player game should work with the new
changes that you added. Now if we add this
character into our game, what we did here is created
a new instance of our class. So this kind of
our default class, like a template or blueprint, that kind of defines how this instance we'll
look by default, but not Italian
instance in scene. I can change, let's say the the marriage
that it isn't here. But if I open my blueprint, we can see that the
mesh is not in here because the class defines
the default state. But if science can be
changed later or at runtime. So that is what happens when we add
the incidence in here. And of course you have
your editing blueprints. So this is when you see
any of the objects that it says edit these papillae, that basically means it
is a class that takes you somewhere and can be edited. Now that we have this, let's just do the
one final thing. And that is add
our hands in here. If you click on the mesh, click in here, we
can do our arms. For now, let's
leave it like this. Wisely, these listed here
since we're going to add our character
in another way.
12. Adding a Camera: Now that we have the
character created, let's try to put it in the game. So I showed you one way that you can put
the character in the game, which is if you go to character, you can put in your scene and then you can type
possess in the details. And then you can cite
said possess player 0. Now in city sample, this won't work because our character is at Motley
spawned from our game mode. So if I click in here, I can see that our
game mode is set to city sample Game Mode
and inheriting point. And we can see that we have our city sample
player character. So it'll change the
star BP FPS character. And that is basically acoustic important that you respond
when you click play. Next thing that we need to. Or in another way that you could change
this series if you go to rural settings
in the game, or you could set whatever
game mode you want with default classes
for some things. Now we're just going
to use their system because that is that this is easier to implement when we're using their
sample project. It's up and are FPS character. And here we have arms that are
right now a bit too small, but let's leave that for now. And let's click on
Add and type camera. So now we can just click out and add any
component that you want to this blueprint and you're going to do is add
the default camera. Now you can see
this camera is set as a trail of the
capsule components. So wherever the capsule
goes, the camera Google, and let's put it a bit up
in maybe a bit forward. So we can set it
in the eye level. And then let's take our
arms and let's rotate them. Now let's put them
approximately there and let's put the size a bit bigger. Now, to manipulate
anything in this, in this hierarchy works the same as if you do it in levels. We could select it
and move it around. If you have these
details panels, Details panel basically the
same, whichever transforms. Now that we have
this ARM selected, we can see here that you can
set the animation class, but for right now we don't
have any emission classes. We have animation assets, so let's select our
idle animation. You can see it's still
too small solids size. Let's put it somewhere
approximately here. Let's say maybe
something like this. And let's click Compile
and let's see how that looks in our game. So first we can just
put it in the scene. And we can see that we
still cannot see our arms. So let's open our blueprint. And let's increase the
size of this window. Click here. And let's try to
kind of set it up. Maybe we can also move
this back a little bit. This would be way too. Sigh would maybe increase
the size a bit more. And you also need
to be careful about the pivot point or arms, maybe something
like this. For now. We will see how it looks
with the Garmin stuff. Much something like
this will be fine. Now before we start spawning
the character in the level, we need to do few things. So let's go to FPS game click, right-click, and then click New Folder and type Blueprints. We will have to create just
an empty Custom Game Mode. Since this does not seem to work if you change
your character here. So let's click
right-click, click on Blueprints and then
type game mode. And let's click on
Game Mode base. Now let's name this
FPS game mode. And we don't need to do anything with the class for just making it so we can change it in here. So we get these options enabled
for the default pallets. Click on the BPF VS character. This way, if we click Play, we can see our character
is in control. Me can see our
hands are animated and put in a level right now if we tried to move,
nothing will happen. And that is because our character does not
have any controls. But that is something
that we're going to add in the future videos.
13. Adding Movement: Now that we have
character created, let's add some movement. So basically the player clicks something on the keyboard one basically something
to happen in the game. So we're going to use
Access Mappings store, create an event when the, when the player
clicks something, something basically a captain. So if you go to Edit, go to Project Settings. Here, let's scroll
down to input. And in here we can see
that we have bunch of mappings that are
already in city sample. So we won't have to do
everything from scratch. But if you wanted to create
a mapping from scratch, we'll just click
this plus button. Set your name. For now we're going
to move forward, but we already have this one,
so we're going to use this. Then what you have here
is basically a list of all of the possible
keys that you could add. So we can say,
let's say keyboard. If you click the left button on the keyboard,
something will happen. So you can pick it in here
or you can also click this, select the K value, which lets you click anything on the keyboard and it will automatically
be selected. So you don't have to
actually search it in here. After that, you have
this scale value. In this scale basically
means that when you click D, this specific
access mapping will have this value,
whatever the value is. So if I add another button
so I can do the same. For the same axis mapping, I can have another key press. So let's say a
integers for example, we want to use this, but I could set a and then
set it to minus one. So when I click Okay, this new access mappings 0, we'll have a minus one scale. And then if you click D,
it will be one scale. And if we click them
both at the same time to have zeros, so it's
kind of add up. And the reason why this is
good is that we can have like one event that triggers forward and backward instead
of having two separate. So we could use this
action mappings. So if I click plus
and let's say, let me select
something. Let's see. And we could use
this action mapping, but you can see
there is no scale. So even if I add more buttons, that from Bhutan can do just one specific thing and we have no, no control over it. It's just a basic button. So this is good for Trump, going to your inventory,
stuff like that. But this axis is good for movement, turning,
stuff like that. And you can kind of
see it in here by their setup, what
they used it for. So you can even have in here, let's say a third button. And we can set it to be, let's say seven scale of 0.5. So maybe for some
reason you have, again where you click Shift, hold Shift, you started walking, let's say the boxplot is 0.5. All of that setup in
just one axis mapping. But for now we're going
to delete this one because we already
have one setup. And you can see in here
that they have WNS forward and backward and values minus one and
the other is one. And when we set up that, let's go to our character. In here we have our
character and let's click, Right-click and type
and move forward. And in here we can
see that we have like an event that is similar to the other events and it
hasn't seeped lightest value. That is basically what number? We will get basically a number, one minus one or 0 if you put glue both of them
or neither of them. And then we have an event
that you want to trigger. So let's click right here
and type movement input. Let's click this. So I'll moment input is a special function that we have for our character movement. And what this function allows us to do is set our
verbal direction. So when we click this
move forward butter, in which direction
you want to go. Now we want this to be dynamic. You want whatever direction the character is looking
at, we want to go there. If I set this to, let's say one. And of course the scale value is just how much will it scale? If you scale it by five, it will be five times faster
or stronger movement. So if you hear a top-down
game and our game, we are looking on their
character, a decent camera. This is static and
this is y direction. And then we have
this x-direction. We can just put this hard
rule that when we click this, it just swap it up and
down all the time. So it doesn't matter where
the character is looking. If you click this will directly go up and down, but
we don't want that. So let's click, right-click
and let's type for a word. Let's get active form. And that means basically
we are just going to get wherever our
character is pointing at. And we can see this
art of justice representation that this
should be afforded vector. So wherever we are looking at, if you turn the camera this
way, we're going to go there. If you turn it this
way, we can go here. So it all depends where we
are currently looking at. So we want to get that. Now if we compile and save, Let's click Play and let's
test it out so we should be able to go forward
and backward. I cannot go left or right. I cannot scroll my
view or look around. And that's because we don't
have other things set up. So now that we have this setup, Let's also do more, right? And if you go back to
our project settings, we can see that we have set up the move right the same way. So we have D which is right, setup to one, and then we have a which is left set
up to minus one. It does basically
the same thing. We can just invert it
but use this one event instead of two or
more. Events are more. Let's have to copy paste,
thermal and input, and we're going to use the same again
now you might think, okay, how I'm going to hover. We're going to use this
to move left to right. And you just need to
get a different vector. We want to get right vector. And the reason for
this is that we just want whatever is 90
degrees to the right. So you're gonna get this vector. So every time we
click left to right, whatever we are rotated, what we want to go here. So if you rotated 90 degrees to the right sphere,
you would go here. And of course we need to connect the axis. Let's test it out. So I can go left, right, forward, and backward. And now that you have
this basic moment, Let's add or a lookout and
rotation for the character. And we're going to do
this in the next video.
14. Controller Input: Okay, Now let's make our
character look around. So let's go back to our input and let's go
to Access Mappings. Here we can see that we already have set up our look right? And look up x is mappings. And if you don't have them, you can just easily
creating by clicking plus and then plus in here to add a new input for the loci to hear more sex and then for
the apprehend the mouse Y. So after we have this set up, we're going to go
to our blueprints. And here we have our look, right, so let's run it. And we also have, yeah, so we have these two n. First, we need to seek how
to keep it out. That controller, Shaw and petroleum fuel view
is that you can cap. So if you have three rotations, I figured you can cancel x, y, and z axis and you won't
be using is the role. We never mattered.
Camera total disarray. What you want from camera to rotate this space so
forward and backward. And we also want the camera to rotate this way, which
is left to right. And from the electrolyte
here we're going to use draw rotation and
then for the app, and now we're going to
use pitch rotation. And if you go to our character,
now let's scroll down. If you can find it. In here, we can see that our
pond saw controller actually can see these controls
for the rotation. You can see if you want are
all parts of your stem. And we'd want for the pitch tool or a
controller to use them. Let's Control, Save. And
now let's go in here and let's actually add
them into our duplex. So let's type art controller. And you can see
these three and we want to add the inputs. And you can see this is even more simple than the movement. That is because we only have this one value that will offset the camera's rotation.
Stack cards. Here, V1, pitch, and roll. If you connect it,
That's the Compile Save. Now let's try to move it. Now. I am moving the character, but it is moving in
the inverted axis. So when I move up, it goes down and when
I go down, it goes up. And also left to
right is working. Okay, So it's just that one. But now that we're moving, Let's fix these problems. So to fix this, it
is pretty simple. You can go to your input
and then just invert. So we have our most why? You want it to be minus one. And since they set it to
minus other set Test1, now we should be able
to move it correctly. And now everything
is working fine. And also you can see
that wherever I rotate, if I click right, I will always go right, depending
on the character. So everything is relative
to the characters. If I click, S will always be relative to the
character of sorts. So if I go to my, my input and let's say for
some reason you want to pick on y and this one on x. If I set it to like this,
and let's click Play. Now when I click w, I will always go towards
this direction. I'm clicking w, our extra, that whole W. I will always go there if I could cast it out, we always quote the
opposite direction AND just moves me in here. So this is kind of an absolute view
of where allowed to move depending on the world. But this can be useful if you're getting
like a top-down game. And your camera will
always stay like this one to go or the backward,
left or right. But since you're not
making that game, we want this to be relative
to our character and we get this to determine
where our directions. So now we have the basic
character movements. We can move around
and look around.
15. Animation Bluerpint: So now let's try to
add animations to our character that there are more than just what
we have right now. So right now, we just have this one idle animation
that is looping. We can see it's not doing
much and you want to basically change when we are moving to change to
another animation. So let's first see
how animations work. So if we open our character, very open our
character blueprint. We can see that
we have our mesh. And this is basically
very set out. Setup our first
animation that is just looping the AK-47 idle. So let's open our arms and just see how the animation
generally works in Unreal. So we have this skeletal mesh, which is basically an
actor that has bones. And this is the list of bonds
that are in the hierarchy, meaning that this bone will move out of the
bones that are in here. So if I try to move this, because I already
moves because this is kind of one of
the main bonds. But if you go through
the train of D, our character, we can see here that only our arm is moving. So this is kind of how we're going to animate
our character is animating the bonus and
bones will deform the mesh. But of course you'll create
the summation somewhere else. You could technically
create it in unreal, but it will be very
easier to just create it in another software and
then importantly handrail. And so in order to have our arms and all
what we need to do, Let's go to main arms. And in here, Let's click, right-click on the AK-47 arms. Click Create, and then here,
Create Animation Blueprint. This is one way to do it. You can also click, right-click and then go to animation and find animation
blueprint in here. The good thing is doing it
this way is that it will automatically identify which
a skeleton you're using. So I've now been using
using the skeleton. And if you are creating
from this hour from here, we will have to manually site. But if you just click
in here, create, it'll automatically
create everything that you need for
your character. Let's name it ABP for
animation blueprint. And let's name it a seven arms. And now let's open up
our animation blueprint. And in here, we can
see two things. First is our event graph
and then animation graph. And you'll notice
that we do not have the Yuval viewport tab. That is because this
Animation Blueprint versus a bit different
than normal blueprints. And the first thing
is that you have this preview window in
here that you can use. And then you have this
event graph where we are going to basically get some information about
our character from our pond. Is our character moving,
changing the velocity? Is it crowd shrink,
stuff like that? And then you can use
that information to modify or choose which
one makes sense to play, which will happen in here. Right now for this arm, I have three now transformations and we're currently using idle. Now what I can do is just pull our admission in here and
we can see we have it here. And I can just set it
to our output port. So let's compile. And now we can see how the
mission change in here. It's a bit more dynamic where our arms are moving
left to right. Let's save. And if you go back to our character blueprint,
Let's go to Viewport. You can see here that it is
still the old animation. But what we can do is click on the animation
mode and then use Animation Blueprint. And in here we can
find our AK 47 arms. And you can see it
automatically applies hour. Make sure that we added. That is because this output
pauses the final pose the toddler will make and we can do whatever you
want in this part. We can do as much
complex animation, choosing and playing and
morphing and whatever we want. And then at the end we just
have to have one pose, one final pose that character
needs to be dataframe. And then of course, you could use the value at
this seat frame. So the animation can
change over time. And in here you can also just
pick any other animation. Now of course, we won't
make it simplistic. But for now we can just kind of play around
and see what happens. And of course, if
we tried to play it, Let's minimize this. Because see how the
machine is playing. First looping. But after
a while, some logic, it will change when you start moving or when
we stop moving.
16. Jumping: Now that we have made our
basic movement events, let's try to other
trumping in the game. So firstly, we need to do is of course go to our
project settings and then click on him. Input. Here. This time we're going
to use extra mappings. And the reason why we're
going to use them because they trigger just once
and there is no scale. It's simple enough for
what amount to do. Also big difference between Access Mappings and
actually mappings is that actually access mappings
or trigger on every tick. And then they put this scale to whatever is being triggered. So even if it's 0, it
will be always triggering because for some things you want to do something
when it's even 0. So it's kind of sliding
scale that is always active. But for the actual mappings, it is triggered only when
you actually press a button. And it works the same way where you can
select it yourself, created in here, or
through the list. Keep on you want to use. Now
you can also combine them. So if you want to click Shift
Spacebar, you can do that. But for us we just
want a simple space, but you already have created
in this Trump action. Let's go back to our blueprints and let's
click right-click. And from here we
have bunch of stuff, but what we need is this
Trump action event. Then we also have a
useful jump function from our character that we get automatically
because we are using our character class
in Helios key, which is just a variable of the key that is
actually pressed, which would be scalable. But we don't want to
use that for now. Now if you go back to
our level and click Play and try to move
around and click space. We can see how our character
in arsenal jumping. Now before we continue, maybe editing our
character's movement to let's close this up and then open our
character blueprint. Let's organize this a bit so it's a bit of
a mess right now. Now, first we can delete
these events because we can, at any point they begin play or something and respondents, so we can see here
that we always have them available and they will get grayed out
because they're not used. But you can delete them for now. And let's select our move forward and move
right event, events. And let's select them and
they pick C on the keyboard. And let's type movement. This way we kind of get more
organized with our stuff. Let's say controller. Here. This is our rotation
of the camera. And then you can select Disk
C and then type jumping. And now we have more organized
view of our blueprints. Let's compile, save. And now let's say that you
want to edit some settings. Maybe you want your
character to jump higher, to move faster, to stop
foster accelerated faster, slower, or something like that. You can always go to this
character moon component. And then here you
have all the details that you can kind of
change for your character. First thing that
you could reach in here is maybe change
your gravity scale. So this will affect
how your character falls and how high he jumps. So there is a force applied to a character when
you click Trump. And depending on your gravity, to depend on how
fast you come down or how fast is the
pool of the gravity. Next thing that we have is our maximum acceleration and is basically changes how fast you accelerate your max speed. If you go a bit down, we have
this small max walk speed, which is right now 600
centimeters a second. And this maximization basically determines how fast you
can achieve that speed. So if I put this
to 200, let's say, and tried to walk, we can see how slowly accelerating
toward thermal speed. But for now let's
leave it at 248. Now you have this
king friction factor, which is basically how fast your character comes
to a stop when you are when you're
walking or running. Your crotch high to just what's your height
when you are crouching, you have your mask, which will also depend for your momentum. So the smaller the mass, the smaller or the bigger the mass and then the
smile friction, it will depend on each
other how fast you stop, depending on your mass and easily lost affect the
gravity and stuff like that. So this urogenital
Moscow, the character. And then you have default, land and water movement more Today's modes
that you can train. A character when
they're walking, swimming, or running,
stuff like that. So you can see here
what settings are for each type of motion. So here we are, here
we are swimming. So these settings
will be applied when applied when the character
is in the swimming mode. But for now we want
to change that. We also have some
advanced stuff which are a bit complicated so we
don't have to go over that. Now, these ones are one
of the most important. So you have your
max step height. This is small. The object needs to be to basically for you to step on it. And then walkable floor
angle is basically, if we, let's say we add
an object in here, Let's maybe we can do a corner. So if you tried to walk on this call, we won't be able to, but because the angle of the normal so
that objects are too high, but we should be able to, if you increase this to, let's say 85 maybe I'm not sure. Let's try it out. So now you can see we can
actually walk on this cone even if
it's very steep. So this steepness angle on which you will
be able to walk on. Let's reset it. I
think 44 is fine. I'm not sure why they made these specific as a default
value, but that's fine. And then max step height is just how small the
object needs to be or how big object needs to be for you to be
able to step on it. So when you have
things like stairs, you don't want your character
to help to Trump for each little flight of stairs
and the characters Motley to smoothly or ramp or
walk on your stairs. So that is the that is
the max step height. Then we have our
ground friction is basically the default
friction on the ground. So she's disabled this. This will also affect how much your character
slides on the ground. Right now I'm trying to go
left to right on the tree. If you can see on the
stream or on the video how I'm kind of face
smooth around morphism. If I click AND goes
left and right. That is because right
now the floor is all lot is pretty slippery
for my character. And usually it's way more. There is more friction. Then we have our max walk speed. This is how faster
character is going. So if I put this two, I see
3 thousand and title plate. We can see how a
character will ramp up until he's going
to use maximum speed. And now he's going
way faster before, about five times faster. If I click space, we can see her job is better,
even better visible. This of course, will
all affect each other. So when you have the you have higher speed
and low ground friction. Hughes slide even more. And if you have an acceleration
to maybe lower or higher, that depends how fast you
can go to your max speed. So you notice how I needed
to ramp up to my max speed. But if I put the store,
I'd say 10 thousand. I come to my maximum
speed almost instantly. Oh yeah, I set it to 600. But if I said to
Tony larger number, it will just come
to that number I'm assisted unless it's really high number like 20
thousand or something. And you have also max
walk speed when crouched. We still don't have crowd. So I could for this. But it's basically venue crowd. You're more speedy, just hopped or whatever number
you put in here. What kitties are not that
important right now. And another thing that's
important for a Trump, you want to customize it. You have your trunk strength and then some air control stuff. So if I put this starts at 0.5, I should have a lot
of control when I'm falling or jumping is if I click Play to Trump and
then moving the IR, you can see how I'm
moving left to right, controlling where
I'm going to fall instead of falling
right in front of me. So let's actually
bring that back. We don't want that much control. Maybe we can do it for this just to have a
more pronounced Trump. But yet those are the
basic controls that we're gonna be working with
for this character.
17. Animation State Machines: And now let's try to add
some animation logic into our character animation blueprint
so we can actually make our character essentially
missions while we're moving. So first let's open up our ABP animation blueprint for now and just start
playing one simple animation. And this is too
simplistic for us. So let's go to the Event Graph. And in here we're
going to use our use some nodes to basically retrieve some information
about our character. Now in this animation blueprint, you also have variables and we can store some stuff in here. So let's click plus, and let's create something
called is moving. So this is just going to be
a custom variable that is, that can be only
be true or false. And we're going to store in here if our character
is moving or not. Now we have these two nodes in here and they're grayed out
because their accuser Tau. First one is basically
like your tick event. If you ever saw tick
event in the normal open. This is similar thing where
this will activate every, every tick, every frame, and then the machine will be re-evaluated or this
information will be evaluated. So what we want to do is in here is try to get our panel on
or this node is useful. So drug track who is owning this animation blueprint and it will take that
point of reference. So you don't have to
specifically know which part is controlling this
actor or you can just get whoever it is and then
get some information from it. So let's try to get velocity. Since the velocity is one of the variables that
are pound stores. After that, we just need
to know how fast he's going or if it's greater than 0. So if the character is moving
in the right direction, just the n is more than 0. Let's type vector or length. So if the vector and vector
meaning the direction, so if our character is
moving to the left, right, back forward, we
don't actually care about the direction
you just want to know is our character wooing? Is he changed the location
from frame to frame. And if that is true, if it had greater, if that is true, it
is greater than 0. We want to set, is
moving to true. We want to do it every frame. So what happens in here is we get the velocity,
we get the length. If he's moving in any direction. Even a little bit, we're going to set this to true, otherwise, it will be false. So this is kind of
the basic logic. Of course, you can do
this in many other ways. Then when we go back to
our animation graph, we need to find a way to
basically use this information. First thing, first
that we need to do is create a state machine. State machines are basically used to trigger different
animations depending on some variable or now we're changing states
depending on some variables. So this state could
be addressed. Let's rename it actually. Let's go back in here. What's the name?
It's a lot more fun. So this state could just
be rather than moving to the character and then you can combine this with
something else. Maybe you have like a
separatory measurement, character gets hit or something. So you have different state
to state machines in which you have different animations that are claimed
based on some rules. For right now we're
going to delete this and then go
into locomotion. Here we can pull from the entry. And what we want to
do is other state, and we can name this state. Let's call it a title. So when we go into
this locomotion, so each each frame, we're going to go into this
locomotion and then try to extract some
information and insights. Locomotion, we're
going to go to entry and first thing that you're
going to hit is idle. When we are in the
idle, we want to track if you want to
go somewhere else. So if everything
is fine in here, in this happens
the first time and then there is some
loop that happens. We're going to create. So now that we have this state, Let's go inside and
you can see we have our output animation and
we were unjust are idle. So when we are in this state, we want to just loop
or idle animation. In here you can also
see the hierarchy. So we are right now
in the idle state, but you can go back to our
motion automation graph and we can close these ones. So now that we didn't either,
we can see that it goes into the entry and then
it's sloping in the idle. Another thing that we can do in here is if you don't plan to, every time I create a state, and then other
emission can just pull the animation and it will automatically create
it in here and we can do name it walking. Now we want to go
from this state to this state in some way. Let's compile. And one way to do this would be to to create conditions on which will change
from ILO to walking. So if I pull from idle
and connected to walking, now we have a condition
at which we are going to try to go to walking any trail we are going to
evaluate the condition. Let's double-click
on this condition. We need to know when we can
go to the other other state. So let's pull moving from here. And you can also type here is
moving and get it in here, but I like to just pull it
and then you can click. You can also hold
control and pool or hold Alt and pool if
you want to set or get out your variables. What kind of tea that you can use we can connect is
moving to our result. Let's compile, save
some ionic character this morning if we want
to go to our other state. But now that we're
at this state, we want to know when
we can go back. And for this we want
to click on here and then pull it to the
idle or put the here. And now we have another
condition that you need to track. We need to set again. Now we don't want recording
just is moving in here because we want to go back when the character
is not moving. So you can just pull from
here and type naught. Or actually we need
NOT Boolean in here. So when the character is
not moving, we transition. And this is the simplest
logic that you can do for these states is we are
in the idle waiting for, when we are moving, we
go to walking back. And this is output here. So now let's click Play.
Let's test this out. Suddenly start moving. We can see our
character is playing the right animation
and then you stop. It stops. And you can see
there is also a bit of delay before the character stop and then before
the animation stuff. It's kind of small so we don't
want confirmation changes. We don't want just to snap
to the other animation. This is, this is called
animation blending. So if I go back, she fits in here we
have player rate. But then for the transition as you have this blend settings. And that basically means
how long do you undertake between the transition from
one generation to another? This is of course useful to not snap from one
animation to another. And we can test this
if we set this to 0. And you can see how
the snapping happens. And that's kind of an
older way that you do it where you just change
from one state to another. But now we have some blending options that
are enabled by default, so you don't even
have to do this. But for some animations, depending on how
drastic the changes, maybe one to two ratio
to be 0.5 or something. But for now, I'm going
to leave it at 0.2.
18. Chapter 03 Introduction: This section is
all about weapons. We are going to create
a weapon that is animated when we run
and when we stand. We are also going to
add some effects like effects when the gun foods and also particle effects
when we hit something. We also will add zoom in so we can zoom in with terror
weapon and also fruit. And you can also see that there's some really
cool on the gun when we are in the aim
or they're not a mode. And if you got out of the
game and go to blueprints, we're also going to
add some line traces, which will let us know
what we hit without a gun and let the
spawn particles. We're also going to add
some sound in a game. So when Oregon
foods, what happens? What can we here? We have a muzzle
flashes and we're also going to go over how
we can set up the weapon. How can we attach the weapon to the hand and rotate
it appropriately? Saw a gun is positioned right in the
left hand and right hand. This section we're gonna, is gonna be pretty interesting, is going to be all about the
gun and how we can set up. They began to work
in our FPS game.
19. Attaching Weapons: So now that our character has proper animations and we have an emission separate
for Ireland walking. Let's actually add a
weapon to our hand. So first thing that
we're going to do is go to our
character blueprint. And in here go to Viewport. First minute to add our
veterans Skeletal Mesh. Let's click Add and
type Skeletal Mesh. I click in here
and let's name it. Now if you go to skeletal mesh, we can find our AK-47 weapon. Now we cannot digital weapon is small and that is because
scale is set to one. And if you remember, we scale our hands by five. So we can scale it in here too. And we're going to use
this later for us. So visual, visual presentation where the ripeness sitting
in the arms, in the editor. But for now we're going
to leave it here. So now that we have the vapor, Let's go to our mesh
and let's open it up. And in here, what we need
to find is our right hand. This hand is actually
holding the weapon. And we want to base our weapon orientation
based on disarm. So let's find our right clavicle where we can find upper arm, forearm, and this is
the hand that we want. So let's take right-click
and then add socket. And let's quickly rename
the socket or web socket. Now we're not sure where
this socket is standing. So let's first set our
previous controllers. So this is good
because we can use Preview animation to see how our wrapper is
positioned in here. Let's click, right-click in
here and then preview mesh. So you can add basically
the mesh that you'll just be here for previewing
how it's looking. Replayed again,
it won't be here. So when we add the
premium, premium mesh now, we can rotate it around and try to position
it as best as we can. And this summation
that is playing, this helping us use the reference instead
of looking like this, setting it up in here, it will be a bit harder. So just using Preview
animation makes it way easier. So now you can see it does
not sit well in the hands, so it's more like this,
something like that. So this will take a
bit of tinkering, but I'll try to make it
sit well in the cans. Maybe something like that. When you're satisfied
how the vape pen looks, we can leave this in
other terms, sockets. So the whole time
you're changing the actual day from the
location of the socket. But now we're going here. We can go to our event graph. And then let's click,
Right-click and type in play. So when the game starts
and you can move this up since this
first-year to activate. So when the game starts, we want to attach our weapon to our mesh on that
specific socket. So one way to do this would
be to pull your mesh and then type attach Component, two components, they're
both components, vapor and the mesh. So let's play this. And you could also just click,
right-click and then type attach component to component, but then you have to choose which components on what
you want to attach. If you click in here, attach Component or competitive
weapon mesh, we get the same thing, but it might be harder to
see or find if you do it that way if you have
a lot of components because each one can
have this option. Now I want to connect
this to begin play. But we are missing the parent to pull the reference
for our mesh and then set it to our parent, the socket we renamed
to web socket. And now this should be fine, except we have these rules
for location rotation scale. So we know that
scale should be the same as the character
which is five. So we can just do
snap to target. Their target scale is, or this measure scale is, we'll just snapped to that. That's actually this a
bit so it's cleaner. Then we have a rotation. We also want to snap and
location also to snap. We can just snap everything. And if you leave this to
keep relatively keep world, what will happen is that wherever that happened
was standing, it will still attached to
this component to the mesh, but it will be in this position. So favela arm moves up, it'll just move it from here up. But we want to snap it where the armies and then
start falling down. So this is kinda
how you get that. And we also have dealt
simulated bodies to three, the arm and developers. One thing, you never want to treat them as separate
in physics terms, sensitive, they are attached. So when we have this, if you go in play, we
should see the weapon in. So you can see everything works
and when you move change, the weapon is following
the actual art. Now let's say that you want to preview in the view port what is happening with your
rapid and very stunning. Since we can see here
that the arms here, the animations, but
weapons or not the Dutch. For this, we can use the
construction script, which is something that
compiles in the editor. So everything in here activates
after you click play. This starts activating. But construction
scripts actually activates when you compile, when you move the object in the scene or
something like that. And you also have some
options for that. When you want to run your
construction scripts. So you have on drugs whenever
I drag it in the scene, which will also run when you
compile and stuff like that. So this is useful to
use in the editor. So what we can do is just copy
this and paste it in here. Connected. And I can see it's still
not working because we're not compile, we
cannot compile it. So if you click Compile, now our weapon is actually attached to the arm and he's doing the exact
same thing that we would see in a level
so we can actually preview what is
happening in here, instead of having to play
to see the weapon attached.
20. Aiming: So now let's try and add
some aiming entire game. So first thing that I did is just added a few new
animations for our aim. This is something that
we're going to use later, but you can easily import
it as we did before. Where you just take your animations for
your content browser, put it in Unreal, and
it's automatically ask some settings
for the import. And then you can just
uncheck import math and then just select the
appropriate scatter. So after you do that, we're going to go over
to our character. The first thing first
is for our aiming, we can actually use that
variable that is inside the n MBP instead of storing
it inside of a character. So that might be
more appropriate. So let's go to our Anime
Class click Search, and then open it up. Now we need to go
to Event Graph. And in here, let's scroll
down and let's click plus and the ad is aiming. Now let's leave it as Boolean. After that, let's go to
our project settings. And in here we need
to add our inputs. So it needs to be Amy
input or it needs to be input framings to our input. Let's first see if there is
already something for aiming. We do have leftmost button, but we do not have a right one. So let's click plus. And let's type aim. In here. We can click here to automatically select value
and click right-click. And now we have
Right-click for AIM. Let's go back, back
to our character. Here. Let's click, click,
click and type aim. Have this simple event. Now that we have this, let's see what we can do. So first let's type get an instance so that we can do is get animation
instance of our math. So you would get the
same thing if you pull the mesh and then
type get anime instance. What we're doing is
basically just getting whatever these classes for our animation of the character. But you're kind of getting
the parent of this, which is RM instance. And that parent does not have these values that we
added into the child. So what we need to
do is typecast too. And it's called AK-47 arms. And now we are saying that
we have a general parent, but we want to split this
specific trials class so we can access
salivates variables. So if we go here
and type is aiming, we can see how we can get
r is aiming variables. But if you try
pulling from here, it does not have the variable
because this is not, the variables are not
implemented in this class. So now if you connect this and click through betrayed
that boolean to true. But this operation of casting
is kind of expensive, so you don't really want to do executed in this input action because player might be spamming about or something like that. And it's a button that often, so you don't want this
expensive operation to be performed so many
times we're going to do is just disable all of this. Let's select these two
and let's put it in here. So what we want to do is execute this just once in
the beginning play. And then we can save the
reference so we don't have to cast every time
to get a reference. So now what we want
to do is create a new variable of
type ABP AK-47 arms. And we could click
Plus and then search for our variable ABP
and find it in here. But we have another option to kind of do this a
bit more easily. The weight to that is
to click right-click in here and click
promote the variable. It will automatically
create a variable and give you the set. So we did what we
wanted to in here. We create a variable, set it, and now we can just
reference this variable. And we can connect in here. And now we can basically just
reference that variable to get the information that
we want, which is aiming. If you click Compile, Save. Now let's go back
to Van graph and let's now put that
variable hits. We can test it if this
is working or not. So we're going to get the
saving and then I'm going to right-click and type print. Let's connect it in here
and is aiming string. Let's compile, save,
and let's play. It says false, but when I click to
right-click, it says true, meaning that we do
execute that one, but after I released the button, it did not go to false
against you only want this to be true while we are
holding the right button. So let's duplicate this set and then we can do on released. And you also need the reference
and disabled the Islamic. And this is a body to
this surrealist trigger when we release button
and press, depress it. So this should work. Now. It's saying false, I'm going to hold right-click
and then release it. And you can see how we get appropriate
response from the game.
21. Aiming Animation: So now let's add
aiming to our game. Here. I already have it set up, so I'm going to go over
how you can set it up yourself and make the work. So the first thing is that
we are going to set this aiming in the
Character Blueprint instead of in here like
we did with moving. For moving, we found a
pawn, font his velocity. And then based on
if it's 0 or not, we basically set our
Boolean to true or false. But what we want to
do is aiming in here. And then if you go to
our character blueprint, we can see that I added this input on him in
production items. So if I go to my project
settings and then go to Input, we can see how I added this aim, actually mapping and such
the right mouse button and you can easily set it to if you click in here and
click right-click, it automatically sets it to the right mouse button or you
can just search it in here. So after we set that up, what you can do is
called this aim. So you can just
click right click and call the actual event aim. And then you can use your
animation instance to basically set is
aiming to 0 false. So we're basically
setting this value from our animation instance. Now how did I get the reference to this animation instance? The way to do that is
basically to get your mesh. So we have our mesh. This metric has this animation
is insert in here. What you need to do
is pull from it. And then get type. We get animation instance. And you can get this. And now that you have a
general animation instance, we also need our ABP AK-47
arms animation instance, which has r, is aiming. If you try to pull from
here and type is aiming, we won't have anything
because that's just a parent that does not have the
new values that we added. But this one, if we type, is aiming, we can see that
we can get the value. After we do that, we can click in
here, right-click and then promote the variables. So we're automatically
going to create a variable of the
animation instance. And it will automatically
save it so we can just set it in here. And this all happens
in the beginning play. And after that happens, we go into the aim and
we set out to values. We set our value is
aiming to true or false, depending if we
click right-click or we're holding
right-click or not. And that means that we don't
have it set setup in here. And we can just set it up in
here and work from there. So after we have that setup, if you remember, if you've
got to look more often, it looks a bit different
than it took before. So before it probably
looks something like this. And what we can do is
when we're inside, our CFI goes all the way back. So you kind of have a Let's
exit out too many times. You can just say
it's out of them. If we got our animation graph, we have our locomotion
state machine, but our state machine
can only have states. So if you click right-click,
we can get out of the options that are available and we have only four options. To add a comment conduit
state aureus or estate. We added our states before, but inside the state with
their CloudFormation. Now what we are
doing, this kind of a high-level concept of
this is we are adding state that has another
state machine in side that has more states. So these kind of gets more
complicated if we have our specific animations that
go from one to the other. If you go one way back, we have our state machine
just for our aiming, and then we have a state
machine or not taming. So the idea is to have
those two separate. So when we add some animations, we can write them separately because in our character
is looking down side and looking down
site and walking. He will have
different animations. And then if he's running
with his weapon, next O'Keeffe's
trust or something. So in here you can just add
new state and namely taming. And you can, before you do that actually you
can X out of this. You can select our walking an idol and
I click Control X to just delete and save
them into memory so you can later paste
them and create here. Just add state, namely taming, go inside and it will
be empty for you. Click, Right-click and
type state machine, and click on new state
machine and you will have this I renamed it or aiming
state you should do. Go inside. You need
to paste it in here. So you click Control X on these two before and they
are called Ireland walking. And now paste them in here. And after pays and connected the entry to kind
of look like this. And you should not
change this or this. Only change whatever is inside. So change the name to a model and then
walking and go inside. And you can see I changed my animation
from idle to a model. And I did the same
thing for my walking. We can see here I have
a invoking. After that. Let's go all the way back. One more back. After that, create another state
and name it not taming. And create another state machine and name it not
aiming set machine. This just make it more readable. And inside you can paste your your copied stuff for I love working here and
just connect you to enter. And that's about it in here. Because we want it to stay the same when we're not
walking, not aiming. But if you are
aiming, we want it to be to have different animations. And now that you have
these two states, you can put in between, just connect them like this. You can connect them and
then double-click on that. And set is not taming on the arrow that leads
from aiming to not taming. We need to set it to be
true when it's not taming. So when we are not aiming, we're going to have
these animations. And then you can put the arrow
from not aiming to aiming. And that means that when we are in the know
taming section, We are aiming or we click
the buttons to start taming. It will go to this animation
and it will play this. So that is the whole idea. So just set the store. The arrow that goes to the left, set it to is aiming and then
to the right to not aiming. If you set it up, you should be ready to test this and see if this is working. Now that we have modeled
working, Let's go back. Let's go to a invoking. Here. We need to change
this to a invoking. Let's remove it. Now let's put this in. Let's compile and save. After that, we have these
Booleans that are set that to change our animation
depending on what we're doing in here. So if we are aiming while
idle or aiming while walking, it to be in this state machine. But if you're not, if you're just not
telling it to go in here. And for this, we need to
connect it like this. Let's then double-click in here. And then we have is aiming. And let's go back. It's actually not taming.
We should go in here. So let's type NOT, NOT Boolean. So if it's not taming, we need to go to North
aiming animation. We can kind of put
this in both places. We can that from entry to go to no timing
can then go taming. But since we have
this transition, if you go into aiming and
this tradition is true, it will automatically
go to an atomic. So you don't have to worry
about these activating first. Now let's get these aiming. Now let's compile and save. And now this should work. Let's go into our game. Now it seems like
when we are walking, it seems like our
hands are missing, so we're going to
have to fix that. Now we can see the
Tower animation is not perfectly positioned. So we need to fix that. Let's go out. And to fix that, we need
to go to our character. Let's go to the viewport. And now let's check
out our hands. So this is our current location. We can actually
do something like this to kind of view how are, how are positioned
looks from the camera. And one thing that
we can also do is in our animation mode, we can change it to use the IMF, an asset, and now we
can use aim walking. And now we can see the change
is change that happens. So the biggest change
that happens is that our hands are shifted
a bit to the side. Let's move it in here. Something like this
should be fine. You can use also aim idle. This is more stable so we
can actually see it looks. And let's also look
from the top view. We can see if you are looking through the barrel of the gun. Now the biggest problem is
that we have these 22 views, but they don't go
well with each other. And we need to change
this in real time. So let's actually, this would
be something like that. Then maybe we can put
it a bit forward. Maybe something like this. Let's say that is good. So what I'm going to do, another peak here, it's set up. Let's go to graph and
we have this a mode. And we want to set
it up that when we are aiming that we
switch to this mode. And if you're not
aiming this feature to Dell model the position and rotation and actual rotation for now we don't
even need to change, but let's just
change the position. So let's copy this. And
let's create a new variable, its name it, aiming, the trim. And let's actually, before
we do anything with it, Let's recompile and now a Socratic here and click
Paste so I copy the location. And for now let's just get this. When we are aiming, we want to set the location of our mesh. And we want to set
it out evocation. So this way, every
time we click, right-click, it should
set this position. Now this will be snapping, so that's something
that we don't want. But for now we are going
to leave it like that. But you might want to use
something like a timeline, which smoothly transitions
from one value to another. So you could use this to go from aiming position to
not aiming position. And we can also create that. So let's type not aiming. And now we need to just set
the animation back to trust. Idle. Let's reposition this a bit. Something like that. Let's do maybe like this. Now it's copied or occasion
and go back to our graph. And let's paste location
to know taming. And now we can take taming, insert it, and we actually
need to rename it a bit. So let's keep it consistent. Now let's connect to this also. Before we play, Let's
change our positions. I forgot to change this to
our Animation Blueprint. Let's compile, save,
and let's try it again. Now you can see how we go to the aim and you can see we can
change things a little bit. So right now, our location of our other cursor is not exact. So all of the cluster
the downsides. So we need to change that. But let's first
change the snapping. So you probably notice how it snaps when I click, right-click. And that is because we
don't have our timeline. Let's create a timeline. And let's name it.
Something like this. Change, change in position. Let's first disconnect this. We can connect everything appropriately and you want to play it or reverse it
depending on what is happening. And let's open this. Now let's add a
track and we will need to me the vector truck. Actually we just need
that floats track, just going to use it for a time. I think let me see. That should be fine. Let's length says length of 0. I think it's 0.2. Butler's. Yeah, Let's
do 0.2 for now. And let's click,
right-click other points. So basically timeline
does is it lets you create a curve from some
time to some other time. And then let's do, gives
you a variable that feel that you can use
when it's updated. This one, Let's make it to one, and let's make this 0.2. And this one needs to be 00. Now let's go back to
engraft and now we have this new, new track. And then let's add a letter. I think this should be
fine. But let's start. Let's add vector. And we can use this as an Alpha. And now let's put
this to update. Or actually we'll need to
put this one to update. And one thing that we're
going to change here is instead of setting, not taming and aiming
to be separately, we're just going to
use them to change our lab or we'll be changed
by this timeline and then we have this position
and not in a position to give us the location that you want to
change from and to. And this should be fine. Now we've given it that's true if I connected this
correctly. So let's see. So I am not changing properties. So let's open it up. We shouldn't connect
it like this. Now it should work. Let's see. Now we can see it works and
it also does not have the problem with snapping
when we click right-click. Now there are some smiles, things that you can do like adjust the gun or
adjust the sites. The one thing that
I'm going to do is I trust the downside sense. It seems like we are, we have it a bit too much. So let's get our mesh. Let's change animation
asset, Let's do idle. We also need our position which we can get
from our events. And naming position. Let's copy that. Let's, let's paste it in here. Here we're aiming position or
this window is a bit small. Let's click again in here. Hopefully you can see it. Maybe we can also look through these views to see kinda
generally curve is standard it. This is harder to see. Let me play again so I can
better see what the problem is while aiming. Ok. So now my positions are not the top because if you remember, we changed our mesh to use animation acid instead
of Animation Blueprint. So I think what we need
to do here is take argon and move it slightly
up and slightly to the side. Something like that. Maybe. Let's compile, save and
let's look at again. Now it's a bit better now we also resets to our previous position,
which is not good. But we can see the
right position when we click Play and
now click anything. I think this is fine for now. Let's leave it like that. I'm going to open, of course you can adjust this
as much as you want, but I'm going to
leave it like this. So now that we set up
the position in here, what you can do is go up copier new location
and go to Events. Find my aiming position, and then just click right
click in here and then paste. This should update our
position, our new position. Also going to turn not taming
position to be default. So what I'm going
to do is copy it, go to Viewport,
click on my arms, and then paste it in here. Have it set up by
default like that. Now change to our previous one. And now let's click play this. And then we go into this year. And we have the basic
setup for aiming made.
22. Muzzle Flash: Now let's add the ability
to fruit tart characters. So the first thing
that you're going to do is let's find our FPS game. Let's go to the characters
and that's open bp FPS character in here. Let's close this. First thing that we need to do is to add a point in front of the guns. So what we want to do is add a specific point where we
can spawn our particle. And it will look like there is a muzzle flash
in front of a gun. To do this, let's
click on our weapon nationalistic and
type scene component. And sin component is
a type of component that is kind of just like
a location or a transform. So you can use it to mark some location or to spend something on
his stuff like that. It cannot be used to from
F or something like that. It is specifically just as a point in space as
another coordinate system. So let's call it or call it. So in order to have it, you can see this attached organ because we attached it in here. We have a hierarchy. We can see how
it's slowly moving up and down based
on our animation. Now we want to just pause this animation so you
can assumption, pause on him. I'm going to pause it
so we get the ability to actually edited
without it moving. So now that you have it pass, let's look on this
muzzle flash point. Now let's try to move it a bit. I'm going to actually use this. Let me write 15, maybe 20, let's say five. So we can see dislocation
is way closer. Let's do seven. I'm gonna move it to maybe one. We're getting closer to the ideal location
x sine think we need to move because
our midpoint is right in-between the barrels. I think actually
it is a bit left. So let's do 0.3 on the x, which is too much, maybe
0.1. This should be fine. Let's do y less than other, another as to maybe 8.5. That's kind of a bit
in front of the guns since it would be
very disappointing. And I'm going to move it
up by just a little bit. So something like this. That should be good
location to spine our spine, our material. So in the files you should
find in the weapon Muslim, find this article which
is called muzzle. And in here we can
see what happens when we activate
these particles. So it's a muzzle flash and we have some bullets
stuff I get. And this is a simple old
school particle system. You can also convert,
if you want to convert into the what actually you have to go to plugins and enabled I gotta or casket and I
gotta convert area. And you could
convert it to Nyae, which is a newer version
for the particles. But for now we're going
to leave it at that. Now that we have this
positioning here, we also need to look at
the rotation of our point. You can see that our
rotational point is in another axis
you've already formed. So this means that our particle
will be spawned looking this way which we don't want
E and then try to rotate. And actually instead of
rotating it that way we can we can do snapping. So snappy, two time
points that will recruit or else we can
just write 19 here, and this will set it up nicely. Next, let's go to
our event grafts. So now we need a way to
activate it, this spawning. So we need to go to our project settings and we
need to set up an input. So let's go to Input. And in here we can create a new
action and name it fire. Or we can just use this
primary action totality have for activating the fire and it is already set to left mouse button so we can use that. Let's go back. We call tab. In here. Let's move this back. Socratic and type
primer primary action. And now we just created, Let's pull from or actual. Let's see if we have this muzzle flash location and we need to span an emitter. So let's type the Catholic and spawn and meter application. Here we have our p muscle. Let's do on pressed. This point emitter is kind of works exactly as we
would expect it to. So it spans meter at a
specific location and you have located for different
scale to set up. Out of the story is fine. Our activities should be fine. So let's get our muzzle flash. And when we get a reference, we can do get world
location, location. And then it gets world rotation. This way everything
should work fine. Let's see. So we don't need to set scale. Scale should be fine. We have are out to destroy
and I'll talk to it. So let's try now. And you
can also close out of this. Let's Move Play. Now you can see when
we click, left-click, we get our muzzle flash and we can also have
some bullets flying out.
23. Single Shot Burst: Now let's hit it
our particle to be more appropriate
for our weapons. So right now it does
the 33 times bursts. So you can see how it fires multiple shells from the county and asked there is
multiple bursts, anyone to change this
to single fires. So the first thing that
you're going to do is just disable one of these
effects one by one. So you can see here in the line, in vertical line we have
different types of effects. So what is the all of them
except the shallow tract? We can see that this one is
just the shell is going out, then you have your flare
glow and stuff like that. If you decide that all of them
except the Federal Direct, we can see that right now that it bursts out through felt
so we weren't dressed, want to do to change that food, go to spawn in the breast list. Because see that
there is happening. And this is at which point they're actually
happening in the timeline. And change this 121 brush. That basically means
that you just want to delete everything
except the first one. If we do this, we can see all
the valence shell is going out. Now that we've finished. Let's go to the refraction. Now, this one might
not be visible because it's just a fraction
of the light. So it kind of, so many foods, it kind of looks a bit verb, verb to that place. So for that you can just delete it and not
see the results. For massive flame.
Let's click spawn. Let's check out this
bonds so we can see it's basically the same spawning
and spawns three times. We're going to
delete two of those. And you can also, at any point, you can also enable or
disable any of these effects. Maybe for some reason you
don't find this air glow. You can just disable it and then leave everything
else enabled and then this one will ever activate it and you
actually play the game. We have our muscle flames. So let's delete, delete, and you should get
just one breast and you can see what you
get at one quick burst. This table that will
go to air glow. Let's go to spawn, and
let's delete these two. And I will just see
the flashlight. Of course, all of these, if they are too
strong, if you want to change it to color
and stuff like that, you can just see which
one it is by enabling, disabling the other ones. Then adhere to have all
the different options for the scale color,
stuff like that. But for right now we just
want to make it not burst. Here. I'm going to delete these two. And then we have a smoke. Smoke is fine. It
only goes once and then it kind of goes forward. And now let's enable all
of the effects to see the final one foot burst.
24. Firing Sound: Now let's add some
sound to the game. So if she going to our FPS game, then if you go to a weapon, we have sound and we
have single AK-47 sound. And if we hover over it
in the Content Browser, because see how it sounds. Now that we have that, let's go to FPS game characters
and open our character. Nine here, let's go down. And what you're going to do is basically just pan the sound. There is multiple
ways store sounds. So you have 2D
application attached. Since we are going
to only look from the perspective of knowing again that we can here will be the gun that we're shooting. 2d. Sound will be fine, but if we want to do as
location or attached, it will also have attenuation. So the distancing to become quieter and quieter
over some distance. But since you don't
need that, we are going to respond some 2D. This kind of the simplest
form of the sound that you can spot. Now
let's connect it here. Cigarette guy again,
connecting it to left-click. So whenever we click left-click, we get our particles and
then respond to sound. Let's type the name
of our sound object. You also have this
drop-down menu and this is good to kind of modify or sound
really simple ways. So one thing that you want to do is just change this volume, maybe 0.6, depending on how
long you want this to be. Now let's compile and save,
and let's test it out. Now, you can hear the sound
and also if you click through a fastest kind
of soft sound automatic. Successfully add some
sound into our game.
25. Firing Animations: When food argon is not
realist response right now. So let's add some animations
for when we food garden, we feel the recoil. So let's first go
to our character. And we have our main arms. And in here we need
to create a montage. And a montage is basically an
animation that will play on top of our existing animation. So let's click
right-click. Go to animation and find
NMF from montage. We need the right scatter, so we need AK 47 arms carton. Let's name it. Recoil. Now let's open up
our animation mown turf. That is few things
that we hear in here. So we have our timeline where we're going to put
our animation. We also have our asset browser where we are going to
pick animations from. And then we also have
some options for the animation in general. So one thing that
you're going to do is change this blend in time. So blending and blend out time is basically blending when you are adding this
animation to alert the existing one in the
animation blueprint that we worked on before. So let's use this to 0. So instantly when you click the foot, it
will start floating. And now let's pull the
second 47 short in here. And now we can see we have
this animation for 40. Now we want this
to be way further. And to make it for today, we're going to click
on our animation. And then in here we have
our playwright and let's put that to maybe
six or maybe seven. Let's test this out. You can see how the speed
of our animation, now we can put it even more, but let's leave it
at six for now. Let's click Save. Now let's minimize this and
open our animation blueprint. And then here what we're
going to do first, Let's go all the way back. Where we have a state machine. You're going to do
is basically change the slot or add a node that a slot that we can slot in our animations
from animation montage. So basically, we can
specify at which point of our animation from
the state machine to our output pose vary
one to put our animation. So let's go try
second type slot. We have slotted default slot,
and let's connect this. You can create your
own custom slots. But whenever we going to use default and
you can see in here, you have different slot types. You can also create new slots. And if you go to Window and
anime slot manager, in here, we can create more slots if
we want specific for this. And in here we can also change which slot
group we're using. So for right now, let's
leave it like that. Now to have this the top, Let's go to our character
and go to BP FPS character. And now we're going to use a
node called a montage play. If you cannot see it in here, you can disable
context sensitive. And let's try to search for it. We have it in here. And it is asking for few things. So it is asking for animation instance reference.
We're trying to make money. For instance, we want
to influence you this. And then it's asking for a monitor that we created,
which is going to recoil. So first let's pull out our animation is not that
we have reference to. Let's click in here and
try to find gunnery coil. And all the rest of
this should be fine. So let's test this out. Now when you food, we can
see how our gun recoils.
26. Aim Firing Animations: Now while we are aiming, we still have the
same animation which we wanted to care when
we are in the heap fire. So if I click, right-click
and try to aim and fruit, we can see how it swaps
from my current animation, which is aiming to
our hip fire recoil, and then back to aim. So we don't want
to do that because we want to kind of
keep it realistic and we want to change the animation montage depending on if you're aiming or not. So let's duplicate our
gunnery coil montage. So we're going to
create basically to monitor fails and then switch between them
in the blueprints. So it'll duplicate. Rename
it to aim can recoil. Let's open that up. And let's delete our acre foot. And let's find our aim foot. So it would be this one. Now you can see that this
one is also a bit too long. So I want to decrease
the size of it. So let's do ten in here. Just so means to see
the animation up close. What can that looks nice. Now blend time. We might
want to increase this later. It depends on how hard our animation is so
you can smooth it in. But for now, let's
leave it like this. And now let's go
to our characters. So what we need to
do is basically choose between one or
the other montage play. By the way, for
the AIM going on, because obviously that our
default slot is the same name, meaning that it will
change it in the same way. So it'll basically slotting the right animation if you
are aiming, are not aiming. To basically switch
between neutron, which one we want to choose. We want this aiming Boolean. If this Boolean we're going
to switch between them. So let's click branch. And let's actually
connect this to false because we want this
to be on the force. So when we are not aiming,
we're shooting this. But then let's click
on the month of place. Click control C, control
V, create a duplicate. And then we want this to be connected through
seven we're aiming, we want different animation. Let's change to
aim gunnery coil. And this should be it. Let's actually
reorder this a bit. When you spawn the sun, we didn't go through
the branch which we track if you're
aiming are not aiming. Depending on. If we are
aiming are not aiming, we get different
monitors to play. So now that we have that solved, Let's see how that
looks in a game. And it looks pretty nice. We don't need to
change anything. If you're recoil is
a bit too harsh, you can change your blend
in time or blend out time. Or actually I would live
blend out the time to say, but maybe increase the
binding time to maybe 0.50.2. But for me it looks fine, so I'm going to leave it as is.
27. Blueprint Functions: Now let's try to organize
our blueprints a bit. And we're going to do
that by using functions. And the function
is just a grouping of some nodes that you
can later execute. We just calling that function without counting each
node individually. So let's first start with this, with the autonomy instance. So what we can do in here, Let's first actually create a
function and let's name it. Get an e-mail. For instance. We can see we can have
separate video for this. And let's go back
to event graph, and let's select
everything in here. Let's click Control X to cut it, and then Control V in here. You're basically done is just changed to the location
of where this, this cost is called. Right now it is in our gut
animation instance function, and let's compile and save it. Let's go to my graph. Now what you can do in here is get our animation instance. And now we can just
call it like this. And it looks neater,
it looks nicer, and we don't have all
of those nodes in here. You can also call
it if you click, right-click and get
animate for instance. And you have our function here. Now, there is another
way to do this. And what you can do is lets
me find where is this, okay? Another way that we can
create a function is by selecting the nodes that we want to add star function click, right-click, and then
collapse the function. And this way we
can just name it. Let's call it spawned
muzzle flash. And now it's nice and we have just one node to
represent that function. Now let's move this a bit here. And for the sound, we
can leave it like this, but let's also
collapse our service. And we can do it the same way. So you can select
everything, click, right-click, Collapse the
function and then name it. Something like this.
Lets the canter. And for each of this
function you can double-click on them
and then you will see everything that
is inside of them. And ask you if you
see nodes that have this blue color with this sign-in here, you
can see it also in here. This is, it says f,
meaning function. But this is their own C plus
plus function that they added and expose it
to you so you can use it to span sounds. So that way you can differentiate between
what is a function, what is an event, or
anything else basically. So in here we have
our special type of this is more of a macro, but we have a timeline. And they're all just compressed. Compressed nodes with a bunch of little functions and
variables inside of them. And you can also do this with
blueprints, with functions.
28. Weapon Line Trace: Let's add some more
functionality to Oregon. Or characters be PFAS character. And one thing that
we're going to do now is add line trace. Trace is basically just a line between two points,
two vector points. So you can imagine pointing
here, pointing here. And we're going to use that to detect anything that
this line hits. So let's say this is our camera. Whatever we see
through this camera, if anything blocks this, we are going to get hit.
Hit resulted there. That will give us
bunch of information which might be the
location of the hit point, maybe the normal
stuff like that. So everything will be
happening in there. So let's click, Right-click
and type line race. We want line tastes
by triangles, so you have different ways
to detect what you hit. And what we're going
to do is by channel, but you also hear
by profile else can multiline, multiline trace, which is basically the line
trusts will hit something, it'll go through your
object, through that object, and then if there is anything else, it
will also hit that. So you have multiple results. But with normal line interest, you're just gonna get
the first letters, all that you hit, which we want to do for our
garden right now. This slide trays by channel. You're going to use
visibility triangle, meaning everything
that is visible, we will be able to hit this visible means by
visible collisions. So if I find an object in here, I'm not sure if I
can find it here. Let's maybe do this. Static mesh. Let's open this. If you have a static method
is static marshes or collider that we are
going to detect sweet, so let's find that. So here is the
collision and we have this collision preset
which is set to block coming that it
will block anything from going inside of this object or wherever
the collision is. We can also show it in here so you can
visualize our collision. And we can see the third
equation is enabled and it is enabled for
query and physics. And query is basically the
things that we do like ray sweeps and then
we have simulation. This is for a rigid
body constraints. And we need both
of these enabled. And we can also see here in
the channels that we have, our visibility is set to block. So we're going to block when our ray tries
to hit this object. Now that we have this,
we need our vector. So here, neither
starting n vector. And to get this, we
are going to click, Right-click and type
camera manager. Camera management basically
for where our camera is, our active camera and we can do actor location and
get our co-location. So when we get to the
location of our actor, we're going to start from there and now we need the endpoint. And to calculate endpoint, we go again into this. So let's say this is
the point or camera. Now we could go into any
direction retaining liked. But what we are going to do is, let's say our camera
location is there and then we have our camera looking down. We can get forward vector and followed vector is
basically a vector of one unit looking forward or
wherever we set for this, for the cameras set right where the center of
where we are looking at. And it's one unit in length. So what we're going to do is get that forward vector with
that length of one. And then we're going to
multiply it by some number, let's say 5 thousand. And then we're gonna get
way longer a vector, which will give us this line
directly in front of us, which we'll use to test stuff. So let's pull from this
n-type to get forward vector. Now that we have this, we need to combine. So we need to take
the start location because we want to
start to be the same. But the end needs to be 5 thousand in length
while it's for us. So let's multiply. First. We don t
want to multiply, since we're going to multiply x, y, and z by the same number. We can just click,
right-click and then convert pin and convert it, or let's say float. And then you can put 5 thousand. And now we can add. Let's click plus on our keyboard and then
let's click Add, and let's connect this. Now, we should connect
this to the end. And now we, when
we click, click, we won't see where
the ray is going because we don't have drought
the book type enabled. So let's do that. Let's do four duration and duration
right now is five seconds. So when we cast
rate would be five, it will stay there
for five seconds. So three components save
and let's test this out. So now when I click left-click, we can see my array cars hitting this and it will
stay for five seconds there. We can also test where
it hidden what happens. So the green line shows you basically wherever I could
have gone or the direction. But we have this red point that says very toxic
hits an object. And now that we have
this information, let's open up our
character and now we want to use this to
do something with it. First, let's disable our AKS. We can see that it works fine. And we have this out here. So if you remember when I talked about the heat information, this is a disease. So if you click, I think we can split struct. Now we have bunch of options. You can also, if I
click Control Z, you can also break the result and you
can do it like this. I prefer this face. We're going to like this. Now we have our
heat impact point. And that is that red dotted
spawns when we draw the bug. So let's click spawn
and meter at location. And we want to spawn. So for this, now what we
are going to be using, so if I go to FPS weapon, we have this bullet hit and
it's called P bullet hit. So let's go back to here. And let's find it. Now we need this location which sought out heat input point. And everything else is
fine to stay the same. So let's save it and I stopped. Now you can see how
the park point, we get the particle effect.
29. Chapter 04 Introduction: So in this section we are
going to learn how we can make horizontally select a random
location and then go to it. We're also going to
add some attacks to the zombie to
follow the player. We're also going to learn
how we can add some audi are and how to create
behavior trees. Odd AI controller. So our, our character or a zombie character
becomes anonymous. I'll say if you come
closer to our enemy, we can see that he'll
start falling us. And you can see here
the sound of roaming. And he comes close. He's going to try and talk. So this is our tree we're going
to cover in this section. It will be pretty exciting. Can you see how you can create a zombie that is intelligent and follows you around and
also avoids obstacles.
30. The Zombie Pawn: Now that we have the gun setup and our character has
the ability to foot, and now let's add something
that she can show that. So let's click, right-click and click on the
blueprint class. We're going to add the
zombie Tara games. So first we need to choose which Blueprint class you want
to select for our zombie. And we don't want an actor because actor cannot
be possessed by AI. We'll put the pond because
even if it can be possessed, he doesn't say when movement
for our, for the character. So to move around, we could add it some custom
functionality for that, but you can just use
Andrea's character. That includes the ability to walk around and stuff like that. So we're going to create a character and let's
name it BP zombie. Now, let's open it up and we shall basically similar
setup to our FPS character, but we still need the mesh. So for the mesh, what you are going to do is take our male zombie and you can see here his name so we
can sell at him. Let's click on the tab. Here in the mesh, we can
click this button to automatically set our mesh to whatever was selected
new content browser. We could, of course,
click in here and then try to search for him, maybe type male zombie. But you can also
just conveniently click this button and just
keep the searching part. Now the tick have added
here we can see that he is rotated wrongly and it's
not in the right position. So let's click E and
then rotate him around. And if you see the rotation is small, you can
just enable this. So you can kind of rotate him
exactly to the 90 degrees. Now in here it might say sometimes some
number then 0.99999. That means that it's kind of close enough because
there is some rounding. So this is still
90 degree angle. So unpolluted scheme like this, but we also want him to be his
likes to be at the bottom. So it's more human-like this. Now, it might be hard to locate exactly how to
put his legs in there. And what you can do is click on perspective
and click to the left. And then now we can see his truck character
directly from the side and the
orthographic view. This way we can position it was different him exactly
where we want to use. Something like this is fine. Maybe move him a bit back. And we can see that he's size
is good for the capsule. But if you ever have problems with the size of your character, you can decrease the
size of the scotoma. Or you can also change
the capsule height to create a smaller
or bigger character. Now this is appropriate
for our character, so you're going to
click compile and save. Now let's go back and find out BP zombie and let's
put him in the game. And you can see
this is our zombie. And you can also see
that the handrail kind of put him to
stand in the level, but if he's maybe in the ground or
something but you can do is just smoking a bit above the ground and then
click on your keyboard. And it will automatically
snap your character to the, it will snap this polygon of your coherent
directly to the floor. And we can see that now our character looks like
he's standing on the floor. So that is the basis
of their setting up our blueprint class
for our new character.
31. Destroy Character: Now that we have
created our zombie, Let's work on destroy him. So we need a few
things for that. So if you look at our zombie, we can see that we have
default on that point. We can put some functionality
for him to exploit. Let's go into our pawn
horizontally pawn. Let's open full blueprint data. And what thing that
we can add in here is a function name that
function explored. Now we're going to have
three things in here. So what happens
when he explodes? He needs to play some sound. Then we want some
exposure individuals, and then we want him
to be destroyed. Now, zombies, of course, would not really die like that, but it will be way
more complicated, creating blood splatter, some more complicated particles or dismemberment that
will be also a harder. So this kind of the introduction to this training and object, we are going to
destroy the zombie. So first thing that
we're going to do, let's click Add and let's
click Add feature per content. In here. Let's just take a look. Let's click the content
and then starter content in here,
Let's click Add. Now we're going to add starter
content to our project. And in there we can find a few things that might be
useful to our projects. So one would be the explosion. So if I find explosion Q, there is some experiment sounds. And in here we can see what
is actually happening. So we have our wave explosion and then it choose random between two different
explosions. And it just took
some installation and then gives us an output. Now, we don't want
to be really far away and then hear him as loud as we would if
he was next to us. And that is this
attenuation settings. And for this, we need
to create a new asset which would be sound
attenuation and we can create it directly from here
or go into the folder. So let's create it from here and let's find our starter content. Let's see where it could be
audio and let's name it. And now we created
this. Let's open it up. And let's see how this works. So we have our
shape troposphere. So in a char pointer
or sound is created, it will create a car. You can imagine it like
a big invisible sphere around it where it
has influenced. You have two inner, inner radius of the sphere
and then fall off distance. Which after you go farther
and farther from the sphere, it will play quieter
and quieter sound. So let's put this to 8 thousand. I think everything
else should be fine. I know we can see these
settings is added to our whole, this whole queue. So we should hear it
quieter and quieter. Okay, let's close that. Next thing that you have in here is the explosions. So it's fine. It, if we've got two particles. Let's see, we can use this one. You can also maybe combine
multiple particles, but for now we can use this exposure that you need a second for the
feds to composite. So you just added
this to our project. And now we can see our exposure. So now let's put
all that together. So in our explode, Let's click, right-click and then
sound at location. And location, we want
to put it on ourselves. So let's get actor location. And this weight will always
be wherever the zombies. Next we need a sound asset. Let's type explosion. And we have this export from Q. And this is the parotid. Everything should work correctly and also have
attenuation in here. We can override
it, but we already have Our correct side or q, so you can live with that. Next, we need spawn
and meter application. We again want to spawn
this on top of our actor. So you can pull it from here. And there definitely not
important to us as ulcers, everything else in here
except arbiter template. For that, we need p explosive. So let's click here
type exploded. And now that working. And the last thing we need. Destroy Actor, you want me
to be destroyed and then, or before that we want our, our particles to respond. Now we need to activate
this function somehow. So this function will
always execute this, but we have not activated
these activities. Let's go to our character. So let's go to Content,
FPS game characters. And then we have our
FPS character in here. If you remember when
we did the line trace, we can now also do
multiple things in here. So let's get her out heat Dr. And this is the hotter that this is the general
class of data to hit. But we won't
specifically to find our zombie type BP zombie. Now when you cast directly
toward BP Zombie, we can get out of
his farm fields and one of these functions
is explored. So now when we re-cast with our visibility
trace, we create a line. If it hits a zombie, it will check if it is a zombie. If he does, it will find this
function and activate it. And if it doesn't,
it will go here, which is basically nothing for. Now. One other thing that
you need zombie is lock down here that are
Collision Presets. We can see that our visibility
is actually set to ignore. Want to set it to block,
which will make it, our array will
actually hit something so we don't want to
ignore to change this. We can click here, click Custom. Now without Collision Presets, we can we also need to set
this to Cleveland enabled. So we have our query
and physics and then we want to enable these two are actually just
visibility since we're using visibility triangles and we could track that in here, will also be using camera,
but we're using it. So after the data,
that should be fine. And now we're testing
against this mesh. What is the collision
of this mesh? So if you look in the viewport, we have this collision, but this Clifford
is not collision of our metrics Curry from the cash-flow component that you use for the general
movement of the character. But our character
is more specific. It has arms, body, legs. Retrial should detect that heat instead of this general capsule. Because if you use this capsule
for collision detection, then if you cast right here, it will detect it
in here, in here. So you want more specific to his body for that
views physics assets. So if I double-click on our
character and open it up, we can see that we have this
physics asset and it is just generated when I
imported the character. So it's not perfect, but it should do the
generally okay job. So you can now see that this is way more
specific for actor. And if the ray casting here, it won't hear the character. Here, one here the character. Now of course you
can click on one of these and change them up. You can also create
new ones in here. But for now I think in
general this is ok, so you don't need to
do too much editing, but if you really
want to do specific, you would maybe create
one coefficient here. So we have detection here. So right now, if I can strain
here, it's one detected. You can customize this until you have it perfect as you want it. So head is also a bit smaller. But yeah, so for now, let's leave that how it is. Now let's test starting out
to see if we miss something. So let's go to our character. Let's try to food. We heard the sound, we saw the explosion and also our
character disappeared.
32. Overlap Events: So now let's add some options for our zombie to
attack the player. One way to do that would be to add the equivalent
sphere and then use that to detect if something comes
near the zombie or not. Somebody that's
open on BP zombie. Let's look odd. Now
let's type Sphere. So let's start sphere collision. And let's type player the deck. So that be the name
of our Cleveland. Now this collision has Collision Presets set
over a power dynamic, meaning that it
will try to overlap everything that is kind
of more blends scene. And in here we can see
our point also in here. So let's leave that on and
maybe we can disable this. And we have also these
genital development that is by default enabled. So that lets us actually
interact with our character. So let's now put sphere in the middle and let's
increase the size. We want. It may be a bit more, maybe 260, something like that. Now let's compile save, and let's go to
our FPS character. If you go to our mesh
and scroll down, we can see some details
about our character. You can see if you do not
overlap each other, ponds, but if you do block where dynamic and they should let
us interact with each other. So let's, let's
actually test that out. Then we are in our, in our zombie character. Let's click on Play the text on that scroll all the way down. Here we can see different
things that we can work with. So one would be on
component begin overlap. In here. Whenever we start overlapping with some character, something
will happen. So let's pull from or
other actor and type cast to FPS character. Let's type print. Now let's see like this. So we have our print to track if this is
actually working, and then we are trying to wrap it up with our FPS character. Let's hit Play. We can see successful activated. That means the dark character successfully
detected our player. Let's go back to our nodes. Now what we're going
to do is click, right-click in here,
promoter variable, and then name it, go all actor. This way we are going
to have a reference to any historic character. So horizontally starts running and trying to capture
this specific character.
33. Go To Random Location: So now that we have
this area where our zombie will be
able to attack test, we want to make it that
when he attacks us peace, he starts running towards us. So first thing that I'm going to do is just
go into our character. And I'm going to increase the
size of this sphere a bit. So let's click on it. And I think they
still, I'd say 356. There's a bit too small for me, so I'm going
to increase it. So when we come in here, it will start running towards us and then
he'll start chasing us. The kind of logic that I want
to have for the zombie is that zombies will be roaming around randomly
in this level. And then when they detect us, they're trying towards us. So let's start with that first
we need Nav mesh volume. So if we go in here
and go into volume, we have this number
of pounds volume. If we put that into our level, we can see that it's
pretty small and they wanted to be way
bigger than this. So let's zoom out, maybe even increase the
speed of our camera. So mild way out, this
is all full level. Now, maybe we don't
want to go in here, but we can customize
our level later. So let's, let's actually
increase the size in here. So let's type 100. And this is kind of taking
our whole level. Now. We don't want the
value to be that big, but for now we're just
going to increases. So it kind of texts the
size of our whole level. Now as disabled
this uniform scale and then let's scale
this to, let's say 50. Zombies will never be able to go onto the buildings
and stuff like that. So this navigation volume
does not have to go vertical. So let's do ten. Let's do two. Maybe. For, maybe something like this
should be fine. Now, if you click P, should be able to
see our navigation. So let's first, yeah, we'll have to build it. So let's go to Build, and let's click build pets. Now that this was
built typically p, We can see these green area. The green area basically
shows us the parts where we or the zombies
are able to go. And if you come closer
to some objects, you will see this where it's kind of broken down
and that's just broken down because there
is some objects in a way depending on
your properties, you can also decrease the
distance like in here, which since we have
this really big number, if it is kind of low
resolution for all of this, you can go to Project Settings. And in here, Let's find
navigation, navigation mesh. And in here we can
increase the tile size, cell size, height,
stuff like that. For right now we're
going to leave this, this quality, but just keep in mind in the
project settings. You can play around
with the settings and create maybe more detail, but of course more performance. You have to balance that
out button for now for us, I think this is fine. Now that we have this,
you are going to create a few other blueprints. So let's create a new folder in the blueprints Dynamic AI. And in here, Let's first
create a behavior tree. And let's call it
b. T is zombie. Behavior tree is basically kind of a logic for what
zombie is gonna do. So we started from here, we can add our sequence. And then in here you
can have actions. So one of the actions will be fine random
location on the map, but go to that location, maybe wait a second or
something like that. So this is kind of
the logic creative. You're going to
put everything in. Now one other thing that we will need is if you've got are
different for intelligence, we still need the blackboard. And we could call it BB zombie. And Blackboard is
basically an asset. So if you go into the behavior, you can set it in here. And Blackboard is just
an asset where you hold variables for
our behavior three, so if we go back to
the hair and three, we can see there is no way
for us to store variables. But since we attach
to the Blackboard, we have keys that
you can put in here. And you can actually
have like inheritance. We have blackboards that are touched on
another blackboard that add some more
values and stuff like that so it can get
more complicated. But for now we're going to use our Blackboard
to store values and then we have our behavior tree
to actually run the logic. And third thing that we're
going to need is I controller. This is just a controller. That does not mean
the player to work. So let's create that
and let's name it. Controller zombie. Let's open that up in here. Let's go to Event Graph and
less delete all of this. Actually will need the event. Again play. Let's look right. I can type run behavior tree. So this behavior three, we run onto this AI controller
and it's called BT zombie. And now that we have this, we also need to click on our zombie and then
click Edit BP zombie. And if you click on this self, we can change AI controller
class to be a zombie. The heart level logic in
here is, we have a zombie. It will get, when we click Play, it will get possessed by our AI controller,
which is this. When our IR controller starts working it to random
behavior three, which is this and this because we'll run out of the
logic for our zombie. Now, we need some way for our zombie to detect
what is around him. If you pull from here, we can see all the
different tasks and these tasks made for
us by Epic steam. But we can make custom
tasks and custom stuff. So one thing that we will
need is run a query. And query is basically
Environment. Environment query where we
can kind of look at things in the environment and kind
of pick an option for them. So now we have these three. We can also add
another thing in here, which is environment query. So in this artificial
intelligence tab, you can see a lot
of stuff here in this mass traumatic
smart object and stage three or other things added specifically
for this CD sample that we won't touch will only touch environment
query here. You can aim it QS,
random location. In aqueous you can see works similarly as our behavior three, because you can run
multiple, multiple things. But what we want is just
points in a circle. We just wanted to
get some points in the center
circle around this. Let's say circular
radius is 2 thousand. We can make this a 100. Now let's do 12 points. And this is the circle, so it's all around us, so it's not just in front or
something like that. Let's see if we can also
add a test in here. So if you right-click
on your task, you can add a test to see. So maybe one, just the distance. We want our character to
arrange minimum so we don't want the character to move like ten centimeters in front of
him or something like that. Maybe want him to move at least two hundred
two hundred units. And now let's go back, back to our behavior three. And now we can find
our random location. And now we have the run mode, which is basically what you want to take from so we
can set our matching. So if you remember, when we created this
task, the task set, we create a circle of radius of 2 thousand units,
which pays between. So you can imagine, see
if I can, with this. So you can imagine if this
throat is our character, it will create a circle around the character and
then it will create equally spaced points in it. Click Create 12 points in
minimal space between. We will have to be a 100, create points around
our character. And it will say, in this area, which we set it to
be for our distance, at least 200 units. So in this area, you cannot create any points. Then we have these points around where we are basically
selecting from. So now that you have that
and we have our limit, we are running this test. And now when we run this test, we want to save the
information somewhere. Something needs to be saved from here so we can use
it somewhere else to actually use it
to go somewhere. So we can go to blackboard. Let's say. Or you can just
name it location. So we can just create a
new key in the blackboard. Then we can create a vector. So that's kinda, that's
basically location. And then in here we want to
use the location to save it. So we run our test. We get our matching, we get a random one from all
of the matching ones, and we save it to location. And now we can run another
task of retries Move tool. And this is basically
just a simple multiplication which we'll use our navigation that degenerated switch will move
around obstacles, stuff like that, and
it will try to move to dislocation. What
is the location? It is our location
that we just saved. In this behavior
tree. How tasks are triggered is from left to right. So we will first trigger and accurate equals square root and then we will run Move tool. And for this, you can also
see the numbers in here, 12. And if I move the location, you can see now this is
one and this is to have the indicator of how
our tasks are going. So it goes 012. And after he moved to, let's say, let's add a
task which is weight. So this is some default data
or other data it useful. So let's say it waits 1 second, or let's say base two
seconds and there is 1 second run deviation, so it can be between 13 seconds. And then when this
finished benefits, it will go to sequence, it will go back through
it and then it will start again sequence,
and then go again. Now, if you have, let's say you have another
sequence in here. Actually we will need a
sequencing here also. If you have something like this, you can see exactly which number does what
and what happens. So it goes 01234. I said it happens.
It will go to five. After the five, there is no six, so it will go to 0 and then
it will go to one, to two. And so that's kinda
the loop that happens. Let's save this and we actually
don't need this sequence. For now. We can delete
it and connect this. Now let's see if this works with our character.
So let's click play. And if you look at the summary,
we can see how he's fine. He's seen as foreign
location when they're waited a bit and then
went to another location. Now he's speed is
a bit too fast, we're going to change that. But you can see that our random location
finder is rocking.
34. Follow Player: Okay, so now that we have random location movement
for our zombie, Let's make hematocrit player or at least got
to Arthur Player. One thing that I did is increase this radius
from zombies. So we can more easily see
when the zombie attacks us. And we can even maybe
increase this a bit more. So let's click this, make it maybe 1 thousand. Let's compile, save. Let's go back to
behavior of three. So what we're going to do in here is add another sequence. And when our character
goes close to the zombie, will go to the other sequence where somebody will do
something else in here, he finds a random location most altogether and wait a bit, and then do, does it again. Now before we start with that, Let's also go to our
character movement. Now let's maybe decrease max walk speed to,
let's say 300. And let's see how that looks. And we consider zombies is
way slower, which is nice. So let's leave it like that. Let's go to our behavior tree. So first thing that we're
going to do is let's select the sequence
and copy paste it. Now that's connected
sequence to the sequence and create another sequence
which is going to be here. So what will happen is we're going to go
through this sequence, then go back in here. Now you also have a selector in here instead of the sequence. But for now we're not going
to deal with that since we don't need any more
complexity than this. So what you want to
do in here is create our own custom
class, custom tasks. So let's click here. And so we have this fork
to create the tasks Insider behavior tree instead
of creating it separately, but you can also
create a separately. So let's name it BTT task. All player. Let's click Save. Now in this task, what we're going to do is if
you click on the Functions, we can actually see what are the functions
we have in disk in this behavior task class. And what we want is
this receive execute. That basically means when this task starts executing
what's going to happen? This is basically
the same as big in play for our blueprints. It's kinda has a similar effect. And then we can receive tick, which is basically like
events deacon or blueprints. But for now we just want
to receive execute. Before we start
working on this task, let's first go back
to the zombie, and let's go to Event Graph. And in here, we want to do
something with our character. So what we want to do is basically take the
reference of our character, FPS character and say that you want to
follow this character. So let's go back
to our a zombie. And we need to save
a reference to the player somewhere and
where you want to save it. If you go to Blackboard,
we can create new key. And let's create an object
and name it target actor. And this is where we're going to save our reference or a player. And now in here Let's
click Get Controller. Reference to self. We want from a monosomy to get the other controller
that we have our Blackboard so we
can type Blackboard. So you can also get
to the Blackboard. Now that we have the
contaminant Blackboard, we can also set value. And you can set values objects. So if you remember in here we created a subject
target doctor. And let's type,
make literal name, and let's name
this target actor. Going to save our character
as that object's value. This, this can also, you don't have to add this. But what efficiency we can do once we know that we want
to trigger only ones. Because when we get
the reference layer doesn't really follow us even if we try to run away from him. So you want to this, for
this to happen months. And now when we set
this reference, so this time France, right now when we
created these empty, but when we start
the game and we come close to the zombie
and we triggered this. We are going to save. Actually we want
to get this going to be bad because you are going to trigger
a bunch of stuff. We want to trigger
this only once. When our cast is true,
Let's compile save. And now the total value,
value is changed in here. We want to use
this value to find the location of this
target and then follow it. And that's something that we're going to do in our full player. So let's type Blackboard
value as object. Now let's look right-click
in here and split this struct type target actor. And we also need this
to be an object. We're gonna get the
reference to this actor. And let's also cast of ****. Since we only need
the **** information, means you have to
cast specifically to BP zombie or FPS player. We can just generate upon. Now let's create a
note card. I move to. This is as useful
nodes that you let us basically simple more to some location but using
navigation mesh for this. Then we want to set
this to target actor, since this target actor is
applied not to somebody. And also we are going
to duplicate this and then pipe self actor sense in our Blackboard, we have this cell
factor reference. We want to take that
and also cast upon. Let's copy paste that upon. Let's connect this and
connect this to the pond. And obviously with
reference to the zombie and to the player. And we want to say
our zombie, okay, you need to go to the player
and this is his destination. And let's type get actor
location from our player. So target actor is a player. Now let's connect this here and let's set a deceptive
alias to ten. Now, this is a simple
task when it starts, it will do this and then
you can see this timer, so it will take some
time to execute. And then this timer finishes. It will activate on
success or fail. And for that, Let's type finish. And we want to finish
execute and you want to finish it on
successful and fail. So let's create two of these. Let's just connect them so and
to be successful, we fail. And for success we
can just enable this. Now let's go back
to our, let's see. So you have this activated. We can go back to
our behavior tree. Now in here, we need our
task and click on tasks. And now we have our
task enabled in here, maybe after he comes
to the player for now, Let's put just a weight. Let's say five seconds. Set this to 0 so we
know exactly five. Of course later we are going
to put some other stuff in here like attack player
or something like that. But for now we're
just going to wait. So let's see if we have
everything set up. We set our input. And yeah, Also another
thing that you need to do is how are we going to
go from here to here? Since this sequence,
what it will do is run a vacuous query mortar
location, wait two seconds, go back to sequence, run a q-squared SQL query more
to location, and do that. Basically infinite. Want to click, right-click in here and then add a decorator. Decorator is a condition
for this sequence. And if the condition is false, when we go from the root to the sequence to
the sequence, it will say, okay, condition is false for this sequence
Stephen activate, we want to go to
another sequence. So let's add that decorator
which is conditional loop. Let's do target actor
when it is not set. So when it's none, which is in the beginning,
it should be none. When it's none, this
sequence is true, but when it becomes something
which becomes player, when we detected player in here, it will become something and then the sequence
will be false. So it will go to
the next sequence. So now let's open this up just to see if
everything is working. So we can also be
realized sequence. So let's click Play. So I
can see he's had to move to. And when he comes
to the location, you should wait a second or two and then go back to our own ikea
square and then move to. Now let's see if
we can activate. So right now it does
not seem to activate. Okay, we did manage activated, and now he's following us. So we had to come pretty close, but now it's working. And you can see here, follow
us as long as he needs to. But if we wait here,
wait five seconds, and then she will start to fall off again, or
at least for me.
35. Zombie Animations: Now let's add some
animation start zombies, so he does not depose the
hallway to the production. So one thing that I did is I went to the mix somewhere
and found some assets. So if you've never used to
make somites pretty simple, you just click Upload character, upload the FBX of
your character. It should automatically detect the record created the
Mixamo rig for the zombie. If not, it'll give you a
simple menu to just put points on his arms, legs,
and stuff like that. And after that you have your character inside
mix somewhere in here. For the zombies, I just typed
a zombie and found all of the different zombie attacks
runs and stuff like that. And I just chose a
few of them clicked. If you are taking
the the running, you'd need to make it in place so there is no root motion. The reason for this
is because we are going to move the
whole character, whole capsule with
us so we don't want this animation to be moving. So it was Monday this week, how it will look like in game. So you need to set
it in place if you're changing some
way animations. And I also added, so I added
ILO, attack and running. But for now we're just
going to use idle and run to add some more fun
to our character. So first thing
that we need to do is create our
animation blueprint. So let's click, right-click
on our skeleton of our character and click
Animation Blueprint. And let's type ABP zombie. In a side of here. We want to go to events and
then we have this try Get Pawn Owner and let's
type velocity. We're going to get
velocity of our character, and then we're going to
get the vector length. So we actually just want
the speed of our character, not the direction
where he's going with factor gives us vector basically gives us the
direction and speed. So we just want the speed, so we can just get
vector length. Now let's create a
variable named speed. And let's click, float and save. Or set our variable every tick on the speed depending
on spin over character. Just so I don't forget, one thing that I changed in our blueprints is just change these secrets to
selector and then others. This blackboard conditions,
if you click right-click, you can add decorator and then add the Blackboard condition. And I added on the
results change self. So meaning that when results
changed from server, we'll abort everything in here. And then we need Blackboard
key that we want to see if you change this target
oxygen, if it's not set. If that is changed, we
want to avoid this. So what will happen
is we are searching for the player at the
moment we find him. We're going here and
we follow the player. And then whenever
we go to selected, it will always
select the secrets. So this was just wanting
that I change there. So let's come back in here. So we have our speed. Now in animation, we could
create a state machine, but there is an interesting
thing that we can do in here, which is if you go back to our character and let's
right-click again another male, male zombie skeleton
and click Create. And here we have these
different things. And firstly click the
animation blueprint, but we can click
on anything else and you can find the
same things in here. It'll just be a bit harder
to find a skeleton. So it's just easier to,
while you're working, you can just click, right-click
on Skeleton Create. And everything is created
specifically for a character. So let's type one day
and name it some more. And this space is
interesting for blending two
different animations. So in this timeline, I
can put animation in here and anywhere in between. What I want to do is
take my island nation, put it in here, and then take my running animation
and put it in here. Now if I hold Control and we can see how different points
on this timeline, the animations are blending. So here he is kind of
running or walking. And if you remember before
what we did or BP Zombie, we changed our max
walk speed of 300. So now we have
this value of 0 to 100 if you change this
horizontal axis to 300. And then move our
points towards the end. Now we have the blend between 0300 depending on his speed. Now one thing that I
would change in here is just he's acceleration. I would put maybe 500. More slowly gains the max speed. So you can see the change in animations that we
will get in here. So you have this bounded
between two animations. One simple thing that we can
do in here is take our one, the zombie moved
blend that we have and just connect it directly
to our output pose. This way, we have this one
value, which is float, that will change
from 0 to 300 and our speed of our
character is 0 to 300. So you're basically
blending between these two. You can see already
mentioned supplied. So now let's go to Viewport. That's liquid metal mesh. Let's look. Use a mission
blueprints and type B. Now if we select Horizontal, we should be able to see
him idling and running. So I tried. You can
see how somebody run. It can slow down. He's an American, slows down. And you'll see when he
stops and starts running, there could be some acceleration before he starts
running at max speed. And we can activate his
ai to start following me. Now that this is working, we're going to start adding
some text or some BN, make him a target.
36. Zombie Attack: Let's now add a tag
to our zombies. So one thing that I added
in here is these axons. So we have some indicator
that zombies attacking us. And I also hear from
Mixamo are zombie attack. So we have that too. But we're going to
do basically is if you go back to
our blueprints, instead of this weight, we're
going to add a new task. So let's click new task and beautiful a player or actually
new task, blueprint base. Let's name it. Attack. And click save our function and let's click receive execute. First, what we're going to
do is get the blackboard. And we want to get
Blackboard value as object. And this object needs
to be our self. And we need this to be a object. Now let's cast to character. So what we need to do in here is create a montage in
play to viral attack. And let's set this up and
now let's create a montage. So if you click, right-click in here and then
click on the animation, we can find here and
measure montage. But we can also
do the easier way where we go in here and
click on Image montage. Let's type a zombie. And inside of here, Let's find our asset browser
and find our attack. Now that we're attacking here, you could change planning
lead times if you want. But for now, I'm going
to leave it like this and we have our
default group slot. And if you remember from before, we need to add
that slot in here. So when Armando of interrupts,
it will go into this slot, which is after our move, so it will override the move. So let's compile and save. Now let's go to our tasks, zombie and let's
click Play montage. Have this useful play
montage function that is also delayed. So we can actually wait through the whole animation and then do something on a
mission completed. We want basically
Skeletal Mesh Component. So I'll make one more dish can only plan skeleton methods. So that's why when you had
to cast to the character, because if it's
just our objects, we cannot find the scatter. We've had to cast it and
we wouldn't get anything. So let's type skeletal mesh. You can actually just type
mesh to get our math. We can connect these
two Skeletal Mesh. And then here we need a zombie. Now that you have this,
Let's also do something before and that is play sound. And we can play some
2D since this will only be played when zombies
are really up close. So it's going like
this. And let's find our Some be sound. This task will be activated when somebody comes close,
it will attack, it will play zombie sound and
it will play this montage. So now we need to go back to our sequence and let's
find our task attack. So now instead of weight,
we're going to have this task, but we also need to add
something at the end. So when our task is completed, our animation is completed. We need to track if it's
successfully completed. For every task, you will
usually need to have some some resolution is, did he succeeded it fail? What happened here if for some reason it gets
interrupted, you can notice. And now we have
finished executing, which means that after
a zombie attacks, it should go back to sequence
and back to fall player. So it will just continue
doing this indefinitely or until it kills the player. And now let's see if we have
everything we should have. Now let's minimize this
and let's test it out. Zombies coming towards us. The sound is played
and he's attacking. And we can see that
it's working out a few. We will be looping
and trying to catch me for as long as you can. A dark when he comes close. Now, one thing that
I don't like is that he comes way to cross
before he attacks. So let's change that. Let's go to our tasks
zombie and then we need to check this one, I think, yeah, we have
this acceptable radius. Let's put this to 30.
Let's see how that feels. Let's click play.
Stopping place. You still comes way to close. It seems we will have
to set it way higher. So maybe like a 150. Let's try this. Now. That's not a bad distance. I would maybe put a 100 because I think right now
he's kind of a missing us. So let's put the
100 compile save. And let's see how this looks. Now this feels right, so I'm going to
leave it at that.
37. Game Mode HUD: So now let's play a bit
with our game mode. So if you go to FPS
game and blueprints, we can open up our game mode. Here, if you remember, we set our bp FPS character and that's basically eat that
you setup in the beginning. Now we're going to use this to add also a widget to our screen. So let's click,
right-click in here. I'll go to right-click
and blueprints. And let's type user widget. Now let's name it again, mode. This is going to hold things like count down and
the zombies remaining. So we can actually started
adding some rules to the game. So let's open our user widget. Let's add our canvas. So let's type it in here. Let's add some texts. This text we're going to
anchor to the top-right. And maybe move it like this. Let's type time, right? Meaning there's going to be how much time you still
have to finish our quest. And then we also need
our zombies remaining. Something like that. Now let's also set our position
white or whole numbers, so they're already in
the whole numbers. That's good. And I'm going to put these numbers
to the whole numbers. So you can have
them align in here. But you can also
actually do this. So it depends how you
want to align it. For 42, okay. And we also need to mark texts. So that's okay. We can duplicate both of them. So it's like one duplicate. And this is just going to be
a number, let's say five. Or actually it's
going to be timed. So let's set the 00,
something like this. And then let's duplicate. And let's set this to zombies
remaining maybe five, so you can see how it looks. Now let's also align them. So this is 96, this
one is 96, this is 44. So we need these 44 so
that an exact alignment. Next thing that we're
going to need is another text and this is going to be taxed
for the countdown. We need this in the center,
so change our anchor. And let's put the
number three in here and then put this
2.5 and then 0.5. Now, we can also set this to 0, interest and some stuff. So let's do 48 in here. And we can also see that
it's a bit to the left. That's because this justification
is not set to middle. You can also size
the content if we want an increased maybe 64. So we have a big
counter in the middle. Now that we have this setup, let's add this to
our game modes. So let's type
Construct game mode. Judy, that's added
to the viewport. Now we can just test it out. They should work fine. And it does. You can see in
the middle are countdown and at the top right we have our time remaining
and zombies are menu.
38. Zombie Roaming Sound: Now that we have added some zombie
animations and interaction, let's add some sounds
when he's walking. So we do have sound
when he's attacking, but we don't have anything
when he's roaming around. And I found two terrifying audio samples
that you can use. Before we start doing that, let's go to this object called City sample
overload your data script. And in here you just need
to disable begin play and you can also disable on enter
sandbox analysis and books. So this is just so
we don't hear all of the audio from the
city sample game because there is a lot of car is going around
and stuff like that. Like people in the world
talking stuff like that. So we don't find any of that. So you can just go in here. So you can just
type over allowed your data so we can go in here. I pulled out with your data. You can go into this asset
and disable the events. So now that we have
these two audio tracks, what you want to
do is combine them so we can kind of pick
at random one of them. To do this, we can
select one of them, click, right-click and
then click Create q. Then let's go inside the queue. And in here we can
see that we have our zombie roaming the tree, just clicked, right-click on. But we want to add this one so we can just pull it in here. And this Q asset basically
gives us options to modify or combine different
audio tracks. So we have these two. Now we can click,
Right-click type random. And now we have this random
node where we can put as many of these tracks as we want. And it'll just pick one of them when it wants to play something. And before we continue, let's just click on both
of them. Click looping. Sure, it picks it loops. One thing that we need to do in here is just set attenuation. So it will not so nice if we hear all of the zombies at the same time with
the same volume. So we can use attenuation
to basically modify that. So it's the Catholic in
here and go to sounds and click on sound attenuation.
Let's name it. Zone, be roaming attenuation. Now let's save all. Now let's open this up. And we can also close this and go numbers that
they found for this is 0 for inner
radius and let's say 2 thousand for the
fall of distance. So basically, this inner
radius means that we can put, maybe if you go close to a certain
distance of the zombie, we'll be hearing max
loudness of these sound. Even if you start coming
closer and closer. There's a cutoff where if
you're coming in closer, will still hear it at
the same loudness, which is the largest it can
be. I just set it to 0. Now let's click Save. And now we need to apply
the star zombie roaming Q. Let's look output attenuation
and let's type the zombie. Now this should work properly, but we need to add
this to the character. So it's got total zombie. And in here, what you're
going to do is add an audio component and you can see it in
here in the common. You can also type out
if you don't find it. We can name it. I'll do roaming. Now
we can have the sound. Let's type zombie
and the rank r q. That's going to
compile, save it. Now when we play, we
should be able to hear his army when we
come a bit closer. So you can see if you can
actually hear the domino. But if you come closer, we start hearing the sound. And now he says
coming towards us and hear him louder and louder. And then the attack. Now what I would like to do is to change that when
the character tax, we actually don't hear
the roaming sounds. So that kinda stops going on when we ran
the zombie attacks. So let's do that. Let's go to our
characters male zombie. We actually want
his behavior three, which would be in here, I think. Now that we're in
this task attack, Let's add our volumes so we're going to add
it in between here. So we have this
convenient play montage, which has this delay. So you can see this column
that indicates that this is a delayed events, so something can
happen over time. So we have this one component
tone and uninterrupted. So first thing that we
need to do in here, somehow get our audio
roaming component, but you cannot get it
through this cast to character because character
designs have this component. But the trial BP
zombie Africa has it. So we have to be more
specific with the cast so it's cached on the zombie. Zombie. Let's delete
the cast of characters. Now let's get Audi or roaming. And when you have
this, Let's then type volume and let's
set volume, multiply it. And we may be not, don't even need to completely
remove this sound, but you just make it quieter. And then let's copy
this and set it in the end here so we
can change this. Bring it back, Wendy. Wendy
play, mother finishes. Now let's double-click
in here just to make it a bit more readable. Something like that. That's compile, save, and
let's see if this works. So it does work. One
thing that I would change is that this might
be a bit too strong. So maybe 15, just to
have a little bit of sound. Does the salt. And now it works.
39. Chapter 05 Introduction: Welcome to the comment
section of this course. In this section, what
we're going to do is mainly to do
with the weapons. So we're going to add
this cross here that you see and also are held apart and I'm account we're also going
to work with the pickups. So if I pick up
the health pickup, we're going to get
some health and of course it should
pick up some ammo. You're going to get some AML. We we're also going to work with our weapon a
bit and that is, I do go to magic fire, also how our MO works. So when the fruit we
actually lose some ammo. And also shooting zombies, are they actually attackers? So this is going to be very interactive section
where we're going to work mostly on the weapon and how it interacts with
zombies and pickups.
40. Crosshair: Let's now add our cross
character or characters. So I have this folder
that I created, UI and textures, and here we have a cross, cross
hair texture. To add this to the character first, we need to use a widget. And the use of Egypt is
basically kind of like a front-end or visual
part of the 2D UI. So she got to UI. We can click,
right-click blueprints. And let's type user. We dropped in here, Let's click select,
and let's name it. We dropped character. The inside. In here we are right now,
cannot see anything, but this works similarly to any other blueprint where
you have your designer, which is visual part, and then you have your graph, which is basically a logic part. What it will do
all of your logic. If you go into the designer,
Let's firstly Canvas, you will usually have to
put this inside to just get the general area of your image. And then let's type image. And this is our image, so we can basically move
it around this canvas. So how, how the widgets we just work in Unreal
is basically they, they are inheriting in a
hierarchy one from another. So you have this canvas in here are imaging is inheriting. This slot can span a slot which gives us
positioning and stuff like that. If you did not have this canvas, so if we have to delete it, but if I did not
tell his kindness, I would not have these options
in here. I have on this. So depending on what
who is parent of who say if I put
over here and then Image trial of the overlay, we can see that we have
this overlay options, but we lost our movement options because this overlay works is
a bit different in Canvas. So that's kinda how
inheritance works. So let's smoke cannabis here. And the other line. Next thing that you need to do is set it in the middle of the screen. Or actually before
that, let's go to image and type cross-sell. And we could just try to set it approximately in the middle and then
scale it approximately. But you get into a few problems. So if you try to
scale this image, we can simulate how it will look when different
aspect ratios. And you can see if someone's
monitor is a bit narrower, we can see how it changes
where the middle is. And to fix this, what we need to do is set this alignment or anchoring
to be in the middle. That means that this, this imagery is gonna be
anchored onto these points. So whenever we
treat us be trash, it will find where this point is and how much it needs to offset this image
based on this point. It is point is on the edge. It will always try to, let's say, x to be 500
and why maybe 300. And it will always try to
leave that pixelation there. But if you have
it in the middle, then to love is a
query to the middle. Now let's put this to 00, so our position is
indirect middle, but now we can see it
does not look exactly. So let's click Size to content and not our cross-fade is
through high-resolution. So let's put it to 32 by 32. That should be fine size. And you can see how the
alignment is set to this point. This is the point of our image. And if you change this to 0.5, we'll basically set it to whatever the middle
point of our images. Now, whatever aspect ratio which shows you can see our image
will always be in the middle. And that's exactly
what you want. Now let's compile
this and save this, and let's go back
to our character. In here, what we need to
add these constructs. So we need to basically
create our widget. When we begin platelets
type Character HUD, we need to create our widget. But just creating
it is not enough. And this is the two
doing DFS character, but creating it is not enough. We need to add it to viewport.
And this is important. So it is actually visually, we could create our widgets in the background and then
add them or remove them from the viewports
anyone to Bartlett's. But we want to add it to
the viewport instantly, so we just add it
directly in here. No, we should go back and
try to play our game. See how we have our cursor, a sensory or ray casting
director from the middle. We can see that it also gets
directly in the middle. If you zoom in. Now if you try to aim to
probably not be in the middle. And I spent a bit of time
trying to align it properly. So this is thing that you will
have to do from your side. So for me to kind of
test the alignment, what I did is if you go back to our characters and
then BP FPS character, we have our ME position and not in position which
we set in here. We can also maybe move
this down to be stopped. So we have our leftmost click
and then right mouse-click. We have are not aiming
at naming position that will add up between when
we zoom in and zoom out. To kind of tie into line. What we can do is
click on our arm. And for us to get our
amine position and click, right-click and click Copy
and paste it in here. So now we have it in
the immune position. And then we want this arm toss bean and use
animation asset and then a Milo to be set. Now what we can do is if
you minimize this image, we can click Play. And in here we can
see the position of our gun and we
can click in here. While we're playing and
basically change our location. This will be saved. And when we are satisfied
with the positioning, we can exit the game. Click, right-click on
the location, copy, and then go to our
aiming position and then right-click
here and paste. Then we're gonna have
our new Amy position. Now, sometimes you want just be needing to just
change the position. You will also need to
change the rotation. For that, what we can
do is go to our arm. Let's see actually that
first, stop the game. Let's go into our
animation so we get the access to our skeleton. We have these weapons socket. And also we should have
in here previous scene. Let's find we should have specific animation
and let's do a model. We could also change the rotation of our
sockets if I click Play. And let's move this
a bit to the side. Should be able to little by little change the
position of our socket. So this is the way that
you can also change the rotation and
location of your socket. So when you set up your
location properly, you can also rotate the socket and position
it a bit better. After you do the socket thing, you don't have to
change anything. But after we stop, we just have to bring
everything back. So if you go to our character, first, we don't want our arms
to be in remission asset. We have to use our blueprint. And now this does
not look right. We need to bring it
back that are standing, starting position
being not taming. We can copy this and then
paste it into our herbs. And if you don't want
to do this, every time, what you can do is in
Event Graph on Begin Play, seats in here won't
be giving play. We can set get our arms. We can set position. Or this wouldn't be, it would be that location, that
relative location. So we could set the location
and get are not taming. Then whenever the game starts
it will automatically set it to not having position. So you don't have to vary
in which position you currently have
your arms in here. But after you do all that, you set up your
positioning for again, it should be going to the game, should be right on your cursor. And now we can precisely,
whenever we want.
41. Damage: Now let's add an option to actually deal damage to zombies. So it's very interesting is that you've just putting a once. So let's delete all of this. And let's click, right-click in the zombie and type damage. Any type of damage, we
get a bunch of stuff and there is some internal
functions and events that we can trigger that is already set up for us in
this character class, for the character taking
damage and applying them. So we have these events
that you can call us. So event any damage here because few things
we get them damage. We get the damage type
instigated and stuff like that. Now we only are interested in the damage and we just
can call this event. When we deal damage,
something needs to happen. So let's first create a variable called celt for our zombie. Let's make it float. And let's give our zombies some default
here, let's say 100. And we can actually add some variation to these two slides. Adh. Again, play. Begin Play. We can set our helped to, let's say, a number between
some random values. So let's click,
right-click and then random loads in range. So it says somebody's don't
have exact health every time. So we can set maybe
between a T and then 120. And now when we apply damage, what you can do is get
our health, our health. And we want it to set it to previous value minus the damage. So we get our previous
value and then we type minus and we get to damage. And now we can set it in here. Now after this, we want a
brand and you want to track if this is less or equal to 0. So whenever we fall below
0, something happens. And we would call the
explored for now. We're later going to make
that more interesting maybe, or the death animation. And then our character
after that explosive, don't leave the, the
character jostling there. So let's click through. So if it's less
than or equal to 0, then we can export
our character. Now that we have this, we need a way to actually
apply them in store character. So right now you
can take damage, but we still need to
call this function. So let's go back
to our character and let's go to Event Graph. Now we need to find
where we live trace. And in here instead of explored, Let's delete this since we're gonna do this
in the character. Let's type out why them. And now we have
this and we don't need any, anything like this. We just need our base damage. Now let's make it a bit
more interesting here. So let's do random float. Let's actually do a lot
in range and range. Let's make it
between then and 20. Of course, you could add
more detail than this. We can say that there is a multiplier to hit the zombie
in a head, stuff like that. But for now we're
just going to apply some damage to our character. Now, let's have some
different options for instigate greater
cause or stuff like that, but we're not interested
in that right now. Let's see if this works. Let's click play the
flute or a zombie. And we can see he exploded after maybe six or seven
or eight. France.
42. Zombie Dying: Now that attract character
can die and take damage, Let's make it a bit
more interesting. Let's add some animations.
Took his debt. So in-between explode
and our branch, we need to add some options. So what I was thinking God, is there'll be Animation and displaying of the zombie dying. After that, we're going to
have some delay and then we'll have our dead
bodies plot basically. So first let's go one-by-one. So let's take our mesh. This is the measure
of our zombie. Let's type clay animation. So we already saw how we can
play animation mown turf. And that is good if you want to insert and animation inside, inside, inside the
animation blueprint. But we don't find
that when we want to kill our zombie will know exactly
what needs to happen. So the animation of
the debt is playing and then we had some time
and then it explodes. So we want a player are
zombie that animation. But before that, let's, we'll again from our mesh and
let's type animation mode. You want to set the animation mode because we
just have to play a simple animation that fund
our Animation Blueprint. So let's use a sagittal
use animation asset. And let's connect
it here and here. And now let's put a delay of five seconds and then
our character explodes. Now we're gonna go this one by one because there
is multiple things that you're going to have to deactivate because
there is lots of happening with horizontal canal. You can see his death
animation is playing, but he still has his
logic for movement. And after five
seconds he explodes. So there is a lot of
stuff to unpack there. So first thing that you need
to do is we need to stop the logic of his behavior tree. So let's do that. Let's
type get AI controller. Let's type self. And so we want to, from this zombie blueprint, we want to get a our
controller and then we want to get brain component by component is basically what
a nice controllers use for trees and want
to type stop logic. Now we want this to happen for a student
to stop our logic. We don't want anything
to execute here. Now that we stopped that, there is still one
thing happening that you can actually
demonstrate. So you can see what
I'm talking about. So if I click Play, we can seek, you're
still coming towards me. And that is because
there is still some some options
that were activated. So first, when this happens, we want to stop
this begin overlap. So while or zombies dying, he can still overlap
with our player and then change the dark
doctor and stuff like that. So you want to
disable all of that. So let's type. But actually it's got
from player detect, which is our sphere
that the tax, if your unwrapping a player and let's type overlap events, and let's disabled
generator operands. So this never happens again. And after that, we still
need two more things. So one thing that will happen is the term
zombie slows down. So even if we stop our logic, if our zombies in motion, he was still more, or at least that Shruti happens. Let's test it out. So let's make him more
viruses and then kill him. And you can see how
she's still moving. So let's go back
to our blueprints. Left-click, right-click,
and then stop movement. Let's do this. Now. Let's test it out. Let's see if this will work. Let's click Play. Now, if somebody
stops and falls down, now if I continue
shooting the zombie, he's animation will reset
every time we put him. Now, we go into this upper logic because we are
taking out health. And we go from minus five
to maybe minus, minus 40. And every time it's triggered
these three events. So what do we want
to do is take this, move it a bit to the left
and type will do once. Now, this will only happen
once after this branch. So all of this will
happen only once, which is exactly what we want. So let's compile seven. Let's see how this looks. And their zombie falls in 14, not because this is exactly
what you want from me. Now, there is more
things that we can do. And one of those
things is audience. So let's say we want
to stop the audio. Let's move this a bit here. Now let's take the audio
and let's type disabled. We don't hear it from
there. So let's type stop. This should work.
So we can do this. Here. Let's click Compile, Save, and let's see if that helps. And you can see there is
no sound of the zombie. Let's just quickly
go over it since this is a bit more complicated. So what happens is when the zombie gets us to
0 or below 0 health. Everything after
this happens once. So we stopped the logic
of our behavior trees. So that says start to random location and
go to random locations. All of that stuff
we stop it in here, are zombies, stops thinking. Then we stop here is
overlapped with the player. So nothing triggers when the player is cos close
to him after his dying, then stop his movements since he has acceleration
deceleration, which means that there
is some time before he stops and before
he starts going. And I want to stop it
right then and there. Then retrench our
animation mode. Wanted to use animation asset instead of Animation Blueprint, which we are using now
choose Animation Blueprint. So we can play just
a simple animation. So if we go in here, we can see that we can
play a simple animation. And then we play that
animation, which is that, and then we just stop the
music, so nothing happens. Here. We also have a
delay if you want, we can put this to
maybe 25 seconds, 30 seconds, one minute. This is just kind of
how much you want the zombie delay there before he completely
disappears and kind of your game will become, of course, more performative. There is less that
zombies on the ground.
43. Macros: This video is gonna
be a bit shorter, but I'm going to go over
how we can create macros. So if you tried collapsing this to the
function like we did before, so let's say you try to
select this and then click, right-click and
collapse the function, you're gonna get an
error that is saying you cannot be placed in
a function graph. And the reason for this is that we have this delay function. And delays cannot be
setting a function. It kind of breaks them, so we cannot do that, but you can set
them in the macro. If I select everything again. And these two, and let's click, right-click and then
collapse the macro. Now let's name it. Be, dies. And we can see we have this
simple node that is a macro. And if I double-click
on it, we can see our Oliver nodes are in here. And macro is different
from function that it is just used for more
organizational purposes. So macro just collapses
everything into this one node. But what Android does when you compile this and
package your project, you just paste
your code in here. So macro is just kind of your group everything
together and then automatically ungroup it
in the, in the compilation. Time. Functions work a
bit differently. So Macros then can be used for, for these delayed knows that
needs some time to execute. Awesome. One other thing that is
different from function is that macro can also
have multiple outputs. If you look in here
now we can have or actually we would have
to have the execution pins. So function can have
only one execution pin. While macro can have
as much as you want. So you can create some
complicated logic. If you ever need more
execution peanuts than one, you'd have to use
a macro because function does not
allow you to do that. So those are two simple fuse or differences between
macros and functions. And if you ever have a delay, you will always
have to use a macro instead of a function.
44. Character Health Bar: So now that we can
damage the zombies, let's make the zombies be
able to demonstrate us. So first thing that we
need to do here is to add some health bars so we can
actually see how much we have. We have this character
hard that you're going to use for this. So
let's open it up. And in here we should have
our little cross hair here, so it's actually rename it. Let's then add a progress bar. So progress bar is basically a little buttons can
be filled or empty. And we can use this
basically for our health. So we have product
is better here. Let's put it in canvas panel. You have it in here, and let's put it off in the
top-left corner. So we have this encoding
that these are the top-left, so that is perfect
for what you want. And let's increase the size. And how this progress
bar works is that it has some options in here you can
see the style and progress. Those, those are unique
for this progress bar. We have present that
goes from 0 to one, that fills up our bar. And then we have, we want it
to go from right to left, left to right field
from the center. So we have all
different options here, but you want the
classical left to right. And you can also
change the style. So maybe the field image, you want something
different to be, background image,
stuff like that. For now we're going to
leave it blue and white. So now that we have d
so that it can feel, let's compile and save, and let's check out how
it looks in the game. And it is kind of hard
to see from the pop-ups, but you can see that
R bar is almost four. So let's open it
up again. For now. I'm just going to put it
a bit down because we have some pop-ups
that go in here. And let's just see
how big it is. I think that's fine. Now you can see in
here that we have this variable tract
and that means that this progress bar
basically can be editor. Editor is considered
as a variable. That means that basically in graph or any other blueprint, we can actually get
the reference to this object and
change some stuff. So we're going to use that. But let's first
rename it helped bar. Let's compile save. Now let's go to
characters, FPS character. In here. Let's go to begin play. And we need some way to
access our Health Bar. And we can do that by
accessing it in here. So we already have who
that you're creating, but we don't have the reference.
So let's create that. Let's click, right-click in here and then promote a variable. Name it character. It should do reference. Now let's connect it in here. Then we can break this up, just connected like this. So it is a bit cleaner. Then after we add
it to the viewport, we can also reference this. So I can take this reference
and then type health bar. And you can see we
have this access to a helper and it wouldn't let us access it if this is
variable was set to false. So now we can type per cent. We can set, our presenter, of course gets presented if we ever want to
see how much we have. So now what should we
set these present two? So we should set it, since it goes from 0 to one, we should set it to
present the job of our, of our health that we have. And we can check that if we click plus on variable and type max health and change
this to float. And then a type of Health. And I'll leave it as float. And now whatever we want, we can just multiply or divide are held by the
Max-Cut and we should get a percentage of how
much water we have. So let's put Max Health to 100. And if you put this
to, let's say 70, then take our health
and our Max-Cut, then divide 70 divided
by a 100 should be 0.7. We can track if that's
right by playing and seeing all bar is at 0.7 mark.
We can see two there. So that way we can have our
health status of present. And let's also do
one more thing here. So our event begin place
getting a bit crowded. There's bunch of stuff lineup. So to kind of organize
these better, what we can do, click, right-click and
then type sequence. This note lets us organize
stuff a bit better where these things will
be or R naught will be triggered from top to bottom. So we can then 0, then one. There'll be triggered
in sequence. So instead of having them, I'll trigger each other. We can trust, set it in here. To trigger like this. We can do attaching and
animation instance here. Let's maybe move it a bit up. We can do this in here. Then we can call the
third one in here. Now it looks a bit better. We know what is executing
a sensory separated it into the components
that are separate, that do not have anything
to do with each other. You can easily see
what is happening. And we can even an organization
organized it more. If we select the HUD
setup, we can click, right-click and then
clubs to function and name it set HUD. And this way, it is
even more organized. And of course we can do this with these ones and
this one if you want. But for now, I'm going
to leave it. As is.
45. Getting Hurt: Now that we have the **** bar, Let's make our zombie
them in-store character. So first thing we're
going to do is open the animation montage
for the zombie attacks. So what basically we need to do is at certain point you need to test if the character is being hit and
then apply damage. So first thing that we're
going to do is let's create a notify track or
actually notify. And notifies are basically
triggers that you can use animations to trigger some
event later in the blueprints. So I can use this as
a montage. Notify. Now let's name it. Apply damage. Now, they will be fine. Let's then go to our severities. It's in the blueprints Ai. Let's go into our task attack. So this is when I was
on B actually attacks. Here I added one print
with a notify name. And if you add this to
notify begin and you're using this montage play, you can actually see the name of the notify. So let's do that. So if you compose your strategy and you can see it
says apply damage. So we have that
trigger into our, inside our task attack. So we need in this trigger to make everything
happen for tracks you, the character is being
hit and to apply damage. So let's do that first
we need our zombie. Let's click Edit zombie. And let's add a box
in front of him. So there's a few ways
that you could do this. You could create like some
collision with his hand or maybe create a small sphere
in front of the ray cast. But what I'm going to do
is simply be effective. So let's click Add. And
let's find a boxcar even. Now I'm simply going to create
a box in front of zombie. And if the character is
colliding with this box at the point when we
trigger the notify, then the character
will take damage. So let's do that so
we can increase this. So maybe something like that. We can also change this to animation asset
and then set it to attack. If we want to see the
range of the hand. So maybe make the
range of bit bigger. Something like that seems nice. Let's also look from here. We can even maybe do
something like this, increase the box size and then
move it a bit to the left. So for the player, it might
be a better idea to move from the right sense he's attacking
with his right hand. So you can also create like
a little gameplay mechanics. So we can leave it like this. Now let's compile, save, and let's name this
box damage or even. Let's see if this is set
properly for the overlap. So we only want it actually
to overlap our character. We can set this to no, and let's set it to a custom. I want everything to be false, but to leave our pawn to true since our
character is the pons. So this does not need to
collide with everything. We can track all of this
in this capsule component. If we go down, we can see that this capsule uses squishing
places. So this bond. Now that we have this
setup, Let's click Save. Let's go to our task attack. Let's delete this sense we
inherit only one not defined. We don't even need to
use the notify name. So let's go back and
let's find our bp zombie and find our the image quality. Now let's type is
overlapping actor. So we're going to
check if this is overlapping, the
player character. For this. Let's do this and
then type of branch. So now for developing actor, we need another actor to compare them and see if
they're the same. So let's see if we can find our character so that we are going to get blackboard
value as an object. We already have the reference,
so anytime horizontally. So that's going to
bias the character. That means that he knows
he has a target dr. So if you remember in our
behavior through Blackboard, we have the target dr,
which is our player. We can use that to compare it, but you can see it
doesn't let us in here. There isn't, doesn't let us is that we have object reference, which is this time to go into the actual object reference victories what we're comparing. So for that we're going
to type cast to actor. And let's connect it in here. Let's maybe move it a bit down
so it's a bit more clear. And then we're
going to use this. So let's move everything
a bit forward. So we are comparing the actor that is colliding
with or damaged or even if it is our player or target actor
which will do the player. If that's true,
something happens. Let's type print
and let's actually see if we're getting
the right director. So let's pull it from here. So let's just get the
name of the actor. If it's true, we
tracked her disease. Right now, we're not getting
anything that's morbid back. Try again. And we're getting
BP FPS characters. So for some reason the first
time we did not get it. Maybe we are casting too much
in the two smaller areas. So let's go to our zombie. And let's increase this a bit. And also maybe pull it back. In cases like this. Something like that.
Let's try now. Now our character
is getting hit. Now let's test if
we get more away. So we don't know this
is working well, but we still are not getting
any damage or character. So let's delete our test. And this is fine set up for
now, let's compile, save. And now we need to apply
damage to our character. So we do have a reference
to our character, which would be here, but we would need to
do more specific cast. So instead of this Kass dr, we can actually cast
to FPS character, which is very specific type
of actor since we created it. We can use this to test in here. But now we have the
reference to our HUD. So let's type we get HUD. And now we can
apply some damage. So let's pull from here
and then get killed bar. And actually, yeah, we don't
need to do this. Then. Do this in the character. We can do similar
things in here. So we said present
on Begin Play, but we could call this set per cent when we take any damage. So let's do something
different here. So we're going to first go
into the character and click, right-click and then
type pig damage. And let's see what we
can just type damage, event, tiny damage, the vendor, any damage we can do the same thing that we
did on the zombies. So let's actually move it in here where we take some damage and then we can do all the calculations in here. So maybe if you get
more enemy types, we will have to set separate
calculation niche one. We can just type this type
of damage, apply damage. I like to add some random
float in range from 15 to 25. Let's do base damage. And now we're going to
do a similar thing as we did on our zombies. So we're going to go to the character and we
have this damage, and we need to do the
calculations in here. So one thing that we could
do is create a function, but let's do it a bit
differently here. Let's first get our
reference to the HUD, so we have it in here. Then let's get Health Bar, then set health or set per cent. And before that we can just take from this health so
we can set it in here. Damage. We can subtract this
from our current health. And I can just put this in the top and then
listen the bottom. So if you, let's say have 50 health will
take out maybe 20, then we're going to
be left with 30. So we want to set
that on health. And after that we want
to set our present so we can actually be really
see what is happening. And present needs to
be set As before, we get our max helped
and our shelf. Then we just divide by Maxwell. And this way we can
get the percents. Now let's test this out. Let's minimize click Play. Now we start with about
0.7 or 70 health. So he applies damage. And you can see the
health is applied. And let's start to doubt humans. And it's working.
46. Automatic Fire: Now let's set our
weapons to be automatic. So to do that, let's first go to our character. Let's find our node where
we are actually floating. So we have this left in
production primary action. Let's move this a bit down. First thing that I want to do is just set this as a function. So this is basically when
we fire, we can click, right-click, Collapse
the function name, namely fire a weapon. Let's put it in here and we want to some stuff to happen before. So we want to add a variable named name it the
primary, excellent rest. And let's set it to Boolean, and now let's add another one. Well actually we're going
to name it can fire. And then we have a
third one that you need to name, fire rate. And the third one
I set it to float. First thing that we're
going to do is just set our climate action pressed to true and then released to false. So this is just the track if
we are currently shooting. So as long as we are
holding our left button, it will be pressed. And when we released,
then D7 to be fired. So we can just connect this, but we also need tracking here. So let's type of branch
and add that can fire. So we actually
need to figure out if we can even fire
absolutely going here. This can be helpful if
somebody is trying to spam quickly to activate a button. So spam it faster
than the fire rate. So we can track it
actually in here. Now let's set, can
fire to false if it's true, something like this. And then after it
goes into here, we need a delay because
we want things to reset. So we want this to be 0.1. Or actually we're
going to set a fire to 0.1 and then we can
connect in here. Well, maybe 0.2 since we
have a bit heavier rapid. And now what will happen is we're going
to click, left-click. It will go to fire a weapon. It was set fire to false. Then we after the delay, we want to set her
can fire to throw. Then we need a branch to track if our primary
action is pressed. And if it's true, we want to go in here. Now let's double-click in here. Let's organize it a bit. Let's see if the
logic is correct. So when the primary
action is pressed, we will fire are rapidly. If we can fire, which would
be the true by default, let's put it in here. And after 0.1 seconds, we'll set the can
find out the true because it is set
to false in here. And then we'll check if the primary action is
pressed and if it is true, we are going to fire again. So this should requests desktop. So we can see the tower fire
up and is working properly. And we can have this slope
that we will infinitely loop. Let me try free to spam. We should not be able
to spend the weapons. So let's try that. I'm going to click
as fast as I can. And I'm spamming it
away faster than 0.2 seconds and it
is not activating, our can fire is
actually working. But now that we have
this, let's organize our function a bit because
it's right now a bit messy. We would have to go really close and see
what everything is doing. But instead of that, we
can trust our sequence. Now let's add three
nodes for now. So first we can check
if can fire is true. Then we can do the
animation and the flash. This can be one, can of
course even more segregated, even more or separate it
even more where we can have this be one and then these to be
some, something else. Or even 11, this node
to be just one thing. So we can also do that, but for now I'm going
to keep it like this. And then this one
is a bit too long, but it is a bit harder
to separate because we can see that from the
first node we have all of these other things
that are going in. One thing that we can do in here is click right-click
clubs to function. We have our fire up a line
trace and you'll notice that we have these variables
now as output. So if you double-click in here, we can see our output
returned node has these two variables and you can also manually
add your own. But when we create a function, it automatically created
these output nodes that there is no
useful because we can use them in our inner node
here so we can connect this. Now it is a bit more simplified. We see in our sleeve
what is happening. Now we have one
problem here that is that now these branch does not work because
when we go through it, we'll just set can fire, but then it will go to then
it will go to the next. Let's actually put
this like this. Then it will go to then T2 and then execute everything
else anyways, so to kind of go around this,
what you can do is click, Right-click and type return
and add return node. And what this means is that when the returned node is reached, so if can fire is false,
we're going to go in here. And when this is activated, everything else
will be terminated and the function will
be ended right here. So we can also do that, which will work
effectively like before, where false doesn't do
anything but through, Let's all of these
nodes execute. So let's try that now. Spam, I cannot stand. When I called, you should
be able to see the spray.
47. Ammo: Our goal is not complete. We need to add some Emma tweets so we can actually stop shooting when we run out of ammo. So let's do that. First. Let's
go into our Character HUD. It's actually close these two. In here. We need to add our texts. So let's say, let's
take texts from here. We want to change for things
which is first-time coding. Let's put this at
the bottom right. And let's name it M0. Now let's play a bit with a font because I'm not
really big fan of it. So let's see what
we have in here. So this first city sample. And it can do maybe light. So this looks fine. Let's leave the site
so 24 and let's click, click Control seen here, click on the canvas
panel and then Control V. And this way we can
just copy paste this. And I want them to be in line. So let's put this to minus 90. Keep it straight there, and then minus 19 here, they're in the exact same line. Now instead of amulets, type 67. Now let's see how that
looks. That looks fine. We can also have this alignment in here which
we want to leave as default. But if you ever
need to align it to another side or in the
middle, you have it in here. And this is good because if
we start adding numbers, it will start adding
them to the right. But you can imagine if you're adding them from right to left. When you add too much number, it will go inside our texts. So we want it from here. I sleep, maybe 255. Let's Compile Save. Now one thing that you
need to do in here is that texts by default is not
set those variables. So we need to click this because this is the number that
you're going to be changing. Now let's click on Plus on
the variables and type Emma. And we want it to be an integer. And the reason for that is that m will always
be a whole number. It will ever be 0.10.5. So we always want to
leave it at one number. The ammo to treat him. Now we need to add it onto our fire weapons. So
let's click plus. And you want to
basically subtract it when you fire our weapon. So let's get our MO. Now. We could set it, set minus and then set to one. But we can also do
something that is called a decrement int. This will automatically take. If you've tried to go inside
of it, inside the macro, you can see that it
automatically takes out one from our MO. So these kind of just
a more convenient way to take out just 1. And we want also to get our HUD, so we want to update
this. Let's type. Actually we did not
rename it here, so let's go back first
and let's name it counts. Let's compile and save
and get the M account. And then what we
can do is pull from here and type setText. This way we can set our
text to whatever we want and we want to
use this number. You can also of course pull
from MO and do it like this. But we can also just use this one since it is a
bit more convenient. Now let's reorder it now, this one, let's
reorder it a bit. Then some nodes are not
acting exactly as I want. So this is a bit cleaner. And now we should see
our m or decrementing. So that's going to the game. Now the type of food
Emily's going down. Now you'll notice that
it went from 55 to 29. And the reason for
this is that we did not set this at the
beginning of games. So we have two separate numbers. We have this 55 that will be set at the
beginning of the game. And then we have the actual
arm account, which is 30. So we just want to update that and we can do that
in the beginning play. Let's click plus in here. And we can also, if you go back in here
in the fire wrapper, we can also just copy this and go back to the graph
and then paste it in here. And get our MO and
connect it in here. Let's pull this back a bit. Of course we can
organize this in more, maybe pull it up. This way. We can have more
space for our nodes. Now, we should start with 30 and it should start
falling back down. Let's test this out.
Now. Let's also test because we did not add any limitation when
around what goes below 0. You should see em are
basically going to mind. But that is not something
that we want to fix this. We can go back to
our fire weapon. And before all of this happens, what we want to do
is add the branch. Track. How many, how
many more do we have? So if you take gamma, we can see if it's
greater than 0, which would be one and more. We trigger our band range and if it's true, we
execute everything. So let's try to play now. I'm still holding my
left mouse button, but our MO is not going down.
48. Ammo Pickups: Algorithm works
and we have ammo, but it is in the
limited amounts. And we want to create a proton pickups where we
can increase our ammo. Let's go to our weapon. And in here we have
the same over here, the sound and 1M or mesh. So what you're going to do is
let's go to our blueprints. Let's click right-click
and then click new type your cups. And in here we're
going to create a new blueprint
that is an actor, so we will never possess it. And let's type M, BP and more. And inside this actually we're
going to add few things. So first, we need
sphere collision. Since we want those is to
collide with our player. And I think we can leave
it the size. That is fine. Let's add static mask
component. Now let's name, it. Will heal. I slept Panama. Now
we added some more, but it's really small, so let's increase the
size to maybe ten. If you notice I
click this button, that means that it will
uniformly scale now x, y, and z axis. Let's decrease the
size maybe to seven. I'm going to just rotate it. Now what I'm going to do
is just select our MO, quote out and move. Actually, I cannot
do that in here. That's the controls
second row V. And let's just duplicate it three
times, so it looks nicer. And we can also rotate it a bit. Now let's select all of them
and set them in the middle. And I'm also going
to put them a bit up so they're visually
clear what is happening. There gonna be a bit
above the ground. We can also take our
sphere and also put it around our pickup. So now that we had
the visual cue, one thing that I'm also
going to do here is just set it Tanaka
even so we don't want our MO to actually have an equilibrium since
our colliding will be happening with our sphere. This file, let's go to sphere and let's just
change a few things. First thing is we wanted
to only overlap it upon. So that is just more performance,
something like that. Now that you have this done, let's click on the event graph and we can delete all of this. You only want one event and that is one event begin overlap. So that would be in here. Let's click Plus. Now another
actor would be character. Let's type FPS. And what you
want to do is add demos. So there's few ways
that we can add M0, but let's go to
our character and let's create a custom function that will increase the AMA. So let's type add M0 in here. What you're going
to do is something new that we haven't done
in the function is, and that is either an input
and we want it to be among. We wanted to be an integer. And basically what
we're going to do is when we call this function, you're going to pass
some amount and then we're going
to add to our MO. So let's scroll down,
Let's find our ammo. And we can set our M account. Let's look plus in here,
connected in here. And we also want our HUD, we want to update.
So it's like mammal. Let's get this set text. Now let's set it to this amount. And this way we
should update it now, this is not called anywhere, so that's one thing
that we need to do. This or material. So
let's go to our MO. And if cost goes through, actually we don't need
the branch in here. If the cost goes through. What we want to do is type
at ammo and color function. Now we have this integer do need to set up something
and we can use, actually we already have
it named Emma mesh, so let's name it. I'm a mesh. This way we can call
our new variable m. And let's set it to integer. And we can set our default
value to maybe 20 bullets. Time we pick up this object, we are going to get 20 bullets. And there is one last
thing that we want to do. So we don't want to play
just a pass through this a million times and pick up as many as we want as he once, we want to destroy this. So I click, Right-click
and type destroy. And at the end, which was destroyed the actor. So now that we have this done to actually
see if this works, let's put our pickup
somewhere in here. These are free floating, so we're going to put it
maybe in here and then we can click End button on the keyboard and should
put it on the floor. And this seems fine. So let's click Play
and let's test it out. So right now we are not
overlapping for some reason, so let's test it out.
Let's click Edit pickup. So we have our own
component begin overlap, and we can print it, see
if our cost is failing. And also one more thing
that I forgot to add, which is play sound to d and
we need em will pick up. And you can use that
as an indicator to see if we are picking
up the right dimer. So let's go again. And it's picked up. It seems that we
just did not set stand on it. Close enough. So let's open it up the, the print and go to Viewport and increase the size of the sphere so we can
make, put it off 50. Or let's do a bit bigger 60. This way it will be hard
to miss this pickup. So let's try again.
I'm always increased.
49. Zombies Respond To Shooting: Let's now make our
zombie Guitar group by player footing him. So let's now go to our zombie. Let's now get any damage. And we have this damage
caused or variability is very useful here wherever
we can, get our Blackboard. And then set the value. The value that we want
to set is the object. Anyone damaged caused her
to be set to the object. So damage because it is
the actual actor that is damaging horizontally
and that will be the player always so
we can set it in here. We also need the key names, so it's neat to
make literal name. And let's type target actor. And now we should
change that value based on damage closer. But you need to go to the player and find where we
apply the damage. We should be in
the fire function and we have this
damage cause it. Let's type self and get
the reference to self, which we can use into
damage caused her. Now every time we
shoot the zombie, it will be set to
our character and then we're going to basically execute basically
the zombies logic. It will start to execute
the attack player instead of just running
around value food him. Wanting that you could
do here to optimize, maybe do like a
sequence and do once, not to do this only once because right now if you
shoot him five times, this will be called five times. We could do all of that, but
for now I think this fine. So let's click Play.
Let's test it out. I'm not going to
compose, but just food. And consider zombie zygote
and start to blackness.
50. Health Pickup: Now let's create a
pickup for the health and we're going to do the
similar thing for the MO. So let's click on the
blue button class. Let's look on the actor
and let's name it BP. Pick up. And let's open it up. And let's add here collision. Let's name it. Pickup CO2 front, and let's add static Math. Name it, health mesh. And now what we can do
is find our static mesh, which should be in here. So we can just pull it from
here and set it in here. Now we can see that
this is way too big. So let's put it to maybe
0.32 because 2.15 maybe. That seems nice. Let's leave it at that. Actually, we need to increase the size of our sphere radius. So let's put a 60
like we did with the other objects and maybe
increase this to 0.7. We also need to
disabled collisions. They probably won't even
happen for this subject sense, we have this sphere
where a player will collide before he even
touches the object, but just in case maybe for
collision with another, with another, with
other objects. So let's say the
zombies behind this box and your footing at
the zombie and you hit in the box,
something like that. So we just want to leave
it at no collision. And let's also
change in here too. No collision or no collision,
but the punk lesion. Or actually we needed the custom so we can ignore
everything except the point. Now, notice that we did a lot of similar things as for the AMA. And more advanced way to do
this would probably be to create child parental
relationship. So have a one general class for the pickups and then create children that inherit all of the basic stuff for
the pick-up objects. And then you just swap the mattress to be helped
or something like that. But for now we're going
to do it like this. This is more beginner
friendly way. So let's now go down
and find begin overlap. Let's delete everything else. Let's do the same thing as we
did before for our players. So if you remember, we started this MO functions. So let's look plus odd. We need for this
to be held among. You can see that
our health is flow to it on Monday integer in here. So let's change it to float. Now let's go back and
let's test FPS character. And let's pipe odd health. And for the variable's
name it help. Let's change it to float. For default, you
can see it running. Let's get this from here
and put it in here. And of course you want
to destroy this actor. Now in here, we need to
increase our health. So first thing that we need
to do is get our health, set it to our health plus D, health amount plus auditing
here and connect it here. We added this in lights
now call our HUD, let's call it helped bar. We can also pull from
here and set per cent. For this. Of course we have our maximum
and let's put it like this. So we have our health
and our normal health. Let's divide. We have it set up now let's
see if this actually works. Let's go back, find
our blueprints, pickups, and pull her
hair out into the scene. And also what we want to do is just move
this above the ground. Now we can see that
our health mf is actually trial or attached to our health pickup collision. So when you move health pickup equivalent everything moves. So you can do this. Let's compile, save our scene. It is a bit above the ground. So let's click Play. Now we get 70 health. So if we go to 90 when
you pick it up and we do. Now we want, maybe you might
have one problem here, which is that we can
go above max health. So if you'd pick up
this and pick up this, We are actually above
our maximum health. Now let's see if you can see that we should be
able to see it in here. We actually did not expose it, so it's actually expose
the d variables. So let's go back
to our character. Let's find our health,
which is not 70. And let's set data instance,
instance editable. Let's compile, save. And that basically means that in our level we should
be able to see it. Or when we have an
instance in the level, we should be able
to see our health. So let's see, we can
see our health here, 70. Now let's go back. Basically this button that touches you from the
character so you can actually move around like you're in the editor
and click on stuff. So let's now select
both of these cups. Let's go out. Click
on the character. And you can see that
we have a 110 health, which is not something
that we want because our Maxwell
should be a 100. Sought to change this. Let's go back to our character. What we want to
do to change that is basically clamped this, so we never have
anything saved that is above 100 or whatever
or max health is. So let's type climb. And climb basically limits whatever input we have in here that you limit it
between two numbers. Even if he had the
value of a 1000 and it will always set it to 01. But you can change the
minimum and maximum. We do want to change that. So max, what we want always
to be, whatever this maxes. So on my cell is 100, so it will clamp
it to 100 always. So let's compile, save. Now let's test it out
again. So let's click Play. Now when you pick
up both of them, we should have 110 if he did not clamp it, but
let's see if we did. We did so now we have a 100. Always.
51. Chapter 06 Introduction: So this is our last section where we're
going to work with the Game Mode and basically
the rules for our game. So as you can see, that it's bunch of things that you now have on the screen, which is time remaining and then zombies remaining,
n In the beginning. We also had our bottom-up timer and we were frozen for that time where while we wait
for the game to start. We also have some
states that trench to zombies remaining will go
down as I kill the zombies. And I, if I killed all the
zombies, I win the game. And there is also other
conditions that can happen. So don't be scared me,
I will lose the game. Or if my timer at the
top-right goes down, I will also lose the game. So this is how the two are going to be doing this last section. We're going to set
up those states and also work with our timer. So our time is properly shown, also zombies remaining and how to place them
correctly in the screens for different aspect ratios
and stuff like that. So this is going to be probably the most important part of the course where
we are going to put everything together and
actually add the rules where player has some risky
she can win if you can lose. And we add some
difficulty to our game.
52. Zombies Remaining: So now let's update our zombies remaining variable in our HUD. So, but the thing that
I'm going to do is just take our zombie
and duplicate him. Let's also move it like this. So you have to zombies
roaming around. The next thing that
I'm going to do is going to gain what HUD. And in here that
makes it out to this. We have our zombies remaining
and you have this text. So first let's change
name to zone B is next. Let's set it to variables so
we can actually change it. And I'm going to set
it to 0 and we should see three after we updated. So first thing that
you're going to do is just create this to be a variable so we
have access to later. Now let's connect it in here. And now what you want to
do is basically Update, get to how many
zombies behave in the level and then
update this number. One. Convenient know that you have your skull to get
actors of class. And then we can type zombie
and find our bp zombie. And in here you're going to get an array which is
basically a list of all of the actors that you have in the scene of
this extra class. And what we want is actually
just the length and not the actual projects. So you just want the
length. And after that, you can now update
our game mode HUD, which we can reference in here. Let's get zombie comes text. And then we can do set text
and set the text in here. Something like this. Now
let's test this out. If this works, we can also just remove the
number from here, set to nothing so it doesn't
distract us to play. And we can see it says
numbers remaining three. Now, if I go and kill a zombie, we can see that our
number is not updating. So what we want to do in there is basically create a function
inside our game mode. When somebody dies
that we basically take out a number of zombies. So first we need a variable
called zombie count. Now let's put the dots
to be an integer. And let's set it in here. Like this. Maybe make
it a bit cleaner, we can do it like this. The next thing that we're
going to make is a function, so we can name it. Zombie died. And when somebody dies, we want to get her zombie
count type decrements. So he's basically take
out one from this number. And we also want to
update our code. So let's pull from the hood zombie text setText. And we want to set
this to whatever the new numbers so you
can do it like this. Maybe even move it
a bit more space. Now, this zombie died. Function is not
activated anywhere, so we need to take care of that. So let's click on
one of the zombies. I think the best way to call this is when the
zombie afraid ice. So we can find our explored
where we destroy an actor. In here, Let's get Game Mode so that you can do is get general game with clients. But then we have to
cast our game mode, HUD, or just FPS game mode. And in here we need to find our neutron count or
zombie diet function. We can call this a
and then everything else should trigger test. So it does not seem like it
reset it after he explodes. So let's I'll change that. So the problem here is that the reset it after
the 5 second delay. So let's put it before. So when the zombie
started dying, basically, we're going to take this and
then find the zombie dice. And you can see in
here that you have this exploded, this
after the delay. So let's pull that all
the way back and then paste our nodes like this. Now we're going to update
the number of zombies. When zombie plays
the death animation. And it's activated. Now let's try another. Now let's start to
kill the last one. We still have done boards. And we have zeros is remaining.
53. Session States: Now that we have the time remaining and zombies remaining, there is different ways
to win or lose the game. So we also need to
add those options. So one thing that could, that could happen is that
you can lose by dying, or you can lose by
running out of time, or you can even by
killing all the zombies. So what you're going to do
is basically create an enum. So if you go to
right-click and then go to blueprints,
click enumeration. Now let's name it. Stephan state. And enums are used usually for basically choosing
different choices instead of using integers. So they are kind of
like numbers but named. So we can basically
nailed them something. So first we want to be
in the warm up state. So this is how the game starts. So you started seeing
the volume upstate. You go from three to one and then the game
actually starts. Then we have, our
game is in progress. That is another state. Basically you're playing the
game and trying to win it. And then you have
some conditions. Then the third state that
could be is out of time. Which is basically if
you run out of time, you go into this state, then we have player died. Last one will be Player one. So these are the different ways that you can finish the game, or at least the three last one. So those first two is
just a game setup. And then again in progress, you are killing
zombies basically. And now let's go to our game mode and see how
we can implement this. So one thing that we
can do is let's do a fantastic severe just going to do the basic setup for this. So if you type switch and
then type session state, you can see that we are
producing our enamine here. And this is really
useful know that lets you them the anime, so different states and what you want to trigger when
something happens. And you can see by default
it is set to warm up. So let's create
another variable, I name it safe and stay in here. We can change this to our enum. And I'll take care of
this session state that can connect it in here. And we still have
these five states. And if you've ever
tried to print this, and let's type warmup, should be able to see
the volume of prints. So let's try it. And
you can see there's a verbal pain that
is because that is the only node that is
right now activating. So now that we have that, let's go to our, that's actually caused a zombie. Now let's create our trigger for our three-to-one countdown. Let's put this to maybe three right now. So
you have something. Then what I want to do is
call a function in here. It's called a function. Hi, I'm Michael timer. In here. Let's get our game
mode reference. And bossing the heart. Let's rename this so
we can name this text. And we also need to make it to variables so we can see it. Now let's get down
text type setText. For now, let's just put it
to 0 to see if this works. Oh yeah, we also need
to call the functions. So let's go back. So you have to fight for
it, but I did not call it. So let's go to Event.
Let's do this. We have our warm-up timer. Now let's see if it works now. Now we can see that it works because it changed three to 0.
54. Warmup State: Now that we have our sovereign
state setup created, Let's add some details in here. So first we need to
set some text in here. So since this is called
a on every tick, what we can do is get gain. In seconds. This is gonna give us trend log n
time when the game starts. Let's also type out the
variable warm-up time. And let's set this to a float. This way we can set, let's say, three seconds as we did before.
Now let's put from here. What we can do is get our time and then take it
from our warm-up time. So let's test this
out if this works. So it goes from minus. So let's try it again. I think we need dislike this. And it goes from three
and then it will go to 0. So that is good. Now let's go back
to our game mode. Now let me move this. And now that we have this, Let's test the other
branch in here. Set this in here. And what you want is to
round up these numbers. So let's type this and
then connect it in here. We can do this to tax, since we are changing
it to integer. Now what it should
happen is that it goes with round numbers. So we have 3210. Now of course it's going to
go into minus three. We're going to change that now. Let's go in here. So
what you're going to do is basically tracking here. If it's equal or
greater or less than 0. Then in here we're just going
to set the text to nothing. So we get empty, basically empty numbers so
we don't have anything. Let's test it out. We can
see our countdown is done. Now what we want to
set it to happen while it's doing the countdown is to disable
everything we want. We want to disable
our character. So let's get player pawn. And from here let's
type disabled input. And let's solve so
yes to FPS character. So whatever I also
want to do is set our primary weapon
pressed to be false. And you are going to
change this of course later. So let's test this out. We should not be able
to move or fruit. In the beginning, I'm clicking things and I
cannot move or fruit. That's good. And now we need to
enable this later. So we want to enable this
when our game starts, so it will pass type game, so we need a
function start game. And in here let's type
the Get Player Pawn. And from here let's
type in enable input. What actually we also
need to cast again. Now let's enable input. We can also get the
player controller. So let's get player controller. And you're going to get again
of the Planet Index zeros. That basically means that
for a single pair of games, that will always
mean the player. But for multiplayer games, you have to get off
for local co-op games, you have to get more specific, but this is fine for
single-player games. And then we can
connect it in here. And we also want our parameter action
pressed to be set to true. And we can ask, is connected
to here like this. Let's set this to
true. Now we need our start game to be called
in the volume of timers. So we have this function that
is triggered when we are, when we, when the countdown
is basically done. So let's compile save. Actually first we need to delete this primer action press because you actually
don't need that. That's our input is disabled.
So let's click Play. Let's test it out. So I'm clicking and
I cannot more fruit, but when it's done, we can now move and fruit and we have the basic state
for a warm-up done.
55. In Progress: Now that we have our Varma, let's go to our
in-progress state. So one thing that we need to do is go to
our time remaining. So we didn't need to change this if we want to start
in progress states. So we basically want
to set that up so we have some time that starts counting down
when we start the game. So let's first go into
our warm-up timer. We have our start game where
we have our enable input. And let's also in
here set our state in progress. This way. Let's close this. This way. On next week
we're going to go to our in-progress state
and our inner progress. If instead let's do
plus update timer. Let's call it update
countdown timer. And let's get our HUD. Or we named it time
remaining texts. So as to that, we also need to enable
it to some variable. So he kept it visible. Let's type get good
time remaining. Now let's do set text. Now what we're going
to do for this is we need another variable and let's type bound to Dawn time. Now let's set this to float. Let's service to 64. Now, what you want to do is basically
amplitude or Delta diamond, that the time is
basically an inch thick. It will be divided
by some value. So in each second you have exactly the second pass is
after all of your frames. So if I could plug in
here and type delta time, we have this input
for the function. Let's set it to float. Now if you've got
our Event Graph and color object
countdown timer, we can see that we
have this delta time and you can connect it in here. And then we have
our count on time. Anyone to subtract this
from our count on time? So we have the new time in the new time we
want to set in here. And actually we
want this opposite. So we want this
taken out from here. Then we can set this time
and then as our setText. So I saw that you
have the conversion. Let's see if this works. Let's wait three seconds. We have our count on time. And it's not going
to be the same as this where you
have the decimal, decimal numbers and
stuff like that. So we're going to change
that, but for now, let's just set it up properly in here
so we have the time. Now let's have a branch
that tracks the time. If it's less or equal to 0. And then we want to
set this to 0000. So if you go like this and it can increase
the size of the window, make it easier
connected in here. Let's put the test
so text to 0000. Now later we're going
to format it properly, but for now let's do this. Let's put our Condon time
to five seconds so we can actually see it faster so you don't have to
wait for a minute. Let's click Play. Timer is going down
and it's set to 0. That's good. The next thing that we want
to do is when we're in here. We also want Get Player, Pawn. Let's type disabled input. Basically want to disable
the input of the player when we go in here. Now let's also cast
to FPS character. Now let's take pressed. So you don't want
this to go on here. So we're going to disable
this. Let's test it out. The game has started
and everything stopped. And this is basically
the action that we want. And after that, we also want for our game state of change so you can
actually put it before, so we don't never do
something if this fails. So let's do state. And actually we
can maybe do this later is cell depends
on what happened. Or actually we can
do it like this. Then we want out of time. And we of course have the other player died
and play around. And we're going to call that
in different circumstances. So if the time comes goes out, we go to Saffron out of time, sovereign state out of time.
56. Time Format: Now let's clean this
up a bit since we are going to go over and
format or texts. So before we do
that, we do that. Let's select this copy paste and connected in here so
you have it a bit cleaner. And what I want to do is
create a new function. So I select all this in, I name it out of time. This is all the
things that happened when we go out of time. Okay, that is fine. Now, the next thing that
I want to do is to format the text so we don't want
to just give this number. You may get new function, name it on text. In here. The first thing that
we're going to do is get our count on time. Then we need to get the mean. It's so to get to minutes, Let's divide this by 60. Since this is just our seconds and then this is the minutes. Then let's floor this floor it. Because Florida is
selecting the lower value. And you have the ceiling B, which is the upper value. So we went to Florida and after that we want to
convert it to text. But let's first
type format text. You want to get. We need this text form. So what we want to do basically
is to format our texts. We have 00 or number of minutes and then my number of seconds and then
colon in between. So we just form a text node. What we can do is write in
here something like this. Let's type minutes. And then seconds. Something like this.
That's the canter. And when we click Enter,
we can see that we get these two values where
we can put minutes and seconds in.
So let's do that. When you put this in, we get attributed to first
convert it to text. Let's do integer. Then we need to get the seconds. So to get the seconds, what we're going to do is
from here multiplied by 60. So whatever minutes we have, we multiply it by 60. How much seconds to take out. And then we get
our count on time, and then we take
out the seconds. So what happens in here
is basically if you, let's say have 65 seconds, we're going to hear this
will value will be one. And when we multiply one by 60, we get 6065 minus 60,
which is five seconds. So those five seconds
we will go over to the seconds. So that's
kinda the idea. Now let's go to text and
then connect it in here. And we need to
connect it somewhere. And for that we need
to return node. So let's click on here, plus. Now let's take the name. Or actually we'll need the text. Let's name it format time. And now we can
connect this in here. Now, we don t want all
those zeros and ones. So what we want to
do is set to inhere. So we always have two numbers. And then we want
to set this to 0. Also, we want to do it in here. So let's increase this. Soil wants to end to end here. Display we forget
correct formatting. Now let's go to to here
and let's delete this. Now what we want to do
is get our format text. And another thing
that we want to do is let's go back to form a text. And we can make it pure. And when we set it to be pure, that basically means
that we just have this output instead of having to connect
the execution pins, we can just give the output
because you don't have to. We just need to get some
value out of this function. It just needs to
process something. You don't have to
give it an input, so we don't have to create
it as an execution. Now let's compile and save
and see how it looks. So let's click Play. So here are our time
and you can see that the timer is going down. When it goes to 0, we
cannot move anymore. Now, before we continue, what we need to
do is let me see. So we need to test if we
set the higher values. So let's do 75 seconds. And let's see if our
formatting worked correctly. And it says 115, which is exactly how much time
we have or we added. And let's see how it will
fall when it goes below one. And it goes to 1659. So that is all fine. Now, let's close this up and this can actually
cause all of these. Now that we have that, let's also add something
on this event begin play. Right now it is a bit messy, so we could also clean this up. But yeah, that's actually clean this
up before we do anything. So the sequence, let's
connect it in here. So we can just connect this. Then move this down. Let's pull up this to
function and let's name it. It. Game Mode, HUD. So it is a
bit more understandable. Now let's create
something like that. And this way it is
way more cleaner. And these are kind of
setups that we need to trigger in the
beginning of the game. So let's also do
something in here. So let's set format text. Let's get our game
mode reference. Now let's do the time
remaining texts. I also want to set
the text in here, so it says right away how much time we have left.
And instead of saying 00. So let's explain, test it out. And you can see it
says 115 and it should start counting
down after a time. It goes way. That makes
it a bit cleaner. Now another thing that
I wanted to do is to basically add some announcements
when we start the game. So if I go to my game
mode, Let's create texts. Stay this text block, set it in the middle here. Let's set 0.50 to 500 in here, maybe too much 200. That is good. We need this in
the middle. Let's say this. Then we need to
size to be bigger. So maybe something like this. We can also size the content. Let's see if we have
anything better in here. Maybe irregular. And
now that we have this, let's put it in
the beginning play when we start the game. We can also edit this name
it, announcement text. And then in here
we can pull from HUD announcement text
and then setText. And we can set something like heel out, something like this. Let's compile, save, and
let's see if this works. So in the game
status we have this, but of course we
want that to move after warm-up time is gone. So what you can do is write
out a form of time is set. We can maybe go
into the start game and then in here we can get our game mode announcement text, then setText, and
we're going to set it. Nothing. So it
basically goes away. While we're here.
Let's also go into our update countdown timer. And when we're out of time, we also want to set our
announcement too out of time. Let's test the sound by
changing our count on time, maybe five seconds,
so you don't have to wait too long
for the testing. We can't kill all the zombies. It should go away and then
we should get it after few seconds. Out of time.
57. Player Won: So we added two ways
for the player to lose, but we did not give
player an option to win. So let's add that. Let's go into the
game mode again. And in here where zombie dies, we take out 1 from
the zombie count. So that's also another
branch here to see if it's if the zombie count
is less or equal to 0, so i, so that it fits
less than or equal to 0. We want something to
happen and let's create a new function
called player one. And for this function, what you want to happen is first we want to do disabled
inputs. We can type. Or actually let's get
Player Pawn disabled input. Let's also cast to FPS character and setbacks and press the false. Want this to happen.
But that's not all. When we also wanted to get out or not at all set
out announcements. So let's gapped announcement, setText and then we can
do something like this. And that should be fine for now. So now that we have this, let's exit out a few
of these functions. Let's go back to zombie died, and let's set the
player one in here. Now if you play. And I forgot to set up the time, so now we have told little time. So let's set this to
maybe 60 seconds. We have more time
to kill zombies. Were killed one order
and then the last one. And it says you want and
I'm out of the mold. So there is one thing
that could happen is that if we lose our health,
Still nothing happens. So let's do that. If we tried to do zombies,
get his attention. And then it made him
she does few times. We can see that nothing
happened there. So this will be, now let's find the last zombie. Okay, he's in here. You can see that we still got
the U1 ending even if we, even if we can knock out. So let's add that. We are going to add
that in the player won. So let's test first our player's health so we can
move this in here branch. And if you type help, Health is less or equal to 0, then we don't want
anything to happen. But if it's not, if it's greater than 0, we want this to
happen. This way. We have the ending where even if for some reason
I held it goes to 0, it will never be able to. We trust that. The last thing that we need
to do in here is to set our seven state to player one. And this way we unwrapped
state where we can trigger all sorts of other
things when player wins.
58. Player Died: Now the last thing
that we need to add is the player lost conditions. So we can type or
Player Die condition. So let's create the
function name it. Player died. Here we, of course first one, our disabled input
from our player. So let's copy that from here. Let's paste it in here. Okay, We can do it like this. Preston disabled. And there's more things that you want to happen when you die. And that is changing our
announcement, of course, so we can set it to
setText to you died. Then I'm going to also add
something in beginning here. So if you have a
sovereign state, let's set it to player died. This fit. Something else does not update. So next time that
we need to change this time remaining texts, Let's set the text there. We want to set it to 0000 so we don't have any
specific time in there. Next thing, we need our players, so let's go back. Now it's got two characters, FPS character in here. When we are damaged, we want to basically
track them if we have less than 0 health
or we have yeah, let's do 00 health event
to take any damage. Which other branch? This is the most appropriate
place to track this. Now let's get our health. Now let's check if it's
less or equal to 0. If that is true, we can do that again mode. And you can cast to our game or the treaty or FPS game mode. From here we can find
our died function. That should be fine. Let's go back here. Let's see if we have everything set up. I've started smoothing,
we have announcements set and that should be fine. So let's now test this out. Let's see chef few
zombies in the center. So I'm going to
click Play and try to run towards the zombie
and tried to kill me. You can also get the
help from the zombie. And now we are dead
and I cannot move in. Our time is set to 0. And now the last
thing that we're going to do here is let's go back to our FPS game mode. What I want to set is that when we realize
that ten seconds, Let's say we want our
timer to become red. And to do this, let's
go to our event graph. And we basically need our
update countdown timer. Here we have this tract for 0. But what you can do is also track setup branch before if
it's ten or less seconds. So let's do that. So
we are going to copy this Connect Sets the less
than or equal to ten. And now in-between,
we can put texts, though it's fine time
remaining setText. And this will work
every time because this branch will always be
true if it's less than ten. So we can put it in
here after this branch. Let's connect this
and let's actually, we don't need to set text, but what you need is set color, set color, and opacity. Let's connect to this. Now let's split
this struct here. We're going to take this
symbol we bought back or down. And we can put the red in here, so 12, right, and
then everything 0. Let's click. Okay. Now let's see if this works. I'm also going to change our account on time
to something lower. So we can actually see this. And we can see our time. It is now red.
59. Finishing The Game: So now that we have
all of our pieces setting in the level of, let's actually boss it out. So let's put some busy
in the, in the level. Let's add some pickups
and stuff like that. So first thing that we're
going to do is let's go to our game mode and
let's change the time. So let's give us maybe 80
seconds to finish them up. Now let's compile, save.
Let's close this up. Now that I look at the level, it seems like it might
be a bit too big. So let's limit to the area. So I'm going to take this ball and I'm going to pull
it all the way here. Something like that. And I'm going to
duplicate the wall and let's put it in here. Let's rotate it smoothly. These tools could
go a bit forward. Something like that looks fine. That looks good, and maybe
that while it's fine. So now we have a very
smaller area to play in. So we don't have to spend lots of time searching
front of zombies. And the next thing that I want
to do is maybe make these, these pickups with more
interesting right now, they're just stay
familiar standing there. And also maybe these pickups
need to be a bit up. So let's open the viewport. I want to make them a bit more floated,
something like that. What I also want to do is
basically rotate R components. So let's click Add. Let's type scene surrounding
sink component because it is basically like
a single point. So we went to the single mono basic hasn't been as foreign, which lets you move things around seven to touch
everything to that scene. Soviet don't rotate
everything individually. And actually we can type rotating component and this
foot rotate everything. So let's set the rotation rate, let's say 50, which will
rotate 50 degrees in a second. So let's compile and say, oh, let's see how it looks. You can see now our
pickup is rotating. The pickup still works. Okay, That's good. The next thing let's do the
similar thing for our health. Let's find, let's find our
meshes, health pickup. And actually we want
blueprints, pickups. And in here Let's go
to our health and maybe also move this
a bit for a bit up. And then we need the
rotating component and set this to 50 hours. So let's compile save, and let's see how that looks. That looks pretty good to me. So let's exit out. Now going to spread
them around a bit. So let's first split
out the zombies. I'm going to select two of them. Let's put them like this. They can patrol there. We can also select these two. I'm holding out, so basically duplicate them so we can
do something like this. Maybe spread them out a bit. I'm trying to not put one
too close to the player, so he attacks the player
when the game starts. So maybe something like this. And maybe this area can be
a bit more hard so we can put zombies together and
we can leave it like that. Now let's take our pickups. So we have our MO, or let's write it out a bit. So maybe in here, maybe if you manage
to kill the zombies, maybe you get some rewards here. Let's put some in this corner. Maybe one here, and
let's do one other here. Something like that
should be fine. Then we have our health pickups. Second, when only one there. Then I'm going to
put it in here. Here. If you fight
these crowdsourcing is, let's put maybe two in here. And then one in here. I'm going to put this
one in middle of the street and
maybe wanting here. And that should also be fine. So now that we have it
spread out and said, Let's test it out. So we have, I think Katie seconds to clear
all the zombies. That's good play. Let's try. So first, we're
gonna go in here. Maybe pick up the MO. We have some ammo here. I think. Obviously not pick up. Nice. Maybe we also need some cool, even the AMA to be a bit bigger. It's still seems a
bit hard to pick up. But we see a lot of zombies
are roaming around here. We can see our navigation lead to zombies to go
into this force, we can also decrease
the size of navigation. So they never tried
to go above the wall. And I'm a bit low on AMA, so let's go here. We still have 690. So we can see here we have this problem we can navigate from. And I'm out of time. There is few things
that we could optimize. First thing would
be the navigation. So let's type Nav mesh. And let's see the size of it. Okay, it's this one. So I will decrease this,
something like this. Then we can ask the case this. You can move it like this. So you basically never
want to zombies to go outside of this area. And also these walls, I don't think have a collider. So let's open that up. Box simplified collisions. So this should be fine. Now, Let's try to, let's actually try to increase
this since we increase the set-up box
coefficient on our walls. Now let's go to tools
are actually always got to build and then
build geometry. This should help us
with the size of the world or with navigation. Not sure if I did not update. Let's do this again. Should be fine.
Let's test it out. See if the zombies
still go inside here. So I got stuck there. Okay, It seems like zombies are not interested in
this part anymore. It seems like our
coefficients are taking them out of ammo. Let's go here. We still
have some problems. Garcia. I was careful to
pick the Navigation more. But now it seems to work fine. Of course, it seems
like the Amaris, the biggest issue right now. But you can see that game
is running fine and you have a five-minute timer, pickups and zombies, and that's the most thing that you
use to adjust the game. Okay, Now just be
shared with the game. To package these
build, what you would, what you would do is if
you have multiple levels, we can go into a project
settings and let's type. Then there should be
a name of the levels. So here this list of maps
including the levels. So we have our small
city level and we also have our default
map that we need to set. So it's got two maps and modes. And it gave me a default map
and it needs to be our maps. So it's named a custom app. So let's go here. Type
customer, the customer. This way when the game starts, when you build it to go
directly into this map. Now we saw that when I typed package that we have
these big city level. So let's remove that. And let's add in. Here are maps. We can click these three
buttons and then we can go into our FPS game. The custom app. This way, when this package
Build is built, it will include our map. Since we have only one map, we can delete the other
maps and live on this. But if you have multiple maps, you'll need to put it in here. Now we don't even need
to put our customer, because any map that is
setting as a game default map, it will automatically be loaded. But just in case
let's put it there. Now what you need
to do is just click platforms, then go to Windows. And then if you have
the package projects.
60. Final Polishing - Course End: Hello everybody to
this bonus video. In this bonus video, I
improved a little bit more our zombie shooting
FPS prototype. And let me show
you how it looks. I'm going to start again. I've placed some zombies. I changed a little bit
the hit of zombies. And I've created a hoarder here, which you can shoot. I've changed also
the muscle car. You can show the
court each zombie has a different speed
with a random value. And let me just collect
all the hordes. The idea is to kill all the 34 zombies
before they each year. And this is how you
can improve the game. And of course, this is
just a little glass in what you can achieve by
creating zombie shooter game. I've showed you
everything that you need to do in order to
have all the basics. And from now on
you can build up, you can add different
varieties of zombies. You can add different
speeds to the zombies. You can add different effects. Of course, the different levels
you can make the zombies to climb on some objects, etc. Pretty much everything
that you need to set up. Right now, my MO is out, so I need to refill. And as you can see, pretty easily created a
horde of zombies, which I can shoot
up. Pretty nice. Ends the game gets
too intensive. But pretty much discourse
was an introduction of how can you achieve this
zombie survival FPS. And of course, you can build
up everything you want. From here. I highly encourage
you to level up this course and make
more advanced zombies. But the most important
thing is that you now have the basic idea of
how to create everything. From now on, you can just
improve your zombie game. Thank you guys for
enrolling in this course. Let me know in the reviews
what you want to improve, what was difficult for you. And did you enjoy the course? Thank you, and I see
you in my next course.
 Ivan Yosifov, 3D Game Artist & Animator