Transcripts
1. 1.0 - Introduction: Visual Effects for games is one of the most exciting art forms there is. You have these amazing skill to create Magic, Explosions, Spells, Portals, Lasers, Shields and whatever your imagination can come up with. It's truly a gift. And if you want to start learning how to create Special Effects for games, maybe just as an hobby, or maybe you want to start a career in Game Development, then you should join me in this course. It will guide you from a beginner standpoint to an intermediate level in creating Visual Effects for games using Unreal Engine 4 with the new Niagara particle system. And even if I don't know anything about Unreal Engine, don't worry I will guide you through this software. We are going to start with something simple like some sparks just to get familiar with the Niagara particle system. Then we will dive deeper into Visual Effects and move on to something more challenging like this Area of Effect attacks that you are seeing. And then we will even create some cool Spells like these Projectiles with their cool Impacts as well. And finally at the end of the course I will show you how to achieve this electric zaps, these electric spells which are truly awesome. So come and join me. Gabriel Aguiar founder of the YouTube channel Gabriel Aguiar Prod. which has almost three million views related to visual effects for games. I will be more than glad to have you on board and to teach you some solid foundations for your future visual effects career. Besides creating effects we are also going to see what makes up a great visual effect, so you can distinguish what's good and bad practices so you can train your eye to decompose how effects are made. We will see the theory behind amazing effects and we will have a comprehensive overview of the Visual Effects fundamentals fundamentals And it doesn't matter if you come from a programmer background, an Illustrator, an Animator, or a 3D Generalist. Generalist or none of these areas. This course will walk you through the softwares and the different techniques you need to achieve great Visual Effects And in case you have any doubt you can always ask me, and I will try my best to answer you as soon as possible. So I hope that I filled you with curiosity about these amazing visual art and I truly hope that you can join me.
2. 2.1 - VFX Fundamentals: Type Of Effects: Welcome to this chapter the visual effects fundamentals chapter where I will show you the theory and practical examples that I wish I knew when I started in this field. It would have helped me a lot and saved me a lot of time as well. I'm going to show you different types of effects. There are in games and principles of visual effects, which in other words are basically guidelines so you can create beautiful effects. We are going to start with a type of effects and then we will see the principles of visual effects. So not all the effects are done in the same way. Not all of them use the same techniques. But it doesn't mean that we don't mix them, that we don't combine different techniques. In fact most of the greatest effects use several techniques at the same time. But these are the five main types of effects we can clearly distinguish and we will use in this course. The first one is the particle effects. Which are effects that are only made with particle systems. For example these Toon Projectiles package that I made for the Unreal Marketplace is a good example. Most of these effects don't use any special mesh or shader. They are basically only particle systems. And particle system is one of the most important things for a visual effects artist. It has a wide array of uses and it's also where we are going to focus most of our attention and one effect can be composed of several particle systems. You can have a particle system for some sparks, another for a fire texture and so on. So the second type of effects are mesh effects which involves mostly the use of 3D models that are previously done in a 3D software like Blender, 3ds Max, Maya and other types of 3D softwares. They can have bones and even animations included the example you are seeing is composed of the factory the model which then has a special shader and a few particles apply it and in order to create a good mesh effect. The UVs have to be very well done. The UVs are extremely important for the 3D models because they control how the textures are mapped and applied to the 3D Meshes to the object. And we can create several different effects by only the starting the UVs The third type of effect our Flipbook animations or sprite sheets. That can be done mainly in two ways. One is with simulations and the other is by hand painting them. They can be the result of simulations done in another software. Once again like Blender, Houdini, 3ds Max or Maya it can be useful to create explosions smoke or a fire simulation and even liquid simulations. This requires obviously the knowledge of another software. It isn't easy and for example this is an explosion simulated in Blender, then I exported every frame into separated PNG images and at the end I created this Flipbook animation also known as a Texture Sheet animation, that can be used inside the game, as a barrel explosion for example or anything. And Flipbook effects can also be and painted like I said in Photoshop in Flash or even in -- or Krita. And it can also be simulated in After Effects for example. But once again that requires the knowledge of another software. The Fourth type of effect are Shader Effects and this type falls a bit more on the technical side and it can have a lot of purpose. For example you can create Water with shaders likes this one, but you can also create awesome Portal effects or Lasers or Fires. Or a Galaxy Shader like this one. They have so many purpose and shaders are considered an advanced topic that we are only going to scratch the surface because this is a beginner course. But in case you want to learn more you can always check out my YT channel. Gabriel Aguiar Prod. And there's plenty of shader tutorials there which they are all available page My Patreon page in case you want to study them up close. They are done in Unity but the fundamental ideas can be used in a Unreal and other Engines as well because that's the good thing with shaders The knowledge you need to create one shader can be applied in several Game Engines Alright. So the final type which are Hybrids, and it is what I like to call them because it is an effects that contains two or more of the types that we have seen previously. It's basically what we are going to do in this course we are going to combine several techniques like particles, like meshes, like Flipbook animations and shaders and that's how you create great effects for games. But like we have seen in the beginning you can always create great effects with only particles. Anyway What's really important is that all of these types of effects share two things in common which are a a shader and a mesh. It can be the most basic shader like a particle additive shader with the most basic mesh which is a Quad that only has two triangles. Because all of the effects must have a shader and a mesh so they can be rendered in your screen and shaders are the basis of everything that is rendered in your screen. Without shaders, we couldn't see anything inside a game, but that's a much more deeper topic. And almost all of the greatest effects are based on the Principles of Visual Effects, which is our next topic.
3. 2.2 - VFX Principles: Gameplay: So welcome to the Principles of VFX VFX Let's have a quick but comprehensive overview of what they are. And don't overestimate the importance they have. They are like guidelines for creating good visual effects and they can even help you understand what is missing on an effect that you are creating. They are mainly five principles. The Gameplay, the Timing, the Shape, the Contrast and the Color. The gameplay it's as simple as knowing what's the purpose of the effect that you are going to do. Is it going to be projectile. Is it going to be an area of effect that inflicts damage upon the enemies or is it an area of effect that heals? Maybe it's an environment effect Maybe it's a character effect So yeah gameplay is knowing the purpose of the effect. What is it for. Sometimes you are working with a client and you may get a list of descriptions and reference like the ones I have been showing you. And that's really helpful because, at least you know what's the purpose of the effect you are going to do, because you may spend a few hours and in case of working with a client you are wasting his money and your time or working in a company. So sometimes it's better to even know how the game works the characters, the mechanics, the story, because the client may not know all the effects he needs and you can give a few ideas of course. I know it's a client scenario or a company scenario but knowing the purpose of the effect you are going to do is a very important step that you have to take before creating the effect. So next Principle of Visual Effects is Timing.
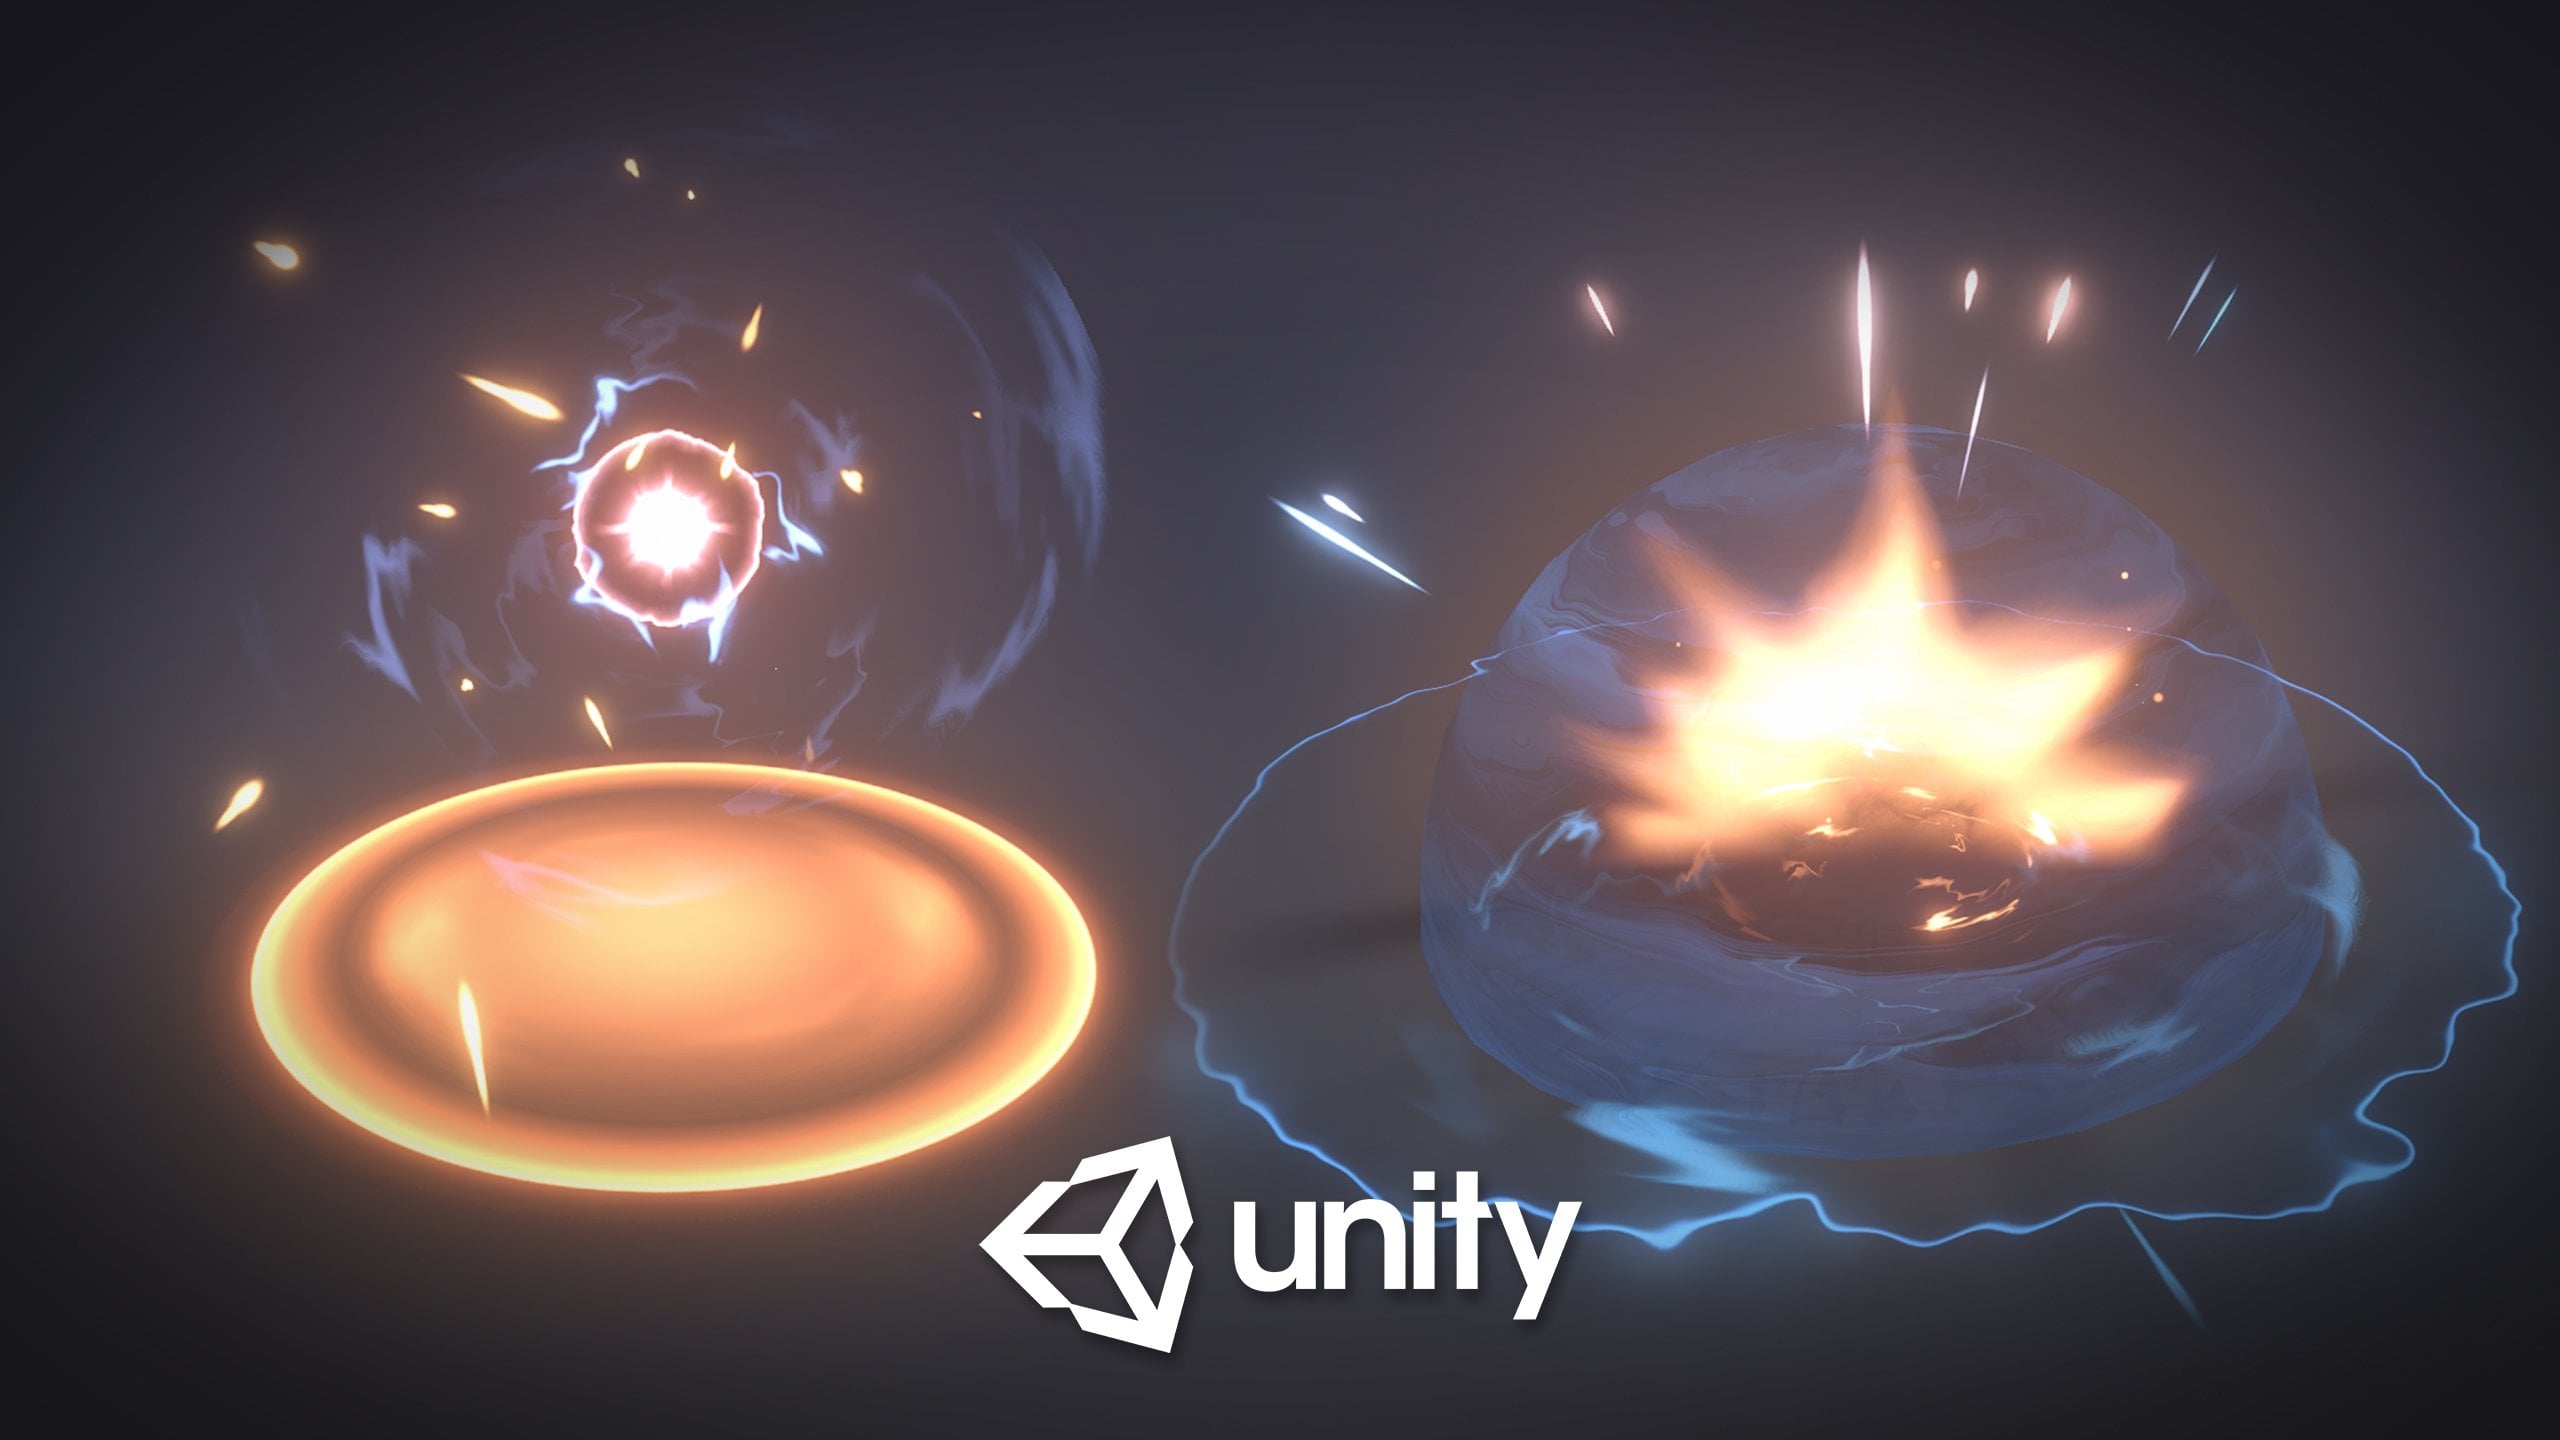
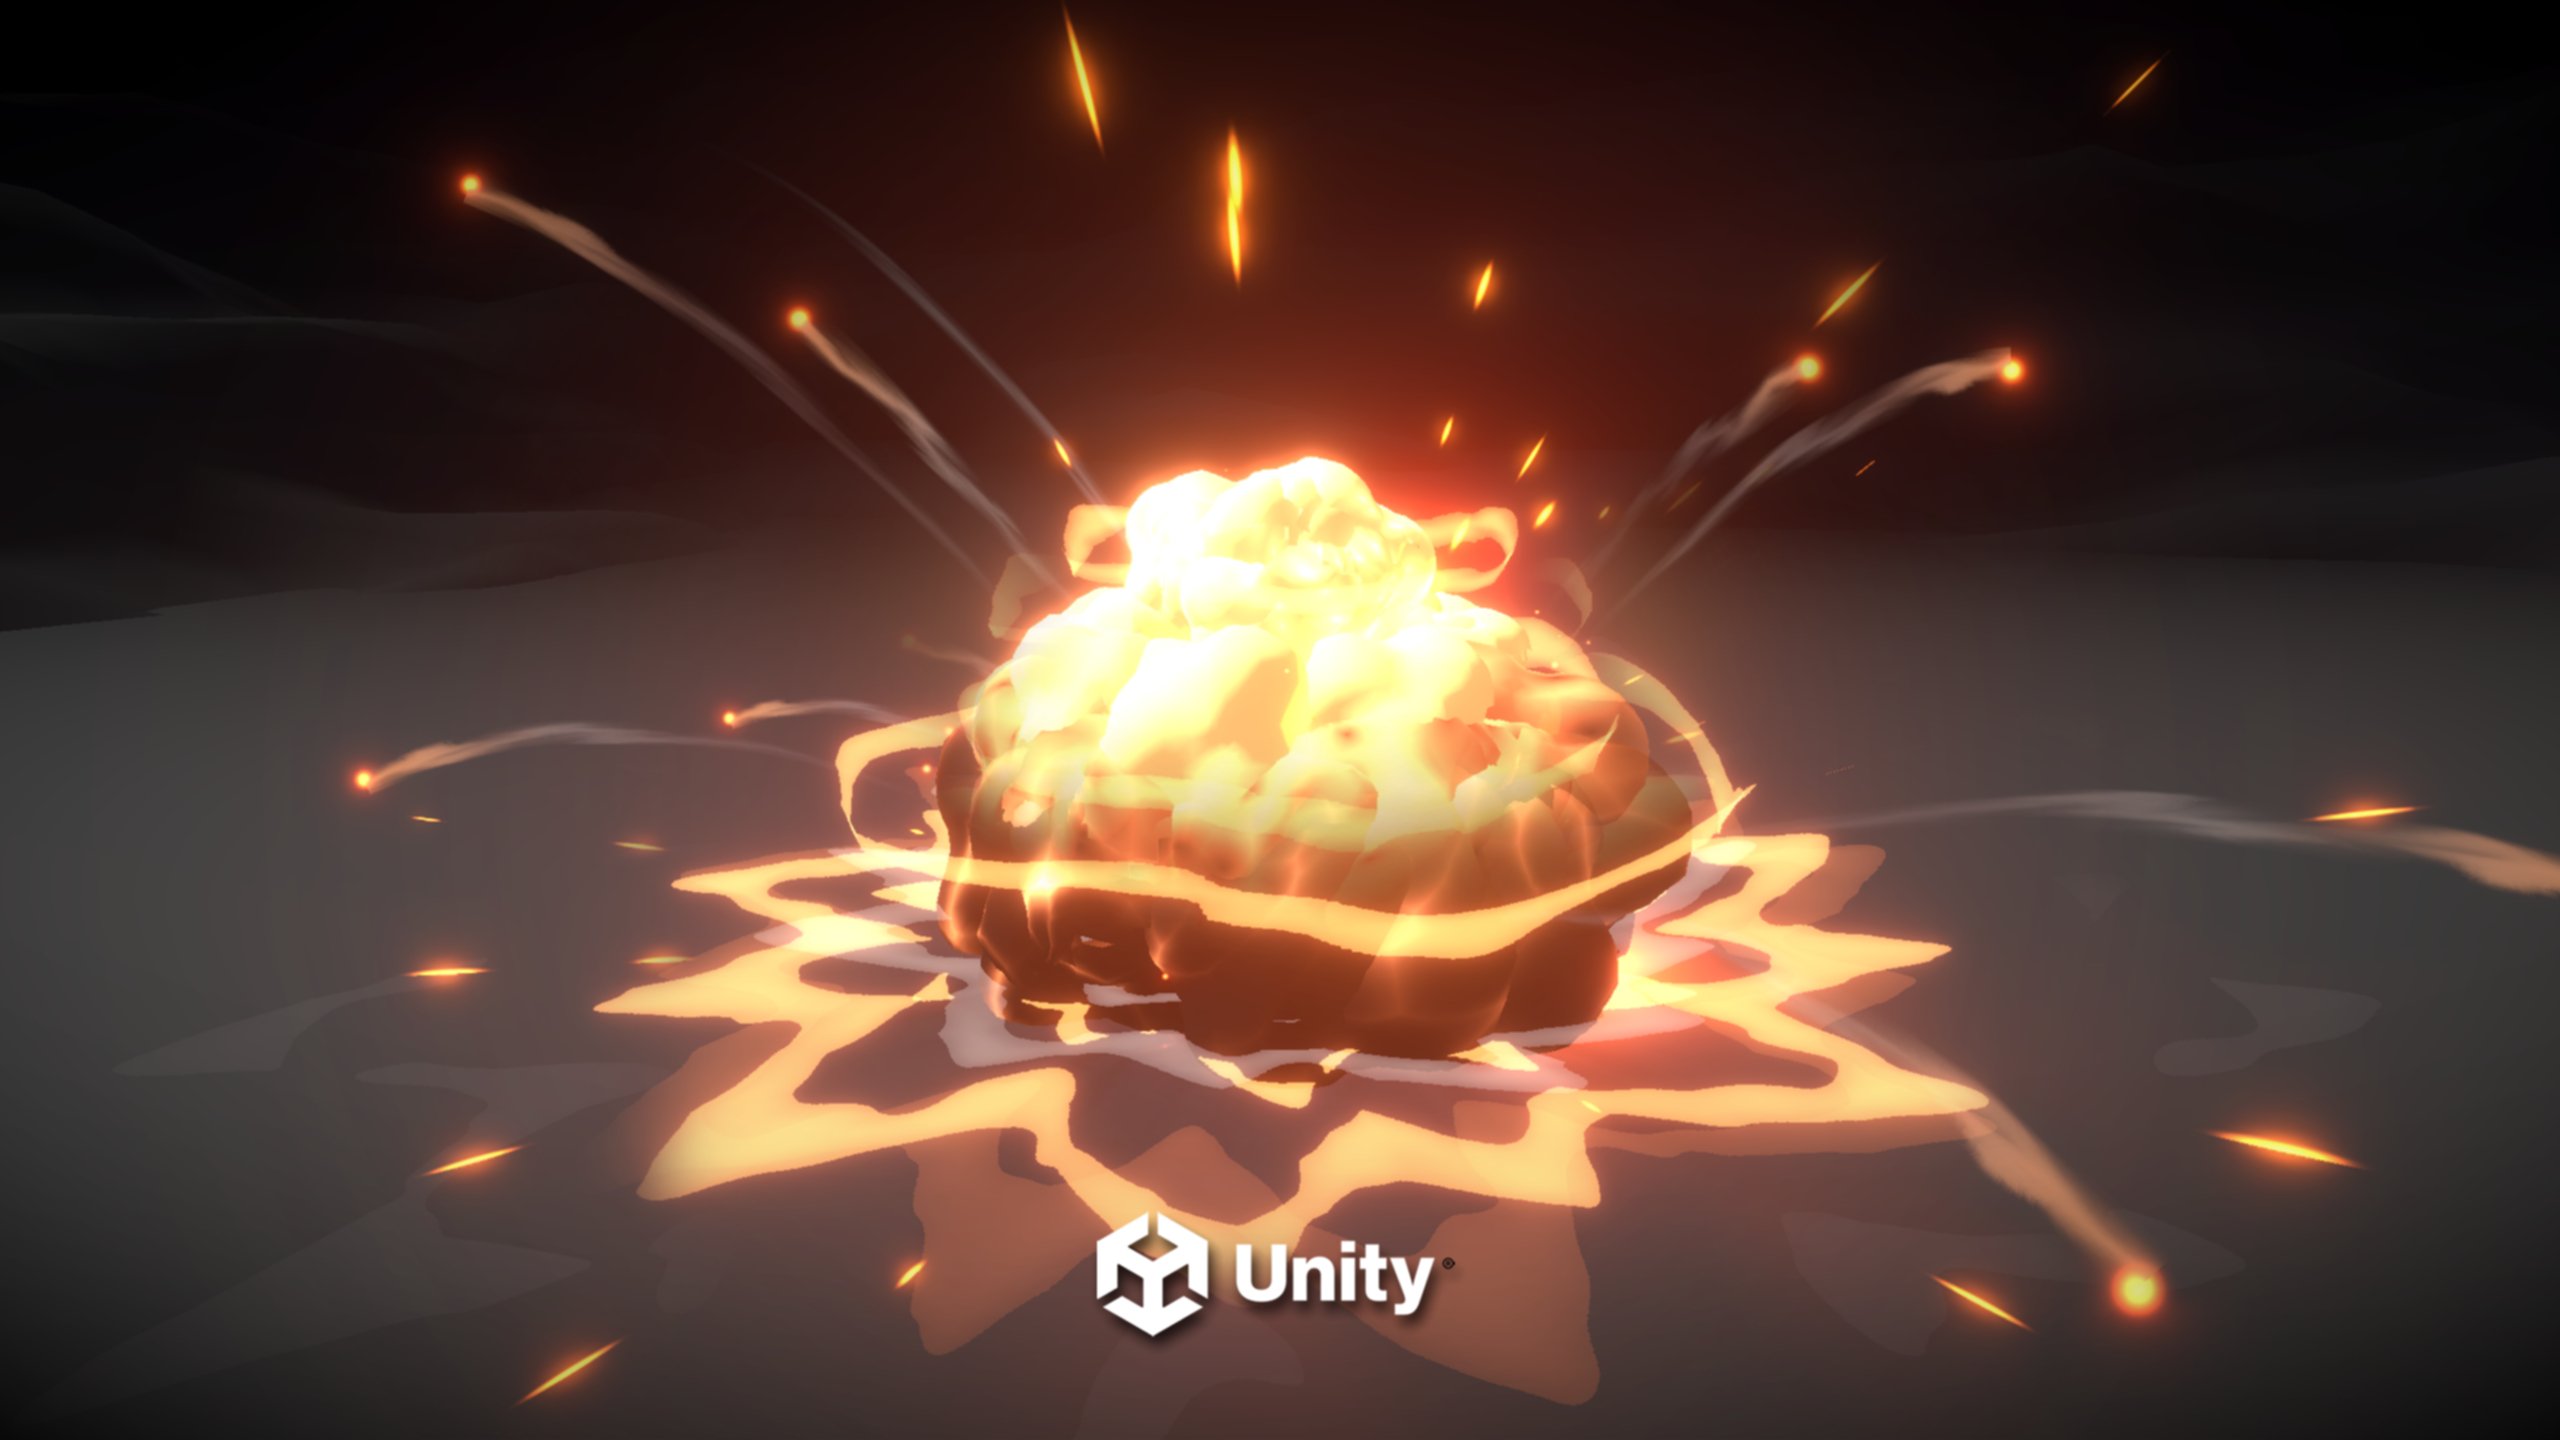
4. 2.3 - VFX Principles: Timing: Timing is crucial in game effects and it can be divided into three main parts. The Anticipation, the Climax and the Dissipation. For example is it a quick explosion with no anticipation? Like just a hit or does it have anticipation? How does that explosion build up? What's the feeling that it gives with half a second of buildup. Seems like we don't have much time to avoid it. But it also feels like it may not cause that much damage. After all. Now with one second of anticipation the feeling is totally different. It feels like it's charging more energy giving a bit more time to avoid it as well. But it will definitely cause more damage than the others. And that's anticipation. It creates an expectation so the player can react here's a few different anticipations with one second for example as you can see some of them create different feelings so build ups or anticipations tells the player that something is about to happen. Another good example of anticipation, climax and dissipation is this AoE attack, this Area of Effect attack. Can you distinguish what are the three main parts? Well this is the anticipation where we get the feeling that the effect is gathering energy getting even stronger and building up to something. The second part is the climax where we have the explosion of all the elements that we have been building up. We see the brightest color values and we see the moment of impact until it fades to the third part and the last one which is the dissipation and the world says it all. We see the dissipation of those elements that we have been building up. We see the aftermath of the explosion. It has also left a mark on the ground, so that's dissipation. Here's another way of communicating anticipation. It also communicates well with our next principle of wills while effort which is shape.
5. 2.4 - VFX Principles: Shape: So clearly the spiral tells where the damage is going to happen. If the player is inside that area or near, he will take damage right. As well as with this electric attack, inside that radius there will be damage definitely. And you know that you need to avoid it. If an enemy casts this AoE attack and the shapes have to be immediately recognizable. Like when you are reading something you recognize the shapes of the letters instantaneously and you know the meaning of a word, well, shape visual effects works in a similar way. You will immediately know that it's dangerous. If you see a pointy projectile coming towards the player coming towards you it's very likely to inflict damage. On the other end, if it's a round shape maybe it will stun or freeze the player. But if you see a green calm floating orb, like this shrine from Bard of League of Legends, maybe it's not armful when an ally touches it it will heal. And of course the green yellowish color as a very important role in communicating that it's a friendly orb. But shapes communicates the area, the intention of the visual effect if it's going to hurt the player if it's going to heal him, maybe it's poisonous. Maybe it's a shield. Maybe it's a power up. It can have several meanings the shapes and combined with colors it has even more meaning. But our next principle of visible effects is contrast.
6. 2.5 - VFX Principles: Contrast: So to have a good contrast in an effects means creating a focal point that drives the player attention. If I quickly show this image. Are you able to tell me which part was the most bright? Well it's the end of the project. Since it's the part that is going to hit first the player and he needs to pay more attention to that exact part, so you can avoid it and the rest fades out so it doesn't interfere with the focal point. And there are a few ways to create contrasts and create the focal point that drives the player's attention. For example these blinking beams of light clearly grabs anyone's eye attention. We are immediately driving to each point of light as well as when you see this trail passing by you. Your first focus on the front because it's brighter. So it naturally grabs more attention. So it's important that the efforts have a good focal point a good contrast in some games. This is even use it as a way of describing the importance of the character's abilities. This is from League of Legends in a presentation made by Jason Keyser. We clearly can see that the first ones in the top are basic attacks compared to last ones which have a higher contrast and are the character's ultimate abilities the ones that will inflict more damage. And if we look at the ones in the middle it's basically what we have seen with the projectile the part that is more dendrites needs to grab the player attention so you can avoid it so he can avoid. If it's from an enemy or go towards it if it's from a ally. In conclusion If we look at this gradient from white to black. If we put a black square in front of the white we are creating higher contrast and a higher focus point. The same happens if we put a white square in front of the black area. So these are high contrast zones. Now these two squares are still creating good contrast not as pronounced as the other two but still a good contrast. So maybe they are useful to create areas of less focus for effects that are less dangerous. However this square in the middle creates a lower contrast with the background which therefore is a low focus point of attention and it is a good example of how contrast works. These gradients can be really helpful. And they don't need to be white and black. We can play with colors and this may seem basic but it plays an important role when we are playing a game. What's also very important is color palettes and themes which is our next and last topic and I'm going to reuse a video that I made a while back because I think it explains really well how color palettes and themes work.
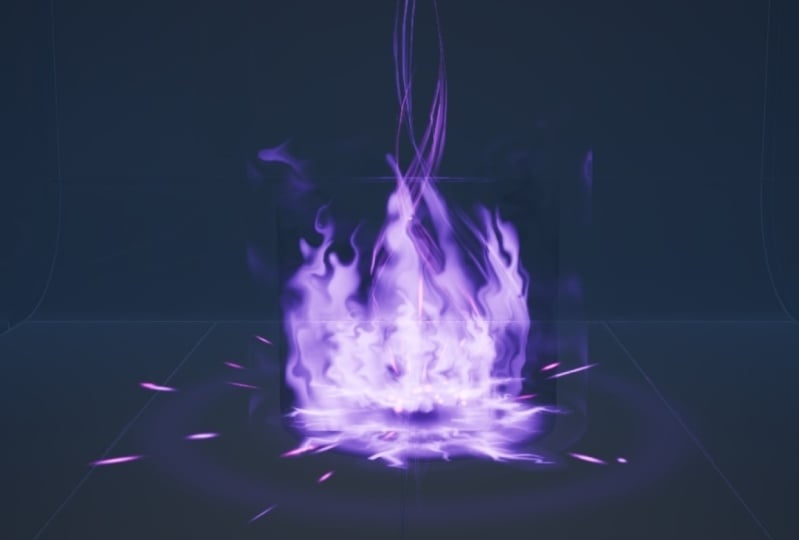
7. 2.6 - VFX Principles: Color: As simple as one may think color is. It isn't. Don't get fooled by the fact that red, may represent fire or blue is water. It's much more complex than that. For example which one would you say it's water? I mean, one could argue that both color palettes could work as water, right? Well what if I tell you that, both are ice? Wouldn't those color palettes be OK to represent ice. Yes one would say. So yeah. Here's when things start to get a little tricky because as you can see both are very similar. Both are blue but now if I had some flakes around these I'd splash. We immediately identify it as such and don't even think twice right. It's obviously ice. Well that's why sometimes it's really important to use elements like these to make things clear to the player. Another example. Consider this Two green color palettes. What's the first thing that comes to your mind? Nature. Right? Both of these colors palettes can be inserted in Nature or Jungle. Well, but, maybe they can also be poisoned and radioactivity. Well that would fit too. So what if I tell you that one represents the color palette of heal. Both could do that as well right. So as you can see once again this is really hard sometimes and it gets really complicated, by only using colors. But what if I do these? And then these? Now we can immediately assume that the top one is poison or radioactivity even though they are both different things. And the bottom one is clearly a healing drop. Don't you think? And if I switch this, well, now it's clearly Nature right? So yeah the Leafs which is an element of Nature helps a lot. Well. This one is easy right? The top one is Strawberry or maybe Tomato Sauce? I'm not sure anymore right? And the bottom one is clearly fire, yeah... Well, not really. The one in the top can pass as Blood. And the one at the bottom can represent Lava. I mean can you see how complicated things can get with colors? Specially in visual effects, when we are trying to represent different Themes and Skins. Oh boy. And we are not even mixing colors. We are only using linear palettes you know. So what if I show you these two color palettes now. What do you assume they are? I'm sure the splashes, did it help? Well, what if I mentioned Gold and Honey? Which one would you assume it's what? Both can be one of this, right? OK so, let's add a shine here and add some hexagons down here. And here you go. What do you say now. Much easier to identify it right? Well Gold and Honey are very similar. But the aspect they have in real world is what distinguish them but if you can't transpose the real world to the game, well, you will need to use elements like these. That's why once again it's important to use elements and shapes to make things more clear. So as you can see color can have so many meanings. But, combined with shapes the message gets more clear and we can give a better perception of what's the theme. What's the skin to the player. And these are only linear. Color palettes. They are still great and beautiful. But for example when we are working in a game sometimes there are skins and factions or teams and there's a lot of color palettes. So we need more than only four colors. So let's look at a few more examples. For instance these two color bots are very similar to each other right. But one uses more purple and the other one more blue. Well the one on top actually represents Mage magic and one at the bottom. It's magic but it's an Arcane magic. Looks a bit more powerful or even in a bit more evil. They both are very similar but they represent distinct origins. Let's look at a few more examples. This one is a very interesting color palette that can also represent magic but this one is even more powerful or even more corrupted by evil and it's what it's called Void. It's a very beautiful color palette as well. Now let's look into a different class these one. Well this one mixes orange, yellow ,a bit of purple and some very light colors. This is an Hard one and this one. This one is used to represent Celestial. Godly beings, godly factions, godly teams. They are pure and white gold armors and have a little touch of purple that makes it look more refined. You know it's hard to use it well but when done properly can be truly beautiful. All right so this color palette actually is very common and it represents the Nature skins or themes and it has the brown that may represent hood or dirt. The green from the leafs are the grass and the yellowish green that may represent flowers and the other light colors too. But in this case I rather call it Swamp because that's what it feels like at this moment. It gives a really sensation of swamp but it's also Nature. Now this color palette once again uses very distinguished colors. It has purple, blue, violets and even yellow. The combination is not an easy one, but it's a beautiful one. Sometimes it's used in spacy themes or futuristic themes like Guardians of the galaxy. It has that vibe you know. That's why I call it sci fi. I'll it can have other interpretations, obviously but this colors combine really well with each other. Next one is a very common one and it's used in powder explosions. It has a fiery feeling of burning. You know it's awesome for explosions and it looks really cool in stylized games. And as you can see the color palette as that dark brown and it also contains the white color. almost white color. So yeah, you have big contrasts here. The last one that I want to show you. It's a very beautiful one, and it has dark and light blue, teal blue as well and a bit of green too. This combines really well with underwater beings and it's what I like to call an aqua palette which fits very well with effects that uses water or that are influenced by it. It's very peacefully actually. So yeah that's it. Color is a very deep topic as you can see, and it's a very beautiful one. When you start creating color palettes it's awesome. The combinations are almost infinite and they can have very distinguished results so you have to learn to make proper use of them. But don't forget that they all have one thing in common for the effects to work well. They have contrasts. They have colors that contrast with each other. Don't forget that, it goes from dark to light and that's very important. Okay so that's it for the visual effects fundamentals. You saw the type of effects there are and most importantly the visual effects principles which are very important and needs to be applied in games to create pleasing effects. Our next topic will get us even closer to getting our hands dirty but before that we need to know what we are going to do. So let's see what's the Pre Production all about.
8. 3.1 - Pre-Production Overview: So welcome to this short preproduction chapter that you need to know before you proceed with the creation of an effect. Before we start the new effect. We need to do for simple things, know the Gameplay Objective, Get References, do a Technical Research and Sketching. So the gameplay objective, we have already spoken about it in the principles of visual effects and it is as simple as knowing the purpose of the visual effects we are going to create. So let's go to our next one which is getting reference. Once you know the purpose of the effect I recommend you gather some reference getting reference is important. It's simple and it's mostly focused on getting images and videos of something that you think it matches the effort you need to create something that inspires you. And there are a few good places that I recommend you like Artstation for example which is an Artist Showcase platform for games movies and other media and entertainment. It's a great place to find inspiration and even get in contact with artists. I even recommend you if you haven't already to create an account so you can start gathering references by living like you can then check your like page and later on you can start posting your portfolio. Once you finish this course. Another great place for visual effects for games artists is RealtimeVFX forum which is an amazing community of Visual Effects artist I highly recommend it to give it a try. It has a lot of useful information that people post. Sometimes they have doubts and questions and if you have doubts and questions also it's a great place to get support. Pinterest is also another great place to get reference for visual effects. It's really easy to use and to search and it's pretty straightforward and if you create an account you can pin any image or video you like to a board of Game Effects references for example. You can even follow other boards from other artists sometimes. You can also find great reference on sites of games where they have their characters listed and you can have a look at their abilities which means you can have a look at their visual effects like for example the champions of League of Legends you can select one and see their abilities and then see their effects. A really great way to get inspiration from great quality content. The same thing happens when you go to Dota website you can find their champions and see their abilities and many of the games like for example Overwatch. It also has a great site where you can see the abilities of each champion and get some really good reference. And lastly YouTube and Google are obviously great places to get reference. You can go to my YouTube channel. Gabriel Aguiar Prod. and you will definitely find something useful there. The third part of preproduction is Technical Research. After you got some images and video reference you may need to do some technical research and what is technical research? Well sometimes there are art styles that require different techniques. Sometimes you need to research a technical term learn how to create specific shaders or even learn a new software. So that's technical research. Sometimes you are even gathering reference and at the same time you are doing technical research because sometimes you stumble upon an interesting tutorial or a good breakdown that shows the process of creating certain art styles or certain effects and it's always useful to understand how certain techniques works or sometimes how specific art styles are achieved. And in case you find yourself stuck once again you can use the same sites that I've mentioned above. Specially RealtimeVFX forum. You can ask a question there and maybe someone in the industry can help you. Or you could try to go directly to me. You can watch my YouTube tutorials. Most of them are in Unity but the techniques the ideas the concepts are the same across all game engines. For example in my personal case I was able to easily translate from Unity to Unreal because the techniques are pretty much the same and you can obviously also ask questions directly here on Udemy in the Q&A Q&A section of each lesson. Or you can send me an email leave a comment on my YouTube channel send me a tweet or even a message on Facebook. I don't guarantee that I can answer you because I get a lot of messages and questions and I have a lot of work to do but I will try my best. The fourth and last point of preproduction and one of the most important ones is Sketching. After knowing what's going to be the purpose of your effect after gathering some images and video reference and learning about a few new techniques you may want to start doing some sketches and they don't need to be super complicated. Some sketches that you will find are amazing and they even have timings test a lot of colors and contrasts and even elements or themes and of course most of the sketches are real detailed but fortunately you don't need to be a super good illustrator and create something super detailed as these you can do sketches as simple as these ones are like the ones I'm going to show you. The idea with sketches is projecting your imagination into the real world into a piece of paper ink to show you the idea with sketches is projecting your imagination into the real world into a piece of paper or into a digital sketch. As I like to say in one day you can sketch 50 effects but if you go to Unreal or to Unity you will be stuck with one or two effects. So sketching is a really fast process that you can do and that you can evolve quickly and try different ideas on spot and I will show you later on. You can create some simple sketches to get the idea on paper or on screen and if you have a graphic tablet that's awesome. It will help you a lot to draw if you don't that's fine. You can follow along with pencil and paper or even try with the mouse. Who knows. So that's it for this simple and quick preproduction chapter. Next we are going to jump into Unreal Engine 4
9. 4.1 - Download and Install UE 4.21.1: Alright. So it's time to get our hands dirty and in case you don't have Unreal Engine you can start by going to Google type Unreal Engine and you can directly download here. But if you don't see this button you can go to their Web site and up here in the top right corner. There's these Download button which will lead you to right here and the epic installer. We'll start downloading immediately. Once we got it we can double click it and proceed with the installation. Now maybe you will need to create an account. If you already have one that's great. And if you haven't it shouldn't take more than a few minutes. Alright. So once it's installed this is the epic games hub. You have plenty of stuff here. But what matters to us is in the Unreal Engine section more specifically in library and we can add the new engine version in the plus sign. Here we have a drop-down menu which lets us select the unreal version. In my case I'm going to use the 4.24. the latest version, but just so you know if I were to install the 4.23 I would press install, choose the location and in options you can unselect all of it unless you are interested in the starter content or something like that. But you can always get it at anytime you want. So with everything unchecked you can press install and after a while you will be ready to start your new project.
10. 4.2 - Creating Your VFX Project: The new empty project is going to be a personal workspace for visual effects. It's here where you will have your shaders your textures your models and you will do your experiments. So, to create a new project we can press on launch and this window will appear. For now let's create an empty project. But don't worry as we progress. I will give you resources with scenes that are already ready to shoot projectiles and to spawn area of effects attacks. Now we can choose game as the project category and then we want a blank template. In Project settings just make sure you don't have the starter content. Even if you didn't install. And done here you can select the location of the project and the name you can put your name for example followed by _VFX _VFX In my case I'm gonna put UE4_VFX_Guide so I can distinguish it from my other projects. And we can press create project.
11. 4.3 - Quick UE4 Overview: OK so this is Unreal Engine. And in case you are not familiar with interface it's very simple. We're going to do a quick overview before we progress. This left panel Left panel is for creating new actors and to add new stuff to your scene. But we are not going to use it that much especially when we are creating visual effects for games. Up here we have a tool bar for several things such as Save Current Scene, Settings of this scene and of the game, build type and play and other things. On the right we can see every object in the scene and select them which is quite useful. Basically in Unreal it's called actors. They don't call it objects but it's the same thing. Down here this panel shows the details of the selected object or actor like the components attached, the transform the mesh in this case off the ground, the material and also physics, collisions and lighting down here that we don't really need for visual effects and down here it's the second thing that we are going to use the most which is the file explorer. And if you want you can open this file explorer here divided into here we are going to manage our assets things like textures, objects, materials, shaders, blueprints basically everything that we need to create visual effects and we are going to need folders so we can be organized. And we can add one with the right click like this. And this one can be for Materials for example we can add another one for Textures and one for Levels or Maps. We can call it whatever you want. It's the same thing. If you come from Unity it's the scenes basically but I'm gonna name it map for example if we press here in safe currency it will ask us to where we want to save this map and we can name it SparksVFX because that's what we are going to do in the next chapter and now we have this scene saved here in the folder and now here in the central window we have the scene. If we press on this icon on the top right corner we get the other tree wireframe perspective windows from the top the left and the front and just for curiosity sakes if you press with your mouse wheel down and move around you can measure stuff in the scene. It can be quite useful to avoid creating oversized or small effects you know. So now we can click again in the same icon to expand this view. Alright cool. And here we can change the snap size For example it may come in handy. If you come from Unity W, E and R are still the same thing. The W is for moving E is for rotating and R is for scaling. Up here we can choose the shading Unlit, Wireframe, etc. And here in this drop down menu there is something useful which is real time. Make sure it's on. Otherwise you will not be able to see animated materials or some type of effects. Alright. So lastly if you press play you can move around freely with the devil W A S D like in the first person shooter and the same thing happens when you are out of the play mode you can still move around like if it was a first person shooter and by the way if when you reopen this project you don't see sparks VFX scene you can come up here to project settings and for example you can change the thumbnail and the description but most importantly you can go to maps and now select which map it's going to be the default when you open up Unreal Engine, this project. All right so that's it. So basically that's the overview of the interface is something very quick I'm gonna show you a few more things along the way of course but this is the basic stuff.
12. 4.4 - Cascade vs Niagara: So Unreal Engine as two particle systems. One is the old Cascade system and the other one is the new Niagara system. Cascade is going to be less and less uses over the time. It has limitations on what it can do basically. So why not learn the more robust one and way more powerful new visual effects to the Niagara particle system which is the future of visual effects in Unreal Engine. But let's first have a quick overview over the old particle system because it is still great and once you learn Niagara cascade will look simpler and not so necessary but basically cascade is accessible. Once we create a particle system with right click and if we double click it. This is Cascade as it is now it only has one emitter We could add another one for example with right click like this. And this one could emit bigger particles for example which is controlled in the initial size module we can solo these emitter and if we add another material we could assign it here and if we right click here we could even emit something different in the type data. Something like a mesh object or a ribbon. Right. So basically we have two emitters and each one has several modules. For example the initial velocity module if I increase it in the z. It will add more motion to this emitter vertically. So as you can see each module is named. So it gives you an idea of what it can do. And if I right click here we get all of these models that are available right. And basically models are parameters of the emitter that we can control. Now if I wanted the emitter to emit in a sphere shape I could add a module called sphere location and it will do exactly that emit around the sphere or inside the Sphere. Now if we wanted these particles to have some rotation we could add a modules for that rotation rate module and we could keep adding modules and create new emitters to use different materials. But we are limited to the current modules. In Niagara there is no limits. We will have access to all the parameters of a single particle. We can even create our own modules basically which are functions. It's truly powerful. The amount of control you have. So let's go ahead and let this particle system. We want to keep this organized as possible and we want to use the Niagara particle system. So let's see how to activate it.
13. 4.5 - Enabling Niagara: Niagara as it is now is a plugin and in order to use it we need to first enable it. But it's really easy. So we can come up here in edit any plugins we can go to affix and enable Nagra. Here and also the Niagara extras and now we need to restart. So this takes effort. Just make sure to save before you restart and that's it. Next we will see how to create some sparks.
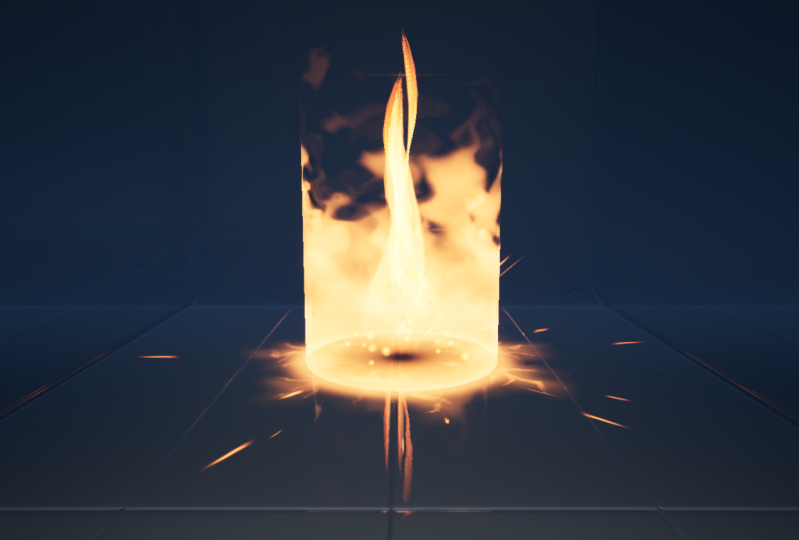
14. 5.1 - Sparks: Niagara Overview: Alright. So the time has come. And now that everything is ready and that we have enabled Niagara let's create our first effect. Something simple that will be extremely useful for you to understand how effects are structurized in Niagara. And to understand the basic knowledge behind materials and shaders and how we can create simple texture And most importantly to start getting familiar with Niagara particle system. So we can access NIagara components by right clicking here and now in effects drop down menu. We have all of these components but the two most important ones are the Niagara Emitter and Niagara System. At least those are the ones that we are going to use the most and an Niagara system is composed of one or more. Niagara Emitters So basically we will be creating Niagara Emitters for an Niagara System So let's start by adding an emitter. And, we get this window where we can create an empty Emitter or choose one from a template. Let's for now choose a Simple Sprite Burst. We are going to call these NE_ wich stands for Niagara Emitter, and then Sparks Basically this one is going to be only for sparks. Let's just add two folders one for Niagara Emitters and the other one for Niagara Systems which we are going to see in a moment and now just drag and drop the Sparks Emitter to the respective Niagara Emitters folder and now we can open the emitter with double click. And as soon as we do it we get this window which is the Niagara and we can duck it up here. We just need to drag and drop. Let's just rearrange this so we can get a little bit more space in the preview window. Alright. Something like this it's ok. So this in the left window is the preview window where we can see how the emitter is going. Let's actually hide the background because it can be quite annoying. And we can do it in window up here and then select preview scene settings. We can now turn off show environments and if you want you can also turn on show floor and by the way you can also zoom in and zoom out with the mouse wheel and you can rotate by holding down left mouse click and if you hold down the mouse wheel you can move around and in case you ever get lost you can press F and it will focus the emitter, just like this. Press F and that's it. It centers the emitter. I'm just gonna hide the floor for now because we don't need it. So now as you can see we have this panel in the middle that represents our sparks emitter and it's basically divided into seven groups the Emitter Settings, the Emitter Spawn, the Emitter Update, Particles Spawn Particle Update, Events and the Render and each one has specific modules that can be added only to that group. For example in the render we have the Sprite Renderer and if I press the plus sign I get specific modules that I can only add to this group. The Sprite Renderer, in this case it already as by default these material assigned here with a default texture. But we will see how to create our own materials and our own textures in just a few moments. Down here there's more options that we will see along the way. Don't worry. Anyway. Most importantly the render is what makes the texture a mesh or a ribbon visible on our screens and for example every time I select one of these groups we can see every module that is attached to it. And in this case we only have the initialized particle attached to particle spawn in this right panel. We can see the settings and the same happens if I select the particle update, we can see everything attached to it. Okay great. So, from the top the emitter settings is responsible for things related to the emitter has a whole. For example we can set the emitter to spawn particles in a local space or in a world space which is useful for example to leave a trail of particles or to not leave a trail of particles. We can also choose to emit particles simulated by the CPU or the GPU you which is quite useful when we are creating something with a lot of particles. We can set it to the GPU and we can set fixed boundaries to the emitter and a few more things that we will see. But basically there isn't much to worry about in this group. We can't even add modules. Next one we got a group that isn't very much use it too, the Emitter Spawn that only updates one time in the beginning. If we press in the plus sign, we don't have that many things if you look around. For example we can even choose to once again set the meter to Local or not. But that is exactly the same thing that we can do up here. Basically this module isn't that much important and I don't use it that many times Next, is the emitter update where it starts to become a little bit more important to us. This group here emits almost every frame. Here there isn't much to do but it's responsible for spawning particles we can spawn particles in a burst or at a certain rate. There's a few more things here but once again it's not super relevant for a beginner. Next we got the green groups and basically the Particle Spawn and Particle Update These ones are the most important ones. This is where we will focus most of our attention when using Niagara especially in the beginning. This is where we have the most modules. As you can see to play with and we can even create our own modules which is crazy. Anyway the Particle Spawn occurs once per created particle. And the Particle Update occurs every frame per particle. So once again the particle spawn executes his modules when the particle is created and the particle update executes all of his modules every frame to each particle created. But you will get the hang of it. It's really simple. So to conclude Orange groups are related to the emitter and how it will emit particles. And the Green groups are related to the particles itself and how they behave. Alright so that's it for a Niagara overview. Let's actually create something.
15. 5.2 - Sparks: Niagara Emitter: Alright so based on the overview where would you go if you wanted to change how many particles these emitter will spawn? Is it in the emitter update? In the particles spawn? Or in the particle update? I know it may seem like a tough question but if you have watched the overview you will know that we can do it in the emitter update. Because it is updating the emitter so it needs to know how many particles it will spawn. So as you can see we already have this module called spawn burst instantaneous. So it's basically a burst of particles and it's spawning one particle at the beginning and that particle as a lifetime of two seconds and the lifetime is set to initialize particle which is part of the particle spawn. It's where we tell each particle what attribute it will have, like color, size, velocity et cetera. So for the lifetime if we change it to half a second you will notice that particle now leaves less. Now what if we wanted the particle to have a random lifetime. Well as you can see we have this arrow right here in each parameter where we have quite a few options. You can explore them as you wish. Of course. And I recommend it do it try them but if you know a few key words it will certainly help you in the future to get what you want. For example I know if I want something random I will type Ranged. It's basically a range, an uniform range which means it's between a minimum and a maximum so let's set those values to 0.6 0.6 for the minimum and the around 3 seconds for maximum. And in case you want to know how many particles we are spawning you can look it up, up here below the name of these emitter as you can see sometimes it's zero sometimes it's one particle it corresponds to the particle living. If we increase the spawn count of the burst to 10 we now have between 0 and 10 0 and 10 particles because some of them live longer than others. Even though we can see it because they are all overlapped and none of them is moving. They don't have velocity. So we got to tell the particle itself that it has to move. It needs velocity and it needs to spawn in a different location. So remember it's related to the particle itself and not the emitter. So we gotta go to the particle spawn in this case. So if I press the plus sign in our search for something related to velocity there's a few modules worth playing with. In case you want to pause and try them, go ahead and there is even a module called Add Velocity in Cone that will let us also set the start location of the particle in a cone shape. So let's use this one in as you can see nothing special really happens in the beginning. And that's because we need to increase the velocity strength and now we see around 10 particles being projected forward and fading out And what if we wanted each particle to have a different velocity as well. So basically once again we can click here and choose the uniform ranged float from the dynamic inputs And now, we can say that the minimum will be around 100 and maximum around 1000. Cool. Now some of them travel a longer distance. Let me just show the background again so we can have a different perception. On how it's behaving OK. Nice. So we are basically adding randomness in the lifetime and in the velocity. But for the sparks we need even more randomness. So now there's quite a few things that we can do to make this more interesting and more similar to some sparks for example now that we know we can set range values we can also set the Spawn Burst to be a Uniform Ranged Int In this case. We can say we want to spawn around 30 to 50 particles every single time. So, so far so good, but, our particles are still round. Now what if we wanted to stretch this particle. So it looks like a spark. Well there's a few ways that we can do it but I'm going to show you one that is simple. For example if we select the initialize particle module, if we come down here to the sprite size you can see that we have the X and Y and if we start decreasing the X, it will look more stretched in the Y. But they don't have the right direction. If we did the opposite they would also not look right you know because they are not following the cone shape. So we don't want to stretch these particles here. We don't need to use X and Y but we want to add randomness. So what we can do instead is convert this vector2 the X and Y to be only a float and then convert this float to a Uniform Ranged Float between 2 and 10 and now we have randomness on the size. So did you see what we just did here. We first convert to the vector2 to a float and then to a ranged float so we can have a minimum and a maximum. Which is pretty cool. We can also play with the cone angle maybe increase it a bit more so it spreads you know OK but we still need to stretch the particle so it looks like a spark. Well what if we could stretch the particle according to its speed. You know if it moves faster it will stretch more and once it starts losing speed it will shrink. Does this sound to you like something that happens only one time or something that needs to be constantly updated? Because in order for the particle to stretch and shrink it needs to know constantly what's the velocity at which it moves. Right? So instead of using the particles spawn, we actually need to use the particle update group. And if we press the plus sign and start searching for something related to the size or maybe to the scale we will actually find that there is a sprite size scale by speed in other words size of the particle by velocity. So that's exactly what we need. And once again nothing really changes but that's because now we have once again a vector2 but this time with a minimum and the maximum and we could once again convert it to a ranged float. But this is actually better because now we have more randomness. For example, if we change the maximum Y to be 10 we are once again stretching the particle. Now we can even add randomness by saying that the maximum X is 1 and the minimum x is 0.1 0.1 as well as the minimum Y and that's it. Some particles now are more stretched than the others but once again they are not following the cone shape in more specific terms. They are not following Their velocity vector. But that's something not related to the particles spawn or to the particle update. It's related to the renderer. If you go back there we will see that there is something called alignment which currently is set to Unaligned But in the drop down menu we got velocity aligned which is exactly what we want. And boom there we go. We are starting to see something more like sparks which is great. Pretty cool right? But as we all know in the real world there is something called gravity. So where would you add gravity if you think about it. Gravity is something that needs to be constantly updated and calculated. So the particle keeps falling but what if I added by mistake the gravity to the particle spawn? Well we would get a warning telling us that there is a dependency not met which is the Solve Forces and Velocity. It basically needs the Solve Forces and Velocity module and it even says that when using the particle update at the Solve Forces and Velocity at the bottom of the stack. So basically after every module and if we look closely we actually already have that module added to the particle update. So all we gotta do now is drag and drop the gravity force before the Solve Forces and Velocity. For example in the beginning of the stack. And here we go our particles now are correctly falling with gravity. So as you can see there are a few things that are specific to the particle spawn and others that really only work in the particle update. Now just because it will look better let's also set the gravity to be a little bit more random within uniform range vector only in the z between 0 and -980. And that's it. We actually have some cool looking sparks. There are still very white but they are starting to look cool and before moving on. Just make sure you don't forget to save this.
16. 5.3 - Sparks: Niagara System: Alright. So here's a quick tip, if you press spacebar. You can reset the emitter as many times as you want and you don't need to wait for the end of the loop which is great right. And by the way in case your background is different when you reopen this you can go to preview scene settings. And if your environment cube map is empty and there's also nothing in the drop down menu. You can click into view options here at and then turn on show engine content and you will get all these images that already comes with Unreal. And you can choose one or simply choose none. I'm going to leave it with the Daylight texture for now. Alright. So to change the color where would you go? Well initialize particle is a good start. You can directly change the color here and it works just fine but what would happen if I disable it. The particles shouldn't be visible. Right. If there is no color it shouldn't be visible. But you can still see the particle and that's because there is probably another module messing with the color particle. And in fact if you look closely you can see that the particles are already fading. So that's a hint that it must be updated every frame. And we already know that the particle update group handles things that needs to be updated every frame. And as you can see we already have the scale color module which is set to white. And down here we have the alpha which is the transparency or opacity you can call it whatever you want of the particle. And it's being animated by a curve. It's basically fading out, if we select this key with left mouse button click we can see that the time is set to 0 which is as soon as the particles is spawn, at a value of 1 which is fully visible then we got another key down here at the end that sets the time to 1 at the value of 0 which is fully transparent. And the time set to 1 is a value between these lifetime between 0.6 six and 3 The 1 represents the lifetime. OK. So as you can see we can also change the color here. Basically the X is the red. The Y is green and Z is blue right. It's RGB. And once we start playing around with these values we get different colors. Right. And the cool thing is that if we double triple or even quadruple these values we get even brighter colors until it glows basically. So basically once we pass the one value the color turns into an HDR mode basically which is pretty cool. But let's still leave it white because that's not where we want to adjust the color. We want to actually adjust the color in an Niagara System. So let's save these. And now just out of curiosity if we'd tried to drag and drop the Niagara Emitter to the scene we basically can't. So yeah we need the Niagara Systems. Let's go to the Niagara Systems folder and let's press right click mouse button, go to effects and choose Niagara System. This window appears and we can see that there's a few templates already but this time we actually want to choose create an empty system with no emitters and we are going to rename it to. NS Which stands for Niagara System and NS_SparksHit. Because this is going to look like something that hit a piece of metal really fast. And it's also going to play only one type so let's double click it to open and now this is Niagara system. So let me just rearrange a little bit this window of the previews so we can have a better perception. OK. So now down here, where it says track a green button you can click it and we actually see that there is a Niagara Emitter which is the sparks and we can select it to add to the timeline and we get something that we are already a bit familiar with which is the Sparks emitter basically. It's exactly the same panel that we had before. But one of the main difference that we can see here is these parameters there are parameters related only to the Engine, things like Delta time, number of particles et cetera and this number in the right is the amount of times the parameter is used. For example in the emitter parameters we could access the Emitter.LocalSpace and we could even drag and drop to the emitters spawn and change it if we wanted. Once again I'm going to remove it and there there's also parameters related to the particle itself. We could also drag and drop them to the respective groups and play with them. But it's better to use the modules and this is more used to see the data that we are using and also share data between emitters. Anyway we also got this new panel which corresponds to the system we are in which is the Sparks Hit and currently it doesn't have much. So as you can see in the user parameters we don't have anything. And the user parameters are amazingly helpful actually. For example if we got the scale color and click on this arrow we can make this parameter read from new user parameter and as soon as we click it we get the scale RGB under the user parameters and we can rename it for example to Sparks Color. Now we can access the sparks color in the blue panel that corresponds to this system but once again let's leave it at white, which is 1 1 1 OK. So let's save this and let's go back to our scene. And now we can drag and drop the NS_SparksHit NS_SparksHit to the scene more or less around here. I'm just going to push it a little bit up and as you can see one of the things that is really annoying is these outline around all of our particles. Fortunately we can disable it and it's super easy. We can click in this arrow on the top left corner of our screen and down here in advanced settings. We get this window and we can uncheck use selected outline and that's it. We no longer have this outline and we can have a better perception of the Sparks. Oh and by the way I am enabling and disabling for solo just to play the particles. OK. So and by the way if the icons are really bothering you you can press G to hide them and then you can press again G just to show it OK. So with the Sparks Hit selected if you look closely in this right panel we now have in the override parameters the sparks color parameter which means we can tweak the color directly in the scene which is pretty cool right. Bow we can set it to something bright like an 9.4 in the X which is the red and around 3 in the Y which is green and that's it. We have a cool color for our sparks. Now you know how to show parameters from the Niagara System directly to the scene which is going to be super useful while you are developing visual effects for games in Unreal. And we can also rotate this by pressing E so the sparks faces up.
17. 5.4 - Sparks: Your First Texture: OK so we have started to see how Niagara works works which is great but we are still using default textures and default materials and a good visual effects artist creates his own stuff his own elements. So that's exactly what we are going to do now in case you have Photoshop you can open it or -- or Krita They all work in the same way and we are going to create a file called Beam01. I like to call it Beam01 but you can call it point of light with a resolution of 2048 by 2048 pixels. And I'm gonna choose a black background as well. So once we create the file we already got the background but now we want to add the new layer with Ctrl+Shift+N Ctrl+Shift+N Ctrl+Shift+N if you are in photoshop and now the idea is to use the default brush, B for shortcut and increase its size to around 900 pixels and make sure the hardness is set to 0 this is the hardness at 100 percent. So 0 is a very smoothly faded brush. Now, with a white color let's click only one time more or less in the middle. Cool. Let's right click on the layer and choose duplicate and with Ctrl+T. Let's shrink it while holding out to proportionally scale down. It's just to brighten the middle. And, to align this to the center. Let's select the 3 layers with Shift and then by pressing V we get these shortcuts up here so let's press on these one to align vertically and on that one to align horizontally and that's it. They are centred Now if you want you can once again duplicate the original layer and put it below the other two. Just like this. And once again with Ctrl+T while holding Alt, this time we are going to scale it up. It's going to be in the back. And now we can control the capacity of this layer because we want just to add a little bit more of glow you know. OK. Now let's make sure that we save this photoshop file and then we wanna hide the black background and save this as a PNG cool. Now back to Unreal. In case you see the engine content folder by the way, you can go down here in view options and uncheck show engine content. OK. So if we dragged and dropped the beam texture we would be creating a reference to thattexture. And we don't really want that because if we erase the original texture we won't have any texture in Unreal. So it's better to right click on Textures folder and choose show in explorer and now we can copy and paste with Ctrl+C and Ctrl+V the beam texture to this folder and in Unreal we can press import down here. This way we also make sure we don't mess with our original texture. Now if we double click our newly imported texture we get access to this window where we have quite a few options and we can see the resolution we can see the compression et cetera and we could change the power of 2 mode from none to pad to power of two. So it's a bit more optimized but it's not real relevant for now. And we can also play with the brightness. The difference is minimal in this texture or we could also play with the minimum or maximum. But I don't really recommend it. And I really recommend that we leave it as it is by default. OK.
18. 5.5 - Sparks: Additive Material: All right so let's go to the materials folder and here. Let's create our first material with right click, which is basically shader by the way. In case you come from unity here material and shader, it's the same thing and we are going to name it M_ M_ParticlesAdditive, M stands for material and before I forget we also want to add the T T_ to our beam 01 text in the beginning. Trust me it will be a lot easier to find something when you get to the point where you have dozens and hundreds of files Yeah. So let's open up this bad boy and well this is where we will create our materials / shaders. Let's just push these up here because this panel in the left is really important. And now in the preview let's also switches fear to a plane by the way. And we can also hide the grid and the background. We don't really need them. We can do it in the show button, ok. And here in the material domain we want to leave it as surface, which is used for any kind of geometry. We've got a few more down here like post process or user interface but we are not going to create a shader for that. OK. So in the blend mode it is where we want to change to additive. Hence the name Particles Add is the abbreviation of additive and we got a few blend mode options down here. But the main ones that we are going to use is Additive and Alpha Blended which here in Unreal is translucent and by the way here is the difference between them as you can see the additive adds on top of what's behind it keeps adding until it's white and it cannot show dark colors, like black. And Alpha can show dark colors but it doesn't brighten and what is behind. ok? So let's leave it as additive for now then we also have the shading model. For example if it's li, it means that the light will affect this material but if it is Unlit it won't affect. Now let's leave it as an unlit because for now we don't want the light to affect this material and we also need to turn on two sided because we want this to be visible from both sides from the back and from the front. For example if I switch back to the opaque mode we can see both sides. But if I turn off two sided we can't, we can only see one side. OK so I'm gonna set it back to additive I just wanted to show you the two sided in action and down here we got quite a few options but what we really wanna make sure to turn on is in usage more specifically the Use with Niagara Sprite option. And for now we are only going to turn on this one but later on we'll see what else we can use from here then we also got quite a few more options like mobile, tesselation, or even refraction if you know these terms. Great. You can find them here. But we are not going to use them for now and for a beginner it's too much information. OK. And in the right panel we got a crazy amount of nodes as you can see, and that's the good thing with Unreal because you've got a lot of options actually, when creating a material. Anyway what we need is a Texture most importantly and to add new notes we can press with right click and you can search vectors or float. And if we try to search texture you still get a lot of nodes so one way to get it right, is to go directly to the parameter sections. Those are the ones that we can control in the real Inspector. And here we have a texture sampler parameter 2D. That's the one, that we want to use and let's rename it to MainTex So as you can see the left panel has changed according to what I am selecting. Basically if I select this node I can see options related to this node. So each node as its own parameters. OK. So with the main texture selected. So with the main text node selected, let's assign a texture, the beam 01 that we just created. OK. And we need a way to control the color of this material of the texture through, the Niagara Emitter and the Niagara System And for that we can use a particle color node the one in the particle section and yeah. Now you probably understand why the name is particles add right? Now we can drag a line from here and search for a multiply note and then connect the RGB from the main text to the multiply. Let's also add another multiply node and by the way you can also copy and paste. Nodes with Ctrl+C and Ctrl+V. And why did we multiply this you may ask? Well we are basically saying that we want to control the call of the text. True the particle. And now we can connect the result to the emissive color input. And as you can see in the preview the whole quad is white. And this means that we are not taking in consideration the Alpha the opacity or the transparency of the texture. You can call it whatever you want. So all that is left to do is multiply the alpha from the particle color with the alpha from the main Main Texture And then we can connect it to the opacity and as soon as we do it we can see our texture. And since it's a PNG image, the PNG stores alpha from this texture, basically they store the opacity values. That's why we only see the beam. And before connecting the opacity we saw a whole quad, a whole Square. Cool. So that's it. We are done with our first material. Let's save this. Now one thing that is really important to remember is that this is the material and this is the original original material that we created. We don't want to use these in the emitters or in the systems we want to instead create a material instance with a right click and this one is going to be Mi_ which is material instance and then Mi_Beam01_Add because it's an additive material. So this is the material instance that we are going to use in the emitters and not the original one. If we open these you can see that we can control the main texture we could change it and we can also see that the parent is the M_ParticlesAdd ok? So any changes that we make to the original material, to the original shader it will affect all of its instance which is great. We not need to change one by one. And we also need to create a new folder named originals and we can drag and drop our M_ParticlesAdd and that's it. Let's just save this one okay. And now in the sparks emitter you can go to render and finally select our own material that we created. Not the original one, remember the Beam01 and they look just a little bit thinner. They look just a little bit different and I think they are even better. And once we save these if we go to our viewport and we also need to save the Niagara System you can see that it's already taking action. The texture that we created and the material as well which is great righ. So let's see what else we can do with these texture and with these new material.
19. 5.6 - Sparks: Impact and Improvements: So when we are in the sparks system it seems like it's looping right. But if we go to the editor we notice that it isn't looping and that's exactly true. If we look into Niagara System, it's just looping because the timeline. It's not infinite. Right. The timeline goes back to the beginning and plays the sparks emitter. Over and over again. Now if we go to the emitter update of the Sparks we will notice that we have a max loop count that is set to 1. But if we set it to zero and we save this and then we go back to the editor. Now it is looping and it keeps on playing the sparks emitter and it is looping every two seconds. We can also control the duration of each loop in the next loop duration if we set it one it will loop every second and we can even go crazy and say that it loops every 0.2 seconds. Wich is pretty cool right. But for now since this is the Sparks Hit let's leave it as it was which is with the loop count of one and the duration can also be one. No problem. All right. So since this is an Hit, an Impact we need a flash of light something bright something quick so let's duplicate the sparks emitter and this one we are going to rename it to NE_BeamFlash for example. And let's open it up. So a flash of light is going to be fast and only one particle. So if you remember right you can change the amount of particles we spawn in the burst module. Up here it's random between 30 and 50 but we only want 1 particle and if we click on this arrow that looks like an arrow going back, we reset the ranged int, to be a simple int now we can insert one particle and this flash of light it's not going to move. So we can remove the add velocity cone, press delete, and we can also remove the gravity force now since it doesn't move. We can also remove the sprite size scale by speed because it is not going to have velocity it's not going to make any difference. And we are almost done with this emitter. We just want to make sure that it has always the same size. So let's reset the range and float to be only a float. Let's put 100 for now because we are going to change this. In the Sparks system. What we also want to be constant is the lifetime. So let's also reset the ranged float and set the value of 0.2 seconds for now it's going to be a flash. So it needs to be really quick. Lastly we just want to change the alignment in the sprite render to an Unaligned. We don't need velocity again. So that's fine. Now let's just save this and go back to the spark system. Now we can add another track down here by clicking in this button and selecting the beam flash emitter and it will automatically add the beam flash panel right here in the system overview. Great. So we could also control the color of this emitter with the Sparks color but as you can see we may not like that color for the beam flash so let's instead make a new user parameter that we are going to call Beam Color and we are going to need a few more user parameters at least 2, one for the size and the other for the lifetime so let's make the size in initialized particle of the beam. A user parameter that we are going to call beam size and let's not forget that these values can be initialized here in the system panel. So let's set the color to white as default and the beam size, to around 75 for now so lastly let's also make the lifetime a user parameter that we are going to name beam lifetime and this one is going to have a default value of around 0.2 now if we save this and we go back to the editor and play with these values we can adjust the beam for example the beam is white. So let's try 10 in the X and 2.5 in the Y and 0 in Z. And yeah that looks like a good color. Maybe shrink a bit the beam size. Okay. And let's try 0.3 for the lifetime but I'm starting to notice that we are still missing a module for the beam. We need to shrink the particle over its lifetime so we can go back to the beam emitter and in the particle update, we can go to the size section and choose a sprite size scale and we want to use a curve for this one, so we can tell it to go from big to small. And if we convert this vector to directly to a curve we would get an X and a Y curve we would get two curves. And it's not exactly necessary for these. So let's first converted to a float and then to a curve okay. Cool and it goes from 1 which is 100% of its original size, to 0. Great. That's exactly what we want. But let's ease in, this keys. If you press with right click we get access to the key interpolation and we want to choose auto and as you can see, it changes the curves automatically but we want to adjust the last key and push these handle a little bit up so we can create a curve similar to this where it shrinks slower and that's it. The beam now is being scaled down and it looks better. Now back to the sparks system. Let's add a glow. And we can add another beam flash for that but this one is going to have a very low opacity in the scale color. Like 0.1 in this key of the curve, in the beginning and the color is actually going to be the same as the beam color and in initialize particle we are going to do something a little bit different. We are going to switch the lifetime with a multiply. Exactly. And the A is going to be the Beam Lifetime multiplied by B which can be 2 so wherever the beam lifetime is. This is going to double it. And in size we also are going to do the same. We are going to multiply the beam size by 2 or maybe 2.5. OK. That looks better. So let's save this and see how it's looking and there we go. We have a nice glow and now you know that you can reuse emitters, and not only multiply parameters but also add, subtract, or divide value so we can basically do mathematical equations directly in the parameters which is truly awesome.
20. 5.7 - Sparks: Gravity and Collisions: Now let's just make sure that we get some more control over the gravity directly in the editor just to show you that the gravity for example we only need Z. So instead of making the whole vector public let's break it apart because we can break vectors. That's the great thing with these allowing us to only make the Z variable a user parameter named gravity minimum let us also do the same for the gravity maximum. So first we break the vector and then we make the Z a user parameter. Right. And we can name it gravity maximum and let's set the maximum gravity to minus 980. And these minimum can be 0 for now. And if we go back to editor we can actually set the minimum to -900 and the sparks don't fly so high. Right. We have control. We have more control. We can even go a bit crazier and set the maximum to -1800 and now the fall faster. In fact they actually don't look that bad. Yeah but we are still missing the collision with the surrounding objects and it's actually fairly easy. So let's search for collision in the particle update since it needs to be constantly updated. And if we look closely we can see exactly that. We have a collision module. Guys, By the way don't mind the generate collision event module. That I added I was just testing something and I forgot to remove it. So please don't add it because we don't really need it. OK. All right. And we get a warning saying that there is a post dependency not met. More specifically the soul forces in velocity which we know we already have. We just need to drag the collision module to somewhere before the solve forces and velocity right. And that's it. Problem solved. Now if we save these and go back to the editor we have the sparks colliding with the ground which is pretty simple right. It's pretty straightforward. They are bouncing a little bit too much and you can play with these values by the way. You can also control the radius of the collider which is nice. In case it's too big or small you can do it here. So we got bounce and friction also and, let's try 0.4 on bounce and 0.6 in friction. You can also play with friction bounce and we are doing this so they don't slide too much. You know there are sparks they kind of stick to the ground once they hit the ground and I think it looks OK. I really recommend it to play around with the bounce and friction and see for yourself what you like. OK.
21. 5.8 - Sparks: Loop and Niagara Tricks: Now we got the sparks hit pretty much done. So let's see how we can create a sparks loop and let's also see a few more tricks obviously. So we can start by duplicating the Sparks Hit system with Ctrl+W and it's gonna be called NS_ NS_SparksLoop. Let's double click it to open and for this to loop we first need to set the max loop count in the emitter update of the sparks to 0 then we can change how it emits particles. We don't want to use any bursts because we want to add instead a Spawn Rate and disabled the spawn burst instantaneous. By the way. This spawn rate can be 10 50 or even more. It really depends on how much sparks you want at the same time. And let's make it a new user parameter so we can have control over these directly in our Editor Going to rename it to Sparks Spawn Rate and set the default value to 50. Now we can literally reuse this spawn rate module by simply holding the Left Click mouse button and Hold Left Click + Alt at the same time And then we can drag and drop to the beam flash and that's it. We have duplicated the module quite useful, but this one is not going to be controlled by the sparks spawn rate parameter. So let's reset it. You know let's actually use a divide here and it's going to divide whatever the sparks spawn rate is by two. It should be more you can put it at around 10 OK you can play with these values Oh and don't forget to disable spawn burst instantaneous by the way. OK. Now let's do the same in the emitter update of the beam flash set Max loop count to 0. And next loop duration can be one now for the beam size. We want it to be random and we can make it a range and float and here's a quick tip. We could actually multiply the minimum and maximum by the beam size the minimum would be multiplied by 0.1 and the maximum by 1. Now if we defaulted the value to 50 the minimum would be five and the maximum would be 50 pretty cool Well I didn't use it in time but you can if you feel like it or you can or you can simply set default values like I'm doing. It's really up to you at this moment all right. So let's actually delete these Beam Flash 01 emitter and duplicate the beam flash with Ctrl+W and these ones are going to be much bigger they are going to be for the glow and the rate is going to be only the spawn rate multiplied by one. Now the alpha needs to be really low like 0.1 should be enough or even less and actually think the spawn rate should be more like double okay. That's better. Let's now create something totally different with the Sparks emitter. Something like a bright flare we can duplicate the sparks emitter with Ctrl+W and let's actually hide the other tracks for now because we can hide. We can solo tracks by the way and in this case we don't need gravity and velocity for this one but if we try to remove these modules we get a warning saying that they are basically inherited and can't be removed so let's simply hide them like these. Let's hide the Generate collision event which you probably don't have because I made a mistake and I left it. We can also hide the sprite size scale by speed the collision the gravity force and the velocity in cone. OK. And we end up with this point in the middle which is what we want, now we want to stretch this particle in the Y. So in the start size we have to reset this Range float and the vector to float too like this. So if we set 15 in the Y for example we stretched the particle right now. What if we turn On rotation and make it random with a Ranged float between 0 and 360. Well it should rotate right. It should have a different rotation but it keeps facing up with no rotation at all. And if you think about it we have something in the render that set the alignment to velocity alignment and since we don't have velocity or gravity the particle its always going to face up. So let's set the alignment to Unaligned instead. And we actually saw in the beginning that we had a flare star but, we need to divide the spawn rate by around three or four yeah. Like this and they are still living too much. Let's decrease the lifetime to be between 0.2 and 0.6. That should be fine. OK that looks better. Now we just need randomness in the sprite size something like these values seems OK. If you want a copy go ahead and the bright star flair thing will be thin and long and it will look great. It fits well with the rest. OK. And before we are done let's just rename the beam flash 001 to beam glow. For example and the Sparks001 Sparks001 Too bright or flare however you see fit. And then we can save these so we can see how it's behaving in the scene right. And we can just drag and drop the loops sparks and we need to adjust some values. Here's my final values if you want to copy them and I think it's looking quite interesting. Now just out of curiosity here's a few more tricks. We are always using in the beam color and thes sparks color a vector4. But if we press this plus sign and start searching for color we also find that there's a linear color So let's add it and rename it to Sparks. Color 01. So we can distinguish them, now in sparks emitter in the scale. Color module if we click on this arrow and search for our new parameter we can't find it. Well that's because this is a vector4 And first we need to reset it. And then we can convert it to a color. If we search for a color and here we go. Now we can search for our sparks. Color011 and we are able to assign it let's just do the same for the bright emeter reset it, convert it to a color and assign the sparks color 01 sparks color 01 parameter and if we save this and go to the editor, now the UI is different and we can choose the color of the Sparks with the color picker in case you were wondering that's all we had to do. But I'm still gonna use the same values by the way in the RGB, ok? Now I believe this is a bug but for some reason Unreal activated the modules l already had disable in the bright emitter if this happens to you you can disable them once again. Now we can remove the sparks. sparks color vector4 that we are not using anymore and just to finish this. Imagine if you wanted to have another color in Sparks. Well we can do that and we simply need to come here to the scale. color of the Sparks emitter for example click in this arrow and search for a Ranged and we get these ranged linear color. Now the minimum can be our sparks. Color01 and for the maximum we can make it a user parameter. That we can rename to SparksColor02 for example let's just do the same for the bright Emitter convert it to a ranged linear color set the minimum sparks. color 01 and maximum tp sparks color 02. Alright. Now if we save this and go to the editor we are now free to use the second color to make something more sci fi for example by simply using a blue color. Why not. It looks cool can even play with these and add other colors if you want. Or we can simply use it. So the sparks aren't always orange but instead add a little bit more of red or yellow if you want to. Sparks is just to add a bit more randomness to the color of our sparks. OK. So that's it. Guys now I'm going to leave a challenge for you because you can still do the same for the beam color Convert it from a vector4 to a linear caller. And then if you want you can use a minimum and a maximum color too. Alright. So that's the challenge I'm going to leave to you it's pretty easy. You can rewatch this video if you want. Yeah. That's pretty much it for the sparks. Guys I do hope you have learned the basics of Niagara and a bit more and that you feel a bit more confident as well to progress to the next effects which is going to be much more interesting and also more complex. Alright. So that's it guys. See you in the next chapter where we are going to take things a step further and create an Area of Effect attack Area of Effect attack
22. 6.1 - AoE: References: So welcome to the chapter six the, area of effect attack chapter where we are going to create a more complex effect and much more interesting than the sparks. And sense it is more complex and as a good visual effects artist that you are going to become you want to spend more time looking for references and there's a few places for that. For example you can go to Artstation which is one of the best places to find artists that work in the game industry and in the film industry and you can get really inspired here and I really recommend you to create that account because for instance if we search in our case for AoE which stands for Area of Effect attack if you see something that you enjoy like these for example you can leave a like or add to your collection. You can keep on searching for a reference find a few more for example these ones are from students from my previous curse which is similar to this one but for Unity users and it's a great exercise to help you get started. Now if you go to my Arstation profile you can also find a few great examples like this package for example for unreal that has quite a few AoE attacks and if you go to my YouTube channel by the way you will certainly find something cool there that may inspire you to try to learn something new and to push your boundaries to get out of your safe zone. I'm always trying to add something new and cool to my channel. So make sure to check that out as well. Hope you enjoyed the videos. But basically with a few keywords you can search for inspiration and once you are found a few reference that you enjoy. And if you have left a like and if you have an account then you can go to your profile and check all the reference you have right here. Study them, deconstruct them and learn from them. So yeah I always recommend Artstation. It's a great place. Another good place to mention is Pinterest. If you search for example for game effects you will find plenty of good stuff here that can inspire you. We are basically going to create something that starts concentrating energy in a certain area which is anticipation and then it explodes and we see the climax happening and then it falls off to the dissipation. And if you see something that you like and if you have an account. Once again you can pin this to a board for example of visual effects and you can come back later on and study something that you have liked before. RealtimeVFX. As I mentioned before is also a great place for knowledge and reference to. Another fantastic place to get inspired is by searching League of Legends champions in Google. Go to this page choose any champion and watch their abilities try to compose them to deconstruct the effect There's plenty of quality effects here that can work as inspiration for academic purpose and you can even download load the video so you can see it in slow motion for example. So yeah it's an awesome way to get references and learn something new so that's it. In our case we already know what we are going to create but in the future if you don't know a good search for reference is always important. It can inspire you. It can open up your mind to new things then you want to go ahead and create some very quick sketches because with sketches you can for example create 50 effects in one day. But if you go to a Unreal and try to create something complex you will be stuck with one or two effects. So that's why sketching is very important. So let's see how we can do that.
23. 6.2 - AoE: Sketches: Sketching is really important. So you can try different ideas very quickly and see what components what elements you need. And one of the best ways is by using paper and pencil of course. But if you have a graphic table and then you have photoshop or something similar you can create some very quick sketches. You can quickly tweak it and test a few ideas for example in a big file like this one with the gray background, in a new layer, with the simplest brush in white 0 hardness around 70% opacity for the anticipation for example. We want something vertical and we want some particles to start gathering around concentrating energy on that spot. We also want these vertical thing to have a cool fire texture and then we want something similar to a shockwave that also gives the sensation of concentrating energy and this will shrink and shrink get small and start gathering even more energy and then the climax happens. The explosion happens and we want a textire similar to this one with a lot of stretched particles going on, maybe even add shockwave a very quick shockwave and then we have the dissipation and in dissipation we will see a mark on the ground that the explosion left you know basically a crack it will break the ground. We will also see some particles floating around maybe even a little fire going on on the ground. And with these quick sketches you will notice that in the case of the anticipation we will need a cylinder we will need a cylinder texture or a fire texture to be mapped to the cylinder . We need these particles to be stretched and we need a circle on the ground to give the sensation of a shockwave. In the climax we need the impact texture as you can see. But then you realize that you actually want the cylinder to appear in the climax. So as you can see you can tweak these very quickly and you can see what textures you need what meshes you need and even shaders or what techniques you need to create the effect in mind and then we can go ahead and go to Unreal to start creating something very cool.
25. 6.3 - AoE: Importing Project and Overview: Alright. So attached to this lesson there is a zip file in the resources and once you unzip it you get these files. All you got to do is double click on Unreal project VFXGuide_AoE to open it. Once it's open. This is what we got here. I have prepared this scene that will help us spawn the AoE attack so we can have a better perception of how the effect is going. And at the moment if you press play nothing will happen because there's no visual effect added to the list of effects And let me show you around for example up here we got to Demo Room. Then we got this blueprint. The SpawnVFX and a few more things. But this SpawnVFX blueprint which is this one, if I open it. We got these nodes up here to create the HUD Basically the UI And we also set the current VFX here which is the first element of the list. Down here we can switch to the next effect. With D. To the previous effect with A and spawn effects with space. The Spawn function is down here and we basically spawn the current effect at a given fire point down here is what handles the next and previous effect functions nothing fancy. That's pretty much it then we got this AreaOfEffect blueprint but I will show in a moment how cool this blueprint is because we will use it only later on. Then we get the demo room files the map that we are in and in materials we got the original one that we created for the sparks. The additive one the only difference is that in usage I turned on Niagara ribbons and Niagara mesh particles. So it works with ribbons and with meshes. Meshes are basically 3D objects and the rest is all the same. And on the models folder we got this plane mesh. It's nothing real special, just a Quad so we can use a texture with it. Then we got Niagara Emitters and Systems folder and down here we got the Textures folder. We already got the beam texture that we created earlier. You can import the one you created for the sparks if you want. That's fine. And then we got some Noises to help us out build effects. They are also for you to experiment, as well as with the gradients too. Alright. So that's it.
26. 6.4 - AoE: Starting the AoE: Now we want to start by creating an Niagara Emitter A simple sprite burst will do. Called NE_Plane This one is going to be used for Textures that we want to be on the ground that we want to be horizontal. OK. So once we open this by the way I changed the viewport It's simple for me to explain to you how things work. And I think it looks nicer as well. I simply switched the preview window to the middle like this basically the first thing we want to do is change the emitter to local space. This way we guarantee that the effect will be exactly where we place it when we place it in the scene now in the particle spawn. We are not going to use sprite size. What we are going to use instead the mesh scale so we can turn off sprite size and turn on mesh scale. Now this means down here in the render, we can remove the Sprite Renderer because we want to use a mesh mesh renderer like this. And we are doing this because it's easier to control a mesh than a sprite. It's easier to put it aligned with the ground for example. Now in the particle mesh we want to specify which 3D object that we are going to use. And in this case it's the simplest one the plane one. And we also need to specify the material well in our case we want to create an instance of the additive Niagara, material that we got here and call it Mi_ Mi_Beam01Add because it's an additive beam and let's move it out of the originals folder because it's an instance like these we want to keep these organized as possible because we are going to have a lot of materials in here. Now back to the plane emitter in the render we want to override the material with the one we just created the beam and it seems like we don't see anything but if we rotate the preview we get the plane in a Horizontal way on the ground which is exactly what we need. And that's it for these emitter now by the way just out of curiosity I told it that you can create thumbnails for your emitters. It's really simple. Let's open the preview scene settings and turn off show environments. Now let's frame our mesh over a meter and click thumbnail. Thumbnail. And if we press save and go back to the editor we got a thumbnail on our first emitter which is quite useful cool. Now let's add another emitter also with the simple sprite burst template this one we can name NE_ NE_SparksIn And for this one we are also going to turn on local space alright. So we actually don't want a spawn burst instantaneous so let's remove it. You can remove it in this trash icon. By the way. And we can add a spawn rate module. This is going to be around 50 for now. OK. So as you can see they are all overlapping so let's change their start location. Let's use a sphere location and now they spawn in a sphere shape but we actually only want particles above the ground. And if you click here and this arrow we get more options. And fortunately there's one that says Hemisphere Z. Cool. Now we got an Hemisphere. What we can also do is say that we want particles only on the surface and we can choose a thickness of the surface of around 0.2 Basically this is between 0 and 1 and 0 means particles are only on the surface and 1 means particles are in the whole volume. Okay. So finally we can also increase the sphere radius to around 200. Alright. So since this is going to be similar to the sparks let's play with the sprite size let's make it a ranged vector and let's try these values around here. Alright. Now we know we need to change the alignment of the particles to velocity aligned even though we don't have any velocity. But now we can add velocity and they will be aligned to their velocity vector and we want them to go in, as if they were gathering energy coming from the outside to the center of our sphere. Let's just set a short lifetime between 0.4 and 1 should fine Now, we want these together energy for only half a second at least for now OK. So in particles update let's search for the velocity module. We already have used the Add Velocity in Cone. And I think it doesn't look good in here. We actually want an Add Velocity from Point module which we need to drag up here before. Solve Forces and Velocity And it works immediately. Particles are well aligned, but we want the opposite. We want particles to go in. So around -100 is OK for velocity strength, but like I said before, we don't want particles to go below the ground. It's a waste. So let's kill them. There is a very handy module. The kill particles in volume that will kill particles as soon as they enter a certain volume a certain space and we can say it's a plane. And as soon as they hit the plane they disappear or we can use a sphere with a smaller radius. In fact we can make it so, if the radius of our sphere location changes, these one will also adapt. And all we got to do is go to the sphere radius of the sphere location module and in these arrow if you go to make section we cannot create a user parameter because that's only possible in Niagara Systems but we can create an emitter parameter and if we go back to the kill particles in volume and search for the sphere radius parameter we will notice that nothing happens. Nothing appears. Well that's because we are not declaring our parameter. We need to go to the meters bound and in the plus sign if we press in set specific parameter down here we got the sphere radius parameter that we can add this parameter can be 200 for example. Now back to the kill particles in volume module. If we search now for sphere we actually get two parameters that we want to use the sphere radius and everything disappears because we want to divide it by 10 and I think 20 is too much the kill volume will be too small in part because we'll still pass and 15 is also too much but dividing by 10 seems like it's enough. Now even if we change the sphere radius this kill volume will adapt which is nice.
27. 6.5 - AoE: Cylinder Mesh: Alright, so we need to create our first mesh our first 3D object and for this part we are going to need the 3D software. And I recommended to use Blender because it's free. There is a lot of information out there and because that's what we are going to use for this course. But if you feel more comfortable with 3ds Max, Maya, Cinema 4D, or any other 3D software then feel free to try to follow along with that. Okay. So here we are in Blender site. And if you haven't already you can download it here and then proceed with the installation. Once it is installed we can open up Blender. And this is what we get. Now there is a very important thing that I need to mention to you. I have been using blender for more than 10 years. And as you can imagine I have always used the same shortcuts but Blender for some reason in version 2.8 2.8 decided to change a bunch of shortcuts making it difficult for 99.9% of the old users to use the new workflow. So if you want to follow along with my shortcuts I highly recommend you to go to Edit>Preference and in Keymap in this drop down menu change these from Blender 2.8 to Blender 2.7 you will be fine following along. But on the other end if you are comfortable with the new shortcuts then feel free to keep using them as long as you can follow. OK. So with that out of the way let's create our first mesh. And by the way I have turned on screen cast of the keys that I use so in case I forgot to mention a shortcut you can always see down here. Alright. So let's select everything with A and press Delete because we want an empty scene so we can add a Cylinder. With Shift+A and if you click down here on this almost hidden Add Cylinder drop-down menu you can change the amount of vertices the radius there etc.. And this time we are going to leave as it is with 32 vertices but be careful in the future if you develop for mobile you will need to have in consideration values like these anyway let's actually smooth these mesh by pressing the Spacebar and search for smooth, and then we can select Shader Smooth. Alright. So let's now and enter in Edit Mode with Tab and then press Ctrl+Tab so we can choose Faces and this will allow us to select the top and the bottom faces while holding Shift and then we can delete these faces. OK. We want this to be open. By the way I'm selecting faces with the right click. But if you have just installed blender you probably have to select faces with left click and once again you can change that in the key map in preference as you can see I have the select with set to right mouse button. So it's really up to you. But remember that every time I say right click it's the left click if you keep using the left button to select objects. So now we want to take a look at the movie maps and they are very important for a game effects artist. So we can come down here in these left button corner right here and simply click and drag to the right. So we can create a new window and now in these top left button we can click and choose UV Editor and we don't see anything because first we need to be in edit mode on the right. We know and then we need to have the geometry selected but let's instead click on this button so we can see what we are selecting in both Windows and if you press Ctrl+Tab Now we can choose vertex in these left window. And we want to select all the vertices down here, you see and if I try to push them down with G they get out of the UV area and we actually don't want that. We want to come up here in this UV drop-down menu and turn on Constraint to Image Bounds this way. Now we can drag these with G and press Y to lock in the Y axis and the vertices will respect the UV boundaries and we can easily feel the whole UV area. Alright great. Now let's just push this a little bit up. If you press N you get this panel and in transform we want to set the Z of the location to 1. That's like this. Now we only need to set the Pivot at the bottom of this mesh so let's enter in Edit Mode with Tab. While holding Shift+Alt at the same time you can right click to select all of these vertices down here. And now we Shift+S we want to select Cursor to Selected Then we go back to object mode with Tab. And we want to use Shift+Ctrl+Alt+C so we can set the origin to 3d cursor and that's it. The pivot is at the bottom which is cool. This will help us a lot to grow and to shrink our mesh as we want. Now let's not forget to save this with Ctrl+S and save these Blend file in a place that you know because we may need it later you can name it CylinderMesh01 Then with the mesh selected we wanna go to File and down here in Export We want to select .fbx Now let's turn On Selected Objects and that's why you need to have your cylinder selected in the viewport and then we can press Export and that's it. It's going to export as default to where you save it your blend file. Right. Now back to Unreal. We want to press right click in the models folder and choose Show in Explorer and these the will appear and then all we gotta do is copy and paste the Cylinder Mesh FBX, just like these and in Unreal now it asks if you want to import, we can say import, and then import all and that's it. Don't worry about this one is just a reminder that the mesh has no smoothing groups. Nothing important. Now let's just duplicate the plane emitter and rename it to NE_Cylinder we can double click it to open and in mesh renderer. Let's switch the particle mesh with the Cylinder and that's it. But as you can see the beam texture itself doesn't look good with these mesh. And that's because we actually need to create a proper texture for these mesh. So let's see how we can do that.
28. 6.6 - AoE: Fire Texture: Alright, so at this point we need to use either Photoshop or GIMP. The differences, are minimum, I'm going to pick Photoshop. Okay, so we need to create a new file that we can call impact 001 or firing back 01, because this is going to be a fiery texture and with a resolution of 2048 by 2048 pixels. Once again, in the future, if you develop for mobile, you need to pay attention to these resolutions. They may need to be lower. Okay, so let's create a new layer with Control Shift N. And By the way, I'm using a drawing tablet for these, it makes drawing taxes much easier. But if you don't have one, you can always try to follow along with the mouse. Okay, So then we went to choose a white color right here. And press B to pick up the brush tool within capacity of around 20 and 0 for the Arabness. And by the way, I'm going to try my best to explain this to you. It isn't easy since I can't guide your hands. But the idea is to start with one stroke only without ever lifting your end and create some spikes like this. Nothing special. This is our background. It doesn't need to be precise. And by the way, quick tip for creating users. If your brush is like these with our edges, you can press F5 and go to the brush tip. And Chris the fate to 0. You will then have a smooth brush. Okay, back to Photoshop. Now the idea is to create some curvy stuff like these that starts from the bottom to the top. And don't worry about being perfect because we are going to smooth out of it with the smudge tool later on. Then with a small brush size, you can do the same, but almost allover the place. More or less like these a bit here and there. You know, it's always from the bottom to the top. The idea is to have several white and gray areas all over our texture that looks a bit like flames. It will look. Now with the erase tool. With a lower opacity around 30. I'm going to start erasing the top part just a little bit. Because we want this to go from white at the bottom and gray around the top. Which means we can go ahead and actually with a big white brush and with the law opacity, add a bit more white in the bottom area, just like this. That looks nice. Now we can also add some white areas like these ones. How around? And then with a small brush and still with around 20 percent for the opacity, we are going to start forming something that resembles the shape of the flames. Then finally, we can also paint a bit more with white at the bottom. And don't be afraid to use the eraser tool. We are going to need it now and we are going to set this to low opacity and start creating some cavities. In the top area. We're going to start creating a shape. And then I'm also going to erase some spots in the middle. Everything will look better once we use the smudge tool. Don't worry. I'm also erasing even more the top section because I want to start defining the flames shape. And then still with the eraser, but with a smaller brush, you can create even more empty areas, basically gray areas. And these will look at them in combination with a special shader that we will create later on. But don't forget to leave white areas as well. Okay, so once you think it's looking nice, we can go ahead and pick this much to this one with the strength of 50 is enough. Now for the Kriti users, you can come up here in breasts and search for blend. Instead, you will find all of these brushes. You can try them and see which one you like the most. And then you can keep following the video. Okay, so the idea with the smudge tool is to start blending these together from the bottom to the top. And you can also use a bigger brush and push a bunch of pixels at once. But it will look better with a small brush size. Okay. Then in some gray or dark areas, we want to push these down so we can get a more pronounced shape in the flames UK. And we wanna keep going on with the smudge tool, adding details and blending the art edges of our texts until we start getting something more smooth. And the smudge tool is pretty cool because you can even extend some parts of the flame or shrink them all so. All right, so once you have something that you enjoy, once you have blended most of the gray and dark areas. You want to pick the erase tool and simply remove the excess, for example, is just the final Dutch. Okay, once the texture is ready, don't forget to save this Photoshop file with Control S somewhere that you will remember. I'm going to call it fire impact 001 actually makes more sense. And then we can add the black background. And with Control Alt S, export this as a PNG. Once again to a place where you know what it is. Ok, So now back in your real, I'm going to once again copy and paste the text directly to the Unreal Project 2 then real textures folder. But you can do as you wish if you drag and drop it will create a reference. Personally, I rather have a duplicate because it works as a safe copy. Now, let's just create a new material by duplicating the beam 0, 1. And this material is going to have the same name as the texture. So we know what texts are these material old? Right? Now I can double-click to open the material. We can enable main texts. So you can switch the text with the fire impact one. And then save this material. Okay. Now we can go back to our sounder emitter, end change the material. And it looks awesome. But there's a couple of things happening here. The first one is that it's mapping correctly our texture to the UV maps that we have created for the cylinder, which is great. In case you have the opposite, make sure in blender, you rotate the UVs 180 degrees because the bottom part of the sender must coincide with the bottom part of the UV area. But as you can see, we have a seam right here. We have these hard edges that doesn't look good. And to fix this, we can go back to Photoshop. And it's fairly easy to create a seamless texts or are we going to do is go to filters help here, and down here. In other. Let's have set these 100 pixels horizontally, for example. Then we can fix it with the smudge tool from left to right and vice versa. From the bottom to the top as well, just smooth the edge. And if you want, you can also use the brush with lower opacity and add a bit more of white around here. And here we go. We have a seamless texture. Now let's again export as a PNG without the black background and replace the existing texture we have in Unreal. Just like this. Here we can say we want to impart, Yes. And that's it. Look at this one problem down here. It looks much better. But we still have these artifacts appear in sander. And it's a simple fix. Let's double-click in the texter and then click on this arrow to show more options. And let me just show you the Sander at the same time, okay, like this. So down here in x-axis tiling mode, where it says Wrap, we want to say it's clamp, it's going to clamp the texts. And we can do the same for the y axis. And nothing changes. Well, that's because we need to turn on weaved wall texture streaming. This will only stream parts of the texts that requires to be visible, meaning that the transparent background is not going to be stream. It hints making the artifacts disappear. And it's starting to look pretty cool actually. And it's going to look even cooler with the shader that we are going to create in a few lessons. But first, let's start putting all of these pieces that we have been creating together.
29. 6.7 - AoE: Starting the Anticipation: OK so before we proceed let's just create a Thumbnail for the Cylinder Emitter OK. And then save it. All right cool. So let's create finally a Niagara System so we can start putting our Area of Effect attack together and we can name it. NS_AoE_FireColumn NS_AoE_FireColumn and we are going to start with the anticipation that we have spoken on the beginning of the course as well as on sketch less lesson of this chapter. So we can start by adding the Cylinder Emitter. Then the plane and the sparks in as well OK. Now one thing that is also very important is renaming the emitters so we know what they are. Since we are going to be reusing them and this will get messy really fast so let's for example rename the Cylinder to 01_CylinderAdd and the "01" is for emitters that are going to happen before the climax before the explosion. Basically the ones that are going to create the anticipation and the Add represents the type of material which in this case is additive the plane is actually going to be 01_GroundBeamAdd And the sparks can be 01_SparksInAdd Alright. So now that we have corrected the names let's just isolate ground beam with this button and nothing much happens here but for the anticipation we want this to start shrinking as if it was gathering energy in one place. So what we can do is go to particles update and search for scale. And if you remember correctly we are not using a sprite. We are using a mesh. So let's select the mesh size scale and in this specific case we don't care about the X Y and Z axis. We are not going to use them separately. So let's convert this to a single float with vector from float and we want to control these float through a curve like this. OK. We wanna animate the size of the ground beam basically. And if we press play with the spacebar we can now watch our beam shrink until it's nothing. Great, but let's also Ease in these curves, we are smoothing them. We don't want to use linear curves. They are predictable and kind of boring in most of the cases so with right click in the first key let's for example choose Auto By the way we got these curves panel here. And if we press on this Icon, we can show, we can see the curve on a bigger graph we can also change these last key to something like this. So it slowly starts shrinking in the beginning but then towards the end it shrinks much faster. There is also a lot of motions you can create with this curves by the way you should give it a try. That can be quite useful cool. Let's Unsolo this and create a similar motion for the cylinder and while holding Alt we can drag and drop the mesh size scale to the Cylinder Emitter great but there is a difference this time because we actually want to use the X Y and Z axis separately. So let's reset this back to the vector mode and then convert the vector to a curve and we get 3 curve. We can then hide the X and Y because first we want to scale down the cylinder vertically cylinder vertically Just a little bit like these and for the x and y we can use these curves but we need to set these first key to Auto. So it becomes smoother okay. Let's see. Hmm. That's looking nice and we can improve this by adding rotation. So in particle update let's search for rotation and let's add a mesh rotation force which gives us a warning saying that the Solve Rotational Forces and Belocity module is missing. It's not the same as the one we already have. So let's search for force. And here is the Solve Rotational Forces and Velocity module that we can add. And it's fine now. And the warning goes away. So in here we also want to convert this vector to a curve but this time we are only going to rotate it in the z axis. So let's add first the Z curve and delete the first key of the x and y axis so it doesn't rotate on those axis because it would look weird. Here we want to add a little bit of rotation in the beginning and towards the end it starts spinning faster. Let's add a value to the last key for around 14 and around 8 in the first key and you can press F to focus this curve okay. Then we can also smooth the curve with the Auto option with right click just like this and it's starting to look really nice actually it adds a nice motion let's just actually increase the beam mesh scaled to 2. This looks better. All right. So now both the ground beam and the Cylinder live the the same amount of time which is 2 seconds and the particles actually stop emitting half the way. So we know that the time it takes to gather energy will influence the amount of time the cylinder and the beam and the sparks live. Right. So we can create a user parameter more specifically a float that is going to be called Impact delay and why impact delay. You may ask. Well because it's also going to influence when the climax happens when the explosion happens when the impact happens. So it's a very important float. Cool. Now if we go to the initialize particle of the cylinder we can say that the lifetime is going to be equal to the impact delay and then we can do the same for the ground beam emitter. Now if I press play you will notice that nothing happens. And that's because we haven't set any value for the impact delay which we can do in this blue node. Let's set it to one second for now. For the particles it's different. We actually want them to stop emitting a little bit earlier before the impact so let's divide the impact delay with the well if it's by itself. Maybe it's too much and the particles don't give the sensation of gathering that much energy. So let's try 1.5 which is 0.75 0.75 if the impact is one second And that seems better. I'm going to try 1.6 It depends. You can try values and I think it looks nicer. It's starting to look cool and it will look even better in the next lesson because we are going to start creating the climax. The explosion.
30. 6.8 - AoE: Starting Climax: Alright. So in this lesson we are going to create the climax of the AoE fire column. Basically the part where it explodes and translates to the dissipation. And we are still going to use the monochromatic level that we have been using. And you will better understand why in just a few moments. So for this part we are going to need the cylinder again. So let's select the cylinder panel and press Ctrl+W to duplicate it OK. Let's rename this new one to 02_CylinderAdd 02_CylinderAdd We want to set the next loop delay to the impact delay. Basically this will delay the spawn of the cylinder according to the impact delay amount but we want this to scale up and not to scale down. And we also want this to live less. So let's reset the lifetime and let's set it to half a. half a second for now. And for the scale we can handle that in the mesh size scale and we want to first take care of the Z axis. So let's hide the X and Y. And it's going to be smaller in the beginning and now I'm actually going to pass these to the curves panel but be careful because if you have turned on a curve before it will always be there like the last curve I used So I'm actually going to hide everything because I only want the Z of this cylinder and I'm going to push it like these in the beginning. a little bit up. OK. So it grows a little bit and Z. It should be more but we are also seeing that the X and Y should be the opposite. So let's fix them. I'm gonna make them visible and now the first key is going down more or less around here. And the last key is going to be up to 1 Okay. That's much better. Now it expands vertically and to the size as well. And I'm gonna make it a little bit faster like 0.4 for the lifetime what we can also do is shrink a bit the X and Y of the original size in the mesh scale in the initialize particle because it seems too big, when the impact happens and we can make it taller in the Z as well. The Z curve of the mesh size scale. I'm also going to make it start a little bit smaller so it seems like it grows faster all right. That seems okay for now because in the end we are still going to make some final adjustments of course. And you can always try different values let's just add a new track for the sparks. But we are going to rename them 02_SparksOutAdd 02_SparksOutAdd so again this sparks will only explode after the impact delay. So let's actually change the next loop delay to match that and this sparks as you can see they have the wrong motion. They should be moving from the inside to the outside to control the velocity we currently have the add velocity module which we only need to change the velocity strength to around 100 positive and for now let's turn off kill particles in volume but we are still using as spawn rate which we don't actually want. We want an impact of sparks flying around as fast as possible. So let's turn off the spawn rate module and search for spawn bursts instantaneous that is going to have a ranged float which is going to be between 15 and 20. All right. So that looks much better even though they are all moving at the same velocity but we'll fix that in a moment. Let's first change the radius of the sphere, 20 maybe a little bit too low. You could try a bigger radius by the way. We can also go to the sphere location module and set the Z to 0.2. So the sparks are more at the ground level. I think it looks nicer but that's a personal taste of course. Anyway let's decrease the lifetime mostly the minimum. I think my maximum is too low by the way. OK so now let's finally add some more randomness to the velocity between 20 and 150 maybe it should be more like 50 and 200 Yeah I think that looks better. The sparks are more scattered around you know. OK cool now let's just add another track for the beam ground and then make sure that this one also has the next loop delay equal to the impact delay. OK so we also want to reuse the mesh size scale module from the 01 Ground Beam and we can do that by holding Alt and left mouse button at the same time and then drag to the 02 GroundBeam and we need to invert the curve that controls the size. Right. Like this. In the beginning maybe it can start at around 20% of its final size. Something like this seems OK. Yeah. Maybe that's too small so let's increase the mesh scale of the initial particles so let's increase the mass scale of the initialized particles. So it covers the standard base and leaves a radius around it as well but it is also leaving a bit too much. Or maybe one second. Yeah that seems better. It's also a little bit too bright. So let's actually decrease the alpha of the color to around 30%. In other words 0.3 All right. That's looking cool. Don't worry about the color we will handle that in a few lessons. We are actually starting to see the shape that the effect is starting to take and it's important to not be distracted by other things like color for example there are few things that are brighter than they should be. But anyway. So in order to proceed we need the very basic and simple meter and we want to create the new emitter with the right click and rename it to NE_Beam You could also name it. NE_Particle anyway. So in here we only need to first change the material. The one that we have created create a thumbnail and then save it. That's it. The rest we can do it in the system so let's add it in here the name to the 02_BeamImpact or beam flash. Actually make sure to delay this by the impact delay amount as well and this is going to be a flash. So it really needs to be fast. So let's set the lifetime to 0.2 and the sprite size can be only a float instead of a vector and it can be big something like 250 that looks better and maybe the Alpha can be lower like 0.5 you know. All right. That looks impactful and it's starting to look good but we still need to add a few more elements to make it more complete and then adjust the brightness of a few elements so it can be more readable and can have a better contrast.
31. 6.9 - AoE: Fire Impact Texture: So as you have noticed by now creating good texture is really important. So that's why we need another one to improve our AoE attack. So in a new file called the FireImpact01 for example with a resolution of 2048x2048 2048 x 2048 Let's make sure we are using a white color and a brush with no hardness and with 20% of opacity and we'll Ctrl+Shift+N let's add a new layer. Remember that I can only give you a few tips gaze and I can't guide your hand so I am really trying my best. If your result is different. Don't throw it away embrace it and try again if you don't like now with a brush. More or less of this size we can create with only one stroke a shape similar to this one. It doesn't need to be perfect but make sure it doesn't touch any of the borders and if it touches you can use the eraser. With these basic shape. Now we can pass again with only one stroke more or less around here around this area. Now just like we didn't the last texture that we can use a smaller brush size and we can pass a few strokes from the bottom to the top like these ones all over our texture. Remember it doesn't need to be perfect. We are going to use the smudge tool later on so we can smooth some hard edges. Now with even a smaller brush. We can create these zigzags as well and make some pointy ones too. More a less in a triangle shape. As you can see. And this is also the part where I create some spikes in the top area. I'm thinking always in a flame shape by the way then finally with even a bigger brush. I'm going to pass in the most predominant spikes only a few times to give them some glow. Now we did erase tool more a less of this size and with zero hardness we can go ahead and start removing some of the excess all around and create some cavities at the top and then later on on the sides and in the bottom area as well. But these ones are in the opposite direction as you can see. And then after I pass more or a less in the miffle I also try to be a little bit symmetrical. Once we pass all around. You can start creating holes in the middle of the texture. You don't need to be precise you know. And I'm going to create a few bigger ones but then I'm going to pass a bit all over my texture always with brushes from the bottom to the top once I have a few holes and a few gray areas I'm going to pick this much to and you know that this one is going to smooth all of the strokes that we have created and the walls as well. It's going to blend them together and I'm going to take advantage of that and start creating a flame shape with the smudge tool. Basically push the spikes a little bit up and the cavities down and you can pass quite a few times. So don't worry. Don't try to be perfect. You need to pass quite a few times. Yeah and if you use a smaller brush size it will look even better. The idea is also to smooth this out. Don't forget it, even the all is in the middle so after quite a few brushes we get something similar to these now my final touches are with an eraser where I create a few more gray areas. Now here's the trick if you find yourself with a texture that doesn't have much white areas. And you don't want to pick the brush again. And once you have finished your texture you can always go ahead and duplicate your layer and for example erase some areas like in my case the top and the bottom zones with a big brush size you can see that if hide and show the duplicated layer I have a few more white areas. So. So that's a quick trick to add a little bit more of white to your texture. All right. So that's it for this texture. Let's save this photoshop file something like fire impact 02 And then we can also hide the black background and export this texture as a PNG now back to Unreal. I'm gonna copy and paste this to my textures folder and then duplicate the Beam material and you can name it so it matches the texture and the shader type double click it to open it and change the main texture to the new one which is the fire impact 02. And finally save it. To add this to our area of effect attack we can start by duplicating with Ctrl+W the beam flash node and rename it to 02_FireImpactAdd then we can go ahead and change the material in the sprite render to the new one the fire impact through to and this is extremely big as you can see and it happens to be too fast. So for now the lifetime can be 0.4 any size can be 100 but as you can see it is below the ground. So we need to push it up and we can do that in the particle spout. We can search for position and with this variable we can now break the vector. So we get access to the x y and z axis and in the z we can now in and in the z. We can now insert a value of around 40 maybe more or less. It also doesn't need to be far too up. OK cool. But it still has no motion so let's scale itup with a sprite size scale. Module that we can convert to a float and then convert the float to a curve the value of the first key is 0 and the last key is going to be 1 and it can be linear for now it doesn't look that bad in this case anyway. What we can also do is control the stretch amount of the particle in the y and x. For example let's reset the sprite size and set a value of 115 the X and 250 in the way. It could also leave a little bit more but I think it will not look that good anyway. There is a big change that we need to apply here to the fire impact 02 and to the cylinder as well. And that change is a proper shader to animate these textures so they look like they are alive you know. So let's see how we can do that.
32. 6.10 - AoE: Distortion And Dissolve Material: Alright. So we can go ahead and go to our originals folder inside the materials and we don't want to create a material instance. We actually want to duplicate it. So it creates a new original material and I'm gonna name it additive scroll Niagara. But that's my usual name. You can use another one like distortion like dissolved for example. That's what we are going to do. And once you have double click it to open I'm gonna duck it up here and actually for this material we are going to need motion, movement you know and anything that requires that in shader terms it's very likely to need a time node. So back here with the right click let us search for time and we are going to multiply this with something what we are going to multiply with is a parameter that we can control in the editor. So if we start searching parameters down here we can see that we have a scalar parameter which is basically a float we can name it. And this one is going to be for distortion you speed meaning that it's going to control the distortion speed horizontally. Now we can copy and paste this node with Ctrl+C and Ctrl+V just like this. But this one is going to be for the V speed which is the distortion speed vertically. You can remember this as V for vertically leaving the U for there isn't an axis. OK but both of the parameters are apart from each other. Fortunately there is a node called append that is going to join these two floats into a vector to then the result of the append node can be connected to the multiply node and by the way this distortion you and V speed are public parameters that will be controlled in the editor. But for now we can access them in the parameters default tab, as you can see they are set to 0. OK cool. Now this distortion speed is going to make a distortion texture scroll, move basically. So let's search for parameter and select the one that says texture Sample Parameter 2D that we can call distortion it's basically going to be the texture for the distortion. And as you can see we have the UV's input which controls the texture is going to be mapped. But with the distortion speed setup that we have here we can't control that. We need another note. We need a UV node which is named Textures Coordinate and if I connect this to the distortion texture nothing happens again because we aren't changing the original UV's value right. So we need to do that. First let me just change the texture to a noise one that I have added to this project yeah. This one seems OK. Now if we add the distortion speed set up to the texture coordinate and then connect this to the UVs we should see the texture moving but it isn't moving. And that's because the values are set to zero let's increase one of them and nothing happens. Well that's simple that's because we need to turn on live nodes appear and here we go. We got the distortion Texture scrolling in whatever direction we want. Alright. That's good. But how do we use these to influence our main texture. Well just to show you something. If I connect this directly to the UV input off the main texture I get an error saying that it can't convert to float3 to a float2 And that is solvable by using an append node to join R and B into a vector2 and then connected to the UVs. But as you can see it will distort way too much hwat I got here. And basically it's distorting. The UVs so much that we start getting the distortion texture in the main texture. So this means we need to have a way to control the distortion amount. Applied to the main texture. Let me just delete this append node it was just to make a point. And what we need is a lerp node also called a linear interpolation or a linear interpolate actually. And this will interpolate between A and B according to the alpha value which goes from 0 to 1. And by the way for those who don't know the lerp node will output the mix between A and B according to the T input meaning that if T 0. It will only output A which in this case is red, and if it's 1 it will only output B which is blue and all the values between are a mix of A and B. So that's it. Let's use this to say that the B value is going to be the maximum possible distortion and A is going to be the text coordinate which is no distortion at all. If I open this they are mixed. So, for the Alpha we are going to create a scalar parameter, a distortion amount distortion amount and if I play with this value in the parameter default tab we can see the linear interpolation in action which is cool so let's just connect it to the UV input of the main text. And then we can save this shader. So let's for example open up the FireImpact 01 which is the material. Applied to the cylinder and here we can switch the parent with the new material we created which is the additive scroll and we can set a distortion amount of 0.1 and the distortion V speed of 0.2 of 0.2 So it goes up just like some flames and it's looking good if you want. You can also try different Noise textures for the distortion and see which one you'll like most. Now if we go back to the Niagara System of our fire column we will notice that our Cylinder has an animated material apply it which is nice and it looks almost perfect. The only problem is that it has created an hard edge. This seem, right here. And this is happening because we are moving the UVs when distorting and it gets out of alignment. So to solve that we can go back to our material Editor and before we passed the totally distorted version we actually need to add it to the texture coordinate. So it kind of recenters the UVs. Otherwise it will move the UVs of our main texture out of place but we still have the hard edge going on and that's because when we imported these fire impact 01 texture we actually said we wanted this to be clamped in the X and Y tiling while in fact we need the X to be Wrapped In other words to repeat itself and here we go. We have our fantastic shader in action which looks much better without that edge in the middle.And by the way be careful some of the noises that are provided aren't seamless they don't loop like this one for example. I think most of them loop. But yeah you get the idea. Anyway we are still missing a very cool and important part in our shader or material can call it shader or material. The part where we can dissolve the main texture it's an extra layer of detail that will make this even better. So once again we need a new texture so let's add another texture sample parameter 2D that we call call Dissolve and select one of the existing noises. I'm gonna choose Noise00. Yeah this one and we also need the same scroll system. We got up here for the distortion. So let's actually select these nodes and copy and paste them with Ctrl+C and Ctrl+D and move them down here now with right click. Let's add a scalar for the Dissolve U Speed. It's basically the same thing that we have above. But for the dissolve and another scalar for the dissolve V speed and connect it like this and then we need the texture coordinate from up here. But how can these influence the main texture? Well let's try for example to multiply them together okay. So the preview is kind of small but we are getting a much less white outcome. Let's connect these up here. I'm gonna change the preview to a plane and as you can see if I switch back and forward you will notice that it's a bit less white. When we multiply it with the dissolve texture. Now what if we could control the intensity of that dissolve dissolve Well we can and we actually only need a power node. And as you can see if I increase this value you get a much stronger dissolve. So this is going to be connected to the multiply and if I play with this power node we get the more dissolved main texture but it's static. So I'm gonna increase the dissolving V to 0.3 So it's a bit faster than the distortion speed. Right. And it's looking great. Now We only need a new scalar parameter for the dissolve amount maybe set the default value of 2 and that's it it's looking cool. Let's save this. Now we can go back to the material and control these values. Right. We always have to go back and forwards between Niagara and the material to control the values which is kinda boring right. What if we could control these values directly in Niagara. Well fortunately that's also possible. So back to our material editor what we can do is use a dynamic parameter node, the one in the parameter section. This node is a life saver and it's super easy to use. Let's put it down here for example and we got these four parameters that are basically floats and they can control anything we want and they can have any name we want. For example the first one can be for the distortion amount the second to the dissolve Amount. And the third for the caller intensity which is going to be kind of useful in some ways. Now let's delete this distortion amount scalar and connect the red one from our dynamic parameter which is the distortion amount and let's do the same for the dissolve amount and we can also set default values like 0.1 for the distortion and 2 for the dissolve for example and leave one for the color multiplier but for the color multiplier we need to add and multiply note connect it like these and drag it up here so we can connect it like this to the outcome of the multiply and then connect it to the emission and now it's possible to control the color intensity which is great. All right. Looking good let's save this and let's save this and go back to our Niagara System and the way we use these in here is simple. Let me just solo the 01 Cylinder. All right. So here we could use the particle spawn to control the dynamic parameters but we wouldn't be able to animate any of the values so let's instead click on the plus sign of the particles update and search for dynamic first let's set the color multiplier once so we can see something right then we can set the distortion amount to be between 0.1 and 0.2 you can choose any value. And now we have control over the dissolve amount directly here which is really handy so let's convert it to a curve and for example what we can do is dissolve in the beginning. So the first key is going to have a value somewhere like 5, 6 OK. And the last key is going to be 0 but it's going to be back here around 0.3, 0.4 more or less around here. And as you can see now in the beginning we got the cylinder totally dissolved and then appears out of nothing which is a nice detail. We could eventually also dissolve these near the end and maybe just a little bit like this all right. Now we can do the same for the 02 CylinderAdd, we can actually hold Alt and press left click mouse button so we can duplicate these dynamic material parameters just like these great and I'm also going to solo these Cylinder And in here the curve is going to be different for this one we can disable the scale color because we are going to fade out with the Dissolve Amount I'm going to remove these last keys set these one to be the last key and it's going to have a value of 6 and the first key is going to have a value of 0 and as you can see now our cylinder dissolves away. And I think it adds a really nice touch. If you want You can also set the keys to be in Auto mode and create a curve similar to this one. So it's a little bit brighter in the beginning. All right. OK. This is looking nice. What we can also do is repeat this process for the 02 fire impact. So let's go to our materials folder and I'm just going to rename this correctly so I can distinguish them later on and I'm also going to rename the fire impact 02 and we can open up and change the parents to be the additive scroll shader now back in our Niagara system. And I'm going to first solo the 02 fire impact. So we can have a better perception of what's happening. I'm also going to do the same and hold Alt and with my left click drag and drop the dynamic material parameters to the 02FireImpact and I think it shouldn't start to 0 in the sprite size scale so I'm going to push a little bit up. OK and make it wider maybe it's a bit too much. Yeah definitely too much right. OK but I'm going to stretch it in the way just a bit more. OK. That looks much better. Next we are going to add some colors to these.
33. 6.11 - AoE: Adding Color: Alright finally let's add some color to this. And I left it white until this point because now it's quite simple to add colors and because it's really important to understand the contrast of our effects and if we leave it white that becomes much easier to understand. For example the Cylinder is too bright and it drives too much attention to that specific point since it's a variable that we want to change in the inspector and try different colors. Let's go to the parameters and in user let's press the plus sign and search for color and we can pick the linear color and we are going to call it Color01 let's also add another color the Color02 because we also want to have some diversity in terms of color. Now if we select the blue panel the system settings we can choose a default color for the Color01 is set 10 in Red 2.5 in green and around 0.4 for the blue channel and then for the second color I'm gonna choose a more reddish orange but you can pick different colors. Obviously and the process is quite simple for example for the 01 Cylinder Add. We can go to initialize particles and in color All we got to do now is assign the user.Color01 that we have created and that's it. Here we go. We already have color and we can repeat this process for the 01_GroundBeam which is way too bright. As you can see and we don't have control over the alpha here but if we come down here to the scale color we have this graph controlling the alpha and we can say that the beginning is going to be much lower something like 0.1 or 0.15 should be enough. We don't want this to be too bright. We just want to say this is going to be the area of our effect attack. So something like this is enough. And what we can actually do is push this first key of the ground beam to around here and then add another key in the beginning so it fades in and I think it looks nice because it becomes smoother. It isn't that abrupt. So like I said the cylinder is a little bit too bright. And what we can do is increase the Dissolve amount instead of being zero. Let's push it to somewhere below 1 almost 1. So it doesn't become too bright at this point. That looks smoother. That looks nicer. OK. Now let's proceed with adding color. Let's add color to the particles. In this case we want to use the two colors. So let's search for Ranged and select the uniform ranged linear color and the process is pretty much the same for the minimum it's going to be the color01 and for the maximum it's going to be the color02 and that's it as you can see we have some bit of reds in the particles cool looking nice. Next we have the 02_CylinderAdd and in here is pretty much the same thing. Color 01 OK for the sparks out once again we can do the same and transform these to a random linear color and then assign the color01 and the color02 as well. And for the 02_GroundBeam we actually have decreased the alpha here. So let's not forget to do the same in the scale color. OK so in here we are going to decrease the beginning of this curve so it doesn't become too bright. That looks nice but we can push the handle of this key just like this. So it isn't bright for too long. We just want a little bit in beginning cool. Next we got the beam flash and we also have decreased the alpha here so, it means we get to go to the scale color and decrease the key of the Alpha curve to something really low like this should be enough I'm actually going to increase the size of this beam flash so it becomes bigger. Yeah like this seems nicer. Last one we have the fire impact and we can do the same thing add the color01 color01 and that's pretty much it. We have color in our fire column so let's save these. Let's see. How this is looking in the scene.
34. 6.12 - AoE: Area Of Effect Blueprint: So in our scene as I mentioned in the beginning of this chapter we have the BP_GAP_SpawnVFX blueprint. Here we have a list of vfx effects that we can assign in the editor but at the moment we don't have any blueprint that fits here. Only the original blueprint that it doesn't have any effect. Which is this blueprint right here if we open this up and go to the viewport we have some public variables down here like the area of effort Niagara System that we can assign in the inspector, the impact delayed the scale the location the rotation and the delay before destroying. Up here we got the Niagara particle system reference this component is used in here in the event graph where it says that as soon as this blueprint is in scene which is the begin play we call a function that is this Spawn AoE and destroy these blueprint after a delay. The SpawnAoE function is where we use the Niagara Particle System component to assign the Area of Effect attack that we select in the editor and then we have these set actor location and rotation node where we set the location and the rotation which is by default 0 for both. Then we get the constructor script which is very important in our case as a visual effects artist. This gives us access to user parameters that we have in Niagara system so we can control them directly in the inspector. For example we check first if the VFX AoE Niagara is valid which means if we have assignment assigned a Niagara System. If it is valid we set the area of effect Niagara component to the one we choosed then we got this nodes that is set Niagara viable. We can set any variable in the Niagara System. Through the blueprint. It's going to look for a user parameter called scale. This is for a vector3 and that one is for a float. It's going to search for a float with scale and it's going to pick the X value and then we got the impact delay and it's going to look for the impact delay keyword in our Niagara particle system the one that we have declared in the user and in a few moments we are going to add a few more nodes here to control the color so you can see how these works so let's create a child blueprint class of this one that we can rename to AoE Fire Column 01 we don't need the gap and if we open this up it opens like this which it shouldn't. But right here in this VFX area let's assign the only niagara system that we have in this project which is the fire column if we compile these and save these and then reopen the industry. Now we have this view of the blueprint which is a resume and that's how it's supposed to look because it is a child. Oh and by the way just out of curiosity if you remember correctly we can create a thumbnail of our AoE attack just like this and that's it. We got it here cool. Now we can go ahead and assigned to the GAP_SpawnVFX the fire column and once we press play we can press spacebar to spawn our VFX. But as you may notice nothing really happens. Well that's mostly because if we reopen these blueprint mostly because our delay before destroying is set to zero. So let's insert the value of 4 seconds after 4 seconds it will destroy our fire column just so we don't create too much garbage you know. And now if you press play. You will notice that our fire column is working and it's working well but it's really small. And if you look closely our fire impact is not there well that's happening because if we come here to our Niagara System of the fire column in the 02 Fire Impact in the emitter settings local space is not checked which means that when we set the particles position here it will set to the world position and not to the local position so let's save this. Now everything works well and we got the fire impact right here in the middle looking great. We only need to fix a couple things like the scale. It's too small. And we also want to have control over the color directly in the blueprint without having to open the Niagara system.
35. 6.13 - AoE: Easy Scale Control: So in order for us to create an easy scale up and down system where we can easily control the size of our effect directly from the blueprint we first need to create. a user parameter a float. Call it scale and let's set the value to 1 so let's start from the first node and all we got to do is go to initialize particle. And in this case we control the size of the cylinder through the mesh scale. So let's multiply that by a float. But make sure to remember this number because it's going to erase it. Once we select multiply vector by fault in this case it was 1 1 1. But later on we will have different numbers. And it's important to remember. And for the float we can assign the user.scale. we just created. Great let's do the same for the ground beam. The 01 ground beam for example here is 2 2 and then 1 can multiply this vector by a float gonna insert the previous number 2 2 and 1 and the float is going to be the scale the user that scale. All right now for the sparks it's a little bit different because we have a vector2D. So once again make sure to remember these numbers and let's multiply these by a vector2. Now I'm just going to insert my previous numbers 0.5 and 10 and for the B option. We want to convert these to a float and then we can assign the user dot scale for the maximum I got 2 and 40 and I'm going to multiply by a vector2 I'm actually going to set this to 2 and 50 and for the B we can convert it to a float and then assign the scale parameter can do the same thing for the cylinder add basically we multiply with a float pass in previous numbers and assign the user scale to the float. Alright. So it's working well everything has the same size as it had before. I'm gonna continue and do the same for the sparks out. I'm also going to increase the maximum a lil bit in the Y to 50 and then assign the scale to the B option. All right for the 02 Ground Beam, is straightforward. Pretty much the same as well for the beam flash make it 280 actually and the last one to fire impact I've got a vector2D So it means I need to convert it to a float and then multiply by the scale cool. Now that is done. Let's just save it. And let's open up our fire column blueprint. And since we are only using a float we only need to set the X to whatever number we want to put the multiply this with I'm gonna insert 2 so it's 2x bigger than the original and here we go. Almost everything is working fine but as you may notice the particles still have the same sphere radius. Even if I make it really small they still have the same radius and the fire impact particle position also needs to be fixed so back to our Niagara system. For the sparks in the sphere location as you can see we are using the sphere radius which is declared up here. So let's multiply these by the user scale and then assign the user scale parameter. That's it. And then I'm going to do the same for the sparks out when I multiply this sphere radius with the user user.scale and we can save these. Now if we test this again the radius of the particles that have the correct size and everything looks fine. Oh we should actually multiply also the particle position of the fire impact zone and that's it. We can easily control the scale of our AoE we attack directly in the blueprint without having to change every emitter quite useful isn't it. I'm just going to actually increase a little bit the minimum of the particles. They're all a bit too small in the X they are too thin I want them to be thicker. All right yep that looks better even with half a second for the build up creates a quick powerful effect and two seconds it's really slow like real the gathering a lot of energy. Yeah I'm gonna leave it that one for now. Next we are going to see how to easily control the color of our AoE attack directly in the blueprint without having to change the color of the particle system directly.
36. 6.14 - AoE: Easy Color Control: So in order for us to control the color in the blueprint we need to open up the blueprint gap area of effect to the original blueprints. And we need to go to the construction script and as you can see here we have the scale. And that is why we can control the size of our Niagara system directly in the blueprint. So all we got to do now is first add a few variables we can click in this plus sign and the first one is going to be called change color 01 and make sure it's a boolean. And don't forget to turn on its visibility so it becomes public. Now I'm gonna drag it up here to the top and I'm going to add another variable for change color 02. I'm also going to make it public and make sure it's a boolean and I'm gonna push it below the change color 01 now we need two more variables. One is going to be called color01 and the other one color02. Both are going to be visible publicly. And the variable type it's going to be we can search for color make sure it's linear color for both and then we want to drag the color01 below the change color01 boolean and the color02 below the change color02 boolean just like these nicely well organize it. Now we'll right click the first node we are going to need is a branch. You can search for if or directly a branch. It's this one. And we can connect these nodes. Otherwise nothing will happen. Now what we want to do is drag and drop the change color get change color and connect it to the branch. Now if change color is true we are going to set a Niagara variable. We've got plenty of variables here that we can control. But the one we want is linear color right. And it's great. We can drag the area of effect Target down here and in variable name. It's very important that we get the same name as we use it in the Niagara System which is Color01 right. These name right here in parameters it has got to be the same and we can drag and drop the color01 . So it changes the color. Now we can copy and paste these nodes with Ctrl+C and Ctrl+V and what we want to do first is delete this color01. We want the color02 and connect it to the in value and in the variable name let's make sure it's color02 Color02 Don't forget that it's very important. Otherwise it wouldn't work. It's only going to be triggered if it's the change color 02. Boolean make sure to change these variables correctly. So once it changes the color 01 we want to go ahead and check if change color 02 is true. So we need to connect this but we also may want to change only the color 02 without change the color color01 So let's make sure that if change color 01 is false we still want to check if we want to change the color 02 like this. Alright. Looking great. This is the only thing we need so we can change color directly in the blueprint so let's save this. Let's go to our AoE fire column blueprint and for example let's turn on change color 01. Let's pick something blue. Yeah like this or make sure the alpha is 1 by the way. And let's turn on change color 02. And I'm going to make this one a little bit more towards purple. Yeah. That seems great. Now if we compile and save this and press play you will notice that the color is changing. It's working well but the colors are a little bit faded. So all we gotta do is come up here and multiply this value by 10 or by 15. Let's do the same here for the color 02 Maybe it's a little bit too much saturated but you get the idea. You can change the colors to whatever you want easily. And the cool thing is for example let's turn this off. Let's compile and save. And now our effect goes back to normal right. pretty cool. What we can also do and this is where it becomes super useful is duplicate this fire column with Ctrl+W and rename it for example to Arcane column and then we can turn on change colors 01 color01 and change color 02 And in GAP_SpawnVFX we can now add another element and assign the Arcane column. So first we got the fire column and then if you press D to go to the next. to the next we got the Arcane column which is quite not arcane. It should be a little bit more purple more like these. Yeah. Now that looks better. Maybe too much saturated but you get the idea. It's super useful to have control over the color directly in the blueprint. You can quickly create several variants and you can see which colors you like the most as well as the size. So yeah super useful stuff but we are still going to need a few more elements in our fire column. Make it look better. So let's see how to do that.
37. 6.15 - AoE: Shockwave: So once again we need either Photoshop or a similar software and we want to create a new file. Called Shockwave 01. And with the resolution of 2048 by 2048 pixels with a black background as well and fortunately this texture is super simple all we need is the ellipse tool. You can hold the left mouse button if you don't see it here and choose the ellipse to make sure the fill is empty and the stroke is white. With one pixel then more or less in the middle we want to press left mouse button drag and hold alt and shift to create the proportional circle with more or less the size. Make sure it doesn't touch the borders. To center this we can select the ellipse and the background with Shift by holding shift. And if you press V we get these align options up here that we can use to center our ellipse then all we gotta do is double click on our ellipse and down here in outer glow we want to turn it on for example have a spread of 15 and the size can be around 200 as you can see you can control it. I think 200 is OK also make sure to have the opacity at 100% In this case and then you can press OK and as you can see we have this hard edge this pixel and the way we can fix this is by going to the Fill of this ellipse and for example decrease it to around 68, 67, 66 maybe, until it pretty much disappears as you can see it's barely noticeable. And that's it. We have created our shockwave texture Now as always make sure to save this photoshop file. Hide the background and export this as a PNG. Alright now I'm going to copy the shockwave, open the textures folder of this project and paste with Ctrl+V this is going to import and then we need to create a new material we can duplicate the beam 01 Add with Ctrl+W and rename it to Shockwave 01 at let's open it up and let's turn on Main texture because we want to change it for the shockwave we had just created now back in our Niagara System we can go ahead and duplicate the 02 ground beam since it's already on the ground and we can rename it to 02_ShockwaveAdd not forget to change the material. Just like these for the shockwave and here we go. We have the shockwave in our fire column effects and the first thing we want to do is go to mesh size scale, set the first key to be all zeros and with right click let's select linear. We actually want a linear graph like this one, then we want to go to initialize particle and in the mesh scale we want to scale this up to around 3 maybe 3.5 let's see if it is too big. OK. That's way too big. And it's leaving way too much as well. So I'm going to decrease the lifetime to 0.3. Ok maybe that's too fast. So 0.6 seems like a good volume. Yeah. And I think the 200 pixels for the glow that we use in Photoshop is way too much so I'm gonna go back to Photoshop and decrease the outer glow to maybe around 160. I'm gonna save these export again and then replace the text or I have in Unreal OK. That seems better. But it's still way too bright and it should be smaller as well. Like 3.3 That seems OK. So in the scale color we want to decrease the first key to around 0.2 what we can also do is limit the scale RGB to 0.1 in the X Y and Z. And this will make it even smoother and it looks way better for a shockwave because we don't want to drag too much attention to the shockwave. Right. So yeah. That looks nice so let's go ahead and actually duplicate this shockwave with Ctrl+W rename it to 02_ 02_GroundCircleAdd and reuse it so we can have a better blend between the cylinder and the ground and the first thing we can do is increase the lifetime to around 1.2 And this is way too big so let's decrease the mesh scale to 2 in the X and in the Y at least for now and for the mesh size scale we want to have a look at the cylinder because as you can see the X and Y are a little bit up. They don't start at 0 and they also have an easy in and ease out as well. So back to our ground circle let's do pretty much the same. Increase this to around 0.5 And then set the key interpolation to alter okay. And it's almost there it's just a little bit too big. So I'm going to decrease it to 1.8 and we need to make it more visible with the cylinder. So let's increase the alpha of the scale color and also set the scale RGB to 1 1 1. And now we get. Now it's too bright. So I'm going to decrease to around 0.5 and adjust with the mesh size scale until it's touching the cylinder. Just around here and it's almost looking good. We just need to make the lifetime shorter around 0.9 seems like a good volume maybe 0.8 0.8 I'm going to decrease the size to 1.6 and also the Alpha because it is too bright and driving too much attention. All right that's looking nice. Next we can also reuse this shockwave but for the beginning we can go ahead and duplicate the 02_ 02_ShockwaveAdd so let's rename it 01. 01_ShockwaveAdd and since it's going to be for the beginning let's make sure that our loop delay is zero. The mesh size scale is the opposite. It goes from big to small. We are already starting to see something and the lifetime is going to be equal to the impact delay but what if we want this shockwave to go almost only at the end just a little bit before the impact what we can do is divide the lifetime. We are going to divide the impact delay by 2 and do the same for the loop delay basically divide the impact delay by 2 and as you can see, when the impact it's almost happening we see a shockwave appearing and we just need to switch the alpha of the scale color. This curve should be the opposite as well. OK and to improve the timing we can actually go to mesh size scale and decrease the last key to around 0.6 more a less like these. I think the timing now is great and it creates a nice anticipation for our AoE attack with just one texture. we made this much more interesting and we are still going to improve this with the next texture for the dissipation.
38. 6.16 - AoE: Ground Crack: So this is a more complex texture obviously but we are going to get it right. I really hope my tips and tricks have been helping you out but remember I can't really get your hands so I'm gonna try my best to explain to you as always. how you can create this one. So you know the drill in Photoshop, Krita or -- let's create a new file named Ground Crack 01 with a resolution of 2048 by 2048 pixels and let's start by adding a new layer. Then we want to pick the brush tool, B for shortcut and make sure we are using a white color and this is the simplest brush we have with zero of hardness more or less off around 170 pixels for the size and most importantly with a low opacity of around 20% Now without lifting your hand let's try and create a circle you can pass several times just like I'm doing don't worry if it gets messy the idea now is to use the eraser and remove the excess until we get something more or less like this it doesn't need to be a perfect circle it's a crack on the ground this will work as our guide I'm just gonna center this a little bit with Ctrl+T OK so the idea now is to create some zigzags similar to this one and you could do it just like I'm doing starting where I left and create another one and then another one as you could see they have more or less all the same space in between and I'm just going to make this small I think it's to be for example I don't have space to create the rest of the cracks and I'm going to keep on going on and create a few more cracks. I always from the center to the outside until I reach the beginning I'm just going to make this one a little bit bigger so it's more balanced the texture. Now from here we want to like connect these to the circle as you can see it doesn't need to be every little crack some of them. Now once again I'm going to center this with Ctrl+T and by the way if you want to create a guide you can go to view and down here in New guide you can choose vertical horizontal and insert 50 and then you can insert the % symbol and this will set the guide right in the middle of our file if you want to can do the same horizontal, if you think this will help you that's OK. If you want then hide them hide them, you can always go to view and in show you can disable guides OK so from here we are going to create some smaller cracks but this time from the outside to the inside but they don't need to go all the way to the middle as you can see they are finer and they just go a little bit to the inside it's like if we are extending the ones that we already have. And then we can do the same. Once again to connect to the other part now I'm just going to create some zigzags in the middle some small ones but sincerely I don't think you need that I'm going to erase them at the end so the next step is to, with a smaller brush create some small branches out of the cracks that we have created in beginning like 2 or 3 for each crack should be fine imagine if the crack didn't go in that direction imagine if it did go to the opposite direction for example OK. So once you have had these small branches as you can see we have some spaces between the cracks where we can add these small kind of triangles all around as well and then once we have reached this point we can go ahead with a smaller brush and pass almost in all of our cracks so we can highlight the most important parts and remember it doesn't need to be perfect as you can see I'm doing this very quickly. Just to add some more details to the crack and in the meantime I also add a few more branches just to tiny ones. We are going to pass these more or less everywhere. Even fix some of the branches. The next thing we want to do is pick the eraser too. And as you can see I'm going to delete these in the middle. But the interesting thing is that it has faded and that's exactly what we want to do to the extremities of each branch of each crack. We can use an opacity level off around 50 person and pass at the end of each crack as you can see. So it doesn't. So it becomes a little bit more faded it adds a nice smooth touch at the end and it's real simple we just need the eraser tool then with a bigger brush and with low opacity we want to pass in the most important parts once again to highlight the bigger cracks because they are kind of glowing. So we add this glow all over of our texture, all around of our texture and then we can also use the same brush to go from the outside to the inside just like these pass a couple of times all around. And then with the erase tool we are going to smooth these out and we end up with these cool texture now a quick trick that we can do is duplicate this layer rotate it, with Ctrl+T, more a less 45 degrees you know and then we can shrink it and try to connect it with the existing branches that we have creating these smaller details. And you also want to make sure that it's centered, aligned with the existing layer what you want to do next is also use the erase tool and kind of remove some of the brightest parts even break the circle until you end up with something like these with some more details in the middle. The next step and the final one is use the glow in the first layer the first layer. This outer glow is going to be subtle just around 15%, 20% of opacity and the spread is going to be zero. But the size can be somewhere between 40 and 80 pixels. It's really up to you once you think it's OK don't forget to save this photoshop file and then we can hide the black background and export this as a PNG so I'm going to copy and paste this to my textures folder inside my Unreal project duplicate one of the existing materials like the shockwave and rename it to ground crack 01 add open it up and change the texture as well. As you can see the really bright. I think that glow is too much anyway. Now in our Niagra System we want to pick the ground circle because once again it's already on the ground. And we want to rename it to 02_GroundCrackAdd and down here in the mesh renderer we need to assign the new material with a crack. And as you can see this is kinda too bright it feels like there is not enough bright spots. So what I'm going to do is go back to Photoshop and in the first layer with the brush. More or less of this size I'm going to add some bright spots with an opacity level off around 20% And I'm going pass several times in just a few areas because in my case I need to have a few more white spots once that is done I'm also going to decrease the glow. I'm actually going to try to disable the outer glow export this without the outer go and let's see how it's behaving. Copy and paste replace the existing file and as you can see now I have some brighter spots in the crack on the ground. And that's OK. I think it's looking nice one of the last things we need to do is adjust the size. In my case it's going to be more or less around 1.2 for the X and the Y and it needs to have a longer life time it's a mark that we are going to leave in the ground. It's bright for just a few moments and then it fades away yeah. That's kind of too much. So 1.2 should be fine yeah that looks OK. It's looking nice and it adds a really nice touch to the dissipation of our AoE we attack cool. Now one of the next things that we need to do is add some contrasts. So we are going to create a new shader to add some dark colors.
39. 6.17 - AoE: Alpha Blended Material: Alright. So in order to use dark colors we need to first create a new original material. So let's go to our materials originals folder and we can duplicate the additive Niagara which we are going to rename to AB which stands for Alpha Blended let's open it up and we only need to go to the blend mode and switch it to translucent then save it and that's it. Now let's go ahead and duplicate the ground crack 01 add and simply switch the name to be AB at the end so we can distinguish them. Once we open it up. We can go to parents and choose the AB Niagara visually. Nothing changes but if we go back to our Niagara System let's first go to the preview scene settings and turn on show floor. Otherwise we can't see the mark will live on the ground. And just to show that additive shaders cannot reproduce their colors. I'm going to go here to the Loop panel. And as you can see if we try to decrease this to a darker color it basically only fades out the textures so yeah we need the alpha blended shader. So let's go ahead and duplicate the ground crack at and rename it to be 02_GroundCrackAB and the first thing we want to do is go to mesh render and change the material to be the AB version of the ground crack and we need to set the order to be -1. So it's rendered below the additive shaders below the crack. Next we can go ahead and increase the lifetime since it's going to leave a mark on the ground and then we want to reset the color because we are going to use black one we can set this to 0 0 0 and we can clearly see the mark on the ground. And if you play with Alpha we can create these nice effects. So let's go to scale color and in the scale Alpha the curve let's increase it to 1.5 and let's also push the key a little bit forward because we want this mark to fade in. So let's add another key and push it to 0. Alright. Looking nice maybe 1.5 for the Alpha is a little bit too much so let's decrease it to around 1 OK. That that fits better it blends in better. Now let's take advantage of this new shader and let's also duplicate the ground beam add and create the ground beam AB version. Let's go down here to the mesh render and if you press on this lupe icon It goes directly to the material and now we can duplicate it and change the name to be AB at the end then in parents we also want to select the AB Niagara version so let's set the Order Layer to be -1 and I forgot to change the material but I will change it in a moment. And then we want to increase the size of these. Otherwise it won't be visible, to around 2.5 in the x and y. And we can also resest the color so we can choose a dark one and it will be cooler if we could show the ground beam AB version first. A little bit before. So that's why I'm pushing this key from the scale. alpha to around 0.25 and at this point I realized that I forgot to assign the AB version so I'm going to switch it right and if I unsolo this the changes are noticeable. But we still need to increase the size of the ground beam AB ground beam AB to around 3. 3.2 looks better. Alright. So it adds a nice touch it also adds contrast because if you have a lighter ground or background and if you only use additive shaders the effect wouldn't be really visible. So that's why we also use the AB version, the Alpha Blended version then what we can also do is duplicate the sparks Add and create an AB version and I also notice that at this point, that we never assign the additive material we still are using the one. So I'm going to switch that in the case of the Alpha Blended version I'm going to assign the beam 01 alpha blend and in the sparks add I'm going to assign the Beam01Add Now back to the AB version we can reset the colors and assign a dark one. So it's 0 0 0. And as you can see it adds a real nice touch. I don't think it's necessary to have the same amount in the spawn rate so I'm going to decrease it to around 40. Yeah. OK. And we can also make them thicker instead of being so thin. So I'm going to increase the X okay. That looks nice. Then we can also do the same for the sparks out and create an alpha blended version so duplicate it, rename it and then assign the the Beam01AB I'm also going to assign the Beam01Add to the sparks out Add because I'm still using the default material which we shouldn't. On the sparks out Alpha Blended version I'm going to do the same changes. Basically reset the color and assign a black color I'm also going to make the X bigger so they are all big thicker and then decrease the spawn burst instantaneous to be between 10 and 15 okay. That looks nice. It adds a nice touch. So the next thing we can also do is create a version of the 02_GroundBeamAdd just like these. And also it's the beam 01 AB material increase the lifetime to be 1.5 and reset the color to a black one. And then increase the size as well to around 3 what I'm also going to do is reset the curve of the alpha. So the first key is 1. OK. Full opacity and adjustable. The curve. OK. That that looks nice. It adds a nice contrast to the dissipation but at this point I noticed that the ground crack AB should live longer 2.5 Seems like a good idea. OK cool. I also noticed that the ground crack additive version should live just a little bit longer like 1.35 1.35 1.35 and we need to change the alpha so it fades in. Because as soon as we have the climax, as soon as we have the impact we see the crack on the ground and we don't actually want that so let's fade in The Alpha just like these. Add another key the first key is going to be zero. And as you can see in the moment of the impact we don't see the crack but just after a few milliseconds we see the crack appearing and it makes much more sense. Yeah that, looks really nice and these small details makes the whole difference in our end product. OK. So let's also go ahead and create an AB version for the Cylinder which means first we need to duplicate the original additive scroll which is going to be called ABScroll we need to open it up and change the blend mode to translucent save it and that's it. Back to the materials folder. The cylinders are using the fire impact 01. So that's the one we want to duplicate rename it to AB at the end open it up and change the parent to be the AB scroll so let's go ahead and duplicate the 01 cylinder Add, rename it to be CylinderAB. Down here in the mesh renderer switch the material to the AB version we can also reset the color so it's black and this is pretty intense as you can see. So let's make sure that this fades in, with the curve of the alpha like these. OK and let's also make sure that the order is -1 so it renders behind the additive Cylinder. OK that's looking nice. We can increase just a little bit. The end. The last key of the scale alpha so it doesn't disappear immediately. And we can make it a tiny bit smaller like 0.9 on all axis. Yeah. I think it adds a really nice touch it makes a nice contrast cool. Now let's do the same for the 02 Cylinder duplicate it, rename it change the material down here and also change the order to be -1 and then reset the color. So it's black in what we can do here is decrease the dissolve amount instead of being 6. It can be 4, because it disappears abruptly and instead of having a lifetime of 0.4 maybe you can increase it to 0.6 and in this case we need the scale color so we can control the fade out. Otherwise the dark becomes too predominant and we don't want that. We just want to add a nice touch of dark to this effect right. And that looks really cool. We can actually make it taller a little bit like 1.6 instead of 1.4 yeah. And if we want this to follow just a little bit more the cylinder add. We can go down here to the mesh size scale and increase the last key move it just a little bit up not too much. That's enough. Yeah okay let's say it looks in the scene. Yeah the dark colors adds a nice touch. That's one of the problems with beginners in visual effects. They most of the times forget dark colors the importance of contrast. And yeah I think we nailed it. Next we are going to add the really cool touch we are going to add some nice spirals to these.
40. 6.18 - AoE: Spiral: Okay so in order to add a spiral we need to go back to blender and in a new file let's go ahead and select everything and press DELETE which Shift+A let's add the plane and then go to the modifiers because we want to use a Screw, for this one. This modifier is super useful because if we start increasing the screw to around 15 or 10 you will notice that we create these spiral and just out of curiosity the steps will add more faces as you can see. But let's leave it at 16. And we also have the angle that allows us to rotate these more or less. But I think that 360 is enough and we also have the iteration that simply repeats what we already have. But let's leave it at one then we can press Alt+C so we can choose mesh from curve and it will transform this into an object. So let's go into edit mode with Tab and with Ctrl+Tab. Let's choose faces. So while holding Shift+Alt we can select one of these stripes and then with Ctrl+I. We want to select the inverse and delete it because we don't need this whole geometry. We just need one stripe one spiral. Let's just see how the UVs are and we can do that down here. Let's drag this right to the corner like this and up here we can select you the editor. All right so we want to turn on these little icon so we can see what we are selecting. And as you can see these face in my case represents the bottom of my spiral but we don't want this to be in the side we want this to be in the bottom. So I'm going to rotate this -90 degrees right. Just like this. As you can see, looking great One of the final things that we want to do is with Ctrl+R divide this in half, otherwise whatever texture that we apply here it would be too stretched But first let's turn on Live Unwrap and then with Ctrl+R we can cut in half just like these. And we also wanna go back to object mode with Tab and with Spacebar. We can search for shade or smooth so we can select shade smooth. Right. Looking good let's just go back again into edit mode with tab and with Ctrl+Tab We want to select vertex what we want to do is select the top vertex these one, and then press O to turn On proportional editing and then press S to scale. And if you scroll up and down and you can increase the area of effect of the proportional editing more a less to around these size and then we want to scale this down to 0. You can literally press 0 and then enter. So we get the pointy end just like these. In the bottom part. We want to do the same but not too much and with less proportional. Editing then we can go ahead and rename this to Spiral01 okay. We also want to save this blender file with the same name spiral 01 and before we export this let's actually select the top vertices and drag them with G and we proportional editing on more towards the center and at the bottom we want to select these vertices and drag them away just a tiny little bit from the center. Okay. Looking good. Let's save this and then export as an FBX with selected objects turn on. Now we can copy and paste these to our models folder just like these and this is going to import we can say import all. Don't worry about these warnings nothing special and that's it. We have our spiral in unreal Now back to our Niagara system what we want to do is pick the 02 Cylinder add and press Ctrl+W to duplicate it we can rename this to 02_SpiralAdd which is the last one and in mesh renderer we want to assign the spiral mesh that we have just created which is down here this one okay. Looking good. I think it's really big but we'll see in a moment. What we want to do also is change the material to the Fire Impact 02 Scroll 02_ScrollAdd. This one it fits well. We don't necessarily need to create a new texture if you want to create a new texture you can go ahead. No problem. But this one is fine. OK. So let's increase the spawn count we actually want a uniform ranged int between 3 and 4. It's enough for now. Then the lifetime is also going to be a ranged float but between 0.4 and 0.9. Yeah and for the color we can reset this because we want to use a range of linear color so we can assign the Color01 and the Color02 as well looking nice for the size. Let's first Unsolo this Yeah it's really big. So maybe around 0.2 for the X and Y and 0.5, 0.6 for the Z yeah it's too big. 0.4 should be fine for the Z But we want to make this little bit random So let's convert this to a ranged vector. And in the minimum I'm going to insert 0.1 for the X and Y. 0.3 for Z and for the maximum 0.2 for the X and Y and 0.4 for the Z I'm possibly going to change this in a moment but that's fine for now. Next we want to add randomness in their rotation in their start rotation. So for that we need to go to the particles spawnp and search for mesh and we want to use the initial mesh orientation. We don't want to use the orientation. We want to use the rotation one. So let's turn off orientation and turn on rotation then we want to convert this to a Ranged Vector because we want randomness only in the Z. So let's set the X and Y to be 0 and we can leave it as it. 0 in Z for the minimum and the maximum Z at 1 as you can see we have a nice randomness but the spirals are too close. And if you increase the X and Y they don't look that good they get really thic and it doesn't add a nice touch so we actually need to go back to blender and in here before we proceed we want to turn off live unwrap unwrap then we want to select this button vertices and with proportional editing (O) we want to drag this a little bit more I'm dragging always in the X as you can see and I'm going to do the same for these vertices in the middle. Drag them a little bit in X away OK that looks fine then by holding Shift+Alt at the same time I'm going to select this vertices from this side and from the other side as well then we can press two times G or one time be careful so we can make the spiral a little bit thinner. At least I think it will look better. Okay that's nice. I think these top vertices. Yeah okay they seem okay. We have messed up a little bit the UVs but it's simple to solve. We can press Ctrl+Shift+Tab and switch the snap to be in vertex mode. And then we can select these vertices press G and then X and by holding Ctrl we can now snap it to the vertices below. Always dragging with G. Locked in X axis. And then press Ctrl to snap them in the vertex below then we can turn on constraint to image bounds in the UV. And scale this only the X and that's it. Now we can once again export this is an FBX I'm going to replace the existing one just like this copy and paste replace. Yes and yeah it's much better now. They are thinner. The spirals. It becomes a little bit more elegant. Alright. Looking good. I'm just going to change the minimum mesh scale to be 02 in the X and Y and the maximum to be 0.3 0.3 okay that's looking nice. I think it fits well with the effect we currently have maybe it's too tall. So I'm going to decrease the Z. yeah like these Okay looking nice one of the last things that we can do is add a little bit of rotation so let's go to particles update. Press the plus sign and search for rotation and we want to use the add rotational velocity but we want to drag this above the solver rotational forces and velocity okay. Just like this. Now what we want to do is convert these vector to a curve and let's like all of the first keys and set them to zero then hide the x and y and insert a new key around 0.2 and push the first key just a little bit up like this and then set key interpolation to be in Auto mode so we can create these curve. Let's see how this is looking. That's super fast is spinning really fast so I'm going to decrease the first key to be 0. 0.2 in value and fix the handles alright. I think this is looking really nice. I really like these spirals in the middle I'm just going to make sure that they're a little bit below. So I'm going to add position particles that position in the particles down and break these vector so I can multiply the Z with the scale, the user.scale and then the B it's going to be something really small like -10 seems to be enough maybe decrease a little bit the lifetime just so it looks like it's coming from the ground. Alright. Looking awesome really cool. I'm really enjoying this spiral. I think it's looking cool Yeah that's looking really nice. Don't forget to save these because next we are going to create the final adjustments to this effort. We are almost done. We just want to rectify a couple of things.
41. 6.19 - AoE: Final Touches: Alright guys we are finally arriving at the final touches where we are going to add a few more elements and adjust some values as well. The first element that I think it would look great is some vertical sparks. So we can start by duplicating the 02 sparks out add and rename them to 02_SparksVerticalAdd right. And the change is very simple. Let's go to our sphere location and instead of shrinking this in the Z we want to do the opposite. We want to shrink the X and Y and Z is going to be a little bit bigger. And the difference that this will make is instead of having some horizontal Sparks We are going to vertical sparks going up. It's just a nice little touch and pretty simple to do. Let's just decrease the velocity so the minimum is 10 and the maximum around 150. All right. Looking great. Now we also want some particles at the end floating it adds a nice touch to the dissipation and they are simple to add and we can duplicate the 02 Sparks Vertical add and rename them to 02_ParticlesFloatingAdd I'm going to solo this and we actually don't want to use a sphere or location we want a cylinder location not forget to disable the sphere location in the cylinder location module we want to multiply the cylinder height, A is going to be 10 and B is for the scale the user.scale we want to do the same for the cylinder radius but A is going to be around 70 should be enough to fit in our AoE we attack let's also disable the add velocity model from point and let's not forget to change the alignment so it is an Unaligned for the sprite size we want to reset this and convert the vector to, to a float and it's going to be a ranged float which means we need to multiply the minimum and maximum separately with the User.Scale for the minimum the A is going to be 1 and for the maximum the A can be around 13 it seems like a good size or right just like these let's just increase the lifetime the minimum and the maximum to be between 1 and 2.4 Yeah that looks OK and as you may notice some particles are intersecting the ground and we don't actually want that. So in the particle spawn let's search for position and we need to break this vector and multiply the Z the B is going to be for the user.scale and A can be around around twenty seems like a good number so they don't intersect the ground. So in this case instead of using velocity in the particle update we want to add velocity as soon as the particle spawn so let's search for velocity this one is module and in here what we want to do is convert these to be a ranged vector and after making a few tests I think that the medium in the X and Y can be -40 and the Z -10 for the maximum we can set 14 the X and Y. And around 40 for the Z. So they mostly go up instead of going down and it adds a nice motion. I think they look great with these values but they may look better if we add in the particle update a sprite size scale let's just convert these to a float and then convert the float to a curve. So basically they shrink exactly like these from big to small. If you want you can convert these to Auto, the interpolation and create these curve okay. That looks nice if I Unsolo this. As you can see they look great. And the position the they are starting a little bit too high. So maybe 10 seems OK. Seems better and for the velocity some of them are going down too much. So I'm going to set this to -5 in the Z and I'm going to make them go up a little bit more. So probably 60 seems like a good amount. Alright. Looking good I think that's it for these particles. It adds a nice touch to the dissipation. Now what we want to do next is in the anticipation and we want to also add a circle to the cylinder so it blends a little bit better with the rest of the effect for that we can actually start by duplicating the ground beam add 01 ground add and rename it to be ground circle add So in here we want to first change the material. So it's the shockwave one the circle as you can see it's all a bit too big so let's decrease the size to be like 1.5 maybe 1.2 here in the x and y that fits nicely and it seems like this one doesn't need any more changes. It's fitting really well with the rest of the effect yeah let's save this. Don't forget to save from time to time for the next little detail that we can add is related to the fire impact the 02_FireImpact impact we want to have some flames that end in the ground. So what we are going to do is duplicate this one we can solve this. And the name can be as it is. Maybe just add 2 in the end so we can distinguish it and first we want this to live a little bit longer and to be random something between 0.8 and 1 then we want the Y in the sprite size to be way less like 200 and then we also want to go to the sprite size scale and push these first key up. We want this to start already with some size and then convert the key interpolation to be now the then we want to increase the spawn count. We want it to be Ranged between 2 and 3 and actually for the sprite size we want this to be random between these values. Seems like it fits well at least in my case. And I think that's it. It seems like it's fitting really well we have that fire in the ground that end is just a little bit for the dissipation to be improve it looking really cool. Now let's improve the mark we have on the ground more specifically the ground crack and we can for example use the scroll shader to add a really nice touch. So with the ground crack selected we can for example click on this lupe icon. Now we can duplicate the ground crack 01 and add scroll at the end so we can distinguish it and the parent is going to be the additive scroll Niagara in here we don't necessarily need to change anything if you want to change something you can go ahead. So let's save this. Let's go back to our fire column and for example now we can assign the material we have created the ground crack add scroll and the cool thing is that we can control these with a dynamic parameter module the column multiply is going to be 1 and the destruction amount has to be really small because it is a crack on the ground we don't really necessarily want to see it move we just want to add a little touch of distortion like 0.01 and then we can solve this with a value of 2 or 1 and we actually need to go back to the material properties and decrease the speed just like this because we don't want to see this move like I said too much maybe this amount can be 1.5 you can play with is values of course we can actually use a curve in the color multiplier this time that starts at the value of 5 and goes all the way to 0 and as you can see it does a really nice touch let's save this let's see how it's looking with the rest with all the changes that we have made as you can see I think we have done a great job if you have followed this far I hope you enjoyed the effort you are and I know this is a field with many questions and what not but if you have come this far and finish an effect like this one it's a great sensation and I hope you have that sensation right now with you. I hope you have a great feeling of accomplishment because you have just made a great effort and I hope that you want to accomplish even more and you are still going to learn more because in next chapter we are going to see to create projectiles.
42. 7.1 - Projectile: References: Welcome to this new chapter. The projectile chapter where we are going to see a very different type of effect compared to the AoE attack that we have done. But we still can combine both. As you can see and we get this area of effing attack that is used as projectiles coming from the sky which is probably going to inflict damage to an enemy inside that area. If you go to my channel, you will find quite a few examples as you can see of projectiles showcases for Unreal and for Unity. It doesn't really matter the engine We just want to get some reference and you can find plenty of cool stuff here. If you goto my arstation page you will also find quite a few packages that contains several projectiles and projectiles can be anything almost anything from a simple bullet to a carrot to a laser. It can be a special skill like a fireball, and orb of energy or even a poison ball. It can take so many forms. And that's the beauty of projectiles. It's just awesome to create them. And you get a lot of creative freedom if you want to go to Pinterest you can always search for fireball VFX for example and you get some pretty examples too. But don't forget to never copy stuff that's generally a bad thing a bad idea only for academic purpose for you to learn. Because eventually someone will notice. And that's bad for you. Only for you to learn to try to dissect the effects and see how they're made. And there's also a bunch of styles as well for projectiles and for effects in general. It's really an enormous world of possibilities. So get creative get out of your comfort zone and try something new. But for now let's learn how to create your first projectile and let's do a very quick sketch to see what we are going to need. It's always helpful to sketch before you proceed to your engine, Unreal or to Unity sketching we always bring forward the elements you need.
44. 7.2 - Projectile: Sketches: So once again I'm using Photoshop and I'm going to create a big file like this one rename it to projectile sketch and the idea here is to paint the background to gray color and with the simplest brush in white or in black it's whatever you like. The idea is that we are going to need 3 distinct effects for our project. One it's the projectile itself. Then we need the impact that the projectile will make when it hits something and then we need the muzzle which is a very quick effects that happens in the hands of the character or in the fire point of a weapon. So these are the 3 distinct effects we need. The first one the projectile We could make it pointy like this one and then we would have a trail with some particles floating stretch stretched particles but let's make it round in the beginning. I think it looks better. So yeah something like this seems fine it's going fast and it's releasing particles leaving particles behind the the trail as well. And for the hit, we want basically something something inspired in the projectile so maybe a fire texture with a shockwave. Yeah shockwave will look cool and some particles as well stretch at particles probably some particles floating at the end. And for the Muzzle we can reuse that texture maybe make it smaller add a few particles as well here with the idea now is that we can see what we need for example how do we make this part of the projectile. Well we are going to need a capsule mesh that we can do in Blender and this capsule will probably have projectile texture a fire texture. So that's two things we need distinct thing, we need the trail also needs to be a texture and trails are made differently than what we have seen before. But I will show you in a moment how and both the projectile texture and the trail texture needs a scroll shader material so we can distort the texture so it looks a bit fiery. We also need some particles some of them are going to be stretched and for the hit well we need the impact. texture the main one we also need to circle for the shockwave. The particles as well and maybe we can add a shockwave as well to the muzzle. Why not. That may look cool. At least we have something to start with. Basically the capsule mesh the projectile texture the trail. That's clearly the main elements of this effect and that's why we do sketches even though we already know what we are going to do in this course, in your future. It will help you to better understand what you need to start with a new effort. Alright. So let's start creating our projectile.
45. 7.3 - Projectile: Getting Started: Alright. So the time has come for us to see how we can create some cool projectiles. Attached to this lesson, there is a zip file and inside it, you will find the VFXGuide_Projectile. You can open up this project and it's basically a very similar scene to the AoE attack one. We have the GAP_SpawnVFX where there is no projectile attached at the moment. This time we can also control some camera shake this camera shake for when we are firing and for when the projectile hits. We are going to play with that in a moment in the textures we have the beam 01. If you want you can import the one you have created of course. In the models we have the plane 01 nothing special and inside materials we already have the Alfa Blended and the Additive versions of the beam 01 and I have also added the original materials inclusive the scroll one if you want. Once again you can import your material the one you have created. If you feel like it that's totally fine. Then in blueprints we got the GAP_Projectile and the GAP_SpawnVFX that we are going to have a better look in a few moments. So let's go ahead and start already by creating Niagara Emitter you can start with a simple sprite bursts and rename this to be NE_Capsule this one is going to be for the mesh of the projectile so we don't need the sprite render we need indeed a mesh renderer and up here for now in the particle mesh let's assign the plane 01 and let's turn on override materials and assign the beam 01 add. Alright. Nice and simple nothing special. Let's save this and let's go ahead and already create the niagara system an empty system by the way for the projectile_fireball and inside this system we want to go to Textures we want to add a new emitter in the track the one we have just created, the capsule one right. Nothing special so far let's also save this and go back to the editor because we are going to need another Niagara Emitter. We can also start with a Sprite burst with the simple sprite burst that's totally fine this this one is going to be for NE_Particle and it's going to be as simple as these we are just creating some place holders so let's also go ahead and create a new Niagara System but this time for the Hit_Fireball yep let's open it up and add the emitter that we have created NE_particle let's just decrease the lifetime to be 0.2 and the sprite size we are going to convert these to a float with a size of around 300. Let's save it. Go back to the Editor and we can already create the Niagara System for the muzzle_fireball. In here we can also add the Niagara emitter particle and let's also save it. Now, we are doing this because, this will allow us to create a child blueprint from the GAP_projectile let's just rename it to projectile_Fireball let's open it up and it shouldn't open like this. Let's close it and open again. This is how we want. The blueprint child to appear. And down here we can assign a projectile Niagara. So let's assign the one we have created let's also assign the Hit to the VFX Hit Niagara and the muzzle to the muzzle. Alright down here we can control the scale, the rotation which we probably don't need, the muzzle offest that we can offset in the X a small value like -50 should be fine. The hit impact offset we don't need that. And the projectile speed can be for now 1000 and 500 and we want to add a delay of 1 second before destroying the projectile collider radius can be 64 with default value and the accuracy amount can be just so it doesn't go always to the same position cool. Let's save it and we can go back to the editor and in the GAP_SpawnVFX. We can already add the projectile fireball we just created. And if we test these out the first thing you will notice is that the component is moving but not the emitter. As you can see, not the system, because it is not set to local. So let's set it to local. In the Niagara system projectile fireball right here. OK. If we save this and it hits the invisible wall and we see the impact. But if you look closely you will also notice that the projectile stays there for a few. For one second. And then it is destroyed. And we don't want that. We want to go once again to the Niagara System projectile and in the emitter update we got this autocomplete that we want to turn off. And we want to turn on complete on inactive, because as you will see in a moment in the blueprint once the projectile. hits the wall. We set it to inactive And if we turn this on the capsule will disappear. But the projectile will still be there. And that's going to be useful once we have some particles because we want to destroy the projectile. But we want to leave the particles behind. As you can see now once it hits the wall it completely disappears. And that's great. That's what we want will by the way. If you increase the camera shake hit strength to around 2 every time the projectile hits the wall it creates a nice impact. If you want to play with that that's totally fine. All right. So we have the basics set up for our projectile to be shot. Let's just have a quick overview of the blueprints. What really matters for us is the GAP_Projectile. Here in the event begin play. This is all to great accuracy. So it doesn't always go to the same spot if the accuracy is different than 100. Then we spawn the muzzle as soon as we fire. Right. And then if the warm up time is bigger than 0 we wait that time before spawing the projectile. It is helpful to create these type of projectiles like these for example then we got the spawn projectile where we set the template to be the one that we have selected in the editor. And we also set active the projectile Niagara and finally add movement at the end. Then we got the stop projectile where it simply deactivate the projectile Niagara and it stops the movement. And then we got the spawn muzzle which is pretty much the same as spawn projectile down here in the event actor begin to overlap. Basically when it collides with something, we set active the hit Niagara effect that we have chosen in the blueprint we set its location. We had some camera shake and we stopped the projectile which deactivates the projectile and the rest is not much relevant if you want to have a close look go ahead. Now most importantly is the construction script. This is where we fill that the template with what we have selected in the blueprint for the projectile for the hit and for the muzzle. We also got this projectile movement component that already comes with Unreal. It has a bunch of options for projectiles and it's really helpful. Right. So this is where we set the speed of the projectile that we have selected in the blueprint. We also set the sphere radius here the collider and then we deactivate everything. Otherwise they spawn right at the beginning and for example in the case of the Hit we don't want that. And next we got a similar setup that we have used in the AoE attack blueprint for the scale it's going to look for a variable called scale. But in this case we set it directly to the projectile to the hit and to the muzzle at the same time. And lastly this time we got 3 colors that we can change for the projectile, for the hit and the muzzle as well. It's going to look for the keywords Color01, Color02 and Color03 once again it's a very similar setup that we have used in the AoE attack and that's it for the overview of the blueprint. And we also have created already the place holders, the niagara systems that we need for the projectile, for the hit and the muzzle. Next we are going to start improving this. Of course we need a better projectile mesh and that's where we are going to start.
46. 7.4 - Projectile: Projectile Mesh: So to create the mesh for our projectile we need Blender once again and we can go ahead and select everything with A and delete it. And this time with Ctrl+--+A we can start with the sphere and then here you can control the segments and the rings of the sphere. Once again if you are developing for mobile you should pay attention to the amount of faces you are using. You can't use that much. But, let's leave it as it is and let's go ahead and press 1 so we can see these in front orthographic view and then we want to press Z so we can see through the mesh and then press in Tab to enter in edit mode and we want to go ahead and with Ctrl+Tab we want to choose vertex then with A we want to unselect everything and with B we can go ahead and select these vertices down here and then delete them. Cool. Now let's select the top vertex this one,let's press 0.2 turn on proportional editing and we g we can push this a little bit up in the Z axis you can press Z to lock it in the Z axis. So it doesn't go to the sides and you can also scroll up and down to control the area of influence that the proportional editing will have. As you can see and you want to push it more or less around here something like this. We can also go ahead and while holding Shift+Alt select this bottom vertex and shrink them just a little bit with S and then push them a little bit down. Alright. Looking good we can get out of the edit mode with Tab and with Spacebar we want to go ahead and search for shade or smooth. Basically we want to smooth this mesh just like this. Looking good. Now let's once again enter in Edit Mode with Tab and select everything with A and then press U so we can unwrap this mesh and in this bottom left corner we want to click and drag just like this to create the new window appear we want to choose UV Editor. And this is the type of UV we want to end up with. As you can see we don't need to do anything else. So that's basically it. Let's just rename this mesh to be capsule 01 save this blend file and up here in file. Let's export this as an FBX. You can turn on selected objects and that's it. I'm going to open up the models folder and copy and paste the capsule mesh just like these. I'm going to say import, import all. Don't worry about this warning once again it's nothing special. So let's go to the Niagara System of the projectile fireball and in mesh render we want to switch the particle mesh with the capsule we have just created. Great and let's just see how this is behaving in the scene. By the way so yeah. As you can see it is not facing the right direction so we need to tell the particle as soon as it is spawned, that the initial mesh orientation more specifically the rotation not the orientation, is going to be -0.25 in the Y axis and if we save these that go back to the editor. As you can see now it is facing the right direction and that's cool. It's starting to look like something. Of course we need a better texture for these which we are going to see in a moment but first let's see how we can have a cool trail to these.
47. 7.5 - Projectile: Trail: Alright so we need a new emitter and this time it's going to be a different one. We can start with a static beam that we can name NE_Trail and the first thing we want to do is set the color to be white. We don't want any color in the beginning for a little while and that's it. We can save this and then go back to our Niagara System projectile Fireball and add in the track the emitter we have just created which is the NE_Trail Let's just rename this so it doesn't become too disorganized. And we are starting to see the beam the trail in this case but it is not facing the right direction. Oh and by the way if you want you can clamp the timeline so it doesn't disappear and appear constantly so as I was saying the trail is not facing the right direction and we can fix that in the Emitter update in the beam emitter setup, the beam end in the X is going to be -250 and it's really thin. This as you can see and we can control the beam with through a curve. This is where we control the shape of our trail and we can remove the first key and then create a curve similar to this one create the user parameter a float for the scale and we are also going to need a linear color so we can already add it. We can name it Color01. So it matches the name of the blueprint let's just set the default value of the scale to be 1 and in this scale curve we want to multiply these with the user.scale and we can leave the B at 1 because we are going to control the size of the trail through the curve so, let's click on this arrow and down here in make we want to transform this to a new user parameter if you go to the parameters. Now we want to rename these to trail white and in here we can add 2 keys one at the end and one at the beginning the one at the end is going to have a value of 0 but the time is going to be 1 and the first key is where we control the size. So let's set it to around 130. And by the way you can press F to focus the wall curve. Now if we set this to Auto we can start controlling the shape of our trail. Right. Looking good. Of course we are going to improve this, but if we try out these in the scene we are now seeing that the trail is left behind actually and you know why. Because we need to turn on local space. So let's go to the trail. Add in the emitter properties up here and turn on local space and say it again and now it follows the projectile. But it isn't destroyed with the projectile. And we have already seen why this happens right. You remember. And that's because in the emitter life cycle we want to turn off auto complete and turn on complete on inactive. Because as soon as the projectile hits the wall we set it to inactive in the blueprint as we have seen. Alright. So next we are going to start to improving this. More specifically we are going to create the projectile texture. So let's see how to do that.
48. 7.6 - Projectile: Projectile Texture: Alright. So for the projectile texture we need Photoshop again or a similar software. We want to start with a new file. Call it projectile 01. With 2048 by 2048 pixels. And with the black background as well. Let's create a new layer with Ctrl+Shift+N if you are in photoshop and with the brush tool. B for shortcut let's make sure we choose the white color and that the hardness is set to 0 and with around 20% of opacity so if you remember correctly the uses of our projectile are in a circle shape. The UVs something like this as you can see. So the idea is that we start painting from the middle to the outside. If you want you can create new guides in view down here we can create one vertically and we can set it to be 50%. So it's in the middle just like this and we can do the same horizontally and this will help you out and let's also not forget to turn off snap. Otherwise every time you paint it will snap to the guides. And this will help us to understand where is the mid, right. So we want to start by painting some zigzags like this from the center towards the outside. Make sure you don't touch the borders and you want to create several of these in all directions but always starting in the middle. Right. Something like this looks great. I'm going to increase the size of the brush and paint two or three times just in the middle to make it brighter to make it pop up if you want. You can also create a new ellipse with the ellipse tool and by holding Alt+Shift more a less in the middle we can create the proportional circle that will work as a guide. Don't forget to set the fill to empty the stroke to white with one pixel. Back to our first layer. Now I'm going to erase the parts that go outside of the circle. Otherwise they will be clipped when we apply this to the project. And I'm going to pass also a few times in all of the points that we have created. Just to fade out now with a smaller brush the idea is to create a few more of these strokes. You don't need to be super precise but make sure you always start from the middle. We want the brightest spot to be in the middle once that is done we can go ahead and pick the smudge tool with around 50% for the strengths and with a small brush size. We want to go ahead and push some of these whites outside in this direction and we want to take advantage of these tool and also add a curvy feeling to these. It will mix everything up and it will look better in the end you know just keep on pushing some of the whites towards outside. And if you want to hide the guides by the way you can always go to view and in show you can turn off guides like these I'm also going to do the same but this time in between the zigzag that we have created just like these just so it looks really bright like a flare or something like that of course. This requires us to pass several times to create this. That's why I've sped up a bit the video. But you understand the fundamental idea right and then again I'm gonna pass a bit more with the smudge tool, just to push some more whites outside just to create some more spikes as well. You get the idea right. As you know I can't really guide your hand, I just can give you a few tips and tricks to help you out so once you think it's looking OK. Something similar to this. We can go ahead and save this photoshop file then we want to hide the black background and export as a PNG and I'm going to copy and paste to my Textures folder of the projectile project just like these I'm going to say yes import and then we need to create the new material and we can go ahead and with right right click in the additive scroll. We can create the material instance right. I'm going to rename these to Mi_Projectile01_AddScrolll so we can distinguish it. And for organization purpose let's drag this to the materials folder because this one is not original. It is just an instance. We can open it up. And in the main text we want to change it. So it's the projectile texture and we can leave for now the rest as it is. Back to our Niagara System projectile, in mesh renderer We can go ahead and now assign the material we have created with the texture of the projectile and it's starting to look really cool. We just need to make a few adjustments. For example we don't want to use a scale color. So what we can do, since we can't remove it here is go to the original niagara emitter The NE_Capsule and remove it here and then save then what we want to do is go to the particle spawn and add a dynamic material parameter. So the color multiplier is going to be 1. And now we can have a better perception how the texture is looking it's looking really great The Dissolve amount. I'm gonna set it to 1 and the distortion amount around 0.15, 0.1 seems to be enough. Of course you can play with this values. You can also try different noise textures for the dissolve and for the distortion it's really up to you to create something that you like and in my case I think the capsule is a little bit too big. The projectile. So I'm going to go to the initialized particle and in mesh scale I'm gonna set it to 0.8 0.8 in the X and in the Y and 0.9 in the Z and I'm probably gonna change this later anyway. Let's see how this is behaving in the scene okay. It's look interesting of course that trail is really, horrendous but we are going to fix that. It's a place holder. After looking closely I noticed this. The texture is being clipped and we could simply scale it down in Photoshop. But what I'm going to do is is erase a little bit more the pointy ends of the projectile texture and then with a big brush size and with lower opacity I'm going to erase all around the texture just like these as you can see the idea is to fade this out even more cool once that is done I'm gonna pick the brush tool and add just a little bit more of white in the middle and that's it I'm gonna save this photoshop file export the texture and replace the one that I have Unreal. The idea was also to fix some of the clipping that was happening here and now it no longer happens and it looks great. Cool in the next lesson we are going to see how to create the trail texture because it is just a place holder for now. So let's see what we can do.
49. 7.7 - Projectile: Trail Texture: Alright. So for this texture we are once again going to need Photoshop and we want to create a file with the same resolution 2048 by 2048 pixels and we can name it. Trail 01. We also want to create the new layer, choose the brush tool with a white color with hardness set to 0 And with the opacity around 20 the same settings we have been using. And the idea is very simple here. While holding Shift and more a less in the middle with a brush size around 700 pixels we want to create an horizontal stripe similar to these. And then with a smaller brush size around 500 we want to once again pass while holding shift. And then with a smaller brush size we can pass again and in the end we can use a big brush size just to add a little bit more white all over the stripe. And if you wanna align this you can select the layer 1 and the background which Shift and press V. So these align options appear up here and you can select these one and now the texture is centred so to distort this, we are actually going to start with a erase tool. And we are going to create some holes in this texture. The trick here is to go from a big brush size to a smaller one. You can add another one around here more or less like these. And then another one. Some of them could be smaller. They don't need to be these big you know just like these. We can keep adding holes to our texture we also want to remove some of the white in the extremities of the texture just like these once we have reached something similar to these. We can go ahead and pick the smudge tool and as always the idea with this smudge tool is to blend these all together and to make it more curvy more flame like and we want to push some of the black areas but not only the blacks but the White. We want to mix them together really well and I'm passing several times quite fast so I can distort them really well. And if you notice, I'm always going in the same direction which is from left to right and I'm going to keep on doing this to the holes we have created but as well in the white spots in the white areas that don't have any holes. And once we have distorted more a less in the middle we can also start in the outer areas in the edges of this texture so we can create something simply act to flames and once you think it's okay now we want to make it seamless. For that we can go to filter and down here in the other we can use the offset to offset these 1000 pixels horizontally so we can see the edge. And so we can fix it and to fix it we can use the smudge too, simply drag some whites to the left or to the right. Until we fix the edge and it becomes a seamless texture right. I'm just going to give a few more tweaks but this time with the erase tool I'm going to fade the extremities of the texture and also remove some of the white. We don't want too much white in here. We want a nice gradient between black and white which means that we need gray areas several gray areas. It will look better with the shade that we are using OK. And once you think it's looking nice we can save this photoshop file. And then hide the black background and export as a PNG and then simply copy and paste it to the textures folder of the projectile . Project. We are also going to need the material so we can duplicate the projectile add scroll material rename it to trail 01 and open it up and assign in the main text, the trail text that we have created. Great. We don't see much we can hide the background if you want. And this time the dissolve speeds need to be different. They need to move in horizontal way so we don't want any speed in the V values but instead we want in the U and we want negative values for example -0.4 and -0.5 for the distortion if you want you can switch the distortion and dissolve textures as always. But what really matters is that the speeds are only moving horizontally and with negative values so the trail scrolls in the opposite direction of the projectile movement you know. Once you save this we can go back to our projectile fireball and in ribbon renderer we want to assign the material we just create and look at that. Looking really cool it's just really small. So let's go to the Blue Node and remember you can click this button. So the curve appears down here so we can have a better perception and I'm going to drag the first key more a less around here and add another 1 so I can create this shape. Now as you may have noticed the trail seems like it's a little bit behind the projectile mesh right. And what we want to do is go to the particles bounce off the capsule and search for position. Now let's break this vector and in the X we want to multiply this with the scale because if we change size this needs to be influenced. And for the B Let's try -30. OK. Maybe it should be even more like -50 but let's save it. And let's see how it's looking in the scene and as you can see it's blending really well the trail with the capsule. What I am noticing once again is that the projectile should be even smaller like 0. 7 for the X and Y at least for my tastes of course you can try different values and position. It's actually going to be -70 so it's more inside the projectile mesh. And yeah that looks OK. Now the trail is really small. It shouldn't be bigger. It should be longer, so we can go to the emitter update of the trail and in the beam emitter setup. Let's multiply this vector with a float and the float is going to be the scale and in the X I'm gonna set 250. This is what is going to control the the length of the trail. By the way and yeah I think that looks nice it seems okay. I just think it needs to be taller thicker you know. So I'm going to push this curve, this keys, this first keys of the curve to around 160, 150 150 That seems better. What I'm trying to achieve is a proportional projectile basically between the trail and the projectile mesh. And yeah that seems OK. That seems like a nice balance. And if you look closely the trail fades out and we don't want that. So we want to remove this color but we can't because it is part of the original emitter. So let's go to the NE trail and remove here the color and save it. Now if we go back to our projectile fireball we can while holding alt drag this dynamic material parameters to our trail and this will allow us to control the distortion and dissolve values. As you can see for distortion I'm going to say to that seems OK. And the distortion seems to be OK but before we proceed I only noticed after recording this video that I set to offset the capsule here. But that's wrong. I'm sorry. We want to offset the trail instead. So let's remove these and let's go to the emitter update of the trail and turn off absolute beam start. Then we want to multiply this beam start with a float the float is for the user.scale set the Y and Z to zero. And now the X controls the start position of the beam. This is a better way to blend the trail with the projectile. And we can set it to around 90 we can also go to the blue panel and push the first key down and move these handle up, creating this curve this will make the beginning of the trail rounder making it smoother and looking better great all right. So that's it. We have our projectile mesh and our trail looking great. We just need to add color and add a few more elements. So it becomes more interesting.
50. 7.8 - Projectile: Particles: So before we continue I'm just going to decrease the X and Y of the capsule to 0.65 and the Z to 0.85 It looks more proportional OK cool, so let's add some particles to this. Let's add a new track and choose the NE_Particlee and rename it to Particles_Add For some reason the timeline is reset so let me just fix it and clamp it again. All right okay. So first let's change the material. So it's the beamAdd and now we can solo the particle emitter okay. So in the emitter update we don't want to use a burst. So let's disable it what we want instead to use a spawn rate. So it keeps on emitting particles until it hits the wall, spawn rate of 50. should be enough. Let's also make sure that they have a random lifetime between 0.4 and 0.8 then we can also set the Color to be Ranged, for the minimum we can assign the Color01 and for the maximum let's go ahead and add another linear color in the user parameters name it color 02. So the blueprint can find it let's assign it like this to the maximum and now for the size we want to first convert the vector2 to a float and then let's make sure it's Ranged, the minimum is going to be multiplied with the scale as well as the maximum okay. So let's set a minimum of 0.2 and a maximum of 6 for now. And as you can see they are all overlapping. So let's add in the particles. A sphere location so they spawn in a sphere shape. And we also want the sphere radius to be influenced by the scale. So let's multiply that. Let's set it to 50. That should fit well with the projectile size we okay. So if we play these in the timeline this is what we got. Random particles fading out but not moving. Right. And they are also not fading in. So let's go to the scale color and make sure they fade in and don't appear out of nowhere. Let's start another key and push the first one though OK. Now for the movement in the particle update we want to search for a wind force. This one and make sure it's above the solid forces and velocity. Now we also want the random force for the wind. Te Y and Z are going to be zero. By the way, for the X we want it to be between -100 and -750. So it moves a little bit in the opposite direction in relation to the project. Okay. Looking good. Now let's add a vortex force. You could also use a curl noise By the way but at the time of recording this I used the vortex force. Anyway. Let's push it above the solve. And the force of this is going to be a ranged float between 50 and 4 and let's also add randomness to the vortex axis instead of being only positive 1 in the Z. Let's make it positive and negative and X and Y is going to be zero by the way. Okay. Let's check it out in the scene. Let's see how it's looking. Okay. It's almost good but if you look closely they will not start the part because disappear as soon as the projectile hits the wall. And that happens because in the emitter update of the particles the autocomplete is on as well as the complete on inactive. Both have to be off specially the complete on inactive because if you remember correctly in the projectile blueprint when it hits something besides spawning the hit effect we also stop the projectile which deactivates the projectile so we gotta tell the particles to not complete on inactive so they leave a trail of particles behind yeah. Okay. So they are actually a little bit small. So let's increase the minimum to be 0.5 and the maximum to be 6 or a bit more. That should be enough. Okay so let's also create in AB version of this particles and duplicate these with Ctrl+W. Rename it and then go to the sprite render and change the material so it's the BeamAB version. Now these particles can live longer it looks nicer between 0.8 and 1.4. They can also be bigger so they become a little bit more visible between 2 and 30 should be enough. And they don't need to be too many 40 for the spawn rate is okay. And let's reset the color so we can set it to black. Now if you want to see them we can go here to the preview scene settings and turn on show environment. Now we can have a better perception of their size and now they are looking. Let's just save this and before we go check it out in the scene. Let's decrease the minimum of the wind speeds to be -20 and the maximum to be -500 as well as the force of the vortex. Minimum can be 5 and maximum 100. All right and they are looking great. It adds a nice touch. Now what we are really missing is the color obviously. So let's see if we can add.
51. 7.9 - Projectile: Easy Color and Scale: So for the color. Let's start with the capsule at in the particle spawn. Let's assign the Color01 to the color Moving on to the trail. We need to add color to the particle spawn and then we can assign the Color02 for the particles we already have. The Color01 and the Color02. Now let's go to the system settings panel. The blue one and I'm going to set 50 for the R, 10 for the G and, 2 for the B or 1 and the Alpha will control its brightness as you can see. I'm gonna leave it at 0.9. I'm actually going to increase the dissolve amount and then set the alpha to 1.5. That looks better. For the second color I'm gonna choose a yellowish one. So 20 for the R, 5 for the G and 1 for the B, the alpha can be around 0.5. So the trail it's a little bit more faded. Okay that looks nice I'm just going to increase the curve of our trail with to more a less around here. Now let's go ahead and also add an alpha blended version of the capsule. Let's duplicate it. With Ctrl+W. Rename it. And then we can assign the material but we don't have it. So let's click on these lupe icon which goes directly to the material and yeah I'm starting with the trail. But we are also going to need it. So let's duplicate it to it's going to be trail 01 AB I'm gonna open it up and change the parent to be the AB Scroll Niagara then I'm gonna save it and duplicate the projectile add scroll for the projectile ab scroll. I'm gonna change the parent also to be the AB AB Scroll from Niagara Now if we go back to our projectile in the mesh renderer we can assign the projectile AB scroll which I noticed at this moment that I forgot to change the name correctly. I'm going to add the scroll in front cool and we don't see much happening. I'm gonna solo this out and we want to start with a color. So let's reset it and then choose a black color like this one and as you can see the Alpha will control its intensity. I'm going to leave it at 1 for now. What we want to do is make the capsule alpha blended fit inside the other capsule. So I'm gonna shrink the Xand Y to be 0.6 for the X and Y and Z something big like 1 and yeah now it's too big we need to push it a little bit back so in the particle spawn I'm gonna search for position and then break the vector and for the X and when I multiply with the scale and I'm going to start push these just like this, so it's inside and a little bit behind. We want to see a lil bit the black at the end of the capsule. Maybe make it bigger like 1.2 going to push a little bit back. more, around here. OK. That seems like it adds a nice contrast if you want you can always play with the alpha. I'm going to leave it at around 1.3 for now. Now let's also create the alpha blend the version for the trail duplicated rename it and in the ribbon render the material it's going to be the trail AB version scroll. Yeah. This one. And then we want to set the order to be -1 and I also noticed that we need to set the capsule AB to be -1. So we make sure that renders behind the fiery capsule. Now the trail AB is small. So let's increase the size and the way we can do it is multiply the scale curve. The B can be 1.5. Let's also make it longer in the beam a meter set up in the beam. And like -420 okay. And now for the color, we are going to reset this and set this to be a black, as you can see it looks awesome. I really like it now I hope you do too. Maybe I'm just going to decrease The alpha so it isn't too predominant. That fits really well. What a nice blend we got here yeah. Looking great. Now if we want to make this smaller like 0.2 This won't work. So let's fix that also. And it's real simple. For example in the capsule at the mesh scale it's not multiplied by the user that scale. So that's what we are going to do. Don't forget to remember the value that you have set because this will erase it I'm actually going to make this a little bit bigger 0.7 in the X and Y and 0.8 for the Z and for the capsule Alpha blended. We also need to multiply the mesh scale with the user.scale you know. Okay. Paste the values that we had before and down here we are already We are already multiplying with the scale. But in my case I am need. But in my case I need to push it back just like this looking great fits really well. Let's check out the trails. I think they are already multiplied by the scale. Yes they are in the particle spawn let's also multiply the beam width by the scale and the trail AB. It's also multiplied for the particles. I think everything is already multiplied. I'm just going to push the Alpha Blended version down here and. Everything seems to be multiplied by the scale. Nice. So let's see. Let's shoot some very tiny projectiles as you can see. Yeah maybe maybe I'm going to increase this to 0.8 0.8 in the X and Y and Z. Yeah. That's okay. That looks nice. Now we can scale this up and scale it down. Oh and make sure the sphere location is also multiplied by the scale just like this. Seems to me that is working well for the scale. We also have color already. Nice let's just add one last thing. A new emitter We can use the NE_Particle This one is going to be for the Beam 01 Add so we can add a little bit more glow to our capsule and for the sprite size in the particle spawn, we want to convert this to a float and then multiply by the scale and this is going to be around 220 for the color. We can create a new color actually the blueprint supports a third color. So let's add another color, a linear one it's going to be called Color03 and then we can assign it here, we are going to add color in a moment. What we also need is to offset this a little bit so let's search for position in the particle spawn break vector and multiply the X with the scale the, B is going to be around 35 40. Yeah that seems okay. We can turn off scale color by the way. We don't need that and down here in the sprite render let's make sure that we assign the beam ab looking great. Yeah. Now I need to make it bigger. I'm gonna say it 250 and push still a bit more to the left around 55. That seems to fit very well. So the colors the retreat I'm actually going to choose manually this color instead of using the RGB You know you can always use color picker, I'm sorry if I'm always using numbers instead of the color picker guys really sorry. It's just a habit, as you can see you can create some really interesting combinations but I'm going to leave it that yellow orange. Yeah that fits really well you can increase its intensity but this doesn't need to be super intense as you can see it adds a nice touch we forgot something. We actually need to set it to local space and in the emitter update. We need to turn off autocomplete and complete on inactive. We want these to be destroyed as soon as it hitssomething just like a capsule and yeah. That's looking really great. We can actually go ahead and duplicate the fireball blueprint and these ones are going to be green for example. I'm going to open it up turn on change color 01 and choose a green, something around here and I'm actually going to multiply this value by 50 so it becomes really intense because this is for the capsule also increase the alpha. Don't forget to increase the alpha for the color02. We can also choose something more a less around here. And I'm going to multiply by 10 in this case and set the alpha to 1. And forget that and the color03 which is for the beam I'm actually going to stick with some green. Yeah. And the Alpha one as well. Now if we save this I also made it smaller by the way. But as you can see looks really nice. We can change colors super easily and change the size as well which is cool. Then we can go ahead and create another one a purple one for example the first call is going to be something more towards being maybe or maybe violets. Yeah. And the second call is going to be more pink in this case and for the beam color I'm going to choose a bluish one. I think that will look nice. Let's see. Oh and sorry I forgot to mention for the green that you need to assign it in the Gap Spawn VFX down here in VFX list you can press the plus sign. And as you can see I've already added the green one. Sorry I forgot to mention that and I'm going to add the purple one. Alright. Looking fantastic. The Blue adds a really nice touch. So as you can see with easy color and easy scale you can create some really cool variations in just a few minutes. But we are still missing something really obvious which is the impact and the muzzle. So let's see how we could create the impact.
52. 7.10 - Projectile: Impact: So for the impact which is an effect that happens when the projectile hits the wall We already have the niagara system hit fireball template. So let's open it up and this Niagara Emitter It's going to be for the beam flash additive and in sprite render, which we could have already changed by the way we want to change the material to be beamAdd Now for the size we want to multiply these with the scale but we still don't have it. So let's go ahead and in the user parameters. Let's add a float rename it to scale and we already know that we are going to need color. Right. So let's add a linear color and rename it to Color01 and we can add another one for the Color02 Color02 so for the size. Now we can use the user.scale parameter and it's going to be 350 but I'm going to increase this later on to around 500. So the lifetime is already at 0.2 which is great. It's what we want. And for the color we can assign the color01. Well let's just set the user.scale to be 1 as default and the Color01 is going to be 50 in the R, 10 in the G and 1 in B. And obviously this is way too bright but we are going to decrease this. We are in fact going to multiply this color. Let's reassign the Color01 and the W parameter is the one that is going to control the alpha. So let's set it to 0.11. So it isn't so bright and let's increase the size to already 450. Now we can go ahead and add another track another emitter. We can start with a particle for this one. This is going to be for the particle stay add, it some particles that are going to float at the end. And let's actually go ahead to this emitter and change the material of the sprite rendered to be the beam 0 1 as you can see it updates right here now which is something that we could already have done. That's fine and we want to spawn bursts we want the burst to be random to be between 10 and 15 particles that should be enough let's already assigned the color. We want this to be ranged, and we want Color01 to be the minimum. And the Color02 to be the maximum the lifetime it's also going to be random a ranged between 0.8 and 1.4, 1.2 more a less now for the size. This is going to be a float so let's convert it and then we want to multiply this with the use of that scale in the minimum and in the maximum as well and the minimum is going to be 3 and the maximum 15. Of course they are all overlapping right now. So let's change that. Let's say the sphere location in the particle spawn and the radius it's going to be multiplied by use.scale. We want to control that around 40 should be enough. Now they don't have movement. at all. So let's in the particle bound this time. Basically as soon as the particle is spawned, we want to add velocity. It's already going to be moving. So let's say add, an add velocity from Point and the strength of the Velocity it's going to be random between 0.5 and 2 as you can see seems like it's really small but that's because in the particle update we are going to add the curl noise forc. Which we need to drag above the solve forces and velocity this noise strength is going to be random between for 400 and 750 as you can see this amplifies the velocity from Point and it adds this really cool motion. If you come from Unity it seems like the Noise module let's just set the second color by the way to be 10, 5 and 0 in B. That seems fine. So let's just make sure that they become smaller towards their lifetime. So let's use this sprite size scale this is going to be a float. So let's convert it and then a curve and they go from big to small just like this. We can set it to be in auto mode and rearrange these last handle to create a curve similar to this one. Now let's go ahead and create some particles stretchered some sparks. Basically so let's duplicate it and if we want to create some sparks as we have already seen we need to set the alignment to be velocity velocity aligned So they stretch with their velocity and we don't want sprite size scale. Let's remove that. We also don't want the curl noise force what we want is to increase the add velocity from points to be between 150, more a less and 750 as well. As you can see now we have this nice impact sensation of impact let's just make the lifetime shorter to be between 0.4 and 0.8 and let's reset the whole sprite size module just like this. And because we want to X and Y we want to stretch them in the way. So let's make it random. And for the X the minimum is going to be 3 and the maximum 10 and for the Y which is where we want to stretch this. We can set 8 as minimum and 40 as the maximum and we have some pretty cool sparks going on. Nice. I'm going to solve this. And as you can see we already have a nice motion but we still can improve this obviously. And for example by reusing the texture that we have created for the projectile so let's duplicate the beam flash add and rename it to be the impact add scroll first thing is change the material in sprite rendere we want the projectile add scroll this one, this texture. And we have dynamic parameters that we can control. So let's use that in the particle spawn. Set the color multiplier to be 1 let's just increase the lifetime of this. This is going to be around 0.6 and it's going to be smaller as well 250 more or less should be fine so dissolve amount is going to be 1 maybe a bit more to be more dissolved and the distortion can be 0.1 Now we want this to grow slowly so in the particle that let's say the sprite size scale convert this to a float and then to a curve and the curve is going to start from small and it goes to be it's totally the opposite. Just like this. But it's not going to start at 0. It's going to start almost at 0.5 Yeah. Like this I'm actually going to increase the dissolve amount to 2. And then set the alpha to be 0.5 All right. That looks nice. Let's see how this looks with the rest of the emitter. Okay. That seems impactful. It adds texture it adds some detail the impact. Now let's just add also a sprite size scale in the beam flash in the particle plate so we can shrink the particle it will add a different sensation to the impact just like these converts to a curve it will look much more impactful you know. And with the sparks it goes really well that motion lets you use this beam flash just gonna make some room. Let's duplicate it and rename it to be beam stay. It's going to stay just a little bit longer. Basically so let's change lifetime to be 0. 0.6 We want this to be less visible so let's decrease the W to be around 0.02 and the size it's going to be way smaller. About 250 is just a little light. Light is going to stay there for a little while. Let's actually increase a little bit the size to around 300 and this doesn't need to go all the way down until it's really small. This can go a bit below 0.5 And this is still too visible so Let's decrease the W to be 0.01 like this. This looks nice looks impactful and leaves a little bit of light at the end. Now let's add some dark colors to this. So let's start with the BeamStayAB and in spite renderer we want to change it to be the AB version as well and not forget to set the order to be -1. So it renders behind everything first thing is to reset the color change it to black and also increase this size, it's going to be big. Around 400, 450 even more and it's going to live longer as well. So 1, 1.2 should be fine. As you can see it already adds a lot of contrast and mixes with the additive shader. It creates new colors beautiful colors and it looks more rich. Basically that's why we add dark colors always. Let's actually go ahead already and duplicate particle stay rename it to be AB and change the material as well. This one we don't need to change the order because they are particles they are small and we want to reset the color to be black as well and we want to change their size because the Alpha Blended one makes them look smaller. So between 6 and 40, 45 looks cool. Yeah also increase a little bit the lifetime to be between 1 and 1.4 And let's save this and let's see how do is behaving with our projected end it looks beautiful. I think it's really great that we can create an impact just by reusing what we already have. Let's make it even more impactful by increasing the beam flash add to 600. It may seem a lot but as you can see it adds really that punchy feeling impactful feel you know. And we can also increase the beam stay and we also need to increase the beam stay the alpha blended version and also increase a little bit. The impact and that's it looking really cool really impactful as you can see the green version looks great too. As well as the purple version. You can try different colors create different feelings but that's mainly it if you want you can even increase the amount of sparks to be between 50 and 20 and that's it looks nice. Next we are going to see how to create the muzzle for this effect for the projectile.
53. 7.11 - Projectile: Muzzle: Alright. So for the last effect we need the muzzle. This one is going to be easier. We actually already have the Niagra system done Let's open it up. I said this one is going to be easier because we can go to the heat. Niagara system selects all of these nodes and with Ctrl+C we can copy them and then let's erase this NE_Particle and now with Ctrl+V we can paste them and we are mostly doing this because the muzzle is going to be very inspired by the hit and the hit is very much inspired by projectile. They influence each other but they're still a couple of things that are different. So the cool thing is that we already have the user parameters the scale, the Color01 and the Color02 We just need to set a default value to them. So the Color is going to be 50, 10 and 1. And the Color02 to is going to be 10, 5 and 0 and let's set 1 for the scale as default value. Okay this is way too big for a muzzle, muzzle is going to be small and quick in a cone like shape so the first thing we can change is the size of the beam flash around 150 200 is enough. And it's not going to go from big to small. It's going to be the opposite. So in sprite size scale, let's set the first key to be 0 0 in time and in value. And the last key is going to be 1 1 just like this. I have solo this out as you can see maybe 175 for the size and the lifetime can also be 0.3
. 0.3 are 0.25 that seems okay. We will see how it goes with the rest for the particle stay. We can decrease the sphere size the radius from 50 to 10. Is enough and we don't want velocity from point because we want to have a cone shape. So let's search for cone and we can use the add velocity in cone. Great module that will make the particles fly in a cone shape. Well the strength of the velocity is going to be random ranged between 10 between 10 and 150. And the cone angle, the amplitude of the cone can be a bit small at 25 30. That seems OK. We can also decrease the amount of particles we don't want this to be the center of attention. So between 5 and 7 is enough for the stretched particles we can also delete the add velocity and while holding alt we can click and drag the add velocity in cone to duplicate this module. And for this one, we want more velocity between 100 and 500 with a bigger cone size angle of 80. As you can see it looks pretty cool. Some cool sparks going on. Let's also decrease the amount of particles between 8 and 13 going to decrease the maximum lifetime to be 0.6 Like I said we not want this to be the center of attention. This is just a detail sphere radius. I'm gonna set it to 10 and for the impact. Now we just need to decrease the lifetime to 0.2 and the size to 130 the beam stay is going to be smaller as well like 200 more or less should be fine. And it's going to live way less as well between 0.2, 0.4 should be fine. Let's see how it's looking with the rest with the projectile and the hit yeah. That seems okay as I can see it adds a nice touch. It's just because we don't want the projectile to come out of nowhere and it's an easy way to add some cool details. Alright guys. So that's it for this projectile. I think if you have come this far you have done a great job. This isn't an easy effect but if you have come to this point and you have end up with a projectile similar to this one I hope you have really enjoyed and that you feel a nice accomplishment for doing this effect because next we are going to see something a little bit different still a projectile but different it's going to be an electric projectile so I hope you have enjoyed this one and let's see how to make another one.
54. 7.12 - Projectile Electric: Lightning Flipbook: Alright. So welcome to these bonus lectures where we are going to see how to create an electric version of the projectile Pretty cool right. But we need a few textures obviously. So the first one we are going to create is called Lightning with a resolution of 2048 by 2048. And this one is going to be different than what we have been doing. This is going to be a spritesheet an hand painted flipbook. It's going to contain at least four frames that we can then animates inside and real. So in a new layer this time we want to use the pen tool, P for shortcut. This one. And the idea behind this texture is simple. We can start creating a zigzag like this can go up a little bit sometimes it can go to the sides as well. Does it need to be straight as you can see this is lightning. You are free to create your own shape. Obviously once you have done this shape something similar to this you can go ahead and pick the brush to B for shortcut and as you can see mine is very small. And we actually don't want that. We first want a white color and then we want to brush size of around 20 and the hardness in this case needs to be around 70, 60 something like that should be fine now. The idea is that we convert this path to a brush stroke and we can do it by simply picking the pen tool again P shortcut. And then with right click down here we can select stroke path, and as you can see we can select the tool and we want to have the brush tool selected and then we have these simulate pressure that we can turn on or turn off if we turn it off. We get these bold path with no fading are. So let me go back and not with right click again stroke path. If we turn on similar pressure we get these nicely faded path in the top and in the bottom and in-between it has a nice thickness and this is much better for lightning. So now we want to create a few more of these so let's add a new layer with Ctrl+Shift+N if you are in photoshop and for example we can reuse this path and if you are using the pen tool you can move this point by holding Ctrl and move them around just like this to create a different kind of shape sometimes it can go a little bit to the sides, it moves a little bit you know it's lightning it moves really fast and then once again with stroke path right click we can use the same technique, simulate pressure On and brush and we get this new path. Now in order for us to see these animated we want to go to window up here and down here we want to turn on timeline. In this timeline we want to create a frame animation just like these select it and click and we have one frame for now let's add another frame for the second layer and for example with the first frame selected we want to hide the second layer and then with the second frame selected we want to show the second layer and hide the first one just like these and we can also go ahead and we right click delete the path you know if you play this way it's very simple 2 frame animation yey we've got lightning let's just make a few more frames so let's go ahead and add a new frame down here and we also want to add a new layer with Ctrl+Shift+N let's hide the second layer if you want to use it as a reference that's OK you can leave it on and only draw in the third layer but I'm actually going to leave it. Now with the pen tool once again I'm going to create a new path just like these. More or less it goes a little bit to the sides sometimes it's lighting it's not very hard to do and then with right click we want to go to stroke path and press OK and we got a new frame. Cool let's just I did the first layer in the first frame and make sure it's on in the third frame just like this and now we got these nice animation let's create another one and the fourth one and the last one if you want you can create more than four I'm just going to create four it's enough. So new layer and once again create a new path and then with right click choose stroke path and then make sure that you hide the fourth layer in the other frames in the frame 1, 2 and 3 just like these and make sure it's also on in the fourth frame all right. When we get this very simple animation and we can boost this we can make this better by for example going to the first layer and with double click we can open up the layer style and turn on outer glow and down here you can play with the glow increase a little bit the opacity if you want. I'm going to leave it at 40. Around 40 the spread among all the spread. I'm going to leave it at 1 and for the size more or less around 50, 60 maybe even more. Now the cool thing is that we can right click on this layer and copy the layer style down here. And then go to the second frame and paste the layer style to the second layer to layer two and do the same for the third frame. And for the fourth frame as well and now we get a nice glow in all of the frames. Looking good let's just save these for the file and to export this first we want to add the black background in all of the frames so we can select all of the frames by selecting the first one and then while holding shift, we can click on the fourth layer and we can select all of the frames and then we can hide the black background and it hides in all of the frames at the same time pretty cool. To export this. We want to go to file down here in export and choose render video down here. And first we need to change these to be Photoshop image sequence. As you can see in this drop down menu, the format is going to be PNG so we can have transparency and it's going to start at number 0 but it's not going to have four digits. It's going to have only two digits. That's enough. We can create a new super folder I'm going to call it lightning. Copy and paste. Make sure you choose the folder where you export this. And last thing is on the render options the alpha channel must be Straight Unmatted and then we can click on render press. OK. And if you go to your folder it has created a new folder and inside it there's the frames. Cool as you can see we have all of the frames exported without the black background. Now to join them we are actually going to use a free software very simple that I've been using for years. If you can find it on Google please ask me. But if you go to Google you can search for GlueIT just like these click on the first link and simply click on the clone or download button. And on here we can press download zip. Save it extract the zip. And once you open it up you can open it like this. And now we can add files. The first step is adding files we can go to our folder where we exported the lightning select all of the frames press. OK. And then the second step is set the number of columns and we want 2 columns. It's going to be 2 by 2. And then we can press this big button that says glue it. This window appears we can close it. We just did now to save it I'm going to save it to right here and call it lightning 0 1 and this card 2 by 2. So we know that it is a flip book with 2 frames by 2 frames in X and in y save it. That's it. Cool. And now we want to impart this to Unreal to our Unreal project just copy and paste this to our texture folder and import it and that's it. Now we need the material for this. We can duplicate with Ctrl+W the beam 01 and call it lightning 01 we can open it up and inside here we want to assign our text and that's it. We have now lightning in Unreal now to use these first. We need to duplicate our NS projectile fireball and we are going to call this the projectile underscore NS_Projectile_Electric I'm gonna duck it up here and the first thing we want to do is change the color be yellow in this case. You can choose another color for your lightning of course. You can also later on change the color in the blueprint any way I'm going to choose yellowish colors. And then the idea is that we are going to duplicate the particles_Add and rename this to be electric particles. _Add and we not need the wind force or the vertex first so we can delete this and in sprite render we want to assign our lightning material. And as you can see if we get really close it's emitting the whole sprite sheet and we don't want that. We want this to emit frame by frame and the way we do it is by going down here in sub UV. We want to say that this is a flip book with 2 frames in the x and 2 frames in the way. Now as you can see we have only one image but it's not animated. And for us to animate this we need to add a sub uv animation in the particle update and now all we got to say is the number of frames it as it's already set to 4 which is correct but we can increase this and it will loop if we increase it to eight it will look two times if we increase it to 16. It will loop 4 times as you can see and we can actually create the range float for these between 4 and 16. So some of the lighting is going to loop only 1 time. Others go include 2 times other going to loop four times and even three times. Yeah pretty cool but we also want to add is the sprite size scale because this is going to leave a small trail of lighting behind when we want these particles to shrink over the time. So we want to convert these to float and then to a curve just like we have done several times like these and the spawn rate is going to be smaller like 7 10 10 is also a good value if you want it's going to also live less like 0.2 and 0.4 we are going to reset the sprite size scale because we want to stretch them horizontally and vertically. You can say it's a range also between 25 and 50 and then 75 and 190 seems okay and I forgot to multiply this by the scale but you can do it you can go ahead and do it. I will do it later on anyway down here for the radius. We want to set this to around 50, 60 and finally we want to add velocity in cone which is going to have a ranged of velocity strength between 10 and 15. Oh I actually forgot in the particle spawn to set a random sprite rotation between -360 and 360 Yeah just like these. Back to the add velocity in cone we want to set the cone axis to be -1 in the X and we want to open these settings down here and increase the velocity distribution along the axis to be 50. Basically it increases the strength in the X axis and as you can see now we have lightning very small lightening across our projectile and if we try this in the scene first we need to actually go ahead and duplicate the blueprint of the projectile fireball rename it to be the projectile electric open it up and assign the projectile electric as well, save these and then we can add these to the Gap Spawn VFX down here create the new element and select the projectile electric. And now if we shoot this you will notice that we have very small lightning that is left behind and that's pretty cool. Next we are going to transform our projectile totally so it resembles more to an electric projectile right.
55. 7.13 - Projectile Electric: Trail Texture: Alright. So for our next step we need a texture or for the trail. And one for the projectile as well. So let's start with a trail electric texture with the same resolution we have been using. And in the new layer we are going to use the same technique with the pen tool so we want to start more or less around here probably more in the middle and then go up or go down. It's really up to you. The idea is that we create a shape a path similar to this one it's once again electricity lightning so it zigzags around and you can finish more or less around here in the middle as well just going to rearrange some of these points to but this time if I go ahead and press right click and do the stroke path we get a really thin. We get a really thin path and we don't want that. So we want to increase the brush size. We can press B and then increase the brush size to around 80 more or less and yeah. That looks much better now. So as you can see we have a nice electric trail and I'm going to push it down here more or less center these it's important that it is centered I'm going to stretch this a little bit OK. That looks nice. Now for the beginning here as you can see if we try to paint these with the brush it won't look that good. So the idea. But first let's actually add a glow. Let's actually add some outer glow first and I'm going to increase it more or less around here to size. This seems about. OK. So what we can do instead of using the brush is once again use the pen tool. I'm gonna create the path that passes on top of what I already have in head with the right click. I'm going to choose the stroke path. And as you can see we get this thick part of the lightning that looks nice and we can still keep on doing this a few more times like these maybe a little bit up here. You get the idea. We want to thicken a little bit the beginning of our trail in the end we want it to be thin but in the beginning we want it to be thicker just like this. Looking nice. So let's save this photoshop file and then we can go ahead and export it as a PNG without the black background.
56. 7.14 - Projectile Electric: Projectile Texture: OK now for the second texture the projectile electric texture . We want to use an elipse So we can have a guideline just more or less around of this size. Now I'm going to center this by selecting background. with shift, and if I press V I get these align options up here and I'm going to center the elipse in the center just like these and then in a new layer we can go ahead and use the same technique with a pen brush tool and create the small lighting that starts in the middle and goes up more or less to around here a path similar to this one. And yet the brush size is really big so I'm going to decrease it more or less to around this size that seems OK. I'm going to thicken a bit the beginning just like these cool. Now we can go ahead and actually duplicate this layer and then rotate it more a less to around here doesn't need to be exactly perfect with 90 degrees rotation what we can also do then is duplicate both of these layers by selecting them and pressing Ctrl+D duplicate and then rotate it 180 degrees and push it down here more or less like these and we can group these so it doesn't get too messy. You can see like these layers with shift and then press Ctrl+G to group them. Now in a new layer we want to add some glow in the middle. So we are going to use the brush tool, and paint right in the middle a bright spot like this one OK. Cool. Now we can actually go to the trail electric copy the layer style and paste it only to the electric layers that we have created the electric paths just like this and we get a nice glow. What we can also do is create a new layer. And now in between these main electric parts we want to create another one very quickly and very small ones like these I'm going to decrease the brush size to be around 40 and hardness to 70 by the way just like these a small electric trail. I'm going to do the same in this side, don't forget to delete the path before you do another path and then another one and another one down here so as you can see we get some nice variety. And if you need to change anything later on you can always come back to this photoshop file and do the Okay cool. Now as usual let's save this photoshop file and then I'm going to hide the ellipse and the black background and export as PNG.
57. 7.15 - Projectile Electric: Capsule Mesh: So another element that we are going to need for these electric projectile is to reopen the capsule mesh that we have created the blender file this would select this capsule and we'd Shift+ D we want to duplicate it and then press escape so it stays exactly in the same position. Right now we want to rename this new capsule to capsule pointy 01 and we can hide the other one just like these. Now I'm going to enter in edit mode with Tab and then press 1. So we get this orthographic view. I'm going to unselect everything. And while holding Shift+Alt I'm going to select these bottom vertices and with proportional editing on O for shortcut I'm going to press S to scale this up a little bit like these with a small radius of influence and I'm going to do the same up here like this vertex push it more or less around here and now the idea is to shrink this with proportional editing on but with a bigger radius you can control the radius of the proportional editing by scrolling up a scrolling down your mouse wheel. It doesn't need to be super precise by the way we just want this to be more pointy. You know what we need to do is push these rings way up here. So while holding Shift+Alt I'm going to right click them so I can select the whole ring and I'm gonna press two times on G so I can push these up and I'm going to do the same for the other rings push them all bit up so they can be evenly distributed maybe scale up the bottom vertices you are free to try your own shape but don't go too far away from this. Okay. So once you have done this with these mesh selected you want to go ahead and export it as an FBX rename it I'm going to name it. 02, pointy02 So I can distinguish it from the other one they already have make sure selected objects it's on. Otherwise you export both capsules and then you can press export FBX and that's it. Next we are going to put all of this together and improve our electric projectile.
58. 7.16 - Projectile Electric: Capsule Setup: So let's import the textures that we have been creating and the mesh as well like the projectile electric texture the trail electric. Copy and paste to the textures folder. And now let's copy the pointy capsule and paste it to the models folder as well. Let's import it all just like this don't need this window and now we can go to our niagara system projectile electric and in the mesh render of our capsule add let's change the particle mesh to be the capsule pointy Here we go. We got the very pointy project at the moment. All right. That's exactly what we want for this one. And we need to make a few changes the first one is the material. Let's click on this lupe icon and let's duplicate the projectile 01 add scroll rename it to projectile electric scroll. And we also need to assign the texture the main texture the projectile electric texture when we have created and for now let's leave it as it is. Let's save it and let's also go ahead and duplicate the trail 01 add scroll rename it to trail electric 01 and then we want to change the main texture to be the trail electric texture is what great let's Save it. Close it Alright so let's assign the projectile electric material we have created, this one and as you can see we have a lot of white concentrated in the point of our mesh and this has to do with the UV maps and how they are done. For example if we go back to our blender file with a capsule you will notice that all of these vertices and face stuff selected. If we overlapped in the texture most of them are very white. At this point a very white beam in the center of our texture. So what we can do is push these edges. This rings a little bit up once again select them which Shift+Alt and right click or left click depending on how you select and then pressing two times G. So they go along the vertices, so we can move them along the vertices only and we are going to push them up just like this creating more space for the, rings below. Great. Let's export this once again replace the capsule pointy that we have don't forget to choose selected objects as always I'm going to replace it with one that I have in Unreal and the change is minimum what we can also do is go to our texture and increase the size of the beam and I'm doing these in my case because it's very white in the middle. I just wanted to show you that the UVs have a very important role on how the texture is mapped in the mesh and all they are made influence is that very much. So once I have decreased this I'm going to replace the projectile electric texture like these and here we go. We can have a better perception of the electricity at the end of our pointed projector. Great. Now we are going to need a few things the first one we can do is add the rotational velocity in the particle spawn. We want this pointy projectile to rotate and we get an error saying that this requires the solve rotational forces and velocity in the particle update, just like these and now for this to rotate we can set a value of around 0.5 in the X as you can see it is rotating it adds a nice touch and now what we can also do is change the direction of the dissolve and distortion speed let's zero this out, and set it around -0.5 in the U and minus -0.7 in the V of the distortion just like this. I'm also going to change the distortion texture to be the Noise09 This one adds a nice touch to the texture. As you can see cool these are small details that in the end they make the difference. Right. So we also need to change the capsule alpha blended version so let's change the mesh to be the pointy one. And for the material we can click on this icon and then we can duplicate it. Call it projectile electric AB scroll and we can change the texture like this. Save it. And now let's assign it to our capsule alpha blended version. And as you can see it's really long. So first let's actually decrease the Z size to be 1. And it seems to me that this is really pointy. In my case it's too long. I don't want this to be that long. So I'm going to go back to my capsule Add and decrease the Z to be 0.7 just like this. And now for the capsule Alpha blended the dark version. I'm also going to decrease the Z to 0.8 and the X and Y to 0.7 and decrease also the Alpha because for my taste it is too dark but of course you can play with those values as you wish. Maybe I'm gonna make the X and Y 0.75 Yeah now let's push this capsule alpha blended version to be a little bit more inside the other capsule just like these around -30 in the position. Cool.
59. 7.17 - Projectile Electric: Trail Setup: Now let's move on to the trail. For the trail. We already have the material so we can change it. Trail electric, this one. And it is way too inside the capsule so I'm going to push it a little bit. Back, in the emitter update in the beam emitter setup the beam start in the X is going to be 30 and the beam X in the end is going to be around -350 seems ok maybe it should be longer. You will see in the moment now it seems to me like it's still too much orange. I want this to be yellow. I want this electricity to be yellow. So I'm going to set the G value of the second color to be 12 and the B to be 0.5 So it doesn't become too saturated. Alright. Looking good maybe also make the capsule even more yellow. As always you can use the color picker obviously and as you can see we have now a good mix of yellows. It looks nice it's blending well. Now for the trail alpha blended version. We also want to, actually we need to create the new material so let's duplicate this one call it to Trail Electric Alpha Blended and let's open it up, and change the material to be the trail electric this one looking great. We can save it and then we can assign it to our trail alpha blended version just like this. And as you can see the dark really adds a nice touch. I mean personally I really enjoy it. So let's fix the position 30 for the X beam start and -450 maybe enve a bit more for the beam end in the x. That looks really nice. Personally I think it's a little bit too big so I'm going to decrease the width scale curve to 1.3 and for the trail additive version I'm gonna increase it actually to 1.5 seems ok seems nice because that's the one that we want to distinguish and remember that these trail wide this beam width they are using this curve that we got here in the blue panel this user trail width this curve and we actually can add a few more points around here. Let's add a few more points so we can create some irregularities. Right. It's just a nice touch. I'm gonna click on this button so I can control so I can have a better control of the curve down here as you can see just like this. It doesn't need to be super precise we just want to break the linear curve that we add because after all this is electricity. Right. Cool looking nice. Now I'm actually going to change the distortion texture. I want this to be the Noise02. I think it looks better just like these and now let's also change the dynamic material parameters. For example I don't want this to be too much dissolved. So I'm going to decrease to 1.5 Maybe 1.7. I think it's looking nice. Let's see how it is behaving in the scene. Let's shoot a few projectiles Yeah I think it looks nice but I'm noticing that the trail is a little bit too short. So I'm going to increase it. So in the trailer additive I'm going to set the beam and the X to be -380 even -400 seems OK. Yeah I think it looks nicer. But if you look closely you will notice that the trail is always in the same position. It is not scrolling it is not moving and there's a new trick that I'm going to show you that adds a really nice touch to the trails. And for this new trick we need to go to the original materials and start with the additive scroll in here we want to in here. We want to add two new scalars one for the main text v speed and the other for the main text. u speed This is going to scroll the main texture What we have been doing so far is only scrolling the distortion or the dissolved text. Now let's add motion to the main text. So with these two parameters we want to append them. We want to join them into one vector just like this. And then we want to multiply these with the time that we get back here just like this. You can double click on this curve if you want. And it will create a new point and you can rearrange the curve just like these. Now we need to add these to the loop just like this and replace the connection to the UVs of the main text. And nothing changes. Everything stays the same which is what we want because we don't want to change anything that we have done previously. Right now we also need to do the same for AB. Scroll for the Alpha blended scroll. So let's copy these nodes let's select them and we Ctrl+C Let's copy them. Let's go to the alpha blended version and paste them right here. Just like these we just need to replace this connection to the UVs. Connect the loop and connect the time. Node like these make sure it's like these now right. Looking good. Now let's go to the trail electric material, the additive version this one. And in here now we have two new parameters, I'm gonna unduck this and push it down here so we can see the changes happening. And we want to change the main text U option which is the horizontal one. I'm going to try -1 and as you can see we got the trail scrolling which is nice. It's exactly what we need. But the trail texter since we didn't make it loop we didn't make it seamless. We have an empty spot as you can see every time it scrolls. We got that empty spot and that's not really good. You want to trail to be continuous. So let's go back to our trail texture and in here we want to go to filters, other and offset these you can offset these 1000 pixels now with the P tool The pen tool. We want to create a connection in here just like this. I'm going to connect this with a few points. It goes a little bit upward cause a little bit down. It's really up to you if you click an old. You can create a curve like this and then we want to use the brush. I'm going to make sure that it's around 30 pixels more or less. And then with the right click we are going to do the stroke path with simulate pressure on that's it We got a nice connection. We can delete this poath and that's basically what we need so far. Let's I've set this back 1000 pixels as well so it goes to the same place and what I'm going to do this time is another path more or less around here because I want this one to be a little bit bigger than it is. It is too small just like this. It adds a nice touch. It doesn't need to be on top of the other path if you want you can add a few more. OK. That's looking nice. I'm gonna save these. I'm going to export as a PNG and then replace the existing texture that I have in Unreal just like this. Now before import this I want you to pay attention to our trail and once I click import we got this really nice trail smooth continuous trail that really looks like electricity you know. And that's the beauty of shaders. You can tweak them to your own needs. You can also tweak this texture easily. And we get these really nice trail I'm going to increase the use bit to -1.75 because these electricity you know it's really fast. Just like this. I think it's really cool so let's actually do the same for the Alpha blended trail just like these. But this time slower like -1 in the U speed. Yeah that looks really nice if we shoot some projectiles as you can see now it becomes much more interesting than what we add which was a little bit too static. You know it was cool but this is much cooler. And yeah I think we nailed this one looking really cool.
60. 7.18 - Projectile Electric: Final Touches: Now let's add a few more details. For example we can reuse these electric particles duplicate it with Ctrl+W rename it to be electric local. This one is going to be fixed It's not going to leave a trail so let's turn on local space. I'm going to solo this and you can see they are really small. But the first thing we want to change is the velocity alignment. We want them to be aligned to their velocity just like these they basically become horizontally aligned. Because the velocity is going backwards and what we can do first is decrease the lifetime to be around 0.15 0.15 and 0.3 very short lifetime. This electricity and we also want this to be bigger like 40 and 100 and 80 and 175. You can try different valves. Of course maybe bigger. 200 and 135 in the way seems nicer let's increase a little bit the radius of the sphere to 65, 60 and then we want to turn off the sprite size scale and turn on the scale color we want to create the specific alpha curve. Let's push this up the end key to be one and we want to make this blink basically. And what we could do is add a few keys push this one down here add another one and create this gap and we can add another gap right here. And what this will do is that it will make the text or blink. It's a simple nice touch that is almost not perceptible but it's there. You know as you can see the zaps these little zaps are overlapped with the projectile. We need to push them back basically. And in the particles pound if we search for position we can add the particle.position. But as you can see if we break these vector all of these lightning all of this electricity is going to be in the center because it has lost the position of the sphere and we not want this to lose its previous position. Let's reset this. We need to add a vector and we are going to add to its previous position so it's assign to the A option. The particles.position. And now we can add an offset basically in the X of more or less around -25 -30 just so it doesn't touch the projectile just so it isn't overlap with the projectile. We can actually make a ranged for a bit more randomness between -20 in -50. Yeah that looks nice. It's a simple touch but it looks cool in the end. And I think the electricity is a little bit too pronounced so I'm going to decrease all of these keys up here select them and decrease them to around 0.7 The alpha so you become a little bit less visible maybe increase a little bit. The trail additive white. OK. And also increase a little bit if you want you can increase the color multiplier. This will become really bright. I'm going to leave it at around 1.7 and for the capsule I'm actually going to increase it a lot. So it becomes really bright to around 140 really bright maybe also increase the trail color multiplier around 4, 5 more a less okay. That's a nice brightness. It is lightning so yeah it should be a bright Yeah. It's looking really cool. Hope you are enjoying so far. I mean this is electric projectile. It's quite something isn't it. Really enjoyed this one. So next we are going to create the impact and the muzzle as well which shouldn't be that hard since we already have a lot of elements. done.
61. 7.19 - Projectile Electric: Impact: So for the last two effects we need the impact and the muzzle. Let's start with it. And let's start by duplicating the hit fireball can rename it to electric. Open it up and the first thing I'm gonna do is basically copy the values from my projectile the color values to the hit just like these. We will adjust it later. Now for the impact. I'm going to solo this and we can go ahead and switch the material with the projectile and electric one, this one. And we want to increase the count of the spawn burst, to 2 we want 2 particles of this because we are going to add quite some randomness. For example the lifetime can be random between 0.2 and 0.6 then the scale well the size can also be random between 250 and 350 more or less. Let's turn on sprite rotation which is going to be also random between -360 and 360 as well. So we can have even more randomness now in the dynamic material parameters. We actually don't want that much distortion so I'm going to decrease it and dissolve. It's going to be 3 and increase the color multiplier to around 6. Maybe you can make it ranged even between 4 and 7. Yeah okay. Cool. Now let's go back to our project. Because we want to reuse the electric particles at these ones so let's copy them with Ctrl+C and let's go back to the hit and paste them with control. The just like these we're going to solve them. Okay. And now the ideas that we don't want to use a add velocity in cone we want a add velocity from point so it goes in all of the directions because it is a hit in impact right. And we want the velocity to be ranged between 50 and 300 or even more and we actually don't want to spawn rate we don't want these to keep emitting. We want this to be a burst just like these erase it turn on the spawn burst instantaneous which is going to be let's say between 10 and 50 particles. Maybe that's too much. 1 and 12. OK OK. They are looking nice and interesting. I'm actually going to turn on scale color and turn off sprite size scale and I believe they live too much so I'm going to decrease lifetime to be 0.1 and 0.4 . Let's try it out with the rest and there is one thing that will fit very well here. But I think we don't have it in the project. We don't have this texture which is the shockwave texture which is the shockwave text that we have created previously in the AoE chapter. So let's go ahead and get that texture copy it and paste it to this project in case you want to learn not to create it. You can go to the previous chapter to the last name and shockwave. OK. So this texture Let's create a material for it. You can duplicate the beam and then assign the shockwave. OK cool. Now what we can also do duplicate the beam flash reuse it rename it to shockwave and let's switch the material to be the shockwave one we're going to solve this and as you can see these should have an opposite motion. We want this to go from small to big. So let's set the last key to be one. And the first key to be 0 and let's increase the size to be 700 that should be OK. No lifetime is also OK. And that seems nice. I'm actually noticing that the beam stay could be a little bit more visible like 0.05 in the W which is the valve that controls the Alpha. OK. That's a little bit better maybe increase also the impact at scroll lifetime. Just a tiny bit. OK so let's save this and let's go to our projectile electric blueprint and assign the hit here the electric hit here just like these save it compile it and yeah I think it's looking nice. The cause seems to not really match the projectile so be careful with that but what I'm noticing is that the electric particles live way to less so I'm going to increase the minimum and the maximum and then for the callers I'm gonna make these even more yellow because it was too orange and the beam flash needs to be bigger. We want to see a big impact. So I'm going to increase to 750 something big and impactful and for the impact add scroll I actually noticed that they are not that much visible. So what we can do is go to scale color and push the first key of the Alpha to around 0.5, 0.6. So we see them for a little while in the beam stay I am also going to increase its size like 600 A lot of tweaking going on but yeah as you can see that's definitely much better much more impactful. The color is also correct. And that's a nice punch to our projector great.
62. 7.20 - Projectile Electric: Muzzle and Final Touches: Now for the muzzle we can also start by duplicating the muzzle fireball rename it to be muzzle electric. Right. And first thing we want to do is go ahead and copy the impact add scroll and the electric particles from the hit. Copy them with Ctrl+C and paste them with Ctrl+V in the missile delete the impact node and place this one right here just for organization sakes rename it as well. OK. So in the electric particles we don't want add velocity from point. So let's remove it. We actually want to reuse the add velocity cone we have in particle stretched with Alt while holding Alt you can drag and drop to electric particles just like these and we definitely want these electric particles to be smaller right. Something like this should be fine and less particles like between 5 and 8 should be fine. In the impact you only want one particle in the burst. That's enough and we want the lifetime to be constant so let's reset this and set it to 0.4 as well as the sprite size. The B option we want to reset it and set it to constant value of 200 Now for the colors as you can see we need to tweak this so they match the other colors we have from the projectile and the hi as well. OK something like this should be fine. Now let's save it and let's assign the muzzle to the blueprint of the projectile Electric down here just like this. Save it compile it and here we go looking nice. I'm noticing that the muzzle is a little bit too far ahead so I'm going to push it back in the muzzle offset in the blueprint. to -120 Yeah. That's nice okay. Looking cool you got a nice electric projectile really like this one. I hope you are also enjoying a lot. Let's create another color version let's duplicate this blueprint. Rename it to blue in turn change color 01 and the change color 02 as well. For the color01 I'm going to set the blue to 20 and then select more or less around here OK. That's nice. Don't forget to set the Alpha 1 and for the second caller a light blue but also intense 10 in the B should be enough. These values seems ok to me. Oh I forgot to set the Alpha 1. OK. And for the last color which I think only affects the beam of the projectile I'm going to say to blue this dark blue what we also need to do is go to the Gap spawn vfx and add a new element and assign the projectile electric blue. All right Oh yeah. This blue is really too strong for the beam so I'm gonna choose the light blue and decrease the intensity as well. It's way too intense yeah. That seems nice. It's actually some pretty cool colors blue lightning is also beautiful and other cool colorful lightning can also be purple so let's duplicate this one, rename it purple and more or less around here. Should be fine for the first color the second color we gonna leave it as it is just to see and last color purple around here should be fine. Let's see how this is behaving we need to add a new element to the gap spawn vfx Select the purple one. And yeah we need to change the trail. Choose something around here. I'm gonna choose something towards more pink. Let's see how it goes. Yeah it fits well that's looking nice really cool colors really cool effects. We have done some really nice projects in my opinion so that's it. Guys we have come to the conclusion of the main chapters which is the AoE and the projectile. I really do hope you have enjoyed this course so far and that you have learned a lot specially about the visual effects the concept of visual effects for games and about Niagara too. In case you have any questions please ask them here in the Q and A and I will try to answer them as soon as possible.
63. 8.1 - Conclusion: So now what. Well you have a few paths that you can take. For example you can try to create different projectiles. Get creative and make a different mesh for example or try different textures as well. Maybe play with the shaders. Why not. You can improve the trail of the projectile too and make new impacts or muzzles. You can also create a new and different area of effect attack with different themes different shapes and timings and colors. You can try to recreate the that you have seen around. And if you think you need to get better at digital illustration to create better textures or flipbook animations if you have passion for creating flipbook animations then go ahead and try to improve that skill. But at least now you know what you need to improve and you can focus on that specific downside of your skills. If you want to challenge yourself, you can always try to recreate my tutorials You can always try to recreate some of my effects that I've done in my YouTube channel as an academic exercise. You will eventually learn something new or you can watch the big games and decompose their effects and try to also recreate all the triple-A games are doing their effects as well. You can always participate in the monthly challenge there is in the RealtimeVFX Forum each month. There is a new challenge and it's definitely challenging and it teaches you how to improve and to overcome obstacles and get creative get out of your comfort zone. It's a great way to learn something new to go out of your boundaries as it can see you have many options. What really matters is that if you love this art you keep on practicing and getting better. And I really hope that you have learned the basics of visual effects and a bit more than that of course. But most importantly that you enjoy in doing this and that you are full of curiosity to keep on learning. So that's it. Guys I really truly hope you'll like this course. I did put a lot of effort into making this happen and I would really appreciate to have your feedback. So thanks for watching and keep on learning.
 Gabriel Aguiar Prod, Game Development