Transcripts
1. Introduction: Hey, guys. Welcome
back to another class. My name's Braden Messer. I am an artist, an
author, a YouTuber. And today, I'm going to be the one that teaches
you how to draw. So this is part three of a three part series that I've made where I'm
taking you through, and I'm showing
you how you can go about unleashing your
charcoal drawing potential. The way I'm going
to be doing that is teaching you the
three layered method, which is a unique
charcoal drawing approach that I've developed myself over just many
years of drawing. This method is outlined
very nicely in my new book, drawing the portrait, step by step lessons for mastering classic techniques
for beginners. Yes, it's a portrait book, but it breaks down the three layered
method in detail from definitions on through some of the most intricate applications. So if that's something that
you would find interesting, I will provide a link to the book and
description of the class. This one, we are
heading to the ocean, and I'm going to show
you how you can use the three layered method
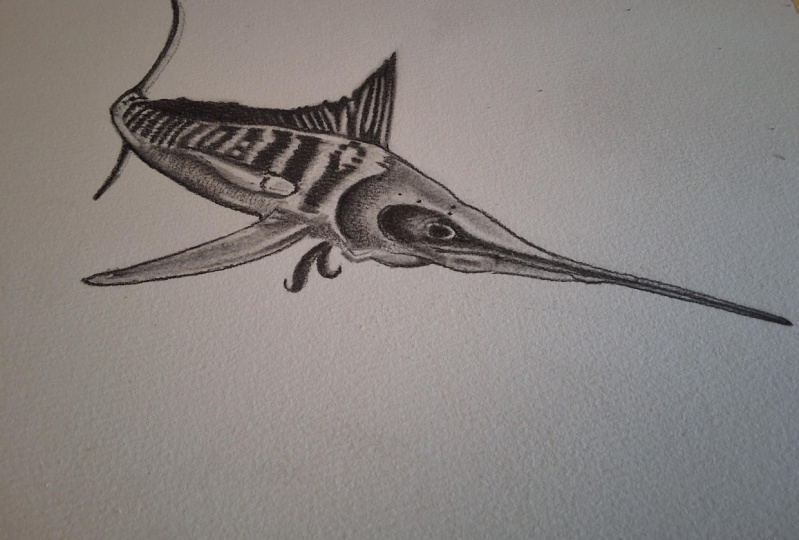
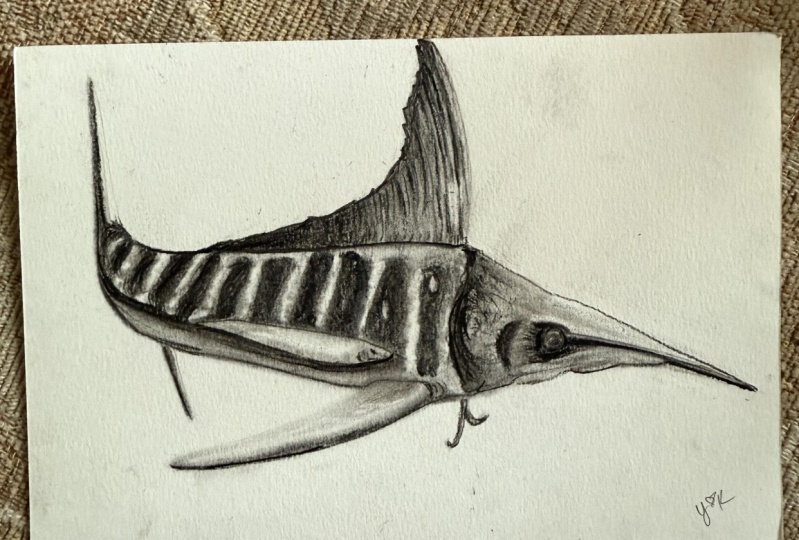
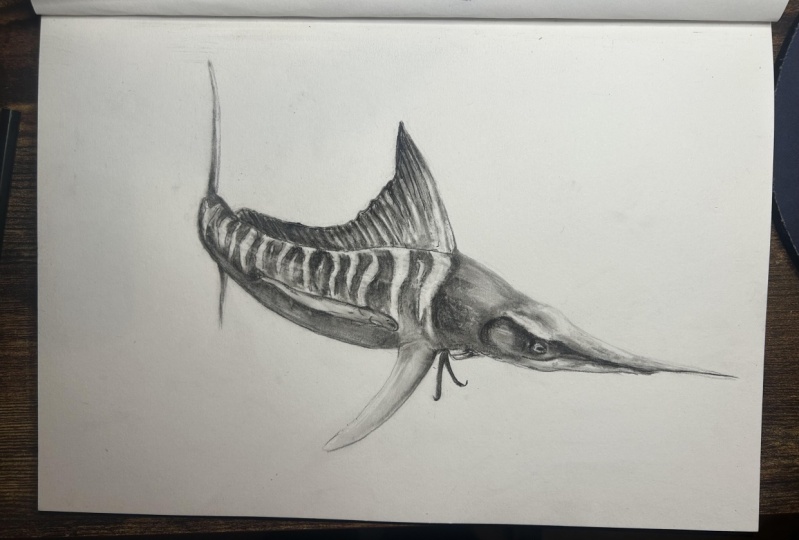
to draw a Marlin. The Marlin is one of the
coolest fish in the ocean, so I figured, hey,
let's draw it. Now, what to expect. In this class, I'm going
to be showing you how we begin to draw the contour
lines of our marlin. Once we have the contour
lines established, I'm then going to show
you how we can use soft charcoal with brushes and smudgers to lay down the
foundation of our drawing. Once we have the foundation, I'm then going to show you
how we can continue to use medium charcoal and
blending layer on layer of soft charcoal to give
us some darker tones and really lower those values in specific places
where they need to be. And then I'm going to
show you how we can use medium and hard charcoal pencils for line work and detail work. And once we tie all
those things together, I think you're going to be
pleasantly surprised at how well your Marlin
looks on your paper. So that's pretty
much what to expect. Now, I will say
this is Skillshare. So make sure that
you are following along and you upload
your project. And then once you've
uploaded your project, make sure that you leave
your review of the class. This way, I can actually feature your project in
my monthly newsletter, which goes out the first
half of every single month. So this is a great opportunity for you to not only get
your name out there, but your art as well
amongst your peers. Now, I know that the
three layered method can be intimidating. There's a lot to it,
and I understand that. So what I would
recommend just for your own sanity is go through the class and just
watch it once, right? Don't try to draw along with me, watch it, absorb it, feel it, hear it. And just try to
really embody it. Then the second time
you watch the class, that is when I
want you to follow along with me and draw true
drawing because you're going to just understand
a lot more about what it is that you're doing versus trying to nail it
right off the bat. So before we jump
into the class, I just wanted to inform
you that I have gone through and updated my one
on one tutoring sessions. So now, rather than just 130
minute session per month, you get 4 hours worth of one on one drawing experience with me where I can share my screen. We can draw animals, we can draw portraits,
whatever you will. So be sure to check that out at the top of my homepage
here on Skillshare. All right. That's
it. That's all. And hope to see you in class.
2. Draw your Contour Lines: Okay. So for this one, we're going to be using just
a normal graphite pencil. We're also going to be using a battery operated
eraser from artisan, as well as a Pentel click
eraser and a mono zero eraser. We're also going to
be using a soft, a medium, and a hard
rated charcoal pencil. As well as a couple of
different smudges here, number seven and
number one and a 3/16. We're also going to be using
scratch beefs paper with some soft charcoal
that I've graded into the top of an old
candle lid here. We can check our
tone onto the paper before we actually apply
it to the drawing. And we're also going to be
using a couple of brushes. The gold one is number six, and the black one
is a elf brush from my wife's makeup kit.
Alright, here we are. So we have our
reference image in the corner of our Marlin here. And with any drawing, we want to start with what they call the basic
shape, right? Shape and drawing, if
we're being true to definition is only ever
two dimensional, right? Drawings, holistically speaking, are only ever going to
be two dimensional. And what separates
your normal artist from great artists is the great artists are able to convey that illusion of
that third dimension through certain tricks
with their pencils. But what we're doing
here is as I'm looking at the reference photo, I'm trying to identify
what that basic shape is. So when you are looking
at your reference photo, what you want to do
is you don't want to busy yourself with the
details of the drawing. Details come later. You only
want to focus on the shape. So here what I'm doing
is I'm marking the top of the fin here. I'm going to go all
the way to the top. Bear in mind that in this step, we are using an extremely
light pressure control. Okay? We don't want to press hard
because if we press too hard, then the graphite is going to be pressed into the paper
and not only that, but we'll do what
they call indent the paper to where even if you erase and lift all of the
graphite off the paper, the paper is going to be scratched. And that's
what you don't want. So just make sure that you use a nice light pressure control
so that you avoid that. The right about here
is where it looks like there's the gill of the fish. And then somewhere right
about here is where that next fin is going to be
something like that. One of the things that you
want to keep in the back of your mind as you're
drawing out the shape of your drawing initially
is that you want to understand that you can always erase bits
and pieces of it, as you progress
through the drawing. Don't think by any means that
this part of the drawing is finite or absolute
because it is not. Okay? That's why we have erasers and three different
types, in fact, so that we can fix any proportion errors that we might draw ourselves
into on this step. But then here we
got the bottom of the tail back of the tail here. But nice and light,
that's the big thing. And if you want to give a
certain line another go, like what I just did here for
the back, you can do that. And I'll show you how
we can go in with our eraser and we can basically repurpose lines
and make sure that our proportions are a little bit more accurate to the
reference image. But then right here, we
got a little fishy that's tagging along with
the marlin here. And so we're just going to do a basic outline of that fish. Again, we are not worried about detail work in this
step, not yet. Detail work comes many
steps later when we are retrieving high values with our erasers and we are
using our hard charcoals. Okay. But then here what I'm doing is if you look
at the reference photo in this basic area is we have basically the stripes
of the Marlin. And so what I like to do is wherever there's
contrast, right? Black against white
or lower values, immediately against
higher values, I like to call that
out in this step. So what I like to do is basically what
you're seeing here. I like to take my
graphite and I like to designate where those lower
value areas are going to be. And this will be nice for us moving forward when
we bring the charcoal into the composition because we'll know exactly where we can start to put the
charcoal down to build up those lower values, right, those darker
spots in the drawing. I have found that outlining those major contrasts
in this step of the drawing definitely helps
me when it comes to knowing exactly where I need to put
that charcoal onto the paper. Because when it comes
to drawing theory, and I speak to
this a lot when it comes to retrieving high values. With high values, there's basically two different
approaches that you can use. One, I use all the time. That's what I call
retrieving high values. And that is essentially
where you go in with an eraser where you've already laid down
charcoal or graphite, and it has a lower value, and you swipe the paper and you lift that graphite or that
charcoal off of the paper, and you essentially
retrieve a higher value. Well, what I'm doing here is
the exact opposite of that. It's the other avenue
that you can take where it's called
saving a high value. That is the exact
opposite of retrieving. Basically, that is
where you don't lay any charcoal onto the paper. And effectively, what you're
doing is you are saving that higher value to where you don't have to use eraser work, um to retrieve the high value. But it's up to you.
It's up to you. If you don't want to do this, if you don't want to
outline the stripes of your fish, you don't have to. This is just everything
that I speak to and everything that
I do works for me, but just because
it works for me, that doesn't necessarily mean it will work for you, right? Every artist is different, and just because an artist's approach is different doesn't necessarily mean that it's
wrong. It just works for them. But in this step, you know, building and drawing
out the shape step, this is for you. Okay? You can add as much detail or as little detail as you want. But see, I hear what I'm doing. Remember how I said that
this step wasn't absolute? Well, this is exactly why. You can go in with your
mono zero eraser now. You can erase those
lines where maybe your proportion wasn't
to your liking, right? You know, if you've tuned into a lot of my other tutorials, you already know that I actually don't like to
call those mistakes. What I like to call those
are adjustments, right? You're making an
adjustment so that you can be better
off moving forward. And that's all this is, right? This is just an adjustment. That's all this is.
We're just making an adjustment so that our
drawing will be better for it. And we can do that.
We can do that. There's no set rules in drawing. There are only flows and processes that are
subjective to the user, and some work better than others depending on what
the end goal is, right? What it is that you are
trying to accomplish. But what we're doing here I'm just looking at the
reference photo, and I'm just trying
to establish, where that jaw is, where that eye is, again,
this is not absolute. If I need to go back in, I
need to make an adjustment, once I get to the head, then that's what we'll do. Most of the time, whenever you approach a drawing such as this, especially with charcoal
because it's so messy, trust me, there's a reason why I wear a drawing glove, right? It's to keep the oils from my hand off of the paper because charcoal loves to latch on to the oil from your hand,
the residue, right? It's left onto the paper. And then here I got my
Pentk liquor eraser and I'm just kind of blasting all of this runaway graphite from
the outlining process, right? Trust me, the cleaner you keep your drawing as you're
going through the process, the nicer it will look end.
3. Draw the Dorsal Fin: Okay, well, that's good
enough for me as far as the basic shape is concerned. So now I'm going to take
my scratch piece of paper, and I got my candle cover here that I flipped upside down, and I grinded a whole bunch of soft charcoal into it, okay? And I'm gonna take my
number seven smudge, I'm just going to
roll it around, get a nice base of
charcoal on there. I'm gonna check my tone,
and we're just going to, very lightly start applying a base layer of charcoal, okay? Now, for those of you that have been following the
videos for a while now, you already know this, but for
those of you who have not, maybe this is your
first tutorial, I'm going to go ahead
and I'm going to explain the differences between soft medium and heart charcoals and why we use them
the way that we do, in regards to the three
layered method, okay? But basically what this
is, I'm using my smudger. And I'm using the
soft rated charcoal to get a nice base of
charcoal onto the paper. One of the reasons why
we use soft charcoal, as opposed to medium
and hard charcoals is because soft charcoal has the least amount of binder in it from the
manufacturing process, and it's because of
that that it spreads across the paper very
evenly, very nicely. Was opposed to medium charcoal, there is more binder in it, and with hard charcoal, you guessed it, there's
more binder in it still. And because of that, when
you start to mess with the ratios of binder
to charcoal, right, as you progress further
down the line in regards to adding
more and more binder, that actually affects how the charcoal one not only
acts on the pencil tip, but how it actually
applies onto the paper. One of the things you'll find as you dabble with charcoal and especially if you use the three layered method
is you'll start to understand that hard charcoal
doesn't spread very good. On paper. The medium charcoal is a nice goldilocks, right? Like right here, what
we're going to do is this is a medium charcoal, and I'm going to establish the top of this fin
here, dorsal fin. And one of the
reasons why I'm using a medium charcoal now instead of the soft charcoal that
I just started laying base layers with is because it does have
more binder in it, and because of that,
I'm able to run really saturated lines and I do not have to worry about
my pencil tips breaking. And while we're on the
subject line work, okay? A lot of times, you
have to take into consideration the
quality of a line or rather the weight
of a line, right? So like say, for
example, right here, I'm going to take
my medium charcoal, and I'm just basically
highlighting the stripes on the
back of this Marlin I'm designating and
I'm really bringing out the boundary of
that contrast between the low value of the stripe and the high values of the other stripes like
right here on the belly, I'm going to pull and I'm
just going to lift up. Right? Lift up as I conclude
and what that does is I start to mess with the line
quality of that line, right? Now, line quality by definition, for those of you that
don't know is basically the thickness or the
thinness of a line, okay? So when you start a line, you want to make sure
that you're maintaining the same pressure and
the same speed, right? Because, you know, if you start out slow and then
you go fast or, you know, vice versa,
that line quality is not going to be consistent
throughout the line. And then, of course, one of
the things that I like to do is as I conclude my line, I like to lift up
because what that does is that thins
out that line. And when you do that, you can show depth in
a drawing, right? Like, you know, the
tail, obviously, when you look at the
reference photo is the farthest thing
from the viewer's eye. And so as the artist,
you can start to manipulate where
your viewer's eye spends the most amount of time, you know, given the
detail and, of course, selling that illusion of
that third dimension, right? We talked about shape. We talked about how that
was two dimensional. We talked about how a drawing in general is only ever going to be in two dimensional
space, right? So it's your job as
the artist to sell the viewer on that
third dimension, right? Because it's an illusion.
That's what it is. A really, really good drawing
is just a simple illusion because it looks
like your viewer can reach out and
touch it, right? When, in fact, they cannot. Okay, so here, same thing. I'm just going to take
my medium charcoal, and I'm establishing
that nice saturated line on the top of the
Marlins dorsal fin here. Okay? And getting back to lines now that we're
doing another line, line weight is in tandem with line quality as far as you
want to understand it, right? Line weeight is used to describe the strength of a
line or how light or dark that line appears
when it's on the paper. So that line that I
just established has what I would call a
nice mid line weight, and it has a nice middle of the road line
quality about it, okay? It's not too thick, but
it's also not too thin. Now here what we're doing is we're doing brush work, okay? And remember how I went in
with the tail and I was using my number seven smudger with the soft charcoal to
establish that base layer? Well, one of the
reasons why I was using the smudger is because that
was a very, very tight area, where with the dorsal fin now, I can get away with laying down that soft charcoal with
my elf brush, right? Because it's a
larger surface area. There's more room to work, if you will, right? And of course, where
there's more room to work, you can move a lot quicker. But with the smudger and
especially with the brush, you don't need to
press hard. Okay? There's different
brush techniques that I'll show you like
this, for example. You can just start to
pull straight down. I ran that charcoal
along that line, and now I'm pulling down. And one of the reasons why
I'm approaching the fin in this manner is because when you look at the reference image, the lowest values, right? The darkest spots on that
fin are along the top of it, which is why I took my
medium charcoal and I ran that nice
line along the top. So now we're bringing and we're starting that
base layer from that line, and we're bringing it
down because this fin, we are not going to see
another defined line on this fin until I establish where the
spine of this fish is. Okay. Now, implied lines
and defined lines. While we're on the subject, a defined line occurs when you continue a line without
any break, okay? Like basically the line that's on the top of
the dorsal fin here, the one that I'm taking my
smudger and I'm running that soft charcoal
right up to the line. All the way to the top
of the dorsal fin, that's a defined
line by definition. Then there's what they
call implied lines, which are basically
where if I was to take my smudger, let's say, and I was to run my charcoal up to the
edge like I'm doing now, but I never established that defined line with
my medium charcoal. I just stopped it at a nice
cohesive break, right? That would be an implied line
because you're basically ending that low value immediately
against a higher value, but you're not really
defining it, okay? That's implied. That is what, by definition, they
call an implied line. Alright, enough about lines. But basically what I'm doing now is I'm taking my smudger, and one of the reasons
why I switched it up from my brush to my smudger is that my smudger
gives me more control over exactly where I'm bringing
out those low values, okay? I move a little slower. True. But I maximize my control
on exactly where I want that charcoal to go and exactly where I want those low
values to be conveyed. Brushes, you move quicker, but you have a lot less control. Smudgers you move slower, but you have a lot more control. So it's a give and take, right? But a lot of times
it's all about knowing when you need to
basically gear down and really emphasize control. You will find too, that as you progress, through
your drawing, the amount of control that you need in certain situations, especially when it
comes to adding detail increases slowly, but surely until the
very end of the drawing. When you're establishing
base layers, you can use brush
work, smudger work, you're going a mile a minute. But when you start
to hone in on, say, the eyeball details in a
fin, let's say, scratches, texture on skin,
that's where you need to rein it in and
you really need to have a hyper focus
on a small area. So just be aware of that.
But then just like this, I'm pulling the charcoal. This is all soft charcoal with the exception
of the defined line, which was a medium charcoal. But also bear in mind,
as I'm referring to my reference image so that I know exactly where to bring
out those low values, I am using a very, very
light pressure control. Throughout this entire
process, never push hard. You should never
have to push hard in any stage of the
three layered method, whether you're using
a brush, a smudger, whether you're running
lines or bringing out detail work,
never press hard. Let your tools do
the work for you.
4. Build your Fin Values: Okay? So here what I'm doing is I'm taking my monozoaster, and I'm just kind of
redefining exactly where that line is going to need to be run with my medium
charcoal, okay? So here's my medium charcoal. And what I'm doing now is I'm looking at my reference image, and again, not pressing hard. But what I'm doing is now I'm bringing out the
variation, right? This is where the
different values within the greater value scale are able to be
accentuated, okay? From complete black to complete white and then
everything in between. This right here, this layering of medium charcoal on top of soft charcoal and then
eventually hard charcoal for detailed work on top of the medium and the
soft charcoal. This is where the drawing
really starts to pop. This is where your
viewer's eye goes, Wow, that looks brilliant. Brilliant in the
sense that there's complete black to complete white and everything in between. In a lot of my other
drawing tutorials, you'll hear me talk
about how it is crucial that if you want a drawing that
jumps off of the paper, if you want a drawing
that really gets a viewer's eye to appreciate
what is on the paper, then you need to understand
this basic principle, especially when it comes to the monochromatic scale
of black and white, okay? 'Cause think about
it with charcoal, we don't have the
luxury of color theory. We don't, we don't
have pinks and purples and blues and
reds and oranges. Like, no, no, no, it's
black or it's white, and all the different values of gray in between that, right? So Okay. So now here what
we're gonna do is I'm gonna run a
define line, okay? Gonna start and notice. Keeping the same speed. And I'm just pushing pushing this line. Nice and steady.
Nice and steady. And then I'm gonna lift
up, as I conclude. Boom. Just like that. Okay. Then while we're
here, I'm just gonna I'm going to go in and I'm going to continue to layer this fin. Again, not pressing hard. This is where I want to bring
out those spines, you know, if you will, those spikes
within the greater fin. And if it looks
gritty, don't you worry about that because
I'm going to show you another trick with
the smudgers and our brush work where we blend the charcoal and we get a very nice gradation
across our values, and we bring out a
smoothness to it. Charcoal is funny that way because when you
softly apply it, regardless of grade, it wants
to rest onto the paper. It doesn't seed into
the paper naturally. That's what smudges are for, and that's what brushes are for. Okay. And so when you're very
soft with your application, it gives you a lot of versatility as far as
do you want to push the charcoal into the paper and bring out some
definitiveness or do you want to just hit it with
a brush and kind of blend it across
real softly, see? But here's the
thing. When it comes to what I like to call
targeted blending, you want to use your smudger. What this does is this maintains where you put that medium
charcoal onto the paper. Thus, it brings out
the fact that you wanted to put a lower value
in that specific area. Then not only that, but if you want to go through and blend and do
a nice gradation across all of those
values once you've established where those low, medium and high values
are with your smudger. You don't do that bit
of it with a smudger. You do that with a brush. Most of the time, the
number six brush, just a nice light blend and
you have your gradation and it looks realistic, right? But then again, like
here, for example, you can see the
targeted blends that I'm able to produce
with the smudger. I'm running my smudger
right up against that defined line that I ran with my medium charcoal, yeah. Just like that. There we are. Wonderful. You can't
do that with a brush. You know, you can blend
stuff all day long. You can bring out
gradation with a brush, and you can move quickly. But nine times out of ten, the smudgers again, moving
slower but more control. Targeted blends.
5. Place your low Values on the Body: And then as promised, the
number six, where we are. I'm just gonna
kind of try to get a nice nice light blend here with this. I'm
just checking it. More or less loading
up my brush. I'll just pick up a little
bit more. There we are. There we go. There we go. Brush work can be intimidating, especially if you've never
drawn with brushes before, but just like anything, once you start through action, you learn what works and
you learn what doesn't. But just like this, real
smooth, real light. Just do a real light blend. Again, I want my
charcoal to rest on top of the paper so
I'm not pushing hard though even though this charcoal is being pulled across
my high values. I know I mentioned
that we were going to try to save these high values, but a lot of times, those of you that have been following how I
draw for a while, you know that I love to retrieve my high values with
my Monozya eraser, but I do understand
high value theory. And so just because I
speak to it doesn't necessarily mean that I
want to practice it in this specific drawing.
So just bear with me. But here, effectively,
what I'm doing is this is just a base layer. That's all this is
a nice base layer. And from here, what we can
do is we can either build up lower values with
our medium charcoal, whether we're doing that with
the pencil or the smudger, or we can go back through
with our monos or eraser and we can
retrieve our high values. Okay. But that's also one of the reasons why
we want to go nice and light with the
brushwork because when we go to hit
it with the eraser, we want to be able to lift
that charcoal right off the paper and really
retrieve a nice high value. If we press too
hard, that value is not going to be nearly as high
as it would be otherwise. So just keep that in mind. But then here what
we're doing is we're establishing the low value. And then we're just gonna go to kind of pull this
charcoal forward, right, right from the line.
Gonna pull it forward. Nice light pulls a remember the way that the light is
striking this marlin, we don't want to put too
much charcoal on it, right? Less is more. With charcoal, less is
always more cause remember, you can always add
more charcoal. It's very difficult to
take charcoal away. And if you put too much
charcoal on the paper, even if you use a nice light pressure control,
it can still be difficult. So keep that in mind. Okay. So now I think it's time that we start to bring
out these stripes a bit. Okay. So when I'm looking
at the reference photo, it's almost kind
of blotchy, right? This first stripe here, this is how we're
going to do this. It's nice and light, maybe a little smudge
here, a smudge there. Again, one of the
reasons why we're using the smudger is because I
want that control, right? This would be very, very
hard to do with a brush. I just want to establish
these stripes like this. Light pressure control? Because I can just go over
the stripe again and again and it'll just blend itself more and more
and more and more. And then, of course,
I can go in with my brushes at the end, and I can soften and lower the value and be a lot
more precise about it. And I'll show you how to
do that here in a bit. But then now that I have
that line established, I can go in and more or less, what I'm doing is I'm just
getting a very defined break between the low value and the high value of
that first stripe right after the
gill of the fish. And then you can just
pull pull just like this. See this? You
establish the line. And then once that
line is established, you just pull left to right. Then here, what we
can do is we can push can push our
smudger this way a bit. Then here while we're here, let's just establish
the the bottom of the fish's jaw here. But make no mistake about it. I'm not pushing hard. I know it looks like I am, but I'm not. There's no need. No need to press hard now
with this technique. And one of the things
you'll find, too, is as you vary pressure
control from extremely, extremely light to, you know, maybe a little harder, but just just barely, right? You'll notice the differences in value that you're
able to convey. And you can start to mess
around with, you know, base texture and base layering with those different
pressure controls as well. But then here what I'm doing is we are just going
to establish that second low value stripe on
the side of the marlin here. We want to be conscious of the direction and the flow
of the fish's body, right? We just want to
be aware of that. Yeah, there's some
interesting facts. I didn't realize this, but I was doing some
research, and apparently, there's differences between
what they call sailfish, Marlins, and then swordfish. So a quick way that you can
tell if what you're looking at is a sailfish
is a sailfish can be recognized by the
large dorsal fin. It actually looks
like one big sail and it has accordion pleats, I guess, is what they call it. Then like a marlin, Marlins
have a single dorsal fin that connects along the fish's back to a short
soft looking ridge. So that's what we have here. Then a swordfish has a dorsal
fin more like a shark, and it even extends far up. You, it looks kind kind
of like a feather. So if you're ever in the ocean, Um, that's a quick way that you can kind of decipher what it
is that you're looking at. But, yeah, just line after
line after line here. Nice, medium pressure controls. And notice how I'm
pushing. I'm pushing kind of left to
right, left to right, but I'm never forgetting
the flow of this fish. Because when you look
at the reference photo, everything about the texture, right, everything
about the shadows, everything goes from the
front to the fish and follows the line of the body all the way
to the tail, right? Nothing goes up and
down. Everything goes left to right in
regards to the shadows. And because we're working
in the monochromatic scale, we need to pay attention
to that, right? We need to pay
attention to that. But then here what I'm
doing is I'm just kind of establishing the shadows
right at the low values that we see immediately under the smaller fish that's tagging along with our marlin
and our reference photo. And what we're going
to do is I'm going to grab the medium charcoal
pencil here in a second, and I'm going to punch in some defined lines and I'm
going to bring out that fish. And you'll get to see how
those lines will make that fish on the side actually look like it's in
front of the Marlin, little landscape effect, little uh elongated
illusion, if you will. So that's the thing
that a lot of people don't realize
about people that draw, you know, especially
people who draw, you know, more photo realistic styles, is that they're
actually more like magicians than they
are anything else. It's all about
fooling the viewer into what they think
they see, right? Here we are. What I'm doing here is if you look at
the reference photo, there are some stripes that have some high value breaks
in between the stripes. So this is just a quick, easy way that it's almost
like a cheat, right? You can take define lines with your medium charcoal and you can draw around that high value. Essentially, what
we just did that's a form of saving those
high values, right?
6. Build your Body Values & Line Work : But then here what
I'm doing. I'm just taking my medium charcoal pencil and making sure that my medium charcoal
pencil is sharp here. And I'm just referring
to the reference photo, and I'm running these
defined lines down to establish the boundary of
the body of this fish. This is what I've done
in my time lapses. I have that time
lapse of the Mo, time lapse of the tiger shark, of the gray white shark, how I'm doing the linework
in this tutorial is exactly how I did the
linework in those pieces. Okay? Nice, steady pulls, and then always, always, with very few exceptions, when you go to
conclude that line, you lift up, right? And you'll thin out the
quality of that line. I find that when
you do that, when you lift up when you
conclude your lines, it just gives your linework just a little bit
of sass, right? Just a little bit a
little bit of character. Compared to if you were
just to hold it, right? You know, give your line work a little bit
of finesse, right? Make sure that you care how
each line looks, right? It's all you have to do.
It's all about carrying. If you care, you'll pay
attention to the details. Remember that quote, How you do anything is how you
do everything, right? Just because you think that
somebody might not notice, it's not about them,
right? It's about you. It's about your quality of work. You know, why do
something if you're just gonna, you know, not care and just kind of
halfway put your heart into it. So just be aware of that. So now what we're
doing is I'm going through and I'm I'm
barely touching the paper here because I'm looking at the reference photo and I'm
realizing that there are variations in the
value that we see across this fish that's on the
side of the Marlin, right? And so I can take my medium charcoal
pencil because, again, the only thing that gives you more control over exactly
where those low values go on your paper than a smudger is a very
sharp pencil tip. Okay? So what I'm doing
here is I'm going right up against that defined line of that fish that's on
the side of the Marlin, and I'm, you know, very lightly. Going in, I'm establishing a nice gritty layer
of charcoal to effectively lower the value
that we see in the stripes. And then I know it looks gritty, but again, just like
with dorsal fin, we're going to be going in
with smudgers and brushes and we're going to be blending
that grittiness away. That grittiness will
literally disappear, and what we'll be left with is a really smooth gradation across all of our
different values, and it'll look like
one cohesive image. Just like this. And with the pencil, you can
go in and you can establish exactly where those lines are if you don't want to waste
time with the smudger. Again, when you're
in smaller areas, control is everything, okay? Just like this. You can see how hard it would be to establish this control if I didn't have a really
sharp pencil tip, okay? Just like that. So now that I got some
runaway charcoal here, I just want to
clean this up a bit with my Pentel click eraser. This eraser has a
much bigger head on it than my other two erasers. That's why I like to
use it for when I get runaway charcoal
like this, okay. Alright, more defined lines. So we're going to take
the medium charcoal. I'm just gonna start
it right here. And I wanted to do this in one real time take just so you could see
this is the speed, and this is how we're establishing that defined
line all the way to the end. There we go. So now what I'm gonna do is I'm
gonna take my smudger. And we just this guy needs
he needs more of a tail. He needs more of a tail, so we're just gonna
pull down from that define line,
just like this. And now our Marlin
has a completed tail. Wonderful. Now what I'm gonna do is I'm going
to take my smudger, and I'm just going
to start blending a lot of this greediness. Again, not pressing hard. I'm letting the smudger
blend the charcoal for me so that that
grittiness goes away. But I don't need to
press hard at all. And you can use a
number seven smudger. You can use a number one. You can use the 316
if your drawing is a little bit smaller.
It's really up to you. Just remember your smudgers
has with your pencil tips. The smaller smudger you go,
the more control you have. The sharper your pencil tip,
the more control you have. So what I'm doing
here is I'm just taking my smudger and I'm
going right up to that line, and I'm more or less
blending from the line up. You see what kind of
effect that gives me? See how all of a
sudden that, you know, the belly of this Marlin is starting to look
almost rounded. Well, here's another
trick. See this. See how I'm taking my
smudger and I'm just pulling down in the straight
line and then pulling up, down and up in the
same direction. Look at that. What
does that give me? That gives me that roundness. Or should I say that
illusion, right? That illusion of roundness. Or bringing out three dimensions in two dimensional space. And now I'm just going in
with that smudger like 3/16. And I'm just
blending away all of that grittiness that was left behind with my medium
charcoal pencil. Right? Okay. He's
kind of a trick here to establish that spine. You can just take your smudger. But, I mean, this is pretty much all I'm doing with my smudgers. I'm blending away all
of that grittiness. And at the same time, while
the grittiness is going away, the value that's
being conveyed on those specific areas of
the drawing is lowering. Just like this, see?
Just like this. Okay. So now I'm going
to take my elf brush. And I'm just going to
very lightly hit this. What this is doing is
giving me gradation, but then it's also
giving me a nice even blend across everything. And then I'm able to go in with my number seven smudger here and go right up
against the line, and I can start to bring out exactly where those
stripes end on the fish. And I can also blend away any of this greediness that's in
these stripes as well. And also, bear in mind that
I'm moving extremely quickly. Obviously, if this was a
commission piece for a client, I would probably spend many, many more hours on it
than I have here, but, you know, given the nature of this video, it's
tutorial, right? And it's longer
than most movies. So otherwise, I would have a lot more
tricks that I could show you. But the cool thing about
it is I can make as many of these videos, as I need. It's not like this
is a one and done type type of deal, but
then here what I'm doing? I'm just taking my
number six brush. More or less bringing out
that gradation, right? That's the other thing about this specific drawing
that I wanted to speak to is DaVinci is one of my
personal favorite artists, and I'm sure that he wasn't
the first artist to do this, but he was definitely
one of the first prominent artists
to speak to it. That is, he talked about
what in optics is known as a landscape approach or what they call the
landscape method. But effectively, what it
is is it is a play on the eye where through detail and linework you are able to basically dictate
where the viewer's eye spends the most amount of time. I've mentioned this in other
drawing tutorials as well, but while you're
here, basically, what DaVinci said was any area in a drawing that has the most
amount of detail work, that is where the
viewer's eye will subconsciously spend the
most amount of time. The flip side of that
is out of focus. So anything that's out of focus, the viewer's eye
will subconsciously, there's nothing really
to appreciate, right? It's blurry. Who likes to
stare at something blurry? That's one of the reasons
why we go and get glasses is because we
don't like looking at things that are blurry.
That's not pleasant. In this drawing, when you
look at the reference photo, the head of the Marlin, the fin, the side of the Marlin, all of that is very detailed. That is where the viewer's eye spends the most amount of time. But as you go back down
the Marlin's body, towards the tail,
everything gets blurry. The tail itself is
actually blurry. It's not even defined,
which is why I have not outlined that
tail is because I do not want the
viewer's eye spending too much time back there
because it's blurry.
7. Draw the Pectoral Fin: So just something interesting. Maybe you didn't know that.
But now what I'm doing is I'm taking my artisan
battery operated eraser, and I'm going
through and I'm just doing some high
value retrievals. And the cool thing
about this one is you can do high
value retrievals, and through doing high value
retrievals, just like this, you can actually
bring out a lot of detail work as far as, you know, the variations between high, low and mid values. And you can also convey
texture when you retrieve high values
with your erasers, as well, whether you're
using the model zero eraser or you're using a battery operated
eraser such as this one. So now see I've switched it up. This is the mono zero eraser. This does not have a battery. You are the battery when it comes to the
mono zero eraser. But look at all this detail work that you can bring out, right? Which is simple, high
value retrievals. That's what these are. Look at that detail
work. Just like that. Wonderful. And see here, we can establish
just high values. Okay, so now that
we've done that, we're gonna go through and
we're gonna have some fun. We're gonna have some fun.
We're gonna get serious here. So here, what we're gonna do is I am going to
start at the front, and then I'm going
to work my way back. This is establishing
the base layer for the side fin of this Marlin. Nice and light. Nice and light. No need to overwork it. Because what we're
gonna do is we're going to go in with our eraser, and we're going to retrieve and get a nice
crisp edge, right? And then from
there, we'll go in, and I'm going to show you that not all lines are
created equal, right? There's some tricks that
you can do cause remember, it's all about staying one
step ahead of that viewer. What they think they see is what you wanted
them to see, right? So as promised, we are establishing the
crispness of that line. If I was to leave that alone, the front part of that, that
would be an implied line. That's a perfect example
of an implied line, not a defined line, okay? Alright, see the back
of this fin here. Let's get that skewed up here. There we go. Okay,
so as promised, let's put a define
line on this puppy. So we're going to
start from the body. Nice and steady. I want
that line quality, right, that thickness
to be the same. So I have to go at
the same speed, same pressure all
the way through, and then I lift up right
there, as I conclude. Wonderful. Okay, so now I'm going to do is
I'm going to take my number seven smudger, and I'm going to start to
bring out the shadows, right and bring out
the underlying form of how that fin plugs in to
the main body of the fish. That's what I want.
You can even take your elf brush here and you can start to blend some
of this away if you want. But again, don't press hard because what we're going
to do is we're going to go in with our model zero
eraser and we're going to retrieve high values, which, in effect, what
that's going to do for us is that it is going to
give us detail, right? Like this, just as promise is going to stand it up on end. Here. I'm just gonna I want to establish the back
the back of this fin. I don't know if I
should leave now. I'm not gonna leave that
implied. Just like this. Nice long pole. Just like that. See that? There we go. See how with that
nice base layer, even though we went and did
those high value retrievals, we were able to convey
texture, right? We haven't lost that
underlying form. Okay. So now, what we're
gonna do here is I'm going to take a hard charcoal, not a medium charcoal,
a hard charcoal. I'm going to do a
nice I'm going to do a nice broken pole because I want the line quality on this line to be thin
compared to the front. I want the front line to be
thicker, a thicker quality. I want the one on the back, the line on the back of the fin. I want that to be of
a thinner quality. So that's why I used
a hard charcoal. And this right here
is a hard charcoal has the most amount
of binder in it, and so it rests on top of the soft and the medium
charcoal very nicely. Very nicely. It's still
blendable. I can still blend. But it's just perfect
for detail work. Okay, so now I'm gonna
take my number six brush. I'm just gonna blend
this real nice. Barely pushing. I'm barely
pushing the paper here. See that? Barely pushing. 'Cause I don't want to
push it too hard, right? Because then I'm just gonna blend away all that detail work that I just put into the
fin with my hard charcoal. Okay. So while we're in it, right here what I'm
gonna do is I'm going to take my
medium charcoal. I just want to establish a bit more of these lines
here in the back, but I don't want to give them too much detail cause again, we were talking about the
landscape method from DaVinci. Well, I want to imply
that same principle here, and I want to make sure
that the viewer's eye thinks that this Marlin
is elongated, right? I want to sell the illusion
of that length in the fish. And how we do that if we're students of Leonardo Da Vinci is that we accomplish that
with detail work, right? Sharpness versus blurriness. And here we're gonna continue
to build these stripes. On our medium charcoal or
with our medium charcoal. And then yeah, any grittiness, you can hit it with smudgers whether you're using the seven, the number one or
the three 16th size. That part of it is completely up to
you because who knows? Maybe your marlin will be a lot bigger than mine. Then
see this trick here. Remember how I was telling
you about the direction, the left to right shadow
direction? Check this out. Quick little smudger
trick. You just pull. Pull, and then you push.
Pull it left to right, push it right to left. See that? That's a cool trick. I love that trick because
what that does is now that has basically
given us that long look. Those left to right shadows
across the stripes. Then we just take our
number six brush, real light. Real light. Real light. We just out. Just blend that out. Okay. So now we're gonna
take our elf brush. And we're gonna focus
underneath this fish. And I'm just gonna I'm
just gonna dab the paper. It's like, this is more
or less what I'm doing. I'm just pushing. I'm pushing. The brush into the paper. And I'm basically
seeding that charcoal, those particles of charcoal into the paper because if you
look at the reference photo, the light hits the
top of the fish. The light hits the top of the fish on the
side of the marlin, but then underneath the fish on the side, that whole belly, that whole underbelly
inside from the midsection down is
all extremely dark, right, a low value
because the light just simply is not
hitting it, right? So that's how we
accomplish that. Okay. So now we're taking our smudger. And again, just like I was
using the number six to kind of punch in, you know, the underlying form of
the muscle tissue, right, where that fin plugs into
the main body of the fish. We're doing that
with the smudger. And then here I'm
just going in and I'm retrieving the center of
these stripes, right? I don't want to get
rid of everything. And then here, if you look
at the reference photo, these stripes do go down a bit
past the fish on the side. So we just want to
make sure that we're staying true to the reference
image in that regard. And guys, if your
Marlin doesn't look exactly like the Marlin
in the reference photo, don't worry about that.
Don't you stress. The cool thing about being an artist and drawing and being a draftsman is that it's all about the action that
you take, right? It's all about drawing. I don't know about you, but
when it comes to me, I personally hope
that I never draw something picture
perfect because that means that I've
arrived, right? That means that I'm at the
apex of my profession. That means that there's nothing
above me, and how boring. How boring would that be? So, if your drawing isn't perfect, be thankful for that because
that means that there's still much left
to be discovered. You know, and that's fun. You know, what's on the horizon? You know, what do we not know? What's a trick
that could benefit us in our next drawing, right? That's what excites me.
And it should excite you, as well. Why not? Why not? We humans
are imperfect things, and our drawings should
be a reflection of that. But the cool thing that
makes us virtuous is that we strive to be better
the next go around. And hopefully, that's
reflective in our drawings, as well. All right. So what I'm doing here is if you look at the
reference photo, there is this bit here. So once we establish the
charcoal, then we pull it. Just pull it left or
right. Here we are. Here we are. Wonderful. And now we want to be mindful
here when we're pulling this charcoal because if we look you can see
the brow, right? The top of the Marlins head
is almost completely flat, but the way the light
strikes it is there is an implied line of shadow right above the
brow of the eye and then down the bill of the fish. So we just want to make
sure that we speak to that. This is more or less
just that base layer. And so now what we do that
we have the base layer, we want a little
bit more control, so we switched it up for
our number seven smudger. And we are looking at the reference photo
and we are really just focusing on those low
values and those shadows, the contrast that we see from mid value scale to
complete black. That's really what
we're looking at. We're using a light to at the very heaviest amid
pressure control. The trick to this bit of the
drawing is just pulling. Remembering the flow of
the body of the fish, left to right, left to right. I hear very lightly,
very lightly, I'm just pulling more or less, you can think of it as skipping across the paper,
which is wonderful. That's what we want
to do. Some finesse, as they say, some
tact, some class. That's what we want.
That's what we want.
8. Build the Head Values: Alright, so now what we're doing is I'm taking my monozur eraser, we're just more or
less cleaning this up. Yeah, cleaning this
up. There we go. Okay. All right, so now I'm going to do some
high value retrievals. We have some planes here
that need to be retrieved. Now what we can do is I can take my medium charcoal pencil and we can just punch in some
defined lines here. Just pull this lift up. There we go. Pull right
there. There we are. Nice. Now we have
the bottom of that. Then I'm going to push a define line on
the back side here. Something like this. Just
push it, lift up. Bone. There we go. Okay, so now I'm going to take my graphite pencil and I'm just going to outline
these little guys. Now, I didn't know this,
but these are actually what they call a
Marlins pelvic fins. Yeah. I didn't know that. They're the strangest
looking fins I've ever seen on a fish. I thought it was, if
you think of turkeys, they have what they call
beards on their chests. That's what I thought maybe
this was some kind of beard. But now, it's actually what
they call a pelvic fin. I got those lined
out, the graphite. And then I took my
smudger and I put a nice base layer of
charcoal on there. And now what I'm
doing is I'm taking my medium charcoal
pencil and I'm just putting in a
nice define line, lifting up as we conclude, as always, following
those graphite lines. And I'm just establishing the boundary of the pelvic fins. And then what I'm going
to do is I'm going to go in and I'm going to put in a nice layer of medium charcoal and I'm going to do it with
my pencil just like this. This, right up to the
line. Right up to the linework that I
just established. Because when you look
at the reference photo, this is the lowest value in the entire drawing next to bits and pieces
of the dorsal fins. So but now we're pretty much at the stage
in the drawing where we are doing what I like to call targeting our low values. We've done the brush work
for the base layering. We've really accentuated
where we want the low values to be with
our smudgers now we're going in and we are streamlining with our medium charcoal pencil exactly where we want
those low values to be. The fact that they're
gritty, we already um, by this point in the drawing
that we can blend those away with smudgers if not smudgers
definitely with brushes, whether we're using
our number six brush or we are using our LF brush. But all throughout all throughout building up
this detailed work, we are using a nice
light pressure control. The last thing we want to do
is scratch our paper, right? So as promised, we're
taking our number seven smudger and we are just
blending away that greediness. But notice how even though the grittiness is blended away. We're still able to keep exactly where we want
those low values to be. And that's the cool thing about using the three layered
method in this way, is that it is
extremely targeted. You know, once you place those low values with
your medium charcoal, when you go to blend them and
hit them with your smudger, even though it blends, that low value still keeps
its place on the paper. It's just the texture
that changes, right? But then you're right
behind the eye. We have a low value, so we
want to establish that. One of the reasons
why we're using the smudgers because it's kind
of a goldie locks, right? It's not small enough
to where we need the pencil right off the bat, but at the same time, it's also not big
enough to where I would feel comfortable laying down this base layer of soft charcoal with a
brush, even my elf brush. It's just a little
bit too small. So we're just pushing back and
forth, left to right here. We got some greediness down here that we need to blend away. So we're going to blend
it away with our smudger. There we go. Very nice.
Right up to the lines. One of the things
you'll find with trying to bring out form and stuff in different drawings is that your lines
are everything. In fact, when it
comes to blending, making something look
like it's seeded, say in the head of an animal, like what we're doing here, you can just use your
medium charcoal, draw out a nice define line like what we're
doing right here. I'm just going to push
this line up and over, lift up as I conclude. There we go. I'm just going to push
this line up and over. Now I'm going to bring
this line underneath. And now I'm going to establish the center of this fish's
eye. Just like that. And a lot of times, when
it comes to fish eyes, you want to establish the linework around
the eyeball first, and then you can take a
smudger and you can pull charcoal from that line to give the eyeball a certain look, right, a certain rounded look. And that's just to kind of speak to just the nature
of what fish eyes, you know, look like as far
as texture is concerned. Then here, we're just
using our pencil and we are bringing out
those low values. Just pulling it a bit. It's
giving us some nice texture. Gritty. But again, we know the solutions to
solve the grittiness. Then we have a little
plane right here, little eyelid above the eye. So we want to pull back on
that line then left to right. There we go. You eyes coming together
here. All right. So now I'm going to go ahead and I'm gonna
take my graphite pencil, and we're gonna re establish
the jaw of this fish. This Marlin has a
beautiful beak. And so I want to make
sure that I do that beak justice and I get my lines right we're just going to
run the jaw line there. We got the beginning of
the beak right there. It's pull over and back. Now I'm just gonna take
my monozero eraser. I'm just gonna clean
up these lines a bit. There we go.
Something like that. And then we're gonna
be using our smudger. Then right about here, looks like the mouth opens
up just a little bit. I'm going to pull that
back. There we go. Okay, cool. So now I'm
going to take my smudger. And one of the
reasons why I'm using my smudger for this versus a charcoal pencil is because
when you look at the jaw, right, in the beak of this
fish, it's all very smooth. Extremely smooth. And
so these lines are more akin to implied
lines, not defined lines. Now, granted, we are
going to define the beak a bit with certain lines. And this depends on you. But if you want to go through
and you want to start to build the jaw and the beak
of your Marlin in this way, you give yourself some options. You can either keep the
implied lines that you convey with your
smudger in this step. Or if you want to go
ahead and you want to streamline those lines
with a defined line with your medium charcoal pencil,
you can do that, as well. It's really up to you. A lot of times my tutorials are all about showing
you what you could do. You don't necessarily need to
follow what I do verbatim, unless, of course, you
know, you want to. That is totally your call. I just love drawing. So,
like, you know, for me, I'll, you know, if
there's something new that I want to try,
I'll give it to go, whether it's a new tool or
a new approach, or I mean, maybe something as
simple as how to convey a defined line from an implied line, like what
we were just talking about. We're just blending this away, lowering the value,
bringing out gradation. And this is what I was talking
about with the fishy here. So you watch this.
Bing bada boom. There we go. Something
just like that. Just like that. See
how you can pull it. I just kind of makes the eye look round and smooth and kind of glossy,
right? Glossed over. Then here, I'm just barely
touching the paper, barely touching the
paper because I want to I want to showcase, you know, that form, right? There is form. On top
of this fish's head, it's just all implied. There's no real
defined lines here. So This is how we can
start to convey that. But here I'm going
to grab a number six brush and I'm just
going to load it up. I'm just going to
dab the paper here. This is giving me a
nice blend and it's also lowering the
value for me as well. Just pull this
back a little bit. There we go. I kind of pull
this down. There we go. I'm just trying to use the tip, use the tip of the brush, 'cause that gives me a little
bit more control, not much, but, you know, by holding the
brush on its side, it's more control than if I was just to dab the paper, you know? Dabbing the paper like this is I'm trying to
lower that value. And then I just blew
off all that charcoal.
9. Detail the Head (Medium & Hard Charcoal) : Okay, so now define line time. This is where I established where that beak
sat in that mouth. So I'm just gonna pull
this straight back from this point. Slow and steady. I want that line
quality to be as uniform across the length
of the line as possible. And then just lift
up. There we go. So then here I'm just
gonna clean this up a bit. I'm just gonna run this
monozursa right up to that line. Right here. There we go. And then here I'm just going to clean
up the bottom of that. Then here as well, because
I used that smudger. I just want to make the
line on this bill crisp. So now I can take my line, and I'm only going to run a medium charcoal define
line on the bottom here. So we're just going to go up and then straight out, and
then just lift up. Boom. There we go. And then now I think I'm gonna just the mouth is slightly open here on the bottom jaw underneath
the top of the beak, so I'm just gonna I'm just
gonna pull this right along this line and make it
look like that mouth is slightly open, slightly open. There we go. And then just very lightly want a nice thin quality
all the way through. Then just lift up.
Something like that. Then here on the
bottom, why not? I'll give it a I'll give
it at a fine line as well. Just something like that. Boom. Alright, so now what I'm doing is I'm taking a
medium charcoal pencil. And again, just I'm targeting those low values and I'm
bringing out that texture. When I grab my hard charcoal, I'm going to show you
why you want to use hard charcoal for certain detail elements
of your drawing, especially when it
comes to fish or reptiles or any type of animal that has a
smooth texture, smooth but rough
at the same time, if that makes any sense. A lot of animals from
the ocean, especially, not only are they
obviously smooth, like whales, dolphins and
certain types of fish. But then they also
at the same time, can have very rough
appearances, like, you know, if you look at the
reference photo behind the eye of this
Marlin, you know, that skin, even though I'm sure it's probably silk smooth, it does seem to be rough, right? But you can convey
that type of look on paper with a hard charcoal. You really don't need
much of anything else. But then here, I just
want to put a little put a little lip on this, and then just kind of lightly. Any kind of targeted values. Any kind of targeted
values that I want I can put on here. I got some runaway charcoal. Come on. Let's go. Charcoal everywhere.
Charcoal for everybody. You get some charcoal, and you get some charcoal.
Now here we are. Okay, so now I sharpened the tip on my
number seven smudger, and I'm just going and just
doing targeted blends and, you know, bringing out the
gradation across these values. But then at the same
time, still maintaining as much control as I
possibly can, being that, you know, the head of this
Marlin is going to have, you know, the most amount
of detail for my viewer. You know, the head is really
the head and the side of this fish specifically is where I want my viewers eye to be spending the
most amount of time. So but it's really amazing what you can do with simple
smudgers with this technique. So as far as, you
know, building up, implied lines and smoothing
out defined lines and increasing line qualities and decreasing line qualities, kind of like what I'm doing
here, I'm kind of blending, running that blend
along the bottom. But just like that.
Boom, there we go. Of course, the longer
you spend on a drawing, the more time you put into it, the detail is just going
to keep coming, right? With very few exceptions, if you are maybe overworking
one specific area, you can do just that. You can overwork that area. But as long as you are aware of not overworking a
drawing in a specific area. When you start nine
times out of ten, you won't, but you just
have to keep that in mind. Then here what I'm
doing is I'm taking my elf brush and I'm just trying to
establish you know, that implied line,
right? Like, on the top. I define the bottom, but
so much of the time, when it comes to sharks,
dolphins, whales, fish, right? Anything, especially
in the ocean, where you have your
light source above, you're going to want to put your defined lines on
the bottom, right, the bottom of the fins,
the bottom of the jaw, the bottom of the belly, right? Very, very rarely do you put
defined lines on the top. Of an animal in the ocean. And, I mean, obviously, you
can do whatever you want, but I have found that if you make sure that your heavier
line quality is right, your darker line weights are on the bottom
of your drawing, it just looks more realistic, at least to my eye. But, I mean, you
can try both ways, and you tell me
what works for you. But then here what I'm
doing is I'm just taking my elf brush and I'm just
bringing out gradation. That's really all it is. A
lot of times with gradation, when it comes to
your brush work, if you push your brush
in a specific area, you'll bring out gradation
in that specific area, where sometimes if you swipe, especially if you swipe
one area too much, you'll bring gradation not
only in that one area, but in multiple areas. But there was a little indent on there was a little
indent on the jaw, so I just wanted to bring
that out with the brush. Now here, take my
modo Zora eraser, put a nice crisp highlight
on the jaw here.
10. Final Detail Work: In that way, I can bring the opening of that mouth
all the way forward. But then as far as your final
detail work is concerned, one of the things that you
can do is towards the end, you can go in with your
medium charcoal pencil and you can just go over the same spot like around the
eye, like what I just did, and you can just
really bring out that low value because we want
in this specific drawing, we want that eye to look
like it's seated inside of, you know, the head of the fish. And then right here, these are just some high value retrievable methods with the
mono Zero eraser, but look how it
starts to bring out, you know, that texture, right? Okay. So then like, right here, I just want to bring this indent out just a little bit more. Just a little bit more. Pull left to right.
Just like that. Alright, there we go.
That's looking good. And this is the 3/16 smudger. Alright, this is the
smallest one that I have. So this one gives us the
most control. There we go. And, of course, I got
grittiness here on the bottom of the Marlins beak. So I just want to keep blending. Just pushing left,
right? I'm doing long poles long poles, especially because of this bit of the drawing I don't have a lot of room
to work with, right? Cause I just want to be I
just want to be careful. Here we are. Okay, then
high value retrievals. And one of the things
you'll find as you draw more and more,
especially like this, is that high value
retrievals with your monozero eraser will
actually do a couple of things. Not only will it give you, you know, those high values, but then it will also
give you texture, lots of texture, especially when it comes to fish like this. So just keep that in mind. But then here I'm just pushing my brush and pushing that
charcoal into the paper. This is for a gradation
effect, right? Then once the gradation
has come through, then I can start to do
high value retrievals. Here I'm just doing short quick
little polls and whatnot. I'm trying to you can see the effect that I'm going
for in that regard. Those those little,
like, ripples and stuff across the
skin, those little bumps. I don't know if
those are bumps or bruises or what those
are supposed to be. But, you know, using the
model or eraser in this way, just barely touching the paper. See this? I'm just
barely touching it. This is how you convey
that type of texture. And texture is not too
difficult to bring out, especially with the
three layered method, because literally all it is is high value retrieval and then
using your hard charcoals to basically take care of your medium and your low values, as far as detail
work is concerned. There. So But with certain poles and strikes of the
monosur racer, you can bring out
underlying form. If not underlying form, you can bring out detail
on top of that form. There's not too many
things that you can't do. Like here, I'm just running
a line, nice, nice, super, super thin quality
on that implied line. Alright. So now I'm just gonna grab my brush very lightly. And you know what?
Here is the trick. This is what I
wanted to show you. This is a hard charcoal, okay? This is my detailed charcoal. And there's just looks
like, I don't know, like, some nostrils or I don't know, some bits and pieces. Here. But now this I'm barely touching the paper
right here, okay? Barely. We're talking pressure control,
I hardly have any. But if you look at
the reference photo, you see all that grittiness. It's almost texture. That's what it is. It's a
type of texture on the fish. This is how we're going
to convey that texture. Now, be careful. You can
overdo it in this regard. But the cool thing
about texture like this is that you can bring this texture up and
over onto high values, medium values, and even
low values, right? Because texture rests on
top of the underlying form. So you barely have to use
any pressure control. All you really have to
do is just kind of focus on the overall underlying form as far as the direction
that you apply it, but even then you really
don't have to because it's resting on top of
what's already there. Okay. All right. So that's looking
pretty good. It's like that. Just this implied line is just not what I was
hoping it would be. So, you know what? I
think what I'm gonna do. Yeah, let's do it. This is
with a hard charcoal, okay? I hardly ever run defined
lines with hard charcoal. I did it once in the side fin, but I'm
just gonna do it here. Why not? Remember, even constant
pressure and pulling. Constant. I kind of
cheated right there, but do as I say, not as I do. There you go. Awesome. And it looks it looks a little better. And then here for
blending purposes, we're just pushing the
charcoal into the paper, and we're getting
a smoother look, a better gradation, and just an overall smoother aesthetic
when it comes to the drawing. As a whole. But yeah, this one's
been pretty fun. You know, to when it
comes to drawings, I always prefer
drawing animals that um it's hard to find drawing
tutorials on, right? When I was a kid, I would run home back
in the days of cable, we only had 40 channels
to choose from. And I would jump over the
couch and I'd turn the TV on, and I would immediately
go to Channel 34 because that was the
discovery channel. And that's where I got to watch, you know, shows
about Africa and, you know, you know, the
ocean and, you know, the Amazon rainforest
and, you know, the Arctic and, you
know, space, you know, all these really, really cool places that were so different, so different from what
I knew as normal. And, and I don't know, I think that's kind of had an effect on
the type of art that I like to make and the type of art that I like to help
other people make, right? Exciting things, new things. Things that are different. I
hope you enjoyed this one. Stay happy, stay
healthy. And remember. Never stop drawing.
 Messer Creations, Artist | Author | YouTuber