Transcripts
1. Introduction: Hello and thank you for
joining me in this class. Today, I want to
share with you one of the best ways to start
your oil painting. Spoiler alert. It's an underpainting. I like to use an underpainting
on many of my works. And there are so
many reasons for you to at least try it as well. First of all, it's
a great way to our count that blank
canvas intimidation. Instead of staring
at a white canvas, you can start bringing in some
colors to them right away. Moreover, under painting
can help you master your painting techniques to
establish the composition, dark and light areas
of the painting. It can have a
significant effect on both your painting process and your finished work as well. And so today in this class, I will show you how easy it can be to start with underpainting. We will get started with the shortlist of tools and
materials for your project. Next, you will learn more
about underpainting, how scholars and medium for it. Finally, we will create a
class project together. More about the project for this class you will learn
in the next lesson. I think this class
will be ideal both for beginners and for anyone who would like to explore underpainting
technique and bring their painting to a new level.
2. Class Project: In this class, the
project is to create a painting starting from an
underpainting to finish. But don't worry, we
will do it together. I will share the reference
photo I will be using for the painting and you will
find it in the resources. You can also use your
own reference photo, whatever inspires you to create. As we will create
an underpainting. First, we will decide on
the colors to use for it. Then we will cover
entire canvas with it. Next, it will be time for us to create monochromatic version
of the future painting. And ones and Stan, google finally Layer local colors to a painting
until it's complete. And as always, I want to
remind you not to forget to share your project with me
and your fellow students. I can't wait to see what
you have to share with us. Once you're painting
is complete, you can upload it in
the class project.
3. Tools & Materials: Now that we know what the
project for this class is, let us go over some tools and materials we will
need to create it. Your final list of tools
and materials you use in this class will depend on
your personal preferences. For example, if
you prefer working with acrylics rather than oils, then you'll list of
materials feel slightly differ from mine,
but that's okay. I'm going to share with
you my shortlist of those and materials that I'm
going to use in this class. Just in case if
you want to follow me in this class step-by-step, and create the same
painting as I am. If you are free to modify
this list as you wish. As I have already
mentioned in this class, I will be using oils. Now it's important
to mention here that when you choose to create
your painting with oils, you can use either oil paints or acrylics for
your underpainting. Next on our list
is the solvent to dilute the paint for
your underpainting. Depending on which
medium you will choose. There are a few things
to keep in mind. For example, if you're
using oil paints, like I am, first, you are generously do it in
the paint with a solvent. Gets you a few using water
mixable oil paint or acrylics. And you can simply
thin it with water in such proportions that reminds you offer watercolor
consistency. Next, I'm going to name just
a few synthetic brushes and blunt knife
to mix the paint. Finally, I chose to
work on the small 20 by 20 centimeters
wooden panel. Those are basically the supplies I will be using for this class. If you have any
questions regarding art supplies or anything at all, feel free to ask me in
the discussion section.
4. What is Underpainting: Now, first, let's figure out what an under
bending actually is. Well, it's exactly
what it sounds like an additional
painting on the canvas. So basically, we apply a layer of paint to
establish composition, structure, or values before
applying color in network. In other words, It's an monochrome version
of the final painting. And once it's finished, artists apply local colors
on the underpainting. Which means those out
through colors of the objects or a surface as
seen in the typical daylight. So, for example,
lemons are yellow, skies are blue, and
grass is green. Those are local colors. Start with an underpainting
in the first place. Well, there are
several advantages of Staten your work with it. For example, you can use
underpainting as a base layer. So you didn't have to stare
at your violets blend Canvas. Or you can use your
underpainting as an outline or a blueprint for your image that
you intend to paint. And finally, under
painting is a great way to build contrasts and tonal
values into your work. You can create dark and light
portions that will make those areas of the
canvas lighter or darker once you apply
and paint on top of it. What I really like about underpainting is that you
can take it as far as you want and how and
for what purpose you decide to use under
painting is entirely up to you. You can stop on the first stage of creating an underpainting. When you send your
canvas with one color, you can take it further and
add blueprint on top of it. You can keep it as simple
and as detailed as you want, depending on your skills and your final resulted,
you want to achieve. That's what makes
the under bending technique worth a
try for an artist. Now that you know, basic understanding of what
underpainting is, let's actually create one.
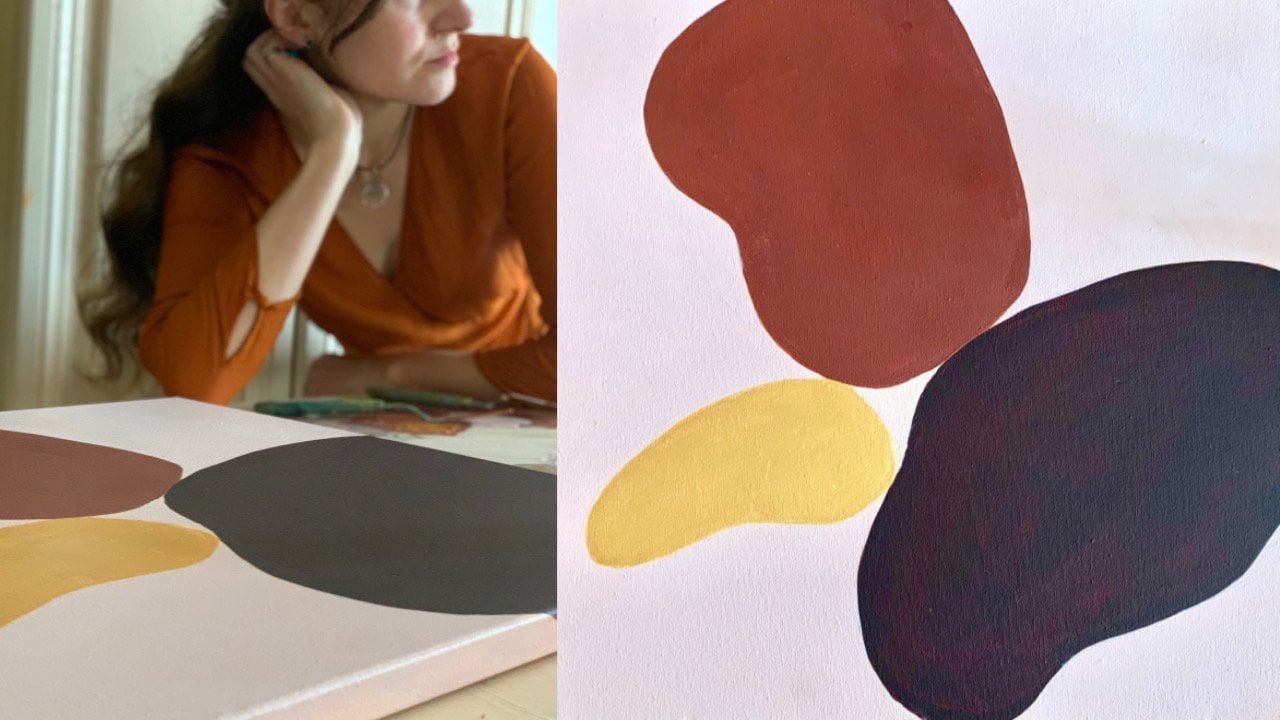
5. Imprimatura: Choosing Color: From the previous lessons, you already know that we create an underpainting
in a few stages. The first one is imprimatur. Imprimatur or the first
paint layer is basically a simple layer of color
paint over the canvas. But its simplicity doesn't
make it less important. Quite the contrary, this
is the foundation that can affect the outcome of
your entire artwork. The first step in layer in implementer is to
choose a color for it. It's an important one as
the color you choose will affect the overall mood and
feeling of your painting. Which color to choose them. But it depends on
your intention. For example, if you want
your painting to be in code, you can create an underpainting
in shades of blue. On the other hand, yellow ocher can make
your painting too warm. So the initial
underpainting color is a conscious choice that you must make before you
start creating it. When the artists also use warm Earth colors like
burnt sienna or umber. Those are perhaps some of the most popular colors to
use for your paintings. But the color you choose for your underpainting
comes from your intention and the mood of your painting or your
reference photo. So your underpainting
doesn't have to be neutral. You can also use vivid colors like pink or green, or wherever. I personally like
to use bold colors that will pick through
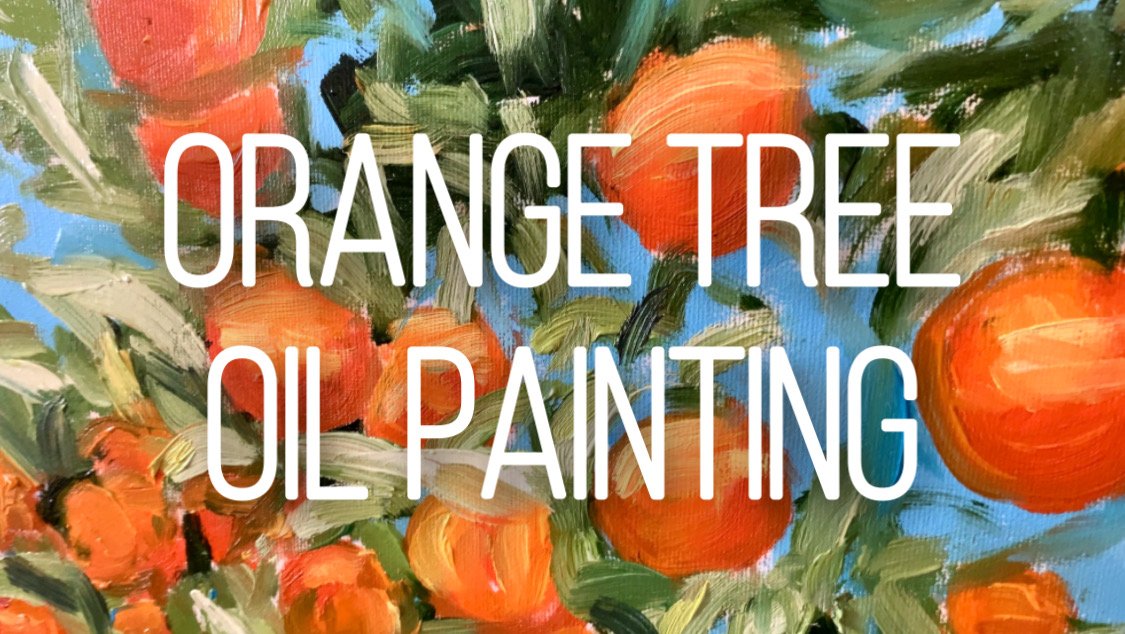
later in my painting. For example, in this class, I will be using this water as a reference for my painting. And I will be going with
a vivid orange oil paint. It will bring, move
warm to my bending. And it will also
help me to create this sunset vibe by picking
fruit in my painting.
6. Imprimatura: Preparing The Paint: Once you decide on the color
to use for improvement Tura, you can finally
prepare the paint for it in the tools and
materials lesson, I have already mentioned that we will have to prepare
the bank for the initial layer of underpainting by using
solvents or water. That depends on
the medium you're using for your underpainting. Once again, if you're
using regular oils, you dilute it with wild spirit. Or in case if you are using water mixable oil
paint or acrylics, then you simply
diluted with water. The resulting mix
should be solved, but not watery in
such proportions that remind you of
watercolor consistency. Keep in mind that oil paint
can be applied over acrylics, but not in the other direction. Because acrylics,
water-based medium, which makes it unstable
on top of oil paints. Once our paints consistency
is where we need it to be. We spread the color thinly over the entire
painting surface. There shouldn't be too
much paint on the surface. So try not to overload
the brush with the paint and apply the colors as
friendly as possible. So together, just like that, we have created the initial
layer of our underpainting, which was also
called imprimatur. Some artists stop at this step. So can you I encourage you to take your
painting further with me. For that, I will see
you in the next lesson.
7. Creating Ouline: Now we can take the next step on our anti painting by creating a monochromatic sketch
of the whole work. Not only this step
will help you to play with the composition
of your painting, but it also will
allow you to create light and dark values
within the painting. Depending on how detailed you want to monochronic
sketch to be. You can either use one or
several values of color. For example, if you chose to create an underpainting
in shades of blue. And to want it to be detailed, you can use a very pale blue in the areas that we
wanted to light as values. Mid-tone blue there you
want to have me zoom values and very dark blue there you want the dark as
well as in your painting. Or you can use just
one value of color and leave the details for the
next stage of the painting. That's exactly what I will
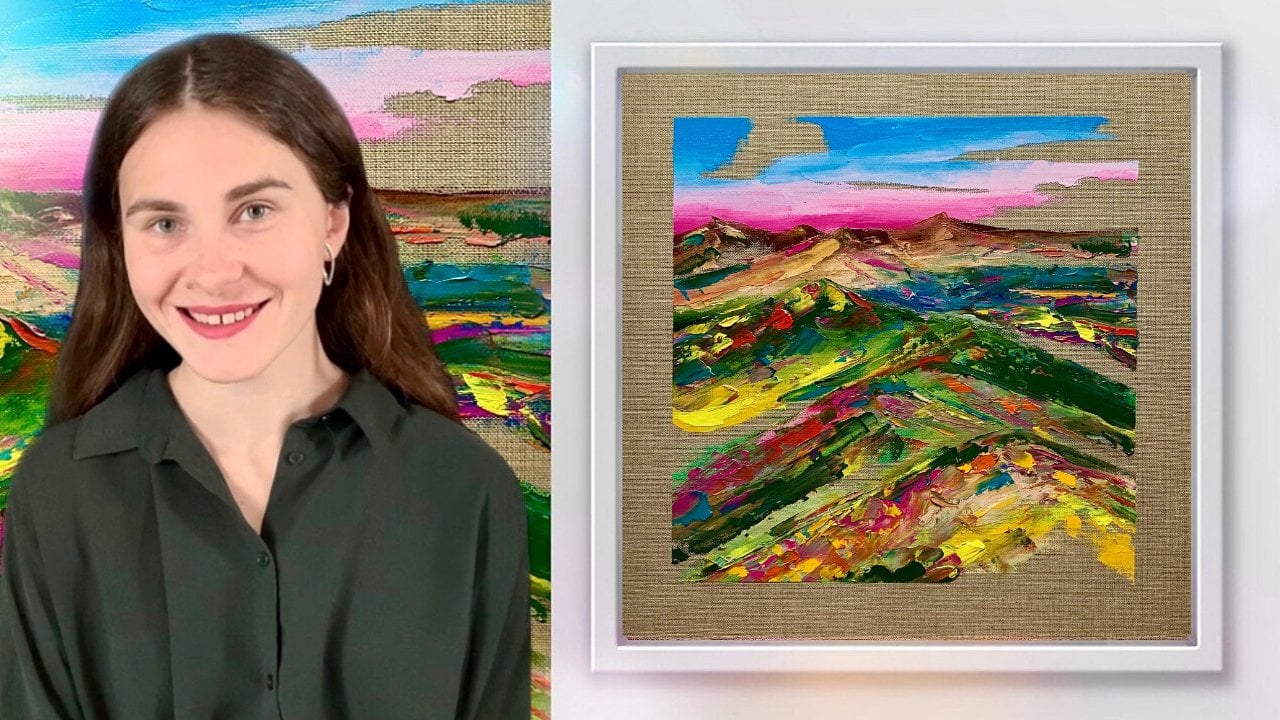
be doing in this class. And so I'm creating a sketch
with burnt sienna color. I've decided to use
just one value, mostly because I want my
painting to be loose. And also because I'm working
on this small canvas. So it's more important for me
to define the composition. The darkest values
in the painting. If you're a beginner, using just one color might be the best way for you to start your underpainting
with less chance for you to get stuck
on smaller details. As I developed my
underpainting sketch from the reference photo, I start with horizon
line first and next we mark where the flowers
and the grass will be. Of course later as we
proceed with the painting, we'll be able to modify
the composition. It allows us to play
with composition within the landscape before we start
applying local recolor. Once we have developed
underpainting sketch, we can finally apply more
local colors on top of it. I will see you in
the next lesson.
8. Adding Colors: Sky: Once our underpainting
is complete, the color and
development begins. Now you can choose to paint
on the wet onto painting, or you can allow
your underpainting to dry entirely before
working further. I personally prefer painting on earth bound painting as it allows me to create smooth transition and an
interesting color blend. I like my paintings. Start applying thin layers of transparent colors over the
underpainting to complete it. Using transparent colors
or in other words, glazes. Because they're allow much of the anti painting
colors to show through. Because the particles
of transparent veins settled on the canvas in a way that allows light to
pass between them. This allows light to go through the paint layers
and bounce back, creating a certain luminosity of color while allowing
to see all the colors. This luminosity of
color rule would not be possible with a puck paints
because with opec paint, light cannot pass
through the top layer. The underpainting is completely
covered with thick paint. You can choose between
transparent and APAC coat colors depending on the effect. And then what you want to
create a new painting and where you want your underpainting
to show through or not. I haven't been using both
of those colors as I want my underpainting to pick fruit in certain areas of my painting. And in other areas, I have wanted to have more
density and even texture. How can you tell if oil paint is transparent or
not? It's easy. Just look at your paint tubes. The symbol used to show the transparency of
an empty square. To show APAC colors, the squares are colored in.
9. Adding Colors: Field: Just like that, we proceed on layering of colors over there, underpainting to
complete the painting. And now it's time to
work on the field area. Same as we do with this guy. We start on applying
the transparent colors. Here. I want to start by developing the background
colors on the field. As I will paint more flowers
and grass on top of it. I'm going to layer
some random spots of transparent shapes of green. And I will also make
sure not to cover the entire area of
the band live in the underpainting to show through the background
area is complete. It's time to pay progress. For that, I will use
darker values of green APAC paint to start building more depth
and density to the painting. Just like that, we keep on adding more details
to the painting. As we are applying
the local color on top of the underpainting. It can also make some
corrections if needed. For example, if you
want to improve with a composition of
your underpainting, you want to change the shapes or simply to add more details. Now it's perfect time to do it.
10. Final Details: At this stage, our painting is beginning to look
close to completion. On this last stage, we can add some last
details and texture. In my case, some followers. This is also, I begin to use thicker paint to make the flowers the highlights
of the whole painting. Even though I'm using fully opaque white
paint for the flowers. The paint blend with
the layers underneath, which creates more
coherent book. Once we finish adding the
farmers to the painting, we can continue to add in last small details until
we are satisfied with it. As you do it, be careful not to overload
your painting with details as we still want those underpainting
colors to show through. Just like that in this
finished painting weekend, see the orange under painting color beacon for row in the sky, and grass and flowers
in the field. Low spots of orange tie everything together into
one complete painting.
11. Final Thoughts: Congrats on completing
this class. Together, we have discovered the best way to
start the painting. You have learned
about underpainting, how to choose colors
and middle for it. And of course, the
significant effect it has on both your painting process and your finished work as well. Moreover, we talked about
the difference between transparent and opaque colors
and what a local color is. Finally, together,
we have created our class project
from start to finish. Thinking about project. Once you finish it, don't forget to
share it with us. I can't wait to
see your results. Also, I would love to
hear your thoughts on starting your work
with an underpainting. Feel free to share your thoughts on that in the discussion. Help you to overcome blank
and less intimidation. We'll use this technique
again in your next paintings. I wanted to thank you all again for joining
me in this class. And I will see you next time.
12. Special Thanks & More!: I hope you had fun discovering all the perks of starting your work
with an underpainting. And you will consider implementing this approach
into your painting process. There are a few
more classes there. I'm starting my work
with an antibiotic. So you're welcome to
check them out as well. There are even more
fun classes to come, so make sure to follow me. You don't lose any of
my upcoming classes. You can also join me on petrol. Then you can make a small
budget and as a reward, you will get all
the inside look at my upcoming paintings
classes and other projects, monthly free access
to my art class, and even for paintings
and discounts. Finally, I want to
thank my patreons for their continued support
each and every month. Thank you all for making
this class possible. You are the best.
 Alina Harvi, Ukrainian Artist