Transcripts
1. Introduction : Hi, guys. Hello, everyone. Welcome back to
my today's class. Today, I'm going to
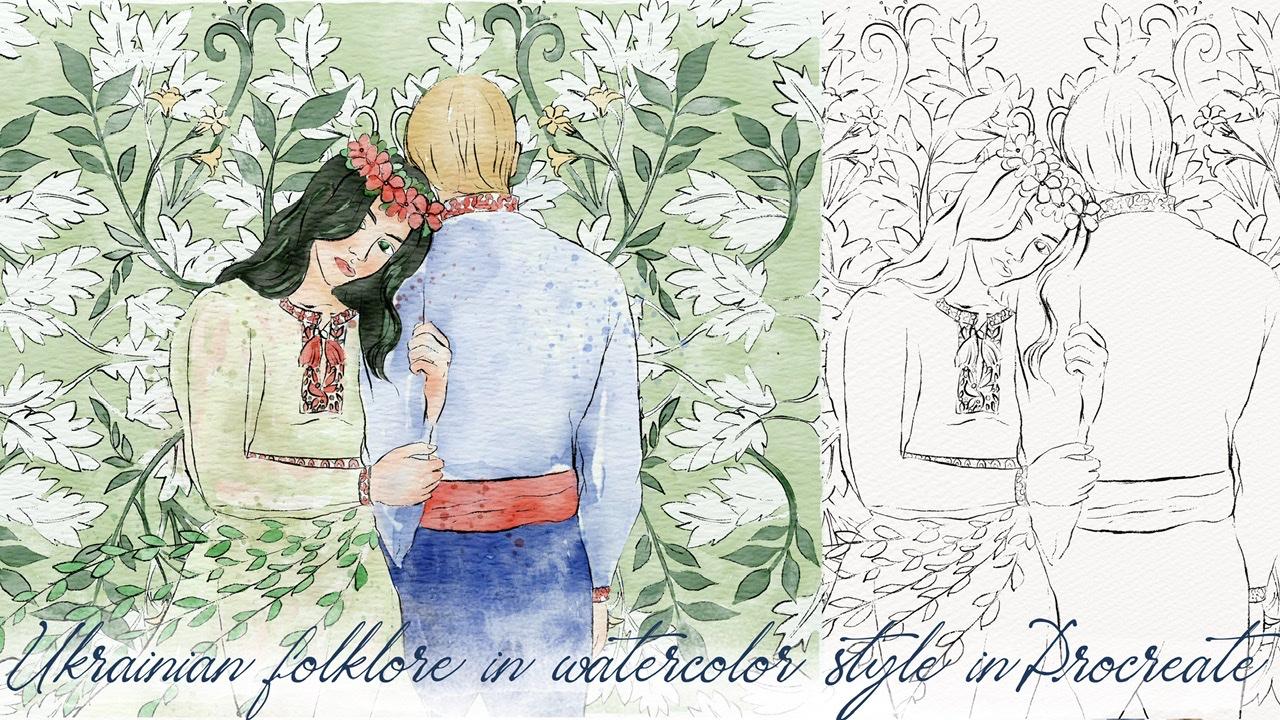
teach you how to paint lovely Ukrainian folklore
in watercolor style. I will tell you one
interest in fairy tale, and you're going to illustrate the love story of
main characters. I hope you will likes it. Guys, I prepared for
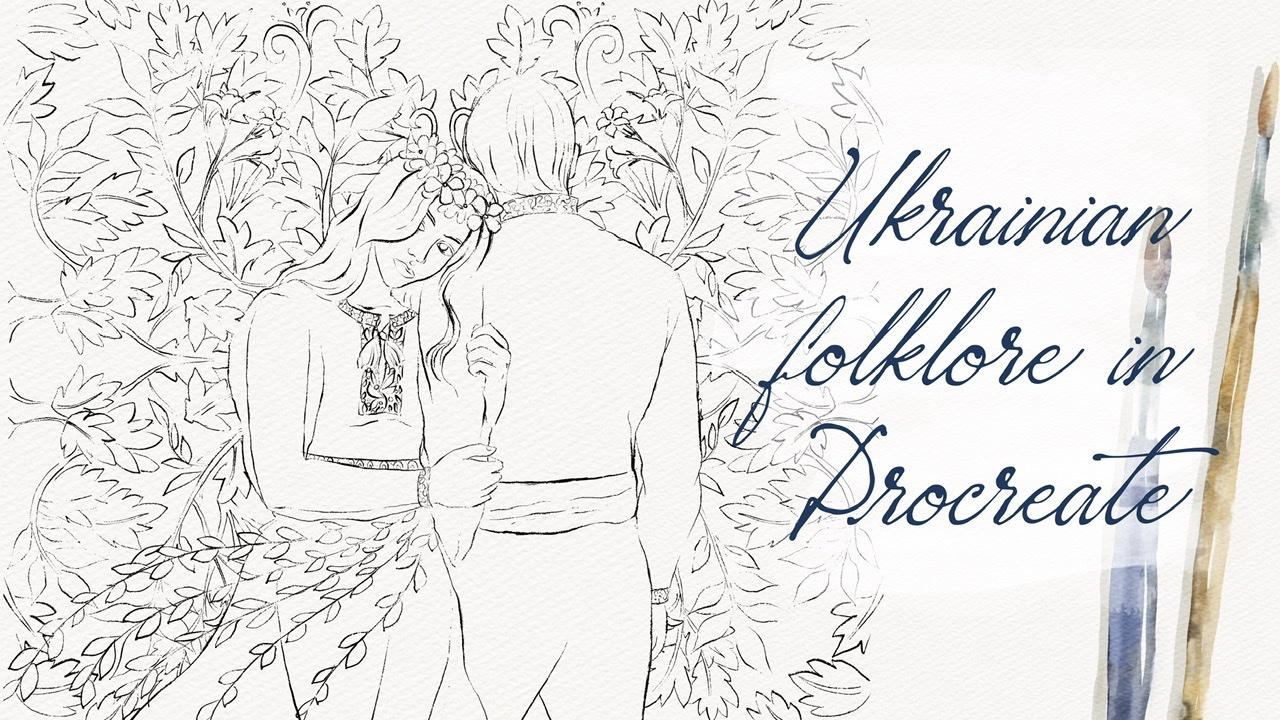
you watercolor brushes, along with these
color palette sketch , and watercolor paper. I hope you are full of
inspiration as I am, and you are ready
to start painting. Grab your iPad, Apple Pencil, and
let's paint together. Hi, guys. I'm Inga,
freelance illustrator. Welcome back to my class. Let's dive into
Ukrainian folklore and paint altogether beautiful
love story illustration. At the end of my class, you will learn more about
Procreate and composition, especially how to use layers, clipping mask, selection tool, and how to add texture, volume, and color
variation to your picture. Most importantly, you will learn more about Ukrainian folklore. We will illustrate famous
Ukrainian fairy tale, The Forest Song, written by Lesya Ukrainka, using the watercolor brushes in a simple way and new
painting technique. You can use the
illustrations you create for posting on Instagram, edit your portfolio, or sell it on Etsy, Gumroad, and so on, or just share it with
someone who you really like. I am sure they will
be so happy to get an illustration
that is created by you. Today, I want to show you
that watercolor is so simple, and it's real fun. Under my class, you can see it. Also, you can try yourself
in totally new genre. Today, I will teach you how
to create texture paper, how to create artwork
from the Sketch, what is composition, what is Ukrainian folklore, how to create traditional
folk art illustrations in Procreate, how to illustrate a fairy tale, how to use my and
default Procreate brushes for painting
in watercolor style, how to apply my new
painting techniques, what other nuances
you need to know, if you want to create
watercolor illustration, how to use Alpha Lock
and clipping mask, how to add vintage
texture to your artwork. I will also show you how to
add shades and highlights. I will show you my whole process from the start to finish. As a bonus, I will share
with you my textured paper, custom brush set, color
palette sketch that I created. I will also add file of
my pictures that I drew. Feel free to use it for
your own art projects. This class is great for
intermediate level. Also, can be useful
for beginners, if you've watched
my previous classes , and experienced artists. Probably here you can
find an inspiration and new ways how to paint Ukrainian
folklore illustrations. Your class project will be next. Paint love story
illustration from the fairy tale using the tips and brushes that
I gave you today. I will use Procreate
for this class, these iPad and Apple Pencil. If you have it or some
massive drawing pads, or just regular
paper and paints, please join our
class. Good luck.
2. Creating Paper: [MUSIC] Hello guys. Today we will learn more about Ukrainian folklore
and how to paint a romantic illustration of a one fairytale in
watercolor style. I'll show you what are
the main features of folklore and how to illustrate
it in a beautiful way. Guys, I hope you are
ready to start painting. Our first step will be, we need to create texture paper. How to do that? First of all, we need to go grab our eye pencil and go to
the Procreate and tap plus. After that tap plus again. Next, switch from pixels
into inches and write 9 by 11 inches with
300 DPI resolution. As you've see maximum
layers is 56. After that tap Create. Now we need to rotate our paper because this is the format. This is the dimension that we're going to use for
our today's class. Next step, what we should do. I will explain to
you how to export all my freebies
into the Procreate. First of all, we need to open our Skillshare class in browser. It can be Chrome or Safari. Because if you open my
class in Skillshare app, my freebies might
not be visible. You go to the browser, open there my Skillshare class. After that go to projects
and sources section and in the right corner under
the headline resources, you can find all my freebies. Download all of them and
after that you can go to files app and in
downloads folder, you can find all the documents. Next step, you export all the
files into the Procreate. How do you do that?
Let me show you. As you might see, I split the screen and from
the right side we have our Procreate app and from the left side we
have our files app. Guys, I have all my
files in art classes, but once again, your
folder will be downloads. What you should do, you just
need to go choose a file, after the [inaudible] to
tap on a file, hold it, and drag and drop it into
the Procreate, like this. Now let's find our file. You see it will be here. Second step, we can do
same with swatches. The swatches are here. This one. Same we're going to
do with our sketches. As you see, I created
two sketches. Actually later we're going
to create composition. I just need to go
decide the sketch, after the tap, long
tap, drag and drop. After that, we need to
move to the new layer. Our sketches, they should
be on different layers. Choose second sketch and
also move into Procreate. That's it. We moved
all our files. Almost all of them. We also have a watercolor paper. It's also in downloads folder. You also can drag and drop or I will show you the second
way of what you can do. Turn off, create one more layer. Next you go to Action button. There's a tap "Add" and
tap "Insert a File". After that go to your
downloads folder, find our paper and export
it into the Procreate. This is our watercolor paper. Let's rotate it and fit to canvas axis. It looks very good. Now if you need to know
how to turn our paper into the watercolor paper with authentic watercolor
texture. What should we do? We need to go and duplicate
layer two times. Like that. After that we will go and
move the plant and layer mode to linear burn and
color burn, like this. Move linear burn mode
on the top, like that. Next, we need to duplicate
each layer like this. You see color burn
and color burn. After that, merge it together. Next we're going to do the
same with linear burn mode. Duplicate, merge that together. Next, you go to the
linear burn mode, to the opacity and lower the
opacity to your 50 percent. Even 40 would be fine. Our next step, we're going to move and select two
layers and press group. How you can select second layer, you see you selected
one layer and after that you need to go and move
to the right side. You see? By swiping and you select
second layer as well. After that press group. Next we can rename this
layer. How to do that? Tap Rename and write paper. Same you're going to do here. We have the sketch. We also can rename
it and write sketch. Now second one. Rename Sketch 1, Sketch 2. Next, we also need to
create one more layer and place it underneath
of all our layers. Also let's rename it and
write paint here. Like that. We can duplicate this
layer a few times. I'll prefer if all the
preparations are done. Now let's move to the next
part where I will show you our color palettes
and our brush set. Let's move to color palette. As you see this Ukrainian
folklore color palette. It's very, very bright. Because we're going to
use watercolor brushes, the colors would be
not then saturated. That's what I need. Next step, what I'm going to
show you is our brush set. It's here, this one. Let me show you some
of the brushes. 6B pencil, native
Procreate brushes. Dependent on the size, it can be pretty chalky
or it can be very thin. I truly like this brush. Dry ink brush also cool brush if you want to add some shades. Not some shades. If you want
to emphasize some details. Next, brushes, are brushes that
were created by me. Next is for oriental dry brush. Also create brush
if you want to add some tiny details or if you want to show
some dry strokes. Next boo opal, our main brush today. You see I chose very
saturated dark color, but thanks to the brush
is pretty transparent. But you see, you can
adjust the opacity and transparency can be
less. Boo scrub. Also create brush if you want
to have the sharpie line. Watercolor background. Great brush for adding some splashes and
adding shades as well. Boo scratch if you want to reach some vintage style illustration. We're going to use this
brush as well because we're going to add some
additional epics flicks. Great, if you want to add. By the way, flicks,
this is not my brush. This brush is native
procreate brush. This brush is great for adding
some watercolor splashes. Next, watercolor stamp. Depending on the pressure, it can be lighter or darker. If you want to erase what
you have on your screen, you can just use three fingers
and rub it back-and-forth. Boo watercolor stamp 20. Also great if you want to
have some watercolor texture. Watercolor stamp 34. Also for adding some textures. Watercolor texture
for our illustration. Guys, I showed you
all the brushes, I show you our sketch. Now let's move to next part where I will tell you more about Ukrainian folklore and about the fairytales that
we're going to illustrate today. Let's do it.
3. Ukrainian Folklore : [MUSIC] Now guys, now we move
to our next class, and before we move
to painting process, I want to share with you some brief information
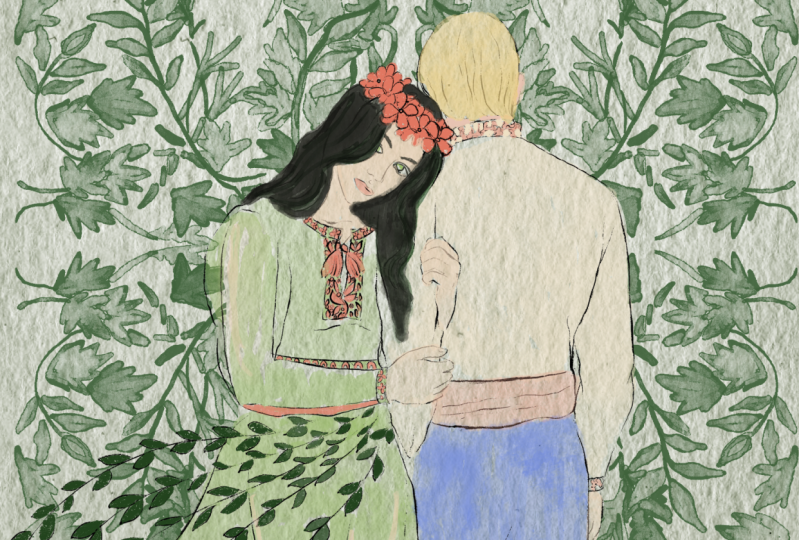
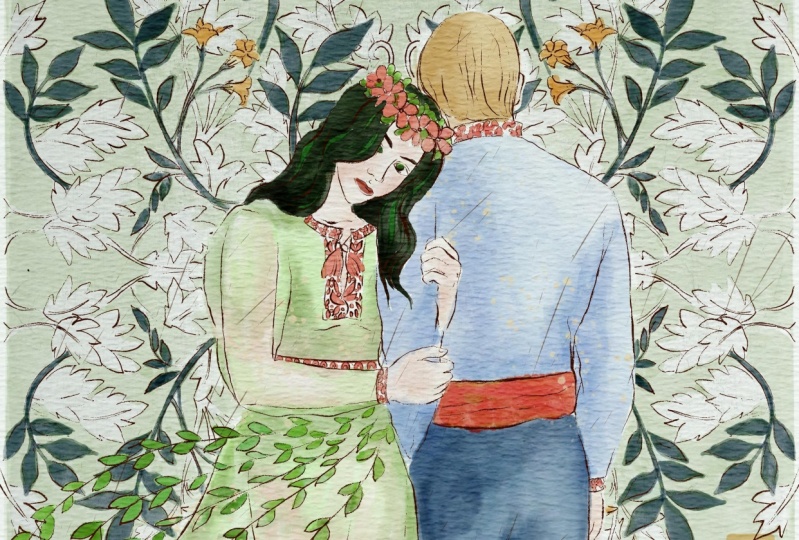
about Ukrainian folklore. As you see, we will illustrate
a drama, fairy tale. It's called The Forest Song
written by Lesya Ukrainka. This is an example what
we're going to paint today. We're going to create
similar illustration and I'll explain to you everything about this lovely illustration. But first of all,
let's talk a little bit about Ukrainian folk art. Ukrainian folk fairy tales is a popular channel in Ukrainian
traditional folk art. The stories have
transferred from generations to generations, and it's a wisdom
life experience, feelings and dreams I
think all nations have. As for main types of
fairy tales in Ukraine, we actually have three
different types of them. Stories about animals, magic fairy tales
which I truly like, and stories related
to social problems. This illustration
is a love story, it's about a couple, and now I want to tell
you more about that. Actually, the name is
The Forest Song and this story reminds me of the
story of Little Mermaid. It's a book, [inaudible]
Disney version. Because Disney version is very optimistic comparing to
the book. Same here. Let's talk briefly
about the story. There was a beautiful girl named Mavka, this lovely girl. She was a creation of nature. She was leaving in forest. She was happy, she lived in harmony
with nature. One day she saw a boy. His name was Lukash who
was playing flute and his music found the
response in heart of Mavka. They fell in love. They were truly happy. But Lukash mother didn't
support this union, and the boy didn't dare
to disobey her will. As a result, he betrayed Mavka by creating a
family with another girl. From the grief our
forest girl with a pure soul turned into
the tree, dry willow. Years passed, Lukash
found the tree, and the tree spoke to
him with Mavka's voice, telling that her love
will be eternal. It was snowing and Lukash was frozen with a
smile on his face, and that was end of the story. The story is sad. But once again,
depending on a angle, when I was a teenager, I read this book and I
was truly impressed. That's why when I
was thinking about the topic, what to choose, I decided to choose this
drama, this fairy tale. I hope you will like
to paint them with me. Let's try to do it.
4. Creating Sketch: Our sketches are ready, we know the story, and now we can move
to next part where our lovely story will
have a watercolor look. First of all, we need to combine our two
parts of the sketch, and make a beautiful
composition. How to do that. First of all, we already
have the background. Why I chose these botanicals. Actually, I tried
to imitate forest. Where did I get the inspiration
for these two pictures? Like this lovely couple
and those botanicals. I went to the website,
unsplash.com, and searched for some
pictures that inspired me, and helped me to
create such sketch. Once again, if you don't
know what to draw, if you don't have
some references, just type, unsplash.com
or pexels.com. Go to those websites, and you can search for some pictures that
might inspire you, and you can create
beautiful illustration. First of all, why I decided
to paint lots of leaves and I have different branches because Mavka lives in forest. I thought that we need to show that she live in
harmony with nature, that nature is important
part of this fairy tale. Of course, the
background should be also important part of
our composition as well. That's why I created
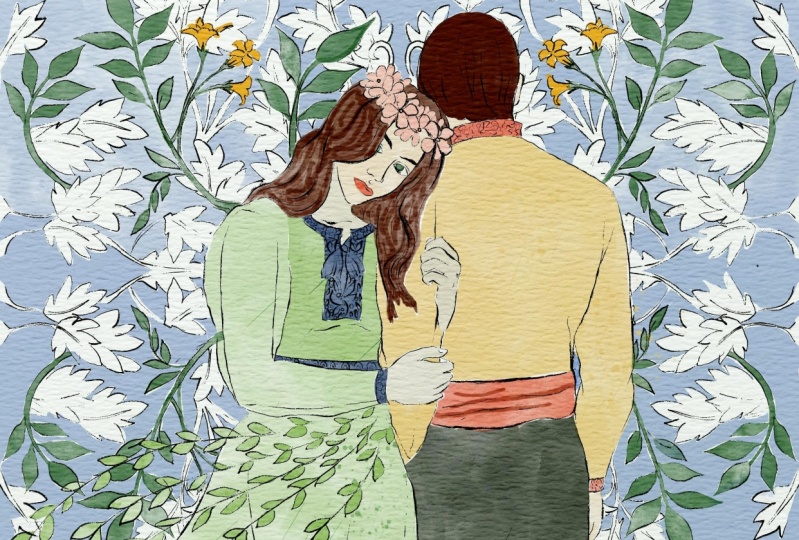
this background. Second, we have the couple. Here, we have Mavka, we have Lukash here. As you see, they're in
traditional Ukrainian clothes. This is vyshyvanka. The view is different,
like these ornaments. Remember, we had a class
about Petrykivka art. Actually some of those ornaments
people use in clothing, they take the illustrations
as you see of some plants, and made the clothes
related to these topics. Girls is a creature of nature. I painted, as you
might see here, some wreath, and also I
have some tree branches, so it can help me to show
the harmonious atmosphere, and her attitude
towards this nature. What are we going to do next? I will just go and combine these two illustrations
together. But you see it's so hard to understand what
we should erase. Of course we should erase our illustration part of the illustration because
we have overlapped. I lowered the opacity of the first sketch
till 25 percent, and I moved to the sketch
where we have our background, because the parts that are
overlapping each other, we going to erase them. What you should do. Of course, you can grab the eraser, and erase it
one-by-one like this. But we have another option. We can go and grab
our selection tool, move to free hand, and now if you select the
area which is overlapping. I just choose a part that overlaps with
our main characters. I'm trying to select it. I selected all of it. After the three fingers down, like that, and press "Cut". The erased overlap is
producing here on our leaves. We still have the overlapping. In this case we will go
and grab our eraser. As eraser, we will
use dry ink brush. [MUSIC] Okay, done. Guys, this is our sketch. Let's increase the opacity. Let's return it to 100 percent, and this is our illustration. Finally, we can
merge it together. Now is just sketch. Next we will move towards
that lower layer, here. We need to paint underneath our paper layer and
our sketch layer. Why is that? Why we
can't paint on the top? I will give you an
explanation. Let me think. For example, if you're going
to grab Boo opal brush, and next, I want to go and grab this pretty
bright green color. I will start painting,
for example, here. Yeah, I paint. Don't worry, I will do it second
time pretty accurately. You see it has a
watercolor texture. But if you move our layer
above all the layers, you see, it'll lose this
watercolor texture. We don't have the feeling that color blends into the paper. That's why it's
important to paint underneath our sketch
layer and paper layer too. Let's clear that. Let's start with the background. Now guys, I will
show you some trick, how to paint faster, how to paint pretty quickly. We're on a new layer
which is underneath. Next, we need to go
to the Action button, go to Canvas, and press "Drawing Guide". Next write, Edit Drawing Guide, move to Symmetry, move to Options,
and write Quadrant. Pay attention that Assisted
drawing should be turned on, and press "Done". Be careful guys, mistakenly
you can press on the white. You see line, here we have
the line, the gradient. If you press "Touch"
this white color, you will not see
the lines that are separating our Canvas
into four parts. Be careful and move
to the darkest one. You see now, we see again our line and
carefully tap "Done". As you see now, our
layer is assisted, and when we paint, I'll show you here,
run the paint. We do it simultaneously from four different
sides you see here. It will help us to ease our
painting process like a lot. Let's start painting.
5. Painting Background : Okay, once again we're
on an assisted layer, we grab Boo Opa Brush, and let's start
our illustration. Carefully paint. Fill that area where we
don't have any leaves. [MUSIC] If you have some overlaps, that means just erase them. It's totally fine. Guys, as a blender, we're going to use
Boo Scrub Brush. [MUSIC] In order to save some time, I'm going to speed up [FOREIGN]. Guys, if you want the
blend to need to do it in a circular way. You
see, like this. [MUSIC] Try not to lift your Apple
pencil from your screen, and in this case you
will avoid overlappings. Like what I did here. Okay, here from this side, as you might see it, [MUSIC] we need to fill this
area with the color as well. [MUSIC] Okay, perfect. I like that. Done with this part. Now, what should we do, guys? If you like you can
change the saturation. You can go to hue saturation, brightness and think which
color you like most. [MUSIC] I think I would prefer this color
a little bit brighter, and next step, what
we're going to do, we're still in the same layer. Now if we need to be careful. We're going to grab
this dark green color and I will need to paint some leaves that
have green color. Try to be careful [MUSIC] because in this case it would be hard
to erase too much. I'm going to speed
up the video again. The lines are very, very tiny. [MUSIC] Okay, in this leaves, such kind of leaves
we won't color them. They will stay white. [MUSIC] Let me think what else. One more leaf here. [MUSIC] I think here, I missed one part. Grab a green color. [MUSIC] One more thing, this part. This part we'll just blur. [MUSIC] There's several check whether we colored all of it. Now, this part. [MUSIC] I forgot to add some colors
to our lovely flower. So if I grab this slight
yellow color, same brush, and I want to finish painting
the petals of the flower. [MUSIC] Forgot one part, here. I think it looks wonderful. Now saying we need to
remove the overlapping. How to do that, first of all, we need to turn off our
Assisted Drawing Guide and make sure that here we
also turn it off, like this. Next we also can grab eraser and erase it little by little or you can just grab selection tool and do same what we did
with the sketch. [MUSIC] You select the
part which is overlapping. Later we'll just erase it. [MUSIC] Like I said, three fingers down, and tap. Now if you grab the
eraser and we need to erase the overlapping
space on leaves. Here is better to
do this curator. Once again, remember we grab
dry ink brush as eraser. Okay, again, so
our illustration, our background is ready. Now we need to move to next
part where we're going to start adding some colors
to our main characters.
6. Painting Main Characters : [MUSIC] Well, next step let's paint skin and we do it
on a new layer. Again, if you think this
color is too saturated, you can just lower that
positive on a brush. Yeah, I think this is less saturated and it looks
more harmonious. You might leave some tiny gaps like that. Same do with this
part, and neck, ear. Also, guys, I want
to show some color, like that her dress might be
a little bit transparent. We can show a little bit of her skin color that we can
see through the material. Yeah, Beautiful. Now I want to make
it slightly lighter, so I increase the brightness. Maybe make it a little
bit pinkish like this. I like the color,
it's very gentle. Next step, I want to add some
color to the hair of boy. He has blonde hair, and I'm going to show it here. Maybe brighter. Blend, blend, blend. I forgot using green color. Let's return the green color to the background in this
part, tiny triangle. Yeah, [inaudible] color, let's just return back. Next. I want to
add some color to her hair and I'll do
it on a new layer. Her hair is mostly black, but also it has some
green light in it. It's a little bit trickier
to show two colors together, but we definitely can do it. Just leave some gaps like that. Grab blending tool. Increase the size a little
bit and blend over the beads. I want to make our
illustration pretty gentle. I don't want to have
the sharp edges like this. Next, green color. I'll grab this green
color and I'll create one more layer because maybe I will change
the color later. Most likely I will do that. Fill the gaps with green color. Now, place them under
the original color, under that black
color like this. Duplicate the layer. You see now I have color, is so saturated like
that merged together. Now let's return to
the green color. Go to curves, and here you can
play with the colors and you can play
with saturation. Make him more or less saturated. Next, use saturation and brightness and lower
the brightness. If you want increased
saturation like this. I want it to be more realistic, so I'm going to blend the edges. Now I merged it together, to maybe a little bit brighter. Now, we can merge it together. If you have some sharp lines, we can blend it. Very lovely. Next step, let's just add some
colors to her dress. Also green color. Let's paint
underneath like that. Her color will very gentle. I think if we grab pretty
grass green color, this one, will be more level 1. I would like to create a
feeling that this dress is half-transparent so that's why I'm going to leave lots of gaps, like that. Next, let's go to curves. Now we need to paint
outfit of Fugas. For that, we need to create
pretty beige color like this. Pretty size. Once again, we do it on a new layer. If you don't like the color because I think
the color is a little bit similar to the skin
color, you can change it. I'll show you how. Now
the trick is next. You will go to
saturation, brightness, and think which color
you would like most. I like this bright blue color. Next, we'll create
one more layer, and I will grab this dark
green color for pants. Try to avoid overlappings. What I truly like about
Procreate is that you can adjust the opacities, the color of the outfit, and this is so convenient. Okay, perfect. Now let's
create one more layer and we need to paint belt. I like this color a
little bit brighter here. This traditional
clothing for men. Also, I'll add some
red color to girl, all the red elements
that we have. Let's go to the boy. Okay, perfect. I like that. Now grab black color. I forgot about eyebrows, and show some black elements. We don't have many. Usually
for Ukrainian Vyshyvanka, for Ukrainian clothing, for such ornaments, people used red
and black colors, and blue colors in some parts, depending on the region. Let me think. Yeah. Now, green color. Her eyes will be green as well and leaves. As you see in our
today's illustration, we used so many different
shades of green color. Once again, this is
to show the nature. That how important it is
for our main characters, for people, I think. Place it on the top of a dress. I want to have pretty
saturated leaves. Next step, I want to
make it more saturated. Same, go to the curves,
play with saturation. Now you see it's so bright. I truly like that. We've done this coloring
part so the next part, will be adding shades.
7. Adding Shades: [MUSIC] Now we move to our next part where we'll add so many different shades
and some color variations, and I will tell you
how we will do that. First of all, we need to remove the transparency
in all our layers. Why you should do that? Because if we keep it that way, it will be difficult to use clipping mask and the textures, the shades might not be visible. What are we going to
do? I'll duplicate the layer of the hair, go to over layer, go to adjustments, press "Hue, Saturation, and Brightness", and move
brightness to 100 percent. Make it two times merge together and merge together like this. The same with the skin. Our skin color is so saturated. I moved one layer to the positive 250 percent
and merge that together, do the same
duplicates the layer, go to the lower layer. Hue saturation,
brightness, and move the brightness to 100 percent. Duplicate white layer one
more time merge together and merge together the
color skin and white color. Same with leaves and
decorations, ornaments, duplicate it, so bright, truly brighter like that. Go to lower layer, hue saturation, brightness, move brightness to 100 percent. Duplicate it, merge together
and merge together. Same with this lovely dress, duplicate it one time. Go to lower layer, hue, saturation and brightness, and move brightness
to 100 percent. Duplicate it and merge together. Same with pants. Go to lower layer, hue, saturation and brightness, move to 100 percent like this. I think it's very bright.
I truly likes it. Maybe I will lower
the opacity to 40 percent and merge all
those layers together. Same with the outfit. I think the color
is very suitable. I duplicate this layer, moved one layer till 60 percent, and I merge that together. The same one more time. Go to lower layer, press "Hue, Saturation and Brightness", and move the brightness to 100 percent and
merge that together. I won't do anything
with the background because I'm going to
keep it that way. I like how that looks, so how I won't do
anything with that, probably I will just make
it a little bit brighter. I went to the background,
press "Curve", and here I want to think which color might
be more suitable. I don't want to change
the saturation, but I want to make it
brighter, like this. If you don't like press
two fingers and undo that. But I made it a little bit more saturated and I want
to keep it that way. Next what I'm going to do
is I will start with pants. I'll create one
more layer above. Press "Clipping Mask",
move to multiply. Grab dark blue color, grab boo WC color background, and use this brush its amazing
you can add some shades. If you want to make
some brighter, it's easy to do. Go to curves, and think about the
saturation brightness. I want to keep it such bright, I likes it, and merge together. Actually, I want
to merge together the whole outfit of Lucas Shaw, so I'll merge that together and it will help
me to save some time. I'll create one more
layer, move to multiply, clip it, and I want to have slightly brighter color because I don't want to have
too much shades. But of course we need
to show the shade from the girl and this
area, like that. Once again, go to
curve and if you want, we can play with the colors. See, now it's very bright and I truly like
saturated colors, so I will keep it that way. What I'll do I'll
create new layer, and I'll press "Clipping Mask", and of course I will move to multiply plan
until they are malt. Let's go to hair, [inaudible] yellow of course, and try to add some shades here. Now let's go to beige color, even peach one, now let's show some color. Maybe show some pink cheeks. I'll use a little bit
of shades in this part, maybe here as well. Lovely. I likes it, I'll merge that
together as well. Same do with the flowers, "Clipping Mask", multiply. We need to grab a bright
red color because I want to show the saturation. Some parts randomly try to add those bright dots, like that. Likes it as well. Also add green color, and you remember that you
also have some green shades. You can add some color
variations here as well. Merge that together. Now dress, clip it, multiply. Grab dark green color, and show us a shade
from leaves [MUSIC]. Like that. Go to curves and think
about the colors. If you want, you can
go to hue, saturation, brightness, and think
which color you like more. Maybe less green and
more pinkish color or more greenish
color. It's up to you. To my mind, I want to
desaturate it a little bit. Then [inaudible] set
together as well. Great. Hair, I forgot
the last part. Clip it, multiply
almost black color. Now also show some shades. Mix it, merge together [inaudible] Now I want
to add some stems, and later I will add flicks. I'll show you how to do that. Once again, if you want
to add more shades, if you want to add tiny details, you might use
[inaudible] brushes. It's totally fine. I actually want to make eyes of [inaudible] slightly,
like dimensional. I want to add, makes them
a little bit darker. Like to show the eyes are green like that. Merge together. My next step is we
have some stem brushes and I want to add some
to our illustration. I'll create one more
layer, clip it, multiply. You see it such a cool
feeling here in this area. When you don't actually
add too much things, it might go clerical, if you wanted to
grip darker color, little bit of darker shades. Beautiful. Same you
can go to the curves and think whether you want
to have that saturated. If you'll want that, you can keep it
that way or you can [inaudible] I don't want
to have it that saturated, so I will keep it that way. Like this. After I'll
merge it together. The same with the dress
multiply, clip it. I want to keep it
that way, I don't want to change it or do anything, like that. Maybe I'll make your dress like lighter because I want to separate her from
the background. If your dress is too
bright or too dark, and we see our background
is also pretty light, that might be hard for
us to desaturate her. Now skin color, and
hair like that, and erase some sharpest lines. You might grab pinkish color and emphasize here you see
this pink color here as well. If you don't like
to have that pink saturated you might change the opacity and make
it less bright. I think I want to
show some kind of her shape with a
skin, like that. Now it's clear that
this is the skin color, merge together, create one more layer
underneath, also clip it. I still want to show
some of her skin color. Like this, I think it
looks very harmonious. Same I will do basic color. This pretty bright blue color. I want to remove the gaps. You see we have some white gaps, so I want to make them
less white. Like that. Cool. I really like it. We've done this ad, in different kinds of splashes, if you might say so. Now I want to actually add splatters flicks here.
What we're going to do? I'll create one more layer
above, move to multiply. I want to show us this
harmonious look, like that. Say I'm going to do
with green color. Also remember you
should be above the dress and show
it all around. Try to make harmonious
illustration. Lower the opacity like this, merge it together, and merge together that one. Also, I want to add
some red splashes. Don't worry if it
lowers the opacity, it will not be that dark. [MUSIC] Last one. Here's background, tone the top of background. Multiply cream color, also lower the opacity, and it looks truly
cool. Very beautiful.
8. Adding Vintage Texture: [MUSIC] Guys, we've done this area in different kinds of shades
and color variations, and I wanted to show you
is the last final trick. If you want to make your
illustration look pretty old, like vintage style, we have one more
way how to do that. Our next step, we'll duplicate the layer of
paint here, this one, and I need to export
one more texture that I added to our
class's freebies. I found this texture also
on a website, unsplash.com. So let's do it. It's
called textures. So the expert is a texture
here, though procreate. It looks beautiful, but we
need to do some adjustments, remove the blend layer
mode to multiply here. Wait a second. Be careful, don't merge any layers. But as you see, because we have some wide gaps, our picture looks not like harmonious,
if I might say so. You see, we don't have
a truly white color. So in this case, you lower
opacity of this texture a little bit like this and also we need to
create one layer above. Double-tap and you will have white color move to opal color. I still want to show briefly emphasize the parts where
we had white color. So thanks to the brush, because brush is
semi-transparent, we won't have truly white color. But maybe we'll
have a gray color, which with peach will help
us to separate our couple, Lukash and Mavka,
from the background. Let's do it. This is a pretty
tricky technique, especially with watercolor, because when we use watercolor, at the beginning it's
semi-transparent, so we don't expect that the
color will be too opaque. But thanks to this technique, we can separate our
lovely couple from the background and make it
pretty in vintage style, and in the same
time pretty unique. This is a couple and you see we have some textures that
adds amazing composition. Also, we can have or we
can add one more thing, and I'll show you what is it. If you want to create
one more layer above, you'll move to multiply, blend the layer mode. Also go and grab almost
dark brown color, almost black color,
and grab boo scratch. Now thanks to the boo scratch, it adds some vintage wipe to
our illustration like that. [NOISE] also, if you want
to can control the opacity. If you think that you don't
want to have it as bright. I like the way how this looks
so I wouldn't change it. Well guys, our class
comes to the end. Hope you learned more
about Ukrainian folklore, fairy tales particularly, and now you know how to illustrate them in
watercolor style. I wish you luck with
all your artworks, and I would be happy to
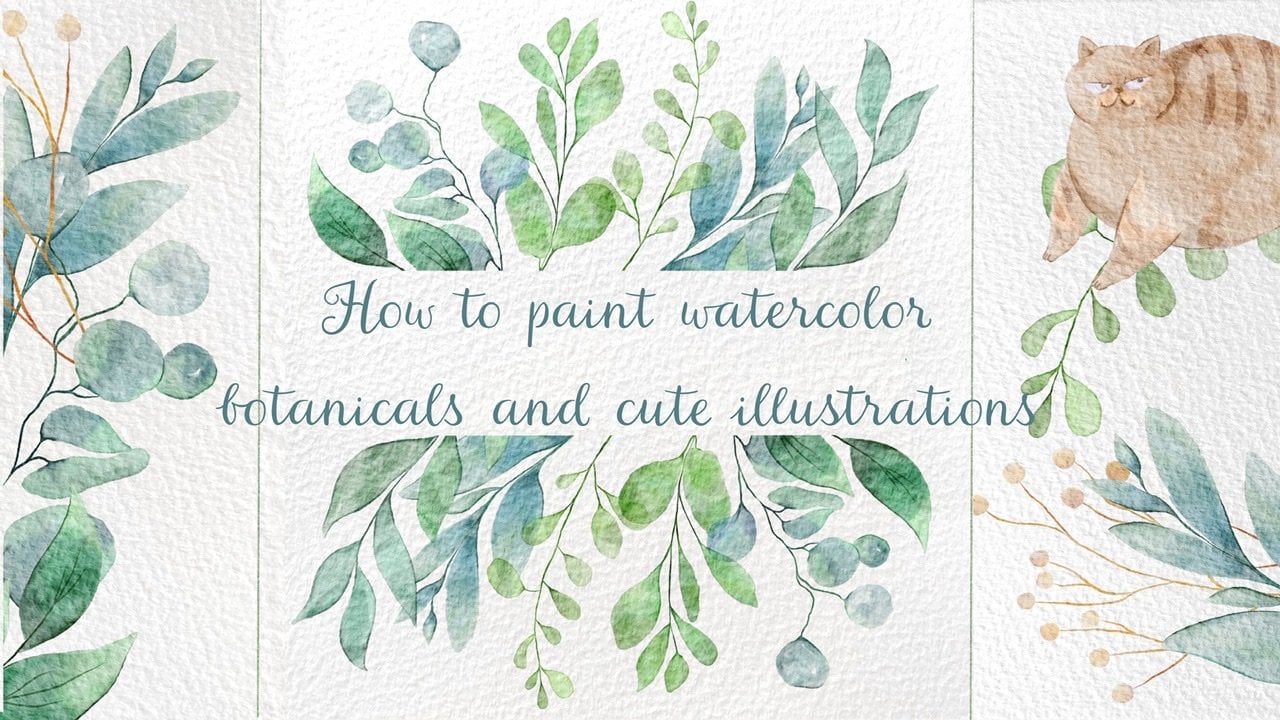
see what you are creating. Guys, in our next class, we will turn our kitchen
tools into pure creatures, and I hope you will
enjoy it as well. We will use watercolor
for our next class. Let's see, each other just soon. [NOISE] This is the end of our class and now you
know how to create love illustration in
folklore art style and now you know how to
paint lovely couples. Guys, I hope my class was useful and you enjoyed the
painting process, and you got lots of inspiration. If you have some questions,
suggestions, recommendations, you might leave some
in discussion section, and let's see each other
in a new class. Bye bye.
 Inga Yoon, Digital illustrator and teacher