Transcripts
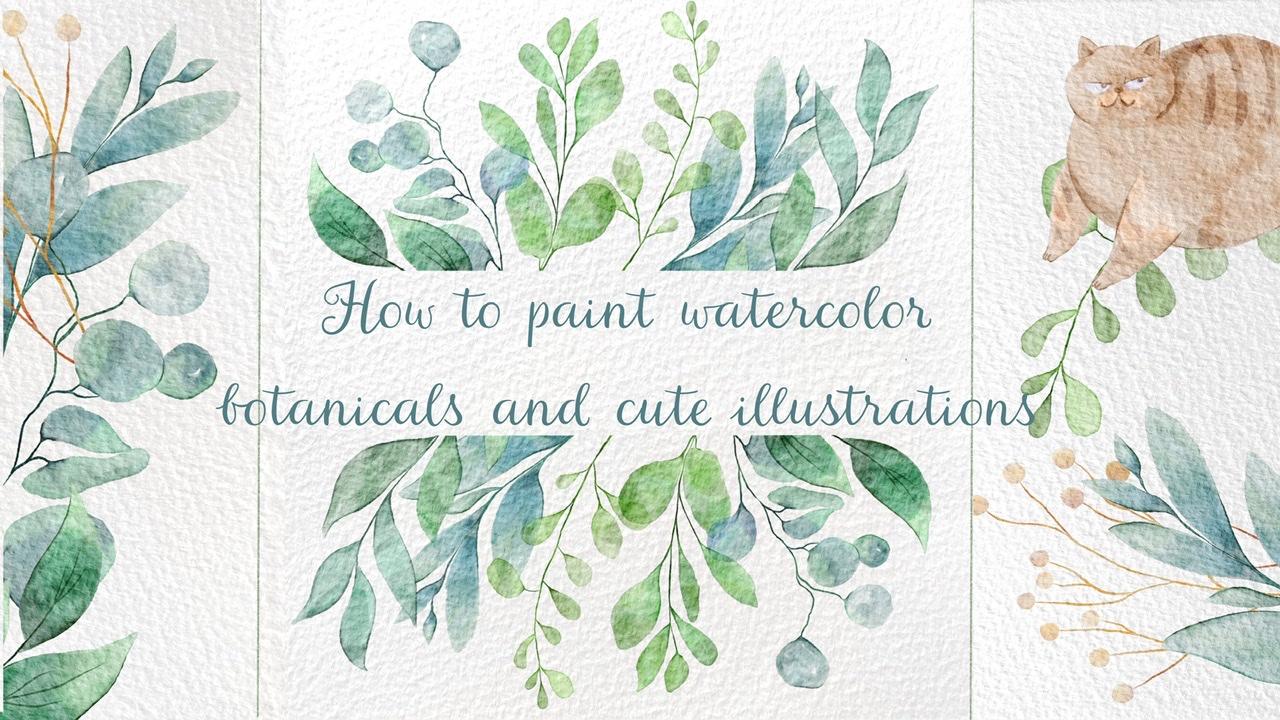
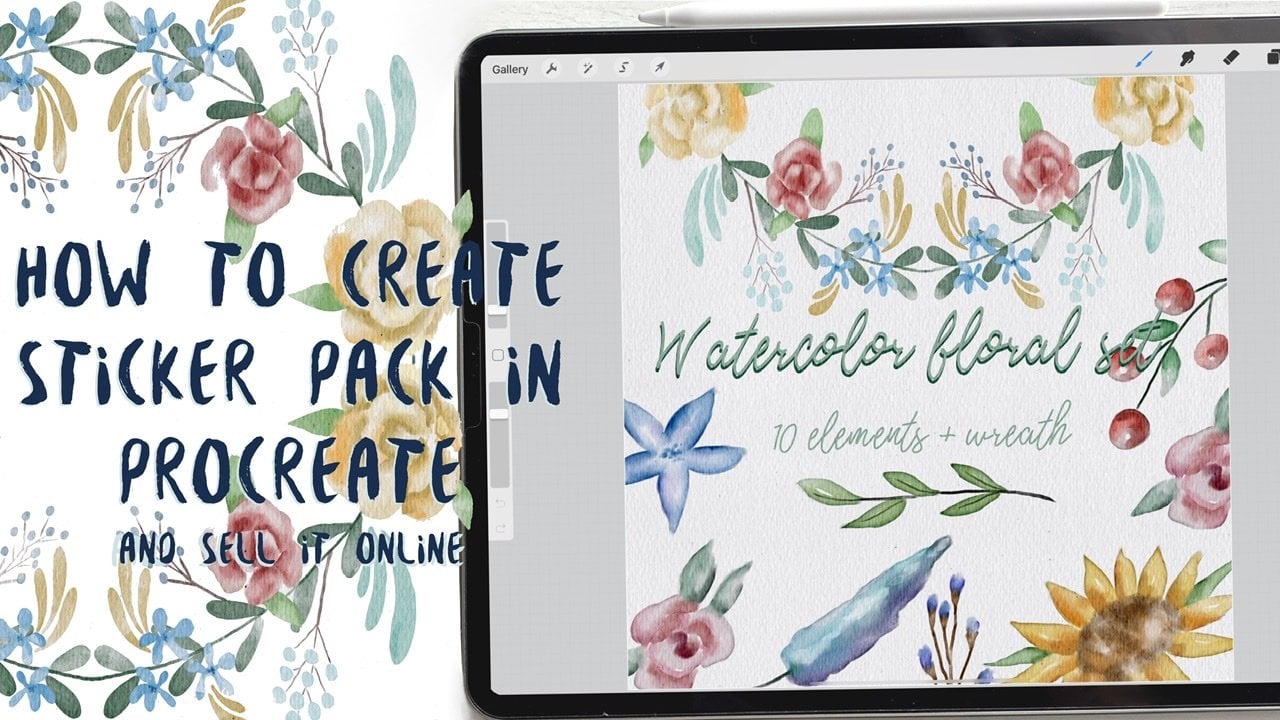
1. Introduction : Hi guys, welcome to my class. So during our today's tutorial, I'm gonna teach you how to paint beautiful watercolor floral illustrations, how to bring botanical. And during my second class, I will teach you how to be an amazing illustration of kids and retaining goes altogether, you know, watercolors style. I'm going to show you new methods, how to achieve. So let's get started. Hi guys, I'm Inger, freelance illustrator. Welcome back to my class and let's pay an altogether amazing watercolor botanical. You'd get in different frames. You can pre and enhance them on a wall or create a sticker back and sell it on Creative Market or whatever. So as you understand our today's topic keys, botanical illustrations. Today I want to show you, is it watercolour? It's simple. And that's a real fun. We will use my botanical sketches and sets that I created and said we'll help you to save time. I also help teach you how to play and lovely animals in watercolor style. Today we'll teach you how to create a textured paper. And we have any Yuan, how to create a beautiful compensation and also how to pay in plans in a watercolor style. I will also show you two techniques of edX and shades. And finally, how to paint three amazing watercolor frames and one cute book illustrations that later you can print, put an iframe and hand on a wall. I will show you my whole process from start to finish. And as a bonus, I will share with you my watercolor custom brushes that I created. I will also add being gif files of my botanical sketches said, textured paper and pictures that I drew. I also prepared for your color palette. Feel free to use them for your own art projects. This Claire's is more for intermediate level, but if you've watched my previous classes for beginners, this class also will be fine. Even some experienced artists can find here some useful tips how to paint vertical illustrations in a new style. And of course, inspiration. Your class project Gilbane. Next, paint your own botanical frame or book illustration using their tips and brushes that I give you today, I will use procreate for this class with iPad and Apple pencil. So if you have it, how some Rs are drawing pads or just regular paper with Spain's. Please join our class and good luck.
2. Texture paper and sketching set: Well guys, I think we can start. And once again, as I mentioned earlier, our today's topic will be about the dean botanical. And we're going to create floral frame and also going to make one illustration, very cute illustration of his kids. I already create a sketch for you. And we're going to use a new textured papers and I created recently. And I will share everything. And you can download that in a section of sources and projects. You might see Islambouli can't say here, we are going to use them for our illustration and also Zao BOB part of frame. And secular is SOS botanical sauce plurals with when I use today also both sketches, both sets. I will chefs us, wow. And also created one you brush, which is called Boolean quarter colors brushes, very lovely. It's good not just for in contained in, but also forward color. And we're also going to use it as well. And once again, we'll use our ball watercolor splashes brush and boom, marshmallow watercolor brushes that we used last class. So you're gonna use SEM as well today. And I think we are ready. And I need to be an annual layer, such as below our texture paper. But first of all, so that's our texture paper. And once again, I'm going to show you, and I'm going to tell you how to insert this file from your folder. Once again, just let's pretend that we don't have texture paper and we need to create a layer once again and after press, Add, and insert the file. And after that you have different folders. And you need to go to download in an afternoon into press file and after you will automatically insert said in our procreate. So as it's, I'll folder because I didn't save said I just created this texture papers is via can show you actually how to insert set, but I hope you understood. So you go to this button after press add, insert the file enough to go to your downloads folder. And often just breast insert the file and you got your texture paper. So let's start and we'll duplicate our extra paper two times. And after the first one we'll move to Linear Burn mode and second one to Color Burn. After duplicate, WK two layers and after merge Linear Burn, same is Color Burn. I wanted replicated and merge as well. And after zed i will lovers D off my Linear Burn mode grade and after Ivo groups at one is val guys, if you wanted to make it even more saturated, go ahead and you can duplicate it even more times. It's all up to you. For example, you can duplicate it three times lower. So positive, same as Color Burn. Replicate. You also can lowers that passage is slightly axis. So for me that's fine. And after I want to put it somewhere on the top, well, now I need to use the layers at just below all, all layers. This is our paint in Iran. And once again, if you're going to use our kitchen. How can you grab the flows at you? Like just go to your kitchen, said, after grab a selection to press free hand, select the fluorines at you like after three fingers down and you need to press copy and paste. So now, as you might see, we have our flora that is here. If you like. You could just word lengths add, and that's fine. Same, you can do it like once again guys, if you want to create a sticker said, or some clip art, do you want to sell on Etsy, on some Azar shops? Go ahead and do that. It's all up to you. And in this way, you need to create as huge, as big picture, as big as possible. So my suggestion is to create bigger size cause you need to have a picture of you so quick resolution. So this is a good way how to make some headway and saying why. We'll turn off our sketch layer. And you can now go and grabs us U1. And also select three fingers down and copy and paste. And after you can increase the size of our painting, Soviet going under same three fingers down, copy and paste increases size like Suez are cave any territory into our original sketch and sad and you kind of go and grab in Yuan, three fingers down, copy and paste increases. Eyes. Are fewer floral and as quote me, now, same return. Grapes and next twang, three fingers down, copy-and-paste, increases size. Turn it off, return sludge selection told her fingers down. Copy-and-paste increases size. Turn it off, returned to have tumor. Three fingers down, copy and paste. You increase the size. Maybe even bigger. Thanks Ed. Oh, and the last 13 fingers down. Copy and paste. Great. Now we could turn off. Originally said that seed and also have cats. I think it's a size of Java's pre-defined saw, either not even cut side as well. And to my mind, we can start as Flores. You started with a system. And we can lowers that passage is slightly, and once again, we need to create a new layer that Tupelo, everything.
3. Painting botanicals Pt. 1: It's just put my kitchen set somewhere here. I came, you layer. And after that I am gonna go and grab my bowl, marshmallow watercolour brush, and we can play music colors. Once again, guys, I will share with you my color palette. So under Ari. And as you might see, as a feeling is very, very nice, surreal watercolor. And it is pretty, pretty convenient. It will take time to finish all our paintings. I know. And this is my accent. I'm gonna go and grab my import in lighter color, brash Sydney U1. And I've a lover, SAP paucity significantly. And now I've turned off ofs kitsch layer and I need to add some details. Now, we're gonna go and grab power blending tool. And let's blend some sharp edges and colors at APA her leptin and R12 cleansing edges you seed from. Brush, you can brush these actual which color. I don't want to lose those gap. And if colours graph if Danny. And now next fan under your selection tool, crib Fenner. Around 3% hue saturation and brightness. Loners subprime case, increased situation, flanks his likes it blends. Can just attrition, brightness, increase price S. Train shen. Thanks his things. The last theme games to go compressed ultimately select at one phasor around 3%, because iteration brightness and loggers uprightness might be to 17%. And now you see it has this authentic watercolor locally from its perfect. Now let's turn it off. We don't need this kitsch layers, so also you can turn that off as well. We can delete set one. And now we have the nasa pain team and nasa sketch Logger set positives significantly, creating new layers. It is below ours layer. And now I'm gonna go and grab mental marshmallow. What color crash? And I want to change the color. Maybe they exist very deep. Something between Cree and we'll color schemes. I want to make some crazy end at some dark shades. Same Tony's IS Mrs. leave. Alright, but light allows us tiny around six glasses crash. Kynars. Pressure. So if you wanted to reach more transparent look, don't press it hard. If you want to have more saturated color. Just press hard. Ground colic. Now let's change brash Tolkien in for the color. Then in topic. They can do it. Now, direct evidence, Shane's freehand. Thank says she situation pride you slaughter so that brightness finds thank her. She's a tradition. Brightness you can, theories of colour uses color. Hue, saturation, brightness. I like this color is so nice. I don't want to change it. Well, in the last tab is automatic. Prep feather, 3% hue saturation, brightness and lowers a practice. Maybe 23% is again, Perfect, perfect.
4. Painting botanicals Pt. 2 : And now I wanted to go and choose his swan. You layer on to stick to green color. Maybe eventually I go to that, I will add it. Yeah. Right now. Oh, darn Caroline. And now what I'm gonna do is I'm gonna create a new layer and how one's better. Sound sharp lines to second. It needs to turn off our sketch layer and I need to add some lines to our leaves. This perfect blend into just planned. Now I want to loggers a size. My blend into two blends. Lives. Feather. Is attrition pride, yes. And that's lower saturation increase brightness. Same situation, brightness, increase brightness. So tell us staff automatic as or maybe 2%. Because attrition, broadcast and allover surprising this axis. We also have wanes. Enclave is mods and she's a moles into like maybe say Swan is fine. How eccentric color Park. I don't like multiply. And I went to low reset positive like set. I mean, it's fine. And after I just march together and turns it off, and now we can delete our sketch layer and we can move to the next one. I want to grab this. Never sat Bassett team. Create a new layer and we can start. Wow, this floral com gonna make lighter. I said, well Marshmallow, you layer them nice tact. Business paint and I'm trying not to leave my appetite. So froms is clean. But even for to color turn off house kitchen layer. Thanks AS light, total dollar brightness. And I DO actually like so sharp patches had ceased. Chloral has slightly different. Okay. Now let's crash rates. Three him. He's right. Next. Universe surprises the situation. Thanks. Ac has greatly interested in automatic. She's iteration brightness.
5. Painting botanicals Pt. 3: I like eucalyptus. To begin with your press harder, you have to practice. Just to point you to court a car crash. I think it's time for my TR. So we can start. Each layer. Membrane P450 said it's ours. Plan to talk. Now Gandhi centroid making 6% herself ICT increase situation. Caries can practice concentration. So this is a question. Cool. And that's a very luckily enough and automatic. And she situation privacy train Shang file has done is fine. What seems Fatma flora.
6. Painting botanicals Pt. 4 : They always tenuous everything actually, It's true. And each layer, no, That's it. The first comic books. And I don't want to add also science. So I keep it the tray. And as her contrition brightness increase saturation and lower price slightly. Now automatic hue saturation brightness and he lowers brightness. Increase situation. Now I liked. So let's keep it likes it guys, we've done with our paintings was our Florio's finally.
7. Painting cats: I'd start off our layer creating Yuan. Floors have positive OS kitsch layer. And let's dive into our kits. And first of all, I wanted to make something like ginger cat, Mo marshmallow. Okay, perfect. So because first kid now into cars and either one and from father second Kant, I think it will be something like color blend and entirely, it didn't leave some sharp parts or sharp edges, not everywhere, of course. So now I'm gonna go and select some areas like this belly. In Africa. I wondered Pfizer that she's changing brightness and just lower as uprightness increase the brightness, Dunbar's it. And I think I want to add some dots here and, and, and, and next year's attrition, brightness and love. And some brains. Thanks us. Sams and Nozick quite abides in very cute. You know what about ice? I wanted to look at change color or personally change in brightness. Make an axes. Next, theories shade is to have shed. And she was attrition brightness. Three, saturation lowers uprightness, acceptance and Western art. And she situation brightness. So I'm gonna go and grab my CPU in quarter car brush. And I will be on a new layer. As I wanted to controls that pass a t. Now get ready to turn it off Alice kitsch layer. And I'm going to add some details. You can leave it like that. You can lowers that positive thetas are key. And I went to March some areas. I want to pretend that this is water colored. Says It means that higher blends and parts. I haven't much together two layers. And now we have to either kit. And at the end. I wanted to situate this light aid. Latin sharp edges. Just get it Prager lowly. And at f. Okay, perfect solution. Now is trashed and write desk and the loggers and brightness. Chris situation is to lower the brightness, like situation brightness. And I guess guy, when I keep the excess land sharp edges as PDF in very, very loudly. And I went to add some stripes. And it's also going to have the correct tree hand. And act like a perfect situation brightness, you can increase situation, but I want to lower set. That would be our cat is very, very low Nuan. And yeah, I have my email watercolour brush managed to be on a new layer. So I say that I think bear ready. And let's just turn off our sketch layer. Very lovely, smart set to get arbitrary. And you can lover said to me this advice, it is fine and you can merge together. A very lovely and intent if autonomy Sam, now it's final touch. Situation in brightness, a loggers upright as country situation. Now we have our logic color can pretend as M-phase. They have two different cats. And now you can play around and start to create him beautiful composition. But first of all, once again, I wanted to replicate all exam in a case if something goes wrong and IV, IV with not like our pain t And again, just to Bill Gates em and make one layer can visa.
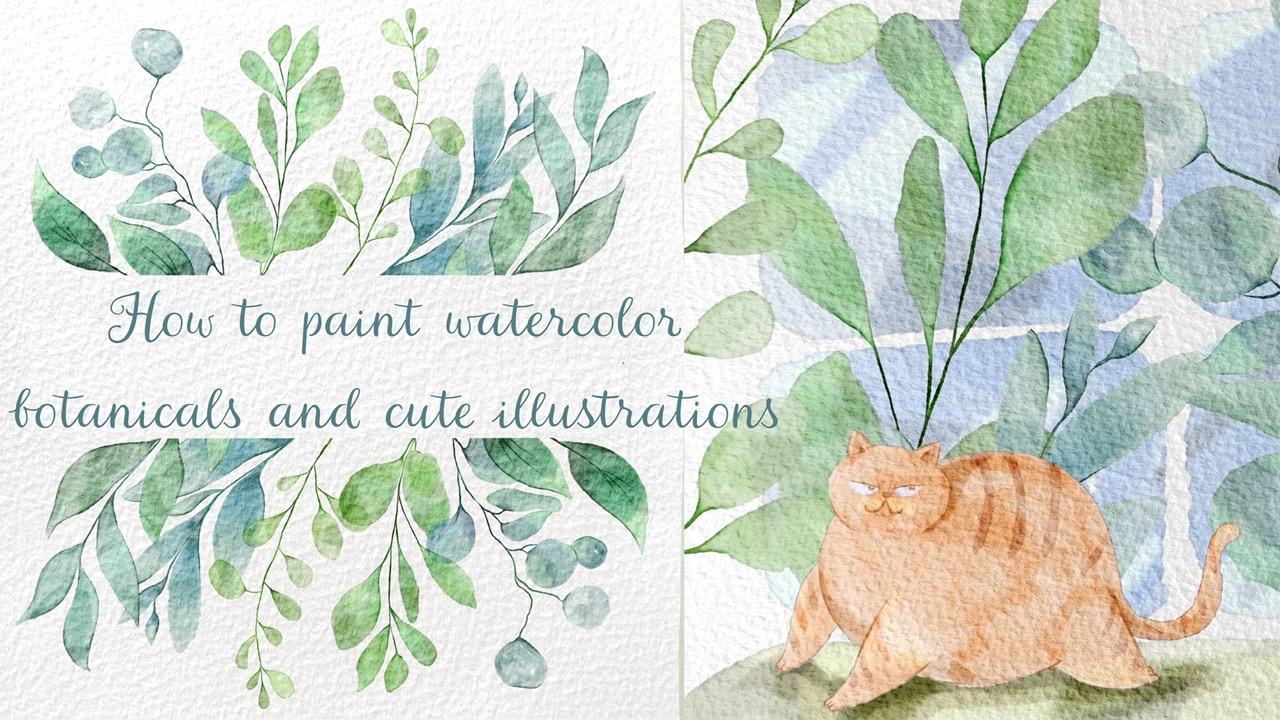
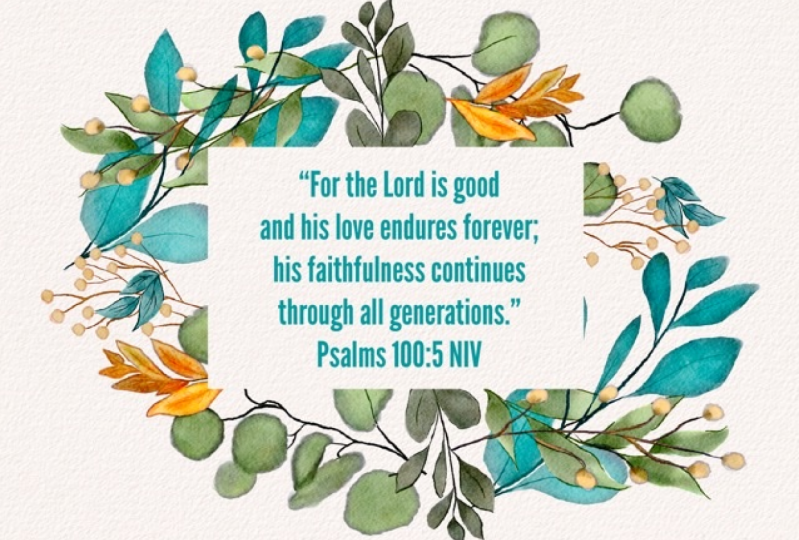
8. Creating floral frame: Well now we have finally rated creative, beautiful floral composition. And let's start to him sad. And first of all, David gonna use laws of labours, lords of our tiny costs, but also want to create the floral frame and also automobile distribution with our podcasts because they have very lumpy. So once again, I duplicated my layers, say here, the main ones. And now I'm ready to start painting. It's tiny creating how pitiful pluralistic station. Thanks. Of course. So phronesis R1 is perfect and I'm going to merge all of them together. Yep. Now next themes that I'm going to draw a goats or ten go enough, try press cut. So we've done with our first frame to S1, this here, this swan is perfect for what color illustrations. You can write something here, whatever you like. We can like, for example, text. Exam. That invitation. Thank cease. Increases size of my day invitation. So that's this guy's out first floral praying. Now let's move to the next one. Let's replicate it. 1c Can I don't look that our kids have the Picketty's layers is layered. Now you're going to create some rectangle shaped frame. And that's why I told you this crates that we created our botanical set up beaks. That means I in high resolution. Keep in mind, I can even draw it somewhere here. We will have Eric technical shaped, framed, aided shaped rectangle, rectangle. And guys, I told you that I promised to show you how to create a beautiful composition, our watercolour paint in watercolor, botanical, WES, not transparent background. So what I'm gonna do, I multiply cases layer. And after this one, I will go to History and brightness, and I will move it to the maximum means it's right now. And after notably case that a few times merged together. And as you might see, at replicated more. And let's put it, I'll paint in oil on top of everything. So as you might see now, our floral is not overlapping as appeals. This very important. And the second one, and call it a frustration brightness and increase the brightness. Now it's wide. R2 is a duplicate that a few times. Now it's wide enough to merge together with I like to keep that in mind that you should be here. Yeah. System OK. And I'm located. Now You don't overlap with Hazara paintings and set looks. Peter can degrade our frame. Same as Tumisah nasa wide. And same Binet tutorials. This one, replicate, increase the brightness. Replicate, replicate, Not quite, and merge together in phase three. And now my next step is going to go, I'm and same layer, I have a rectangle and I'm gonna go and grab rectangular shape ICS. And after Act. Next frame. And I'm nice, I hope you like that. You also can use it for Claire fed and illustrations for the creation of your website, of your scrapbooking or whatever you like. It's all done x part and sustained in the illustration with scared as it promised.
9. Painting cute illustration: Well, our next frame where I'm gonna use my kids as well. So let's move into this one and I will go and create a new layer, cause I need to create a shape for Maine. Next. Illustration. Xi's actors at invert and copy and paste, and cut and paste. And Alice turns it off. Now we have our illustration and sets, guys. You need to keeps it in mind that you couldn't use it, as you recall in the future is a pretty transparent. So I wanted to improve, said Hannah multiplicate layers. And after our second layer would go and grab power brightness to maximum. Now you need to replicate there's couple of times merge together and after set vth caps. Now as you might see, our costs are not transparent at all. Now let's play around and create. Our frame is now also keeps it in mind if you want to change the shape of our. What you need to do is go to liquify high, increase the size. And I'm going to push and move, have diurnal. No way how you like to see that. We call to our eucalyptus applicants. Okay, perfect. I think we are ready. So let's turn off struck hold. And if an hour is extremely beautiful, you can keep it that way. And that's what I'm planning to do. A piece I will match to kids or layers exist two layers and after, here. Two layers together. And after I have one more layer that I'm gonna merge. So as you might see, we have our Florida's data separated, thrown out, cancel. It's very important. Next step is so once again, you can keep it that way. You can even duplicated legs if you make one layer invisible, show you one magic trick that can help me to cut some material. So you go here after that, press select, after invert. Our next step is go to the layers. A disavow our selection, selected layer and architect clear. So now inside human have anything that is funded very, very lovely about, I think I wanted to Kansas to race as well. Once again, guys picks up options. It you like it can be this way or this option. Both ways are fine, but I want to keep cats like sad. I don't want to cut Sam because pretty, pretty loudly. And now our last painting is actually, I'm gonna create an illustration with you and things to say. I'm going to go and have a turn of how cats I already created pass catch. So we're gonna draw cats in front of the window and behind, you're going to add some plurals. So should be beautiful. So they have how sketch you need to create a layer. And in nice, I'll sketch. And I'm gonna go and grab the blue color because we are going to paint windows. What's the color? And then make it perfect knowing to those ED. Thanks. After. You need to create a place where our kids go seat. You thank satisfying. And I need to add some shades freehand. And their situation brightness lowers the brightness increase situation like this. Play music colors. So up to you. Once again. I can't now I do exit door. You can turn off house, kitchen layer connected doubly kids at one. Now, as you might see, like some signing. And it goes through the window and it looks pretty denies. Now we have our kids and say here is 21. And I'm going to go and separate Sam, I'm from each other and cut and paste. And once again, you need to put our window on a bottom costs here because our kids should be in front of everything creating ice, but I want to add some shades. So basically you have selection tool here and add phasors are slightly lowers uprightness, increase saturation. Play was a Shades. Excellent meals. This findings indicate lower layer. She's a titration, brightness increases mass. Wk, Is it a few times in the arch? That last step is to replicate institution and bribe is it'll take ten marched gizzard Segways as our paint and other cats. And I'm also gonna show you one more magic trick, once again of a 2 second. Now because the metrics change that I'm gonna show you, ease your duplicated all our botanical layer after zed here go to the white color Hopkin, press Select and fill layer two times, one times S. Ok. And now I want to show you what was its magic trick. This is the second option. How can he use all botanic OS API like that as well? So you might create just a feeling that we have some flavors, some pluralists behind, as it was in the class. And I hope you enjoyed our leads and process and now you know how to pay and beautiful floral illustrations and appropriate. So go ahead and create your own projects. Use a brushes that I created and let's test next.
 Inga Yoon, Digital illustrator and teacher