Transcripts
1. Introduction: Hi, I'm Mickey,
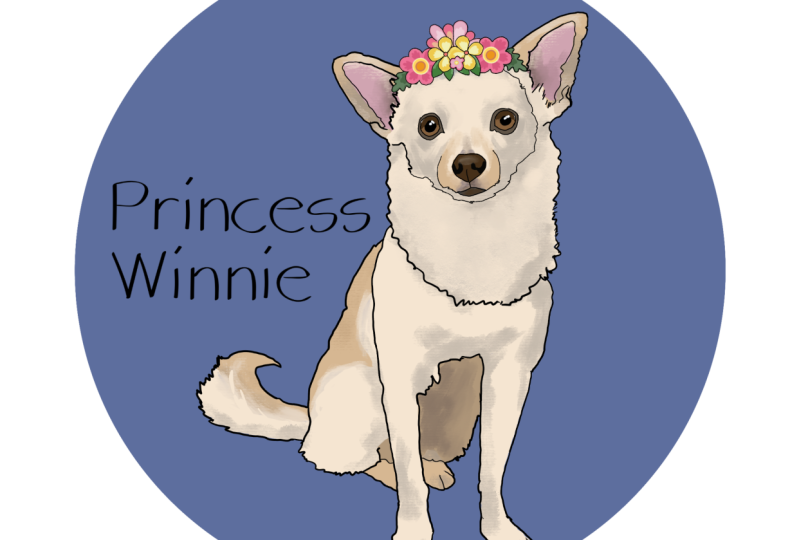
and this is venue. She's my artistic muse. And welcome to how to paint
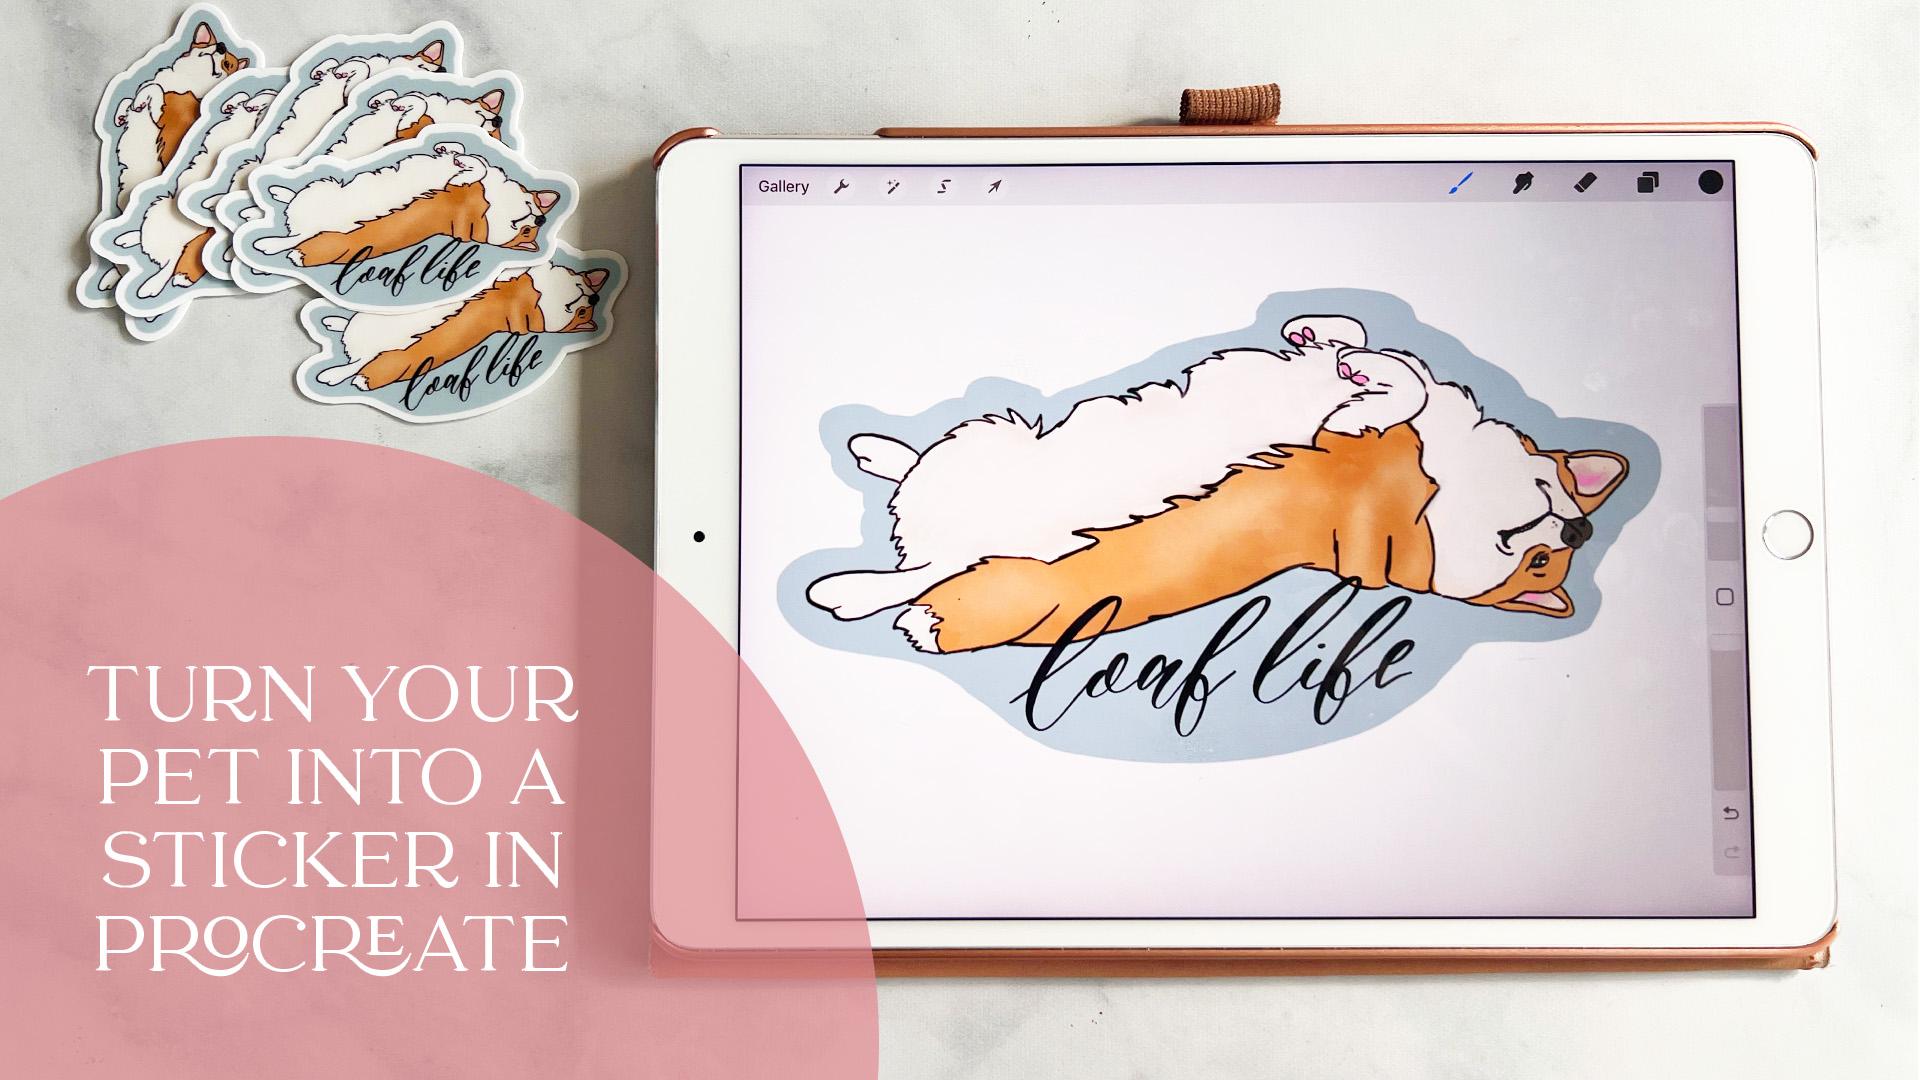
your pet in Procreate, and create a sticker. I'm really excited for
this class because I know how much our
pets can mean to us. And I'm gonna teach you how
to draw them in procreate. This is a beginner's
level course, so you don't have to be
super pro, at procreate. All you need is an iPad with the Procreate app and
some type of pencil, like an Apple pencil
that you can draw with. And I'm gonna put her down. So you're going to
need those and we're actually going to be
tracing your pet. So of course, if you want to, you can draw your pet by hand. But I wanted this to be
accessible to anyone. So I am having you guys trace. I'm going to show
you how to do that. You're going to
trace over your pet. Then we're going
to add some color. We're going to add
lots of detail. And then I'm going
to show you how to export your artwork and upload it to a website where
you can print out stickers. I love having stickers
of my opinion, but I also do a lot of
stickers for clients. A lot of clients
want to incorporate their pets into
their wedding days. So I've made stickers
and coasters. And you can also sell
your stickers on Etsy. You can give them away as gifts. It's just a really
fun thing to do. Now, as I said, this is a beginner level and we're going to
be using Procreate. But if you've never
opened Procreate before, I suggest taking a
beginner course, either getting on YouTube
or there's a lot of really fantastic and
beginner courses for Procreate on Skillshare. I'm really excited. I know I always say that and
always Skillshare courses, but I really am
excited to teach you how to turn your
pet into a sticker. It is really fun and I hope
that you enjoyed this class.
2. Class Project: For the class project, your actually going to be doing the project as you
watch the class because you're going
to take a photo of your own pet and
draw it with me. I'm obviously going to use a picture of venue
and you can use a picture of your
pet if you don't have a pet and you
still want to do this, find one on Instagram. I mean, how many adorable
dogs and cats and rabbits and all sorts of little creatures are
there on Instagram. You can totally use one of those photos or just find
one on the internet. But that's your class project. I want to see what
you guys create. Obviously, you don't need to show me the finished product, which is a sticker
because it'll take a couple of weeks
for it to arrive. But if you could please post
your artwork, I really, really love seeing what
you guys create and it also helps his class
gets shared more. So be sure to share
your artwork in the project section
of this class.
3. Setting Up Your Canvas: The first thing we're
gonna do is we're gonna go ahead and sketch our pet. Now I'm in Procreate, so make sure you're
in Procreate. And I'm going to
create a new canvas. And I want this canvas to be 2 thousand by 2
thousand pixels. Now if yours is
not set up pixels just come over here
and you can change it. 2 thousand by 2 thousand will
give us a pretty good size. And the DPI, you want to
make sure this is at 300. We need it to be
really high-quality. And maximum layers is 130. That is more than enough. When I come over here
to the color profile, and I'm actually going
to move it to RGB. That's totally fine. It'll print fine. I think we're all good. So Create. Now what we need to do is we're gonna bring in
our pet picture of them. Now, I am going to
just be tracing it. I think that's the easiest
way for everybody since this is a beginner level and I want to make sure this is assessed. Everyone. We are going to trace
our pets and then we'll go from there and color
and all that kind of stuff. But if you love to
draw and maybe you're, you know, you're
really talented at it. Feel free to just draw it
yourself if you want to. There are no rules
when it comes to that, but I am going to be showing you how to trace
it today because I want this to be
easy for you guys and for you to be
happy with the result. I got to grab the
picture, my pet. Now if you don't have a pet, but you want to do this graph, just grab them from
the Internet or your favorite Instagram
dog or bunny or cat. I'm gonna go to the wrench tool and I'm going to insert a photo. I'm gonna go to my albums. I have an album. All of bend, my little girl who is tearing up a
toy in the background. I hope you can't hear that. I want to grab a
photo of her that has pretty good dimensions where
I can see all of her body. Now, if you want to
adjust your dog's head, you could totally do that. I recommend getting I mean, you could really do
any angle you want. But I am going to actually
select this photo because I liked
the proportions of it and I like her little face. I'm gonna make it a
little bigger just so There's a good amount here. I'm going to unclick
this so it's set. And then I'm gonna come over
here and I'm gonna reduce the opacity because I want
to trace over it now. I don't want the opacity
still life that I can't see the details in her. I'm going to probably
put it around like 60, maybe a little bit more at 65. Then I'm going to
create a new layer. Make sure you're on a new layer. Otherwise, this
isn't going to work. You're on a new layer. You have black selected, double-click and
it'll give you black. And I'm going to come up
and grab my HB pencil. And I'm just gonna
do the rough sketch, the rest sketch you can zoom in. You don't need to get
every tiny little detail in less lots of style
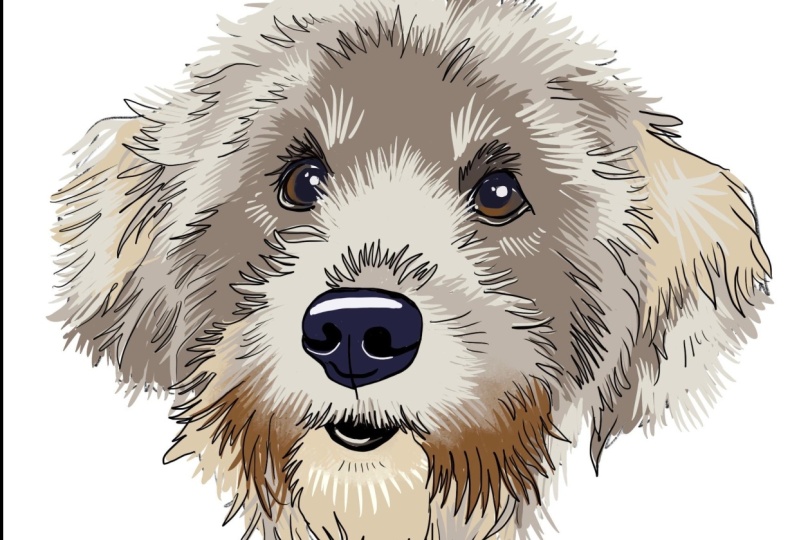
that you're looking for. Today. I'm doing more of an animated, cartoony style of her. So I just need the basic shapes and then I'll go in and
fill in from there.
4. Sketch Your Pet: We're going to
continue to sketch. I don't know what happened,
but my layer disappeared. So make sure you're
on another layer. I like to zoom in and
just sketch around her. Now I'm not concerned with getting every
little piece of hair, but I do want to get some things that are
important like knowing that this is the inside
of her ear and this is the for that touches
just on the outside. And maybe this little
indentation here. We're just sketching. Zoom in when it gets
closer to her eyes. Because I want to get
if you make a mistake, just hit this back button. Sketching around her. Pets are the best
thing in the world. We got Ben yea
during the pandemic. We actually got her rape before the pandemic started in January. And I was so thankful
for her because as I'm sure a lot of
you have experienced, it was a hard time and she made it better
because she was so cute. But old man, she was a puppy. And the puppy stage
is really hard. The nose is usually
something where I need to turn up
the opacity a bit. Now make sure you're not
moving this photo because you need to draw exactly
right on top of it. But it's only going
to move if you grab this tool and
move it around, I'm going to
increase the opacity just so I can see her
little nostrils there. Then make sure you're
on that layer. Draw our little nostrils. I mean, I actually
can't really see them, but I'm just guessing that
drawing practice comes in. Then I liked it, sheds us
little shiny highlight on her nose and I like
to grab that as well. I'm going to go back to turning
down the opacity of it. A little bit more. Keep on tracing. The like I said, when
she was a puppy, Homeboy, choose a lot to handle. I had never raise
the puppy before, so I learned a lot. She has these little eyelashes for benefits and she's a Porgy. I want to make sure that I really showcase the
brown and the YE, in the little, the artwork
that I'm gonna be creating. So I'm making sure that in delineating between
those things on here, little mouth and a little chin. I'm kind of obsessed
with my dog. Sketching her little feet, her nails that she
never lets me clip. She's got all this
white flew right here. Then to do something really fun
that you can do. And we can go into
this more depth, but adding a little
flower crown, if you want, would
be so Q or you could put a tennis ball by them. Now, what I'm going
to do is I am going to hide this layer. And as you can see, I have this nice little
sketch of my dog. The next thing we're gonna
do is we are going to add color and then
add some definition.
5. Coloring Your Pet: Now that we have
our little sketch, I'm going to duplicate it. And I'm gonna hide this just in case something
happens to it. Now we're going to
come in and add color. So one way you can add
color if you want it to be really true to the
color that your dog is, is increase the opacity
of that original picture. And then what you can do is
just hold down your finger. It will grab that color. Now, you can make
your own palette. If you go like this, create new pallet.
What's going on? I can tap here and it'll
add that color in. Again. If I hold down here, go to my palette
and just tap here. It'll grab those colors. Now, you might want to do something a little more vibrant, or maybe you want to make your dog brain boat colors
or your cat or your bunny. Wherever you want to do, just develop a color palette. I actually have a color
palette for Bunia already down here that I
made some stickers with. But I think I am going to use some of these truer
colors today. I'm just going to
go ahead and add a couple more colors to this. Just going around and
touching different areas, or the colors just
slightly different, like here, it's a
little more gray. Wow, that's like almost
exactly the same color. And then her eyes are
definitely a really dark brown. Then chess and
pink and our ears. But I actually think I
like this pink better. So I might grab that
and put that in there. Grab your color palette, and then we're gonna
get started sketching, I'm sorry, like
filling in the color. I'm gonna go ahead and you
can do one of two things. You can either take this off completely if you're
ready to, just, sorry, you can hide this
layer completely if you're ready to just
start coloring in. But I want to make sure
that I get it as true as possible to some of her
different areas and details. So I'm gonna leave it on, but I'm going to reduce it
so it's not too strong. Then I'm creating a new layer. And I'm going to grab, I want it to have a little
bit of a chalky feel to it. I am going to grab my
dry texture brush, which is dry ink brush. Then I'm going to
get that color. I'm just going to
start painting. Another thing that's
really important is name your layers. I am so bad about doing this, but it really does help. That's gonna be my sketch
and then I'm gonna name this one brown layer because that's what I'm going to paint in the brown
layer right now. And all you're doing is
just coming in and making sure that it's an
opacity you like, You know what, I
actually want to use? We're going to do a
technique called a clipping mask, which I love. And that's gonna be able to
give us that texture later. But for right now to
lay a good base layer, I'm actually going to
use the studio pen. That's going to just give it, let it be really covered and the opacity will
be really high. I'm coming in here and I am
just drawing or painting. I guess you would say. I'm going to speed
this up just so you guys aren't watching
me paint forever. But you go ahead and fill in your dog or cat or
bunny, your pet. If it is multiple colors, I am going to stop and
switch colors and I'll show you stop after your
first layer of color. We have this base layer down. It looks really silly. That's okay. Now I'm gonna go ahead and
add in the white for her. I'm going to rename
this layer white. I don't want to
use a stark white. I'm going to use more of, I'm actually going to
make my own white here. Little with a little
yellow in it. Golden. I'm going to go ahead
now that I'm on a new layer and paint
in that color again, feel free to reduce your
brush size if you need to. I'm actually just
going to have you guys paint along with me. I'm not going to
speed it up again. And don't be shy. If you paint over certain
areas because I'm going to show you why you don't
have to worry about that. I mean, don't get too crazy. But here I'll show
you right now, what you're gonna
do is select this. I'm just holding it
down and put it above. Then you're going to be able
to see where to sketch. If you're like, Oh my god, this looks like a hot mess
right now, don't worry. This is part of it
looks really funky at first and then we go in
and we do all the details. I work from home, So every day I get to
spend with my dog. She likes to line when
she doesn't get her ways. So she'll like wine at the door because she wants
to go out and laying in the sun show line
because we kick the soccer ball around in the garage and she
wants to go in there. She's really gotten a number. We're just sketching. Don't worry about
it being perfect. We're gonna come in and do
all the perfecting later. We're just putting down
the main base layers. Then her little ears. Like I said, I'm doing
more of a cartoony kind of animated style,
little minimalistic. So it's not gonna be life-like, but it is going to be cute. We have pretty much that down. The next thing I want to do is her little ears have a
little pink in them. I feel competent that I
know where to put that in. We have a new layer and we're
going to label it yours. And I'm just going to put that's really bright so you
can reduce the opacity. I'm going to reduce the
opacity of the pink because it really doesn't need to
be super, super bright. I'm just kind of
putting it like that. And then I'll show you
how we're going to kind of blend it in
a little bit more. Go to this. This is your smudging tool. And I'm going to
use the pan Danny. Just come in here. That is way too big. Reduce your brush
size. Get rid of that. Reduce your brush size, and then just smash it around. You're basically
just smudging it. Sometimes it can take
quite a bit of time. But what it's doing is just removing that harsh line that we really don't want in our sketch unless
you want that look, that's also totally fine too. But I want it to feel
a little more smooth. Now we can paint
her little nose. New Layer knows. Now we'll combine all
these layers later, but I like to keep them
on separate layers just in case we need
to change anything. Now, I could make her
nose stark black, but if I do that, then you're not gonna
see her little nostrils. What I need to do is make her
nose a little more light. And I'm picking up
almost like a blue. I like to use a blue
because that's what I use for my watercolor
paintings on dog noses. And I find that it
works really well. Just coming into her nose, the opacity is down, so make sure it's back up. I wanted to test
this out and see that compares two next
to regular black. The difference is not that high, so I am going to go back. We need to get a color that's
just a little lighter. I would say. Maybe like that.
That's like blue. Maybe that think this
one's a little better. Let's see. Yeah, slightly better. If you want a greater contrast, just feel free to mix your
own color that works for you. I'm gonna leave her little
highlight and her nose. Come around here. She also has, I'm gonna
paint this as well. Her little nostrils get that. The blackest black. So double-click. Just come in here. Now we're going to come in
and make a little highlight so that you can see
them even better. So don't, don't worry. We're coming back
for those details. Base layer. Now we have to do her eye is make sure it's the same kind of thing here. We don't want it to
be the darkest black, probably like that
same nose color. Just come in here. Make an outline. Technically when
you're doing dog eyes, this is gonna be soft. There's like all these little
tiny hairs that make it up. But since we're doing that
cartoony animated style, we are going to make the
lines a little more harsh and straight and not as soft. Then the brown we're going
to grab for her eyes. So this bone is so dark that I actually want to
lighten it up a little bit, maybe a little more golden. Because when I look in her eyes, it looks gold and I'm
going to grab that color. Actually maybe just
slightly darker. It's important to leave a
little bit of white in here. Otherwise, your dog's eyes
looked like a black hole. And then for the pupils, I am going to use
our blackest black. We will add all those
little details later. But for now, that is
what we're doing. I'm pretty happy with this. I'm gonna turn off
that back layer. And then you're gonna
see that there's some areas that need to
have a little work done. So just come back in here, make sure you're on the
right layer and you have the right color and just
perfect those little areas. Now something to mention, see I'm drawing and
nothing's happening. That's because this white layer is on top of the brown layer. So if I switch them, it's gonna be a
little bit different. I switched it because these
areas needs to be fixed up. So just be mindful what layer is on top and what
layer is on bottom. Really important for Procreate to think about those things. And also if you ever go
ahead and use Photoshop, you will need to know that. I'm pretty happy.
Oops, I'm pretty happy with the way
that this was looking. The next thing that we're
going to do is add in some shading to just give
this a little more interest. In the next video, I'll show you how to add in the shading.
6. Adding Texture: All right, we're back
to our pet painting and we're going to
add in that shading. Now another reason why we left these layers separate
is now I can add shading to just
the brown layer without it getting
onto the white layer. We're using that clipping
mask technique that I love. So what you're gonna do
is add a new layer on top of whatever your brown layer is. So maybe this is
a black layer for your dog or it's like a
tanh layer for your buddy. You're going to click on
it and hit Clipping Mask. You should see this
little arrow come down. And basically what that
means is that I can sketch, I can paint all over this, but it's only going to
go onto the brown part. Let me demonstrate this really
quick by using like a red. And we'll use a studio pen. And I will show you
what's going to happen. See, I'm writing or painting
all the way over here. But it's not getting over here, it's only getting
on this brown part. It is such an amazing tool. I love using clipping masks. It's fantastic. So we're going to add
a little texture, a little shading here, so we don't need that color. I'm going to click on this
color because I want to make something that's a
little bit darker because I want to do some shadows
in this half of her body, but then I want to add
some lightness up here, just coming down here
to a little bit darker. And then I'm going
to go into my, let's see what kind of
brush stroke I want to use. What we're gonna do is go up to our brush and go to charcoals. We are going to select
the carbon stack. We have that darker
color selected. We're just going to
come in here and add a little shadow where there
would be shadow on your pet. Think about where the
shadows would be. And I'm actually going
to select a little lighter of a color that
I'm using right now. Then I'm just coming
in here and kind of smudging it around. There's a little, if
you hold this down, it's gonna select
your current brush. It'll select that
chalk, chalky finish. Just want to blend
it because I want it to be a little more blended. Then maybe it down here, sorry, Go to your brush, make sure your clipping, you're on that
clipping mask layer. She would have a little
shadow down here. Just blend that in again. Then I'm going to
select something that is quite a bit
lighter, this color. My opacity, That's what's that? Just kind of go over
her a little bit. That's looking like too much. So I'm going to take the
opacity down a little bit. Just do it like that. I think it's just cool
to add a little texture. If you want yours to be really, really smooth, you
can totally do that. Now I'm going to work up on
her face and I'm going to bring that same texture up here. All I'm doing is
just applying it by. I can paint anywhere
on here and it's not going to affect it, effect anything else because
I'm on that clipping mask. I might want to come in here and just maybe make it a
little darker with that same I have that same brush
selected, the charcoal. This guy missed out down here, so I have to make
sure to get that. I think that looks pretty good. I might put a shadow here. Here I go getting realistic. It's like I always say, Okay, I'm not going to do realistic painting and then
OU's somehow turns into that. But I'm just making a
little shadow right here because
technically it would be here because she's
covering this area up. And then I'm going to
blend it with my blending. Cute. I'm just actually going to
lighten that one more time. Adding that in there. Okay, so we have the
brown layer done. Now if you're happy with
the way this looks, you can merge your
clipping mask. Look what happens
if I take it off. Big difference. This is a cool styles who if you want to
leave it like that, but this is adding
in that element of just making it a
little more interesting. So now we're gonna move on
to the rest of the layers. So I'm going to merge
this down so they stay together going into
that white layer. And we're going to
do the same thing. We're going to select a new layer and create
a clipping mask. And I'm going to select
the whitest white. And I'm going back and
getting that carbon stick. And I just want to add
some white details to her. Maybe up here, I'll put yours
are separate. I forgot. Then I'm gonna go back
and get that kind of grayish tone and where she
oops, that's way too big. Reduce the size where she has these kind of overlapping for I'm going to just
darken that a little bit. Maybe under her chin, she would technically have
a little shadow there. Then going back and
just blending it. I'm actually going to
erase some of this because I'm not super happy
with the way it looks. You can't really
erase because it has that layer
that's underneath. So that's going to come back. So what I actually need
to do is grab that white again and
just paint over it. And that'll take care of that. Okay. I'm happy with that. I'm actually going to
just paint over this. I might add almost like a
really, really light brown. I think that will look better. Yeah. I'm happier with that. Now, she does have a little
bit of markings on her nose. I would say a
little bit of pink. Just do really light
and then blend it in. Think about the details
on your dog or your pet. What are just some little
details that maybe you see and not everybody sees? Those are important
to add in because it'll look more like your pet. Like venue has this
little black spot or kind of grayish spots on
her nose that are so cute. I wanted to get that. I feel pretty good
about the whites. Just kind of happy with it just being more white and not all
this random colors in here. I'm good with that. We are doing a final inking over this so we can put in a lot of those details that
way if we want to. Now we're going to move on to, I'm gonna make sure I merge these layers so
they stay together. And now we're going to
move onto her ears. And, oops, what's
going on there? Okay. I do want to add some of
that white inner ears. Again clipping mask. We're only working on the ears. Bring it up a little bit
with the white. Here we go. Okay. Merge down. Then the pink ears. The pink ears. I'm pretty good with them. I might add just a
tiny bit darker, pink. Oops. Make sure you are
on the right layer. I think that looks good. I'm happy with those. Merge those down her nose. I might put a little using that same charcoal. I don't think we need that. I'm not gonna put
anything on her nose, the eyes, her eyes. What I want to do is actually do a clipping mask so that we
don't go outside of it. But I'm just going to grab my regular inking and I'm going
to get the technical pen. And I want to add in that
more golden each tone, just like a couple of
little light like that. Then maybe blend it in a bit. It gives her eyes some depth. We have the basic layout here. I like the texture
that we've created, all that we have painted and we're good
with the way it looks. What we need to do is we
want to combine our layers, but let's put this sketch
all the way at the bottom and then turn off your
sketch. This is cute. Some people really
like the style, but the reason I turned
off our sketch is because if we merge all of these
and the sketches involved, we're not gonna be
able to get rid of it. We only want to merge all
of the colored layers. Now that those are all merged, we're going to add in the sketch now since the sketches
underneath, we can't see it. So we have to highlight this layer and move it
on top of this layer. I'm going to rename this. And this is just
spending will put. Now that our sketch is above, we can use as a guideline
because we're going to do the ink outline. So add a new layer. I like to use black, but you can use whatever
color you want. Grab your technical pen. I'm using a size six
and the technical pen. And I'm going to go around
and outline all of Ben. Yeah. Basically when
you're doing this, there's gonna be
some discrepancies. We're going to have
to come in and erase that a little bit. That's fine. But you can do a lot of
detail or a little detail. It depends on what kind
of style you want. You're just going to go around basically drawing the outline
that you want for your pet. I'm going to speed this up just because it's gonna take me some time and I'm sure
you're working on yours. And I'll meet you back when
it's all sketched out. We have her totally
sketched out. We have our nice black outline. What we're going to do is
we're going to uncheck the sketch layer so we can
see our beautiful artwork. I don't know what
happened right there. So if you have any
random things, gosh, that must
be on this layer. We're going to have to
fix that in a second. But you have your sketch
and you have your sorry, you have the ink, and then you have the color. Now this is the time
to add in any details. In the next video, we're going to add in all
those small little details.
7. The Little Details: How we're adding in
all the little details and also fixing up anything that might be a
little bit funky here. Now if this is a level of perfection that you
don't care about, feel free to move on
to the next lesson. But I like to make
everything nice and tight. So I'm gonna come in here and
I have my technical brush. And I'm just going to fix up all these little areas that
kind of missed the paint. You don't need to worry
too much about the texture because there's
such small areas. You're not going to notice that the texture is a little
different with them. If they're really large areas, think about using
that clipping mask again if you need to. So it looks like I got all
the brown little vary here. Now, I want to grab the white
and fix up these areas. This is actually on the outside. And we're going to
erase those because we want to make sure
there's nothing on the outside since we're gonna
turn this into a sticker. Just fixing all
those little areas. If just press down and
grab that color again, if you need to switch
your color up. That is looking
pretty good to me. Sorry, these guys
needed to be fixed. So grab that color. Just come in here. It looks like I missed a spot
for the black ink as well. So I'm going to just
grab the black, come in here like this, maybe like this,
around those out. Now I'm gonna grab my eraser
and come on the outside over here and just make sure that
I don't have anything going. There's another mistake
that needed to be fixed. Eraser. I don't want anything
to go outside of the black because when it gets
printed as a sticker, that's will show up
and we do not want that because it just
won't look that good. That all that's done. Make sure you get
any random stuff like that. I want gone. This I'm just going to
cover off with there we go. The other ink, we
have that part done. And now I want to
go in and just add a little bit of detail. And I have that
same technical pen. And Bennett has these cute
little were her whiskers go. So I'm going to add those in. Feel free to add
them if you want for your dog or whatever pet. She also has these little
black for by her nose. Like I said before, I wanted to add in a little
highlight around her nostrils so the brush is or the pen
is really, really small. It's a three. I'm just going to add a
little light highlight. You don't have to do that
if you don't want to, but you can if you want. And then I'm going to
make sure that she has these really cute. This is the key to
making animals that Q is putting these little
white things in their eyes. Those are actually two big she
looks like she's on drugs. Fix that. Just come in with black if you want
to make them smaller, but they really do make
animals look so cute. I don't know what
those are called. I guess it's like a
little highlight. And I see an area that I missed for my outline coming
in here and doing that. I like how there's a little
variation in her eyes. There's that golden brown
and the darker brown. It looks really good. There's a little
spot right here. I want to fix that up. Feel free to if you need to reference your photo, you can. Oops, that's not
what I wanted to do. You can bring it up. Why does this keep happening? So you can see if you missed anything or you want to
add any more details. I am pretty happy with this. I think it looks
really, really good. I did see another spot down
here that needs to be fixed. Make sure I'm on
the correct layer. Make sure we fill this. All done with the artwork. And now there's a couple of
fun add-ons that you can do.
8. Adding a Flower Crown: You could add on a flower
crown if you want, or trying to think what else? If you wanted to put like
a little tennis ball by her or your pet, if you want to add
a flower crown, I'm just going to do
something really, really simple right now. Add a layer. And we're just
going to use black and make sure you're on another layer because you don't want to draw on these layers. What you're going
to do is just make, I'm gonna make this
thicker, like five. Just make your flowers
however you want them to be. Let's see. I'm doing it really base. But the cool thing if these
are completely closed, you can just grab a color. So let me grab a pink. It'll just fill that. Which is so awesome. Then maybe yellow just
makes it really easy. Maybe I'm gonna put yellow. Now if for some reason you
touch the wrong thing, let me show you an example
of what can happen. If you're doing that. It's going to happen
here actually. As you can see, this black line is not a
completely closed shape. When I add the yellow, it didn't do what it
was supposed to do. Let's do it like this. If I had a shape like this, as you can see, it's
not completely closed. If I grabbed yellow
and added it here, it would make the entire thing yellow and we don't want that. So what you need to do is
you need to close the shape. Once the shape is closed, essentially the paint can't
escape and it stays in there. I just wanted to mention
that because I know sometimes people get frustrated. They don't understand
why it's doing that. Then I just add maybe
green back to black. And since this
flower crown layer, which we should
name flower crown, is on top of the other layers. We don't have to worry about it. It's going to be on top of her head instead of underneath. I can't really close
the shape unless I wanted to put this flower
on another level layer, then I can close it and put it underneath
this flower layer. That shape was not closed. That's because I was
on the wrong layer. Those layers, man,
they'll sneak up on you. I'm just adding more
little greenery here. I touched on thing. Like I said, I'm just doing a really, really basic little flower crown here so you guys can
see what I'm talking about. You could all keep
extending it a little bit, although I know that venue would never let this be on her head. Maybe you do like a little rose. Just making weird shapes here, but you get the point. Purple. Maybe. You could even add
little variations of colors, lighten it up a little bit and
you'll get some different. Look really cool. Definitely recommend
playing with the different hues and saturations because
you can do some, some pretty cool stuff in here. Maybe I really liked that
flower and I want to duplicate it because I don't
want to draw it again. So I'm gonna come over here
with the selection tool. And then just, oops, selection tool and just trace around it and I'm getting these
little marching ants. Then I'm gonna take three
fingers, swipe down. Copy, new layer. Oops, I'm sorry. Go like this again. Paste. So now I
have two of these. And I can just put
the other one over here so I don't have
to draw it again. And there's our cute
little flower crown. If you wanted to add
that to your dog. I'm not going to keep it on venue because I I'm gonna have
R just like this. Oops. Now we're going to
move on to how to turn it into a sticker and upload
it and get them printed.
9. Preparing Your Artwork For Print: Now that your dog or cat or rabbit or Guinea
pig is all drawn, you want to get this file
ready to send to the printer. And I like to use Sticker
Mule because they have super
high-quality products. And I'll go into that
further once we get there. But something that I like to
do is put a little outline. First, what I'd like to
do is what I just did, remove the background
by deselecting it. So it's basically hidden. And then you can come
in and see, oh, okay, There are a couple of areas
that need to be fixed up, so make sure those
areas are good to go. Just going to clean
these up really quick, this thin because the
background was white, so it was hiding from us. Same thing down here. I like to you can do
a couple of things. You could send them
just like this and ask them to put a
little white around it or a different color, or you could do it yourself if you want to do it yourself. I'm going to show you right now. Especially if you
wanted to use a color, like a different
color behind almost like a little border.
I'm going to choose. Let's do blue. Blue is pretty blue. And I'm gonna
create a new layer. Something I forgot
to mention too, since we're pretty much done here and we're
happy with our artwork. We can merge these layers together now we don't have to worry about them separating. I'm on a layer but I made
sure that it's underneath my pet and that's
because I don't want to. I'll show you what happens
if I'm on top of it. If I'm on top of it and
I start painting around, it's gonna be a mess and
get all over the place. But if it's below, if it's below, I start painting. I can paint over her and
I'm still gonna be okay. So now that the layer is below, I'm gonna come in and
grab the studio pen. I just want to put
a border around her because I think that
that would look nice. I'm just coming around
and I'm making a border. I'm using the studio pen
at the highest opacity. But feel free to use a different pen if you want
it to be a little thicker. You want it to be pretty smooth. You don't, don't
get too jittery, don't drink too much coffee
when you're doing this. Because when they, they
do the die cut sticker, it will cut exactly
how you have it here. I'm just going to
smooth it out up here. Then when it prints, it'll have this nice little
border if you want it. Otherwise, they could just
tell them to do white to see it's kind of
messed up right there. So I'm going to
select this layer. I'm gonna reduce the size
of this pen by a lot and just gently paint in here to get rid of that.
Like never ending. Okay? That is one way
that you can do it. Another way is if
you feel like your, you want it to be a circle or if your pets it
fits better in a circle. So you just did the head and you don't want to
die cut sticker. You can make a circle. I'm going to grab
the blue again. Just any panel do but let's
try the technical pen. I'm on a new layer
and I'm going to draw a circle and hold it down. And when you hold it down, it says ellipse
created edit circle. It makes you the perfect circle. Oops, that was on. And then I can just grab
this and fill it in. If I hit this arrow key, I can make it bigger. Make sure uniform is selected so it doesn't make
your circle wonky. And then I just put the
venue layer on top of that. And now I have this little
circle with Benny in it. Now keep in mind if
you did not paint these white and we're just relying on the background color. They are now not White. So go back, get the white. Makes sure you're
on the, your pet. And just come in here
and Draw that in. Because you don't
want the whites of their eyes to be blue. Then just fix this. There's a little guy
right there too. There's a lot. There's another little
thing right here. My goodness. All right. Now we are going to go into uploading your sticker
and getting it printed.
10. Uploading Artwork to Website: Now that our artwork
is all complete, what we need to do is export it. Now you can either work
directly on your iPads. So we're gonna be using a
company called Sticker Mule, which is a website online. You can you can access that
directly on your iPad. Or what I like to do is I like to AirDrop it onto my computer
and then I go from there. That's the method I'm
going to use here. The first thing I
want to do is remove that background because I'm
making a die cut sticker. And then I'm gonna go ahead
and merge these two layers. I'm going to rename it sticker. I'm going to make
sure that this is the only layer that's on if any of these
other layers are on, they're going to
export with you. Make sure only the
artwork that you want and the background
is turned off. Go to the Wrench icon. Share, I'm gonna
share it as a PNG, so that means it's going
to have no background. I am just going to AirDrop
it to my computer. So go ahead and do that. Once you have it either
on your computer or if you still have
it on your iPad, because you're gonna be working
completely off your iPad. Feel free to just save it
in your, in your image. So you would go to
JPEG, sorry, not JPEG. You would go PNG. Save image, and then it'll
save it to your photos. All right, Now I'm gonna
show you how to upload to the website and get
your stickers printed. All right, if you guys go
to the class description, there's a link in there
for Sticker Mule. If you use that link,
you'll see this. You've found a $10 credit and they'll give you a credit
if you open an account. I love Sticker Mule. If you do sign up
for an account, they're going to send
you awesome deals. They sometimes like
I just recently ordered some a bunch of
stickers for my business. And they're normally
seventy-five dollars and they were on sale for $24. So they have lots of really
cool deals like that. If you want to sign up, there's no, they're not gonna
take any money from you. It's just opening an account
like any other website. You will get a $10 credit. So use the link in the
class description. Otherwise, just go
to sticker meal.com. Here I am. I'm logged into my account. I really suggest
having an account because it's easier
to track things. I'm gonna click on stickers. You can see there's tons
of options for stickers. There's the transfer stickers,
There's vinyl lettering. There is kiss cut. So kiss cut means it's like a die cut but you have to
peel it away from this. I really like the
dicot stickers. It's what I use for my clients
a lot when we're doing there stickers of their pets for their weddings or events. You could also do
the circle one. Now the circle one
is going to be less expensive than the die cut. Oops. Too carried away there. Because dukkha is just
a little more work for them to have to cut it, but I'm gonna go
ahead and do dicot. But if you have a
sticker or sorry, if you ended up doing a circle, feel free to choose a circle. It's going to be
the same process. I'm selecting this and then
whatever size I want it. Just they know two-by-two
is really small. Three-by-three is a
little small tube, but I use this size
typically on water bottles. Four-by-four is probably
more of what I want. You could do. If you don't want 50 of them, you'll have to come down
here to custom quantity and type in what you want. So let's say I want 15. I don't think so. Must be a multiple of ten. So they're not going to let
you just do one sticker. You have to do at least ten. That'll be $24. So the
more that you order, the better deal that
you're gonna get. And these are passed artwork
that I've submitted. So I'm going to choose my file. It's so simple. They'll take just about
any file. Let's see here. You can also email them the artwork if you don't
want to do it this way. But I'm going to choose
my core good sticker. Then in here you want to put
any special instructions. So if I wanted, if I leave it just as is, it's going to get cut right
along that blue line. There's not gonna be anything
extending possibly line. But say I want a white border. I'm gonna say please add a white border to the
outside of the sticker. Just waiting for it to upload. And there you go. It's so easy. I'm not gonna go through
the checkout process with you because you know
how to do that, then what's going to
happen is they send you a proof relatively quickly. It's usually within 24
hours that they'll send the proof and then you'll
be able to approve it. If you're happy with it,
make sure you like it because they work
really, really fast. And then your stickers will typically arrive within a week. Super simple to just upload and get your
stickers printed. A couple of other things. If you guys are feeling very creative or want
to make more things, you could make magnets. They have buttons. I do Coasters a lot. So if you click on More, they have their custom coasters, they even do t-shirts. You can really have a
lot of fun with this. And then something funny that this website has
is the hot sauce. And it's actually
really good if you spend a certain amount
of money with them, they'll send you the hot
sauce and it's delicious, like sweet and spicy. But that's totally random. But yes, that is how you
produce your stickers.
11. Final Word: I hope that you guys
enjoyed this class, please let me know
in the reviews if you enjoyed this
and like I said, post your projects, I love
seeing what you guys create. And I just hope that this is
a really fun class for you. Have an awesome day.
 Nikki Hess, Artist & Corgi Mama