Transcripts
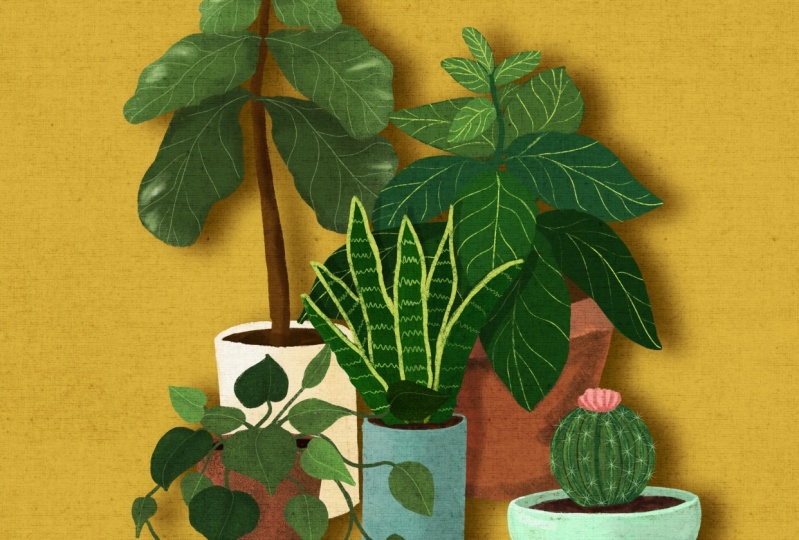
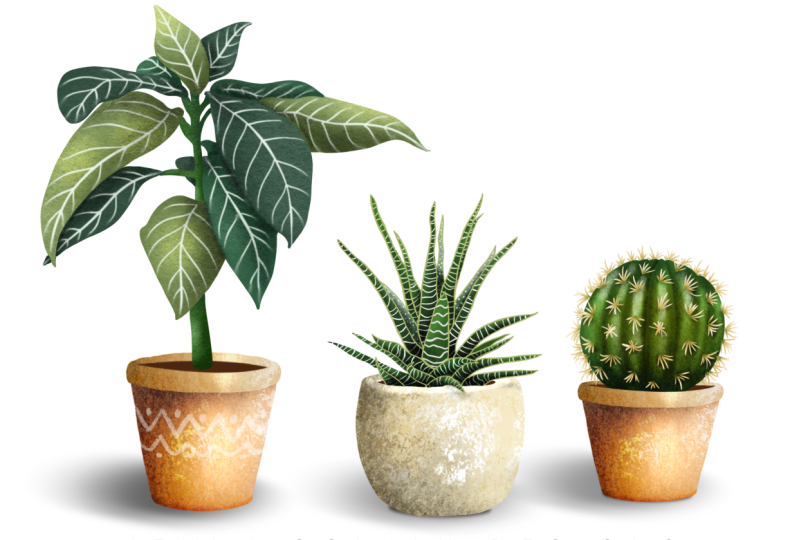
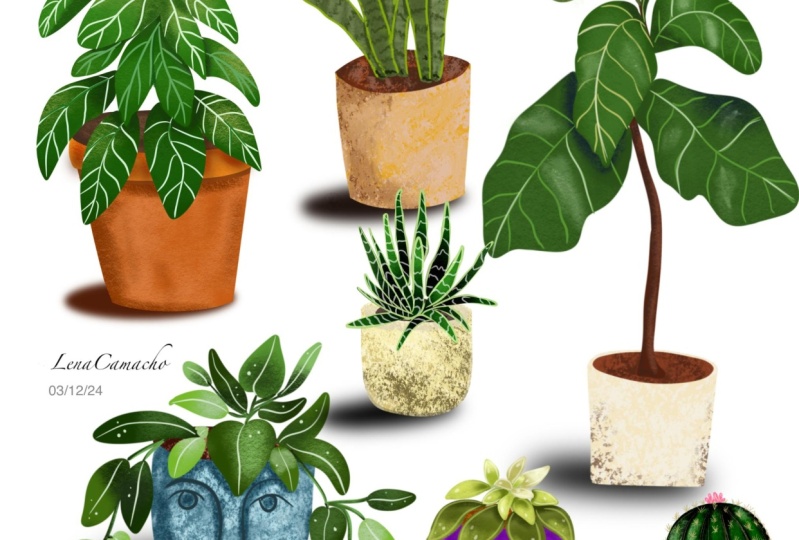
1. Introduction to house plants in procreate: Hello and welcome to my class on drawing houseplants
in Procreate plants. I don't know about you, but
my house is full of plants. I think I have about 30
different plants at this point, but I feel like
everybody's kinda gotten into the
house plant trend, which is amazing because
they're great for you, they're great for your mood. They're great for
purifying the air in your house and
oxygen all around. Amazing. So today we are going
to draw them in procreate. We are going to start off
by sketching the plants. We are going to be
painting for plants. Then we're going to add color. I'm going to show you how
to add texture that gives your work a little
bit of interests. And that's it. For the class project. We are going to be
drawing these together. So I would love to see
what you guys create. You can also draw your
own plants if you have some in your house
that are different than the ones that we did today. But either way, please
show me your work. I love to see what you guys
create for this class. You are going to
need a few supplies. The first is you
are going to need an iPad with the latest
version of Procreate, as well as the stylus. So an Apple pencil or
something similar. Alright, let's get started.
2. Sketching Houseplants: Okay, We're going to get
started by sketching. The first thing we
need to do is open up a new document in Procreate. And the way that we're
going to do that is we're going to hit the
little plus sign here. I like to use a 2000s by 2
thousand pixel document. If you don't already
have one on here, just come over here and hit the plus and then go to pixels and you can type it in DPI. I like to have 300 DPI just in case you end up
wanting to print these. Alright, so here we are, and we are just going to
start sketching our plants. And what we're
going to do is add, each one is going
to be on a layer. So I'm going to name this
layer, sketch layer. You don't have to
do this, but it is good to stay
organized if you can. And I am going to grab go to sketching and what
pencil do I want to use? I'm going to use my HB pencil. Okay, the first
thing we're going to start with is our zebra plant and we are going to sketch out the pot
and then the plant. What I like to do is start
with a very shallow sea curve. And you can actually make
it come up like this. This is gonna be
the top of our pot. Then, depending on the
style that you want, I'm going to do like
a terracotta style. There's a lip here. So I'm just trait like
following that same line. The sketch doesn't
have to be perfect, but you do want it to
be the general shape of what you're doing
because I'll make it easier when we go in and paint. Then just having
the side come down. And don't worry
about how big it is, we can always shrink this later
and then just the bottom. And now we're going to come
in and draw the plant. You guys might notice, I like to draw out an angle. It's I'm a calligrapher as well, so I'm used to kinda
tilting my paper. If that bothers you guys, like draw habit straight, but just know that unless you've changed the command in
your iPad or in Procreate, you can just two
fingers and swivel it. Okay. Now, the zebra plant, I have a pretty prolific ones. So it has these a lot of leaves and they're kind
of a long teardrop shape. And make them, you wanna do some with like a little
movement in them. Don't worry, we'll
come in and get rid of all those other guys. And they're kinda
comes up to a top. I mean, all of them
are different but the leaves are fanning out
from a top point up here. So if it helps you more, you can draw that top
0.1 and then come down. Just make sure that you are changing your leaves
a little bit. You don't want this to
be boring to look at. Pull up a photo if you need one. I haven't really big leaf. I'm actually looking at my
plant in my house right now as a reference. And this is going to
look a lot more like the zebra plant once we come in and make a lot of the details, because it does have these veins that are
going to come through, but we don't need to worry about that in the sketch right now. Now I do want to erase
just this area right here. So just come in with your
eraser and get that. And if you guys have never
or you're new to Procreate, you can come in here
and change your eraser. So I like to keep it on syrup because it's
nice and thick. But if you have small areas, you can use a fine
tip technical pen. You can use any of your brushes, which is really cool. Just going to erase. Oops, and you can
make it bigger and smaller over here. Alright. So I'm actually going to rename this layer zebra because it's our zebra plant
to keep them separate. And I'm adding a new layer. And we are going to move
on to the fiddle leaf. So I'm going to make this a
little bit smaller, actually. Just move up here. Now we're going to go to the fiddle leaf and we
can rename this fiddle. And the fiddle leaf is a tree, although I did just
propagate one of mine, so it's a teeny tiny one, but we're gonna do a
larger one right now. Again, I like to start
off with the pot. This time, I'm gonna do
that same shape on top. But I'm gonna make it
kinda come straight down. And then I want it to have a
little like dish underneath. So I'm going to sketch that in. And the fiddle leaf. Is going to have one
skinny, long trunk. Typically it's really skinny. So make sure you're
going to have to make sure that your pot comes
all the way around, or it's going to look weird. And now the fiddle leaf
has these big, old, not old, these pig leaves. And they typically grow
in to out of time. So it's common that you'll have another one coming
out in the same side. At least mine does. So just making these big leaves. And as you get to the top, the leaves are
going to be smaller because those are
just sprouting. Then maybe I want one that
kind of overlaps here. So I'm going to grab my
eraser and get rid of this. And one more over here. That's a fiddle leaf. We're going to
shrink that one up. We can always make
it bigger later. Obviously, this is
not to size right now because they would not
be that close in size. Next, the famous path, those, the plant that's
basically impossible to kill. Well, that an
exponent we're gonna do are basically
impossible to kill. The path is, is the one I am. There's a full name for it, but I can't really pronounce it, so I just say Pat those. But it has a lot
of little leaves. It's really beautiful. I had to get rid of some of ours because
they're toxic to animals. And our dog-like see everything,
which is really sad. So the first thing we're gonna do is we're going to
start off with a pot, but we're definitely going
to be drawing over the pot. Because there's a lot of
leaves on a path though. I think for this one, I'll still do the
little a terracotta. You guys can do whatever
you want with your pots. Then we're coming in at an angle on the sides and then
round on the bottom. And this just has so many leaves and they're
all kind of shaped like this. So you want to have some like a side angle and some where
you do see the whole thing. And there when it's
just starting, it's kinda like a
really thin like almost it's wrapped
up in itself. But they're tiny. So you're going to have a
lot of vines coming down. You can make it as full
as you want or not full. But make sure you're
showing that it has these tiny branches coming out. You can do a side view, then maybe one in
the front again. And then just come in here
and erase any overlap. It's not a 100%
necessary that you do this right now in this phase, but you can if you want. Okay. That's our patios. And our last one is
like I promised. Let's rename this. If I do recommend
naming your layers, I kind of work chaotically, but naming them
really does help, especially when you start
to have a lot of layers. So this is our snake plant, and this snake plant is
basically impossible to kill. You cannot water it for a month, sometimes two months, and
it doesn't even matter. It's what I got my husband for his office plant because I knew that he needed something
that he couldn't kill. The snake plant has these
long, straight leaves. So again, we're going
to start with a pot, since we have two of
these terracotta pots, and then we have one like this. I think I'm going to make
another pot like this. Just kinda circle here. I'm just coming straight down. And literally just kinda wiggling your pen because
this is what it's like. It's a succulent. I'm pretty sure. A couple of pieces might
come out in different areas. But for the most part, it's pretty straight
up and down. You don't need a lot of
those because they have, like the outside is yellow. So we're going to do
that. And then they also have this design
in the middle. But we're going to do all of that once we get to
the painting part. We have all of our plants and we are going to get
started with painting. I'm going to set
them up like this. Let's see. I'm just grabbing them
and resizing them. Just so you know,
I have, let's see. The uniform clicked. So when I go like this, It's going to scale it
and not like warp it. This guy. And then maybe this wasn't the best size canvas
or something like this, but we can, we can
shrink them down later. Okay, let's move on. We are going to
start adding color, and then we're going
to add texture.
3. Zebra Plant: Welcome back. We are going to be
adding color now. The first thing I wanna do is I want to create a color palette. And this isn't 100% necessary, but sometimes it makes
it easier to have a color palette so you have more consistency if you're working, like we're working on
several different plants that are all part
of one collection. I'm going to click up
here where my color is, and I'm going to
hit the plus sign. Create new palette. Now, these are cool
options as well. If you took a photo outside of like a lot of greens that you liked or you wanted to actually use the colors
that your plants are. You can take a photo
of it and it'll bring in that all those colors. It's really cool. Same
thing with cameras. Like you can go and
take a picture. It's not going to work right
now because my iPad's down. So I'm gonna come up here, I'm gonna make a new, create a new pallet. And then I'm going
to rename this. Let's just say house plants. And I'm going to start
grabbing some colors. I actually really like this
color as a terracotta color. See if it'll let me grab it. Yeah. I can just if you have any
colors here that you like, you can grab them and
bring them up here. Otherwise, you can come here and you can
make your palette. I, there's gonna be
a lot of grains, so the zebra plant is
more of a darker green. So I'm going to grab that darker green than maybe a
color right above it. And maybe something
really light. And then I know that the snake
plant is kinda this color, but then it has a
yellowy green outside. We can always add more
colors when we're painting. This is just a general
baseline for us. The path those is really
bright for St, green. And let's see what else we have. I think some of these pots, I might wanna do one that maybe is like a
really light color. And we can play with this later. It's nothing set in
stone right now. And I think about it, we're going to need a white
color for the zebra plant. Alright, that's good
enough right now. So we have our color
palette and we want to work on one
plant at a time. So the way to do that
is I am going to, I'm going to start
with the zebra. So I'm going to uncheck all of my other plants so I'm
not looking at them. Then I can take this, I can make it big and I can
start filling in some color. I am going to be grabbing. I'm gonna go to inking
and my technical pen. This is how I like to do it. Obviously, you
guys are following this class for a reason, but explore other pens and
see what you like for me. This is how I like to start
off this kind of work. I grabbed that very dark green and I am going
to create a new layer. You can either create
this above or below. Sometimes it's helpful. So I'm just clicking
on the 0 layer and moving it above to have it, to have the sketch
above your painting. So you can see the sketch still. Just layer this color for Zebra just in case it
gets confusing later. And then I just come in here and make this a little bigger. I'm just outlining these leaves. And if I made this leaf and
this leaf and this leaf, all the ones that are
touching the same color is just going to blend
in and be a blob. So what I like to do is add
a slightly lighter color, just like you would
do in watercolor or any other medium where you're looking at something and seeing the saturation of color that, that makes it
interesting to look at, that makes it more 3D. So we are going do that here. But this first bottom layer, I'm going to start the
leaves the same color. Oops. So I have outlined
this leaf with my pen. And instead of having
to color this all in, I just tap and hold
with the heck, tap and hold down and I
drag it and it fills it in. It is the best and
easiest thing to do. I love it so much. I'm just going to do that for this bottom layer of leaves
because these would be the darkest ones since they're
the furthest away from the light source
coming in at the top. Now on this next layer, I want to lighten
it up just a little bit so you can go to
value, sorry, not value. Classic and you can go
this way, or this way. I'm going to go to
the left just a bit. Maybe I'm going to go up. I'm gonna go up a little bit. So I'm still around
that same color. Oops. But slightly different. Let's see if it's
enough of a difference. Yeah, That looks good. Just coloring in these leaves. And I think this one needs
to be a lighter color. This doesn't have to be perfect. You're just experimenting and especially learning
how to use an iPad. It takes them experimenting with colors because it's
different, at least for me, it's different than any
medium I've ever used before because I've been using a pen and paper and
watercolor paints for so long that this is definitely
a new challenge for me. And then we're gonna go even lighter for these top layers. That's actually a little
too bright green for me. I'm going to bring it down here. Technically, if you ever want to grab a color that's
in here already, just hold down and
it'll do that for you. I thought this one should be
a little more bright green. This last guy. So if we removed our sketch, this is what we have right now. Now, don't worry if you
think this looks like a blob we're gonna be adding
in texture and shadows. But we're going to turn
back on our sketch layer. And now we want to do
the pot underneath. Now, you can do
one of two things. You could come in on this
same layer and add the color. But I recommend that we do
the pot on a different layer. And I'm going to move
that layer underneath. And we're going to
call this zebra plot. And you'll see why
we're doing this later. Just trust me. Okay. Now I want to come in and grab kinda like a terracotta color. And we're gonna do
the same thing. Make sure I'm on that layer. Coming in. Just so you guys know too. If you make an
outline and say you skip apart and you
didn't complete it. Look what's going to happen. If I tried to do this. Basically the color escapes out of that little hole
that's right there. And it goes all over
the whole thing. So if that ever happens to you, it's because you didn't
complete the shapes, so you have to
completely close it off. Oh, dang it. If you ever do something, just undo it this way. I'm going to undo just going
around and makes sure. So since this is
on top of the pot, technically, I could
just draw right through this because these
are separate layers. So you don't have
to worry that they are touching or that it's going to turn the
leaves a different color. Since this layer is
underneath this layer, it's not on top of it, right? Because if we did that, if we move the zebra above, it's going to do that. Okay? And just fill in
this little area and then fill in this back here. And I want to add a little
brown for the dirt. And I'm again going to add a
new layer and I'm going to grab this kinda like
a darker brown color. And just making a circle
here, filling it in. And it's perfect right there. Let's name this zebra dirt. The reason I'm keeping zebra and the name
is because we're gonna do this for
all four plants. So we're going to need to
keep it nice and organized. Okay, Now we're done with our sketch so we could technically get rid of
it if we wanted to. Sometimes in
Procreate, you're only allowed to have a certain
number of layers, so you could delete that layer. It's good to keep your
layers nice and condensed. But we're gonna keep it for right now just
in case we need it. Now I want to come in and I want to add what is going on here. I'm going to erase this. I don't know why that's done. They're going to come in and add some
texture to the leaves. And the way I'm gonna
do that is I am going to create a new layer. And this layer is going
to be a clipping mask. So I'm going to
select Clipping Mask. And that means that
it will literally clip to only this little
arrow right there. It's going to make
sure that whatever we put in this layer only
sticks to this painting. It won't go over the edges
and won't go on the pot. I'm moving over
and I'm going to, let's go with carbon, stick, something with texture. You guys can choose
whatever you want. I like the carbon stick. And I want to give these leaves
a little bit of texture. And the way I'm gonna
do that is I'm going to select a color that is slightly lighter than this. I'm gonna come up here and
just start going like this. Do you guys see it? So it adds a little texture. I think it makes it
more interesting. And since we colored
these different colors, some of these layers
are probably going to need a little lighter color. What I can see, how it's on there. So if I took the
clipping mask off, it just be a hot mass. But since I have the
clipping mask on, it's only going on
the zebra plant. I'm going to grab
a lighter color, even lighter for
these top leaves and actually a
little more yellow. Not too yellow but like this. And I'm going to give them
little light source coming in here like that. And maybe I want to add
some shadows over here. So I'm going down
to a darker green, not like black, but
darker than this color. Then I'm going to make this
smaller and kinda zoom in and make a shadow here. So this is going to make the
leaves on top pop out more. Because we want them
to show up better. Then there would probably
be a shadow underneath here and a shadow over here. Now, you can't really see the difference between
these leaves right here and the shadow I currently have is
a little too dark, so I'm going to get a color
that's darker than this, but not as dark as
what we were just working in and come in. Actually, it needs to
be a little darker. Just make a shadow. Now, if it's feeling
really harsh, grabbed this smudge
tool right here. You can change this
to whatever you want. This works well
for me right now. And you can just come
in and smudge it around so it looks smoother, kinda like what you
do in watercolor. And I'm actually going to
do that a couple times because there needs to be
some shadow work here. This tutorial might be longer
than I thought it was. Alright. This guy could use a shadow. Same thing over here. I really encourage you to look at either a
photo or if you have a plant in your own
house to see where the light's coming from and
where the shadows are. It's always going to
make your painting look more realistic if you do that. Because you need some way to
separate the colors here. I'm still working on
that clipping mask. So make sure that you still
have your clipping mask. Then just going to come
in and blend a bit. Len Blend, Blend, Blend, Blend. Okay. We are going to
add more details, but for now the shading, I'm just actually going
to go a little bit darker for these
guys under here. I'm a big shading person. If you guys have done
my watercolor classes, you know that that is my jam. I just want to make
sure that it's clear. When you look at this that
there's some shadows here. I'm using that smudging,
smudging tool again. There we go. Okay. That looks good. And if you are happy with that, you can go ahead and
merge these layers. Perfect. Now, I would like to
work on the dirt a little bit just to
give us something. And I'm going to add a
clipping mask again. When I tell you that
clipping mask or life changing and being really
serious, they are the best. And I'm just doing the
same thing with that dirt. It doesn't have to get crazy. Maybe I want to add some
little dark spots in it. I'm not overly concerned because it's not
showing that much. I just want to make
sure that it's not super boring to look at. Merge Down. And we wanna do our pot. This pot definitely
need some love. And the first thing
I think it needs is it needs to be darker
and a little bit. So I'm getting a
darker color because, oops, come back to your inking. And I want to add, like under the lip, I want to make this whole thing darker because technically there would be a pretty good shadow. Oops. So sometimes that happens
and it actually is closed. So what you need to do hold on. Well, you need to do is see how it says threshold up here. If you move, see how
I'm moving this. It's making it less. So. Oops. So just hold down and move to the left and then it will do what you
want it to stay. Okay? Alright, this guy, I want to expand this
just out a little bit because it looks kind
of funky. All right. I want to do a couple
of things here. One, I'm going to
add a clipping mask, and I'm going to grab
my charcoal again. The carbon stake, use
whatever texture you like. And I'm going to grab this color but make
it slightly lighter. And paint all over, oops, make it bigger. Paint all over this. So it's looking more
like the same color. And now we're going
to talk about where some shadows would
be grabbing darker. And let's say the sun's
coming in from this way. So there would be, oops, gotta make this smaller. There would be a shadow. Oops. There be a shadow all the way
under the lip of this pot. And then it would be
on this side here, coming down. And under here. Then we just need to blend it because it looks
pretty harsh right now. If you guys don't know, you do need to
replace the tip of your stylist or Apple pencil, whatever you're using
every now and then. I didn't realize how
bad mine was until the other day it was
completely smashed. That was something
that I wasn't aware that I needed to change out. This color. I'm going to darken it a bit and do a little
shadow over here as well. And under here because there's some leaves that are gonna
make it a little darker. Now, I could spend a
long, long time here, but for purposes of this class, I don't want to spend too
much time on being perfect. Just wanted to show
you the general guidelines and you can come in and out as much time
as you want to. Something like this.
I'm going to merge these layers because
I'm happy with them. And then I'm turning
on my other layers. And I need to add those final details
onto the zebra plant. First of all, I'm going
to add another layer, and let's call this
zebra details. And we're grabbing our inking. I like to use a technical plan,
so I'm going to use that. And I'm going to
use a white color because actually it
needs to be kind of a greenish white
because that is what the zebra texture or pattern
is going to be in this. And I'm just going to
come in here and make all these lines coming down. And then there's all these
veins in the plant leaves. Of course, no plant is going
to be exactly the same. Like if you use this
color all over here. It's not going to
look super realistic. And we are going
for kind of like an animated, cartoony look here. But I recommend saving this color and then
having one that's maybe a little slightly darker or has little more gray or blue to it. And alternating between those because it'll make
it more interesting. Another thing you
can do is you can come in here with white, white. So if you double tap
the color wheel, it's gonna go to white, white, double-tap here, it'll be white. If you double-tap
here, it'll be black. And adding just maybe
like some of these have a little like some of them
are bright white lines. If you feel like doing that. Okay, we're just coming in here. We're adding all of these. I'm not going to speed
it up because I'm assuming that you guys
are doing this with me. And I know that I get really frustrated when I'm in a class and all of a sudden they're like speeding it up and I'm like, wait, I wanted to
paint with you. We're gonna do this altogether. You also have the
option to speed up yourself if you want to. I know I use that quite often. When I'm watching a class. It's like the little
speed dial on the screen. As we get up here, these lines are gonna be
white, lighter, right? Because maybe we make these ones white because the light
source is coming up here and pull up a picture if you
need a reference, but the veins are
this is how they go. I'm looking at plant right now. I'm gonna switch
again to this color. Now these are fun. If you guys want to post
this on your social media. If you could make
stickers out of these, you can make patterns for
like fabric and wallpaper. I'm not going to teach
you how to do that because I'm just learning
about myself right now. I know how to do stickers, but I pattern design is
something that I'm trying to get into that I'm not good at
it enough to teach you yet. Like I said, you could
really spend time here for a long time
if you wanted to. Or you can make it
a quick tutorial or a quick little class and
work as fast as you want. Alright, that is
our first plant. I think it looks pretty good. One other thing you can do
if you feel like it is, add a little shadow down here. And we are going to do that by grabbing like a
dark gray color. Remember we said the light
was coming in from this side. So the shadow would
be over here. And I just am making like
a little circle like this. And I'm on my own layer so
I can move it if I need to. Then I'm just going to I
think put it over here. Then I'm going to
set it behind all of this and grab Gaussian Blur. And you just put your
pencil down and move it. Like however much
you want it blurred. I think that's probably good. It's just like a little
extra thing that you can do. You can make it smaller
if you want to. But sometimes
little teeny things like this just adds so
much to your paintings. So I'm going to keep it
there and make sure that you label it the ZBrush shadow. And we're going to
move on to our next. Before we move on, sorry, I want to show
you really quick. I'm happy with this. It looks good to me if
you are happy with yours. What you can do is pinch
them all together. And this is now, oops, sorry, we
forgot the details. This is one layer and then you can rename
this zebra plant. And it saves us on layers, so we don't have a bunch
of extra layers and then you can just uncheck it if
you don't want to see it. So now we're gonna move
on to our other plants.
4. Snake Plant: Now that we have our
first plant and done, we are going to move on
to our other plants. And it's going to
move a lot faster now since you guys kinda know the
basics of what we're doing. But if it's ever going too fast, feel free to pause and come
back when you're ready. Now we're gonna go this
snake plant and hoops. Make sure you're on
the right layer. Going to move this
snake plant over here and make it bigger. And then I'm going to
make this bigger as well. So I can see, maybe
I'm getting old, but zoom in on everything. The first thing I'm
gonna do in this one is I wanted to do the pot, so I'm coming in here
and rename the layer, and this is going to
be the snake pot. I'm gonna make this
plot a single. Oops, that's not what
I was trying to write. Single color. I think I wanna do it like
this color right here. So getting my technical pen, I'm on my snake pot layer
and I'm just outlining it. And make sure you come
over here like this. And all the way on the bottom. I'm just dragging that color in. And we're gonna do the same
thing that we love to do, which is add texture. So making a clipping mask, grabbing, Let's do like
a lighter tan color. And then I wanted to try
a different texture. What about this? This kinda cool uno, hold on. That's kinda cool. So I don't actually like that. Let's look at some
other textures. There's a whole
texture panel here. Also, if you guys buy brushes, That's an option as well. Let's do, let's go
back to our charcoals. And I'm going to do
the birch tree one. I'm going to make this a little bigger and just
add some texture. This looks cool to me. This looks like, you know, those cement pots, I
want to fill it in. I don't want there
to be too many gaps. And the same thing, we're going to have
the sun coming in from the right-hand side because I want all of our
artwork to be consistent. Grabbing a darker, kinda
grayish shade and making this smaller and just coming in here along the
bottom a little bit. And then just using our smudge
tool might change this. Let's change it to that
same charcoal. Oops. The back button is
your best friend. Okay. I kinda like to smudge
this just a little bit. It looks a little more
realistic on the texture. So we have that that's
a little bit crooked. So I'm just going to
move it a little bit. Oh sorry. We're working in a clipping mask. That's
not going to work. So I like this. I'm going to merge it down. And I want to move
this pot a little bit because it seems crooked. And maybe that snake plant two. Okay. Now we're moving onto this snake or making, or the snake plant. So we're gonna put snake color. And we're gonna do
that first layer, which is a darkish green with a little more
yellow in it like that. And make sure you go back
and get your technical pen. I'm just coming in and
I'm going to outline these and drop color in. So if you guys are getting
these tiny lines right here, there's a threshold issue. So when I go like this, I want the threshold
to be higher. So that doesn't happen. So you just move your stylus across your screen and
it'll fill those spots. And I'm gonna make these guys fill them in. Since this one is
behind this one. This one can be dark, but we're going to
make the one in front slightly lighter. That's done can be dark as well. And we're just coming up
here and moving slightly up. We have different color one. Now you can separate
your layers here. So if you wanted these lighter ones to
be on a separate layer, when you do the clipping mask, you could totally do that too. Okay. We're going to add
a little texture, adding a layer clipping mask. That is the word of the day. Something a little lighter. And let's go back to
the carbons stick. I liked the carbon stick. You guys can choose
whatever you want. And just adding in a
little texture here. And since this color is
very similar to this one, you're not gonna see it a lot. So you might grab something
lighter for the use. Just make sure you stay on them, not on the stuff behind them. I want some darker shadows, like here and here. And here. Maybe at the bottom where
it connects into the dirt. Okay. You can smudge it if you
feel like it needs it. I'm actually okay with
the way that looks, maybe these ones because they
don't look quite as dark. I'm going to merge that down
because I'm happy with it. And now we're going to add in
the details for the snake. So the snake, plant snake, eye. There we go, no snake details. And we want to grab
that yellowy color. Say like this. And grabbing my
technical pen again. Oops. I'm coming in here
and I'm just making a line that follows the
outside of this plant. Pull up a picture if you're
not familiar with this plant, because this won't
make sense if, if you aren't familiar with it. But it's just this
yellowy green line that outlines each leaf. That's another reason
why I wasn't too worried about things blended in because this is going
to show the light. Show you where
certain leaves are. Okay. Just outlining, outlining uniform. And then they have
this darker color. It's almost like a
zigzag in the plant. But I think that's some
different pen like maybe this dry ink would be better because it
looks more textured. I think we need
something even darker. Wow, even darker than that. Yeah, because I want something
a little more textured. It looks funky, but it's just
like these little lines. And you could even come in
and smudge them a little bit. Let's see. Do I want to do that? Maybe just a little bit. So making these lines, it's kinda funny plant. And obviously the ones
back in the back, we're going to have to
grab a super dark color. It might not even show up. You could skip it as well. Oh, there we go. It does show up. I'm literally just making
these little squigglies. And we need to add the dirt. So that looks good. Now we're going to
add in some dirt. Grabbing a brown and make sure you go back
to your technical pen. Making a circle. I'm not going to worry
about that because if I put it on top of the pot,
it looks a lot better. And just, we like
to add texture. So grabbing this color and maybe the charcoal block
to give it some texture. And I'm actually going to
move this snake above it. See, now this is acting
as a clipping mask, but we don't want this
to be a clipping mask. Oh, okay. I messed up there. Don't do what I just did. So merge these guys
and then move it up here and then make sure
it's not a clipping mask. So what I wanna do is I want to show that there are
shadows coming in here where the plant is going into the dirt because the
dirt that you use for a snake plant is supposed to be really like papillae
and easily drained. So it has a lot of like
lumps and stuff in it. That's what I'm
trying to show here. Alright, that looks good. I'm going to erase or delete my sketch layer and I'm going to merge down
my dirt texture. I'm happy with all of these, so I'm going to
merge those as well. I'm going to, let's
add that shadow. I think it'll be fun to
have that on everything. So I'm grabbing a black, essentially that I'm making. Oops, don't forget to
get your technical pen. And making that circle. Filling it in. And I move it behind the plant. And then I'm just
going to tap it over. So it's just right there. Then grabbing the Gaussian Blur and just letting it blur out. I like that to be a
little more blurry. I can always make it smaller if I feel like
it's just too big. Perfect. There's a little I'm
going to leave that. Maybe it's a chip
and the pottery. Let's make it authentic. Rename this snake plant. Awesome. Let's see what we have so far. We have this snake plant and
we have the the zebra plant. It looks really
cute. I like them. I think they look adorable. Awesome. So now we're going to move on. This actually needs
to move a little bit. There we go. Move on to the fiddle leaf. We're going to turn off
these layers and we're going to move them under
here since they're done. I'm going to delete that
because we don't need it. And now we're going to
work on our fiddle leaf.
5. Fiddle Leaf Fig Tree: Alright, we're ready to
move on to our fiddle leaf. One of my very
favorite houseplants, makes sure that you have
your technical pen. And we are going to go in and
color some of these leaves. Now the ones on the bottom, we're going to be darker
because they're older growth. And our ones, as
we go up the tree, it's going to get lighter. So I'm just going to move to a little bit of a lighter color. I don't know if you
guys have ever seen a fiddle leaf in real life, but the leaves are kinda shiny. So will definitely show some
little highlights with, when we come in for our details. I'm gonna make this
one the same color. Then I'm gonna go and
move the color up. We get a little more
yellow. Here we go. For these guys. You can outline them all. And then come over and add the color. Brush. There you go. Okay, that looks good. And then we want to
add in some texture. So we'll add a layer above it. Click on that layer, make it a clipping mask, have that little arrow. And for the top, we're going to use a
light green cg color and grab some kind of texture since we've been using
the charcoal block. I think I'm going
to stick with that. I'm just going to
actually make it bigger. Add a little bit of
that texture on there. Actually, I don't
think I like that. Let's do the vine chalk. I like that. It's a little more close together. There we go. And then I'm going to grab a little darker color and
make some shadows in here. Make it a little smaller. Again, our light source is coming from the right-hand side. We want it to be consistent
with all our plants. So the shadow would be on the left-hand side or
like underneath here. I'm going to grab just a
little bit darker because it would slightly darker than that. And going to smudge, whoops, get the same
kind of texture. Okay, Cool. Moving on to our
leaves below it. In order to get this color, I'm just going to hold down my finger and it
has that color now. And I just want to get
something a little bit lighter. I'm on the same chalk. And I don't want to get
into these darker leaves. So just stick on. Just be careful not to do that. Or you could have
put these leaves on a separate layer and
then not worry about it, but we're just going to
be a little bit careful. Okay? Same thing, grabbing
darker color to add some shadows here. Shadow, shadow. This one, I'm going to
pretend like it's on top, so we're not gonna
do a shadow there. And then just much, that was a little
too much smudging. Finally, our darkest leaves. We're going to add
something a little lighter line chalk little bit. Now, since these are
on the very bottom, there would be a
shadow right here. And this already
looks pretty much like a shadow
because it's darker. I think we're good there. So that looks good. I'm going to merge down my clipping art or clipping mask so that
now it's on the leaves. And I want to do the
trunk of the tree. I'm going to grab a
pretty dark brown and then I'm gonna come in
and add little highlights. And I'm gonna go back to
my inking technical pen. The trunk is usually
long and skinny. For a fiddle leaf. Wobbly. It's not going to let me do it. So I'm just going to
paint in and then make sure you're kinda showing where the branches connect. Okay, then I'm going to grab something a little bit lighter. And I'm going to make
a clipping mask. And going back to
that same texture, the vine, vine charcoal. And just adding that in. And then grabbing
something darker. Maybe making this even smaller along this side which
would be totally shadowed. It will also be shadowed up here where the leaves
are kinda covering it. And then shadow down here. And there would be some
shadowing in here as well. Cool, Awesome. So that looks good. I'm going to merge that down. And now we need to make
our dirt and our pot. Go back to grabbing my technical pen like
this light brown. And I'm just going
to draw a circle around like a flattened
circle and color it in. Again with a clipping mask. Grabbing and charcoal. Let's do something kinda
rocky like this burnt tree. Make it darker. There we go. Kinda looks gravelly. I'm going to merge down
and I want to move this layer underneath
the tree trunk. So just do that. That looks good. And we're going to
paint our pot now. Oops, that actually got
put into a new group. I don't want that. So I just want to click
and drag it under. Perfect. So now our
pots, let's see. So we've had one
that's kinda yellow. We have one that's terracotta. Maybe we go back to
that yellow color. Make it a little
lighter. Outline. Oops. Make sure you have
your inking pen. Outline it. And then I'm going to
make an outline over here because the pot would go around. If you're looking down at it, you would see that I've decided I don't wanna do
this plate underneath, so I'm not going
to paint that in. I'm going to add another layer, do a clipping mask, and grab that
really light color. And let's see. Let's go to charcoal again. Maybe this part tree. I like that. I thought it looks kinda cool, are pretty cool with
the other plant. But I'm going to fill
it in more so it looks more like cement. Then I'm going to
smudge it a little bit. Perfect. Then I want to come in and add just a little bit of a shadow on this side, on the bottom. And then just
switch that around. Remember our clipping
mask is keeping this from going all over the
place, which is amazing. I think that looks good. I'm going to merge
that layer down. I'm going to get
rid of my sketch. I don't need it anymore. And it's time for some details. And the leaves, now the leaves have pretty
large veins in them. And it's kind of similar to the zebra plant
where it's thought really limeys, light green. I'm going to grab
my technical pen. Where are you? There you are. I'm going to start
drawing these. You can see if you look
at the fiddle leaf, the backside is
usually brown veins, but the top is usually
these light ones. And I'm gonna make this
smaller, maybe 8%. And you just go like this, kinda wiggle them a little
bit so you get some movement. And we can come in here with the white and add little highlights. Like I said, they're
shiny leaves. We're definitely going to
be adding those highlights. It's kind of just like
a shaky V on here. Like you drink too much coffee, which happens to me quite often. Sometimes it's hard to paint small details when you have
jacked yourself up on coffee. It's so neat how just
small details like this really adds so much. Now I am going to make it
just a little bit darker, a little more green. Since we're moving
down a little bit. Makes it cool, more interesting
to look at. Perfect. Okay, that looks good. And then since
these are so shiny, I'm going to grab a white and I am going to
add small details. So this is going to
look funky at first, but I just added
some right there. Then I'm going to grab
our smudging tool. I'm on that chart vine
charcoal because I think it's going to smudge it the best
and then just start smudging, smudging until
it's pretty loose. And it just looks like a
highlight in the leaf. You can do this several times. You're going to have
to go back-and-forth between oh, actually, sorry. That's a smudge. I thought you're
going to have to change your brush a lot, but you don't have to
do that because we're using the Smudge button. So just pick a couple of places, maybe make like one line you could do like a
circle and a line. Add some up here. It's all about those
little details that are going to add so much to the life
of your artwork. Alright, now we have to
smudge all of these, which is pretty fun. Just come in and
smudge, sludge, sludge. And it gives it that look at the fiddle leaf is unknown
for those shiny leaves, they actually get
pretty dusty and you're supposed to wipe them down. We have a corky that
sheds like crazy, so I always have to wipe
down our fiddle leaf. Then if you really just want
to give it that extra pop, you can come back, grab white, white with your I
have my ink pen on. And just maybe making some of these veins have a little
white shadow or highlight. And you could even do it on
the leaf too if you want. Okay? And lastly, we are going to do that shadow
that we did before. We can go ahead and merge all of these for
the fiddle leaf, and we can rename fiddle leaf. Now I want to add that
shadow at the bottom. Remember it's just
it's on a new layer, but it's not only shape. If you guys didn't catch that. Procreate, if you
draw a shape and you just hold your pen
down, it'll snap it. So you could do a circle. You could edit it. I didn't make it
at all circular, so that's why it didn't grab it, but it'll make a circle for you, which is really cool. So that's why when I draw this, I just hold it down
and it snaps it into a perfect oval shape. Going to fill it in. I'm going to push it
underneath the fiddle leaf. And then I'm coming
up and grabbing Gaussian Blur and just dragging my pen until I'm
happy with the results. So I think I'm good with that. I'm going to merge them. And there we have
our fiddle leaf. Okay, so our plans are
looking pretty adorable, and now we just have to do
that last plant, the potatoes.
6. Pothos: Okay, We want to make this
bigger so we can see it. I like to zoom in. And I am going to add a layer and make sure I have
my technical pen. Then we're going to
use several shades of green because there are so many leaves on
here and some will be newer leaves and some
will be older leaves. You really want to make sure
that you have a variety of, it should be one kind
of color of green, but a variety of shades of it. So you wouldn't wanna do
like a blue-green and then a forest green or
like a Seiji green, although that kinda
looks like that. But along the same color
path, color, theme. And actually, because we are going to be using so many different colors, are clipping masks are going to be a hot
mess if we do that. So I'm going to separate
these different layers. So I'm gonna grab
this tool right here. And I'm drawing
around the leaves. Then I'm doing three fingers. Oops, just kidding. Let's try that again. So I'm coming up
here to this tool. I'm drawing around. These leaves out
are the same color. I'm going to three
fingers cut and paste. And now I have this
on a separate layer. As you can see, a little
bit got left behind, but I can just erase that. That's right here. And we can fix that later. The reason I'm doing this is because when I use
the clipping mask, I want to make sure
that things like we're gonna be using different colors for the lighter greens and we
are for the darker greens. So now we're gonna go in and
just make this darker green. We're going to do all the leaves that we want in that color. So kinda have a vision for that. Overhear. You kinda, if you're not
familiar with Photoshop, procreate is very
similar to that, the way that layer's work. So you kinda have to
start thinking in layers when you are
using a tool like this. It can feel weird at first, but once you get the
hang of it, it's, it's easy and it's really
helpful when you're working in layers to
keep things separate. Let's do now I'm
going to move on to, I'm gonna make a new layer
and do a darker green. For some of these. Maybe I feel like that one
wouldn't be that dark. Maybe these guys would be k. Now I want to go back
to this lighter green, and I want to do several
of them in that color. And you can do this
one too. Okay. Now we're going to work
on our clipping masks in layers, different layers. Now I'm on the
darkest green layer and I want to do something
just a little lights. I'm going to use
charcoal just because we've been using that
with everything. And I'm coming in here
and doing the same thing. Maybe make it a little
bigger so I don't get so many streaks. And it's only going to work on those dark leaves because those are the only
ones in this layer, which makes it way more easier. And maybe I want to add
some darker shadows here. Maybe right here. This side, our light source is coming from the right side. Or a leaf might be covering up a certain area which
would make it shadowed. Then I'm gonna come in
with my smudge tool. Around. Here we go. Okay. Merge that down.
I'm happy with it. Now we're moving on to
these greener leaves. Clipping mask. I'm going to select that
color so I know where I'm starting from and then I have
to do something lighter. You can go lighter or darker. I like to go lighter. That's usually my go-to. That's way too thin
so make it larger. So we're not getting streaks. That's kinda cool
because I don't have to worry about it going
on any other layer. Now grabbing something a
little darker and putting in some shadows,
Rabia, shadow here, maybe one down here because this leaf underneath here, here. And then smudge. Okay, Lastly, we're
happy with that. We're going to merge
it down. Lastly, we want to get that green, really light green and add. I didn't have my
clipping mask on. Okay. Now it's on. Can these are
kind of at the tippy top, but we can see if maybe here there's a
little shadow coming in. Maybe over here. These guys look good. Merge that down. We can merge all our leaves now. We need to add in the vines or the branches
that connect them. Now grab a green
and a new layer. Grabbing my technical pen and just connecting
all of these, I am going to use a
clipping mask on these to give them a little texture. Okay. Let me know how you guys
like using clipping mask. I really think that they like
change the game with it. But that's just my
personal opinion. And this is looking really
kind of bland to me. I'm going to add another layer because I might want
to get rid of this. But I'm going to
add a darker green. Just a line underneath. So it looks like a shadow. It's just looking boring to me. That's why I wanted to do this. Yeah, that looks better. It just makes it more
dimensional in my opinion. Okay, cool. Now we can merge all those and we have to paint that pot and the pot looks
like it's underneath. Well, it is underneath
the leaves, but we don't have to worry
about that because all we need to do is
make a new layer. And then we can
just basically hide this one so that we
can draw that pot. I'm gonna make it that
terracotta color. Oops. Technical pen. Come in here. Oops. I went too far. Make that lighter color. That's a little too light. There we go. And even though we can't
see a lot of this, we do want to draw
the whole thing basically because just in case
we move something around. Okay? Now, we definitely, this is
looking funky over here. There we go. Definitely want to add
some texture here. Clipping mask, charcoals. Sue carbon, stick. A little lighter. What's going on here? Oh, it's really
similar in color. That's why. Okay, then we want
some darker areas. And I'm actually going to
grab my technical pen for these and add some lines. We're going to use
a smudging tool. Maybe is a little bit over here. And then smudging, we get that beautiful
smudged out shadow. That looks a lot more natural. And we really got rid of
a lot of texture here. So I might want to add
a little bit back in. I'm going to grab carbon stick and just lightly come in here. And then maybe use that
for this right here. That's way too big. Sludge. Okay. I'm happy
with that for now. We need to do the dirt. So grab a brown. This can be pretty simple. I'm going to leave it flat because we don't see a lot
of the dirt in this plot. Thanks to the pothos plant. We are going to merge that
down and then you, okay, So if we were to merge this right now what's going to happen is your pot is going to be
in front of your plants, not going to look like the
plants inside of the pot. So you need to do is take this layer of leaves and
move it above the pot, and then you can merge it down. We want to add a
couple of details in the leaves, just small veins. Grab that really light. Green. Grab your technical pen. I keep calling it inking
pen, sorry, new layer. And the reason I use new
layers just in case I, if I don't like what I did, then I can easily remove it. And we're just making
these really light lines. They just have like a
vein down the middle. At least that's what
it looks like to me. Their leaves can be a
little bit shiny too, but we don't need to
add those highlights. You guys can, if you want. Awesome. Get rid of our sketch. I'm happy with the details. I'm going to merge them down. And then the last
thing we have to do is just that shadow. And going to grab
my arrow tool and make it a little
smaller, fill it in. Then I'm going to put it behind, grab the Gaussian blur, and blur it out. I'm
happy with that. Perfect. All right. You did it, you guys. Okay.
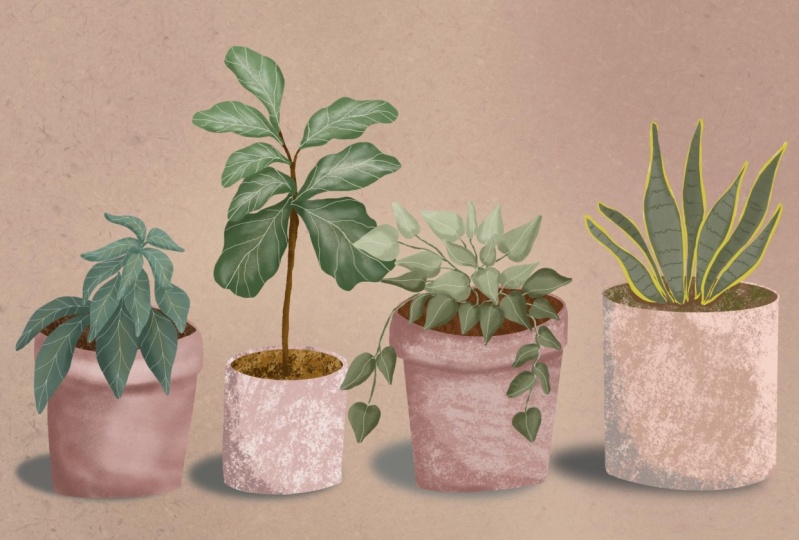
7. Final words: I wanted to see
these all lined up. So I'm going to
shrink them down. You know what I'm
actually going to do? I'm gonna make a new canvas
that's more long and skinny. And the way to do that is
just to set up a new canvas. I'm gonna do inches and the width I'm going
to say is eight, and the height is four. I forgot about our fiddle leaf. That might affect
our fiddle leaf. I think we're okay. Okay, so
you guys can go like this. You can hit your layer. You can name these two and copy. And then you're gonna
come over here. And three fingers paste. And your plant is here. Now. We have one, I'm
gonna do this with all of them so we can see. Make sure you're on
the correct layer. When you hit Copy. Paste. Technically are fiddle
leaf would be a lot bigger compared to these other
plants, but that's okay. Little leaf copy paste. These are like giant
compared to the other ones. And lastly, we're going
to grab the zebra plant. Copy. Paste. Awesome. So here are you guys
is beautiful plants. I really want to see
what you create, so please, please, please
share what you create. You can add it to the
class project section. I, I always say this, but I really love seeing what
you guys make because it's, everybody does it a
little bit differently and it's really amazing to see. Also, if you are on Instagram, you can tag me at
lavender and see. I love to chat with you guys and know
that you're watching. And also, if you
enjoyed this class, could you please leave a review? They mean so much to me. I love reading
them, but they also get my class seen
by more people. I hope you enjoyed this class. If you have any
questions at all, feel free to reach out to me and I hope you have
an amazing day.
 Nikki Hess, Artist & Corgi Mama