Transcripts
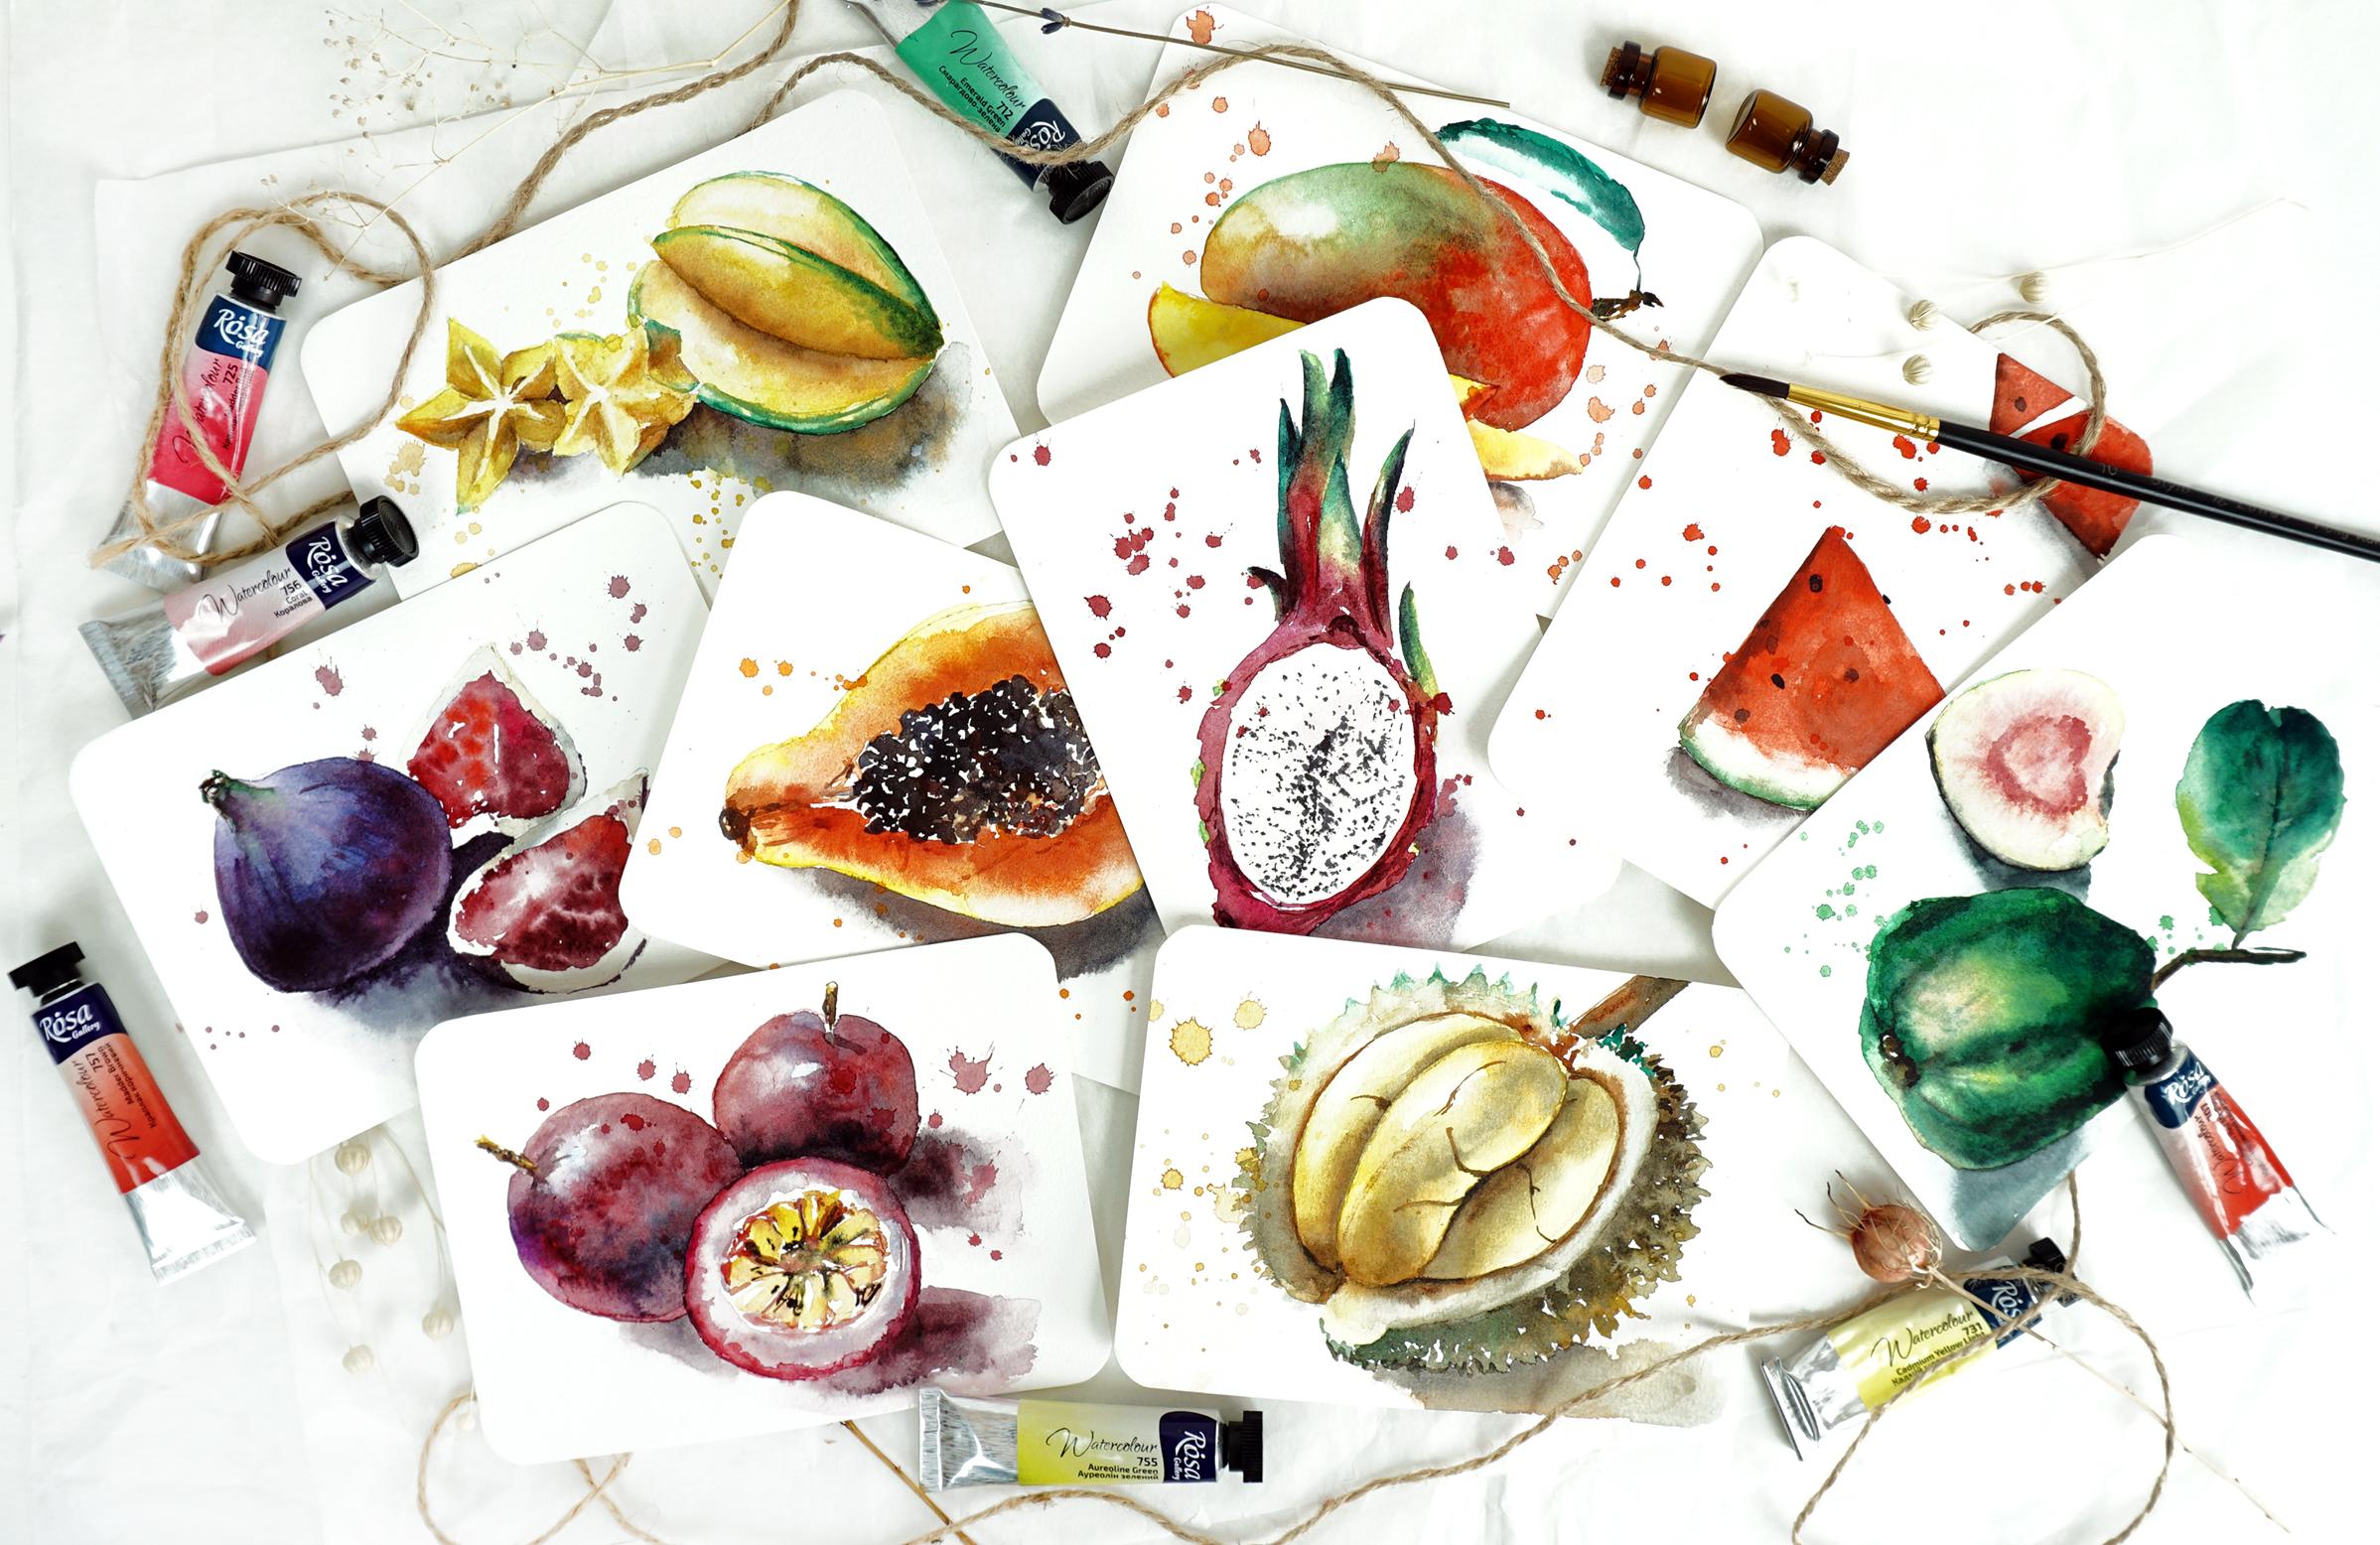
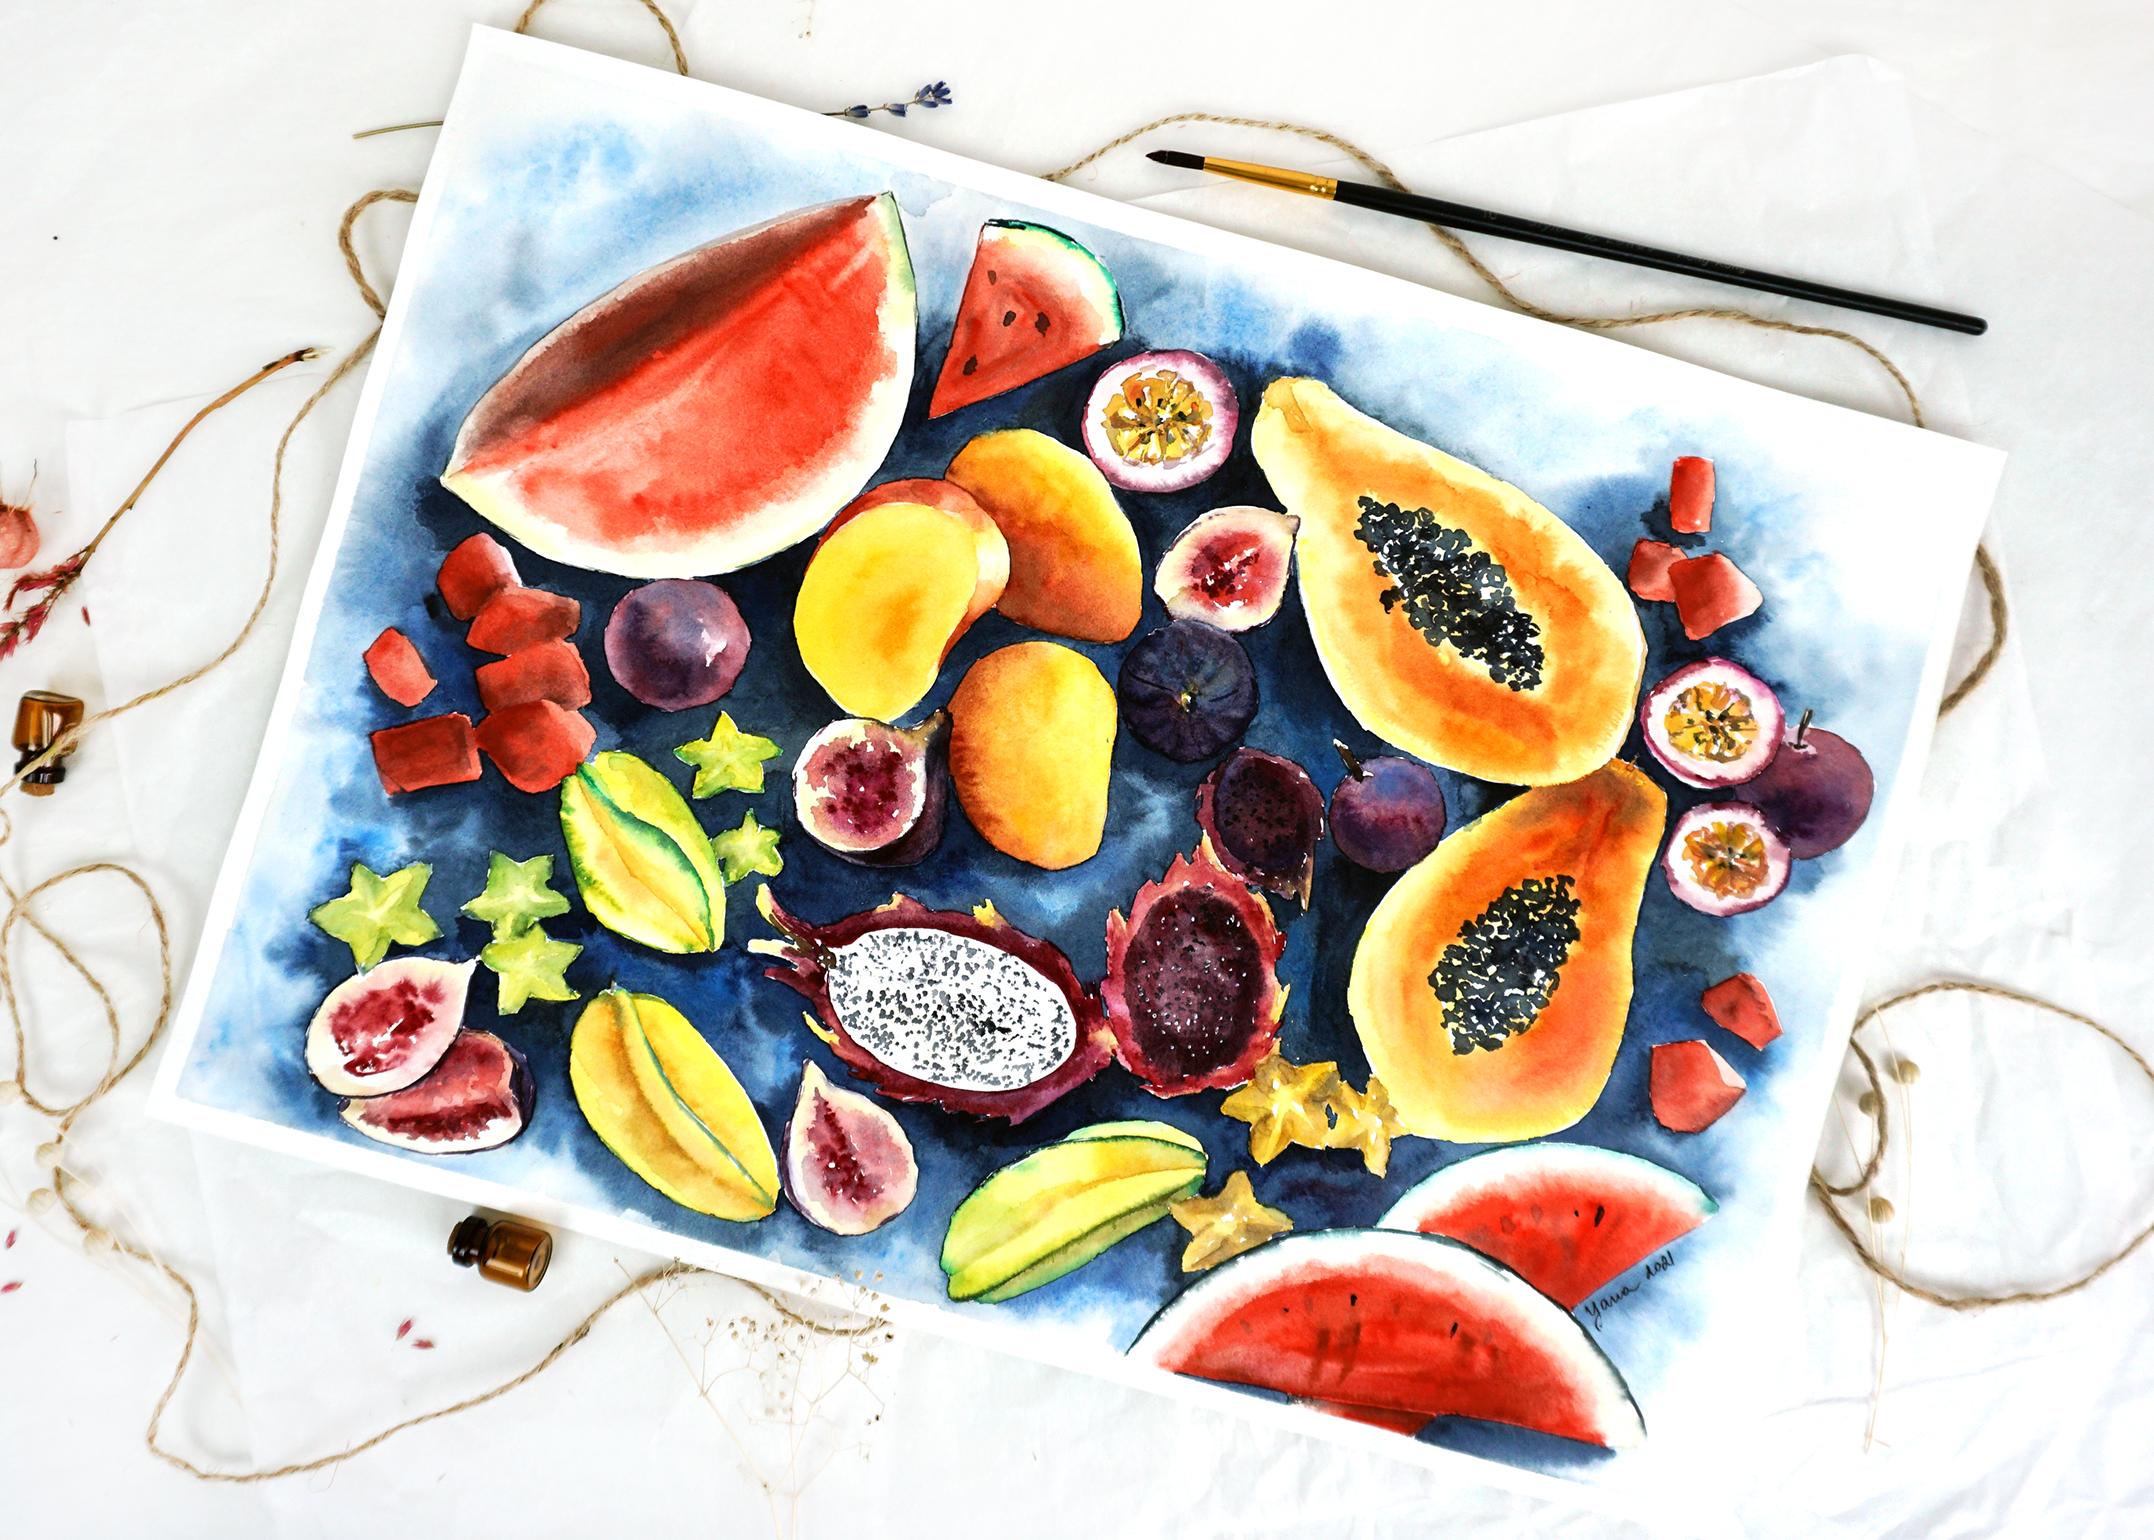
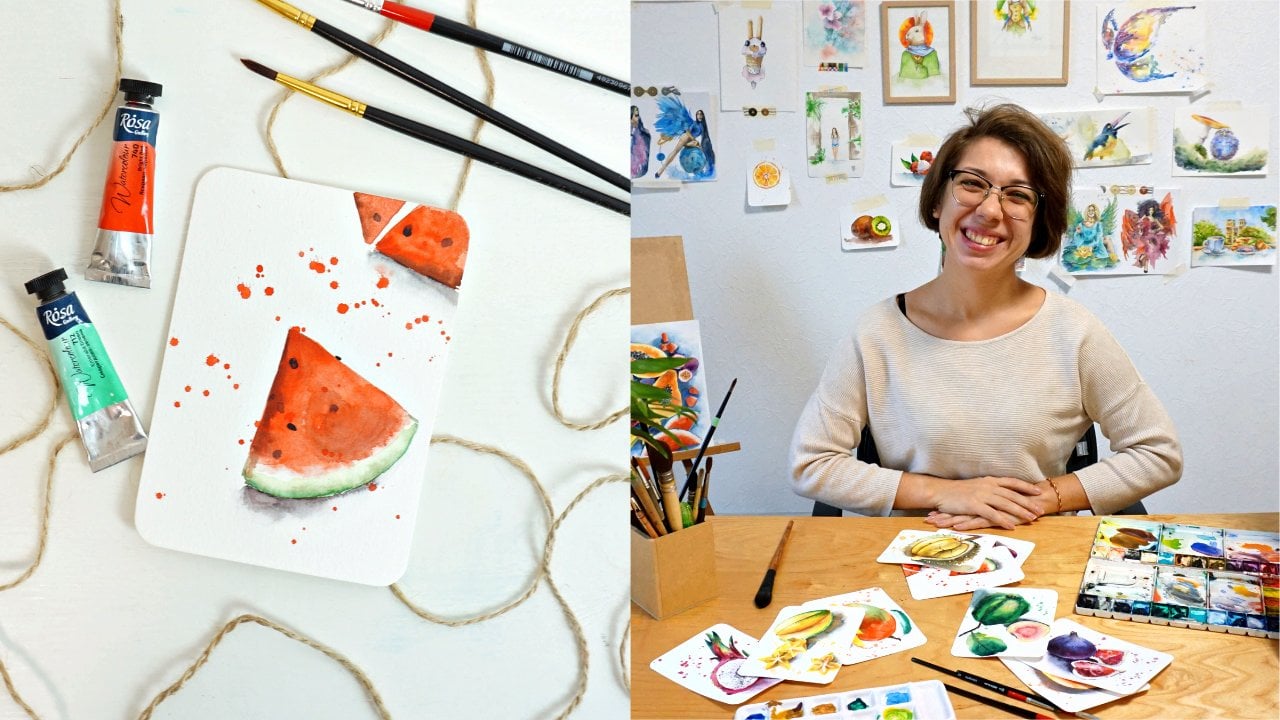
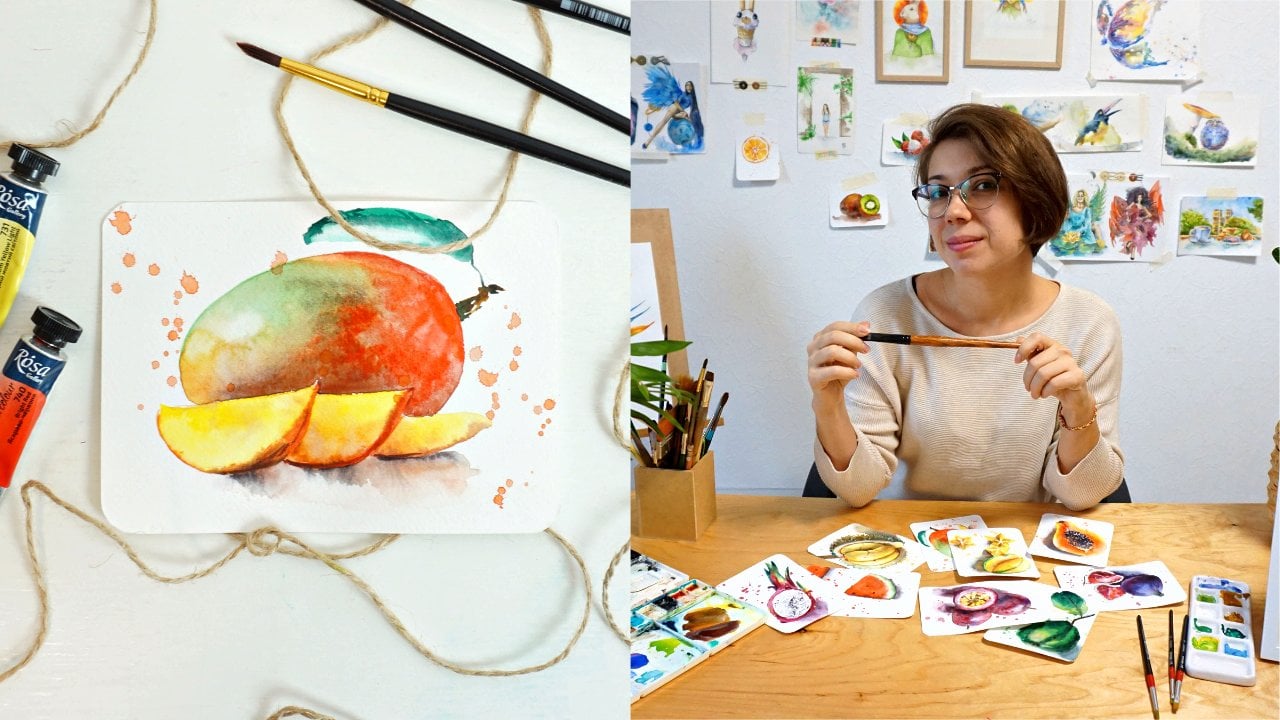
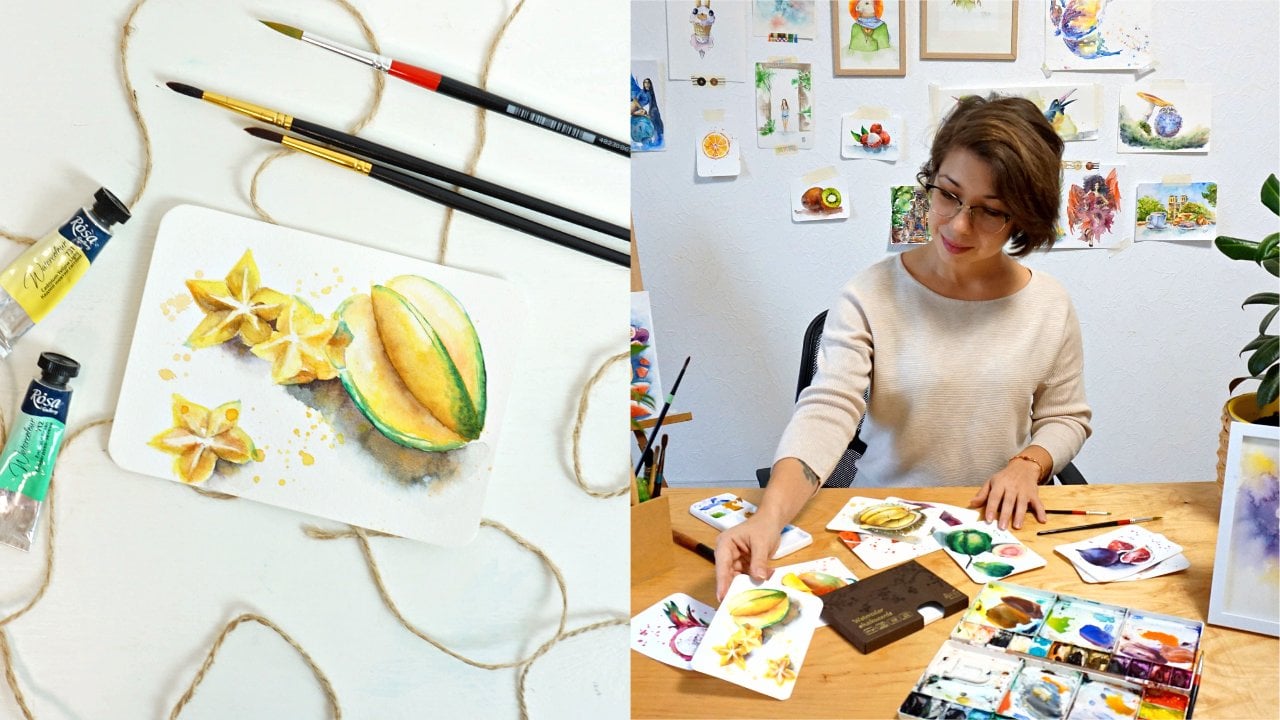
1. Welcome to this course!: Hi and [MUSIC] welcome to my watercolor tropical fruit series. If you love painting fruits and other yummy foods, you're in the right place. Today, we are painting exotic figs. In this course, you will learn basic and most common watercolor techniques, such as wet and wet technique, wet and dry, and layering. You will find out how to use no more than three colors to create an inspiring piece. You will learn how to mix colors to achieve those you need in harmonious color combinations. This information is based on theory and not just intuition, so you will be able to apply to your next painting too. Finally, you will be able to create a realistic painting of exotic figs instead of a flat illustration. This course is packed with useful tips and basic rules of watercolor, which you get to practice in a fun and relaxed atmosphere. Now, more about this tropical fruit series. This watercolor figs is the fourth course of this series. We already touched some watercolor basics with a watermelon, papaya, and a dragon fruit. I recommend you check them out and follow my courses in a chronological order. Every class opens up a little bit more knowledge and secrets about watercolors so you can grow gradually and with no stress. Practicing each tropical fruit separately will also help you gain confidence with watercolor as a medium. At the same time, you won't get overwhelmed with large complicated pieces. The series consists of nine independent courses devoted to nine different tropical fruits. We already discovered four of them. Every next food will be a bit more challenging and exciting to work on. All these is leading to a final course number 10, where you will apply all the knowledge and skills in practicing and painting a masterpiece. Oh, yes, and about me. My name is Yana. I'm a professional watercolor artist, and I want you to start painting with confidence. You can do it and you don't need special background for it. I've been painting with watercolor for more than 10 years. I'm also a full-time traveler, which gave me a chance to host watercolor workshops across the world. I have been regularly teaching classes in Thailand, Vietnam, and hosting various art events in cities I travel to. Working with students face-to-face gave me an insight into what they actually need or difficulties with watercolor they have, and now, I know how to help them best. That is exactly what I'm going to teach you in this series of courses. Are you ready to paint these figs with me? Let's start.
2. These are art materials for your painting: Welcome to this course. Let's discuss materials you will need to paint our fig fruits today. Starting with paper, you can use regular paper, cellulose content, for example Canson or any other brand that you prefer, can be Italian brand, German brand, anything you like. Cellulose paper is student quality paper. I will use SM-LT brand which has 100 percent cotton paper in it. It affects the result a little differently. It also holds water differently and makes the overall experience [LAUGHTER] different as you probably guessed already. But if you don't have access to cotton paper, that's totally fine. You can use cellulose. Just make sure that the thickness of your paper is 300 GSM and the texture is cold pressed or hot pressed. I would not recommend you to go for rough texture because it's going to show through the painting quite a lot and we don't really want to have that in food art. You would also want to have a separate sheet of paper to test your colors to find the best color combinations and stuff like that. To draw your sketch, you will need a pencil. I am using automatic pencil because it allows me to create really thin line. But you can go with the regular pencil as well. The hardness should be quite big so you should choose H and go up to any number, H2, H4, H6, whatever you prefer. Do not take soft pencil because the lines will be too easy to destroy with your own palm and just make your paper [LAUGHTER] muddy. Also, to erase your sketch, I would recommend you to use kneadable eraser, eraser that allows you to remove the line without damaging the paper and keeping your paper sheet safe. [LAUGHTER] But if you don't have kneadable eraser, you can use a regular one. Just try to limit [LAUGHTER] the amount of erasing you do on the paper because it really damages the texture of the paper. Watercolor I'm using is a bunch of different brands that I already prepared in my palette. Most of the time, it's Rosa professional watercolors. You can go with the student quality paint. It doesn't really change what we're going to do today and not going to affect the result. The brush, you really will need just one, especially considering the size of your paper. It's a synthetic brush with a pointy end, pretty small. I would do literally everything with just one brush, so you do not have to worry about big set of different brushes. The colors in detail, I will discuss in the next lesson. But of course, you will as well need some tissues and a bucket of water. Let's move on.
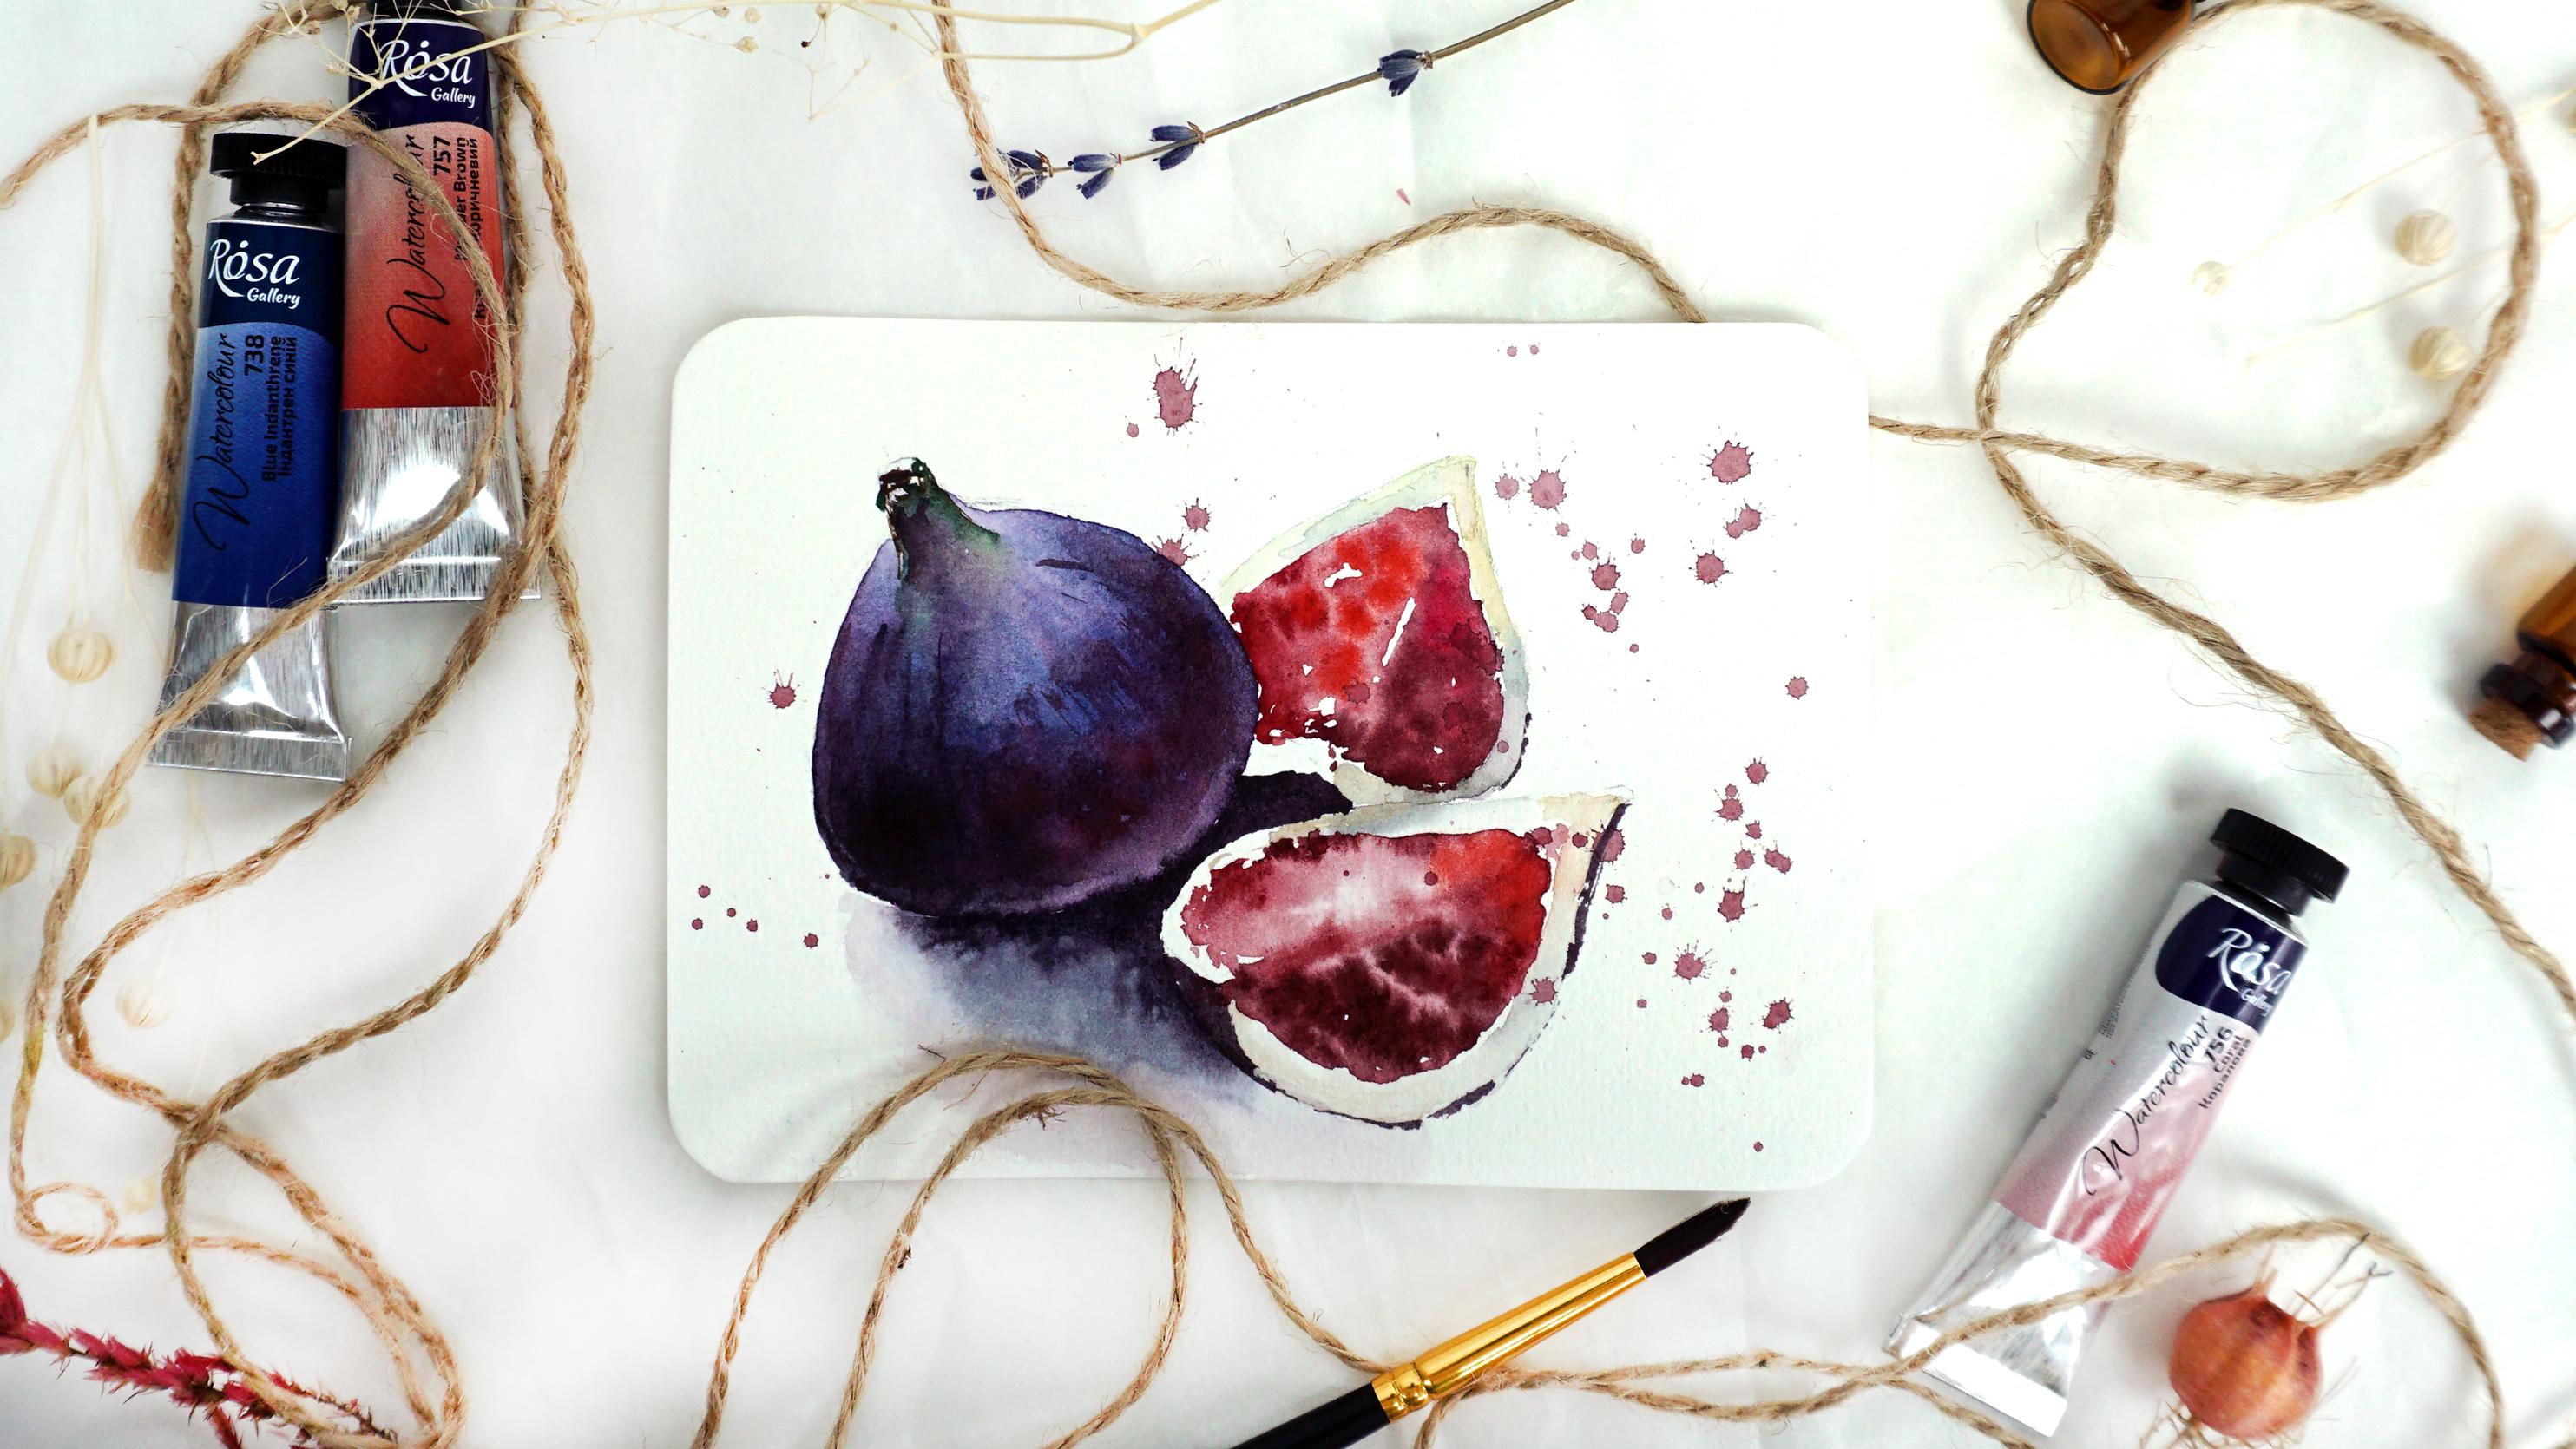
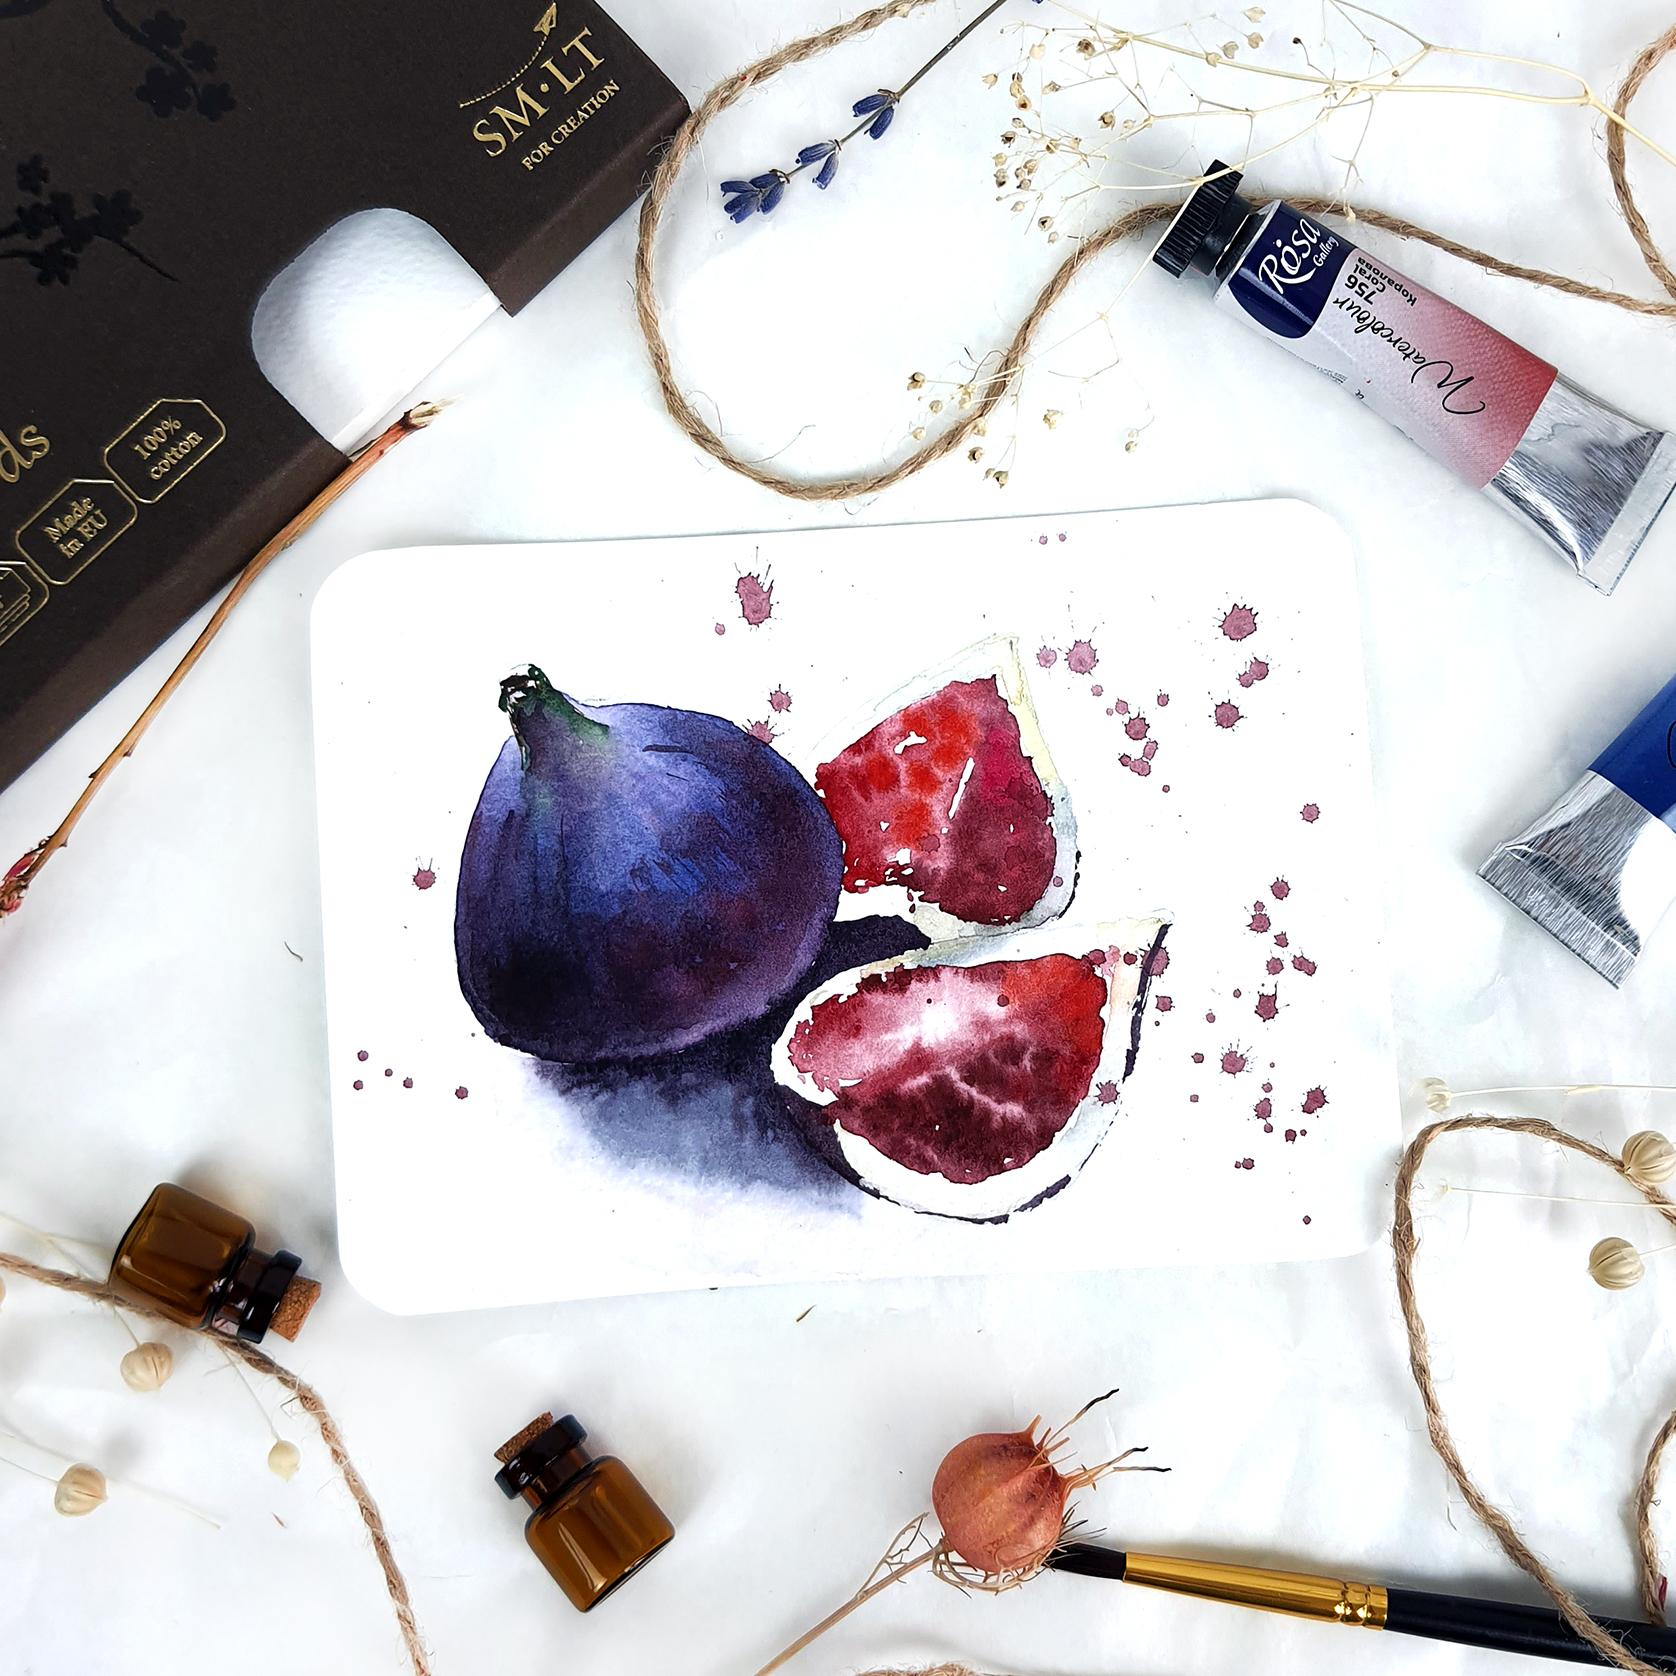
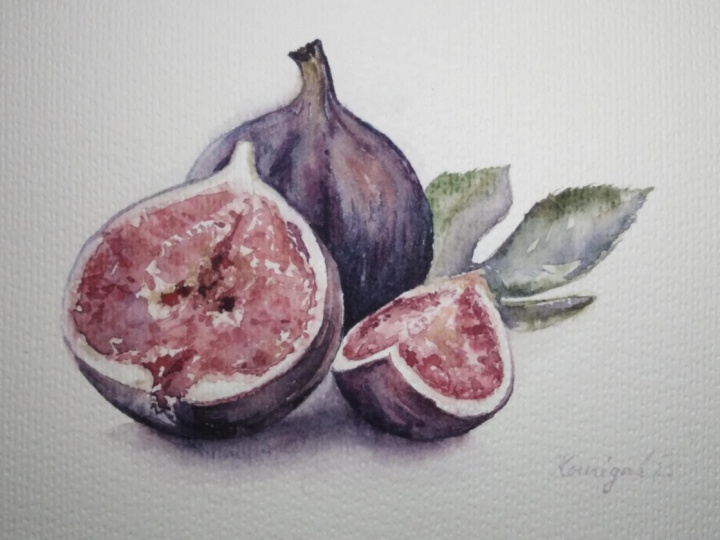
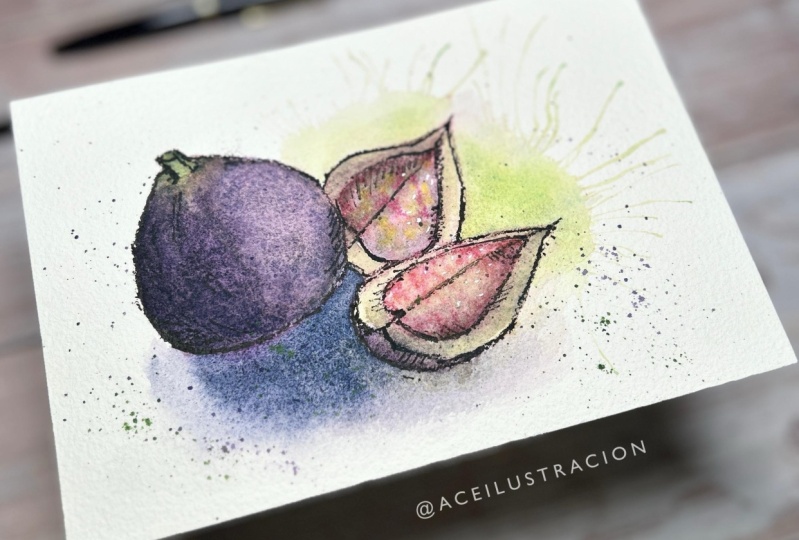
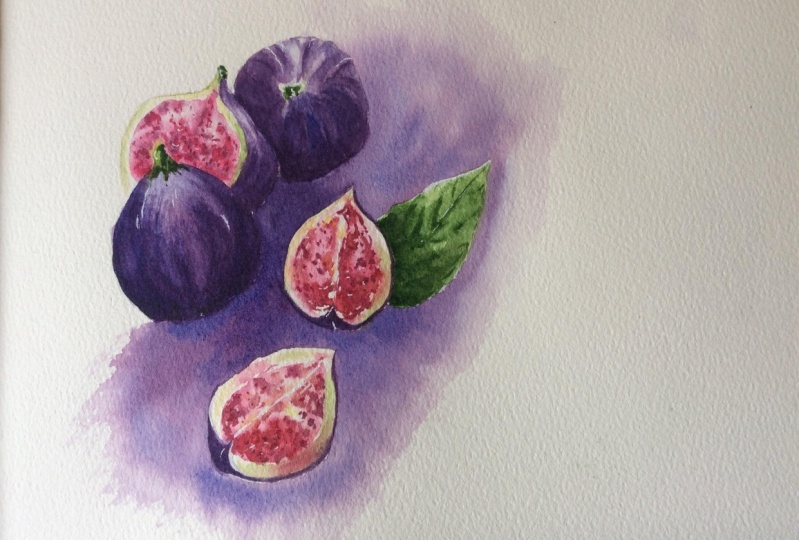
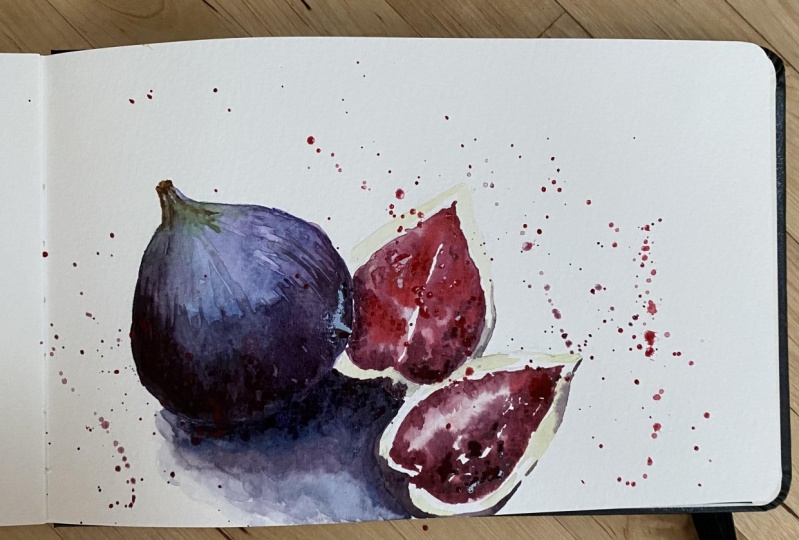
3. How to draw figs: discussing shapes: How do we draw figs? Let's talk about that. In my paper, I will have to think which fruit from the reference I will draw. I think that I'll go with the full fruit that we see completely and a little slice of it. The whole fruit has a shape of a teardrop. Technically, when you will draw your fig, you can start with just a circle and a little tip on it and that's going to be your fig. Also remember that in the reference, the interesting and challenging part of this painting is that our fruits are shown in a certain perspective. They're not flatly, they're not straight. They are in perspective. This means that there is certain source of light, which we can see is coming from here. It makes part of the fruit highlighted and the other side of the fruit in a shadow. That's important to remember when we will be painting with watercolor. Also, because of the angle that we see our fig, the tip of the fruit is not coming exactly from the edge over here, but it's a little bit inside. Then when we're drawing the slice, here on the side, it also has a teardrop shape and here, it's a little deformed. It actually looks like a reversed heart. Also there is this heart inside like this. But the interesting part as well is that because this is the source of the light, it highlights exactly half of our slice. In this half is in light and the other half is in a lot of shadow. The same happens with the slide that is closer to us in the forefront. It's easier to start from this exact middle where we can see the light breaks into light and shadow. Half of our heart here will be in a shadow and the other half here will be highlighted. Light, shadow, light, shadow, light, shadow. This creates a very important feeling of depth in our painting and also make it more realistic and three-dimensional.
4. Selecting paints for your painting: We will need only about three colors to paint our fig and let's discuss them. Of course, the most important color here will be purple or violet. Most of the time you will have violet color in your tube already pre-made, you can just use that or if you don't have one like me, you can mix your own purple color and to do that, you need to mix two colors, pink and blue. Let's do that. I take a little bit of pink, madder red, and I add blue, indanthrone blue. Now we've got our purple. As usual, you can just play around and mix all different type of pinks you have with all different type of blue that you have to find your most favorite combination for this painting. For example, this purple is a mix of the same pink, madder red, but with a different blue, phthalo blue, and this is the result that I've got. I think this result is going to go better with the fig than this one. I can as well try magenta and mix it with phthalo for example, and here I got really nice vivid violet color, which doesn't really go well with the natural skin of the fig, so I'm not going to use it. But I can try one more combination of the same magenta but indanthrone. That's better, it's nice, warm, purple color, which actually I might as well integrate in my painting just to make it more derived and interesting because this one after is getting dry, it becomes grayish, muddy and I can use that for shadows and I can use that for highlights of my fig. For you, just check all the blues that you have mixed with all the purples that you have, to find your best combination of purple color. Remember that ultramarine blue granulate, so it's going to leave a very particular dusty feel and texture on your painting and I'm not sure that this is going to really look nice on our exotic fruit painting. Instead of ultramarine blue, you can use cobalt blue if you have it. Then for the inside of the fig, it's, of course, going to be pink. Here I have different types of pink in my set. As already mentioned, I'll probably go somewhere in-between madder red and magenta. I think madder red is going to look better in the fig and to create a darker tone of the shadow part, remember the one we discussed in the previous lesson. The shadow here and here, the darkest side of the fig, we need to create darker tone by using complimentary color and complementary color to pink will be light green, so I take emerald green. Of course, you need to find proper balance between the two so that you have more pink than green because you need darker tone of pink. Otherwise, you will have grayish tone or you will get darker tone of green if you have more green in your mix. The final part is the tiny outline around the pink inside our fig. It looks yellow to me, so I'll use cold yellow, which is lemon yellow like here. You can go really with any yellow, but I think lemon yellow will work the best in this situation. Of course, I might use some additional colors as I go. I can't really plan ahead everything I'm going to do, but those three really are going to be my main colors for this painting. Let's sketch.
5. Let's sketch figs!: Today, I will change the format of my painting, and instead of the portrait, I will use landscape. This is going to make it easier for me to think of the composition and locate all the fruits on my sheet considering the size of it. It's pretty important to think about it ahead of time. My main whole fig is going to be somewhere here. It's the largest in terms of the size, so I start from it. First, I'm just drawing the circle. As I finish the circle, I add a tip. As I mentioned in one of the lessons earlier, the tip is going from a little bit away from the edge, not exactly from the edge, but from here to give it that feeling of perspective. Also, the actual fig is not really perfectly round. It is, as I said before, in the shape of the teardrop. I am adjusting the shape just slightly bit to make it look more realistic. I'm making my sketch dark on purpose so that you can see it on camera, but I really encourage you to make sure that your sketch is very light and almost invisible because your pencil line is going to shine through the watercolor layers and it's not going to look nice in the end in your final result. I think this is going to work well for the fig. Here is the slice that fell on the side and I want to move it a little bit closer to us as viewers. I start from the highlighted side. First I draw half of it here below and the second half on the side like this. The second half is a little smaller than the first half. It's closer to us, we see it better, it's bigger. Now the heart inside. I need to keep my sketch very light. The other half is here, also starts from the center. I'll draw the reversed heart and the skin. Actually, on the reference, this slice is hiding behind and I like it. I would like to repeat it. Try to not use eraser as often as I do here. Save your paper. Inside. Reverse heart over here. When you draw your heart, make sure that the outline of the heart is very thin because this is the place where the red, pinkish part finishes and yellow light part begins. You really don't want pencil line to be visible on your yellow slash white part of the skin of this fig. For that, try to almost avoid the pencil line if you can. Don't draw it and paint this pink heart with the watercolor directly.
6. Painting the first fig: Let's start from the whole fig over here. In this painting we will use wet-on-wet technique, which means we will apply clean water on the area we want to paint first, and only then we will add pigment. Now while the water layer is getting dry, I will mix my purple color, and take my red, add some purple blue. For the highlight, I decided to go with magenta and turtle blue. Now I get the pigment, rinse a little bit the excessive water, and apply it right on our fig. Because first, we put water there, now the layer is flowing nicely, softly, without sharp edges. I am intensifying color a little bit, and right away add the shadow part that I mixed before. For the second variety, I want to drop a little bit of my pink that I have been using here and there, as well as blue, so that the tone on our layer is more interesting. Here in the bottom I decided to add the line of pink to show the affected area, and at the same time, I want to intensify our shadow and also maybe correct the shape of the fig to the one that fits more the fruit. As long as your layers are wet, you can correct the shape as much as you want. [NOISE] Now since this layer is still wet, I would like to add the shallow right away and allow those two layers to blend together.
7. Integrating a shadow: For the shadow, I'm going to use exactly the same colors but just add more black into it. [NOISE] Also first I will apply just clean water a little bit here underneath, go all the way close to my slice here and right away you start adding the shadow. My brush doesn't really carry much of water. Just a little bit to get nice, not dry stroke. With it, I'm outlining the other two slices that we have here using negative space technique and creating the shadow. [NOISE] Now, I would like to correct the bottom. [NOISE] I'm cleaning my brush rinsing it over the tissue and carefully diluting the hard edges of the shadow to navigate the shape of this shadow the way I want it. [NOISE] Because we didn't wait for the fix to get dry but started to paint our shadow underneath right away, we allowed the colors to blend softly and achieve nice and smooth transitions.
8. Working on the first fig slice: While we're waiting for this fig to dry we can move to painting the slices. However, while it's still wet, I'll like to drop a little bit of yellow mixed with green very light tone here. Even maybe a little darker by adding pink to this tip to show our tip. It's important to do it now, while the layers are slowly drying up so that our colors integrate softly and smoothly and we don't have sharp edges. I take a little bit of brown sienna to outline the shape of this tip and just carefully integrating it into the fig. Make sure that your brush doesn't carry water. Otherwise, the water will dilute your previous layer and you don't want that. Also if you've got a sharp edge, clean your brush, rinse it, make sure it's pretty much dry and carefully correct the edge. Here we go. Now we can move towards slices. For the slices, I will use wet on wet technique as well. To be careful, I start with this one because this slice doesn't touch our big fig and I just apply clean water. I also erased my sketch almost completely, so I see the line just a little bit. Now I'm taking my mother red, the pink color, and carefully just drop it on the painting. While I'm covering both sides at the same time, I keep in mind that this side, the bottom one will be darker and this one will be lighter. Also, I'm leaving some blank spots uncovered spots on purpose to make it look more airy. Now I'm mixing darker tone of red as pink for the shadow and add it right away. You see that my moves are like dots. I'm just dropping the pigment and letting it blend all by itself. I'm trying to avoid dropping too much water in my fig because the first layer was water and the paper already carries a lot of water so we don't want to add more to it. What we need to add is the paint. The highlighted side of the fig also has a little more concentrated color, which I am adding right now but a tiny bit. Now we can move to the other one.
9. Deepening tones on the main fig: Now, there is literally [LAUGHTER] just a few things left to do to finish the skin, the yellow part on the skin of our slices. I would also like to intensify the shadows on our big whole fig and I think I'll start from the big fig. The one that's not chopped in parts. I'm mixing darker tone, which is exactly the same color I was using before, pink plus blue and a tiny drop of black. Also what's interesting is that this fig has some texture, little veins, which I'd like to repeat. Make sure that when you work on the shadowing, you don't use pure black color. Also make sure that your brush stroke is not too dry. If you got dry lines, you can dilute the edges with a semi wet brush. You rinse your brush, rinse the excessive water against the tissue and carefully dilute the edges of your strokes. Also pay attention to not have too much water on your brush because too much water will dilute your previous layers and we definitely don't want that. What we're doing now is called layering technique. We apply fresh layer of paint on top of already dry layer and achieve deeper tone in our painting. [NOISE] Just a couple of strokes here and there to show the texture. [NOISE] Now we can finish up with our slices.
10. Painting the second fig slice: Same approach with our second pic. First, clean water and then paint using traditional wet and wait technique. I'm really enjoying watching how the colors are floating by themselves without me reinforcing anything. For the sake of variety, I will drop a few drops of warm red. [NOISE] But, just a little bit. Then we have our darker side. Remember to follow the shape of the heart. [BACKGROUND] As well, I left blank spots here and there on purpose to make the whole fruit please.
11. Detailing the slices: For the yellow part of the skin, I'm taking the very transparent lemon yellow, and carefully applying it around. Make sure that your color is very diluted with water. You have to have lots of water in your paint, not on the brush but in the palate, when you pick your yellow color. Here in the place where two slices connect and one is hiding behind another, you can use a little bit of blue or the other purple tone that you use but also very diluted, so it's not bright. It's not carrying too much hue, it's very diluted. Almost gray, just to show the shadow here because naturally if this slice is behind, you don't see it really well and it has a shadow. Now, can work on this one. Very light, very diluted. In some places, I even leave blank on purpose, just white, the whiteness of the paper is plain to roll off the white color in our painting. Here, there is a little bit of a shadow as well, because naturally this slice is casting shadow on the front one. As well, just a tiny drop, just a little bit. Do not overdo it. It should be the lightest color in your whole painting. The only thing left is to, actually show the skin of this other slice very carefully with the darkest tone that we already used here. I am showing the skin here and a little bit there and that's it. The final touch is my favorite touch, [LAUGHTER] the splashes.
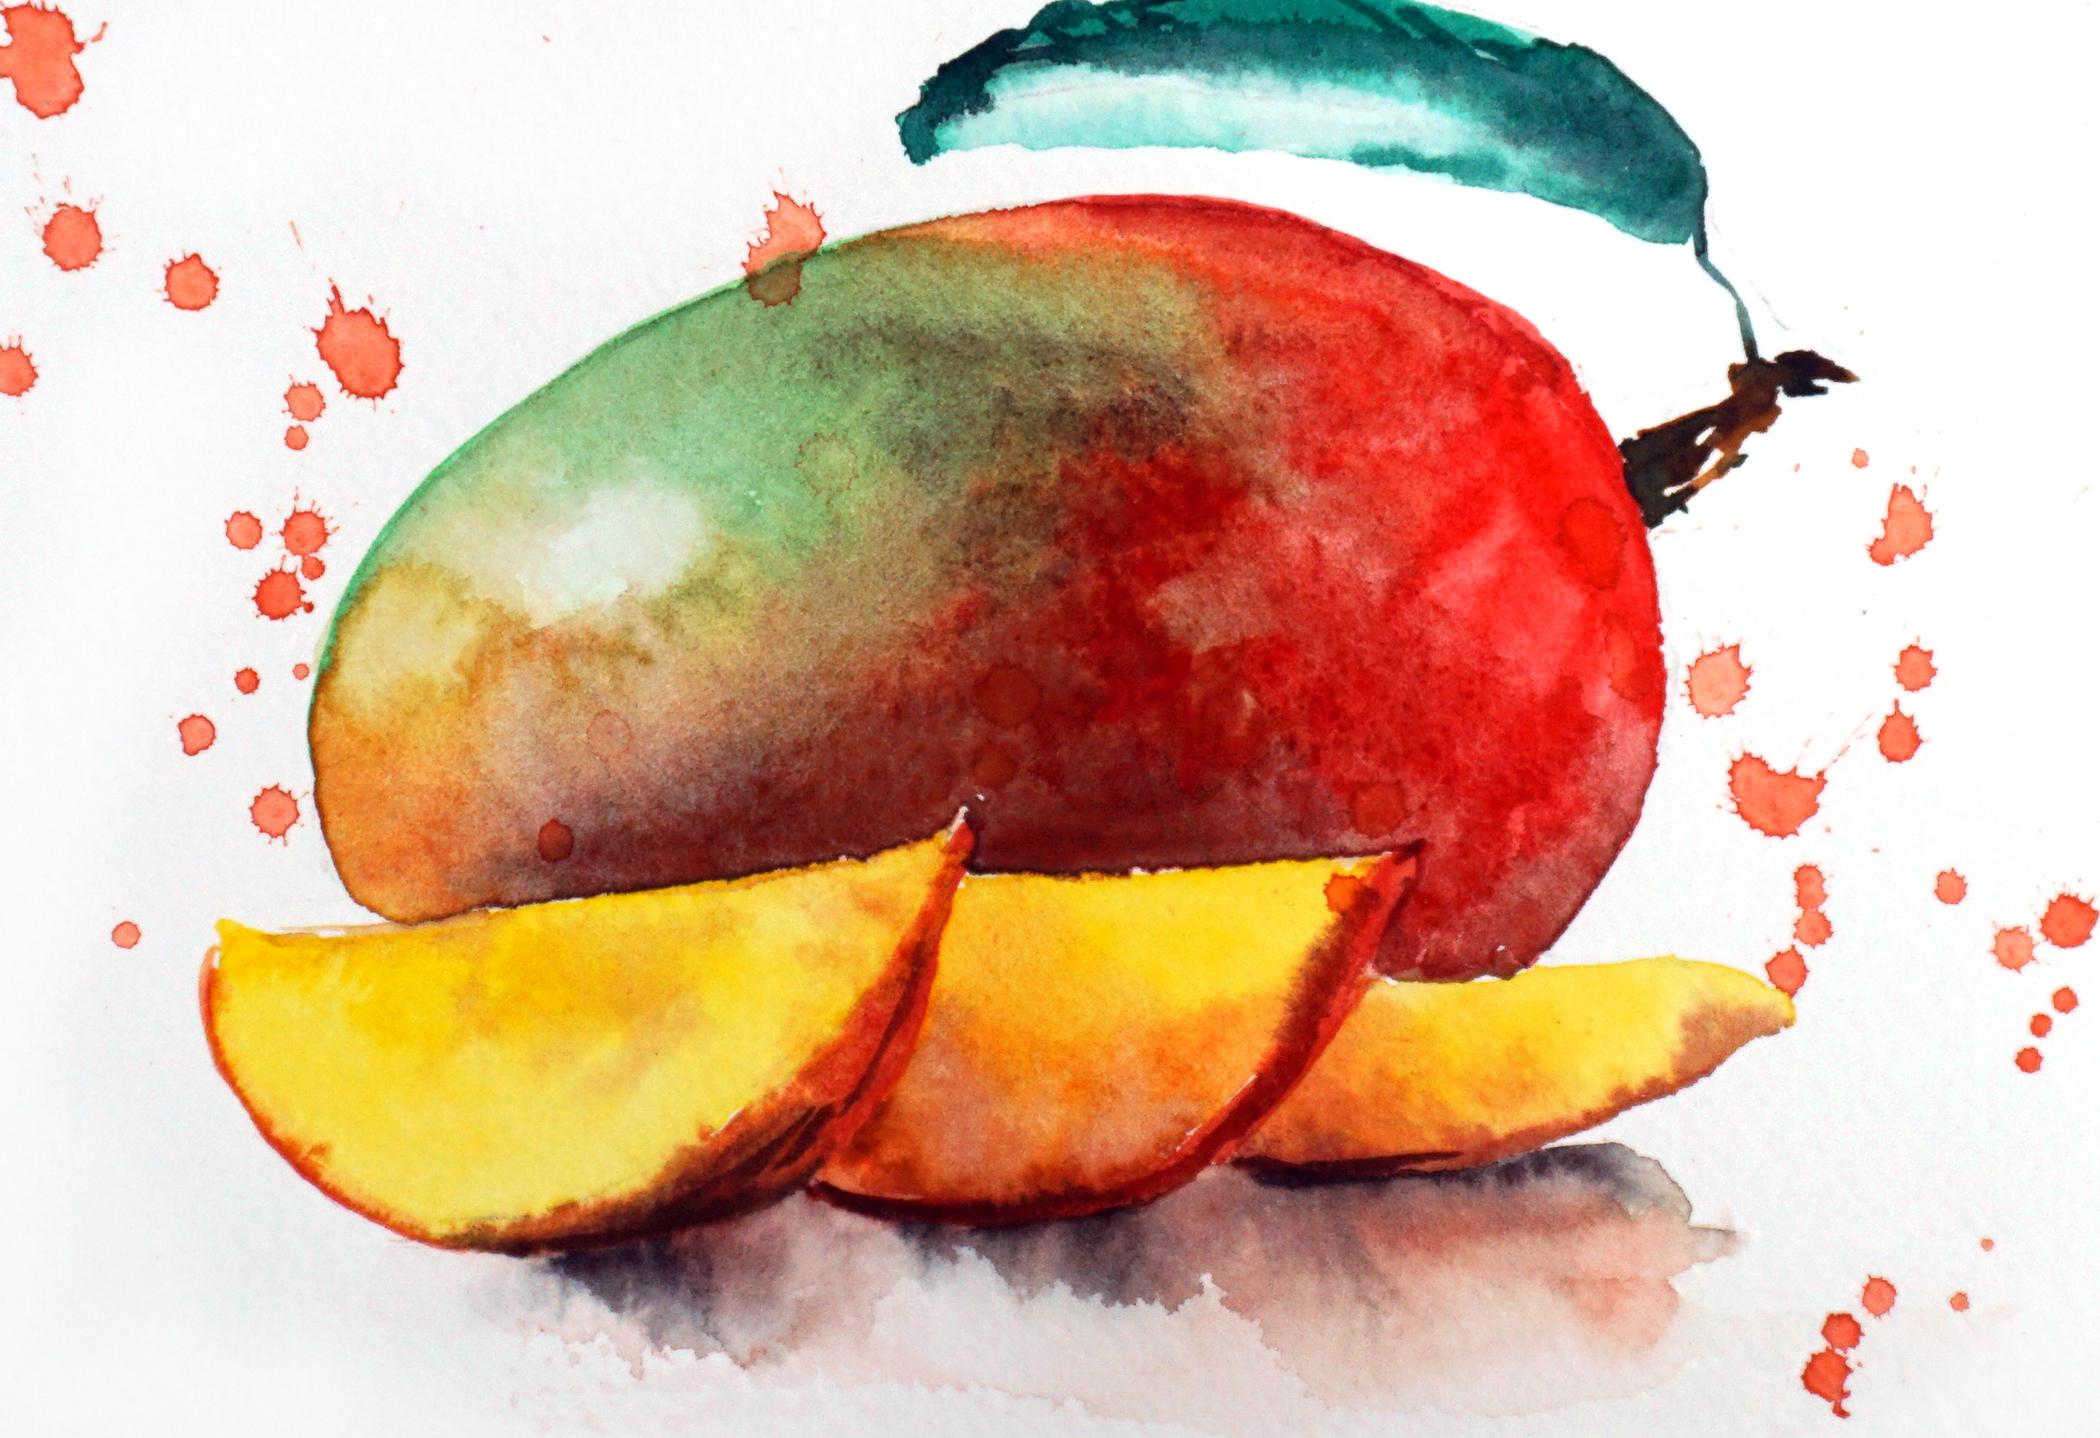
12. Your class project: That was really great painting session. I hope you enjoyed as well. Please do submit your paintings to this class. Your class project will be to paint figs. You can choose any fig from the reference. You can paint all of them. You can paint just one. It doesn't really matter as long as you do take the time to practice the techniques I was talking about in the course and share it with me. I will be very happy to give you my feedback. And of course, do not miss my next course where we will be painting exotic mangoes.
 Yana Shvets, Professional watercolor artist