Transcripts
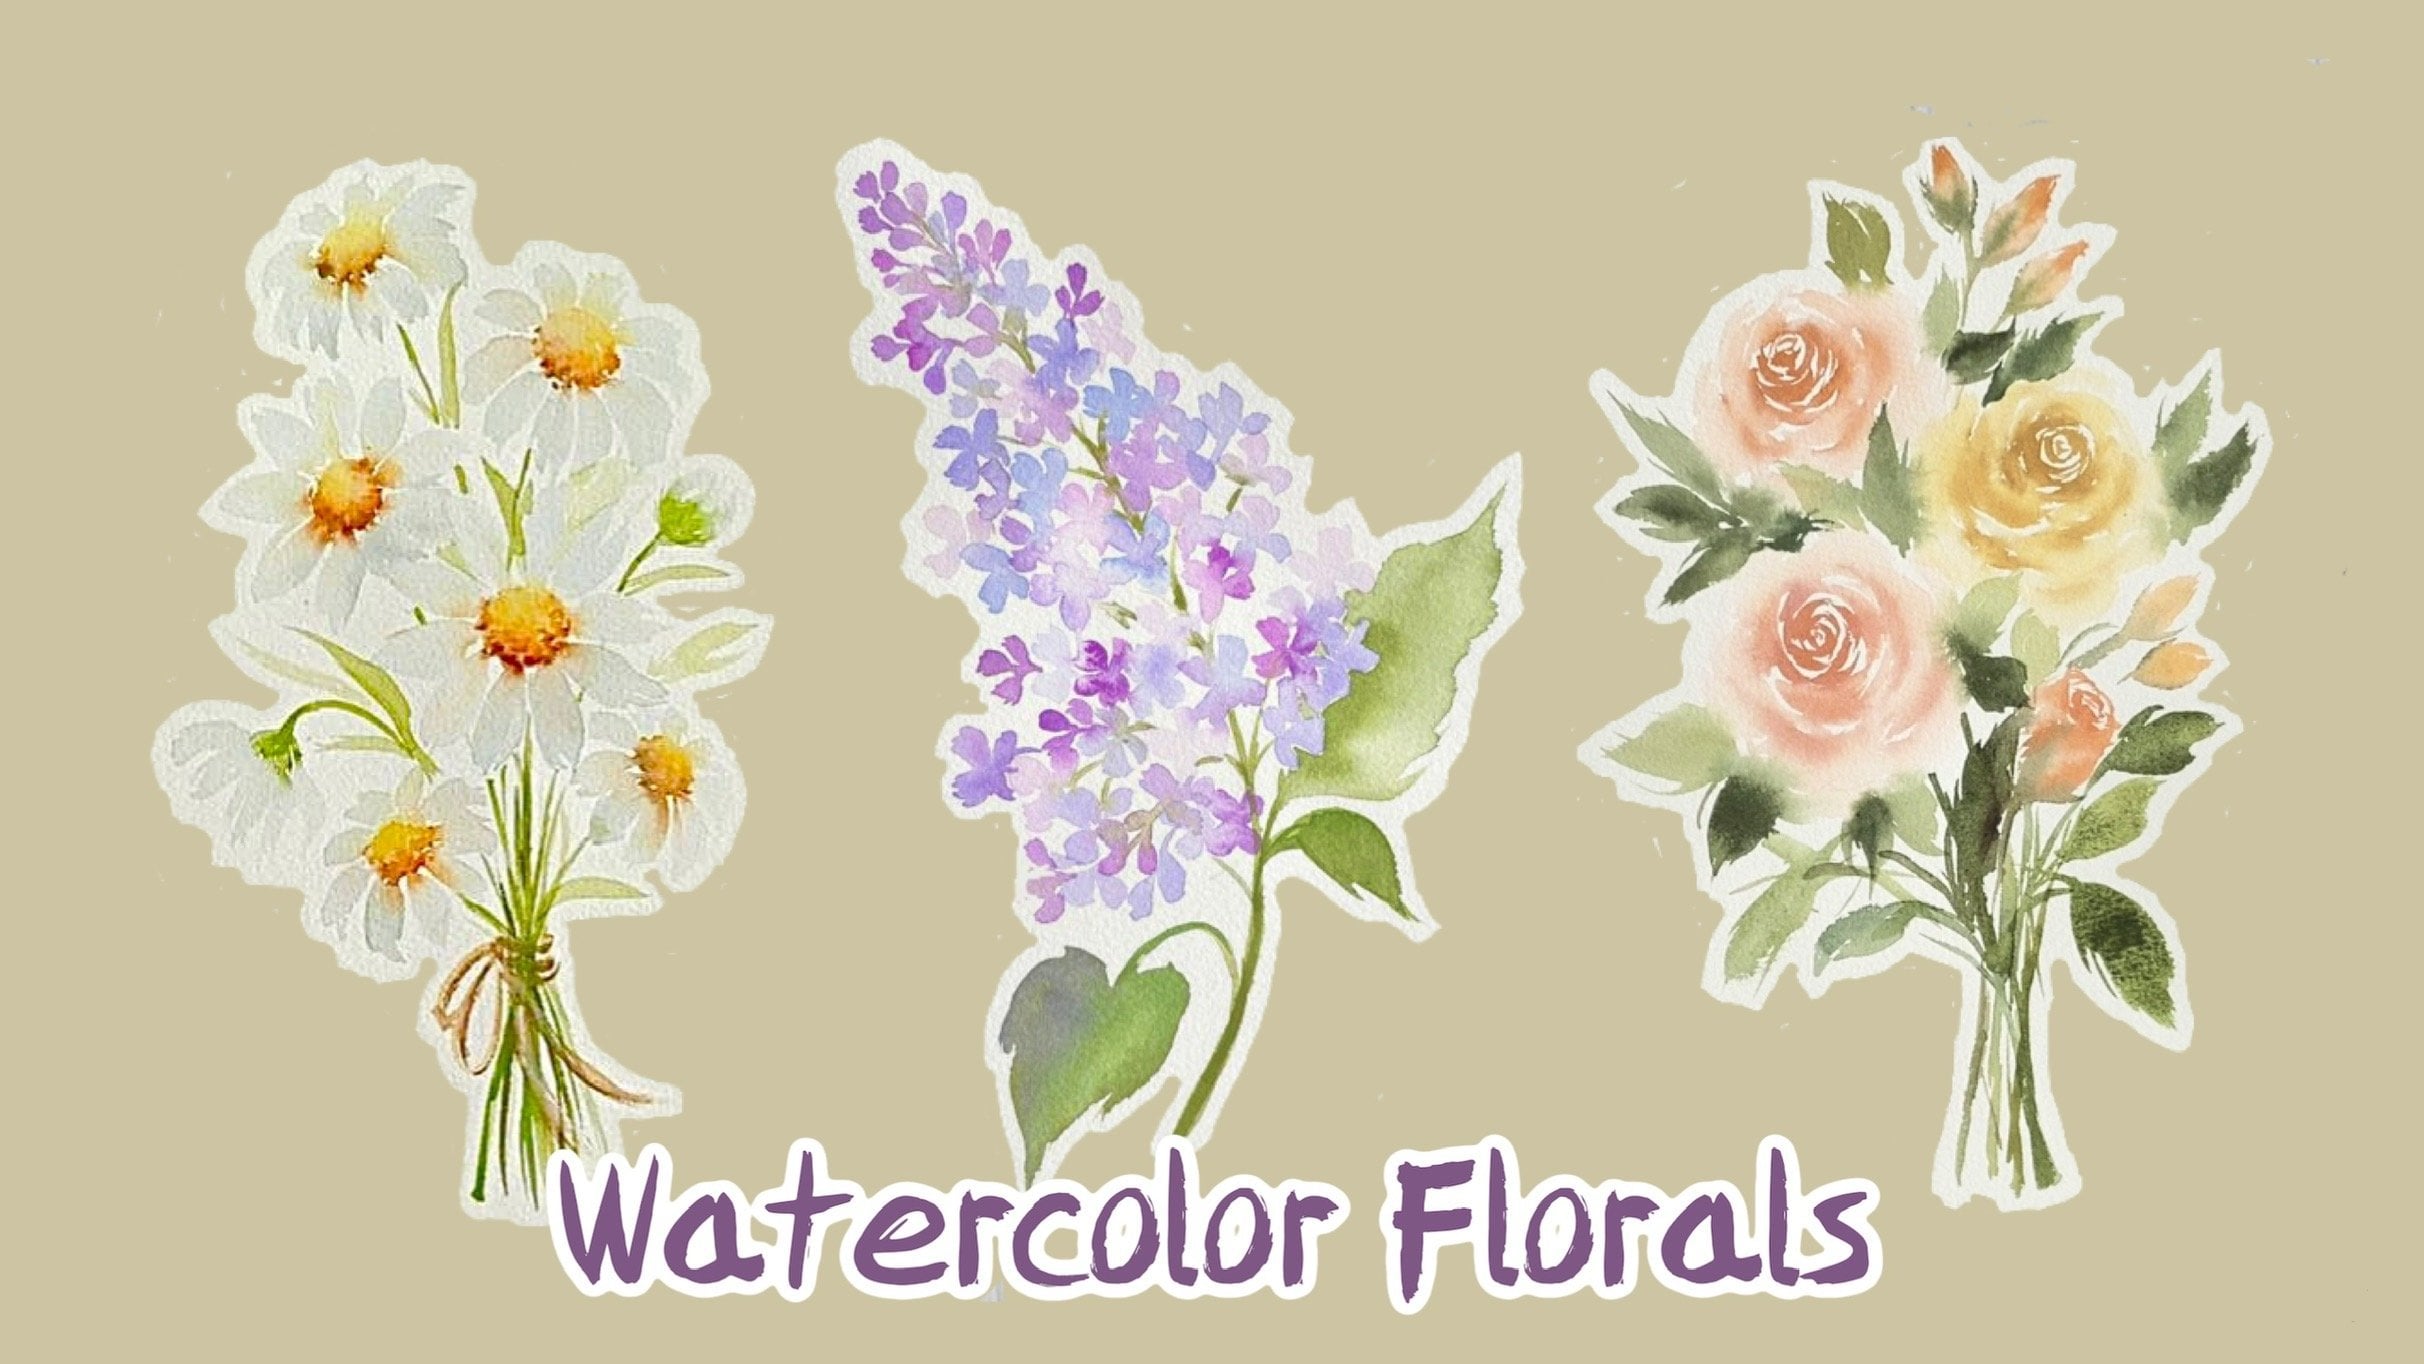
1. About The Class: Hi, everyone. Welcome
to this class. My name is Lisa, and I'm a watercolor artist
based in Malaysia. I started watercolors
seven years ago and florals are one of my
favorite subjects to paint. In this class, you will
discover the art of painting soft and enchanting
watercolor florals. I'll begin the class by showing you the
materials required, and then I'll guide you through the essential
watercolor techniques for creating soft
and lovely petals. You will then practice
these watercolor techniques in a warm up exercise, preparing you for our
three class projects. During these class projects, you will learn how to use
the wet and wet technique to create soft color gradients
within your flowers, achieving samless transitions in petal hues and adding subtle color variations
to your flowers. I'll also share tips and
techniques for creating an interesting composition and adding depth and dimension
to your artwork. Upon completion of this class, you will possess the knowledge
and confidence to craft your own soft and captivating
watercolor florals. This class is suitable
for all levels, so grab your brushes
and let's get started.
2. Materials Needed For The Class: Okay. So let's start
with the paper. I'll be using this Bau Hong
Academy Watercolor paper. This is 100% cotton co press
watercolor paper in 300 GSM. I also have this
in an A four size. Okay. For this class, we'll need some round brushes. I have these medium
sized round brushes. These are in a size three and size four from the brand tu. I'll also be using
a size six and size eight round brush
from silver black velvet. For final details, I'll be using this Chinese
calligraphy brush. Now, if you don't
have this brush, you can use any small round
brush in a size one or two. You also need a palette or
plate for mixing your colors, some paper towels,
and clean water. For the colors, I'll
list them out in the individual class
projects. All right.
3. Watercolor Techniques For Painting Soft Florals: All right. So we'll
mainly be using the wet on wet technique
to paint our flowers. This technique
allows us to create soft and seamless
transition of colors, which is perfect
for achieving that soft and eheal look
in our flowers. Now, it's important to note
that with this technique, thicker pain mixtures spread less while thinner
ones spread more. I have two mixtures of million in different
consistencies. One is thinner while
the other is thicker. We are going to compare these two mixtures
on a wet surface. We'll start with a base layer. I'll go over this
several times to make sure it remains wet
for a longer period. Because when
painting wet on wet, it's important to
have an even layer of sheen on the paper, and to prolong this shen, we can reapply
moisture to the area. Let's start with a thinner one and compare it with
the thicker mix. You can see that the thicker
mixture spreads less, giving us more control
over its spread. Now let's create a soft gradient of color using this technique. Now, before you
apply your colors, make sure you have
an even layer of sheen and that there
are no water puddles. Now to achieve a soft gradient, we always work from
light to dark. I'll start with the thinner mix. And then I'll apply the
thicker mixes on top. Because the thicker
mixture spreads less, we are able to achieve
a soft gradient effect. Now we can continue
working wet on wet as long as there's an even
layer of sheen on the paper. To create subtle color
variations on the petals, I'll use a smaller brush and apply the thinner
mixture on the petals. Now, since the
paper is still wet, we can continue with
the next technique. I'll use the end of my
brush to scratch out the orange pigments to
create some fine lines, giving the impression
of delicate veins. We can do this as long as
the pain is still wet. Now the next technique is
the lifting technique. This involves removing
pain from the papers surface with a brush. We can use this technique
to create highlights, correct mistakes, and adjust values as long as the paper
is still slightly wet. All right. So in
the next lesson, we're going to practice
these watercolor techniques in a warm up exercise.
4. Warm Up Exercise: Let's do a warm up exercise to prepare us for
our class projects. We'll practice the watercolor techniques from our
previous lesson. Now for this exercise, feel free to use any
colors that you like. All right, I'm going to paint a four petal flower with
a watery mix of lilac. To prolong this sheen, I will re wet the petals to make sure they remain wet
for a longer period. Always make sure you
have an even layer of sheen before
applying your colors. Now I'll add some
violet to the center, letting it bleed
into the petals. To create a subtle color
variation in the petals, I'll use a smaller brush and
apply this along the edges. Next, I'll add a thick mix of ultramarine
around the center. This has a thicker consistency
than our violet mixes, allowing us to achieve a
soft gradient on the petals. We can see a smooth
and gradual change in color intensity. While the paper is still, I'll pull out some fine lines
using the end of my brush. Okay. Now, at this stage, the flower is still
slightly wet, so I can use the lifting
technique to remove any excess colors and to create
highlights on the petals. Okay. All right, let's
paint another flower. I'll apply several
coats of paint to make sure the paper
doesn't dry out too soon. I'm using the side of my
brush to paint the petals. Now, if you're interested
in learning more about creating a variety of brush
strokes with your brush, I recommend checking out
one of my previous classes, nine day watercolor
floral challenge. In that class, I'll
teach you how to combine brush strokes to
create larger petals. Now, let's apply some
red to the center. You will notice that
the pain spreads quite quickly due to its
watery consistency. I'll also apply
this to the edges. Once this dries, it will create a subtle color variation
in the petals. All right. Now, let's apply a thick consistency of violet. This allows for a more
controlled spread compared to the red mixture, resulting in a soft gradient
of colors on the petals. Next, I'll pull out
some fine lines while the pain is still wet. For the flower centers, we'll apply a thick
yellow mixture to minimize bleeding
into the red petals. Now let's move on to
the stems and leaves. To add depth to the painting, we can vary the tonal values
of the leaves by diluting our green paint with water to create a variety of green tones. The lighter leaves will create the impression that they
are in the background. We can also create different
shades of green by mixing our green with yellow and violet to add visual interest
to the painting. Now, we can also use the wet and technique to darken the color of our leaves by applying a darker
green on the base layer. Now, for more defined veins, we can use a brush to paint them in once the flowers are dry. All right, so do practice these watercolor
techniques and experiment with different
pain consistencies before moving on to
the class projects.
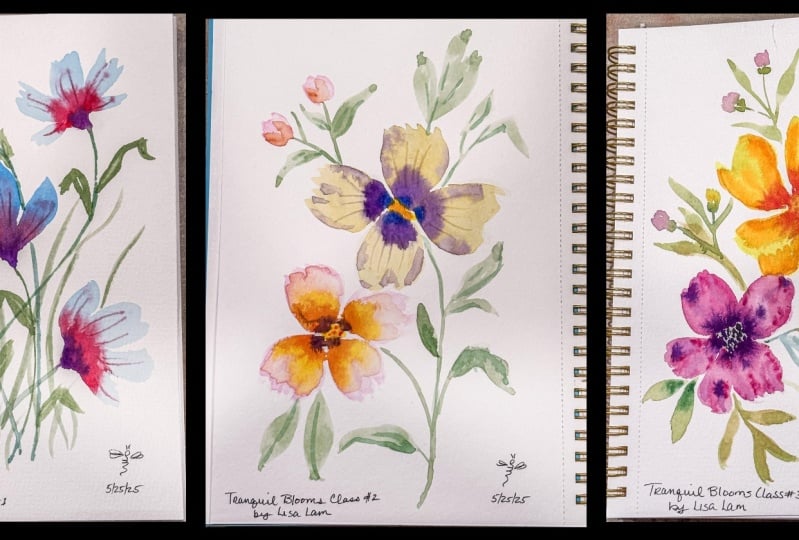
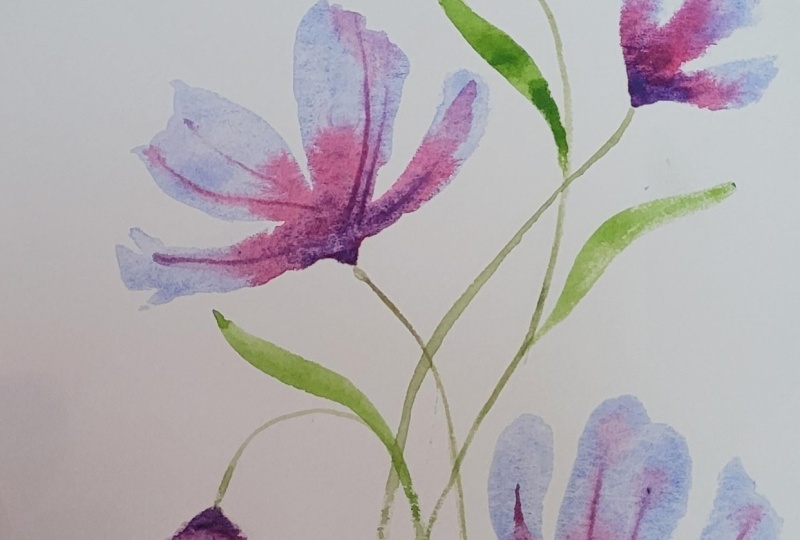
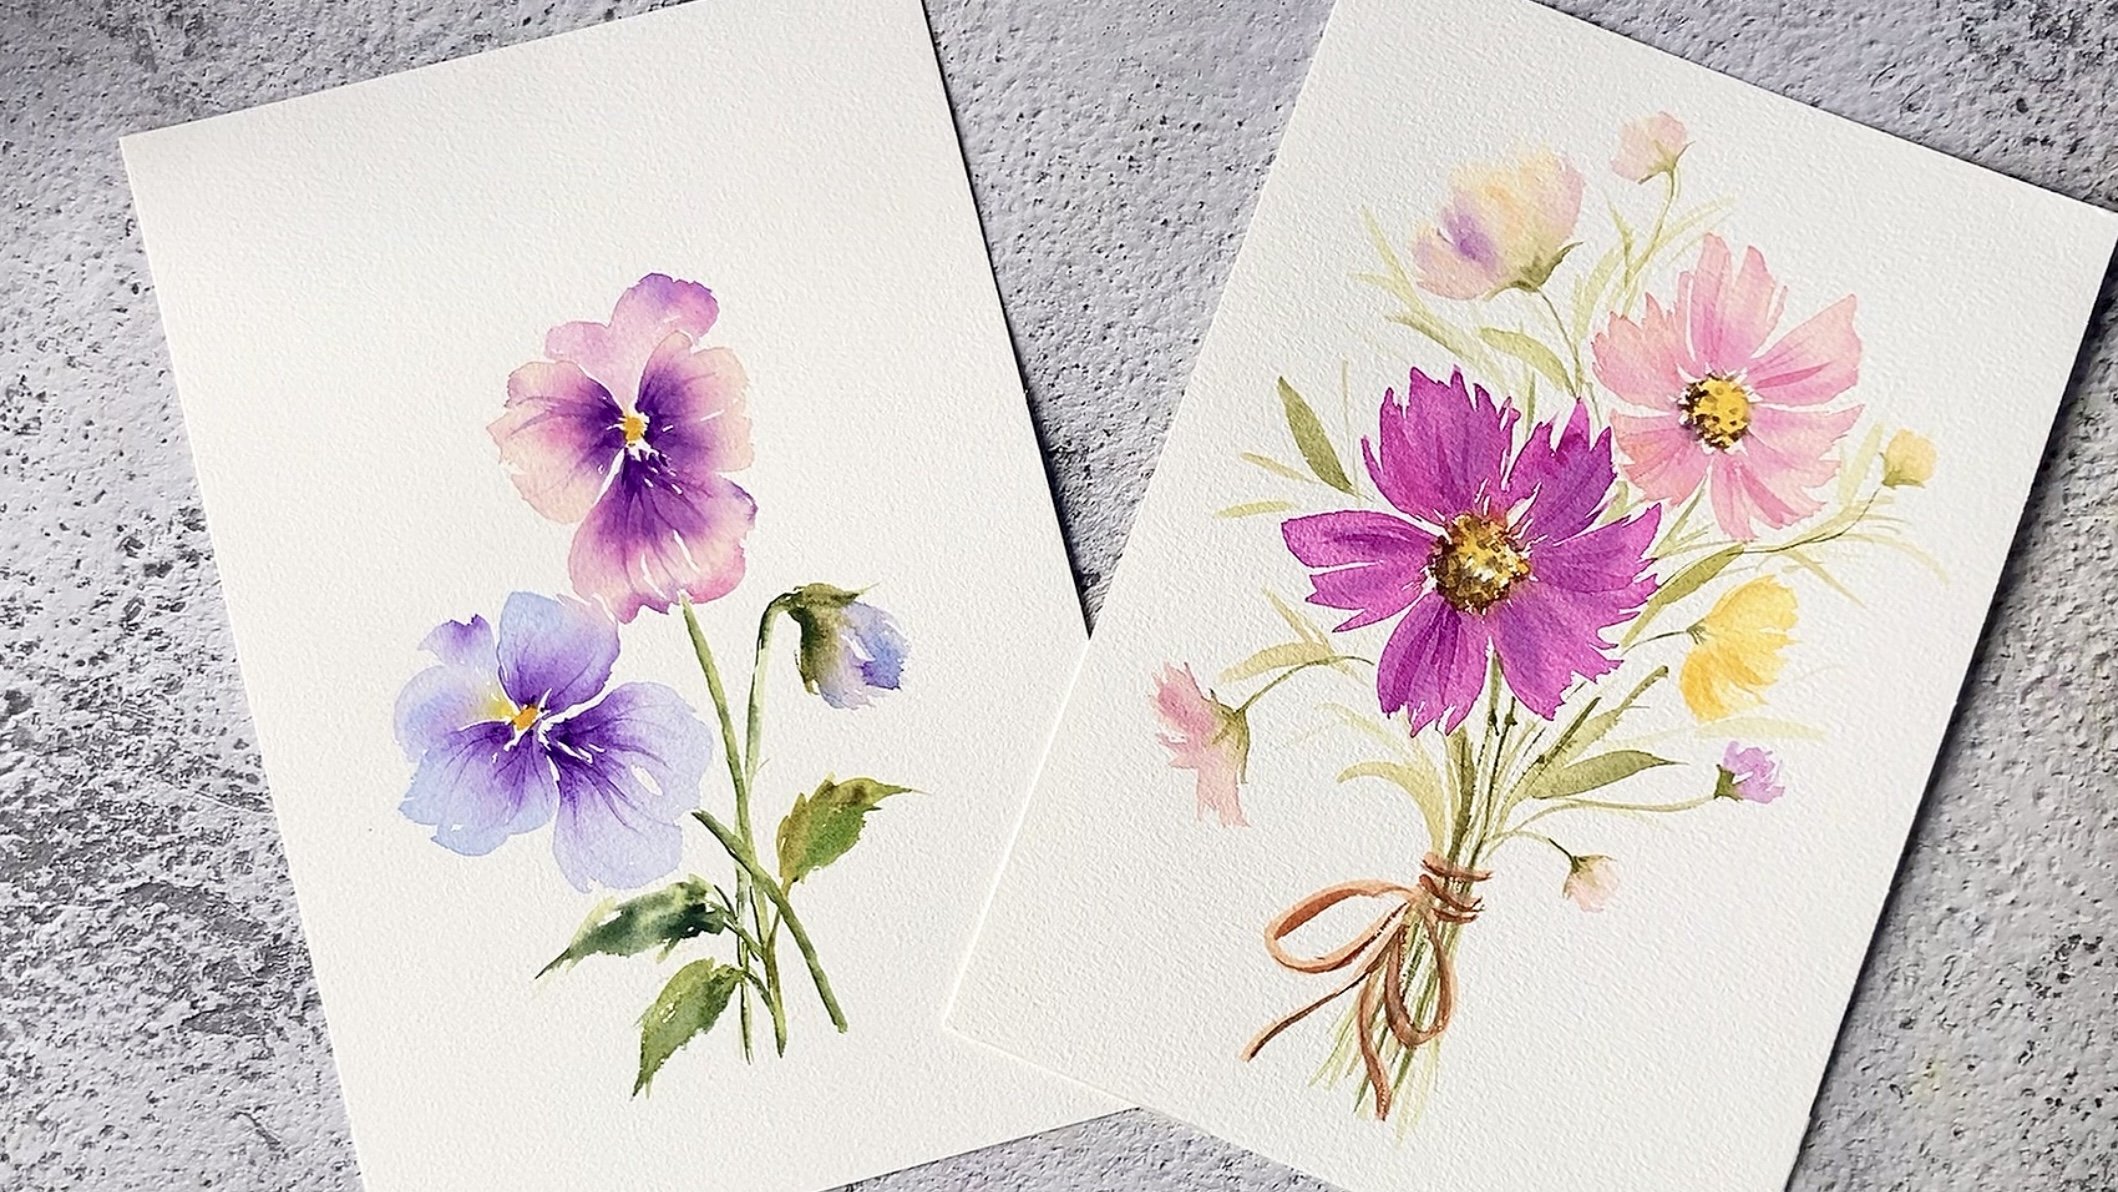
5. 1st Project : Dancing Florals: For our first class project, we are going to paint
this lovely composition of dancing florals. Now I'll be using an
A four size paper, but feel free to use a smaller size if
that's your preference. For the colors, you
can use any red, blue violet, and green
in your palette. I'll be using Quinacridons, ultramarine violet, and green
Earth from white nights. For the base color,
we are going to use a very watery and diluted
mix of ultramarine. Now let's start with
our first flower. I'm going to paint a
four petal side flower and I'll vary the
size of each petal. When painting wet on wet, it is essential to
keep the base layer wet to allow ample time for
adding subsequent colors. So to ensure the base layers, I'm going to apply
additional layers of paint. Now, let's drop in some
quinacridone rose at the base and let it bleed
into the wet petals. All right. Next, I'll drop
in some violet at the base. Now I make sure that my violet mixture has a
thicker consistency than the red mixture so
that it doesn't spread too much that it
covers up the red fragment. Now, you can also use the tip of your brush to gently
spread out the color. Next, I'm going to pull out some delicate veins with
the end of my brush. We can do this as long as
the pain is still wet. While the flower is still wet, I'm going to add in
additional violet at the base to add some
contrast to the flower. Now let's pin a delicate
stem for this flower. Okay. All right. Now for the second flower, we're going to place
it at the top, and we'll paint this following the same steps as the first one. I'll add some slight variation
to this flower by adding another petal because to create visual interest
in the composition, we want each flower to look slightly different
from the previous one. We can achieve this by
varying the number of petals, the size of the flower, and the direction of the flower. While this is still,
I'm going to drop in some violet at the base and
let it bleed into the petals. Now, let's attach a
stem to this flower. I'll paint a
slightly curved stem and let it overlap
with the first swan. All right. Now for
the next flower, we are going to place it at the lower right corner and we'll paint this facing
a different direction. Okay. Now, always make sure there's an even layer
of sheen on your paper and that there are
no water puddles before you drop in your colors. I Now I'll use the end of my brush to
pull out some fine lines. Another tip for creating an interesting composition is to place our flowers at varying
heights from each other. For our next flower, we're going to place it here in between our
first two flowers, and we'll make this a smaller flower with only three petals. Now, let's drop in
some quinad rose, followed by some violet. All right. Now, let's paint the wavy stand for this flower. And for our last flower, I'm going to pay in a
small drooping flower bud on the lower left corner. Okay, now that the
flowers are painted, let's complete the composition by adding some grass and leaves. And for added interest, let's paint the grass
in varying heights. For the final step, I'll add some delicate
veins to this flower. So here, I'm using a very light mix of
ultramarine and violet. And this concludes our p. I hope you have
enjoyed this lesson, and I look forward to
seeing your class projects.
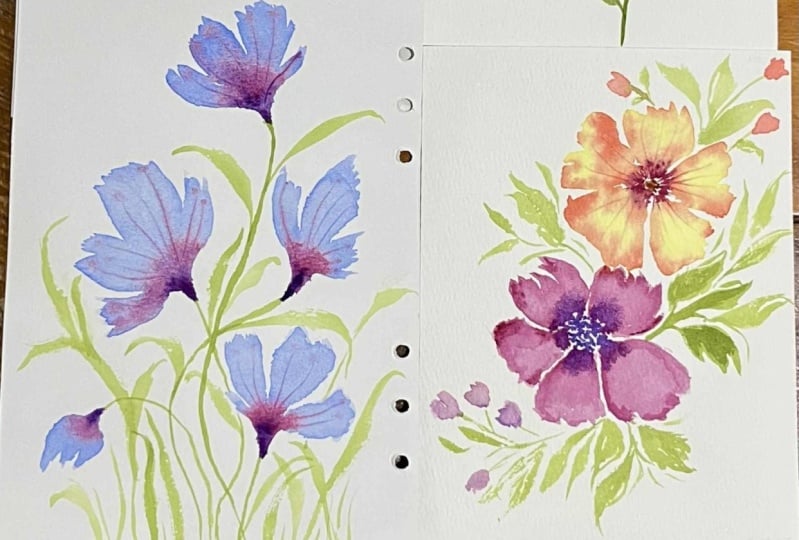
6. 2nd Project : Four Petal Flowers: For our second class project, we are going to paint
this lovely composition of four petal flowers. Here is the list of colors
that I'll be using. All right. Let's start
with our first flower. I'll be using a very watery mix of John brilliant
for the base layer. Now you can also use Naples
yellow or yellow ocher. Just make sure to use
a very light mix. I'll leave a tiny gap in between the petals just
to separate them, and we'll also leave
an empty space here for our flower center. I'm painting with
a very wet brush. This allows my brush to
glide smoothly on the paper, making it easier
for me to create these really loose and
relax brush strokes. All right, similar to
our previous lesson, I'm going to re
wet the petals to make sure they remain
wet for a longer period. So next, I'm going to drop
in some violet around the center and let it
pled into the petals. And then while
this is still wet, I'll drop in a thicker
mix of ultramarine. I make sure that
this mixture has a thicker consistency so that
it doesn't spread too much. Next, I'll pull out some veins
using the end of my brush. So I'm just using the end of my brush to gently scratch
out some fine lines. Now, at this stage, the
flower is still quite damped, so I'm going to tap in a
little bit of violet along the edges to create a subtle color variation
on the petals. This adds dimension to the flower so that it
doesn't look too flat. For our second flower, I'll use shell pink
as the base layer. If you don't have shell pink, you can use a light
and diluted mixture of any red or pink
in your palette. Before I begin, I'll mark the
flower center with a dot, so I'll know where
to place the petals. Now, when you're
working wet on wet, always make sure that there's
an even layer of sheen on the paper and that there are no water puddles before
you drop in your colors. All right. So now
I'm going to drop in some permanent yellow
deep around the center, followed by a bit of vermilion. And then I'll gently tap in a thick mix of violet
in the center, letting it bleed slightly
onto the wet petals. All right. Now, let's try
to pull out some veins. Now at this stage, the
pain is almost dry, so I'm only able to
achieve very faint lines. For more defined veins, we can use a brush to paint them in after the flower
has completely dried. With the flowers painted, let's move on to the
stems and leaves. To create depth in the painting, I'll vary the total
values of the leaves, some will be darker while
others will be lighter. We'll vary the size, shape, and direction of our leaves to add visual interest
to the composition. I'll also create different
shades of green by mixing green with some brilliant
yellow and violet. To add variation to
the composition, we paint some flower
buds on the upper left? All right. Now let's complete the painting by adding
more leaves and stems. To create depth in the painting, I'm going to paint some
lighter leaves here at the top to suggest that
they're in the background. I'll also deepen the color of these flower buds and add
some seples at the base. All right. Now for the
finishing touches, I'll include a yellow center in the first flower and introduce a touch of
violet in the second one. This concludes our lesson. I hope you've
enjoyed this lesson, and I look forward to seeing
your class projects. Okay.
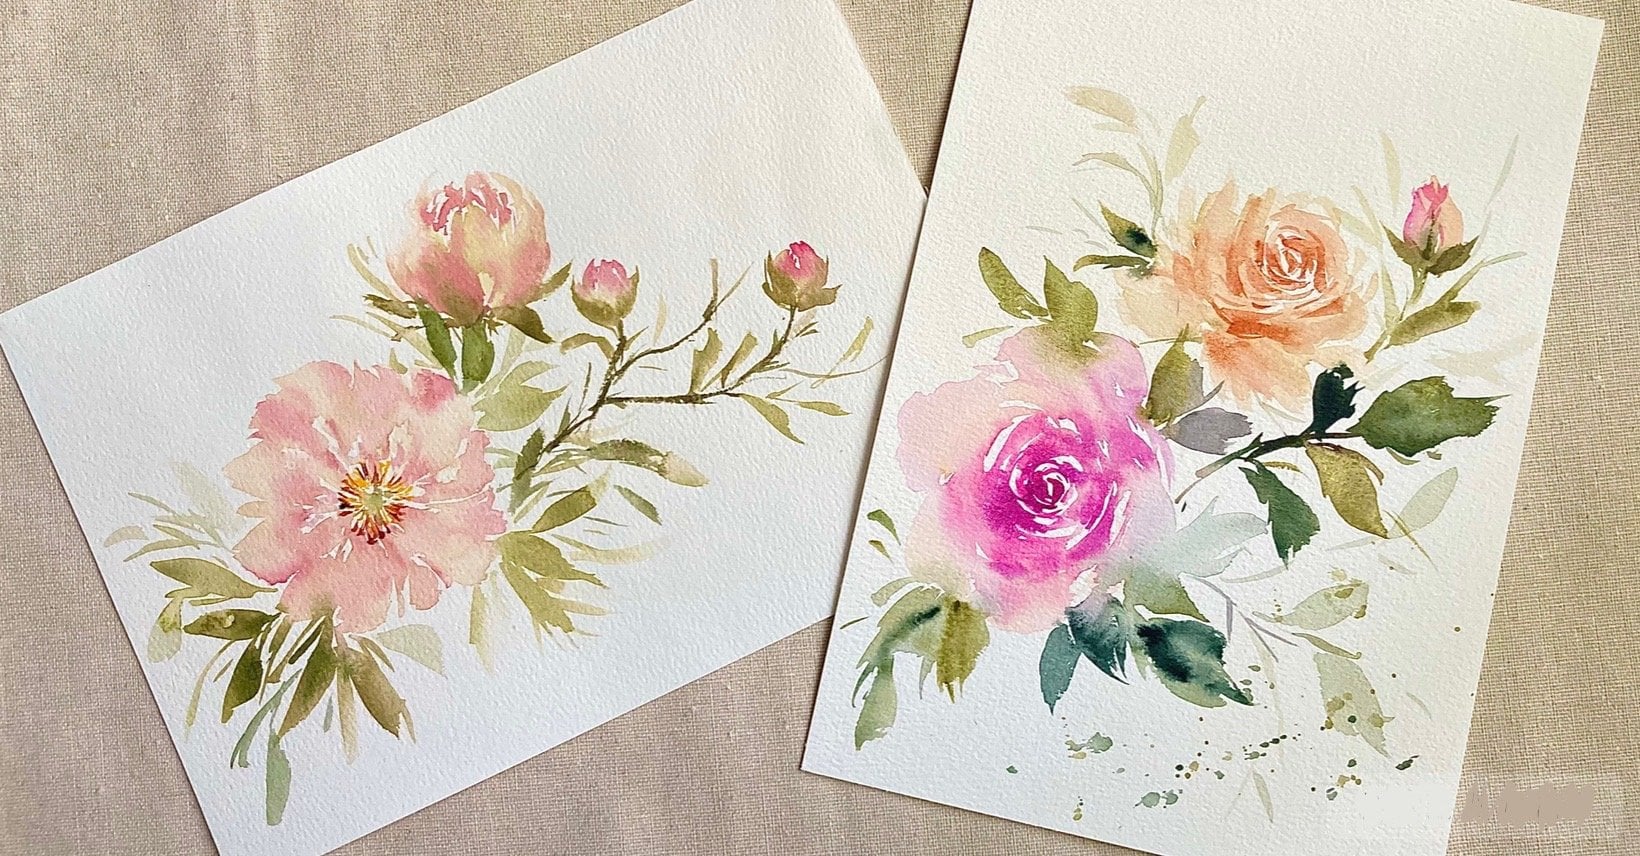
7. 3rd Project : Colorful Florals: For our final class project, we will be painting this
composition of colorful florals. Here is the list of colors
that I'll be using. For our first flower, we are going to use
a watery mixture of yellow for the base layer. I'm going to place
a dot here to mark the flower center so that I'll know where to
place my petals. I'll paint five petals
for this flower, each varying in size. Just like what we did in
the previous lessons. I'll moisten the petals again
to ensure they stay wet for a longer period so that I'll have more time
to work wet on wet. All right, now let's
drop in our first color. I'm going to tap in a bit of orange and let it blend
with the base layer. For our second color, I'm going to use carmine, and I'm going to drop
this around the center. So, this has a consistency than the orange mixture so
that it doesn't as much. All right. Next, I'm
going to fill in the center with little
dots of yellow, followed by some burnt sienna. Now at this stage,
my flower is still. So I'm going to gently sp
out some of the pigments. If your flower is
starting to dry, it's better to skip this step. Now, moving on to
our second flower, I'm going to use a watery
mixture of quinacridon magenta, and I'm going to place
this on the lower left, letting one of the petals touch the first flower so that I can get some nice color bleeds. Next, I'll apply a darker
value of acrid Mina. This will add dimension
to the flower, so it doesn't look too flat. Now, while the
pain is still wet, let's create some contrast by adding a darker
sheet of color. I mix quinacridone
magenta with a bit of violet and apply this
around the center. While also adding some
textures on the petals. I make sure the mixture
isn't too watery, so I have control over its sp. All right. Now, let's darken the flower center
with a bit of violet. I'll pin little dots of violet, letting it spread slightly
into the wet petals. Now that the flowers
are painted, let's move on to the
leaves surrounding them. So to add depth and interest
to the composition, we vary the size, tonal values and
direction of the leaves. We'll also paint
some flower buds to add variation to
the composition. And similar to our
previous lesson, we'll create different
shades of green by mixing it with yellow violet
and agon magenta. So to create a sense
of movement and flow, we'll paint our leaves cascading diagonally towards
the lower left. These lighter leaves add
depth to the composition, giving the impression that
they're in the background. All right, now let's paint
some flower buds at the top. And as a final touch, I'll add some burnt sienna
to this flower center. All right. So this
completes our painting. Don't forget to upload
your projects in the project section so that I
can give you some feedback.
8. Final Thoughts: Congratulations for
completing this class. I hope you've enjoyed
painting along with me and that you've
learned something new. I can't wait to see
your class projects, so please upload them in the project gallery so that I
can give you some feedback. Now, if you have any questions, you can post them in
the discussion section, and I'll get back to you
as soon as possible. Now, if you find
this class helpful, I would really appreciate it if you could leave
a class review. This will help this
class gain more views. Thank you so much for
taking this class. I really appreciate
your support, and I hope to see you
soon in my next class.
 Lisa Lam, Watercolor Artist