Transcripts
1. Tinkercad 3D Modeling for Beginners Create Your Designs Promo Video: Welcome to the most
exciting course in Tinkercad Tre D
modeling for beginners. TinkerCAD is a platform
that allows us to create three D designs
for three D models for rapid prototyping
or three D printing. This course is for
beginners who wanted to learn three D modeling the
easiest software in the world. So here we will be discussing how we can
exactly create an account, how we can navigate
in this platform. What are the tools available, how to create three D models by dragging and dropping into
this particular platform, and how we can exactly
manipulate them to create our own custom designs
and how we can exactly upload them for different kinds of purposes
like three D printing, prototyping, uploading for
different kinds of platforms, and even selling them online
and earn some kind of money. And here, this course
is for beginners. So if you don't understand
how to create three D models, what is all about it, and how you can exactly create
an account, don't worry. I will teach you
everything you wanted to learn as a beginner in
this particular course.
2. What is Tinkercad (Overview and Applications): Why I choose
TinkercaT for you to design and teach these kinds of three D modeling
is very simple. The Tinkercat software is an open sourced one by Autodesk. It provides us an easy
and better interface for us to learn the three D
modeling and is very simple. We don't have to worry about installing it on our computer. It's a web browser based
software so that we can directly open up any kind of browser and search for Tinkercat and then we can log into
that particular platform, and then we can start
designing them. And also, we can share those kinds of designs to
different kinds of people, and we can export them for
three different ding as well. The beauty of this
Tinkercat software is dragging and dropping the
components into our platform. That is the interesting thing in this particular software. Whatever the design we want, we can just simply drag and drop them and we can easily
manipulate them. Of course, we can have four different kinds
of manipulation tools. In this particular
Tinkercad platform, and also they are
improving their platform by adding some kind of additional tools in this
particular platform. So it is the best that if you are a beginner
in three D modeling, you can learn better things in this course for you to
become a three D modeler. And if you wanted to start your three D
printing business, you are at the right
place at the right time. So here we will be learning about how we can exactly rack
and drop three D models, how we can manipulate them, how we can navigate
in this platform. All those comprehensive things will be discussed in
this particular course.
3. Setting Up an Account: Now I'm going to show it to
you how we can exactly log into this particular
Tinkercad platform. It's very simple. We have to go to the Google and search for TinkerCAD from
any kind of browser, from your computer,
it supports on tablet or even supports with
your smartphones as well. So I strongly suggest you to use these kind of
things in your computer. So then it will be
very interesting for you to design these kinds of
things without any hassles. So here you can start with
this Tinkercat platform. If you click there and it
will ask you to sign in. So if you sign in, all of
your three D models and your data will be stored on
your particular account. So that is why we
have to sign in. If you are new to this particular autodesk
Tinkercat platform, you have to sign up firstly. And when we are signing up, if you are a learner, you can try to start with
your personal account, or if you are a teacher, you have to start with
this particular step. Educators start here because
you will be able to monitor, students can provide
them activities, homeworks, likewise,
whatever you design on your account will be available on your students
account as well. So if you are a teacher, you can go with this
particular account. If you are a student, the teacher might provide
you some class codes to you, then you can login by
clicking them their link. But for now, if you are a hobbyist or if you
are a DIY expert, you can start with creating
a personal account. Here it will ask you to sign up with your email or sign up with your Google account or sign
in with Apple account. Now I'm going to go with
the sign up with email. Now I'm going to select
my country over here. And my birthday, and I'm
going to click next. Now here we have to
insert our email account. Now I'm going to insert my
email account in a password. After you have inserted
your email account, this is the interface
that you'll be having. Then if you want their emails
to be received by you, you can click this
one and click Done. And this is the platform
after you have logged in. And here, if you are using
it for the personal account, you can go to the
classes, and if you want, you can join a class that is shared by different teachers. Or if you are a teacher, you should register it with
an educational account. So then you'll be able to create different
kinds of classrooms and then monitor your
students activities in this particular platform. So now I'm going to go
with the home button. If you don't see this
particular dashboard, you can click this
logo or icon here, and then you'll be having
this particular dashboard. In this dashboard,
what we have to do is we have to go
to the homepage. Under the home, we can
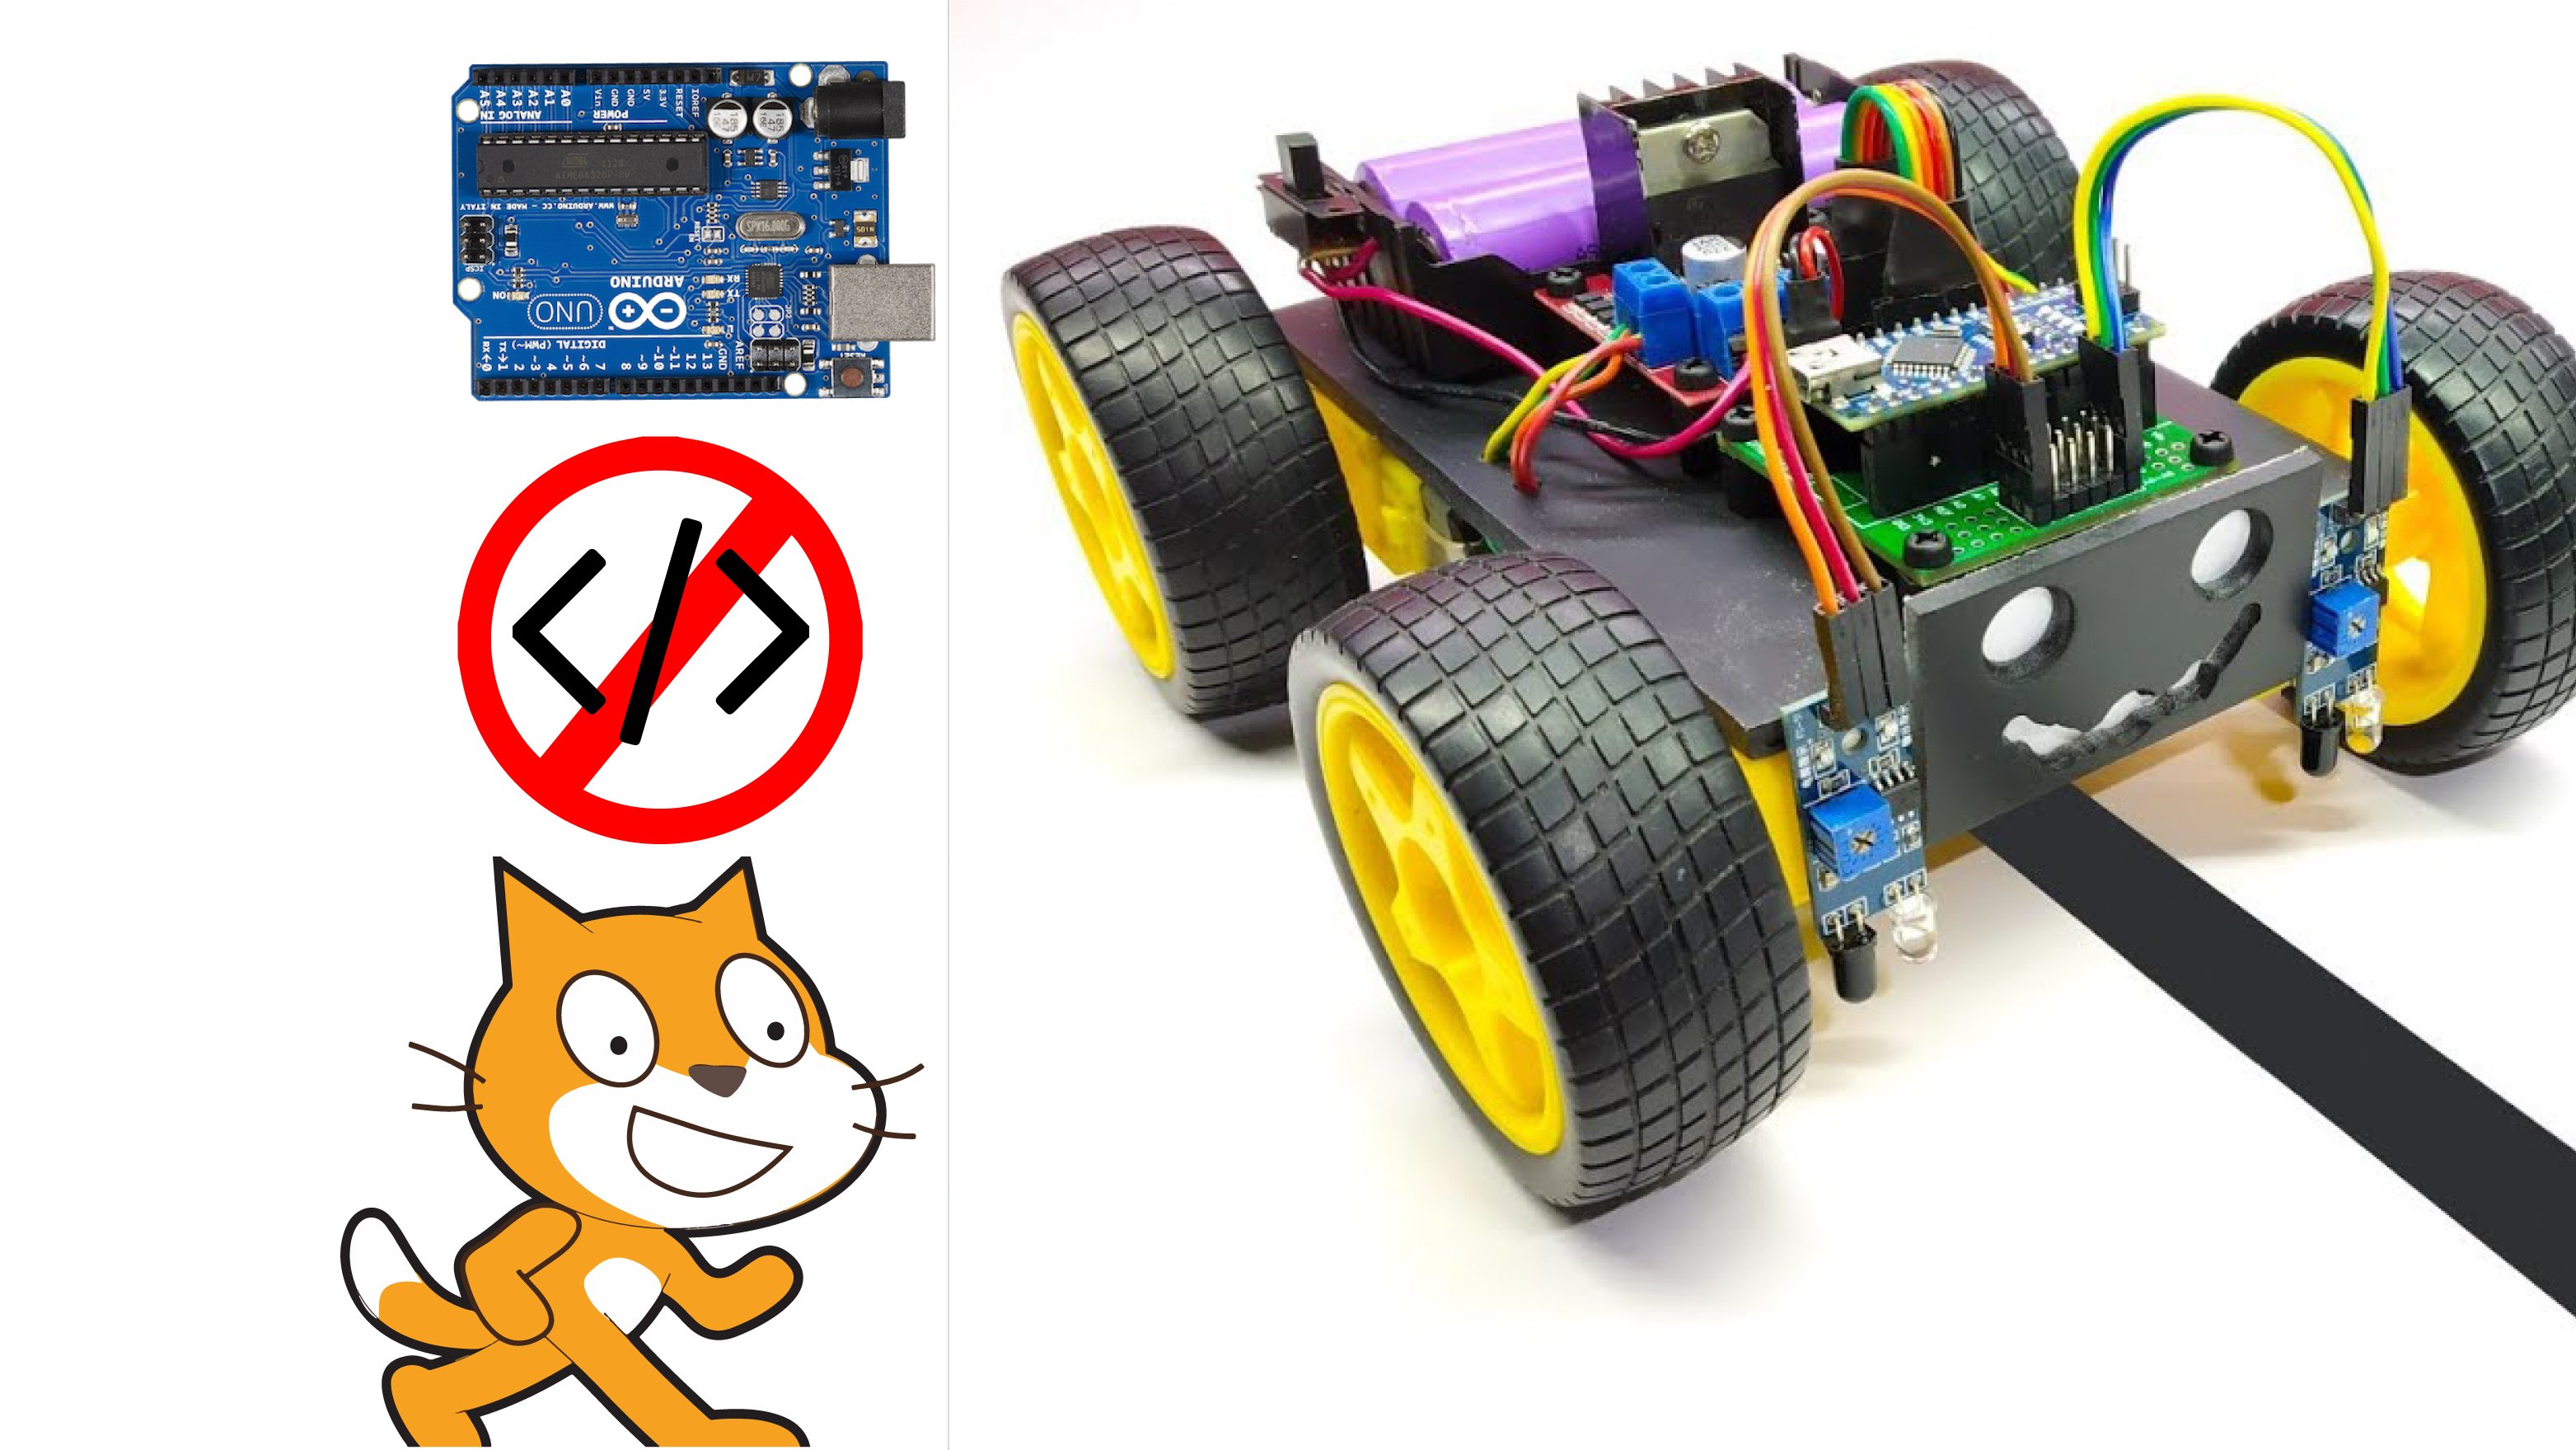
create three D designs, circuits, and code blocks. So in this particular course, we are only going to discuss
about three D designs. If you are interested in
learning about the circuits, try my profile and on my course, I'll do robotics with scratch language programming
in Tinkercat course. You can visit that
course and learn from them if you are
interested in circuits. But now in this
particular course, we are going to design
three D models. Therefore, I have to click
this particular icon. So then the platform
will provide you the workspace for you to design your three D
models over here.
4. Understanding Navigation (Zoom, Pan, Rotate): This is the interface after we have logged into the
Tinkercat platform. And if we are going to
create three D models, we have to click Create
and click T D Design. And then it will
allow us to design three D models on its platform. And here, you can notice
that on this platform, this is their workspace, and here on the bottom,
the work plane. And whatever the models, we are drag and drop it, and then it will be set onto that particular work
plane. Like this. And here you can notice that on the top left hand corner
is the project name. We wanted to name whatever
the project name we wanted to name it and just
name it as project number one. And then I can click some bls
to edit that first of all, we have to understand
about the navigation in this particular
platform. It's very simple. We can simply rotate our
mouse wheel up to zoom in, down to zoom out. It's very simple
if we are having our mouse cursor on
wherever the place and if we rotate our mouse wheel up to zoom in on that
particular cursor area, and then if I rotate mouse wheel downwards and then
it will be zoomed out. So that is the zoom in
and zoom out operation. If we are going to rotate this particular work
plane or the work space, I can simply right click on that area wherever
I wanted to rotate. I can simply right click it, and then I can
move my mouse like this to rotate this
particular area. Or I can simply use this particular cube to rotate the entire
workspace like this. Then the third thing we have to understand is panning in
this particular platform. Under the navigations, the panning operation
is done by pressing the mouse middle button and moving our mouse
cursor like this, then we can pan on
this particular area. It's very important
for us to learn about these kinds of
navigations used in Tinkercad for us to learn about the advanced things if you are a beginner in Tinkercad
or three D model.
5. Exploring the Interface: Here we are going to learn about these particular tools
in TinkercatPlatform. First of all, if I click this particular object
or the component, and if I press this one and
then it will be copied. And if I press this button, and then the component will
be pasted down like this, or can simply select a component and press
Control plus C on my keyboard and press
Control plus on my keyboard to paste that
particular component. Copy and paste are very
simple and straightforward, but this particular
thing is not like that. It's a duplicate button. Let's say I wanted to have the same component to be
repeated several times. So then that is
why I have to use this particular duplicate
and repeat option. So it's very simple. I can press this component, and then if I click that one, and then it will be duplicated onto that particular element. And now if I move that
element like this, I'm just moving it in one
direction so that I'm going to press Shift on my keyboard and drag
and drop like this, moving 30 millimeters apart from that particular component and then without clicking
anywhere else, I'm just going to
press this button, then the same operation
will be repeated. That is why we have the
duplicate option so that the same operation
will be repeated like this. So that is the duplicate
option for you or we can simply press that component
and Control plus B, then it will be duplicated and move it somewhere
else wherever you wanted to place the component
and press Control plus B again and again and again to repeat the components or
the same process like this, then it will be
patterned like this. Here, if you want some
components to be deleted, first of all, we have to
select a particular component. That is why the delete option is not available
for us right now. And then for selecting, we have three
different options for us to select a particular
component or components. If I left click my mouse and then the
component will be selected, or the second option is I can
draw a rectangle like this. Then all the components that the rectangle
touches be selected. Or the third option to
select is I can simply press Shift on my keyboard and select whatever the component
I wanted to select, and then those components
will be selected. After selecting
those components, I can simply delete to delete that particular
component or components, or I can simply select a component and
press delete key on my keyboard to delete that
particular component. Likewise, you can simply select components and
delete very quickly. Let's say you have
done some mistakes on this particular
platform and mistakenly, the component is deleted. You can simply recall them by clicking this undo
button like this, or you can simply
press Control plus Z on your keyboard to undo
that particular thing. Or if you wanted to redo that same operation
and then you can click this particular romarO you
can simply press Control plus Y on your keyboard to redo that
particular operation. You can notice that we
have a cube like this. This cube, in particular, it is used to navigate in this particular
work plane like this. We can change the camera of
this particular workspace. Camera is like our screen facing on to this particular
work plane like this. If we wanted to change its orientation of the camera
and then we can simply click like this and
then we can move our mouse like this to
change its viewpoint. Or we can simply press
this top button. So then it will be seen
from the work plane. So then the top view will
be appearing like this. Or we can simply
press this button to be seen from this
particular viewpoint. If you wanted to view it
from different viewpoints, we can simply press the
front view or right view to view this particular workspace
onto different angles. And then here, these tools are
very simple to understand. They are home button, and let's say you are lost on somewhere else by zooming
in or zooming out, and then if you press that one, and then it will be set to the home view of this
particular workspace. Then similarly, if you
get lost on somewhere else and you wanted to see all the components in one view, you can simply press this one. So then it will be set
to that particular view. Let's say you have
the components like here and you get lost on
this particular view, and then I can simply
press this one. So then it will not going
to set to the home view, but it will be set to fit all
the components in one view. That is the fit all in view
or you can simply press F on your keyboard and if
you wanted to zoom in, of course, we can click this particular button to zoom in and if I
click this button, and then it will be
zoomed out as well. Here in the tools over here, we have a final tool called as switch to flat view or
switch to perspective view. Right? So there are
two different kinds of options available on
this Tinkercad platform. It's like if I click this one and you can notice
that this edge, this line, this edge, this particular line,
both lines are parallel. That means they will not
going to meet each other. They are converging each other. But if I click this turn
on the perspective view, and then you can notice that this is under the
perspective view. Right? You can notice that these two lines will be converging and then they
will meet each other. Of course, they won't
meet each other, but it looks like they will
be meeting each other. So that is the perspective view. If you want, you can
turn it on or turn it off based on your different
three remodeling conditions. It can be done like that.
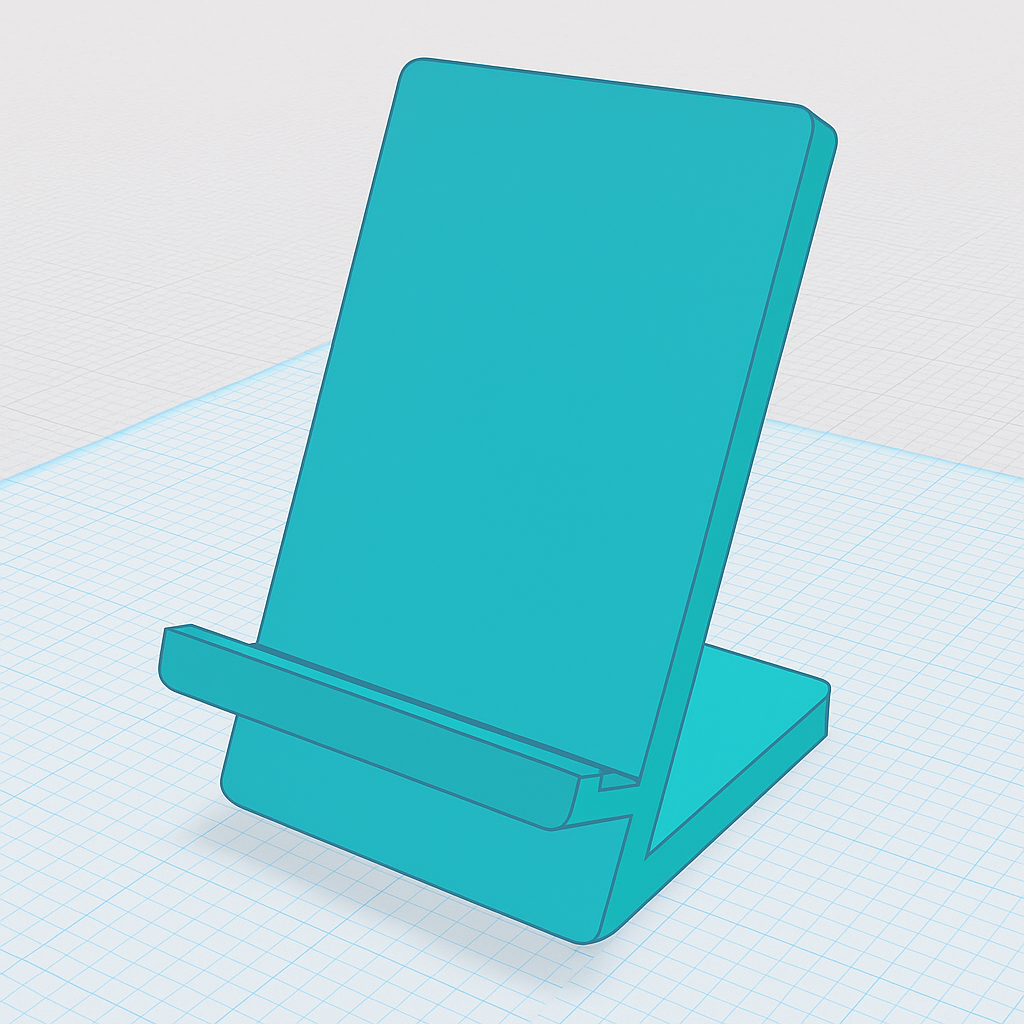
6. Working with Basic Shapes (Box, Cylinder, Sphere, etc: Now we are going to work with
the basic shapes over here. So here we have a box shape. So here you can notice that if I select this
particular component, if I click this
particular point and I can be able to edit
its width like this, so then I can click
its width and adjust it to 40 and click Enter. So then it will be set to 40. So if I wanted to
adjust its length, I can click this one, and then I can change it to 30, and then that length
is adjusted like this. Of course, similarly, you
can adjust the height so that if you are going to adjust
the length and the width, you can select these
four black dots on this particular shape. And if you wanted to
adjust its height, you can click this
particular white dot and then it will be
available for you to edit the height
and then I can set that height to 50 or
whatever the height you wanted to set that up. Then after you can click this particular option to rotate this model and then
once you have clicked that, and then you can drag
and drop like this, how much is the angle you
wanted to set that up, maybe -90 degrees or you can simply click over here
and enter maybe plus or -90 degrees or whatever the angle you wanted
to rotate let's say like 45 degrees and presenter
and then it will be set to 40 degree
angles of rotation. And then this
particular option for the rotate belongs
to the other plane, like I press this one
and drag it like this. As you can notice that we can rotate on that particular plane. So I hope you have understood
about those kinds of rotations in this
Tinkercat platform. And then this conical
shaped button is used to elevate that particular
model from the workplane. That is why we can use that one. So you can notice
that if you want to elevate that
particular model from that particular
workplane and then you can notice that it can
be adjusted like this. And then you can
notice that if I click this particular box and wreck
it like this and then here, I can change the value, how much it should
be elevated from the bottom plane
or the work plane. Let's say, I'm going
to insert it 25. Now you can notice
that it is 25, and this one is showing the increment value of that from the previous state of
that particular shape, likewise, now you can
notice that here, I'm just decreasing
the elevation by five units or the units
are in millimeters. And if I click that
and just elevating it, incrementing it
by 5 millimeters. So that is what it is
showing over here, and this one is the
total elevation from the work plane, right? So hope you have understood
about those things, and that is the
box shape for you. And then if I dragon drop
this particular one, and then you will be having different methods of
changing its values, if I click this particular one, I can set it to whatever
the dimension I want. And then if I click
this particular one, I can change its dimension,
whatever I like it. And then, of course, similar to the box shape, I can increase or decrease
its height like this, and then of course,
I can elevate by pressing this conical shape. Here, the third shape that
we can learn is sphere. Spherical shapes can also be obtained and
edited like this. I can click this one to edit its width like 30 and
click its length, so then it can be
changed to 30 like this. Now you can notice
that the shape is manipulated like this,
non linear spherical. So here we can change its value. So whatever the value you want, you can change it
like a rugby bowl or something in a different
shape oval shaped one. So we can change its values, and that is how we
manipulate those kinds of shapes in the
Tinker cat platform. Likewise, as an exercise, you can drag and drop all of the components
into the Tinkercat then you have to
do this practice. You have to dragon drop each and every component
onto your work plane, and then you have
to try and edit all the values that are
available in Tinkercat platform. Let's say, this is the exercise, you have to dragon drop
this particular component, then you have to edit this value and this value and this value. All the values should be
manually edited by yourself. So that is the exercise
and providing it to you. You have do that, and then you can take a
screenshot of that one, and then you can submit it as an exercise for this
particular lesson. So then you will understand
how we can dragon drop and edit all the elements that are available in a
Tinkercad platform.
7. Mirror and Cruise Tools: When we are modeling these
kinds of three D models, what we have to do is we have to model only one side of
that particular area, and then the rest of the sizes should be mirrored and obtained. That is the easy way to have
these components like this. I'm just going to click
this particular object and then I'm going to duplicate
that particular object. Now you can notice that the duplicated
object is selected. Now if I click this
mirror option and then it will be having these
three arrow marks. If I click this
particular arrow mark, what will happen is that object, that the duplicated
object will be mirrored along with
this particular plane. So if I click this one and then it will be mirrored like this. So after you have
mirrored those objects, you can manually press
shift on your keyboard, and then you can
adjust it to fit it onto that particular one. So then it should be
-47.5 millimeters. Then it will be aligning
together like this. And then I can select both of the components
and click group, then this particular slot
can be created easily. That is how we can create
different kinds of objects in this
particular platform by using this mirror option. And of course, if I want, I can click copy and
paste the component, and then I can rotate this particular
component 90 degrees and I can select
these two components and then I can align
them together like this. Right. So likewise,
you can create different kinds of object and
different kinds of things. I just throwing you
some kinds of ideas, how we can exactly create different kinds of models
and manipulate them. And you can learn from this, and you can try to
practice creating different kinds of
shames and manipulate them to get the three D models that you wanted to have it. Right? And then here
you can notice that I have this option to
be cruise option. You wanted to move
this particular or this particular object on
top of this particular one. So then you can
click this object. Then you can click this
object and click Cruise. So then it will be available where you
want to cruise that, and then you can click it, and then you can
paste it on here. So then it will be set to
that particular point. So that is the cruise option. You can place dragon rope those components
like this and then after you have
done that and then after I need to click this
object and this object, then I need to align it. Then it will be
set in the center. Maybe I can edit
its radius to 15, this one to 15 as well. Then again, I need to realign it with the center like this. I'm just going to remove the bewel then it
will look like this. Right? So that is
the cruise option. If you wanted to move some
objects like this object, this object is to be moved. So then you can select where
you wanted to cruise it maybe on this surface or on this surface
or on this surface, wherever the surface
you wanted to move that particular
object in it, you can select that
cruise option, right? So after you have done
cruising that one, and then you can
manually align them
8. Scaling, Rotating and Moving: Together. Now we are going
to learn about scaling, rotating and moving solid bodies in Tinkercad. It's very simple. Maybe we can have our
solid bodies over here and if we wanted to
scale it, it's very simple. We can click this particular
dt and scale it like this. That is why we have white
square shaped boxes like this and then we can drag it like this
to scale them up. When we are scaling, if you press Shift key on
your keyboard, and scale it. And then what will happen
is it will uniformly scale. That means it will scale
in all three directions. So then the body will
be uniformly scaled. Likewise, if you reduce it, maybe if you press
whatever the position, whatever the white dots
and scale it up or down when you are pressing
shift on your keyboard. Then it will be scaled up uniformly or scaled
down uniformly. And here, if you don't want to uniformly
scale up and down, and then you can do them without pressing the shift
key on your keyboard. Likewise, we can set up
the dimensions like this, and here and there, we
can adjust it like this. Then the rotating function can
be done by using this one, then we can click
this particular icon, and then we can press and
hold our mouse button, and we can rotate it wherever the position or wherever
the angle we want. And then we can stop pressing
our left mouse button. So then it will be
stopped at its position. And here you can notice that this is for the
rotation of this angle. That means in this
particular plane, that means along with
the front plane, it will be rotated. If I press this icon
here you can notice that if I wanted to rotate
along with the right plane, I can use this particular
arrow and rotate it. Then it will be
rotated like this. You are not attaining the precise amount
of degree rotation, and then you can
manually adjust it. You press Shift on your
keyboard and then it will rotate on 45 degrees
of angles each step. So if you don't want
to achieve them, you can click this
particular angle degree and then you can place it
whatever the angle you wanted to set that up. After we have done
rotating them, and then we can learn move
option, it's very simple. We can select this
particular object and move it wherever
the position we wanted to move it and place it by dragging and dropping
it wherever we want, or we can try to insert the dimension like
-40 and here plus 40, then it will be set to its precise value wherever
we wanted to move it. Or when we are moving, we can use the shift
key on our keyboard. So then what will happen is it will move in only one axis, like it will move
only on this axis. It won't move in two directions. It will only move
in one direction. So if I wanted to move another direction like
an L shaped direction. So what I can do is I can stop pressing the
left mouse button, and again, I can press
Shift on my keyboard, and again, I can do that one. So then what will
happen is we can make that kind of path
of this movement, right? So it's very simple. You can press Shift on your keyboard and move
the object like this. If you want the precise
movement, of course, you can try to insert
the values over here, so then it will be precise. Right. So that is the scaling, rotating and moving of these elements or the objects
in Tinkercad platform. And the very special
key is shift key. If you are pressing
the shift key, it will move only
on one direction. If you are pressing the
shift key while rotating, it will rotate 45
degrees of angle. And if you are pressing Shift key when you
are scaling it, it will uniformly scale, right? So those are the three things we need to understand when we are doing these kinds of
operations in Tinkercad.
9. Using the Workplane Tool: Now we are going to learn
about the work plane, too. So the work plane you have
currently over here, right? Let's say you are going to
have a shape like this, right? And then you want to have another box on top of this
particular box, right? In order to do that, we can have two different
kinds of options, like let's say you are having
this cylinder over here, and then you can select
this cruise option and move that particular point
and place it over here. So then what will happen is
that particular cylinder is set on this particular surface or the plane over here, right? Or similarly, what you can do is you can click this
work plane tool, and then you can
set that work plane onto this particular
phase, right? So if I click that,
this is how it will become as you can notice that this plane was my previous plane and this new plane is
my current workplne. Whatever the component
I drag and drop, all those components
will be inserted on this particular
current workplane. Right? So that is the option
of Work plane tool. Maybe that work plane can be set whatever the surface
you wanted to place it. Or if you wanted to go back
to that previous workplane, you can simply click this one and select your previous plane. So they need to be set
to your old workplane. Or you can change your
work plane like this. Then what will happen is
now you can notice that the plane has been shift
at 90 degrees rotation, and then whatever the
components that you and drop, it will be set in this
particular new plane. Then you can select multiple objects over
here and then you can align them to be fitting
in the middle like this. Now I'm going to click
this one and set back to the older
work plane, right? After you have setting up
these kinds of things, and then you can
mirror these kinds of objects or you can manipulate
them whatever you want, you can have those things. And here, now you
can notice that after I have made
all those changes, and then those two components were crossing that
particular work plane or maybe this ball on here is
floating on the workspace. So now what I'm going to
do is I'm going to select that object and press
B on my keyboard, and then what will happen
is the ball will be settled down onto that current
work plane that I'm on. So here I'm going to
group these two objects, Control plus G. And then
after I have group that objects you can click this
and press B on my keyboard. So then it will
be settle down to the ground of this current
work plane, right? That is how we can have
different kinds of floating objects and settle down to the work
plane like this. So if you are three D
printing these objects, you have to do this one
so if you didn't do them, and then you will be
you'll be having to apply some kind of
supports to make that three prints happen because
if it is floating in the environment and then the three D printers cannot
be able to print them. So we have to add supports
when we are three printing.
10. Importing 2D Images and Converting to 3D: Now we are going to learn about creating three D models from two D designs
or two D images. Okay, this is my
particular logo. So what I'm going to do is this particular logo
is in PNG file. PNG files will not going
to be supported on Clinical cat platform to
be inserted as images. So what I'm going to do is vert this particular PNG file into an SVG file or maybe whatever
the image file you have it, you have to convert to SVG file. So that I can go to the PNG
file to SVG file Converter. I can Google it, then you
can notice that conversio. This website offers you
the free conversion. Then what I'm going to do is
I'm going to choose my file for convert that image or
the logo file into SVG file. So now I have selected
my particular logo, PNG file, and then I'm going
to convert it to SWGFle. You can notice that it has
been selected as SWIGFle. Now what I'm going to do is
I'm going to click Convert. So then that particular PNG file will be converted to SWGFle. Right? After it has
been converted, what I can do is I can
download this SVG file and insert that SVG file into the three D modeling
TinkercaTPlatform. I'm going to click Download, so they need to be
downloaded like this, and now I'm going to go
to the TinkerCATPlatform, and then click Import
three D files. We have to click this
Import three D files, and here you can
not that Tinkercat supports SDL OBG SVG files, SVG file is a two d file, we can insert it,
and then we can extend it or extrude that one. Right? Here OBJ and STL files
are three D model files. Maybe if you have
already created three D model files in different softwares or
different platforms, we can convert them as
STL files or OBJ files, and then we can directly import them into the
Tinkercat platform. That is a better option in
Tinkercat for us to insert other platform three D models or other three D files into
this particular platform. Now I'm going to
click that SVG file, so I'm going to
click Choose File. And I'm going to select that particular SVG file that I have downloaded
from the Internet. So this is how the platform
looks like when we are importing those two defiles into this particular platform, and it asks us how you wanted to center it art or
artboard, right? So artboard means the entire
outline of that image, like how much is the resolution
of the image, right? So here, art is
particularly art. That means only those
kinds of lines, right? So how you wanted
to insert them? What is the center
of that, right? So here we can select
based on your images. So now I'm going to select art and here it asks you to scale, how much is the scale
that you want to apply, maybe you can scale it up, maybe increase it more
than 100 or decrease it. So then what will
happen is the image or the three D model file
will be scaled up or down, and just going to set it to 20%. And here you can change these dimensions if
you want, right? Or you can set these
percentages like this. I'm just going to
apply the dimensions, then it will be easy for
us to three D print. So then I'm going to place
it as 30 millimeters. So here I'm going
to click Import, then what will happen is
30 millimeter length of that particular image will be inserted into this
platform like this, right? So here you can notice
that this is how we can easily import our logos or the texts or the two d images into this
particular three D platform. And after we have inserted them, we can click that
particular item and we scale it uniformly like pressing this one
or scaling it down, or we can increase its height or the extrusion height up
and down like this, right? So here I'm going to place
it as 3 millimeters. So this is my logo. Here we can export
this as an STL file. So then we can three D print these kinds of logos
very simply, very easy. So here if you are running
a business and you want to three D print your logos and supply it for your
marketing purpose, of course, you can do this by using this particular platform. You have to obtain the
PNG file of your logo, and then you can
convert it as SVG file, and then that particular
SVG file should be imported into this
particular platform, and then you can
adjust its scale how much is the length and the width you
wanted to have it, and then you can directly
import them into your platform, and then you can click Export to upload it for three
D printing, right? So it's very simple
and straightforward. We can simply upload
our three D model.
11. Adding Text and Embellishments: Now we are going
to insert text and embellishments onto the
Tinkercat platform. Maybe if we are going
to create some kind of texts that to be printed
on our platform, maybe custom keychains,
custom name boards, customized things, it's very
simple and easy to forward. So here you can notice that I have created an
object like this. Now we are going to insert text and emblishments on
this particular model. It's very simple.
What we are going to do is we have to
insert this text box, and you can notice that if I
drag and drop this text box and it will ask me to place
where we have to place it, if I place it on here, and then it will be
on the wordplay. If I place it over here, and then what will happen
is the text will be on this particular surface. That means the top surface of this particular three D
model over here, right? Now, what we have to do is we have to scale
them like this. If I press Shift key on
my keyboard and then it will be uniformly
scaled up and down. But rather than uniformly
scaling them up and down, we can simply select
the dimensions, how much we wanted to have. I can click that text
and then here I can change the text whatever
I wanted to change it. I'm going to type
it as Roboto tech, and here you can notice that it has been expanded like this. Now we have to reduce the
dimension like this so that we have to click
this particular item and we have to change it to 65. Then what will happen
is it will be set to 65 millimeters
of width like that. Now we can manually
align them like this, click align like
this. Center align. So now you can notice that those two objects are
aligned like this, and then I can click this
Roboto tech object, text, and then I can move it like 5 millimeters apart from that. So now you can notice that the text has been
inserted like this, but it looks like annoying, so that I'm going to decrease the height of this
particular text, maybe one millimeters like this. So now you can notice that
I have created an emboss. Text like this, that means
embossing means it has been set on top of that particular model,
right over here. What I'm going to do is I'm
going to select them all, and then I'm going
to click group. So then it will be a
single object, right? So the entire thing is a single
object like this, right? Instead of that, I'm going to click this one and ungroup it. And here you can notice
that this text is embossed. Now I'm going to debosit or engrave that on this
particular theory model. To do that, what I'm going to do is I'm going to
make it as a whole. After making it as a whole, I can press this conical
shaped one and then I can decrease that size to
minus one millimeters. So then what will
happen is it will go inside of that
particular three D model, and then it will cut down that surface if I group
them down, right? So now I'm going to click group. So then you can notice that that has been engraved
like laser cutting. So this is how we can
create some kind of texts or maybe if you wanted to insert your text or customized things, maybe birthday gifts,
wedding gifts, we can try these kinds of three D models and maybe we
can sell them online as well. I'm going to click group, and here I'm going to click
this particular text. And here you can notice
that the font we have in TinkerCAD is limited, maybe SAS and SAS
Mono and Sheriff. So these are the fonts that we are currently having
in TinkerCAD. I don't know if they might
include more fonts in future. If the font is not
good in Tinkercad, what you can do is you can open Canva or different
kinds of softwares, and then you can type
whatever the customized typing maybe you branding
or maybe your namings, and then you can make
them as PNG files. You can download
them as PNG file. Or you can download if
you are using Canva, you can directly download
them as SVG files, and then those SVG
files can be inserted into this particular
platform as two D models, and then they can be converted
to the three D models, and then those kinds
of things can be inserted onto this
platform as well. You can try my profile, and then I have graphic
designing course in Canva. So then that course
will be useful for you to learn about
these kinds of graphic designing works can be learned from that
particular course. That's a separate thing. If you want, you can try
check out my profile. So that is the text option
for you. It's very simple. So then we can have this kind of thing and we can group it. And then another option
that is available in here is emblishment means
scribble option like here. So here, if I click this one and dragon
drop it like this, I can draw some kinds of designs whatever the
thoughts I have in my mind, I can draw it, and then
that can be three demdeled. If I draw a tree or maybe
we can say it as a doodles, maybe these kinds of trees
can be three demdeled. So here these are the tools. If you don't like any strokes, you can click Undo and
then if you want, again, you can click redo, and this is the pencil mark, and here you can take it
for drawing operations. And here if you wanted
to delete something, you can click this one,
then it will be deleted. And here, this one, this star is used to design some kind of
designs like this. So they need to be
designed like this. If you don't want them or
if you want to delete them, you can use this eras
with shape option. So then all those things
will be deleted like this. So those are the
options available for this scribble option
in Tinkercad. After you have done editing this particular sketch
or the doodling, you can click Done, and then that particular one can be inserted into this
particular platform, and then after that, we
can increase the height, whatever we wanted
to adjust it, right? So that is the doodle
or scribble option you can try with your tablets. Roving with your
mouse will be hard for you to do these
kinds of doodles. Maybe you can try your tablet and throw some
kinds of drawings. Right. Of course, after we have drawn this particular one, if you wanted to insert it on whatever the
surface you wanted to, if you wanted to move it, you can click this and click this particular
cruise option, and then you can move this one
up to this surface, right? So then what will happen is that particular
design or the doodle will be applied onto this particular surface
like this, right? So then here you can play around with these
kinds of things. It's very simple
and easy to learn. If you have any question, do not hesitate to ask it to me. I will always help my students. So if you have any question
or any clarifications, you can put a question
on the sections below, and then I will try to answer your questions as
soon as possible.
12. Create a Custom Keychain: Now we are going to create a custom key chain as a
hands on practice session. This is the interface. I'm going to name it
as custom key chain. And here in this key chain, I'm going to insert a box
like this and I'm going to expand that particular box for three D printing operation. Then what I can do is I
can insert the dimensions like maybe 80 millimeters
by 30 millimeters. Here I'm going to make it as
4 millimeters of thickness, and I'm going to insert this particular
cylinder like this. I'm going to mark the
dimensions like 30 30. That means 30
millimeters of diameter. And then I'm going to
group them before that. I'm going to align
them like this. After aligning them,
I'm going to make it as apart from 65 millimeters, then it will be like this. Now I'm going to mark this
dimension 4 millimeters. Now I'm going to insert the whole by adding this
particular hole like cylinder and then I'm going to make these custom
dimensions like 20 by 20. Then the diameter will be 20. Now I'm going to align
these two things together like this. The center. So it's already in the center. Since those two dots, this dot is in gray color. That means that's already
in the center aligned. Now I'm going to
move this part by pressing the shift on
my keyboard and moving it from 70 millimeters apart
from that particular edge. Then this is how
it will look like. Now I'm going to make
these two parts together. Then it will be added
with the whole like this. Now what I'm going to
do is I'm going to insert a custom keychain.
That's the name of this. Now I'm going to insert a
text box on top of that, and now I'm going
to place it on top of this particular keychain. Then it will be Roboto tech. I'm going to ungroup it, and now I'm going to
edit this text box. It should be in capital letters. I wanted to make
the 65 millimeters. Move this apart 2.5 millimeters. Now again, I'm going
to combine them. Now our kitchen is ready. This is how we can
create these kinds of kitchens or smaller designs. Maybe you can try
different kinds of items. Maybe you can try with
this one as well. This is a hollow cylinder, you can try with
this one as well, maybe four MM of height. Then after you can add some designs like whatever the design
like maybe this one. Here it's very simple. We can add this kind of
key chains very simply. This is another method
that we can create. Whatever the design you do, we have to align them, that is the proper
way to do them like this and then after
I have to click this one, it should be the same 20 by 20, you have to be aware about
the dimensions like this, it should be 20, and then
you have to align them. Like this. Then after you have to move that
particular part. I'm going to reduce
the height of this part and increase
the height of this part. Likewise, I can manipulate them, so I can move this part. 52 millimeters. Need to move it 1
millimeter apart. Now I can reduce it height like this and now I can
combine them together. Likewise, you can create
different kinds of key chains, maybe whatever the
design you like it, you can create different
kinds of key chains.
13. Exporting Files in STL and OBJ Formats: Now we are going to
learn how we can exactly export these kind of three D
models for three D printing. If we are going to
three D printed, we have to export
them as STL files. Most of the printers are
supporting STL files. Then what we have to do
is we have to obtain STL files from this
Tinkercat platform, and then we have to upload those STL files into
our three printers, and then the three
printers will generate G codes and then
based on those codes, it will three D print. So here, I'm going to delete
this particular design, and I'm going to have
only one item over here, and then this item I
wanted to print it, as you can notice that. So here, if you are going to export this particular design, I'm going to click Export. And then this is the
interface that is available for us to download
this particular design. And here you can choose which file you
wanted to download, maybe in OBJ file or
STL file or GLTFFle. Or if you are going
to laser cated, you can choose SVG file. So here, if we are going to three D print this
particular design, I'm going to click
this dot STL file. So then what will happen is that particular STL file
will be downloaded. If I click that and
then it will be opened on my three
D viewer like this. So this is the design of
the three model that I have created in Tinkrocat
in STL file format. And if you want, you
can click Export again and click Download
OBGFles as well. So these kind of files will be supported on different kinds of platforms or different
kinds of applications. So if you want that
particular file, you can also choose
that file as well. And now, if you wanted
to share these kind of designs to others, of course, you can click Send to and if you wanted to take a
screenshot of your design, you can click Download locally. So then what will happen
is it will generate a PNG file of this
particular design, what is showing in the screen. It will take a screenshot of your three D model that
you are currently in. Maybe if you wanted to take it on different kinds
of orientations, like maybe in top view, you can choose
that one and click this orthographic view
turned on or turned off, and then you can click Send two and you can click this one. So then the image PNG image
will be downloaded like that. You can generate different
kinds of screenshots for your three D models if
you wanted to have them. Other options like it
has sent to Google. So if you want, you can send this particular design
to your Google Drive. So then if I click that, and then it will ask me
to continue to the site, and then if I click
Continue to the site, and then if I open up
my email and sign in, and then as you can notice that it has been
uploaded to my drive. So here I can select
which file format I wanted to upload it
to my Google Drive. So here, if I click that
STL file and send it, and then that
particular STL file will be sent to my Google Drive. You can go to the
Google Drive and share them directly on there. It's very simple. So I'm not going to go to
my Google Drive. I'm just going to click Close. Or you can have other
different kinds of options like share to
your Google classroom. If you are a teacher,
you wanted to share your designs
with your students. Of course, we can
do that as well. And most interesting
thing here is we can upload these kind
of designs directly to the three D printable
platforms like those platforms are accepting SDL or three D model three
D printable files. To be submitted on
their platform. So if we submit them
onto their platform, and if those items
or the models sell, and then they will pay
us some kind of money. So therefore, if you are
interested in doing that, we can directly upload them to the printables, thinggiors, radical, mi
manufactory, et cetera, some platforms require money to be entered into
their platform. Some platforms are not
selling their platforms for a money only free moas can
be sold on their platform. And here, if you want, you can invite more people onto this particular
platform as well. So these are the options
available for us if we wanted to share what we
have designed in this particular
Tinkercat platform. And here in Export, we have three D print
option as well. We can directly go to these three D printing
manufacturing platforms. And if we want, we can get a quote from them and we can get those kinds of three D models printed and delivered
to our doorsteps. So if we wanted to make
those kinds of things, if you don't have the
three printer with you, you can order them online by contacting these
kinds of platforms.
14. Basics of 3D Printing Slicing Software and Print Settings: Now we are going to learn
how we can exactly three D print those items after we
have opened the STL files. So here, you can
download and install this particular three
D slicing software. I'm just using Reality print. Since I'm using a Reality
version of three D printer, you can download different
kinds of softwares like Qa. So here I'm just going
with Reality print. So this is their interface of the software here you can notice that this is the
three D printers bed. And if I want, what I need to do is I need to
click Open File, and then I need to import
that particular STL file, which I have downloaded
from Tinkercat software. So now I'm just going
to open that so this is the custom key chain I have designed on
TinkercatPlatform. This is the STL file. But three D printers, if you wanted to operate
three D printers, we need to provide them G codes. Those G codes are used for
these kinds of operations. So therefore, we can drag and rob these kinds of
component like this, right? After we have drag,
rob that one, we can simply select the profile of the three
D print over here, so high quality one or
normal quality one. We can edit these kinds
of things as well. So I'm just covering
the basics in here. I'm going to go deeper in
this particular course. And here you can select or edit these kinds of
qualities and the speed of the three D printer and set the profile up after we
have set up that profile, then we can add supports. If the model is
floating in the AR, we have to add some
kind of supports. Those supports can be added
automatically or manually. So here, this model doesn't
require any supports. So here I'm going to
select the material. I'm going to select PLA. Since I'm using PLA filament, I can click slice. So then the design will
be sliced and as you can notice that
the printing time will be around 30 minutes, and this is how much grams
that the three D printer would take 6.9 grams and 2.3 meters
of length of that filament. And here, this is how
the design looks like. So this is how the
G code will be. So here, if you want, you can try different kinds of settings in three D printing. So we will discuss that
in a different course. After we have done slicing
that particular STL file, we can click and printing
or Export to Local. If your printer supports
Wi Fi connection, you can click and printing
or you can generate the Gcde file for this particular
slice to three d model. Then if I click Export to Local, and then I can choose
the path and save that. So then what will happen is the code file will be created. So this is the code file. So this G code file can be
sent to the three D printer, and then the three D printer will take care of this design and take care of the
three D printing process.
 Bazeer Ahamed Mohamed Nishad, Design Engineer and Founder - Robototec