Transcripts
1. Introduction: I learn what you can
do with Canva in 2024. You are watching
the right class. Canva is quickly
becoming the go to design platforms for creatives of poor skill levels
and backgrounds. Thanks to its vast
template library, anyone can now produce professional quality
designs without spending hours struggling
with the tools. There's so much you
can do with Canva. It's not just about making
visuals for social media. You can create videos,
powerful presentations, edit your photos,
design visual docs, or even build websites. Hi, I'm Ronnie Hermosa. I am a Canva verified expert, and together with my wife, Diana, we manage one of the largest YouTube channels
dedicated to Canva. Oh, also, I worked at Canva
for two full years with the design education
team back at their headquarters in
Sydney, Australia. Today's class is all about teaching you the
fundamentals of Canva. We'll start the class
by introducing you to the platform
and its interface before moving on to
all you can do with Canva and the different
mechanics of how to use it. Now, this is not a master class, nor will we dive into
specific design projects? I just want to give
you the basics. We will be using the latest
version of Canva to date. That is the glow up version with the lighter
streamlined interface and all the AI features. Now, this is how
Canva looks today, and depending on when
you're watching this class, there might be some
newer features or slightly different
interfaces. So this class will
teach you the basics, help you get familiar with
the home page and the editor. Get a good feel of what
you can do with Canva, and also help you choose the right Canva plan
for you. Let's do this.
2. Discover the Canva Homepage: Even though Canva
is very intuitive, when you first open it
as a complete beginner, it can feel a little bit
overwhelming. But don't worry. This lesson was designed,
so after watching it, you feel empowered to navigate
Canvas homepage with this. I'll give you a tool so you
get to know the structure, the different buttons
and features that are there to help you be more
productive and organized. If you have been using
Canva for a while, I still suggest you
watch this lesson until the end because
there could be a couple of features that you
might have missed since the last big Canvas update
at the end of May 2024. It's also important
to mention that since Canva is a platform
that is constantly evolving, the arrangement of some of the elements might
change with time. If you notice that a
tool has disappeared, or on the contrary, there is a new tool
that you didn't see on this lesson, don't worry. In this case, make sure to
watch the last section of this course with all of the latest tools,
features, and updates. First thing I would like
to show you here is that this page is
divided into three. The menu on the left. Then the column next to it is what I like to
call the sub menu, and then we'll see
the working area. The menu on the left and these five other
elements will be fixed on the screen no matter in which section you
are in the homepage. On the home page, you'll
be able to create a new design by clicking
on this button that says, create a design or by clicking
on any of these icons. You can also create
custom sized designs by clicking on this one, and upload your own files. You can upload
images, videos, Fis. You can also find your recent
designs on the home page. You can find them on
the main working area or in the sub menu. The sub menu that you
see on the home page is the same one you will
see under projects, and this section right here
is actually customizable. You probably won't see these different folders
that I have in here. These have been personalized and I will show you how
to create them later. Under projects,
you'll be able to find all of the folders
you have created. You can create new
folders by clicking on this button that says at
new and then click folder. Can type here the
name of your folder. You can share it with people in your team and then hit continue. Under the project section, you'll be able to
find your folders, designs, ran templates,
images, and videos. Now let's go to templates. From here, you can search from
the thousands of templates available in the cavalry by using this search bar
on top of the screen, or you can also use
this menu right here to see a particular
type of template. Let's go to templates, social media, and let's
say TikTok videos. Now see on the main
area a search result of TikTok video templates.
Now, let me go back. I'm going to close this
menu right here to quickly show you that we have some other sections
under templates. We have Workds, which
is a new section. I do recommend you go and browse this page right here to
learn more about war kids. We have then the photo
library in Cava. You can explore the
photo library from here. You have also the icons library, the creators you follow, and the start content will take you back to the
projects section. Let's go to the brand section. This one will be available if
you have a CVA pro account. I can go to branches and see all the different brand
kits in this account, or we can view the
brand templates. Lastly, we have apps, so we can filter the apps by workplace essentials,
AI powered. Productivity, the sign
essentials, which, by the way, if you scroll down, you will see our app called Rondi Tutorials. You can see that
we are inside CVA, which is pretty exciting, and then you have a
share and publish apps. You also have Apps for teams, so you can filter by marketing, creative, HR and sales. Lastly, we have the
content planner, which is a CVA P tool. You can have access to it
under the app section. We have product photos and MCPs. We have these two buttons here, which we haven't talked about. The bell icon will have a little red dot if you
have new notifications. If you want to see all
of your notifications, simply click on the
bell to see them all. Next tow, you will
have a drop down menu. From here, you can switch
from teams accounts. You can invite members to your team and then you will have some other sections that will help you learn more about CPA. And you can also
sign out from here. Now, let me show
you quickly how to create a new design
from the homepage. I'm going to create a
social media design. Let's say that I want to
create an Instagram story. I'm going to select a
template from here. I'm not going to edit it. I just want to close
on this design to show you where you can
find this design later. Going to refresh my page, you will see that
your new design will appear under
your recent design. If you need to go back to
this design to keep editing, you're going to click on
this thumbnail and then click on any of these
elements to open the editor. You can do your changes and close your design
if you want to. Your design will remain
here on the homepage. Before moving on to
the next lesson, I want to show you
how to personalize this sub menu that we see on
the Hump page and projects. Remember that this sub
menu will remain the same, even if we are on the Hump page or under the projects section. If you want to have
a quick access to any of your designs
on this sub menu, you are going to hover on your design and then
click on this Star. This will automatically bring
your design to this left. N. I'm going to do the
same for this one. I'm clicking on the
Star and you will see that it appears
automatically here, and let's do it for
this one as well. Now, let me show you how to
create a section so you can organize all of these designs
that you have editing here. You're going to
click on this icon. When you hover, it should
say Create section. This is going to create
an untitled section, so let me rename
this one by plates. You can also add an MOG from
here so you can click on this MI face and select an MOG for this
section, and that's it. You have a new section. You can start bringing your
designs to this section. At the moment, all of
the sections are closed, so you cannot see
the designs in here, and this is going to make a cleaner look on your home page. If you still want to have a
quick access to your designs, you can simply leave this section open and you will see your designs from here. You can keep other sections open or you can collapse
them once you are done.
3. An Overview of the Canva Editor: In this lesson, you'll
discover the editor. This is the place where
you'll create your designs, animations, videos, and more. After watching this lesson, you'll know where the
tools are located, how to access or activate them, so you feel ready to start
designing. Let's get to it. Let's discover the editor. For this, we are going to
create a new document. I'm going to click
on social media, and then I'm going to
select in Stagram story. I do suggest all of us
select the same option, so we see exactly the
same on the screen. Default, we will see that
the design tab is open, but we're going to click on any other section on your
page so we can close it. Like this, we will be able to preview the structure
of the editor. In here, I see four
different sections. We see the navigation
bar on top, the menu on the left, the menu at the
bottom of the screen, and then we see the page where we are going
to be designing. Let's start by discovering
the navigation bar on top. Let's go to the left. From here, we see the
open menu button. When you click here, you
will have access to the menu and the sub menu that we
saw on the Hump page. If you want to close
this menu right here, simply click on this x
that says Close menu, and this will take
you back to the edit. Then we have file in
which we will see a menu with different tools
related to our document. From here, there is
the settings menu, which I personally use a lot. This will allow us to
show rulers and guides, add guides, show
margins, and so on. Then we have this CVA pro button that says resize
and magic switch. When you click here, you will be able to either translate, transform into document
or resize your documents. Then we have this
little drop down menu. From here, we are by default in the editing mode because
we are creating a design. If you just want to add
comments to provide feedback, you're going to activate
this mode right here, or if you want to only
view the document, you're going to click here. Go back to the editing mode and continue with
the navigation bar. In here, we have the
undo and redo buttons. We then have this little cloud that says all changes saved, and we usually see
this check mark if we are connected
to the Internet. If you are offline, you will see that
the cloud looks different and next to
it, it says offline. When you're back
online, you will see the check mark inside the cloud. Then we have the name of
our documents at the moment is untitled because we haven't
renamed these documents. Click in here if you want
to rename your document, And here enter
when you are done. Next to, you will see
your profile picture, and if you are collaborating with other people
in the same design, you will see their
profile pictures in here. You can provide access to other people by clicking
on this plus icon. You have access to
insights to the comments, and then if you are
using a CVA pro count, you will see this button that says publish as brand template. If you are using
a CVA proc count, you won't see this
button, but instead, you will see a button around
this section that says, try Canva pro for free. Then have this very important
button that says share. From here, you'll be able
to download your design, or you can also share it in
so many other different ways, but we will show you how to
do this later in the course. Finally, we have this
x that will allow us to close this document and
go back to the home page. Coming back to the editor, now let's discover the menu on the left side of the screen. The first thing you have
to know is that when you hover your mouse on
any of these icons, you will see a little window When you move your
mouse to your page, this window will disappear. But you can fix this
window if you want. You're going to hover on any of these icons and then
click one time. You will see that
these icons and the window are not floating
anymore and they have a continuous white You can
close this window from here and go back to the
previous version of this menu in which we
see the icons floating, and when we move the mouse
away, it disappears. Now, let's click on the sign, and let's keep
this window fixed. From here, we see a bar that will allow us to search
for different templates, or you can simply scroll down to discover templates in the
library. Let's go back Because in here we
are under templates, but you also have another
tab called styles. From here, if you have
a Canva Pro account, and you have set up a branchet
or several branchets, you will be able to
access them from here. In here, you also
see combinations of color palettes with
different font combinations. You have different
color palettes, font sets, and also
reason design styles. Let's go to elements. We have, again
here a search bar. Right below the search bar, you will have some
keywords that you can click to find the
front elements. Let me clear the search bar
and then show you that below, we have the recently
used elements. I have this section here because I have used this account before. I have recently used elements. But if you are using
Camba for the first time, you might not see this
recently used section. You should see shapes and
the other categories, we will see down below. For every section,
you will see a Col, which is going to
open that category. In this case, let's open shapes. I'm going to click on COL, and you will see all of the
shapes available in here. Let me go back.
You will see that elements is actually
pretty useful. You will use it all the time
when designing in Campa. In here, you will find shapes, graphics, and AI
image generator. You will see stickers which
are these animated elements. You will see photos with
and without a background. You will see videos, audio, That means music
and sound effects, charts that you can
fully customize. For example, let me
show you this one. You can change the colors, phones, and so on. You can also create tables,
add frames, grades, mockups, and you also have
collections of elements. Let me go up and add
a couple of elements. So I'm going to add
A square shape here. Let me go to graphics
because under graphics, we also have
different categories. So let me add an element here. Let's go to stickers and add
this milly animated face. Let me go back and back again. This time, I'm going
to add a photo. Scroll down, add a video. A chart. A frame. And a mockup. I'm not trying to create
a designing here, but I want to show you
what happens every time that we select any of
these elements right here. At the moment, I have
this mockup selected, and then we have the toolbar appearing on top of our page. But this toolbar
will change or will adopt depending on the element
that we are selecting. L et's select a video this time. You will see that we have a different menu than
the one in the mockup. The one in the video has different options and these
are related to editing. What happens now if I select a photo or a shape
or an animation, it will look different depending on the element that you select. Let me show you how these
frames and more cups work. If you want to crop
a photo or a video, you can use these frames. Let's say that you want to
crop this photo as a circle. You're going to drag
your photo on the frame, and your photo has
a circular shape. Let me go back and this
time add a video here. You will see that the
video now has this shape. Can do the same with a mockup. At the moment, when I'm
filming this lesson, we can only work with
photos and elements. Let's drag this photo
inside this mockup, and when you double click, you'll be able to adjust the way the image
looks on your mockup. Now let's try this mockup
with this element right here. Let's continue with
the menu on the left, and let's discover
the text section. Here, you can also search
for fonts and combinations. You can add a textboox. As you can see, every time
you select a text boox, you will have this toolpar
appearing on top and F here, you'll be able to change
the color of your text, the font, size, and so on. If you have a brand kit setup, you will see your branded
fonts in here and down below, you will see different
font combinations. Here are the different
font combinations that I have used recently. From here, these
combinations are pretty cool because many of them
have effects applied. Let's say, for example, this one right here, I'm going
to apply it to the design. Let me delete here a
couple of elements, so we can see clearly what
we are doing in the textbox. All you have to do to
customize this text box is to double click and start
typing your own text. It is a some that
you can customize these textboxes and still
have the text effect applied. Let's move on to bran kit. This section is obviously more useful if you are using
a CVA pro account. You will see here your
different bran kits and be able to access them if you
click on this little rob. Scroll down and you will see all of the elements
in your Branke. You don't have uploads. Remember that you
can upload images, videos, and audio to CVA. You can upload them from here. You can search for your
content with the search bar, and you can also record yourself in CVA by
using this button. If you didn't know, you
can also draw in Cava. You have this tool here, three different
brushes to work with. An eraser, an arrow
that will allow you to move your element
on the page. You'll be able to
select the color on your marker and the line
weight and transparency. Let me close this window
because when you draw in Cava, you can select your element and then change the color from here. You don't have projects, which is exactly
the same section we saw on the home page. You will have access
to your designs, folders, images, and videos. Lastly, you have access to the apps section in the editor. Can also search for
different apps. You can scroll down to
discover more Canva apps. If we go up, you will see that we are under
the discovered tab, but there is another
one called your Apps. You will find in
here the apps that you have used with your account. Moving on to the menu at
the bottom of the screen, we see on the left hand side
this button that says note. This one is pretty useful if
you want your notes to be displayed in the
presenter view when you are presenting this design. You're going to add
your notes here, you can close at this window. You can start working
on your design. You can add more pages
to your design and pay attention because
in every single page, you will have different notes. So I'm located on
page number three, and when I go to notes, I don't have any notes in here. The notes that I have added, they were placed in
page number one. So when I go to page one, you will see the note
that I just created here. X T notes, we have duration. This one, it's
pretty useful if you are working on an
animation or a video. Let me click here and pay attention to the three
different pages. At the moment, we don't
see any duration here, but when I click duration, we can see the duration
of each page in here, so each page lasts 5 seconds, and we can adjust the duration for the pages and
still see it here. And you can activate
and deactivate this duration view
whenever you need it. Now on the right hand side, we see this button
that says go to page. This one it's pretty
useful if you are working on a document
with a lot of pages. Let's say that you have
500 different pages. You will see here a number that means the number
of the page where you are located and here we see the amount of pages
in that document. Let's say that you want
to go to page number one. You click here, you type
your number and hit enter. Now you see that we are
located on page one. Let me type now three, it enter, and you see that we are now located on page three. We have a slider to zoom out
or zoom in on your design. We have a button right next to the slider that does
exactly the same. You can increase or decrease
the size of your page. You can fit the page
to your design. Next, we have a different
view of the design, so you can see this
design as a scroll view. When you click here,
all of the sudden, you can scroll down
through all of the pages, and when you click back, it
will say thumbnail view. You click here, you will see
the view that we were seeing before with a little thumbnail of each page at the bottom. Next, we have the grid view. You're going to click here to preview your design as a grid. This one again, it's pretty useful if you have
a document with several pages and
you want to see them all at the same
time in a grid view. Let me close this view to
see now the present screen. When you click here, you will see your design full screen, and when you click
back on these arrows, you can close the
full screen view. Finally, you have this
question mark icon where you can ask
Canva for any idea, advice, or any question. Now let's talk about the page where you are going
to be designing. When you click on the
background of your page, you will see a menu appearing
at the top of the page. When you right
click on your page, you will see another
set of tools and Right below the page, you will see this little thumbs. When you click on any
of these three dots, another menu with more
options will appear. With this plus icon, you can add a new page
and in this case, in this particular document, it is a video document. That's why we have this
play button right here. Just to show you
the difference with a presentation
document this time, in this one, we don't
see the play button.
4. Access Thousands of Free Templates: In this lecture, I want
to show you what to me is the real
strength of Canva. It's amazing template library. Templates are your secret weapon to creating stunning designs, even if you're not
a great designer. Some of these
templates have been created by professional
designers, including people at Canva, and others were made by designers of the Canva
Creator program, which I'll come back to
later in this lecture. The bottom line is
that they look great. Easy to customize
and will avoid you the trauma of starting
from a blank page. There are a few
different ways you can access the Canva templates. The first one being
the search bar which is on top of your screen. When you do know exactly what
you need to design, like, let's say an Instagram story, I would recommend you use the search bar on top
of the home page. When you search for
templates in the library, you will get a mix of
different results. Free templates are the
ones that don't have any icon on them in the lower right corner
of their preview. But when you see a yellow crown that says pro when
you hover over it, that means that the
template is a pro template. If you try to use it with
a Canva free account, Canva will prompt you to upgrade your account
to Canva Pro. In the template search results, you might also come across
templates that have a little euro or dollar
icon on them and say paid when you
hover over that Now, these templates can
be used by all users, but they contain some
premium elements in them. You recognize these premium
elements if you are a free user by the watermark
they have on them. If you are a free user and want to use these templates,
the paid templates, you will either have to pay for the premium elements before downloading the template or have to swap the premium elements for other free ones
if you don't wish to pay anything before
using the templates. Back to our IG story
templates here. You will have all your
templates displayed right here. In order to find what
you are looking for, I suggest you use the filters. You have all your
filters right here. You have category
filters, business, social media, et
cetera, your style, your themes, your features, some of them have animation, some of them have videos, some of them have audio. The great that is if you are working with educational
ma ter real, subject topic, even color. You could filter by color. If you want templates that
are in the yellow tones, you can select the yellow
color and apply that filter. You see the results of your
IG story templates have been filtered to show you only the yellow ones.
That's pretty cool. Now, let's say you
are interested. In one of these templates. You can simply click on them. And from here, you'd have access to different
functionalities as well. So first, you'd have the
title of this template, Food Promotion Instagram story. You'd have the name of the creator who
designed this template. Here it is Pobleens. Okay. So you can directly
follow this creator, if you want, with this
button right here. You could click on the
name of the creator. Let me open that in a new link. So I'll show you, so this is balance
creator profile. From here, you can see
all of the templates that particular creator has published on Canva. Not only templates. If he or she has published
other things like photos. No, there is no
photos or graphics, no graphics, only templates
for this particular creator. Let me come back to my template information
page right here. That's what you see from there. If you want to start
using template. Right here, it's a pro template, but I'm using my
Canva pro account, so I could just click on Customized this template to open the template
directly in the editor. From where I can
start customizing it. Now back to the
template info page. If I continue to scroll down, I see more like this. These are templates
that are similar to the one I
originally clicked on. You see a few of these templates right
here that are similar. All the way to the
bottom on this page, you will have your explore more section with a bunch of
different tags right here. These are key words that will lead you to similar
looking templates. For example, food or menu. Let's click on one
Instagram Story. I would come back
to my main search about Instagram story, which has a bunch of different
templates right here. You can clear the filters
you have applied to your template search by simply going to all filters right here, clear the filter apply to
come back to the main search. The Instagram story search with over 350,000
templates available. Now, let me show you another way to access the Canva templates. Let's say I want to create
a design for social media. I' going to start by using this icon button here
that says social media. If you're looking
for a template, you shouldn't click on
these icons right here that represents the
document types. Because if you do what it does, that it creates a blank document like this one right here. You don't have access to the
templates, you need to go Find the template right
here in your design tab. This is not what we want. Let me come back to the social media section right here, icon. Instead of clicking on
these tiles, use the tabs. Instagram, Facebook,
or Linked in, let's say you are looking
for Facebook design, scroll down a little
bit and then you'll see your Facebook post templates. You can see them all right
here, your Facebook cover. Templates. Again, see
them all right here, Facebook ads Facebook
event covers. If you are searching
for a Facebook cover, for example, click on C O, and now you should be looking at all of the Facebook
cover templates. Indeed, you'll have over 3,400 templates for Facebook
covers, which is great. From here, you have access to
the same options as before. You have the possibility to customize the
template from here. You have your more like this and explore more with
the different tags. Here. Okay. So if
I come back here, I can also use the side menu right here to
navigate the categories. So I'm here in the
Facebook covers. So let's say if I change my mind and I no longer need
a Facebook cover, but instead I need
an Instagram post, then I could just click on Instagram post right here, like, change the category and now see all of the Instagram post
templates right here. Okay. So use this side menu to navigate between the different
categories of templates. When you are on the home page, you can also access the
templates via the template tab. Once I click here, I have the full library
of my templates. From here, I have
much more options to really search deep
for these templates. You'll see a section
about the work kits, which is a relatively
new thing in Canva that has been rolled out
at Canva Create 2024. Wkits are basically a
set of different tools, including a lot of templates, a lot of very cool
templates that are organized into I would
say categories of work. You have your
marketing, work kits, your sales human resources
and your creative Wkits. Let me quickly open
the creative workkit so you can see
what's inside them. First, you'll have a
bunch of templates. These are very cool
templates that creative, like free ancers or
graphic designers, or really any kind of creative person might need So you have your
creative briefs, you have your
creative productions, project management templates, you have creative ideation with different whiteboards and
stuff like that, mood boards. All of this is
really cool, brands, strategy, thoughts, starters. All of these are templates. All the way to Apps, when you start seeing
a section about Apps, it means you've gone
past template se. So these are work kits, come back to your
template tabra here. Then you will have all
of your I would say famous document types.
You're recommended. Then you have
presentation templates. You classic presentations
in 16 by nine, your mobile first presentation, your iPad format
presentation four by three, your brainstorm documents, brainstorm presentation,
and game presentations. You keep scrolling down, you might see different
sections here. Canva is currently
showing me selection of Facebook covers because I recently searched for
a Facebook covers, but you probably
will see something different here and
they are often experimenting with the sections that you see on
specific landing pages. Right here we are on the
template landing page. Don't be surprised if you see something else.
Some stuff you may like. They're trying to personalize
the recommendations, and then you start with your, I would say most commonly
used document types and some templates for
these Facebook post, Instagram post,
Instagram stories. This may depend on your
latest search as well. But that's pretty much what
you have here under template. You can obviously search for templates from
the search bar, or you can just navigate
the different menus here. You have all of your tips for your presentation,
social media, videos, print product, click on more, you have your less
conventional stuff like magazine covers. Don't forget you can
use a little arrows to keep scrolling
to the right here. You have many more
document types that you can explore
and discover. Let's say you want comic strips, which is not a very
common kind of template. Click here and you should see a bunch of different
comic strips. There you go. That's
the template library. If you don't know what to
design or where to start, I would invite you to take a peek at this template
button right here. It's a very well
furnished section of the Canva home page
of the Canva website. Nic it's time I tell you
about the Canva creators. Creators or Canva creators is a program by Canva
that rewards designers and photographers in
the community to create content and make it available
for the Canva library. If you're good at designing, you can apply to become
a Canva creator. Design a bunch of
templates and submit them to Canva to put them
in the template library. If they are accepted, you'll then earn royalties every time users
use your templates. Canva creators can
submit templates, elements, but also photos
to the Canva library. Let me show you. If I
search, for example, for productivity tips and just
use a search bar it enter, and I want to search
for Canva templates. This should show
me Canva templates with productivity tips. I want to show you, for example, this one right here. Quick tips, I'm going
to click on it, and you see that the creator of this template is
actually Diana Minos. Oh, what a coincidence. Dan Minos is actually
a Canva creator. When I click on Diana's
name right here, we access her creator profile. So you see I'm already
following her. I'm going to do something
very crazy here. I'm going to unfollow Diana. I hope she's not going
to hate me for this. But the reason why I unfollow
Diana is because I want to show you you can easily
follow the creators you like. For that, just hit
the big purple button that says follow
feel better now. You can follow the
creators you enjoy. Once you click on their profile, you should see all
of the templates, but also the elements and the photos they have contributed
to the Canva library. I know that Diana has published
a lot of things here, so you can see if you
scroll down a bit, over 15,000 templates
have been published by Dana come back up to show
you a few other things. Next to the follow button,
you have a share button. You can quickly share a link to DNAs profile with
all of your friend, which I highly recommend
you do so that DNAs follower account will
keep going up right here. You also have a
three little dot. If you judge that the
content is inappropriate, you can report the
creator profile to Canva. That's if you come across inappropriate content
for some reason. So You keep looking
down here on this page. I'm just following the
flow here of the page. By default, you are on content, which shows you some
featured template and then some collections of different templates that the
creator might have created. Here, Dana has created several
collections of templates, planners, sellers,
productivity tips, et cetera. But you have your about section. The about section tells you a little bit about the creator. You can read their description, templates for small businesses, entrepreneurs and
content. Caters. You can add link to your social. For example, you see here, Diana has a link
to her Instagram. Another link right
here to a link tree, if I'm not mistaken. You have the number of
views on Diana's template, over 239,000 views, and then the location of where
the creator is located. Let's come back to the content
stab because I want to show you once you
scroll down a bit more, you should see a search box to search content from this
particular creator. If I am looking for a
Carroll, for example, here, I just type in carrousel, and then I don't even hit Enter. Canva is going to filter all of the carousels from
Diana's template. All you see here is just Diana or that particular
creator's template. So you can also decide to
search for photos or graphics, or you can use the categories. For example, you want templates with video,
Facebook video. She doesn't have any,
maybe Instagram video, let's say YouTube
video, mobile video. No she doesn't have much
template with video. But if we scroll
for social media, Instagram post, so there you go, you have all the
Instagram post templates that Dana has published. Canva creators is pretty cool. In my opinion, you can follow
the creators and obviously, once you have followed
your creators, you have a place in Canva to see a feed of
everything that your, your favorite creators
have published. In order to find it, let me
show you from the home page. From the homepage,
you will go to templates, and from templates, you should see an
item right here on this secondary menu that
says creators, you follow. Creators you follow is your
creators hub on Canva, where you will see the templates of all the creators
you've decided to follow. Here because I'm on my
Canva Glow account, I don't follow many creators. Only one, you see one following
and that one is Diana. But Kanva will suggest me
to follow other creators. I'm going to follow my friend Roger rez right here,
my social designer. He has also some
pretty cool templates, so you should also follow him. Definitely. Let me come back and find a few other ones
that I might recommend. So those, I don't
really know them. But definitely the
Canva creative studio. You should also follow this one. This is Canvas main, I would say template collection. This one is curated by Canva has some very
cool stuff as well. If you are yourself interested in becoming
a Canva creator, I would recommend you head back to this landing page right here, where you can become a creator. I will have a link for you in
this lectures description. Believe this gives
you a good overview of where to find
the Canva template. You'll see that these
templates can also be accessed directly via
the Canva editor. But I'll show you that
in a different lecture. Now, let's take a quick break.
5. Canva's AI Revolution: In this lecture, I
want to give you a glimpse into how Canva leverages artificial
intelligence to empower creativity
and innovation. Since its founding in 2013, Canvas mission has been to
empower everyone to design, regardless of their skill
level or background. Now, this vision revolves
around democratizing design, making it accessible
and intuitive for everyone from beginners
to professionals. Now, fast forward, 11 years, and Canva now has almost 200
million users worldwide, helping them transform
their creative ideas into reality with ease. At the heart of Canvas vision is a commitment to innovation. And this translates into
their continuous efforts to enhance the platforms
capabilities and the user experience. By integrating AI, Canva takes a significant leap in
fulfilling its mission. Indeed, AI enables more
intuitive design processes. It automates mundane
task and introduces powerful features that were once only accessible to those
with advanced kills, like removing the background
of a photo, for example. This not only makes
design more accessible, it significantly amplifies the creative potential
of all users, AKA, empowering everyone
to design Canvas moto. Now, let's take a trip down
memory lane and see how Canvas AI journey began with
several key innovations. In 2019, Canva adds AI background removal via the Remove Dot BG
app built by Calido. This tool simplified
the design process by removing backgrounds from
images with a single click. Background remover
is the evolution of the removed dot BG
website by Calido. Turn into a native
Canva feature. And one that we make millions of users want to upgrade
to Canva Pro. In 2021, Canva acquires aldo to deepen their research and development in the
AI design space, paving the way for more
powerful tools and seamless integration of AI
into their visual suite. In August 2022,
generative AI models like Stable diffusion and DL E become available for public use, and the Canva team
begins experimenting. Shortly after September 2022, Kanba launches its first
NAI product called text to image that transforms text descriptions
into visual content. Now, this opens up a whole
array of possibilities. Then, end of 2022, six weeks after OpenAI's
CA GPT is made public, Kanba launches GPT powered Magic right to all
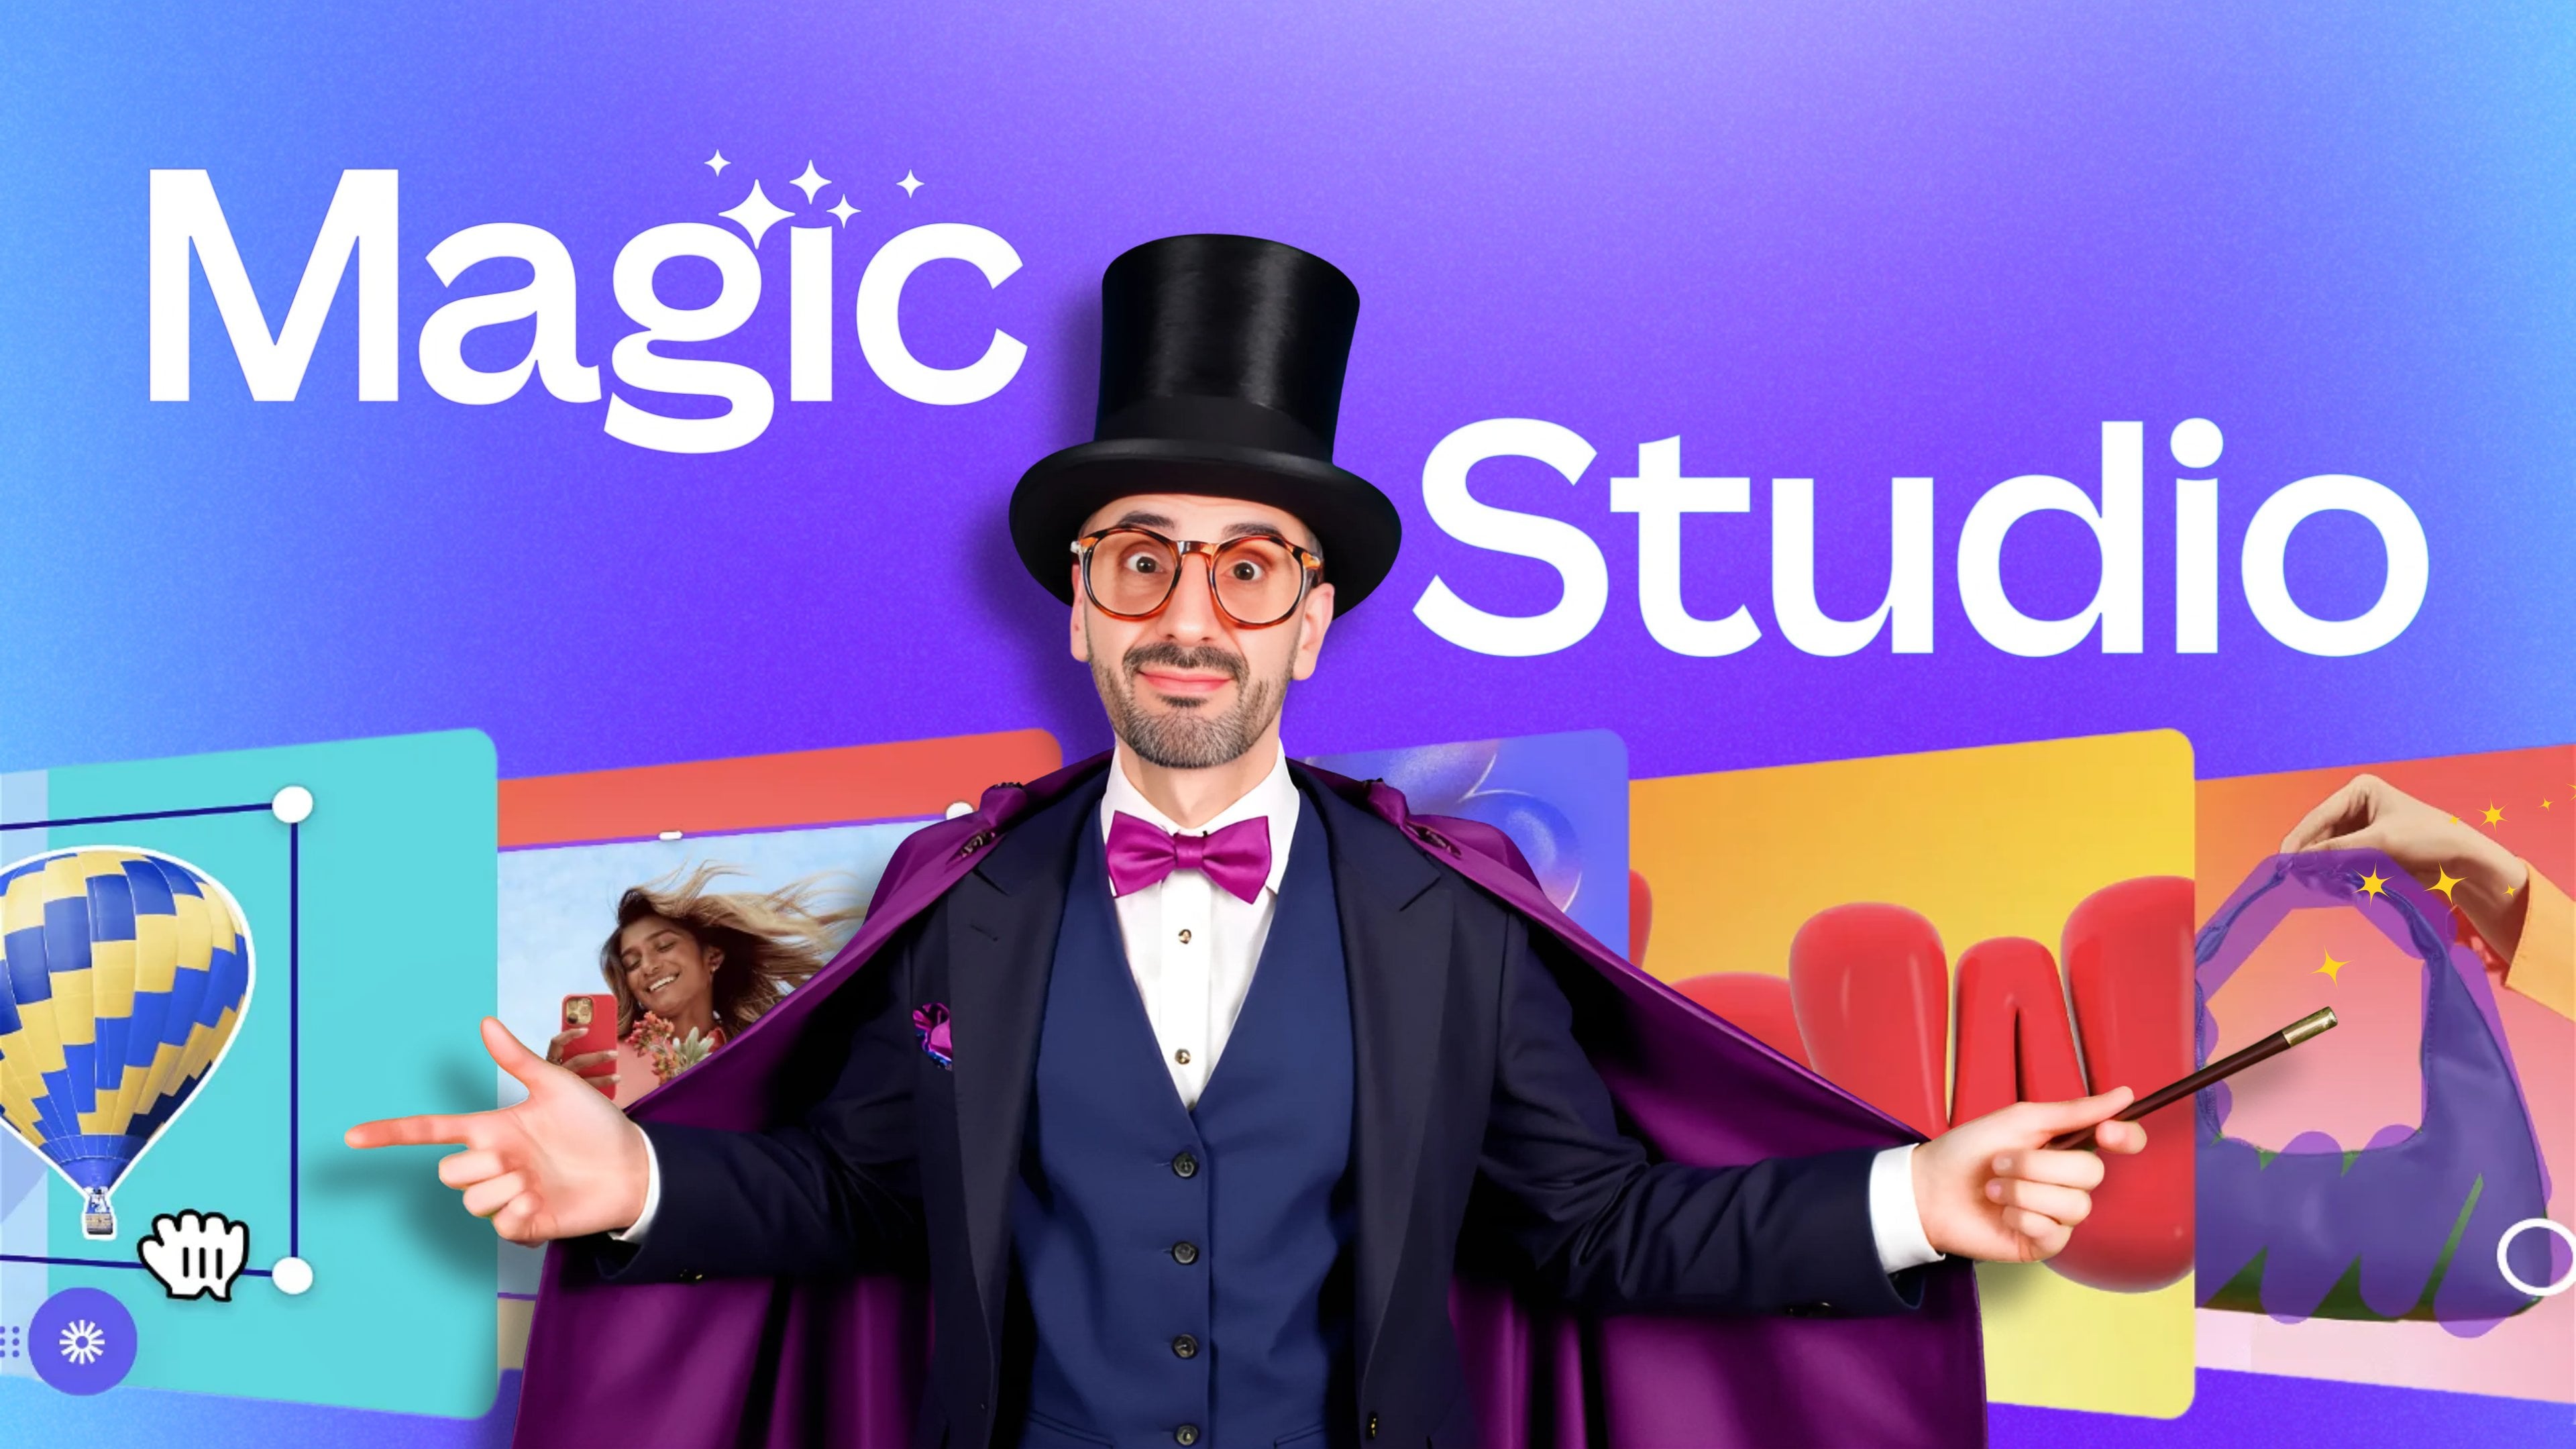
users in Kanba Docs. And then in March 2023, C Kanba introduces Magic Studio, a suite of AI powered features that would transform
the way we design. The suite includes features for translating and summarizing
documents, editing, and transforming
images, and converting brainstorm whiteboards into
fully fledged presentations. Since its launch,
Magic Studio has been used over 7 billion times, demonstrating its
significant impact. E year later, Canva doubles
down on Magic Studio at Canva Create 2024 and introduces more AI powered
features like Magic Design, video, background remover,
bulk create and more. In July 2024 Canva
acquired Leonardo AI, a generative AI platform, renowned for its advanced image and video generation
capabilities. And while this acquisition
is significant, it's just one piece of
Canvas broader AI strategy. Leonardo excels at producing hyper realistic
photos and videos, and it will gradually be integrated into
Canvas Magic Studio. This integration promises to deliver even more
powerful tools, further enhancing the
creative process for. By the way I sit with
this acquisition, Canva reaffirms its commitment
to AI and innovation. Of course, for us users, all of this means some
shiny new features are on the horizon, promising to brill our minds and further enhance what
we can do with Canva. Yeah, exciting times.
6. How to Search for Things in Canva? (and find them!): In this lecture, I'm
going to show you how to search for the design
ingredients in Canva, K A, all the things you
need to create a design, to create a video, to create
a website, et cetera. And you will see that there is always a few different
ways you can go about finding
particular elements in Canva. Let's dive into it. All right. Let's start
from the Canva homepage. I want to show you how you can search for things from
here and find them. So we are going to use the search bar on top of
your screen right here. This is where you want to
go to search for things. Let's type in Instagram. And before I hit enter, we can see a couple of
different things here. I see two types. I can search for Canva
templates right here. Or I can search for
all my content, or I can search for both. By default, both of these
tiles will be visible, meaning you are actually
searching and you are being given a mix of
different things here. So this is important to
understand that you can search for templates or you can
search for your own content. Let's start with my own content. So if I click on
all your content, I will see all the
documents here, I believe there are
seven documents that I created that either contain the word Instagram
in their title, or in the content of
the document itself. So Canva has the ability to scan through what's inside your
documents to find keywords. You will be served
anything that contains the keyword Instagram that
is part of your content. That is searching
or your content. If I come back to the
original search Instagram, you can also search
for templates. If I click on templates, I should start seeing
templates right here. Templates for Instagram. That's interesting
to understand. I haven't hit Enter yet. If I hit Enter here, what I'm going to go to is to the search result for
Instagram template. You see here 20,000
templates for Instagram. If I scroll down,
this will be a mix of Instagram posts,
squared, stories, and anything really related to Instagram because I didn't specify what kind
of Instagram post, what kind of Instagram template. So this is how search work. If I clear that, and search
again for Instagram. If I just type in
Instagram and Lung, I will have a mix of results, starting by my own designs. You see the seven designs that contain the word Instagram, either on the title
or inside of them, and then my Canva templates. Important to realize when
you search for something, you either searching
for templates in the Canva library or you're
searching your own content. Make sure you understand
this difference. Now, I want to show
you something else. Let's come back one step in search again for
let's try another one. Let's try Facebook. I'm
just type Facebook. If I look at the
different results that are presented to me here, I can see different things. The first one is
a magnifier icon, search for Facebook,
and then you have other ones like
other magnifiers. These are suggested searches. Canvas suggests that maybe
you'd like some business Facebook covers or maybe you'd like a collage Facebook covers. Maybe you don't need a template, but you need a document type. Specific Facebook
related document type. Canva is going to
suggest a few here, Facebook ad, Facebook app ad. Or maybe you are searching your own content because it
doesn't know at this stage. I didn't click on any tile yet. Out of the box, I'm being served a mixed bag of results here. Now, there's something
else I want to show you. I want to click on the
templates right here. You see when you use template, when you search in templates, you have this other
kind of magnifier, the magnifier with a
little spark in it. This is the magic
design feature. Magic design is an AI assistant that will create a
custom template for you, based on what you search for, what you prompted
in your search. Canva gives us two
examples here, a beautiful Facebook
cover image of a nighttime city
scape. I imagine. Or create a Facebook cover
image of vibrant graffiti art. These, let me click on one
to show you what they are. These are magic designs. Canva will be using its AIC, it's being generated here. So cover image of
vibrant graffiti art. Basically, Canva is
going to mix and match different things like
different templates they have in their library and the AI will generate
the text for you, colorful graffiti art for you, and it will also
generate the image, or it will search the Canva
library for some graffiti. There you go. We have
a few Facebook covers that feature vibrant
graffiti art. This is pretty cool. It's
called Magic Design. It's a pro feature. You see the little crown
right here, and it says beta, and though it's a pro feature, I am in my free
account right here. You see Ronnie free. I believe this is a pro
feature, but it's a free. Feature. Meaning you will be
able as a free user to try this feature for a few times before they lock you
in and they tell you, Okay, we cannot use
that feature again. We need to upgrade
to a pro account. But for now, it works
with my free account. Now, this is very cool, and I will come back
to Magic design later into the course when I
talk about the Magic studio, there will be a
dedicated section of the course only for the
AI assisted features. Great. Now, let's come
back to the home page. So these are the
different features that you have when you search
from the home page. Now that we know how to
search from the home page, it's time to take a
look at how to search from within the
Canva editor K A, the design area. All right. We are now in the editor AKA
the Design area in Canva, and I want to show
you similarly how to search for things from
here and find these things. The way you will typically start a search is from your
elements tab right here. I'm going to click on it, and
I can search for elements. So let's search for rubber duck. I love my little rubber ducks. When you search for rubber
ducks and hit Enter, this is what you will see. Basically, this is a mixed bag of results between
different kind of elements, Design ingredients, if you
first have your graphics. Graphics are either
illustrations, either like three D renders of rubber ducts drawings
or sort of graphics. They will have
different properties, but basically these are your
graphics or illustrations. Next, you'll have photos. You'll have photos of
rubber ducks with or without background, free or pro. Remember to see the little crown right here to receive
the indication of whether a design
ingredient is free or Next, you'll
have your videos. So you see videos of rubber ducks in
different situations. You have plenty of video
results right here, and then you'll have
your audio clips. Rubber duck squeak.
Let's try this. Yeah. Pretty cool. Basically,
these are sound effects. What you see here is all
of the design ingredients that correspond to your
rubber duck search that I just conducted
right here. Now, it is possible to go deeper on any of these
categories of outputs, and you can use the tabs right here on top
of your screen. By default, you will
see all of them mixed in this search
result right here. But you can filter
only your graphics, and then you have all
of your graphics. You might find some
prompts if you are using Canva free account to upgrade so that you have access
to more premium graphics, all of the pro ones
they show them to you, but they are not all available. You will not be able to
export, for example, your design if you use a pro element on it.
It has a watermark. It won't let you add it to your design unless
you pay for it. This is something you
might see prompts like this one right
here in the graphics. Now, for photos, we see
similar results, rubber ducks. When you search for photos, you might bump into a
prompt like this one, looking for rubber duck, watch your words transform
into one of a kind AI image. Powered by AI. So basically, you can generate an image right here by using magic media. We'll cover these
features later in the course when we talk about
all of the AI features. Just know that this
feature exists. It's available for pro and
free. So that's pretty cool. But otherwise, you will see under the photo tab right here, or the results for your
rubber duck photos. All right. You can
filter by video. You can filter by shapes. There is no shape audio. We saw that there are a few
rubber duck sound effects, frames, mockups, and
then what is this one? Charts. So you have all of your types of assets right here. So this is what searching under element gives
you right here. Now, I'm going to
give you a protip. If you don't want to use the
filters right here the tabs to filter between your
different categories of acts, I would say. You could also search under the apps right here,
the apps button. If you scroll down a
little bit and you locate the section that
says more from Canva, you should see a few
different icons that will allow you to open a new section underneath
this separator right here. Searching only for videos, only for audios, or
only for photos. You see photos right here
if I can click on photo. The icon, the tab will be pinned right here in my
app section right here. I had magic media. And so everything
that's underneath this separator can be pinned or unpinned by hovering over the icon and by using
the little x here. I can close it. So let's
close Magic media. So what I was showing
you is that you can pin a tab for photos, which I just did, can pin
another one for video, and you can pin
another one for audio. Now, if you search for a photo, you know that what you're
searching for is a photo, get in here to your photo tab right here and search
for whatever you need. Like, for example, a green lake. Let's come back to our rubber
duck search right here. Be I want to show
you the filters. When you search for
keyword under elements, you can use the
filters right here. Let's click on that
little filter icon. Are a few different
types of filters. The first one is color. L et's say you want to find a rubber duck that
is not yellow, but instead let's say green. You can select that
filter for the color. Then if I come back to my
results here or the results, I see only green kind of photos and icons,
graphics. You see? I have only green
colored ones right here because I selected
the filter green. Now I could have
selected purple. Then I would have
the same thing like rubber duck related results in different kind of media,
graphics, photos, videos. But this time,
everything is purple. The color filter is very useful. You cannot find
this anywhere else, and I really like
it because it can really keep your
design on brand. So that's the first filter. Let me remove this
filter by clicking on Clear All right here because I want to show
you the other ones. The second filter
is the orientation. That is if you are
searching for a squared, vertical or horizontal
type of image. This works best with
photos I imagine. Searching for a horizontal
like a landscape photo. I'm going to select that and search for my photos of
Robber Ducks right here. You see, now they are all in the landscape mode right
here, horizontal mode. Every single result that
I'm being presented here. If I didn't get this filter, I get rid of it, for example, clearing it. Come back here, I will see some portrait
like this one, for example. It's not a landscape photo, this one either, this
one, for example. You get the point. What else do I have in terms of filter? Also, you can combine
different filters. You can go yellow
and then square, and then you will only get yellow and square rubber
duck related photos because I am now on the photo tab right here. Just
like that, you can add your filters. Let's clear them animated versus static. This is also a
pretty cool filter. Let's say, you want some
animated rubber ducks. Under my graphics because the animated icons or the
animated stickers, they're all under graphics. There's no animated photos. You can see right
here, this little guy is an animated
rubber duck graphic. Another one right here.
Another one here, not a duck per se, but I mean, close enough. This is animated versus static. Then you have a last one
right here, which is cut out. Maybe you want a rubber duck without a background in
your photos, for example. Let's use this page right here. I'm going to change
the color to black, so you can see what's
going on here. I'm using the filter cut out. Most of the result
will be pro ones. You might find a few
free ones in there, but it's not going to be
that easy. Let's see. This one right here indeed
doesn't have a background. That's what Canva calls
the cut out only. You go, these are all the
different filters you can use when you search
from within the editor. All right, I have a
few more tips for you guys before I
wrap up this lecture. Let's say you find a
rubber duck that you like. No this one, not that
cool, but this one. This one is super
cool because it has some nice, swaggy sunglasses.'s pro rubber duck, but it's fine. I don't need to
download it for now. What I want to show
you when you find graphic or photo or something that you
like in the library, in your search
result, you can use a three little dots by
hovering over your element. You should see this
menu right here. Three little dots,
click on that. From here, you have a bunch of different information
about your asset about your design ingredient. The title, it's
called three D rubber duck wearing
sunglasses, the creator more by KW Studio
from KW Studio. You can see it's one
design use for one Euro, that's if you want to purchase this element while
downloading your design. Then you have a few keywords, and you can see the
whole list of keywords. That is if you want to
search for similar ones, these are clickable, I believe, so you could click on
them and it will run a different search for
that specific keyword. You can start that rubber deck. You can see more like this one, which is really interesting. In my opinion, this is a very powerful feature to create consistency
in your documents. Add it to a folder,
you can report it or you can view collection. Now, not all of the graphics
will be part of collections. But what Canva calls a
collection is a set of graphics. Collections are only
for graphics as of now as far as I know, so it doesn't work for photos. But you see here, they're all
three D inflatable items. They all have the same style. Basically, it's a set of
graphics that has been created by the same creator
that Canva qualifies as a set a collection. It has a
specific unique name. If you search for
this exact name, you will land on
that collection. Also, be aware that not all graphics are
part of a collection. Though this one with those three D
rubber duck wearing sunglasses is part
of the collection, you can see view collection. This one right here
called Blue rubber duck, you see it's not part
of a collection. So it's not going
to be automatic. It's not going to
be a given that your specific elements
are part of a collection. The way you do find collections is just by
having a little bit of Also, with some training, you will have that feeling, this is probably part
of a collection. This pixelated rubber duck, I would bet that it is part of a collection because there's probably more than
just this one. If I get here, y, you see Bingo, it's part of a collection, and there you go like
a pixel art collection of different items right here. So my advice is when you do
find a graphic that you like, see if it's part
of a collection. If it is, it's much
better for you. It will add that
consistency between your different visual elements
in a specific document. So try to stick to the elements of a specific set right here. Now, if you see an
item that you like, let's come back to my
rubber duck search right here, graphic. If you see an item that you like like this blue rubber duck, it's not part of a collection. Still use the S more
like this button. See more like this,
and there you go. You will see more of this rubber duck in
different colors. It's interesting that it's not part of a collection
because they have all of these different colors
for this same rubber duck. Again, click on the
three little dots, see if it's part of a
collection, if it's not, you can always create your
own collections by adding similar looking elements into a folder or starring
them really up to you. Then the last
thing, the last tip I'm going to give you
to wrap up this lecture is you can click on
the three little dots and not focus on
this lower part, but on the upper part. You can view more of the same contributor or
the same Canva creator. If I like this style, maybe I find more of
the same designer. You see view more by
C N. If I click here, now, what I'll see
here is the account of C N z. I can
search from here. I can see only the graphics, and I can see this person has some pretty
cool illustrations. These are probably part of a set a collection.
No, it's not. Sometimes contributors
don't take the time to organize their assets into
sets into collections, but they are pretty cool. They are pretty cute as well. You can follow this creator. You can click on
the name at CN UI. From here. So I feel that
being able to search more from the same contributor can lead
you to some pleasant finds, like some really cool finds. You can discover new
types of illustration, like graphic artists that
have consistent style. You see, this is
clearly inspired by the Japanese
kind of drawings, like, cute little animals, like cats, like dogs, ducks, all of this stuff. So it makes me think of
the Kawai kind of style. So yeah, you can really
go and search deep. In the Canva library. And all of this started from one single graphic that
I found interesting. I don't remember if it was this one or another one,
but basically, you can go and search kind of deep dive into a
specific contributor. And I believe this is a great
way to discover content. Now, I wish Canva would let us easily search for contributors
from the home page, from the template
library or somewhere, but they don't at the moment. Okay? So you see the profile
picture here, Bessie Kalsi. There's no way I can get to that person's
contributor profile. Yet. I really do hope Canva
changes that in the future. Right, guys, I'm going
to leave it here for this lecture
about finding things. In the next one, we are going to look at how to work with text.
7. Working with Text: Working with text in Canva is one of my
favorite things to do. But I have to admit finding or mixing and matching
the right fonts in Canva, among the thousands of different options that
are available to me, could be a bit of a finding Wardo moment
for a Canva beginning. So in this lecture, I'm going to give you some tips for finding the right fonts in the library and how to
best work with text in Canva. When you are in the Canva editor and want to add text
to your design, you can do so by clicking
on the text tab. I'm going to do so right now. From here, there are
two different ways you can actually add
text to your design. The first one is
to add a textbox. You see this purple button and Canva made it
purple for a reason because this is the
actual simplest way to add a text to your design. Click here to create a textbox. I believe it is the last font
you have used the last font plus attribute you've used while working with
text being created. Or if you are a pro user, you will have the
font that you set as your main font in your Canva Branket as
the default text box. I would say configuration. But here, I'm using
my free account. When I create a text box, it comes in the form of
the latest font I use. There you go. This is how
you create a textbox. There is a shortcut, a
keyboard shortcut to this. I'm going to delete this one. The keyboard shortcut
is simply the letter T. If I hit the T
key on my keyboard, it's the same thing as
going to the text tab and hitting this purple
button right here. It's the same thing. All right. Now that we have our text boxes, it is time to make them look
great to build our design. Obviously, you will need
to click on them in order to bring on a set
of features right here, on the floating menu that
you see here on top. The first thing you
should see is Magic R. Magic writ is the
Ca gPT of Canva. I will talk about this in the dedicated AI
section of the course. The second thing you can do
here is to change the font. If you click on that font name, Public Suns, which
is this font name, you should open a menu
on the right side of your screen with a bunch of different font names right here. So this will be divided
into different sections, and also you will have a
mix of free and pro fonts. If they have a little
crown next to them, this means they are pro font. You see this one, this one, all of the ones with a little
crown icon are pro fonts. Obviously, by now,
you know all of this, a little crown means paid. Name of the fonts. This section is divided into your document funds because I have a second page right here. This is like where
I want to get. This page is inside
this document. I will see my document
funds right here, Pissans and public sans. Pisans is the big gold
letter that you'll see here. You will have that section
first, your document funds, which is useful because if
you have a 50 page document, you will want to use the
same fund from page to page. Next, you have a section
of recommended funds. This is just what Canva
believes would pair well with these existing document funds that you see right here.
You can try them on. Next, you have your
recently used funds, which is also useful because we tend as designers to keep
using the same funds. Me, I use Montserrat a
lot, as you can see. Then you have your
brand kit funds. If you are a pro user and have set up your brand kit,
they will show up here. Then you have popular funds. These are rising
funds that Canva believe are popular funds are trendy funds.
Long list of them. And I believe that's it
at the very bottom here, you have upload a font button, which is a pro feature. Okay, this gives you the
possibility to upload your own font and add that font to the
Canva font library, but this is a pro
feature. All right. So let's try to change this second line of text
here for my piece sons. Piece sans. There you go. I have my textbox updated with the latest
font with Piece son. You can see the
name here as well. Now, to change the size of this phone to make it
bigger or smaller, you also have a few
different options. You need to click on it. That's non negotiable. You need to click
on your text box. Then you can look at
this number right here, 27.1 and use the plus
or minus buttons. That's the basic way I
would say of using this. Another way to get there is to simply s. You can
double click here to select all of the numbers
or you could select part of it to select that number
and type in the new one. So let's say 50, hit enter, and then your text box has
been resized to size 50. There is one last way
you could do so to resize your text is
to simply grab one of the corners of your
textbook and then either make it smaller or
bigger by stretching it. These are all the
different ways you can actually resize your text. The most precise one is to
enter the value manually. Let's say you want
55, there you go. You type in 55 hit enter, and then you know your
font is at size 55. That is the most precise one. That is the one I
use most of the Let's come back to
the name of the font. L et's click on that.
Bring up the menu here. I want to show you how
to search for fonts. Either you know the name of the font you're
searching for. For example, if I'm
searching for Montserrat, I can start typing Montserrat, and when I see it, can click
on it to change the font. But sometimes you don't
know the name of a font, but you do know the type of vibe you want to
communicate with your font. Let's say maybe you
want a fun font. You can try typing
key words like fun. Example. So if you hit enter, you would see a bunch of different fun fonts here,
like ten moonlight. This is a quite fun font. Hit cut, also quite
of a fun font, bow, also kind of fun. So there's other things like you could type bold, for example. Bold for title, for example. So you have a bunch of
bolder font right here, these kind of things that
would work for headlines. You see bold kind of fonts. So Canva recognizes the
keyword that you use here. You can use keywords like cute, elegant, quirky, or you can
try different keywords. If you don't know, or
if you're not inspired, you could look at
these ties right here. So you have your handwriting, you have corporate display. Now, what in design, we call a display
font is usually a fantasy font or a
fun type of font, some sort of a different type
of font that you would use sparingly to add a touch of
craziness to your design. Okay, so these are
the display font. You headings. So Canva makes it easy for you by
using these tires. Don't forget you
have a little arrow, sometimes it's a bit hidden. You don't really see them well, but there are arrows left
and right here that you can use to go through these
different keywords, which are very useful, like the retropont, you see, something like this retro that's also use the filters. Once you search for funds. Language, for example, you could search for funds in
a specific language, for example, if I type Tai, the Tai alphabet is different, so you could apply this
and find some fund that are compatible with the
Tai alphabet right here. That's language.
Now, another filter you can use is the price filter. So you can filter only the pro or only
the free fonts, which could be very useful
if you are a free user, and you're tired
of seeing all of these pro fonts that
you cannot use anyway. So in that case,
you can filter by ticking the free
box, and applied. Now Canva will only
show me free fonts, which is a blessing, I believe, for free users. So these are simply the filters, two types of filters, language, and price. We're
going to clear them thing else I want to show
you when working with fonts is that some of them are
part of font families. And you will recognize
a font family with the little arrow that you see
in front of the fonts name. Like, for example,
here, public sans, if I click on that arrow, I can see different font weight. Let me show you by
actually clicking on it. This is public sans thin. Then you have your regular, medium, bold or black. Now, these different weights of fonts are really useful if you want to create contrast in a specific
paragraph, for example. You could have a headline
in the same font. So you're still
using public sounds, but you want your
headline to pop out. So you will use a font like the public sounds
black, for example. And then your text would
be public sounds regular. Okay okay? Let me show
you what I mean by that. So this would be your headline, in public suns black. And then you will have
your public songs regular right here for
this other textbox. So you can create a hierarchy in your design working with text by simply playing around with
the different font weight. I would recommend you
explore these font families. You see Montserrat here has a bunch of different
weight to it. The more popular the font, the more weight they will have. This one gives us a large
range of weight to play For example, let's have our
headline in Monsat Extra bold and our text
body in Monsat light. For example, let's align this to the left,
and there you go. You have your headline
and your text body. This is how you use font family very useful
for creating contrast, for creating hierarchy between your different paragraphs
and layouts when you work Text, and also stay consistent because basically you will keep working with the same font, so it will look nice consistent
and all but you still have some flexibility to
highlight specific parts. You could also highlight a specific word by
changing its color. You can change the color with this text color
button right here. Could make this, let's
say You could board. So you have all your
classic, like bold, italic, underline. This
button right here. Very interesting. Let me
unbold everything here. You could uppercase. Some of these features will just consider the entire text
box like uppercase. Color doesn't work like this. You can highlight
a specific word in a sentence. Same with board. But the uppercase will put all of your sentence
in uppercase. That's a bit of a bummer, but that's how it works. So some fonts will not have
all of these attributes. Some fonts might not have the bold and italic and
underlying options. That's just depends on
the nature of the font. Next, you have your
alignment settings. You can align your
text to the left, center, to the right,
or paste knee. Can create bullet
lists, numbered list. You can play around with
the letter spacing. Two types of settings here. The space between your letters,
that's letter spacing. And let me show you if I
can create more space. Also, I will align
this to the center, so we can see that better. More space between letters and less space between letters
becomes almost unreadable. The default is always
going to be zero. Play with this if you
know what you're doing. Then you have your line space, which is, in my
opinion, more useful. Creates more space
between the lines. So that is also something
you can play around with. The default here is at 1.4
correct. There you go. This is your different
text options right here. Then you have effects
animate and the double arrow right here that gives you
access to even more features. Now, let me show you some other ways you can
use to style your text. From here you can access
the text effects. Create shadows. Each of the effects will have
their own settings. You can create different
kind of shadows like lift. You can make that word hollow, supplies, outline. Outline is interesting. Outline, let me show
you some options here. You can select the
color of the outline. Let's go for
something like white, and you see now everything
here has a white. Outline. You can also upgrade the sickness of that outline,
which is interesting. If you want to
create T shirts or fun graphics with
typography on them. That is your outline. I use this effect all the time. Echo glitch neon. I'll let you explore the background is one that
I use all the time as well. It creates a background
behind your text, and you can also change the
color from here directly. If you don't see the color that you like, you can create it. For example, you want some
highlighting that you go, can create create it
like That is background, and then you have
your curved text. Let me reset that text color because it became
a bit funky here. I'm just using my
control Z button, and I'm going to stretch
that a little bit, so we do have an entire
line right here. You know what? I'm going
to make that shorter. Earth is counting. I'm going
to select this textbox. Use the copy style
button right here, which will copy the
style of this textbox, and I can paste it on this one. With the first one selected, I'm going to use my copy style. Click here to paste my style. I'm just doing this
to show you how to use the copy style button, and now you delete that. Now I want to show you the last of the effects right here. I'm going to click on
see all the curve text. These first categories of
effects modify the style. But then we have one effect that modifies the
shape of your text, and that is the curve
text right here. If I click text
will be curved and then I have control
over that curve. Can curve it negatively. Can am create a circle,
which is pretty cool. If I do this and make my text a bit bigger
and add some texts, Earth is counting backwards. Now you see that
creates a full circle. Obviously, I need to
curve a little bit less, but I could make
these two touch I could add a dot at the
end of the sentence. So it almost creates a
full circle right here. A cool little design here would be to find a
graphic of the Earth and place that right here in the middle of your
text effect like so. There you go. Now
you have created an interesting design
based on typography, text effects, et cetera. And let me wrap up this lecture by giving
you a few tips on how to pair fonts or how to
combine fonts in Canvas. The most important
thing in my opinion is to look for contrast
when combining funds. The first way to
create that contrast. In my opinion, the easiest way
is to combine a bold font, like the one you see here with the thin font, the
one underneath. This one, the bold one is null, and the light one or
the thin one is code. All right. In order
to find them, I did something very easy. I just went to the font
menu and typed in bold. Canva gives me a
bunch of bolder font. Similarly, for the other one, you can search for
keyword like thin. But combining bold and thin font will always give you that contrast and
always create that, that effect of
highlighting of hierarchy. Yeah. For me, that
is the easiest way to create contrast
when pairing font. Okay. Moving on to the
second way of creating that contrast is to use a
toll font and a short font. So here we see knowledge is
power with tech Tall Arabic. Then we have this other one
right here, Roboto condensed. Anything that is condensed
will be like a shorter font. Tall versus short also creates that great contrast
and in my opinion, is also a very easy
way to get way is to use serif
versus San serifont. This implies that you
understand what cerifs are. The cerifs are the
little legs that you see at the end or the
edges of the letters here. You see that this font right
here called Orelaga one is a Serif font because it has these little legs
attached to the letters. While this one right here, red hat display
doesn't have the legs. You see the F R E, there's no legs like there
is on this other one. Combining a Serif with a Sanser font is also a popular
way to create contrast. Yet another way to
create contrast. Guys, this is not an
exhaustive list by all means. There are plenty of
ways you can create contrast when working
with fonts in Canva. The next way is to
use a display font or fund font and combine it
with a more serious font. Like I did here on this example. I have this one right here, Rubi Vanil nine by nine. I'm not sure how to pronounce the word. It is a display fund. You can clearly see
this is a fantasy fund, it's a fund fund,
not very serious. I would not use this if I was to create my business
website, for example. Then you have the counterpart,
the serious font, which is Monsat, which is
your serious, your clean. I would say your
corporate kind of fund that in this example,
combines very well, creates that contrast,
between the fund, the display fund and the
second line right here, which is more serious. Sure, there is plenty of other combinations that
could be thought of. This is not an exhaustive list on how to create
contrasts with fonts. I'm sure there is many
other ways to do so. But this is just like
my quick wins, my tips, my easy tips for you guys to start creating that contrast. All right. Moving on. There
is something else I would like to show you about
creating font combinations. NDA actually gives us
free resources that we can leverage in order to create cool font combinations. Let me show you where you can find this font combo preset. You'll have to head over
your text tab right here. And if you scroll down a bit, you should see font combination. You'll see here a bunch of
preset font combinations. Some of them will
have some effects, some of them are some
of them are free. But what I recommend you
do is to keep scrolling. See this list is pretty long. Keep scrolling, scrolling,
scrolling, scrolling. Until you start seeing
some black and white ones, like this one right
here. You see? This one is a nice
font combination between bold and thin
font, keep scrolling. You should see some
more fancy font with a classic type of
font works well as well. Big and small you
see for this combo, this one right here with a handwritten and kind of
straight kind of font. The more you scroll, the more you should see
preset font combination. All of the black and
white should be free. On top of being
nice, they are free. So make sure you explore these I would say preset
font combination that Canva designed for you and gracefully placed right
here under the text tab. Need to keep scrolling
in order to find some more combinations because there is an infinite
scroll almost here. Look at this all of this
scrolling. My head is spinning. These obviously are
editable. You click. Yeah. Let me show you,
let me delete all of this and keep only
this one right here. I put it in the
middle of my page. When I click on it, I see a button that prompts
me to ungroup. Why is that? Well, Because these are actually two
different text boxes. You see once it's ungrouped, you can see each
of the text boxes. The first one, this
one, the fantasy font, is called chewy and then we have the second one,
Legs Parton Caps. Obviously, they
are both editable. So for example, I can
type my own message. Thanks for purchasing purchasing this course. There you go. Thanks for purchasing
this course, and you have used that
fund combination and basically customize the
text to your personal use. So that is pretty cool. There is one more thing
I want to show you, another asset that anbi is
giving us to combine funds. I have here a template that I just imported from
the template library. If I click on the
design tab right here, this is a template. You see? It's come from this one. I just changed my
name and the date. I want to show you
another cool way you can style your
fonts in Canva. That's a lesser known way
of pairing of combining your different fonts
so that they match so that they create specific
sense in your design. For that, you will
want to click on the design tab right here. Instead of going to templates, you are going to
go to your styles. Go to styles and then
scroll down a bit and you should see a section
dedicated to font set. Font set right here. Click on CO. Now what
you see here is similar to the font presets that I showed you just
a few seconds ago. But they are all right
here under my styles. These font set right here,
they are the same thing. If I click on any of these, it will change all
of the fonts on my specific page that I
have selected right here, page number eight for this
combination of fonts. Let's try with one, that is pretty different from this
so this point right here. Mom. You click here and now you have your font right
here, that is Montie. Yes, I was trying to
read it from here, Montie then you have glacial indifference
as your second font. Basically, just with
the click of a button, you change all of the
font in your document. So basically what
you're doing here, you are using set fonts
or set font combinations in the style button to change everything on your design
with a single click. Okay. Every single
textbox will be updated to match these
fonts right here. Usually, they will give
you two fonts per style, which is more than enough and
you see right here, again, so everything has
been thought of, everything has been
designed by designers, so you can pretty much trust all of these font
combinations right here. They are very, very useful. I think we are going
to leave it here for this section about
working with text. In the next one, I'll show
you how to work with photos.
8. Working with Photos: Canva has over 100
million stock photos in its media library. In this lecture, we
are going to discover them and see how to
best work with them. There are several ways to
search for photos in Canva. Let's start by searching
from the home page. The way to access
the photo library from the home page is simply to head over
your template stab, so click on templates. I know it might not seem like the place where you
will find your photos, but photos are indeed located
here under the template. You should see on the
left side menu icon with the title that says
photos. Click here. And you will land on the
Canva photo library, which is an amazing resource for you to find any photo
you like. Okay? So I'm going to give
you a quick tour starting from the top and
going down this page. So here, you will have
a header that will change kind of
regularly in Canva. They will always update
this with some new stuff, some new collections they
want you to discover. Then you have a series
of ties with tags. So you have beach, sky, food, coffee,
anything right here. You can use that to start searching for
categories of photos. For example, if you
click on House, you should see photos of houses. If you work in real estate, for example, this
could be very useful. This tag right here that
says House, coming back. You have all of your tags. Don't forget, you have
your little arrows right here to navigate further
left or to the right. So you have these little arrows that are not always visible. Then if we continue to
scroll down, explore photos. We can see first drop down menu to filter the free
from the pro content. If you click here,
you can filter, for example, here, I'm using
my Ronnie free account, so I could filter only
the free content, and you will see 2.162
million photos right here. Now, let me put pro and free. So you see 83.6 million photos. The pro library
gives you access to much 80 million more photos
than the free account. This is really something to
consider when it comes to deciding whether or not you
need to upgrade to Canva Pro. The amount of media
that you get with the pro subscription is significantly higher than
with the free subscription. We just saw that with photos. That's pretty much
what there is to it. There's a big search box
right here, obviously. If I search for a blue
banana, for example, a blue banana, does Canva
have a blue banana in store? Yes, it has. Look, there's a
nice blue banana right here. The rest is some bananas with some blue color on
that same photo, but I could find a few photos of blue
bananas, which is amazing. As always, when you
see a little crown, that means that this particular
photo is part of Canva P. You won't have access to it with a If you
don't see anything, it means the photo
is actually free. Here, as you can see, there is one right here,
Blue Banana, free. Let me click on it and give you a little
bit more explanation of what you see once you
click on one of these photos. The first thing you should
see is the name of the photo, the name of that
particular media, Blue Banana on the
yellow surface. This is keyword optimized. Then you see the name
of the photographer, Mihael Nov, from Pexels. Mihael Nov is a photographer
contributor to Pexels. Form. And both of these names Mihalv and Pexels are
actually clickable. If I click on Michel Love, I'm going to head straight to Michel's profile on Pixel,
as you can see here. Now I'm going to
go back to Canva. That's one thing you can do. Click on the
photographer's name. Second thing you can do,
use this photo in a design. If I click here,
Kanva will suggest me a series of documents
that I can start. This photo will be uploaded in. If I want a Facebook post, for example, in landscape mode, and just click here and Canva
will bring up my photo of my blue banana in a Facebook
post in landscape mode. Doesn't quite fit
the entire photo, but I can stretch it and make
it fit very easily like. This is something you
can do very easily. You can use the photo that
you see in the library directly in your
desired document type, your desired design
type What else? You can start your photo. It will then show in your
start content right here. We are still in templates
and then start content. And start for now. You can click on the three little dots. You can report the
content if you believe or if you
judge it's offensive, or you can add it to a folder, which is very convenient. Now, even free users can
create a multitude of folders. You can create as many
folders as you need. And you can store, you can start organizing photo
collections, if you want. You can start resizing your photos for different
social media platforms. We'll talk about
all of this when we cover the lecture
about social media. That's what we see
on this part of this Here. Let's continue scrolling down to focus on what's
below the photo. A couple of tags, banana, fruit, conceptual studio shoot. Then we see a color palette of five colors that are taken
directly from the photo. You see this first
one, this amber color, then we have a slightly
darker orange right here, the black of the shadow, the blue of the banana and some darker blue for some
other parts of the banana. These are the five
dominant colors taken from this exact photo. Then you see more like this, Canva recommendations of
other photos of blue. So that's pretty much
how you search for photos from the Canva library, which is for me, the best way to look for photos on Canvas. The way I usually use it is
I come to the home page and I either start for a specific search that I need a photo of
something specific, and I will type my
keyword right here, or we just simply scroll down, see what's in here, and try to see something
that catches my eye. The way you search for
photos from within the editor is via
the elements tab. Or if you have opened your
tab if you have pinned the photo tab and quick
reminder through the Apps tab, you could find
photos right here. If you click on it, it
will be pinned here until you close it with
the little X mark. Similarly, you can
just search from here. Let's say I need
diverse people working. No diverse diverse people work want to showcase the
diversity of my workplace, I will need to try to avoid cheesy stock photos like this, for example, this is really
cheesy, I don't want that. I'm looking for
something like this. These are good
photos, but I want to find them in the
library right here. I need to make sure
they're not too cheesy. One is right here, this one right here.
I can click on it. Once you find something,
you can click on it. If you have frames on
your design like here, you could by moving the
photo towards the frame, make them snap
into these frames. If you don't want them to snap, you need to hold your command or your shift key, I believe. On a MAC is a
command key on a PC, I believe it's the
shift or Ault key. Hold it down, and then the photo won't snap
into the frames. Once you find a photo you like, let's say you like
this one right here, you can actually click on
the three little dots to find more information about
this particular photo. People of Indonesia, young
men working outdoors. It's a photo by Satrio Ramadan
from Studio Indonesia. So this is cool. I
could probably try to see more of this photographer. You see, now I'm accessing the entire library or photo library of that
specific artist. It's labeled artist by
Canvas Satrio Ramadan. This is cool. Let's
see what also here. Yeah. It's the set of photos. Once I have this, now I
have a bunch of photos from Indonesia that are consistent because taken by the
same photographer. But I only have Indonesia. So that is just one
way of working. You've seen how I did
something similar to what I did previously
from the photo library, just using the information about the name of the photographer
to find more of the same. But you could also
have a look at the keywords that are
being used here and see if you see one that is particularly original
or particularly unique. I would say probably Canva,
ID, working Indonesia. I think this one is probably the most unique in everything. If I click it, yes, this will probably bring
me to my entire set Now, there is a third way. The first way is via
the element tab, the second way is via the
photo tab, if it's open. The third way is via the Canva assistant,
the magic assistant. The magic assistant
is always here, the quick action guide. For those of you who are in
English speaking country, you can also use the slash key. Slash will open that same menu. From here, you could
type photo of, I don't know, photo of
Muslim people working. So you type this, you should see a bunch of photos of
Muslim people working. So click on CO, and then your side menu here will be populated with all
of these photos. So here, again, I believe this is another photo
from Indonesia. Is this the same person? No. It's not the same contributor. Again, if I want to
access the specific set. There is a set, let's see
if there is a unique tag. I don't see a unique tag here, like all of these
are pretty generic. What I'll try to do is to click on the contributor's name. Now I can find more photos from Indonesia
that look the same. Pretty much the same. It
will be a mix of results, but I do have more photos
of Muslim people from So that is the third way just
by using the quick action. If you are in a English
language country, you can try the slash
key on your keyboard. This will bring
up the same menu. And by the way, you can search
for anything from here, not only photos,
search for graphics, you can search for a
line, for example. You can search for
really anything with this quick action button. All right, you find
that one great photo you like in the Canva library. But how can you find
more of the same style? Or even maybe from the same photographer?
Keep watching. All right. Let's see this photo I really like is this
one right here. So I see young Indian woman with tinted colored
hair. So I like that. I think this is both
modern and traditional at the same I want to
find more of this. I want to see if
the Canva library has more of these same photos. How can I go about this? I can see it's by core lens. So if I click here,
I will be brought to the main I would say
page of core lens, which has over 35,000 photos. So this is not really helpful. I'm going to go back
one step to my photo. Woman wearing traditional
attire for Dev. Okay. So here are some tags. I static Jerry, South Asian
women Bauty Festival. Do I see a very specific
tag here? Not really. So how can I go about finding, let's see the three
lire dots, no free to? These are the terms and
conditions for using this? I'm going to give you
a tip on how you can get more information
about this photo than what you actually
see here and how you can actually try to get to the actual photographer,
the actual set. You'll see is a
two step process. What I'm going to do is to start the photo from
here. All right? Now, I'm going to go back
to my Canva home page. Open a document doesn't
matter which one. Open the document. There you go. Now I'm going to head over my projects right here and
look for my start folder. There you go. Here is my photo. I'm going to add
a page right here and bring this photo right
here on page number two. Though it doesn't really matter if we see the photo here or not. I just want to show you, now I'm working in the editor. I'm right here in
my Start folder. I'm going to hover over
the three little dots. Click here and now see
more information here. Woman wearing traditional
attire for Diwali, that's the same title, but instead of Core lans
as the contributor, I have a name more by Daniel
Adams from Core lens. And if I have a
look at the keyword right here and show
all Festival general, aesthetic beauty, Bollywood,
Canva, urban Diwali. Now, that keyword sounds
pretty unique to me. If I click here,
Canva rban Diwali, and now I access the actual set. You see, this is the
set I was looking for, because it's a consistent set of young Indians
dressed for Diwali, which is the festival in India. Yeah it has more of
the same person. Look, this is the same
lady, the same hair, the same tire, the same outfit, so this is perfect. This is exactly what I
was looking for Again, I'm going to sum up
what I did to get here. But I just wanted to
show you this way of working with photos in Kanva that not many
people know about this. If you use these tack almost, you will be ahead of the curve, you will be way more advanced
than 95% of Kanva users. Yeah, you're welcome, guys. This is my little
contribution to the Kanva community to show
you deep searches Canvas. Now instead of
starting this photo, I could simply have
added it to a folder. So that would be another
way to go about this, or I could click on the creator profile and start
following this account. In this case, core lens is not so much particular
photographer. This is a platform
or agglomerate of photographers that are just all working together
for core lens. So I don't think it's
very interesting to follow accounts like core
lens, but let's say I want. Let's say I do. So let's
follow this account. Now following Core lens as a photographer as a contributor
to the Canva library. I can find this
information like the media that Cre lens publishes
under this tab right here. I'm still under templates,
Creators, you follow. I click here, I should see
core lens being added here. So yes, it's right here. You see core lens, and these are all the latest
photos from Cre lens. Again, it's not ideal to follow big accounts like core lens because
it's a big account. I prefer to follow smaller
independent photographers or people who really experience emotions when
I looked at their photos, like the set I
showed you before. So I'm going to
unfollow for now, but I just wanted
to show you how you can follow contributors and then where you can find these media that contributor
has actually published. It's obviously also possible to upload your own
photos in Canvas. Actually, you can do that in
a couple of different ways. Let me show you these
different ways. The first one is to
start from the homepage. The Canva homepage
has an upload button, also subtitled Ad Media, which is located right
here near the other icons. Locate that upload button. You do, you will get this
choose files button, which lets you access the
files on your computer. Me, I have a bunch of photos
right here on my computer. These are all photos
from the time where I was working with my nonprofit Fair
trade connection. I will talk about
fair trade connection a lot during this course
because this represents about ten years of my life where I traveled
around the world and worked with the fair
trade producers and fair trade organizations. My job was to document
the impact of fair trade. I took a lot of photos, a lot of videos. That's also how a. So there you go.
You'll see a lot of this Fair trade connection
material in the course. Back to our photos here. Let's say I want to upload
this one photo here. So I have it selected. Just click on Open, and it
will be uploaded into Canva. But not only will
it be uploaded. Canva gives me when I upload from the home page a
few different options. I can edit this image. If I click here, I will be directed to a modular
photo editor. I'm going to show that
to you in a second, but I want to first focus on the two other buttons
right here. The The prominent one,
the one they chose to put in purple is to
use in a new design. Canva wants you to
start a design. So if you click on this button, you will have to choose
a document type, all the types of documents
you can create with Canva. Okay, so you can choose one, and your photo will be placed in it in the
right dimension. You can start working on
that design immediately. Okay? That's the first option. Or there's another option right here that says add
to a template. This is relatively new. Have a look at what's going to happen right here on
top of your page. This is this magic
design feature again. So basically, Canva is going to pinpoint
some templates in its template library
and place your photo very smartly inside one
of these templates. You have a variety of
different document types, YouTube nail, Instagram post, social media, Facebook
cover, et cetera, et cetera. You have a few different
documents with your photo already
inserted in the template. It gives you a good overview of what your design
could look like So this is relatively new
and pretty interesting. Let me go back one step. I'm back here on the home page. What I want to show
you also want to show you this modular
photo editor. I'm going to upload
another photo because this one has already
been uploaded, so I'll show that
to you in a second. I'm going to upload the second one from the same
day of shooting, same kindergarten, same
school in Nepal Katmandu. I'm going to open this
one as well and show you the option to edit your
image directly from here. This is great because
you upload photos and they might not
be perfect already. You'll have an assistant
giving you two. I'm going to skip
the tour for now. Basically, I want to
show you that from here, you have access to all of
your image editing settings. I'm going to cancel
here, this card. What I want to show you
is that these two photos that I uploaded via
this button right here, they are somewhere kept
in the Canva cloud. The way you can find them is to use the project tab
right here, click on Then locate the up loads
button under your folder. Make sure you are
under all folders. A or folders. Let's go to folders, uploads, and there you go. These two photos are right here. From here, you can
do more stuff. You can click on the
three title dot, you can edit the image, which will open the same editor. You can move that to a folder. You can replace it across different designs,
which is interesting. You can download it. You can
create tags for your photo, which is interesting, but
this is a pro feature. Tagging your photos
is a pro feature. I'm going to go
back to this later. Yeah, we have our two
images right here. Under projects, And since we're here, since we are working with
these folders, there is something
I want to say here. One thing you will want
to do at all costs is to stay organized because
one phot two photos, it's fine. It's manageable. But once you start
uploading dozens if not hundreds of photos into your Canva account, it's
going to get messy. It's going to
become difficult to find these photos to
remember where they are, to organize your workflows. So what I suggest you do, and the habit I would like
you to adopt is to stay organized and to label stuff properly and to put
things into folders. Is a wonderful update since the last time I
updated this course is that free users can now create infinite
folders in Canvas. I used to be different. You used to have a few
folders only as a free user, three, four, I don't remember, with a very limited
amount of folders. Now you can create as
many folders as you need. Use these folders to organize your assets to organize
your design ingredients, photos, videos, graphics,
logos, anything, really. Just do it. Let me show
you how you would proceed. So I'm here under folders. You can see that this
account is not an account I use regularly because I don't
have a folder structure. I just have folder one, two, 34. This is my Canva free account. I have another one which I use
all the time with my team, and this one has a
bunch of folders. One thing I would like
to do is to show you how to rename a folder or
to create a new folder, creating a new folder very easy. Click on the plus add
new button folder. You can create a
folder folder name, and you can share it. You can mention wherever you
want to have this folder. Since I already
have four folders here with nothing inside them. You see zero items zero items. I'm just going to use folder one and rename this
folder by clicking on the little pencil and
call that fair trade photos. Fair trade photos. Now I have this empty folder
called fair trade photos. Again, something
useful is that you can use the little
bread crumbs here. It's called bread
crumbs to navigate, come back to the
previous folder. So what I'm going to do
is to go to my upload, select these two photos. These two fair trade photos. You see this menu popping up at the bottom of my screen,
two items selected. I can either delete them,
move them to the trash. They will not be
completely gone. When you move to trash, the trash is somewhere
kept for about 30 days. I think it is that
your media will be stored in the
trash for 30 days. After that, it will
be completely gone. Just parentheses here. What we want to do is
to move to a folder. I'm going to click
on Move to a folder. Locate my folder. I love that
anvana has a recent tab. Otherwise, you will have to navigate through
all the menu, but now, with the recent
tab, just easily, click on your recently created
folder fair trade photos, and I'm going to move the
two pictures in here. Now they are gone
from my uploads, and if I go back to projects, go to Fairtrade photos,
they are right here. Some more stuff you can
do. You can rename them. I'm going to leave them as
such because it's already carrying a name convention that I chose with Fair
Trade Connection. So yeah, that's
pretty much how you upload photos from
the home page. Something else I
want to show you. You can also add photos by clicking on the plus add
new button right here. You see, you can
upload from here. Let me upload a third photo. This one right here
of this little girl studying in her book. When you do that, when you use the add new and then upload, the uploaded media will show up immediately
in your upload. It will be right here. Similarly, you'll have to
select that and move it to the appropriate
folder that is if you want to stay
organized. There you go. Something else I
want to show you is that you can also upload videos. You see, there is an image
and a video tab under load. The way you upload a video
is exactly the same way. But instead of selecting
a photo right here, you can select a video
file and upload it. It's exactly the same way. It will take slightly longer. But then your video be found under the
videos tab right here. There is one last thing I want to show you.
What you can do. Instead of using the
upload button like add new upload from here and then it will be stored
under your upload, you can upload directly from
the appropriate folder. You see right here, I am
in the Fred photo folder, so I can from here add
the photos I like. I will use the upload button. Let's say I want to upload all of the other
photos I have here. I have about 30 more photos. Will be uploading them
directly to the right folder. So this will kind of
prevent me from having to move them from one
folder to another later. There you go. It's going to be uploading and why
it's uploading, I can just live my life. I can just do something
else in Canva. There is no problem about that. Everything is going to be
nicely organized in my folder. I don't have to worry about it. Okay. So just to show you, you come back to it,
going to my projects, and going to my fetit
photos and you see 16 photos and it's still
going, still uploading. So depending on your
Internet connection speed, it will take more or less time. Just a reminder, I am using
my free account here, and you've seen that I've uploaded already a
bunch of photos. In terms of storage, free Canva users can have up to five gigabyte
of Cloud storage. Cloud storage includes
everything, photos, videos, design, so all of that needs to stay within the
limit of 5 gigabytes. The other hand, if
you are a pro user, you will have up to 1
terabyte of cloud storage. So that is significantly more
than what free users have. If you have to work with hundreds of thousands
of photos and videos, I would highly recommend you upgrade to a Canva pro
subscription. All right. Let me show you yet another way to upload your own
media into Canva. This time, when you are working inside the Canva editor,
the design area. I'm here on the editor, slightly Zoom level here. This is a blank
document, nothing in it. I want to show you
two different ways. You can upload photos from here. I would say the
classic way would be to go to your load tab again, right here, Uploads
and then click on Upload Files. Click here. You will be again able to navigate the files on
your computer. This time. All of this has already been uploaded to the Fat
trade photo folder, so I'm going to find a
photo on my desktop, which is this one right
here of Diana and NI on Ns Plaza in Barcelona. I'm going to select it
and just click Open. I'm going to start
load right here. And if you want to use
it, you can click on it. It will be displayed on
your page right here. Start editing this, working
on this as your design. One thing I want to show you, if you hover over the photo, click on the three little dots. You will have access
to a few options. First thing I see is that
this photo is called Untitled Design four,
which is not great. So I'm going to rename that photo for the sake
of staying organized. I'm going to call this Diana and Ronnie in Barcelona.
There you go. This is much better now
when you hover over it, Diana and Ronnie in Barcelona. Move this to a folder. This is interesting. You
can move your assets, your photos directly to the right folder from
here in the editor. You can download it or
you can move it to trash. This is the first way to upload
a photo from the editor. I'm going to delete
it, and I'm going to delete it from here as well. Actually, I'm going
to copy the name. I don't want to keep typing
this name again and again. I deleted it. It's not in my
you see image move to trash. To show you a second way you can actually upload that
image into Canva. I'm going to move my mouse to my second screen here
that you don't see, but I have my desktop
folder open here. What I'm going to do is to
select my file and drag it. You see it's coming here.
I'm going to drag this file, which is the image,
the four PNG image. I can either drop it right
here in the design area or I can drop it right
here in the upload area. I'm going to drop it directly to my page so that you
see what's going on. The photo is going to be visible on my page
and it's going to upload right here under my
image upload. You see upload. This is great
because you can pick files from your computer and drop them directly into Canva, and you don't even need to
be in the uploads button. You could be working
on under element and drag that file and
just drop it in here, and it will start uploading in the right folder in
the upload folder. I don't need two versions
of the same photo, so I'm going to move
this one to trash, and I'm going to rename
this one the proper name, which I kept in my copy
paste. There you go. I think that's it. These are the different ways that I know of to upload your own
photos into Canva. What if you have a
PowerPoint presentation you'd like to open in Canva. What if you have a
PowerPoint presentation, you'd love to open in Canva, or maybe a PDF from your company that you'd like
to open and edit in Canvas. Can I do that? Absolutely.
Let me show you how. Let me show you what kind of files are actually
supported by Canvas. When I drop a file right here. Okay, so I'm not going
to drop it for now, but I just want to show you this menu right
here, this message. Drop files to upload can upload
fives of different types. Adobe Illustrator PDF,
PSD, which is photoshop, PPT X, which is PowerPoint, Google Doc, Doc X,
et cetera et cetera. These are all the
types of documents of files you can
upload into Canva. Then these are your
supported image formats. Images straight from your
iPhone camera, gifs, JPEG, PNG, SVG, which is the vector
format, so all of this. These are your
video file format, AVI, and B four, M, give m4v, M KV, et cetera, et cetera, and all of your audio formats. So what I'm going to try
right now is to upload a PDF because I believe this is powerful and you can
do different things. But before I do, I want to show you what PDF
I'm talking about. This particular PDF is a presentation made
by Skill Share, which is the creator
guideline and inspiration. These guidelines
are for instructors on Skillshare who are actually partnering
with Skillshare, so they give instructors a bunch of guidelines
on how to work, how to create sponsored
videos, et cetera. Right. Let me come back to my
Canva interface right here. I'm going to click on loads, and I'm going to
simply drop that PDF. You see it coming here,
drop it right here. I'm going to upload. You
see, Skillshare Summer 2024. Now, I have this document
uploading right here. Once it is, you will see the number of pages,
so I can click on it. It will take a
little bit of time for all of the
thumbnails to generate. But I can assure you that these pages are
actually right there. I can by clicking on it, adding these pages to my design. Let me refresh to see if the pages load properly
now. Yes, they are. Sometimes you just need a little refresh button,
but there you go. Now I have all of my
pages from this PDF. I can add second page,
which is this one. Or I can simply apply
all pages to my design. I'm going to do this instead, going to delete
these two pages and click on apply all 13 pages. You see Canva is going to
populate I click on Grid Vew, all of my 13 pages right here. You remember that it was PDF. Well, the beauty and
the power of uploading a file into Canva is that it becomes editable.
I can change that. Creator guideline, creator
framework, and inspiration. I could totally edit
everything in my document. You see this graphic right here, I can make it smaller, flip it. I can probably change the color. If I use an effect,
everything becomes editable. Everything is pretty much
where it needs to be. See this photo. I can
apply some effects on the photo by simply selecting it using the
little arrows right here. If I want to change something
here, so magic eraser, for example, if I was
a kind of a pro user, I could use that tool. So That is the beauty of
uploading your files. You could upload
a photoshop file, a PowerPoint file and start working on editing whatever
is inside that file. I'm going to show you for
every single type of document, but I believe this
example of the PDF is a very interesting one because we all work
with PDF, right? And so Canva makes it super
easy to edit these documents. We're not going to
go too deep into photo editing in this
section of the course. Indeed, we're still
reviewing the fundamentals, and I'd like to keep
these short and suite. But rest as short, we
will go deeper into the various photo editing tools in Section six, for example, the Canva Magic Studio, and we'll also see how to
properly edit your photos with Canva in sections like Section seven designing
for social media. I'm not going to
edit it, but I want to give you a quick overview of where all of the
editing features are located in Canva. The first thing is I'm
going to need a photo. So I'm going to head over
my project tab right here. Go to my folders and fetch it
from my Fair trade photos. Here, Let me grab a photo. Let's say this one of this
pottery worker in Bangladesh. Now, I have my photo. The way you make the photo editing features options appear, you will need to
select that photo. A lot of people forget to
select the photo first. Select it by clicking on it, and then use a
little double arrow right here to see
all of the features, or of the options you have or you can use
the edit button. You see like an image icon, and edit, can click on that. This will bring up this
menu right here from where you have access to
all of the editing options. Again, I'm not going to edit it, but I want to list the
things you can do. The first thing is
the adjust section, which is not going to be
the one open by default. The one open is going
to be Magic Studio. If you want to access
the adjust setting, just use the little
arrow right here. These are all your brightness, contrast, highlight, shadows. The classic Basic, I would
say photo editing features. You can have a look
at all of that. There is an auto adjust
button, which is interesting, which will calculate how
to adjust the colors. You see colors adjusted
automatically. You can select the whole image, the foreground, the background. I like that, that you can
create some special effects by selecting only the foreground or the background of your image. For example, let me quickly
show you if I select the background and I
desaturate the background. I will have a black and
white background and a colored subject right
here in the foreground. Can create cool
effects like this. This is the first thing,
the adjust button. Now if we look at the
Magic studio suite of tools right here, we have all our AI
powered features like background remover, magic eraser, magic grab, grab text, magic
edit, Magic Expand. I talk about all of
these features in the Magic studio section of the course because these
are very interesting. A lot of them are
only for pro users, though, so just
be aware of that. These are your magic
studio features. Under that, there
is the filters. This is more something you
should be familiar with. If you use Instagram, if you use Facebook, or if you just simply use the photo app on
your smartphone, you should be
familiar with all of these effects. Explore them. There are some funky
ones at the bottom, color pop and stuff like
that, monochromatic. These are just simple filters. Next, you have your effects. Effects are interesting. You can add shadows, duotone, blur part of your
picture, auto focus, which will also focus on the person or create
a blurry background, and then pace we touch. Again, we'll cover
all of these effects. Time. Then you have a
couple of apps that are also super useful.
You have your mockups. This one not going
to demo it now, but places the photo inside of an object,
which is really cool. Image ab scaler. If you have a low
resolution image, you can use this
app image ab scaler to upscale your image. Colize is an interesting effect. Pielfi, bland color. I will let you discover they
are more or less useful. Have your basic
things like flipping the photo horizontally
or vertically. That's very basic. Adding
a border to the photo. I like that we can
now do that easily. Change the color, for example. Let's say you want
a yellow border. You just go about it like so and add a thicker
border, for example. You can round that border,
which is also cool. Rounding it will be from here, you can add some
rounded corners. I also love that you can
have a gradient border. That's something
very funky that I like to Transparency,
et cetera, et. Play around with these settings. You can animate your photo. You have a different
set of animation. Some of them will be free, some of them will be pro.
That's your animate. Then finally, you have position. That is the exact position
of your photo on the page. You can work with
layers if you had different ingredients
on your page. So That is Nat shell. Again, we'll cover that into details in a more practical way, but I just wanted
to show you where these options were
located in Canva. Again, if you forgot,
click on your image, click on the edit button, and then this menu will show up. Remember that you have
different sections. Just use the little navigation
options right here. If you are in one of the
options, for example, use the back arrow to go back
to your main photo menu. One thing I highly
recommend you do when working in Canva is
to stay organized, especially when
working with photos. Let me show you a
couple of easy ways to keep your media nice and tidy. So the first way I
would start that organizational system is to simply have the appropriate
folder hierarchy. So I am here in my pro account, one of my pro accounts. This is the Team Rondi account, the main account where we work with every other team member.
9. Working with Colors: Another key design
ingredient that you will use over and over in
C anva is color. In this lecture, we'll dive into the basics of
working with color. Now make sure to sprinkle in some good tips and resources for you guys.
Let's get into it. Your best friend when it
comes to working with colors in Canva is the
color button. All right. So let's, for example, say, we want to change the color of the background of this
Instagram square post. All right, Let me reduce the size of the
Zoom a little bit. The way we do that is to
simply click on the page, and then we'll see this
gradient button right here that reads
background color. I'm going to click here. And this will open
the color button. Okay. So I'm going to go through the different
sections of this color button to kind of explain to you what's in here. So the first thing we see on top of it is the
document colors. So right now, we don't
have any document colors, but let me add a few
pages to this document. Okay, let's say three pages. Going to import a template
doesn't really matter. Let's grab one from Diana, page three, grab another one. This one, page four,
yet another one. Now I have these three pages. I'm going to come
back to page one. Let me close that window and click back on the
background color. Now you see the
document colors have been populated with all of
these different colors. Basically, what you see here
in the first section of the color button is every single color that has
been used in your document. On the other pages
of my document. So that's the first
section right here. The second section is the
colors of my brand kit. I am here using my
Runny free account. I have a very limited bran
ket limited to three colors, and these are the three
colors of my brand kit. Moving on, scrolling
down this color button, we have the default colors. These by default will
always be the same. Canva gives us these
different colors here to work with if we want to. Then at the bottom of
this color button, we have the gradients. Now, let me add one more
thing to this document, a photo because let's
use this photo that we've previously used
previous lecture. Come back here because yeah, I wanted to show
you this section right here that will only work if you have photos
in your document. This one is called photo Colors. Photo colors basically
will extract the five dominant colors of any given photo you've
used in your document. Here we have this
photo right here, and the colors that
have been extracted are this like khaki green. Then we have this forest green, then a darker green maroon or brown color and then
this fuctia color. So, yeah, it works like this. Canva will identify
the different colors. The different dominant
colors on your document. Now, let me try again. You see, I have a
second color palette generated from this second photo right here. So that
is pretty cool. Helps us really kind of like stay on brand if
we want to create consistency in our designs to have this color palette extracted
from the photos we use. So in the last section
I wanted to show you before I got carried away
is the gradients section. This section allows us
to create gradients. You see, Let me get
rid of the photos. I simply created a
gradient by using one of these presets
gradients right here. Similarly, you would
have a plain color for your background by clicking
on that color right here. Now, something else,
you might not find the color you need in
all of these options. In that case, you'll
use the first option. Add a new color. Let's click here to
see what's going on. First thing you'll see is this
color spectrum right here. It is made out of two sections. The first big rectangle right
here that allow us to go from dark black to
all the way to white. If I just stay on that vertical right here goes from pure white
to pure black. Then I have everything in between on this straight
line right here, all the shades of I move
towards this direction, I'm moving towards the orange. But I could move the second slider right
here to move down the color spectrum from red to another red right here
going through your purples, blues, and greens and yellows. That is basically how you can pick a color manually,
I would say. But it might very
well be that you know the X code of
a specific color. If you do know the x code, you can input it
from right here. Let me input a color
right here that I pasted. This is the green color that I like using in
some of my designs. I had the exact hex code, so I pasted it here, and that's also another
way of creating a color if you do know
the specific hex code. Again, this all
started from the add a new color button right
here, solid color. I knew the hex code, so
I pasted it right here. It might be that you do have
this animation on your page. And you like one of the colors. For example, you like
this blue right here. You would like to
recreate this blue color. Let's say you have this
square right here, you want the blue
in that square. So how would you do that?
First, you select your shape. Then you select
the color button, go to add a new color, and you can use
the color picker, which would be right here. So you will see a color
picker in most cases, if you use most of the
traditional browsers, I'm using Google Chrome. I believe it works
with a Microsoft edge. It works with Firefox, probably works with Safari. So most of the I would say, renown browser, you will
have the color picker. Okay. So click on
the Color picker, and then you can basically
find the color you wish to replicate on your design
by simply moving your cursor. Ma one. Blue right here, I'm going to click on
it, and there you go. My blue color from the shirt has been passed onto
my square right here. That is creating a color
based on the color picker. There is another tab right here under the create your
own color button. That's the gradient tab. Here, similarly, you
can create gradients, and you can create gradients of as many color as you need. Here by default, you
have two colors, so you can change
the first color, so you can make that
greener green, like so. Second color, you can go towards your yellows and do
some and there you go. You have two color gradient. You can also play around with
the style of your gradient. You see this second section
right here to make the light come from different
points on that gradient. Or you can also add a third
color to your gradient. You could go towards the
blue after the yellow. You can reorder the
different colors of your gradient as well to make it to your
taste, basically. You can keep adding
more colors Personally, I am more of a two
color gradient guy. So here I would probably
get rid of the blue and keep the nice green and
bright yellow gradient, go for something like this. This is actually pretty nice. Okay, that's how you
work with gradients. That's pretty much how we use colors in Canva via
the color button. But you might be wondering, what can I add color to? Can I change the color of
everything I see in Canva? The answer is almost. Well, obviously, the
first thing we've already seen that is the
page background. So you can change the color of any page background very easily
by simply clicking on it. The second thing is all of your elements are most
of your elements. So if you click on
the Elements tab, There you go Elements tab, you don't have any searches loaded up in your
bar right here. The first section
you'll see is shapes. So you can have all
sorts of shapes. By default, when you
create a new shape, it will be in the color in
the last color you've used. Okay. So if I change
this color to, I would say orange and
create another shape, it will be orange as well. And if this is the first shape you create in your document, it will be the first
color of your brand kit. Just be aware of that. There
is no randomness to this. There is actually a few
rules that can follow. So all of your shapes can change colors. You
have your graphics. This is where it gets a
little bit more complicated, not complicated, but there
are some exceptions. There is no straight rules. Not all graphics will be something you can
change the color of. So for example, let's
search for something. Let's search for a banana
icon, Banana icon. So I have this one right here. You can see I can
change the color because there is a color
button showing up. So if I want blue
bananas, I can have that. If I want purple banana,
I can have that. Next, let's try
another banana icon. This one right here, you see
there's no color button. So for these second
bunch of banana, I cannot change the color, at least not with
the color button. There are ways to actually
change the color, and I will show you
how in a minute. But what I wanted to
show you here is that not all graphics will have
the options to change color. Some of them will, like
this one, right here, this third banana has actually five color
buttons you can play with. So that is kind of like
your best case scenario. Oftentimes, this is when this graphic right here
is an SVG. Graphic. It's not really you don't
have the full detail of that graphic right here and it's a pro element as well. But, this is your best case scenario because you can really play around with all of the
elements of your banana. Let's make this banana blue. Changing its color. This can remain green.
Yeah. There you go. Blue banana with a
purple top. All right. Yeah, Your best case
scenario is when you can change all of the colors
of a specific graphic. So what else can you
do? Let me create some space here on my page. I'm going to delete
even the background Shapes we've seen,
graphics we've seen. You can change the
color of your charts. If you keep scrolling
down the elements menu, you will see your charts. For example, this pie
chart right here, I can change every
color inside the chart. This is very easily
done by clicking on the corresponding
colors and just adding some new colors
to my chart right here. That is charts. Let
me delete that. After chart, we can see tables. You can change the
color of tables. This one is a little bit different the way you
change the colors. First, you need to select it. Once it's selected, you have two different
things you can change. You see here it says
color. It has no color. This is the inside of the table. For example, if you want that light terracotta color
inside of your table, this is where you want to come. The first button right here, it could be transparent
as well like no Then you have the borders of your table right here
and you can change its color by clicking on
this button right here. For example, this dark
terracotta color there you go. You can have a colored table
as well. That's table. Let me delete that. Then
you have your frames. A frame can be
colored, no problem. So. You just add a
color inside the frame, which is the
equivalent of a shape. Let me revert that. But you can also
have a color around the border of this
frame right here. That border can also be
of a specific color. You see? Let me make it thicker so you can really see
what's going on here. Let's add something
into my frame. Let's add this video. You
can add videos into frame. There's no problem with that. And something I love
doing as well is to have gradient borders
around frames. Frames totally okay
with colors as well. Next, you have your grids. They work just like frames. You can color them and you can add borders to them as well. So exactly the same
thing as for frames. Next, you have your mockups. Mockups work a little
bit differently. You cannot change the
color of mockups, or at least not from
the color button. That's pretty much what you have right here under
your elements stab. We delete that. We'll talk about mockups a bit
later in the course. What else do we
have We have text. Obviously, you can
change the color of any text box very
straightforward. You probably already know
how to do that. Yeah. This is something less known. You have your draw
the little things you can draw with the
different pens right here. The color can be also
changed on that. Once it's on your design, just click on it to select it, and then yeah, easily
change their color. Like this little squiggle
that I draw here, I can make it a different color. Let's make this green. So that's pretty much everything you can change the color of, and you see it's almost
everything apart from a few graphics that won't
let you change their colors. Maybe videos and photos, you won't be able to change the colors of specific
photos and videos. You can change the borders around these photos and videos, but not the photos
or videos per se. There are some hacks to change the color elements that don't offer you an option
to change their color. The first one is
the duotone effect. Okay, let me show you first with this logo right here from
fair trait connection. So this logo has a color. It's like a dark purple.
It's almost black. It's not black's dark purple. You can see when I selected, there is no color
option right here. The way the hack I can use to change the color of
this design of this logo, even though there is no
color button is to use the edit button and to
find the duotone Okay. Duo tone right here. I'm
going to click on it. This will allow me to
select two colors, hence the name duo Tone. I can click on any of these. Okay. Let's click
on the first one. This one is basically a mix between this gray and
this almost black. Right? I can change
each of these colors. So if I want this
logo to be red, let's say this like intense, bright red and then four zeros. I will select the first
color to be that red and select the second
color to be the same red. And since I can input
a hex code here, I can pretty much use any color that I want
to change the color of any non colorable item in Canva into something
in the desired color. So there you go. That
is the first hack to change the color of anything in Canva is to use the Duotone app. Another interesting
asset to change the color of an element
is the Tracer app. And you'll find my full
review of this app in the dedicated app section
at the end of this course. Alright, folks, when
I'm about to show you are three of my best tips. If not best tips ever, at least three of
the best tips for working with colors
in Canvas. So Buck. This might be the
coolest resource I know for using
colors in Canva. Okay? This landing page is
called canva.com slash Colors, and it is a great
mine of resources. It's just a great resource
to understand color theory. So to find some inspiration
with the color palette ideas. Yeah, and find some
nice photos from the library with vibrant colors that will match our design. So let me show you how it works. Okay. So first, let's
read the header, find the perfect color tools and resources for any project
from color palettes to everything you could
ever want to learn about color So there's
a few different things. There are four main
sections here on this page. The first one is the
color palette generator. When you click here, basically, you can upload an image, and Canva will extract four
colors from your image. Let's try. I'm going
to upload an image. I'm going to come to my
downloads, right here, grab an image from this folder
with the Fett producers. Let's find one that
is colorful enough. C. This one is cool. To upload this, and you see
Canva automatically generate a color palette that will match the vibe of this photo right here. Let me
try another one. To just take a random one. There you go. Okay. This
is an interesting tool. You can have your
X code right here, and I like that Canva
renames the colors, spicy, mix, night rider,
moon Mist, noble. All of this is pretty cool. Roll down, you have
some color palettes. You can explore the
color combination, which is the second
section of the page. I'm going to come back
one step back right here. The second one is the
color palette ideas. This one is your gold mine of color palette and color
palette idea inspiration. You have 99 plus pages
of color palettes. So it's just up to
you to explore them. You can start by typing
the name of a color, so I don't know, like lime, green, all of the color palette kind of like corresponding
to this keyword. So yeah, that could
be very interesting. You can type
keywords like fresh, and you will have some
fresh color palettes. You can type some other
keywords like seis, and you will have only one
serious color palette. Interesting. Pink. You can
type like this name of colors, but also emotions, I guess, to match whatever it is
that you are searching for. Once you find a color
palette that you like, you can click on it
and you will have an easy way to copy the hex
code of any of these colors. If you like this magenta, this pink right
here, click on it. Then you can come back to
your design right here, and select the
background, for example, go to create a new color, and then paste that
hex code right here in the Hex code
box and there you go. You have recreated your color pink from this color palette. This is I like that you just have to click
to copy the ex code. You see the little checkmark. It means this has been
copied to your clipboard. You have related color palettes, you have templates that could
match these color palette. All of this is pretty cool. I love that canva also gives you a little photo that goes along
with your color palette. That was the second
thing. Let's come back to the color home page. My favorite one is probably the color color wheel gives
you some theory about colors. So you can grab any color
of this color wheel, and it also explains what the color wheel
is, how it works. So you have your
complimentary colors, you have monochromatic,
you have analogous, you have triadic, et
cetera, et cetera. So it's a really great
way to learn about colors and to understand what
the theory behind color is. I highly recommend you
spend a little bit of time like reading
right here about these color wheels and the different options
and the different ways of using the color That was tile number three,
your color wheel. If I come back to the color hub, I would say, you have
the color meanings. This one is also pretty cool. It's just a bunch
of different tiles with a lot of colors right here. If you click on
one that you like, for example, the lime one, super fresh color right here, you will have some explanation
about this specific color, and you will have
some color palette generated with that
specific color. You'll have a bit of a history
of the color, the meaning, the emotions that it conveys, et cetera, et cetera. This is also very cool. Bunch of resources
to play around with, so the color meaning
page right here. And type the name of a color. So you say orange, then you
will see your orange color. Read more about orange, there you go orange
color theory. A whole page for you to discover a bit more about
this specific color. Let's come back to the editor, the second resource
about colors. That is not that much known in Canva is hidden right here
underneath the design tab, and you'll have to switch over
the style tab right here. From here, you can see combinations of color
palettes plus fonts, or if you scroll down, you'll see color palettes. So if you click on C O, you have an equivalent, I would say of what you had in the color hub with all
of the palettes there, but this time, they will be immediately right here
inside the editor. The power of this, let me show you by using the second
page right here. I'm going to select any
of these color palettes, and look what's going to happen. I'm just going to click
on the desired palette. Let's say this one right here. You see, it applies the
colors to the current page. I can shuffle by keep clicking. I could choose another
palette and keep shuffling the colors,
and again, another. So this is a great way
to create a template. Give that template a completely different look by changing all of their colors based on
that specific color palette. Let's try it another
page right here. There you go. Very
easily change all of the colors in a specific
page in a specific template. I love that you can search
for keywords like vibrant, colorful, bright, So this
is the second resource. It's the color palette
under the styles button. This is going to be
available for everyone. Again, I'm using my free
account right here. So you see exactly
the same thing as IC. Similarly, you could choose
a combination between a color palette and
a font combination. For example. In this case, it will change not
only the color of the document,
but also the fonts. See? There you go, I've
changed everything. I'm going to change everything
again, font and colors. You can shuffle. There you go. So that was my second resource. Let's move on to the third one. All right, folks, I kept
the best one for the end. I'm that kind of guy
when I eat dessert. I keep the best
spoon for the end. The last one, the most savory
one, the one you remember. This one is called Apply
Colors from template. The way it works, select
the page on your design. I'm going to select this
page right here, page two. I have a bunch of
different things that need to be colored here. Next, you will head over your design tab
templates and find a template that carries a
color palette that you enjoy. You can I can
search for vibrant. For example, vibrant. Let's see. That should give me
some cool colors. This one really enjoy, but it is a pro template. So this feature is
not going to work for me because I'm
using my free account. See, I will need
to find a template that one carries a color
palette that I enjoy. And two is free. Let's find one that is free
with some cool colors. This one, this one is
not bad. So let's see. The way this works, you will need to click on the three little
dots right here, and you will search
for apply Colors only. You see? This, let me show you. This is quite amazing. Are
you ready? Okay, let's go. This will apply the colors of this template to my
current page. All right? You can even apply colors to all the pages of your
document. And there you go. Now, you have in one click, like applied a color palette
to an entire document, not just one page,
the entire document. If I had 100 pages here, all of the pages will be
matching this color palette. Again, the way I got there, you select a page or you don't have even
to select a page, you just go to your
design templates. Find a template that you like, like the colors that you
like, for example, this one. Make sure if you're using a
free account that you use, you select a free template, the Pro ones one work, let me show you that the
Pro ones one work. You see don't have that option. But this one right
here is a free one. Again, I can apply colors
only, and there you go. You can shuffle them, I guess by simply shuffling the colors. Yeah. You can also
apply text only. That will change the font. In this case, not that
nice because yeah, the first font was
actually better. There you go, folks. If you
use these three color hacks, you will definitely
manage colors better than 95% of Canvas uses. You are welcome.
10. Aligning and Layering Elements: This lecture is going
to be short and sweet. It tackles how to align
your elements perfectly in Canva and master the art
of working with layers. So if you're ready to get your ducks in a
row, pun intended, let's dive in. All right. What I have here is a cute rubber duck that I
found in the Canva library. For this lecture, I am using
my Canva Teams account. I can simply because I wanted some nice rubber
ducks and that Canva pro gives me access to some more options
for rubber ducks. We'll be using this QT
for the sake of this aligning I'm going to show
you a couple of things. First of all, you need to
click on your element. Next, we are going to
locate the position button. When we click here, we have a few different
features that we can use for aligning or positioning
this element on our page. The first section,
the upper section of this menu has to do with arranging your elements
in terms of layers. But here, since we only
have one rubber duck, one element, this is grade out. We cannot use these features because we need more
than one element. I'm going to show you
these in a second. To start with this section
of the menu, line two page. This rubber duck is
right now in the middle, exactly the middle
of my document. You see this when
you start moving it, you see the intersecting lines, the purple lines indicating
this is the middle of and I'm holding my click here if I release it, these
lines disappear. If you don't know
where your element is, you can always start moving
it, holding your click. That's very important
on my mouse. I'm holding the click,
and I see this line. I'm just staying on the line. It only appears
when you are on it. When you are at the
middle of your document, you should see the
intersecting two lines. Align to page are just some
quick action buttons to align an element on a specific
position on the page. To be super honest
with you guys, I don't really use
that too often unless I want to make sure the
element is at the middle. If I want it at the center, you click middle center. These two at the middle here. Middle and center are the ones that I use most of the time. If I'm trying to put something
in the center middle, I will be using these two. You see here are some
specific numbers that you can put in for the width
and the height of your duck. If you want the ratio to
be respected, for example, you want to bump the width of your duck
to, let's say, 400. The ratio, if you lock it, will be respected and
then if you hit enter, you will scale that element
by this exact number. You don't lock your ratio and you change only one
of the numbers here, let's say, for example,
300 and hit Enter. You see what happened
here is that my duck has been cropped right here because
I didn't lock the ratio. Make sure you lock the ratio. I'm going to go control
z, lock that ratio. Then the last line right here are your positioning
in the space, the x and the y axis. I could go 900 and move my rarely use these
advanced commands here. I prefer to scale the
elements like so. But just know that they
are available here. They could be useful if you
need to work with precision. For example, you want the
duct to rotate 45 degrees. You can enter the
exact number here instead of going like so
and trying to find 45. It's just a simpler, more precise way of working. All right. That's the first
thing I wanted to show you. In order to get there, again, select your element and click
on the position button. All right. Let me
now show you how to work with multiple
elements on your page. This is where you will be
unlocking all of the features. Similarly. So you can
click on your page, not on any particular
elements of the page, but click on the page background and use the position button. When you do so, let's say you land on this
menu right here. You don't see anything,
but if you do click on the page and
click on position, you should buy default
land on the layers tab. Okay. So the layers
tab is to help you manage the different layers
on your page. Very useful. It is something
relatively new in Canva, and I'm super happy that they added this feature
because it allows us a more granular control over the different layers
in our design. So for example, let's say I want to work on the black
duck right here. I have four regular ducks and I have one black
ducky right here. You see, it's hidden in the middle among its
yellow brothers. So how do I select it? Well, with the layer
option right here. Once you click here, it will be also selected on your design. So I could do one or two things. Since it's selected, I
could hover my mouse over Being careful not
to select any of the other ducks that is in
front of the black one. For example, here I'm safe, but here I'm not safe. I'm touching the
duck in front of it. Here I am safe, so I can click and move, and I get the black duck out of the pack of
the yellow duck. That's one way of doing so. That's the hard way because
you need to make sure you are clicking exactly
on the right duck. An easier way to do so would be to select your
duck right here, the black duck, and then move that layer to the
top of all layers. Now it's super easy to select that duck because it's right
here in front of everything. That is really, in my opinion, the power of these layers
that you see here. You can reorganize
every single layer. Now I put it in front
of the first duck, so could be playing with
that and progressively make that duck appear again until
it comes to the foreground. Now, remember when we were on the arranged button previously, I showed you that these
buttons were grade out. Well, these buttons
allow you to go backwards or all the way to the back or forward or
all the way to the front. So here we are dealing with
your selected elements, here the Black duck,
it's still selected. I can go all the way to the back with this
button right here, you see different
layers and an arrow. If I do this, it will be positioned all the way to
the back. There you go. I can double check
that by clicking on the layer tab and I see it
all the way to the back. Back to arrange. Let's bring it back all the
way to the front. Now instead of sending it
all the way to the back, I'm going to send it
backward one layer, and then two layers,
and then three, four, five, and now it is
all the way to the back. Again, back to the last layer right here. Get to the front. So yeah, this is just
a convenient way to work with layers, and
you don't need to have, let's say you have your ducks like they don't need to be super aligned like
they were before. Let's grab this
black duck again, and let's put it right
here in the middle. I'm going to push it
back once, twice. You see you can play with your composition and
organize your ducks. This one would be nice to be all the way to the
front. Oh. Like so. You could even flip it vertically and start playing
with your composition. Like this one could also be
flipped. And there you go. You have a nice little bunch
of duckies right here. Remember these features. I think they are super useful. Everything starts with
the position button, either from an element
position or clicking on the page position to access
all of the layers right here. Thing interesting
also with the layers, you can select one
and delete it. I just hit the delete
key on my keyboard. M control Z, bring
back the black ducky. You can use the
three little dots to have extra options
for your layers. Layers, bring forward, bring to the front and back
and backwards. You have a few different options when you work from there,
and then obviously, you can drag them back and forth on the hierarchy of layers. The only layer you cannot
delete is your page, the background layer right here. You cannot change
it. That is pretty much what there is to know
about the position button. Sometimes you need to work with precision to align elements in your design or to make sure your text is exactly where
it needs to be on your page. C Kanda has a secret
weapon for that. Let me show you. What I have here is a set of
pages from a template. Let me show you full screen. I'm going to go quickly to show you what this template
is all about. It's a presentation
about mockups, and you see there's
a lot of texts, and everything seems to be well aligned everything
where it needs to be. So let me show you what
that secret weapon is. How do we get all of that text super aligned
like this knowing that it could be difficult to have everything right
where it needs to be need precision work while working with
texts, for example. But it also is the case
while working with graphics. You work on a poster or you work on a presentation like this one, and you need your
text and text boxes or graphics to be super aligned. I recommend you head over the file button right
here. Click here. Locate your settings,
settings and then click on Show
Rulers and guides. This will do two things. First, it will bring
up the rulers. On both the left side of your screen and the top
side of your screen. Those are the rulers with the
dimension of your document. But what these rulers allow you to do is to pull out guide. I'm going to click on
the ruler and drag and see this guide coming up
like the purple guide. This is super useful because it will snap to your
different elements. You will fit it
snap. Maybe without manipulating the mouse yourself, it's going to be a bit
difficult to understand that snapping motion,
but it does snap. It snaps to a textbook So
these guides are super useful. For example, I see here
an alignment mistake. You see this and this textbox, they're not super well aligned. Why? Because this text box could be reduced
slightly like so, and this one as well. And so when I do so, you
see I reduced it slightly, and now it is perfectly
aligned. I can zoom in. Let me show you,
I am that kind of like an obsessive align person. Like, I need everything
to be super aligned. So here it is the same
alignment. Let me zoom out. Can create as many
guides as I need. All I need to do is to come
back to the ruler, click, Hold my click and drag, going to create another
guide right here. I can create guides
coming from the top, so I'm going to create
one right here. Another one right here, another one for these. I want these two obviously to be aligned like point number
one and point number three, same for two and four. Obviously, I need another
guide for two and four, so let's bring it there
you go right here. Boom. When you do so, probably need some guides
on the side as well. Here here. Once you have this, like it's almost impossible. Let's say something moved
then you like this and, no, everything is moved on
my design. Well, no problem. You just get the
elements and you start aligning them back to
where they belong. Canva will keep assisting you. You see these little
dotted lines. It means something is
aligned with something. Right here, there you go. I know it's the right s
for aligning my element. Here as well, there
So the guides are your secret
weapon for aligning, textboxes, graphics,
videos, photos, anything really that you need
to align on your documents. All right, folks,
let's stop here. In the next lecture, I'll
show you how to share, download, or publish
your design.
11. Downloading, Sharing & Publishing your Designs: Hey, guys, welcome back. We have two more things to
cover before we wrap up this section of the
course that covers the fundamentals of Canva. The first one being what to
do when your design is ready. Okay, so I have a
design that is ready. This design right here, a square format 11 aspect ratio. I have two pages in my design. Remember our Earth is counting backward with
the little planet. This one I'm not going to
use because it has a pad. Here. I'm going to focus on
Page two only right here, which doesn't contain
any premium elements. I'm I'm good to publish this even though I'm using
my Canva free account. The way you share download
or publish your design, it all starts with the
share button right here. I'm going to click
here. I want to go through the different
options with you guys. The first one that
you see on top of this menu is people with access. I can see that I
am the only person with access to this design. You see Ronnie Free, I am the owner of this design. The only person with access. I could add people here if
I had people in my team. Obviously, free Canva
users cannot use teams. I don't have that option here, but I could share with
an e mail as well. I could add an e
mail of a person, let's say random
person@gmail.com. I would send an e mail with a personalized message
if I want to and basically invite that person to collaborate with
me on that design. That would be free
for that person to simply open my design
and start working. You can also tick
that box and create a team with this person by
trying Canva for teams. That is like a subtle
way Canvas low keying, trying to sell you Canva
teams by using that box here and it will basically prompt the person
to try Canva teams, which you will need
to pay for that. But if you want to simply share that design, you
can do so for free. You can also share a
design and a person doesn't need a Canva account
to open it and edit it. They can just start editing
it from their browser. That is important
to When you share, you can decide if that person can edit only comment
or only view. These are different
access settings that you can set from here. Once you're good to go, you can share and that person will receive that e mail with
invite to collaborate. That is one way you can do so. You can click on the plus
button, which is similar. It's the same thing as basically adding people from the
search box right Now, I want to show you the
difference when you work in a Canva Teams account. This is my free account, so
we don't see anything here. Let me quickly switch over
my Canva team account. I switched to my
main Canva account, my Canva Teams account, where we have the
entire Randy team here. Share button, it's
the same design and just duplicated it. Now, if I click on
the box right here, I could share it with
the entire team, meaning every single
person in the team, or I could create
a specific group. Then my team and start adding people from the
team in that group, which could be useful if you
are a larger organization, or even not a very
large organization, but a ten people organization like we are more or less
eight to seven people, and then just share this with your designers,
for example, or with your
marketers or whoever needs access to the
social media team. Yeah, you can share it
with your entire team. Can view, can comment,
can edit same options, or I can search for
specific people. I could share this
with Diana only. Diana, there you go. I
would click on Diana and, can send her a
particular message, share and she would receive
Also an e mail from Canva, saying that I am inviting her to
collaborate on my design. By default, you can
also set access to specific folders of designs
that you might have. So everything that
will be placed, every design that
is placed under that folder will be shared
with the rest of the team. So that is very convenient. Let me switch back to
my free account and I want to continue exploring
this share menu. I'm back to my free account. You see, Purple is free. Let's click on that
Share button once more. From here, I want to
show you yet another way to very simply share your
design with someone. First, you need to set your collaborations
option right here. Only you can access. Let's click on anyone
with the link can access. That way, you are
saying to Canva that anyone with
the link can edit. Can change that. Can
view can comment. Let's say anyone with
the link can view. Then you can click on the
purple button to copy the link. See link copied to
your clipboard. Now I can paste that link in an e mail
in a slack message, in SMS, in a whatsapp
message, whatever, really. That's an easy way
to share the link. You could also create a QR code and use that link
for the QR code. These are basically your
collaboration option, collaboration links. Just be careful that if you leave it on anyone
with the link can Edit. So you are putting
yourself kind of a public situation here where
you might create a design, share that link, and that
link might be shared by some people you don't
particularly have control over. But if anyone with
the link can edit, it could be somehow
risky for you. So be careful what you
choose here in terms of who can do what
with your designs. Something else you
can do obviously, once you have designed
a nice, for example, Instagram post like this one, you could download
it so that you will be uploading it on
your Instagram account. If you want to download, just click on the share button. I was already in
that menu and focus on the little arrow right
here that says download. I'm going to click
on this button. Then this menu will pop up. Depending on what's
in your design. Here on that design, I see a five second animation. Let me delete page
number one and play that so you can
actually see the animation. You see how the
text is animated. That is why when I
clicked on Share, and download the default
file type right here is MP four video because Canva noticed there is an
animation in that design, and then by default made
it an MP four video. If you want to download this as a straight image, no problem. You can change the file type by clicking on that
little arrow right here. Choose JPEG, slight
steel image format, PNG, more suited for complex images or
illustration, PDF standard. Best for documents,
and e mailing, PDF print, best for printing, SVG, best for web
design and animation, that's the highest
quality of images. NP four video, obviously
for your videos, or you can even export
this as a gift, so that is short clip, no sound, more for posting
online, for example. Going to choose the PNG format. Note that each of the file types will
have different options. Some of these options
will be pro only. See, for example, JPEG, you could change the size of that document if you
were a pro user. Similarly, you could improve the quality or
decrease the quality, which will result in a
smaller or larger file type. Preferences. You can tick
this box if you want to save your download setting so that the next design
you download, we'll have these saved settings. Once you are good to go, let me show you
another file type, for example, PNG has a
different set of pro features. For example, you in PNG format, you can download with a
transparent background, which could be very interesting. If you have a logo, for example, can export or download this in PNG with transparent
background, and you could then clap your
logo on any kind of design, won't have a solid background, which is pretty So
I'm going to go for a JPEG right here.
Download this. You'll see a little
message from Canvas. Once it's ready, it should
land in your download. Right here, this is my design. I didn't take the time to
properly change the title here, so don't focus on that. But that is my JPEG download
of this specific document. So what else is behind this
share button right here. You can also share your design on social media
directly from Canva, and even with a free account, if you have properly set up
and connected your accounts. So in order to do that, the first thing is to
click on share, obviously, then I suggest you click on CO to bring up all the
different options. You should see section of
the menu that says social. The first one is going
to be your schedule, your content scheduler,
which is a pro feature. We'll talk about this one later. But you can publish directly
to different platforms, given that you have connected these platforms with
First one is Instagram, and you have your Facebook page, you have your X or Twitter. You have TikTok Facebook Story
Pinterest Linkedin profile Linked in page or Tumbler. These are all the platforms that are currently
integrated with Canva. I'll show you how to do
that in the section of the course about publishing and designing for social media. There will be a lecture
dedicated to publishing directly from Canva with and without the
content scheduler. But for now, know
that you can post directly to your social from
Canva. Just click here. You will need to
connect your Facebook account to your Canva account, which I'm not going
to do right now. Can publish directly,
which is a pretty good, I would say, time
saver if you are designing in Canva and
publishing on Social. That is publishing on social. Let me show you
something else that is pretty cool
that you can do in most countries while publishing your design. Click on Share. This is always the base, and try to see if you see
this icon, print with Canvas. So this is Canvas print
on demand. O option. So if you click here, you
should see different options of what you can print your design on with
Canva from your country. So here I am in Spain, Europe, and therefore, I have a
lot of different options. So you see I can print
letterheads, banners. Let's say I want
to create coaster, but you can scroll down the list is pretty long
of what you can print on Apparel. You can print
like a stationery, or you can print posters, business cards,
there's a horse array of documents and supports calendars that you can print on. Stickers, that's pretty cool. Let's focus on
coasters, for example. Let's click on
this coaster icon. What Canva will do, it will
re open a different design, a coaster design, and bring
on your design on it. You see I have the rounded edges of the coasters right
here to give me a better understanding
of what my coaster would look So print your design
on quality coasters, 9.5 by 9.5 centimeters
rounded corners. You can see a preview of what the coasters look like
with your design, which is pretty cool,
so that's the front, then the back with
the cor texture. You see it with lifestyle shot with a y more lifestyle shot, so you can really
see what your design will look like on the product
itself. There you go. Page one of your design, you can decide which one
of the different pages, you might have different
pages on your design. You could create
different coasters. But I believe Canva won't let you mix and
match the coasters, you'll have four coasters of the same are a little bit heavy on the price as well like 22
euros for four coasters, that's five euro per coaster. She's not cheap.
But hey, I mean, that is your one chance of
getting customized coasters, maybe you want to
splurge a little bit, or maybe you earn some
canva print credit in a contest or something and you want to treat yourself with something unique
for your house. So that could be a good
idea. There you go. If you are into coasters, you want to create
your own coasters, that's one way you could do it. At least if like me, you live in a country where this print product is available. If by non chance, I would say, you don't see this icon
to print with Canva, if you don't see many print
options, don't take it on me. This is really depending
on where you are located and how big of a network Canva has developed
already in your area. In terms of suppliers, printers, and print partners, So, yeah, this is Canva print. We do have a bunch of
different tutorials on our YouTube channel where
I print T shirt, hoodies. But yeah, I would recommend you to check them out if you are into printing or print on demand because
they're pretty fun, and the products are of
pretty good quality as well. And then you have all the other exporting and
sharing options. One last time I'm going
to click on Share. Click on the CO
button right here. I'm going to go through all
of the different buttons. I haven't explained yet because you guys
might be curious, and I want this master course
to be a master course. So no stone is going to
remain unturned here. All right. The first one
is the public view Link. If you click here, what
Canva will prompt you to do is to generate
a public view link. Meaning Canva is going to
publish your design online and generate a view only link that anyone can
access with the link. The link is right
here, I can copy it. If I paste it, there you go, I can see it with the
animation, which is pre cool. If you share that link with
anyone, they can see that. Doesn't mean they can
can only view it. So that is what
public view links do. And you will be
indicated by Canva if your design actually has
a live public view link. So the way you know that, when you go back to share, you will see this button, public view link, will now have a live like green capsule
indicating it's live. Actually. So if I delete, you can go back and delete
this public viewing, which is very
convenient because you might sometimes want to publish somethings and
then at some point take them out of
the public domain. So you can do that.
You can control that with this delete
public viewing button, which I'm going to do
right now. Click here. Canva will ask you to
confirm. Are you sure? You want to delete
this public viewing? Red button, it is now deleted. Click on Share.
Public view Link. You see there's no
live button here. It's not live. That
is Public view Link. Instagram, we've
talked about this one. This is sharing directly to Instagram from Canva Schedule. That is a content scheduler. Pfeature. We talk about this in the section of the
course about designing for social media. Template template link
is very interesting. This will allow you
to create a template of this design and share
that link as a template. So let me show you. First,
let's create a template link. It's been created. It's been copied to my clipboard as well. Now, I'm going to come
here and past that link. Boom. This is what users will see when you share a
template link with them. A template created
by Ronnie Free, that's me was shared with you. Start designing now. You give the user
the possibility to start editing this template. Do open this template and
start making some changes. They change the
phone, they change the color, they
change everything. It doesn't modify
your original design, this one right here because you've not shared the
link to this design, you've shared the
link to a template created from this design. Basically, Canva makes a
copy and makes it editable. The template link
is the best way in my opinion to share a
specific template that you want to share with
your audience without running the risk of your
original design being modified. So always think about the template link.
It's a free feature. Use it because it's
very convenient and it protects your
original work as well. That is template links. Again, you will have a live
little indication when you do have a template link and you can delete these
template links as well, which is again, very convenient. What else do we have
under the Share butt? I'm going to click on CO. Public view link
template link, present. Present is very simple. It is the same thing as
these two arrows right here. You get into presenter mode. You have different options. You have your presenter view, present and record, where if you want to talk
over your design, presenter view just brings your full screen presenter view with your notes and everything. We talk about this when we talk about presentations. Okay. Let's go back. What else do we have here?
Present and record. This is going to be available
to most users in the world. Not people in India. If you are a student
from India, I am sorry, but this is a decision
made by Canva, long time ago already. This feature is not
available in India. I believe it's for
legal reasons. That's at least what
we've been told by Canva, but I don't know the
bottom line of this story. Yeah, I'm just warning you
that if you are from India, you will not have access to this Next you have copy to clipboard. Copies, I believe, like a screenshot of this
to your clipboard. Save two folder will save that specific design
to a specific folder. You can send that to
your phone by generating a QR code or you can send that
via e mail to your phone. If you want to do
this for some reason, you can embed this
design on a website on a WordPress or you can
publish as a website, which is also a
cool little feature right here for an
Instagram post. I don't really see the point, but if it was a
presentation, for example, let me go fetch a presentation instead
of this Instagram post. Let's go with this portfolio. Template is template. I didn't create this,
but it has six pages. Let's go to share
and then website. This is the feature I want you. Publishing a website is
quite straightforward. You can tick the box to resize this website so that it
fits a mobile phone. I would always suggest you
do so to resize on mobile. You can also include a navigation menu if
you want. Website URL. You will need to
enter a website URL. It could be portfolio. Portfolio, this YL
is not available. Portfolio, Ronny, this
year is not available. Portfolio, Ronny, team,
Ron this should be. Okay. So basically, you
have to create a URL, and then it will be complemented by my Canvas site
at the end of it. And then your
publishing options, you have different ones, right? You can give your
website a name, a description, an icon, as well. Then once you have all of that, you can publish the website. Canva will prepare that website and then put it
online, publish it. It's as easy as that. You can get a website
up and running from a Canva document in literally
less than 1 minute. If you want to see the website, click here and there you go. I have a scroll down website with some full width
images as well, some clickable buttons
if I added links. This looks pretty good to me. Let's come back to the document. Obviously, there
will be a section of the course dedicated to website. There we'll see how you can edit your website
once it's published, et cetera, et cetera
So many things you can do with Canva website. But for now, let's continue to explore that share
button because I really want to cover
every single button in here before I
wrap up the lecture. Let's click on CO one last time. Think I've covered everything
from this section. Now let's just continue
scrolling down. We've covered the social save. These are your saving options. You can download,
download the selection. If you don't want everything on your design, let's say this, what you've selected, share, C O, download the selection. Only what's selected
here will be downloaded. That's a pretty cool option. You could publish that to your Google Drive, to your Dropbox, to your Microsoft, One Drive,
Microsoft PowerPoint, box. Obviously, you will need to
connect these accounts in order to get access
to these features. You can also connect your
Canva account to e mail, whatsapp message to a bunch of different
applications right here. Then as you scroll down, you will see more options with all the different platforms that actually integrate with Canva. If you connected these accounts. You will be able to somehow interact between your Canva
design and these platforms. So I'm not going
to show you every single one of them
kind of useless, but the process is
always the same. Once you click on one,
you need to connect your account or create an
account and then connect it, and then you will be
given some options to somehow leverage
your Canva design from Canva directly
to this platform. And this menu right here, you see it's already
super long and it's bound to become longer as Canva develops new partnerships and new integrations
with more companies. Right, I believe we've
covered the key sharing, downloading and exporting
options Canva offers. Now, very important is to keep in mind that this
menu is likely to evolve as Canva
continues to grow and integrate with new
platforms and companies. So it's always a good idea to stay updated on
what's new in Canva. Well done, guys, we are almost done with
the fundamentals. Now that you're well
equipped to create, but also publish or download
or share your design. The only thing that
we have left on our checklist is which one of the Canva plans is the
right one for you. And that's exactly what we'll try to answer in
the next lecture. I'll see you there.
12. Choosing the Right Canva Plan: Guys, let's take a moment to appreciate how far
we've come already. You are almost
through Section two, where we tackle the fundamental
mechanics of using Canva. Now, seriously,
this is a big deal. By now, I hope
you're feeling more comfortable using
the Canva interface. Before we dive into creating
all sort of cool designs, there is one last thing we need to cover.
It's a question. I get asked all the time
on our YouTube channel, and the way you answer
that question will definitely impact the
way you use Canva. That question is, is it worth paying for a
paid Canva plan? If so, which plan
should I go for? Well, just like Michael Jackson, there is no black or white
answer to this. No offense. In this last lecture
of Section two, I'm going to address
these two questions. One, show you the
main features of Canva Pro, what
you're paying for. Number two, help you figure out if you actually need
these features. For that, we'll look
at where you're at in your design or
entrepreneur journey. Let's dive in.
Now, if we look at Canvas plans and pricing, I am here on the URL
canva.com slash Pro. This will lend you on this page, and if you hover over
plans and pricing, you should see all
of Canvas current plans. So let's start by
exploring these different plans. First, we have the
Canva free plan. Design anything and bring
your ideas to life, no cost, just creativity. Canva promised that Canva will always have a free
version that isle. Okay? That's the vision
of the founders, and I believe this is going
to stay unchanged forever. Okay. The second thing
you have is Canva Pro. Canva Pro, unlock
premium content, more powerful design
tools and AI features. Next, we have Canva teams, and I'm going to explain the differences between these different
plans in a second. I just want to go
over them once. So next two Pro, we
have Canva teams. Transform teamwork, grow your brand and
simplify workflows. And then you have Canva
enterprise empower your organization with an
Odin one workplace solution. So these are the
different plans. One free plan, and then
one, two, three paid And then on this side, we have two other
plans right here, education and not for profit. That is part of Canvas
Force for Good project. Canva is actually giving
away its paid products. So Canva teams or Canva
enterprise almost to educational actors and not
for profit organizations. If you are falling into one
of these two categories, I would recommend you check out these two plans right
here because you might be entitled to having Canva teams for free because you are part of one of these
organizations. Canva for Education,
a powerful free tool for classroom,
district and students, and Canva for not for profit, Canva Pro is free for all registered non
profits. Apply to I would go even further and
say it's not Canva Pro, that is given to not for
profit organizations, but Canva teams because it's up to ten seats that are being given for
free via this plan, Canva, not for profit. Explore these at your own time. I want to focus on
these right here. The difference
between P and teams. Let's crawl down a little
bit down this landing page. Canva Pro creates
stunning designs. I'm going to read all of
Canvas marketing right here. But just know that
this page has it all. If you want to learn more
about Canvas different plans, this is the place to be. Why upgrade to Canva Pro? Design easier, scale your brand, improve workflows and
all in one place. All right, I think it's
time that I explained the difference between
Canva Pro and Canva teams. Let's start with Canva Pro. Canva Pro is the
basic paid offer of Canva that works
for individual works. So if you are a team of
one, see working solo, increase your productivity,
manage your brand, and build your
business with Canva. Start your free trial today. Canva Pro is basically
the bundle of paid features for
individual designers. Canva Teams, if I go back to the top of the page
here, pans and pricing, if I focus on teams now is basically the same
package more or less like roughly
the same package of paid features that
Canva Pro offers, but this time not for
individual workers, but for a team of workers. Much the same features
is just that Canva Teams is for an organization that
is small to medium sized. If you have a large
organization, they have another plan,
Canva enterprise. But Canva Teams is pretty much Canva pro for more
than one person. If I scroll down to the plans and pricing
here of Canva teams, you can see the question,
how many people So you can insert the number
of people in your team. For example, as we
are seven people. If I type in seven, this table will actually
refresh and give you the price that you need to pay for these seven
people per year. In my case, in our
case, 630 euros, which comes down to 90
euro per year per person. Now, be aware that there is
a minimum of three seats. So if you decide to
go for Canva teams, you will need to pay for
at least three people. That's the minimum amount
of seats in your team. So Canva Teams gives you
these perks right here, which are pretty much
the same as Canva Pro. Though the emphasis on
the teams feature here, the collaboration features
because those are now possible since you
work with the team. Remember Canva Pro is
for individual workers. But I guess most of
you guys will be probably hesitating between the Canva Pro and
Canva Teams plan. I'm going to start by describing the Canva Pro plan because
teams is pretty much the same. You just have
collaboration on top, you just have team
templates on top, brand templates, et
cetera, et cetera. It's not massive the difference
between the two plans. There is a core bundle of
features that I want to cover. In order to cover it, Canva gives you some hints
on this landing page. Basically, it's about designing faster, scaling your brand, improving workflows, and having all of these tools
in one single place. You have tools like the
background remover, you have access to all
of the premium content. You see a 100
million plus photos, template, graphics, and videos. Have access to the magic
features called Magic studio. These are all the AI
powered features. You have a little video
that shows you here, for example, background
remover is one of them. Yeah, Pro gives you
all of that magic. You unlock all of the magic
or the AI powered features. There's a bunch of
them. We'll cover that later in the course we have this table
right here that sums up basically the difference
between free and pro. Unlimited premium templates,
which is interesting, you have access to all of
the premium templates. You don't have to select only
the ones without the crown. You unlock the full
library of content, 100 million plus photos,
videos, graphics, audio. You can create and manage up to 1,000 brand kits
within your brand. That's quite amazing, creating so many
different brand kits. You can pretty much
create a new brand kit for every single campaign or every single sub brand you're managing or
client you're managing equal quickly resize
and translate designs. That is the ability to transform a Facebook post
into I don't know, a Linked in Carousel, for example, or YouTube banner. You create ones, and
then you use resize to transform your document into another document type with
carrying the same design. You can remove background
with a single click, boost creativity with
20 plus AI tools, plan and schedule
social on content, that is the access to
the social scheduler, the social media scheduler, which will cover later You have 1 terabyte of Cloud storage compared to 5 gigabytes if
you're a free user. A significant larger
amount of cloud space. Cloud space is the ability for you to host all of your photos, videos in Canva, but
also your design. The designs you create in
Canva have a specific size, and once your Canva account
cloud storage is full, you need to delete things
if you want to keep us So having a P account gives you much more space
to deal with, and it's very convenient
because you can really start uploading your assets,
your visual assets. Pro also gives you
online customer support, which in my opinion
is a useful feature. If you need to contact Canva, if you have questions, you can reach them online directly. Now, let's quickly
take a look at the teams feature over Pro. If I go back to plans and
pricing, if I go to team, Let me get to the
table right here at the bottom of the page where they compare the plan pricing. Here, the comparation is
not between P and Teams. That would have
been nice, but it's between teams free
and enterprise. Let me read the bullet
points here for teams. Scale of brand and
centralized assets. Basically, this is something
you can do with Pro as well, that is uploading all of your brands assets
into your brand kit. You can do that
with Pro as well. But here they focus on that because that's what
the team needs. So they have cherry
picked the arguments to resonate with a team here
versus an individual work. Sue brand consistency
with approvals. This is new because
in a pro account, you cannot have
multiple workers. Approvals is basically you can set roles to the different
members of your team. For example, you can
have a designer set the role as designer or brand designer to
someone in your team, and that person will have Clearance to accept other people's design
when they publish it. So that is pretty
cool. Edit comment and collaborate in real time. This is indeed a perk of teams. You can leave comments
in any design. You can tag people in a design to assign tasks,
so that's pretty cool. Generate on brand copy with AI. You can do that
with Pro as well. Reports and insight. That is when you
create a design, you publish it and you
can have insights on who has used or
opened or interacted, clicked on a specific design
so that could be useful. Pay as you grow, so that
what we've seen here, 90 euros per seat at this time of the year could
be more in the future. But pay as you grow, it's a per seat of pricing plan. On terabyte of Cloud storage, same as online customer, same as P AI admin Controls. I believe that is the
same thing as P and ISO 27 001 certification. This is something pretty
much nobody cares about. So these are the
main differences, I would say between the plans. Then you have Canva enterprise. Now unless you are a big
company, this is not for you. This unlocks a whole
array of new features, which I'm not going to
cover in this course. This course is more geared at individual workers
or small teams. If you are a big corporation, then there are some
interesting resources online about Canva enterprise, but I'm not going to cover
this in this course. Okay, Ronnie, but what's
the verdict here? I appreciate all the explanation about the features and all, but you still haven't
answered my question. I upgrade to Canva Pro or to Canva teams as much as
my guts want me to say, Hey, yeah, Canva Pro is awesome. Because at the end of the day, that's really what I think. I'm going to play it safe here and go with the good
old, it depends. Whether or not you
should upgrade to a paid Canva plan depends in my opinion on three
different things. First, it depends on
the features you really need to accomplish
your day to day work. Then second, it depends on
your financial situation. And third, it depends on where you are in your
entrepreneur journey. Now, let me break all
of this down for you. In this section,
I've pointed out the major differences between the free and paid
versions of Canva. If I were to sum it all up, it will come down to accessing
millions of new photos, graphics, videos,
and audio clips, enjoying more
flexibility when using Canva as a team by doing
things like creating your own templates and sharing
them with your team or easily collaborating on
designs with your teammates, developing a detailed
visual identity. Your brand kits, Unlocking all the magic of the
AI powered features, being able to remove the
background of your photos, but also your videos
in a single click, being able to create
ones and resize your visuals into a
variety of formats easily, downloading PNGs and SVGs with
a transparent background, which is very
convenient for logos. Example, enjoying
more animations, more fonts, and more templates. Finally, having access to
the content planner to schedule content to social
media straight from Canvas. Now, that is in a nutshell what Canva Pro and Canva teams offer. It's not an exhaustive list, but these are to me the main
perks of using a pay plan. So the question really is, do you need these features
to achieve your goals? Maybe you need a couple of them. And if so, then how badly
do you need these features? Will they help you save time or maybe generate more income? If the answer is yes, then you should
consider upgrading. Now, obviously, another factor that will influence
your decision of upgrading to a paid plan is your current
financial situation. If you can barely make ends
meet and you have to scrap pennies each month to feed
your family or paid the rent, and signing up for $15
monthly subscription is probably not a good idea. This goes without saying, but I thought I
would bring it up. Also, be careful guys here. This is big warning, red flag. Listen carefully. I would strongly
recommend you stay away from all the
scam out there on the Internet promising you Canva Pro for life for some
ridiculous cheap price. Trust me. I've worked
at Canva for two years, and I can guarantee you there is no such thing as
Canva Pro for life. Anyone trying to sell that
to you is either lying. Trying to scam you
or doing something illegal that will
eventually get shut down. So mark my words. There is no lifetime
subscription to pro, to teams, or anything like
that that doesn't exist. And it will probably
never exist, and it's not in Canvas
best interest to do so. So please do not fall for that. All right. This leads me to
my third and last question. Where are you in your
entrepreneur journey? I said entrepreneur in a designer journey
because I see purchasing a subscription to
Canva Pro or Teams as an investment in your
business or in your career. Are you at that
point in your life where you want to
invest in any of these? Your business or your career, or are you just doing
this for fun and don't really use Canva professionally
nor intend to do so. Answering these questions should really help you
make up your mind. Also, having been on the road
myself for about ten years, trying to stay afloat with my little nonprofit
organization, I know what it is to be
a broke entrepreneur. I understand the meaning of
bootstrapping a business to stretch every dollar and really be careful about
what you invest in. In there. If this
is you right now, here is my advice to you. And this is something I've
learned over the years. You've got to respect
and value your time. The number one mistake I
made while trying to grow my business was to
think that doing everything myself would
make me save money. And so I spent hours doing
something that could have been outsourced or simply made more quickly if I had been
using the right tools. Like spending 45
minutes in photoshop, trying to perfectly get rid of the background of a photo.
Yeah, I've done that. Canva Pro or Teams will
help you save time. Time that you can then
invest in other projects or in other ideas that will help you grow
your business bigger. Try to see these $15 a month as an investment
in your business, a commitment that you make
to become a better designer. Personally, my paid plan has
helped me in different ways. It helped me create
better videos that got me more
views on YouTube. It's helped me design better project proposals that have landed me better
paying clients. It has allowed me to speed up my workflow and save
me a bunch of time, which I have done dedicated
to other projects. Has helped me streamline the
way I work with my team, which made outsourcing
task easier for me. Then again, save time to allow me to think about
the bigger picture. All right, that's all
I have for you folks. It's really up to you to decide. If you decide to
give Canva Pro a go, I've got a special 30
day free trial Now, there are many free trials, even if you go through
the Canva website, but by using my link, you can explore all the pro
features for an entire month. You will also be supporting
me at no extra cost for you. Please do me a little favor. If you are considering
trying Canva Pro, the free trier of
Canva Pro for 30 days. Use that link by
scanning the QR code. You can also find
a clickable link in the lectures description. Thank you for your support.
13. Class Project: Congratulations, guys. You made it to the
end of the class. You are now ready to get on board and just start
designing with Canva, which is exactly what you will need to do for this
class project. The project consists in
you creating and sharing or publishing your very
first Canva All right. So I'm going to give you
a few practical steps. You can follow to do this. The first one is obviously, you need to design
your project in Canva. And you can design
anything you like, could be a post
for social media, a presentation, website, if you're feeling adventurous,
anything, really? It's up to you. Think
about something that is useful to you,
to your business, or if you want to create
a gift for someone, you can do that too with Canva. Now, I understand that
as a Canva beginner, you might feel overwhelmed
when it comes to finding all of the
design ingredients in the Canva library. So to help you out with that when you are designing
in the editor, my team and I have put together a collection of
keywords that will help you source the best graphic
collections to understand what font combinations or what
fonts work well together. And three, some of our
favorite color combinations. You find all of that in a digital product that you can grab from my skill
share profile. So no more excuses, guys. Now you have everything you need to start
designing with Canva, the knowledge from the class
and the digital product with all the cheat
codes if you need them. All right. How to share
this design with us. Very simple, go back to the section about
publishing your designs, see how to create a public
view link in Canva, grab that link and paste that in the project section
of this class. I will make sure to regularly jump in there and have a look. Happy designing
 Ronny Hermosa, Your Go-To Canva Guru