Transcripts
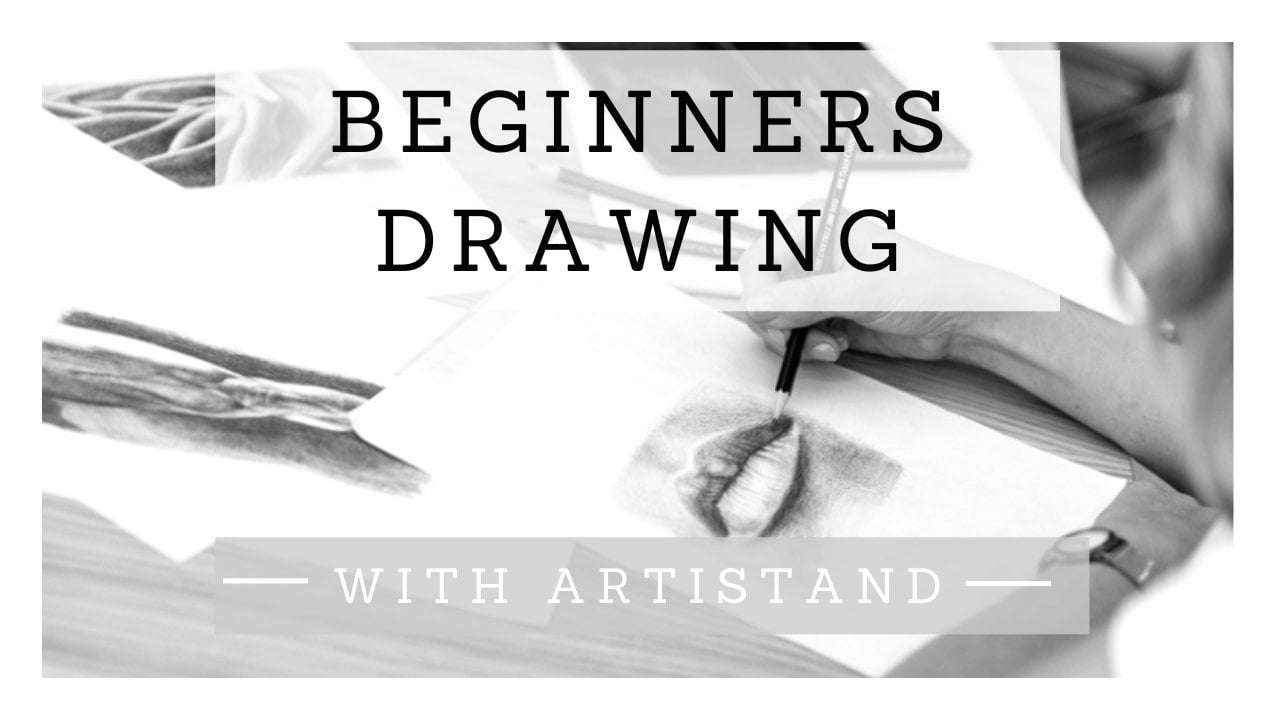
1. Shading Introduction: What I love most about drawing is the fact that you can copy absolutely anything. And the process is so satisfying. Our isn't just for these selected view is for absolutely everybody. My name is China and an artist and a business owner. This class is about helping you become a more confident artists power of shading and understanding your tools. I'll be showing you some fundamental techniques that I had been shown through other grandmasters. And also some of my own things I think will be really helpful when you go into galleries and see what other people have done. Sometimes feel like this is never going to be something that you can do. But I promise you that's not the case. I'm a true believer that everyone has the ability to become as good as they possibly can. And it just takes practice patients and a willingness to fail. I'm going to show you a whole bunch of techniques that will help you get to where you want to be and become a better realistic biases. We're going to be looking at quite a few different things. So be ready for shading overload. We first need to know our tools and what they all mean so that it'll make our lives a lot easier. Next, we will start on our growing drills and see how they can get us in the right mindset for getting that muscle memory. Then we're going to start to apply all of this shady theory into our drawings and look at a couple of different kinds of shadows, how they're relevant in the drawing realm. And finally, useful masterpiece. To put all those things together. Often we get scared of what we don't know. So we end up not trying to reach our full potential. Did you really give it a go? And most importantly, don't be afraid of shading. Really get those dark tones, lens a bounce into those gentle, soft ones and just let go. You can let go of all your assumptions about your own ability and just enjoy the process. I promise you, you'll be able to get there. Good luck. And I can't wait to see what you do.
2. Shading - Stage 1 - Equiptment: So before we begin, we should really look at our equipment. It's really important that we're fully prepared for our drawing and that we understand why we need things. So I'm going to go through different options and I'm going to go through the equipment that I'm going to use myself. So let's start with our pencils. Probably the most important thorough shading. You can buy pencils in big packs. You can buy them that range from a five-page all the way up to a nine B. Now later in the lesson I'm going to tell you what each of these mean. But for any of my drawings, I only use pencils. Here. I have them in front of me. So let's start with the two stage. Now. The two, which is a really hot pencil, is also really liked it later on I'll show you what a five-page is compared to a to H. And a five-page is even lighter. But this is super, super light and it means that you can really get a lovely soft effect now you can always go lighter with this is really hard to get doc. So for me, this is the minimum sort of shade or the pencil that are used for a light shade. And it's also quite dangerous, I suppose, because it can easily rip your paper. I say that quite lists that you can scale your paper if you press too hard. So H is the maximum pencil in the age range. Next, I have my tube. So this is my go-to pencil for any outline. Whenever I start a drawing, this is a perfect place to start because it's docket and it's softer than a to H. And if it's softer, it just means that it was God, the paper as much if I make a mistake. It's really good for shading, but it's not the darkest pencil can go. So this pencil is your automatic pencil that you should pick up whenever you start a drawing. And it is really good for a lot of middle ground shades as well. So to be, That's our second important pencil. Now, the final one is an eight or nine B. If you have it, sometimes packs of pencils or in the even go to a 60. So it's completely up to you how dark you want to go so long as it's six B and above, then this is the other pencil that you need. So my AB is super, super soft. Rarely soft is almost annoying. But it's really, really dark. So there are ways that we can eliminate that soft effect. We can use our two h to get back into drawings. But it gives us that dark range, that really important contrasts that we need in our shading. So I'll show you the texture of all these pencils in our next lesson. But for now it would be really good if you can get these pencils ready. Now, these pencils, just the three of them are available on artists and website, so you can buy them as a pack of three rather than buying the whole range that you might find on other websites. I don't use any of the other pencils unless I've lost one of these, which is highly possible. But for me, this is all we need. You've got the maximum darkness, you've got the average middle, and then you have the maximum lightness. So these are your pencils. Now, this is just a pencil, rubber. And honestly, it is amazing. I give these to all my students because you just can't really go wrong. They're really good at picking out the finer details. If there's any mistake that is nice and hard. So get yourself a pencil rubber, which is a bit more accurate as well. So any fine rubbings. So not necessary. This is optional. But I thought I'd show you anyway. This ribbon is what they call a Percy rubber. So it means that I can pinch this into a very specific shape and then I can just selectively pull out that pencil. Now this is really good. If you're shading has become too dark and you just want to move a little bit without smudging the whole thing, which is usually big rubber does. This one avoids all of that. So it's really good and gentle, which sometimes it's bad if you want to rub everything else. But it is a very good rubber just for getting those, those finite, this fine, delicate bits out. So a posse rubber is your next thing. Now, for this course, you might just want to grab a ruler just to get some straight edges not necessary. Again, you can even just use the edge of a pencil to draw a straight line. But if you have a ruler, sometimes is a little bit easier. Now you might wonder why I have a knife. And this is an option to sharpen our pencils. So you can use the classic sharpener. No harm in that ASL. You should really make sure your pencils are always shop. Really important that, that, that happens. But to me, I sometimes sharpen my pencil with a knife and I will show you how to do that in just a moment. But it means that our pencil can, it can be really sharp for even longer. So what we'll do is we'll expose the lead to about an inch, inch and a half. And then we'll use a sand paper just to file it down and it should create a really long point. Now is a bit heartbreaking if you break the lead, so do be careful. But just another option, again, not necessary, but another option for us. Just to improve our drawing that little bit more and make it a bit more accurate. So get your materials ready, decide what equipment you want, what equipment you don't want. These three are necessary. All of these are optional. So let's begin with exercise.
3. Shading - Stage 2 - Fine Sharpening: So let me show you how you can sharpen your pencil with the knife and the sandpaper. And I can show you exactly what I mean by having that long fine point. So grab your pencil and your knife. And first of all, I want to start by saying, if you're not comfortable with a Stanley knife, do not do it. You don't have to prove anything to anybody. I'm going to show you a method that is safe. But I do want to make sure that your health and safety is the most important. So only do this if you feel confident enough that you will not hurt yourself. So I want to make sure that I've got a good grip on my pencil. I'm holding it with all my fingers. And what I wanna do is I want to use my thumb to help push my Stanley knife down that pencil. Now, notice how my finger is saying way from the end because we're knife is going to be sliding down that stick. So all I'll do is just start by practicing a few little strands here. And you can see I'm not really taking much off, but this is just a little practice. So try and get or build a little bit of confidence as you do this and start to get some longer strands. You want to work your way around. And you can see the chunks again in a little bit bigger. Now, I'm pushing mainly with my thumb. I'm not really doing any work with my right hand is all coming from my thumb because it's more controlled and it's lower and it just means that I won't hurt myself. Keep that back index finger away from the knife. You do not want to stab yourself and just keep pushing down. So it might take a little bit of time, but honestly it's totally worth it. So just take your time. Make sure your knife is sharp as well. I'm starting to get some of that lead exposed from underneath the word, which is great. Now, this is when you have to start being careful and make sure you're not pushing into the lead. You're pushing into the woods. They'll say, Oh, your knife is an angle is not going down. It's going almost with the angle of the word and a pencil, the slope that you're creating. So I've taken a little bit of a chunk out of my lead and that is fine because I'm going to send it down anyway. So make sure you get these long strides. Getting quite a mess underneath here. You might want to get a bowl maybe in, keep your mess contained. But I just like to play with fire as far as amino acids. Naturally I am a mass. I'm drawn to mess. I guess a really starting to get loads of exposure to lead there. So I'm starting to be a lot more careful now. Be super delicate when you start to see your lead is heartbreaking. When you've done all this work. And then your pencil just snaps because you've pushed that little bit too hard. And if you've snapped your pencil already at this point, I feel I feel your pain. I'm so sorry that you've done that. But you've got to practice, practice it again and again. Okay. So some people do just sand away with a knife like this. And you don't, you don't end up cutting yourself because you're just very gently scraping the side of that pencil there. But I much prefer using the sunblock as little bit safer and much easier. Now, what I'm doing is I'm rotating the pencil between my fingers and just see how I'm holding. I'm holding that in a line. And then all we want to do is rotate that as I go back and forth. So just keep going. And your pencil will take her out at the very tip. So tilt your pencil is the tiniest bit up again, don't push it too hard. It's very gentle. You just rubbing it back and forth on this sandpaper. You can see already that is starting to form that point. So it might take you a little while, be very gentle and they say do not want it to snap. Bit of practice that. And it's, it's so worth it. I guess let me just now I'm just going to go up and down and still rotating, but I'm just finalizing that tip there. Blow the dust stuff. And there we go. And can you see how much more it well, the sharpness compared to there, so it's more accurate. Obviously this one needs a little bit more of a sharp, but you can see how thick it is and how much longer that will last because it's been taped it down. So if you want to, you can do this or your pencils. You don't have to. I'm going to do It's mine. The effect will be very similar. So you can decide which one you want to do. It's really good to know anyway. So I would say practice and wanting your pencils, give it a go. And then, and then we'll start our first exercise.
4. Shading - Stage 3 - Pencils: Okay, So our first exercise is looking at something that we call the valleys scale. I have no idea why is called the value scale. People refer to shades as values. And I'll do my best to stick to that term just to get you used to it. But I might also refer to shades as shades as well. So the value scale is really important because it helps us to recognize that differences in values or shapes. Now, our eyes really love high-contrast. That means they love light next to dock. And there's so many different shades in between. Now if you've done one of my classes before, the mindfulness, you might have heard this before, but if you haven't, I will tell you again. So we really love to see these different shades. And if you imagine a black and white photograph, we're able to understand that image quite easily because there are so many different shades. Now the shades help us to recognize that an object is 3D. We can understand that something is curved because there's more than just one shade on that. So what we need to do is practice reaching those shades and seeing the differences in them. Now, I'm going to very quickly show you the differences in our pencils on. I'd like you to do the same as well. All you're gonna do is grab your pencil. So I've decided to get them all with this lovely sanded point. And we're going to start with a to H. So all I want you to do is shade a little square in your to hedge. So just go back and forth. If you've got your pencil like mine, don't press too hard, but you can just make it darker by adding layers and eventually it will stop going dark because there is a maximum value that it can achieve. So I think that's just about as dark as that can go. And I can tell because it's very even so. That means that it can't get any Docker. That is the maximum shade it can be. So just next to that. I want you to get your Tooby and I want you to do the same thing. So we want to find a maximum darkness in the Tooby and see if you can notice a difference. Is there a difference in texture? Is there a difference in value? Does it sound different? It might sound a little bit wishy-washy, but there is a difference, but is really good when you can connect with your equipment in this way. So after you've done that, so sharp it to snap. This one's a self, this one so is be careful on your abs so, so it will snap twice. So get your HB and just shade that in next to it. Again. Feel the differences, see the differences. And just notice what happens with those pencils. So as you can see, there are some major differences. So the two, let me write that. The two which was really hard and it's really liked. So this is the darkest it can go. This is usually good for her, but also for removing any of that grainy paper that sometimes you see through your shading. Now the next one, it was the two B. So this is your average pencil you'll go to is not to dog. And it still has a little bit of hardness in the lead to make sure that it's snapping is not smudging as much. So this is your middle of the range pencil that she's really good to have. Now the final one, the eight B or maybe you had just six B. This one was super soft. It was so, so that is not so this one is for your dark shading. It does match coil up. I don't tend to smudge in my own artwork. And, but it is really good to get those dark shade. So usually I use a mixture of this one and the two hedge to get rid of that grainy effect. So now we know a pencils, we can start with our exercise.
5. Shading - Stage 4 - Value Scale: So I just want you to draw a rectangle. So grab your ruler. And this is where you will create your value scale. And I wanted to draw ten squares in there. Okay? So we have 1, 2, 3, 4, 5, 6, 7, 8, 9, ten. Remember this is your value scale. Now I'd like you to start with your to be pencil. You'll go to, we're going to practice the range of shades that this can achieve. So we're going to start on the right-hand side, which is counterproductive if you are right-handed like myself because you will be moving to the left. But the reason why we saw on the right-hand side is because this is guaranteed be the darkest value. The first square, which will be number one, will be what? So we do not want to put any pencil in that. Instead, we are going to start at number ten, find that maximum darkness, and then work our way down the scale. So take a few minutes now to try and achieve that. So you might want to, OK. So you might want to focus on trying to get those books is nice. And even because often, what I find with students is that there'll be dark corner where they've press really hard as a shading back and forth or maybe one edge is dark, one edges light. Often you'll find that a couple of the squares look the same, they're the same value and we do not want that. We want to have different values. And we want to have 10 different values. So work your way down now from 10 all the way to one. And hopefully you can get those different shades. So they're becoming lighter and lighter each time as we move down that grid. So it's up to you as well. You might want to label them as you go down. Just so you have a reference, you have like a numerical reference to them. And then you can just refer back to, to this value scale and think, okay, So that would be a number nine, that would be a number eight. So I really tried to focus on taking as incremental steps. And the reason why we stall at the Johnlock end is because it's much easier for us to find the maximum darkness rather than the minimum lightness. Sometimes when we touch the pave with our pencil, we can be quite heavy handed and I definitely can be. So I need to be careful as well to make sure it's much easier to find. The darkest pencil can go rather than the lightest. So just trying to make it easy, easier. I don't actually think this task is that easy. I think it looks really easy, but when you actually do it, yeah. Oh wait. They all look the same or, or how do I get this even is, is quite surprising. How challenging this actually is. So not only are we practicing achieving all those different shades, we also practicing shadings, shading evenly. And in-between the lines. It's an extra bonus training, I suppose. You may notice as I go down, I end up switching my career. And I'll go more into this later. But just notice how I'm holding my pencil now compared to before when I wanted to get really dark. So you might want to just be aware that yourself as well as any way that you can hold or change your grip to make life easier for yourself. Okay, there we go. So there's our values. Gail. Now, what you can do is try to do this with your API. So you're AB means that you actually have a wider range of shades because that is darker and that's darker than the darkest value of the to be. So if you have eight be there and you want to get from that darkness all the way to white. You do have a wider range of dogs. So I would recommend that you practice this. If it's not if you're not happy with it at this stage, try it again. It'll only take you a few minutes. If you want to challenge yourself. Try the HB because even though it has a wider range, is actually a lot more difficult to get the light arrange. After that, try your two h, which is even more challenging because that darkness is probably only as dark as my, my six here. So really that range is much smaller. I have to get from six all the way down to number 1. Now, luckily it is lighter, so we extend that range in the light area, but we do start off at a much darker value. So these things are just optional. But if you really want to push yourself and test to see how delicate you can be, it's a really good exercise to try and exploit all those different ranges of grays and darks and lights that we can achieve just with those three pencils. So that is the value scale. Well done. Something that you can just practice watching TV and something that we will refer to quite a lot. So let's look at our next lesson, which is trying to get a blended gradient and a soft edge rather than a hard edge.
6. Shading - Stage 5 - Soft Edge: So let's have a look now at a soft edge. And once we do that, we're going to have a look at how we can transition from a hard edge to a soft edge. Nonetheless than previously, it was all about hard edges so we could see the differences in between our shades. This time, we don't want to see any difference between each shape. So what we're gonna do is we're going to start with another rectangle. I'm going to use my pencil to draw the outline. You can use whatever you want to drill that. But we're just going to get a little rectangle. Just like before, we could even pop it underneath your value scale that you've just done completely up to you. And this time what we wanna do is we want to stop what we want to do. The same thing. We want to start on the right-hand side and end on the left-hand side. And again, that is because we are trying to find our darkest value. So this time I want you to use your eight p. Now if you, I didn't manage to do anymore value scales in your AB, then this is a perfect time to try it on here. So all you wanna do is start on that right-hand side. And it's going to be quite difficult to stay within the lines because we're going quite well. My hand goes a bit too quick, so it's going to be very careful not to go too crazy. So I'm finding my darkest value here. And as I travel down the value scale, so I'm working my way now into what would be value nine that we did previously. I'm just loosening the pressure that I'm applying, so but there's no difference that you can't really see where one starts and one finishes. But as I move down, I just release that pressure a little bit. So it becomes lighter and lighter. You can see I'm going back and forth a little bit just to try even it out. And you can see when I get into the lice areas, how grainy it gets and is quite difficult to achieve a light shade. But when I get to number one, I don't even want to see a difference. I don't want to see that a hard line. I don't see any hard lines on this because this is a soft edge. So I'm just working my way back up just to make sure I'm achieving all of those values. And just because I'm a perfectionist, I just want to share these edges now. I'm being careful to try to match those values as they are in that area. And just try and blend that in. Okay, there we go. So there we have a gradient. So this is a soft edge. It's a soft edge because you cannot see where any differences between each of the shades. Now you can obviously see the direction that I shaded in. That's fine. But you can't see any hard edges like we had on the previous one. So this might take a little bit of work just to get that transition. So again, I practice with all your different pencils if you want to push yourself and just see where it takes you. But for now what I'm gonna do is show you how to transition from a hard edge to a soft edge just below. I only wanted, well, I only want you to make two rectangles or squares, so it doesn't have to be attached, but it can be. And so on one side, let's switch to our Tooby pencil just to spice it up a little bit. So on one side, I want to make this really dark and really push into that pencil. Doesn't matter which value it going for. You just want to make sure it's nice and dark. And even as well, make sure it's even. So once you've done the right-hand side, do a lite version on the left-hand side. So now we have a hard edge and a soft edge. And often I'll do this in drawing. I'll do this even if I'm drawing an egg which has no hard edges. This is essentially isolating a shadow. And what we wanna do is change this so it's less aggressive. And so it becomes a really condensed version of this. And all I want to do is I just want to start shading along the edge of the dark. But if I shade on top of this, I risk making it darker. If I shade more of a push harder in a light area, it's easier to make that darker and to match this. So just watch carefully for a second. So all I'm doing is putting more pressure when it meets the edge of that block and less pressure pushing into that lighter area. So that happened very quickly. So it can either either extend that blend into there or I can just soften that edge there. So maybe I just want to make this a tiny bit more. Even. There we go. That's how we transition from a hard edge into a soft edge. And it's a really useful skill when you recognize there's a difference in shape. Or even if there is a small transition from a hard edge to a soft edge. And you'll see this quite often in drawings. So that's a really, really useful skill to have. So again, practice that one. It's really, really great. Now, in our next lesson, we are going to apply both of these things and draw a sphere. So this is a classic, classic exercise that asks us use all the time when they learn how to draw realistically and when they learn to shade, a sphere is such a useful thing to practice. So reshaping your pencils get something circular so you can draw around it. And let's have a look at how to draw a 3D bull.
7. Shading - Stage 6.1 - Sphere Outline: You might want to grab something circular for this. So I am going to use the inside of some masking tape. So you can either get a free hand and draw a circle, or again, make life easy for yourself and find something secular, maybe the bottom of a cup or a candle. And then all you're gonna do is use your to be. Remember that is I'll go to just to draw that circle. So I just went a bit. And the backseat, not the best example of China. But let me do that again. Just go around the circle. So if you've got any finer hairs coming off, just get rid of those. Now, what we wanna do is, well, is draw a shadow. Things always look more situated when there is a shadow. So we want to imagine that there is a circle that is squashed underneath here. So all I'll do is I'll make this side on the left longer because our light source is coming from the top here. So it needs to be longer on the left. Then as it curves around, it's still nice and curved everywhere. The shadow is the hardest part. Trust me. Just take your time getting that is it doesn't need to be perfect. We just need a gesture of it. Okay? So that is our outline. And what tends to happen with a bull is where the light source is. So luckily, that's where my actual light sources. Wherever the bull is closest to the light source, that is going to be the lightest area. Imagine perspective. Whenever something is closer to something, it becomes bigger and whenever it's further away, it is smaller. So in this case, when the object is closer to the light, the light is bigger. Then as the ball is further away, the light becomes a lot less. And hopefully that makes sense as a bit of a weird analogy. But anyway, so what I tend to do for this exercise is to, is a bit weird. So bear with me. Remember that value scale that we did a couple of lessons ago. We have 123. Okay, so that's three values. Now, that's going to be around the light source. So what I wanna do is very lightly draw a circle around that area. So I'm creating a barrier where I'm not gonna put any pencil in that moment. Because that is it's just making life easy for myself. I don't have to worry about it. And I can just, I can just go from there. So what we wanna do now is because this is 123, I just want to shade in the whole thing of value for. Because what happens is the light is cascading off. And that means that the next value, the next shade will be shade for. So let's shade that all n. It doesn't have to be neat and tidy. Worried too much. We just want to knock off that white. And it just means that we're giving ourselves some layers that we can filled up on. So this is going to be our first layer. And you might know as I'm changing direction of my shading strokes, I'm getting a bit of cross hatching in there. Just to try and sell all of those gaps. We don't want to see any y in that section. We do want to leave the whites in the circle that we drew. So that inner circle is nice and messy, which is great. Now what we're gonna do is the relationship between the value we've just done and the value of the shadow. So once we start to apply the shadow, the relationship should change. So switched your HB pencil now and start to shade that shadow in. And you should notice that the value for that we just applied becomes, feels a lot lightest was not actually changing. But once we add a high contrast in there, which is our adult value of shadow, and light values start to look lighter because instead of white surrounding it, making it look so it's black surrounding it. Oh, boy, dark value. So it's really interesting how relationships change. The relationship of value changes once you introduce a really dark shade. So as my pencil begins to get blunt and shorter, it means that I am able to shade in a little bit heavier. There we go. So for me, and hopefully for you too, the ball actually looks really, really like now. So what we wanna do now is work on the shadow inside the bowl to try and mend that relationship. So often we have refracted light, and that is when light will hit the flow and then it will bounce back into an object. Now while happens quite a lot is people will notice there is a highlight on an object and they will leave it really, really light. Now, it is a highlight in the sense that it is lighter than another shade. But it doesn't mean that it reaches value one or two or even three on the value scale. It can mean that the highlight is actually a number eight, but it's next to a number nine. So because it looks like we read that to be super light, we want to show the world that we recognize is lighter, so we leave it and it's a bit too aggressive. So I want us to make sure we're being brave. So first of all, we're going to create a hard edge that just like before when we practice our hot edges. And it wants to curve with the ball. So just above that, we want to create another one. So it looks a little bit like I wanna say cricket ball or it's just got belt. There we go.
8. Shading - Stage 6.2 - Sphere Shading: So all we wanted to, now, sticking with our HB pencil is shade in this band that we've created. Now I wanted to reach number nine. So it's really dark, but it's not black. Still going to be a little bit grainy, which is fine. I just wanted to shade that in. Just don't be afraid to make it dark. Because if we make it dark, it means we have more of a range coming from dark to light. So from number nine all the way to number one. But if you make it two lights, you'll only going from a donor number 6 to number 1, so your range is smaller. And remember, we like contrasts. Now we've got a hard edge, we've got loads of hard edges. But remember this is a bowl is a 3D bull. So everything is really soft. And what we wanna do now is remember how we transitioned from a hot edge into a soft edge. And when we did that scale where it was dark all the way to light. So I'm gonna do that all the way around this bull. And I'm just going to start at the edge of number nine. And I'm going to go and little strips. Okay, so as I push out of that bowl, I start to loosen the pressure and it becomes lighter. Now you might not want to do it with your HB, might want to do it with your tube. So let me try just next to that. There is a difference. So as much sharper already it means is less grainy, but it's not as jogs. It's up to you if you want to do a mixture, maybe you want to go over in both. Just to get that consistency for all you want to do now is work your way around the bowl and shy and get those transitions from that hot edge into the soft edge and make it blend, make it a gradient. Just work your way around the ball. Make sure you don't miss the edges on the top. We're going to wait to do the bottom. Don't do anything on the Boston that just yet. So hopefully you can see what I'm talking about when I am referring to leaving that highlight two lines. Just work on a top half. Again, don't put anything inside the center. And I'm just switching back to my to be mainly to kind of smooth out the grain. And I'll show you a different way to do this when we near the end. But this is just helping me try and reach all those values. But most importantly, just to get in these edges. Okay, so as you can see, this at the bottom, that was number four on the value scale. So that was actually, it wasn't too light, it was like middle of the range, but now it looks nearly white. And that's because we sandwiched, sandwiched it between two dark values. So I want you to use your API and again make that smooth transition. So a blending that in and we'll make sure that we're trying to reach number eight. So it needs to be one shade lighter. You can be forgiven if it's a number seven as well, that I just want you to appreciate how dark it can actually be for it to still look like a highlight. And k. So final bit is to work in this light area on top. So this is where it's probably the most difficult because we're going from a light shade into a lighter shade and we want to leave some white paper in the middle. We want to leave number 1. So I'm just going to do that same transition from number 4 this time, all the way to number 2. So using your TB pencil, because that's much lighter, you might be questioning, why don't we have the two h that's going to come in a moment. But the to-be, the TB still has a bit of grain to it, whereas your two, which will have a completely different texture. So by all means, try it, but your two-page rarely is just going to combine everything together rather than have its own so donor ring thing that we're doing here. So all the way around, keep turning your hand around to sue, or you can move your paper around as well to make life easy for you for a more comfortable position. There we go. So I'm, I'm quite pleased with that. Hopefully you should be really pleased with that too. It's not fully over there and there's always tweaks you can make. So this is one of those things where it's quite addictive to keep going. So I'm just going to go for a little bit longer and I will keep the camera rolling so you can see what I'm doing, but I just want to refine it. And as I mentioned earlier, this is where the two can come in. So the two Haidt has to be really, really sharp, okay, See that point? And it's quite dangerous. And all this does, is it fills in all those little bits of paper that are poking through. I'm not a huge fan of having graininess in my own artwork. I think it can look nice sometimes I do leave it and I really love seen on other people's work. But for me I really love this soft textured effect. So depending on how much time you want to give to this, and you can literally go in color in all those tiny little pockets of whites and it will start to just even out the drawing. So I'll just work on this little area and hopefully you can see fairly quickly how you can start to see all those different changes in value. So it brings everything together. It's, it's really satisfying. And I think pretty mindless, you know, you can just switch off and shade away and you're like, wow, look at the smoothness of the bull. Often people get frustrated with the texture of the graininess. Like myself. Hopefully I'm not the only one out there that feels like this. So really getting as Noakes and crannies and just see what happens at the end. You might find you really enjoy this process. Okay, so there we have it, our wonderful 3D ball. Now, this could be literally anything. It could be something like the tip of my nose. Imagine there's this fear shape in there. Anything that's round, these principles will apply. So it's really good to keep practicing it and well done for getting to the end because it's not easy and my process is a little bit odd. But it gets the job done so well done. Now let's have a look at the different types of shadows and how our shading can really affect that.
9. Shading - Stage 7 - Cast Vs Form Shadow: So it's really important that we know the difference between the two different types of shadows. The cast shadow on the form shadow. The cast shadow is the shadow that the object has created on the floor. So whenever you see a hard edge, often that is a cast shadow because the light is coming from assessing area and it is casting a shadow onto a different surface. Now, the form shadow usually follows the shape of the object. So in the bowl we've just done, we have a form shadow which follows the shape of the bowl. So this is easy to recognize because there's a nice soft edge and a really nice transition from dark to light. So whenever you are shading, It's just really good that you start to think about the different types of shadows and how they interacting on your paper. There's no real exercise except practice to figure out the difference between the cash shadow and a form shadow. Perhaps something you can consider is if it is a form shadow, can you get this transition here? So this is what we've done on a second exercise with a soft gradient edge. So there we have the form shadow and the cache shadow. And now we're going to move on to putting everything together into drawing a really nice 3D plot.
10. Shading - Stage 8.1 - Final Drawing Outline: So make sure your pencils sharp. And let's begin with the outline. So I'm using my Tooby to start this one. So grab your TV, make sure it is nice and sharp as I've said. And we will start with the ellipse. So just very gently sketch that in there. Because from the top to the same. So this is going to be the top of our Pott. Pott's the word. This is the top of our plot. So try and make sure it's even. Imagine there's a narrow going down the middle and it's the same on the top as it is the bottom. So you wanna make sure your lines are Sally. Clean. Aid is not full of loads of lines because then it might be difficult for you to figure out which edge is the actual line. Okay. So there's the opening now we need the top of the rent. So nice thin rim at the back. And then a second one. The front, not too thick. You don't want to make it to access it. And then we'll just turn the corner there. Corner there. Okay. So now what we wanna do is we want to get the edges, so you want to cinch that in. So it's coming at an angle. It's not straight, it's an angle. My fingers a disgusting is coming at an angle, not straight. So the same on the other side, you want to try and match the angle. And then let's get a nice curve underneath here. So this line as well isn't straight. This is curved. It's the same curve is here. So this line should be parallel to this line. Great. And then we want to synch in the edge of the part. So just like this angle here, it's going at an angle down there. You want to match that down here? And we can. And once again, we have a curved, Awesome. I should match this curve. Just going to clean lines. So from here we'll add that little pot that the pot sits in the drainage part. I don't know the technical term for it. But this one, you want it to go around his ear continuing from that that line that we just used to draw the bottom of the pot. It just extending the outwards. And we want to get that little ledge just like the top here. So it's thinner at the back and then it's thicker at the front. So this is because of perspective, because it's closer to us. What happens when things are closer to us? A bigger well. So then we need to sent that. And again, love ascension is Powderly. I don't know if that's the right word is cinch, but hopefully you all know what I mean by it, that the angles are coming towards each other. And then the final bit, again, angular lines, synched lines. And then the curve around here. Just a tiny error up here thing that's a little too high. So let me now it's a little too Angular's. Let me curve that. There we go. Good. I'm fairly happy with that. Okay, so that's our outline done. So the next stage in the final stage is to practice our shading. We have a lot of different edges on here. So hopefully it's going to be really exciting for us to draw together.
11. Shading - Stage 8.2 - Final Drawing Shading: Okay, so we've got a few different edges in our pot. We've got hard edges and we have soft edges. What I want us to do is start with the easy things, okay, so I don't want us to worry too much about the big section because that is a lot of shading. Instead, we'll practice on the smallest sections. What I'm gonna do is start in that bottom curve down there because it's nice and small and gives us a good opportunity to make a mistake if we, if we're gonna do that ASL, you might know. So let's start with the shading on the left-hand side. So this is exactly like we did in that gradient part of the course. So it's darker on one side and it's lighter on the other. Now I'm using my eight to get that nice dark shadow. And as I move across, it's becoming a little bit lighter. As we move now is not going to end up being the lights or the other end because it's right underneath the pot. So it means most of it is in shadow. This one's both shadows. It's a cast shadow and a form shadow. So the cast shadow is going to be right underneath this lip here. If you draw a nice dark lip around that and I stock edge, then that means we have our cast shadow form shadow is this curvature that it makes. So it's dark on one side, lies from the other and it's a very nice soft gradients. So I just want to make sure my form shadow is a king. Good. And let me just tidy that edge. Okay, nice. So let's move up one now. And it's slightly longer this time. So we've got a wide space to fill. Now, I'm going to switch to my two B because it is a bit license. And I know my to-be can still get quite dark. So if I need to push that Docker on the side I'm on now on the left, then I can always go over it a little bit with my HB. So again, we want to get that nice gradient. You can go up and down. You can go left to right, whichever you prefer. Just going to make his stuff. So just notice how I'm holding my pencil. Got a nice soft grip. It's on the edge of the pencil rather than the tip. So that means it's creating soft lines and go back to the beginning and make that darker. So we've almost got like a darker red along the top here and that goes all the way across. Very similar to the one we had underneath. However, this one just wants to blend in a little bit more. It's almost like a second. And just populate a bit that get and just add a little bit of my eight. And the Fed is just so contrast is stronger. Okay, Great. Okay, So the rim on the top darker at the back room and it is lighter near the front. So remember this is facing the sky. So it's going to have different rows to how the curves of the cylinders up behaving. So in this part we have the very light corner has both pop that back in with my putty rubber. And it goes pick that out really easily. And can switching to my HB. Now I just want to get these jobs sections in here. So you can kind of see there's like a little ledge there where it goes from the edge to the base. You might just want to throw that in. I get it nice and dark in that because that is in pure shadow. And then over to this side. Okay, great. And I think we're ready by then we're ready to face the main book of the pot. So it's really dark on the left. It's underneath the let that and then it's lighter on the right-hand side. So I'm going to stick with my HB for now so I can really reach those dark areas for the main body. Isn't that lights at all? So let's see whether it's appropriate or not to keep with the AB, which I have a feeling it might be they just got to be careful about the graininess of the paper. As anybody be careful, be aware of it. Yeah, I have to be careful at all. That was very dramatic. China via be aware of the graininess because it will affect the shading and whether it looks smooth or wherever it looks dark. So if, if you don't like the graininess, then push harder on your pencil. And especially for the dark bits. Or you can refine it with your two h, which is probably what I will do after this. So I'm going to start with a very general so shade just to get over the main area of the pot. Because it is such a wide area, the hands comedy cover it. So if you have to do and bits and bobs, then that's fine. But maybe just, just watched to see how I blended. Now, I keep doing that thing, won't go back to the dark area and pulling out that shading. So that's what keeps it really nice and smooth and keeps it in a really lovely gradient. Okay, and I'll just push underneath pot that. Good. So I'm going to switch to my Tooby now just so I can try and minimize those gaps because there's so many white gaps due to the really soft pencil HB, CSRF. And we know that that's the price you pay for really dark values. And just notice how it's a little bit darker at the bottom because it does is surrounded by something else. So it's just taking away some of that light. Trend top that as well. Got it. Okay, so let's move up one. Switch back to your HB because there's a really lovely dark edge there. And then let's get that lovely gradient ones. So it might switch pencils halfway through to my to be saved, switched my to be. Yeah, that's a good transition. I'm just going to just be to make them really soft and then extend that line, the final, well, final two bits. Let's actually do the inside of the pot fast because we have our AB anyway. So let's get a bit more of an outline. And then we'll start that transition. Switching to my to be as I get to that lighter area. Yeah. Okay. And then land it ends as a tiny bit darker. Tiny bit darker on the top, and a little bit darker on the left-hand side. Okay, good. So then the final bit is this lip. Again it has it has that little light rim, tiny bit darker along the outside. And then when we get into this section, can you see it's Dhaka where it meets the middle. Make sure you blend that back into that. Now, you might notice that Next is very light, but it doesn't mean it's white. Still add a little bit of pencil there. Okay, so I can already see that I should make this darker where we get from the lip to the edge. So just push that in tiny bit darker on the right-hand side. And then up here in the middle, I'll use my API that again. There we have it. There's a lovely shaded pot. Now it's up to you whether you want to get your h and go in all those little nooks and crannies just to make everything look completely unison. Now, as I am a perfectionist, and there's not necessarily a good thing by the way, I will certainly be going over mine just to even everything else. But it's completely up to you if you want to do the same as your drawing. So you can choose maybe you just want to watch me do it and then that's enough, that's fine. Or maybe you want to spend a little bit of time just getting lost in evening out the pot. So you've got this far well done. Hopefully you've learned a lot about shading and about the different techniques and why it's important and how we can create the idea of form. And three Dina's through our shading. So just remember, keep your pencils sharp. You only need three of them. And try and work on that soft gradient, which is probably one of the hardest challenges. So thank you for joining me. Well done on your creation and do make sure when you give it a go, you pop it in the chat so that we can see what you've done at love to see your work. Thanks again. My name is China and thank you for joining me on the ultimate shading course.
 China Jordan, Art Teacher