Transcripts
1. Welcome To The Course!: Hi, and welcome to the complete J course for
beginners here on skill share. This J course is perfect for
complete beginners who want a simple step by step guide on how to deja from
start to finish. You don't need any
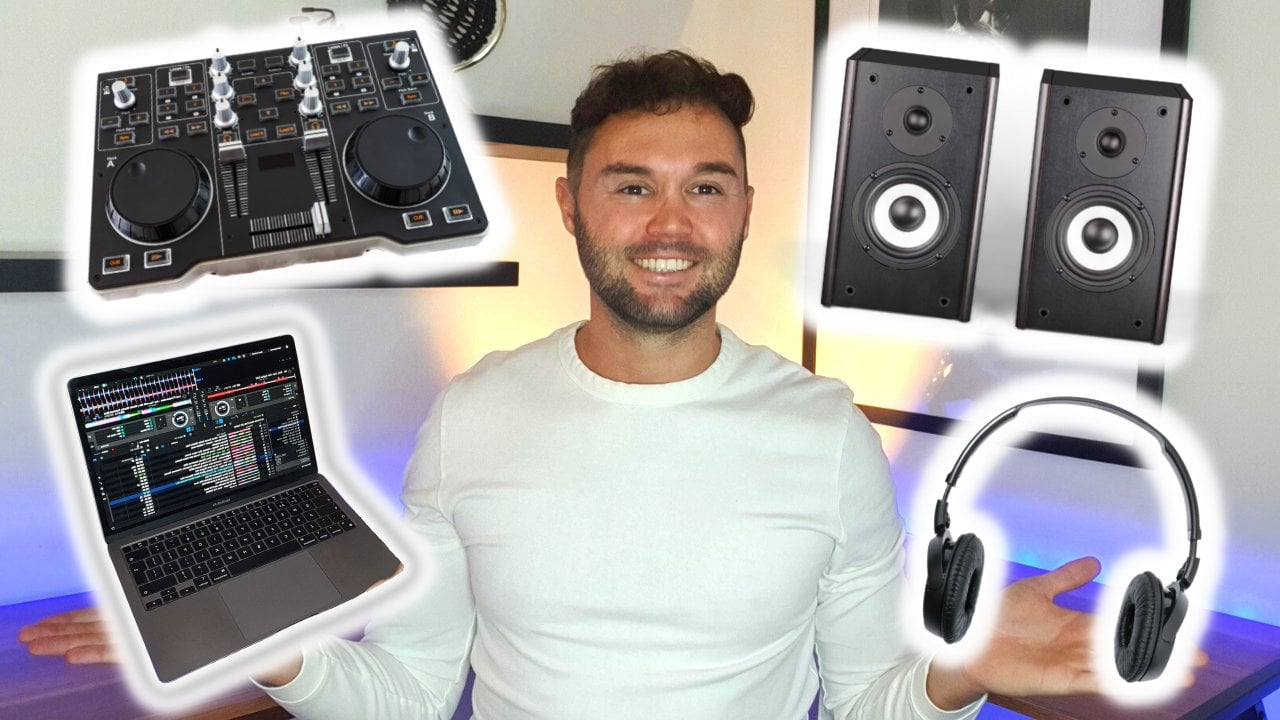
prior knowledge to take this Deja course. You just need some
basic Deja equipment such as a deja controller, a laptop, some headphones, and a keen interest to learn. And by the end of this course, you'll be putting together your very own professional
sounding DJ mixes. My name is Off the
Rat Jack and I am a professional
International deja. I have over 15 years experience and deje all around the world, including places
such as Thailand, Australia, France,
Greece, and the UK. In these places, I
have dejayed across a wide range of venues
including clubs, bars, boat parties, pool
parties, and festivals. I have a huge range of DJ
experience and in this course, I will share with you
all of my DJ techniques, tips and tricks that I've
learnt over the years. So you two can start
your own DJ journey. What is unique about
this DJ course, and one reason why
it's so successful for my students is that
all the music that is used in this course
to demonstrate all the DJ techniques and mixes is also included
in the course. For you to download 43
in the course resources. This means that you can
then practice along with the guided video
tutorials in real time and do the exact same deja mixes and techniques as I
do in the course. This makes learning
how to deja with this course a whole lot
easier and a lot more fun. It also doesn't matter what deg controller that you have as all the deja
techniques taught in this course can be applied
to any deja equipment. This is because
all deg equipment have the same basic
functions to deja with. They just might look
slightly different and have the buttons and dials in
slightly different places. That is all. They will all still have the same
basic functions, buttons and dials to deja. With this deja course is broken down for you into five sections. The first section
is where you will learn all about how
music is structured, learning all about the
different sections of a track, and how to count your beats
in terms of dejaying. In the second section, you
will learn how to beat, match two tracks together. You will learn how
to get the speeds and beats of two tracks in time with each
other so that they sound good together and
are ready to mix with. Section three is
when you'll learn basic mixing techniques and start the guided
mixed tutorials. You will learn how to
time two tracks together perfectly and learn how to transition between them smoothly by using the cross fader
and volume faders. In section four, you
will step things up a little and learn intermediate
mixing techniques. You will learn how to
use the equalizers and filter dials to help mix in different sections
of the tracks and blend your mixes
even more smoothly. Section five is when you'll learn advanced
mixing techniques. You will learn how to
use the hot cues, loops, and sound effects to add some extra creativity and
uniqueness to your deja mixing. So by the end of this course, I am very confident you'll have the skills and
knowledge to be able to put your very own deja mixes together with your
very own tracks. In the next video,
I've put together for you a quick
sample mixed tutorial that you can watch to give you an insight of what you can
expect from the course. It explains to you one
of the key principles of Jay that every beginner
DJ needs to know. And it also explains two
common mistakes that beginner jays can make and
how you can avoid them. So feel free to watch that sample mixed tutorial
next after this video. I'm super excited for
you to get started and start your very own DJ
journey with me today. Thank you for watching and
I'll see you on the course.
2. Sample Mix Tutorial - The Rule Of 32: Welcome to this example video. I'm going to explain to
you one core principle of deejaying that every
beginner DJ needs to know, and also show you two
common mistakes that begin to DJs make and
how to avoid them. You don't need any
DJ equipment to gain some value
out of this video. You can just watch
the video and still learn the key points
from the demonstration. But if you do have your DJ
equipment setup and you also have the free music part that comes with this course, both these tracks that
I'm using now are included in the free music pack that you get with the course. On the left-hand
side here on deck 1, I have the track Give It Up, and on the right-hand
side on deck 2, I have the track Calabria. In this example, we're
going to imagine the track, Give It Up, is playing
to the audience. When it starts to get to
the end of the track, we are going to mix out
of the truck Give It Up, and mix in the start of
the next track, Calabria. The first thing that
we're going to do, which is really easy, is turn both sync buttons
on on your DJ controller. What this is going
to do is simply put both tracks at the same
speed as each other. You can see here now
that they've both gone to 130 beats per minute. So now both tracks are
at the same speed. Even though the sync
button has made life as a DJ a whole lot easier, there is still a
lot more that goes into deejaying and mixing two tracks together
than just getting the beats in time
with each other. Now what I'm going
to do is show you a basic timing technique that is taken from our basic mixing section of the course. Firstly, one mistake
beginner DJs can make is that when one
track is coming to an end, there will always press play on the next track on the
drop of the chorus. The drop is the first
beat of the chorus, and the chorus is the most
energetic part of the track. For example, on the
track here, Give It Up, [MUSIC] that is the chorus where all the sounds come
together and the drop is the very first
beat, which is here. [MUSIC] Let's have a
listen to that mix and see what it sounds like. I'm going to press play
on the track, Calabria, on the drop of Give It Up.
Let's have a listen to that. [MUSIC] Now as you can
hear, the tracks were clashing a lot and it didn't
sound too great as a mix. That is not one option that
we want to use every time. The second mistake
beginner DJs can make is that when a track
is coming to an end, they will always press
play on the outro beats. For example, on the track here, Give It Up, when the
energy goes away, [MUSIC] you are left with just some basic beats
at the end of the track, and these are the outro beats. Let's have a listen
to that mix and see how that sounds when we
press play on the track, Calabria, at the start
of the outro beats. [MUSIC] Now that doesn't sound too bad and
still not a bad mix, but it does sound a little flat. With just some basic
beats playing, it doesn't sound too great
in the middle of the mix. What I'm going to teach you now is what I call the rule of 32. Modern-day music is mainly
made up of blocks of 32 beats. These blocks of 32
beats are like building blocks that make up the main
structure of the track. You will generally find that significant changes in a
track where sounds are added or taken away
will happen at the start of these
32 beat blocks. For example, I'm going to play the start of this
track, Give It Up. What I want to do is count
along with me 32 beats and listen to see
if you can hear any changes in the
track at that point. I'm going to press play
on the track, Give It Up, here, count 32 beats. I want to count along with me
and listen for any changes. [MUSIC] 4, 3, 2, 1, 1, 2, 3, 4, 5, 6,7, 8, 13, 14, 15, 16, 17, 18, 19, 20, 21, 22, 23, 24, 25, 26, 27, 28, 29, 30, 31, 32. As you can hear
then, in that track, there was a change in the
track every 32 beats. Now in all tracks have a change every time there's a
new 32 beat block, but the changes do generally happen at the start
of a 32 beat block. These 32 beat blocks
are called phrases. What we can do now with
this information is use it to time our tracks
correctly when deejaying. This time I'm going to
mix these two tracks again between the
end of the track, Give It Up, and the start
of the track, Calabria. But this time I'm going to count 32 beats from the
drop of the track, Give It Up, and then
press play on the track, Calabria, and see
how that sounds. Let's have a listen to that mix. [MUSIC] You can count
along with me if you like. 1, 2, 3, 4, 5, 6, 7, 8, 9, 10, 11,12,15,16,17, 18,19, 25, 26, 27, 28, 29, 30. As you can here then, that makes his time perfectly and would have sounded great
to an audience. Now this is just
one basic example of timing two tracks together and an example of
how you would time these two particular
tracks together. Not all two tracks are the same and different
tracks will have different structures and
would need different timings. In this course, I teach you
exactly how to do that. In this course, there
are over 30 different guided mixed tutorials
where you can practice along with real
examples just like this one with the trucks that are given to
you in the course. They will teach you many different ways in
which you can mix two tracks together from beginner techniques
using basic timing, just like this example, to intermediate techniques using the equalizers and filter dials, all the way up to
advanced techniques using hot cues,
loops, and effects. I hope you've gained some
great value from this video, and there's a lot more
to offer in the course. I hope you're as excited
as I am to get started and I hope to see
you on the course. Thank you for watching.
3. Download Free Music From Resources: In this video, I'm going
to show you how to download the music
for the course. You should be on a screen
similar to this right now. If you scroll down
under the video and find the tab for
projects and resources, you should see on the
right-hand side of the screen, all the tracks that we'll
be using in the course. All you need to do is
click on each track to start downloading
it to your laptop. It's as simple as that. All the tracks that are
in the resources will be used at some point in
the course where you can mix along with me and do all the same DJ techniques that I do in the course in real time. When you have gone
ahead and downloaded all the tracks in the resources, we need to find where they have downloaded to on our laptop. This will generally be
in the downloads folder. So from here I've gone to
the downloads folder on my laptop and all
the tracks are here that I've just downloaded
from the resources. What we need to do is place
all these music files in one folder on our laptop that is easy to find and access, and we also need to
put the folder in a place where we won't
have to move the folder again in the future
and we can leave the folder where it is
throughout the course. So I'm going to open up
a new tab on my laptop here and open up the music
folder on my laptop. From here I'm going to create a new folder and name this
folder DJ Course Music Pack. You can name the folder
whatever you want, that's completely up
to you as long as it's easy to find and you know
where it is on your laptop. Then we're going to
transfer all the music that we have downloaded
from the resources over to that new
folder that we've just created specifically
for the DJ course. Now if I go to music on my laptop into the DJ
Course Music Pack, all the music for the course
will be in this folder. Now we should be ready to go
to our DJ software and get the music from our laptop
onto the DJ software. So after this video, there are two separate
videos on setting up your DJ software and music
library ready for the course. One is for rekordbox
and one is for Serato. You only need to watch
the set up video that corresponds to your DJ software. After that, all the DJ
techniques in this course can be applied to any DJ
equipment that you're using. Because no matter what DJ
equipment you are using, all the DJ equipment will have the same basic
functions to DJ with. But if there are any big
differences in settings between rekordbox and Serato
that needs highlighting, I will do separate
videos for them. So you can follow
along no matter what DJ equipment or DJ
software you are using. Let's move on to the
next videos and get your DJ software setup
and ready for the course.
4. Quick Set Up - Rekordbox: In this video, we're going
to look at how to set up your DJ software and music
library in Rekordbox, so we have everything in place to move forward with the course. The first thing
we're going to do is go over to the
top left hand corner of the screen and make sure we have Performance
mode selected. I'm going to click
the drop-down here in the top left and
select "Performance", and then just to
the right of this, we have another drop-down
and we've got to make sure that we have 2Deck
Horizontal mode selected. Once this is done,
we're going to find our music that we've
saved in our laptop. The DJ Course Music Pack
that we've downloaded. I'm going to head over to the left of the
library over here. To access the files that
we have in our laptop, we're just going to select
this tab called "Explorer". I'm just going to click the little arrow
to the left of it, and this is where we can access the files and folders
in our laptop. What I need you
to do now is find your DJ Course Music Pack in your laptop. I
found mine here. For best-practice,
what we're going to do is mirror and copy what we have on our laptop over into the playlist
on the DJ software. I'm going to go to the
top of the list here on the left and go to Playlist. I'm going to click
this and there's a little plus icon just
on the right of it here. I'm going to click
that and it'll create me a new playlist. I'm just going to
rename this the same as the folder on the laptop
DJ Course Music Pack. Once that's done,
I'm going to get all the files from my laptop in this folder here and
move them over to the playlist that I've just
created in the DJ software. I'm just going to click
this folder here, DJ Course Music Pack, and there's not much information that comes up on the tracks, if any, for some. That's fine. We're going to get all the
information very shortly. I'm going to select
everything in this folder by using Command A or Control A, and then drag and
drop them over to the playlist that I've just created called DJ
Course Music Pack. I'm just going to
drag and drop them into that new playlist. What they should do is analyze
all the music files that I have dragged over into that playlist from
my laptop folder. When you drag over your files, you may see a box pop up just like this one, and that's fine. All you need to do
is tick the box that says Key and press "Okay". If this box doesn't come up, you can go into
the settings cog, up on the top hand
right hand side here, go to Analysis, and then from here it'll
say Track Analysis, and the only two that we
want to change right now, and make sure we've got ticked
the BPM/Grid and the Key. When bringing tracks over into Rekordbox from your laptop, your DJ software will need to analyze your tracks
before it can play them. By analyzing your tracks, what the DJ software is doing is getting all the information
it needs about the track, such as the speed
of it, the key, the wave form, and the
beat grid of the tracks. This is so that is able to use the tracks to DJ
with effectively. We'll go over what all
of these mean and how to use them in more detail
later in the course. Now, we've done that.
We've dragged and dropped all the music from our DJ Course Music Pack on
the laptop from explorer, orienting their new playlist
that we've just created, we can go ahead and
close the explorer tab. We ideally want to be working
within the playlist in the DJ software throughout the course and when DJ and
in general for that matter, rather than within the files on the laptop through explorer. We will go over
later in the course some best practices that
I've learned over the years for organizing your music
and setting up your playlist to help you when DJing when you do start to
grow your library. But for now, we just
need all the tracks in one playlist to make it easy for us going forward
with the course. What I'd like you to
do now is just drag any track of these up
over onto the left deck. Once it's loaded,
you can see here now three different waveforms. The wave form is a
visual representation of the track using
lines and waves. So we have the extended
wave form at the top, the full waveform here
on the left-hand side, and then each waveform of
each track in the library. As you can see, they're
all set to a blue color. What we're going to do now is change it to three
different colors, which is red, green, and blue. I need to go back up
to that settings cog in the top right hand
corner, select that, and then go all the way
over to the left to View and scroll down
until you find Waveform. Once you've done that,
we need to change the color over to RGB, which stands for red,
green, and blue, and then just under that, the full preview waveform want to change to Full Waveform, and then just exit settings. Now, you can see it's changed all the waveforms to
three different colors, which is red, green, and blue. This library is looking
a lot more colorful now. Having the waveform set to three different
colors as red, green, and blue will make it
easier for us to visually see the different types
of sounds in each track, rather than just
having the offset as all one color of blue. This will make it
a lot easier for us to learn how to DJ later on. Now, we're going
to have a look at the different
information that we can see of each track
in the library. A lot of it can be unnecessary
and quite confusing. What we're going to do is
just change what we can see in the columns
of the library. What you can do is
right-click one of the titles of the columns on the library just
here at the top, and it'll give us a list
of different options that we can see in the library
and in the columns. For now, all we need to do
is select five of these. We need preview, track title, BPM, key, and comments. Everything else, all
the other options in the columns can be de-selected. You can drag across these
different columns to make them shorter or longer
up to your preference, but now your library should
look a lot neater with a lot less information and only the key information
we need for the course. Now, as standard Rekordbox's
font can be quite small. If you wanted to, you
can go ahead and change, just open the settings. Go on to View, and then one
of the first boxes here, you can see the font size. You can make that larger
or smaller up to you. Now, just over on the left here, you can see a little arrow
and you can just check this and it's going to
show you a plus and a minus magnifying glass. What this does is zooms out of the extended waveform
at the top or in. So you can zoom all the way
in and all the way out. For this course,
I would recommend zooming all the way out. This is because the
waveform moves slower across the screen
and you can see more of what's coming up next
in the track making it easier for you to watch and
get your timings right. The last thing in this video I'm going to show you
is called Tooltips. It's a great little
handy tool to help us out if we are a beginner
to this software. We're just going to go over
to the settings cog again, go over to the left
and select View, and then scroll down until you see a tab called Tool Tips. Another way to do is just
to select this and tick this box and then exit settings. What tool tips does
is when you hold the most cursor over a
function on the DJ software, it'll explain exactly
what that function does. For example, if I hold the
mouse cursor over this, it says auto beat loop, create a loop with
a specified length. This is a brilliant tool to use, and if you're ever
unsure of what a function does and
need some extra help, you can use this tool tips. But I will be explaining what everything does and showing you exactly how to use all the functions
throughout the course. Now, we should have
our library setup and our music analyzed, ready in playlist to start using the tracks
for the course. Any further settings are
changes that we will need to make we will go over when
we need to know them. This is so then I can explain
in more detail what they mean and they'll be more relevant to know what
we're doing with them.
5. Quick Set Up - Serato: In this video, we're going
to look at how to set up your DJ Software and
Music Library in Serato so we have everything in place to move forward
with the course. The first thing
we're going to do is select up here in the
top-left, the number 2. We want the two deck
horizontal mode. So we've got the two lines going across the middle
of the screen here. Now I'm going to show
you where you can find your music from your laptop
through the DJ software. We're going to go over to
this tab here called Files. We want to select that
and this is going to give you access to
your laptop folders. As I mentioned, I put my DJ course music pack
in the music folder. So just on the left here, I'm going to select music. As you can see there,
DJ Course music pack. Ideally for best practice, we want to be using the
DJ software to access our music rather than
the files on the laptop. So what I'm going to do is
come over to the left here and create what's
called a Crate. So there's two boxes here with
a plus sign next to them. We're just going to click
the orangey looking one. That should create a Crate at the bottom here called Crate 1. What I'm going to do is
just rename this the same as the file here, DJ Course Music Pack. Once that's done,
I'm going to select the DJ course music
pack in the files tab. That should open up all
the tracks in this folder. We're going to select
all these files by using Command A or Control A. Then drag and drop them over into the new crates that
we have just created. Then you can see them all
load up into this crate here. Once that's done,
we can go ahead and just close the files tab. Now when bringing tracks over
to Serato from your laptop, your DJ software will need to analyze your tracks
before you can play them. By analyzing your tracks, what the DJ software
is doing is getting all the information
it needs about the track to DJ
with effectively, such as the speed, the key, the waveform, and the
beat grid off the tracks. We'll go over what all
these mean and how to use them in more detail
later in the course. But for now, what
you'll need to do is in this new crate that
you've just created, select all the tracks in there. Then select this
box here just above the tracks called Analyze
files and click that. What's that's going
to do is analyze all your files so they're
ready to DJ with. We ideally want to be
working within the crates in the DJ software throughout the course and when
DJ and in general, for that matter, rather
than just within the files on the laptop
through the files tab. Once the tracks are analyzed, you want to avoid moving your tracks around on
your laptop and do all your editing and movement of your tracks within the
crates of the DJ software. We will go over
later in the course some best practices that I have learned over the years for organizing your music and
setting up crates to help you when you're
deejaying and when you start to grow
your music library. But for now, we just need
all the tracks in one crate to make it easier for us to
go forward with the course. Now when first using
your music library and loading trucks
into your crates, there may be a lot of
different information available of the tracks
in your library. What we can do is
change and select what information we see
through changing the columns. Up here at the top
of our library, you can see loads of
different columns. We're only going to need four to move forward with this course to make it easier for us to see our tracks and the
information that we need. So what you can do is
right-click one of the top of these columns
where the titles are. It'll give you a
drop-down list of all the options you can
have as the columns. The only four that we
will need are song, BPM, key and comments. Everything else
can be de-selected to make it easier for
us to move forward. As you can see here now,
should be a lot easier to view your library and
the details that we need. You can stretch out
these columns as well, making them shorter or
longer to your preference. Now what I'd like
to do is just drag any track up onto the left deck. This will load up two
different waveforms. The waveforms are
visual representations of the tracks using
lines and waves. Across the middle here is
the extended waveform, and upon the top-left here is the full waveform
of the track. Now we can zoom in and zoom out of this extended waveform in the middle using the plus and minus keys on your keyboard. It's down to each individual DJs preference on how zoomed in and you
want your waveform. But for this course, I'd
recommend zooming completely out on Serato and then zooming
back in just for one. I find this view the easiest
to learn with over time. This is because the
wave form moves slower across the screen,
being more zoomed out, and you can see more of what's coming up next in the track, making it easier to watch and get your timings
right when deejaying. But you can also see
the beats a little better than if you're zoomed
out to all of the way. The last thing we're
going to look at in this video is a handy little
setting called Tooltips. If you go to the top right
here and click Help, and then click Show Tooltips. What tool tips does
is when you hold the mouse cursor over a
function on the DJ software, it will explain exactly
what that function does. For example here, it shows you the track display and explains
what the track display is. The main waveform display, and all the information
about the credit track list. This is a brilliant
tool to use if you're ever unsure of
what a function does, and need some extra help. But when you're
first starting out, it can all be a
little overwhelming and you may not know what
some of the DJ terms mean. This is why I'll be explaining
what everything does and showing you exactly how to use all the functions
throughout the course. We should now have
our library setup and our music analyzed ready in the crates to start using
the tracks folder DJ course. If there are any
further settings are changes that we need to make, we will go over them
when we need to do them. This is so then I can explain
them in more detail of what they mean
when they are more relevant to what we're doing.
6. Intro - The Structure Of Music: Welcome to the first
section of the course, the structure of music. In this section, we
are going to go over everything you need to know about how music is structured. Without knowing how
music is structured, it is not possible to learn
how to DJ effectively. In this section, you
will learn what beats, bars, and phrases are, how to identify the
different frequencies and sounds of a track, how to identify the different
sections of a track, and how to count the
number of phrases in each section of the track. This section of the
course will give you the foundation and
knowledge that you need to be able to learn to DJ effectively and move
forward with the course. Let's get straight into it and I'll see you
in the next video.
7. Beats Bars And Phrases: In this video, I'm going to
explain to you what beats, bars, and phrases are in music. The first thing we're going
to do is just go back into our playlist that we've created on the left-hand side here. I'm going to drag two
different tracks up, one on the left,
one on the right. What I've done here
in the library, I've just clicked the BPM logo
at the top of the column. What this does is it arranges
the library in order, ascending or
descending of the BPM. The track that we want
on the left side, on deck 1, is this track
here called Calabria. We're going to drag this one
over on the left-hand side, and then the track on the
right-hand side on deck 2, we want as Shook. Drag that onto the
right-hand side. The first thing we're going
to go over is a beat. Now, a beat is a
measurement of time. The beats are represented by the white lines up here
on the extended waveform. Each white line is the
start of a new beat, and the beat is the distance
between the two white lines. A beat is not a kick drum. A kick drum is an actual sound
that can come at any time. You can also see the white lines which represent the beats, but there isn't a kick
drum on every beat. Let's have a listen
to this track. [MUSIC] For that, I just wanted to
highlight that a beat is a measurement of time
and not a kick drum. Now, you can have shorter
beats or longer beats, depending on what
track it is and what style of music
you're working with. But for each track, the beat doesn't change. The beat stays the same and consistent throughout the track. That is also how you can
measure the speed of the track. You measure the speed
of the track by how many beats there
are in one minute. This is called beats per minute, or BPM for short. The BPM numbers on the software here are the numbers
inside these circles. The track here on
the left is 126 BPM, so there's 126 beats
in one minute. The track here on
the left is 90 BPM, which is 90 beats in one minute. This also means that
the higher the BPM, the faster the track is, and the lower the BPM, the slower the track is. Then the next thing we're
going to go over is a bar. Four beats equals one bar. As you can see on the extended
waveform here at the top, that every four beats, so every four white lines
there is a red marker, and each red marker is
the start of a new bar. You can also see the
numbers here in the center. Once you press play,
these numbers will count up in the bars. I'll press play on the
track on the left. [MUSIC] As you can see there, it counts up with
the number of bars. Every red marker it goes
past, will go up one. You can often hear minor changes in melodies or
vocals within a bar. This truck on the left here, I'm just going to click forward
onto the green section. Now, if you listen to
this part of the track, you should be able to hear
slight changes in the melody of the track every four
beats. If you have a listen. [MUSIC] Now, we'll go over
what a phrase is. Thirty-two beats
equals one phrase. At the start of a phrase is when significant changes
happens in a track. A significant change
can be an addition or a subtraction of a sound. Now, this won't necessarily
happen every phrase, but the tracks do generally change on the start
of a new phrase. On this track on the left here, what I'm going to
do is press play, and together we're going
to count the phrases. As we do, listen
out for the changes in the track every 32 beats. Three, 2, 1, [MUSIC] 1, 2, 3, 4, 5, 6, 7, 8, 13, 14, 15 16, 17, 18, 19, 20, 25, 26, 27, 28, 29, 30, 31, 32, 13, 14, 15, 16, 17, 18, 19, 20, 21, 22, 23, 24. As you can see there
if you were counting along, every 32 beats, which is one phrase, there was a significant
change in the track. There was an addition or subtraction of a
sound in the track. What I did also, as we
were counting along, I just highlighted the
start of each new phrase. Phrases are essentially the
building blocks of a track, and we're going to
come across these a lot throughout this course. One other thing
is, also sometimes they can have a 16-beat phrase. This is rare and less common
in the 32-beat phrase, but it is worth knowing. You just have to be more
aware and prepared if a track does have a
16-beat phrase in. This is where a significant
change happens on a 16-beat instead of 32-beat. To just quickly summarize, a beat is a measurement
of time, not a kick drum. Four beats equals one bar, and 32 beats equals a phrase. This is where the
significant changes happens in a track at the
start of a new phrase, which is an addition or
subtraction of a sound. We're going to go
over the different types of sounds we find in a track and how to identify
them in the next video.
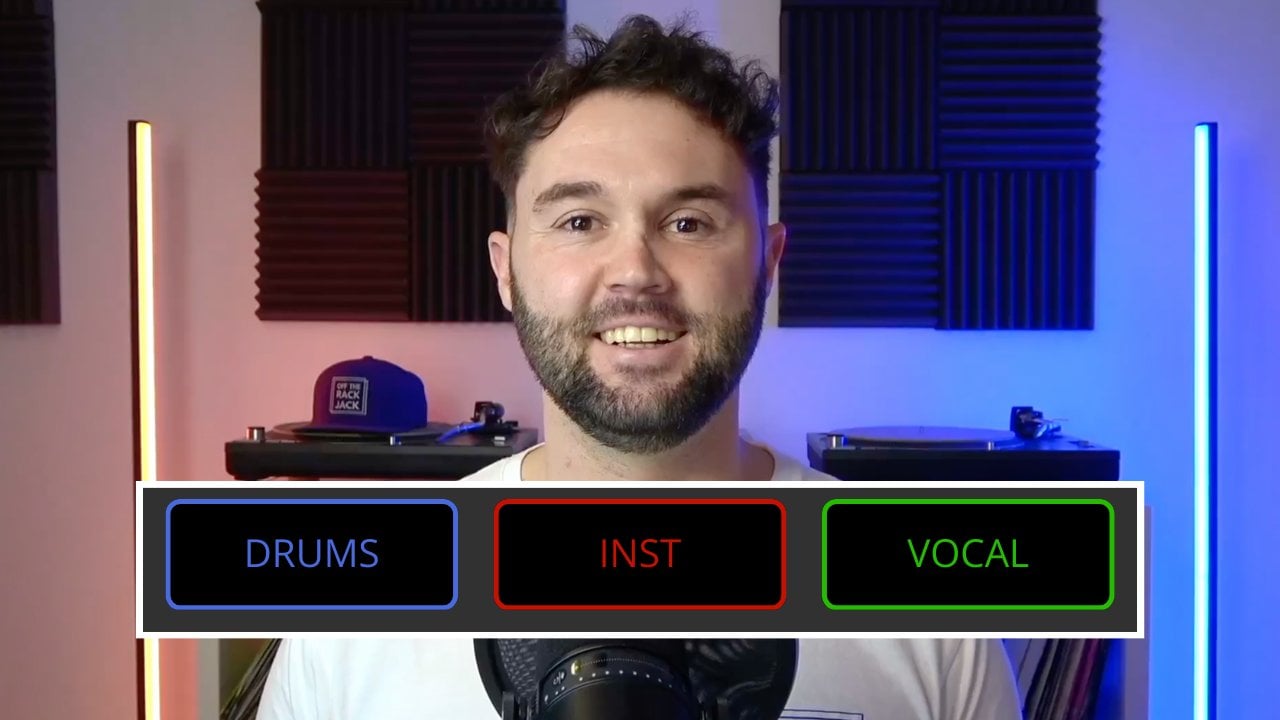
8. Frequencies And Sounds: In this video, I'm
going to explain to you what the different
colors of red, green, and blue represent on the
waveforms and how you can identify the different
sounds of a track from it. On the left deck here,
we need the track. Stardust, music sounds better. Now, RGB format breaks down
the tracks waveform into different colors that represent different frequencies
and sounds. The blue color represents
high-frequency sounds. The green color represents
middle frequency sounds, and the red color represents
low-frequency sounds. The blue color that represents
high-frequency sounds consists of mainly
hi hats and claps. At this track here on the left, we can see a blue line in the middle of the
beat just here. Now, this is going
to be a hi hat. So what I'm going to do is
just isolate the same for you. This is what a hi
hat sounds like. Hi hats can be off beat and as we're just seeing though
is in the middle of the beat. Claps are generally on
the beat every two beats. So on the next one,
that is a clap. I'm just going to highlight
and isolate this one for you. This is generally combinated
with a kick drum as well. But if you listen to this
track now and every two beats, listen to the difference and you should hear the clap sound. [MUSIC] Now the green
color that represents middle frequencies
generally consists of vocals and melodies. Vocals being singing, or rapping and the melodies
being musical instruments. You can see here the
track on the left it has a green
section just here. We're going to have a listen
to this and can listen to the different sounds it has throughout the track
at the green sections. [MUSIC] As you can hear though
it consists of melodies, which is the musical notes, and also some vocals as
well, which is the singing. The red color that represents low frequencies
generally consists of kick drums and bass lines. The kick drum is the
thudding sound that people can often
mistaken for a beat. I'm just going to mute this
track on the left here, slightly forward as you
can see this red section, and as you can see that it
has a red line on each beat, and that is a kick drum. We're going to have a
listen to this now. [MUSIC] Now it's not
just kick drums that are red, it's also baselines. What I'm going to do
it in this section of the track here is that
you have listen now, there's going to be
a combination of kick drums and bass
lines as well. [MUSIC] We have now identified the three
different colors represented in three
different frequencies, and each frequency generally consists of two different
types of sounds. The blue color represents
high frequencies, which consists of
hi hats and claps. The green color represents
mid-frequencies, which consists of
vocals and melodies, and the red color
represents low frequencies, which generally consists of
kick drums and bass lines. We're now going to
also group three of these sounds together
in another category, which is going to be
percussion sounds. Percussion sounds
are sounds that would be found on a drum kit. These would be the high hats, the claps, and the kick drum. These are going
to be referred to as the percussion sounds. On the start of the
track here on the left, on Deck 1, you can see that there
is a mixture and a combination of the
percussion sounds. We have the kick drums, which is a slight red
marker here, the hi hats, which is the blue ones in
the middle of the beat, and then the lighter blue ones, which are the claps
on every two beats. If you have listened to the
start of this track now, you should be able to identify the three different zones
of the percussion sounds. [MUSIC] All the other
sounds that we have identified are going to
be non-percussion sounds, sounds that are not
found on a drum kit, such as the vocals,
melodies, or baselines. To summarize, the RGB format
breaks down the tracks wave farms into different colors that represent different
frequencies and sounds. The blue color represents
high-frequency sounds, which consists of
hi hats and claps, and these too are also
percussion zones. The green color represents
mid-frequency sounds, which consists of
melodies and vocals, and the red color represents
the low-frequency sounds, which consists of the kick
drums and the bass lines. The kick drum is also
a percussion sound.
9. Sections Of A Dance Track: In this video, I'm going
to explain to you what the different sections
of a dance track are and how you
can identify them. The main sections of
a dance track are; intro, breakdown,
chorus, and outro. As you may have guessed,
the intro and outro make up the start and
the end of the track. The breakdown and chorus make up the main middle
sections of the track. Depending on the track, there can be different amounts
of breaks and choruses. But on average, there are
generally two of each; two breaks and two choruses. Each section has its own purpose within the track and we will go over what these are now and also what they sound
and look like. For this video, we want to
load up the track Stardust, Music Sounds Better on
the left-hand side. Now, as mentioned, the
intro is the introduction, which is at the
start of the track. This generally starts off with
simple percussion sounds, and as we have discussed before, these consist of kick
drums, hi-hats, and clubs. The intro starts off
basic and simple and it slowly introduces the track
and adds more sounds. We can also use
this introduction to time with the track
already playing. We're just going to
have to listen to the start of this track here. [MUSIC] We're just going to flick through
slightly as well, just to speed up the process. [MUSIC] As you can see there, the introduction lasts up until this point when the waveform
starts to turn blue, and you can see the
percussion ends. This is now the start
of the breakdown. What I'm going to do is just
going to put a marker on the start of the breakdown here and at the end
of the introduction. You can do this by putting
your hand on the top of the jog wheel and
spinning it around, and then just press in
one of your hot cues to set a marker if you
are joining along. Now, the breakdown
of a track mainly consists of melodies or
vocals of the track, often on their own. The idea is the track
breaks down and then it begins to build back up
again towards the chorus. We're just going to
have a listen to this section here and
flick through it. [MUSIC] This section now is the start of the chorus, so we had the
breakdown and builds anticipation towards the chorus. What I'm going to do is
just set a marker at the start of the first
beat of the chorus. Again, I'm going to do
it just by pressing the hot cue and leaving that marker at the start
of the chorus there. The very first beat of the
chorus is called the drop. The chorus is the most energetic
part of the track when all the sounds come together and when you dance
and jump around. We're just going to
have a quick listen to this chorus and
have a flick through. [MUSIC] As mentioned before, dance tracks often have two
breaks and two choruses. What we've entered here
is the second breakdown. I'm just going to
set a marker just at the start of this
second breakdown and at the end of the chorus. Again, we know
it's the breakdown because the big
cushions have ended, the energy has stopped, and it's just going to be the melody and vocals coming in. I'm just going to have a listened to this
part of the track. [MUSIC] Now, there are
a few percussion here, a few kick drums and high hats, but it's still part
of the breakdown. It's still not energetic
enough to be a chorus. [MUSIC] Here you can hear the build-up
to the next chorus. [MUSIC] Now, we're
into Chorus 2. I'm just going to
add another marker at the start of Chorus 2. We know it's the chorus
because you can hear that it's the most energetic part of the track where you'd want
to dance and jump around to. Let's have to listen
to this second chorus. [MUSIC] What you can hear
here is the tract slowly started to
lose its energy. It slowly started to reduce its sounds and gradually
fade the track out. [MUSIC] As you can hear there, until it completely gets
to some simple percussion. Now, what I'm going to
do for now is just place a marker at the start of
this simple percussion, which is what we think would
be the start of the outro. [MUSIC] The outro is similar
to the intro, but opposite. It gradually fades
the tracker and reduces the amount of
sounds in the track. It will end up with simple percussion at
the end of the track, just like we've
listened to them. Now, the sections
of a dance tracker are usually determined by the different sounds that are included in that
part of the track. Because of this, you
can sometimes see the different sections of the track just by
looking at the waveform, and this is one reason
why I've just put the markers through at the
start of each section. As we can see here, we have the introduction and you can see the waveform slowly
starting to get red, and then it drops
down into green. Then for Break 1, you can see that it's
got a small waveform. The smaller the waveform
means that it's less in volume and the wider the waveform means
it's loader in volume. Then after this Break 1, we can see that it's green. You can see the whole of
Chorus 1 where the energy is, then into Break 2, which it looks very
similar to the Break 1, which is green and
low in volume. It does have a bit of percussion in the middle of the Break 2, but it's not got high energy enough for it to be a chorus, and it's still building up to the anticipation of Chorus 2. Then we have Chorus 2
here with the energy, all the signs added together. Then at the end,
we have the outro, which is just the simple
percussion once again. Over time, you'll
get used to seeing these sections and knowing where the sections of a
dance track are just by looking at
the full waveform, even without these
hot cue setup. Now, it's not
always that simple. I'm going to introduce you to two new sections that
I have made up myself, which have helped me massively when I have been deejaying. These are intro plus
and outro plus. Intro plus and outro
plus are when you still class that part of the track
as the intro or outro, but there are more added sounds than just simple percussion. It can still be seen as
the intro and outro, but it also has added
sounds to consider. The most common sound
would be added would be the base during the
intro and outro. Now, I mentioned at the
end of this track here, we put a marker at the start
of the simple percussion. However, I don't see
this as being the outro. If we listen to just
32 beats before this, you can hear the track
reduce downside there. [MUSIC] Just that, and that to myself is what
I would consider the outro. But because it still
has the baseline, I would call it the outro plus. I'm just going to set a
marker there instead. For me, the track
reduces at this point, too much for it to
still be the chorus. But it is not just
simple percussion, so this is where I'll class
this as outro plus base. Let's have a listen
to it one more time. [MUSIC] As you can hear though, the track energy reduces down, and it doesn't carry
enough energy with it to still be the chorus. That there is where I
class as an outro plus. I'm going to show you a
couple more examples of an intro plus and an
outro plus in tracks. We're just going to load
up on the right-hand side, on deck 2, this track
again, Calabria. Now, looking at this track
at the full waveform, we should start to be
able to pick up where the different sections
of the track are. So where the track changes
from red to green here, that should be the
end of the intro and the start of Break
1. Let's have a listen. [MUSIC] Technically, this whole section here should be the intro. However, it's not just simple percussion all the way through. After one phrase, it does add extra base to it.
Let's have a listen. [MUSIC] As you can hear there as well, it also has some melody to it. For me, the start
of this track would consist of an intro
with just percussion, and then an intro
plus base and melody. Then it will break down
into the first break. As we should now know that the green section here
is the first break, and then it should go into Chorus 1. Let's have
a quick listen. [MUSIC] Then this section here
should be Chorus 1, and then into Break 2. [MUSIC] Then from the second breakdown, it should build
up into Chorus 2. [MUSIC] Now, this is the part of the
track we're going to listen to where the Chorus 2
enters the outro. I'm just going to
flick it on slightly, and we'll have a listen to this. [MUSIC] Now, this part of the track should
technically be the outro. However, it still has
quite a lot of base in, and this continues to
the end of the track. [MUSIC] As you can hear there, the end of this track
doesn't consist of just simple
percussion for an outro. This again is what I would
class as an outro plus, an outro plus base. I will show you plenty
of different ways to mix with all these
tracks using intros, outros, intro plus, and even outro plus when we get to the mixing
sections of the chorus. It will actually become
a lot clearer on how to use them when we start
actually mixing. But first, we just
need to be aware of these different sections
and what they consist of, and their purpose
within the tracks. Just to quickly summarize, the main sections of a
dance track are the intro, break, chorus, and outro. The intro usually starts
with simple percussion by itself and slowly
introduces more sounds. The breakdown is the
melody of vocals, usually on their own, and then builds up anticipation
toward the chorus. The chorus is the most
energetic part of the track, where all the sounds
come together at once, and the outro slowly
fades out the track, reduces down to
simple percussion. Then we have the intro
plus and outro plus, which are parts of the track
within the intro and outro section but have added sounds
such as base or melody. Now, one thing to
bear in mind when identifying different
sections of a track, not all tracks follow
the same structure, and it's not always as
simple as just intro, break, chorus, outro. Each track is different and can have its own unique structure. It's up to each individual
DJ on how they interpret their tracks and to which part of the track means what to them. I'm just giving you a basic understanding of
how the tracks are generally made so
you can go away and interpret the tracks
for yourself. But the main thing
to be aware of when identifying the different
sections in a track is where the track's key
changes are and what sounds are being added or
subtracted at that point. But this is also what
makes deejaying so fun, this constructing
different tracks and being creative
with your mixes, which we are going to do
plenty of in this course.
10. Counting Phrases: In this video, I'm going to
show you how you can count the phrases of each
section of a track. We now know how to identify the different
sections of a track. We also know that not all
two tracks are the same. One of the main
jobs of a DJ is to time two tracks
together correctly. One One which can help us
do this is by counting the number of phrases in
each section of a track. The easiest way to do this is by using a function
called Beat Jump. Now most controllers
should now have Beat Jump function on
their performance pads. But if not, you can still use the software just
as effectively. Firstly, we need
to put a track on Deck 1 on the left-hand side, You're No Good For Me. In record box, just on the left hand side here
where it says the tab Hot Cue and we're going
to scroll down here until it says Beat
Jump and select that. We can move left and right
between the values using these arrows here and the one
we want is the Number 32. Now, if you're here in Serato, to show the Beat Jump controls, what we need to do is go
over to the settings cog in the top right hand
corner, click that. We need to go to DJ Preferences and then in this
first section here, scroll down until you
see the last box, which is Show Beat
Jump Controls. I'm going to select
this and then go back out of the settings. Now the Beat Jump
controls will show here on the second
line of these numbers. The numbers above are
the loop function, but just below now is
the Beat Jump controls. We can move left and
right on these using the arrows to the side of
the numbers and again, the number that we
want is the Number 32. To use this function, all you need to do is press the Number 32 to activate it and then use the arrows
here on the side. What Beat Jump does is it
allows you to jump forwards or backwards in the track by the amount of beats
that you select. Firstly, what we need to do
on this new track here on the left is identify
the different sections. We're quickly going to
do that and we should start now being able to identify where the
different sections are just by looking at
the full wave form. Here at the start where it
goes reddish into green, I assume that's where
it's going to go from the intro into the Break 1. But as we've mentioned, there may also be intro plus, where it goes from
simple percussion to percussion plus
base or melody. As we can see in the
middle of the intro here, there's a slight different
change in color so I'm just going to have
a listen to that transition there as well. [MUSIC] As you can hear though, it went from simple
cushion to intro plus. I'm just going to highlight
that section as well, [MUSIC] and then go to
the end of the intro plus to the first breakdown. [MUSIC] As you can see
there, I'm just setting hot Q markers at the
start of each section, just so I can see them
a bit more clearly. Then we're going to go
from Break 1 to Chorus 1, [MUSIC] and then at the end
of the Chorus 1 to Break 2. [MUSIC] Now the reason
why I'm listening just a few beats before it's just to double-check
that it is still the Chorus 1 into Break 2. We can't just fully rely
on our eyes for this, we do have to use
our ears as well. Then I'm just going to go from the Breakdown 2 to Chorus 2. [MUSIC] From here,
from the Chorus 2, I'm going to listen to
the track transitions from Chorus 2 to the outro, where Chorus 2 reduces and
starts to fade into the outro. Let's have a flick
through and listen. [MUSIC] There it is. For me,
that's where the Chorus 2 ends and the outro begins. As we can hear though there's
base so we're going to call this Outro+ and let's listen to that all
the way to the end. [MUSIC] We have our
different sections there. We've gone back to the
start of the track right onto the first beat. What we're going
to do now is use the Beat Jump with the 32 bits, which is one phrase, to count how many phrases there are in each section quickly, so I'm going to jump
forward one phrase. As you can see that the
first bit of the intro, which is simple percussion
is one phrase long, and then we press it again and then the intro plus lasts
for one phrase also. Then I'm going to count
how many phrases are in Break 1, one, two, so there's two phrases
there in Break 1, and then in Chorus 1 we have 1, 2, 3, 4 phrases. Then in Breakdown 2, 1, 2, 3, three phrases in Breakdown 2. In Chorus 2 we have 1, 2, 3, 4, four phrases in Chorus 2 and
the outro one, two phrases. As you can see though, we can quickly identify the
different sections of a track and quickly count how many phrases there
are in each section. This is going to
massively help us when it comes to mixing two
different tracks. They don't necessarily
have to put hot cues on markers at the
start of each section, but we're just doing that
for this example just to highlight the different sections and make it easier to see. Now sometimes it's not
always that simple, so we're going to
try another track. We're going to load up on
the left deck here, Utopia. What I'm going to do now
is highlight each section. You don't need to listen
to me do it all again so I'm just going to highlight these sections really quick. I've gone through then,
highlighted each section. We have the Intro and
then Intro+, Break 1, Chorus 1, Break 2, Chorus 2 and the Outro+. Now what I'm quickly
going to do is go through each section and count how many phrases are
in each section. In the Intro, we have one
phrase and then Intro+ is one phrase and then Break 1 we have one phrase
and then Chorus 1, we have 1, 2, 3 phrases, and then Break 2, we have 1, 2, 3 phrases. However, that went past
the drop of the Chorus 2. It seems that there
is an inconsistency with the phrases and
the structure there, so I'm going to jump back
to the start of Break 2. Now as I can see here
on the top right in the waveform and also in
the full wave form here, there seems to be a smaller
phrase, a smaller pattern. I'm going to do is try that.
I'm going to jump forward 16 beats and then
back to the 32, 1, 2. That takes us up
right up to the drop. As we can see that the
Break 2 on this track is a 16-beat phrase followed
by two 32-beat phrases. It's not as a standard
structure or as a simple structure to the track as the
previous tracks were. But the main things here
is that we just need to be aware of where the key
changes are in the track, and just by jumping through with the Beat Jump
function there, we are aware that this track has a 16 beat phrase at
the start of Break 2. Now we're going to
continue Chorus 2, 1, 2 phrases and outro
plus 1, 2 phrases. Hopefully that you'd be
getting used to identifying the different sections of
a track and being able to count the different phrases
within them sections and spotting any irregularities
within the sections.
11. Intro - Beat Matching: Welcome to the next section
of the course, beat matching. In this section, you will learn the different ways to beat
match two tracks together. Beat matching is when you get both tracks at the same
speed as each other and also get the beats of both tracks in time
with each other. This is so that the track
sound good together for the audience and they
are ready to mix with. I will show you how to
use the tempo fader and jog wheel to
beat match with, how to use your jog wheel to
beat juggle your tracks in, how to use the sync
button and how to adjust the beat
grids on your tracks. In this section, there
are some videos for Rekordbox and some
videos for Serato. You only need to
watch the videos of the DJ software
that you are using. Let's get into it and I'll
see you in the next video.
12. Decks Walkthrough: In this video, we're going to walk through some
of the functions on the DJ controller that we're going to need in the
section of the course. We're going to take a look at the play/pause and cue button, the jog wheel, and
the tempo fader. For this video, you just need any of the two
practice tracks included in the music pack loaded up on either
of the decks. For this video, you
can see here I have the Track 2 practice track loaded up on Deck 2 on
the right-hand side. Now firstly, on
the DJ controller, everything on the
left-hand side is mirrored and exactly the same as it
is on the right-hand side. Deck 1 will be exactly
the same as Deck 2. We will start by
looking at the play and pause button and the cue button. The play/pause button
does exactly that. When you press play, it plays, and when you press it again it pauses and stops the
track at that point. [MUSIC] When the waveform passes over the red
line in the center, that is this sign you will hear from the track in real time. Now, the cue button
just above the play and pause button has a
few more functions. If you press the cue button
whilst the track is playing, it acts like a reset button and takes the tracked back
to the cue point, and it also stops
playing the track. I'm just going to press
play on this track again. [MUSIC] Press the cue button and it will take me back to the cue point and
stop the track. The cue button is represented
here on record box by a small triangle
underneath the waveform on both the extended waveform
and the full waveform. The cue point is
generally set on the start at the very
first beat of the track. Now, if you press and hold the cue button whilst
the track is paused, and at the cue point, the track will play for
as long as you hold the cue button down
for until you let go. Then when you let go
the truck stops and it resets itself and returns
back to the cue point. I'm just going to hold
down the cue button now. [MUSIC] Then when I let go, it's going to go back
to the cue point. You may often see DJs tapping the cue button
when deejaying. What they're doing is
tapping and listening to the first beat of the
track to get the timing right in their headphones
with the track that is already playing and then
getting ready to press play. Similar to this. [MUSIC] If you press and hold down the cue button but want the track to keep playing and not go back to the start
when you let go, you can press the play
button at the same time and let go of the cue button and the track will continue playing. If I press and hold
down the cue button, [MUSIC] and then press
play at the same time, and then take my finger
off the cue button, the track will continue playing. You can move the position
of the cue point and set it at different
places in the track. Whilst the track is paused, you can move the track forwards and backwards with the top of the jog wheel and then press the cue button to
set a new cue point. I can move this track forward, [MUSIC] and then
press the cue button, and it will set a new cue point. Generally, you always want the cue point on the
first beat of the track. But it is good to know because
sometimes the software doesn't set the cue point
right at the first beat, so you may have to
do it yourself. As we've just seen
with the jog wheel, it can be used to respond like vinyl where you
can do your wiki, wiki sounds and your
cool spin bikes. The jog wheel respond like
this in play and pause mode. Be careful when deejaying
not to catch it by accident. However, the sides of
the jog wheel can be used to temporarily
speed up and slow down the track by nudging
the sides clockwise or anticlockwise without
stopping the tracks momentum. Then once you start
nudging the sides, the track will continue to
play its original speed. For example, if I press
play on the track now and then touch the sides of the jog wheel
moving it clockwise, [MUSIC] and anticlockwise, [MUSIC] it's going to speed the track up temporarily
faster and slower. This way of using the
jog wheel can be used to get the beats of one track
in time with another, which we will go
over exactly how to do this later in the section. Up in the top
right-hand corner of the deck is the tempo fader. The tempo fader lets you manually adjust the
speed of the track. When the tempo fader
is in the middle, at zero, the track is
at its original speed. You can move the
tempo fader up or down to make the speed of
the track faster or slower. As we now know, the speed of the track is
measured in beats per minute, or BPM for short. The higher the BPM, the faster the track, the lower the BPM, the slower the track. For example, at the moment
we can now see that this track here is
124 beats per minute. Now, if I was to move the
tempo fader up and down, you can see it adjust
the speed of the track. This is also another way in which we can time the speeds of two tracks together by
putting them at the same BPM. One thing to bear in mind
when changing the speed of the track is the key of
the track may also change. This will mainly
affect any vocals or melodies in the
track and basically means it can make
them sound squeaky or deeper when you move the
track faster or slower. This can make the track
sound bad or off to the audience especially when
it's a well-known track. To show you an example
of this I need a track with vocals
and melodies. I've got a track here on
the left-hand side note, Last Night a DJ Saved My Life. What I'm going to do is just put it to a part of the track, whether it's going to
be melodies and vocals. It's going to use Break
2 as an example here. Then I'm going to press play on the left-hand side
and speed the truck up and down and have a listen to how it affects the
vocals or melodies. [MUSIC] As you can hear there, the track goes squeakier
and deeper as I move the track faster and
slower with the tempo fader. Now we can avoid this
unwanted key change by activating a function called key lock or master tempo it may be called on other DJ
controllers and software. Just under my tempo
fader here there's a button called master
tempo and key lock. If I just turn this on now, and this can also be done in the software here
where it says empty. Also in Serato, there is a musical key button
that if you click that, that will activate key
lock and master tempo. If I press play on
the track now and move the tempo
fader up and down, you should be able to
hear the difference of the track not going
squeakier or deeper. [MUSIC] I'm just going to turn it off. [MUSIC] Then back on. [MUSIC] As you can hear there with the master
tempo and key lock on, you can still speed
the track up and down without the key
of the track changing. For this reason, I
would suggest to always have this function on to avoid any unwanted squeaky
mistakes when deejaying. That is just a quick
walk-through of the functions on the DJ controller that we'll be needing throughout this
section of the course. Let's move on now to learning how to get those beats in time.
13. Tempo Fader And Jog Wheel: In this video, I'm going to show you how you can beat-match two tracks together by using your tempo fader and jog wheel. For this video, we need
the two practice tracks that we have in the music pack. We need practice
track 1 on deck 1 on the left-hand side
and practice track 2 on the right-hand
side on deck 2. These are specific
practice tracks that I've made for this
course that consists of just simple
percussion to make it easier for you to learn
how to beat match. When both tracks are at
zero on the tempo fader, one track should be
at 122 beats per minute and the other
tracks should be at 124 beats per minute. Now, on record box, the BPM is shown to
two decimal places, giving you more
accuracy for when you're adjusting the
speeds of your track. However, in Serato, our standard, you only
have one decimal place. I'll show you how you can
change this quickly now. As you can see here
on the BPM display, you only have one decimal point. If you go over to settings, then to library and display, then down to the middle
onto the right-hand side, it says two decimal places. If you just select that
and then exit settings, you should see now
that your BPM display has two decimal places. So firstly, what we need to
do is set the key points of each track to the very start
of the very first beat. If I press play on track 2 here, then press play on track 1. [MUSIC] You can
hear that they're slightly in low and then start to go further and further out. This will continue and
this is called double beating and this is what
we do not want as a Dj. One way we can get
the tracks in time with each other
is to simply move the tempo fader
on one deck so it matches the BPM of
the other deck. For example, on
deck number 1 here, I'm just going to
adjust the tempo fader to match the track on deck 2. I'm just going to move
it up until it gets to 124 BPM. There we go. With the BPMs being
the same speed, they will stay consistent
with each other, but it doesn't necessarily
mean the beats are in time. This is when we have to use the sides of the jog
wheel to nudge the track in time with the other by
speeding the track up or down. Remember, clockwise
speeds to track up and anticlockwise
slows the track down. You can use the
visual display to help you line the beats
up with each other. But it's good to also pay attention and focus
with your ears too. Because what you hear is
what the audience will hear. You'll need to make
sure it still sounds right and doesn't just
look right on the display. You should use the
lines on the display as a visual aid only to help you, but ultimately your
ears will have the final say on how it sounds. As the beats can look
in time on the display, but still may not be
perfectly in time. When moving the jog wheel, slight nudges are better than big ones at first
to get started, and listen out for the subtle changes in the beats getting closer together until they
eventually perfectly in time. If you do big nudges
on the jog wheel, you may move the track
too far in one direction and then have to go back in the opposite direction
to correct it. For example, here I'm going
to press play on deck 2. [MUSIC] Then we're to
press play on track one. [MUSIC] Now you can hear though, that the beats are not in time. What I need to do is
slow down the track on deck 1 by nudging the
jog wheel anticlockwise. There's going to
be slight nudges. Listen for the beats
going back in. There we go. The beat
should be in time though, and because they're at the
same speeds and the same BPM, they should stay consistent and stay in throughout the mix. I'm just going to try
that one more time. Press play on deck 2 again. [MUSIC] Then press
play on deck 1. [MUSIC] Again, it's
a little bit ahead, so I have to slow it down
and nudge it backwards. If I was to do this too much, the track would go
past and too far. [MUSIC] As you can hear
though, it's sounding worse. This time I have to
nudge them a little faster by moving the
jog wheel clockwise. Slight little nudges. Listen in for the
subtle changes. [MUSIC] Now we have them back in again. That is beat matching,
getting the beats of two tracks in time
with each other. But as we have mentioned, we also want to time the
phrases of the two tracks together so that the changes in the tracks happen
at the same time. This is called phrase matching. If you look at the
waveforms on both tracks, you can see a pattern just like you would do on a normal track. You can see a slight change in color at regular intervals
throughout the track. We just have to
listen to this part where the changing color is. As you can see though, the
kick drum goes out and we should hear a symbol on this track here on the
first beat as well. I'll just wind it back slightly. [MUSIC] What you can hear though, is the kick drum going
out for four beats and assemble on the start of the
first beat of the phrase. Now we're going to
have a go at both, beat matching and
phrase matching by pressing play on
the first beats of the new phrase and
using the jog wheel to nudge in the beats in
time with each other. I'm going to press play here
on the right-hand deck. [MUSIC] What you should
see coming up on the waveform is the
change in the track. I'm going to press
play on the first beat of the start of a new
phrase just coming up here. [MUSIC] 1, 2, 3, 4. As you can hear though,
the beats are imperfectly, so I'm just going to nudge
the jog wheel slowly [MUSIC] until they're in time. You should see the
changes of the tracks at the same time. Let's
do that again. I'm going to press Q on deck 1, Wait for the new phrase. Try timing in time
with the new phrase. [MUSIC] 1, 2, 3, 4. Then nudge the tracks in. [MUSIC] Once again, we can see the track changing at the same time so the
phrases are matched. [MUSIC] As a beginner, if it sounds okay to you, it will probably sound
okay to the audience. Don't worry about getting
them perfect straight away. Over time, you'll
pick up on how to get them perfect in time, faster and faster, the
more you practice. Now some DJs actually prefer
using the tempo fader and jog wheel to deejay with even over the
automatic sync button. This is because they feel
they have more control over their tracks and what speeds
they want their tracks at, especially if they are Djing at different BPMs
throughout their sets. Another reason is
because you can also deejay using
this method with any deejay equipment as pretty much all deejay
equipment now have a BPM display and jog wheels. Whereas if you just get used to using only the sync button on your own deejay controller and completely rely on
that to deejay with, you may struggle if you use
some other deejay equipment. As the sync function
can work differently on different deejay controllers
and deejay softwares. But if you can use
this method of beat matching with the
tempo fader and jog wheels, you should be able to deejay
anywhere on any equipment. Have a few practices now with one track playing
and then trying to get the beats and phrases
matched on the other track. If you want to get
used to beat matching just a little bit
more with your ears, you can do this without
looking at the screen. Try and anticipate when the
new phrase is going to stop, press "Play" and without
looking at the screen try and nudge the beats back in
by using just your ears.
14. Beat Juggling: In this video, I'm going
to show you the basics of beat juggling your tracking
when beat matching. What I want you to
do on the track on the right-hand side is press Play and then
catch the tracks. So that means putting
your hand on top of the jog wheel and starting
the track from playing, [MUSIC] and then just winding the track back to the
start of that first beat. [MUSIC] So your hand is
on top of the jog wheel, stopping the track from playing. If you were to release your hand off the top of the jog wheel, the track should start playing. [MUSIC] So with your hand
on top of the jog wheel, at the start of that first beat, what I want you to try is
pushing your hand forward and backwards just
over that first beat. [MUSIC] Then try and get
into a rhythm and count to four and do it at the
same time as your count. You don't have to push the
track all the way forward, just halfway over the beats or where that
sound's good to you. So 1, 2, 3, 4; 1, 2, 3, 4; 1, 2, 3, 4. So as you bring their hand back, you're bringing it just to
the start of that first beat, and then pushing over the
beat, and bringing it back. You can use the lines
on the software to keep an eye on and you
can use your ears, but you can also use a
marker on the decks. For example, I could lie my hand up with the
Shift button here. [MUSIC] So I'm just going to stop the track at the moment. So just here on my
deejay controller, I have the Shift button. What I can do is line my hand up so that the start
of the first beat, my hand is at the same
position as the Shift button. So I'm just going to catch
that first beat again. [MUSIC] Then get it.
So my hand is just at the start of the Shift
button, just here. What I can do is just watch
my hand go forward over the Shift button [MUSIC] and then back to
that shift button. [MUSIC] That is one way how you can use a visual aid on your controller to know where
to bring your hand back to. If you don't have a visual aid, sometimes you can
just use your finger. [MUSIC] If I press Play, catch the beat here,
bring it back to there. I can just put my
finger at the side and I know that is the
start of the first beat. [MUSIC] Now, this time
what we're going to do is press Play on the track on Deck 1 and try and do it in time with the beat
of the other track. [MUSIC] So I'm going to
catch the first beat, line it up with
that Shift button, [MUSIC] and then do it to
the beat of the truck. 1, 2, 3, 4; 1, 2, 3, 4; 1, 2, 3, 4, and then this time, release the track on the
first beat at the next phase. 1, 2, 3, 4. Then merge it in
with the jog wheel, press the Cue button, press Play, catch that
first beat again. 1, 2, 3, 4. Nudge the track in with
the side of the jog wheel, press the Cue button, press Play, catch
that first beat. [MUSIC] That is just the basic way of beat juggling
your track in when starting the track. At this time, we're going to make it
a little bit harder by doing it at twice the speed. So this time instead
of counting 1, 2, 3, 4, you're also going to say
the word and in between the numbers and that's going
to represent half beat. So I'm just going to catch
that first beat again. [MUSIC] Then instead of going 1, 2, 3, 4, I'm going to say that
and in the middle, one, and two, and
three, and four, and one, and two,
and three, and four, and one, and two, and
three, and four and. So I'm going to press
Play on the track on the left-hand side
and we're going to do it to the beat of the track. [MUSIC] I'm going to
catch that first beat. [MUSIC] Do it in time with the other track
and do it every half beat. One, and two, and three, and four, and one, and two, and three, and four, and one, and two, and three,
and four, and [MUSIC]. Get used to touching the
track in with the jog wheel, press Cue, catch the first beat. One, and two, and three,
and four, and [MUSIC]. One more time. [MUSIC] Now, once you get used
to doing it in time with one beat and every half a beat, you can mix these
up and add them together and create
your own sequences. So do four beats just before the next
phrase of the track. So for example, we can do two beats at full beats and
then two beats at half beat. [MUSIC] So just like this, 1, 2, 3, and 4, and 1, 2, 3, and 4 and. Or we can do it the other way. We can do two beats
at half speed and then two beats at normal
speed, just like this. 1 and 2, 3, 4; 1 and 2, 3, 4. Then time it with the
phrase on the other track. [MUSIC] So you ready? One and 2, 3, 4. Or try the other way. 1, 2, 3, and 4. [MUSIC] So wow, be able to
do them at both speeds. You should be able to make up your own combinations
of four-beat juggling. You can combine them and do them eight beats before the
start of the new phrase and just have a play around with these ideas using the counts 1, 2, 3, 4, and then the ands in-between
for the half beats.
15. Sync - Rekordbox: In this video, I'm going
to show you how to use the Sync function on rekordbox. The Sync button basically
puts the two tracks at the same speed and can also snap the beats in
line with each other. Firstly, we need the two
practice tracks up again. On the left-hand
side is Track 1 on Deck 1 and on the right-hand
side is Track 2 on Deck 2. Now to start off with, both of these are at
the original BPM. So both tempo faders
should be at zero at the middle and on
Track 1 should be 122 beats per minute and Track 2 should be
124 beats per minute. There are two different types of sync that we can
have on rekordbox. We'll just go over firstly to the Settings and then to
Controller tab at the top, and then to the Deck
option on the left. If we scroll down,
you should see a section called BEAT/BPM SYNC. What we need to have here
as selected is BEAT SYNC. BPM sync only matches the
two speeds of the track, just like we would do with
a tempo fader manually. If you had BPM SYNC selected, you would still have
to touch the beats in with the jog wheels to
get the beats matched. However, with BEAT SYNC, this will put the two
tracks at the same speed, but also will snap the beats in at the same
time as each other. This is the option
we want selected. If you're just going
to exit the settings, then I'll show you
how to use this now. With rekordbox, there's always going to be a master deck. At the moment on Deck
1 is the master deck, and the master deck is
generally the track that is playing out
to the audience. If I was to press
"Play" on Deck 2 now, that should become
the master deck. [MUSIC] As you can
see, the Deck 2 on the right-hand side has now
lit up as the master deck. If I was to press "Play" on
the left-hand side again, [MUSIC] that has now
become the master deck. Whichever track is the
master deck will be in control of the BPM and speed. Generally speaking,
the master deck will lead and the other deck will
follow the master deck. For example, if I
press "Play" on Track 1 on the left-hand
side on Deck 1, [MUSIC] and then if I press the both SYNC buttons
to sync the tracks up, both tracks will go
to the master deck BPM of 122 beats per minute. Also, if I move the tempo fader on Deck
1 as the master deck, both BPMs of the tracks
will move at the same time. However, if I was to
move the tempo fader on Deck 2 which isn't the master deck,
nothing would happen. Now, if I was to
change this and stop Track 1 and press Track 1, this one, Track 2 then
becomes the master deck. If I was to move this BPM, it would now change. If I move the tempo fader on the left-hand side,
nothing would happen. Whichever deck is the
master deck will be leading and the other deck will follow the
master deck's BPM. That is just a simple
way of getting both your tracks
at the same speed. All you need to do is
press the sync buttons on either deck and they'll
sync up with each other. Now with the beat sync setting
selected in your settings, what will happen
also when I press "Play" on the other track
that isn't playing, the beats will
snap him with each other and beat match
automatically. For example, if I press "Play" on the left-hand side now, [MUSIC] that will become the master deck and if I
press "Play" on Track 2, on Deck 2 the beat will snap
in to the closest beat. If we just have a listen.
There now we're in time. If I was to do that again, you can see the beats
snapping with each other. Again and one more time. When I press "Play",
the beats will snap to the closest beats. As you could see
there, when I press "Play" and they
were out of time, the beats would snap in automatically to each
other to the closest beat. Now, if you wanted to,
you can still touch the jog wheels to
adjust the beats. The tracks would stay
in the same speed, but the beats will not be
snapped in with each other. For example if I press
"Play" on Deck 1, then I press "Play" on Deck 2, if I nudge the jog wheel now, it will change the beats. As you can see, they
have gone out though. They'll stay at the same speed, but to get them back in, all I need to do
is turn the sync off and then turn it back on again and they'll snap
back in the same time. With beat sync on, you can also use the
beat juggling to start your tracks off
and the beats were still snap into the same time. For example this time if
I press "Play" on Track 1 again and I catch that firstly on this track and I want to do a bit
of beat juggling in before the next phase, I can still do that and the beats will snap
in at the same time. [MUSIC] Again, one more time, just going to show you
that the beats snap in. This is a very
simple and easy way to get both your tracks at the same speed and to snap the beats in at the same
time as each other. It can make deejaying a
lot of fun and open up a lot more different ways of
deejaying with your tracks, being able to snap the beats in straightaway at the same time. However, as I've mentioned, different DJ equipment and different softwares have
their sync functions work in different ways, which is why I showed
you how to beat match. We're just using
the tempo fader and jog wheel in the
previous video so that you are prepared if
you do ever go and use a different controller
and different software. But if you are using rekordbox, this makes it very
easy for you to use. This is the setting
that we'll be going forward with
throughout the course.
16. Sync - Serato: In this video, I'm going to
show you the different ways on how you can use the
sync function in Serato. We've got our two practice
tracks loaded up here. We've got Track 1 on Deck 1 on the left-hand side and Track 2 on Deck 2 on
the right-hand side. Don't worry that these
say 10 steps to DJ. That was just the previous
branding of this course. They're still the
right practice tracks that you should have
in your music pack. Both these tracks should be
at zero on your tempo fader. Track 1 should be
at 122 beats per minute and Track 2 should
be at 124 beats per minute. There are two different
sync settings on Serato. I'm just going to have a
look at both of these. Firstly, we're going to go
into the settings cog at the top right-hand corner and then select DJ Preferences, and just at the
bottom here we have the section that's
called sync mode. We have two different options. We have simple sync
and smart sync. We're firstly going to have
a look at simple sync. For this we need the snap
to beat grid box selected, and then we can
exit our settings. When the Sync button
is activated, it basically puts
the two tracks at the same speed and
BPM as each other. The track you press
sync on first will change its BPM to match
the other track's BPM. For example, if I press
the Sync button on Deck 1, this track's BPM should
change to Deck's 2 BPM. I'm just going to
turn this one on. As you can see there, they've both synced
up with each other, about 124 beats per minute. If I was to turn these off and press the Sync button on Deck 2, this track's BPM should sync up and match the other track's BPM. Now we have them both at
122 beats per minute. Now to get the beats
to snap together automatically when
you are playing, you have to press Play
first and then press the Sync button again to snap the beats in
time with each other. Now I'm not able to run
the sound through Serato, but I have set up a
speaker and should still be able to hear
the beats clearly, but just for this lecture,
you may have to bear with me. If I press play on Track 1 on the left-hand
side on Deck 1. [MUSIC] Then I want
to sync up Track 2, so I'm going to press
the Sync button first to get the BPMs the same. Then when I press
play on Track 2, it's going to start the track. I'll do it at the
start of this phrase. Now you can hear the
beats are not in. What I need to do is press the Sync button again
to snap them in. Then if I stop Deck 1. I'm going to press
play on Deck 1. They're not synced in. I have to press the Sync button
to snap them in. Now, one thing to notice
is that the beats also snapped to the nearest bar
and not the nearest beat. Now as we have mentioned before, the numbers on the extended
wave form across the middle, as you can see them
going up here as 1, 2, 3, 4, 5, these numbers represent a
number of bars in the track, not the number of beats. When you press the Sync button, it snaps the beats
to the nearest bar, so the numbered lines of each track match up
with each other. This time I'm going to
press play on the track completely out of time, then press the Sync button and watch the tracks snap
to the nearest bar. I'm going to press
play on Track 1. [MUSIC] Then when it gets
to the near Bar number 5, I'm going to press
play on Track 2, and as you can see,
they're completely out. If I was to press
the Sync button, it's going to snap the numbered
lines with each other. It moves ahead two beats there. I'm just going to show you
that again on the next phrase. I'm going to phrase match
these two tracks now. There I was completely out
of time with the phrases, but if I press the Sync button, it'll jump ahead and
snap the bars together, and now you can see that both
tracks are phrase matched. Simple sync is as
simple as that. You press the Sync button
when you first load up the track to
match the speeds of the two tracks together and
then press Play followed by the Sync button again to snap the beats in time
with the other track. Now if we go back
into the settings cog in the top right-hand corner, so DJ Preferences and
down back to Sync Mode. Now we're going to show you
how to use the smart sync. I'm going to exit settings. On smart sync, you will have three different colors
of the Sync button, which will represent
three different ways of using the sync function. You'll have blue,
gray, and yellow. First, we will cover the
blue and gray colors of the sync functions, the blue color will only
show when the track is playing and blue means
that beat sync is activated and the
track that's coming in next should be able to snap
the beats in time with it. The gray color will only be
seen if the track is paused. The gray color
means the track is armed and when you press play, the beats will automatically snap in time with
the other track. When both tracks are blue
when they're playing, it means that both tracks
are in time with each other. For example, if I press
Play on Track 1 on the left-hand side
[MUSIC] and then press the Sync button, it's
going to go blue. Now this means that
beak sync is activated. If I press the Sync
button on Track 2 now, it's going to go gray and
this means it's armed. This means that when I
press play on Track 2, the beat grids will snap
in time with each other. I'm just going to wait till
the next phrase and show you and I'll press play on Track 2. I'm going to do it slightly
out of time so you can see the beat jump in
time with each other. However, now you can see that both sync buttons are yellow. If you touch the
jog wheel or press the Q button on either track, this will deactivate
the beat sync on that track and put the
sync button to yellow. For example, if I
press the Q button on Track 1 and the Q
button on Track 2, this will keep the track
on the yellow Sync button. The yellow color
means the track is now only in tempo sync and the yellow color means it
will keep the track at the same speed and at the
BPM of the other track, but it won't snap the
beats in together in time. If I press play on Track 1 now, [MUSIC] and then
if I press play on Track 2 on the next phrase, you'll see that the beats won't snap in time with each other. Now what I need to do to get these tracks to
sync up with each other, I have to activate both
beat syncs on both tracks. I'm going to press
sync on Track 1. Now it's blue and activated. Then I'm pressing on Track 2, and it'll snap in time. If I was to nudge Track 1 now, so slow it down or speed
it up with the jog wheel, you can see that the
beat sync goes yellow. Just to get it out of this, you can press the
Sync button again. They'll both go blue and snap
in time with each other. With both tracks at
paused and in yellow, what you can do is just
press the Sync buttons to turn them gray again. This means that
they're armed and ready to snap in time
with each other. As you've seen then, beat
sync will only work if both tracks are blue and
beat sync is activated. I would recommend that if
you are using smart sync to try and keep both
tracks as beat sync activated and use the blue
and gray sync functions to keep beat sync activated, try and do this by avoiding using the jog wheels
or Q button on your DJ controller as these will put the track
into the yellow sync, which means the tracks will not snap in time
with each other. Now this can take
some getting used to the different colors at first
and I hope I've made it a little clearer for you
of how the sync function works in both the simple sync
and smart sync in Serato. The best way to get used to the different beat sync functions is to practice and have a
play around with it yourself. You have to practice tracks that you can practice with and all the other tracks
as well that I've included in the music pack. You also have tool tips to
help you out which will give you a description of
what each function does. You can always revisit
this video too if needed. This is also why I've shown you the way to beat match without the sync function by using only the tempo fader
and jog wheel. If you can imagine
getting used to the Serato sync function and then going to a
club or venue to do your first DJ set and they have another DJ software where the sync function
works differently, you may find it a
little hard to adjust, but if you know how to use the
jog wheel and tempo fader, you should be able
to DJ anywhere. But to start with and whilst learning to DJ with
your software, the beat sync is a
great tool to use and it is what we will be using going forward with the course.
17. Beat Grid - Rekordbox: In this video, I'm going
to show you how you can edit the beat grid
of your track. We should now be familiar
with the lines on the extended waveform
showing goes where the beats and bars
are off the track. These lines are what's
known as the beat grid. Most of the time the
software analyzes the track correctly and puts the
beats in the correct place, which as we now know, we need a line at the start
of every beat throughout the track and a red line at the very start of
the very first beat. This is to make sure
that all the bars and phrases are in the correct
places throughout the track. However, it is rare, but sometimes the software
doesn't analyze the track correctly and can put the
beat grid in the wrong place. This can make it a problem
for us to DJ with because everything in the software works around the beat
rid of the track. I'm going to give you a quick walk through
of how you can edit your beat grid if you need to. Just on the far right-hand
side of the deck here, there's a box with
four squares in. If you select this, that'll take us to our normal display. But just below, you can see a box with four
vertical lines in. If you select that,
it will open up the edit beat grid section. On the right-hand side here, I have got the
track needing you. I'm not going to go
through all the buttons in this section as
most aren't needed. I'm just going to cover the
main ones that we may use. The first button, It's got a half-white and
half-red line in it. As it says here on tooltips, it sets the first beat of the bar to the current position, and that current position will
be where the play head is. For example, I'm
just going to move this track forward slightly. [MUSIC] Now the play
head is in-between these two beats here. If I was to press the
button with the half-white, half-red lining, is going to set the first beat of the
bar that position. As you can see now,
the first beat of the bar is set at that position
where the play head was. Now, this can be a
common mistake that the software makes is by putting the first beat of the bar
in the wrong position and not putting it at the
very start of the track. All we need to do here is zoom all the way in on the
waveform on the first beat. Move the play head to the very start of the
first beat of the track. Then press the half-white, half-red button, and it will reset the first beat of
the bar at that position. Now if I zoom out, the beat grid is in the correct place with
the red line at the very start of
the first beat and a line for every
beat after that. Using this option, it
doesn't change the speed of the track or make the beats
any bigger or smaller, it just repositions the
first beat of the bar. Next, we will go
over the line of the buttons on top here. As this person says, this one will shift
the whole beat grid to the right and this one will shift the whole
beat grid to the left. The two buttons in the center will shift the whole
beat grid slower, and the two buttons on the outside will shift
the whole grid faster. For example, if I was to
hold this button here, shift the whole beat
grid to the right. If you keep an eye
on the beat grade, you will see all the beat
grid move to the right. Then if I was to
do with the shift the whole secret to the left, you will see the whole beat
grid move to the left. The line of buttons
just below that here, the two on the
left-hand side will shrink the beat intervals, which were basically it
means that it'll reduce the gap between the
beats down shorter. The two buttons
on the right will expand the beat intervals, which means it'll stretch and make the gaps between
the beats larger. Now, these options will
change the BPM on speed of the track as you are making the beats either
larger or shorter. If I was to expand
the beat intervals, keep an eye on the beat grid
and watch it stretch out. Then if I was to shrink
the beat intervals, you can see the beat grid
compress and get shorter. As you can see that
the BPM value changes, the two buttons
here at the bottom. This one on the left will double the BPM value has gone up to
235 beats per minute now. This one on the right will have the BPM value back
down to 117 BPM. In this box here where
the BPM value is, you can also click and type in manually what BPM you want. I'm going to put 125.00. That's changed the
beat grid back to 125 beats per minute. To check if the beat
credit in the right place, I want to zoom in all the
way on that first beat. As we can see, it's not exactly at the very
start of the beat. I'm just going to
move the play head at the very start
of the first beat. Press the half-white,
half-red button. Then what I want to
do is check that it's consistent
throughout the track. I'm going to check
the first beats on the first chorus here. I'm going to select
the, move it forward. [NOISE] We can see
the red marker on the very first beat
of the chorus. Then I'm going to
check chorus two the first beat of chorus
two, move that forward. [NOISE] As we can see that there's a red marker
at the very first beat, of course, too as well. If you have a change in
a beat grid on a track, you want to make
sure and check that it's consistent throughout
the track also. Now if you were to change
the beat grid, for example, if you want it to stretch it out and then move it to the left. The beat grid is
in the completely wrong place at the wrong BPM, you can always just
analyze the track again to take it back to its
original beat grid. Here we have got the
track needed new. I'm just going to right-click. Then click Analyze track. What that'll do is take it
back to its original beat grid and analyze the track like it's the first time it's seen it. Now when I did load the music
pack up into my record box, I did notice a couple of tracks, it didn't have the beat
grid set correctly on them. I'm quickly going to change that now whilst we are recording. I'm just going to drag up on
the right-hand side here, the track pump up the bass. This is how recall box
analyze this track for me. As you can see,
the red marker is not at the very
start of the track. [NOISE] If I flick
through the track and go to the second drop, I can see here that
the red marker is not at the very start of the beat. If I was to beat match this
track with needing you. [MUSIC] The big grids
are lined up and you can hear that the beats
are completely out. What I need to do on
this track is zoom all the way into the
start of the waveform. [NOISE] Then put the play
head at the very start, click the half-white,
half-red button. That should set
the first beat of the bar to this position. Now I'm going to zoom out. Check the second
chorus of the track. Now it seems like
there's a red line at the very start of the chorus. I'm just going to
beat-match these to check. [MUSIC] As you can hear,
that sounds a lot better. As I mentioned, the software does normally do a
good job of analyzing the tracks and placing
the beat grids in the correct
positions of the track. But sometimes it may just get it slightly wrong
and you have to go into the track and edit
the beat grid yourself. But now we have had a
quick walkthrough of how to edit the beat
grid of the track. If this does happen to you, you should be able to
change it and correct it.
18. Beat Grid - Serato: In this video, I'm going
to show you how you can edit the beat
grid of your track. We should now be familiar
with the lines on the extended waveform
showing us where the beats and bars
are of the track. These lines are what's
known as the beat grid. Most of the time the software analyzes the track correctly and puts the beat grid in the correct place
which as we know, there should be a
marker at the start of every beat throughout
the track and a numbered marker
numbered one at the very start of the very
first beat of the track. This is to make sure
that all the bars and phrases throughout the track
are in the correct position. However, it is rare but
sometimes the software doesn't analyze the track correctly and can put the beat grid
in the wrong place. This could make it a problem
for us to DJ with because everything in the software works around the beat
grids of the tracks. I'm now going to give you a
quick walk-through of how you can edit your beat
grid if you need to. The track on the right-hand
side here is needing you. Just to the right of
the track title you can see a little button
that says Edit grid. If you select that, it will open up the
edit beat grid section. What the first button
here called set does is if I was to
move the beat grid just to the left slightly to the next beat and
press the button Set, it will change the
number one line to this position
of the play head. Then if I was to move
the wave form back to that first beat and then
press the Set button, it should move the
number one marker back to that position. Now, if you were to use this, the best thing to do is
to zoom all the way in on the waveform and then
put the playhead at the very start of the
beat to make sure that it's accurate and then
press the Set button. This can be used if the
number one marker is not right at the start of
the first beat of the track. You can change it and put the number one marker in
the correct position. Just below this we have
the adjust buttons. The two buttons here
on the left under the set button will shrink
the beat grid down, making the gaps between
the beats shorter. The one on the inside
will do it more slowly and the one on the
outside will do it faster. I'm just going to hold my finger down on
this button here, the button that will shrink down the beat grid a little more slowly and just keep an eye on the beat grid and how it
reacts to this button. As you can see that
the peak grid, it's compressing into
world's number one marker. Now, the two buttons on the
right will do the opposite. They'll extend the gap
between the beats. Again, the one in the middle
will do it a little more slowly and the one on the outside will do
it a bit faster. I'm just going to
hold the one on the outside this time and watch the beat grid extend and the gaps between the
beats get larger. When doing this, one thing
to bear in mind is it will change the speed and BPM of the track as the distance
between the beats are either getting
larger or shorter. The line of buttons
just underneath this which says slip
will basically move the whole beat grid
either to the left or to the right without
changing the BPM. Again, the ones in
the middle will do it slower and the ones on the
outside will do it faster. This button here will
move the whole beat grid to the left-hand side. If you keep an eye
on the beat grid you can see it
there slowly moving all of it to the left-hand side. Then using this button here I'm going to
move the beat grid all the way to the
right-hand side and it should move a little
faster this time. As you can see there,
the whole beat grid is moving to the right. Once you've adjusted
your beat grid, if you do need to change
it you can select the Save button here and it will save your edits you've
made on the track. However, if you
don't want to save the edits that you've done
for example like now, we can just click
the Cancel button, it'll go back to the way it was before we started editing. As you can see there
it's gone back to its original beat grid. Now, if you want it to lock the beat grid so it
won't be changed, you can go over to
the left-hand side at the library here next
to the track title, hold command on your keypad
and then click this box here. Then a little padlock
will come up. This means that it will
lock the beat grid in place and you can't
make any edits. This is worth knowing if you get any tracks from DJ record pools. Because sometimes they can set the beat grids
on them themselves, when you download the tracks and you're not able to
edit the beat grid, all you need to do
is hold command, click the lock and
it should remove that beat grid lock and then you should be able to
edit your beat grid. As I've mentioned, the software normally does a
really good job of analyzing the tracks and putting the beat grids in
the correct places. However, if it is a rare occasion where it
does get it wrong and the tracks don't sound well together when you're
trying to beat match, you now know how to go into the edit grid section and
correct the beat grid.
19. Intro - Basic Mixing: Welcome to the next section of the course, basic
mixing techniques. In this section of the course, I will show you how
to do basic mixing by using the correct
timing of your tracks. This section includes a total of four guided mix tutorials that you can mix along
with and do yourself. I'll also explain to you
what significant sounds are, how to use your channel
faders and crossfaders, how to make notes of
phrases in your tracks, and how to use your
headphones when DJing. Let's get into it and I'll
see you in the next video.
20. Significant Sounds: In this video, we're going
to take a look at what the different significant zones
are when we're deejaying. In the frequency
and sounds video, we have established
there are generally six different types of sounds that we come across
when deejaying. These are hi-hats, claps, vocals, melodies,
baselines, and kick drums. We have established
that three of them are percussion sounds; the high hats, claps,
and kick drums. Now, the other three sounds
of vocals, melodies, and baselines, we're going to categorize these now
as significant sounds. The reason why these three
sounds of vocals, melodies, and baselines are
significant sounds, is because they are able to hold the attention of the audience. Whereas with the
percussion sounds, they are not able to hold the
attention of the audience. So for example, the track here on the left, You're No Good For
Me, I'm just going to put to the first
break up the track. At the start of the break, it's primarily vocals
just by themselves. Have a listen to see how
these would be able to hold the attention of an audience
just as vocals on their own. [MUSIC] Then with the track
on the right, I'm just going to put it to
the first break as well. At the start of this break, it's primarily just
melody by itself. Have a listen to see
how this could hold the attention of an audience. [MUSIC] Now I've loaded up a track on the left, Billie Jean, and
I'm going to put the track just after
the intro here. It's going to introduce
just a baseline. Have listen to see if
the baseline makes a significant difference
and should be able to hold the attention
of the audience. [MUSIC] Now, if you're listening to any percussion sounds without at least one of
these significant zones, you'll find it's not enough to hold the attention
of an audience. So on the track on
the left here now, Music Sounds Better, I'm just going to play
the intro and I'm going to flick for it where
it's just percussion, and have a listen to
see if this would hold the attention
of the audience. [MUSIC] Then I'm also going to flick the
track towards the end, so the autro, so I
have baseline now, and the baseline
is going to go out and leave it just
with percussion. So as you can hear there, the percussion would
not be able to hold the attention of the audience like the significant
sounds would be able to. Another difference
between percussion sounds and significant sounds is that percussion sounds
can be played at any time of any
parts of the track. But with significant sounds, you can't have two of the
same significant sounds playing at the same time. For example, you cannot have two vocals at the same time, or two melodies
at the same time, or two baselines
at the same time. Because they are significant, if you have two of them
playing at the same time, they will clash with
each other and sound really bad over the
top of each other. So for example, and I have the track on the
right here called Right on Time and the track
on the left as Calabria. What I'm going to do is play
the intro of Right on Time, which is just in percussion
sounds over the top of different sections of Calabria where it may have
vocals, melodies, or baselines, and just pay attention to that it still
doesn't say bad with the extra percussion
from Right on Time over the top of the
Calabria track. [MUSIC] So I'm just going
to put the sync buttons on. So that's over the
melody on percussion. Now, it has a bit
of vocal as well. But it still doesn't
sound about with the intro percussion
of Right on Time. I'm just going to do the chorus. As you can hear there,
it still doesn't sound bad with the extra
percussion of Right on Time over the top
of the chorus with the baseline from Calabria. Now, this time, I have
two tracks loaded up. The track on the left, Are You with Me, and the track on the
right, Video Games. What I'm going to do is
just play the breaks of these two tracks
at the same time. Now, they both have
different melodies and vocals in these
sections of the track. I just have a listen to how
they clash with each other, and it doesn't sound
too good to listen to. [MUSIC] So it's not
too bad right now, but listen to when
the melodies and the vocals come up at
the top of each other. [MUSIC] So as you can hear there, it's not too pleasant
to listen to, with a clash of two
different vocals and a clash of two
different melodies over the top of each other. This goes for the same
with baselines as well. Having two different
baselines on top of each other
doesn't sound great. However, you can have several different
significant songs playing at the same time, as long as they are not
the same types of sound. For example, you can have a baseline of one track
with a vocal of another, or a melody of one track with
a vocal of another track. So now, I've loaded up
another couple of tracks, and we have Calabria on the left and You're No
Good For Me on the right. Now, we've established the
start of the first break of Calabria is just mainly
melodies and nothing else, and the start the first
break on You're No Good For Me is mainly just
vocals and nothing else. So if I was to play these
two at the same time, it won't sound too bad, and it shouldn't clash too much. So if you have a listen to
the difference of this. [MUSIC] So as you can hear there, it's not too bad if you have different significant sounds playing over the
top of each other, but just not the same
two significant sounds. So we're just going
to do a quick recap of what we've gone
over in this video. So we have identified
that there are six main types of sounds that we are going to come
across when deejaying. These are high hats, claps, vocals, melodies,
baselines, and kick drums. We have now separated these different sounds
into two groups, percussion sounds and
significant sounds. The percussion sounds
consist of hi-hats, claps, and kick drums. These are the sounds that
you can find on a drum kit. They are not able to hold the
attention of the audience, and they can be
played at anytime over any parts of another track. The significant sounds are vocals, melodies, and baselines. These are sounds
that are able to hold the attention
of the audience. However, you can't have
two of the same type of significant same
playing at the same time. So for example, you cannot have a baseline under baseline
playing at the same time, or vocals playing on top
of the other vocals, or a melody playing on
top of another melody. But you can have different
significant sounds playing at the same time. For example, like a melody from one track
with a vocal from another track or a baseline from one track with the vocal
from another track. Now I understand this can be
a lot to take in at first, but you don't need
to know all of this by heart straight away. It just makes it
easier for you to understand the different
sounds and what I mean when I refer to the
percussion sounds or significant sounds
as we go through the mixing sections
of the course. Being aware of these
different types of sounds and what you
can and can't do with them is going to create
the foundation for us when it comes to mixing
two tracks together. It will become a lot clearer and easier to understand as we progress through
the course and put these different types
of sounds to use, which is exactly what
we're going to do in this section of the course and in the next group of videos.
21. Basic Mix 1 - 'Give It Up Lola': In this video, I'm going
to show you how to do the first basic
mix of the course. Now, the way I see the
whole job of a DJ is to keep the attention
of the audience and to keep them entertained. We do this by selecting
good tracks to play and making a smooth transition
between them tracks. We now know that the
significant sounds in a track are what keeps the
attention of the audience, the vocals, the melodies
and the baselines. What we need to do to
make a smooth transition between two tracks
is to time when one track significant sounds end and the other tracks
significant sounds begin. This way we'll keep
the energy high and we will keep the attention
of the audience. So for this mix, on the left-hand side, we will need Give
it Up on deck 1, and on the right-hand side, Lola's Theme on deck 2. What we're going to do is mix Lola's Theme into Give it Up. So firstly, what we're
going to need to do is work out when the significant sounds end on the track on the
left, Give it Up. So as we can see
with the waveform, this here should
be the starts of chorus and by the looks of it, the outro starts just
here on the track. So we're going to
have a listen to see where the energy changes from
high energy to low energy. So I'm just going
to flick through the backend of this track
just to have a listen. [MUSIC] So this is the
start of the chorus 2. So still quite high energy, got the significant sounds. [MUSIC] This sounds
like you'd lose the attention of the audience, is basically just
a percussion here and the significant
sounds have ended. So we've worked out that
here is the point where the significant sounds
of this track finish. To be able to mix the track, we need to work out
how many phrases that is from the start of the chorus. So what I'm going to do is get the play head right on the
first beat of the chorus, and then use the beat jump
function that we've used previously to count
how many phases it is from here to when the significant sounds end
and to the end of the track. So I do have the beat jump
function on my DJ controller, but just so it's easier to see, I'm just going to use it
on the software here. So I'm going to jump forward
with 32 beats from here, that's one and two. So that's two phrases from
the start of the chorus to where the significant
sounds end and then one, two phrases until the
end of the track. So this track here will
be two phrases for chorus 2 and two
phrases for outro. Then what we need to do is
work out when the significant sound starts on the track
on the right, Lola's Theme. So a similar thing, but this looks like
the intro here until break one
where it goes green. So it's going to have a
flick through and listen to when the significant
sounds come in. [MUSIC] So you can hear that's just
basic percussion , still basic percussion. It looks like there's
some baseline coming in now and a bit of melody as well. We'll flick through this, so in similar right up
until the break. Now similar to the track
on the left-hand side, we just need to work out
how many phrases are in this using the beat
jump function. So I'm going to jump
ahead 32 beats one, two. So this is two phrases
from the start of the track until the
significant sounds come in. Then we're going to jump
forward again, one, two, and then another two
phrases until the break. So for this track on the
right, Lola's Theme, we can say that there's
two phrases of intro and two phrases of intro
plus before the break. Now, I have referred to
the very first beat of a track a lot throughout
this course when setting Q points
and beat grids and so on and also now
when we are mixing, but now we're more
familiar with DJ terms and we are going to start
to be mixing tracks. The very first beat of a
track is called the downbeat. So I'm going to refer to the very first beat of
a track from now on as the downbeat and also throughout the mixing
sections of the chorus, we're going to be referring to the very first beat of
a chorus a lot too, which we also know
is called the drop. So to make it easier
for us going forward, the very first beat of a
track is called the downbeat, and the very first beat of the
chorus is called the drop. So we have now worked out
that the track Give it Up it's significant sounds and
two phrases from the drop. We also know that the track
on the right, Lola's Theme, significant sounds start two
phrases from the downbeat. So if we were to press play on Lola's Theme on the drop
of chorus 2 on Give it Up, the two tracks your time
perfectly and mix well together and when the
significant sounds end on Give it Up, the significant sounds should
start on Lola's Theme. As we now know, we can play percussion of any
part of any track. So that's not going to be a problem for us playing
the percussion of the intros and outros of the
tracks over the other track. So I'm just going to
put this a few beats before the chorus. I'm going to press Beat Sync on both tracks to make sure
the tracks the synced up, and then I'm going to press
play on Lola's Theme at the start of chorus 2 of Give
it Up right on the drop. [MUSIC] So coming up now which would be where the significant sounds
change [MUSIC]. As you can hear that, the
mix was timed perfectly. So when the track Give it Up
significant sounds ended, the track Lola's Theme
significant sounds started, which kept the energy
high and we could keep the attention
of the audience. The way I see this in my mind
when mixing these tracks, I see the intros and the outros of the tracks like
Tetris blocks. Each track has its
own structure, like a Tetris block does and
our jobs as DJs is to fit the Tetris blocks
together so that when the significant
sounds of one track ends, the significant sounds
of another track begins. This time and of
two tracks together to keep the attention of
the audience throughout your mix is going to be
the foundation to how we're going to time our
mixes throughout the course. Mixing these two tracks together is fairly easy and simple, and this is a great
introduction to mixing, but we are solely going
to build up and do some more complex mixes as we now progress
throughout the course.
22. Basic Mix 2 - 'Give It Up For Me': In this video, I'm going
to show you how to do your second basic mix. In the last video, we mixed two tracks together that
had the same amount of phrases in the intros and
outros to time the perfect mix. However, as we have mentioned, not all tracks have
the same structure. Now we're going to
look at different ways of mixing tracks that do not have the same number of phrases
in the intros and outros. Let's jump straight into it. On the left-hand side on deck 1, again, we have the same
track, Give it Up, but this time on the right-hand side we've got the track, You're No Good For Me on deck 2. As we already know, the
track on the left-hand side, Give It Up has two phrases of course and two phrases
of atrial beats, which is just simple percussion. What we need to do
on the track on the right-hand side
on deck 2 is work out where the significant
sounds come in and work out how many
phrases there is. We're going to have to
listen to the start of this track and just have
a quick flick through. But as we can see, this
looks like the intro here, and then the start to break one. Have a listen to
this intro section. [MUSIC] We have basic
percussion to start off with. [MUSIC] Then it
sounds like we have some intro course here with
some baseline coming in, which is obviously a
significant sound. [MUSIC] Then to break one. Using the beat jump
function again, we're just going to jump across and see how many phrases this is to where the significant
sounds come in on this track. As we can see here, this is the point where the
significant sounds come in. That's one phrase to
the significant sounds. Then one phrase to the break. Now one common mistake
that beginner DJs make is they still press play on
the drop of course two. We're going to give that a
go to see why it's wrong. I'm going to sync the
tracks up with pressing the sync buttons with the track Give It Up
being the master deck. What I'm going to do is
press Play on the track, You're No Good For Me on
the drop of Give It Up. [MUSIC] This can be what
a lot of beginner DJs do, which is a common mistake, is press Play on the drop
of the track regardless. [MUSIC] As you can hear, there's a clash of significant
songs of two baselines, so it doesn't sound great. Another common mistake of
beginner DJ's is they will press Play at the start of
the outro beats just here. Let's have a listen to that
to see what that sounds like. [MUSIC] As you can hear though, it's not very energetic. This wouldn't hold the attention of an audience because it's just percussion on top of percussion with no
significant sounds. [MUSIC] Then the
significant sound of the base comes in
after one phrase. But as you can hear
there, it goes flat and it wouldn't hold the
attention of the audience. As we have mentioned previously, to do a good mix with
a smooth transition, you want to time it so that when one track significant
sounds end, another track significant
sound should begin. What we need to do
for this mix is wait one phrase before we
press play on the track, You're No Good For Me, then the two tracks should
time perfectly. Now what you can do is you can count the beats from the drops. When the track drops, you can count in your
head 32 beats from there. Once you get used to
DJing and mixing, you'll get used to when the
phrases in the track are coming up and when the
changes are going to happen, your ears will get used to listening out for them phrases. But what we're going to
do just by this example is going to have
a listen out and put a marker of where that
one phrase is after the drop. Let's listen to this
track on the left. [MUSIC] 3, 4, 5, 6, 7, 8, 9, 10, 17, 18, 19, 20, 21, 22, 23, 24, 31, 32. That would be one
phrase from the drop. What we're going to do is just put a marker here
with a hot key. I'm just going to
press a hot key, any hot key, and it's just going to put a marker
there on that track. If you don't want
to set a hot key, what you can do is watch out
for the bars on the track. We're going to press
Play on bar number 81. Also when that was coming
up, you can generally see the changes in the
track on the phrases. You can see here, [MUSIC] there is a slight change in
color on the track, but sometimes it's not as
obvious and it is more subtle. You have a few different
ways of timing the track you can count
your phrases in your head, or for the purposes of this,
you can put a marker there, or just look out for bar number 81. I'm going to wind this back. [MUSIC] We'll have a
go at this mix now, pressing Play one
phrase after the drop. [MUSIC] I'm just going to stop truck 1 when it
gets to the break. [MUSIC] There you have it, another perfectly timed mix. Now you can see why counting phrases and being aware of where the significant sounds start and end in your track is so
important when DJing. However, we can't
just be pressing play out loud all the
time when we are mixing. As you can hear that the truck
can come in slightly too strong and it's not as smooth as we'd like it to
be straight away. In the next video,
we're going to go over how to use the
channel faders and crossfaders to
control our volume and make our mixing
sound even smoother.
23. Volume Faders: In this video, I'm going
to show you how to use the channel faders
and crossfaders. When we are mixing
two tracks together, we don't just want
to press play out loud on the track
we are bringing in. We were just doing that
on the last two videos to practice getting the correct
timing of our mixes first. When we are actually mixing, we want to slowly
introduce the track coming in and slowly fade out the
track that's going to end. This is so that there is not
a sudden change of sounds to the audience and
it'll make us have a smoother transition
between the tracks. Each deck has its
own channel that controls the sounds that
is played from that deck. Deck 1 has Channel 1 and
Deck 2 has Channel 2. At the very top
of the channel is a dial that controls the
whole volume of that channel. This determines how loud
the track is going to be. It can have several
names such as the trim, gain, or channel level. Mine on this controller
is called the trim. For example, if I press
play on Track 2 [MUSIC] the trim here controls the
volume of the whole channel. Moving it up and down. On a lot of DJ equipment, you'll also see
some level lights. These are lights that indicate
how load your tracks are. For example, if I press
play on Track 2 again, you can see the level
lights come in and you can see green, amber, and red. Now if I was to turn this
up, it would go red, which is not good,
you really want to stay in the green
with your tracks. If you go into the
amber or red lights, it means that the
track is too loud and this can distort
your tracks and make them lose their
sound quality and can also potentially
damage speakers. You may find that when you start to play in clubs
and other venues, the club owner or
manager may say to you, watch your levels, which basically means,
stay out of the red. Underneath the trim, we
have the equalizers, or EQs for short. We're going to cover these
in more detail later in the course as we don't
need them just yet. Then underneath that, we
have the channel fader. The channel fader controls
the volume of the channel in relation to the overall
volume set by the trim. The channel fader can
only go as loud as the trim volume and cannot
go any louder than that. This is so that when
you are mixing, you know you can fully
use the channel fader all the way to the top
without it being too loud. For example, if I press
Play on Track 2 again, [MUSIC] I can pull the
volume all the way out and put it all the way up and it will not go any louder
than I have set the trim. Then at the very bottom, we have the crossfader. The crossfader can be
used to switch from one channel to the other
by using only one fader. When the crossfader is all
the way over to the right, you can only hear the
right channel and when the crossfader is all the
way over to the left, you can only hear
the left channel. When the crossfader
is in the center, you can hear both tracks
equally at full volume. When you move the crossfader
from one side to the other, it will slowly blend the
track's volumes in and out. For example, if I beat-sync
these two practice tracks now and I was to put the channel fader
all the way over to the left, press Play. [MUSIC] press Play
on the right deck. Now you can only hear
the left channel. Now you can only hear
the right channel. In the center, you can hear
both the tracks equally. Then if it starts
on the left side, I can slowly transition
over to the right side. You can change how
smooth you want the transition from your
cross-fader in the settings. If you go into the Settings on record box and then go over
to the Controller tab, and then to the Mixer tab, and then go down to
Channel Fader Curve and Cross Fader Curve. For the channel fader curve, we want it in the middle
one as linear curve, that would be the
smoothest transition on the channel faders. Then on the crossfader curve, we want this dial in the center. Again, that will give
us the smoothest transition for the cross-fader. Then just exit settings. Now whenever we bring the
volume of a track in, we generally want
to do it smoothly in time with the tracks
that are playing. One way to do this is to
time it over one phrase. You want to start
bringing the volume in over track at the start of a phrase and have the volume should be fully up at
the end of the phrase. It takes you the full phrase to bring the volume fully in. Same with if you are
fading a track out. You want to start fading the
track out at the start of the phrase and then
have the volume fully out at the
end of the phrase. Again, it takes you
the full phrase to take the volume fully out. This is so the fading in and out of the tracks
fits in well with the time of the mix and stays consistent with the
timing of the tracks. We're going to give it a
go with the two tracks we use previously
in the last mix. On the left-hand side
here now we have the track Give It Up and
on the right-hand side, on Deck 2, we have the track,
You're No Good For Me, just the same as the
last previous video we did the mix with. I've got both tracks, beats synced up at 130 BPM. We know to perfectly
time this mix, we need to wait one phrase
from the drop of Give It Up. But this time we're
going to start with Deck 2's volume all the way down for the track
You're No Good For Me. What I am going to
do once I press Play after one
phrase of the drop, I'm going to slowly introduce Deck 2 over the
time of one phrase, then the volume should
be fully up ready for the transition and the switch between the significant sounds. Then I'm going to slowly
bring the volume fader down on Deck 1 so it takes me one phrase to fully
get the volume out ready for the break on
You're No Good For Me. Let's have a listen to this and keep an eye on what I do with the volume faders and
give this a go yourself. To start with, I'm going
to use the channel faders and then use the crossfader
the second time. For this first mix, I want the crossfader in
the exact center of the cross-fader and Deck
2's channel all the way down. Let's give it a go.
[MUSIC] Remember, we're going to wait
32 beats before I press Play on Track 2. It's coming up now. I'm going to slowly start
fading the track in and then slowly start
fading Deck 1 out. That's one way to do
with the channel faders and this time I want to
do with the crossfader. I'm going to have the
crossfader all the way over to the left-hand
side for Deck 1, then over the first phrase, I'm going to move the
crossfader to the center. Then for the second
phrase of the mix, I'm going to do the crossfader
all the way over to the right. Let's have a listen. [MUSIC] For this to use the crossfader, we want both channel faders up. Ready? Now I'm going to slowly move the
crossfader to the center. Now the significant
sounds have switched, I'm going to slowly move the crossfader
over to the right. That's two ways there that
we can mix the tracks using the channel faders and the crossfaders to make
a smoother transition. Also, at the top of the
software, just here, you have a Mixer tab
where you can put the mixer view on the software. If I select this here, it's going to open
up in the middle of the two decks on the
display the mixer view. Whatever I do on the mixer
on the DJ controller, I can see on the
display as well. This can help you when mixing. Instead of having
to look back at the mixer journey
or mix every time, you can just keep your eyes on the display and look at what
your channel faders and crossfaders are
doing without having to look back at
your DJ controller. I'm going to keep this view
on to make it easier for us to see what we're
doing on the mixer too throughout the course. Now we know how to use the
volume faders and crossfader, going forward, we're
now also going to use these to do
our mixing with. In the demonstrations, I will be mainly using
the cross-fader, but it's up to you
if you want to use the cross-fader
or volume faders. Each DJ has their
own preference, give both a try and
see which you prefer. But the principles of
the mixing is still the same and still applies
to both methods. Now we know how to use the channel faders
and crossfaders. Let's get into the next mix.
24. Diagram Walkthrough: In this video, I'm
going to give you an overview of the
diagrams that I'm going to be using going forward in the
course to try and help with understanding the mix tutorials and how the mixes
are structured. I have also included visual diagrams for
each mix tutorial. We have already come
across a couple of these diagrams already,
such as this one. Sometimes it can help
being able to see the mix visually as a diagram, as well as watching and
listening to it be performed. As I have previously mentioned, you can potentially
see the start and the end of the tracks,
light tetris blocks. Mixing two tracks together
can be visualized, light fitting two
tetris blocks together. As you can see here, that is the inspiration
behind the diagrams. As we go through the course, the mixes are going to become a little more complicated and therefore the diagrams may also become a little
more complicated. Just to make them
easier to understand, I'm going to quickly
go through what each part of the diagram means. I'm going to use this diagram of a mix here as an example. At first glance, it can be a lot of information to take in and you may not
know where to look or what to pay attention to. I'll quickly go through what everything means
on this diagram. Firstly, we're going to take
a look at the red blocks. The red blocks
generally represent the track that is currently playing and the track that we're going to be mixing out off. At first in the basic mixes, this would generally be
the end of the tracks, the last chorus, and
the outro of the track. Once we get into more
intermediate and advanced mixes, the blocks can represent
different parts of the track. As later in the course,
we will start to mix out of different
parts of the track, not just the very end. In the middle of the blocks,
it will say what part of the track it is and how
many phrases it is, so you know what it represents. For example here, on this side, it says Chorus 2. This is the second chorus of the track and it consists
of four phrases. This part of the
track, Chorus 2, will be four phrases long. That is what is
represented here by this block and this
section of red. Then we have the outro, which consists of two phrases. This section here
of the red block will represent the
two phrases of the atrial beats
of the track and also just to the side here
you'll have the track title. You'll know which track
the blocks represent. Then the green blocks
will generally represent the track that
you are bringing in next, the track that you're
going to mix into. At first in the basic mixes, this would generally be
the start of the tracks, the intros, and the intro
pluses of the tracks. But again, once we get into more intermediate
and advanced mixes, the blocks can represent
different parts of the track. As later in the course, we will start to mix into
different parts of the track, not just the very start. Again, in the middle
of the blocks, it will say what
part of the track it is and how many
phrases it is, so you know exactly
what it represents. For example, here at the start, this block here represents
the intro beats of the track, and this consists of two
phrases and then we'll have the intro plus of the track and this consists
of three phrases. The first part of
the track will be two phrases long of the intro, and the second
part of the track, the intro plus will be
three phrases long. Also, as you can
see at the side, you can see the track
title so you know which track the
block represents. At the side of the blocks, there will be any extra
information that you need to know about the track
to help with the mix. For example here, the
information tells you where the significant sounds
begin and end on the track, with arrows pointing
to which part of the track they begin and end. If there is any extra
information about the track that you
are mixing out of, it will be underneath the
blocks next to that track. For example, here, the track
that we're mixing out of, this will be Track
1, the red one, just underneath
they'll say where the significant sounds end and point to which part of the track it will
be representing. As you can see here at the end of Chorus 2 and at the start of the outro is where the
significant sounds end. I can see the blocks get
slightly smaller as well. If there is any
extra information about the track you
are mixing in next, it will be above the
blocks next to that track. For example here, above the green blocks
of the Track 2, you can see that the
significant sounds begin and there's an arrow pointing to the
part of the track where the significant
sounds begin. This here will be at the
end of the intro section, and at the start
of the intro plus. Also outside of
the blocks will be any actions that you need
to take to do the mix. Firstly, it will always
show you when to press play on the track you
want to bring in next. For example here,
it will say wait two phrases and then this symbol here represent when you
press play on the track. With this block here being
red and saying Chorus 2, this very start of the blocks will be the drop of the chorus, when the chorus starts. When you're doing the mix, this will represent you have
to wait two phrases from the drop until you press play on the next
track coming in. As well as when to press play, it will also show
you when to bring the volume of the track in. This is because quite often
when you press play on the track and when you actually bring the volume
in on the track, it can be at different
points in the mix. For example here, it says, wait two phrases from the drop, then press play on the track, but then you're not to bring
the volume in until after one phrase of pressing
play, which is here. This line here represents the volume and you
slowly increase the volume over one phrase and leave it up for the
rest of the mix. This will also be the same for when to bring the volume out of the track that is already playing and when to
stop that track. For example here, this blue line represents the
volume of the track that's already playing and as you
can see from the start, it stays high and consistent
all the way through the mix until the last
phrase of the outro, when you reduce the volume
down and then press stop. This is the symbol that
we use to stop the track. Sometimes you might
come across a block that is slightly
lighter than others, for example just
like this one on the first phrase of the
intro of the green blocks. This means that the
volume of that part of the track will not be
heard to the audience. This could mean that the volume is down for the
part of the track, just like this part here, or the track has
already been stopped and the audience won't hear
that part of the track. Looking at these diagrams
at first glance, it can be quite intimidating. Looking at all the
information at the same time, the best way to look at them and read them is from left to right, just like reading a book. This will be the order of
events during the mix. For example, on
this diagram here, if we start off all the
way to the left-hand side, this first part of
the track will be at the drop of Chorus 2, and the first instruction
is to wait two phrases. Then after two phrases
of the Chorus 2, we will then need
to press play on the track that's coming in next. After that, we'll
wait one more phrase and not do anything. Then after one phrase here, halfway through the intro of the track that you're
bringing in next, we will start to
increase the volume of this track to full
volume over one phrase. Then after that,
you should see that the significant sounds begin on the track that
you're bringing in next and the significant sounds end on the track that
you're mixing out of, but no action is
required at this point. Then as you can
see, you can wait one phrase and you won't need to do anything as the mix is in play and then during the last phrase of the outro of the track we're
mixing out of, we're slowly going to
start to reduce the volume out and then stop the
track at the very end. Then the track that
we've just brought in can just play and
continue as normal. Now that we understand
this diagram, we are quickly going to
look at another example. First, when we see this diagram, we can look at the blocks of the tracks and what
they represent. As we know, the red blocks
represent the track that's already playing and
it has a Chorus 2, which is four phrases long, and then the outro, which
is two phrases long. Then the green blocks
of the track that we're bringing in next have an intro, which this time is
three phrases long, which goes into an intro plus of one phrase and
then into break 1. Then we can look at
the different actions and extra information from left to right and have a look at how the
mix would pan out. If we start all the way
over to the left-hand side, this is Chorus 2 here
on the red section, so this will be the
drop of the chorus. Then from the drop
of the chorus, we just have to
wait one phrase and then press play on the track
that's coming in next. Then after that, we can see that the intro section consists
of three phrases in total. It seems as though we have to wait two phrases and then bring the volume on the track that we bring in the next
over one phrase. After that, we should see that significant sounds begin on
the track that we're bringing in and the significant
sounds end on the track that we're mixing
out of at the same point. Then this track will
go into the intro plus for one phrase and
during that phrase, we can see that we've reduced the volume of the track
we're mixing out of straight away as soon as the significant sounds switch
and then stop the track. At the point where we
stop this track here, it should go into the break of the track we're bringing in. That track should continue as normal and play it
low to the audience. This section here is light green because this is not being
heard by the audience. The volume is not up, but it is playing in the
background and this section here is slightly lighter red because it still
exists in the track, but we have stopped
the track here so the audience won't hear
this section of the track. These diagrams have
been added only to help support the
main mix tutorials, not to be the only thing that will explain the mix to you. Sometimes especially at first, you may not understand
the diagrams by itself until you have
watched the mix be demonstrated to you practically. That's completely
fine and like I say, the diagram is just to support the main mix tutorial
and add extra value, not to be the only way you
can understand the mix. When watching the tutorials, you can always pause
the video to take longer to look at
the diagram and you can always go back
to the diagram after you've watched the mix be demonstrated to you
practically or if you want to, you can even ignore the
diagram if you learn better by watching the mix
be demonstrated to you, rather than looking
at the diagrams. Everybody learns differently and I have added the diagrams to help with the understanding
of the mixes in a visual way, as well as watching
the demonstrations and listening to the mixes. It can be hard to design some of these diagrams as some
mixes can be complicated, but I've tried my
best to make them as easy to understand
as possible. With them being an
addition to the tutorials, as well as the practical
demonstrations, I thought they could only help. I hope this video helps you going forward when
seeing and reading the diagrams to help
you when you're doing the mixes. See you
in the next video.
25. Basic Mix 3 - 'Give It Up On Time': In this video, I'm going
to show you how to do the third basic mix. On the left-hand side here on
Deck 1, we have the track, Give it up again and
on the right-hand side this time we have to
track Ride on time. Again, we know that
the track Give it up on Deck 1 has two phrases, of course, and two
phrases of atrial beats. Let's work out when the
significant sounds come in on the track Ride on time and how many phrases it consists of. [MUSIC] It's starting off
with simple percussion. Let's flick it forward. [MUSIC] Still simple percussion with a beat of both for
coming in but not too much. The baseline comes in. Now, I would say that was
a significant moment. Lets click it onto,
listen to a bit more. Still just baseline. [MUSIC] A little bit of melody. Let's listen to this part. The melody fully comes in now. That's when I would
say that the track is fully in its full swing. [MUSIC] We're going to
cut them phrases so we can see here that
this part here of this waveform is when the
significant sounds come in. On this part here
is when the track is in full flow and the
melody fully comes in. Let's count them phrases. We have 1, 2, 3, 4, so we have four phrases until the significant
sounds come in, and then we have 1, 2, 3 until the track fully gets going with
the melody fully in. The phrase before this, I would still say is the intro is still not fully picking up. The melody only trickles
in a little bit. This is the point
where the melody fully comes in and the track
is in full flow. We can say here that Ride
on time has four phrases of intro beats and then
three phrases of intro plus. There is a bit of
vocal in there, but not too much to
be worried about. It's not too
significant and it's going to overwhelm the mix, but it's good to be aware of. Now before we go on to the
next part of the video, I want you to pause this video and see if you can
work out yourself how you'd mix these two tracks together. They would time right. That when the significant
sounds of Give it up ends, the significant sounds
of Ride on time stop. Pause the video, give the mix go yourself and see if you can
time the tracks correctly. Let's go over it and
see if you were to mix the tracks the same way that
I would mix these tracks. For me, there's three different
ways that you can mix these two tracks together
so their time right. As we should know, now, if we
press Play on Ride on time, on the drop of Give it up, it's not going to time right. There would just be two
phrases of just percussion. There will be no energy and you lose the attention
of the audience. Because it takes four phrases
for Ride on time to get to its significant sounds and only two phrases for the significant sounds
to end on, Give it up. What we can do is press
play on Ride on time, two phrases before the
drop of Give it up. What I'm going to do is go
to the drop of Give it up. Put the play head right at
the start of that drop, and then jump back with
beat jump two phrases. What we can do is press play on Ride on time at this point, now this will be a long mix, but you could do
some channel flicks with the percussion
because as we know, you can play percussion
over any part of any track. So just at the start of Break 2, I'm going to press
play on Ride on time. On this mix, I'm going to use the channel fader on Ride on time to flip the track in and
out. Let's have a listen. [MUSIC] The channel fader is
all the way down for now. I'm going to press play at
the start of a Break two. Now pressing play here. Should actually mean
the significant sounds change at the right time. But it can make for long mix. I'm going to use the channel
fader to flip the track in. [MUSIC] Then because there's a bit of vocal on Ride on time, I'm going to wait till
the second phrase, but the chorus to
bring a track in. I'm going to slowly going to
start fading the track in. [MUSIC] The significant sounds
of switch that. Slowly we are going to
start fading, Give it up. [MUSIC] Even though the
track Give it up, ended a little early, it was still a good mix and
a good smooth transition where the significant sounds
switched at the right time. Now, another option we can do is use beat jump to jump forward to phrases on Ride on time
and set the cue point there, and then press play on
the drop of Give it up. From here I'm just going
to put beat jump on, and then jump forward two
phrases on Ride on time. Then from here I can press the cue button to
set a cue point. Put the track, Give it
up just before the drop. Now this time I'm going to put the cross-fader it
all the way over to the left-hand side and then press play on the drop
with Ride on time. This time I'm going to
wait to phrase again, before I move the
crossfader across. Now I'm slowly going
to start moving into the center of the crossfader, so follow tracks
to equal volume. [MUSIC] Wait going to wait one phrase and then slowly start fading out to
track Give it up. [MUSIC] Now the last option that we
can actually use is to use the beat jump function
whereas we are mixing. I'm going to put the cue point on right time back
on the downbeat. But I'm still going to
press Play on Ride on time, on the drop of, Give it up. But before I start bringing
the crossfader across, I'm going to use beat
jump to jump forward two phrases so the
tracks time right. Then what I'm going to do
with the track, Give it up, is jump back one one
towards the end of the mix so it times right
with the melody coming in. Have a listen to this. I'm going to put the crossfader
to all the way over to the left and then press
play on Ride on time, on the drop and use beat jump to jump forward two phrases. [MUSIC] From here you cannot hear the
track on the right. The crossfader is all the
way over to the left. I'm going to jump
forward two phrases with beat jump 1, 2. Let's slowly start fading
the crossfader across. There we have it timed
perfectly again. I'm going to slowly
fade give it a slightly but not all the way. Just as it's due to end, I'm going to jump back 32 beats, fade a little more. [MUSIC] As you can see there you can use
the beat jump function during a mix whereas
bring a track in, or whereas mix in a track out to make sure that your
mixes a time perfectly. There you have it. Those three
different ways you can mix a track with a longer
intro to still time right, and fit with the golden
rule of when one track significant sounds end another tracks
significant sounds begin. If you mixed it in any one of
them three ways. Well done. If you mixed it in
a different way that I have not
shown on this video, let me know in the
comments below the video, and if it works, I'll
include it in the video. Onto the next mix.
26. Basic Mix 4 - 'Give It Up Sounds Better': In this video, I'm going
to show you how to do the fourth basic mix. Again, on left side, on Deck 1, we have the
track, Give It Up, but this time on the
right-hand side on Deck 2, we have Music Sounds Better. We know that Give It Up on the left-hand side at
the end of the track has two phrases for chorus
and two phrases for outro. We need to work out where the
significant sounds come in on Music Sounds Better and
how many phrases it is. Let's press "Play" on this
track and have a listen. [MUSIC] We have
simple percussion to start with and then we
can see it go red here, so some signs are introduced. Let's see if this is
significant or not. There's no baseline though, it's still just simple percussion. What came in was a kick drum. Let's flick it on
a little bit more. Still, just simple percussion. Then the melody comes in here. That to me would be the
significant sounds coming in. What's different
about this track is it doesn't have any intro, plus it goes straight from intro a simple percussion to a
breakdown with melody. Let's count how many
phrases it is to Break 1, which is the significant sounds. We'll put beat jump on again, jump forward 1, 2, 3, 4. It's actually four
phrases of intro with just simple percussion
and then to the break. To time it right, it
will be the same as the last video and
not the last mix, we'll have three
different options. We can either press play
on Music Sounds Better two phrases before the
drop of Give It Up. Or beat jump forward
two phrases on Music Sounds Better and
set the cue point there or press "Play" on
Music Sounds Better on the downbeat and on
the drop of Give It Up, and jump forward
two phrases during the mix with the
beat jump function. However, the difference is with this track is that
it's not going to be the same transition between
the significant sounds. When they switchover,
it's going to be a lot quicker switch. Now you can still bring Music Sounds Better
in over one phrase, but on the track Give It Up, we want to stop that
track a little quicker so it doesn't run over into
Music Sounds Better's break. We have two options. We can stop the track straight away on Give It Up just by pressing stop when the significant
sounds switch, or we can quickly fade it out four beats before the switch. I'm going to show you
both of them ways to mix these tracks. How I'm going to get
the timing right? I'll use beat jump
after I press play on the drop and jump forward two phrases to get
the timing right, and then I'm just basically
going to stop the track Give It Up on the switch
and see how that sounds. [MUSIC] I'm going to put the crossfader all the way over to the left-hand side. Press "Play" on Music
Sounds Better and jump forward two phrases
with the beat jump 1,2. Now this should time right to the significant sound switcher. Then slowly fading, the
track Music Sounds Better, and then just stop Give It Up. All I did there was basically just press "Pause"
on the track Give It Up as you can see right at the end of the
significant sounds. Now, because the break is
still expected and travels through to Music Sounds
Better it still sounds good. Now, the other option we have is to fade the track Give It Up, just over these four beats here, just over this bar
to slowly bring it out to the point where it's
completely out of the switch. Let's give that a
listen. This time I'm going to jump
forward already two phrases and
set a cue point on Music Sounds Better
just to give you a different way of
timing the tracks. I'm going to jump forward 1, 2, set the cue point here. Put the crossfader all the way over to the
left-hand side, and let's do the second mix. [MUSIC] This time we have no need to use beat jump because they've
already done it before hand. I'm going to wait
to the next phrase before I start
bringing the track in. Let's start fading
Music Sounds Better in. Then from here I'm quickly
going to push it across. As you've seen there,
let me get it to the end of the
significant sounds. As you've seen there,
I faded the crossfader across very quickly
over the four beats, but still in a
smooth transition. It was just a bit faster. That's just a
different way of doing it instead of pressing pause. Because it's going
into a break anyway of Music Sounds Better it still sounds good to stop the
track that quickly. There you have it. Those
two different ways to mix a track that goes from intro with simple
percussion straight to a break.
27. Making Notes Of Phrases: In this video, I'm going to
show you how you can make notes to remember the
phrases in your tracks. As you may realize by now, there are lots of numbers to remember that are
associated with the phrases of the intros
and outros of the tracks. It's not possible
to remember all of the phrases off
the top of your head and it's also not
efficient to keep beat jumping every time you
want to play a track, especially if
you're mixing live. I'm going to show you two
different ways in which you can make notes to remember the
phrases in your tracks. The first one is to make notes
of them in your comments. You may remember at the
start of the course, I asked you to put
the comments column on your library just here. We can use this column to make notes of the phrases
in the tracks, so when you come to
play that track again, you know exactly the
number of phrases it has at the start and at
the end of the track. Now I'm going to show you
my way of how I make notes. But you can interpret
your phrases and make notes on them
however you want. The main point of the video is just to show you
that you can use the comments column
to make notes of the phrases so you
can remember them. Firstly, we need to know the tracks phrases in
the intros and outros. We're going to use the
two tracks that we mixed previously in
the previous video. On the left-hand side
here we've got the track, Give It Up and on the right-hand side we've got the track, Music Sounds Better. I'm just going to listen to the start of the
track, Give It Up. As we normally do, listen for when the
significant sounds come in and how many phrases it is. [MUSIC] That's just
basic precaution, a little bit of vocal but
not too much to worry about. That looks like it goes
straight into the break here. [MUSIC] That would be our significant moment
though where it goes into Break 1. Let's
use beat jump. I'm going to put the key
point right on the downbeat. [MUSIC] Then beat jump from here and it's just
one phrase for the intro. What I'm going to do is go
over to the comment section, find the track, Give It
Up, I'll just click here. What I'm going to do
is just put IN equals. That stands for intro equals. Then I'm just going to put 1P, which for me stands for
one phrase of percussion. The next time I look
at this I know that the intro equals one percussion. Now we're sure we're
pretty familiar with the outro of this track now, but I'm just going to
quickly flip through again. We know that it's
two phrases chorus and two phrases outro. Well, I'm just going to
put the play ahead on that rope and then just jump forward just to
double check 1,2. That's the chorus and then
we can have a listen. [MUSIC] It's just basic
percussion for 1,2. What I'll do now in the
comments is I'm just going to put five spaces to
create a bit more space, 1,2,3,4,5, and then
just put OUT equals. This to me means the
outro of the track. Now outro was a collective, so what I'll need to
mix out of the track. It can include the chorus as
well because we know that that's involved with
mixing out of the track. What I'll do is I'll put 2 for two phrases and CH for chorus. Now you can just put
C if you want to, but just for chorus
I'm going to put CH space and then 2P
for two percussion. That would be my
notes on this track, so I know that the
intro consists of one phrase of percussion
and the outro of where I'm mixing out of the track and what
that involves will consist of two phrases of chorus and two phrases
of percussion. Basically, I put
whether it's the start or the end of the
track using in or out. Then I'll put the number
of phrases followed by the first letter
of what's included. Here are just some of my shot and down versions and letters that I use for when I'm
making notes of phrases. I would put IN equals to represent the
intro of the track, I would put OUT equals to represent the outro or
the end of the track, what would it be used to
mix out of the track with. Then I could use P for
percussion, B for base, V for vocals, M for melody, CH for chorus, and BR for break. If you did want to
make notes of what's involved in the breaks
and the choruses, you can also put for example, BR1 for Break 1 or
CH2 for Chorus 2. I'm just going to
do the same now with the track on the right, the track, Music Sounds Better. Let's have a listen to when the significant sounds come in on this track and how
many phrases it is. [MUSIC] This starts off with simple percussion
and we can see how the waveform here
that it changes. Let's see what comes in. [MUSIC] That's still
simple percussion. [MUSIC] Then integrate
one a melody. Let's quickly count using
beat jump how many this is. We've got 1,2,3,4, four phrases of
simple percussion until the break and the
insignificant sounds. You may remember that
from last time we've mixed it but I just wanted
to go through again. In here on the notes, what
we can do is put IN equals four intro and then put 4 for four phrases
and P for percussion. Now next time I look
at this track I know the intro equals 4
phrases of percussion. Now let's have a listen to
the outro of this track. Let's have a listen to where
the significant sounds end, where the track
starts to fade out, and how many phrases
it is and then how we're going to
interpret that as well. [MUSIC] This is the chorus, I got baseline melody and
vocals all inside of it. That's why it's the chorus, all the sounds come together,
like for the track. [MUSIC] Just have the melody and baseline there no vocals. A little bit, but this
is still the chorus. It's still energetic
enough to be the chorus. It might wind down here now. [MUSIC] The energy levels
drop slightly though, you could still cross this at the outro with the
baseline in that [MUSIC] and then to simple percussion. [MUSIC] Why I would
actually close the end of these trackers is the chorus up to
around this area here. Then I would say is the
outro with baseline. The energy drops,
so I would say it's the outro and then the
simple percussion. Let's count how
many phrases that is from the drop of the track. [NOISE] From here
is 1,2,3,4,5,6. That actually would be
six phrases of chorus. Let's just have a
listen to this section. [MUSIC] Yes. That's where I'd say
the energy level drops. [NOISE] But there's still
some baseline in there. What I would actually do is
put that is six phrases of chorus and then let's
listen to the baseline 1,2. Two phrases of baseline and
two phrases of percussion. That's how I would
interpret that track. From here in the comments about five spaces to space them out. Then put out for
where I'd mix out of the track equals 6 CH. Then 2B, two for baseline and then 2P, two for percussion. This track here of what
I'd use to mix out of wave would be six
phrases of chorus, two phrases of baseline, and two phrases of percussion. This is one way where
you can make comments on the phrases in the tracks
of how you interpret it, so next time you come across this track again in the future, you know how many phrases consist of each
part of the track. Now, another way that you can
do this is also by setting hot cues on the tracks and
using them as visual markers. Now on the decks here
where it says beat jump, we can select this
and go to hot cue. Or if you're using
your DJ controller you have a hot cue setting, we'll find, Give It Up notes
comments, which is here. Then what I can do is press the first hot cue pad
here on the downbeat, which will set a hot cue, and we can use this as a marker. Because what we can do
is change the color of the marker and leave comments
on the marker as well. If I right-click this now, I can change the color of it to represent any color that I want. For example for percussion, I could have a light blue color. Then I can also right-click
and add a comment, which for me would be 1P. Now I know from this hot cue
is one phrase of percussion, and also because it can
set different colors if I know the light blue
color means percussion, just by looking at the hot cue, I should know that it's
percussion from there. Then same with the outro, I can find the drop
of the chorus too, set a hot cue marker here. I'm going to use one
of the last ones, one of the last two hot cues because it's towards
the end of the track. I can just select
that hot cue there, it's going to set a marker,
I can change the color. For the chorus I might
want a bright red color. Whenever there's a red hot cue, I know that it means chorus. I can also right-click
the hot cue, click Comments and write 2CH, so I know it's two phrases of chorus until
the next section. Then what I can do is
set a hot cue marker at the start of the
percussion beats, start of the outro beats, and then just hit because
it's a percussion again, I can set it as light blue. Right-click again, add comments and put 2P for two percussion. Now, not only does it have
the phrases in the comments, in the library, I can also
visually look at the track, see where they are, and interpret what the
hot key markers mean from the colors and the
notes that I've left. I can see at the very
start the track is one phrase of percussion
because it says 1P at that hot cue marker to the next section where
you can even select here. [NOISE] Drag it to the
start of the break, set a hot cue marker here, right-click, leave a
comment saying BR1, so then you know this is
the start of Break 1. Then you know this marker here at the start
of the chorus is two phrases of chorus and
two phrases of percussion. This is just a couple
of ways that you can remember your phrases
instead of keep having to beat jump
and count them every time you want
to use a track. This can help you be
able to mix two tracks together that you've
never mixed before by just looking at your notes
in the comments you will know how many phrases
the track consists of, and then you can work out
when you should press Play and time your mixes for
a smooth transition. For example, here's
what I did earlier. The track Calabria,
I've gone ahead and put the phrases in
the comment section. I'm going to drag this track
upon the right-hand side. By looking at the comments
I can read that it says intro equals one
percussion and one base. Also the mixing note
section of the track will include four
chorus and two base, so I know what this
intro section here. Now, if I was to mix it with, Give It Up to time it
right I'd have to wait one phrase from the
drop of Give It Up. Let's quickly have
a listen to that. Let's beat sync the tracks up. Press Play on, Give It Up. [MUSIC] Put the cross fade all the way over
to the left-hand side. From this, I know
it's one phrase of percussion until the
significant sounds come in. I'm going to wait one
phrase, press Play. [MUSIC] Slowly start
fading the track across. We can see it here on the center of the screen, the cross fader. [MUSIC] Then I know I've got one phrase
until the break. For the slow we start
moving across fader across. [MUSIC] That's how you can use your notes
in the comments and what phrases the track here
consists of on the intros and outros to mix the tracks together without having
to listen to them first. I hope this video helps. If you have thoughts
of any other ways of making note on phrases, let me know and
let everyone else know in the comments below.
28. Headphones: In this video, I'm going
to show you how to use your headphones when Djing. The headphones are
mainly used to listen to and prepare
the track you want to bring in next without the audience
being able to hear it. This is so you can
get the next track prepared and in time with the track already playing before you start to mix it in. You can also do live mixes
in your headphones too and listen to exactly
the same as what the audience is listening to. Usually on your mixer section
of the DJ controller, you will have a headphones dial. This dial will normally have
two settings on it, cue, which is all the way over
to the left-hand side, and master, which is all the way over to
the right-hand side. To keep it simple, the cue setting is how you
would listen to a track in your headphones
without the audience being able to hear it. The master setting is how you
can listen to exactly the same as what the audience is listening to out
of the speakers, but in your headphones. To be able to listen
to a track in your headphones
without the audience being able to hear it, you have to put the
headphones dial all the way over to
the left-hand side, which is the cue
setting and then press the cue button on
whichever channel you want to listen
to and activate it. For example, the left
channel is activated there and now the right
channel is activated. You can listen to one track at a time or both tracks
at the same time. When you are on the
cue setting with the cue buttons activated, you'll still be able
to hear the track, whether the channel
faders are up or down, or if the cross fader is on the left side or the right side. When you're on the cue setting, the volume faders do not affect the volume of the tracks
in your headphones. So you can still
listen to attract, even if it's not being
played out loud to the audience and the
channel faders down. As long as the dial is
all the way over to the left-hand side on the cue setting and the cue button is activated this is how you would prepare the track you
want to bring in next and get it beat matched
and in time with the other track already
playing out loud. When the dial is all the
way over to the master setting you'll be able to listen to exactly
the same as what the audience is listening
to out of the speakers, but in your headphones, this is so you could do a live mixing your headphones
if you wanted to, rather than listening out
loud to the club speakers. The club of venue
that you are playing out may have bad
acoustics for the DJ, and you may not be able to hear your music very clearly
in the DJ booth. Sometimes the club can have
several speakers pointing in different directions
so the sounds may be coming at you from
different directions, making it hard to hear
your beats clearly. This is when you would
use your headphones on the master setting to do the mixing your headphones
and listen to exactly what the audience
is listening to. I'll give you a quick
walk-through of a scenario when you may use your headphones
when Djing live. [MUSIC] You can imagine I'm
playing this track out loud now to the audience,
I'm Djing live. I'm listening to this
track out loud with the master setting on all the way over to
the right-hand side. What I can do is
select the next track, load that up on the
left-hand side, get the beats matching
[inaudible] with the tempo fader. [MUSIC] Then I can
put the headphones setting [MUSIC] all the way
over to the left-hand side to the cue setting and then press
Cue on the right hand side and now you can [inaudible] hear the track on the
right-hand side. I can flick through
this track now, have a listen to other
significant songs come in. Work out how many phrases it is. [inaudible] [MUSIC] Now, I put [inaudible] on
the right hand side. There's two phrases for intro portion and
two phrases of this. Now what I can do is
put this cue button on, on the left-hand side. Now we can hear both
tracks at the same time. Because we prepared this track on the left-hand side before, I know that from this
blue marker here, it's two phrases of base. I'm just going to wait
for that point before I press play on track on
the right-hand side. [MUSIC] For this mix, I'm
not going to use beat sync. I'm going to put my
tracks manually. Again, just to show you
how to use the headphones. We get ready to press
play on the track. In my headphones now I can hear both tracks
at the same time. Going to beat match some
with the jog wheel and then put the headphones dial all the way over to
the master again. Now I can only hear what's
being played out loud. I can move the cross
fader slowly across. Listen to exactly what the
audience is listening to. [MUSIC] We're slowly
going to start fading the tracker on the left. There you have it. That's
one example of how you can use your headphones
when Djing live. Quickly, just to recap, the cue setting on the
headphone dial all the way to the left-hand side combined
with the cue buttons on, is how you'd listen
to a track in your headphones without the audience being
able to hear it. Then the headphones
dial all the way over to the right-hand side on the master is how you'd
listen to exactly what the audience are listening
to out loud on the speakers, but in your headphones.
29. Intro - Intermediate Mixing: Welcome to the next section of the course, intermediate
mixing techniques. In this section of the course, I will show you how to do
intermediate mixing techniques by using the equalizers
and filter dials. This section includes
a total of 10 guided mixed tutorials that you can
mix along with yourself. I will show you how to use your equalizer and filter dials, how to mix in key with your tracks and how
to use your sampler. Let's get into it and I'll
see you in the next video.
30. Equalizers And Filters: In this video, I'm
going to explain to you what the equalizers
on the mixer do. In this section of the course, we're going to start using
the equalizers to mix with. The equalizers are
the three dials in the middle of the mixer, just under the trim here, that's called high,
mid, and low. These dials can separate and isolate different
frequencies in the tracks. The high dial controls the high frequencies
of the track, the mid dial controls the
middle frequencies of the track and the low dial controls the low
frequencies of the track. For example, if I was to press ''Play'' on the track on
the right-hand side here, [MUSIC] if I was to turn down
the high dial completely, you'll hear all the high
frequencies cut off, leaving just the
low frequencies. If I turned in the
mid-frequencies, [MUSIC] you'll hear
the middle frequencies of the track get caught on. [MUSIC] The same with the low. If I turn the low frequencies
all the way down, you can hear the low
frequencies disappear, leaving just the highs. When the equalizers are used, they are only really used
to reduce the sounds of a frequency rather
than turn them up. The dials very rarely go past 12 o'clock in the
right direction. When they're not being used, they're generally just sit
in the middle at 12 o'clock. They will only really be used
to cut off frequency out of a track when mixing so the frequencies don't
clash together. For example, if you
have two tracks that both have a baseline
playing at the same time, you can turn one track's
low-frequency completely down so there's only one
low-frequency playing at a time. We can use the equalizers to be more creative with our mixes. They allow us to
be able to mix at different places in a track that you wouldn't normally mix in because now you control
the different frequencies of the track and decide which frequencies are
playing and at what time. Underneath the equalizers, we
also have the filter dials. These are another
way of controlling the frequencies of the track, but just by using only one dial. If you turn the filter dial all the way to the
right-hand side, this is called the
high-pass filter. Turning it to the right
reduces the low frequencies of the track and leaves just the high
frequencies playing. For example, if I press play on the track
on the right here, [MUSIC] and I turn the filter dial all
the way to the right, it's going to reduce the low frequencies and leave
just the high frequencies. [MUSIC] If you turn the filter dial
all the way over to the left, this is called the
low-pass filter. Turning it back to the left, reduces the high frequencies of the track and leaves just
the low frequencies playing. For example, if I were to press ''Play'' on the track
on the right again [MUSIC] and then turn the filter dial to
the left-hand side, it's going to reduce
the high frequencies and leave just the
low frequencies. [MUSIC] That's a quick run
through of what the equalizer and
filter dials do. We will now also
be using these to mix with going forward
in the course.
31. Intermediate Mix 1 - 'Trick Me Saved My Life': In this video, I'm going
to show you how to do the first intermediate
mix of the course. The track here on the
left-hand side on deck 1 is the track Trick Me and
on the right-hand side, on deck 2, we have Last
Night A DJ Saved My Life. Now, if we were to
mix these two tracks together doing a basic mix, we would have to work
out when one track significant sounds end and the other track
significant sounds begin. I've already gone ahead and
done this with these tracks. From the drop here of Trick Me to when the
significant sounds end, it's six phrases of chorus
with baseline on vocals, and on the track on
the right-hand side, Last Night A DJ Saved My Life, it's two phrases until
the baseline comes in. To have these two
tracks timed correctly, where I'm doing a basic mix, I would have to wait four
phrases from the drop of Trick Me before I press play on Last Night A
DJ Saved My Life. Let's have a quick
listen to that first. Then we can compare it
to how are we going to do the intermediate mix after. I'm going to press
Play on the track, Trick Me on the left-hand side. [MUSIC] I'm going to put the crossfader all the way
over to the left-hand side, both tracks are
synced up by 130 BPM. [MUSIC] For it to time right we have
to wait four phrases before we press play on Track 2
on the left-hand side. [MUSIC] This is the
fourth phrase now, I'm going to press "Play"
after the end of this phrase. Now the track should time right and the significance
sound should switch. I'm slowly going to start fading the track on the
right-hand side in. [MUSIC] As you can see coming up there at the
baseline should switch. [MUSIC] We started fading the
track on the left deck. [MUSIC] As you can hear that, that's technically
correct on how you would do a basic mix. When Trick Me's
significant sounds ended, the track Last Night A DJ Saved My Life significant
sounds began. However, personally,
I felt like it was a bit too long and drawn out, and there's three phrases
of just baseline. As we mentioned, the main
job of a deejay is to hold the attention of the audience
and keep them entertained. We're going to look for
ways now how we can make this a little
bit of a better mix. Now we have the
equalizers to use, which means we can manipulate the frequencies of the tracks and have some influence on the significant
zones of the tracks. The main equalizer
deejays use when mixing is the
low-frequency dial. This is because it can completely cut out the
baseline of the track. The mid-frequency dial can't completely cut out
of vocal on melody, but it can reduce
the frequency of it, but it cannot
completely get rid of the vocals or melody
out of a track. But the low-frequency dial can completely cut out a
baseline of a track. For example, if I
have a listen to the track Trick Me
here on the drop. [MUSIC] We can hear the baseline coming
though the chorus. If I was to turn
the low-frequency dial all the way down, you can hear that the baseline is completely cut out there. If I was to turn the
mid-frequency down, [MUSIC] you can hear the mid-frequencies get reduced but you can't completely get rid of the vocals and this
is the same melody as well. This is why deejays generally
use the low-frequency dial when deejaying because they can carefully to get rid
of that baseline. This means now we
don't have to wait for track's baseline
to end naturally, we can cut it out ourselves, and this is also the main
significant sound that would normally clash when
mixing is the baseline. Now we can have more control
and freedom of a when we want to mix the tracks together by controlling the baselines. Now when doing our
intermediate mixes, we need to work out where the different significant
sounds are throughout the track rather than just when the significant sounds
starts and end in the track. For example here on the
left-hand side, Trick Me, we've just got six phrases of chorus until the
percussion comes in, but we need to analyze
and see what's actually consists
of in this chorus. Let's have a quick flip
through and listen. At the very start, [MUSIC] we can hear that
it's just baseline, there's no vocals
or melody here. Then there's some vocals
introduced but still no melody. Then the vocals drop
out and it's left with just baseline again
but still no melody. Then it reduces
down to percussion. What we can do here
is work out when that vocal comes in and
goes out of the track. What I've done here now, just for the purpose of saving time, I've gone ahead and put markers on the chorus of the track here of when the vocal comes
in and out of the track. So as you can see here
on the hotkeys now it says 1B for one
phrase of baseline, then there's three phrases
of baseline and vocals, and then there's two
phrases have just baseline, and two phrases of percussion. Then we need to have a listen to the start of Last
Night A DJ Saved My Life to have a
listen to which significant sounds
consists of this. [MUSIC] At the very start, it is just percussion, and then the baseline comes
in after two phrases. [MUSIC] But it seems like
after another phrase, the melody composite for
a phrase until it gets to the brake [MUSIC]. On the track on the
right-hand side now, I've gone ahead and put down which significant signs are
involved in this track. So we have two phrases
of percussion, then there's one
phrase of baseline, and then there's one
phrase of baseline and melody before the break. Now, when we are mixing, the
same rules apply as before. We want to avoid any
significant sounds clashing with each other. We don't want any baselines
on top of a baseline, or vocals on top
of another vocals, or melody on top
of other melodies. So as we can see here on the
track on the left-hand side, it mainly consists of
baselines and vocals, and the track on the
right-hand side mainly consists of baselines
and melodies. So there won't be a clash
of vocals or melodies, the only clash would
be a baseline. But now, as we know
with the equalizes, we can completely cut the
baselines out and control them. So what we're going to do
this time with the mix is press "Play" on the track
on the right-hand side, Last Night A DJ Saved My Life on the drop of Trick
Me straight away. But when the baseline is
due to come in on the track on the right-hand side Last
Night A DJ Saved My Life, I'm going to turn the
low-frequency dialed down completely on the track
on the left-hand side, Trick Me, so there isn't
a clash of baselines. So this means I can mix a lot
early in their track if I wanted to which can make for
more of an entertaining mix. So let's have a listen
to this one now. I'm going to put the
crossfader all the way over to the left-hand side, both tracks are being
synced up at 130 BPM. I'm going to press
"Play" on the truck on the left-hand side and
then when the track drops, I'm going to press
"Play" also on the track on the right-hand
side. Let's have a listen. [MUSIC] So I'm going to start
fading the right track in. When the baseline comes in, I'm going to turn it
down on the left side. [MUSIC] So now, there's
no clashes baselines. [MUSIC] As you can hear
though with that mix, there was no clash of melodies, there's no clash of vocals, and with me being able to turn down the low-frequency dial, I could cut the baseline out of that track so there's
no clash of baselines. That to me sounded like a
lot more interesting mix than the previous one when we had to wait for the
baselines to end naturally and wait six
phrases of the track. We had a lot more layers to it. There was baseline, melodies, and vocals from different
tracks all going on at the same time but
without them clashing. So I'm just going to show
you how to do that mix one more time without
talking over the mix, so you can have a
full listen to it. [MUSIC] In the next few mixes, I'm going to show you
different ways in which we can use the low-frequency
equalizer to mix at different parts
of the track and create more interesting
mixes just like this one.
32. Intermediate Mix 2 - 'Trick No Good For Me': In this video, I'm going
to show you how to do the second intermediate mix. On the left-hand side, we have the track Trick Me
on deck 1 again. This time on the
right-hand side on deck 2, we have the track
You're No Good For Me. As we now know with the
intermediate mixing, we want to know where the significant
sounds are throughout the track so we
can mix the tracks together earlier and
avoid any clashes. As with the previous mix, we know the end of the track Trick Me has one
phrase of baseline, then goes into three phrases
of baseline and vocals, then goes into two phrases of baseline and then two
phrases of percussion. In a previous video,
we've already analyzed the track You
Are No Good For Me, but we're just going to
have a quick listen through this again just to double-check. [MUSIC] Just at the start here, here can hear simple percussion, which is what it says 1P, one phrase of percussion, and then you should
go into baseline. There's no melodies
there, there's no vocals, let's go straight
into a baseline. There it looks like
break, one comes up here. Let's have a listen
to the start of this. That's straight
into vocals there. I'm just going to set
another hot Q marker there just so we know, and then I was going
to say break 1 vocals. We've got BR1 V. Break 1 vocals. Now we know on the left-hand
side, the track, Trick Me, consists of mainly
baseline and vocals, and the introduction of You're No Good For Me mainly consists of baseline and then the vocals come in
after on the break. During the mix, there's
not going to be a clash of any melodies or any vocals, there will only be a
clash of baselines, which we now know we can control with the low-frequency
equalizers. To make this the most
interesting mix possible, we could time it so that when the vocals of Trick Me ends, the vocals of You're
No Good For Me start at the start
of its first break. Then it will go straight from one track's vocals to the
other track's vocals, keeping the audience's
attention and making it for a more
interesting mix, and also avoiding any clashes
of significant sounds. To time this right, on the track Trick Me the vocals
end after four phrases. On the track You're
No Good For Me, the vocals begin after two phrases at the
start of the break. To time it right, I'll have to wait two
phrases from the drop of Trick Me and then press play on the track
You're No Good For Me. Also when the baseline comes in on the track You're
No Good For Me, I can cut the baseline on
the track Trick Me using the low-frequency equalizer to avoid any baseline clashes. Then there'll only be one
baseline playing at a time. For good practice now, we're going to start doing
a complete base swap. This is where you start with a low frequency dial of the track that you're
bringing in completely down, and then when it's the time
to make the base switch, you complete the switch, both low-frequency
equalizers at the same time. This will make the
mix sound smoother, and on the track that
you're bringing in, it won't come in as strong. Let's set these tracks
up and give it a listen. I've got both tracks
synced up at 130 bpm, crossfader all the way over
to the left-hand side. I've got the track
on the left ready, Trick Me a few beats before
the drop and track You Are No Good For Me ready on the downbeat. Let's have a listen. [MUSIC] To time this right, remember we've got way phrases. [MUSIC] Get ready. Let's turn the bass down on this track so it's
not mixing it across, and get ready to
switch the bases. I'll play the track there. There you have it.
Another intermediate mix, mixing tracks earlier and avoiding any crashes
of significant sounds. I hope you would agree
that that would be more of an interesting mix and hold
the attention of the audience a little bit more
than if we were to wait till the
right at the end of the track Trick Me and wait for the baseline
to naturally end. I'm just going to do that mix one more time for you without talking over it so you can have a listen to the mix properly. [MUSIC]
33. Intermediate Mix 3 - 'Trick The Feeling On': In this video, I'm going
to show you how to do the third intermediate mix. On the left-hand side on
Deck 1, we have the track, Trick Me and on the
right-hand side, this time we've got
the track, Push The Feeling On, on Deck 2. Again, with these tracks, we have to work out where the significant sounds are throughout the track
to see where we can do the most
interesting mix and avoid having any clashes
of significant sounds. As we know on the
track on the left-hand side from the chorus, we have one phrase of baselines, three phrases of
baseline and vocals, two phrases of baseline, and then two phrases
of percussion. Now on the track on
the right-hand side on Deck 1, Push The Feeling On, I've already gone ahead
and put the markers on the track and worked out the phrases and
insignificant sounds. But just so you can hear,
we're going to have to listen through them together. At the very start, we just have two phrases of
percussion and vocals. Then after that, we
have three phrases of baseline and vocals, followed by one phrase of
percussion and vocals. Then it goes into this Chorus 1, which is everything of baseline vocals and
melody comes in. On this track, I wouldn't
really say there's a breakdown or break, it goes straight from the intro, intro plus to chorus.
Let's have a quick listen. [MUSIC] You can hear at the very start here
we've just got percussion with the
vocal straight away in. [MUSIC] Such two phrases of percussion on vocals that
it comes into the baseline. [MUSIC] As you can hear
that, the baseline comes in, there we have baseline and vocals together
for three phrases. [MUSIC] This little bit a slight melody though
for trickling in. [MUSIC] Then after three
phrases of baseline and vocals, the baseline drops out, leaves the vocals, and again, for one phrase and
this is what I mean, I wouldn't necessarily
call this a breakdown or break and they go
straight into the chorus. [MUSIC] We can hear
the melody coming up. [MUSIC] On this track here it's two phrases until
the baseline comes in, and then a further four phrases
until the chorus stars. The track on the left-hand side, Trick Me, as we know, is mainly consists
of baseline and vocals for the end of the track, and the track on the
right-hand side, Push The Feeling On, also mainly consists of baselines and vocals at
the start of the track. It's bailed to do this mix. We know we cannot
completely cut out any vocals with the equalizes. To avoid having
any vocal clashes we'll have to do that
with our timing. We will only be able to start to bring the volume fader in on Push The Feeling On after the vocals have
finished on Trick Me. For this first mix,
I'm going to wait four phrases from the
drop of Trick Me. To start the vocal, I've Push The Feeling On and then the baseline should
switch actually as well and we can have a listen to this mix to see how it sounds. What I'm going to do
is put the track, Trick Me just a few beats
before the vocal comes out, just so we don't have to
listen to the full chorus again to do the mix
and I'm going to press play on the
track, Push The Feeling On as the vocals
and on Trick Me. It's having listen to this mix, I have the crossfader
all the way over to the left-hand side. I've got both tracks beats
synced up at 130 BPM. I'm going to play the
track Trick Me just before the vocals drop out.
Let's have a listen. [MUSIC] We're going to switch
the basis here. [MUSIC] Even though the switch naturally, I just wanted to do
that for good practice. [MUSIC] We just want to listen to it to see how long it takes
to get to the chorus. [MUSIC] Now that is still a really good mix
and technically correct. However, I did feel
it did drag on for a while and it felt
quite long before the track Push The
Feeling On chorus came in and the tract got going
and picked up its energy. I think I would
have liked to have the chorus of the track
Push The Feeling On, come into phrases earlier, just to give it a bit more of an entertaining, and exciting mix. I'm going to do the
same mix again, but what I'm going to
do is press play on the track, Push The Feeling
On two phrases earlier, so the chorus comes in two
phrases quicker in the mix, which should hopefully make for a more interesting
mix for the audience. Now the good thing about the
low-frequency equalizers is not only can we cut the
baseline so early on the track, already playing, but we
can also decide when we want to bring the baseline
in on the track coming in. We can delay when to
bring the baseline in and bring it in
later in the mix. I'm still going to wait before the vocals
end on the track, Trick Me before I start
to bring the crossfader across to avoid
any vocal clashes. But then I'm going to wait
two phrases before I switch the baselines and bring the base and I'm
Push The Feeling On. We'll have a listen
to this and I'll start the track two
phrases earlier this time, and I'll talk you
through what I'm doing. I'm going to put the track, Trick Me before the drop this time so we can listen
to the full mix, crossfader all the way over
to the left-hand side. Both tracks are synced up to at 130 BPM and let's have a listen. [MUSIC] I'm just going to turn the
baseline down on the track, Push The Feeling On ready, so its was completely out. [MUSIC] I'm going to start the track on
the next phrase. I'm waiting two phrases from
the drop on this mix [MUSIC] and I'm still going to wait till after the
vocals are finished before I bring the
crossfader across. [MUSIC] Now the baseline has started on, Push The Feeling On but I'm not going to switch
them over just yet. [MUSIC] I switched the baselines at this point coming up now. [MUSIC] Now you should hear the chorus come in, two phrases earlier
than the previous mix. There you have it.
There's an example of where you can mix a track in and delay when to bring the baseline in
until you are ready. By doing that, it
meant that the chorus started two phrases earlier
and I hope that you agree that that
would have kept the audience's attention
a little bit more and be more entertaining for the audience than
the previous mix. As another mix where we avoided any vocal clashes and also
any baseline clashes, where we mixed the tracks earlier than they
should have been but it made far a
more entertaining mix with the audience. I'm just going to do that mix one more time for
you so you can have a listen to it done properly without me talking
over the top of it. [MUSIC]
34. Intermediate Mix 4 - 'You're No Good For Me Lola': In this video, I'm going
to show you how to do the fourth intermediate mix. This time the track on
the left-hand side on Deck 1 is you're no good for me and the track on
the right-hand side on Deck 2 is Lola's theme. These are pretty much
two fresh tracks that we haven't analyzed yet. What we have to do first is workout where the
significant sounds are at the end of
you're not good for me and at the start
of Lola's theme. Let's start with the
end of you're not good for me and have
a listen to this. [MUSIC] Okay, so this first phrase is mainly
consisting of baseline. There's no melody there, there's no vocals
to the baseline. I know there's a
melody in there. This melody lost
the three phrases. [MUSIC] Then the melody drops out there and just leaves
the baseline left. There wasn't any vocals
throughout that. There's a little
bit of vocals just before the start of
the next phrase. [MUSIC] Just like that but not throughout the phrase enough for it to be significant. There is a baseline all the
way to the end of the track. I'm quickly just going to
fill out where these are on the track now
with the markers. What I've gone ahead
and done those, put the markers on the track and explained what's consisting
of these markers, so the first one is one phrase of baseline and then we have
three phrases of baseline, a melody, and then drops into two phrases of baseline
to the end of the track. I'm not being too picky with the colors that I'm choosing
for these sections. As I've mentioned, you choose your own different colors that represent different things. The main thing that I'm
looking at are the notes on each marker that describe what
consists of each section. Every marker could
actually be the same color as long as you've got the correct notes
written underneath. Let's have a listen to the
track on the right-hand side, Lola's theme and
work out whether significant concerns
are in this track. [MUSIC] Starting off with
just basic precaution there, [MUSIC] they'll stay
in basic precaution. It looks like we've got a
baseline coming in here. [MUSIC] Okay, so there's a baseline
there and a bit of melody. [MUSIC] This baseline of melody all the way up
until that first break. [MUSIC] It drops back
down into the melody. Now, if I remember rightly, this is two phrases up
until the baseline and melody and then two phrases
of melody and baseline. I'm just going to
put the markers on this track volume now. So I've gone ahead and put the markers on this track here, two phrases of precaution
at the start and then two phrases of
baseline on melody. Now we've worked
out the track on the left-hand side and the chorus mainly
consists of baseline and melodies with no
vocals and the track on the right-hand side
also consists of baseline and melodies
with no vocals. It's safe to say that there
isn't going to be a clash of vocals because there isn't
any in these tracks. We also know that we
cannot completely cut out the melody
with the equalizers, but we can cut out and control the baselines with
the equalizes. To try and make the
most interesting mix, we can time it so
that when you're no good for me's melody ends, Lola's theme melody begins which will mean there will
be no clash of melodies and it should still be
good enough to keep the attention of the
audience and we can do a base swap with the
low-frequency equalizers to avoid any clashes
of the baselines. At the time this right, it takes four phrases for the melody to end on the
track on the left-hand side, you're no good for me from its drop and it takes
two phrases for the melody to come
in on the track on the right-hand
side, Lola's theme. To get the right timing, we would have to
wait two phrases from the drop of you are not good for me before we
press Play on Lola's theme. Then the melody should
switch at the right time and we can also do a base
switch at the same time. Let's have a listen to this mix and I'll talk
you through it. I want to start the truck
on the left-hand side a few beats before the drop, cross-fade it all the way
over to the left-hand side. Both tracks are synced about 130 bpm. Let's have a listen. [MUSIC] Okay, so remember we've got to wait two phrases before
we press Play. [MUSIC] Now press Play
on the next phrase. [MUSIC] I will turn the base down on this
just for good practice. [MUSIC] Slowly start mixing another
track on the right. [MUSIC] That would
be my base switch. [MUSIC] We start fading the track on the left. [MUSIC] There you have it. Another mix optimized to keep the audience's attention using the base swap technique with the low-frequency equalizers to avoid any baseline clashes. I'm going to do that mix one
more time for you without talking over it so you can have a listen to the mix
done properly. [MUSIC]
35. Intermediate Mix 5 - 'Last Night A Dj Is No Good For Me': In this video I'm going
to show you how to do the fifth intermediate mix. This time on the
left-hand side on deck 1, we have the track
Last Night A DJ Saved My Life and on the
right-hand side, on deck 2, we have the track
You're No Good For Me. Now I've shown you
how to mix tracks in slightly earlier
towards the end of the tracks by using the base swap technique with the low-frequency
equalizers. In this mix I'm going to
show you how to mix in the middle of the track using
the base swap technique. On the track on the right-hand side You're No Good For Me, we've already analyzed and looked at the start
of this track here and worked out what
significant signs consist of an intro. As it says here, it's one
phrase of percussion and then one phrase of
baseline before it goes onto the break
with a vocal. On the track on the
left-hand side here Last Night A DJ Saved My Life, instead of working out where the significant sounds are
at the end of the track, we're going to work out where the significant signs are
in the middle of the track. Let's have a listen
to the track here from the drop of chorus 1. [MUSIC] We see here from the drop, we have a melody and a baseline so there's
no vocals though, it's just melody and baseline. Again just melody and baseline. There's a little bit of
vocal that comes in there, but it's not consistent
throughout the track. It's not consistent
throughout the phrase, it just comes in a little bit. It's still just mainly
melody and baseline. From there we can hear
the melody go out, and there is a strong vocal
in this phrase of the track. Then it goes into break 2. I'm just going to
quickly put the markers on this track here and
write the phrases in. What I've gone ahead
and done here is just put on that
first marker there, that is four phrases of
baseline and melody so I've not included
the vocal because I don't think it's
significant enough. To include as a
significant sound in that section of the track it
only drips in a little bit. Then I've put this one phrase of baseline melody and
vocal and that's when the male voice
starts to come in and do the vocals and then
it goes into break 2. In the middle of this track, on the left-hand side Last
Night A DJ Saved My Life, consists of mainly
baseline melodies and then some vocals at the end. On the intro on the track on the right-hand side that
we want to bring in next, You're No Good For Me, only has baseline at the start of it. If we were to mix these
two tracks together in the middle of the track Last
Night A DJ Saved My Life, there would be no
clashes of vocals or melody and we'd
only have to do a base swap with the low-frequency equalizers to avoid any baseline clashes. To make for the most
interesting mix, we could time it so
that the baseline of You're Not Good
For Me comes in over the vocals at the end of Last Night A DJ Saved My Life on the last phrase. Let's time this right, the
vocal in the middle of Last Night A DJ Saved My Life comes in after four phrases from the drop of the chorus
and the baseline comes in on You're
No Good For Me after one phrase from the down beat at the start of that track
so to time that right we'd have to wait three phrases from the drop of chorus 1 on Last Night A DJ Saved My Life before we press "Play" on
You're Not Good For Me. Then we want to do a base
swap when the baseline comes in on the track
You're Not Good For Me. Let's have a listen to this mix, and again I'll talk
you through it. We're going to put the
crossfader all the way over to the left-hand side. Both tracks of beat
synced up at 130 BPM. I'm going to press
"Play" on the track on the left-hand side a few beats before the drop and then wait three phrases before I press
"Play" on the truck on the right-hand side You're Not Good For Me. Let's
have a listen. [MUSIC] Let's turn the
low-frequency dial down ready on the
truck on the right. I'm going to press "Play" at the start
of the next phrase. The low-frequency dial is down. I'm solely mixing it in. I'm going to do the
base swaps here, we are going to start
this next phrase. Start fading the
track on the left. There you have it. An
early mix in the middle of a track where we avoided
any clashes of vocals, melodies, or baselines by using good timing and
the base swap technique. Some people may think
why would you want to mix out of the
middle of the track? This can be a good option
to know because sometimes a track might not be going down very well
with the audience, or it might be going on
too long and get boring. It's good to know
that you can mix out of the track early and keep the momentum on the
dance floor and keep the attention
of the audience. Sometimes you might
not want to fully play a track and only want to play
a certain section of it. Being able to do these early
mixes can help you do that. You don't have to mix
out of every track this early and in the
middle of the track, but it's just nice to know
you can in case you need to. I'm just going to do that mix one more time for you without talking over it so you can have a listen to the mixed
properly. [MUSIC]
36. Intermediate Mix 6 - 'Needin' A DJ Saved My Life': In this video, I'm going
to show you how to do the sixth intermediate mix. On the left-hand side on
Deck 1 this time we've got the track Needin' U and
on the right-hand side, on Deck 2, we have the track, Last Night A DJ Saved My Life. On this track on the
right-hand side, we're going to be using
the introduction of it, and we already have worked out
the phrases of this track. It says it has two phrases of percussion followed
by one phrase of baseline and one phrase of baseline plus melody.
Let's have a quick listen. [MUSIC]. It should be two
phrases of percussion, [MUSIC] one phrase of baseline, and then one phrase of
melody and baseline. You can hear the melody slowly
start to filter in there. [MUSIC] It doesn't come into heavier and it gets louder and louder
throughout the phase, [MUSIC] until the vocal
comes in on Break 1 there. We're going to mix
this track into the middle of the
track Needin' U. Now we need to work out where the significant sounds are
in the middle of this track. Let's have a listen to this. [MUSIC] When it first drops though we've got
baseline and melody, but there's no vocals. Switch on a bit. [MUSIC] Still
baseline and melody. [MUSIC] Then we can hear the vocal
coming in as well. Right now we got baseline, melody, and vocal all
at the same time. [MUSIC] Seems like the baseline drops out a little bit
only for a few beats, [MUSIC] and then we're still
going to have baseline, melody, and some vocal. [MUSIC] Then here the baseline is dropped too and the melody and vocal slowly
starts to fade out. It gets quieter and quieter
throughout the phrase. Then we have the
start of break to just there as it
builds backup again. I'm just going to quickly put
the markers on this track and highlight the different
significant sounds in them. What I've done here now
is just made a note of the phrases in each section. The first section here has two phrases of
baseline on melody, and then followed by that
we are going to have three phrases of baseline,
melody and vocals. I'm going to include
this little section here because it is
only a few beats, so it doesn't make up
a phrase by itself. This whole section here, I've got us three phrases of baseline, melody and vocals. Then for the last phrase here, I've just written
that it's one phrase of melody and vocal, but it fades out. The track on the left-hand side, Needin' U consists of
baselines, vocals, and melody throughout that
chorus until the last phrase, where the baseline drops out and the vocals or melody start
to fade out as well. Then the track on
the right-hand side, Last Night A DJ Saved My Life, it consists of
baseline, a melody, but the melody starts to
fade in on the last phrase. If we can time the mix
so that the melody and vocals start to fade out
on the track Needin'U, and the melody starts to
fade in on the track, Last Night A DJ Saved My Life, it should be a good mix
without any real clashes of significant sounds
because they'll be fading in and out of the phrase. So to turn this mix right, the melody and vocal
starts to fade after five phrases from the
drop of Needin'U, and the melody starts to
fade in three phrases from the downbeats of Last
Night A DJ Saved My Life. To turn this mix correctly, we would have to wait two
phrases from the drop of Needin'U before we press ''Play'' on Last Night
A DJ Saved My Life. Then we can also do a base swap with the low-frequency
equalizers when the baseline comes in on the track Last Night
A DJ Saved My Life, so there's no clashes
of baselines. Let's give that mix listen
and I'll talk you through it. We're going to start
the track here Needin'U a few beats before the
drop of the chorus, the cross fader all the way
over to the left-hand side. Both tracks are beats
synced up at 130 BPM. I'm going to wait two phrases
from the drop before we press ''Play'' on Last
Night A DJ Saved My Life. Let's do it. [MUSIC] I'm going to have just set
the low frequency dial down, ready on track 2 [MUSIC], and I'm going to
press ''Play'' at the start of this phrase. [MUSIC] [inaudible] bring
this track here [MUSIC] and then
switch the baselines. Just stay at the
start of this phrase. [MUSIC] There you have it. Even though there
was some overlap of melodies at the start
of the last phrase, because they were fading out
and fading in naturally, they didn't clash too much and the mix still sounded good. So there's another way
we can mix in, early, in the middle of the track
by timing our mixes, so there are no clashes
of significant sounds, and using the base
swap technique with the low-frequency
equalizers. I'm just going to
do that mix one more time for you without talking over so you can have a listen to the
mix fully. [MUSIC]
37. Intermediate Mix 7 - 'You're No Good Music Sounds Better': In this video, I'm going
to show you how to do the seventh intermediate mix. On the track on the
left-hand side on Deck 1, we have this time, You're No Good For Me, and on the right-hand
side on Deck 2, we have the track,
Music Sounds Better. On the track on the
right-hand side we've already analyzed the
start of the track and highlighted what
significant sounds it has at the intro. It says here that it's four
phrases of percussion, so we're just going
to have a quick listen on this and check it. [MUSIC] That's just
simple percussion. It should be two phrases
until the kick drum comes in. Still no baseline, still just the kick drum
and simple percussion for four phrases all the way
up until that first break. We're going to mix
this track into the middle of You're
No Good For Me. What we need to do
now is work out where the significant sounds are
in the middle of the track, You're No Good For
Me, so let's have listen to the chorus
and the drop here. [MUSIC] When it first drops, it's got just the
baseline there. Then a bit of melody in those
which it's got baseline and melody and that seems consistent all the way
through that chorus, so it's just baseline
and then free phases of baseline and melody and
so it's got a break too. I'm just going to highlight
this section here now with the markers and
put the phrases in. On the track here on the left, I've just gone
ahead and pots that this first marker here is one
phrase of baseline and then after one phrase it goes into three phrases of baseline and melody until the end of the
chorus and start a break too. Altogether this is four phrases in the middle of the track, one phrase of baseline and three phrases of
baseline of melody. With the track on
the left-hand side, You're No Good For
Me, consists of baseline and melody
in the middle, and the track on the
right-hand side, Music Sounds Better, consists only of percussion
until the first break. There won't be any clashes of
significant sounds to worry about throughout the mix and to me this an
interesting mix, we can time it so that the chorus ends on
You're No Good For Me, and the break starts on the
track, Music Sounds Better. As the chorus of
You're No Good For Me, consists of four phrases
in total and the intro of, Music Sounds Better, consists of four phrases
in total as well. To time this mix, right, we just need to press
play on the track, Music Sounds Better, on the drop of the chorus of, You're No Good For Me, and the chorus should end on
You're No Good For Me at the same time as Music
Sounds Better, break starts. As the track coming
in is only percussion we also won't need to do
a base swap in the mix. We can just let it run until the end of the mix and just stop the track, You're
No Good For Me, at the end or fade
out quickly over four beats just before
the end of the mix, because it is a
pretty simple mix, and it's just a case of waiting for the timing to be right. To make it a bit
more interesting, we're going to beat juggle
the track in and leave the volume fader up
throughout the mix and then this mix what I'm going
to do is fed the track out quickly over the four beats just before the end of the mix. Let's have a listen to this and we'll talk
you through it. Both tracks will sync
to about 130 bpm. We've got the track
on the left-hand side a few beats before the drop
and we're going to have the cross fader in
the center this time because we're going
to beat juggle the tracking on the right. If you can grab that
first beat on this track. [MUSIC] If you're mixing live, you've been doing this
in your headphones, getting it ready with the
cross fader over to the left. [MUSIC] Getting that
first beat ready in your headphones and
then we're going to press play on the track on the left-hand side
and beat juggle in. [MUSIC] Both volumes are full here. But because it's
simple percussion it doesn't have that much of
an impact on the track. [MUSIC] Like you wanted to here you could put
the base slightly there just so that kick drum doesn't
have much of an impact, but it's still just
simple percussion. All we need to do now is
get ready to move this across four beats before the
end for a smooth transition. [MUSIC] That's another way that you can mix in the middle of the track using a track that comes in and goes straight into a break. We also used a little bit
of beat juggling to get the tracking and in time
at the start of the drop. But throughout the mix there was no clashes of any
significant signs. The track coming in
was just percussion until that first break, so it's quite a simple mix, but still very effective. I'm just going to do
that mix again for you one more time without
me talking over it so you can just listen
to the mix. [MUSIC]
38. Intermediate Mix 8 - 'Are You Out Of My Mind': In this video, I'm going
to show you how to do the eighth intermediate mix. This time over on Deck
1, we have the track, Are You With Me and
over on Deck 2, we have the track,
Out Of My Mind. We're going to mix the track, Out Of My Mind on Deck
2 into the track, Are You With Me on Deck 1? The interesting thing
about the track, Out Of My Mind is
it doesn't have any precaution at the
start of the track. Let's have a listen and see what it sounds like at the start. [MUSIC] As you can hear there it goes straight into melody at the start
of the track. There's no baseline, percussion, vocals, just a
melody on its own. [MUSIC] Then it
goes into vocals, melody, and baseline
altogether as a breakdown ready to
build up for the chorus. At the start of this track,
I'm just going to put a marker to describe what's
at the start of the track, which is basically just going
to be one phrase of melody. What I've done there is
just put a marker at the start of the track
saying one phrase of melody until it goes into the baseline vocals
and melody altogether. As we have mentioned previously, not all tracks are made with the same structure
and as we can hear, this track is an
example of that, as it has no percussion at
the start of the track, the track just
starts off straight away with melody on its own. Also, as we've
previously mentioned, our jobs as a DJ is to
keep the attention of the audience and keep them entertained by selecting
good tracks to play, and making a smooth transition
between them tracks. If this track on the right, Out Of My Mind has no
percussion at the start, we have to make do with what we have and try our best to make the smoothest transition
possible with this track that will also keep the
attention of the audience. What we need to do
now is work out where the significant sounds
are in the track, Are You With Me to see where the best place is where
we can do the mix. I'm quickly going
to have a listen to the end of this track
here on the left Are You With Me and work out where the significant sounds
are in this track. I'm going to put it just
before the drop-off Chorus 2. [MUSIC] As you can hear though
is baseline and melodies. [MUSIC] That continues. [MUSIC] As you can hear though, the track starts to fade out. The melody gets less
significant and, slowly starts to fade
out in the track, still with a bit of
baseline in there, until the melody has
completely faded out. Then the baseline ends up
leaving just percussion. That's pretty much all the
way to the end of the track. What I'm going to do is quickly
work out the phrases of the end of that track and put markers on the track
so we can see. What I've done there on
the track on the left, I put a marker on the drop, of Chorus 2 which says three phrases of
baseline on melody. That's the main
parts of the chorus. Then from here on
the second marker, it has two phrases of
baseline of melody. But the melody fades out. I'll just put there
on the marker that it fades out over them two phrases. Then after that
there's two phrases of percussion at the
end of the track. We now know that the
track on the left, Are You With Me
mainly consists of baseline a melody at
the end of the track, but they also start to fade
out after three phrases. The track on the right, Out Of My Mind only consists of melody at the
start for one phrase, which means the only
significant sounds we have to worry about clashing when
mixing is the melodies. We have a couple of options, how we can mix these
two tracks together. Neither options are
going to be wrong. They will be up to each
DJs individual preference on which they think
sounds better. You can time it so that
when the baseline and melody completely fade
out of the track, Are You With Me
that the vocals and baseline come in on the
track, Out Of My Mind. It's the time that makes right, the baseline and melody completely fades
out on the track, Are You With Me, five
phrases from the drop. The vocals and baseline
come in on the track Out Of My Mind after one
phrase from the downbeat. One way to turn this
right is we could wait four phrases
from the drop of, Are You With Me before we
press "Play" on the track Out Of My Mind that even
though the track on Deck 2, Out Of My Mind has melody
at the start because the melody is fading out on
the track on the Deck 1, Are You With Me, they
shouldn't clash. Let's have a listen to that mix and see what it sounds like. You have the track on
the left, Are You With Me a few beats before the drop. Across fader all the way
over to the left-hand side, and both tracks are being
synced up at 130 BPM. I want to wait four
phrases from the drop, Are You With Me and
then press "Play" on the track Out Of My Mind
and do the transition. [MUSIC] So far that mix, as you've seen, I didn't use any of the low-frequency equalizers. This is because there
wasn't a transition of the baselines or a base
swap as the track Out Of My Mind doesn't have
any baseline at the start of it and that makes
this technically correct. There were no clashes
of significant sounds and it would keep the
attention of the audience. However, I personally think
it could still be improved. I would actually
mix it one phrase earlier and press "Play" on
the track Out Of My Mind. As soon as the melody starts to fade out and then mix
it out from there, if you slowly bring
the cross fader across as you are mixing, there shouldn't be too
much of a clash between the two melodies as the melody from the
track Are You With Me, should start fading out naturally and the
mixture still sound good and hold the
attention of the audience a little better than
the previous mix. This time we're going
to do the mix again, but press "Play" on the
track, Out Of My Mind, one phrase earlier, as
soon as the melody and baseline starts to fade out
on the track Are You With Me. Let's have a listen to that mix. [MUSIC] That makes for me
that would keep the audience's
attention a little better as it transitions from one track to the other
a little faster, but still doesn't have any
significant sounds clashing. But both ways of fixing them
two tracks then are both technically correct and just
opt to each DJs preference. Now what I'm going to
do is quickly show you two ways where you
can mix the start of the track Out Of My Mind into the middle of the
track Are You With Me. What we will need to do
is work out what are the significant sounds are in the middle of the
track, Are You With Me. I'm just going to put the
track just before the drop of Chorus 1 and have
a listen to this. [MUSIC] Slightly away from
the start though, we'll just has
melody and baseline. [MUSIC] That's the same all the way up until
the end of Chorus 1, where it naturally fades
out at the end of Chorus 1. I'm quickly going
to put the markers on this track in the middle. What I've done
there for Chorus 1 is I've just put my
marker at the start. What Chorus 1 consists of is only two phrases of baseline, a melody, and then
it drops down and naturally fades out
into the break tone, Now the melody is too
strong during the course of Are You With Me to play
the melody at the start of, Out Of My Mind over the top
of it and do a mix that way. Let's quickly have
a listen to that. I'm just going to flick
it into the middle of the Chorus 1 and play both
tracks over each other. You should be able to hear
that the melodies clash. [MUSIC] For me that is too much of a clash of melodies and that wouldn't
sound good to the audience. It's not at the end of the track where it slowly
starts to fade out. The melody is in full force in the middle of that Chorus 1. What I'm going to
do now is show you a technique called drop mixing. Drop mixing is
simply why you just drop the next track in
without really doing a proper transition
or mix is basically just pressing play on the track you want
to bring in next, and at the same time, simply
stopping the track you want to mix out or
quickly fading it out. Now this can be a rather
common technique to use when a track has no
percussion or in the intro, which means you cannot
do a normal transition. It's not the most technical mix nor the most fun mix to do, but it can still be effective. If it's the best option to do
a smooth transition between the two tracks and keep the audience's attention,
it has to be done. With this mix what I'm
going to do is when Chorus 1 ends on the
track, Are You With Me. The track naturally fades out and I'm basically
just going to press "Play" on the track Out Of
My Mind at the same time. Let's have a listen to that mix. I'm just going to start
the track Are You With Me halfway
through Chorus 1. [MUSIC] The chorus fade is
going to be in the center. [MUSIC] As you
could hear that, I simply just dropped
in the track, Out Of My Mind at
the end of Chorus 1. Again, it's not the
most technical mix, but it can be effective
and the best option to use when you have no percussion
at the start to mix with, the audience is expecting a breakdown of the track anyway. You effectively just swap
in one tracks break down, but then other tracks breakdown. Another option could be to drop mix the vocals and baseline of the track Out Of
My Mind straight and after Chorus 1
of Are You With Me. What I'm going to do is set
a Q-point at the start of the vocals and baseline of
the track, Out Of My Mind. I'm quickly going
to jump forward 32 beats from the downbeat. I'll set a Q-point here. This time, press "Play"
at that point in the track when Chorus 1
ends on Are You With Me. Let's have a listen to that mix. [MUSIC] There you have it. There are four ways you
can mix the track Out Of My Mind that has no percussion
at the start of the track. With these types of tracks, we have to try our best to avoid any clashes of
significant sounds and to make the
smoothest transition possible to best keep the
audience's attention.
39. Mixing In Key: In this video, I'm going
to show you what mixing in keys and how you can
use it when DJing. When we first
started the course, I asked you to put the key
column on your library, just like this one here
and also when you analyze your tracks to have the
key box selected also. This is the video
where I'm going to explain to you what
it is for and how can use the key of a track
in record box as standard. The software analyzes the key of the track in classic format, which is what you can see here. But this is not the
format we want our key to be in and we need
to change this. What we need to do is go over to settings and then
go to the top view, and then scroll
down until you find the section called
key display format. Then from here, from
the key display format, we need to change
it from classic to alphanumeric and
then exit settings. As you can see now, the
key format has changed. They should now put your key of your tracks as a
number and a letter. In Serato as standard, it should analyze the key of the track in the Camelot format, which is the one we want. Just as you can
see this one here, it's in a number and
a letter format. If you are using Serato, you shouldn't have to change
anything of your settings, but just in case you do
or you want to check, you can go to the
settings and then over to library and display and just in the bottom left of the
section of display here, you'll see short key as and we want the selection of
Camelot just hear. These numbers and
letters represent the key of the track
in a way that makes it easier for us to understand
and easier for us to mix tracks together that are
in the same or similar key. If you mix two
tracks together that are in the same or similar key, they are going to sound
a lot better together. This is called harmonic mixing. This was first developed by a company called
Mixed In Key and they invented this
diagram called the Camelot system
or Camelot wheel. You can get this image in the resources of the course
to use it for your mixing. But it is a fairly easy
system to follow without. How it works is to keep
your tracks mixing in the same or similar key
and to do harmonic mixing, you can use that one up, one down, one across method. We're going to just use
another diagram to show this. For example, if your track
is in the key of 8A, so just here A minor, you should be able to go
one up to 8B on the scale, or one across from it
to either 9A or 7A. This will keep the tracks
harmonically sound and keep the tracks
mixing in a similar key. By using this method, you can mix through
your tracks by working around the
Camelot wheel to keep your full DJ set harmonically sound and every
mix you do in key. You also don't have to move to another key when you do a mix. You can also stay in
the exact same key. For example, you can mix a
track with a key of 8A with another track of a key of 8A and there'll be perfectly
harmonically sound. To give you an example
of how you can use the Camelot wheel or
the Camelot system, if you had a track
and you started off your set in the key of 1A, the next track you
play and mix into, could be of the key of 2A, and that mix will be
harmonically sound. Then from 2A, you can go to 2B, and then the next track
after that you could go to 3B and then from the track 3B, you can go to 3A and you
can even work back again. You can go from 3A back to 2A to 1A to 12A to 12B to 11B across, and then down to 11A and
each one of them mixes and each track will be
harmonically sound and you'll be mixing in
key for each mix. What we can do to make
this even easier for us is on the key
column on our library, we can arrange our tracks in key order by clicking the key box at the
top of the column, just like we can do
with the BPM column. If I click this box
here where it says key, it's going to arrange my
tracks in ascending or descending order according
to the key of the track. As you can see
that it works from the highest number down
to the lowest number. This will make it
easier to select tracks of the same
or similar key. For example, here the track
Video Games is at 11A. The track above and
below it is also at 11A. It makes it easier to find and select tracks of
the similar key. As well as moving
around the Camelot, while enjoying your set, you can arrange your library in key order and just work
through your tracks that way. Now in my opinion, mixing in key is
great and it does make for some really
good sounding mixes. However, I very rarely use this method when
I am DJing live. This is because I
believe that track selection and the
timing of your mixes to keep the audience's
attention is more important than actually
mixing harmonically in key. I'm not saying you should avoid using the harmonic
mixing option. If your tracks are
in key, then great. But generally, your
audience you are DJing to when you are performing live is not going to notice if your tracks
are mixed perfectly, harmonically in key
with each other or not. They would generally
be more concerned with what tracks you
are actually playing. For that reason, I wouldn't
let mixing the tracks harmonically in key
get in the way of my track selection
during my set. But that being said, there are times where I
would try and mix my tracks harmonically in key
and use the Camelot system. The first one would
be when I am doing a recorded mix to post for
people to listen to online. The second one would
be when I am doing a more advanced mixing
techniques such as mashups, which is exactly
what we're going to do in the next couple of mixes and why I've left this video to explain about mixing
in key until now. Let's move on to the
next mixes and use this technique of mixing
in key to its full effect.
40. Intermediate Mix 9 - 'Insomnia Jump': In this video, I'm going
to show you how to do the ninth intermediate mix. This time on Deck 1, on the left-hand side, we have the track insomnia, and on the right-hand side, on Deck 2, we have
the track jump. So the mix that we're
going to do with these two tracks is
called a drop swap. A drop swap is when
you swap the drop of one track with the
drop of another track, for example, let's
have a listen to the drop of the track insomnia. [MUSIC] So as we know, the drop is the first
beat of the chorus. What we're going to do from that drop of that
track insomnia, we're going to
swap it and played the drop of the track jump, which sounds like this. [MUSIC] This can make
for an exciting mix, especially if they are two
tracks that are well-known, it can make for a
good surprise for the audience and catch them off guard with a different drop and make the mix more
exciting for them. They will still be expecting
the drop of a track, but I'll just be a
slightly different drop. So to be able to do this mix, we don't really have
to find it where the significant sounds
are in the truck. All we need to do is time
the two tracks together so that they are due to
drop at the same time. Just before they're
going to drop, we switch from one
track to the other. Now this is where the mixing and key parts is important
and comes into play. If the drop of one track
was to replace the drop of the other track and they were in completely different keys, it will be too much of a
difference or not. So in grades. So when doing a
drop swap mics is best to do it with
harmonically soundtracks. So I'm just going to
move the screen up here so you can see the library. So as you can see
here, the track on the left-hand side, insomnia, is that the key of
10a on the track on the right-hand side jump
is at the key of 9a. So according to the
commonwealth system, these should be harmonically
same because the key of 9a is just below
the key of 10a. These two keys are next to each other on the
common law system. So one way to time
these two tracks together is to set hot cues, one phrase before the
drop of each track. So what I'm going to do
on the track Insomnia is just put the play head
on the drop of the track. Then from here I'm going to
use the beat jump function to jump back 32 beats,
which is a phrase. Then I'm going to set
hot cue marker just here so I know that's one
phrase before the drop. And then I'm going to do the
same with the track jump. Find the drop of color as one. Use beat, jump to
jump 32 beats back, which is one phrase. Then set a hot cue
marker just here. So I know that's one phrase before the drop of this track. Then as Insomnia is playing, when it gets to this point, I'm also going to press
play on the track jump. So these two tracks
time together and the drops of the tracks should
happen at the same time. There are two ways
in which we can transition between the
tracks during the mix. We can do it gradually
over the phrase, or we can do it quickly
for beats before the drop. Also for this mix, we're going to use the
filter dials instead of the cross fader to add more of a filter effect to the mix. So let's have a listen to this mix and I'll
talk you through it. So I'm going to put
the track insomnia halfway through its break, giving it plenty of
time to build up. Then on the track jump, I'm going to have the key
point is set at that hot cue. So I know that's one
phrase before the drop. Now instead of putting
the cross fader all the way over to
the left-hand side, I'm going to put the cross
fader in the center. I'm going to turn
the filter dial all the way over to
the right-hand side, to the high pass filter side. So now if I was to press play on the track on the
right-hand side, you'll hear that it only has
the high frequency sounds and it's eliminated all the low-frequency sounds
from the track. [MUSIC] Then as we fade it in, we're going to slowly
turn the filter dial up until it's ready to draw. [MUSIC] I'm going to
bring the filter dial gradually over the face
until the last second, and then swap the cross fader across all the way over
to the right-hand side. So let's have a
listen to that mix. [MUSIC] So that is one way
of doing the drop swap mix. And this time we're going
to do it one more time. But this time we're going to
bring the filter dial in on the track jump just four
beats before the drop. So it's going to be a
very quick transition. Let's have a listen to that mix. So let's turn the filter
dial down all the way down on the right-hand side to the high pass filter and press, "Play" on the track on insomnia halfway
through the break. [MUSIC] So there you have it. That is how you do
it drops swap mix. You replace the drop of one track with the
drop of another track. You can do this by
timing both tracks, one phrase before
they are due to drop and switching them
at the last second. But remember, when
doing a drop swap mix, it's best to make
sure the tracks are harmonically sound
and are mixing in key using the
common law system so that when the
other drop comes in, it doesn't sound
too different and it still sounds good
to the audience.
41. Intermediate Mix 10 - 'Video Utopia': In this video, I'm going
to show you how to do the 10th intermediate mix. This time on the track,
on the left hand side, we have the track video games and the track on the right
hand side on Deck 2, we have the track utopia. For this mix, we're going to
do another drop swap mix. As we know for this mix, we don't have to work out where the significant sounds
are throughout the track. We just have to work out
where one phrase is from the drop of each track and
set a hot cue marker there so then both tracks drops at the same time and we
also need to make sure that both tracks
are harmonically sound according to
the Camelot system. We're just going to have a
look at the library here. As we can see, the track utopia, which is on the right-hand side, is a key of 11A and
the track video games, which is on the left-hand side, is also at the key of 11A. These should be perfectly
harmonically sound. You can also check
this by looking under the title of
the track here, it should say 11A and the
same on the other side. We're going to have
a listen to the drop of video games and then jump back 32 beats one phrase from the drop and set a
hot cue there [MUSIC] That's what the drop of
that track sounds like. Let's find the first
beat of the chorus. Use the beat jump function
to jump back one phrase and then set a hot
cue marker there so let's have a listen to the
drop of utopia [MUSIC] That's what the drop
of utopia sounds like. We're going to find
the drop of it. Use the beat jump
function to jump back one phrase and set a hot
cue marker just here. We can also set the
cue point here on this track because
this is where we're going to be pressing play. Again, for this mix,
we're going to use the high-pass filter on the
filter delta to mix him. Firstly, I'm going
to gradually fade in the high pass filter over one phrase and then I'm
going to do the mix again. I mix the track utopia in
four beats before the drop so we're going to start
the track video games in the middle of the break. Cross fader is in the
center we're going to turn the filter dial all the way over to the high-pass filter side. Both tracks or
beats linked up at 130 BPM and let's
do the mix [MUSIC] I'm going to do that
mix one more time but this time we're going to
bring that filter in a lot quicker with four beats before the drop. I'm going
to start the track. Video games in the
middle of the break, cross fader in the center, filter dial all the way over onto the
high-pass filter side. The track utopia is
set 32 beats before the drop and let's do it [MUSIC] There you have it.
Another drop swap mix, where we replace the drop of one track with a drop
of another track. We time the tracks together, one phrase before
each drop so they time correctly and we
also make sure that both tracks harmonically
sound using the Camelot system so there's no difference in key when
you do the drop swap mix.
42. Sampler: In this video, I'm
going to show you how to setup and use your sampler. The sampler is a place you
can put different sound FX or short samples of sound
that you can quickly trigger and play over your
tracks when you're DJing. This can include things
such as a horn sound FX, a siren sound FX, a crush sound FX, or even a sharp vocal sample. In the DJ music pack that you
get free with this course, I've included a few sound FX and samples that we can put
in our sampler and use. If you arrange the
deejay music pack in the library to
ascend in BPM order. So if you go to the
tab that says BPM, at the top of the library, and click that so it's
in ascending order, all the samples will
be at zero BPM. This is because they do not have a consistent beat and they are just one-off hits of sound. Now, if we go to the
top of record box, there is a tab made up of
a lots of small squares. If we click this,
it will open up the sampler bank where we can store our samples and sound FX. You can put whichever
sound FX you want in whichever
sample bank you want. What I'm going to do
for this video is put the sample of the
Longhorn sound FX in the first sampler bank, then put the siren sound effects in the second sampler bank, and then put the lets go vocal sample in the third
sampler bank, and then put the boom fade out sound effects on
the last sampler bank. On most DJ controllers, you'll now have a sampler option on your performance parts. When this option is
selected and you press the corresponding performance
path to the sampler bank, it will play that sound. For example, if I press the
first performance pad now, it should play the first
sampler bank sound. [MUSIC] That's the same with the second
performance part, [MUSIC] and the third,
and the fourth. [MUSIC] Most DJ
controllers now will also have a sampler volume. This is so you can independently change the volume of the sampler so it doesn't sound
too loud or too quiet over the tracks
that you are playing. If you do not have
a volume control on the sampler on your
deejay controller, you can also do it here
on the software by increasing or decreasing
the volume here. If you do not have
a sampler option on the performance pads
on your DJ controller, you can still use
the sampler bank. You can use the
keys on your laptop instead to trigger
the sound effects. If you go over to the settings, cog in the top
right-hand corner, and then go to the
keyboard tab on the top, and then find the option of sampler and click
the plus button, here you can assign a key on your keyboard to trigger the sampler bank
on the software. As you can see here, it says Playback slot 1, and this is assigned to the
X button on the keyboard. You can also change
this key if you want to right-click
it and click Change, you can change whatever key on the keypad you want to assign
to that playback slot. Now, if I leave it
as the key X on the keypad and I
exit the settings, and now if I press
the X on my keyboard, [MUSIC] it's going to
trigger that sampler bank. My experience with these kind
of side-effects are good and it can help bring more
energy to your DJ sets, but using them in the
right way is key. I'd recommend not
to get over-excited and use them all the time. If you overuse them, it can actually make your
set sound worse. Using them sparingly and only ever so often I feel is best. Let's do a mix and use these new samples and
see how they sound. So far this mix, we're going
to use the same tracks under the same drop mix as
the previous video. On the left side, on Deck 1, we have the track video games, and on the right-hand side, on Deck 2, we have
the track utopia. I'm going to put the track video games in the middle of the Break 1 and get the track
utopia ready 32 beats, one phrase before the drop. [MUSIC] I'm going to beat
sink both tracks up. [NOISE] Keep the cross fader
in the center and turn the filter dial all the way
over to the high-pass filter. Then just before the
drops, what happens? I'm going to hit a
sound effects and see how it sounds. Let's do it. [MUSIC] There you have it.
That's how you can set up your sampler and
use it when DJing.
43. Intro - Advanced Mixing: Welcome to the next section of the course, advanced
mixing techniques. In this section of the course, I will show you how to
do advanced mixes by using the hot cues,
loops and effects. This section includes 12 guided mixed tutorials that you can
mix along with yourself. I'll also show you how
to use the hot cues, loops and sound effects
when deejaying. Let's dive into it and I'll
see you in the next video.
44. Hot Cues: In this video, I'm
going to show you what hot cues are and how they
can be used when deejaying. We have already been using the hot cues throughout the
course but we have only been using them as
visual markers to help us with our phrases
when timing our mixes. This isn't actually the
main purpose of a hot cue. Hot cues are actually
used to set markers at certain points in the track and when the hot
cue is triggered, the track will automatically
play it from that point. For example, if I press Play
on the track on the right. The track on the right I
have the track Calabria just for example, I'm
going to press Play, [MUSIC] and then I'm going to press hot cues
throughout the track. Hot Cue 1, Hot Cue 2, Hot Cue 3, Hot Cue 4. Now if I go back to
press Hot Cue 1, it will play the track
from that point, same with Hot Cue 2, Hot Cue 3, and Hot Cue 4. So every time I press one of these hot cues the track will start playing
from that point. To be able to delete
these hot cues you should have a Shift button. If you hold the Shift
button down and press the hot cues, it
should delete them. But when we are
using the hot cues we don't just want to
use them randomly, like in that example. We want to use them
in a way that goes with the flow of the
track and use them in a way that the
audience will be already expecting a
change in the track. As we know, significant changes happen in a track
at the start of a new phrase where songs can be added or subtracted
from the track. This is one place in
which we can trigger and use the hot cues at the
start of a new phrase. We can set hot cues
at the start of certain phrases or sections of the track and jump to
them when the audience will already be expecting
a change in the track. But we can take them to a different section than
what was going to play. So for example here, on the
track on the right Calabria, I want to set some hot cues throughout the track
where we can jump to. I'm going to set a
hot cue at the very start of the first break. [MUSIC] Then I'm going
to set a hot cue one phrase before the
drop of Chorus 1. [MUSIC] Then next I'm going to set a hot cue
on the drop of Chorus 2. Then I'm going to
set a hot cue after one phrase at the
drop of Chorus 1. Then I'm going to set a hot
cue at the start of Break 2. Then I'm going to set a hot cue one phrase before the
drop of Chorus 2. Then set a hot cue two phrases after the drop of Chorus 2. Then set the last hot cue
at the start of the outro. All these hot cues may seem random but what I'm
going to do is press each hot cue in order every 32 beats so it jumps
throughout the track. Because each one is at the
start of a new phrase, it should still fit well with
the timing of the track. This is all just for an example, so you don't actually have to go ahead and join along with this. This is not necessarily a way I would use this when deejaying, it's just an example to show you how the hot cues can be used. Now, before we do the
example and start using these hot cues to
jump throughout the track, we need to make sure we have our quantize set up correctly. Quantize is like beat sync
for hot cues and loops. Quantize makes sure that when you are using your hot cues and loops the track still stay
in time with the beat grid. Because when we're pressing
our hot cues and loops, we'll not always be
perfectly in time with the track and
what quantize will do will make sure
that the track is still in time and doesn't
sound out of time. What we'll need to do is go to Settings and then the
Controller tab at the top, and then the tab
that says Others. From here you'll have the option to edit your quantize function. In each one of these
drop-down boxes here, we will want the number one
selected which is one beat. Some of these may
be set as standard as half a beat or
quarter a beat. We want to make sure
that each one of these boxes selected is at the number one for one beat
and all set to enable. Once that's done you
can exit the settings. Now to make sure the
quantize is activated, there's a little letter Q on each deck on the software
just next to the circle. So there's a letter Q
there and a letter Q here. If this is red, this means that the quantize is activated
and it will keep the hot cues and loops in time
with the beat that you set it to which we have just set
to one beat in the settings. This means that no matter how fast or when we
press the hot cues, it will always stay in
time with the beat. For example, I've just quickly drag the track up on
the left-hand side right on time and I'm going to set a hot cue on one
of the first beats. [MUSIC] With quantize on, I can press the
hot cue as fast as I want and it still won't go any faster than one beat and we'll stay in time with the
beat of the track. So let's have a
listen. [MUSIC] I'm pressing that as fast as I can. If I was to take quantize
off and deactivate it, if I was to press the hot
cue as fast as I can, it will go to how fast
I press the hot cue. [MUSIC] But once again, if I activate the quantize it will stay in time
with the track and in time with the beat
grid no matter how fast I press the hot cue button. [MUSIC] Whenever you
are using your hot cues and loops it is
important to have this activated at all times to keep your tracking
time with the beat grid. If you are in Serato, to make sure this is
all set up correctly, you can go to your Settings, DJ Preferences, and then
to the option where it says Quantize Value and
have it set to one beat. To make sure your
quantize is activated, over in the top
left-hand corner of the screen there should be
a button with a Q in it. When it is blue, this means that the quantize is activated. Now we have our quantize set up, we can jump through this
track using the hot cues. As I mentioned, I'm going
to press each hot cue in order every 32 beats. Let's
have a listen to this. [MUSIC] So there you have it. There's a quick example and demonstration of how you
can use your hot cues to jump forwards and backwards throughout the track
while still keeping it predictable for the
audience but playing different sections and phrases of the track at different times. In this section of the course, we are now going to be
doing some advanced mixing, I'm going to show you
several different ways in which you can
use the hot cues effectively to be more creative when mixing
and deejaying.
45. Loops: In this video, I'm
going to show you what loops are and how to
set them when deejaying. Most DJ controllers now, will have an auto
beat loop setting. When auto beat
loop is activated, it will continuously loop and play the amount of
beats you have selected at that point in the track until you deactivate and
exit the loop. Some DJ controllers will have the option to use the auto
beat loop function on the performance parts
and some will have a separate section like
on my DJ controller here. If you have the auto
beat loop function on your performance pads, each part will
generally correspond to the number of beats
you want to loop. For example if I go to the
performance pads section here on the DJ software
and on the drop-down tab, I select ''Beat Loop'', your performance parts may have something similar to this, where the first part we'll
set a quarter of a beat loop, the second part we'll
set a half beat loop, the third pad we'll set
a one beat loop and the fourth part we'll set it
two beat loop and so on. If I press "Play"
on this track now, [MUSIC] then press the public corresponds with the number
two for the two beat loop. The tracker keep
looping two beats over and over again
until I exit the loop. You can also move
through the loops. If I press to the
four [inaudible] , it'll loop four beats. Then the eight will
do eight beats, [MUSIC] and then the
16, we'll do 16 beats, and 32 will do 32 beats. Then you just have
to exit the loop for the track to
continue playing. On this DJ controller, I have to select the
amount of beats I want to loop beforehand and then
activate the beat loop. For example, if I press
"Play" on this track now, [MUSIC] I first have to
select how many beats I want to loop so I can
select four beats. Then when I'm ready, activate the auto beat loop function. The chat will continue to look that amount of beat
until I exit it. I can move up and the amount
of beats I want to loop to eight or 16, and also down. Using the arrows up and down on my Auto beat Loop section. There is going to
exit the beat boot. Each DJ controller can be different to how
they're set loops, but each DJ controller will have an auto beat loop
function somewhere on it. It may be a good
idea to now find out where your auto beat
loop function is on your DJ controller and how
to use it and then get a little more familiar with it for this next section of the course, as mentioned in the
previous video. When using the auto
beat loop function, we want to make sure we
have quantized activated. This will make sure
all of our loops are snapped in time the beat
grid when using it. On the DJ software, there should be a
little cue next to the circle with a BPMN. When this is red, that means
the quantize is activated. For this example, I'm just
going to turn quantize off, zoom in slightly so you can see the beats a little better, and then I went to press
"Play" on this track. [MUSIC] That's an also beat
loop with quantize off. As you can see though, it's not snap the auto beat
loop to the beat grid. Now if I was to exit this loop, turn quantize on and
do the same thing. [MUSIC] Quantize
will automatically snap that loop to the beat grid. This is why it's
important when using the auto beat loop function to have the Quantize activated. Along with the auto beat loop, you also have the manual beat
loop on your DJ controller. You will have two buttons
that say in and out. This is when you can
set loops manually to how long you want the loop to be when the track is playing. The In button sets where
the start of the loop will be and the Out button will set where the end of
the loop will be. For example if I press
"Play" on this track, [MUSIC] then I press
the "In" button, it will set where the
start of the loop will be. Then when I press
the "Out" button, it'll set where the end
of the loop will be. Now just to exit the loop, just have to deactivate
the loop and exit. I very rarely used
the manual beat loop. I mainly only use the
auto beat loop as I find it easier and faster to
use with this same result. Just like with hot cues, we don't want to just be
setting loops randomly. That was sewn off
to the audience, just like the examples
we've been using. Then we want to use
the loops in time with the tracks natural
timing and structure. For example if I flip forward in this
track here slightly, [MUSIC] I'm just going to
set auto beat loop randomly. [MUSIC] As you can hear that, that loop is not in time with then tracks natural structure. As you can hear, the loop is set of the start of a new phrase. What we can do is set
the loop in time with the tracks natural
structure. For example, [MUSIC] and if that loop was to keep playing
to the audience, it wouldn't sound too
bad to them as it is in time with a tracks natural
structure and timing. In this section of the course, where we are now going to
do some advanced mixing, I'm going to show you several different ways in
which you can use the loops effectively to be more creative when mixing
and deejaying.
46. Advanced Mix 1 - 32 Beat Loop Intro : In this video, I'm going
to show you how to use a 32 Beat Loop as an intro. This is a mixing technique that I have come up with myself that I use on pretty much all
my tracks when I am DJing. It is one of the most practical
ways that I have found to use the loop function when
mixing two tracks together. It helps me always have
perfectly timed mixes, no matter what track I'm
mixing in with next. I'm going to give you a few
examples now of how to use the 32 beat loop as an intro and how it can always help you
time your mixes perfectly. So far this first example, on the left-hand side on Deck 1, we have the track, Last
Night A DJ Saved My Life. On the track on the
right-hand side, we have Lola's Theme on Deck 2, so just having a
quick look at the end of the track Last Night
DJ Saved My Life. We have two phrases
of bass line and melody and then two phrases of bass line and
melody and vocals, and then one phrase of
bass line and melody, where the melody slowly
starts to fade out, and then one phrase
of percussion. So let's just quickly
have a listen to that so you understand
the end of the track. [MUSIC] So there we just have
bass line and melody. I never go into bass line melody and a little bit of vocal. Then after the red marker, we just have one bass line and melody and it slowly starts to fade out at the
melody as you can hear there. And then it goes into one
phrase and percussion, and the atrial beats. I just wanted to give
you a quick listen to the end of that track there. As we're going to see
here on the track, Lola's Theme is two
phrases of precaution, and then two phrases of
bass line and melody it. So we'll just quickly
listen to the transition of that where it goes into
the bass line and melody. [MUSIC] So it's two
phrases percussion and then the bass line
and melody comes in. So far this makes
the sound good. We can time it saw that when the bass line and
melody ends on the track Last Night
DJ Saved My Life, the bass line and melody will begin on the track Lola's Theme. So the bass line and
melody ends on the track Last Night A DJ
Saved My Life after five phrases from the drop and the bass line and melody starts on the track Lola's Theme, two phrases from the downbeat. So it's a time this
mixed perfectly. We would have to
wait three phrases from the drop of the track Last Night A DJ
Saved My Life and then press play on the
truck, Lola's Theme. However, instead of
having to wait for three phrases to press play
and time the mix that way, another way to tie in
these two tracks together perfectly is to set
a 32 beat loop just before the bass line and
melody comes in on the track Lola's Theme and use that loop
as the intro of the track. So for example what I'm going to do here on the
track Lola's Theme, is delete this first marker that says two phrases
or percussion. I'm going to put the
play head just at the start of where the bass
line and melody comes in. [MUSIC] Then using the
beat jump function, I'm going to jump back 32
beats, which is one phrase. Just like we would do on the
drops what makes technique? But this time instead
of setting a hot Q, I'm going to set a 32
beat loop at this point. As you can see there
now the 32 beats are highlighted in orange. What we're going to do, just
like how we set a hot Q, I'm going to press
the performance parts to save this loop. So now if I was to press that first performance part
where the loop is saved, it will start and
activate that loop. [MUSIC] As we now
know, when activated, a loop will continue to play
until we deactivate it. We can make the loop
play for 1 phrase, 2 phrases, 3 phrases, 4 phrases, and so on. It is completely up
to us because we control how long the
loop will play for. So what we have done
is we have effectively created an intro in which we
can control the length of. This means we can now start
the loop on Lola's Theme, straight away from the drop of Last Night A DJ Saved
My Life and then just exit the loop when
the time is right to do the transition
between the two tracks. So I'll do the mix now and
show you how this can be used. So I'm going to put
the track Last Night DJ Saved My Life a few
beats before the drop. Put the crossfader all the way over to the left-hand side. Both tracks a beat
syncs up at 130 BPM. As soon as the
track Last Night A DJ Saved My Life drops, I'm going to stop the loop on
Lola's Theme straight away. Then when the time is right, exit the loop and
transition between the two tracks.
Let's have a listen. [MUSIC] So now as you can see there, the loop is running in the
background on Lola's Theme. Then what I can do
over the next place, it slowly starts
transitioning over. So now I can start
bringing the crossfader across and exit the loop so
it doesn't repeat again. Now the two tracks
have timed perfectly. That is one example
of how you can use a 32 beat loop as an intro
to time your mix perfectly. This technique can be used
instead of you having to wait a certain amount of
phrases before you can press play on the
next track coming in. You can start the track straight away on the drop every time and loop it as many times as you want until you want
to do the transition. I'm now going to
quickly show you some more examples with some
different tracks on how you can use the 32
beat loop intro to time your mixes perfectly. This time on the track on
the right-hand side on Deck 2 is Calabria and
as you can see here, the track has one
phrase of percussion at the start and then goes into one phrase of bass
line and melody. So for this, the
bass line and melody ends five phrases
from the drop of Last Night A DJ Saved My Life and the bass
line and melody begins one phrase from the
downbeats of Calabria. So normally to get this
mix to time right, we would have to wait four
phrases from the drop of Last Night A DJ Saved My Life to then press play on
the track Calabria. But instead, what I'm
going to do is set at 32 beat loop before
the bass line and melody comes in on
the track Calabria, and start the loop
straight away from the drop of Last Night
A DJ Saved My Life. Then just like in the
previous example, when the time is right, exit the loop of Calabria and do the transition as normal. This way I don't have to
count any phrases or wait any amount of phrases after
the drop to press play, I just know I need to exit
the loop on Calabria when the bass line and melody ends on Last Night A
DJ Saved My Life. So what I'm going to
do on Calabria is just remove this first marker that says one phrase of percussion. Go to where the bass line and
melody starts on the track. Use the beat jump function
to jump back 32 beats, which is obviously the start of the track, which
is the downbeat. But I'm just showing
you for example, then set the 32 beat
loop from here. Press the first
performance path to set that loop in
the memory bank. So now that 32 beat
loop is saved just before the bass line and melody comes in on the track Calabria. I'm going to put the track Last Night A DJ Saved My Life a few beats
before the drop, a crossfader all the way
over to the left-hand side. I'm going to put both tracks'
beat syncs up at 130 BPM. Then as soon as Last Night
A DJ Saved My Life drops, I'm going to stop the
loop on Calabria. Then when the time is right, exit the loop on Calabria and do the transition as normal. Let's have a listen to that mix. [MUSIC] The good thing about
using this technique as well is you can mix
the track in early. So that's what I'm going
to do now. [MUSIC] Now I'm going to exit
the loop on Calabria. [MUSIC] Get ready to
hear the bass swap. [MUSIC] There is another example
of how you can use a 32-bit loop as an intro to
time the mix perfect way, where you don't have to
count the phrases and you can start the track up
straight away on the drop. Now this time on the track on the right-hand side on deck 2, we have the track
Music Sounds Better. As you can see here, it's
four phrases of precaution until it gets to break one where the melody comes
in on the track. But this time instead
of counting the phrases between the tracks and trying
to time them that way, I'm going to delete this
first marker on the track, put the playhead on the track Music Sounds Better at
the start of break 1, use the Beat Jump function
to jump back 32 beats, activate a 32-bit loop, press the first performance
pad to save that loop on the performance pads and
do the same mix again, starting the track Last
Night A DJ Saved My Life, just a few beats
before the drop. I'm going to put
the crossfader all the way over to the
left-hand side, both tracks at beat
syncs up at 130 BPM. I'm going to start the loop on Music Sounds Better straight
away on the drop of Last Night A DJ Saved
My Life and then exit the loop and do
the transition as normal when the time is right. Let's have a listen to that mix. [MUSIC] On this next verse, I'm going to exit the loop
and do the transition. [MUSIC] Now I'm just going to show you
one more example of how you can use the 32-beat
loop as an intro. This time on the track on the
right-hand side on deck 2, we have Push The Feeling On. Again instead of counting the phrases on this
track here on the intro, I'm just going to find the point where I want to
mix in the track, which for this example, I'm going to mix it
in at the point of the chorus, which is just here. [MUSIC] When I do the mix in transition, I want the track to
come in at this point. What I'm going to do
is get the playhead on that first beat of
the chorus on the drop. I'm going to use the
Beat Jump function to jump back 32 beats, I'm going to activate
a 32-bit loop, and then save that loop on the performance pads just here in the bottom
left-hand corner. Now I'm going to put the
track on the left-hand side, Last Night A DJ Saved My Life just a few beats
before the drop, crossfade it all the way
over to the left-hand side. Both tracks are beat
synced up at 130 BPM. Then as the track Last Night
A DJ Saved My Life drops, I'm going to start the loop
on Push The Feeling On, and then exit the loop at the right time and do the
transition when it's ready. Let's have a listen to that mix. [MUSIC] There you have it. That is how you can
use a 32-bit loop as an intro to always have perfectly timed mixes no matter what track
you're mixing next. As you can see in
these examples, each track had a
different intro with different amounts of phrases before the significant zones. By using the 32-bit
loop intro technique, I was able to mix all the
tracks in the same way. I mixed them a lot easier without having to
count phrases and wait a different amount of time before I could press
play on each track. This is a good technique to
use if you're going to do a live DJ set and you are unsure which tracks you are going
to play at what time. You can prepare all your tracks beforehand with a
32-bit loop before the significant
sounds come in and always have perfectly timed
mixes during your set.
47. Advanced Mix 2 - 4 Beat Loop Intro: In this video, I'm going
to show you how to do a 4 beat loop intro. In the previous video,
I showed you how to use the 32 beat loop as an intro and how to
time that to do a mix. Now we can also do
the same thing, but with four beats
or even eight beats. One of the main
times we would use a four beat loop as
an intro is when there is a short
vocal just before the significant sounds
come in on a track. We can use that 4
beat loop of the vocal to mix over the baseline of another track
and time in time with the tracks natural
structure and phrases. The 4 beat loop can also
add extra anticipation to the mix as it builds up to make for a more interesting mix. So for this first example on the track on the
left-hand side, we have the track
Trick Me on deck 1, and on the right-hand
side on deck 2, we have the track
You're no good for me so at the start of the track
here, You're no good for me. We have one phrase
of percussion, and then it goes into
one phrase of baseline. But just before it goes into
that one phrase of baseline, when the significant
sounds come in, there are 4 beats
with the baseline goes out and there's
a bit of vocal. Let's have a listen to that. [MUSIC] What we're going to do is use that four
beats though with a bit of vocal sample
to mix in width. We don't need to use
beat jump for this. What I can do is just wind back to the start of the four beats. Now we're going to
set a 4 beat loop so as you can see though
now the four beats are highlighted in orange, so the loop is activated. I'm just going to delete that first marker
of one phrase of percussion and instead place them on the performance
parts of the 4 beat loop. Now when I press that
first performance part, that 4 beat loop will activate [MUSIC] To time this mix right what I'm going to
do with this loop is gradually fade in as soon as
the vocals end on the track, Trick me, and then I'm going to exit the loop after one phrase. The track then goes
into the baseline as it would do normally to
time the mix correctly. What I'm going to do is just put the track on
the left-hand side, Trick me in the middle of
the vocal and baseline. Then as soon as the vocals end, I'm going to bring the
track, You're no good for me in and do the mix. What I'm going to do
is put the cross fader all the way over to
the left-hand side, both tracks beats inked up at 130 BPM and let's have
a listen to the mix. [MUSIC] That is one example of how you can use a 4 beat loop on the vocal just before it comes in with a significant
sounds of a track. As you noticed, I set the 4
beat loop off and just let it run in the background until
I was ready to bring it in. Then after one phrase of
the loop repeating itself, I exited the loop, reduce the baseline on
the track on the left, and did the
transition as normal. Now this time on the track on the right-hand side on deck 2, we have House every weekend. Now we've not used
this track before, so we're going to have
a listen to where the significant science come in and we would want
to mix the track. As you can hear, that
other track just starts off with some
simple percussion. [MUSIC] Slightly a bit of melody there, a bit of vocal fading in. [MUSIC] For this example here we're going
to use that 4 beat vocal sample just
before the track drops. What I'm going to do
here, set a 4 beat loop, save it on one of the
performance part, and use this 4 beat loop, just like the previous one, to mixing the track over
the track Trick me. But this time what
I'm going to do is start with a cross
fader in the center. The filter dial all the way over to the high-pass filter side. I'm going to activate
the loop as soon as the vocals end on
the track Trick me. I'm mixing it in a slightly
different way this time, but with the same principles. As soon as the vocals end
on the track, Trick me. I'll activate the loop on the track House every
weekend and then fade in slowly over one
phrase with the filter dial, then exit the beat
after one phrase, just as the track
would drop naturally. Let's have a listen to that mix. [MUSIC] There's another way
that you can use a 4 beat loop over a vocal
just before the track significant sounds
come in to mix over baseline of the
track that's ending. I'm just going to give
you one more example of how to use this technique. This time for this example, the track on the right-hand side on deck 2, we have the track, Push the feeling on and
what I'm going to do is mix into this part
of the track here. Let's have a listen.
[MUSIC] What I'm going to do is use the 8 beat loop this time instead of the 4 beat loop just before that tracks significant
sounds come in. I'm just going to
wind the track back. Then set an 8 beat loop
just here and then I went to save the loop
on my performance pads. Then I'm going to the
same mix this time, but with 8 beats instead of 4. This time we're going to
start with the cross fader all the way over to
the left-hand side, both tracks are beats
synced up at 130 BPM. I'm going to stop the loop off before I'm going to bring
it in so at times right. Let's have a listen to this mix. [MUSIC] There you have it. There are some
examples of how you can use a 4 beat loop or an 8 beat loop to mix in a vocal just before the significant
sounds of a track come in. But when using this technique, make sure you stick in time with the same structure
of the phrases of the track so they
still naturally switch and transition
at the right time.
48. Advanced Mix 3 - No Percussion Loops & Hot Cues: In this video, I want to show
you how to mix a track with no percussion at the start
by using hot cues and loops. On the left-hand side on deck 1, we have the track
are you with me. And this time on the
right-hand side on deck 2, we have the track
out of my mind. If we just have a
quick listen to the start of the track
on the right-hand side, out of my mind, you'll hear that there's no percussion
at the starts of it, and it just goes
straight into melody. [MUSIC] In previous
videos, I've shown you some more basic ways to mix
these two tracks together, and ways how to mix a track with no percussion at the start. But in this video,
I'm going to show you a more advanced way of mixing in a track with no percussion at the start by using
hot cues and loops. Firstly, what I'm going
to do is set a hot cue right at the start of the
track, out of my mind. [MUSIC] Now, when I press that hot cue
on the performance part, it's going to take me
straight to that point in the track and start
playing from there. Then what I'm going
to do is find a section of the track that
I could use as an intro. You can usually find that
the outro of the track will be suitable to
also use as the intro, if the truck has
a outro that is. This is because the
outro would usually be made of similar kinds of
sounds as the intro would. If the track doesn't
have a outro either, you can use your judgment and use any part of
the track that you feel could be suitable to
use as an intro to mix with. For this track on the
right-hand side here, I'm just going to have a
quick listen to the outro [MUSIC], and just hear that
last phrase of the track, is what we're going to use for the intro for this example. As we can here there, it's got some slight melody and
some slight baseline. [MUSIC] Now using the technique that we have learned in
the previous videos, I'm now going to
set to loop over that section of
the track that we want to use as an intro, and save it on the
performance parts. So I'm going to
move the play head back to the start
of this phrase, [NOISE] set at 32
beat loop from here, and then set that loop on the performance parts
on the last part. Now if I was to press
that performance part it's going to activate
that loop and start from there [MUSIC]. What I'm going to
do for this mix, is use this section of the
track way I've set the loop as the intro and mix
this section in as I would do normally
with a normal intro. But at the end of the mix, when the track is due
to start a new phrase, I'm going to jump
to the hot cue that I've set at the
start of the track. This would hopefully work
just like how an intro of a track would naturally flow
into the break of a track. And you should sound good
and fluent to the audience. As we just mentioned within that loop at the
end of the track, out of my mind, it mainly consists of melodies
and baselines. As we can see here on
the left-hand side on the track, are you with me, there's a section of
the track here that has two phrases of
melody and baseline, but it fades out, which
is this section here. What I'm going to do to
time this mix right, is as this track on the
left-hand side, are you with me, the melodies and baselines
start to fade out, I'm going to bring the
melody and baseline in on the track, out of my mind. And then at the end of the mix, I'm going to use the hot cue to jump back to the
start of the track out of my mind where the
track can continue as normal. I'm going to put the track
on the left-hand side a few beats before the drop, put the cross fader all the way over to the left-hand side, both tracks will be
synced up at 130 BPM. Then when the track
are you with me drops, I'm going to activate the
loop at the end of the track, out to my mind, and
use that as the intro. And then when the track's
read, I'm going to mix it in and fade the
cross fader across. Let's have a listen to that mix. [MUSIC] That is one example of how
you can use hot cues and loops to mix in a track with
no percussion at the start, by using a different section
of the track as the intro. I'm now going to
quickly show you another example of how you
can use this technique. This time on the track
on the right-hand side, on deck 2, we have the
track, pump up the base. If we quickly have a listen
to the start of this track, you can hear that it
has no percussion at the start also, and just goes
straight into melody. [MUSIC] There's also a little
bit of vocal there as well. So I'm going to do
the same kind of mix that I did on
the previous mix. Firstly, what I'm going
to do is set a hot cue right at the start of this
track, pump up the base. Now, if I was to
press that hot cue at the start on the first
performance part, it'll jump straight to this part of the track and start playing. And then I'm going to find
a section of the track that I should be able
to use as an intro. As I've mentioned previously, I'm going to listen
to the outro of the track first because
that is going to be a section of a track
that is most going to resemble what an intro
would sound like. [MUSIC] Once again, I'm going to use
this last phrase of this track as the intro. As you can hear
that it's got some slight melody and a baseline. I'm just going to set a loop over this phrase of
the track [MUSIC]. Save it on the performance
parts on the last part. I know if I was to press
that last performance part, it's going to activate the loop and play the
track from there. [MUSIC] Now as this truck on the right-hand side,
pump up the base, the loop section that
I've highlighted consists also of
melody and baseline, so I'm going to do a similar mix as I did with the previous one, just with this different track. Once again, I'm just
going to set the track on the left-hand side a few
beats before the drop, cross fader all the way
over to the left-hand side, both tracks will beat
synced up at 130 BPM. I'm going to activate
the loop on the track, pump up the base straight away on the drop of
are you with me. Then when the melody
and baseline starts to fade out on the
track are you with me, I'm going to fade in the
track, pump up the base, and at the end of the mix
hit the hot cue that's at the start of the track pump up the base and let the track
continue from there. Let's have a listen to that mix. [MUSIC] There you have
it. There's a couple of examples of how you can use hot cues and loops to mix in a track with no
percussion at the start, by using a different section
of the track as the intro.
49. Advanced Mix 4 - Add Bass With Hot Cues: In this video, I'm going to
show you another way and how you can use hot cues to make
a more entertaining mix, if a track doesn't have any
base line during the intro. This time on the left-hand side, on deck 1, we have the track, Give It Up, and on
the right-hand side, we have the track, Music
Sounds Better, on deck 2. As we may know, the track on the right-hand side now,
Music Sounds Better, only has precaution
at the start of it and then goes
straight into break 1. Let's have a quick
listen to this. [MUSIC] Now with this track, we are going to
try and make this a more entertaining mix by using hot cues and add some
extra base to the mix. We can do this by jumping
to a different part of the track that has base
line in it during the mix. Then at the end of the mix, jumping back to the start
of the break of the track, so then the track
continues as normal. As we can see here on
the track on the right, we have highlighted two phrases of base line during the outro. Let's have a quick
listen to this. [MUSIC] What we can do from here is use
these two phrases at base line during the mix
as part of the intro. We already have a hot
cue set at the start of the two phrases of the
base line, so that's fine. If not to do this mix, you'll need a hot cue at the
start of them two phrases, where the base line comes in. After we've used these
two phrases at base line, we're going to jump back to the start at the
break of the track. What I'm going to do is go to this start of the break and just set a hot cue here. Now if I was to
press that hot cue, the start of the break of Music Sounds Better would start. As we can see here, the track
on the left, Give It Up, has two phrases at base line and melody for the chorus 2, and then two phrases of percussion to go to
the end of the track. To time this mix right, what we can do is
when the two phrases of base line and melody
end on the track, Give It Up, we can jump
to the two phrases of base line on the track,
Music Sounds Better. Then at the end of the mix, jump back to the start of the break on Music
Sounds Better. I'm going to do this
mix for you now. Keep an eye on the hot cues
and when I'm pressing them, on what part of the
track I'm jumping to. What I'm going to do for
this mix is put the track on the left-hand side a few
beats before the drop. Crossfader all the way over
to the left-hand side. Both tracks of beats
synced up at 130 BPM. When the track Give It Up drops, I'm going to press "Play" on the track, Music Sounds Better. Then when the baseline
ends on Give It Up, I'm going to use the
hot cue to jump to the base line on Music Sounds
Better for two phrases. Then at the end of the two
phrases of the base line, I'm going to jump
back to the start of the break of Music
Sounds Better, so the track can
continue as normal. Let's have a listen to that mix. [MUSIC] There you have it. There is another example of how you can use hot cues to jump to different parts of
a track to make your mixes more interesting
and entertaining.
50. Advanced Mix 5 - Acapella Bridge 1: In this video, I'm going to show you how to use an acapella or vocal to create a
bridge between two tracks. For this example, we
are going to quickly mix between three
different tracks. To make things easier, we are going to create
a separate playlist just for this mix with the three tracks in so we can quickly load them up
in time for the mix. What we're going to do
on the left-hand side on the library is just click
the plus icon again, and it's going to create a
new playlist, four rows. You can name this playlist
whatever you like, but for this example, I'm going to name
it Acapella Bridge. Once you've done
that, you can go back into the main playlist. The first track we need to drag over is the track Trick Me. Then the second track we
need to drag over into the new playlist is the
Hands Up Acapella Loop, and the third track is
the track Calabria. Now you should have
all these three tracks in a separate playlist. What we're going to do for
this mix is use the Hands Up Acapella to link
the two tracks together of Trick
Me and Calabria. We will go from when the
vocals of Trick Me end to the vocals of the Hands Up Acapella and then to
the melody of Calabria. We will only play each
section of the mix for one phrase and
quickly jump between the three tracks to make for
an entertaining mix with some added anticipation
and surprise for the audience than what your
usual mix would include. Once the mix is done, we will also jump through
the track Calabria using hot cues to get to the more energetic parts
of the track faster. We're just going to set
the loops and hot cues on these tracks to get it
setup ready for the mix. Firstly, the track on the left-hand side
we need Trick Me. We should already have
the hot cue markers set up at the end of the track. So as you can see here, it says three phrases
of baseline and vocals, which is the red marker, and then two phrases
of baseline, which is the dark blue marker. At this point of the dark
blue marker just here, this is the point where
we will bring the vocals of the Hand Up
Acapella in the mix. If you don't already have the
hot cue marker set up here, you will need a
hot cue marker for phrases from the
drop of Trick Me, where the vocals and
the baseline begins. Just have a listen to
that section real quick. [MUSIC] Just that. Then we will load that track, Hands Up Acapella on the right. What we're going
to do here is set a 32-beat loop and save it
on the performance parts. I'll just go on ahead
and set a 32-beat loop, and I'm going to save
it on the hot cues of the performance parts. Then on the left-hand side, we're going to load up the
track Calabria and we're just going to set a few hotkeys on this track ready for the mix. The first hot cue we're going to set at the start of the break, [MUSIC] and then
the second hot cue, we're going to set 32
beats before the drop. I'm just going to go to
the drop of chorus 1. [MUSIC] Use the beat jump
function to jump back 32 beats. And then set the next
hot cue just there. Then what we're
going to do is set a third hot cue on the
drop of the second chorus. The reason why we're setting
a hot cue on the drop of the second chorus
is because we want this drop to play instead
of the first drop. If you have a listen
to the first drop, [MUSIC] and then have a
listen to the second drop, [MUSIC] you can hear
that the second drop is more energetic than the first. So during the mix
we're going to play the Drop 2 instead of Drop 1. I'm just going to
drag the track, Trick Me up on the
left-hand side again. To time this mix right, when the vocals of the
track Trick Me end, we will bring in the
vocals of the Hands Up Acapella in for one phrase. Then after one phrase, we will end the track, Trick Me and let the Hands Up Acapella play for
one phrase by itself. Then after one phrase, we will press play
on the hot cue to start the break of
Calabria so that the Hands Up Acapella
and the melody of Calabria are playing both
together at the same time. Then after one phrase of that, we will end the Hands Up
Acapella and jump 32 beats forward before the drop of Calabria using this
second hot cue marker. Then just as the
track Calabria is about to drop on
the first chorus, we will press the
third hot cue to jump to the second drop and
play that one instead, because that one
is more energetic. This might seem a
lot to take in, but once you've
watched them mix, it should become a lot
easier to understand. For the first mix, I will explain what I am doing
and then I'll do in the mix again without talking so you can
listen to the mix fully. To get this mix
set up correctly, we need to make sure
that we have quantize activated on both
sides of the decks. We're going to put
the crossfader all the way over to the
left-hand side, both tracks of beat
sync top at 130 bpm. We're going to put the track
on the left-hand side, Trick Me a few beats
before the drop. Then when the track
Trick Me drops, we're going to start the loop of the Hands Up Acapella
in the background. Then when the time's right, when the vocals end on Trick Me, we will bring in the
Hands Up Acapella. We're also going to
bring in the Hands Up Acapella using
the filter dial. What I'm going to do is
turn the filter dial down all the way over
to the left side, which is the low-pass filter. When it's time to
bring the track in, we're going to use both the crossfader
and the filter dial. Let's have a listen to that mix and I'll
talk you through. [MUSIC] When the truck drops, I'm going to stop the loop
of the Hands Up Acapella, but keep the crossfader
over to the left-hand side. [MUSIC] On the next phrase, I'm going to make a
crossfader across on the filter dialog to bring
in Hands Up Acapella loop [MUSIC] just as the
vocals end on Trick Me. [MUSIC] [inaudible]
track Trick Me. [MUSIC] Get the track
Calabria loaded up. [MUSIC] Crossfader in the center and be ready to press
the first hot cue. [MUSIC] Fade the Acapella and get ready to press
the second hot cue. [MUSIC] I just want to drop
first and the third hot cue, hold the second drop
of the track Calabria. [MUSIC] There you have it. There's an example
of how you can use an acapella or vocals to
bridge between two tracks. Also another example of how
you can use hot cues to jump to different parts of the track to make
it more energetic. I'm going to do that mix for
you one more time without talking over it so you just have a listen to the mix fully. [MUSIC]
51. Advanced Mix 6 - Acapella Bridge 2: In this video, I'm going to
show you another example of an acapella or vocal to create a bridge
between two tracks. For this mix, we're
going to need three tracks in a
playlist again, but this time we need
the tracks Utopia, the Hands Up Acapella, and Pump Up The Bass. For this mix, we're
going to go from the track Utopia to the Hands Up Acapella and then to 32 beats before the drop of the
track Pump Up The Bass. Let's get this tracks
ready setup for the mix. First thing, we're to
drag the track Utopia up on the left-hand side. There's already
some markers setup here on the track on Utopia. This says it's got from
the drop of chorus 2, two phrases of
bassline of melody and then it goes into two
phrases of bassline. Let's quickly have
a listen to this. [MUSIC] That's the bassline of melody. They should drop
into just bassline. [MUSIC] It's at this point here where it goes from bassline
and melody just into the two phrases of
bassline where I'm going to bring the
Hands Up Acapella in. Now I'm just going
to drag the track Hands Up Acapella on
the right-hand side. This track should already have a 32 beaten loop set
at the start of it. If it doesn't, you just want
to set a 32 beat loop at the start of the
Hands Up Acapella and puts it on the
first performance pad. Then when you hit that
first performance pad, it's going to loop
them first 32 beats. [MUSIC] Now let's drag the track Pump Up The Bass
on the left-hand side. Here we want 32 beats
before the drop. Let's find the drop and then use the beat jump function
to jump back 32 beats. Then set a hot cue right here. What we're going to do
to time this mix is when the melody ends on Utopia, the vocals come in on
the Hands Up Acapella, and then we're going
to leave those two tracks in for one phrase, just like in the previous mix, and then end the Utopia
after one phrase, then the Hands Up Acapella
should play all by itself for one phrase whilst we're getting the track Pump
Up The Bass ready. Then what we're going to do
is start the track Pump Up The Bass 32 beats
before the drop leaving the buildup
of Pump Up The Bass and the Hands Up Acapella
going at the same time. Then just as the track
Pump Up The Bass drops, we're going to stop
the Hands Up Acapella. Again for this mix,
we're going to use the filter dials and the crossfader to bring
the tracks in and out. Once again, I'm going to do a mix where I'll talk
you through it and then another mix just
after where I don't speak through it
and you can listen to just the mix fully. To get this mix
ready now, we need Utopia on the left-hand side, the Hands Up Acapella
on the right-hand side, and then Pump Up The Bass ready to go after the track Utopia. For this next now,
I'm going to put the track Utopia a few
beats before the drop, the crossfader all the way
over to the left-hand side, and the filter dial on
the right-hand side turned all the way down
to the low-pass side, both tracks are beat
synced up at 130 BPM. When the track Utopia drops, we're going to use the
loop function again to get the timing right of the Hands Up Acapella until we're
ready to fade it in. Let's have a listen to that mix. [MUSIC] We've set
the 32 beat loop of Hands Up Acapella in
the background ready. When the next phrase of
the melody ends on Utopia, we're solely going to bring
the track Hands Up Acapella in using the crossfader
and filter dial. [MUSIC] I'm going to fade the
track Utopia out. [MUSIC] Get the track Pump Up The Bass ready on
the left-hand side, crossfader in the center and press the hotkey 32 beats before the drop with
the filter dial down. [MUSIC] Use the filter dials to mix. [MUSIC] There you have it. There's another example of
how you can use an acapella or vocal loop to bridge
between two tracks. I'm going to show you that
mix one more time without talking over it so you can have a listen to
it fully. [MUSIC]
52. Advanced Mix 7 - Loop Build Up 1: In this video, I'm going to
show you how to mix between two tracks by creating your
own buildup with loops. Dance tracks normally have a buildup before the
drop of the chorus. The buildup is normally a
drumroll that starts off slow and then speeds up the
closer it gets to the drop. The buildup is there to create anticipation for the audience, ready for the drop of the track. We can have a quick listen to the track on the
right-hand side here, Pump Up The Bass just
before the drop. You should be able
to hear the drumroll starting off slow and then picking up speed as it gets closer to the drop. Let's
have a quick listen. [MUSIC] We can use
this technique to create a similar
buildup by using loops on one track to mix into
the drop of another track. Ideally, when using a buildup
with loops to mix with, it's best to use a
vocal or acapella that is isolated by itself
as much as possible. This is because an
isolated vocal on its own will have less chance of clashing with another
track's buildup, and a looped vocal
can create more of an entertaining mix rather than just a loop buildup with
percussion or a normal drumroll. For this example, on
the left-hand side, on Deck 1, we have the
Hands Up Acapella, and as we just listened to
on the right-hand side, we have the track Pump
Up The Bass on Deck 2. This time on the track
Pump Up The Bass, we're going to set a hot
cue two phrases before the drop instead of one phrase and start the track from there. This will give us more time to do the loop buildup on the Hands Up Acapella and create more
anticipation during the mix. What I'm going to do is
put the track on the drop-off Pump Up The Bass, use the beat jump
function to jump back two phrases this time 1, 2, and then set a hot cue there. [MUSIC] Now on the truck
on the left-hand side, the Hands Up Acapella, we should already
have a 32-beat loop set at the start of the track. Let's have a quick
listen to this. [MUSIC] As you can see there, it's got a 32-beat loop setup. If you don't already
have this setup, we'll need to just set a 32-beat loop at the
start of that Hands Up Acapella and save it on the performance pads
on the first one. Then what we're going
to need to do is set a one-beat loop at the very start of the
Hands Up Acapella. I'm just going to
exit this loop, go back to the start
on the downbeat, and then set a
one-beat loop here. Save that on the performance
pads on the second pad. Now when I press that
second performance pad, it's going to activate
that one-beat loop. [MUSIC] What we're going to do for this mix
is start off with the 32-beat loop on
the Hands Up Acapella, and then after one phrase, reduce it down to one beat. Then when it's on 16
beats before the drop, we're going to reduce it
down further to half a beat, and then when it's eight
beats before the drop, reduce it down to a
quarter beat loop, and then when it's just four
beats before the drop we'll reduce it down to an
eighth of a beat loop. It sounds something like this. [MUSIC] Then we're going to filter out. To make it easier to know
when to reduce the loop down, we're going to set
hot key markers on the track Bump Up The
Bass at these points. The hot cue that
is set to phrases before the drop is where we're
going to start the track. Then as we can see here, we've already got
a hot cue marker one phrase before the drop. At this point here is when we're going to reduce it down to one beat loop and then 16
beats before the drop, we're going to reduce
it down to half a beat. Let's have a listen.
[MUSIC] Which is just here. I'm going to set a hot cue here. Then after that,
we're going to reduce the loop down even further, eight beats before the drop,
[MUSIC] which is just here. Then after that, we're going
to reduce the beat loop down further one
more time four beats before the drop, [MUSIC]
which is just here. Then just before the
drop, we want to filter the loop out. These hot cues here
before the drop is just markers for us to know
when to reduce the loop down. What I'm going to
do is do the mix for you first and
talk you through it, and then I'll do the mix
again so you can have a listen to it fully
without me talking over it. On the track Pump Up The Bass, I'm going to get it ready on the second hot cue two
phrases before the drop. [MUSIC] I'm going to
have the crossfader in the middle and the filter dial down all the way over to
the low-pass filter side, and that's how I'm going
to introduce the track in. Both tracks are
beat-synced up at 130 BPM. Just here on the performance
pads on the left-hand side, I'm going to put the beat loop function on just so you can see which beat loop we're up to and it's easier to
keep an eye on. Let's do the mix and
have a listen to it. I'm first going to
start off the Hands Up Acapella with a 32-beat loop. [MUSIC] Then to start
the next phase, I'm going to start the track Pump Up The Bass two
phrases before the drop. [MUSIC] Then I'm going to
slowly filter the truck in. [MUSIC] Then to start
the next phrase, I'm going to do one beat loop. [MUSIC] Then each hot cue I'm going to reduce
down the beat loop by half. [MUSIC] There you have it. Those are an example
of how you can use to beat loop function to create a buildup mix between two tracks just before the
drop of the next track. I'm going to do that mix
one more time for you without talking over so you
can fully listen to it. I'm also going to mix out
the track Trick Me to give you more of a full example of how you could do this live. Now on the right-hand side, I have the track Trick Me, and I'm going to mix
the Hands Up Acapella into the track Trick Me just like we have done previously. Then I'm going to load the
truck Pump Up The Bass and use the loop function on
the Hands Up Acapella to mix into the drop
of Pump Up The Bass. Again on the
performance pads here, I do have the beat loop values
so you can keep an eye on this here as I'm going through the beat loops, I'm
reducing them down. Both tracks are
beat-synced up at 130 BPM. The crossfaders in the sensor, I'm going to use the filter
dials to mix these tracks. Let's have a listen to this mix. [MUSIC].
53. Advanced Mix 8 - Loop Build Up 2: In this video, I'm
going to show you a second example of how you can mix between two tracks by creating your own
build up with loops. In the previous example, we used the hands up acapella
to do a loop build up with. To do this mix, you don't necessarily need a specific acapella
track to create a loop. You can also do the mix with any vocal that is isolated
and on its own. You can often find
vocals on their own in the middle of the
breaks of the track. For example here on deck 1 on the left hand side and if we have a quick listen
to the second break, you can hear some vocals
just on their own isolated. [MUSIC] Now there is a slight bits of melody
and piano there, but not too much it's mainly
just vocals and we're going to use this
part of the track to do the loop build up with. As long as the vocal loop
sounds good when you loop it, it should be okay to
use for a build up. For this example,
we're going to use the four beats of
the Bar Number 72. We can just see here on the
waveform the bar numbers, and we're going to
use Bar Number 72. I want to wind this
back slightly. I'm going to set a
four beat loop at the start of Bar Number 72. These are the four beats
we're going to use to loop to do our build up with. Let's have a listen. [MUSIC]
Now when we do the mix, we're going to hear
the same build up with the same structure
as the previous mix. We're going to start
the track that we're going to mix into two phrases before the drop and then when the track is
one phrase from the drop, use a one beat loop
and then reduce the loop down as we get
closer to the drop. On the right-hand
side here again, we have the track
Pump up the base and same as before we're
going to start this track, two phrases before the drop. We're going to loop the
four beats for one phrase then when the track
Pump up the base is one phrase before the drop, we're going to reduce the
loop down to one beat, then when it's 16
beats before the drop, reduce the loop down to half
a beat and then eight beats before the drop reduce the
loop down to a quarter beat. Lastly when the track Pump up the base is four beats
before the drop, reduce the loop down to
one-eighth of a beat, and filter the track home, just like we did during
the previous mix. We already have markers
setup on the track, Pump up the base to help us and let us know when to
reduce the loops. I'm going to give you
an example of this mix, and I'll do the first mix and talk you through it
and then I'll do the mix again without talking you through it so
you can listen to it fully. I'm going to start the track,
You're not good for me, at the start of Break 2. Then when it gets
to that 72nd bar, I'm going to set the for
loop and activate it. At the same time I'm
going to start the track, Pump up the base two
phrases before the drop. For this mix, I'm going to use
the filter dials to do the mixing with and keep the
cross fader in the center. Both tracks of beats
synced up at 130 BPM. Just on this performance parts here on the left-hand side, I'm just going to put it
on beat loop again so you can see the different beat
loops that I'm activating. You can also see
the numbers here of the loops on this
part of the software. Let's have a listen to that mix. I'm going to reduce
the filter dial down on the track Pump
up the base ready, and as soon as I
set the four loop going on the track
You're not good for me, I want to start
the track, Pump up the base with the hot cues, two phrases before the drop. Let's have a listen to that mix. [MUSIC] I've got my loop function
setup ready for four beats, so as soon as I activate it is going to do a four beat loop. I'm getting ready to press the performance pads
on Pump up the base. [MUSIC] There we go, so we got a four
beat loop going, Pump up the base going I'm
going to filter that track in. Then on the next
phrase, I want to reduce it down to one beat loop. Guess you are ready,
that's a one beat loop. Next, hot cues you reduce
it down to half a beat. [MUSIC] Then a quarter and
then an eighth and filter it out. [MUSIC] There you have it. There is another example of how you can transition
from one track to another by using a loop build up with the vocals from
the breaker of a track. Now just before I do
that example again, without talking over it, I'm going to show you how to
set an automatic beat loop. Now when you set an automatic
beat loop on a track, it means that when the track plays over that
part of the track, it will automatically activate the loop that you
have set itself. This can be good to
use if you always do the same mix with the
same loop every time. For example if you
always want to loop this part of
the track here. [MUSIC] You can save that loop
on the performance parts. For this example, I'm
just going to have to delete a couple of
these hot cues. We can save this loop on the
performance parts just here. Just in orange here,
so a loop symbol. Now, if I was to click
this orange loop symbol is going to turn red. Now what the red loop
symbol means that it is automatically activated when it plays over this
part of the track. For example if I wind this
track backwards slightly, and I play the track from here, when it gets to the part of the track where the loop should be, it will automatically play the loop so I won't
have to press anything. Let's have a listen. I'm going to press play on the track. [MUSIC] I'm not going
to press anything on the controller or
on the software and it will automatically
loop that part of the track. This time I'm going
to do the mix again, but use this automatic
loop function so I don't have to set that
first loop and I can focus on pressing play on the track on the right-hand side and
then I'm manually going to flip down through
the loops when it gets to the right
points of the track. Let's do that mix again. I won't talk through
it and can listen to it fully and start the track just before the break cross fader in the center, the right-hand side
I'm going to turn that low-pass filter down, both tracks are beats
synced up at 130 BPM and I have my automatic loop set on the track,
You're not good for me. Again, I'm just
going to change this to beat loop so you can see the different beat
loops that I'm using now let's do the mix. [MUSIC] There you have it. There's another example
of how you can use loops as a buildup to transition
between two tracks.
54. Advanced Mix 9 - Loops & Fader Cuts Build Up: In this video, I'm going to
show you how to use loops and fader cuts to mix
between two tracks. This style of mixing was
made popular by James Hype, who I've actually
had the pleasure to DJ with a few times in Greece. He's technically
one of the best DJs that I've seen in terms of technical skills with
the DJ equipment and manipulate in tracks live. What we're going to
do for this mix is emulate one of his famous mixes. What we're going to do is
loop the vocal of a track, just like we have done
on previous mixes. But then we're going to reduce
it down so much that it creates a constant noise
and a certain tone. Then what we're going to
do is use fader cuts, which are basically quick flicks of the channel fader or cross fader to quickly cut in and out of the
volume of the track. We're then also going to use
the play/pause button as a slow break effect just before the drop to add
extra anticipation. I will now show you how to
use this technique of mixing with loops and fader
cuts in this video. On the left-hand side
we have the track this time Pump Up the Bass on deck 1, and this time on the
right-hand side on deck 2, we have the track,
You're No Good For Me. It's the same two tracks
as the previous video, but just the
opposite way around, just so it makes it a
little easier for me to be in right handy to use
this channel fader. Before I explain this technique, we need to adjust some settings just for this particular mix. What we need to do
is just go into the settings and then go to the controller tab and then
to the first tab of deck. Then from here, we need
to scroll down until we see vinyl speed adjust. Now, we have the option of touch/break and release/start. What we need to do
for the touch/break is set the dials to one o'clock. Then we need to go
into the mixer tap in controller and this time find
the channel fader curve. As standard, this will be
set to a linear curve. This is the actual
curve that we want for the channel fader when
we're doing normal mix it. It is the most gradual
unsteady fade of the track. But for this mix, we want the exponential
curve just above it. This will mean we can cut in and out of the track's volume a lot faster for this particular mix and then exit the settings. For the touch/break as we
put it at one o'clock, what that will do is
it will stop the track slower instead of stopping
it immediately as normal. If I play this
track on the right now [MUSIC] and
then I press pause, is going to stop
it a lot slower. This is the effect
we're going to want when we pause to track. [MUSIC] Also with
the volume fader, is now going to have an
exponential curve so it's going to get louder faster towards
the top end of the channel. [MUSIC] For this mix, we're going to use a
similar structure to the last couple of loop
buildup mixes we have done. We are going to use the same four-beat loop on the track, You're No Good For Me. We should already have a loop set up on the band number 72. Let's just find
that on the track. It's just in the
middle of break 2. [MUSIC] We're going to use
that same loop for this mix. If you don't have this setup
already on your controller, you can always set the
four-beat loop yourself when it comes up to
that part of the track. But this time instead
of after one phrase, reducing down the loops by half every time until the drop. This time we're going to use the manual beat loop function to reduce the loop down until it's making a constant tone. We can do this by when
the loop is playing, pressing the Out button
on the controller, on the manual loop function. This means we can
then move where the end of the loop is
by using the jog wheel. We can make the loop
shorter or longer by turning the jog wheel
clockwise or anticlockwise. For example, I'm going
to play the loop, [MUSIC] and then when I
press the Out button, it's going to start flushing. Now, if I move the jog wheel
clockwise or anticlockwise, that will move the
end of the loop. What we're going to
do for this mix is reduce the loop all the way down until it makes a
constant noise and tone. Let's have
a listen to that. [MUSIC] I'm going to
press the Out button, reduce it all the way down until it makes a constant noise and
tone just like that. Then we're going to
use our channel fader, which is now set to the
exponential curve to cut the track in and out quickly
to a pattern of four beats. Similar to when
we beat joggling, we can use it in counts of four, 1, 2, 3, 4, and also with
the ands in-between such as one and two and
three and four and. We can make patterns
to this count. Just like we would do
with beat joggling, we can do the same
with fader cuts. This is a very basic way of doing this whilst
we're learning. If I was to press play
on the track now, I can use the fader cuts one and two and
three and four and, [MUSIC] so I could go 1, 2, 3, 4. One and two and
three and four and. We can create patterns just
like the beat joggling. One, two, three, and four. One, two, three, and four. Or for example, one and
two and three, four. One and two and three, four. One and two and three, four. Then when the track is four
beats before the drop, we're going to use
the play/pause button twice just before the
drop of the track. For example, the noise
and the tone we'll be playing [NOISE] then we're going to use the
play/pause button just like that before the drop. I'll do the full mix now
and talk you through it. Then I'll do the mix again afterwards without
talking so you can have a listen to the mix done properly and also watch how it's done. For this mix, I'm going to have the auto-beat loop setup over that four beats
of the bar of 72. We also have the hot cue
still setup on the track, Pump Up the Bass so we can gauge where we are within the track. I'm going to put the
track, You're No Good For Me at the start
of break two. Crossfader is in the center
and I'm going to turn the filter dial down to the low pass filter
side on the track, Pump Up the Bass and fade
that in as we did previously. Both tracks or beat syncs up at 130 BPM. Let's do the mix. [MUSIC] When the full
beat loop starts, I'm going to hit the
second hotkeys and Pump Up the Bass and start the track
two phrases before the drop. Now, the results
of that tracking. Now, let's press that Out button and reduce that loop
down to a noise. Then use the fader cuts and then starts off. There you have it. That
is how you can use loops and fader cuts to mix from
one track to another. What I'm going to do now
is I'm just going to show you that sequence again, just using the loops of the track of You're
No Good For Me. Then I'll show you again fully with both tracks and do the mix. Whilst the track Pump Up
the Bass is building up, I would show you the loop
sequence that I'm going to use. [MUSIC] Firstly, the
four-loop beat will stop. Then we press the Out button, reduce the loop all the way
down until it makes a tone. Then do the four-beat sequence. [NOISE] Then four beats just before the end, before the jog, we use the play/pause button, then the track should drop. I'm going to do that
mix for you one more time without talking over it so you can have a look and listen to it for yourself. Crossfader is in the center, turn the filter dial
down on Pump Up the Bass all the way over to
the left-hand side on the low-pass filter, both tracks and beats
synced up at 130 BPM. We have the ultra beat
loop setting ready on four beats on the track
You're No Good For Me, and let's do the mix. [MUSIC]
55. Advanced Mix 10 - Hot Cue Play: In this video, I'm going
to show you how to use Hot Cue Play with an acapella over the drop of another track. For this mix, on
the left-hand side, we have the track
Energy on deck 1. On the right-hand
side on deck 2, we have the Rhymes Acapella. Now, if we listen to the
drop of the track Energy, we can hear that
the track mainly consists of baselines
and a little bit of melody as the significant
sounds and has no vocal in it. [MUSIC] When a dance track has a drop without
any vocals in it, it can be fun to
put your own vocals or acapella over the top of it. One way to do this is we
can just set a loop on the acapella and simply play the loop over the
top of the drop. On the track on the
right hand side, Rhymes, we can set
an eight beat loop. [MUSIC] Save that to the performance parts
on the first part. Then when the track
Energy drops, we can just simply play that
loop over the top of it. Also you may have noticed, because we are
playing a vocal over the top of another
track's chorus, both tracks are harmonically
sound and in key. Both tracks, for this example, are in the key of 4A. These two tracks should sound
good together when mixing, rather than two tracks that are incomplete, in different keys. Let's have a quick
listen to this. I'm going to put
the track Energy a few beats before the drop. Then as soon as the track drops, I'm going to play the Rhymes
Acapella over the top of it. [MUSIC] You can use this technique to transition
between two tracks like we have done in
previous examples. Or you can just
make a track more entertaining and fun,
just like we did then. Now another way in
which we can play an acapella over the drop of another track to
make it more fun and entertaining is to
use Hot Cue Play. This is where we set hot
cues at certain points on the acapella and press them at different times to
create our own patterns. This time on the track Rhymes, I'm just going to
delete that loop. This time I'm just going
to set a hot cue on the downbeat of the acapella on that first performance part. This time when I press
the performance part, it's going to play it
from that hot cue. [MUSIC] This means we can press that hot cue at certain times and create
our own patterns. To start off simple,
we can press it in a pattern that sounds
something similar to this. [MUSIC] That will create as a one phrase
pattern that we can repeat in time with the other
tracks natural structure. To make it a bit more simple, I'm going to set
markers on the track every phrase so we know when
to restart our pattern. Now on the left-hand side
on the track Energy, we have just Hot Cue
markers every phrase. Before we do this mix, we need to make sure
that quantize is activated and set to one
beat on the settings. So that when we are
pressing the hot cues they will snap in time with
their tracks beat grid. Let's have a listen to this mix. [MUSIC] That is a simple
way in how we can just use a hot cue to create our own
pattern within acapella. This time what we're
going to do is use two hot cues instead of one. We're going to set
one on the downbeat, which we've already
got, and then set another at the start
of the next bar. [MUSIC] This now means we can create our
own pattern with two hot cues and repeat
itself over one phrase. We could do a pattern that
sounds something like this. [MUSIC] Let's have a listen to that mix over the top
of the track Energy. [MUSIC] There is an example
of how you can use two hot cues to create
your own pattern. Know you can even
go further than that and set three hot cues. I'm just going to delete
this second hot cue and I'm going to place another hot cue in the
middle of the first bar. [NOISE] Then a third hot cue on the start of the second bar. [NOISE] Now we can be
even more creative with our Hot Cue Play
and we can create a pattern that sounds
something similar to this. [MUSIC] Let's have a listen
to that pattern over the top of
the track Energy. [MUSIC] There is another
example of how you can use three hot cues to
create your own pattern. As you would here then
on the second phrase, I just went off and
did another pattern, but I kept it in the same
structure of the phrase. So with all the examples,
I just made them up. You can make up your
own patterns also. But the important thing
to remember when doing any Hot Cue Play is
you want to keep your patterns in time with the natural structure of the bars and phrases
of the track. Make sure you keep
your hot cue patterns in time with a four
beat, eight beat, 16 beat, and 32 beat structure just like we have
done on these examples. Not just pressing the hot
keys randomly at any time. The Hot Cue Play
has to be in time with the track's
bars and phrases, so that when your hot
cue pattern changes, it changes in time with the
track's natural structure, and it will then
still sound good to the audience and
not out of place. That being said, Hot Cue
Play is a really fun way to make your mixes and DJ
sets more entertaining. Have fun with it
and try and create your own acapella patterns.
56. FX Unit: In this video, I'm
going to explain to you how to use the FX unit. Most DJ controllers will have at least one FX dial and
some can have up to four. On this DJ control
that I'm using here, the FX unit is along the top. Each FX unit will have
an on-off button to activate and deactivate
the FX and FX dial to control the
intensity of the FX and buttons to control the number of beats that the FX is applied to. You can also view the FX unit on your software by clicking the FX tab at the
top of the screen. This will open up
the whole FX display at the top of the screen. For this demonstration, I'm
going to use the FX dial closer to the center
as its easier to see. To control this FX dial
on the DJ controller, on the software on
the FX display, it will be these buttons
here that will control it. Firstly, I'm going to
click the drop-down box. You'll be given
different options of what FX can be applied. For this one, I'm
going to select the echo effect as this is the most used effect and
it's easiest to explain. Most DJ controllers and DJ software will also
now have Auto Tap, which is just here
where it says auto. Auto Tap is like the
beat sync but for FX. Just how beat sync keeps the beats in
time of the beat grid, and also like quantize keeps the hotkeys and loops
in to the beat grid, the Auto Tap does
the same for the FX. Auto Tap will keep the FX in time with the
tracks beat grid. By selecting Auto Tap, this will automatically
time your FX with your track's BPM so you don't
need to do it manually. If you do have Auto Tap, it's best just to leave it on
whenever you are deejaying. If you do not have Auto Tap, you'll have to use manual tap. All you need to do to get your
FX in time with the BPM of your tracks is tap the top
button in time in the BPM. For example, if I press
play on the track on the left-hand side and
use the Tap button, keep an eye on the BPM
number changing as I tap it. [MUSIC] As you can see there, it's not completely accurate as my taps will be slightly out. Does say 129 BPM but the track
is actually 128 beats PM. So as mentioned, if
you do have Auto Tap, it's worth just keeping
that on and then your FX will automatically be beat
synced up to the track's BPM. As you can see on
the software here, the FX at the moment have
the number one on them. This number is how many beats the FX is going
to be applied to. This is just like
the loop function. We can increase this by doubling it or decrease this by half. Now, this echo effect will affect eight beats of the track. This effect will no longer
be applied to half a beat. This can also be changed by the arrow keys on my
DJ controller here. I can go up and increase the number of beats the
FX will be applied to. I can also go down to decrease the number of beats that the
FX will it be applied to. The on-off button on the
FX unit does exactly that. It turns the FX on an activates it and turns the FX off
and deactivates it. Now, when the effect is
activated and turned on, this doesn't mean that you will hear the effect straight away. The only way you will
hear the effect is if the FX dial is turned up. The FX dial determines the intensity and the
volume of the effect. If the dial is low, the effect will be
of lower intensity, if the dial is high, the effect will be
of higher intensity. To use the FX unit, you first have to
select which FX you want, which we've done here. We've selected the echo effect. Then you have to make
sure that Auto Tap is on so your effect will be in time with the beat
grid of the track, then select the
number of beats you want your effect
to be applied to. Here we have one beat. This means the echo effect
that we have selected will be applied over
one beat of the track. Then we have to turn the FX on the DJ controller
to activate it, and then turn the intensity dial up to however intense
we want the FX to be. Let's play the track
on the left and have a listen to
how this sounds. [MUSIC] We have echo
effect selected, Auto Tap is on. We're going to activate the FX. You can't hear it
just yet be applied. Now, we're going to turn it off. [MUSIC] As you could hear,
the echo effect was applied. If you stop the track
from playing whilst the FX is still
applied and activated, the FX will still continue
until it fades out completely. I'm going to press play
on this track here, turn the echo effect on, and then stop the
track. [MUSIC] There are two ways to stop the
FX from being applied. One is to turn the
dial all the way down, and two is to turn the FX
off and deactivate it. It can be a good idea
to have a look at your DJ controller and
see where the buttons and dials are for your FX
unit and have a listen to some different FX and
how they can be applied, and have a listen
to how they will affect your tracks differently.
57. Advanced Mix 11 - FX Build Up: In this video, I'm going
to show you how to use your FX to create more of
a build upon your tracks. As we have mentioned previously, down-strikes can have
a drum roll that increases in speed as it
gets closer to the drop. This is to create
more anticipation for when the drop does happen. For example, on
the left-hand side here we have the
track, Needin' U, and I'm just going
to put the track on the second break during the build up and have a
listen to the drum roll up this track [MUSIC]
As you can hear, there is building
up anticipation and increasing the
speed of the drum roll. Now vocals looping faster until the drum roll stops and the loop stops just
before the drop. We can add more anticipation
and build-up to the drop by adding some extra
FX during that buildup. This is a common
technique that DJ's use when they are playing dance
music or house music. You may see them turning the FX style more and
more as the track builds up and then turn the FX style completely off just
as the track drops. This is to create more
anticipation during the build up, just before the track drops. For this example,
I'm going to use the echo effect first
and see how that sounds. Just here on the FX display, I'm going to select
the echo effect. I'm going to set the echo effect to half a beat to start off with and then reduce it down to a quarter beat when it
gets closer to the drop. Then I'm going to deactivate the effect just before
the track drops. What this will do as the track
echoes every half a beat, it can act as a loop, but whilst the track
continues to play, it can create a drum
roll effect by itself, hopefully creating more
anticipation for the drop. Let's have a listen
to how that sounds. I'm going to start the track Needin' U in the middle of Break 2 and slowly start to apply the echo effect
as it builds up. Let's have a listen to
that [MUSIC] I'm going to activate the FX and slowly
start to increase it. Just quickly turn if off so
you can hear it. Back off. I'm going to reduce it now. Then just before
the truck drops, I deactivate the FX. I'm just going to do
that one more time without talking
over it and have a listen to how the echo effect affects the build up
of the track [MUSIC] As you can hear that, you can use the echo effect to create an added anticipation and noise to the build
up of the track. It can create a loop effect and drum roll build
up effect by itself. This time we're going to try a different effect
and we're going to try the reverb effect
and see how that sounds. In the drop-down box here, I'm just going to select REVERB. At this time, the reason
why I wanted to show you this one is because it
doesn't come up in beats, it comes up as a percentage. For this we're going to use the 25 percent reverb and have a listen
to how that sounds. We're going to use it in the
same way the echo effect was used and slowly start turning it up the closer it
gets to the drop. Let's have a listen
to how that sounds [MUSIC] I'm going
to activate the FX. I'm just going to
turn it up and have a quick listen to how it sounds. Then now as the track builds up, slowly turn up the
intensity [MUSIC] As you can hear again though, you can use the FX style and
the different FX to create added anticipation and noise
to the build up of a track. What you can do now is have
listen to the different types of Fx and how they
affect your tracks.
58. Advanced Mix 12 - Echo Out: In this video, I'm
going to show you how you can use the echo FX, to echo out of a
track when mixing. When mixing from one
track to another, you can use the echo FX on the track you're
mixing out of, to make more of a smooth
and gradual transition into the next track. It can be used to avoid the
track you are mixing out of, sounding like it's
ending too suddenly. For this mix on the
left-hand side, on Deck 1, we have the track Trick Me, and on the right-hand
side, on Deck 2, we have the track
Music Sounds Better. When I do the mix, just as the track Trick Me
is going to end, and transition
over to the track, Music Sounds Better,
I'm going to add an echo FX on the track
Trick Me for one beat. Now whenever you use
the echo FX on a track, you want to make sure
that the bass line and low frequency dial is
turned all the way down. If a kick drum, or bass line
is repeated and echoed, it can sound pretty
bad to the audience. Some DJ's can say that
when a kick drum, or bass line is echoed, it has a muddy sound. They say that the kick drum
or bass line repeated on itself over and over again
as it's echoed, it's muddy. If we are using the echo
FX to echo out of a track, it's good practice to gradually turn down the
low-frequency dial, just before you do
the echo effects. Let's do this mix as normal, and just before the track
transitions over into, Music Sounds Better, I'm going to put the echo
FX on the track Trick Me. I'm just going to put the
track Trick Me halfway through chorus 2 to
make this a bit faster. Let's have a listen. [MUSIC] I'm gradually going to turn
down the bass line, and echo out of the track. [MUSIC] As you can hear that, the echo effect carried
on slightly after the mix into the track,
Music Sounds Better. What I did is I left
the echo effect activated and the
effect style turned up, and just paused the track, so the effect kept
going just like this. [MUSIC] I'm quickly just going to do that
mix one more time for you without talking over it, so you can have a
listen to it properly. [MUSIC] Again, as you can hear, the echo FX carries the
track on a bit longer, and face the track out even
after the mix is done, into the track Music
Sounds Better. Now, this technique of using the echo FX to echo
out of a track, can be used on pretty much
any mix you want to do. Now another way in
which you can use the echo FX to echo out
of a track when mixing, is if you can't do a normal mix, and you have to do a drop mix. The drop mix, as we mentioned
in the previous video, is where you just go
straight from one track to the other track by pressing play on the track you're
bringing in next, and stopping the track
you are mixing out of. You may have to do this because you don't have an intro beats, or percussion at the start of a track you want to bring in. Or you may just want to
drop beats in a key part of the track and create
anticipation in that way. Now this is not the
most flattering way to mix two tracks together, but it's good to know
how to do it just in case you ever need to quickly
switch between two tracks, and for some reason you
cannot mix them properly. It's a technique
that can be used as a last resort if nothing
else is working for you. This time on the
right-hand side, I have the track Calabria, on Deck 2, and again on the right-hand side I have the track Trick Me, on Deck 1. What I'm going to do is just echo out of the track Trick Me, and simply press
play at the start of break 1 on the track Calabria. Just as the track Trick Me is coming to the end of its phrase, I'm going to turn the echo on, press Stop on the
track, and then simply press Play on the
track on Calabria. Let's have a listen to that mix. [MUSIC] As you can hear that, that's just a simple drop mix, but with an added echo effect
on the track Trick Me. Just as it came to the
end of its phrase, I simply applied the echo
effect on the track Trick Me, and at the same time
pressed Stop on Trick Me, and Play on the track Calabria, at the start of its break. As I mentioned,
it's not the most flattering or technically
hard mix to do, but it can be just as effective if you need to do
that type of mix. There you have it. There's a couple of
ways in which you can use the echo effect to echo
out of a track when mixing.
59. Class Project: Hi there again. As part of
the Skillshare community, you may already know that
class projects are a big part of the platform and what
makes Skillshare unique. In this video, I'm
going to quickly outline this class project. For the class project, Skillshare gives you
an option to add a cover image, a project title, a project description,
and any extra images, videos, or files you may
have and want to share. All you need to do is go
to Projects and Resources tab under this video and
click "Create Project". For the cover photo, you can use any DJ picture that you like. Some suggestions can be to use a screenshot of
your DJ software. Or you can take a picture
of your DJ equipment by itself if you do not
want to be in the photo, or you can even take
a picture of yourself DJing with your DJ equipment. For the class project you can
title it whatever you like, for example you can
title the project, My First DJ Project
or My First DJ Mix, or even I am Now
A Wicked Sick DJ. In the project description, you can feel free
to put whatever you like in relation to the course. You can share your
experience with the course in any way you like. There is no right
or wrong answer here any information on how your experience was
with the course and with djing in general
would be perfect. But if you are
struggling for things to write and to keep things simple, as I know it can be
hard to think of things on the spot sometimes and also because I want as many
of you guys as possible to participate in
the class project, I'm going to give you an
optional structure to follow of finishing
these three sentences. I started this DJ course because three things that I have learned
from this DJ course are, and after this DJ
course, I am going to, so in the project description, you can finish them
sentences for your project. The more that you guys share, the more we can all
interact with each other and connect and
discuss the topic of DJing is always great to hear how
people have got on with the course and the
positive impacts it has had on the DJ journey. At this time,
Skillshare does not yet offer the option to directly upload videos or audio to class projects so
for this reason, I'm not expecting
everyone to record their own DJ mix and upload it. But if you do record
your own DJ mix with either the tracks
from the course or with your own tracks
and want to add it to the class project
that will be awesome. Any mix that you could
share would be great to hear for both myself
and the other students. One of the best ways to do
this is to record your mix on the DJ software directly by
clicking the "Record" button. From there, you can upload
your mix to Mixcloud. Mixcloud is a platform
designed specifically for DJs to upload
their mixes too. From there you can
share the link to your mix in your class project. Another bonus to this is that everyone else who
listens to your mix on Mixcloud via Skillshare can also follow you on Mixcloud too and listen to
your future mixes. Another option could
be if you have a YouTube account and you don't want to create a
Mixcloud account, is to put the audio into iMovie and put an image
of the top of the audio. You don't even have to
make the YouTube video public if you don't want to. You can just upload
it as private and then share the
link in the project. Or the last option is just to set your phone up and record your mix through
your phone using the camera microphone on there. Again, with this option, you would have to
upload the video online and then share the link. Remember, sharing your DJ mix is just an option if you
did want to do so. If you don't want to do that, just uploading a picture and leaving some
comments would be great if you have any
questions about the project, feel free to create a
discussion in the course, and I'll get back
to you from there. I hope you enjoy the course
and I look forward to hearing how it goes
in your projects. See you in the next video.
60. Intro - Hip Hop and R&B: Welcome to the hip hop and
R&B section of the course. This is an extra
section of the course that I have added due
to student feedback and students asking if I
could do a hip hop and R&B section and I'm
glad to say here it is. Unfortunately, in this
section of the course, I'm not able to give
the tracks away for free for you
to mix along with, but I am very confident you will still learn a lot
from these tutorials. By the end of this section, you'll be able to mix hip pop
and R&B tracks effectively, even without the free tracks. You will still be able
to do the same hip hop and R&B techniques
that I teach you, but just with your own
hip hop and R&B tracks. In this section of the course, I will show you several
different ways in which you can mix hip hop and
R&B tracks together. This section also includes
how to mix tracks together that are
at different speeds and at different BPMs. For example, how to
mix a track that is 70 beats per minute into a track that is 90
beats per minute, or how to mix a track
that is 100 beats per minute into a track that
is 130 beats per minute. This is one of the most common questions that I get asked, how do you mix two tracks together that are two
different speeds? I'm very happy to say
that in this section, I answer this question and
show you exactly how to do it. Also, at the end
of this section, I will do a short DJ mix for
you that mixes five tracks together that are also at different speeds and
at different BPMs. This is to show you
how you can use these DJ techniques
practically in a live DJ set. I hope you enjoyed
this section just as much as I enjoyed filming it, and I'll see you
in the next video.
61. Sections of a Hip Hop and R&B Track: In this video, we're
going to take a look at the different sections of
a Hip Hop and R&B track. In dance music, the
sections are determined by the music and
sounds of the track. The break of a dance track is quieter and has less sounds, and then the track
builds up to the chorus, which is the most energetic
part of the track, where all the sounds
come together and play at the same time. Hip Pop and R&B tracks
are not the same. The main sections
of a Hip Pop and R&B track are determined by the lyrics and vocals of the track rather than
the music and sounds. There are four main sections
of a Hip Hop and R&B track. These are the intro, the chorus, diverse,
and the outro. First, we will take a look
at the intos and the outros. Just like with dance music, the intros and
outros are parts of the track that are at the very
start and at the very end. The intros build up the track at the start and the outro fades
out the track at the end. The intros and outros
of a Hip Hop and R&B track are usually a lot
shorter than a dance track. They only usually last
for one or two phrases. However, this can
vary depending on what version of the
track you are using. There are two different versions of a track you may come across. These are DJ friendly tracks
and non-DJ friendly tracks. DJ friendly tracks are
tracks that will include intros and outros specifically
made for deejaying. They'll have beats at the
start of the track to mix in with and beats at the end of the track
to mix out with. However, non-DJ friendly
tracks do not have intros and outros specifically
made for deejaying. They will generally just
go straight into a chorus of us without any
beats to mix with. These are like your radio
edits that you will find on the radio or also on
YouTube and Spotify. For example, as you can
see on the playlist here, we have several tracks
that are the same. We'll have an intro version
and a non-into version. I'm just going to drag this
track up here, light it up. Let's have the
non-intro version on the left and the intro
version on the right, just so we can have a
listen to the difference. The track on the left
on deck 1 will just go straight into the vocals
and have no intro beats. That's all at the start.
Let's have a listen. [MUSIC] Whereas the track on
the right-hand side on deck 2 is the intro version, and it generally
has one phrase of intro beats before the
chorus of us comes in. Let's have a listen to this one. [MUSIC] As you can hear that, the track on the right
has one phrase of intro beats specifically
made for deejaying with. Sometimes non DJ
friendly tracks do have very short intros and outros that may last around 60 beats. But these are
generally not beats specifically designed
for deejaying with. They are just there to
quickly build up to the main part of the track
for the radio or Spotify. For example, what I'm going
to do is drag the track. I'm going to put the
non-intro version on the left hand side and the intro version on
the right-hand side. As you'll be able to hear
on the non-intro version, the non DJ friendly track
on the left-hand side, it will have a slight
intro but it's not specifically designed
for deejaying with. Let's have a listen to this. [MUSIC] As you can hear
that it does have a slight intro for 16 beats, but it's not designed
for deejaying with. On the right-hand side,
we have the same track, but with a DJ friendly
intro version. Let's have a listen to
the start of this track. [MUSIC] As you can hear that, the DJ friendly track on
the right-hand side has one phrase of intro beats designed specifically
for deejaying with. One place you can find DJ friendly trucks are in
what's called DJ record pools. A DJ record pool is a
platform where you can download music specifically
made for deejaying. The DJ record tool that
I use is called DJ City. Another option is
to use DJ links. You can generally find
the DJ links already built into your library
on your DJ software. For example, if you look
here on the left-hand side of my DJ software
on the library, these four boxes where it
says login are DJ links. We have SoundCloud, Beatport, Beatsource, and TIDAL. What DJ links do is
allow you to stream DJ friendly music directly to your software and
use them to DJ with. It's like being
able to connect to Spotify from your DJ software, you'll have access to a
massive library of music directly from your DJ
software to mix with. If you are serious
about deejaying, I would highly
recommend checking either of these two options out. It makes it a lot easier
to DJ when you have tracks with specific intros
and outros to mix with, rather than just radio
edits that you may have downloaded from
YouTube or Spotify. Now that being said,
in this section, I am going to show
you different ways to mix both DJ friendly tracks and non DJ friendly tracks
so you know how to mix both types of tracks by
the end of this section. Now we'll take a look at the
choruses and the versus. The chorus is the main
parts of the track. It can consist of either
singing or rapping, and can also be known as
the hook because it's the most catchy
part of the track that sticks in people's heads. You can tell what
part of the track is the chorus because it is normally repeated two or three times
throughout the track, and usually only
lasts for one phrase. The verse is the section of the track in-between
the choruses. The verses are usually two
or three phrases long, and the lyrics are not usually repeated anywhere
else in the track. You'll generally find different versus
throughout the track. To be able to find where these main sections
are in the track, it's usually easier to
find where the choruses are first and then the versus will naturally
fall in-between. When highlighting your tracks, you only really need to
highlight the choruses. Now, because the sections of a Hip Hop and R&B track
are determined by the vocals and lyrics rather
than the music concerns, we cannot just look at
the waveform to determine the sections of the track like we can do with dance music. We have to actually listen to the track and listen
to the lyrics to see where the lyrics repeat themselves to find the choruses. For this example, I'm just
going to drag the track, lights it up again up
on the left-hand side. I'm just going to
quickly highlight the choruses on this track. What I've done here now is I've highlighted where the
track repeats itself. Let's quickly have a listen
to these sections now. [MUSIC] So that's the first
chorus there. Then we'll just going to
quickly have a listen to the second chorus., [MUSIC] As you can hear there
on the second chorus, it repeats exactly the same
lyrics as the first chorus. Now, if we flick anywhere
else in the track, you'll realize that it's
not saying the same lyrics. We've just listened to a section at the start of the track, [MUSIC] and then in the
middle of the track, and then towards the
end of the track. You can hear that each part
of that track is different. These are the verses. When mixing Hip Hop and R&B, it's the choruses that we
need to focus on mainly. This is why I've just
highlighted these sections. What I'm quickly going
to do now is highlight the choruses as well on the
track on the right-hand side. What I've done there is
I've just highlighted the choruses on the second
track on the right-hand side. Well, we're just going
to quickly have a listen to these to see if they
repeat themselves. [MUSIC] That's the first chorus though. I'm just going to
quickly listen to the second course as well. [MUSIC] As you can hear that, on chorus 2 it repeats exactly the same lyrics
as our chorus 1. If I was to click anywhere in the track now within the versus, it won't have repeats in lyrics. I will just quickly going
to show you that each one of these courses
is one phrase long, so I'm just going
to put the track, light it up on hot cue A at the start to
the first chorus. Then use beat jump function
to jump forward 32 beats. It takes us straight to hot cue B. I'm going to quickly jump to hot cue C. If you've seen them, the verse in the middle
is two phrases long. Then from here, from
hot cue C to hot cue D, you can see that's
one phrase as well. Then quickly just wave well, I went to put it on hot cue A. Use the beat jump function
to jump forward 32 beats. Then you can see there
that it's one phrase long and it will be the
same with chorus 2 as well. I'm just going to
quickly as well change the chorus
of the hot cues and make notes of them
just so it makes it clear to what these
sections are. What I've gone
ahead and done that is just change the
colors so that the first chorus is our light blue and the second
choruses are a darker blue. You can see in the comments
as well I've added CH1 for chorus 1 and
CH2 for chorus 2. Now, as I've mentioned
previously in the course, you can make notes
on hot cues and set your hot cues
however you want. But just for the purpose
of this section, I'm going to set
them out like this. Now you may be thinking
why I have not set any further intros and outros. This is because with
the DJ friendly tracks, they are generally
always one phrase of intro and two phrases of outro. It'll become clear throughout
this section why I've not highlighted them and only
highlighted the choruses. But like I've said,
after the chorus, you can highlight your
tracks however you want, whatever suits you better. Another key point that I want
to make in this video is, as you can see with
these examples here and the highlights
that I've made, the sections of the hip pop and R&B tracks are determined by the vocals and lyrics and
not by the music and sounds. As you can see, there can
be changes in the music and changes in the sounds within the sections of a Hip
Hop and R&B track. For example, the base can
come in and go out during the chorus and the base can come in and go out
during the versus. This means it's not possible
to spot the sections of a hip pop and R&B track just by looking at
the wave forms, you have to actually
listen to the vocals and the lyrics to be able to
find the different sections. For example, as you can
see here on chorus 1, it is mainly red in color, and then slightly it goes out. In chorus 2, is only half red and half
a green yellow color. Then same with the chorus on, it's half green and half red, same of chorus 2. This is the same for the
versus as well in the tracks, and each track is different. As you can see, it
can be hard to spot the different sections just
by looking at the waveforms, you do have to actually
listen to the lyrics. The quickest way to spot the different sections
of the tracks is to find where
the choruses are by where the lyrics
repeat themselves. Now we understand the
different sections of a Hip hop R&B track. Let's move on to the mixes.
62. Hip Hop and R&B Mix 1 - Basic Mix: In this video, I'm going to show you the first
way we're going to mix these hip pop and
R&B tracks together. The first way I'm
going to try and mix these two tracks together is in a basic way of when one track
significant sounds end, another track significant
sounds begin. This will be when the base
ends on the track Light It Up and the base
begins on the track Wow, which is at the very
start of the intro, at the very start of the track. The track here on the
left-hand side, Light It Up, the base ends around
this point in the track. Let's have a listen. [MUSIC] It still does have a slight
bit of base there, but it's not too intense. I'm going to mix it at that point there to
see how it sounds. Firstly, we're going
to have both beat sinks on on these tracks. Then let's have a
listen to the mix. [MUSIC] Even though the
significant sound switch at the right time and there are no real flat parts of the track we've just
basic percussion, it is still a
rather long mix and takes too long to get
into the next track. Especially when hip pop
and R&B tracks are a lot slower and it takes longer
to get through a phrase. Let's see if we can make
it sound any better. The second way I'm
going to try and mix these two tracks together
it's by pressing play on the track Wow as the second chorus ends on
the track Light It Up. After the second chorus
on the track Light It Up, there is a bridge between
chorus 2 and the outro that just consists of baseline and a slight bits of vocal. Let's have a listen to that. Just here as chorus 2 ends, I'm going to mix the track in. [MUSIC] It's this section here I'm going to mix
the track Wow in, and I'm going to do
it like a dance mix at the crossfade over to the left-hand side and do a base swap in the
center of the mix. Let's have a listen to
see how that sounds. [MUSIC] Now that mix does sound good, and again, it's
technically correct. However, for me,
it can still take too long to get into
the next track. The reason why I've shown you these mixes is to show you that mixing hip pop and R&B is
not like mixing dance music. That style of mix that
we have just done would be good for dance
music because when mixing dance music it's more orientated around the
music and sounds. However, mixing hip-hop and R&B is not all about
the music and sounds. It does obviously play a part, but mixing hip pop and R&B has more to do
with the transitions between the vocals and lyrics rather than the
music and sounds. This is because the vocals
on the lyrics of a hip hop and R&B track play more
of an important role. For this reason, when mixing
hip pop and R&B is going to have to be a lot faster
and punchier style of mixing. It should ideally go
from the vocals of one track straight to the
vocals of the next track, as well as switching the
sounds in the background. This time what we're going to do is mix the intro of the track Wow over the top of the chorus
of the track Light It Up, which means to time this right, we will have to press
play on the track Wow at the start
of the chorus of Light It Up and then mix out of the track Light It Up at
the end of the chorus. After the chorus, the
audience will generally be expecting a new verse anyway. The transition into
the other tracks first should fit pretty well
when doing the mix. During the mix,
we're still going to do base swap in the
middle of the mix to avoid any clashes up significant
sounds and baselines. Let's see how that sounds. I'm going to start
the track Light It Up just before the second chorus. Then just as the
second car starts, I'm going to press
play on the track Wow. Crossfade all over to
the left-hand side. Both tracks beats sync up, and let's have a listen to that. [MUSIC] As you would hopefully
agree there, that makes sense a lot
better and will keep the audience's attention a lot more and keep
them entertained. It's still avoids any clashes of significant signs of baselines,
vocals, or melodies. Now the good news
is, pretty much all hip hop and R&B
tracks that are DJ friendly are structured
in the same way as this, with one phrase of intro
and one phrase of chorus. This means that most
hip pop and R&B tracks when mixed this way will generally fit
together perfectly. I would say that this
style of mixing, where we mix the
intro of one track over the top of the
chorus of another track would be the most simple
and effective way to mix hip hop and R&B. This also means that
you don't have to wait until the end
of the track to mix. You can always
choose to mix out on the first chorus or
the second chorus. This means that if the track
isn't going down to well, you can always mix out of it
early into another track. For example, what
I'm going to do now is mix out of the track Wow and back into the track
Light It Up with the same technique. Let's
have a listen to that. I'm going to put the track Wow just before the first chorus. Then press play on
the track Light It Up at the starts of chorus 1. [MUSIC] That you have it. That is the most simple
and effective way to mix hip hop and R&B tracks
together when you have DJ friendly tracks with
intros and outros. Let's move on to the next video.
63. Hip Hop and R&B Mix 2 - Mixing In: Now, we have established that
you can mix the intro of a new track over the top of the chorus of an over
track already playing. There can be
different ways to mix the new track in over
the top of the chorus. In the previous video, we did more of a dance
style mix where we faded the new track in
slowly with the cross fader. Then did a bass swap
and then faded to the other tracks slowly with
the cross fader as well. But as we have mentioned, mixing hip pop and R&B is a lot faster and
a punchy style of mixing compared to the more progressive
and smoother style of mixing dance music. So this time what
we're going to do is mix the new tracking
a lot faster, so it has a lot more
impact in the mix. We can do this by hitting play on the track that
we're bringing in next with the cross fader already over slightly
towards the middle. This way, the new track
comes in straight away and should have more
of an impact in the mix. I'm going to show you
an example of how to do this with
these two tracks, and this time instead of staying in the cross
fader all the way over to the left-hand side
and slowly fading it in, I want to start a bit
just next to the center. Let's have a listen to this. [MUSIC] So as you can hear then, as soon as the chorus starts, the next track comes in with a lot more impact straight away. Now, depending on how
loud and how much impact you want to have the new track coming in will depend on how far over you want
your cross fader. If you want something
to sound equal, you want to have it directly in the center of
the cross fader. If you want it to only
have a slight impact, you can put it a quarter
away across the cross fader. This all depends
on what traction mixing and what impact
do you want to have. However, when doing
this style of mixing, we have to remember to avoid any clashes of
significant sounds. So if I either want
to do a bass swap at the very start of the mix or
in the middle of the mix, depending on your
preferred style of mixing. So the first option would be to start the track you're
mixing next with the low-frequency
equalizer all the way down and then switching them
in the middle of the mix. All to have more impact, you may want to bring
the track you're bringing in next with full bass and turn the bassline down on the track you're
mixing goes off. So I'm going to
show you these two different styles of mixing now. For the first one
I want to start with a cross fader
over slightly, and the bassline
on the truck that I'm bringing in next
all the way down, and then doing a bass swap in the middle. Let's have
a listen to that. [MUSIC] Then this time what I'm
going to do is start the new track with the
bass all the way up and turn the bassline down
on the track I'm mixing go top just before
the chorus starts. Let's have a listen
to that. [MUSIC]. So I'm just going to
quickly show you them two styles of mixing again, where we bring the
track in a lot faster with more impact, with a different track on
the right-hand side now, to give you a
different perspective. The first one, I'm going
to start with the bassline down and then switch them in the middle and
the second one, I'm going to start with the
truck I'm bringing next with the full bass up and turn
the bass down on the chorus. So let's have a listen to that. [MUSIC]. This one we
have the bass diode on the truck coming in next. [MUSIC] Then this time for the last mix of this video, I'm going to bring the
track in with the bass fully up and turn the bass down, so it just before the chorus of the track
I'm already playing. Let's have a listen to that mix. [MUSIC]. So there you have it. Now you have three different ways to mix in a track when doing
a hip hop and R&B mix. You can fade it in slowly and do a bass swap
in the middle, like a dance mix that we did in the previous video or you
can bring it in straight away with the bass
down and then do a bass swap in the middle
of the mix or you can turn the bass down on the chorus of the truck already
playing and have the full bass of the intro of the new truck come
in straight away. These will all depend
on what tracks you are mixing and what impact you want to have
whilst you are mixing. Now we have looked at
the different ways of bringing a track in. In the next video, we're going to look
at different ways of mixing a track out. See
you in the next video.
64. Hip Hop and R&B Mix 3 - Beat Juggling In: In this video, I
just wanted to add another quick way of mixing a track in using beat juggling. Using either one of those
techniques that I've shown you in the last
video of starting the track in with the crossfade already in the
middle and the base already up or down you can also beat
juggle the track in, so the audience expects
to track to come in. Let me just quickly show you
what I mean with this mix. This time instead
of pressing play, what I want to do is beat
over with a track in, I want to turn to track down
on the left-hand side on the base and let the
track that's coming in next coming with
the base fully up. Let's have a listen to that. [MUSIC] They have it. I just wanted to add a quick
video on just how you can beat juggling a track as well when mixing in hip hop and R&B. You can use the same
patterns that I've shown you in the beat juggling
section of the course and also including the DJ
music-pack to practice to hip hop and R&B tracks with just beats to practice
your beat matching. Try that style of
mixing and have a bit of fun beat-juggling
all tracks in as well. See you in the next video where I'll be showing
you different ways of mixing out of the
hip hop and R&B trucks.
65. Hip Hop and R&B Mix 4 - Mixing Out: Now we have looked at
the different ways to mix a track in. In this video, we're
now going to look at the different ways on how
we can mix a track out. So far, we have just
gradually faded the truck out that was already playing
by using the crossfader. As we have mentioned,
mixing hip-hop and R&B can be a lot faster
and punchier to mix with. Now we're going
to take a look at a few more ways how
we can mix out of a track to have more of an impact on the track
that's coming in next. The first way we're going to mix is that we're going to set a shot two-beat loop within the chorus just before
we mix the track out. Let me show you how
to do that mix. I'm going to start the
track, Light It Up just before the second chorus. Then just before I mix out
the track Light It Up, I'm going to set
a two-beat loop. Hopefully what this
will do is add a little extra anticipation to the mix and add more impact to the track that's coming in next. Let's have a listen to that. [MUSIC] As you can hear that, it can build up some
extra anticipation for the track coming in next. Also because you're disrupting the natural flow of the tracks
chorus by using a loop, the audience will then
expect to mix and also expect the music to
change to another track. Now we can also add
spin back into this mix to add even more impact to
the track coming in next. Just before the lyrics of the next track is
going to come in, we're going to add a spin back. I'll show you how that sounds. [MUSIC] As you can hear that on the last couple of beats of the mix, I just did a quick spin back, and as soon as the
spin back ended, the vocals in the
next track came in. Now another way we can do
this type of mix and have a similar effect
is to exit the mix earlier with a
two-beat echo effect. You can set the echo
effect to two beats on your DJ controller or
in your DJ software and apply the echo effect to
the track you want to mix out of a few beats before
the next track comes in. For example, here, I can open up the effects option
on the DJ software, and on my release effects on
the DJ controller just here, I have the echo effect
setup to two beats. Now when I apply
this release echo, it will echo two beats. Let's have a listen to that mix. [MUSIC] As you can hear though, at the same part of the track, I applied the echo
effect for two beats. The only downside to
that is you cannot do a spin back once you've
set the echo effect. To take this a step further, we're going to go back
to setting a loop. We can set the two-beat
loop earlier in the chorus and then reduce the loop down to create more anticipation. This time we're going to
start with a two-beat loop first and then reduce
down to a one-beat loop, and then further to a
half a beat loop and then do a spin back out just as
the next track comes in. Let me show you what
I mean on this mix. [MUSIC] As you can hear though, setting the loop and
then reducing it down and adding a spin back adds a lot more anticipation
to the mix and more impact for the
truck coming in next. There you have it. You now have four different ways to exit a
track during a hip hop mix. You can fade the
track out gradually using the crossfader just
like with the dance mix, you can use a
two-beat loop within the chorus and then
spin back at the end. You can use an echo effect with the chorus with two beats, or you can use a two-beat loop earlier within the
chorus and then reduce the loop
down and then add a spin back at the end also. I'm going to show you one more
mix the other way around. This time I'll mix
light it up into wall just to give
you another idea of how you can use
these techniques. Then we'll move on
to the next video. Let's have a listen
to that. [MUSIC]
66. Hip Hop and R&B Mix 5 - Changing BPM's: In this video, I'm going to show you one way in which you can mix two tracks together that are
different BPMs and speeds. This is often one of the most common questions
that I get asked. I'm happy to be doing a
few videos on this topic. Firstly, we are going
to be going from a slower track to
a faster track. We are going to be playing
Whats Poppin first, which is 72.5 beats per minute, and then mix into Rockstar, which is 90 beats per minute. Now, we can't just do a normal
mix because we would have to change one track speed to match the other track speed, so we will end up with either a track that is
going far too slow, or a track that is
going far too fast, which either way
won't sound great. We have to find a way
to mix these two tracks without them sounding bad
or off to the audience. Firstly, when doing
this type of mixing between tracks that
have different BPMs, we want to put the pitch
range on the track we are mixing out
of set too wide. Our standard is usually
put to plus 6 or plus 10. As you can see here, just
in green on the circle, it says plus 6, so I'm just going to
change this too wide, so I'm just going to click
it until it says wide. You should be able to do this
on your controller as well. What this does is it
allows you to change the track speed at
a bigger range, allowing you to make the track a lot faster and a lot slower. For example, now if I move the pitch fader all the way up, it can go all the way to 145. But if I just put it on plus 6 and then move the pitch fader all
the way up to the top, it's only going to go
to 76 beats per minute, so it gives you a lot
bigger range to play with. When using this type
of DJ technique where you have to make big
changes to attract speed, you also want to make sure
that the master tempo is switched on and
activated on record box. Just here in red, you can
see some small letters that say MT on this side
and on that side, this is the master tempo. When it is red, it is activated. It is also known as a key lock, as it is called on Serato. We have covered this
in a previous video towards the start of the course, but what this does is it stops the track from going squeakier or deeper when doing big
changes to the track's speed. It keeps the track
at the same key no matter what speed it's going. For example, I'm going to
play this track Whats Poppin, and then change the speed of
the track and listen to how the key of the track doesn't change with master temper on. [MUSIC] The speed changes
but the key doesn't. This time, I want to press
"Play" again and turn the master tempo
off and listen to how the vocals go squeakier. [MUSIC] As you can hear that, the master tempo is very important when doing
this style of mixing. Now, what we want to do is find a part in the
track that we are mixing out off that
wouldn't sound bad being looped
over and over again, preferably for two
beats or four beats. This will work best
with an isolated vocal, so the less sound is the better. Which means you want to loop a vocal that doesn't
have any bass, melody, or percussion
included with it. It also helps if the loop is the last two beats or the
last four beats of a phrase. Now, if you cannot find
an isolated vocal, you can use the
low-frequency equalizer to cut the base side of
the track if needed. As we can see here in the track, there is a greeny blue section, and as we know from the colors, it means it won't have
very many sounds and it could be potentially
vocals by itself. What I want to do
is try and loop the last few beats
of this section and see how that sounds. [MUSIC] As we can hear that, that is a complete vocal, so it is like a short
sentence that we can keep looping that
doesn't sound too bad. We're going to use this
part of the track. Now, when this truck is playing, when it gets to this part, we're going to loop these
two beats ready for the mix. What I'm going to do just for the point of this mix is just set a hock you here
saying loop two beats. [NOISE] Now, when I get
to this point here, I know this is the
point where I want to loop two beats
just for this mix. Once we have looped
this part of the track, we are then going to
increase the speed of the track to match the speed of the track we want
to bring in next, which for this example
will be Rockstar. Then we'll mix the
track Rockstar over the top of the loop. I want to show you that mix now and let's see how that sounds. I must mention that
whatever track is playing should be
the master tempo. That means whenever
you use beat sync, the track that is not
master tempo will change its speed and BPM to
match the master tempo, which is good for this mix
because this will then go from 90 BPM to 72.5 BPM, and then we can increase
the speed on the track Whats Poppin to much 90 BPM, then press "Play" on this track. I'm now going to
press "Beat Sync" on both tracks and the track
Rockstar has now gone to 72.5. When doing this type of mix, make sure you're familiar
with your sync buttons on your personal DJ controller
and DJ software that you use. I have been guilty of it myself previously when I've used
different equipment where I've used beat sync wrong and
the track that has been playing out to the
audience has all of a sudden jumped
to a different BPM when I try pressing
the beat sync buttons. You do have to be
careful when doing that. Have a listen to this
mix, see what you think. [MUSIC] As you can hear though, I also started reducing the loop down at 16 beats
and at eight beats, and then at four
beats left before the next truck came in, just as I've shown you
in previous videos. Now, the reason why
we use a loop when changing the track to a
different speed and we do not just speed the track up as
it's playing normally is because using the loop disrupts the track's
natural flow, and lets the audience
know there is going to be a change in the track
and change in the mix. It can also add some
extra anticipation for the audience to
what's coming next. If we didn't use a loop, the track would just
be increasing in its speed and it'd sound
really off to the audience. It'd sound like there
is something going wrong with the track
because they are not used to the track
being played at that speed and
changing as it is. Using a loop sounds
more deliberate like you're meant to be doing
it during the mix. Also, when using a loop to
mix between two speeds, the loop acts like a bridge
between the two tracks. Track 1 plays in
its normal speed then the loop does
the speed change, and then Track 2 plays at
its normal speed as well. That means that both
tracks are playing at their normal speed and it's only the loop that
changes speed. This is a mixing technique
that can also be done from a hip-hop
track to a dance track. Here now on the left-hand side, we have the track Light It Up, which is at 100
beats per minute, and on the right-hand side, we have to track Sexy Chick, which is 130 beats per minute, which is a dance track. Firstly, we're going
to find the parts of the track that we're
mixing out of that has an isolated
vocal and doesn't sound bad or incomplete
when looped. Again, it helps if it's
the last two beats or four beats of a phrase. We're going to have a look
at the first chorus here, then have a listen to the last
four beats of the chorus. [MUSIC] What we're going to do is use these last four beats of
chorus one as they are isolated vocals with
no baseline melody or percussion with them and it's the last four beats
of the phrase. I'm going to do the
same mix again, and let's see how that sounds. I have the track on
the left-hand side here set to wide on
the pitch range, it is the master deck, so it won't change speed when
I press the sync buttons, the track on the right-hand side will change speed instead. Now, currently, it's at
130 beats per minute. I want to press both
the sync buttons, and now the track on
the right-hand side has gone to 100
beats per minute. Master tempo is on
both tracks as well to avoid the tracks going
squeakier or deeper. Let's have a listen to that mix. [MUSIC] As you can hear that, we did the same DJ technique. We looped the four beats
at the end of the phrase, gradually moved up the
pitch slider until it got to 130 beats per minute, then hit "Play" on
the track Sexy Chick, which came in with a good
beat and a good baseline, and then reduced down
the loop after 16 beats, then after eight beats, and then after four beats,
and then span the truck out. This DJ technique generally
works better going from a slower BPM track to
a faster BPM track. This is just because
tracks don't sound as bad going faster and
increasing the intensity. But if you were to
slow down a track, it can sometimes sound worse
going slower and it may lose the energy and the momentum that you've gained
from the audience. It can sometimes sound off
by dropping down speeds to a slower track when
the audience are used to a faster speed
and a faster track. As well, it is worth noting, you also don't want to be doing a mix like this
every single time. You only really want to
be doing big changes in speeds now and again
when you have to. If you can, you
ideally want to be gradually increasing
your overall speed and BPM throughout your set by
playing tracks that are only slightly faster than
the previous track as you progress
through your set. You ideally want
to be jumping up small increments of
BPMs every track, rather than large jumps in BPMs. For example, it's better
going from a track at 72 BPM to 75, then to 80, then to 85, and then to 90 rather
than going straight from a 72 BPM track to
a 90 BPM track. That way you can slowly increase the speed and BPM of your tracks whilst it's playing without the audience noticing
any big differences. That being said, if you do
need to jump bigger BPM gaps, you can use this DJ
technique to do so. What I'm also going
to do is show you a couple more ways
and techniques to mix between BPMs in the next few videos.
See you there.
67. Hip Hop and R&B Mix 6 - Acapella Bridge: In this video, I'm going
to show you how to use an acapella bridge to mix
between two different BPMs. We have used an acapella
bridge to mix between two tracks before in the
dance section of the course. It's the same technique, but as the acapella loop
is playing by itself, in the middle of the bridge, we can change the BPM to
match the next track. When using an acapella loop, you want to start
the acapella just as the vocals and on the track
you want to mix out off. Then you want to end
the acapella loop as the vocal style on the next
track you are mixing in. You want the acapella
loop to mix into the track that is currently
playing for one phrase, then you want to play
the acapella loop by itself for one phrase, which during that time you're
going to increase the speed of the loop and get the next
track ready and loaded up, then you want to
mix the intro of the next tracking
over the top of the acapella loop
for one phrase. All together, it's going
to be a three-phase mix, with something different
happening every phrase. Let's have a listen to that
and I'll talk you through it. Firstly, we're going to
start off with the track on the left-hand side on
Deck 1, What's Poppin. This track is at 72.5
beats per minute. Then we're going to mix in the acapella loop of Music
Makes You Lose Control. This acapella loop is
at 71 beats per minute, and then we're going to increase it to 90 beats per minute, and then mix in on the left-hand side on Deck
1, the track Rockstar. We're going to go
from What's Poppin, to the Acapella Loop,
back to Rockstar. As you can see here as well, the track loop we're
going to be playing first is going to
be the master deck, so the acapella loop will change its BPM to match this track
on the left-hand side, and we've also got the pitch
range as wide on the track on the right-hand
side because this is the one we're
going to be changing. Both tracks have master
tempo activated. What we're going to do now
is beat-sync both tracks up. As you can see, the acapella loop now
has changed to 72.5. Let's have a listen to that
mix and see how it sounds. [MUSIC] So just as the [inaudible] I'm going
to start the acapella loop. Then over one phrase, I'm going to move
the cross-bedder across to the other side. Now, because it is a solo track, the phrases take a bit longer. Now I'm going to
take the next track ready and load it up, and then change the
BPM on the right. Then to start the next phrase, press "Play" on the truck
on the left-hand side. Now over one phrase
played the acapella loop. Then add a beat of
the sampler effects. There you have it.
That is how you can use an acapella loop to mix between two tracks
of different BPMs. I'm going to do that one more time for
you without talking through it so you can have
a listen and watch fully. [MUSIC]
68. Hip Hop and R&B Mix 7 - No Intro Hot Cue Jump: In this video, we're
going to look at one way in which we can mix Hip Hop and R&B tracks that have no intro specifically
made for deejaying. For example here on
the left-hand side, we just have the original
version of the track, Light It Up, so it's
not the introversion. Let's have a listen
to the start. [MUSIC] As you can hear that it goes straight
into the melody on the vocals. I'm going to show you
a way in which you can mix this track into another track by using a different section of
the track as the intro. Now we have done a
similar style of mix in the dance
section of the course. Where you can use
a different part of the track as the intro and then hot cue jump
back to the start of the track at the
end of the mix. We're going to the same type
of mix with this track. Firstly, we will want
to find a part of the track that best
resembles an intro. A part of the track
that hopefully just has some percussion and bassline and doesn't have
any vocals or melody in it. This can usually be found in the outro towards the
end of the track. Even though non-DJ
friendly tracks don't have a proper
intro to mix with, they can still often
have some form of outro you might be able to
use to mix with instead, even if it's only eight
bits or 16 beats, you can still use a
loop to mixing with. For example, let's have a listen to the end of this track. [MUSIC] We should be able to use the
end of that track there. Now, I'm going to use
the last 16 beats instead of the last phrase, because the second
part of that phrase, the vocals answers prominent. I'm just going to set a loop on that part of the track just now. [MUSIC] I'm just going to set that loop on the
performance parts as a hot cue. Then what we're
going to do is go back to the start of the track, and set to hot cue just here. Then at the end of the
mix, using that loop, I can jump straight
back to the start of the track and play
the first verse. [MUSIC] What I'm quickly going to do now on the track on the right-hand side is just highlight the choruses so
we know where we're mixing. Now we have the
choruses highlighted, we've got chorus 1 here at the start and then chorus
2 towards the end. For this example,
I'm going to mix the outro over the chorus 2. I'm going to have
to loop it twice to make sure it makes
a full phrase. You can use any style
of mixing that I've shown you throughout this
section of the course, bringing the tracking straight
away with the base down, and then doing a base
swap in the middle, or bringing the tracking
straight away with the base up and having the base down on the track that's
currently playing. I'll leave that up
to you to decide. I'm just going to quickly
show you how to use the loop at the end
of the track and use the hot cue to jump
back to the start of the track during the mix.
Let's have a listen to that. [MUSIC] Now as you could hear that, the track Light It Up did have some slight vocals
at the end of it. But if you don't have
a DJ-friendly track, you may just have to
work with what you've got and do the
best that you can. Or if you really want it to, because the outro of
the track Light It Up does have some
slight vocals in, you can make it a little
longer mix and put the outro of Light It Up over
the outro of the track Wow. It would be a longer mix but can still work and that's
completely up to you. I'm going to show you
that mix as well. I'm just going to
delete the loop at the end of the
track Lights It Up, set a hot cue just at the last phrase of the
track of the outro. I'll show you a mix using
that one as well and still jumping back to
the start of the track. Let's have a listen to that mix. [MUSIC] You do have another
option though. If you did want to use that, that's completely up to you
and you're on DJ preferences. What I'm quickly going
to do now is just highlight the choruses on
the track, Light It Up. I did the same mix again,
but the opposite way around. Now what I've done
here is highlighted the choruses is on the
track Light It Up. We've got chorus 1 here in light blue and chorus 2 in dark blue. I've also gone ahead and set a 32-bit loop at the outro or the track wall because
it just consists of mainly basslines
and precautions. I've also set a hot cue
at the start of the track where the vocals come in
and the verse starts. [MUSIC] What I'm
going to do now is show you the same mix again, but the opposite way around, according from the track Wow
to the track Light It Up, using the outro to mix
with that first for the loop and then jump into the start of the track
using a hot cue. Let's have a listen to that mix. [MUSIC] There you have it. There is one way that you
can mix a track that has no intro made
specifically for DJ by using the outro as
the intro and using a hot cue jump to get back to the start of the first verse. I'll see you in the next video.
69. Hip Hop and R&B Mix 8 - Drop Mixing: In this video, I'm going
to show you another way to mix tracks together when
they don't have intros, or outros that you
can use to mix with. This technique also
works if you want to change BPMs and you
don't have any intros, or outros to mix with either. The technique we are going
to look at is drop mixing. Drop mixing is
basically when you simply stop the track
you're currently playing and then just press play on the track
that you want to play next. You are just basically
dropping the track in. This is the most basic
form of deejaying. Even though it's
called drop mixing, there isn't actually
much mixing involved. It is not the most
flattering way to DJ, nor is it the most
fun way to DJ either. But trust me, it
works and it can get you out of some sticky
situations as well. We have used the
technique of drop mixing before in the dance
section of the course. But I believe it's even
more relevant when mixing hip hop and R&B tracks for the main reason
of changing BPMs, and that some hip
hop and R&B tracks don't have intros to mix with. Drop mixing is sometimes
your best and only option. The key to drop mixing is to end the track
currently playing at the end of the chorus and then simply press play
on the next track, a significant
moment of the track that will keep the
audience's attention, preferably the start of a verse. For example, what
I'm going to do here is mix of the chorus of Wow, on the right-hand side on deck 2 straight into the verse, and the start of
the track, Light it Up on the left-hand
side on deck 1. I'm simply just going
to stop the track on the right and press play
on the track on the left. Let's have a listen to that mix. [MUSIC] It's as simple as that. Waiting for the chorus to end on the track you
want to mix out of, moving the crossfader over, or stopping the track
and simply pressing play on the significant part of
the track you want to mix in. Now to make this a
little smoother, you can start to
reduce the base and the low frequency
dial a few beats before you stop the track
you're mixing out of. Let's quickly have
a listen to that. [MUSIC] Now to make this mix even smoother and less
of a sudden change, you can also add some
light echo effect on the track that
you're mixing out of. This will then make
the track carry over slightly and make it
fade out a little more, which will make it less
of a sudden change. It's not only good
to have the echo set to a half a beat, or one beat when doing
this type of mix and applying it just before
the end of the chorus. This also works
best when reducing the base and the low
frequency dial first. Then you are not repeating
any baselines in the echo. What I want to do here
now is just open up the effects style
and I'm going to set the echo effect here
just to half a beat. That echo effect is just this dial here in which
is what we're going to use. I'm going to apply
that a few beats before I press
stop on the track. Let's have a listen to that mix. [MUSIC] Now as mentioned, this technique can
also be used to mix tracks that are
different speeds and different BPMs because you're not actually mixing the tracks. They are not going to be playing at the same time as each other. You can do the drop
mixing technique exactly the same and it
should still work the same, even though they
are different BPMs. I actually use this technique
quite a lot during my set. When I want to
quickly change BPMs, or sometimes it's
a lot easier than actually mixing the tracks. Let's show you how this is done. What I'm going to do
here is mix the track Rockstar into the
track, Whats Poppin. Both of these tracks don't
have specific intros, or outros for deejaying with. What I'm also going to do
from this one is mix from the higher BPM track to
the lower BPM track, just to show you
how it can be done. I'm going to go from
the track Rockstar at 90 BPM to the track
What's Popping at 72 BPM. At the end of the
chorus, I'm simply just going to press play on the track on the left-hand
side at the end of the chorus. Let's have a listen to that mix. [MUSIC] That was it that
I've done with just the basic play and stop. This time I'm going to
reduce the baseline and add bits of echo as well. Let's have a listen to that mix. [MUSIC] There you have it. That is how you can
use drop mixing with hip hop and R&B tracks
that don't have an intro, or outro to mix with, and also how to mix two
different tracks at different BPMs if they also
don't have any intros, or outros to mix with. One thing that you
can always remember when deejaying is, if in doubt, echo out. See
you in the next video.
70. Hip Hop and R&B - DJ Mix Demonstration: In this video, I'm quickly
going to mix through the tracks that I've been using in this section of the course. I'm going to show you how
I would progress through these tracks if I was
mixing them live. Now I'm not going
to play the tracks info just for the
sake of saving time, but you should still be
able to get the idea of the mixing techniques
and how to use them. I'm going to start off with
the slowest track first at around 70 beats per minute and then as I
go through the mix, I'm going to build up to
the fastest tracks of 130 beats per minute, as this is how I
would normally do my sets when DJ-ing live. So as you can see
here in the library, I'm going to go from
70 BPM to 90 BPM, to 100 BPM, and then to 130
beats per minute. I find that speeding the tracks up gradually throughout your set has a better effect than slowing the tracks down during your set. This is because
picking up the speed and the BPM throughout
your set will also increase the momentum and energy throughout your
set for the audience. I'm just going to
give you a quick rundown of what I'm going to do. I'm going to start with
a track, What's Popping, and then do an
acapella bridge into Music Makes You Lose Control
and then into Rockstar. I'm going to increase
the acapella loop in the middle to 90 BPM, and then what I'm
going to do from Rockstar to Light It Up, it's just do a drop mix. So I'm going to
go from 90 BPM to 100 BPM by doing a
simple drop mix. Then what I'm going to do
is mix the track Wow into Light It Up by using the
outro of the track Wow, as an intro and jumping to the start of the track
using a hot cue. It's as if the track Wow
doesn't have an actual intro. Then what I'm going to do
is find a loop in the track Wow that is just a vocal
isolated by itself, increase the speed to
130 beats per minute, and then play the track
Sexy Chick over the top, finally ending the mix
on 130 beats per minute. I hope you enjoy
the mix and you can get an idea of how you can mix these tracks during a live set that have lots of
different BPMs in them. Now obviously when DJ-ing life, you're going to have
more than six tracks. So this is going to be more
of a gradual increase, but just for the
sake of the course and for the sake of this mix, I'm going to mix
these six tracks for you how I would do if
I was DJ-ing live. I hope you enjoy it and
let's have a listen. [MUSIC]
71. Congratulations!: Congratulations on completing
the full DJ course. I hope you've learned
some great DJ skills and DJ techniques and I
hope you've come away with a lots of knowledge
and value from the course. I just wanted to
say thank you so much for choosing this course, and I really do hope
you have enjoyed it. I want to wish you all
the best and good luck in the future in all aspects of your DJ journey going forward. I hope you can use all
your new-found DJ skills and I have lots of fun
deejaying and hopefully potentially get
yourself some live DJ gigs and put some great
DJ mixers out there online. If you've not yet left a review, please feel free to do so. It is hugely appreciated and it makes a
massive difference. I always try and
reply to anybody who writes a review
as I believe, if you've taken the
time to write a review, the least that I can do is
respond and say hi back. Once again,
congratulations and thank you so much for choosing
this DJ course. Hope to see you again soon
in the future. Bye for now.
 Jak Bradley, Professional International DJ