Transcripts
1. Introduction: Hello guys. This is her son. As I full Welcome to my class. I will teach you
on the topic and art for beginner
students who can enjoy the art of drawing with just minimum materials
and resources. Is the form of defining your inner beauty towards
the outside world. In the form of drawing. If you get carried away from the beautiful art made
by professionals. But seems complicated
while drawing. Don't worry, I will teach you how to draw
freehand style of different types of
Sainsbury's and drawings with the help
of pencil shading. Drawing and art creates wonder for an
artist's imagination. It summarize the art and
artists pills around. If you want to learn and enjoy your inner soul for
practicing the art, then here you come. This class will definitely be
benefit for the beginners. Are the kids who are fond
of art without any due. Let us start our class. In this class, the topics
which will be covered. Our first material
required for the drying. Second, until shedding
of freedom Bird Code, then till shedding of hand with butterfly for pencil shading, beautiful flower, until shading
of moonlight and sunset.
2. Material Required: Let us first build up with
our materialistic needs. So the first question will be, what are the materials required to start the art
of pencil shading? By the name of the topic,
suggest better materials? Yes, the main and important
material which we will use for all
the drawing pencil. As an artist to define the
perfection of the art, they use a lot of variety, instrumental resources to bear it a perfect,
beautiful portrait. But with the help of basic
requirements materials, this class will help
you to start your art. So first, the basic
material is pencil until place the basic requirement instrument
in our drawing. As this help us to draw in
a more illustration manner. The good part. It can be erased
easily, but it is. So we have an option in our unconscious mind that things don't fail if
something went wrong. Also, you can use pen benzyl for the outline because it gives a solid shape
for the drawings. Second item we need is eraser. And the third item is booked, or A4 sheet or a cardboard or paper as
per your preference. And the last item we required sharpener to blend our drawing
lines to a perfection.
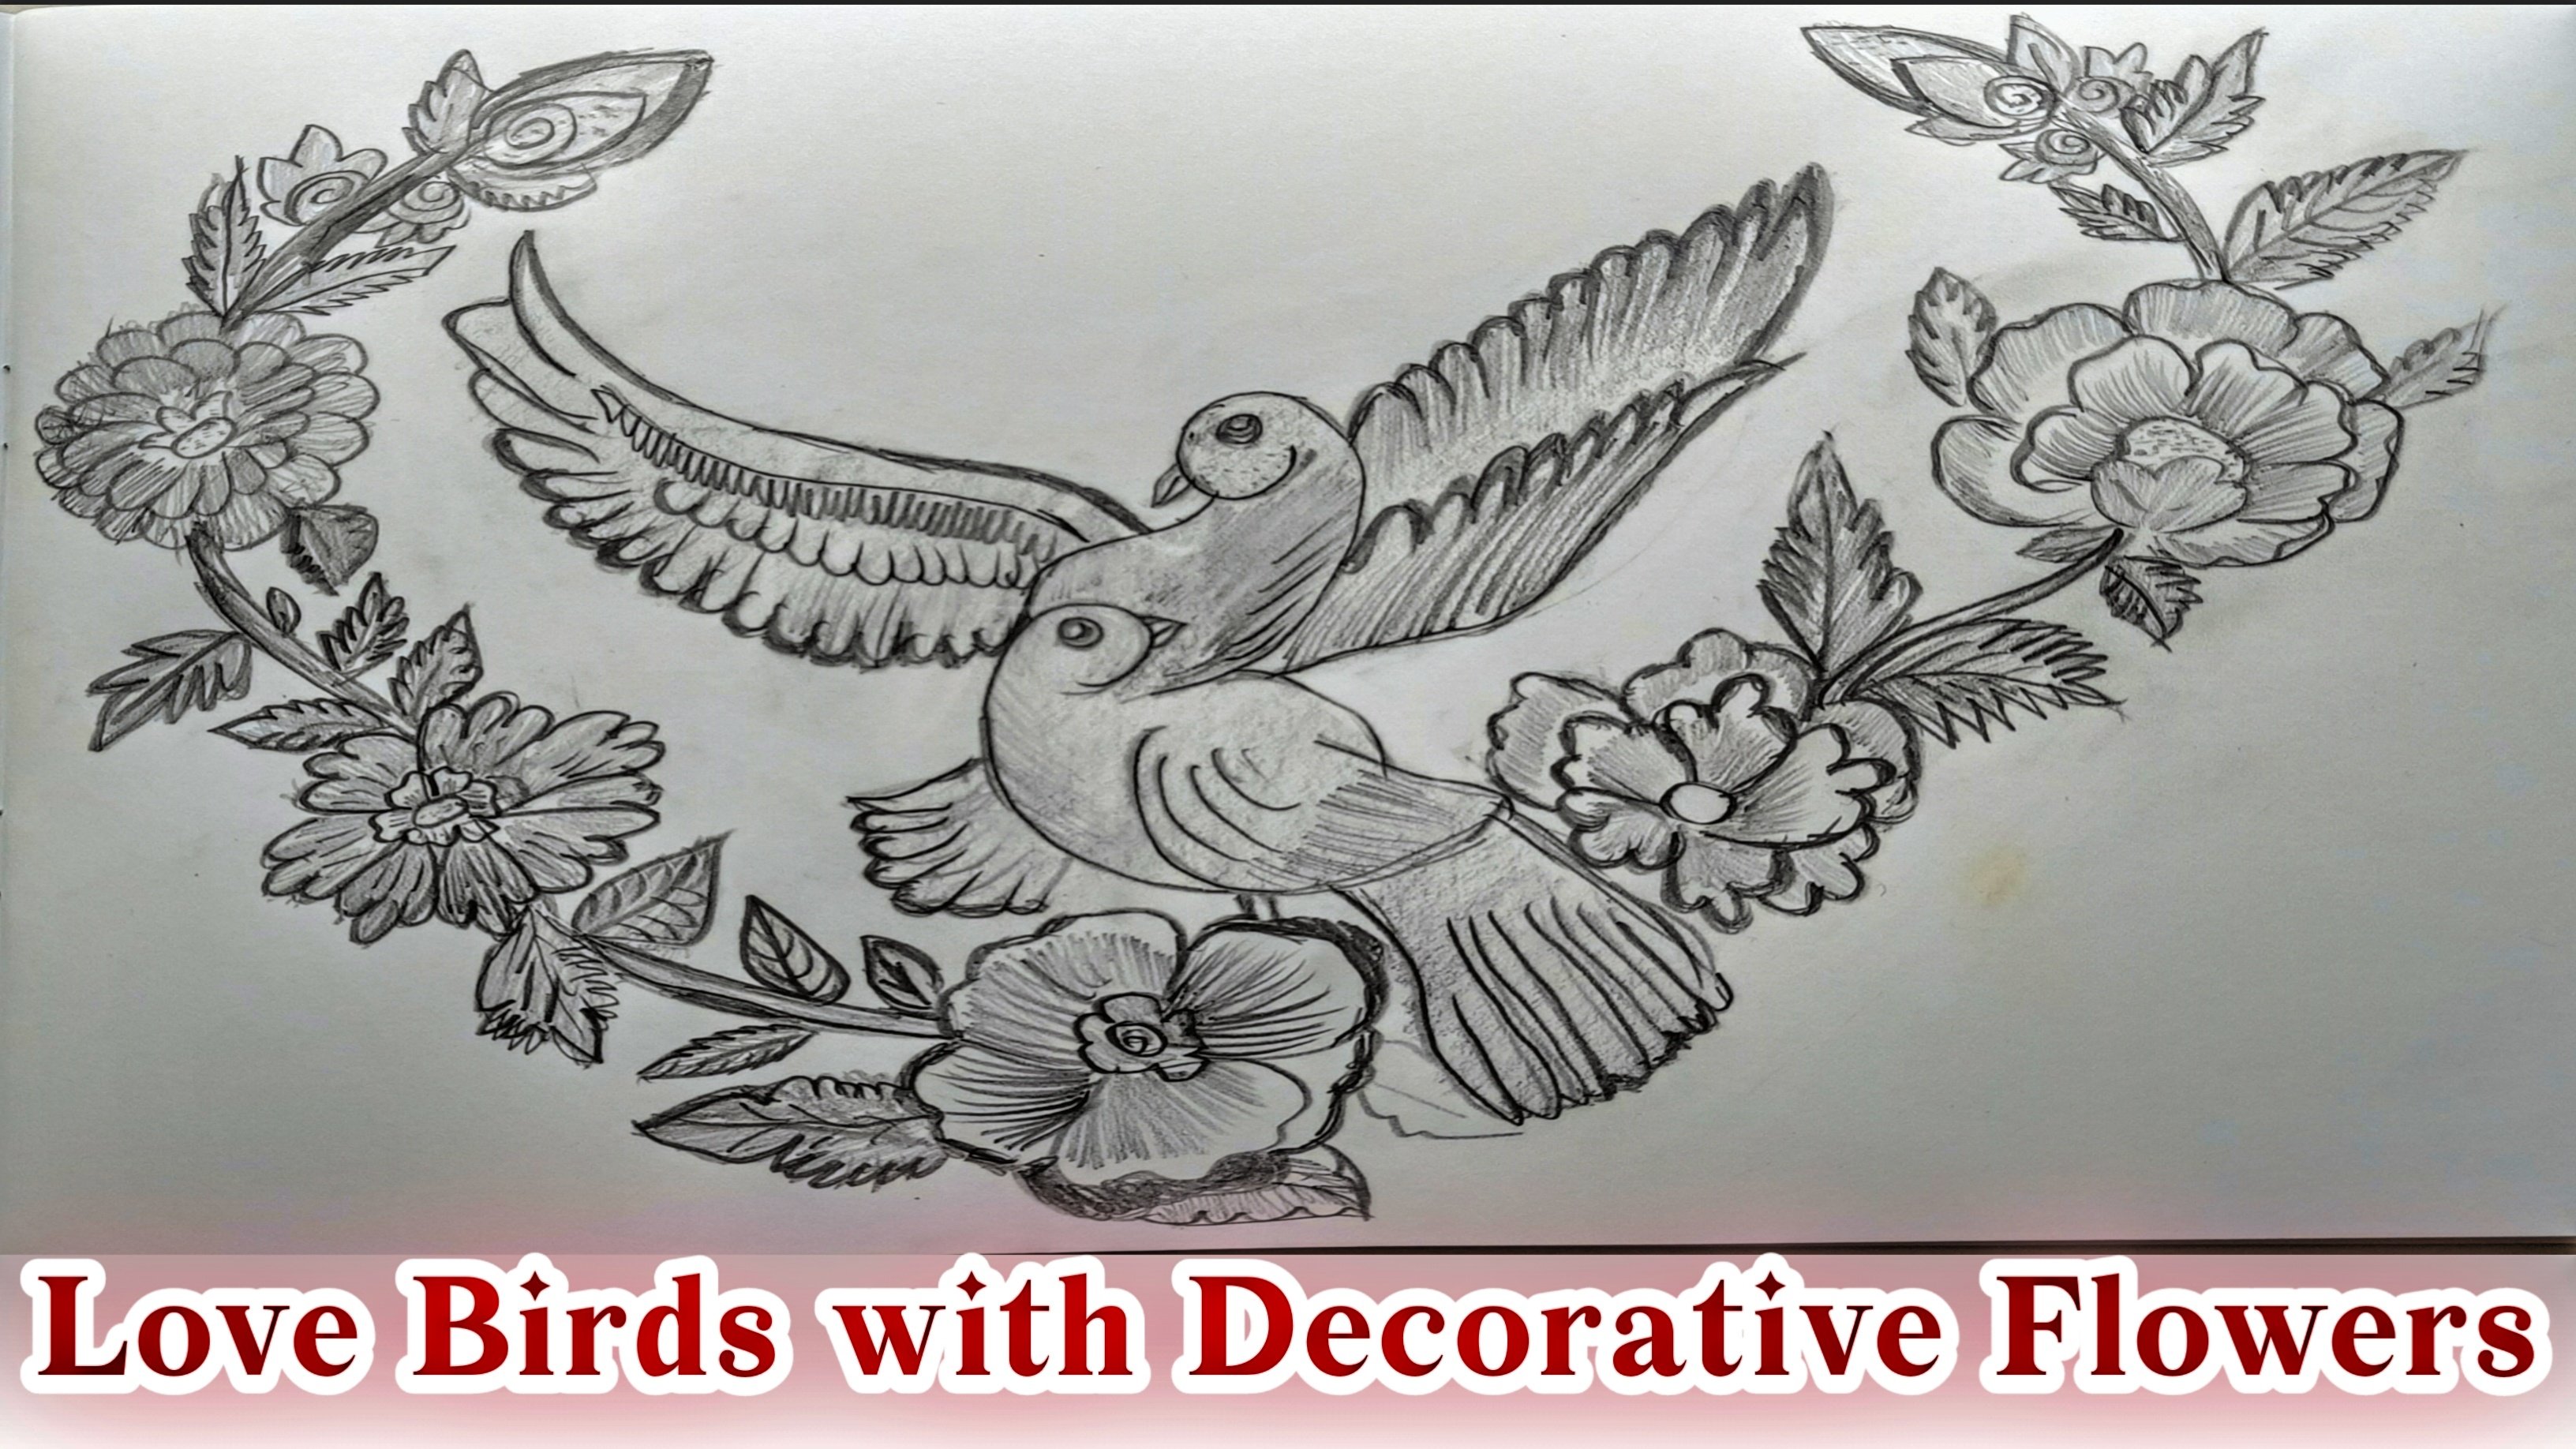
3. Pencil Shading of Freedom Bird: Let us now draw a freedom
bird with the hand. Let us start the outlining
the pencil shading work. I have illustrated a drawing where I have selected
the freedom bird, which is being joined
debt towards the hand. Let us now start by drawing
the neck of the bird. From that down to its peak. Let us draw beautiful
face of the bird. Let the peak be a
little bit sharper. Now, draw the lower
part of the body of a bird and join the lower
body to the beak of the bird. Now we have completed the
lower part of the bird. Then let us adjust
the neck of the word. Draw the small eye of the
bird by protein, small dots. Let us now draw the banks of
the world where we have to draw the curved line
from downward to upward and upward or downward. So at the initial
stage of sketching, you can try to segregate
the parts of the wings, where you can put the sharp edges towards
the wings of the bird. So we have completed the
first string of the bird. Let us know. We'll do the second thing. Let us know the second
week of the word. The second thing is being
drawn beautifully by holding the free hand style
where you can tie it up. So make the veins in such a way that it
becomes the leaf shape and then try to draw the
curved line one after another. And tried to take it
to the innervates. So one of the advantages
of the pencil shading, you can always write to arrange the mistakes so that it
gives a definite shape. The drawing. Now, let us go to detail. Let us draw the tail from
the bottom of the part. Here. You can draw
the tail by joining the second wing and
lower part of the body. After completing the
wings of the bird, let us now draw the
tail of the bird. So let us highlight detail
by segregating into deforms. Draw the line inside detail. Even. You can add a
bit of a tail to it. So by this, we can say that we have completed
our pencil sketch of the word. Additional duties. You can also add some things
like a bird hitting Delete. So now let us draw the
leaf with three petals and try to share the list by drawing lines inside the leaf. The leaf inside the
mouth of the bird. Draw another leaf to the stem. You can also add the
flour instead of leaf. Draw small lines inside the leaf so that it
looks a perfect list. Give dark outline to the leaf. Here. They have completed. The bird was scaring the leaf. Now, let us now proceed
by trying her hand. There. It is set as free. Freedom bird, which is set
free through our hand. So let us try to draw a hand. Hand is the difficult part, but I will teach you how
to draw in a easy way. So first tried to draw
up the small finger. First finger. Then you can also try for the second finger. Draw continuous line till the end as it
completes the finger. Then add to the
end of the finger. Then try to draw the, another finger pointing towards the freedom hand as
your third finger. So let us consider
the forefinger, ******* behind the bird. Now, let us draw
the another finger. This finger. Let us also consider that
it is being set as a free. Now, draw the edge
of the finger, which is moving downwards. Now add to it, has it completely finger. Let us draw the, another corner of the hand. Draw a curved line
which joins the hand. Let us erase the extra lines being drawn to
avoid the mistake. Now, let us draw
the last finger. Finger, which is being
available to set very broad. It can finger in
between of the hand, add a small label to it. Now we have completed the hand. You can also add more
features for detail. Now, I'm trying to add under
step of additional detail. As you know, the bird will
have many feather to detail. This will give a
highlight detail as it will feature the Double Feature
Layer tail at the bottom. Now let us shared detail. First, we will outline
detail with the pencil. So here we have
the final picture. There you can see freedom
bird with the hand. Let us now draw the
outline of the drawing. Let us start by
shading the word. First. To shade this crime, let us try to give a
minimum touch by using different pencil
for that shading. Let us use a different pencil. So let us now give shading
to the bird scale. I will share the inner
tail of the bird. The bird use upward, downward movement
for better results. So you can see clearly that
tail has been shaded first. Because whenever
you move from here, it becomes easier for you to share the other
parts of the bird. Try to give light
shade to detail. Let's go to the next part
of the tail by shading. Just move from
alpha to the node. And then inside of it. Try to shade the whole
tail of the bird. So we have completed the
shading the tail of the bird. So now let us go to
the wing of the bird. So first tried to
shade in a light way. You can do this by bending the pencil and try to
give beautiful shading. Shared the corner of the wings. Tried to shade in
a lighter weight. Similarly, you can
also share it. And try to share
the complete bird. Just kill it depends, hill and try to cover the whole bird by
shading like this. Now let us share the
face of the bird. Tried to shade in
the lighter wave. Now, let us try to shed the hand also by
treating the pencil, but also try to keep the minimum shading to the
hand compared to the bird. Give lighter shade hand
compared to the bulk. So no, after finishing this. So let us now shade the
corner parts of the wings. Writer shared with
the same procedure. Unleash it the corner, back up the wings and try
to give the dark shade. The corner part of the right to draw a continuous lines to
the corner part of the savings and gave
it in the darker one. Also give that sharing to
the other wing of the bird. I always try to note that
in a penchant shading, you need to highlight
the outline as it gives more contrast to the drawing and becomes as a
beautiful drawing. As you can see, I am outlining
the savings of the bird. You also try to give
outlines to the wings. So now come to the
downward part of the bird. Here I am feeling with
the dotted pattern of the shading by covering the
whole body of the bird. Kill the neck. You can also follow
the same pattern like drying adopted the
whole body of the bird. Let us now make the outline
a little bit darker. One, do not forget about
the leaf tried to give the minimum shading because we have already here
on texture to it. And also do not forget to
outline within that part. Draw a leaf, a bit darker one so that
it looks attractive. Now, try to again
highlight the part. You can see that I'm trying to outline every part by giving
a highlight towards it. Highlighting the outline
will enhance the wilderness. By giving highlighting
to the bird. It will look more beautiful. Tried to outline the
whole body of the bird. After completing
the highlighting. Now, let us put the hand, the hand we're doing,
minimum highlighting. Let us share a little
bit towards the hand. Tried to give a lighter
shade campaign to the bird. Now, I am going to the nails. Here. I am feeling deniers to
look a bit attractive. Also, you can add
a texture to it. Tried to give a darker
shade to the nails. Yes. You can see the freedom bird with
free hand is ready. Here. We have completed the freedom bird who
is getting the leaf.
4. Pencil Shading of Hand with Butterfly: So let us now move
to Dinesh crime, where we will draw a hand
with a beautiful butterfly. Let's start the drawing. So first, let us draw
with the finger. So you can see I am starting
with the small finger. Then the next one. The third one, makes sure
that for every inch of it, every second hand, you will need to track the big
towards the downward. As we had completed the
drying of three fingers. Let us draw an under finger. Now, let us draw
the index finger. Index finger, which is open. As you can see, the
other fingers are close. Then let us draw. Did come here at time, finger pointing a
bit towards, upward. As you can see, I have
drawn all the fingers. So now let us give some
highlighting by covering it with some t-shirts or dress code where you can add some points. Try to outline the clock. We have completed the hand. Now let us add
some more texture. Draw three to four
small circles. Now, let us draw the butterfly. The butterfly is a
beautiful insect. A butterfly had a face to which it has a tail, then
beautiful wings. Now let us draw the
beautiful wings of the butterfly and continue
to draw another wing. Drag to draw the same veins on the other side
of the butterfly. So you can see, I'm feeling some more details by
drawing the outline. The butterfly. Draw the same line to the
outline of the butterfly. As you can see, I'm crying
the outline of the butterfly. We have completed our
beautiful butterfly. Now, let us draw this small butterfly as monarch butterfly will
always look pretty 1. First, let us make
face and the body, then the wings of the butterfly. So you can make
some adjustments if the body bookshelf of the butterfly becomes
the small one. Let us draw too small. And Bina. Now we have
completed the outline. Let us now try to
start shading this 1. First, let us share the dress. Try to give a lighter shade
by tilting the pencil. And for the hands also tried
to give a lighter shading. Now let us move
to the butterfly. I also recommend for the
butterfly to shed as a half. So you can see how gentlemen, I am trying to fix the shading. So don't put more
pressure for butterflies. Shading. Here also try to give lighter
shade to the butterfly. So try to share in a dedicated way and do
not hurry for anything. Be patient enough to
filling the shedding. After completion of
the large butterfly, let us move to
small butterflies. Monarch butterfly try to
keep a lighter shade. After finishing the shedding. Know, you need to apply
some more texture, which will highlight
the drawing. So you can see I am highlighting the
texture of the drawing. Let us try to pilot a
corner fat after dress. After completing dress, rectus
now highlight the fingers. Hello writing plays
an important role. To fill the areas. Highlighted will give more
attraction to the drawing. Now, let us cube shading
to the small circle. These are some additions
which I have been added. If you want, you can, you can neglect it. So now let us share the
body of the butterfly. As we have heard it that is
now follow the same method. From the outline to the
inside of the butterfly. We will give a darker
shade to do butterfly. Try to draw that line
inside the wins. So what happens when they try to shed from the inside
to the outline? It does not flow
very well for us. So it goes out of the butterfly. Try to shed slowly
and do not rush. Shedding from the
inside will give more texture where we have
pressure here and inside. It becomes a slight thinner one. Continuous lines
from right to left. Now you can add small curved
line one after the another. I am trying to give beautiful
outlined the butterfly. So you can add some
more texture so that it gives a more outlining
and add beauty towards it. So as you can see, I'm trying to add two
wings of the butterfly. So you can see I have given a different texture to all
wings of the butterfly. Now, let us move to the small butterfly where you
can add some texture to it. You can see I'm adding
only the texture inside so that it gives beautiful features
to the butterfly. Try to add the same texture to the other wing
of the butterfly. Now, draw our claim to the butterfly wings
as well as the body. Do not forget to highlight
the events I let him parts. Here's a beautiful texture which will help to enhance the
beauty of the drawing. So you can see I am giving
highlighting the whole part of the butterfly, right? To shed all parts of the butterfly so that it
looks more attractive one. So if you have
made any mistakes, you can modify or erase it. So best part of
the pencil shading is that we can modify or read, is if we have made
some mistakes. With the help of
benzyl, we can read, modify the drying,
my erasing it. So now we have
completed the drawing. As you can see, I have drawn it had a large butterfly
and a small butterfly.
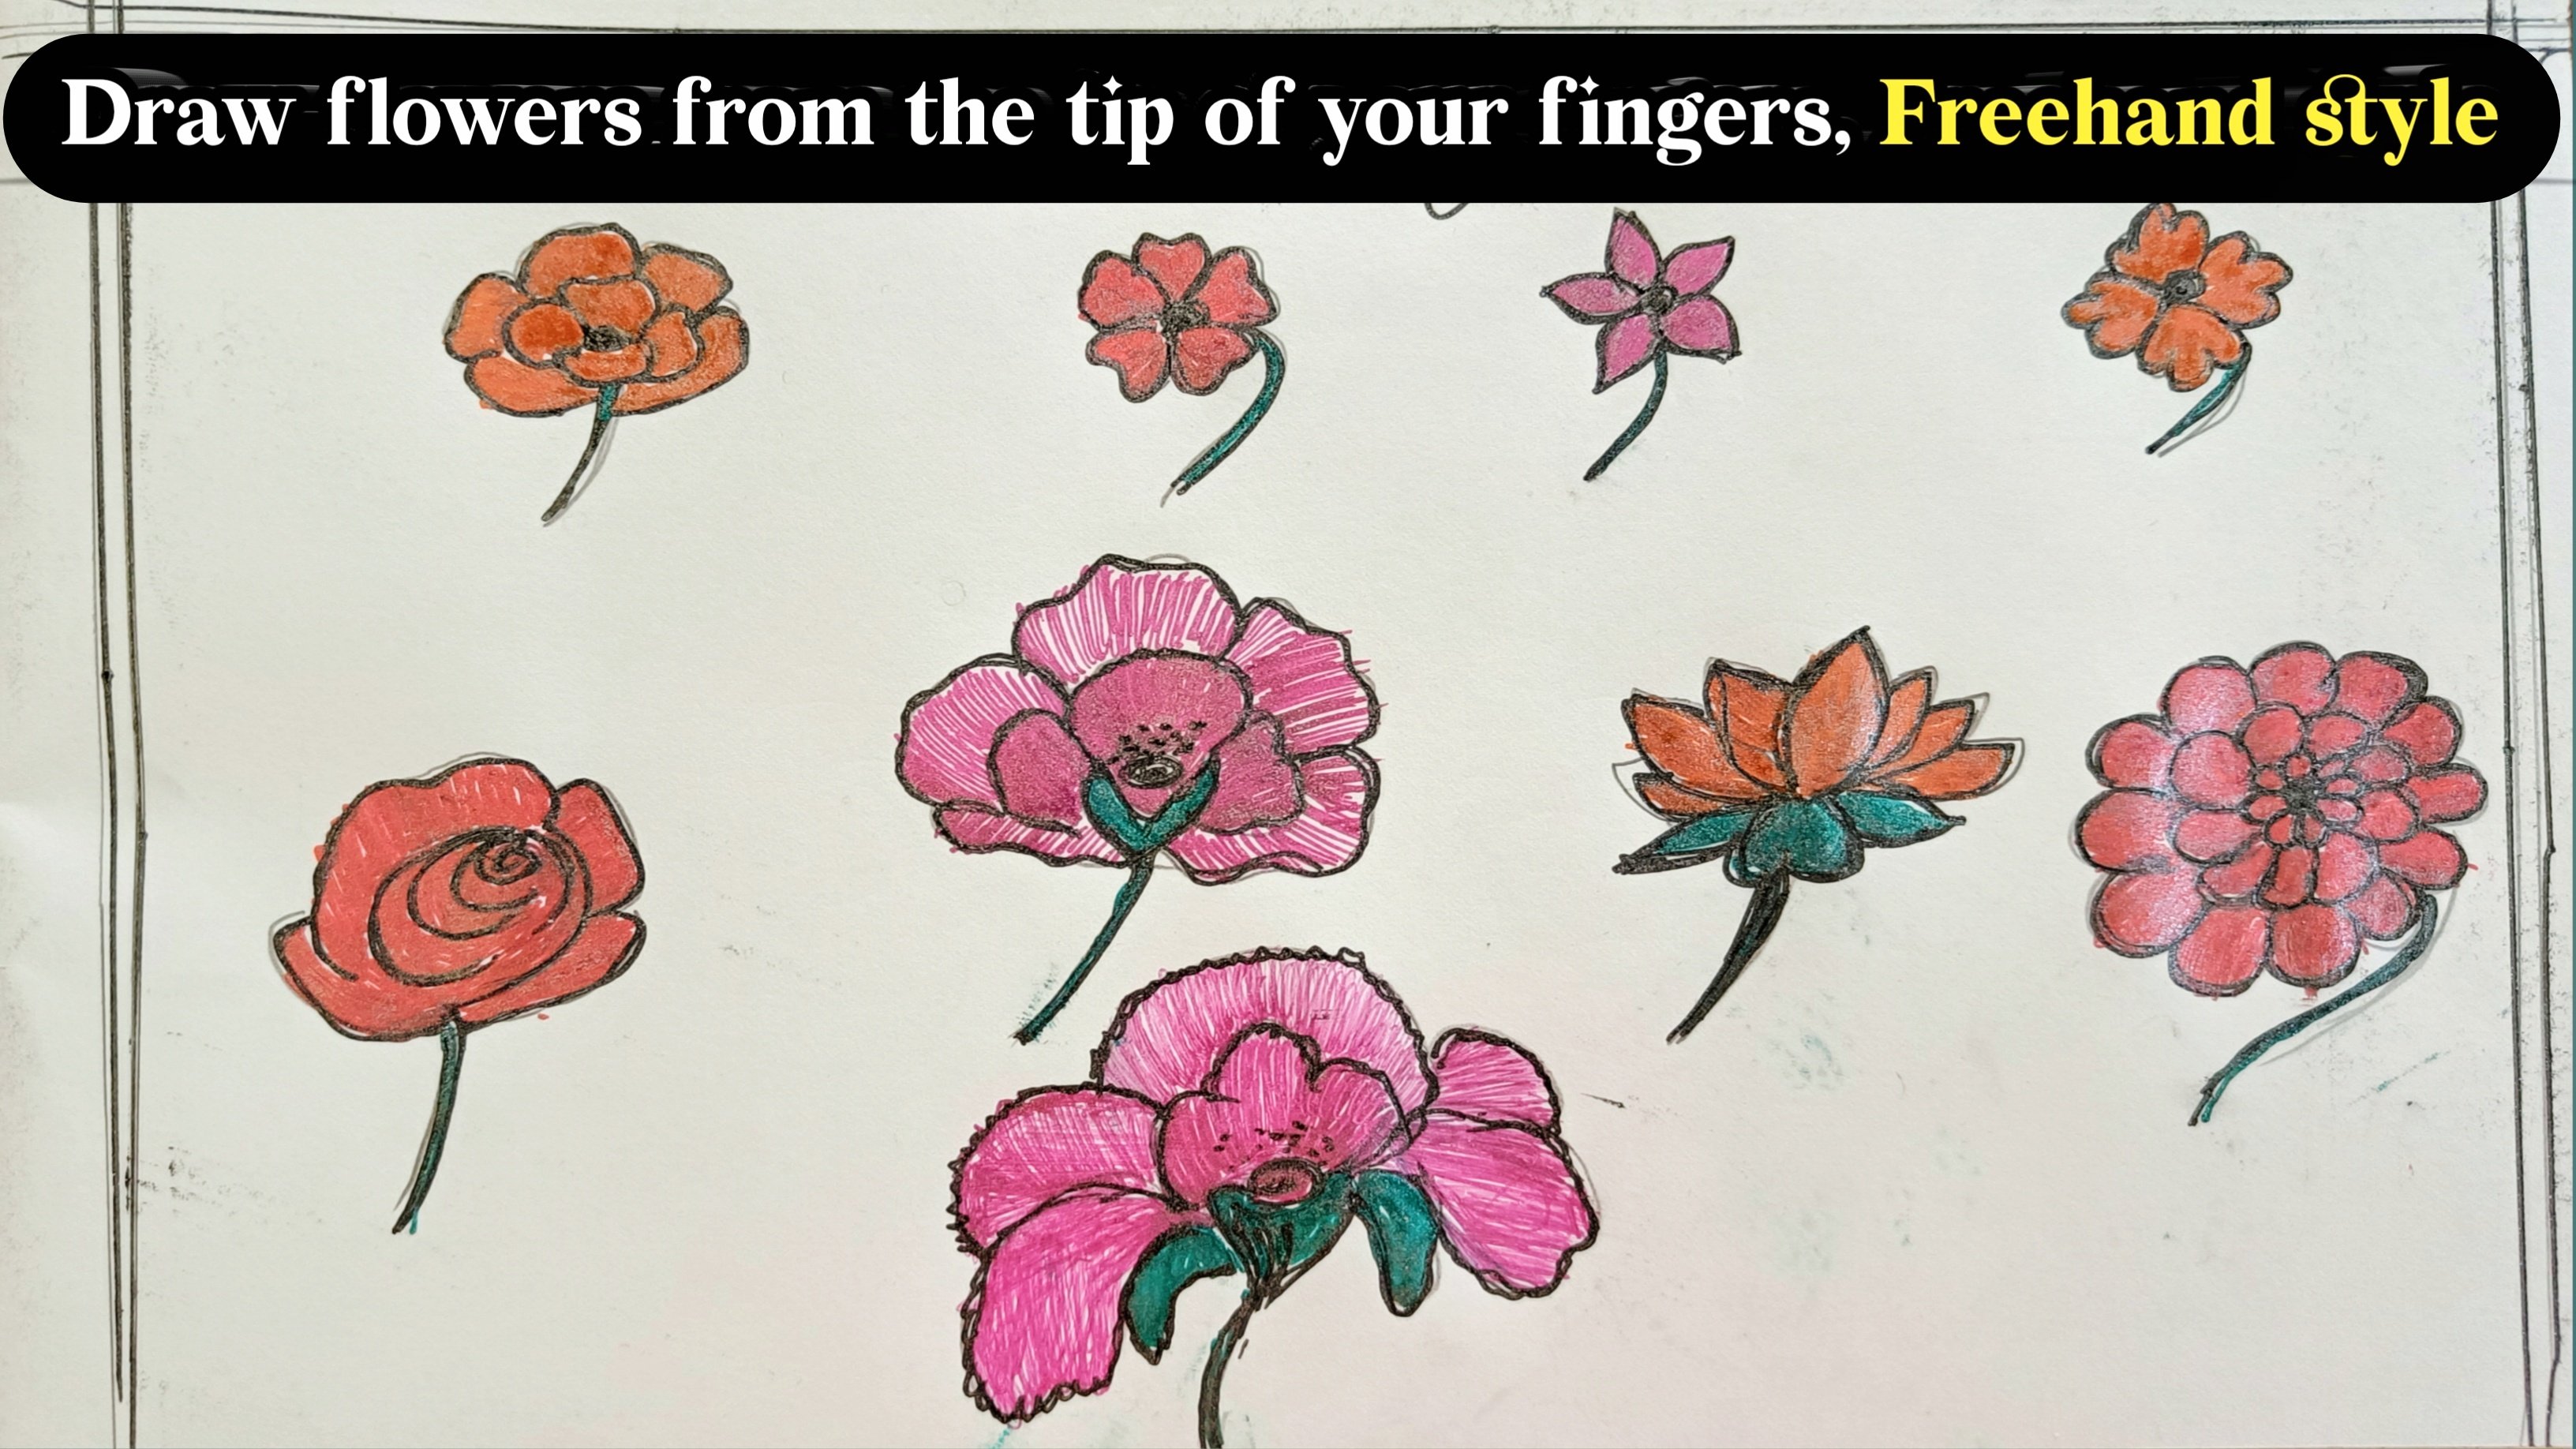
5. Pencil Shading of Beautiful Flower: Let us now draw the
beautiful flower. First. Let's draw stamp like a straw to be closer
to each other. So as you can see, I'm
drawing the stem a little. Try to draw two straight line which is closer to each other. Once you have completed
drawing this time, try to give a dark
outline. Jewish temple. So now we have
completed this time. No, Nikesh draw a small petal by joining these temp to it, by trying in the
main petal form. As you can see, I have drawn
a small circle type better. After completing the
main petal flower, let us now add flour to
make it as an unfolded and try to draw a line starting from stem
to the top of the petal. You can also add
some more texture like as if it is
folded in this way. Nationally, let us try to
add some more vectors by adding more petals to it with different
shapes and designs. Try to add a beautiful petals
to complete the flower. Let us draw the last petal, my journey to the Stamp. Act a small petal
inside the flower. Now let us add small leaf
petals inside the flower. So draw a curved line
instead D better. And add some more petals
on the top of the flower. By adding more petals, the flower will look
more beautiful. You can also add my texture, which will enhance the
beauty of the flower. Now, let us draw a small petal on the
bottom of the flower. We have completed,
or beautiful flower. Now, like I said
suddenly, to the flower, let us draw a two
curve line from bottom dish time to
give a beautiful shape. They live by freehand shape. And also you can adjust it. Drain more leaf with enhance
the beauty of the flower. Now, let us add some more
leaves to the flower. If duty part of the leaf is it, it can be drawn with ever you
want and however you want. So try to give a
beautiful shape to the leaf so that it leaves
a beautiful flower. You can see I am adding
more lift to the flower. So now I am completed
the outline of the leaf. If you have made any mistake, so you can rectify
it by erasing it. You can see the leaf is
behind different leaf. So you can add is this part. As this shows that babies
stops cross the actual one. So try to cover the leaf, which is handy, another leaf. Now you can see I have drawn for lists which gives more
attractive to the flower. We have completed the leaf, but does this make
our flower complete? After completion of the flower? Let us now draw a beautiful butterfly on
the top of the flower. First row and the
butterfly phase and continue with the
body and the tail. Now I'm drawing the small
legs of the butterfly. Butterfly usually
have a small legs. After the condition of the leg, let us draw a two
small antenna to the butterfly to parallel light, which is facing to each other, which gives the shape
of the antenna. Now, let us draw a beautiful
wins to the butterfly. Also add a small living
beside the other ring. Has the butterfly
sitting in a side of it. If we need to keep in mind too, that only one side of the
butterfly needed to be heard. Now, let us add some more texture inside
the butterfly wings. Draw a small circle, intensity butterfly wings so that it looks more
beautiful to it. So here we have completed the art lining of the
butterfly and the flower. As a next step, let us start to shade the boat
flower and butterfly. So shading is done. We decided with first, let us share the leaf. Make different shapes a
bit and try to shake. So you can see that I'm
trying to share it in a lighter way so that the
leaf look more attractive. Now, rectus sheath
the, another leaf, right to shade the whole leaf
as it covers all the parts. To hold the pencil in
the lighter weight so that the shading
loads more beautiful. Let us now share the
another list. Similarly. Finally, let us
share the lash lift, right to cover whole part. Pencil shading will help the drying to look
more beautiful. Now we have completed
shedding of the list. After completing the leaf, lettuce shared the
stem of the flower. Now, let us share the inner
patent of the flower, right, to shed the whole flower. As you can see, we are
shedding the whole flower. Try to filter benzyl and cover the whole
flower by shading it. And try to give a darker
shade to the flower. To shed the corner parts of the petal so that it
looks more beautiful. Now, let us share the
down part of the flower. After completing the
shedding of the flower. Now, let us share the butterfly. Once we are done with this, let us go to the main shading now in a straight way and try to give the shading
and they're darker. Also try to give the dark
outline to the leaf. You can also give differentiate because it looks more
attractive than usual. Now, lighter shade,
the ANA that leaf. Here also, I'm trying to give a different shape
compared to another leaf. Now, let us share
the third leaf. This leaf, I'm trying to give a different texture that tastes
like grass type texture. Tried to cover the same
texture to the whole part of the list to shed the
whole corner of the leaf. So at the center, I'm trying to give
a different texture so that the leaf look
more attractive. Now, let us share the
another leaf here. And so I'm trying to give a different type
of texture to it. So for the last leaf which has been tilted towards it onwards, let us draw the outline and try to give some
unique features. Let us draw a leaf shape design so that it covers the
whole part of the leaf. Tried to convert that design to the whole part of the leaf. Now, try to shed beside delays and try to
erase with the hand. Look more attractive. Now let us hit the flower. Let us start from the
bottom of the flower, right, to give darker shade
to the outline of the flower. And also shared the inner
part of the flower. Try to keep this shading
to the floor by holding, went straight to it. So now let us hit the
top of the flower, right, to get a darker
shade to the outer flower. Now add small length
to the inner part of the flower and
try to share the, each petal with different
types of lines so that each petals of the flower is shared it with different
types of texture. So you can see, I'm trying to give
a different types of catcher for the whole flower. And finally, let us add
outline to the flower. Try to add outline
to each petal of a flower so that each
petal should look clearly. As you can see. I'm trying to outline the, each petal of the flower. Try to outline the each
petal of the flower. So now we have completed
the shedding of the flower. Let us move to the butterfly. Now, let us give outline
to the butterfly. Try to give a dark
outline to the butterfly. Now, we have completed the
shedding of the butterfly. So now we have completed the
flower and the butterfly. Isn't it looking beautiful?
6. Pencil Shading of Moon Light and Sunset: Now let us draw one
light pencil shading. First. Draw above, and divide the balls into two parts for
two different grains. So let us draw the first part. That is moonlight
pencil shading. First, I'm trying to draw
irregular line or four. You can see I have drawn
afford line with the help of freehand pencil style.
With this line. Let me also draw a thick line so that I can segregate
with each other. So here I am drying the
brakes where I am just putting the line which are deposit or just tend
towards each other. So the good part of free hand style drawing is you can give any
shape to any drawing. So now I have completed D was. Now let us draw the tree to the top right
corner of the drawing. Now, draw three to four
line from the corner, which is moving downward. That I am adding more
features. That is lift. Try to draw a small leaf to the vote side of the branch
and cover the whole tree. Bro, small, small
leaf to the tree. So I am just adding some texture to give
some more highlight. If you want. You can also add a new branch and also
use a leaf to it. As you can see, I'm trying a new branch and trying
to give life to it. So after drying the leaf, now, let us draw the full moon. First. Let us draw this circle. Then tried to outline the
circle with darker shade. After drawing the moon. Let us grow cute pair of birds. First. Let us draw the female bird. Try to draw a small female bird. First. Let us draw the face, then let us draw the body of the female bird and
then add legs to it. Now, grow up another bird, which is male bird. Now, let us draw a
small face of the bird. Then continue with the body of the bird at clashed,
add small legs. Now, let us do
outline of the bird. Beautiful birds tried to give a dark outline so that both the birds
look beautiful. Now, we have completed drawing. They both diverge, which
are facing to each other. Here. We have completed
the outlining the drawing. Now, let us go to the, another part that is
shedding of the trying. First, let us shared
by tilting the pencil. Try to give the
lightest shade to the world's after completing
the shedding of the words. Now, let us try to give
shading to the moonlight. Try to shed outline of the moon. Now, let's shade. This guy tried to give the
lighter shade to this guy. After completing the
shedding of this guy. Now, let us draw
outline to the leaf. Try to shed each and
every part of the leaf. Try to shed on delays so that it looks very
attractive at the end. With the shading. Try to
also give highlighting, outlining and the features. Try to give the dark shade to the each leaf, each
different branch. As you can see, I'm trying to share each leaf into darker. We saw that it looked
beautiful and attractive. Also, try to give outline
to the leaf while shading. Let us share the large temp of the tree and try to give
outlining to the each leaf. Shedding. It'll make the
train bit attractive. After giving shading
to the left. Now, let us draw a dark outline to each
leaf of each branch. Tried to outline all the leaf of the brand so that each leaf
looks more attractive. Now, let us outline
the large temp, right, to outline all the list. So we have completed the
outlining of the tree. Now, try to give a light
shape to the whole tree by just depends heel completing. Let us now you've
outlined to the wall. Given the highlighting,
we'll also define the beauty of the drying, which will help in eliminating the mistakes
which we have been. Wild free hand drawing. Try to give outline
to the each fall. So here we have completed the moon light shading
for the beautiful bird. Is intake looking beautiful. Let us now draw sunset shedding. So here I am drawing the graph
at the bottom of the page. Try to draw a line one
after another till the end. Now, make the grass
a little bit darker. We'll try to cover all the
grass by highlighting them. Now, let us draw the mountain. Draw a line from left to right. ******* moving upward and downward as it gives
a mountain shape. Now, let us grow this trend, set a half circle, which looked like sunset, starting from the left
to the right mountain. As in free hand drawing, we don't need any perfection. So try to draw a
circle for the sunset. After drying this time. To outline, Listen. Now, let us add some more
paint to the drawing. I ordered like to add a boat. So try to draw a boat
in a rectangle shape. First, like cash crop, the bottom of the boat. Let us draw the top of the boat. Draw two lines. Try to give a leaf
shape to the boat. So as you can see, I'm trying to draw a
top part of the boat. Or you can also use
triangle shape to it. The important part
up until is that you can erase the mistake
and try to rectify it. Now, let us draw the top of the boat with the help
of a triangle shape. So our body is ready. I had one small
mountain to the left. Add some small birds which are
flying freely in this guy. As the part of the sunset, we can add reflection
of the book. So now I am drawing the
reflection of the boat. So here we have completed
the reflection of the boat. Now let us start shedding. First letter shared the boat. Sedna left. I shared the top of the boat. Even shade, darker one. And also shake good
on part of the book. After completion of the board. Now, let us share
the reflection. As you can see. I'm trying to share the reflection
with lighter one. Now. Let us share the mountain. As you can see, I am giving darker shade
to the mountains. Try to cover all mountain. We did our shared so that
it looks more attractive. After completion
of the one part of the mountain left asthma
and other mountains. Now let us share
the other part of the mountain to give that
shape to the mountain. For the pen tool in
this tray to be bright, to cover the whole
part of the mountain. Now that I shared the
top of the mountain, guide to shade in
a darker value. Now, let us give our
claim to demand tens. Vectors give outline
to the dog park up to Montana after completion of the mountain. Now, let us share the water. As you can see, I'm tilting
the pencil and trying to give a lighter shade to cover
all the butt of the water. After completion of the water. Now, let us know who this guy. Let us give light
shade to the sky. Now, let us give
shade to the grass. Try to give a dark shirt. Now, let us draw a small
waterways around the water. At-large, try to give
outlining to the sun. So here we have computed the moonlight and
Sensex shading.
 Abul Hassan