Transcripts
1. Introduction: I love showing people just
how easy it is to make something really cool from
something totally undesirable. Hey. My name is
Bronwyn Tarboton. I'm a broadway performer and content creator with a
passion for home decor. When the pandemic
hit, like many of us, I found myself with a lot
of extra time on my hands. So I started transforming
whatever furniture I could get my hands on and
sharing my projects online. Now, my social handle,
nyctrashtotreasures, has over 40,000 followers and has been featured
in print and TV. In this class, I'm going to
introduce you to the quickest and most inexpensive
way to transform something ugly you
might already have into a high-end decorative piece that looks ceramic
or hand carved. I'm going to show
you different ways you can use this
technique to create a ton of different looks so that you can customize it
to fit your style. All it takes is baking soda, paint, and a little imagination. You should take this class if you're an aspiring proctor
looking for a low stakes, inexpensive way to makeover
an object within minutes. Maybe you have some
old-fashioned vases sitting around that you
don't know what to do with, maybe you're looking for a
cost-effective way to style empty shelves or a table,
whatever your project. Once you try this simple but
insanely effective trick, I'm sure that you'll be hooked and return to it
time and time again. Let's get started.
2. Getting Started: Welcome. I'm so
happy you're here. Today we'll be exploring one of my absolute favorite
up-cycling tricks, because it's so easy and
looks so good every time. These steps can
be used to create totally different looks so you can easily customize and tweak it to fit your
own personal style. Today, I'm going to
show you how to turn thrift store vases into ceramic
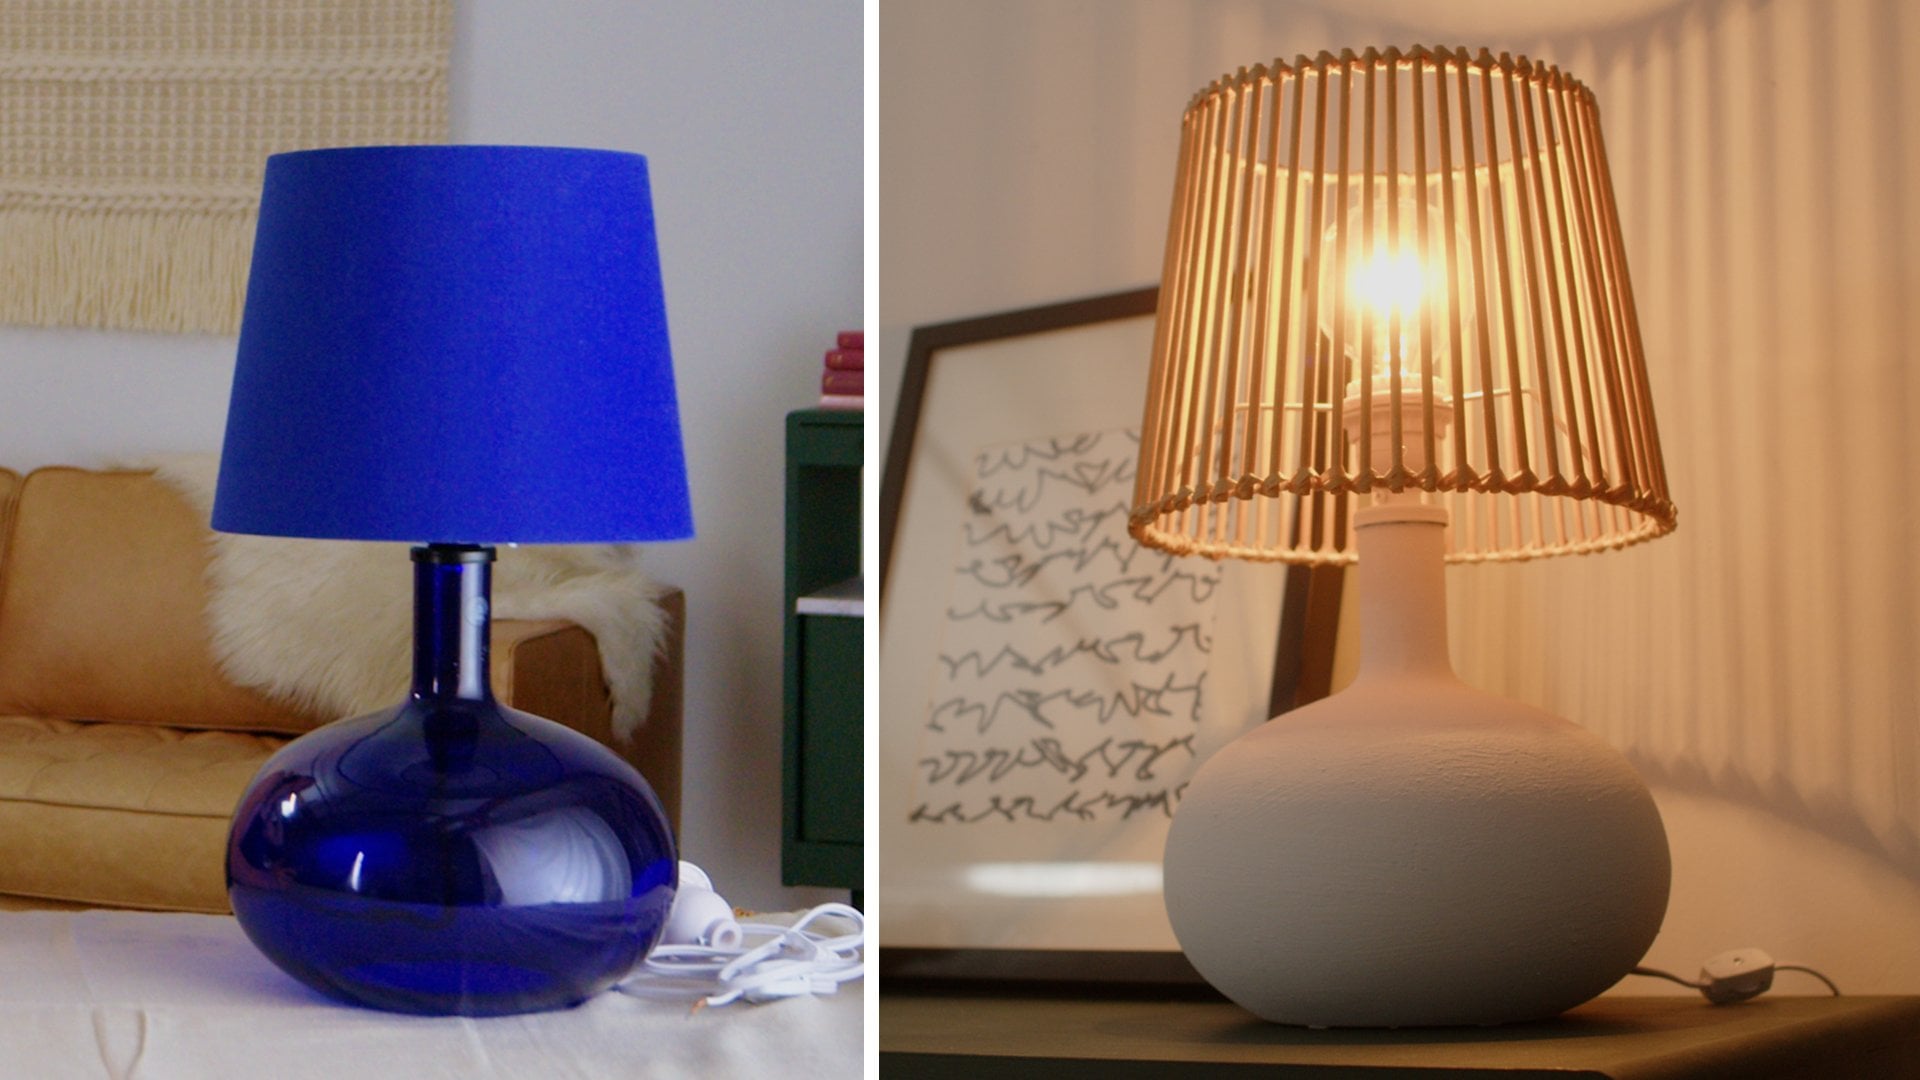
looking statement pieces. You can use the same
effect on planters, lamps, and plenty
of other objects. For the main effect, all you'll need is
some baking soda and any kind of paint. We'll start with a basic
effect use on an old vase. Then I'll show you how to create an aged pottery look just
by adding some dirt. Then we'll experiment
with color blocks. I'll show you how to
use it on a bowl and a cup to create a
pedestal accent piece, and we'll finish by playing with clay add-ons to make
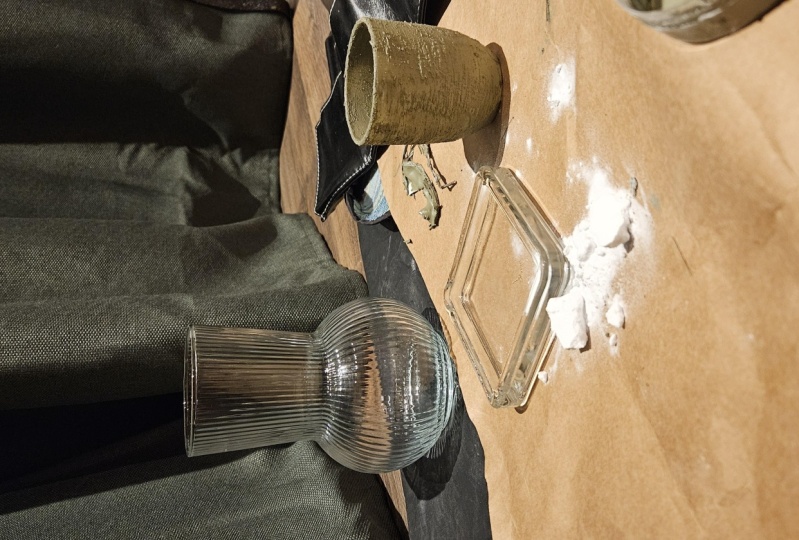
a decorative urn. To make the ceramic effect, you'll need some baking soda, paint, a paintbrush, and
something to mix in. I use leftover
Tupperware or plastic lids and a chopstick
to mix the paint. Feel free to use anything you already have around the house. Then you'll need
something to paint on. This paint will stick to glass,
plastic, truly anything. I'm using glass vases
because I find a ton being thrown out and thrift stores
are overflowing with them, but you only need
one to get started. If you want to level up
your object even more, you'll use a second
color of paint or dirt, clay, and some glue. Now you have
everything you need to try this easy trick
out for yourself. Join me in the next lesson
to learn the basics of baking soda paint ceramic
effect. See you there.
3. Creating a Ceramic Effect: [MUSIC] In this lesson, I'm
going to introduce you to the quickest and most
inexpensive way to transform something ugly you
might already have into a high-end decorative piece that looks ceramic
or hand carved. In Instagram, in home stores, you see these gorgeous
vases and planters. You can get the same
look with just using these basic materials that you probably already
have around your house. You can use this effect
on a plain clear vase. You can use it on a lamp, you can use it on a
planter, on a bowl. This mixture will stick to
basically any material. Any thrift store that you go to, you will be able to find a weird vase and you can paint over it so it
doesn't matter the color. I would definitely not
spend more than $10. This one was $3, which
to me is pretty pricey. You can get them for
99 cents or just grab a vase that a friend got
flowers in and is throwing out. You can also do it on a
vase that has texture. Anything is going to work. The other materials you
need are some paint. You can use any paint for this, so you can grab some at the craft store for
a couple of dollars. I love using leftover wall paint because we always have extra. You can get some at
the hardware store. This was $5 for this
whole sample and I could probably paint 10 vases. You can do this with any color. Mine is a wall sample that was $5 and it's a
beautiful stone color. Then you're going to
need baking soda. You can also use baking powder. It's a little bit of
a different texture, so I like the baking soda. Next, you're going
to mix your paint. I usually use leftover
takeout containers. Any container will work. Don't buy something,
just find something. You'll pour your paint. You don't need very much. Then you're going to add
in some baking soda, so you need quite a bit, almost think of the same
amount as your paint but I would start with just a little bit
and then stir it. To stir the paint, I usually use a
leftover chopstick. You can also use
the back of a fork, just anything that
you have at home. You'll want to stir
in the baking soda. I don't measure because
every single paint is a little bit of a
different mixture. You just want to feel it out. What you're looking
for is the paint to be a little bit thicker
and not so watery, but if you get to the
point where you can't stir it or it's feeling tough
then you've gone too far. Also, if you're not sure if you've gotten
the right mixture, we're going to
test it out on the vase and you'll be able to tell. You want to stir it really well. Now you can see it's getting
a little bit thicker. That's what we want. Let's
do a little bit more. If you're going
for a smooth look, then you don't need
as much baking soda. If you're going for a
distressed thick chalky look, then you'll want a little
bit more baking soda. Let's try out this paint because the only real way
to tell is on the vase. Let's test out and just see how it's going on and it's sticking and it's
not too sticky. That is about the texture
that you're going for. So if it was sticky, I'd
add more baking soda. If it was clumpy,
I'd add more paint. I like to wear my
vase as a glove, [LAUGHTER] so I don't
touch the paint. I don't really care about the bottom being painted
because it's just going to sit around and
be decorative and it just makes it more messy
when you're moving it around. You can also paint this in different ways for how
you want it to look. I'm going for a pottery stone look so I'm going
to paint it around. If you want a different look, you can go up and down. If you want it to be messy, you can just throw the paint on. You can do a brushed look. You can also just do messy
and not worry about that. You can also create more of
a stone look by dabbing. Some people really like
that for planters. I like the brushed look. I don't mind seeing
the brushstrokes, so we're going to go
all the way around. Really, the only thing that can get weird with this project is if the paint's not dry and then you start
to paint over it, the baking soda reacts weird
with the layer below and it gets all peely and messy
and it's hard to get back. I'll just do one coat, go over the whole thing. It's going to be a little
streaky and weird in places. Then we'll let it dry
and we'll come back and fix anything you need to
fix with the second coat. I'm going to get as much as I can with
my vase glove on. See, that is looking
really cool. Now you want to rest it in a spot that you can leave
it for a while to dry. Because if you keep moving
it around and moving it around the bottom can get
peely and start to peel off. Now we're going
to paint the top. You want to go over the top rim and then go in a little bit
so that when you look at it, it doesn't give it away
that it's just glass. If your vase keeps tipping over, you can drop something
heavy into it. If your vase is a
different shape, you can just decide how far
you want to paint down. You just want it to look nice when you're looking at
it from a normal angle. So there's our first coat. It's already looking way cooler. I'm going to let it sit, wait for it to completely dry before I try to go over
with another coat, and that is your
first ceramic effect. So meet me in the next lesson and I'm going to
show you how to use the same effect to create a
pedestal [inaudible]. [MUSIC]
4. Making an Accent Pedestal: [MUSIC] In this class,
we're going to make a pedestal accent bowl using
this same ceramic effect. You can look up
inspiration photos of pedestal bowls online, they're super expensive,
and we're going to make one right now using
just a couple of $. First, you want to
pick out two things that you're going to glue
together to make your bowl. I'm using this $0.99
bowl from Target, and then I have these
other bowls from Target. This is a cup that I
got from Goodwill. You can also use like
leftover candles, anything that has a bowl shape, you want to get to that
go nicely together. That looks pretty good. [NOISE] We can also do this one, that looks pretty good. You just want to play with
it and grab a bowl and a cup or a planter or anything that's going
to make a good base. But once you have
your two things, all we're going to do
is glue them together. You can use any type
of glue for this that's going to work on
the material you're using. I'm going to use a hot
glue gun just because it will dry quickly and we
can go right onto painting. You just want to make sure that your base is in the
center of your bowl. That looks about good. Since I'm using a glue gun, so I won't be able to
move it around after, I'm going to make a little mark. Just so I remember where
I get it right on. We're going to be
painting over this anyway, so it doesn't matter. Here we go. Great.
Let's press it down. If you weren't using
a hot glue gun, you could just put something
heavy on it, and let it dry. This is another one that I
made using a cup and a bowl, and I did it with super glue. So it's dry and also
ready to be painted. To see you can make
them in all shapes and really make it for however
you want it in your place. Let's paint it. We're using the exact
same ceramic mixture, we already mixed it. Great. Let's paint it. My glue seems pretty dry, so I'm just going to hold it by the bottom, paint the top. Technically, you could
paint the bowl first, but now I don't need
it, I wouldn't. Great. You can see this
goes on plastic too, just as well as a glass. I think this will make a
really cool stone color. I definitely would not
use this for food. Just like the vases, it's really like a
decorative piece. They look really cute on tables, you can put little
plants in them, they look really
cute next two vases. This plastic is like a little
bit of a darker color, so I would definitely do
a second coat on this. Don't worry if your
first coat is streaky, we're going to let it dry and
then just go back over it. My brush is falling apart. I think that's good
for our first coat. I'm going to do a second coat, so I'm not too worried
about the streaks. Let's drop it down. [NOISE] Then I know I might have to do a finger
and fix this part. The bottom is good, just paint over my finger. That's your first coat
on your pedestal bowl, I'm going to let it dry, and then go back over
it with a second coat. Join me in the next lesson, I'm going to show you
a fun way to add on to this ceramic effect to create totally different looks.
[MUSIC] See you there. [MUSIC]
5. Aging & Distressing Your Piece: Now that you know your
basic ceramic effect, I'm going to show
you the easiest way to create a different look by using literally dirt from
outside or your plant. You want to take your piece. These are both, it's a plastic picture and a glass face that I
painted over two coats. This is how it will look once you've done both of your coats. I let these dry completely. Now, we're going to create
an aged look using the dirt. I absolutely love using the
dirt because it creates like aged vintage distress look that is in all of these
stores right now, but it's really easy, you can't mess it up and it weirdly makes it look
way more expensive. Let's do it in two
different ways. The first way we're
going to do is literally rubbing it on like it can't be less
complicated. Take your dirt. This is just soil from a
plant, nothing special. I'm just going to
take it in my hand and I'm going to
rub it on trying to replicate the idea of like if this picture had been
just rolled around. I live right by a
pottery barn so I see this work all the time. Now that you'll see
it, you'll laugh, you'll be like, that's $60
and I know how to make it. Little imperfections like
this are totally fine. That's what we're going for. You want to be
careful not to rub too hard since we
did just paint this. But then again, if
the paint chips it goes along with
that same look. I'm doing it on the bottom
where I might've gotten dirty, trying to keep it asymmetrical. Now we'll do some on the top. Let's just take some and rub
it all over the top here. Just want to make it
look not quite so clean. If you want it to really
make it look more aged, you can even add
some other colors, some blacks, some brown. Let's rub off all the extra, the more random the better. Hand marks are fine. Cool. I'm going to
leave that one there. I like it when it's random and you can add on
more dirt or less. But this is like that, farmhouse rustic look, you
could put flowers in it. I'm going to leave
this one and go on to our next way
to use the dirt. There's that. For this next way, I'm going to mix up some dirt with water into a
little bit of a mud paste. You take your same dirt and pour just a little
bit of water in. I have endless chopsticks from takeout that I wish
they wouldn't give me. We're just stirring
in the water. You want to keep adding water until it's a little
bit of a mud mixture, a consistency that
you could paint on. Great. We have our mud mixture. Let's just see
what it looks like on and then we can
adjust as needed. I'm going to try a
foam brush for this. You want it watery enough
that you can paint it on. I like it when it's super
uneven and super inconsistent. Just throw it on, don't
think about it too much, and then we're going
to rub some off. This is a really
cool look on lamps. If you want to create those
thick ceramic aged lamps, this works really well. We're rubbing it all over. It's okay if you don't get
all of it because that can just be the
normal paint part. Let's do some on the top. We have the dirt on. Let's play around
with it. Let's rub some off and see how it looks. This is where you choose
your own journey. You can dip the rag
back in the mixture, you can rub it off. Just be careful again
with your paint that you don't totally nick your
paint and chip it. I want it to be inconsistent, so I'm not going to be careful with it just trying
to get it off. I'm going in a vertical motion. I just like the way that looks. I really like when some
parts are muddy and thicker, so you can really
lean into that. You really can't mess this up so you can go with
whatever the dirt's doing. If this isn't happening, you can just dip your
rag in the water. The paint is a
little bit thicker. If you're doing one like this, you can really put a lot
of paint on it and not worry about how you're brushing it and it'll
come out really cool. Almost done. I'm just
going to get the dust off. This is where you can decide. If you want it to be more muddy, you can keep adding
layers and layers on. We are done. I think this
looks really really cool. I have one just like this
sitting in my apartment. Here are two dirt looks. I will see you in our
next lesson where we will be playing with
two-tone color.
6. Exploring Two Tone Color: In this lesson,
we're going to use our basic ceramic
effect to create a two-tone or dipped look. I'm starting with two
vases that I painted over using the basic ceramic
effect in a terracotta color. This color was also
a wall sample. I'm looking at these
West Elm vases that are terracotta and white
for my inspiration. You can either paint a straight
line or a curved line. You can also tape it off
or you can freehand it. I find I get a better
line if I free-hand it because sometimes the
tape line isn't perfect. I know a lot of people
are freaked out by free-handing so in that case you can tape right on your vase. We're going to create a
straight line with tape. You just take your
painter's tape. You want to align
the tape up with wherever you want your
other color to stop. I'm going to paint
the top in white and then I want to
stop right here. That's where I'll put the tape. Let me just pull some out. I'm just gently pressing it on. You can also do this before
you paint the color. I just find it a little weird then to paint
the other color. This way is easiest for me. Now we have our painter's tape on and now we're going to paint. I'm using the basic ceramic
effect white paint. I want to do my
dip from the top, so I'm leaving the bottom
as is and then I'm just going to brush
over the top. The inspiration that I am
going for is a brushed, not completely filled-in
look on the top. I'm just dry-brushing
it on and not worrying if it has
full coverage, but if you want, you
can really lay it on thick and make sure that you can't see the other
color through. I think this looks really cool and so once you have
some paint on your vase, you don't need as
much baking soda because the paint's already going to stick to
the other paint. I wanted to leave some of the
terracotta showing through, but I don't want it to look like an
accident, so we'll see. This is really fun because
you can really use any color and also any
shape combination. You can use the same
colors to create almost an unlimited
amount of vases. Now that we're close to the top, I'm just going to
make sure we have everything we need and
you could paint in. I don't mind because it has just the terracotta showing
through so I'm going to paint the top rim and not go super far down. I'm just going to set that
aside for a second while I do my other one. Let's try a curved
line on this one. If you want to use
painter's tape, you can. You can just curve the tape. You might have to use
multiple different pieces to create the shape
that you want. I just find it
easier to freehand. I'm just going to put some
paint on and see what happens. I want to start from the top, but then I might just do a little bit of a curved
line on the bottom. Let's see. I guess I'm going
down in because I went down in a little bit. See, I really like that with
the color showing through. Let's see. Let's make a little
bit of a curved line, so let's try, and I'm really liking this brushed look so I don't want to get
too intense with it. If you were doing a
filled-in curved line, I would start really making a nice line and then color in. I like how some showing through. I'm just brushing it on and seeing how it goes. I'm really happy with that. I like it showing through. I like how it's an
even but uneven line. I'm going to set
that aside and let's pull our tape off
this first one. I never have as much
luck with tape, but I think it's working. We are finished. I hope you can see that
you can make tons of different looks
using these colors and this two-tone effect. Join me in our next
lesson where we are going to do our
final effect using clay to add on a ton of different looks to these
vases. I'll see you there.
7. Adding Clay Handles: [MUSIC] Now you are becoming an expert on our
faux ceramic effect. We are going to take clay and I'm going to
show you how you can create different
shapes and add-on to any vase to create a
totally different look. This one you can get really creative with so I
would definitely look up some fun vases with
different types of handles. You can look up a squiggle vase, a vintage urn, look online, find
some fun examples. Basically, any little
extra handle shape, we're going to make
that with clay. These can be really
expensive and we're going to do it
with like $5 clay. There's a bunch of ways
that you can do this. This was a little
plain glass face and I added these
little wings onto it. First let's start with just our basic straight up and down vase. I've done one coat of the
ceramic effect in white. For this project, you can use air dry clay or oven baked clay. I recommend using air
dry clay if you're using a vase that's
more curved, and you want the clay to really fit to it because the
oven baked clay morphs a little bit
in the oven and then it doesn't quite match. It still works. You
can just fill it in with glue and paint over it, but that's just what I've found to make
more sense for me. First let's do our
straight up and down vase. We're going to make
this into like a really cool abstract thing. Urban Outfitters I think has one called the Georgia
vase or something. Using this polymer clay, I'm just going to
take [NOISE] some out and start rolling it. I'm looking to create a bunch of handles to go down the side. Actually just two
on either side. We're rolling it out. I want to get it so
it's fairly smooth, pretty even all the way down. Once you have your roll, you're going to cut
it into handles, like to trim the end, and then let's just test
out a handle size. I'm just making a curve and
let's see how that looks. I got really lucky
that [LAUGHTER] happened to be a good size. But if it's not, you can just practice. That's the size I like, so now I'm going to use that
as my little template and cut however many other handles
that you want to match. Then you're going to form them into the
shape that you want. I'm going for them to
go right onto the vase. Great. This is a flat edge, so I can basically just lay them out and make sure
they're pretty [NOISE] flat. I'm going to do
that with all four. A little trick I found
with the oven baked clay. I can shrink and morph in the oven so when I'm making
these for the straight vase, I sometimes pull them
out a little bit extra. That way when they shrink back, it'll be almost flat. You can also just fill it in
with glue, and it's fine. But little trick that I tried. They don't have to be
exact because we're going for like a handmade
pottery look. I feel pretty good about this and now we're going
to put them in the oven. You can put them on foil, you can put them on
your baking sheet, just whatever your
clay instruction says, and then you'll take them out. Here's some that I premade,
and they're out of the oven. They're nice and hard. Let's glue them on. I'm going to use a hot glue gun because that way they
stick right away. You can also use other
glue, but you'll have to tape it on and balance
to wait for them to dry. Let's take our handle, just eyeball where
we want them to go. I basically want them right
at the bottom. Here we go. I'm going to do glue on the handle, and then just
press it in and hold. Great. That's what's so
great about the glue gun, is like now that's on. Let's do our others. That's what's so fun about
this clay is you can really make any shape that
you can imagine. There's some crazy
vases online and you can really go crazy
and make all of them. I'm doing two sides, so I just want to eyeball it
and make sure that they're somewhat directly
across from each other. Make sure they're fairly even. If you really screw
it up you can just rip them off,
and go for it again. Try not to get as much
extra glue as I did, and eyeball it. Okay, great. Now we have our
little handles on. I think it looks super cute. I'm just going to let
that dry for a second while I mix up my paint and
get ready to paint over it. Let me show you a
little bit of how the air dry clay works
if you want to use that. I tried a bunch of
clays on this and the cheapest Crayola
clay is my favorite, it sticks really well. [NOISE] You're going to open
your clay and same thing, just make whatever shape
of handles you want. If you want to make
these wing handles, you'll roll a little ball, smash it, cut it in half and then you have your little wing that you
can shape however you want. I'm going to make
some urn handles. Just rolling the clay. I'm going to shape
it into two handles, trying to roll it out,
getting it smooth. Same thing with this
one. I'm going for like a distressed vintage look so it doesn't really matter
if it's super perfect. To get ideas for these I
just look all over online. Once you try making these, you'll start seeing
them everywhere. Like I was watching TV last
night and in the background, they had like vases with
handles on and I was just looking past trying to figure out how I can make
those in clay. I have my roll. I like to trim the
ends just so I'm working with the same
thing on both sides. Let's start a little bit long, so I can always trim. I'm going to take that, and just start shaping
it onto the vase. This is the air dry clay, which is nice
because you can keep working with it for
awhile until it dries. Let's do that like halfway down. Let's see if we can get one
to match on the other side. Then once we like our handles, we will have to glue them. But right now I'm
just making sure that we have a
shape that we like. This one's better.
Let's trim it. Take my advice and
start a little long and then we'll get shorter. Press it on a little
long we'll just trim it. With your air dry clay,
you want to press it on a little bit so it's basically
in the shape you want. Then you want to get some glue. I'm using superglue for this. We're just going to
peel it off carefully, put the glue on the handle, and then put it right
back where we had it. That way while the clay is drying the glue can
also be drying, then you'll be set and
you can paint over it. Obviously, these are not like strong handles that you
should hold the vase by. This is just [LAUGHTER] for
fun and for decoration. There's that one. Let's paint our other one. If you're having trouble with
them sticking you can also, I think it's called scoring it. You can take a needle and make hashed like little cross marks. I haven't had problems with
mine sticking with this glue. You can also do this directly on the glass before you paint. This one I already
have a first coat on. Now that your glue is on you
can just make sure before it hardens that your clay is
in a shape that you like. I feel like mine
are a little uneven but that's just going
to be the look. You can smooth it out. Now I'm going to set this
aside for the glue and the clay to dry before
painting a coat over it. These are the oven bake
handles that we glued on and now I'm going to
paint over all of it. This is the basic
ceramic affect, white paint mixed
with baking soda. Let's paint over it
so that it looks like one cohesive piece [MUSIC]. There you have it, finished
with our second coat. I wish I would have done a little bit less glue so
that it didn't poke out. But I still think it
looks really cool. The air dry one, I'm going to leave to dry and then just do
the same process, painting over the handles. I hope you see that you can
make a huge range of things. I hope you've had as much fun playing with
this clay as I have. [MUSIC]
8. Final Thoughts: That's how you turn a box of ugly vases into
stunning home decor. These are fit for any mantel, shelf display, or
tablescape in your home, and you can do this project
for under $10 total, or for free if you use
stuff you already have. I hope you are excited to start experimenting
with this technique. When you do, please upload the before and after pictures
in the project gallery. I cannot wait to see
what you transform. Thank you for taking this class. I look forward to seeing
you in the next one.
 Bronwyn Tarboton, Home Decor DIYer and Actor