Transcripts
1. Introduction: I think it's because the mosaics look pretty intricate
when you're finished. People think that they're
really complicated to make, but they're actually one of the more straightforward
projects that are pretty hard to mess up. I'm Bronwyn Tarboton, home decor, DIYer,
and content creator. I also happen to be
a Broadway performer who taught myself upcycling
during the pandemic. Now, my social handle, nyctrashtotreasurers
has over 40,000 followers and my
highly curated trash, as I call it, has been
featured in print and TV. In this class, we'll be learning my absolute favorite
technique, mosaicing. I know it sounds
fancy, but trust me, you are going to be shocked with how simple this process is. I've done this on trees, tables, planters, bar cards,
and even wall frames. The possibilities
are pretty endless, but for today, we'll
be making a tabletop. In the end, it will
look expensive, but I'm going to show
you how cheap and easy it is to make in
just four simple steps. First, we'll break our
tiles into smaller pieces, lay them out to
create the design, attach them to the table and
fill in the gaps with grout. You should take this class
if you're looking to learn a fun and unique way to create a statement piece from something broken that you
might already have around. Let's get started.
2. Getting Started: Welcome. Thank you for joining me
for my tile mosaic class. If you were to ask me
which of my projects get the most positive
comments from family, friends, and followers, I would have to say
it's my mosaic ones. They've become a
signature of mine and are definitely my favorite. So I'm excited to share
this process with you. The technique is super versatile and can be used to create gifts, wall art or Sheikh
pieces of furniture, but it's inexpensive
and fun to do. I love to create mosaics because you can use
things that are cracked, broken or left over
to create something that looks amazing and is
totally one-of-a-kind. Today, I'm going to
walk you through four simple steps to create a mosaic tabletop out of a handful of leftover
floor tiles. The whole process takes under an hour and once
you have it down, you'll be tempted to mosaic every surface of your
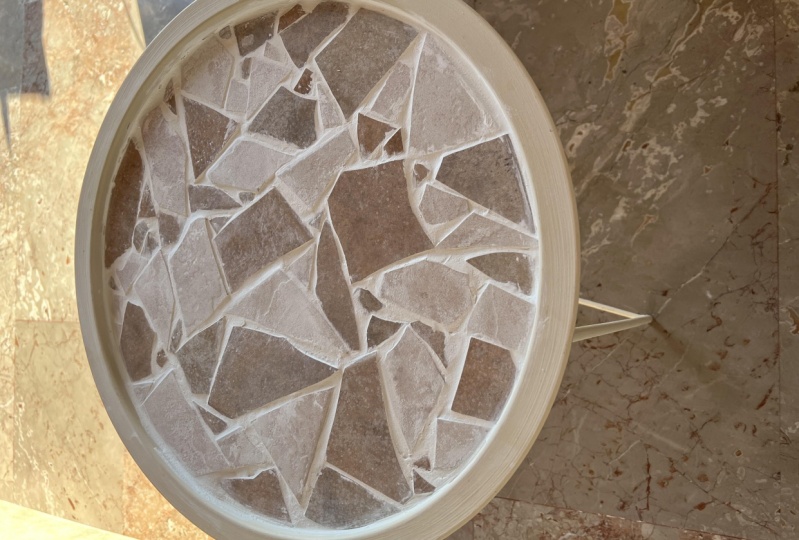
house just like I am. The first thing you'll
need is a table or a flat surface with a
lip around the edge. I recommend something that has this raised rim because it makes finishing the edge
so much easier. I'm using this
table I grabbed at my local thrift store for $10, but you can also buy
the same design for $30 from most online retailers, if you'd like to follow along
using the same exact piece. One variation I'd
like to offer for this class is to
use a cheap tray. As long as it has a lip or raised edge, then
you're good to go. Next, you'll need to
choose your tiles. I'm going for a terrazzo look, so I'm using three colors of large floor tiles left
over from another project. But you can also buy these
at any large hardware store. You really can use any type of tiles or hard material for this. I've used glass
from broken lamps, broken dishes, small
bathroom tiles. You can even order broken glass
or boxes of tiles online. I suggest for this table
using materials that are flat and all the same
thickness to keep it level. If you want to follow
along exactly with me, I would get large floor tiles
in three different colors. The other tools you'll need are a hammer, glue, and grout. Let's start preparing the
table for our mosaic. See you in the next lesson.
3. Prepping Your Tiles: [MUSIC] Let's talk
about choosing your supplies for this project. You'll need something
to work on and then tiles to create
your mosaic design. I'm going to be creating
a mosaic tabletop. This is just the
top of my table. It's a standard tray table. This is just the tray that
sits on top of the legs. The reason this is a great beginner mosaic project
is because it's a fairly small
surface, and it has a really clear lip
around the edge. If you want to start small, you can pick up a $1
tray, just like this. It gives you a great, small mosaic space to work on. For choosing your tiles
for this project, there are so many options. I really suggest basing it around whatever you
can get your hands on. Once you start keeping
your eyes open for things like leftover
tiles and broken tiles, you will start to see them
everywhere because people use them for their projects and no one knows what to
do with the leftovers. This was a half used box of tiles that I
found on my curb. This is a piece that I broke out of a lamp that someone
was getting rid of. This was a broken plate. I think I spotted it
in the recycling, and I grabbed it because
I like the design. These are pieces
that I took off of a broken mirror that
I found on my curb. These circular ones are from an extra sheet of tiles
that I saw in a dumpster. I love tiles, so I
always grab them. These are from someone in my, I think, Facebook group. They were getting rid of them. People know I love to mosaic, so they offered them to me. These were extra tiles. I think they were
retiling in my building, and they had some extras after, so I grabbed them. You can also look in thrift stores for something
that you could break. The things that I would look at are the size of your piece. The smaller the tile is, the more of them you're
going to have to glue. Just to make it
easier on yourself, if you're going to use
really small tiles, I'd go with the small piece. If you're doing a big piece, maybe use bigger tiles. It will look cool if
you use small tiles, it will just take a lot longer. You want to make sure
that, for a table, you're using tiles that are all the same or similar depths, because otherwise, your
table won't be flat. If you're doing it
on something like a tray or something that
isn't heavily used, you can have more fun
with it and use beads, and it doesn't really matter
if it's completely flat. People ask me all
the time how I get the specific shapes that
I use for the design. I like to either go with the shape that's
already there or I just break the pieces, and use that shape to
make the design. If you want to create
a very specific shape, you can get a tile
cutter which will easily cut on a specific spot. You can also use a
wire cutter which will cut it but just not
quite as specifically. For my design, I'm going to use floor tiles in a couple
different colors. I'm going to create a
terrazzo type design, which is really fun because
you don't have to have any specific shapes
or a certain pattern. We're just going to
use the broken tiles to fit together and
create a cool look. If you're starting
fresh with large tiles, you'll need to break them
into smaller pieces. I usually do this on my
floor with a tarp down, and I use a hammer. Today, we're doing it on a
table with a cutting board. My tile is already broken because I found
these on the curb, but you can do this same exact
thing with a fresh tile. I usually don't wear goggles, but feel free to
wear safety goggles, close your eyes, wear
some sunglasses. Just protect yourself in case
any bits go flying places. Lay your tile out, and we're going to smash it. That's all there is to it. [NOISE] There we go. [NOISE] If I wasn't
doing this on camera, I would definitely do
this on the floor on a tarp, and I wouldn't hold
your tile while you hammer. Once your tiles are broken small enough
for you to use them, we're going to
create the design. I will see you for that in
the next lesson. [MUSIC]
4. Creating Your Design: [MUSIC] We have your broken
pieces or your tiles, and now we're going to create your design and glue it down. From mine, I'm going
for that terrazzo look. I'm using three
different colors. You can really use
any color for this. You could do it all in one
color. You could use two. I'm going to try
using three colors, and evenly spacing them out. If you're really brave, you can just put your
pieces down and glue them. I like to create the
design so that I feel good about it, and
then set them down. I'm going to start
just putting pieces down so that they line
up with the curved edge. After we create our design, we're going to be grouting and that's going to be
filling in all the gaps. We want to leave a somewhat evenly spaced
gap between the tiles, that's why I like doing this
because if you're doing square tiles or really
clear hexagonal tiles, you'll need the gaps to be even [NOISE]. Let's do this [MUSIC]. What I'm trying to do is put the pieces together so that
they look like the shapes fit together and spread
the sizes out so that there aren't tons a huge pieces in one place and
small on the other, and also spread the
colors out so that they're evenly balanced
all over the table. There's no exact method to it. You just want to keep
playing around with it. I like just looking
at the shape of the tail and it's like a puzzle. You can figure out a
place for it to fit. It's totally okay if the gaps
aren't all the same size. You just want to make sure
you don't have any huge holes as you're going you might
find you don't have the right shape and pieces
or you don't have enough, and so you just want to
go and break some more and keep doing that till you have the shapes
that you need [MUSIC]. Really don't need to get
fixated on the gaps, like it's all going
to be filled in. Try to just let
yourself go for it. Every now and then you can
take a little peek back, you've got big ones here. Maybe I need some more
big ones over here. This is probably the hardest
part right at the end because you just want to
make everything fit nice. We have the design. We made it. I could adjust mine for hours, but I'm not going to because
it [LAUGHTER] looks great. I'm putting myself off. The next step is to glue
the tile pieces down. I usually just use a strong glue that's going to work with whatever
material you're using. That could be like a
gorilla glue and E600, tile paste, super glue
anything that's really strong. I'm going to try a
glue gun today just because I want to speed up the process to show
you the next step. But I'd suggest just
using a strong glue. With the gluing, you'll just pick up each individual piece and put some glue on and
then press it back down. Like if I'm making
like a wall mosaic or something that's not a table. I will glue the pieces down as I go because that makes it faster and you get to
skip this extra step. But I don't know for
some reason on a table, I just like to see it off first and I can make adjustments
at the end as needed. This glue gun seems
to be working. When you're gluing your tiles, you just want to make sure that they're really securely down. Press them into your surface, and you want to make sure
that the glue is dry and that they are completely
fixed before you grout. When you grout, if
they're not fixed, they'll start to move around, so then you'll have to pause and just make sure
that they're down. I love this part of the
process because the creating, the design is done. You know it's going
to look good, and you can just take your time, touch each piece, glue it
down so it feels really nice. [LAUGHTER]. If you find a loose piece
when you're grouting, you can always just
pause and glue it down. We've finished making the
design, and gluing it down. Meet me in the next lesson and we will add
the grout [MUSIC].
5. Finishing With Grout: [MUSIC] It is time to finish off your table by adding some grout. The easiest way to do this
is to buy premixed grout. You can get it in a tub. You can get it in the
exact color that you want. You can also mix your own grout, in which case you can add in paint to make a custom color, I'm going the easy route. I bought this bucket of grout, it's in white and
it's ready to go, I can dump it right on my table. Before I grout, I'm taping off the edges
of the table to make sure that it's protected and I don't get any extra
grout all over it. I've put my tape down and
press it against the edge, I'm going to start
scooping it on. Many different ways
you can scoop it. I just like to use my hands, it's easiest for me and
I think it feels nice, so I'm just going to
grab it and then start pressing it in to
all of the crevices. I think they have special tools for this if you don't want
to get your hands dirty, but I really like the
feeling of the grout. I feel like I can
really get it into all the crevices, it's more fun. This is just white grout. I wanted to contrast with
the black table and blend into the white tiles to
create a creamy look. No exact science to this, just keep pressing, keep
filling all the gaps. It's totally fine and part of it to get the grout
all over your tiles. After the grout is dry, we're going to
wipe it all clean. If you're using really
sharp edge tiles, just be a little bit mindful of your hands
not getting cut. Just press lightly, be careful of those edges. [MUSIC] You want to keep pressing
the grout into the gaps so that it fills the whole gap from the table to
the top of the tile. It's the idea that you
want it to be flat. You want it to be all one level. I'm double-checking to
make sure that grout is in all of the big gaps and all of the
cracks and crevices. Once we have it in, just going to smooth
off any major excess, we're doing a real
wipe down later, but just to make things a
little bit easier on ourselves. Once your grout is pretty smooth and spread all over your table, you're going to set it aside just for it to set a little bit. So you can look
at your grout and follow whatever
instructions are on it. You want the grout to set enough so that when
you wipe it off, it stays in the gaps. But you don't want it to set too much that you can't
get it off your tiles. I'm going to set mine
aside and wash my hands. While we're waiting
for this grout to set, I thought I talked to you about some other ways that you can use this same technique to
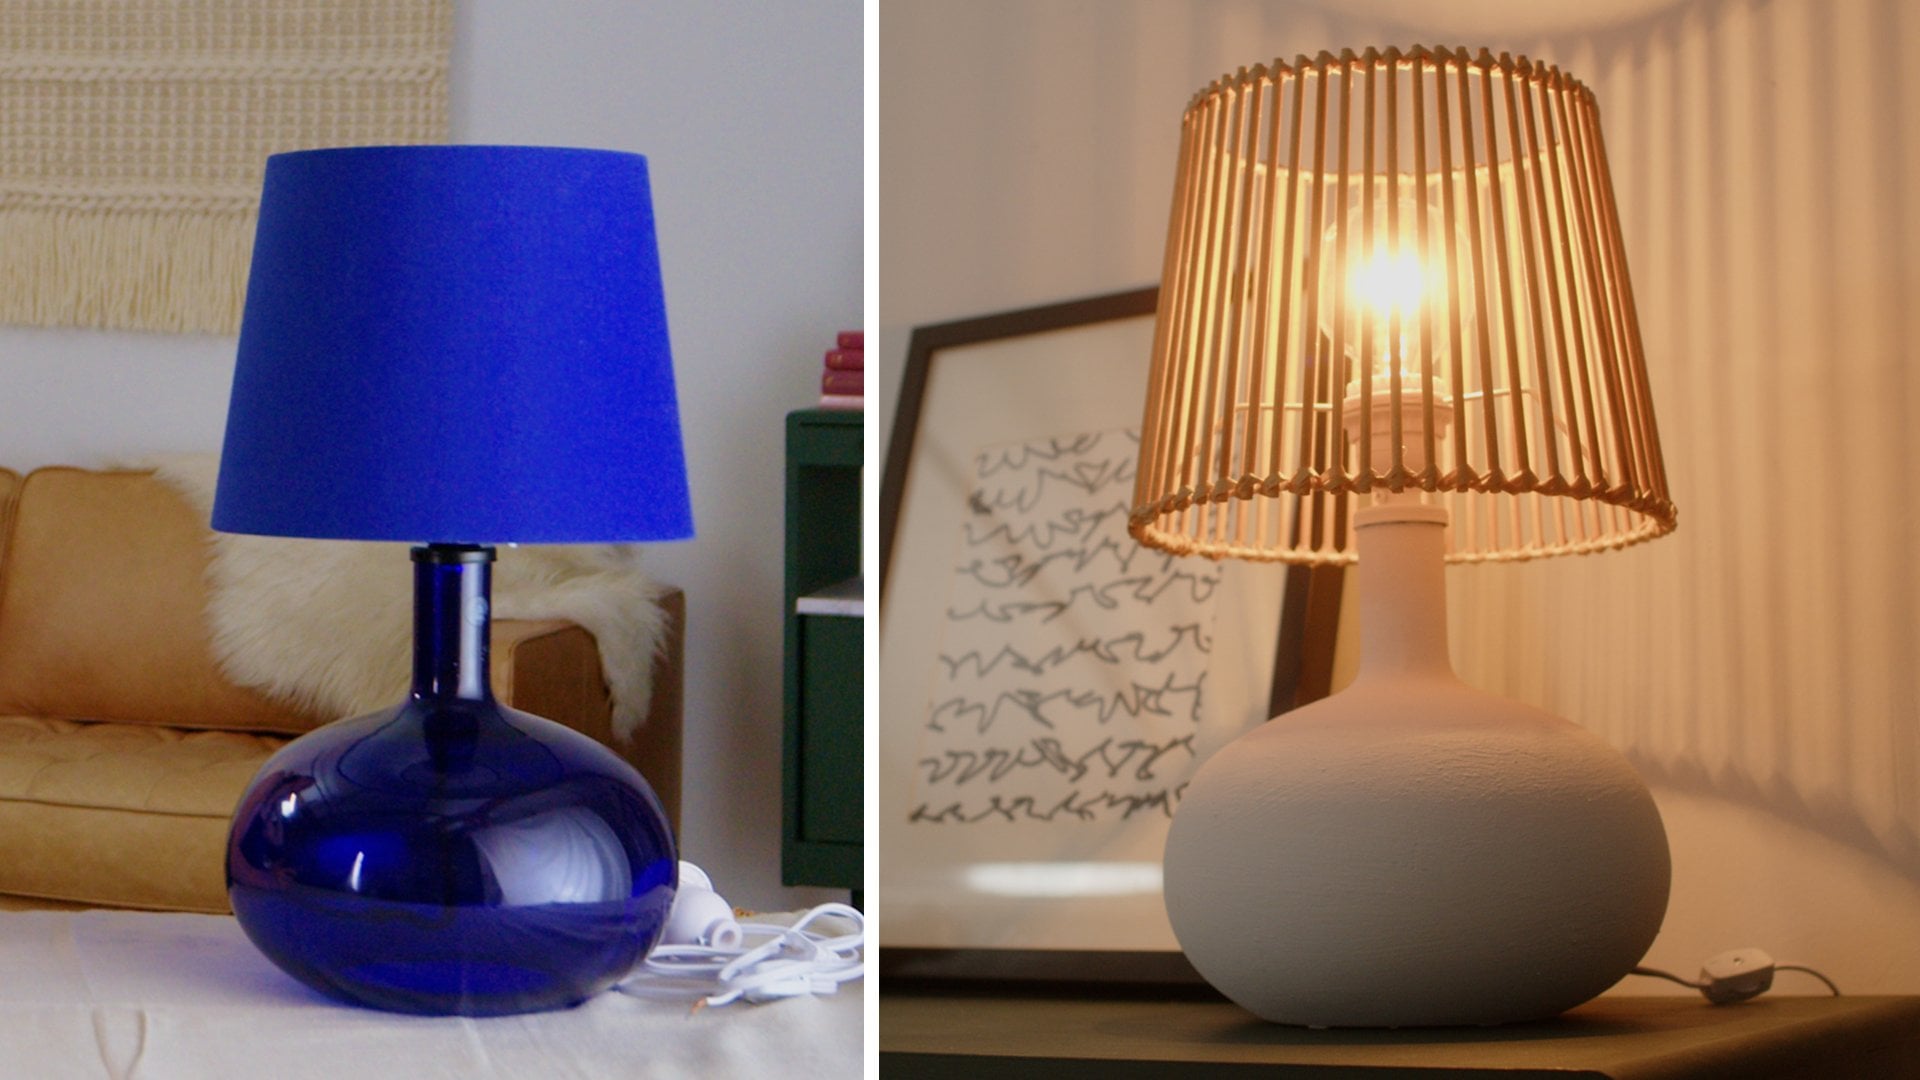
create different projects. This is the first
mosaic that I made. You can see these are pieces
of a lamp that was broken. I took the lamp apart and
use those as my tiles. This was the wiring that was holding the lamp glass together, this was the piping
in-between the lamp glass. I use some of the shapes
that the lamp had and then broke other pieces into smaller bits to create
these smaller bits. Then I threw in some small tiles that
I found in a dumpster. I made this using the
exact same process that we just did. I glued it onto the
backing and then you can see that the grout
is much tighter. I just glued the pieces really close together
and then used a dark gray like almost cement color grout
to fill in the gaps. You can actually see in this one there's tons of imperfections, but it doesn't matter. That's part of what
makes it beautiful. That's mosaic that you
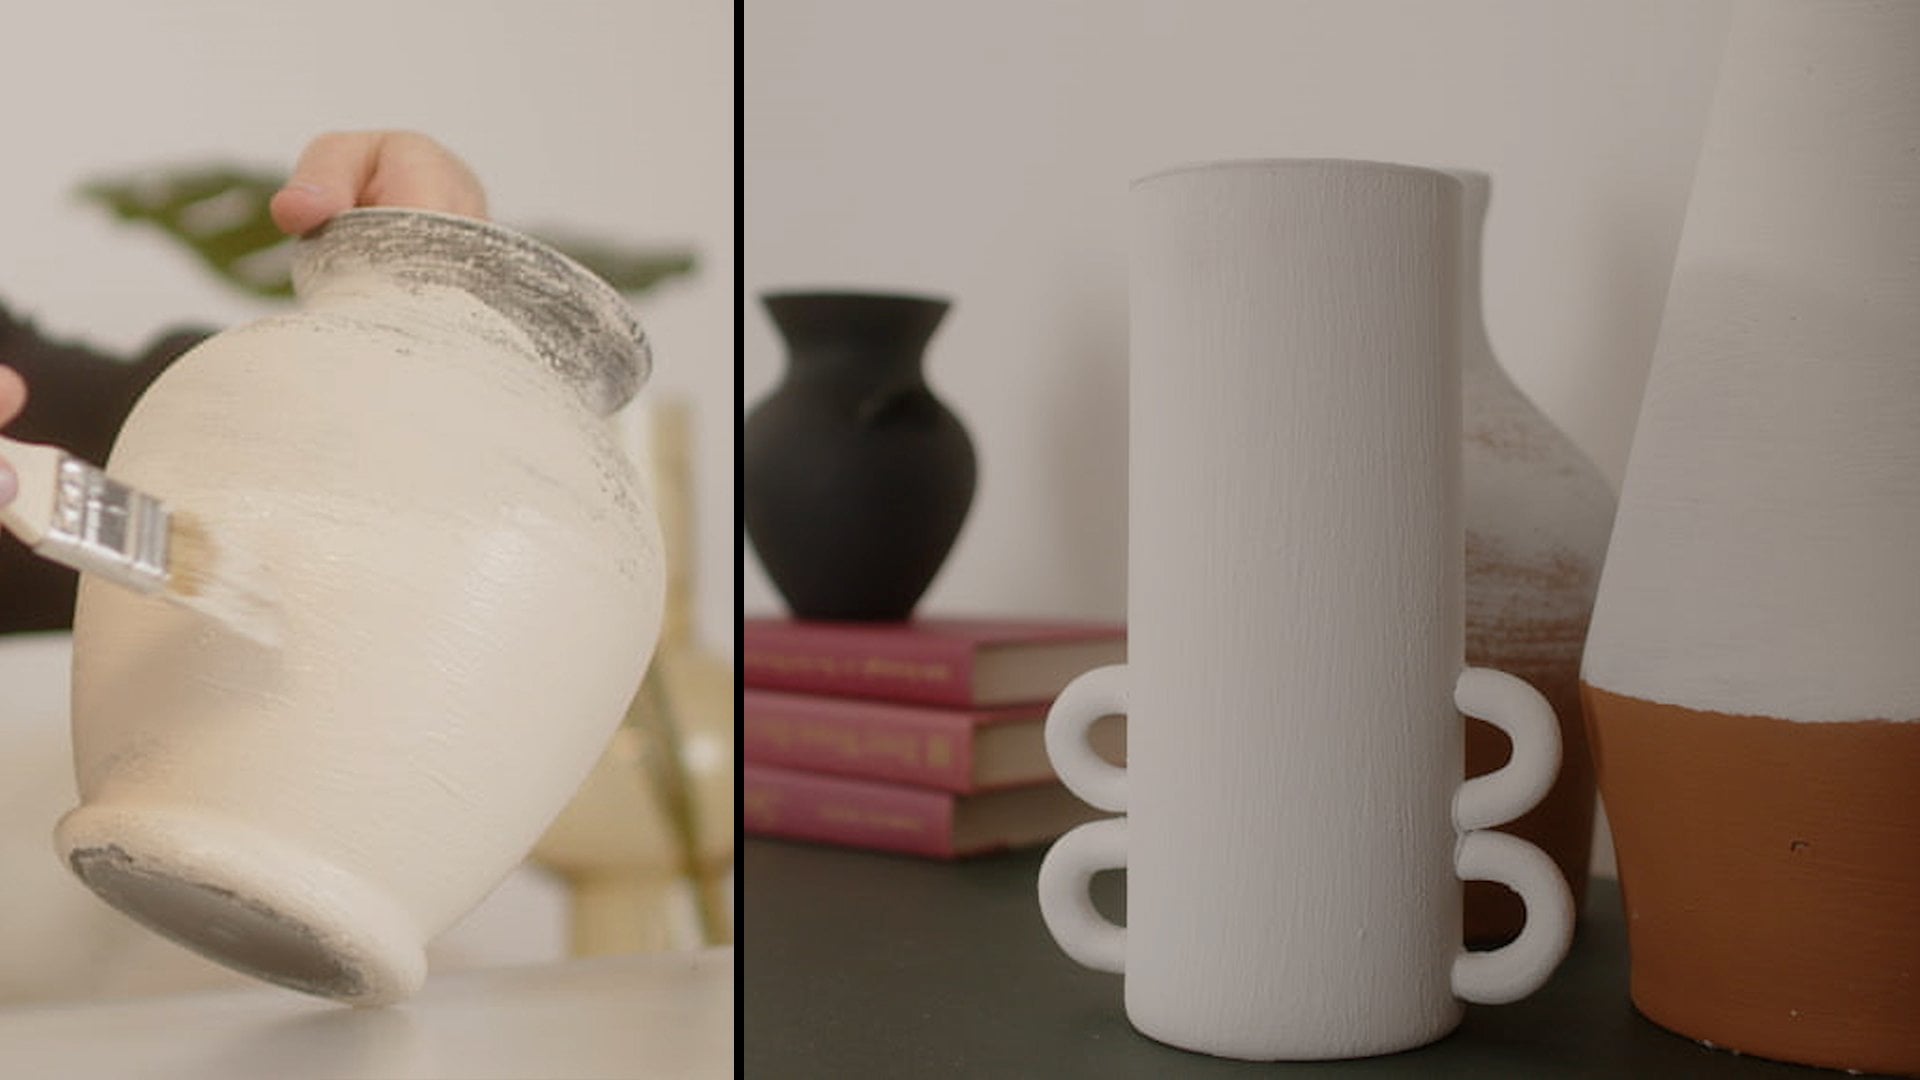
could do for the wall. Another really fun
mosaic project that I've made is a mirrored pot. I took broken pieces and did the same process we
did just gluing it all over a plane, terracotta pot. Things like that are
fun to make because it doesn't matter at all
if they're level. So that's where you
can get creative with, you can mosaic a picture
frame or a planter, you can really just go to town on it and it doesn't
matter if it's flat. I think it's because the mosaics look pretty intricate
when you're finished. People think that they're
really complicated to make, but they're actually one of the more
straightforward projects that are pretty hard to mess up. It's basically the same process. You'll take your
object, your glue, your tile pieces
onto it, and then you'll cover it with grout
and wipe the grout off. So it really is
just four stages. My table has been sitting
aside for about 20 minutes. You can see these
gaps are still soft, so they're not quite
ready to be wiped off. I'm just going to
start carefully wiping some off on my tiles and not
touching these bigger gaps. [NOISE] I could have made sure before the
grout dried that there was less grout on the tiles. I'm just going to try spraying some water and starting
to wipe it off. [NOISE] Let's see. Then if I wipe off, [NOISE] way too
much of the inside, we can always just go back
in and add a little bit. So I'm going to keep wiping
it down and cleaning off the tiles and I'll be back to show you
the finished piece. I spent a bit of time
cleaning up this mosaic. Let's talk about it and
dive into what happened. As you can see, the wiping off process did not
work how I was hoping. It's still a little bit wet, but then there is a film that has dried
on top of the tiles. Some things that I
did to combat that, I sprayed it with
water and wiped it down which brought up a little bit of the
grout in the gaps, but I could go back and fill
in any gaps that I needed. I tried sanding it, which did work to get
some of that film off. I tried wet sanding
it, which also help. When I make these, usually I make it with grout that I mix. Normally, I take a lot
more time before I set it aside to wipe it down and make sure that the tiles are
a little bit more clear. This process was
slightly different and didn't go
exactly as planned, but we still ended up with
a pretty cool mosaic. Once you're done
with your table, you do have the
option to seal it. My table, I didn't
seal and I use it as a side table and
it's totally fine, but that is an option
you have if you want your table to be really durable and really waterproof, if it's going to
be heavily used. Let's see what it looks
like on our actual table. We'll take the top and we'll just put it
back onto its base. Even with its crazy
imperfections, like once you get it
actually altogether, it actually looks pretty cool. That's the process that
I use to make a mosaic, I hope you have
fun making yours. [MUSIC]
6. Final Thoughts: [MUSIC] Thank you so much for
joining my Mosaic class. I hope you've had
as much fun as I have and are in love with
your finished product. I cannot wait to
see what you make, so please do share them in the project gallery
and on social. Until next time, keep an eye
out for broken ceramics, tile, or glass to mosaic
with, and happy crafting.
 Bronwyn Tarboton, Home Decor DIYer and Actor