Transcripts
1. Introduction: Over the years, I have tried
all sorts of sketchbooks. I tried big ones, small
ones, medium ones, sketchbooks with thin paper, with thick paper, with smooth
paper or with rough paper. I tried everything. But at the end of the day, I never actually found a sketchbook that I
really, really loved. So that is why I started to
make my own sketchbooks. So if you like me want to make your own sketchbook because you are fed up or not
finding the right one, then this class is
perfect for you. In this class, I will
show you how to make your very own hardcover
sketchbook like this one. And I will guide
you step by step from cutting the paper and
which materials you need, and then how to fold
it, how to stitch it, and everything you
need to know to go from raw materials to something like this that you can do with any paper you
like, any sides you like. So I will show you
how to properly cut and fold your
sheets of paper, how to mark the hose and punch the hose
for the stitching, how to stitch the book, and then how to cut
the cover and cover it with nice decorative paper. And then how to apply
the finishing touches. As usual, throughout the class, there will be little tips
and tricks that you can use to make this book and also any other
book that you like, because in this class, I
will give you the tools and the knowledge to make
not just this book, exactly the same, but
any book that you want, because I will give you the techniques to use to
make this type of book. So whether you have
made some books before or this is your first time,
by the end of the class, you will have a set of
skills to make more books, and of course, you will have
your very own sketchbook. So if you're ready,
let's get started.
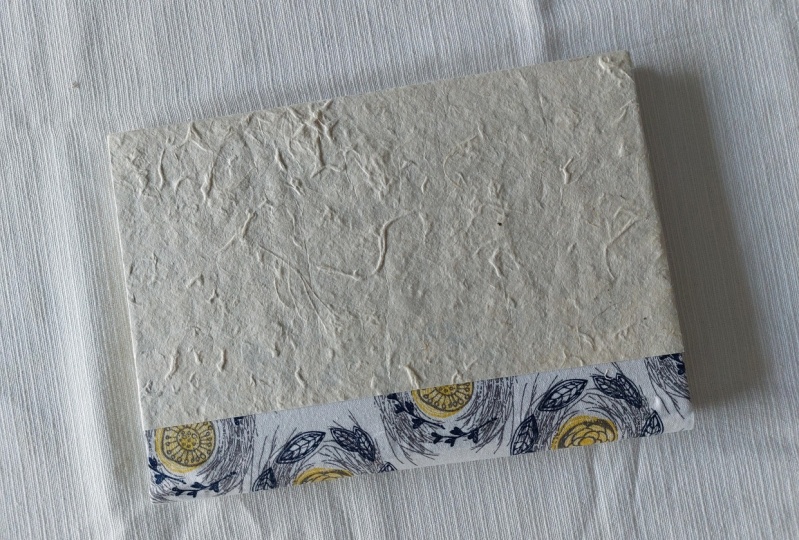
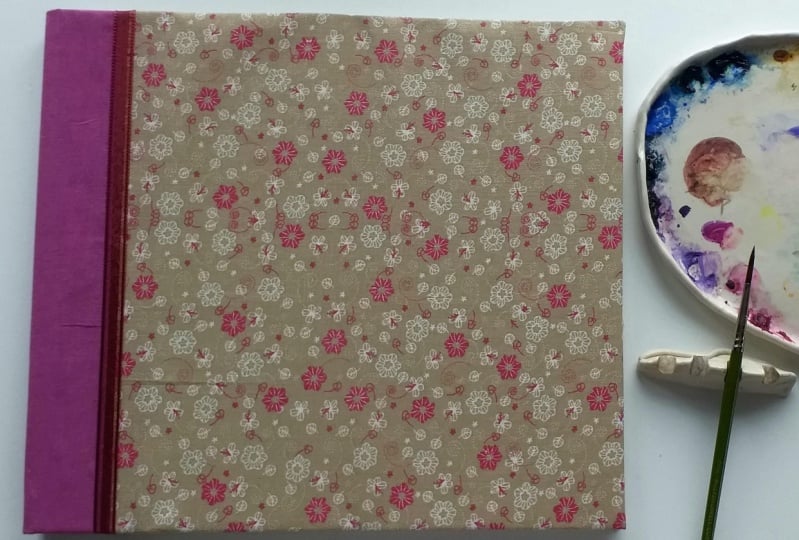
2. Class Project: The project for this
class, of course, is to make your very own
personalized sketchbook. So you can use any type
of paper you like. I've used arches, 300 grams hot press because I like to do
botanical painting. But you may want to use
your sketchbook to do different type of painting like landscapes or still lights. So you might want to use a
different type of paper. So this paper is 300 grams, so you know that even if you
want to use a thicker paper, you can absolutely can because it's possible,
as you can see. I hope you will post a
picture of your project in the project section and
that's it. Let's go.
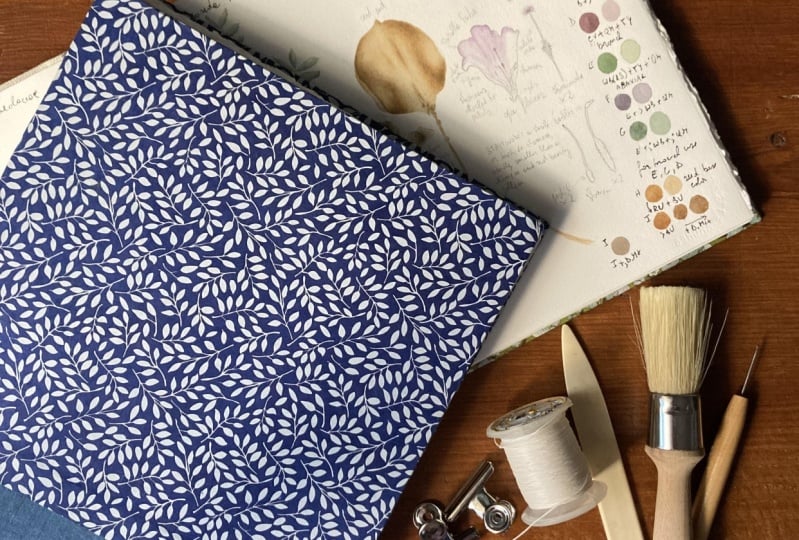
3. Materilas: So here we have the materials for the book to make the
hardcover sketchbook. And as you can see, there's not a lot
of things you need. There's some glue, which
is specific for binding. So you need glue
that is non acidic. So it's best to get some glue
that doesn't have any acid, so it won't corrode your book. And then we have some thread, which is this is
the linen thread. Is specific for binding,
but then again, you can use a cotton thread
as long as it's strong, so you don't have to invest
in expensive materials. This one is a little
bit expensive, but you can get a very
strong cotton thread. And of course, the needle,
you will need that. So this is quite big. Again, it's a
needle for binding, but you can get a big
needle. It's okay. The bone folder, which
is not made of bone, of course, but you
will need that. It's very important.
It's not very expensive. And then some
pencils and the owl. So you will need
these for the hose. So try to get one
that is quite small, so you can make small holes. You don't want to make
these big huge hose. So I have two here, but they are quite both of them,
they're not very big. And then you will need also some cutting implements
and cutting tools. So I have the different
cutting knives. This is quite good. You can change the blade there or
you can use the normal or, you know, every
day cutting knife, the cheaper one, cheaper option. Well, then you need a ruler. I have metal rulers because they're better when you're
using them for cutting. And for cutting the paper, I will use a 1 meter ruler and you have some clips as well, and a dish where I put my glue and then paper,
of course, for the cover. So I use some quality paper and bookcloth which I will
use for the spine as well. The book cloth and the
paper from a shop in London called Shepherds
Shepherds, something like that. So they have this really
nice Japanese paper. And of course, you
will need the board. So it's a millimeter two or three millimeter board
is fine. Just a gray board. You will need a paper
that doesn't crinkle when you put the glue on it. So make sure that it'll list you by the best paper
you can afford. And the Japanese
one really nice. This is handmade paper. And let's don't forget the
paper for the actual book. I used aches, 300
grams hot press. And there about 56 by
76 centimeters sheets, and I use five of them. But you can use whatever you like any type of paper
that you prefer. Of course, that's the
point of making the book. So you can use Fabriano, you can use cold
press is up to you. Okay, so these are
the materials, and we can move on
to the next step.
4. Paper Grain: Before we move on to
the next lessons, I would like to talk to you
briefly about paper grain. And all the materials that
we use in book binding, including the gray board, they have a grain because
they're all made of fibers. And these fibers, they run
in a certain direction. So I made this sort
of diagram here to show you the paper grain, basically, so to illustrate it. And you can see that this you can imagine these like matches, like little bits of
wood, basically. And they all go
in one direction. So when you try to
fold the paper, it would be easier
to fold the paper in this direction rather
than that direction. Because if you
imagine these pieces of wood and they're quite hard, they're quite stiff, then it won't be easy to
fold it that way. But it will be easier to
fold it the other way. So this way, it would oppose a certain resistance to folding, while in this way, it will fold much easier. And by chance, this
type of paper, the printer paper is actually I actually got that
grain that direction. So it folds easier
on the long grain. So here, the paper grain is this direction and it's
called long grain. If it was the other direction, it would be called short grain. So another way to
see the paper grain is to run your fingernail
against the grain or the paper. And this will start to
bugle, as you can see. And if you run it
with the grain, then it will stay the same. But if you don't want
to ruin your paper, you just try to fold it without actually going all
the way down, folding it. This is true, of course, for thicker paper as well. Just try it and see which
way gives less resistance. If it's easier to
bend it this way, then it would be short grain
because it runs like that. Why is this important? Because when you
fold your paper, you always want the
grain direction to go in the same direction as
the spine of the book. So let's say this is a book, a beautiful
illustration of a book, and these are the pages. You want the grain direction to go the same way as the spine. So in this case, if you
had the short grain, you will want to fold
the paper this way, and you will have
an A five booklet. But if the grain is long grain, then your paper will
be folded like this. So you can't do an A five, but you need to do an A six. Because the paper grain, in this case, will be this way. So you need to fold it again. And that way, the paper grain will run
with the spine of the book. So if we cut this with a knife, then you will have the booklet. And the pages will go in
the right direction because that's the spine and that's
the grain direction. And this will prevent
the paper from buckling and not
sitting properly. Because if you fold your pages and especially
your cover against the grain, then the pages will
tend to buckle in the book won't sit properly. I will open. When you
just put it down, the pages will tend to open. So make sure that you check the grain direction for
everything that you use, even if you want to
cover your board. I did this sketchbook here, and this is the board
that I showed you, and I had to check the grain direction of
this paper as well. Because otherwise, when
you cover your board, if the grain direction
is the wrong way, it would tend to
keep the cover open. This way, on the other
hand, is completely flat. All right, so that's all I wanted to say about
grain direction. I hope it all makes sense, and you can always reach out to me if you
have any doubts.
5. Cutting and Folding: The first thing you want to
do when you are going to cut your paper for
your sketchbook is to see which way is the
grain of the paper. So what I'm doing
now is exactly that. You sort of it's like you
want to fold the paper, and the direction where
the paper folds easiest, then that would be the
grain of the paper. So what I will do now is
to measure the pages, and you will get three pages from a sheet of
paper like this one, which is 56 by 76. So the pages will be 25 by 28. So you will get the
three pages and then you can fold
them along the grain. And there will be about
1 centimeter left of excess paper. Don't
throw that away. You can use that for your colors watches
when you colo test, actually, W you're looking
for a color for something, then you can use this little scrap paper
to taste the color. So I've marked all
the different pages. And what I do next is I will cut the paper and
always be careful. I use this cutting knife, but just be careful
when you do this. It would be better one of those rulers which have a
protection for your fingers, but I haven't been able to
get all the one just yet, so I'm very careful when I cut. Just don't think
about anything else, concentrate on
what you're doing. And it's best if you use anyway, metal ruler like I'm doing. You won't cut the plastic ruler. So just proceed slowly and make sure the page is detached,
like I'm checking here. And when it's
completely detached, you can remove the ruler. And that will be the first page. And then what you do is you just fold the page along the grain. So make sure it's
folded in half. Then I use a bone
folder to well, it's actually made of plastic, but that's what it's called
to fold the page properly. And I proceed this way with
the rest of the pages. So I'm using five
of those big pages, and I'm cutting all of them. And just keep doing that. So cut and fold, and I put them one
inside the other. And that's the pages
that are going to be creating your sketchbook. And here I actually folded it before I took
that centimeter off. So that can happen. It's
not the end of the world. If you don't do it before, you just open the page again and then cut that little bit off. It's very easy to do. And I've sped up the video. I always go very slowly
here when I use the knife. And so this is the signature. And as you can see, I put aside the spare
piece of paper, and I'm just folding
the other pages now. So I start from the middle
and go towards the sides. And this is another signature. So we have all the
signatures now. You should have five if you
used five sheets of paper. And now what I do is I
leave them with a weight on top so that they will
be nice and flat. So you can use any
type of weight. I will use a big book. I put some just clean paper on top and my food and cooking
book, and that's it. Now we're ready
for the next step.
6. Marking the Holes: We are ready now to mark
the hose in our signature. So what I do is I
measure the book, the height of the book, and it's 25 centimeters. And I show you this in
a scrap piece of paper. So what you do is you have 25
centimeters and you want to leave something about 1.5
centimeters from both ends. So from the top and
from the bottom. So I'll mark that 1.5 and
same at the bottom, 1.5. And then what is left, I divide it equally. So I will mark around the
7 centimeters. And 14. So I have a total of
seven different holes where the thread will go in and out while I'm binding the book. So what I do is I take
the measurement here. So we have the 25 centimeters, and we mark the 1.5 at
the top at the bottom, and the rest of the
places where I want to punch the holes. And then with the owl, I will punch the
holes in the pages. And what you can do, you can mark them one by one, or you can put all the
signatures together and then use some clips to hold the pages together
so they don't move. Just make sure they are
in the right position. And just apply the clips
so the pages don't move. And then after this, you can mark your positions for the hose with a ruler
on the right side. So you do your 1.5 centimeters from the
top and the bottom. So take all the measurements And then what you do is you
just mark this on the spine, completely on the
spine of the book, and then you can punch the
hose from the outside.
7. Punching the Holes: I made a little
mistake here when I was punching the hose. I just wanted to show you this because it's not a huge problem. This sketchbook
will be for myself. I won't sell this. So it doesn't really matter. If this happens, don't worry. If you're using expensive paper, there's no need to throw
it away as long as you know which one
you're going to use. What I did is punch the
holes on the one page. And then put the
page all together, align them so they are
lining up properly, and then you need to keep
them secure together. I use a little clip. I think it's called
bulldog clip, but just use a little clip so that the pages won't move while you are punching the hose. I put one on top and one
at the bottom of the page, and then just using the
first hole as a guide, I will punch through the
entire signature of pages. So I do that for
all of the holes. Just make sure that
the owl is coming out right on the
spine of the pages, not because it might tend to
go a little bit up or down. So just ensure that it's coming up straight in the little
spine of the signature. So that's why I like to do
this from the inside out. There's more at least for me, I think there's more control
how the holes are punched. And once this is done, you can do that for
the entire book. So for all the signatures, and this is what I did. So at the end, you
should have all of the signatures punched
and ready to go. And the next step will be to actually stitch them
all together. But
8. Stitching the book: Now we're ready to
stitch the book. And what I have here is the linen thread or
as I was saying, before you can use the cotton. And I measure the same amount of thread as the amount
of cinnatues. So in this case, it is five, and I leave a little bit more. And then what I do is
thread the needle. And I have a little trick to make sure that the thread
won't slip off the needle. And what you do is you unwind a little
section of the thread, and you put the needle through. So you put the needle
through the thread, and it's a bit fiddly, but this is a good
way to make sure that the thread won't slip off the needle while
you are stitching the book. So you just pull it and then pull the thread until
the needle is secure. And now we are ready to start. And what I do is I start from the bottom signature and I insert the needle from the
outside towards the inside. And you want to make sure that it's coming through properly, that it doesn't go, you know, left or right, just
come through the hole. And then you pull the thread, making sure that
it doesn't tango, which you will tend to do, as you can see, but
just, you know, work slowly and just
pull the entire thread. And leave a little bit, I don't know, five,
6 centimeters, a little bit that you
will need afterwards to tie the thread
when it comes back. So just use a little bit of washy tape and secure
it at the back. So the next step is to insert
the needle from the inside. So from where the thread is basically coming out from the
inside towards the outside. And again, pull
the entire thread, making sure it doesn't
tangle inside. And now the needle goes back in from the outside
towards the inside. The first signature, especially can be a
little bit tricky, but, you know, just be patient. So again, pull all the thread, making sure you don't have
any knots on the outside. And again, insert the needle from the inside
towards the outside. So I'm sure you can
see the pattern here. Just keep checking that
your thread is not tangled, doesn't have any knots,
and just keep doing that. Now it's from the outside
towards the inside. In the end, you will
have the needle again on the outside of your pages. So what you need to do now
is take the next signature, still from the bottom,
keep them as they were and insert the needle again from the outside
towards the inside. Pull the entire thread. And then again, from the
inside towards the outside, So now when you
pull in the thread, make sure that the signatures aligned because they will move. And I will put some
clips afterwards. So now what you want
to do is to put the needle through the stitches from the previous signature. So just insert the needle from
below and pull the thread. And now inset the needle from
the outside to the inside. And this will help to hold the signatures
better together. So just pull the thread. Don't overdo it,
but just make sure that it's pulled tight. And as you can see, I'm
adding the clips here because the pages are
moving a bit too much. So just give it a good pull
always gently but firmly. So now that the two signatures
are sewed together, you can carry on
with the needle. So again, it comes
out from the inside. Just making sure
it's the right hole. This is the one I made a mistake when I was punching the hose. And of course, be careful that the thread doesn't get
caught in the eclipse. Now again, from the bottom, just thread the needle inside the first
stitch and then again, inserted towards the
inside so that we keep the signature
close together. Give it a nice pull and then go out again
from the last hole. And what you need to do now, again, just make sure that
you have all the thread out. You can tie a knot between
the loose end that we had at the beginning and the thread dressed
to the thread. So in this way, you will keep the two signatures nice
and tight together. So just a normal knot will do. And after this, we can carry
on with the next signature.
9. Stitching Part Two: We can now add the
third signature. And what I do is I move
the clips in order to keep this next signature aligned
with the other ones. So just make sure that it
doesn't move too much. And now, again, I will
insert the needle from the outside towards the
inside of the book. Just pull all the thread. And again, come out on
the outside of the book. And you need to do the
same thing we did before, put the needle through the
stitch so that you will keep those signatures nice and tight together and then thread the needle again towards
the inside of the book. So you just keep doing that. Always check the thread. That doesn't have any knots
or anything like that. And again, the thread will go through the stitch underneath. And now we can go inside. M And then again, outside at the end. So we can add the
next signature. Always making sure
that they all align. So we're threading the
needle through the first, the first stitch,
not the second one, but the very first one. And then through the hole
again towards the inside. And sped up the video a little bit here because basically, it's the same process for
the rest of the book. So outside, through the
previous thread and inside. Just make sure
that the thread is nice and smooth and tight, and then just again, through the previous signature so we get to the last one. So again, same as before. Then you come out, you go
through the previous stitch. Keep pulling gently the thread, so it's nice and taught. And we are finally at the
end of the signatures. So you put the needle through the previous so
I'll show you better. Put the needle through
the previous stitch, not the first one
but the second one. And then what you do is you put the thread
around the needle. So I show you again
the needle through the stitch there and put the thread on top
and around the needle. So that creates a knot
And at this point, you can just cut the thread and you are done stitching
the book, basically. So I'll show you one
more time just in case. So put the needle through, and then the thread over the needle and you can pull
it and create the knot. And that's done. So we are
ready for the next step. A
10. Glue The Book Spine: Now that the book is stitched, we can we can go
to the next step, which is adding some
glue to the spine. So what I have here is
some just a shelves that I don't use
anymore for shelves. And I just put my book in between them
with some clean paper, so wrapped in some
white clean paper, and I put a weight on top of it. It can be anything heavy, so it's my usual book. And then I add some of the
glue to my little dish, just because for me, it's simpler to pick
it up like this. And I use a brush which
is for deco page. So it's a synthetic brush, just flat synthetic brush. And carefully I apply
some glue to the spine. So just going from sort of
the middle to outwards, and then the other way. So just making
sure that the glue goes all over the
spine, basically. And I'll do this a
couple of times, so I'll let it dry. And then once it's dry, I apply again the glue this way. And usually, if
it's a bigger book, I can do it even three times. So it's 2-3 times. Apply the glue, let it dry
and then apply it again. And then what I do
what is later dry, I add some clips as well, so it keeps the spine nice and tight and just
leave it there. Then after this, we can
carry on with the next step.
11. Cutting the Cover: Now that we have
the book completed, the inside of the book, we
can proceed to cut the cover. So we're going to cut the
gray board for the cover. And to do that, I'm going
to take some measurements. So you need to measure
about 8 millimeters to 1 centimeter from the spine. I try to keep it
at 8 millimeters. So take the measurement. And I'm just going to lightly
mark this measurement. And then what we need
to do is we need to cut the board from the eight millimeter measurement up to five millimeter over
the edge of the book. So because in that way, the cover will be a little bit
over the edge of the book, which is what's happening normally in the hardcover books. So take the measurement that just jot down what
the measurement is. And then we need to do the same thing at the top and bottom. So we need to have a
measurement that goes over 5 millimeters
from the top and 5 millimeters from the
bottom of the book. So the cover would be a little
bit larger than the book. And jot down that
measurement as well. And then we can proceed
measuring the gray board. And I always check the
grain of the board as well because it needs to be the
same way as the paper. So the grain direction needs to be the same
direction of the spine, as I explained before. And once I've established that, so that's the grain direction, I can cut the cover. So we cut it and here, just take the measurements. And then I just
check with a book that is actually a
little bit larger. I just double check that, and that is a little bit like those 8 millimeters
inside of the book. And now we can cut it. And again, be very
careful when you do this. Always do a few times. Don't try to cut the board
straightaway applying a lot of pressure because the knife might slip and
you might cut yourself. So do a few cuts until you reach the entire
thickness of the board. This is the first
cover that is ready. I'm just writing here, which one, which
side is the spine? Because it's almost
the same size. So it's not square but almost, so it might be easy
to make a mistake. If you can see here, just leave the 8
millimeters from the spine and then it will
be a little bit larger, 5 centimeters larger all around. Which is exactly what
you want. There you go. That's still coming and
inspecting the work. Now we can cut the second cover. Again, checking the grain, making sure the grain direction
is where the spine is. I align the first cover and then use that as a template
to cut the next one. I'm just using the same method, just make a lot of cuts instead of trying to do it
just first time. And these are the
two covers ready. And what I do afterwards, I just use some fine
sandpaper and just go around the edges where it's been cut just
to make it smoother. And you should really do this
outside if you you know, if you don't have a place
with a nice big window, it's best to go outside
and do it like that. I was wearing a mask
anyway while doing this because there will be
the dust from the cardboard, that it goes everywhere,
so just be aware of that. So these are the covers cut, and they're ready
for the next step.
12. Preparing The Book Spine: Now that we have the book
inside and the covers ready, we can prepare the spine. So for the spine, I'm going
to use a blue book cloth, which are both in
Shepherd's in London. But you can find the
online, I'm sure, or in other shops that specialize in this type of
book binding materials. And I'm going to basically fix the book inside and the
covers with some clips so it doesn't And in order to know how big
the spine needs to be, so the, the book
cloth needs to be, I'm going to use
some scrap paper, and I'm going to
hold it very tight against the spine of the book, and I'm going to just mark
where the cardboard is. So just on the edge
of the cardboard. So on the front, and
then carefully you can turn it and do
the same on the back. So mark both sides. Make sure is correct
the way you marked it. And then what you do is you
can measure this distance. So that's the distance
of the book spine. And then what you do is
you take your book cloth, and you need to
add I normally add five more centimeters to
your measurement that you've taken and is 5 centimeters for the front of the book and 5 centimeters
for the back of the book. And that is the bit that you can see when
the book is finished. So you add three
plus five plus five, and you get 13. So that's your measurement
that you need. So on the back, there is a sort of paper side
on this book cloth, so you can draw on the back and do your
measurements there. So we have 13 And then for the height, I will measure the height
of the book of the covers. And then I will add generally, I add 1.5 centimeters for the
top and 1.5 for the bottom. So it would be 26, which is the cover,
and then plus three. So it's 29. So we'll measure
29 and cut this rectangle. And what I usually do is I check to make sure
that the sizes are right now we don't need
the clips anymore. And I take the inside of the
book and I put it aside. And just check that
this would be okay. And when I did this, I actually noticed that it was not quite enough the
book cloth to turn it. I mean, there was a little bit, but it would have been better
if it was a bit longer. So what I did was add I think it was another
a centimeter or so. So probably you better off to leave something like 2
centimeters top and bottom. So I add this little bit, and then I can cut
the rectangle. Now, just make sure that I have the spine of the
book where it should be. So that's how it's
going to be basically. So one more thing that
needs to be done is to measure 5 centimeters from the right edge and from the
left edge of the book cloth, this will help me place
the two covers in the right position once I put
the glue on the bookcloth. So I will draw a line
that will help me guide me where to position the covers. So this is basically the same measurement
that we took for the spine, the inside one. Okay, so we're ready
for the next step.
13. Glue The Bookcloth To The Boards: All right, so now we
can glue the boards to the book cloth to
build the book cover. So I have my glue here, the neutral pH glue. And I put a little bit
in the dish as usual. And you will need, again, some scrap paper to
protect your workspace. And then you can apply the
glue as we have done before, just with your brush
going towards the edges, so from the center
towards the edges. But I apply the glue only
on the area that I need. And I can use those guidelines I drew
before to apply the glue. Now, following those guidelines, I can attach the two boards
until the glue is still wet, you can still move the boards and make sure that
they are where they should be also make sure you don't have anything
underneath like I did here. So I just attach carefully
the board to the cloth. Don't be afraid of moving it if it's not in
the right place. And then I just check
that they are aligned. And after that,
you can just apply some pressure on your boards just to make sure
they stick down. And after this, I check that is the right distance between the two boards that
they have moved. Give it a good wrap down. And the next thing
we need to do is to fold down the top and bottom
areas of the book cloth. So I get a little bit more glue. And again, usual
technique, apply the glue. Going towards the outside,
towards the edge. And then you can use your
bone folder to help you fold the book cloth
towards the inside of the board and make sure
you give it a good rub, so it's adhering properly. And there's no, space, no air pockets or anything. So same thing on the other side. Again, use your bone folder. That's why this is a very
important tool to have. Okay. Just getting rid of
the excess glue there, and then you can just turn it around and give it here again, a good rub to get rid of any air pockets
that they might be. And that is done. You need to leave it
to dry a little bit. And as you can see, it's starting to take shape. So we are ready
for the next step.
14. Finishing the Book Spine: There is one more thing we
need to do for the spine, and that is to add a
little bit of paper. So measuring the spine is
about 1.6 millimeters or so. And I add this paper. I don't want to add
more cardboard. But I want to add a little
bit of thicker paper. This is watercolor
paper as well. So it's also acid free, and I want to add it just
to give it a little bit of strength to the spine when
you open and close the book. So it's a good thing to do. If it was much thicker book, probably I would use the same cardboard I
used for the cover. For this, I'm just going to
use this paper because it still allows you to be flexible with the
spit of the book, but it's going to be a
little bit stronger. Just cut this rectangle
of extra paper. And then I'm just going
to glue it in place. So I'm going to cut it
a little bit shorter. So I just leave it a little bit shorter
than the top or bottom. So you don't really see it
when the book is on top of it. And make sure that is 5
millimeters from both sides. And in this case, I'm just going to eyeball it, but it's more or
less in the center. So 5 millimeters
space from each side. And it's a little bit fiddly
because it's so small, but just need to
add a little bit of glue and then just
stick it in place. And then after
this, we are ready to cut the paper for the cover.
15. Cutting the Cover Paper: M. It's now time to cut
the paper for the cover, and I've chosen this
beautiful Japanese paper. I also bought in
Shepherds London. I'm not an affiliate,
by the way. I just love the shop. I don't get the chance to go
that often anymore, though. So what we need to do now is to cut the paper so that is a little bit overlapping with the bookcloth so you
don't see the edge. So we cut it sort of 1.5, 2 centimeters, you know, longer so that it can overlap. And then of course, it needs to be a bit bigger on the top and bottom of the cover as well, so you can fold it underneath. So I'm just taking
the measurement, and I don't really give you any measurements around, I mean, for this book because you
can use any paper you like. You can make any sides you like. So this is the general
way to do this work. So you don't need to I mean, I'm not going to give
you exact measurement because it could be
completely different. So as you can see here, I'm
leaving some space from the top and the bottom. So about a couple of
centimeters would do for that. And this paper is quite dark. So you can't really
see the pencil. I realize that it's
difficult to see. So at the moment, I'm
just using the pencil, but I will switch to
a white color pencil. Which looks pink,
but it's white. Well, it's kind of
white ish and pink ish. So it's a light color pencil. But then again, I realize
something else because the paper is made by hand
is not perfectly square. So what I do is I get a square, so I cut the exact sides that I need from a
different type of paper. So that's the
measurement there that I got, which are my measurement. And what I do is I
will use this paper, which is square to cut the paper for the
cover in the right way. So with square sides instead of having it
uneven, basically. So I used as a template. And I just go round
just for good measure. So if anything like
this happens to you, just use a template. This paper is a little bit
thicker than printer paper. And you can see how
different it is because the paper is, you
know, it's not straight. So this is the best way
for me at list to go about this problem when you have paper that is
handmade and it's not, you know, with 90 degree angles. So and then just cut it carefully and just square
off the corners there. You can see how different it was how wonky it was.
And there we go. We have the first rectangle
to cover our book cover. And then we just cut another one with the
same measurement. So I just basically
indicate where the spine is where I
need to put put that. And I do the same
with the other one. I just use this one as a
template to cut the next one. And that's it. We
have our rectangle of paper to cover the book cover. So we can just if you
put it on the top, you can just imagine how
it's going to look like, which is going to be really
nice, in my opinion. And we can carry on with
this in the next steps. A
16. Finishing the Cover: All right, so now we are ready to stick the paper
for the cover. And basically, I'm taking a measurement of about a
couple of centimeters. And so I have a
guideline of where to put the paper once I
put the glue on top. And I do that for both sides,
the front and the back. It's always good to have
a sort of guide for this. Then I'm going to get
some scrap paper, and I will add di glue
on top of the paper. So I used two sheets of
paper because otherwise, one wasn't going to be enough. And again, I put some glue
on my little dish there, and I use it from there. I just find it easier that way. So just apply the glue, again, try to work quickly. So as fast as you can without ruining the
paper, of course. And just work from the center to the
outside or, you know, going towards the outside, so you won't get glue on
the front of the paper. And try to cover
the entire surface. So it's kind of almost stippling action when
you add the glue. And you will need, one
of these larger brushes. A small brush won't
do for this type of work because by
the time you finish, applying the entire
surface of glue, then the first glue that
you apply will be dry. So it's best to have
a bigger brush. So And then you just very delicately
just pick up the paper and apply it on your cover. So try to leave more or
less the same amount top and bottom and align it with your markings that you did before
with a pencil. So always double check that
you're applying it correctly. And then you can
just press down with your hand just to get rid of any air
bubbles that might form. This paper is very good
for this type of work. It doesn't wrinkle. It doesn't
make too many bubbles. So what you need to
do now is turn around the book cover and you need
to cut the two corners, leave something
like I don't know, 3 millimeters of paper
from the corner. So don't cut all the
way up to the corner, but you need to
get rid of some of the paper excess there. But don't cut too close because otherwise you will have
the cardboard show. So then you can fold the
paper towards the inside. And then with your bone folder, you need to press a little bit
on the side of the corner. So just turn it
around to show you. So just press
towards the inside. So the paper is sort of
folding towards the inside, and you do the same thing
on the other side as well. So press towards the inside and then you can fold the
rest of the paper as well. So that should give you
a nice and sharp angle. There we go. So that's
one side of your cover. It looks quite lovely already. And then you simply do the
same thing on the other side. Apply the glue. And I made the video quite fast because it's exactly the
same procedure, basically. Then just use your guidelines and stick the paper
down carefully. And again, need to
cut the two corners. And I do the same thing here. So first fold the sides,
the longer sides, and then I push that
little bit of the corner inside with a bone
folder in both sides. And then you can
finish folding it. And that's your
cover ready to go. And we're ready
for the next step.
17. Finishing the Book: We are now ready to
finish the book finally. And to finish it, what we're going to do
is to attach or to glue the first page of the
book to the cover. So we're going to do this
with the first page and the last page so
that the book will be just together with the cover. So to do this, we're
just going to apply some more glue and
just always remember to put some scrap paper underneath and apply
the glue as we did before when we were gluing the covers and just cover
the entire surface, always with a stippling
action and always going towards the outside of the book when you
get to the margins. So make sure you apply a
good quantity of glue. And then what I like
to do is just to close the cover and open it again so that the page
is sticking properly. And just get rid of your scrap paper underneath,
which has got the glue, and then just press
with your hand and make sure that the paper
is adhering properly, and there's no air pockets
and it's quite straight. So just to make sure that is
closing properly as well. So that's one side
of the book done. Try not to open it completely at this point and make sure that everything
is sticking properly. And so that's one side, and then I just turn
the book and do the same for the other side. So I just had some
paper underneath. So get a fresh piece of paper. Don't use the previous one because you might get
glue on the cover otherwise. And just do the same. Again, once all the surface
is covered with glue, just close it and open it
again and then make sure that the page is in the right
position and then you can stick it down by
pressing with your hand. And that's it. The book is done. Just going to double check it. Just make sure that the
page is stack properly. You can use your bone
folder to just go over it and press it down. You can do that for
both sides, of course. That's your sketchbook done. What I do normally is to add some scrap paper
between the first, so underneath the first
cover and the back cover. And I leave the book overnight
with some weights on top. So just to make sure
that everything is stuck properly and it dries
properly and everything. So it would be nice and flat. And then on the next
day, once that is done, you can take that paper away and you can start
using your new sketchbook. So I hope you've
enjoyed this class, and I hope to see your new
sketchbooks very soon.
18. Final Thoughts: M. Congratulations on
completing the class. I hope you really
have enjoyed it, and I hope you will make lots
and lots of sketchbooks of all sizes and shapes and colors. If you like to keep in touch, these are my social
media and also check out my profile here on Skillshare if you'd like
to see my other classes. And if you like to be
informed of my new classes, don't forget to follow
me if you really don't. So thanks for watching and I'll see you in the
next class. Bye.
 Katia Galante, Botanical Artist and Illustrator