Transcripts
1. Class Introduction: If you're like me, like the idea of having
always a notebook with you in your
bag or your pocket. Maybe you might have considered the idea of making your
own 12 something special, something that is just stills. In this class. I'm going to show you
just how to do that. Hi, I'm Catia. I'm an artist and online teacher and I'm based
in Sydney, Sicily, Italy. In this class, I'm going
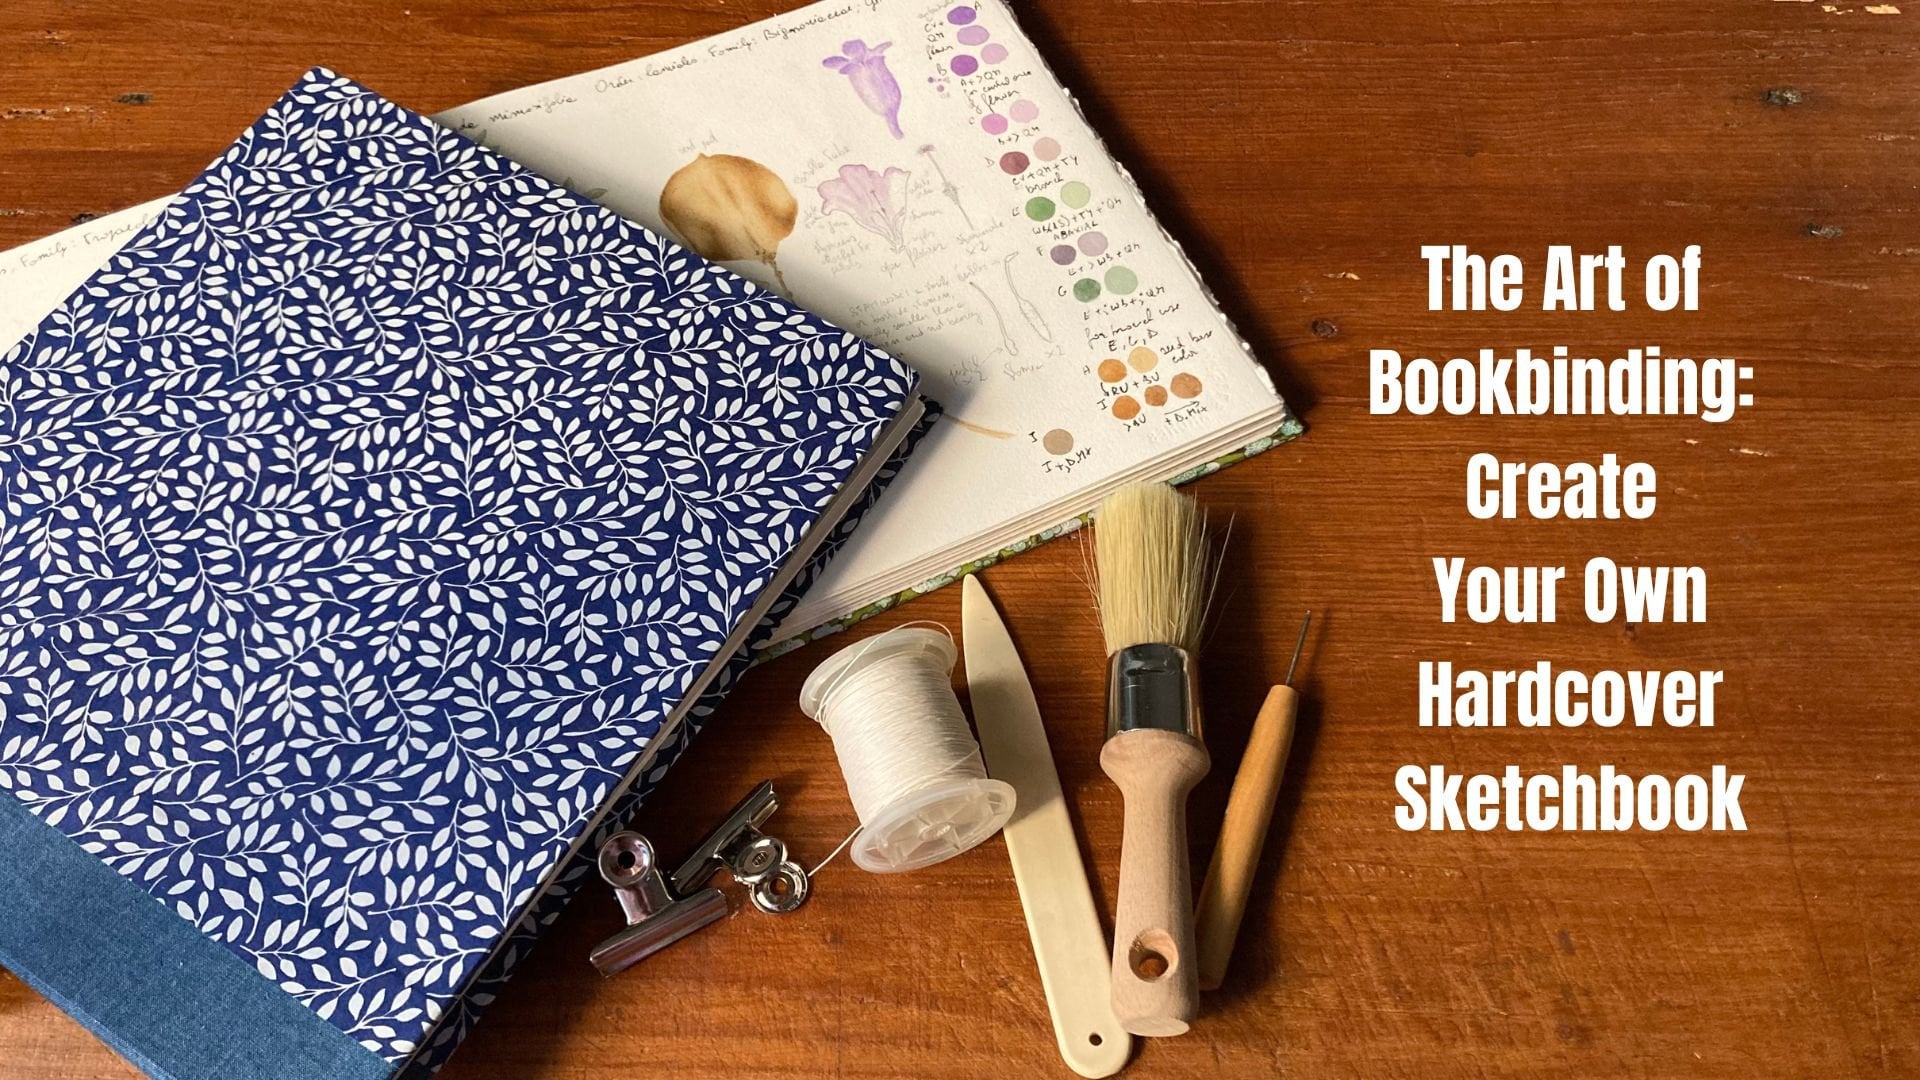
to show you how to make a booklet like this one
from beginning to end. So I'm going to talk about the materials we will
need to take the class. And then I give you
an introduction to the basics of bookbinding. Don't worry, it
will be very short, but it's something that
it's very important to know when you're
making your own books. I will show you how
to fold the paper, how to make the stitching
holes for our little booklet. Then of course I will show
you how to stitch the pages. India, and they will
show you how to trim and finish your book. I also have a bonus lesson
for you where I show you a super easy way to bind your book if you don't
want to use this teaching. So if you're ready,
let's get started.
2. Class Project: The project for this
class will be of course, to make a little
booklet like this one. You can use a plain
color if you like, or you can predict
the kobe gave you. Or you can use your own pattern. Or you can painted yourself. So you can use plain pages inside or you can
put colored paper. So just do it the
way you prefer. It's your book. So it should
be your very own creation. Just let your
creativity run wild. And of course, once
you done the book, just put pictures in the project section so I can give you my
feedback and of course, I can admire your cation. Okay, so let's go
and make the book.
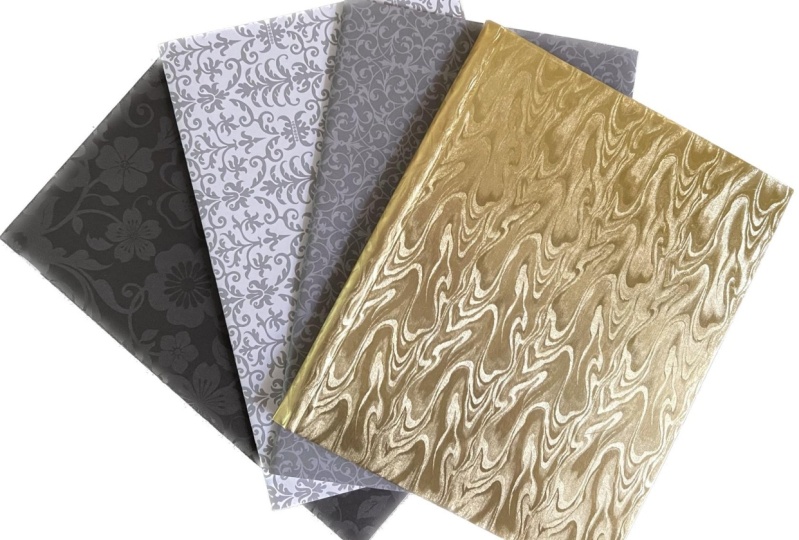
3. Materials: In order to take this class, you will need a few materials. You will need all of these. Some of them are optional, but I wanted to give
you some options. So first of all, you will need
some paper and you can use just some normal copy
paper for this project. Is just a number people
they use on your printer. You can also use a paper. So you can purchase these
in different colors. And other like this. One was a packet with the
multicolored the bus. So I think they're going
to use some of these. You can use a mix
if you have them or just color or just wait. Then you would need some
thicker paper for the cover. Now, you can purchase
some thicker paper. Just one color if you want, or with a pattern. I used for my own pattern. And I'm going to put a file for you to download
so you can use the same for your own
booklet if you want. One thing that I
wanted to show you. If you download the
file and print it, makes sure that you have
the printer's set on a, on a setting when normal genes. So full-page. Because otherwise you would get this white frame all around. As you can see, this
one for this project is gonna be right because we will trim this paper so it
doesn't really matter. But if you're doing
something where you use this paper
folded for a five, then you don't want this
white frame around. You need to paint
it like this one. Were no border. I think it's called
borderless print. Unlisted my printer. Then you need something
to cut the paper. So I'm going to fold it and then probably use
just one of these. This is a letter opener. You can use a knife. I think I believe the
code shoe knives, the ones that are
used in bookbinding, but you can use
something like this or a knife from your kitchen as long as it's not too
sharp, don't cut yourself. Or otherwise, you can use
a scalpel like this one. Makes sure the blade is new. And if you use a scalpel, I would advise you to use a metal ruler because
the scalpel might actually cut into
the plastic ruler. So always be careful. Keep your fingers well away from the border and go very slowly. When you cut with a
scalpel and the ruler. Then you will need
a bone folder. Again. You can fold the
paper with your hands. But if you are one of these,
they're quite inexpensive. This is plastic
actually is called bone folder because they used
to be made of bone, but luckily, they just
make them all plastic now. So they're not very expensive
and you avoid putting the, the grease from your
fingers on the paper. You might need some scissors
to cut the thread, e.g. and I have here
bookbinding needle. So these are quite big
needles as you can see here. And the thread, which
is linen thread. You can, if you want,
use something else. This is quite good because
it's really strong. And is number 25. So the different numbers
for the thickness, but this is quite, quite
good for what we need to do. And they're a bit more
expensive than normal thread. But it's really strong. So instead of this
you can use some, some of these which
is embroidery thread. So it's embroidered silk. If you'd like to
have something e.g. with color, you can use that. So I would use more than
one strand that we use like two or three strands
altogether because these are different strands. So I will use like two
or three to do this. Or you can use normal
crochet cotton. This some of the
codon for crochet, depending on your need to do. It's quite thin like this one. So you could use that
if you find that in Euro Kraft through. So these are different
options you can use. You don't have to go and
buy expensive materials. Then you will need a pencil. Just a normal pencil. We do have a mechanical one, but then one of these, which is called an hour, if I'm pronouncing that right. And basically, you will
need these to make the holes for the
binding thread. So you need that. And this one, I think
you can really, I mean, if you have a pointed
object or maybe you can use the
needle since it's only like three holes
we're gonna make. But if you want to
make more books, I will advise you to
buy one of these. And then just some scrap paper. You will need that
for this protecting your surface or, you know, or taking some notes
down or something, it's always useful to have a little bit of
scrap paper around. So that's all you need, I think for this class. And if you're ready, we can go on to the next lesson.
4. Paper Grain: Before we go on to
the next lesson, when we start folding the paper, I wanted to talk to
you about something very important in bookbinding, which is the grain
direction of the paper. So all the paper materials that you will use in bookbinding,
including the board. We're not going to
use it in this class, but if you're doing
a different type of bookbinding in my use, the gray board as well. They're all made by fibers. And these fibers, more or less, I did this sort of
simplified scheme here. Just imagine them like
straight, like spaghetti, e.g. or matches little wooden sticks. So the fibers are
aligned and there's always a direction
they go towards. And it will be easier to fold the paper if you follow
the direction of the fibers. So in this case, it will be this way rather than this way. Because you need to imagine these fibers so rigid in a way, you will always
find this one way. Would it bends easier? So even with this COVID paper. So with this one here, e.g. you will see if you
do it yourself, take a sheet of paper,
try to bend it. Don't, don't push
it all the way, but just try to
bend it this way. Then. This way. You will see that here
with this paper I have, it's much easier to bend
the paper this way. Rather than this way. It gives more resistance if
you try to bend it this way. So the grain of this paper, it's actually the
grain I printed this. And it's like this long
brain. You might not see it. Okay, so it's longer because
it's along the long edge. And another way
to see this is if you now have very
short fingernails. But if you run your
fingernail against the grain of the
paper will start to buckle as you can see. And if you run it with a grain, it will stay same. But if you don't want
to ruin your paper, you just try this. And this is true for
thicker paper as well. So just try it and then see which way gives
less resistance. And if it's easier
to bend this way, then it will be short grain
because it runs like that. And why is this important? Because when you
fold your paper, you always want the
green direction to go the same way as the book. So the same way as the spine. So let's say this is a book. Beautiful illustration
of a book. These are the pages. You want the grain direction to go the same way as the spine. So in this case, if we add short grain, then you will want to
fold the paper like this. And you will have
an A5 booklet, e.g. that. And if the
grain is this way, you want your paper to
be folded like this. It goes the same
way as the spine. So that the spine here, if you're getting Rachel, is this way, then you can't
do an A5 with this paper. You have to do an A6. So you fold it and then
you can fold it this way. But the grain direction
is like this. So you have to fold
it again this way. And then you booklet will
be opening like this. So your grain direction rounds with the spine of the book. I hope this is clear. So if we cut this with a knife, I can cut it with a bone folder. Then you will have your booklet. And the pages would go
in the right direction because that's the spine and
that's the green direction. And this will prevent the paper from buckling
and not sitting properly. Because if you fold your pages and especially your
cover against the grain, then the pages will
tend to buckle and the book one sit properly. When you just put it down, the pages will tend to open. So make sure that you check the green direction for
everything that you use, even if you want to
cover your board. E.g. if one day you do a more complex
projects and you want to cover this with
some paper, e.g. make sure that you check the direction
of the paper as well. E.g. I. Did this
sketch book here. And this is the board
that I showed you. And I had to check the green direction of
this paper as well. Because otherwise, when you
cover your, um, your board, if the green direction
is the wrong way, it would tend to
keep the cover open. This way is it's
completely flat. Alright, so that's all I wanted to say about green direction. And we can now move on
to the next lesson.
5. Folding the Paper: All right, So we can
start folding the paper. And since this paper
as long grain, I'm going to fold it this way. So make sure you
match the corners. And then with a bone folder. Just for the paper. That and showing you again here, maybe it was a bit of
Camila so much decoders. And the just pick your time. So we save time later trying to make this ray
thought the waist. And then from the center, this is where all your hand. And then once you've
folded like this, you can cut through it. So let's see, just below
the middle, like this. And then you turn it
and fold it again. This way. The grain would be way
basically with the spine. And then we'll leave a little
bit of the pages and cut so that the corners want mover want to work and you won't
get to folds and things. So there were staying
nice and flat. And then afterwards
you can finish opening the beaches. No problem. If you prefer, you
can use a scalpel in a router and cut the pages. You said? You can cut it. When
you're afforded enough. I can cut it with a
scalpel in the ruler. And then once you have
two pages, that case, you wouldn't have to cut
than say a page like this. It could be just and then
you turn it 90 degrees. And the other for this one. Then you can just put them
one inside the other. And you do these was
worth two pages. You do this with all the
other pages that you want. And if you want,
as we were saying, you can add some
colored paper as well. So again, a preset here, and then the bone folder
from the center outwards. And then you can use a sharpened knife and he
will live less of an inch. And then turn it
and fold it again. And you fold the papers. The sheet of paper like this. So you do this with five, sheet of paper,
should be enough. Then once the paper is folded, that we can move on
to the next stage. Alright, so we are all the
paper folded here to white. And then these colored papers, so you can mix them. And it'll give you this effect. And what we need to do is to put them one
inside the other. And then we can move
on to the next stage.
6. Cutting The Cover: The next thing we need to
do is to fold the Kaaba. And then we will assume this. Afterwards. We'll folded enough like I did with
the other favors. And then we need to put the
booklet inside the cover. And then we will
need to trim this. I will trim a
little bit of this. Um, so let's see. I can dream about centimeters. So here, here. So it will be easier
to work if it's, if there's less paper around. And for this, I can just use a smaller cutting mat. This way. Use my metal ruler and the knife scaffold. And you just go over
this a couple of times and go and now we can proceed with
the making the holes. And then the pages.
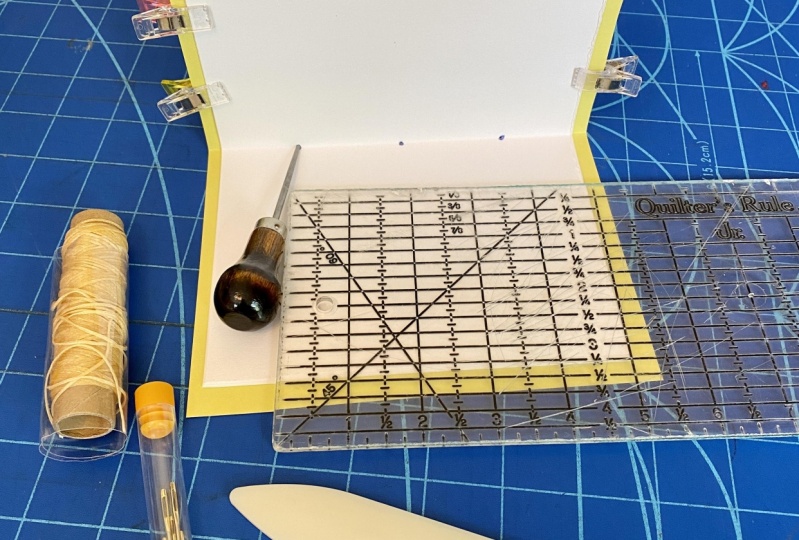
7. Make The Sewing Holes: So now that we have the cover, which is trimmed a little bit, and the inside of the book. We're going to put
them together. And I'm going to open
it to the middle. And then this and then add the paperclip is to
hold that in place. And then what we need to do
is I just gonna take one of these scraps of paper
that I had before. And it's the same height of the book, the same measurement. Let me see if I can show you
better. Say measurement. And what I do is I measure this, this is 15 cm. And I mark the center, 7.5. And then I will make
another two marks, sort of the same distance. So it will be 3.75. So 3.567, so around here
doesn't have to be too precise. And 3.567 there. So these here just show you a close-up this year where we're
going to do the holes too. So the the booklet. And to do that, we just need to get our hour. So I use a cork here from a wine bottle because
this is quite sharp and actually need to change
this because I managed to, to damage the point somehow, but should be okay
for our exercise. So make sure the
book and the color are aligned with a centerfold. And then I'm going to put
this here against the middle. And then I'm going to use the
lines that we did before, the the pencil marks
to do the hose. And you just need
to press basically, just go gently until you see
it coming from this side. Okay. So the first one
then the next one, again with the pencil mark
is you can see it purposely. So I'm going to make it a bit darker there. Make the older home. And then the last one, make it a bit darker
for you again. Alright. And then the next
step would be to actually, so with a thread, I'm going to double-click. And we will do that
in the next lesson.
8. Sewing The Book: We're now ready to
solve the booklet. So what we need to do is to first of all
thread the needle. So I'm going to use the, the cotton thread leading,
actually this one. And I'm going to measure about three times
the length of the book. So 123, two-and-a-half to three
times it should be enough, but just in case. And then you need to do something
specific with a needle. So we traded the
usual way like this. But then I'm going to
teach you a little trick so that the thread doesn't slip away and you
don't have to make a naught, which will be
difficult to them too. So you need to
unwind the thread. So just turn it the other way, round, the other way. That is normally
found basically. And then you insert the needle in-between this
trans and then new thread ID. And then you just
pull the thread. And then a little bit
long disciplined, but that way it won't come off. The thread won't come off. Then you go from the inside and you thread the needle
from the center or pull it. Then we can leave a
little bit at the moment. Then you bring the needle back towards the inside
from one of the holes. Doesn't matter, but I'm going
to go from the top one. Let's see if I can see it. Okay. So bring it back in. Then you need to bring
it back out from the center and then backing from the other hole. So let's see. Oh, okay. Then you need to pull the
thread is nice and tight. Nice pool. Tightly. Take these away. And then we joined the
two with a brief note. Tried to make it coincide
with the center. Hold this tight. And then you can cut it. Close to note. You can, with the bone folder, you can press the knot a little bit. Alright. So we have attached
the pages to the cover. So the next step will
be to trim the book. And we will do that
in the next lesson.
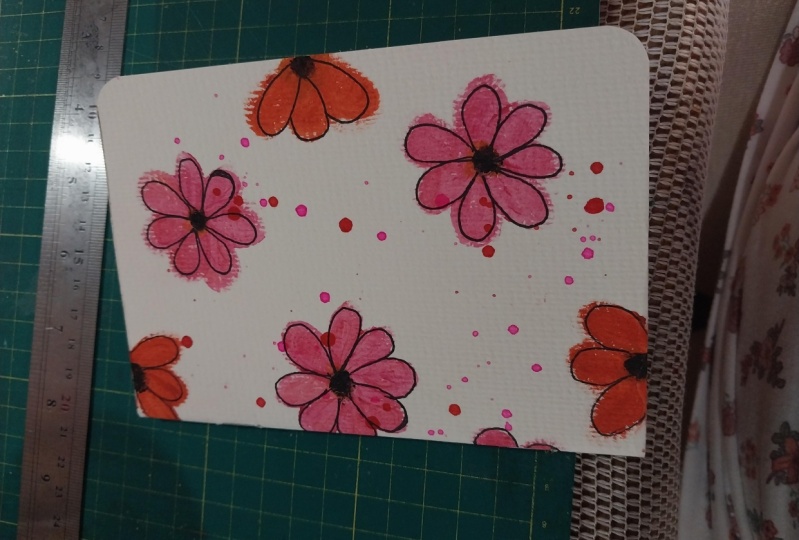
9. Finishing The Book: We are now ready to
trim the booklet. So what I do is I
use this more math. And we will start
with the forage, which is this side of the book. So the the right side, and I will mark, make a couple of marks. This inside here is
about 1,010.5 cm or so. So we marked it around 10.4. So we can trim it nicely. I'm 10.4 cm. Then. I want to make a line
because it might be, might still see the line
went off medial there. So what I'll do is
to take my scalpel. But you can take a another type of knife but something sharp. And then just make sure
that this sitting nicely. And then start trimming it. And you don't want to
apply too much pressure. Because this is something
that you need to do slowly. You need to apply some
pressure on the ruler. But not longer knife. To cut it slowly, slowly. You're trimming the excess paper a little bit at the time, that it would be less easy to make a mistake
if you do it like this. As you can see, trimming it slowly, nearly there. And then we need to do the
same thing for top and bottom. And now I'm going to measure. So this year is 1 cm, so we're going to need 1.3 to make it completely
fresh flush homing. So C1 three is going to
make a little mark there. Check this again. Yep. And we do exactly
the same thing. Okay. And then same thing here. So there's less. This
paper here. You can see. So maybe 1 cm will be enough. So again, I'm going
to mark 1 cm here. 1 cm on this side. Okay. Hold the family. Alright. And we have our little booklet
with colored pages. So as you can see, it's not difficult to do. And you'll have your very
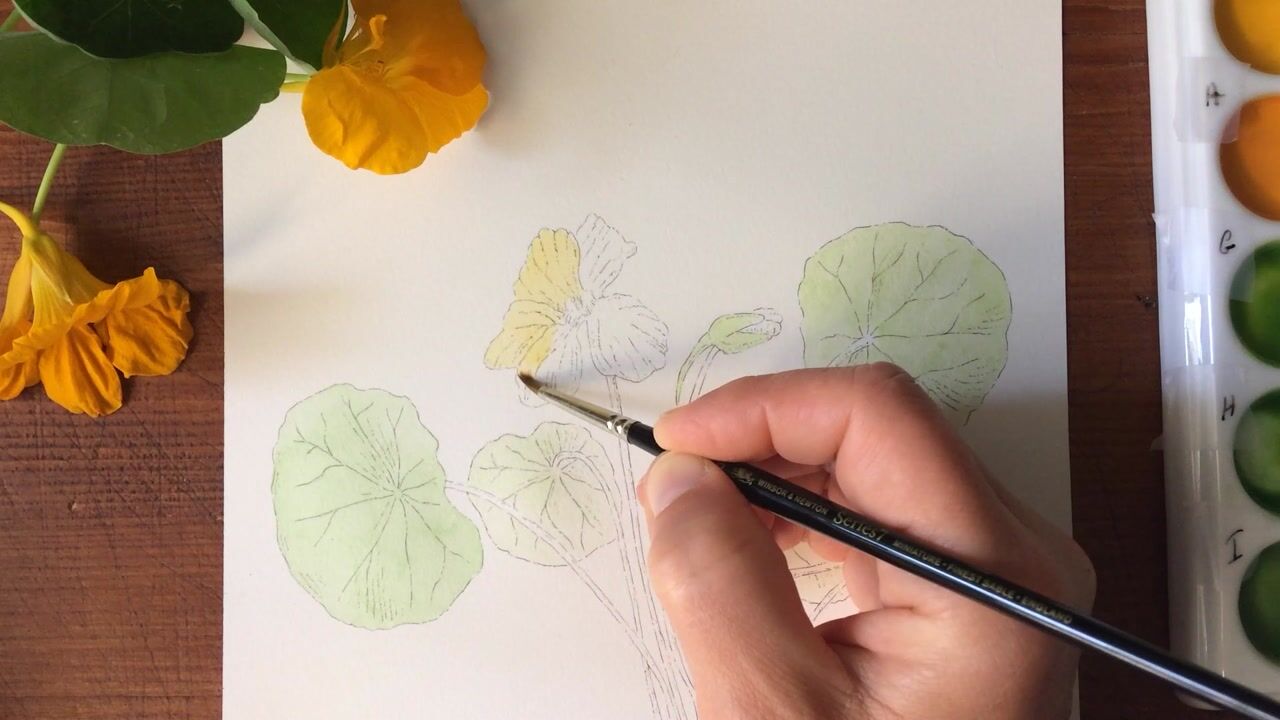
own personalized book, especially if you're like me, print your own pattern, e.g. if you'd like a button
design as well, you can do this. You can use a thicker paper
and print your pattern on it. Or you can just use a
different type of card, card stock, different columns. Or you can use even
like a cream or white card stock and then do your urine during
directly on the cover. I hope you have enjoyed making this little
booklet with me and I can't wait to see
your own notebooks.
10. Bonus Easier Binding: In this bonus lesson, I wanted to show
you an easy way to bind your book without
using the stitches. This is if you do want to do the stitches or if you don't have the
materials to do that. I've made the book, as
I showed you before, with some colored paper inside. Exactly the same process. We have The Cover and the pages. And if they already so this time I tried that
before my finishing it. And then why you do is
you'll make sure that everything is
completely straight. The pages are in the right
place, and then you open it. And what you can do at this point is you can
use one of these, which is one of those
staplers with a long time. And you can just
put your Booklet, booklet in here and staple it. And that's done. But if you don't
have this because not everyone has
got one of those, you can use a normal stabler. Just any old Sega. And some cartoon from
this is from a box. So just something that
gives you a little bit of thickness between your book
and you're working surface. And then again, makes sure that your book gets the
way it should be. Open the stapler. And then that's one. This one here and
moved a little bit. Not exactly perfectly in line, but just to show you. Then on this side, you
just turned this tables. Inside. You have your little booklet. So that was very easy to do. And you don't have to do the stitching if
you're the one too. But you might want to have the Stitched book because it's a more traditional booklet. So it's up to you whichever
method you want to use. And this one of course, you don't need to buy the
thread if you don't have any, you can just do it this way. K, I hope this was a
useful tip for you.
11. Final Thoughts: Congratulations on
completing the class. I hope you have enjoyed
it as much as I did. This little projects
are quite fun to do. And I hope you will make lots
of different notebooks to take with you and to jot
down your beautiful ideas. Don't forget to post pictures of your notebooks in
the project section. So we can admire it.
And if you want, I can give you my feedback. And of course,
don't forget to hit the Follow button
somewhere up there. Here on Skillshare. So you can be notified as soon
as I post in your classes. If you'd like to keep in touch, you can find my social
media links down here. And of course you can
check out my website and my profile here on
Skillshare for more classes. And if you have
enjoyed this class, please do leave a review. It will be really
helpful for me so, and it will be very grateful. Thanks again for taking the class and I will see
you in the next class. Bye.
 Katia Galante, Botanical Artist and Illustrator