Transcripts
1. Introduction: Fabric brings something
special to collage art. It adds texture, softness, pattern, and dimension in a
way that paper alone cannot. Whether it's a delicate
piece of lace, a printed cotton or a scrap of cloth left over
from another project, fabric invites us to create with a more tactile and
layered approach. Welcome to the studio. It's Froyle here, and I'm so excited that
you've joined me. As a mixed media artist with over 30 years experience
painting and exhibiting, I'm passionate about
empowering you to create art, to find your creative voice, and to help you find the
tools that's going to enable you to express yourself through
mixed media applications. Welcome to class 13 of
100 Days of Collage. Textiles Treasures
fabric in collage. In this class, we're
going to be working through days 85 to 91. It has been an
absolutely epic journey, and I really hope you've been along for the
absolute adventure. In this class, we're exploring the creative possibilities of fabric within our
collage practice. We'll be combining
textiles with paint, jelly printing, mixed
media techniques, and layered collage to create richly textured journal
pages filled with color, pattern and visual interest. Over the next seven lessons, you'll be guided
through seven prompts, each one designed
to help you explore a different aspect of
working with fabric, so tactile, so much texture. It's going to be so much fun. We'll experiment with
combining textiles, printing directly onto cloth,
creating layered textures, exploring pattern,
building botanical forms, working on fabric surfaces, and bringing everything together in a final mixed media collage. This class is very much about
exploration and discovery, really stretching your
creative boundaries, exploring things that maybe
you haven't tried before, and looking at prompts from
a different perspective. How are you going to approach working with textiles
and fabrics? Have you tried
different materials on your gel plate or in your
mixed media collages? There's so many things to
try, so many possibilities. It's about looking at familiar
materials in new ways and allowing texture to become an active part of your
creative process. You'll learn how fabric can add depth, contrast, softness, and a character to
your artwork while expanding the possibilities
of what collage can be. So who is this class for? Well, anyone who
wants to explore their creativity through
mixed media application. Whether you're just beginning
your creative journey, or you've been making
art for years, you'll find plenty here to
inspire and encourage you. I'll be guiding you
every step of the way, sharing the exact materials, techniques and creative
prompts I use to help you create ritually
textured expressive pages. And if you're a more
advanced artist, this class will encourage you to experiment with new
materials and discover fresh ways of
building layers and surface interest
within your now, this is class 13 of our series
of 100 Days of Collage, but it is complete in this
one class all seven lessons. However, I do hope you've
been traveling along with me on the journey because each class builds
on the next class, and we've learned so much with our mixed media experiments,
exploration and discovery. This class is going to push
our techniques even further, and it's going to
be a lot of fun. Right. So I can't
wait to get started. Let's gather our materials. Let's rummage through
those cupboards, find all the things
that we need because we're going to make
some Textile Treasures.
2. Material List: Class 13 Textile Treasures
fabric in collage. Now, for our
material list today, of course, we're going to
have to be using fabric. And all sorts of fabulously
textured pieces. Now, you don't have to rush
out and buy a heap of things. Make sure you pull out
what you have from your cupboard or your craft
areas or your studio, things that you already have. And I have found a stack of fabulous materials
from the cheap shop. Now, this is a
recyclable shopping bag from the doll store. Really, really
cheap, really easy. And what I'm going to do is cut the straps off and then use this section for
printing with both on the gel plate and
also just on paper. That's going to
work really well. Cheesecloth is really
inexpensive to buy. I bought some from
a kitchen shop. Super easy and really great
texture for gluing onto the pages to paint over or creating different
textured marks. This one is actually a Halloween decoration
from the cheap shop. And what I love about it is the incredible
pattern it's going to make from all of the
glorious netting. I think it's a type of cotton, so it should really take the
paint and the inks well. I might even glue it into the art journal because I
really love the texture of it, and it's really soft, that's going to be super easy. So the material, the fabric or the textiles don't
have to be expensive. More bags from the dollar store. Look at the texture on this one. It's a completely
different weave, so have a look and a bit of a rummage to see
what you can find. I found so many different ones to use that have different
patterns on them. And this piece of lace, this one's going to print
up again really well. And I know it would stick down super easy also into
the art journal. So number one, gather a
whole heap of fabrics. They don't have to be expensive and they can be really
different textures, different types of fabrics, ones that you want to use
to create textured marks, some jelly printing or gluing
into your art journal. Of course, if you've got
any glorious ribbon, that's going to
work really well. And I also have these
fabulous pieces of hemp, I think they are from tapiology. I have a box from taperology and I've got quite a few
of these pieces that I know would make a really
good print on the gel plate or I could glue them into
the art journal as well. So are you using an art
journal for this series? You know you don't have to. I absolutely love this
particular art journal. It's the Dilusions
creative art journal, and this is the third one for this series because
we are in class 13. We're on the home stretch now. So it takes five classes
to fill the art journal, and I'm up to the third one. I love having all of the glorious textures and pages and lessons
together in one place. So this works really
well for me personally, but you don't have to use a particularly
commercial art journal. You can make your
own art journal, or you can just use loose pages and even bind them together
when you're finished. It's completely up to you. You might want to take
some of these props and actually create
artworks on canvas. Or put them onto
bigger pieces of paper and then frame them
when you're finished. It's completely up to the
direction that you want to take your creativity and how you want to
develop your art. I'm using the art journal, and I'm doing a two page
spread for each prompt. So really, I'm doing
200 days of collage. And I've had so much fun creating all of these
fabulous lessons. Now, of course, I'm using my favorite acrylic paints
in all my favorite colors. You don't have to use the
exact colors I'm using, but I will tell you what I'm
using in your class notes. So have a look there if
you want to know exactly. Use the colors that you like the best or the brands
you like the best, all the different paints
that you like to work with. I love the Liquitex basics because they're very affordable. But then this
particular Amsterdam one for this class
has been my favorite. I do also like the metallics
in the tila brand, and of course, we have to have a little idscent bronze
fine from golden. Now, I'm going to be
using some acrylic inks. I've got an art spectrum one
and a Dela Roni one as well. They're beautiful acrylic inks, and I do love to
splash them around. We're also using a little of the soft body in
the menin because I the bottles that they come in with these nibs are fantastic
for scribbling with. And if you watched the last class of abstract
expressionism theme, you know I use these a lot. You might want to find yourself a few extra beautiful
embellishments for the prompts and your
collages and the pages. I actually got these
super cheap off Timo. So have a look there if you don't mind using that website. Type in what you want, and it comes a huge amount of options and super, super cheap. I've got some other beautiful patterned colored
squares of fabric which are absolutely glorious and some more from my
taperology blocks. We have to have just a
little bit of bling. Now, of course, I do a lot of jelly printing in the class. You don't have to
do jelly printing. I also create textured paper as well if you don't want
to do jelly printing, but it is a whole lot of fun and super easy for creating
amazing collage papers. In fact, in the development of this course over the
hundred days of collage, I've done a lot
of jelly printing and I have learned so much. It has really developed
my jelly printing skills incredibly with each class because the more you do
it, the more you learn, the more you experiment, and the more you allow
yourself to really stretch out those boundaries and really
express your creativity. Of course, you need the basis. I like to use mat gel
medium for the adhesive. You can use whatever you like. But I have found that this works for everything
that I'm using. Although if I have
something a little bit stronger or tougher or
thicker that I want to use, then I will use a PVA glue. I also pulled out some of my favorite deco foil and the mixed and relief
paste worked super well, and I just love the
glorious colours. So I think that's
all we're using, and I'm pretty sure
we've used all of these materials are before
in the previous classes. So you'll probably have
a whole heap already. Don't forget to have a rummage
through what you've got, pull out of your cupboard, all your bits and bobs
and see what it is that you can explore
with the jelly printing, making the textured papers, and also in your collage. It's going to be a
whole lot of fun, and there's so many ways to
really create the artwork. Right. So let's
gather our materials. Let's get ready. Have
super amounts of fun, and let's make art.
3. Day 85: Fabric Fusion: Welcome to class 13 Textile
Treasures fabric in collage. How very exciting. And we're working
from day 85 to 91. We actually hit the
90s with this class. It's very exciting. I've wanted to do
this one for a while. We're going to be
experimenting with textures of textiles
and fabric and creating all sorts
of different papers and using the fabric and
textiles into our collage. So you're going to
need to pull out a whole heap of
material and fabric and textiles and all sorts
of beds and pieces from your craft boxes or storages or wherever it is that you stash all
of your treasures, you're going to need to pull
them out for this class. We're starting with
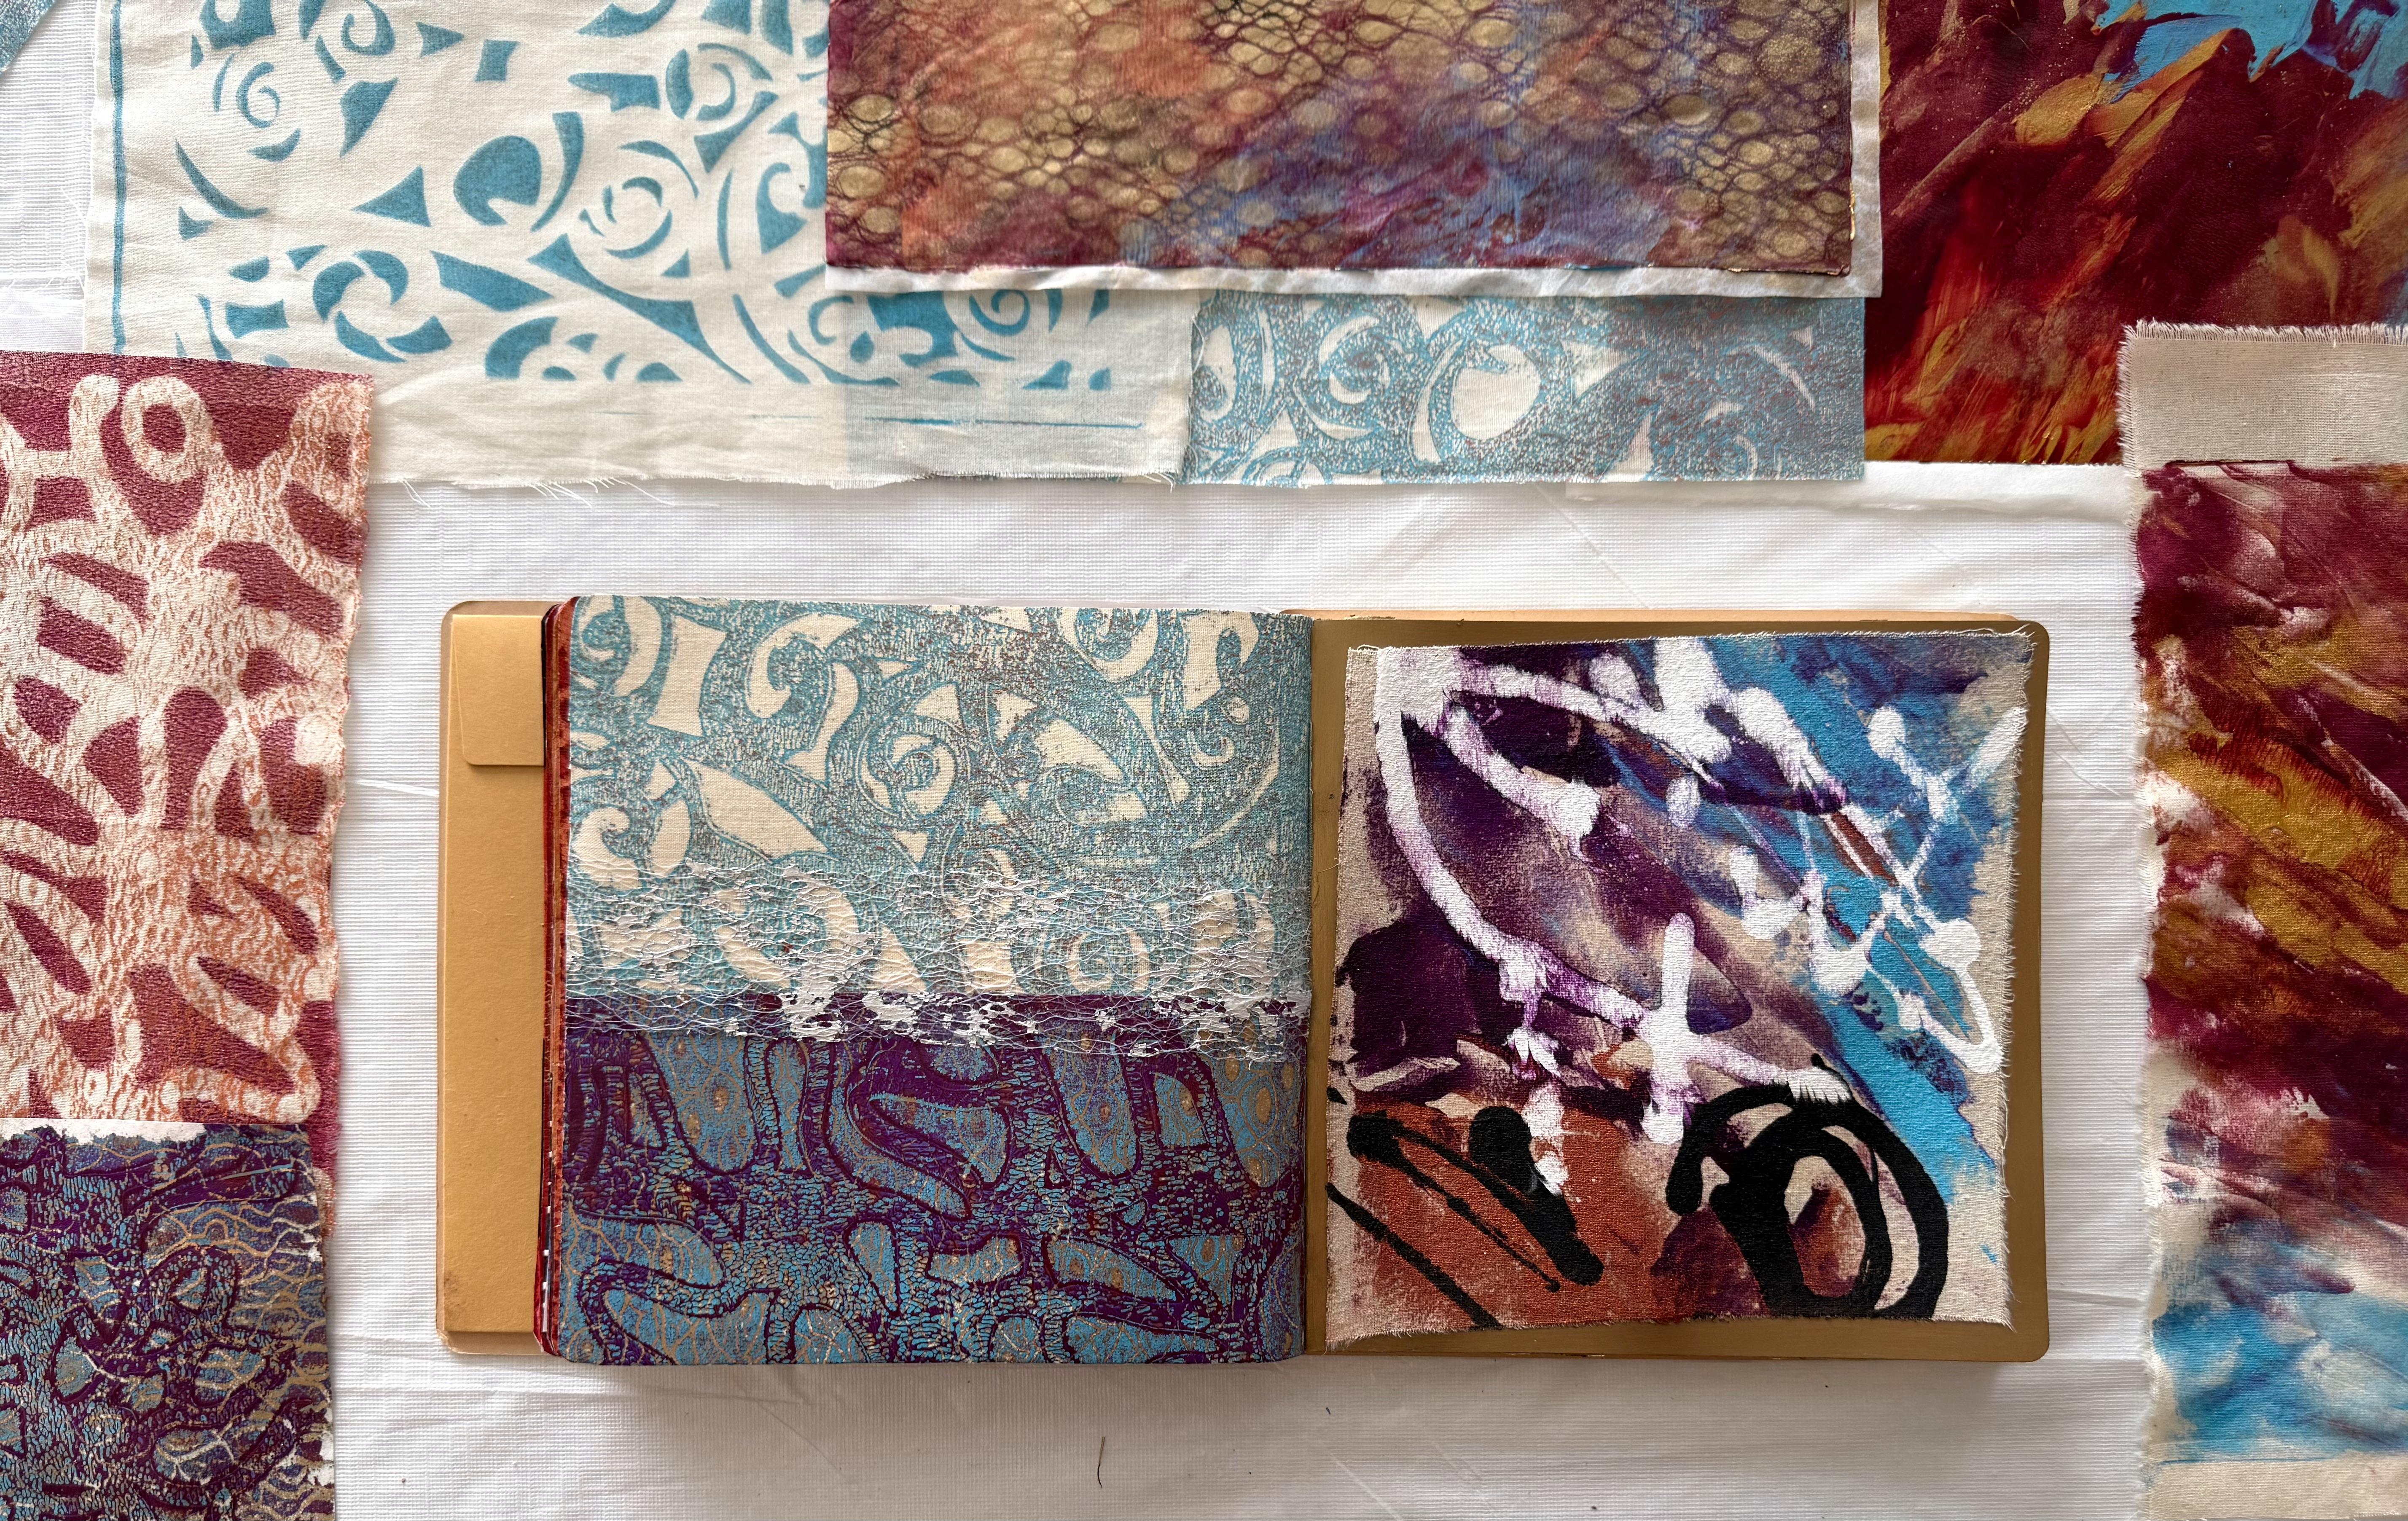
day 85 fabric fusion. Create a collage that
seamlessly blends of various fabric materials to add texture and depth
to your composition. Experiment with combining
different types of fabric, such as cotton, silk and lace to create visually captivating and tactile
layers in your artwork. So basically, pull
out what you've got, and let's see what you can create with all of those
fabulous textures. Now, I'm starting with these fabulous textile
and material pieces. This is a shopping bag from the dollar store cheap as Bro. Absolutely. And
what I'm going to do is chop this section here, chop off the handles, and then I will have a nice big surface like this
with this fabulous texture. Look at the pattern on it. It's actually like a stencil, but it's material and fabric, and I'm really excited to try this one because I do
like the pattern of it. These were also from
the dollar store. They are cheap bags, and I'm thinking that
it's I don't know, I'm not good with fabric. I don't know fabric, but I'm thinking some kind
of a synthetic something. I don't have a clue
what the material is, but I'm thinking of perhaps printing with it
on the gel plate. Wouldn't that be so cool? It does actually say
reusable cotton bags. So there you go. It's
cotton. Did you know? This would make a good size for the gel plate
to take a print. And I've got some more of these cheap bags from
the dollar store. Look at the texture
and the weave on this one. That's
gonna be great. And then this is slightly
bigger. I know, right. Why would you buy
one when you can buy packets and packets? Of them, why do I have so many? I don't know. I get obsessed. When it comes to
starting a new class. And I just see things as I'm out and
about and pick it up, think, Oh, that'll be
good for the class. And then suddenly,
I have a ton of reusable and recyclable bags from the doll store.
Have a look at this. This was actually a
Halloween decoration. Look at that. Some
kind of spooky Fabric. Now, what is it? Maybe
it's cotton, weave. It's some kind of weave, and look how much
of it there is. How fabulous is that? So this can spread right across the gel plate
numerous times. And I'm thinking that
if I paint this, like if I print with
this on the gel plate, then it would become
painted, right, in a color. And that could be great for
putting in the collage in the art journal because it's so thin and light. So
that's going to work. And I really like
these frayed edges. So Halloween decoration. Here you come to the
dollar store. Off you go. I absolutely love this. I love the texture
and the weave, and I can't wait to see what
that one's going to do. Oh, I also have this one. Which is like a lace.
I say like a lace because I'm not sure
if it is exactly lace, but it definitely
looks like lace. Again, cheap chop. So that's got a
beautiful texture to it. Have a look at that. It's going to be so much fun this class. I'm going to try all
sorts of experimenting. Definitely on the gel
plate, first of all, and then I might try using
the same textures onto paper because I think it would
have a different effect. So these are all
from the cheap shop, cheap shop, cheap shop. I think I got this
one from Timo. Don't tell anybody, but I
did. Look how big it is. Again, super, super
cheap, super easy. That's going to print well. On the gel plate, I could
also paint that and stick it in the collage
because look how beautiful the pattern is. Definitely some kind
of lace, so good. I also have some of these
from the taperology box. Now I will leave you a link in your class notes
to taperology, there's a discount code there if you want some of
this because I have all sorts of bits
and pieces that I have a box full of taperology. So I've got these. These would work so
well again for printing or I could also stick them into the collage
on my art journal page. Look how beautiful they are. Look how beautifully textured
and patterned. They are. They're going to work really
well, loving that idea. There's so much to explore. It's so exciting. The possibilities of
what we can do in this particular lesson
with fabrics and textures. Right. So for this
particular class, I pulled out a stack of paints. This is my new favorite. It's a permanent red violet. I know red violet. You already
know it's my favorite. But this is my new
favorite from Amsterdam. There's just something really
beautiful about that color. And then I'm going to put it with some light blue permanent, a little splash of orange, of course, my favorite
prism violet. Then I'm thinking some of
the liquitex in the bronze, maybe a little parchment, not sure about this one. And, of course, I'm
going to have to have my favorite
idscent bronze fine. They bos bronze, but they're completely
different colours, which is really a lot of fun. And I'm going to have
copper and gold. So I'm going to start with
these fabulous colors. I think I'll head
in the direction of jelly printing first,
creating some papers, and then I think I'll put my collage together
with those papers and maybe some bits and
pieces from all of the amazing textures that I
seem to have accumulated. So I can't wait to see how this one's going to
look on the gel plate. It's just so beautiful. It's so delicate and fine. But then also, I'm a bit keen for the spooky
Halloween one. That could work
really well, too. Right, oh, I'll get
these off the table. I'll pull out the gel plate. Let's create some papers
and have a fabulous time. Right. So I've decided I'm going to start with
the shopping bag. I really like the texture and the shape and
the pattern on this. So I've put on the
beautiful prism violet onto my gel plate. I have a nine by
12 gel elf plate. It's a great size for experiment and then
I'm putting a piece of wet strength tissue
just to push through the pattern of the fabric
to take off all that paint. In between the lines, it's like what you
would use for a mask, so you want to get the paint
from around those shapes. Once the beautiful
prism, violet is on. Look how fabulous that looks
already on the gel plate. I'm loving this idea. All of these textures
with the textiles. I know I'm going to have a
lot of fun in this class. Then I put my fabulous spooky
Halloween piece of fabric. It's like a mesh or a netting. And then I put on
the beautiful light blue permanent and roll over it. I don't know that this
was the best idea, but we've just started, so we can try all
sorts of ideas to see how I'm going to
get the best prints. It's on the plate. Now the
colors are working well. Now I do have to wait for these layers to dry before I
can put on the pickup color. Which I decided to use the
beautiful liquitex bronze. Then I'm putting my paper on. I'm using the Coso Studio
jelly printing Mulberry paper. It's a new paper that I'm using. You can get it in big
sheets or A four sheets. I've got a few big pieces of it, and I've just cut it down
for my nine, my 12 plate. It's absolutely fabulous paper. I've been using it on
my bigger gel plate. Pulls off really well. It's really strong
and very absorbent. So when my fabulous
print was dry, I poured it off the
gel plate, tra tra. It looks absolutely fabulous. For my very first print of
our textiles clageGlass, I love the colors. I love the shine of the bronze, and I absolutely
love that pattern. So the next print, I'm starting with the
vivid red orange, and this time, the
paints underneath. I've got my fabulous
netting on top. I'm giving it a bit of a
rollover with the brayer, trying to get that
beautiful pattern. To the gel plate, and
then I'm rubbing it with the same piece of
wet strength tissue. I'm just going to use this
piece over and over and over. It's like a roll
off sheet of paper. You just want to remove the
paint from the gel plate. And in the end, I'm thinking it's going to
look pretty amazing. Then I pour the netting off, and once that layer was dry, I put on some of the beautiful
permanent red violet and my favorite shopping
bag piece of fabric. I also put on one of the other shopping
bags because it's got a different kind of weave and we're doing fabric
fusion, shall we? So we have to have a few
of the textures together. I thought it was a
pretty good idea, putting a couple on
the plate at once, and look how fabulous it looks. So once that layer
was dry, this time, I used the beautiful idscent
copper to pull the print. Now I'm going to use the same
paper for all of my jelly printing today because I've cut it up into the right size, and I just think it's
a beautiful paper. Once it was dry, now I did give it a little
bit of time to dry. Pulled it up, ta ta. It looks absolutely fabulous. Look at all that copper and orange and the
beautiful red violet. And you can see the different
types of patterns from the different shopping bags that are used on the gel plate. So then, of course,
I just had to create one more, one more. And I started with the
light blue permanent, and I put on a fabulous
piece of the lace. I'm loving these bits of fabric and the incredible
textures that they're making. Putting the wet strength
tissue on to get the paint off from around
the different shapes, it'll be really interesting
to see how this one prints. I'm not sure how
it's going to go. I wasn't sure how much
paint I actually got off. So I decided to put the
lace back on and put some of the permanent
red violet over the top. So it's going to create, like, similar marks, but
in different places. I thought that really
could be very interesting. Then when that layer was dry, I used my favorite golden
iridescent bronze fine, put the paper down and
waited for it to dry. Now, I did give this
a fair amount of time to dry because my
layers were quite thick. I do get a little carried away, especially when I love
the colors so much. So then when I pulled it up, oh, man, look at this print. This one is definitely
my favorite. Have a look how
beautiful this paper is. It's got a really
nice feel to it, 'cause it is Mulberry paper, but it has been designed
for us jelly printers. I love it. Now, there will be
a link in your class notes, and don't forget
the discount code. This is definitely
my favorite print of these three that
I just pulled. I absolutely love the
textures of the shopping bag. Make sure you go
to the doll store. Look at the different patterns that the different
shopping bags produce. Love that. Love that. Love that. Now, I'm going to go
and get my art journal. Also, we can create
our first day collage for this fabulous series. What am I going to
put with the prints? Well, I do have an
abundance of possibilities. I've got some beautiful ribbon. That would work really well. I've got a little bit of lace. This feels very lacey.
That could work. I'm also thinking that this
fabric that I printed with, I could use this on
the collage as well. I could just glue some of this on which I'm very tempted to do, because I just love this stuff. And then also the lace one, I could use the lace one. Also, while I was
jelly printing, I decided I loved this lace material so much that I needed
to have it in gold. So I cut off a beautiful
nice piece of it, sprayed it with gold. Spray paint because I just thought I might want
it in the collage. So, have a look at how beautiful both the lace in the gold looks. Yes, it does. Or I could use the
paper because, of course, I sprayed it
onto the Coso paper. I could use the paper
in the collage, so I could use either
the actual material or the print from the material. There's so many options. Do you see why I'm so excited? I could also pull out
some of these from, yes, my taperology box. Look how beautiful
these pieces are. These would look
nice in the collage, so I'm actually going to have perhaps a little bit
of problem deciding which ones I want in this particular first art
journal page because I have, as usual, way too many options. So some of these are going onto the page
in my art journal. I think I'm going
to definitely start with this print because
it is my favorite. Whether I want to add some of these other textures on
it or not, I'm not sure. They're pretty shiny. Even the ribbon matches
really well in the color. So I'll have to
think about that. Go and get the matte medium, and let's see what we decide on. So I'm definitely going to
start with this print cause, yes, it's my favorite. I'm going to just trim off
the edge of the paper. And then see how
much I can actually fit onto my art journal because my art journal
is not very big. This is the third of the art
journals in this collection, which is really exciting because we're on the
home stretch now. This is the second last
class of the series. There's only one
more after this. I have learned so much
by creating this class. This is such a hotful
mixed media art course. I really have warned a bunch. So I love sections of this. I think I might
put it like that. Glue it onto there,
just like that. The blue and the
permanent violet and the bronze
worked really well. And then maybe I might
add some of the lace. Over the top, especially seeing as it's
beautifully painted gold, and maybe some of the ribbon because this ribbon
matches really well, and I rummaged through all
of my drawers and found it, and I was pretty excited. So I'm thinking some Oh, yes, look at that. Look at that. Now I'm hoping my mat gel medium is going to glue
everything down. I might have to plaster the page and then wait for
a while for it to dry. But those colors are
working fabulous, so I'm definitely doing that. And then this side,
I think I'm going to go with both of these prints. I'll put a strip of
both of the prints. I'm thinking, and
then perhaps some of the taperology down the section. Maybe, baby. I haven't fully
decided on that one, but I am gonna use both of the prints 'cause I
like both of them. Maybe that one. Oh, they're
such nice textures. Can I just put them
all on the page? That'd be a fabric fusion. Alright, so that's
what I'm going to do. I'll glue all that down, and I'll show you
how fabulous they're going to look once
they're nice and dry. My pages have dried
up pretty good, especially considering
I plastered them with the matte gel medium. I didn't even know if it
was going to clear up, but you can still
see a little bit of wet spots here on
the golden lace, but I'm pretty happy
and the ribbon, I was very concerned
about the ribbon, 'cause it is a matte medium, so I didn't know if it
was going to be okay, but even that one's
still looking beautiful. I'm very happy with the first collages of this
fabulous Textile Treasures. So I hope you've pulled out
lots of bits and pieces from your boxes of supplies and you're getting ready to
create something beautiful. I'm really happy with how both the prints turned out and the collage that I put together. I had a lot of fun
making those prints with the different
textures of the fabrics. I can't wait for tomorrow for tomorrow's prompts because I know I'm going to be creating something with the gel plate
that I've never done before. And I can't wait to show you.
4. Day 86: Printed Cloth Explorations: Day 86 printed
cloth explorations. How exciting we're going to be printing onto fabric
and disclaimer. I've never done this before. Create gel plate prints
directly onto fabric and discover how paint behaves differently on cloth
than it does on paper. Experiment with stencils, textures and layered
color to create unique printed fabrics
that can become focal points or background
elements in your collage. Let the unexpected marks and textures guide your
creative choices. So many possibilities, so
many experiments to try. I've got some pieces of
calico and some cotton, which I actually think
was a pillow case. So I'm figuring the
nice flat surface could work well
for Jai Printing. So, of course, I'm going to
start with my favorite color. I'm putting the beautiful red
violet onto the gel plate. Then I'm putting down a mask. This one's from
PMR the studio and putting on I think it's a
piece of, like, calico. I found this particular piece of fabric in my taperology box. So I really think
that's what it is. Then I put wet strength
tissue to give it a really good rub
so it would have good contact with the gel plate, hopefully to pick up
the beautiful paint. And tra, tra, look
how good it looks. I think it turned
out better than I actually expected
because I really wasn't sure how much paint the fabric would actually
lift off the gel plate. As I said, I haven't
actually done this before, but once you've done it,
then you know and you understand and you can
develop your ideas further. But we first of all, have to at least try a few
different things. So I ended up putting this beautiful piece
of fabric aside because I thought I might add
another layer to it later. And let's create another print. Now, with all of that beautiful red
violet ghost print on the plate, I let that dry, and then I rolled on
the beautiful blue, added my favorite
lace material to it, and used the wet
drench tissue to take off the pate in
between the shapes. Have a look at the
fabulous pattern. Think this one's going
to work out really nice. Now, you do have to wait for these layers to dry in between. So I gave it a
little bit of time, and then I put on my favorite
idscent bronze fine. Put on the paper and left it for a little while before
I pulled the print. And when I pulled it up, have a look at this one. It's so fascinating
and so interesting. This one's just on
the paper because I'd already pulled the
other one on the material. But this looks absolutely incredible with all of
those beautiful layers. So next, I put on the fabulous
copper onto the gel plate, put on the beautiful
lacy material, and then pulled some
of the color off. Leaving that fabulous pattern. Then I put the printed
material on that I'd already taken previously because I thought it just
needed another layer. It just needed some more color, some more texture, and a
little bit of metallic shin. I pushed it down
onto the gel plate. I gave it a good rub, and then I pulled it up. Have a look how
beautiful that looks. All of the fabulous copper. Textures from that lace material are in the shapes of the mask. I'm loving that. That
prints really well, actually, considering
it's just fabric. Now, I don't have any
fabric medium in my paint. I'm just using the
ordinary acrylic paint that I was using yesterday. Same colors as well. So if you're wanting
to create jelly prints on material that you can then wash or use for
different things, so many different ideas, you will have to
put a fabric medium into the paint so that the paint sticks to
the material and doesn't wash off if you're
wanting to wash it. But I'm having a bit
of a play today. I've never actually tried jelly printing with material before. So all of it's pretty new to me. It's pretty exciting,
and they are actually turning out better
than I thought they might. Now, of course, I've still got
a whole lot of that copper in the beautiful little
textures of the lace material. I really like that material. I'm putting on the beautiful
blue and another mask. Then I'm putting on the fabric, which I think is like a calico. Again, I found it
in one of my boxes, pushing it through the
mask to try and get as much of the paint off
the plate as possible, and it looks pretty nice. That light blue permanent
really is a pretty color. So then after I pulled
the first print, getting all the off from in between the
shapes on the mask. I pulled the mask up and
put another piece of fabric down and gave that a good
rub on the gel plate. I did leave it sitting there for a couple of minutes
because I really wanted to see if I could pull up a couple of layers of paint
with the fabric. And then when I did
pull it up, ta, ta. Have a look at that. I've got the shape of the fabulous mask. Plus, I've got a little
sprinkle of the copper color, and that looks so pretty. I'm really liking this I think so far this one
could be my favorite. But of course, I
couldn't stop there. So after being inspired by our class 12 with
abstract expressionism, I decided to put
a heap of thick, beautiful paint on the gel
plate with a palette knife. Got nothing to lose now. Let's try it, and let's see what we can
create on the fabric. Again, I think I've
got some calico. Putting it on the plate, pushing it down with all
that beautiful thick paint, pulled it up straight away, and it looks
absolutely stunning. Now, of course,
there's a whole lot of paint left on that plate. So I did wait for that to dry, and that did take quite
a while because I did rather thickly spread that beautiful paint onto the gel plate with
that palette knife. But when that layer was dry, after sitting in front of my fan for a good solid 10 minutes, I rolled on my favorite
iridescent bronze fine and pulled the print. I pulled this one
just onto the paper. I wanted to make sure I could
get up all of the paint off the gel plate so I
could try another idea. So the next idea I wanted to
try was an image transfer. Now, I've been asked before when someone's seen one of
my shorts or my videos, when I've created the
beautiful image transfers, can I do that on a T shirt? Well, I don't know. Because I've never done it. And that's how I've always
answered. I'm not sure. I'm pretty sure it would.
Haven't tried it, but so today, I wanted to try it on
a piece of cotton, which was a pillow case
and see if it would work. So I have this image of my
beautiful little treasure. It is a colour laser copy print. I'm using the
liquitex muted violet because I know this paint works. Putting it on the plate, the secret is not too
much, not too little. It has to be just right. Now, I have found that the full body liquitex works really well
for image transfer. And you have to have a
good quality laser print. Once the paint is down, I put down the print,
a little bit of rub. I usually count to ten, not too long, and then I
pull up the print copy. And Tara, Tara, there she is beautifully sitting
on my gel plate. Now, I put my piece of
cotton straight onto the plate because I
thought I wanted to pull her up off the
plate just like that. I didn't really know if I
could put a second layer on if that would actually pull up off the plate with the fabric, so I put the material on. I waited not long enough. And then I pulled the
print off the gel plate. Now, the image transfer actually turned
out quite perfect, but she doesn't look
like a bit of a ghost because half of it was
still on the gel plate. So I'm thinking, is it
the type of fabric? Do I need fabric medium, or did I not wait long
enough for the print. Perhaps it needed to dry
longer being the material. So, of course, I had
to try it again. So I pulled out another
laser copy print. This one is one of the
buildings from Naples. And I put down some beautiful
muted turquoise this time. Same process. Put the
paint on the plate, put the laser copy down, give it a little
rub, pull it up, and the transfer
is on the plate. Fantastic. Now, I
decided this time to wait for this layer
to dry and then roll on another color to see
if I could actually lift it up off the plate with the fabric because
I've never tried this. So I rolled on some parchment, and then I've put down
my piece of cotton. And this time this time I'm going to wait a lot longer
and see if it works. I even decided to put
one of my books on top of the gel plate to
give it more contact. I left it a lot
longer this time. And when I pulled off
the book and pulled back the material tratara
image transfer is absolutely perfect. I couldn't have got it any
more perfect than this. So, to answer the question, can I do that auto T shirt, yes, if you want to, but you
are going to have to use, like I said, fabric medium
in with your paints, if you're going to put it on
something that you then want to wash because this is
just the ordinary acrylic. But look how amazing the image transfer printed
up absolutely perfectly, which makes me think about
all sorts of other ideas. So this is the lesson. If this is the only thing you
remember from this lesson, Wait longer for
your print to dry, especially on the fabric, because the first one is a little ghosty and half of
it was left on the plate. The second one pulled up incredibly well and have
a look at the plate, there was absolutely
nothing left. Bit more time, a little
bit of patience, perhaps the fan blowing the
breeze across the gblade. And just wait. Now, I decided to do just one more because I had another
piece of the calico. So I put on the
beautiful paint again, nice and thick with
the palette knife. I did really enjoy this because I'm at heart, an
abstract expressionist, and then I put some
scribble marks on with the meat and soft body, put the fabric on, gave it a good push on the
plate, and pulled it off. Looks absolutely beautiful
because I love abstract art. And then I put a second piece of the cotton onto the plate
as well and pulled that up, and even that one
looks pretty good. Then I didn't actually
wait for the paint to dry. I just rolled over it with the red violet and put the
paper on because really, I just wanted to
clean the plate. When that dried,
I pulled that up, and it's got those beautiful stunning colours of the blue, the violet, and the copper. I'm thinking that
this print would look absolutely stunning
with a little bit of gold spray paint, especially through my
favorite piece of lace. So I gave it a little spitzer
of the gold spray paint, and it looks
absolutely stunning. So here are all my options
for today's collage. I had so much fun printing onto the fabric because I've
never tried it before, and I learned so much. Now, don't forget the
amazing super lesson of the image transfer. Look at my little ghostly
girl who's That would have actually pulled up perfect if I just had have
waited longer. Ah, I don't think I'll
ever forget that one. So maybe you won't either, because if you have a look at
the second image transfer, it turned out
absolutely perfect. And yes, you could put this on a T shirt absolutely for sure, but you will just have
to use the fabric medium so the paint sticks to the material and
doesn't just flake off. What do you think?
T shirt worthy? I don't think I'll
be making t shirts, but it's good to
know that I have the answer if you want to, because that is a
perfect image transfer. Now, I really do love
these other pieces. This one looks so pretty with the copper
through the lace. And then this one,
look at this one. I really like this one, too. But then this one looks
good on the fabric. I like the little sparkle
of the metallic shine. And then this piece,
the first print, that turned out really
beautiful, too. It is actually printing a lot better than I
thought it might. It's coming off the
plate really well, and I'm still
shocked at how clean this plate was after
the image transfer. So that's quite amazing
with the different fabric. We could be trying
different fabric, but this is what I had
right now in my drawers, which I'm thinking is
cotton and calico. And I'm not sure
what this one is. Maybe that's calico, as
well, just a bit thicker. I do love this one because
I love abstract art, but I also like the
rough texture of it. This is pretty
nice, I'm thinking. This is nice, too, with
the beautiful colors, and I have this one on paper. Although I do think
that this one is definitely one of
my favorites when I added the gold spray through the fabulous lace
onto this print, it was just like, it just
made it absolutely amazing. So, I have to decide which ones I'm going to use today
in my art journal. How many tough decisions. I do like the fabric
of these two designs. But then I really love
this one as well. So I'll go pull it out, find the mat medium, and then have to make
some tough decisions. So I'm really loving this one. Of course, you knew that. I'm really tempted
just to stick that on the page like that because I
like the abstract quality. I like the marks and the
shapes of the paint. And I like the feeling of
the fabric and the texture. It was a great experiment. I almost might do this again. I'm thinking. Now, I do like
these other ones as well, so it is a bit of a challenge. Actually, if I do put this
one on the page like that, just like that is
what I'm thinking. I don't even think I'll
add anything to it. This one would sit very
nicely next to it, don't you think they
sit together nicely. So that's an option. But then I do like these
other ones as well. These ones are very pretty. The shapes of the masks worked well and the
fabric looks good. So I could even do
two of these pieces, either vertical or horizontal, like that, that would work. That looks pretty nice.
This one's pretty nice. It's pretty with the copper. And it does sit nicely
next to that one. Oh, man, now I can't decide. This has got to be the best
cleanup sheet I've ever made. So this piece of
paper was literally to clean the paint up
off the gel plate. It was the last pull. And then I sprayed it with
the fabulous gold spray paint through the
piece of lace fabric, and I really love these
marks that it makes. So I could use this one on here. What do I want to add
to it? I'm not sure. You know, you could always
stick a print on or a piece of fabric or a painting or
something that you've made, and then come back
to it another day. You don't have to
actually decide in the one lesson exactly
what you want it to be. I could put this on
here and then come back another day and maybe add
a little something to it. That's another idea. But now that I've got
way too many ideas, I'm not sure exactly
which one I want to do. I do love this, but I do think that this one sat really
well next to that. And then what about
if I add some of my beautiful taperology material that I've got in my stash. Silver would look rather
stunning on there. I'm a little tempted to do that, the top, bottom, the
middle, the side. Oh, too hard with
all these decisions. So we'll have a think about it. Get the mat medium flowing
and see how it taves out. So this is what I decided on. And, truly, I could have
gone with any of the prints. They turned out beautiful. But I loved this
one, particularly, and what I did was
I tore the side of the material because I didn't want it to be a cut edge. I wanted this
lovely frayed edge, and then I put the bronze underneath on the
page so that I'd have that beautiful beautiful
framing on the printed fabric, and I'm loving this. It looks like a little
abstract painting. Makes me happy. What can I say? And then I ended up
with these two prints. I un and art about it. I really could have used
any of these other prints. They're all really beautiful. They turned out great. But, you know, there's more
lessons in this class, so I might keep these in a
folder for another lesson. You know, you can
do that, right? Use some of the prints in any of the classes for any of the collages that
you want to make. So make sure you do that. Put them somewhere where
you can find them again, especially if you love them. Well, these are
all dried up now. They're looking beautiful.
I'm really happy with that. What a whole lot
of fun that was, and didn't we learn a lot
about printing on fabric. So what are we
going to do next in this mighty fine adventure? Mm.
5. Day 87: Embellished Textures: Day 87 Embellished Textures. Craft a mixed media
collage that incorporates fabric alongside of other
textures like paint, paper, and found objects. Use fabric to create tactile elements that interact
with other materials, enhancing the sensory experience
of your collage artwork. Now, for some strange reason, you might not want to
do jelly printing. Which is perfectly optional in this mixed media art class. So today, I'm going to use the same materials and textiles and the
patent of fabrics, but we're going to be
creating on paper. So I have a nice big piece of the Coso paper that
I've been printing on, and I pulled out
my favorite piece of dollar store shopping bag, and I'm using the
liquitex spray paint in a beautiful, brilliant blue. See how it captures those
fabulous textures and shapes? Oh, I just love it. Who would have thought
a cheap shopping bag would be such a useful, creative mixed media doll. Next, I put on the
Halloween decoration, fabric, mesh, material. And sprayed it with
some of the zincs. This one is the glorious
turquoise color, and it leaves a really nice
print behind from the fabric. Then I put on some more of
the material and splashed on some acrylic ink
in a muted violet. Now, I thought maybe the
material might be able to leave behind those shapes from those fine
lines of the mesh. But I found that the acrylic ink was too absorbent into my
beautiful coso paper, and the material
wasn't quite strong enough or thick enough to
actually create the shapes. So I pulled out a heat gun. I thought, maybe if
I zapped it with the heat gun so that it drew
out all of the moisture, it might leave a crisper image. But no, not really. I it didn't quite work as
I had wanted it to work. Not quite what I
expected, but, you know, that's how it goes when you're
creating mixed media art. You have to try different
things, experiment, throw it on the paper,
and if it doesn't work, you just try something else. So now that patch with the
muted violet was a bit dark and it didn't really create the shapes that I wanted. So I pulled out this
piece of material. Now, this is very similar in
its patterning and texture. It's just a little thicker, a little stronger, and
it's been painted before. I think it was a
car cleaning cloth many years ago that
I pulled apart. It had quite a loose thread, and I just pulled
that apart to create this beautiful shape and
texture of the fabric. So I've put that on, and I'm
using some gold spray paint. Now, this is actual gold
enamel spray paint, which I never use, but I got so frustrated with the liquitex water based gold
because it kept clogging. Usually, I only use the water base spray paint because there's a lot less odor, less smell, less toxvity. But today, I pulled
out this gold enamel, and it worked fabulous right
over the top, of course. I did get a little
carried away with it, but I would recommend the liquitex water
based spray paints, by the end of the day, I really wasn't happy with that smell. Penetrating through
my studio space. Then I put on my
favorite lace material, sprayed it with some
lavender in the zincs, and then put back the fabulous
dollar store shopping bag, and sprayed that with a
color called underwater. I'm just putting the material on the paper here and there, adding the sprays,
adding the textures, and filling up all
of the spaces. I absolutely love
these zinc sprays. They are my favorite, but they're discontinued now. You can't get them
anymore. I'm sorry. So whatever you've got
to use, just use them. You can get the dilusion shimmer sprays.
They're really nice. But because I rushed out and bought what I
could when I could, I do have quite a few
of the zincs left, and they work so well with these materials and textures
you just put it down, you spray it and ta ta. It's already done.
Super easy, super fast. So I worked my way
around the paper, and in colour here, and in color there till all of the
space was filled up. And then, of course,
I had to go a little crazy with the
gold spray paint again. Do really love the
bling and I love how it looks on top of all of
these beautiful colors. Have a look at the paper now. So I'm going to
use this piece of paper for my collage today, and what else will I add to it? Hmm. I might have a little
rummage and think about that. Right. So I'm going
to start with this. This is going to be the
base piece of the collage. I'm not sure which section, but I'll pick two
different sections, and then I think I'm
going to add some of the beautiful Fabric on top of it because I think it would
glue down really easy. I mean, look at the color that
it is from being sprayed. You've got to get
yourself some of this. I'm going to put some
of this on the page. I was thinking
about maybe adding the thicker one,
the heavier one, but I'm not quite sure, even though it does have some nice golden sections
from where it was sprayed. But I'll think about that. What else I might want
to put on that because I do have quite a few
bits and pieces. So I'll grab the art journal, the Mac gel medium, and let's see what
we want to create. So I could choose some different
sections of the paper, maybe this section, and maybe that section,
different colors. See how nice that gold
looks over the violet. Don't stress out if something doesn't work the first
time you try it. Let it dry and then put
another layer over the top, add some more paint,
get some spray paint, do something to it to change it and
create something else, especially if you've got some fabulous textured pieces that you're creating
your marks with. These materials have
worked so well for that. And I would have to say that the cheap dollar store
shopping bag and this piece of lace really have been
my favorite bits of material for this
fabulous creative adventure. They just work so well over and over and over in so
many different ways. So if you don't want to
use the jelly plate, pull out a piece of paper, use the same textured
fabric, textiles, and throw on some paint, find yourself some spray
inks and have a lot of fun. So I could use two different
sections or I could just use one section and let it run over both sides
of the art journal. That's possible. I do
want to add some of this section here where I'm
using some of this violet, but then I really do love
the turquoise with the gold. And then that comes up.
Maybe I'll do that, but then I'm missing
out on some of that. So oh, I don't know. Shall I run the whole
thing over or shall I do two separate pieces so
that I can get more. I want more on there. But I definitely think I'm going to add some of this fabric. I'm going to glue it on
with the matte medium. And then when it's
dry, I might scumble over it and highlight
some of the texted areas. That'd be really fun. Yes, let's do that. I like that plan. I've just got to
decide which parts of the paper I want to use. Look how fabulous my
pages look all dried up. They did take quite a
while to dry because I had them quite plastered
with the mat gill medium, putting that fabulous
netting down. Oh, love this material. Doesn't it look amazing? And I decided to
run right across the two pages instead of
having two separate ones. And I think it looks fabulous. Now, once it was completely, totally and utterly dry, I scumbled some bronze, iridescent bronze
across the top, just to pick up some
of that texture. Doesn't it look beautiful? Yeah. I absolutely love it. This Halloween
decoration material, fabric mesh stuff is
the best $5 I've spent. It works so well for jelly printing or for
spraying onto paper, and now for gluing into
the art journal for that beautiful Embellished
Textures qualities. And then I added some pieces of the beautiful
power shell because the whole texture of the fabric reminds me
of the ocean nets. I love it. I think
the page looks great. I had a whole lot of fun creating this mark-making
on the paper so make sure you get yourself a nice big piece of paper
and have a whole lot of fun. Right, what are we
going to be doing next?
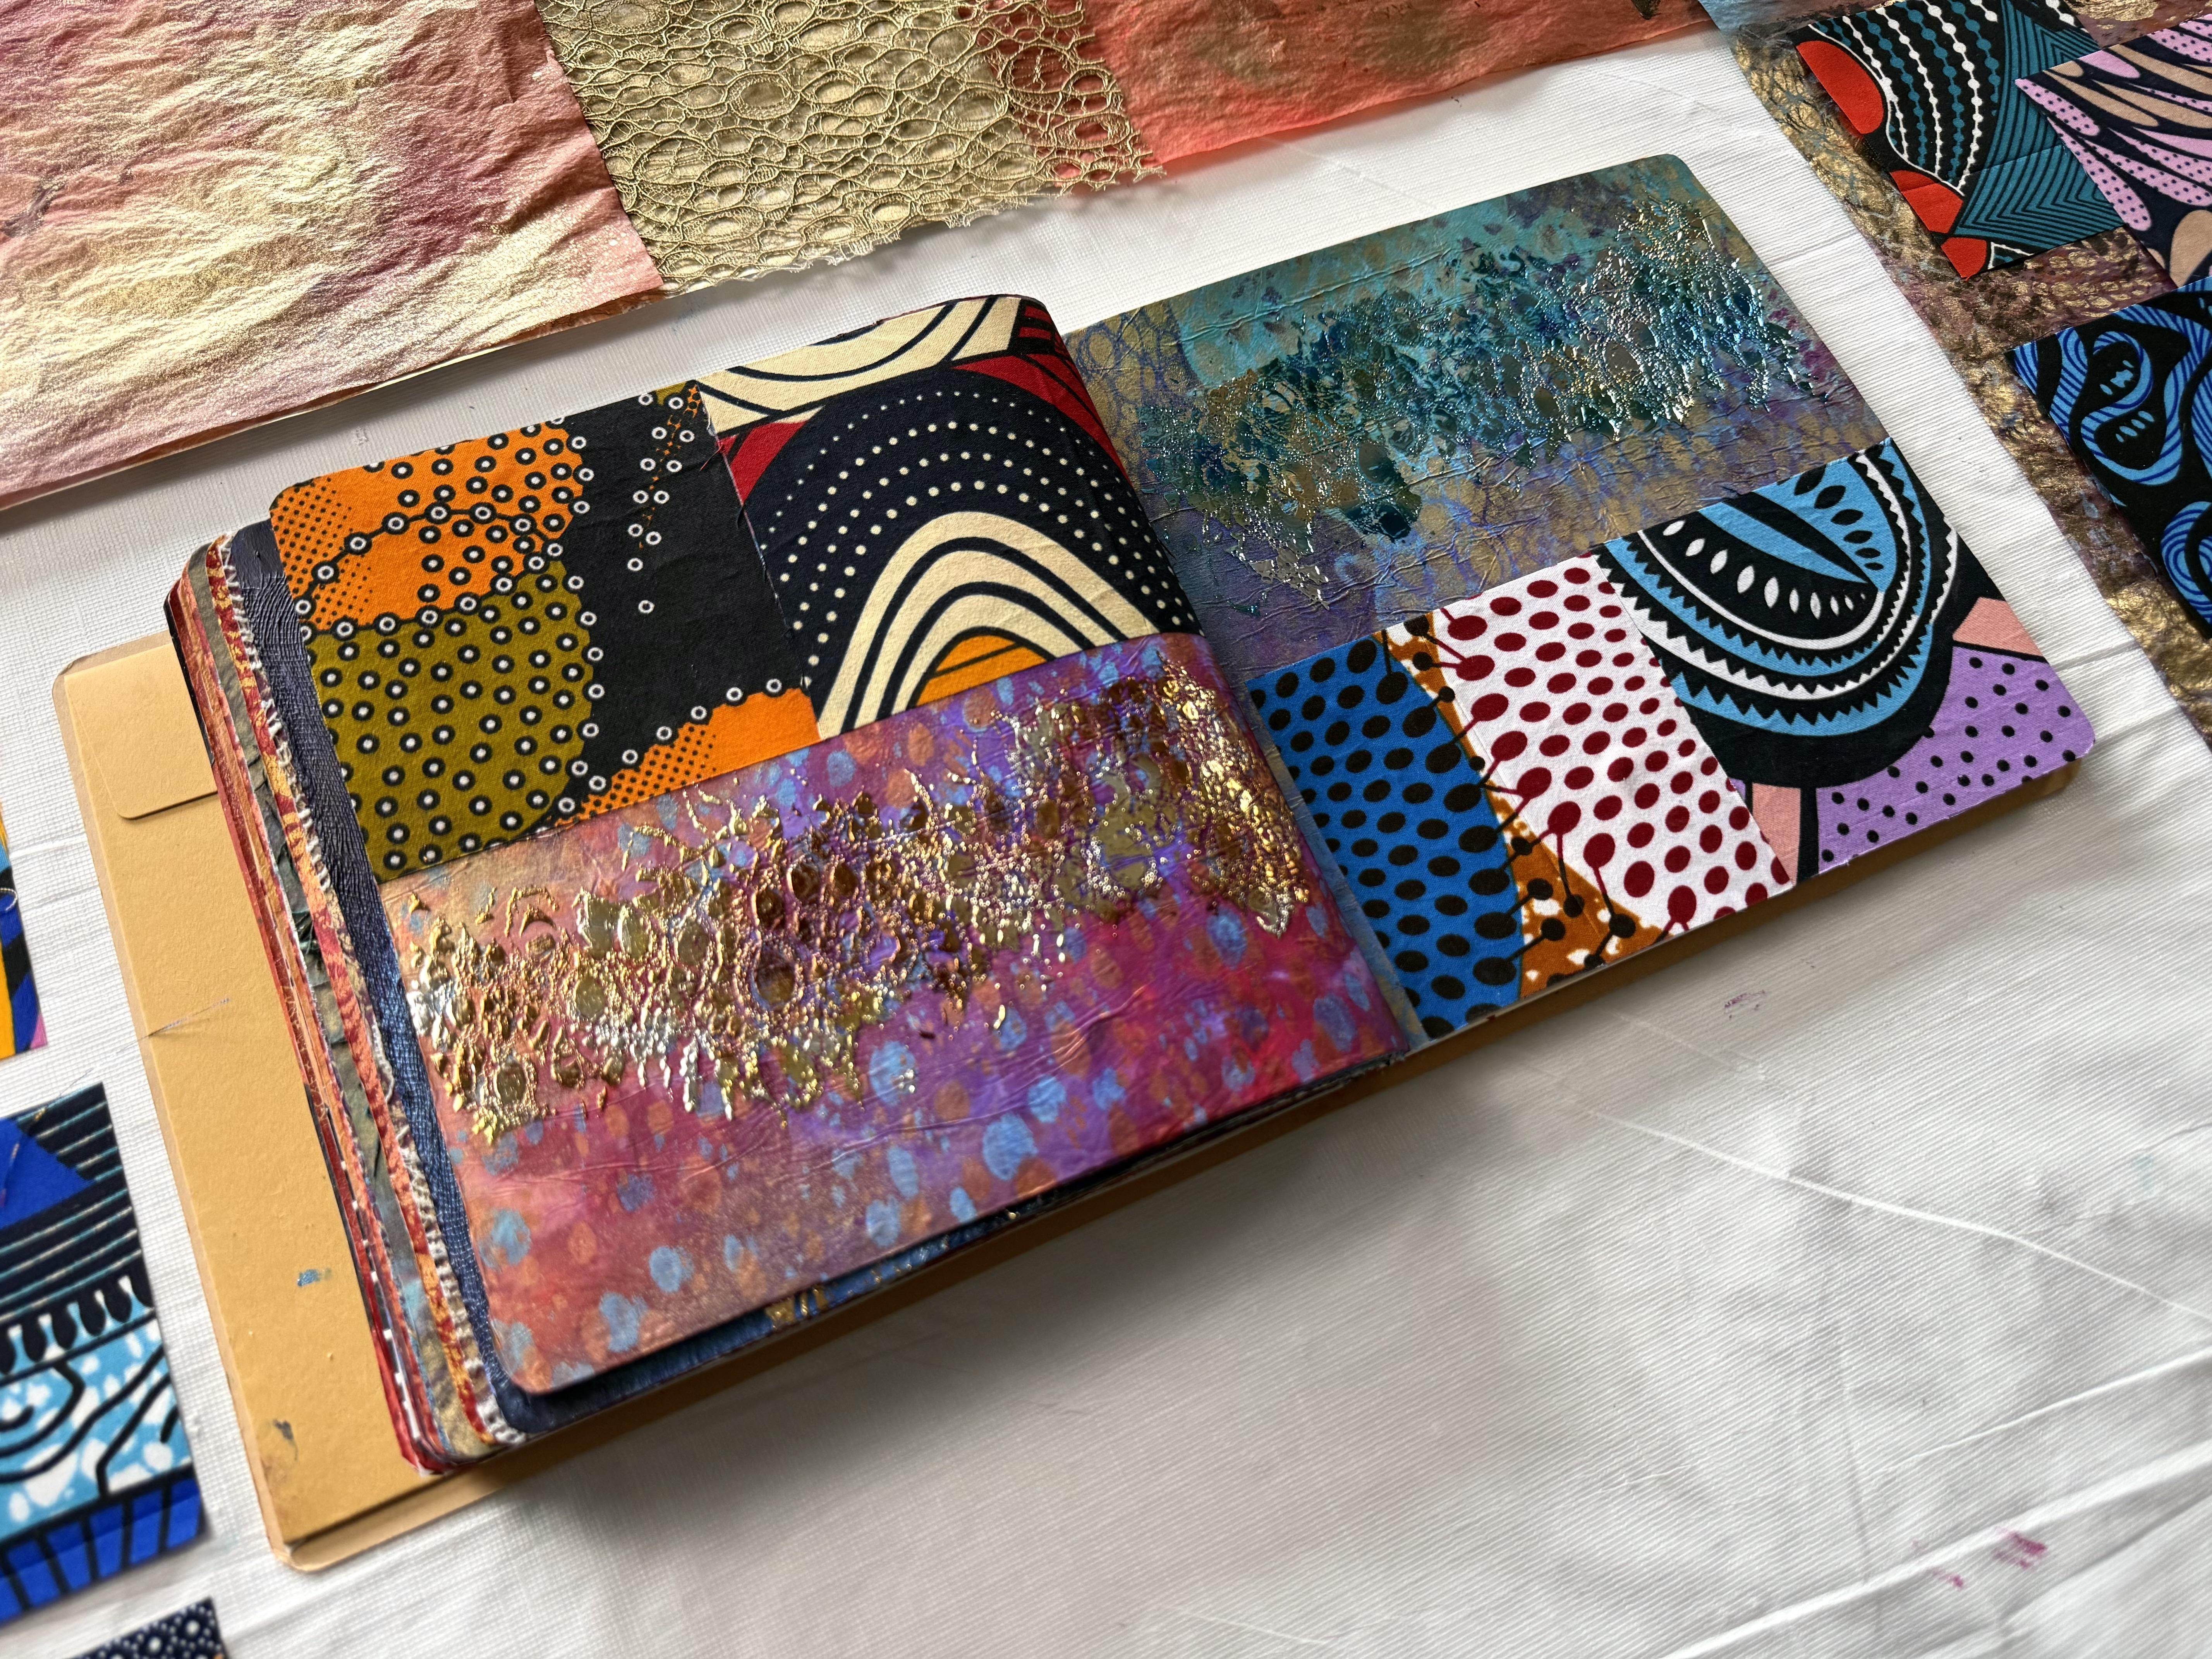
6. Day 88: Pattern Play: Day 88 Pattern Play. Dive into a world of color and texture by highlighting patterned
fabric in your collage. Experiment with
fabrics featuring intricate designs or
prints and juxtapose them with other collage
elements to create a visually dynamic
and engaging artwork. So really, we can go a little
crazy today with patterns. What kind of patterned
fabric have you got? What kind of patterns
can you make? Because you can always
make some patterns out of different
shapes and textures? I'm wanting to use some of this the taperology box fabric. I
don't know what it's called. I actually think it's hemp, and you can't really
call it a ribbon. Is it twine or a braid
or I don't know. But I really like
them. They've got a fabulous texture to them. And I'm going to first of all, try them on the gel
plate because I think they would make
a beautiful print. So, of course, I'm starting
with my favorite red violet. I just love this color, putting it on my plate and
then putting down the twine, I'll call it twine. I don't
know what to call it. And then I'm pushing it
down with a piece of wet strength tissue just
so I can get rid of the paint from around them
and through them and make all of those details of
the different patterns, adhere to the gel plate
through the paint. And when I pull them off, they're looking
pretty beautiful. I think this idea is
going to work out right. Next I put on some gold. I also put on some
copper because why would you want to decide on
one when you can have both. Put on both of the
beautiful colors and then put my paper on. I'm still using the
fabulous Coso studio jelly printing mulberry paper. And I did leave it
for a few minutes because I had that paint
quite thick on the plate. And then when I
pulled it up, trata. Look how stunning it looks
with those metallic colors. Yes, I know they are my
favorite, but look how clear. Patterns are. I'm
actually quite impressed. I think these fabric pieces turned out better
than I expected. So I'm thinking, Well, why would just stop at one? So, of course, I had
to do another one, and this time, I wanted to get a little bit more dramatic. So I started with burnt umber, put the pieces on and rubbed
them again onto the plate, removing all of
that excess paint. Then I put on the beautiful
red violet and some bronze. I'm liking the way
the other print had the two tones. I
thought that worked really. Put the paper on, gave it a really good rub and left
it for a few minutes. Then when I pulled
it up, oh, man, it was just as beautiful
as the first one. The marks are so clear and the details come through so well with these
pieces of fabric. The two prints are looking
absolutely beautiful. So I'm thinking I'm going to put them on one side
of my art journal, maybe a piece of each
one onto that one side. And then I thought,
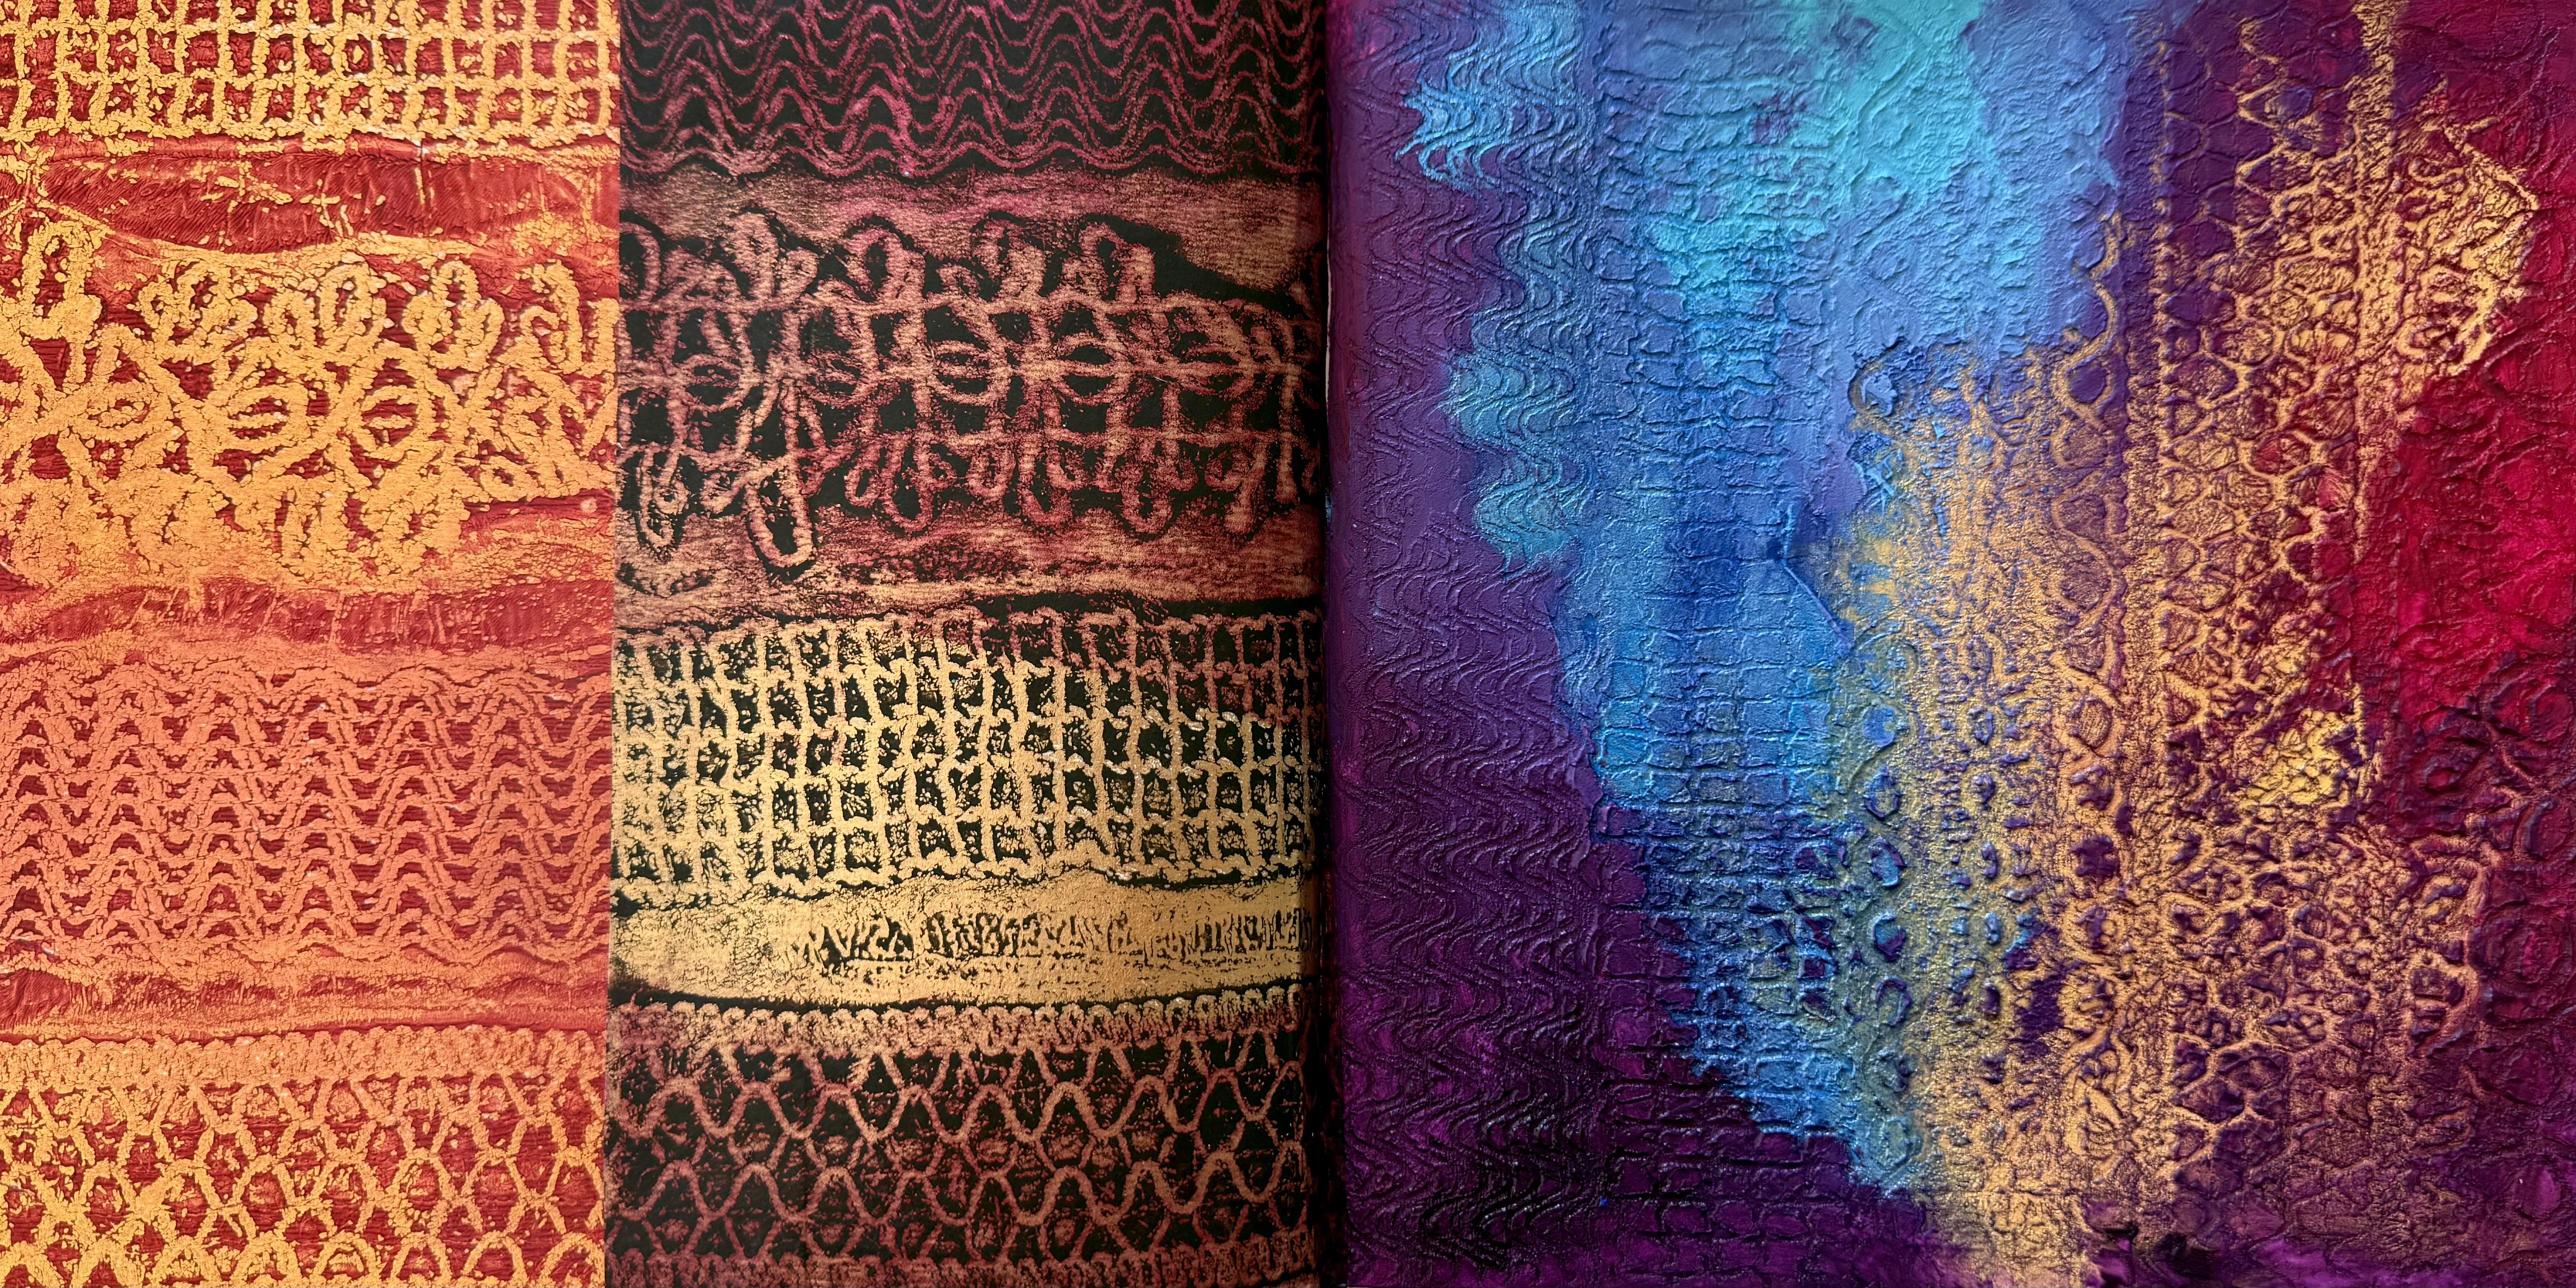
What about if I put some modeling paste
on the other side? Of my art journal, smoothed it out and pushed those same pieces into
the modeling paste. Now, because they printed
so well on the job play, I thought this idea
might work really well. It's a beautiful texture, the light modeling paste. Make sure you get the light
one because it's light. So it's a lot better for the art journal.
It's quite smooth. It's very nicely textured. A little like whipped
cream putting it on, but no, you can't
eat it. I love it. It's one of my favorite
modeling paste to use because it's so light and easy
to put in the art journal. So I put that on,
put the fabric on, squashed them down
into the paste. And look how fabulous they look. The texture looks beautiful. And then, of course, I
had to leave that to dry. So, this side is looking
beautiful. It's all trimmed. Up now, I love both of
the gel prints on there. Isn't it interesting how
I put the same piece in the same place across
both the prints? Up here, I use different ones. Here I use different ones. All the way I use different ones except for there. I think
that's pretty funny. These actually printed up
better than I expected. So make sure you try
some different twine or ribbon or fabric
or hemp or something. Something textural to create
some fabulous patterns. And look how good they look pressed into the
light modeling paste. The texture of it's
absolutely beautiful. Now, light modeling paste
is really easy to paint. It's quite chalky and because
it's the liquitex basics, it's very affordable,
easy, peasy. So I could use paint or
I could even use inks. Do I want to use similar
colors that I've been using throughout
this class, which I kind of do
like that idea. I'm loving all of my pages. I've been having so
much fun with this. I might add something
else to that. You can, you know, go
back and add something else to the pages. I do that. Oh, I like these ones. You
know what I like about this? I know I just got sidetracked. I like the way this
mesh disappears and how you don't really quite see it so much once it's dry. You just see the nice
shiny soil the bits. I really like that. Love my
painting on the fabric and my fabulous ocean net with
my beautiful power shell. I can hear the ocean currents. Splashing on the shaw. So, let's get back to it. Stay focused. What are
we doing with this? Love the patterns.
They worked so well. So now I just got to
decide on the colors. I'm going to go with some of
the light blue permanent. I'm thinking, perhaps. And maybe Oh, maybe
some magenta. I haven't pulled out
the magenta yet. I love magenta and perhaps
a little prism violet. I'm just going to paint over the beautiful
texture on the page, and then I might
maybe drop in some inks perhaps I could
do that because all the inks would then run into the beautiful little crevices
of the texture paste. So good. So, so
good. So, so fun. Thanks. All these colors work so well together I
really like them. I like the little pot of the blue with the
purple and the magenta. I think that wool
works really well. I just have to stop fiddling
with it and let it be. I might add a few drops of acrylic ink just
so it can run into all those beautiful crevices and textures of the light
muddling taste. Have a look at how beautiful
the page dried up. It did exactly what I wanted. I wanted the inks to soak
into all of those areas around the fabulous texture
from these beautiful pieces. It works so well. Better
than I thought it would. I absolutely love it. And the colors are beautiful. Of course, they have
to be beautiful. Actually, both of these
pages I really like. I think this was a very successful prompt
for me personally. I really, really enjoyed it. Now, don't forget, we'll leave all of the
paints and the inks and the different
things that I'm using through the class in
your class notes, if you want to know
exactly what it was, I just splashed on the page. And I'm so happy with these art journals.
They hold up really. I've got fabulous
mixed media pages so that it copes with the paste and the inks and the
spraying of the water and all of the fabulous collage elements we just have to have. So, pretty happy with this
prompt and these pages, I definitely think I
would like to do this again with the different
textured fabrics. Hm. And now we're moving
on to the next lesson. What are we up to next?
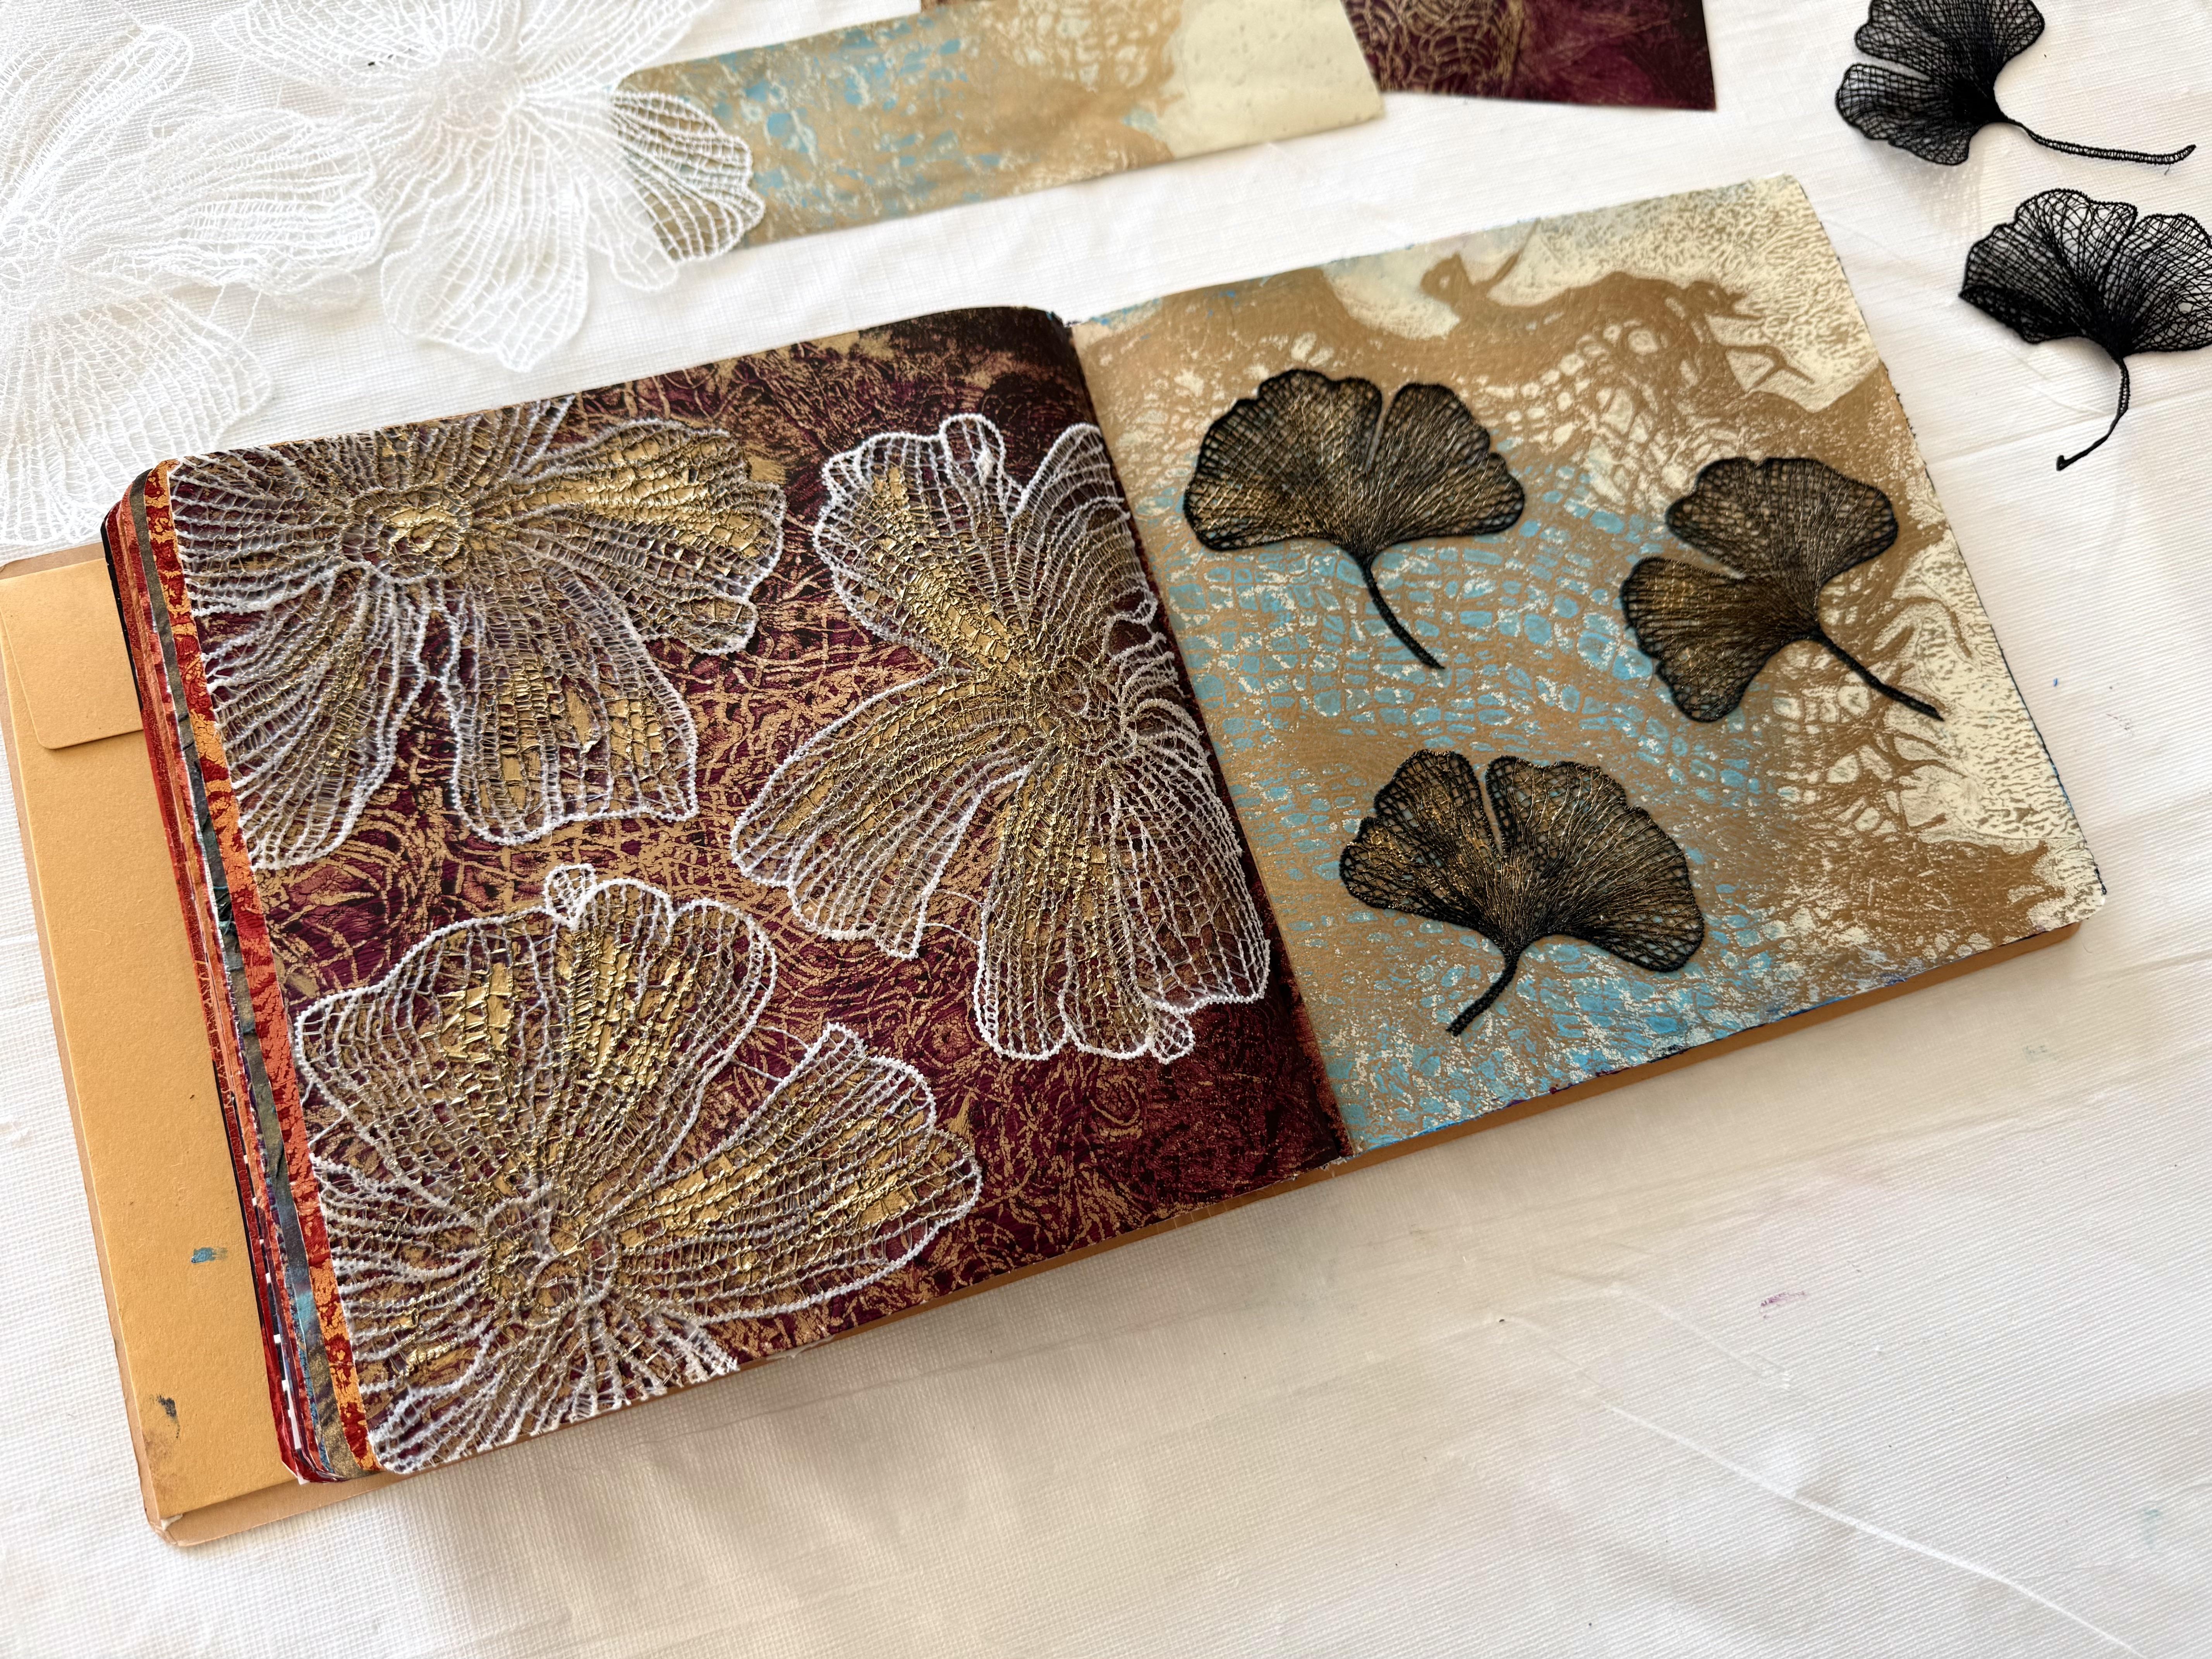
7. Day 89: Textile Blossoms: Date 89 Textile Blossoms. Create a collage that features fabric elements to
depict flowers, leaves, and natural forms. Use fabric to create
botanical imagery, allowing the tactile qualities
of textiles to bring an additional layer of realism and depth to your
floral compositions. So today, I'm going to start with my favorite
piece of fabric. Which is this mesh cotton mesh, I'm thinking,
Halloween decoration that I have just
loved using so much. I love the pattern it
creates on the gel plate. Off the gel plate,
sticking it onto my page. There's so many ways
I've used it for this particular
class, and I love it. So I'm starting with this today. I've decided that I want to make some jelly prints for
backgrounds because I have some beautiful floral pieces of fabric that I'm going
to add to the collage, and I just need a
few more prints. So I'm starting with my favorite golden iridescent bronze
fine on the gel plate, putting the fabric down, and then using the wet
strength tissue to take off the paint in and around
those textured marks. What I really love about
this fabric is the edges, the beautiful wispy edges that it creates with the
print on the gel plate. When the bronze layer was dry, I decided to add on the other material
that I really like, which is the cheap dollar
store shopping bag. I was going to roll on
the paint on top of it, but that didn't seem to work. So I rolled the paint
on the gel plate, then put the material
on and pushed the wet streak tissue through to pull off
some of that paint. Particular technique seems
to work a whole lot better. But you really don't know till you try and you have to try. Put the paint on,
put the material on, pull off the excess, paint around the fabric
and the texted marks. I tried putting the material on and rolling it with
paint. That didn't work. I tried it a few times. You got to try it
more than once, but at least try different
ideas of how to get the fabulous marks and
textures onto the gel flake. And then when the blue was dry, I put on the liquitex
parchment to pull the print. I'm still using the fabulous
Coso studio jelly printing, mulberry paper, it's
working fabulous. I left it for quite a
few minutes to dry, probably five or even ten. And then when I pulled
it up, tra, tra, look how fabulous
that looks with the pattern of the
fabric and the blue, and, of course, the
stunning bronze color. Now, I'm not good for
stopping at once. I really always like
to do two prints. Just in case you come
up with a better idea, or the first one doesn't work. So this time, I wanted to get
a little bit more dramatic, and I'm using the bird umber, putting it on the plate,
putting the material down, and giving it a good rub. I think I actually
probably rubbed off more paint than
I wanted to rub off. I got a little carried
away this time, so I put a layer of the
beautiful prism violet on, put the fabric on again. And then rubbed some
of the paint off. This time, trying
not to rub too much. Look how fabulous
the pattern looks. You never quite know what you're going to get when
you're jelly printing, and you just have to go
with the flow of the ideas. The first time I put the
fabric down with the paint, I took off just too much. So I did it again
with another layer, and it looks
absolutely fabulous. So then I used my favorite
iridescent bronze fine to pull this print because
I just knew it would work so well with
these glorious colours. And have a look at that.
Absolutely stunning. What a fabulous texture. So this is what I've got. What a great place to start. Look at the beautiful line of the fabric texture from the chow plake it
worked really well. I'm loving both the prints. This one with its double
print on the paper there. The textures are just fabulous. So what I'm going to do
so I'm going to cut them, stick them on the page here, and then I've got some flowers, some beautiful textile blossoms to add to the pages, as well. So I'll do this first.
Put these down. I really like the edges. See the edges of the print? I really like that.
So I'm going to make sure I'm keeping the
edges of the prints. Ooh, maybe I'll go up
that way with this one. And perhaps, yeah,
I'll put them at the top and put that
edge along there. Oh, I like that idea. Okay,
I'm going to do that, stick them down, and then
find my Textile Blossoms. Right, so the pages are all dry, and they are looking beautiful,
absolutely beautiful. The way that netting or mesh creates this
fabulous texture, I just absolutely love it. I could keep doing it all day. So I'm very happy with both. Now, I have these beautiful
textile blossoms. Look at that. How delicate
and pretty is that? And I'm thinking I'm going
to glue a few of these, and I'll probably
just chop them, so parts of them are
hanging off the page, but I was thinking that if I put some of these beautiful
white ones on this side, that would work really well. And then I've got some
fabulous black ginko leaves. And I thought, if I put them on this side, once they're dry, I might just lightly
scumble over them with the bronze to add
that little bit of highlight. I'm thinking that
could be a good idea. Now, if you are
scumbling some metallic, specially beautiful
shimmering effect onto any of your textures
and your materials, make sure it's all
perfectly dry first, because the dry brush is what skips across the top layer and just leaves that little
bit of paint on it to create that really
nice shimmering effect. So that's what I'm thinking. That's where I'm
heading. I'm going to do that with my textile blossoms. And see if I like them
once they're glued down and see if it's
finished or not. We'll have to just
wait and see how it works out once I've
got all glued down. This The flowers dried up, beautiful. And I added a tiny little
element of the bronze. Yet I just had to a little scumble to bring
out that beautiful color. And I think it matches really well with the
background prints. I'm really happy
with these pages. They were super easy,
and it was a lot of fun. I absolutely loved this
fabric on the gel plate. I know I've gone a
bit crazy with it. Now I did get these fabulous
Textile Blossoms from Timo. So if you're willing to use that website,
have a look on there. There's so many amazing
things and super super cheap. These worked really
well for my pages. I'm really happy
with the designs. They stuck down super
easy cause they're so thin and the material
feels really nice. Great textures. So another fabulous
lesson finished, and we'll be on to the next one. What are we creating next?
8. Day 90: Fabric as Ground: Day 19 fabric as Ground, reverse your usual
process by using fabric as the foundation
of your artwork. Build layers of paint, collage and jelly prints
directly onto the cloth, allowing its texture
and character to become part of the
creative conversation. This prompt encourages
you to see fabric, not as an embellishment, but as the integral part
of the artwork itself. So we're actually
going to start with the fabric on our page and
build our collage from there. Now, I'm starting with this fabulous piece of cheese cloth. Have a look at the
wonderful texture of it. And what's so great is
that it's so affordable. I think I bought it
from the kitchen shop. It was super, super cheap. It's a really big piece, so I could use as
much as I want. And then I was cutting up the dollar store shopping
bag for the other side. And, of course, I had to pull
out my favorite lace piece. I absolutely love the
texture of this fabric. I'm thinking that
these three pieces of material are going to be
such a great way to start. But the dollar
store shopping bag wasn't quite big enough. It didn't stretch
across my page, so I pulled out a
different piece. And that's the fabulous part of using cheap dollar
store materials. If one doesn't work,
pull out another one. The first bag was too small, so I pulled out one
that I'd already chopped up and stuck that down. Now I'm using copious
amounts of matte gel medium. So this fabric is
going to have to dry before I can move on to adding some
paint and collage. Oh, man, ud. But I'll probably
leave it on my table, put my little fan on it, and give it a little
while to dry. What I loved about gluing down the cheese cloth was
putting the wrinkles in it. I liked creating that pleated
kind of lines through it. I thought that was
really interesting. And the texture of
the cheese cloth has such a fine line to it, a meshy kind of line that's
really fine and small, and I'm thinking that
if I paint over that, it should look really good. Of course, the lace fabric
I absolutely love and the cheap dollar
store shopping bag glued down really easy, as well. Now, once they were all completely dry from
the mat gel medium, I decided to add a
gesso primer onto them. Because I had plastered the fabric with the
mat gel medium, I thought maybe a light coat of gesso primer over the top
would help the paint better. On the fabric because
sometimes the gel mediums can be a little plasticky and the paint doesn't
stick as well. So a little bit of gesso on it. You do have to wait for
this layer to dry as well, but I do think it's worth
it in the overall project. Now, when both sides of my
pages were completely dry, I pulled out the paint, and I'm using some
Prussian blue. I've got some magenta, and I've also some of that beautiful blue
I've been using. The light blue permanent. It's been going really well
with these other colors. So I decided to stick with a similar palette and
put some on the page. Now, I didn't know
what I wanted to do. I just thought I'd pull out some dolops of
paint and put them on the page and move them around with the brush
and then decide, as I'm creating where I want to head and what I
want it to look like. So don't be afraid to just start head in a direction
and see where you end up. Choose a few colors,
not too many. Colors that are going
to work together. And then just start painting on your fabric and see
how it develops. I'm absolutely loving the
texture of the cheesecloth. It looks fabulous with
the paint on top. I don't know why I
haven't done this before. And I'm kind of running the paint together
and blending it and just allowing the colors as an abstract
design on the page. Now, when I was happy with the paint on the page and the colors and how they
were blending together, I added some of that
beautiful galactic blue in the acrylic ink. Oh, man, this is
a stunning color. The metallic in it is amazing. And I know that
it's going to seep into all of that
texture of the fabric. And I guess that's
the point, right? We want to highlight the fabric. We want to see that
texture in the end, and putting the ink on and
spraying it with water gives us a great opportunity for all that color to
really soak in. So then once the left side
was done on the art journal, I decided to start on the other side with
orange because I wanted it to be completely different to the page
I just finished. Then I added some magenta, and up at the top section, I added the beautiful
prism violet. Again, I was just
blending the colors, going with the flow, seeing where it took me, and deciding as I went
what I wanted to create. Of course, I had to pull out that glorious gold ink
again and splash that on because I knew it
would look amazing on the beautiful lace
textured fabric. I didn't add any to the
top in the prism violet. I wanted to, but I was thinking I might add some
later when it's dry, or I might even
add some collage. I haven't actually decided. I wasn't quite sure what I
wanted to do next with it, but I knew I had to let
the pages completely dry. Before I could move on and make a decision of what else
I wanted to add to it. So the pages have all dried up and they look
absolutely beautiful. I love the richness of color
and the glorious textures. This lace materials definitely
been one of my favorites. And this painted up beautifully
for a cheap shopping bag. I do like the cheesecloth. I like the texture
of the fabric, and I like the way it creates these pleated lines,
fabulous textures. So I'm thinking I could do
this again on a bigger scale. That's what I'm thinking, 'cause I love the way this looks. So what am I going to do? Am I going to leave it like this or should I add something? Well, I really love this piece that I did
a few lessons back. It was a mm, almost a roll off sheet. I was cleaning up my gel plate, and then I sprayed it with
the gold spray paint, and I think it's beautiful. And I was thinking,
because it's got the same pattern of
that lace fabric, maybe, baby I could add just
a little slither somewhere. I'm not sure exactly
where or how, but I do want to try
to add a little piece. I might even add a
piece to both sides. Maybe. But you don't know
until you try get an idea, head in a direction, and see how it works. Really, that's the whole
process with creativity. You just have to try. Head in a direction,
see if you like it. Now, what about if I
tore a piece here? Not too bad, not too bad. I do like the idea of putting a piece maybe on this section. And I was going to scumble over this fabulous texture as well because it
would look amazing. I don't want to add too much, but because I really like
the texture of the fabric, but I could add
that piece there. And then it's kind of
mirroring the pattern of the lace down there.
I don't mind it. I'll add a little bit
of gold onto there. That'd look pretty nice. And I was a bit keen to add a little slither onto this side. Not too much. Just a little bit, something like something like
that. Just a little piece? Maybe. Oh, what
about even skinnier? Ooh. Then it still has the
color and the pattern, but it doesn't
obscure or take away from the beautiful textures that I've got there in the
paint and the fabric. So I'm thinking maybe
something like that. Do I want a second
piece? I don't know. But I haven't actually decided, so I'll think about it. I'll probably minar about it. I might go and have a cup of Oh, that actually looks really
good like that. Oh, man. I'm gonna say I might
go and have a cup of tea and think about it. And then I put that
there, and I liked it. I think I like it going
like that. Like that. What about that idea? No. It's covering too much
of my beautiful fabric. Alright. I'm back to
the cup of tea idea. Maybe I don't need
anything on it at all. Oh, man, I can't decide. So I can't decide. I'm
gonna have a cup of tea. I'm gonna think
about it, and then I'll give you a close
up and show you what I actually decided
because I might not do anything to the pages at all. I might just leave them
alone because they do look rather stunning with
the paint and the inks. Tough decisions,
tough decisions, I need a cup of tea. I'll give you a close up, and then we're on
to the next lesson.
9. Day 91: Textile Transformation: A 91 a Textile Transformation. Now, in this lesson, we get to use all of the
leftover prints and materials and the favorite ways that you enjoy using the fabric
in your collages. Which prompts from this
class did you like the best? Which fabric combinations
did you really enjoy using? Was there something that really stood out for you
that you were like, Oh, man, that's amazing. I'm going to do that again. Today, we can use any
of the leftovers, so that's a really
good idea as well, because I do have quite a few. But before I move on to that, I want to show you the
finish of yesterday's. Now, I pulled out the fabulous
mixed and relief paste. I love this stuff and the deco foil sheet,
beautiful colors. This one's in the
lapsus watercolor, and this one is the
amber watercolor. Super easy, super
affordable, as well. Now, with the mixed and paste, it goes on white and then goes completely
clear when it's dry, and it does take quite
a few hours to dry. So make sure you
don't try and put the transfer sheet on before
the paste is really dry. And it turned out pretty good. This is on the Cheesecloth. Look at the texture of the fabulous deco foil
on the cheese cloth. It gives it a nice highlight. It's quite dark and stormy
here in New Zealand, so I've got my studio light on. It's a little glary,
but you get to see all the fabulous highlights
of the metallic foil. This one I put over
this section here. Now, I do think that
the shopping bag was perhaps a little too textured
to handle the deco foil. It's still sticky where the
foil didn't quite adhere. To the base that's on there, but you can't worry
about things like that. That's what experimenting
is all about. I probably wouldn't use it
again on the shopping bag, but I would definitely
use it again on the cheese cloth texture because that actually
came up quite beautiful. And because I had
the deco foil out and about Man, I
love this stuff. I decided I wanted to add some to the first
page on that ribbon. Now, I did say you
can go back to your previous pages and the previous lessons and add some more things
if you want to. Pretty happy with this class, it's turned out
really beautiful, and I've had so much fun. This one, I ended up putting some of the deco
foil onto this one. I used the amber water color, the variegated one in the gold. It's a really beautiful color. And, of course, what
you need to do is put the sheet down like this? Oh, that's the piece I use. Silver side goes down. You rub it dub, dub,
just like that. Simple, simple, super easy. Look at the beautiful color
of it. Love this one. Now I will put the name of it in your notes if you want to
find what I'm using here. But that has turned out
absolutely beautiful. And I'm pretty happy with that. So, you know, in today's listen, you can always go back through your pages and see
if you want to add anything else to them. Especially as you get more brave moving along through
the different lessons, and you pull out more materials. That's a key note as well. So onto today's collage, what are we going to do? Well, actually, I've got
some of these papers, and these papers are the roll off sheets where I was printing
on the gel plate, pushing the material down to get that shape and
texture on the plate. I was using wet strength tissue. And I did say that
a few times using wet strength tissue to
put it down, la la la. And then I decided to finish off the papers so
I could use them. So I pulled out the first
sheet of the roll off, and then I added some of the beautiful
acrylic spray paint, the liquitex in the
brilliant blue, some of the ins in that
stunning purple color. And then a few of the other
easinc colors as well. I think I added some tea, some more of the
fabulous lavender color, all the spray inks that
I was using before. I just pulled them out, sprayed them onto the tissue. And it looks
absolutely beautiful. And because it's wet
strength tissue, it does handle quite a few
layers of paint and inks, but you do need to let it dry, make sure you lay it out, let it dry if
you're spraying it. Or adding acrylic ink, you
could do that, as well. Spray it with water. I do that quite a lot with
wet strength tissue. But you do need to have
it on plastic and you do need to let it dry
before you move it. The next piece, I pulled out some of the zincs in saffron, and I think in some of the
tea and some of the coffee, absolutely beautiful
warm colors, spraying it across the
wet strength tissue. And then, of course, a
little spritzer of gold. You've got to have the bling. We've always got
to have the bling. And then the third piece, I threw on some acrylic ink, and then I splashed it with some water before adding
some of the saffron, some of the coffee, and some of the beautiful
lavender colour. A little bit of gold
finishes it off, and it all looks
lush and beautiful. Now, once the papers were dry, I pulled out the piece of lace fabric and gave
it a spray with the gold spray paint onto a couple of these beautiful pieces
of wet strength tissue. And you can see the
beautiful gold spray here on this piece. Look how fabulous the
lavender has dried up. Those inks are glorious so sad, they've
been discontinued. And even this side of the paper is really
beautiful with its colors. So this would be a great
piece to start with. Then I could add some of
the other fabric pieces. I like this one, as well. This pattern is from
where I was pushing down the taperology pieces of braid. I was using the wet
strength tissue to create that
pattern on the plate. And this one, I also added the gold spray
paint, too, as well. Beautiful. So I've got
these papers to use, and I'm definitely going to
use them as a base today. I also have some leftovers
from the previous lessons. I've got this one on
fabric that I really like. I like the way I've
pulled this print. And then this one was using the roll off or leftovers
still on the plate. I like that, as well. But I also have I
had another rummage. I threw in my drawers
and found some of these beautiful pattern
pieces for patterned play. So I might incorporate some of these patterned pieces with some of the beautiful
roll off gel print. Sprayed paper. That's my plan. That's where I headed. Oh, look at that. That's a
really nice piece. The only trouble is going to be actually deciding on which pattern pieces to use and which gel prints I
actually want to put down, 'cause my art journal
really isn't that big. So that's my plan. That's the direction
that I'm heading. And these pieces of
fabric are beautiful. It'll be interesting
to see how well they glue down with the
mat gel medium. Right, oh, that's the plan stand. That's where
we're headed. So I better just
make some decisions. The paper and the
fabric glued down really well with the mat
gel medium. Good to know. And then I decided I
couldn't help myself. I had to add some of the mixed and paste
because I'm going to put some deco
foil on the pages. So I've put it on. It's nice and milky white, and now I have to wait
at least 2 hours. I probably with longer
because today is, like I said, stormy
in New Zealand, so not a good drying day. It's going to take hours to dry. In fact, I might have
to wait until tomorrow. And I'm not sure what colors
I'm going to put on it. I just wanted to add a little bit of my
favorite metallic bling. I really like the way I used the fabulous lace piece of
fabric to put the mixed and paste through because I like the repetitiveness of the
shapes and the textures, and I just love how well this piece of fabric has worked
through the whole class. Pages look gorgeous. The prints have come up so well and having the beautiful
patterned fabric with it. I love it. And it's completely different to the other pages, and I really enjoy that. So I'll give you a close up once the mix and paste has dried, and I've put on the
fabulous deco foil. You can see what color
I finally decided on, and then we're going
to be moving on to our last few words of celebration for
this fabulous class. I've enjoyed it so much, and I can't wait to hear
which parts of the class and the lessons and the fabrics and the textures did
you like the best.
10. Let's Celebrate: Congratulations. Hip hip parade. We did it. Class 13
absolutely fantastic. And we have completed 91 Days of our hundred
Days of Collage, fabulous creative art journey. So which of the prompts
did you enjoy the most? Which lessons did
you really like? Which textures or fabrics or applications were you
really inspired by? Because this fabulous journey
really is all about you, developing your artwork,
finding your voice, and really considering
your creative expression. Now, I really had a lot of
fun with these lessons, and I enjoyed going
back and adding some of the beautiful deco foil
on to this ribbon piece. I absolutely loved
using the lace piece of fabric for creating these beautiful textures
on the gel plate. But then also, it worked really well for
spraying onto paper. That was a whole lot of fun. And, of course, this piece, which really was a Halloween decoration, don't tell anybody. It was one of my favorite
pieces of fabric to use in our texture Treasures because I liked the way it created
that beautiful netting look. I love the edge of it. When I was printing on the gel plate and
creating those prints, I thought that was
really effective, but even gluing it into the art journal turned
out really well. But let's not forget the
humble cheap dollar store, recyclable shopping bag, and its fabulous textured
marks that it made. So make sure you
have a whole lot of fun trying and testing
different fabrics and seeing how they print or
what kind of mark-making you can create with them for putting your fabulous
collages together. And this piece here
was actually where I spray the lace and
put it onto the page. So anything's possible. You can glue that fabric right on your art journal or pages. It doesn't matter if the
art journal doesn't close by the time you finish all
of these fabulous lessons, as long as you're enjoying it, having a great time, and really allowing yourself to
express your creativity, 'cause that's what
it's all about celebrating your creative self. I really enjoy painting onto the fabric which I
haven't tried before. I'm still loving
this piece here. On the calico, that
worked really well. And then my roll off
print, that was fabulous. But wasn't it really interesting about
the image transfer? So don't forget this lesson. Make sure you leave it on the plate longer
because when you do, it turns out absolutely perfect. Now, this, of course, could
be printed onto a T shirt, and I'm really excited
now because I can answer all those
questions for sure. I know adamantly now that
it can, and of course, you will need to use a
fabric medium in the paint. If you're going to want
to wash the fabric, if you are going to try printing onto T shirts or tote bags, that could be really good, too. You might want to look at
what fabric medium you need for it to really stick to the fabric if you're
going to be washing it. But if you're
playing around like I did and having a little try, then just the plain
acrylic paints have worked really, really well. I think this one turned
out absolutely perfect, and it was just a
cotton pillowcase. So you could always do some more experimenting
with these ideas of the image transfers on the fabric that did
really work well. And, of course, this
one I love the way I glued that particular piece
of netting onto the page, added the beautiful para shells. Even the feel of
it's really nice. There's so many ways you can use the fabric in the expression
of your art making. These pages turned out
better than I expected. This was with the light
modeling paste and pushing those taperology
braided pieces onto it. I absolutely love the texture. I think I'd like to do
that in a bigger size. Even the gel prints
turned out fabulous, but that is something that I might come back to another day. And this was fun
with, of course, my favorite gel prints
using that fabric and then putting on these
beautiful flowering blossoms. I do like the way both
of the pages turned out. I like the color and I like
the textural elements of it. And I've got some leftover. So, you know, I could use
some in the next class. That would be fun, too. Oh, I did have a lot of fun with the Deco foil. I
loved putting it on. That Cheesecloth glues down easy and paints up really well. So if you're looking for some extra texture on your
page in your art journal, the cheese cloth
is nice and light. This one was perhaps
a little bit thick for doing that
kind of application, but it was fun to try and I do like looking at
the texture of it. Of course, my beautiful lace
piece painted up beautiful, especially when you add some of those fabulous acrylic inks. So overall, I think I had a mighty fine time
with this class. These pages look great. I love the elements
of the pattern play. And then, of course, I had to
add my favorite deco foil. Through that piece of
lace onto those prints. The colors absolutely beautiful. It's nice and shiny.
It makes me happy. Now, don't forget you can find more info in
your class notes. And if you haven't yet been through all of the
classes in this series, 'cause this is class 13, have a look at the
fabulous treasure map, see where you're up to and
what you're doing next. We've only got one more class, and then we will finish all 100 days in our absolutely fabulous
mixed media art course. And I really have learned
a whole lot creating it, and I hope that you're
enjoying the journey with me. So don't forget you can post
pictures on the platform here or you can post your
photos in my Facebook group, creative Adventures Making Art. I'd love to see how you've
responded to the prompts, what fabric you've used, what textures you've
liked the best, and how your pages
have turned out. You can email me if you have
any questions or problems, and you can find out more
of who I am on frol.com. Make sure you allow yourself to really express your
creativity. Experiment. Try the different ideas. If it doesn't work,
it doesn't matter. You can try something else. You can add more paint or
more fabric or textures, have a whole lot of fun and really enjoy the
creative process. Right. So I look forward to catching up with you
in the next class. Have a great time with all of these fabulous
creative ideas, and I'll see you again soon.
 Froyle Davies, Mixed Media Artist