Transcripts
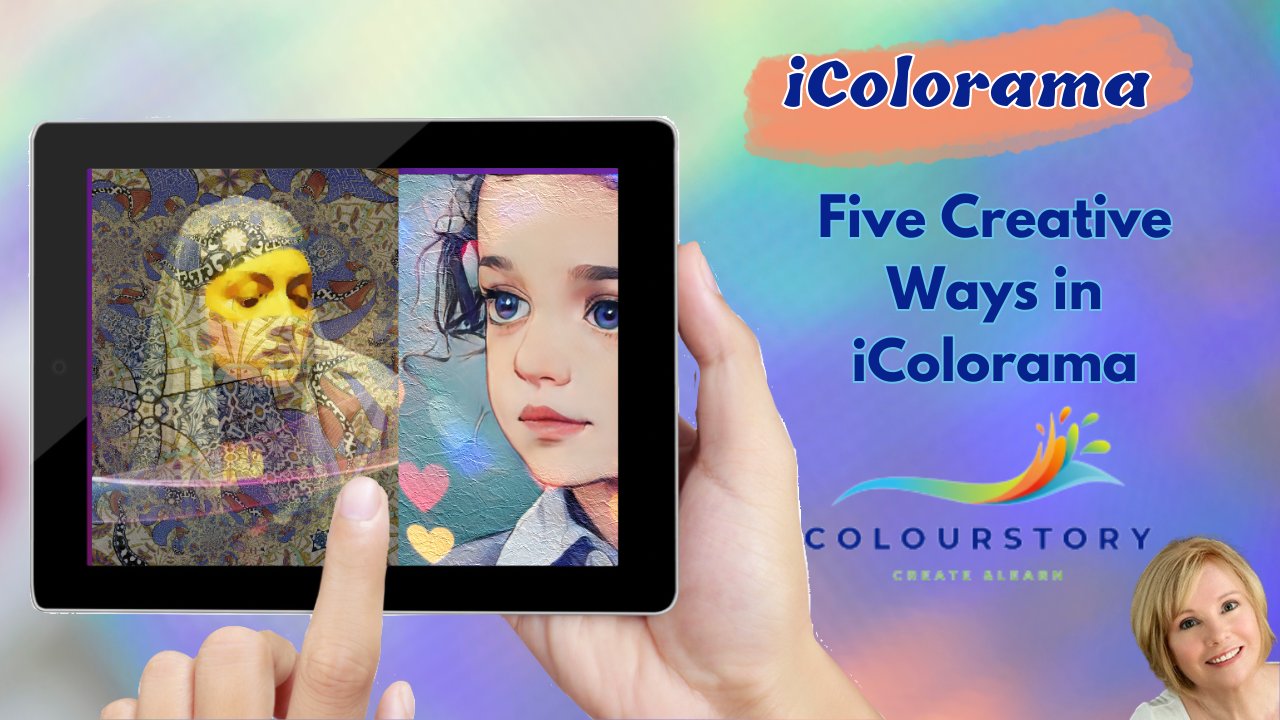
1. Class Six Introduction: Thank you for joining me in
my sixth Eichler armor class. Ten, easy creative
composite images in Eichler armor for
digital artists. Although this is a longer class, it's broken down
into ten simple, short lessons from which
you can pick and choose. When you have a spare
five or ten minutes. Composite images are the
mainstay of Eichler armor, I believe, allowing your
imagination to run wild. If you're new to Eichler armor, It's a fantastic app That's
only about six US dollars. Onetime, only. Procreate artists
love to use it as a creative add-on for
its special effects. Full instructions are
given in lessons 12. Here's a quick run
through of each picture. With the first one, I was inspired by an
goddesses beautiful photos of babies in flower pots
popular a few years ago. I decided a butterfly
baby was just the thing. Next, iPad and hummingbird
with the water scene. Then a magical woman
featuring spring flowers. The musician inspired
a beach scene with a musical manuscript. For animal lovers, iPad to stallions within
American red barn. The lion man could
just as easily be a Black Panther featuring
half and woman space. Let your imagination run free. Classical ballet never
loses its charm, as shown with these
two ballerinas. Here's a fun playtime
picture for children, a good technique for authors
have preschool books. I just had to pair this streaming girl
with a magical unicorn. Finally, we traveled through
time with this woman flying into the past
or perhaps the future. I'm hoping there's something for everyone in this collection. I include all the images
needed to replicate them, but strongly
encourage you to use your own combinations and cherry-pick the
techniques you like. I would love to see
your creations. Upload it to the class
projects section for everyone to appreciate. Finally, if you have
time to leave a review, it gives me encouragement to
keep producing new courses. Also a reminder to tap the
followed that no bath. So I can notify you
of new classes. Have fun and enjoy the class.
2. Lesson One Butterfly Baby Dreaming: Welcome to Lesson one,
butterfly baby dreaming. I'm going to show
you how to make this sweet little baby and add a butterfly and complete
this dreamy finish. So let's get started. Open up Eichler on tap the picture icon in the top left and import the
picture of the baby. Next we'll go to
effects and blend. The bottom right-hand corner, tap the picture icon, and we're going to
bring in the butterfly. Now this butterfly I've
already taken into Procreate, doubled the wings and
removes the body. But for people who
haven't got Procreate, I'm including the PNG
of the butterfly. So first of all, we're
going to position it and resize it with our fingers
or the Apple pencil. Then we're going to rotate it for more realistic looks as it's coming from
the back of the baby. Next, we'll tap the brush mask. Tap the brush, and
choose the basic brush. Tap the brush again. Reduce the brush
size quite a lot. Then we're just
going to remove with the Apple Pencil the part that's overlapping
the clothing. So it appears that the
butterfly wings are coming out the back of the baby. Safe to adjustments. Now Press style. Go along the second
menu and find water. Tap the window in
the bottom right, and choose preset to. That gives us a nice soft,
dreamy watercolor finish. Going to save that
to adjustments. Now we're going to
change the color slightly so we're
going to go to town all the way along
until we find sweet. Tap the window in
the bottom right. And you may choose a
different one to me. So just go through and look at the different colors that you
can change the picture too. I chose presets 14. I'm going to save
that to adjustments. Now. Going to texture. Back along the sub menu
and find directed. Tap the window in
the bottom right. And I thought it
would be quite nice to put some rays of light
coming down on the baby. Sorts of an angelic look. Again, you can choose
whichever one you like. But I decided on six. I thought that wasn't to
match it over the top and just gave it a
little bit of mysticism. I save that to adjustments. And staying in texture. I went back along the
sub-menu and chose Boca too. Press the Window,
the bottom right. And again, you can
add some more light, some quite nice ones
that give a good effect. But I ended up
choosing number six. I thought that was quite subtle. Next, I tap the circle
mask, the plus sign. I move the circle over the
baby's face and reduced it. Increase the blur radius. That the circle again that's
just removed a little bit as the bokeh bubbles
off the baby's face. And that's our picture. Really quick and easy
to do and would make a nice present for a
baby in your life, one of your friends babies. So have a go and see
what you come up with. Save it to adjustments. And we'll just look
at the history. We started off with the
picture of the baby. We added the butterfly wings. We changed to a
watercolor finish. Will change the tone. We added the directed lights. And then we finished
with the bokeh. And that's our
picture completed. So we'll move on
to less than two. That first, we'll
save to camera roll. Now we'll move on to lesson two.
3. Lesson Two Hummingbird : Welcome to lesson two. We're going to put together this picture of a hummingbird. The techniques we will use, our coherence and
we're going to put a Prisma light on there. Then we're going to
finish off with rain. I think this is quite
a nice combination that you'll enjoy. Let's get going. Open up my color on top, the picture icon in the
top left-hand corner. But this time we're going
to choose IG portrait. Give us a blank canvas
on which to work. Save that blank canvas
to adjustments. Move it in a bit so we
can see what we're doing. Now go to effects and blend. In the bottom right, tap the picture icon. I'm bringing this
beautiful water ball. Now we're going to
expand this with our fingers to fit the screen. Move it over slightly, expand it a little
bit more. We are. Now we're going to save
that to adjustments. Now we're going to
go back into blend. Tap the picture icon in
the bottom right again. I'm bringing the hummingbird. Again with your fingers. Expand the hummingbird
and position it. If you can't quite see
where to position it, lower the opacity, then you
can see what's underneath. I think we wanted a bad there. Turn the opacity back up. Now we're going to
press brush, mask. Low the brush size. Tap the brush and choose
the soft basic airbrush. Brush size a little bit higher. Why we just removes the outside. The larger areas. Take the brush size right down, tap zoom, and bring the Bird app so you can
see it more clearly. Subsume again. And then carefully
go around the edge. Removing the
background. You can, of course, first take
this hummingbird into procreate and removes
the background there. I'm removing it here. So the artists who haven't got Procreate will know how to do it in the eye
color on the app. You can turn your iPad Ryan, so you can reach different parts of the
hummingbird easily. Keep adjusting your brush. Go really small. Remember if you delete
part that you don't want, just tap the eraser and that
will put the part back in. Tap the brush again
to continue removing. Increase the brush size. To remove the bulk. Then go right down. To get a good outline. Take your time with this. It does require a
little bit patients. Remember, if you accidentally
removed too much, just tap the razor and that
will put the part back. I think that's about it. So you're going to tap off the brush mask and
save two adjustments. Now go into style. Look along the second menu
and choose coherence. Tap the window in the bottom right-hand
corner and choose number to save two adjustments. Now go into texture. And Prisma, which is along the second
menu on the right side. Tap the window in
the bottom right. And you can see this different
prisoners you can use. But this time I
chose preset seven. But you can see it doesn't
cover the picture. So we will rotate it to
make it portrayed shape. Then with our fingers will expand it there. That's about right. So now we'll save
that to adjustments. Next, we're going to force
rain in the picture. So staying in texture. Pick rain from the second menu. You can see straight
away that we have to expand the rain to
cover the picture. Tap the window in
the bottom right. And there's all different sorts of rain that's quite pretty. Go through and choose
the one that you like. This is the one I ended
up with, number 13. We can now say that
two adjustments. Next, I went into town
and I chose daylight. Tap the window in
the bottom right. And again, there's different
tones you can give it. You can see there's some
quite nice ones here. I ended up with number seven. I just quite like the effects
that I achieved with this. I'm going to save
that to adjustments. At this point, you
could either put a paper texture on there or not. Your preference. Let's have a look and
see if it helps or not. So texture and paper. Tuck the window in the bottom right and just look
at the textures. The top right you'll
see a little square. If you press that down. It shows you the
before and after. Probably see it more
with this texture. So press it down. I actually think is better
without the texture. So we're going to leave that. Let's have a look
at the history. We bought in a blank canvas. Then we added the water ball. Next we added the hummingbird. We chose coherence to alter
the effects of the picture. Then we put a prisoner
effect on that looks almost like a rainbow
reflected on the water. And then we put a rain effect
on So it's all very watery. And lastly, we chose
a tone, daylight. I think that gave quite a
nice finished to it all. So now we can tap in the top right-hand corner and
saved to our camera roll. Hope you enjoyed this lesson. And now we'll move
on to lesson three.
4. Lesson Three Magical Woman: Welcome to lesson three. I particularly enjoyed
creating this fantasy woman. I combined the lady's face
with an image of wild flowers. Then I use the flow effects and triangles to give an
interesting texture. There's many ways you
can use this process by combining all
sorts of images. So let your
imagination run wild. Here we go. Open up
Eichler on their tap the picture icon in the top left and bringing the picture
of the lady's face. Now first, we're going to
start with style and flow. Tap the window in the
bottom right hand corner. And we're going to
choose number four. Now you can see the eyes of dalda little and we
don't want that. So we're going to
tap the brush mask, turn the brush size right down. Tap the brush and
make sure it's on basic one, a soft airbrush. And then just gently run your Apple pencil
over the Irish. That just brings the
eyes back to life. Tap the brush mask off, and then save two adjustments. Next, we'll go into
effects and blend. In the bottom right-hand corner, we'll tap the picture icon and we'll bring in
the wild flowers. Now you can see they're not covering the face at the moment. So with our fingers, we're going to expand
the image to cover. If you turn down the opacity, you can see where the
flowers are going to go. So you could actually
move them about and position them in the place that you think is most pleasing. You have to expand the image a little bit
more to fit it in. Do so. Turn the opacity back up. Now we're going to tap the window in the bottom
right-hand corner. And we're going to
choose overlay. And you can see that
the wildflowers of now covering the lady's
face and blended in. This is exactly what we wanted. So now we're going to
save this adjustment. Next, we'll go into style. And along the bottom menu, we're going to find triangle. This gives a nice triangular
factor over the face. We tap in the window
in the bottom right. You can see different types
of triangle you can use. But we're going
to use preset to. Now you can change the
size of the triangle, make it smaller or larger. But we're going to put
it at 20 per cent. We're going to say
that adjustment. Next, tab texture. Along the bottom
menu and tap paper. Tuck the window in the
bottom right-hand corner. And look at the different
paper textures. You can choose. Can of course choose
any one that you like. But in this case, I chose preset 119, increase the intensity to 40. 40 per cent, which gives a really nice texture
over the face. Going to save that
to adjustments. Now to me, the face looks a
little on the light side. To address that, I'm
going to go to adjust and tone lap up the window
in the bottom right. See the different tones
that you can get. I think number four
is quite nice. Let's just try the others. Definitely like number four. So I'm going to choose that
and save two adjustments. At this stage, you
could go into town, any of the tones and choose one or two,
tapping the window. Just looking through, That's
quite nice in the venture. Also, say you chose
this one in adventure. You can press the normal at the button and choose
different overlays. That's quite good too. So let's have a look
at another one. Moody. No, I don't like those. Long beauty. Some interesting colors there. Try charm. That's quite nice. Let's try the screens. You get the idea. You can go along and try out all the different tones until
you find one that you like. But for now, I'm going to
stick to the finished picture. So we'll just have a
look at the history. We started off with
the lady's face. We push a flow effects and we use the mask just
to clear the irises. Then we blended in
some wild flowers. And you can blend
any image you like. And of course you can use
any fay lady space that you like to just experiment. Then we changed
it to triangular, which gives us a
really nice texture. And then we went into
a paper texture. And ladies, in even more
interesting texture. Finally, because I felt it
was a little too light, we went into tone lab and
we chose a different tone. So that's all
completely finished. So we can tap in the top right-hand corner
and saved to my camera roll. Just have fun with
different faces and different blend images
and different textures. I think you'll find it
really interesting to play about with these
several elements. Now let's move on
to the next lesson.
5. Lesson Four The Musician: Welcome to lesson four. In this lesson,
we're going to make a composition of three images. The seascape background,
the musician, the musical manuscript. Let's get started. Open up our color armor. Tap the picture icon in
the top left-hand corner. I'm bringing the musician. And we're going to go
to Style and coherence. Tap the window in
the bottom right, and choose presets to. Now we're going to save this
straight to our camera roll. So I press the up
arrow and save. Go back to the picture
icon on the top left. I'm bringing seascape. And again, we're going to
go to Style, coherence, the window and preset to really making them
both in the same style. So when we combine them, they will look right. This time we'll save
two adjustments. Now going to effects and blend. Tap the picture icon
in the bottom right. I'm bringing the musician that we've just saved
as a coherence picture. Size her and placer
exactly where you want. Remember the lesson
of two-thirds and, and make her take up
two-thirds of this space, which will look balanced. Next we're going to press the brush mask and
low the brush size. Just get rid of the main line
with a larger brush size. And then we're
going to tap soon. Large the picture so we
can see what we're doing. Tap zoom again to set it
more as the background. Now, load the brush size right down and carefully go
around the outline. Keep adjusting your brush to
make the process quicker. And remember if you take a
little bit too much to press the eraser and just
put that back in. Pressing again and
enlarge it to do these little details of the guitar again. So he can move the
picture about. You press zoom, moves a
picture and then press Zoom again to set the position. So little bit time consuming, but can be quite relaxing. So don't worry about the time. Just enjoy the process. That's all done. So
take the brush mask off and save two adjustments. Sometimes the brush mask
leaves a bit of an outline. So before we do the next part, I'm going to go into
the history and just press that
final picture again, which removes any lingering
glitch in the program. Now we're going to
go into blend again. Tap the picture icon
in the bottom right. I'm bringing the music. They're spread the music with your fingers over
the entire picture. Now, tap the window
in the bottom right. You can see the
different screens. Multiplies quite good,
but I chose dark. And for this, you can see it's just blended
the music in a little. But we don't really
want the music over her face or some of the rocks. So again, to press the brush mask the size a bit and just
take it off the figure. The lower rocks. That's about it. So now we're going to
save that to adjustments. Next we'll go into
texture and paper. Tap the window. We're going to produce
a paper texture over the composition. Choose whichever you want. I ended up with Preset five. I put the intensity up slightly. Then I save that to adjustments. And that's our picture finished. So now we're going to
look at the history. We started off actually
with the musician. Puts a coherence effect on her and saved her
to our camera roll. Next we bought in the seascape, made this one coherence. And we say to adjustments. Then we went to effects
and blend and brought in the musician and masked
around her body to cut out. Then we bought in the music. We spread this across. And then we must
start the music that went over the body and
some of the rocks. Lastly, we put a paper
texture on there. And that's our
completed picture. So we're going to
go to the arrow in the top right and
save to camera roll. Now we'll move on
to less than five.
6. Lesson Five Horses: Welcome to lesson five. Now for a different look, here will combine two horses
with a barn background, will use a painterly effects and finish off with
the Mosaic Law. Let's go open up Eichler on tap the picture
icon in the top left, and bringing the
picture of the horses. Now go to style. And painterly. Tap the window in the bottom right and looked down until you see painter to tap this. Now we're going to save this
picture to our camera roll. So top right and press Save. Next we'll import a Canvas. Tap the picture icon in the top left and press IG landscape. Go to effects and blend. Tap the picture icon
in the bottom right, and import the barn and expand to fit the
picture safe to adjustments. Then go to style and painterly. Tap the window in
the bottom right. And again, go down the
list and choose painter to save this to adjustments. Now go to effects and blend the picture icon
in the bottom right, and import the picture
of the horses that you saved after making them
into a painterly effect. Spread the night to fit
the entire picture. Then press the Window icon. And we're going to
change this to overlay. Save two adjustments. Now go to style. Look along the second
menu and find mosaic. Tap the window icon
in the bottom right, and choose preset to. Going to save that
to adjustments. Now go to texture and paper. Tap the Windows icon. Goes through the paper textures. In this case, I chose 26. I put the intensity up a little and save two adjustments. This is quite a quick
and easy way of blending some pictures using an
interesting mosaic pattern. Let's look at the history. The history icon. That first we bought in the horses and we made them
into a painterly effects, and then save them
to our camera roll. Next, we chose the landscape
Canvas and save that too. Adjustments. Then we went into effect some blend
and bought in the barn. Next we turn the barn
into a painterly effect. Then we went back into blend
and bought in the horses. And then we use the screen to blend them
into the barn picture. Then we went to mosaic, mosaic effects on there. And then we finished off
with the paper texture. And that's the completion
of that lesson. So we're going to go to
the top right hand corner, to the upper arrow and save
it to our camera roll. Now let's move on to lesson six.
7. Lesson Six Lion Man: Welcome to lesson six. I thought we would
create an image to trick the eye by combining a lion's
face with that of a man. An interesting effect
for a change of pace. So let's get to it. Opened up by color on that. And let's bring in the
picture of the liar, tap the picture icon. And bringing the lion picture. Next, we'll go to
effects and blend. Tap the picture icon
in the bottom right. I'm bringing the
picture of the man. Now. Reduce the opacity so you
can see what you're doing. Expand the picture of the
man and move it up until the eyes are exactly over
the eyes of the lion. Then we're going to
tap the brush mask. Tap the brush, and
choose basic one. Reduce the brush size. Twice way down. Press Zoom and moving so you
can see the whole picture. Presses Zoom again. Then with your Apple pencil, go from the top in a straight
line down to the bottom. And then on the left-hand side, we're going to gradually
remove that half of the man. Now we'll increase the opacity so we can see what we're doing. And we gradually going to reveal a little
bit more of the line. On the right-hand side. We'll go a little way
down on the foreign too. Blend this in a little
more gradually. There, that looks about right. So we're going to save
that to adjustments. Now go into style and coherence. Tap the window in the
bottom right-hand corner, and go all the way down to the button and choose Preset 12. Now is a brush mask. Let's just uncover
the eye a little bit. Take the brush mask off
and save two adjustments. Now going into
preset and lineal, tap the image icon on the
bottom right-hand corner. And you can see there's different graduations of
color that we can choose. Just to make the man's face
stand out a little bit more. I went all through these
and I ended up choosing 60. Touch the brush mask again, very tiny and just uncover
the blue is the eye. We're going to lower the
enhance to 20 per cent. Now we'll save that
to adjustments. Next we'll go to texture. And our weight. Tap the window in
the bottom right. I want you to put something
near the bottom as the picture to cover the
blackness, a little bit. Forgotten to take off the
brush mask or do that now. So we'll look at the airwaves. And I think number
18 was quite good. So we're going to expand
that with our fingers. And this more
blackness on the left. So we'll tap on this
icon here and just flip. Now you can see because I
left the brush mask on, it's covering part
of the R wave. So I'm going to
take a step back, go into history, and tap
the last one that I saved. Now if I go into airwaves. And again choose number 18, you can see the whole thing. I've left this mistake in. So if you make it, you'll know how to correct it. So if you lose a brush mask on and you go on
to the next step, and it covers part of the added feature than simply go into history and take a
step backwards and try again. So now we have the
L Wave going to tap this icon in the bottom
right to flip it over. And then I'm going to
rotate it a little bit. Now that just gives a bit more interests to the
lower parts of the picture. So I'm going to save
that to adjustments. Staying in texture. We'll put a paper
texture on this. So press paper. Press the Windows icon, look at the different papers. I ended up choosing number 29. But you can choose
any one you like. I thought that
suited the picture. So I'm going to save
that to adjustments. There we have it. I'll just go back
into the history. Started off with
the lion's face. We bought in the picture of the man and revealed part of it. Then we went into
coherence, then lineal. And we uncovered the eye. Then we put the L
wave on the bottom. And lastly, the paper texture. So that's all done. We're going to go
to the arrow in the top right and
save to camera roll. Now we'll move on to our
next lesson. See you there.
9. Lesson Eight Playtime: Welcome to lesson eight. Let's take a
lighthearted approach by creating a tune
effects for children. This technique is useful
for artists who make kids books or
making an image for a birthday card and
other childlike things. So let's begin. As usual, we'll start by
opening up Eichler alma. We'll tap the picture
icon in the top left. And first of all, we'll bring
in the image of the dog. Will go to style and tune. Click the window in
the bottom right. And we're going to
choose tune one. Save that to adjustments. And then we're going
to go into form. And crop. Just got rid of
those white edges. Maybe going a little
visit the sides. That's it. So we're going to
save that to adjustments. And then we will save
it to our camera roll. Next, we'll tap the picture
icon in the top left. And we'll tap landscape to
make ourselves a canvas. Now go into effects and blend. Tap the picture icon
in the bottom right. And we're going to bring in the girl standing on the beach. Spread this with your
fingers until it covers the entire canvas. And save two adjustments. Now we're going to make this
into a tomb picture also. So we'll go into style. And two, we're going to save
that to my camera roll. Now we'll go back into
effects and blend. Tap the picture icon
in the bottom right. I'm bringing the two
image as the door. Now we're going to tap this icon in the bottom
right to flip it. Will spread it with our
fingers and place this in the corner there
That's about right. So now we're going to
tap the brush mask, reduce the brush size, check that the brush is on. Number one basic. And then we're just
going to mask out the hard edge so that it blends in with the picture of the
girl on the beach. Remember, you can tap
the eraser if you go over and use
deleted too much. That's all done. So I'm going to save
that to adjustments. And now I'm going to stay in effects and press blend again. Tap the picture icon in the
bottom right and bringing the PNG, the balloons. Now I'm going to
rotate the balloons so they appear to be
coming out of hand. So it looks as if she's
holding them and tap the brush mask and just removes the string that's
overlapping her arm. So we've got all our elements
now within the picture. So save two adjustments. Next we're going to
go into texture. Look along the second
menu for Sparkles. Tap the window in
the bottom right, and choose Presets 11. Tabbed window again to remove the menu and spread
the sparkles, the brush mask off, and spread the sparkles with your fingers and position it. That looks about right. So I'm going to save
that to adjustments. Next, I went into town
and I chose Adventure. Tap the window in
the bottom right. I looked at various tones here. And I chose number one, quite like number three as well. So it's up to you to
choose which one you like. Tap the window to
remove the menu. And I'm going to save
that to adjustments. Next, I'll go to
texture and paper. Tap the window in
the bottom right. Because all the different
paper textures. Now you can see it's not covering the part
that I masked out. So I'm going to go into history
and tap this one again. And now it covers
the whole picture. Just remember that it can be a quirk of the program
when you're using mask. To have to go back into the history and choose
the image again to make sure that the paper texture covers
the whole picture. So this is what I chose. Presets six, tap the window. Save to adjustments. There, that's our kitty
picture finished. So now we will go
into the history. We started off by bringing
the picture of the door, making a tune effect
and cropping it, saving it straight
to our camera roll. Then the next process is
choosing a landscape Canvas. Gone into effect some bland and bringing the girl on the beach. Then we change that
to attune effects. Went back into
blend and bought in the doll picture that
we made a tune effect. Then we went into blend again, I'm OT in the balloons. Then we went into texture. And we put sparkles over the picture to
give it some life. And then we put the
texture effect on. That's all finished. We can go to the top right and save the
picture to our camera roll. Now, we'll move on
to less than nine.
10. Lesson Nine Dreaming: Welcome to Lesson Nine. When I saw this image
of a girl asleep, I immediately thought of
her in the dream state. Bringing in the unicorn. Same, the perfect face. Here we'll use the
sketch process added with an enhanced
screen effect. So let's go. As usual, we'll open up Eichler armor, tap the picture icon. And this time we're going to
choose a portrait canvas. Save it to adjustments. Then go into facts and blend. Tap the image in the
bottom right-hand corner. I'm bringing the girl. Plot the Zoom and reduce the canvas a little so
we can see where we are. That the Zoom again, the fingers spread the picture to cover the whole of the
bottom of the canvas. So when we've got the
picture positioned properly, will save two adjustments. Now staying in blend will
press the picture icon. I'm bringing the unicorn. Now you can see that the
unicorn needs flipping. So we'll tap this icon
in the bottom right and flip the unicorn
around with your fingers. Spread the unicorn. Fit the top of the picture. And then we'll go
into brush mask. Lower the brush size. Check we've got the
right brush, basic one. And then gradually
soften the edge of the picture to blend it in. I went a bit too much there
and you can see a hard lines, so I'll press the erase button. Let me erase that back there. That's perfect. So we'll save two adjustments. So next we'll go into
style and sketch. Tap the window in
the bottom right. There's all sorts
of sketch effects. But going right the
way down to number 20. And I thought that gave a really lovely effect
for this picture. So we're going to save
that to adjustments. Then we're going to go into town and enhance,
tap the window. And there's all sorts of really pretty tones
that you could use. You don't have to use
the same as mine. Or you may have a different
picture entirely. Just go through Let's
see which ones you like. For this example. I've chosen 25. Then I went into where it says
normal to choose a screen. And I chose multiply them
again to get rid of the menu. Yes, I really liked that effect, so I'm going to save
two adjustments. Next, I'll go to
texture and leak. Tap the window. And you can see
all the different leak effects you can get. So I decided to go with
the tea with my fingers. I moved it off the
side of the picture just to give that up
slightly as well. It's a good that
pretty pink effect. I save that to adjustments. Staying in texture
will go to paper. Tap the window in
the bottom right. And that there's all sorts of paper textures look quite
good with this picture. I went all the way down to 26. And I save that to adjustments. There That's precede picture of a young girl
dreaming of a unicorn. So we'll go to the history. We chose to portray
Canvas. Then blend. We bought in the
image of the girl, and we bought in the
image of a unicorn. Then we use the sketch effects. Then we went into enhance
and used a screen as well. Then in Lake, we put that
pretty pink light one side. And we finished off
with the paper texture. And that's our
picture or finished. Have a look through
the photos that you have or drawings
that you have, and choose to in a
similar vein to put together or use the
ones I've provided. So now we're going to
go to the top right. Save to camera roll. And move on to our final
lesson. Less than ten.
11. Lesson Ten Time Travel: Welcome to our final
lesson in class six. Less than ten. In this lesson, we'll
travel through time. I've used several effects
to build this image, including our waves
and a cracked finish. So let's begin. Open up eye color armor. Tap the picture icon
in the top left. I'm bringing the
image of the lady. Now we're going to make
some changes to her. Go to style and flow. Tap the window icon
in the bottom right. And we're going to
stay with preset one. So I'm going to save
that to adjustments. Then we'll go to
term and pastoral. Tap the window in
the bottom right. You can see all the
different effects. We can change her too. I went with number
19, preset 19. So we're going to save
that to our camera. Roll that, be sure
to save it as a PNG. So tap, Save PNG. That makes sure she'll
have no background. So now we can go to the
picture icon again. And we're going to bring
in a landscape Canvas. Go to effects and blend, tap the picture icon
in the bottom right. I'm bringing the
picture of the time. Expand that with your
fingers until it covers the entire canvas and
save two adjustments. Staying in effects, we're
going to press blend again. Tap the picture icon
in the bottom right. I'm bringing the safe
picture of the woman. You can see she needs
expanding quite a lot. And we're going to rotate her. So she's flying through time. That looks about right. So we're going to save that
picture to adjustments. Next, we'll go into town and look along the
second menu adventure. You can use any of these. So these are just suggestions. Fees have put a picture together
yourself in your style. So tap the window in
the bottom right. You can see all the
different venture tones. But I went with preset six, the window again and
save two adjustments. I just like the brand
and cream tones to give it an old worldly look. So going back in time, maybe. Now going to texture
and find airwaves. Tap the window in the bottom, and go to preset one. Tap the window again. But we're going to expand this. So it's right over the
picture and position it. That looks about right to me. So I'm going to save
that to adjustments. Next we going to put
the crack effects on. So staying in texture, look along until you
find one called cracks. Tap the window in
the bottom right. There's all different sorts
of cracks effects we can use. But I ended up using preset 23. Now I rotated this round,
make it landscape. Just tap the window again
to get rid of the menu. Now, spread the cracks
out with your fingers. It's a little bit too much. So the opacity will
reduce it to 60%. That's given It's more
toned down effect. Save two adjustments. Staying in texture again, moves the second menu along and choose paper to tap the
window in the bottom right. And again, there's all
different paper effects. You can adjust the size and intensity and the
opacity if you want. Ended up with number 19. I thought that gave a similar flow texture that
match the cracked effect. Tap the window again. Safe to adjustments. And that's our finished picture. We'll go to the history. First of all, we bought in
the picture as the lady. And we changed her with flow and a pastel effect
and saved her as a PNG, so there's no background. Then we went back
into the program and chose a canvas, a
landscape Canvas. Then we bought in
the time image. We brought in the lady that
we'd save disappear and g. Then we changed the
tone and adventure. Then we push on the airwaves to give a
little bit more interest. And then I added
a cracked effect. I'm finishing off with
the paper texture. And that's our
completed picture. I'm going to save that now to our camera roll
as a normal JPEG. And that's the end
of our lessons. Four plus six.
12. Class Six Wrap Up: Thank you for
completing classics, and I look forward to
seeing your creations. If you need any help
or advice, please ask. I'm happy to help. Please leave a review
if you have a moment. It's such an
encouragement for me. And if you'd like to
know more about me and my other creative
work as an artist. And also, please visit
www color story.com. I started my creative journey
writing books and audios, as you can see here. Then I returned to
my first love art and created all kinds of art. Finally, I have 20
years of mind, body, and spirit articles to help my readers navigate
our complex world. I think you'll find it
very interesting to visit my website, color story.com.
 Christine Sherborne, Artist and Author