Transcripts
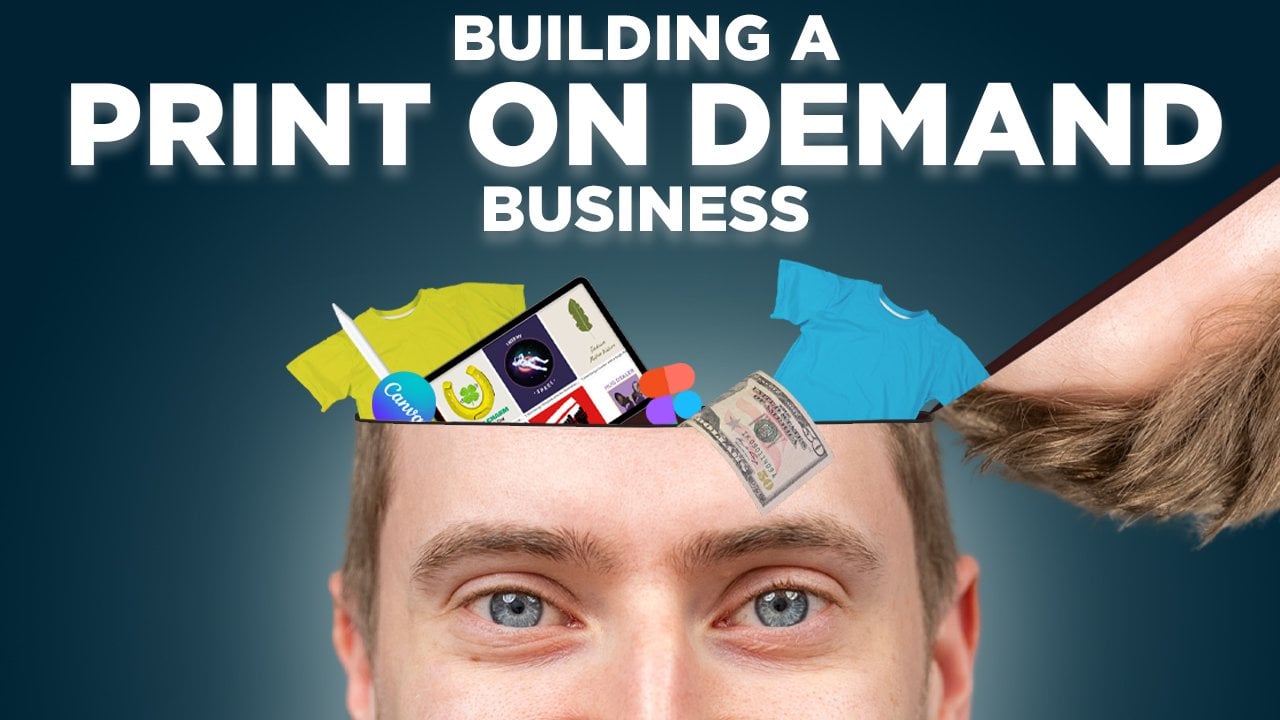
1. introduction: well had other people. My name's Alfie. Andi. I am gonna show you how to create a screen printing business for as little or under or £100. How to start it on then, from there how it grows into, uh, pretty much a full business from beginning middle toe end. I'll show you all the various steps, pretty much building a screen this but, boy, that you can see here to, uh, make it some screens. So there's no mention there. It ripped is left over when to make a screen, how to stretch a mesh over it. And then how to from there, how to expose it. Sorry. Exposed about designing their how to make a design through four shop or some other third party free program. Some tips and tricks that have learned over the time on then was a girl how to make Huckaby T shirts by the paint? What emotion inks, paints, papers. Prince print her, uh, T shirts, exposure unit, even online advertising and stuff like that. That was pennies to show you that you don't have to do the whole let's throw money at it to make a business when you could literally just make it all by yourself. So, um, you guys already hit the click on the link or subscribe? I don't know. This is my first video under from now, literally show you everything of learned on most of all, all the mistakes I've made that will save you that time when he and pretty much headache. So, like you guys And I hope you have a beautiful day.
2. building a screen printing press: other guys will come to my lesson or welcome to my class on for your first lesson Today, I'm going to be teaching you how to make a screen printing press with just basic household tools. Onda for as little as 20 quit or $20 wherever I said in my intro. So that being said, that's gonna start it. Uh, you can see here there's just a basic tool that I use just some gloves, screws, bolts, nails, son soul from clumps, some minor things. Don't worry. There will be a list on an image of all of the tools I used at the end of the video just that you can refer to it. Also, these are all the materials are used word clumps, bungee string on assortment of screws on some wood glue, and again there will be an image under a list of all the materials you would be requiring. So first things first is to be cutting down the main lengths of wood two by four. The four by eight, whichever you were able to acquire find or by cutting him down, I think it would be just three pieces, four pieces you becoming now using. Of course, the Michael box makes things a lot easier, and there are a lot straighter cuts. It's very important that you try and keep the cuts of straight as possible will just prevent any sort of future problems here. I'm just putting making a T, finding the center off the smaller piece, making two marks of where I want the screws to go and using a big drill bit. This is just account a sink in the hole a little bit. This is just for cosmetic use, Aunt, to allow the screw to penetrate in a little bit deeper, just to give a little bit more stronger grip using. And, of course, the wood glue. Very important stops any squeaks and creaks that you'll be getting when using it. Then, of course, pop this group. Make sure to hold this is firmas possible. Use the clumps or G clumps or brackets if you want against the table. If it is kind of slipping away from you, forget that screw in nice and tight as you can see, creating a tea nice and solid, and then do the exact same one the smaller T. In other words, the smaller arm the same process of before mark center pop to hold screw marks where you want the holes to go, then come to sink it just a little. Not much if you have a screw that compacts through the whole thing. Great. But I recommend to come to sink only because they will just make it easier for the screw to go through and easier again. What would believe Not too much or too little. Place it on top. Use the screws you have in clumps. I totally recommend to use clumps thing. As you can see. 2nd 1 done all it was fundamentally just to teas one on, too. Now the second piece of wood, the smaller piece of wood, the flat melamine would you can use any Would you want here? Could be MDF could be fibreboard. This is just a shelf that will be pretty much supporting the screen, using the clubs to find it. Find the center than clams to, of course, holding in place. You can put wood glue here if you want, but it's not a very structurally supporting heavy parts soul. Just a couple of screws. 12 and three should be more than enough. As you can see, I would put to. It's not very heavy objects. Not gonna be holding a lot of heavyweight. It's just a little guide. When you're placing your screen now, place the small T on top of the larger T on that little small block of wood at the far end of it on the hinged to On top of all of that, screw these down so that it becomes like her door hinge kind of thing. As you can see from the illustration here, it's just very simple Door hinge now something I did. Forget toe ad in the original beginning, but you'll be making two small little blocks at about a 45 degree angle. The miter saw box that you have will have to 45 degree angles. So you just cut a small block on an career, a 45 degree angle. And as you could see here, they're being placed at the side off both of the arms. This is just to keep the arm that swings open down, aligned back down when it's settling again. Screw these on. I do not recommend to glue them because if you need to move them, alter them and the future. The glue will give you some trouble trying to remove it. So just two screws. Both sides. Andi, just so it's in the middle. You can glue the base if you want. I did, because I know I won't be removing it. But just in case in the future, you wanted to remove it. I do not recommend gluing it. So if you wanted to make a different size base, you could make a sleeve. You could make a new arm jean leg, etcetera, etcetera. And then you just remove that piece of wood, put the wood on top, and then you drape their new jeans or cloth or T shirt on top of it. Now, this is the arm support a thing. I don't know what they're called on. All you're doing is making a screw hole through the wood, and then you're placing the bolt through it. This is, too, to increase or release tension from when the arm goes up and down. So you wanted to just so it bites. As you can see, I'm going up and down multiple times, making sure that I just get that nice little bite night. Perfect. Now, Andi, I recommend you'll see in a moment to use to clubs to or or or something stronger, like a G vice something. So you grabbed the two clubs. Onda, put it on a safety first. OK, make sure you have the glasses on on any of those safety get you require, uh, go very slow with their wood metal drill bit. Andi, you just popped two holes in this under the same for the other one on. Then just need to screws going into the wood here. I'm just before I'm clumping that down. I'm going to just make three medium sized holes in the three legs. This is just so you can screw it down to any surface. Or if you go if you choose to, you can compare. You can do whatever, but that is there for later. Now I'm gonna be putting in the I let on the open. I let holes making the marks. As you can see, they don't have to be exact when you're doing them yourself, just roughly make sure very important that the screw is as far back behind the bracket as possible. As you can see, there. So trying to keep the metal hinge forward on the bracket, The the islets. Sorry. As far back as possible. And then I'm just gonna use a roughly the same screw slightly thinner than the thread, and then screw it. And if it's becoming difficult, recommend to use a screwdriver and to screw them in now I'm just using the bungee, getting a rough a size first, and then I will be tightening it later and then getting a rough size on that one and then just tell your name up as tight as you can. Make sure the army's down when you take in it, and then when you raise it proper weight on there and then if it's able to hold that way took, you know, hold the screen. I wasn't normally I don't paint them, but I had some leftover paint, so I thought, Mother, given I Celik on, surprisingly, I'm looks a lot nicer, so I had to recommend to have some leftover paints. As you can see, the gentleman, she is a beauty, Andi. Fully function made from under 20 quid. I think of paid are equivalent ₹20 yen. Dan, I don't know but cheap hope you guys enjoyed Andi. Look forward to see the next video. What? We're going to be learning how to make a screen putting a mesh on there. Making a scoop colder under a screechy. Ready for printing a design. Getting a design on this. Getting on your T shirt. I love you. Beautiful. Have a lovely day. See? Next time.
3. making screens : my nephew apples back around to on in this video, I'm going to be showing you how to make a screen showing you how to make a squeegee on some small ones as well. And I know I'm cheating. But is life all about you and how to make a scoop coder? That being said, let's get started to some basic tools I've been using on, and this is the materials. Hire quiet. There will be a list at the end with the accompanying image. Apologies for the wood that I was using. Unfortunately, we are in the Corona period, and all the shops were closed, so I was able to find some leftover wood around the house. Onda. Of course, this is another advantage to saving money in making stuff around the house. Just a quick border that's an a three size that I, of course, showed listing of a three and then just using that as a rough guide to how large to make my screen on both sides of making a mark off the 45 degree angle, as in all the corners will be pointing in. This will just make it easier, so I don't mess up my cuts. Now I'm just cutting it with soul invoicing. That was a very wrong choice to. So if you have a bigger sword, I recommend using it. As you could see, each corner comes together nicely into a 45 degree angle. No, I'm just doing a rough lay out on the table, making sure it all works. Bringing it to the corner, using some clumps just to holding it down and again on the other side is a very easy way of applying the screws and the glue that you require. Pop some glue in there, clump it down, and then use medium or large. Choice is yours. I recommend to just kind of played by a see which one you like. The look up to try and find one that doesn't to be a even not too small, kind of like Goldilocks. I guess I found the medium ones to be a little bit more suitable for the requirements. Then I got drill bit. That was just slightly smaller than the screw on this is the direction is shown here, but I'll be making the pilot holes one on two and then following it with of course, the screws on this results in a very strong and secure joint will not give you any play over time. And I repeated this process over all the four corners. When I brought the two pieces together and I get clumped them again, Play that you come to sinks on the screws, but then on the fourth corner, you may have a little play on. It may not be as easy you will. Meineke was about a muscle on the best strength, so I just recommend to bring which do it any best way you can. Grab a corner, push a corner, use a string screwed onto the table. Use more clumps if you have them, whatever you really go hand. But I just use some gusto on. Got the screw in. Got one in with a bad pain on the 2nd 1 Followed in quite easily, as you could see the ambit of really nice for him if you never ever worked to make screen prints again. This is ah foundation lesson to making picture frames for yourself if you have a wanted to . This is just to show you with this process, you could make any size screen you want. This is a zero screen. I think it is for poster printing, and this I will be showing you how to make and used in another following tutorial. And this is just showing you how I use these little triangular blocks in each corner when you go to a certain size a little bit larger. This is only because screens when they get larger, they tend to become a lot more wobbly. So you just make this tiny little triangle blocks and again, just using your miter box. It's a small triangles pops and glue in there. Put the screws going vertically down just straight, really, or you can go at angle as listed. I'll show you here how you can go straight in in with the same screws, and this would give you such rigidity. Once you placed these triangular blocks off all four corners, Here's a little test to show you how strong it is. Without them, she would have walked a lot more wobbled and should definitely will never hold my weight like this. Well, I'm sorry I came here. I'm going to be showing you how to make a screen stretcher. Here is just a basic Drillbit. Ah, Hama and some nails. Try and find Ah, nail on a grill bit off similar size. I'm gonna be using the longest hide off the screen first. This is just sold is enough from both sides to stretch. I'm gonna be over sizing it a little bit, so making sure you got a little bit over I'm just marking. Decide where I will be applying my nails here. I'm playing very few marks. I recommend after I did this to put as many to double double the amount of nails you put in here. So I put maybe 2 to 3 per inch. I'd recommend to put leg maybe 5 to 6 per inch. Maybe just put a middle row in there. I would recommend because once I used it, I noticed it wasn't as tough as before. So apply some more nails and holds in there. If you have the time in the patient's, it will serve you better. Now all you doing is putting the nail in backwards, as in the pointy end up on Dublin and down. I'm just pretty much nailing them in. As you say it just a closer view the meals will go a bit blunt at the front. That's okay. If they go to blend, I recommend to take it up another one in if you're just kind of falling with a little better resistance, and some will go a bit blunt. But the mash is quite loose, and it will easily pass the mash. As you can see here. Ever supplied a couple? I recommend 1/3 layer in the middle. Now I'm bringing the mesh, and this is 42 thread count mesh that I bought on eBay Cost me about £5 very inexpensive, and I'm able to achieve 3 to 4 screens from this one. Mesh a. Meet her by a meter, and I'm just getting a rough size on Dhere. Recommend to bring a corner toe one side and then about hand spun out is pretty much more than enough. You'll need to cut a long for your screen, do a little snip more than enough, and then just tear very loose material until tear very easily you will get you might need to do on the other side, but I don't think so, because it's very, very little left on the residual and no, I'm just getting a rough idea where to place my mash and screen. Now you can easily use a stapler and just pretty much stapling 2030 times along two sides of the screen. But the problems with Staples is I tend to spine them toe rust when I'm washing the screens out. You can, of course, use it if you wish to save some money in time. But it's like trying not choose not to. Instead, I use an epoxy bond that is pretty much contact cement. That's about five quid from the show, and it's able to produce maybe 20 to 30 screens very easily on there, has a better strength over time. She does start to give away, but by then I'm pretty much done with the screen, and I'm bending and probably replacing it anyway. So staples do last longer. But the glue is cleaner, quicker Andi easier, I feel so what I'm doing here is I'm just applying glue to all the four sides there. I lost the footage for the other two, but I recommend that you apply the glue toe all the four size, let her dry and then continue with the process I'm doing now. Once you dried with a little bit tacky, so you're able to kind of roll a screwdriver or whatever you want over the top of it, just to get a little bit tacky. Just so she'll hold down, Then I'm just applying more glued to her and then waiting about 2 to 3 minutes, maybe five, making sure she's solidly remember toe only. Apply this to two sides on the two sides now holds very strong, as you can tell. And then I'm going to be bringing out my screen stretcher and apply it to clumps to hurt the edge of the table and then at the edge of the table. I'm going then going to bring this screen, but her up against it raised the screen a little bit. This is very important because this is what gives you the stretching pressure. And then I'm gonna be pulling the mesh as I'm squeezing her down. I'm across through the needles and the pins on the mash, and as I pushed her down, I can see and you can feel just by touching the measure how tough, taut and rigid she has become. Then, through the mesh. I'm going to apply more contact cement, squeezing you, pushing in nice and hard, nice and solid, and then repeating the same process on the other side of the screen, squeezing it through. And then to test whether she was sufficient or strong enough, she will bounce or he will bombs Or it'll Bones, whatever you wish to call her or him, then I'm going to just cut the mash along. I don't recommend through the tear thing because you could dislodge or tear into the screen , so it's better to snap away now. A little trick to getting rid of these lips is to get yourself a sanding block or maker something block, and then you just son downwards and just scoring along the top and then the remaining mesh or the little lip. Well, just peel away very easily, as you can see. Very simply, here is the final result. On While I was busy, I thought my goal makes him more while I was at it. So that is the final screen that was the A three could, of course, just use any a three piece of paper to show the size. This is the scoop coder. I know I'm cheating, but seriously, by what? You can use what you can, because at the end of the day stops expensive. So the squeegee for your windows is what I'm using to spreading the emotion. This is just a floor Squidgy that you would use in your bathroom kitchen, etcetera. I got on eBay for £5. Onda. I'm just making a mark just a little bit in from the screen. You can kind of play with it. As you wish. You'll kind of get the gist of it yourself. Clamp it to the table on DOF course. Saw it. However, you feel best. I want to get to the robot. You while we will have some trouble. So then just use a little Stanley knife or blade, a knife or scissors. You want to be super careful, and then it's got it down. You will have some sharp pages recommend to get your sending block on to just send all the edges nice and smooth, because you're gonna be using a lot. And you don't want to get any sort callouses or splinters in your in your hands. On the two little ones. No point throwing my way. Just cut the little edges away and you got yourself a little small scoop small squeegees that you'd be using for chest emblems or other things that will be showing you nature and art tutorials. As you can see, there's that. As I said, the chest emblems or small little designs are very intricate details and your big, long squidgy And, of course, your scoop quarter. And I hope you enjoyed. I hope you enjoy the class, but it wasn't too difficult trying to make it as easy as possible. The next class, I'll be showing you how to make an exposure unit, how to do some full shop designing how to print it. L expose it onto a screen, the screen that you just made on bond. Until then, lovely, beautiful. Have a lovely day on bond.
4. creating half tone designe: What? Hi there, guys. I guess we're back for round four. Losing count. Going to show you how to make a design. Get on that computer, get your images, use a photo convert into a process called half tone and create more of a vector base. More solid, like text on symbols and shapes and stuff like that s so let's get on the computer. Is rock n roll by? Okay, that guys, How you doing? So gonna show you how to, of course, make a design. Now, Andi, to be honest, it's only really two processes to making designs. Two techniques to making designs for screen printing. It's half tone, Andi. Quite solid vector shapes like text on bond stenciling that I generally quiet vector kind of style. So I'll show you the on to give you a new example off the two different kind of styles. This is ah, half tone kind of technique this half Tony generally used if you trying to retain or trying to gain as much detail as possible. So it be this would be the results. Is the half tone all it does? It tricks the mind by creating lines or dots or whichever to thinner and thinner like thin and thick lines. I don't know the math behind it, but it's an absolutely beautiful technique on process. The discovered ages ago for this exact same process were using it for on then the This is another kind of technique. I mean same style. As you can see. I just love this image. Very country, contradictory. I'm conflicting. And then I created it into this. Create some of the head and then some of the corners and then mask it over. But as you can see, we again using this half tone effect that tricks the mind into believing it is a original or full image. You can see the more vector based shapes is generally more solid. Black, solid white. Um, here on Dhere. I made this from cool image here, and I'm not selling any of these. I just make him for myself just to wear him on personal T shirts. Um, and as you can see, this is very again solid colors. Andi, I did do the whole image very solid, but I didn't like how it had no depth so that I mixed in the half tone Onda as you know, is able to mix with solid stenciling effect with the Haft one effect, which is something like absolutely awesome. So that being said, let's rock and roll on and create one. So I'm going to think I use Maybe I'll use this image on I'll do that again. This is my friend. She asked me to put this on a T shirt with the slogan and stuff like that. So Maazel's style Because I haven't started, and I think I should. So I'm using this program on. I'm gonna create new, uh, a four landscape and create, and then I'm going to drag in the image. The reason why I do it this way is to avoid the chances off getting my aspect ratio off. I could have dragged the image directly in from here onto the timeline or into new document , and it would have created it. But then say, If I worked on it and did all this and all of that, then I printed it out. She would have printed out something like this, stretched because it would have been spared stretching it to the A four size because, as you can see here, the white here and here is April. So it's a good practice to open the size you want to work on either being a three, a four or any in the variation and then to drag your images in and shift him around. Justin forward thinking first. So with that being dropped in, I'm gonna expand out. Sierra liked position the image, move around, push and pull all the bits. However you feel I kind of like that, like to be centered. Bring the top head in a little. I'm kind of happy with that. That's wicked. Okay. Oh, that being said, of course, you do not have to use this program. I do pay for this program on dumb. I know some people's budgets will be a little bit more tighter. Some people, but just will be a little bit more foolishness. So all I suggested you literally go to Google and you type in free video. Sorry. Free photo editing programs. I did download one. Just give you an example. I think it was called G G. I am something Jimmy Gimp. Wait, That's not Kim G. I am gim. No, I don't know. Maybe I'm reading around. Please. tell me from reading a right or wrong, but this G I M p it is totally free. I downloaded it. I would have been the tutorial in this, but unfortunately, I I still haven't quite figured it out myself because I'm used to the other program and the short cuts and everything's all over the police. So I will be doing a second tutorial. Once I've learned this myself Figured it out. It's exactly the same. Was that from my initial messing around with it? It's just the bits are everywhere else in the settings, and I think different. It's just kind of throwing me off. So I didn't wanna waste time on that on also have two different classes for two different programs anyway. But from messing around with it, it's free. It's absolutely, surprisingly, very impressive of I was quite shocked are free program. I might consider moving over to here permanently when I need to pay for my second you know , payment for the program I'm currently using because the more I spend, the more they take the less I make so simple as that so highly recommend not all you can Still Google Search and see which one you do like. I did see up to 10 free photo editing programs. So go crazy at your hearts Ledger going to YouTube. Find some tutorials for that particular program you chose to go with. But I do recommend that one. I'm not being paid by them. They're not sponsored. I just found them to be the most versatile for screen printing on the things. So we're back into this on. We are going to now Haft on this so half toning is very simple. Process is very easy. I have my image selected and then I come up to here. Where is his image? Click there when I go to mode, and then I hit Gray Scale. What this does is it plans the whole image and turns it black and white. Pretty much that flatten. You have to unfortunately, um, and then I go back of the image again when I hit here and then I go to bed. You could Onley access this and two of the ones when you're in gray scale because bit map is a, um, black and white filter on it. There's no point to have it in color and If you did need in color, you would just do it. Bring it back in and then just add the color. But it's not necessary. This is the first pop up. You don't need to mess around with that because this is literally the size of your document . Just make sure that brought him here. Selected 1/2 tone screen. The others are really cool as well. But for now, just stick with this. A mess around with them. Don't you figure the basics out? This one is the one way you get to have all the fun and tweak and mess around with. Frequency is the best way to describe it in detail. The distance between the lines on the thicknesses so the closer they are together, that would be the frequency. Higher would be more detail on the frequency. Lower would have more less detail. But, um, thicker lines. Onda. It's always been kind of a struggle to find the different the balance between health in tow . Have your lines how thick and how much detail, Because this will greatly affect you when you are exposing this onto your screen. It's kind of a trial and error process So I wish you well and don't give up and the rewards will pay off. And then the other other one here is the angle. This is just the direction off the lines. So let me bring open up again. So the 45 degree angle is this here and then if you did it at zero, it be this way. So just imagine Oclock and then I did 45 or 50 or whatever. It's this way 60 is this way and it just goes around and around like a clock facing the lines in different directions. So let me try going. I'll go out like a try zero just to give you an understanding and then I'll click this to 20. And as you could see that the lines are absolutely dead. Zero the details still there it looks nice. I just don't like the line uncles, but it achieved it and you can still see and insane. Absurd. I got something in my eye. As you can see, you could see an incredible amount of detail considering how low the image is in just lines . I don't like how that turned out. Let me go back. Go back to image mode, but much okay, voicing you can't keep doing it, so you have to kind of remove the effect. Go back and click. Click, click next. Click, click, Click. Next. It's exhausting, but you get used to it and we put that to 30. We put this two dots. These are the difference. Shapes its mess around with him. You get the gist of it. Let's try around. Dying round. Try around 2030. Okay, so I did it into dots. I like that. If it's cool, it's cool. Go back again. Let me try. 45. My 300. Let me try that. 15. There is like a sweet spot. I kind of like I like to mess around with. This is between with 10 to 20 and think higher than that. I'll give you an example. I'll put it No. 50 As you can see there, nothing changed. Beautiful like very little change. Look how small the dots are. Very small. It's impressive, but this you will struggle trying to expose this unless you have a very high high quality was exposure unit, you will struggle. I have even struggle with this on very expensive exposure units. So on that much detail is, it's not that necessary. I like the rustic nurse. The the effect. It's the graphic e stale. So I'm gonna go to 15. I'm gonna drop this to lying. Take that to 45. I kind of like the angle. Let's see what that does see. Look about. It's perfect. It's got the detail from afar is retained a lot of style as well. Even I did the lines of I did a cool effect to it, and then it's just going on a T shirt. You know, it's gonna look cool. So try not to overthink that how detailed it needs to be in this, that No, it's a T shirts cloth. So many of the steps that are gonna make it lose quality. So find your happy with and then from there, keep moving forward. So that is done. One thing I did notice it did mess. It was quite blonde. The image was quite blunt to start with, so controls he back, and I'm getting back to my basic generally, before I do half tone. I always like to go to image once I've turned it into, so I hit the gray scale. I do that. Happy with that. Then I come up to here adjustments just below it below it. And I hit here. Levels on all levels. Does it messes with three colors black, white and gray with shades. This will expand any black pixel until it's completely blown out. This will expand Any white pixel on this will expand any gray. It was one side or white towards one side. That's all this does. But the wicked thing is able to do I'm able to give it a little bit more punchy sometimes. So I like that. See that? I like a bit more. I'm not gonna lie. See what I mean through the difference? Quite great. Quite dope. And then if I go back until the more pop, everybody likes a little who don't like a little bit of pop. I got myself look sorry. What? We were touching that so mode. And then we go back up to a bit much and then we create okay, half cone. The settings from my previous amount was already last. That's beneficial. Okay, look it up. But I was just wicked. We should it before, enough to image, but no to me. I might be with that. So not being done. Also, you can then drop in text and stuff before you to do that, you need to get out of this. So then get out a bit. Maps. You go pit image mode and then just come back to gray scale. You don't need to go 10 thing else. This just allows other functions. So if I stayed in bit map, I wouldn't be able to use some of these functions. And Mesereau message with you. Happy with your image. Come back down to Greece. Scale. Okay. Don't know what that means, but hit. Okay, and then this allows you to go in, do some alterations. Draw so paintbrush and go in and paint some areas in pink areas out safe. I see the overall result of how something looked August white on there paints and why I'll do some crazy whatever I want to do. And then safer way to drop my slogan. My text. So find a cool Put that there. Boom, boom, boom. Whatever. You know, go in there like that. Throw that down to Black. Tex is there? You know something just keep, keep pushing and keep messing with it. And then you can also, if you wanted, I can also select all by literally hit by hitting control A by selecting all. Or you can just come up to here where it says select cool as in control, eh? And then I hit control C as in control. Copy. And then if I go to file new new a four document again sideways, create control the then I'm able to come up here to edit transform control T I would like to use And then I got this. Bring it down. Come here. Go to my paintbrush or go to marquee. This cuts image out like this is a good line. You can drawer if you want. Make a city do something crazy Whatever I want mon t shirt business, whoever I want you. And then I delete all of that and then bring my paintbrush back in. Remember, only work in black of wipes the only way it would actually work And then I loathe me Has my brush dairies Oh, me black but cool, funky patterns Bring what else and addle your cool pants reply that together and then just keep messing around until you're happy. Your your sod with whatever you made and then to me, that's finished. Now I'm gonna not gonna print out. Now. I'm gonna use that. A combination with the text So showing you how to incorporate in text Andi Mawr vector shapes stenciling kind of effect in the just in a moment now, so see in a minute.
5. creating text an vector design: So in this second class, I'm just going to be took putting some basic text on DA with that. I don't know what I'm going to just type. I don't know. I think to do some covert or something for this very crazy period. So you just hit thes text icon here, and then wherever you type or wherever you hit it, it will just create just a sample. Text off what you're using of where to start typing, just to give you an idea, then you literally type as in that same spot. So, um, to configure it settings and font size. You do have some basic ones here up top. But if you hit this little icon box here, it's able to give you a little bit more on all of our all kind of bundled up into one. Someone explained the textile gonna highlight all of it. So I'm gonna expand the text a little, just trying to see them get my side. This isn't a three. By the way. I was gonna show you how to do a nice big A three design or a three layout. So a three. So then that means I have a lot more to record. Sometimes I like to place to a fours or if you have any three just next to me and then Masa call with the reference next to me. I'm able to visualize the spacing a lot easier when I'm messing around with layout and stuff like that. So what, we're gonna call this T shirt on to incorporate the other image to show you how easy it is ? This is my other image. I'm gonna hit the selection tool you hold down in selection to on all of these. If you hold down, there are other variations of it. You'll learn as you kind of go along. I'm gonna probably just maybe take just a face of this one that didn't work out Well, could do it again, do you? That's quite nice. No, they said it was an example on a copy. This control. See, I'm gonna move back over to this one. Control. There she is. Right. Bang in the sun. Uh, nice round. Ah, I was thinking maybe I did some around text. I'm expanding inside. Control T, of course. Transform any image I want. And as you can see, it's still retained all of the half tone because it is still just a solid image from the other one there. I like that. I do want it to have a little bit more pronoun. So if I click on the layer itself, it opens up this layer styles not gonna go into depth in this. I will be creating more classes on this later in my more intermediate level. But all this does is it just gives you more off putting which boldly other filters and settings and stuff all in a more organized way. That only applies to the layer that you have, because normally the other layers and stuff that you use applies to everything. This just allows you to individually control each individual layer just gives you a little bit more control. That's pretty fundamental basics. What the Layer style is thus called the layer style. So all I like generally like to use the latest out for its I only to be honest on the use for like inner glow, drop shadow and stuff like that. I don't do a lot of the tricky tricky because it's kind of wasted on screen printing. If you do want to touch up photos. Highly recommend to mess wrong with them. So I'm gonna have stroke here. All that does is it creates a nice line around anything and everything. Um, stroke needs to be hit as well, so it accesses the settings. Andi, just look at my image. Just give yourself an idea. I could just see it, and I'm gonna increase the size. You can see yellows point less because it's ah screen and has to be in black and white. And I hope I mentioned this before when you're creating stencil or whatever. It has to be black and white at the end. Regardless, even when you print our it has to be black and white and I think of your white as your transparent because you're going to be printing onto a plastic film. I will be showing you which wants to buy and all that. Don't worry about that later, but imagine everything that's white is see through and everything that is black is of course, black. No strokes. A bit big, so I like that. That's gonna cute. I'm just showing you don't think I'm gonna really print this image out. I'm just showing you how you can incorporate each step together Generally sometimes like to have them spread over two. And what that will do, It will allow me to the position them a little easier getting a little bit more freedom for when you're moving your text around stuff like that. I was getting text to be, Yeah, hockey of this. Fine. So good. Might them two together as one word and then that one is another. So before I do that, I want to change the text that the suicide maybe just leave the blood of suicide, Maybe change, Leave them or I don't know, let me change the top on it, See how it looks. So Texas selected. Select this guy here, go through my text styles, just highlight it. And then just kind of with your arrow keys up and down, I just press up and down and you're able to go through all that. The variations are text layer styles you have available for you. As you can see here. Multiple now, half of these are pretty much just what came standard, but pretty much, maybe 90% off the ones in there. Um, in Google electoral, just typed in free free fonts F or anti fonts on What that did is just provided me with a ton crop. Load off free sites to download funds and they will even explain to you how to apply it to whichever program you chose. But really, you just drag and drop it into a folder in your windows or Mac. But I've seen Layer. I lost that text. Nice to have a night of issues. Yeah, heels. I feel suicide. High heeled suicide. Should be. I want with text a little bit bigger. Andi, with that, I can use thes here is will the little squishy ones. This will give you the distance of text. This will, of course, squish it up and down. This one will make all capital or all non capital that will bold it. I don't need to bold it already kind of capital. Uh, this humble. Sorry. Squish it. That when you don't need No, you don't need underline. I don't need that. So that now like that. I think maybe all trying our kids do that wraparound thing I did before and flex grease. You're gonna have to really mess wrong with them to see how you like it. But the Ark intends to sometimes be a bit weird. I was a kid, I guess, more. Can you reduce its size? Okay, that looks terrible. But again, it's just introduced Auriol. Okay, This guy here, you see, she left the Texas that I said when I have to talk about this tutorial swimmer design and gets really but I have to work on that. So slept all the layers. My pretty much Oh, let me show you how to bring in something off face Internet. So I go there. I just type in. What's it called? Sculpt? I ask you sculpt. Okay, There's a little trick I do to turning a basic image into anything you want. Thank you from nothing. Okay, so that's the image is absolutely tiny, but it doesn't matter, because now that details gonna be taken out. So a little trick I do to make something that take off anyway with a camera phone with the old photo off the internet, it doesn't matter. You bring it in. And if you need it to become photo Sorry. T shirt printable you primitive image. So when you bring an image into was called. And to polish up the photo from your phone from a camera screen, grab whatever you're gonna put it onto a T shirt, you need to, of course, remove all this detail and turning to essential. So there's a little trick I do. I go its image, adjust de saturate, or you can hear ship control you. It takes all the color. I just makes it easier. And then, like before, image just loves. No, we do the same again. But this time we hug the side. Oh, sorry. I forgot something. Let's get rid of the background because she's kind of messing up. It's not magic. One tool here might help. It just lets all one color like So we're gonna delete all of that background. Beautiful. Now delete. So then back to remove the background. And then we've already saturated it. Go back up to image it just and then levels or control l As you bring this in. Bring this to the side. You can see you have the hardness. All the stencil als There it is. Retained. If I moved out a little with this one here, it's still gray Grady. And that will be very impossible to a screen print. But if I literally hugged the end completely everything, consult black. Then when you move these around, you are able to choose how much of it you want. Even with this one you could bring in, it will bring more, more or less. Or you could bring more together. I just realized that. And as you push it, I'll see. But when you do that, she doesn't work. Yeah, so leave that one there. You've got one. Now, come on, man. So as you move it around, I'm able to decide how much I want to believe or how much you want to bring. Also, you don't have to stick with that just as it is, as I showed you in the past could get the same image duplicated. Yeah, I'm just getting everything wrong today. Copy it. Sorry, you don't duplicate on the keyboard. So you come down here and drop it into the copy. Now I have to the exact same image, but make sure they stay on top of each other and then I'm gonna hit control l as in control levels. Bring this there, get the detail that I like try and focus on one side of it first, so I liked Come. So I like that amount of detailed there. Yeah, that's good. And then bring that bottom layer on top and such, and then focused more of their effort on that side. Control. Elegant. Don't bring that back here now and focus a lot more effort on other side like that. Happy with that? Now, if you get the eraser tool with the top player selected, I get the eraser tool. Make the brush a little bit bigger or right brush up a little bit bigger. It was perfect, man Ra about the bit of why didn't one like So? As you can see, that's all I did a main image. The second is that I had a copy of top, literally just rubbed her out. All I did you can see I had rubbed out the details. I was too much. So I did 1/2 of the image and then I did the other half and then I just clued up together like so you can see Bill trick. I picked up. Please share and enjoy. So now that's quite cool. Um, I right click here and I do this marriage down. You put these two lays together so I don't need to mess wrong with them jumping around all over the place. Hopes on. Then I'm gonna select the color white from that. And you could do that. We're going to select color range, Select just by tapping. It will select everything wiped in that hit delete on the keyboard. Select. No, I don't know why, but she looks better in a weird way. So I was gonna control transform. That just fits a little bit better, I think, like, uh Well, look on that. You might pursue that a little bit more, See if I can put it into the original image and then do the halftime lines. That's the only reason why she's kind of looking a bit weird now. I would have had it. Don't before I did the half tone It It's like school effect to the face, maybe some a bit on the neck. And then I would do the half tone to it is struggling because you're putting half. Sometimes it works. Sometimes it doesn't, but I'm trying to put half tone lines. I'm trying to put just a basic image on top of Haft online, so she's kind of completely with it. But I hope you kind of got the just off the technique I was trying to teach you. So lead up there. I finished working not another day, but in essence, that is now Well done. Oh, hello. Hope you enjoy that class. Tried to keep it as easy as possible. I know it was a bit basic, but I will be doing more intermediate classes later on with more intricate more detail, just trying to like, you know, wet the whistle. That's what it really is called that. Now the next class, I'll be showing you how to make an exposure unit on. Then, of course, getting your mulch in onto the screen on, then getting that designed you whatever you made or copied onto their on exposed it and then from there lettuce rocket. See you later
6. making exposer unit: valuables. Apologies for the delay. Is the Kobe period on? Um, it's just I guess you understand. Enough said so. Today I'm gonna be showing you how to make an exposure unit basic under Justin Lassen thing because all the shops are closed. Walking home found a broken picture free on the street. I'm gonna be using the glass. It couldn't get yourself to a glass shop. I told you recommend it. They'll be able to cut it to an A four a three size for you. You can sit on and it's a lot more compact on using the black for the L E D Strip. And then, of course, these are you. The led 50 50 50 50 Just represents how big the led issue is. 50 50 millimeters This way. 50 millimeters This way. As you can see, you'll see if you just type it in on, of course, is a company with a power supply. And it has this cool port so you don't have to do any soldiering if you know how to do some soul. Great blessing. If you don't don't read that just broke straight into that show. You have to attach this this on credit exposure. You exposed down. So enough said, that's right role. What? So just a picture frame could find some glass? Just some scrap wood. This is what's called will be used later. The ladies on the power supply and this is an A three board To cut a piece off a three board out and you'll see what's useful. Those two are just smaller pieces that a three with just half of the size and this is just a scrap piece of wood. I'm not showing you what you doing with that shortly. So firstly, get the screen and just get a screwdriver. Most lead. They're held together with clips you might find something screws. I'm just some with the rubber or a blue. This one has no metal clips and just pushed them back. And, of course, I take the glass. Discard the image recycled, of course, and then the backing board co keyboard. Keeping them. And as I realized here, this is a perfectly fine screen for mesh. I did notice that is a bit weak around the corner, so maybe some corner brackets or some small hinges just around the sides. All four of them, And that would be a very sturdy free screen. So I might even do that either. And under the tutorial. Uh, this is just an eighth, a three piece of paper. I have just to give myself an idea up size you kind, of course, salad eight to a force together if you want, and be able to do the same thing so you can get a rough idea. And all I'm doing here is placing the A for the A three sorry piece of paper in front, on top, off the wood on. What I'm trying to do is just get a good size. And of course, this is the legs you'll see shortly. All I'm doing is placing them there and making a mark. So I know how much space I need left over for the feet or the legs too screwed on. I'm doing the same on this side. I'm just marking it on the inside on the outside, so I know where to place them. Gives me an idea. Rough idea. But generally, if you're not that first, I just think you should get maybe 1 to 2 inches all around the a thin piece of paper. As you can see here, I did an inch, but next time I do want to two inches just all the way around roughly. And then, of course, cut it down with the hon soul or geeks alike. You have one got cable. So whatever tools you have available, please use. But if you up to the bare minimum, just a $5.5 pound Hansel, then, of course, the sanding block. Just some sun paper, square block, cheaper Sunnybrook. He could never get a light cost 20 p bread and sandals corners. And while I was, of course, messing that I noticed it was really weak on a bit too flimsy for what I was thinking needing to make. So, as I have, I don't have anything really to do other than just get thicker piece of wood. Andi. Just glue it to the top of it. If you If you are having this problem, if you don't have a thicker would, you could, of course, just get find stumps. Thinner pieces, smaller pieces on just gloom together. So I just that glue on doesn't have to be clean or perfect, and then just get yourself some plastic or wood and just spread it around. There are some clams, and if you have, if you don't have any clumps and just put it on the floor, put something heavy on it, about 10 minutes. It should be dry enough to mess with. Here are just showing that I don't have any wood big enough, but I'd recommend something wrong half an inch to report to the core of an inch thick, the melamine or co keyboard or apply board. These are very strong suit beautifully. And then, of course, this is an a three piece off would as well that I just couldn't have, and you'll see shortly what I'm doing at the side there, next to it is hinges on some nails and screws. I used the clumps and just to keep it upright. If you haven't got any clumps, don't want to play sitting down. And then was it called Just screw face onwards, like your your your lower to the table. So what I'm saying here is make sure that the brackets, the hymns, the bump area is facing down because it is facing up. It will get in the way so once the face down. You repeat the process on the other Lego's well, and then it is complete. Bring back there Would I made on again. If you have a thicker would you do? No need to go through this process by advocacy. There is nice and strong and it is the with I needed That is why I kept it. So now you put the legs on this. You can pretty much do it whichever way you want, you can either. Put on edge is the way I did because I want the legs toe Hang, go a little or you can have it smacked bank hitting the edge What it would do It was then hit the side and stop itself from, you know, falling over. I just want to once two screws in there just to get the idea and it looks like it's working beautifully. Nice little compact Apologies for the my screws. Again, shops closed. I had to use and left over the Hud. Then repeat the process to the other side. Andi, I tried to cut it with the hacksaw. It did not work. Um, my friend has my grinder. So when I pick it up off him. I'll just grind them off. But I'd recommend smaller screws so you could see All you're really doing is creating a leg door. Now keep in mind you can avoid this. If you have space and room, you can just screw them straight Sick is maker. Table doesn't have to this this folding thing. But I just like my stuff. We compact because I have a lot of projects going on in space is quite premium for me. So what I did here is I measured the top on the bottom on die roughly worked out How much led when you buy the led that recommend getting about five meters. That's pretty much how much they give you. But here I had five meters and all the ladies have a stick stuck a tacky back that is provided that you just removed the sticker and then put it down. So when you come to these corners, this is the tricky part. As you can see, flatten does not fall very well. It starts to round on Led is on sitting right. So there's a little trick I devised. I tested it. It works as long as you do very slowly on. Generally, don't be very aggressive when you've done it once, don't give it 23 times in the same location because you will rip the band. So once it's fine prices pushing it. So all I do is I pretty much get the loop line up the two ladies at the button that to really be on the top line up and then I just kind of banned in as it bent, flying down as when it sits and you can see this is beautiful. You repeat this process all the way to get the idea where you get to into these lined up below to really be the top aligned. And then when you just forced down slowly with your hands, no look, well said, as you could hear messed up the spacing, I think I must have put the decimal point. And as I was removing and sticking it back down, the tacky tape believe Lost. It's tacky, became a real Tuckey pain. So a quick fixes just clear tape on the recommended anyway, because regardless of the the release of on the back of the ladies off the calm of noticed , they do fall when they get hot or or dry or dump, you do fall off. So just get yourself some clear tape, put it on top and then you're good to go. Then get your public supply, Put it straight in test to see if they're all working. They should be working. And if they're not, there is a quick solution to fix it. You will need to solder. I'm sorry, but if you be really gentle and really slow, you will be able to achieve that. Now. This is the reason why I had the a three board made. This is a separate a three board. You can, of course, ticket off your press and use that you can have. It has two functions. You just have to screw it on. It's great off. And then the scrap pieces of wood at the button is raising it up. All this does is it brings it a little bit higher than the screen base, so the screen is fundamentally flocking. So then you have a perfect contact off. The mesh is plucked because the measures cloth and it bumpy. So this is for the acetate off your design to sit on all I'm saying there is. When you do get your piece of glass, I'd recommend putting solid tape around the edges because I did cut myself, place it nice and beautifully. This is, of course, what we made after this. I did realize that the legs were a bit fully for the any shortfalls in. So maybe some bungee or a next ra screw at the bottom. When they're open, you just turn a screw that will keep it in place. But I think just a bungee on talk. I just make a hole in one leg, holding bungee over the top of it like a like a bridge will keep it talk and out. Just a bond. Your little plastic other than nights. A little table on top. Don't look other guys. I hope you enjoy that class. I tried to keep it as easy as possible for the rough edges. I just couldn't find a tool. But I will be fiction or find smaller screws because you don't have to have a folding legs . You can just have, like, a table or have a box. But all you pretty much have to do. We just make sure it's like a meter away, so the best way to decide is pretty much that just a little bit above. Have it that far from your screen. And then you'll be farther than that to the health and safety warning. Trying to look directly into the light while it's on you will kind of give you a migraine or echoing because it is kind of a very strong UV light. It's not dangerous. It's just annoying. So wear glasses or don't spread directly into it on that being certain will be doing the next class. I'll be showing you how to print off design like that, how to cook the amble shown on the screen, how to dry it, how to expose it with same explosion you just made there. So that being said, I love you beautiful. Take care, be safe on DFAT
7. coating and exposing screen: I have your false hope you're keeping well safe on. Did you and your loved ones for all? Okay, eso I guess we're back for the next class. On with this, I'm going to show you how to print off your design. Two special acetate film. This is for inkjet. Just getting from eBay. I'll show you in a link on then how to, of course, the screens you have made how to get emotion until there how to dry it. How to get your design on it and use the exposure unit you use to expose the design. And then how to wash it out to dry, prep it and get it ready for printing being sir rope. Sorry that I'm using a a three print to myself. I did start with a four printer on with the A four printer. I, of course, printed onto two designs to separate a fours. Sorry and stuck them together. But to be honest, when I started, I literally just like printing on a four is to start with, like a text or a design. I try to keep him small when learning on experimenting. And most my T shirts did sell with just text on the T shirt and an A four is more than enough. But I do. You could see that I just folded on a 3 4.5 on I just Salad taped him together with some clear tape that works perfectly fine in the same process. Here, you can see that I'm printing onto a full paper first. This is just plain straightforward, a four paper, just to make sure my designs squeezed on nicely on bond. I don't make any mistakes on the acetate because in a four paper is only like five p on an asset tail. This is like maybe 50 Peter pound. Now when you do get these, you'll see on one side it's slippery and under the side, little bit sticky. The sticky side is the emotion that the company has put on top for the printing process. Some companies are very nice, and they give you like a paper, showing you the paper printing side. But then when you print on paper, so I have removed this paper because I know which side it is. Some do some don't and then after I've done my of course, my test print because many of them as you want. But once you printed toe plastic acetate, you kind of committed to it. And then, as you can see, that the design that's printed off before we print off beautifully. I'm just testing here. And as you can see, 100% comes out fully dry. That is the beautiful thing about these is you can touch it instantly. I still try to be careful cause fingerprints and stuff like that. But it is perfectly opaque. My settings on my printer I go in and I just literally put everything 200% black, 100% color 100%. While you're trying to do is achieve the most blackest of the most thickest amount of paint or ink down. Place it on top. One is the paper you printed first with a good little carry cake here. I'm just showing you the materials that I used. This is wise born eBay. One is an emotion. One is the activator on the other bottle with screen remover. My here I have the emotion and here is this the emotion activator And in here all I do is you put water about halfway for 3/4 but I tried to keep it a little as possibles of the emotion of the get too runny. So inside edge of dry powder, you just get some a normal hot tap water from your bathroom or kitchen. Nothing special. Just normal hot tap or, uh, and then you just pour it halfway into the bulges by I You can't really make make this mistake. If you did Philip the whole bottle by accident, it's still okay. I just like to put half. So it keeps the emotion less running because then you have noticed in the past, when I've used the full bottle was more running along the screen, trying to keep it a little bit more. As you can see that the emotion starts off blue, showing you that it's a fresh batch. Try and get yourself a stick, a spoon, plastic knife, anything. Whether the mystic I used because it did give me headache, just something to stir it. It's non corrosive, non dangerous. Then, of course, the liquid that you mixed in the bowl with the warm water. It is poured in directly to the glue emotion and just start stirring stairs slowly at the beginning because the liquid at the top, the water will fly around. And then once it gets to the bottom, then get really in there. Try and get in the corners as much as possible. And I say, Do start for about five minutes. It is recommended and then give yourself a good clean. As you can see from the lid to the emotion it is green. Now, any time you see a green and from this point onwards it will last about 3 to 4 months, and I find its most effective ist within the 1st 3 months. After that, you will start having exposure unit leave it for about five minutes and then you're ready to do whatever you want with it. Five minutes. I just leave it personally because in the past I've used it early and it has messed me up. Now, of course, getting the screen that we've been in the past tutorial setting now all up and get your emotion a little plastic Unfortunate Couldn't find that squeezy thing had at the beginning , but really anything flat. A ruler of this little piece of plastic found on the floor a tubal where anything with straight edge that's generally plastic or rubber something in your kitchen because you don't rip will scratch the screen. You can, of course, by a scoop coat on eBay. You come by all of this on eBay if you want, but I found making is just a cheap injustice. Fine. And then with that plastic thing, you just kind of spread it around Pretty much, however you want put a little bit more for a little bit less. I think less and grow is better than having to pick up and put back in the tub and then make sure you check the other side because it does squeeze through. So you, just like that could have a lot left over. If there's any dust or any sort of crap, Lund's on it or falls on it. I recommend to take it away. Now just literally use your finger, wipe it off and then continue emotion because once it's dried, it will either affect your screen or you won't be able to get out. So keep doing this cleaning, checking for any bare or eyelashes or hair back and forward, spreading emotion out, getting a nice clean Was he called level, you will see lines and streaks. This is okay. Just make sure there's no gaps where you can see white or straight through. And then sorry about the Big Hoover. Big massive who were looking heater, but a normal floor heater. Fan heater, but bedroom heater, even a hair dryer. Anything just to give it some heat. You can use a £10 heat. A £20 year doesn't matter. It was on the lower setting as well. All you're doing is just getting some nice warm air into it. So it dries the screen, touch it, and if it massine drive to the touch your fine. Now, of course, set up your screen by applying all of the layers, as has been shown in the past, and then just put it on there. I normally leave mine for about two minutes because I found that this exposure unit is very effective around two under around one minute, 52 minutes. I found the exposure when I was doing the test exposures, and then once this is good, I will, of course, removal the electrics and anything. Remove the exposure unit to be careful. Of course, the one that damage will move anything because the glass I'm the design. And as you can see, you will see a faint design imprinted onto it. Very faint. This is this is a good sign, and then either take it upstairs. You can use a cloth, a bucket if you wish on a spray bottle. I just take upstairs in the bathroom because it just makes it a lot easier and then just wet it. Just apply a bit of water to the front and back, and then just just a little splash. Nothing special and then leave it about 1 to 2 minutes. Three. If you did the exposure for a bit longer and get yourself just the basic sponge used, the yellow side, not the green. It's up to you, but you will damage part you do not want to remove, and that does apply the water on very lightly. You will use the sponge. You will be able to see which areas to go harder or less, but if you exposed it properly, a nice light brush on both sides with always using lots of water. Highly recommended. Use lots of water. You're not trying to rub out the design. You're trying to just agitate a little on the top on for the water to fall through and push the design through the mash. And then I'm just going over, just worn finally very lightly on the last one because you got remember, this is water soluble this emotion on, the longer it's in water and stuff like that, it will start to break down again. As you can see, the design came out beautifully. Look it put. Put up to the light. Put up to something white. Put your hand behind it you'll, but you'll be able to see where has come out, where has not and it's just would be perfect. And then, of course, but it back in front of your heater. I recommend to do this because you want the reaction off the emotion to stop breaking down , and then it's a chief. You want to do this, but I recommend it for safe measure. Put it back under the exposure unit, and I give it another blast for about five minutes to get proper baked. Just in case my two minutes or three minutes wasn't long enough. Now here, I'm showing you how I did the test. So imagine that example was that the exposure unit is on top. Andi, I get something like a piece of paper, a couple of pieces of paper, something thick, like a magazine. And then I'm gonna make some marks at the side. 123 However, meet you want to do This will take you a couple of screens to figure out your timing on your exposure. And in there you can put 10 seconds and then as you moving down incrementally to those lines 10 seconds. You exposed the light for another 10 seconds. Exposed the light for another 10 seconds. What you fundamentally trying to do is achieve larger gaps of exposure. So in one of the top, you'll be hitting 50 seconds at the bottom. You beating 10. And when you wash it out, you will see lines off the design some washing out and some not on the one where it's perfect. This is where you know exactly what was meant to be Quit. I recommend to put it into a square. College saves so much waste on bond. Article A distributes a lot better than get the sponge and use the green side this time And of course, spray even the around. Give it nice, Vigorous. I am just example ing I'm sorry, but I just literally printing. Don't waste the emotion on then, of course, to the other side on then Just screwed by And then what's it called? Sometimes it comes out Sometimes it doesn't take upstairs. Put it in the shower. Wash out with some soap If you want all you can get a bucket off water Onda and the sponge on Then just wash out that way now that you might have bits again in the screen. So I always give you a second spray and always try and get in the corners the corners I found always to be quite strong and difficult And then again repeat the whole process scrubbing it and other class down on I think we only have maybe 23 left. I think the 3rd 1 will be a bonus. Eso I think the next class will be, of course, printing that design and always been a long journey. But don't worry. After a while, you're hell. Just be second nature. So see the next one. I'm gonna squeaky those designs out. Take care. Bye Bye bye
8. printing an drying: Looks like we have for that final class. And in this class we're going to be doing the one thing you clicked on that link is to print on a t-shirt. So and apologies for the hair. We all know it's no surprise I dye my hair, but this time we try something new. I tried something, sorry. And it then turned out very well at become messed up, but it's kind of growing on it. We'll see if I come out with a little video of my hub. With that being said, I guess, let's print. Bye. Okay, so of course, the screen press, that's just undid the screen. You've exposed the squeegee, you've made some squeezes I found after righ here in there. Of course, Brown and clear tape choices you're grounded and easier to see. I'd recommend water-based black pain. I recommend the style with black and white designs. Little easier, a lot more forgiving. You kinda goes via the colors. This is just a DCF spray gun from the local hardware store, like a pound or two. You can buy the original, but it's up to you. Just a heat gun. This is too dry and wet paint or any kind of glue or anything like that. And of course, most importantly, t-shirts or any fabric of government you wish to screen print on the press the holes that you may prior, the three holes that you made and some long screws now click on the wood, you kinda cause companies to a table. I don't recommend it because you will be exerting a force on to it and you don't want it to just pop off. So cos, drill screws, get it nice and secure. Monsters don't give it a little test. A medium amount of pressure, not all your weight. Just put something heavy on or hold it down. If we can hold you forcing to on down, you're laughing. Now cause the screen you exposed. Grab yourself some tape. Struggling to find the beginning as always, story of life. Now what you are trying to now there's two ways you can do this. One, you can actually emulsion the entire screen. So you don't have to do this. You save a lot of time. Would you use a lot more emotion? Or you can use a little emulsion and expose the design and then use solid tape. I would have personally expose the entire screen with the motion. But I ran out. So I'm taping it up now. All you're doing is taking up any exposed areas. So this does not translate any paint onto your Tisha at the bottom when you're squeezing through magic scene doesn't have to go to the edge. Because when you, when you place it on top of your screen, you'll know it's just saying areas are noticeable when your teacher has been put down. It's just like a slight little border to protect the t-shirt from any spillage or ink square through. As you can see, they're just done just square root of the design. Now cause the base needs to have a tacky, sticky surface. Now, you can't get the spray contacted the safe. It's pretty good. But the problem is it tends to come away with the t-shirt. And this blue stuff is the same as like a floor and DSpace continually sticky, always be sticky. I prefer the glue now you can buy both of these on eBay. The original ones, T-Shirt, adhesive spray and contact blue. It's a little bit more expensive and their quality is a lot higher. But I just bought mind from a hardware store. And all you really do is you just glue it down, ask them Florida csev or spray adhesive and then you just brush it around. It is water-based, water-soluble. So you can't just go run some water over it. And it's nice and clean and dry. Then of course, but he'd gone to one not too. You want it to be a medium heat and then just run over it. And then as you slowly touching it, you'll notice that it becomes very tacky. And you are able to come away. If, if the trickiness comes away with it, then you need to cause a Play Again. All maybe ruffled the surface, you some sandpaper to rough up the surface and then apply the contracted ISA. All I'm doing here is I'm rubbing t-shirt or an old cloth over it because the stickiness was too sticky. I wanted it to be medium. That to me still is a bit too much, but it's okay for now. When you put the tissue or going to a on top again and again, it will leave some link behind making it less sticky. Now, of course, please make sure you place the design the correct way, upside down, not facing you, facing away from you, because your teacher is going to be placed on upside down as well. I played a T-shirt first just to stop the screen from sticking to the base. When I stick this, when I'm trying to align the screen. But done this in the past where I literally put the screen straight on with the tacky base like this. And then when I tried to lift the screen, it ripped the entire screen because it was too stuck to the base. So just for a quick Lutetia on there, just to get your tissue aligns squared up to your design. Now remember this, go by. I really just doesn't have to be square. Everything, just move it where we think left, right, up, down. Push him in. Here. I'm just showing you how to hold the T-shaped, holding from the two shoulders seems nice and square flying out have the sides, of course, from the arm rundown, triumph and the square section of the whole T-Shirt, nice and flat. And then you literally pinch the bottom and it's all been flat. Skip your hands him, and then just feed along your hands. There you go. You have nice square centre. Pretty much the whole surface area where you are on the screen print. Pull the entire tissue all the way down to the bombs. So it literally hits the top of the neckline and then grab the two shoulders and an equal amount. Pull identically, nice and tight. And as you drop it and just below the front neck line, you can't use two lines, two fingers basis forefinger spaces. Depends on your design. I recommend placing design on top. Ceo comparable maybe Pinot TSE t-shirt and see where you feel like it looks nice on before you continue doing the same thing. I'm just testing both sides, just using my fingers as a guide. And then just using my fingers, this is from the side seam of the t-shirt. And then just a nice to a light path down so the teacher doesn't come away. This is so when you remove the screen up and down, it doesn't the tissue does not stick to the bottom because it does tend to. So you can raise it up and place it back down multiple times without the teacher moving. Here are just some squeezes. I recommend buying these. I found these in my mom's kitchen. They are absolutely amazing, beautiful things ever. The cost like 1020 p, your local corner shop or hazardous. They just for cleaning dishes and egg making eggs and stuff, I highly recommend it. So. Q. I only use very little ink when I'm making my teeth, because I only do one of two designs. But if you're doing multiple, I'd say throw the whole bucket of ink on top of it. Make sure you screen is nice and clean. Debris on there. Now place it and a nice even pressure pull long. This is just to get the first layer and a little bit but not too much. Then the second one, you apply some decent pressure and then decent pressuring. Again, I tend to do 34 passes, I honestly don't mind. And then once Erasmus screen, well, beautiful. And also make sure you raise very slowly. Try not to rush the liftoff, raising your screen. Edge to edge. Beautiful country, nice. There is no patchy areas. You will want to attempts. You might get some patchy areas or some area that had not been exposed as well. You'll learn that over time where to apply pressure when not to how much. This is something you could have to learn by yourself. This is just a cleaning process, does three processes I've learned. One, you can use a squeegee bubble and some tissue or a rag. And you just spray on top and then you just front and back. It still looks kinda dirty. That's the reason why not let people do it, but it worked for me for ages and I'm still able to use the screens multiple times. It just adds is very cloudy, dirty effect, as you can see. But the advantage to this is the tape remains and I'm able to reuse it again quickly and signal at time. You can't do it in the shower. But my friends who did it. I've no is the left stains along the whole Buffalo on the wall and now you can of course use a hose outside. But the problem with that is the tape starts to come away. So quickly down again, a spray bottle and a rag. And you can of course, keep using that same because the dry out, the pain. Again. I'm just showing you here use level one on the dryer and literally just about a hands distance from your design. This is to just get it touch dry. This is not the final cure. You can do this for ten minutes using final cure, but this is just to get it so it's touch and you're able to of course remove it from the press. Here I noticed I should have put more lint on there. I should have put more T-Shirts rubbed on top of it because the attacking us was a bit too strong. But then again, I did another little quick dry with the gun. And as you can see, she came absolutely beautiful. Now this is one way of final curing it. You literally just throw into your dryer and just put it on maybe the 40 to 50 minutes, I'd recommend. Because if you have a very high heat, my drives very low heat. So I need about 15 minutes. If you have a very high heat Dreyer, 20 minutes is plenty. And if you do not have a dryer, you can pop into your oven. This is good, but I find you have to literally sit there and watch it because the the oven gets very hot. So you have to remove it and put it in, remove it and put it in multiple times while keeping an eye on it because you may over cure or probably Brown. Your T-shirt. Put it on the absolute bottom of your dryer for about five to ten minutes tops. Well, I hope you guys enjoyed that. That was the final last class. I did have some ideas to maybe do a poster printing, some advanced classes that would be post a printing large sheets of musical fabric so you can do repetitive patterns and stuff like that. And there's some other ideas. I will add them. This was a, this is a big, big journey and apologies for any mistakes I made. Apologies for anything. It's just difficult. I'd have learned a lot through this one as well. So as also, you don't have to make the stuff you kinda cause by the stuff just push a budget up to about maybe 4500. Buying oppress, buying all the scoop coal and stuff like that. If you have the disposable income, I highly recommend it. I just went down this path because our skin, to be honest, just totally skin vantage addresses if it breaks, you know, had to fix it, the metal ones or the ones that they provide. You have to kind of figure it out for your best or returning or pay and stuff like that. But everything has its pros and cons. And I hope you enjoyed the journey with me because I really enjoyed it. And I guess love you guys. And I'll see you in the next tutorial.
9. creating content vidio on pc: Hi there guys. Okay. So I'm gonna show you how to create videos, but media and social media and stuff either. First get onto eBay, Amazon, whatever, and type in phone lens. I recommend to use your phone, save some money. Who cares about that? Get anyone you like, get menus, you like. Get tripod. One of these 5-6 quid, seriously, can't spend more than that was the point. And then if you haven't got a camera phone or a decent one, just literally type in google point-and-shoot cameras, like 20-30, 40 pounds. And they're amazing. Get yourself one of these little lights comes in handy. Stay away from the RGB ones that terrible. And then I'll show you what you can make with all that stuff I just showed you. So as you can see, just using my camera phone. Did the lenses a tripod here in there. While I'm using it by hand, freehand. This is just in my friend's workshop. As you can see, if you just do very quick shots, close-ups, wide angles, do whatever plans, drugs, the goofy, stupid. You can record virtually anything and they just get it together. This is literally just a jump cut. I put the tissue ONE. Jumped, change teacher, junk. But this is another one. Literally just mess around holding a camera, camera phone, a lens on the front. Null positioning or angles necessary. This is the tripod, just the wide-angle lens that shot would have been way tire. Just messing around Davos only half of it. But when I generally go to it is the most easiest are found all of them. It just provides a lot of the filters. The transitions, drop audio in this NIH is really goofy and basic, but at the end of the day it's free. And I just want to make the content quick and get it. So download it and let's get started on first launch. As you can tell, it, isn't he basics? I mean, like really simple, but it's to get what you Paypal. It's nothing. It's nothing. And I swear it's it does its job of messed around with a lot of them. Now if you want to pay or try different program, please go crazy or your heart's content. I just want to get the content out and done and dusted. What did tutorials if you want. But if you've done video editing before, you kind of pick this up quite quickly, is quite basic. It's very simple, very intuitively easy. So first things first, it's going to add some content. Already, created, some cool videos, already create HD loads of Cuvettes went on about. Now the cool thing to this is that it actually labels off which your files. I did divide them up for you. So that's that's quite crude. So all overdue meals kinda going around council that so my t-shirts and I just Please don't wanna hunger. And accordingly, my camera phone, I created some nice just creating some nice videos of what I was often in town just giving some cool random backgrounds because I've notice it gets a bit boring. Just recording in a studio could've done of ages. So you kinda thought to breakup the background and this worked quite well for me. So just take a hunger with you. Take some of your designs and just go around or just stick them on the floor or on buses and benches or stop by that. Use your surroundings to your advantage, Do not be stifled or stubborn and just don't leave your house. Beautiful other, so once you click any of the videos, it'll cause they are a bit long. So I might just slowing down a little trick I do is I just talked about both. I second is Instagram videos. These are Facebook videos, Twitter, Vimeo, tick tock. So they have to be sure, keep people's attention. Don't drag, don't make it boring because bullying is just boring. So, so I'm going to counsel, every time you move the cursor, it does this cut bracket in and blackout and all this will do, it will bring this red bracket to here. And the blink will bring the blue bracket to wherever you end it. This is your in and out. So I'll put about in there and hit play. And there are keyboard shortcuts. Everything you hold above you see the keyboard shortcut which has played Control Spacebar. And then when you want to move stock, it will be hovering. I'm just sticking to the mouse. And just so you guys can see what I'm doing, but I'm recommend to find a shortcut quickly and easier. Now I'm gonna move count for five seconds, 1234 or as financially for a second. And I click there, drop that into there. Now, I literally hit this and and she will drop it into the timeline for me. That is very close. So if I move down here to the zoom in, zoom out. I'm just going to zoom out a little bit, give myself a little bit more room to mess with it. And then I'm going to jump over to my second video. I'm going to do the same to see recognized or spiral like the look of one kid from above. They're, all these ticks represent all the videos you have used. So that is very convenient to about deme goes five seconds, warning. You can either click on that or I can click this button here, just discovered they were there. And then drop it down. So easy, most to those two, squeezing easy, squeezy using now, there's my basic comp and shots, but cool already. Now I would like to crops and transitions. Now they are a bit Basic. I'm sorry. He started, once you start making so many, You'll be a pull-based up about program. When you literally look, these are all of your segments, all the videos. Eclipse, sorry, you broken dragon Brian. Now in between them, there is this cool little cross. And this means transition between both the clips and this one. And that once was like two arrows. And when you click on that, it will come up with a list. It's not a great deal. I'm sorry. But it is it's something so you're able to then go in to the one you want. So let me use this love heroin. And now if I press play, we'll see it goes into love heart. It's super corny, but so on and just have fun in your ear. And I'll do that to all of them. So this one here must like basic fade. Duration 1 second, that's fine. I've gotten the blood halal status being Town spade from white can hit a random act demo. I'm done. Randoms load at times, it just gets it done on a light. I like making content is getting out there. So what catches people's eyes? Now? If I press play? Nice, nice. I'm going to end it on faith. Convenient actually. So now the sound is too where you can go about that. Scrum is the online and push it up. So use up little room to play with. You can either mute all of it and then you'll have no sound. But the problem with that is it kind of, it's an unnecessary line and there is an outer. Never need that sound ever. So if I write few, click on top of it, and you click this button here, unlink on link, link, link, link. Now, you can right click and delete, or you can just click it and mouse and hit the Delete on your keyboard. You have a whole nice truck available to put some music on here. So let me show you how to get some cool music. So what I, what I have is, so now it gives you a nice clean truck to a Cos, drops a musical math. Now here is my music truck. They're bringing my beginning into their speech it over a little economists only above 15 seconds classical long track, but bringing into the middle to mess up until about there. Git add. And of course unfortunately he dropped it to there, but it's okay. You can just drag it back because that's just how the computer sees AS despite was that. And I'll just read it to their night or press play. Oop, sorry. It's maybe it. Now if I press Play, if you click on top of it and you click this button here on link, link, link, link, on link. Now, you can right-click and delete, or you can just click it and mouse and hit the Delete on your keyboard. You have a whole nice truck available to put some music on here. So let me show you how to get some cool music. So what I, what I have is, so now it gives you a nice clear truck to a cost, drops a musical math. Now here is my music truck. They're bringing my beginning into their scooch it over a little economists, only about 15 seconds us along track. But Jim, bringing into the middle to mess up until then git add and cause unfortunately you dropped it to there, but it's okay. You can just drag it back because that's just how the computer sees a US. Despite was that. And I'll just read it to their night. Press play oop, sorry. Maybe it. And I press Play CDS against sick though like you pretty good. So now that is complete. And it says Done. Now let me show you how I got this free music. I literally, and in YouTube, I type in royal free music, background music type of clicker to anyone you want. Royalty-free music. Now, Katya has contempt. You may need to read the conditions. Sometimes they do say charge in snappy generally just says, enjoy free, download, free using this song, YouTube must include the following. I put, I do copy and paste that information into the link. Always. But if you don't want to or if you're just using it for your own enjoyment, go crazy. So I'm going to copy the URL. First. Just copy the URL. The URL you would go to. Why MP4? Amazing, absolutely amazing. Cya cannot believe, discovered this move very late in the game. And then now paste the URL, of course. So then once you click away from all the pop-ups and stuff, and when you come back, you'll be able to don't click these or you can always send in the wrong direction. You can download the mp4, mp3s, the webs to do everyone. And, but I just need the mp3, so five megabytes and download that. And it says here demo for free, under the pop-up, Thank you for nothing. And that and as you can see now that Dan was complete and if I go into my Downloads folder and keep to that same file, into my audio. And from there we should be vaginas. There. She is transforming. Now Chin and grabbed you about him. This bio delete. And then that should be dropped a tune on it and dropped the audio on top of it. Let's see how she looks to final look before I'm going to be rendering her. Okay. I'm super happy but does so I will leave it and do other always comes up with this message is never really asked me to pay. But one day I will give them some money because they did. They helped me out. So I will purchase it later. Name your video, export it to wherever you want, and that's going to be Desktop preset customer. I don't recommend messing around with ICT. Leave it all as it is. You can mess around with that liter. First figured out the B6. So our first art, you know, flying and then start walking. So la boxes will put a top-notch crop resume. This is the one we're going to be using 29 frames a second, sorry, estimated file size is 28. Megabytes, is really small, that's good actually. And then I'm gonna create and generate. And then get out a minute. Be back in ten. And here's one I created earlier joke. I don't think that really made the Acropolis museum. To be honest. That was m, sorry, dusky, find good. Hsun tune is always videos and visuals is quite easy to cap. So now I'm going to transfer over to the phone and I'm going to show you how to do this whole process and in the phone as well, because you don't have to have a computer to edit video because a lot of the videos I created as well, I add, create, recorded, downloaded, the music, and edited, and uploaded or from my mobile phone as well. So that'll be the next tutorial. I'll show you guys how to do that with the same content. Bye-bye and see you guys shortly.
10. creating content vidio on phone: Okay, so I'm gonna show you how to create content on your phone and how to egg it on your phone. This is currently an Android phone. The next one will be a iPhone. So to begin with, I downloaded all of them. So first thing is the upside uses animated text. An enemy attacks, and you'll find loads on, I totally recommend to enjoy and mess around with any one of them. But the one I download is this one, legend and admissions. I think it's called The Legend animated texts. Intro maker, sorry, legend, Make a text. And I installed that one. Then I will type hen the video editor. Video editor. So the second thing would be video editor and you have low. I have used a lot. They have pros and con, good and bad. But the one I generally go to quite often is this one, video editor, video maker. And this one, and this one is, you cut this one adjective, already downloaded it. This one is quite good as well, so I recommend this one as well, used for creating the t-shirts when I was on location. I'm going to just use them now. So let's select click one. And when you just click them, able to allow you to wait and do, de-select, sorry, click select, and keeping that one. This one. This one. This one and this one or this one? Maybe. Yeah. And then once you've done that, you're able to come down to here and literally click Next. Now it will bring you to the next stage. And this one is very awesome. You're able to scrub through the timeline. And it's already, already put them together for you. So it already has put them into a segment for you. Could play. Like you belong. That's a bit long for me to be honest. People will get very bored very quickly. So it's, it's all there, but I'm going to start trimming it. So what we do is we hear see right there where it says trim. I'm able to see where it says write that trim and hit trim and that image. And I'm able to bring it in. And the wicked thing about this is you can bring it in on both sides, sorry, about the same time. You can bring both sides left and right as you please if an electron from the back, from the front. So I'm going to bring, and it will show you the total time just here in the middle. To keep around four to five seconds because currently it's at nine seconds a bit long. Spoken to about four. That's a cool shop. And you can trim well to bring both sides and you can cut, well, cut the segment into two different videos. I don't want to split. And again, it will split there and keep the remnants of the video I wanted to or just be bought into that section. So I'll hit trim and then I'll click Select. And what that did was, as you can see, it created just to the pi. I asked it. On the next one, I'll show you. The other ones do. So then I drag over to the next video again. And I'm gonna hit trim again, just here. Same. And then I'm going to figure out where I am to be able to scroll the timeline just with your finger. And once I'm trimming over it, so it's about the middles finds all do the same as before. I'll bring that in, bringing that about four seconds already. Four. I'm going to delete this one. If I select on it, you have multiple choices. I'll explain them. Now. You have trim, speed, that is the speed of the duration of the video. So just like faster or slow, slow motion or a RAM speed, ramp speed, you have volumes that you want to mutate, low rate or increase it. You have split, you're able to do that just off this menu, delete the video I'm gonna be using now. Crop to zoom in a little, copy, paste, rotate and duplicate. So I'm gonna delete that. So I deleted that file. And now I want to go back to discriminant cropping and say if you made this accident for yourself, select the file and then save, you messed up, you'd have to delete it and then click that file, and then drag that little arrow back out to its full size. Now this clip is back to its original length. So I go back into it and then I hit trim, premise selected. I'm going to bring that back down. Bring that back down when you're messing around this, you kind of figure it out as you're going along. This just makes him random videos and just play around, but it's a very easy program. And I hit Select against. So drag day in, grab the n and my total duration is 44 seconds. Yeah, four seconds. It's just listed right there and hit OK. And now as you can see, this is four seconds long bias for second place. So you can see 111200000341001000200003000, one thousand, four hundred thousand English. Perfect. Continue that with this one here. And a trim that down to four seconds issues well, doesn't move in or out. Who cares in the day? That's four seconds again. Let me do this one as well. And that's already kinda is four seconds, but just an LP perfect will be nice. I will go for seconds and done. And then this one here, this one seems a bit long, so four seconds, sram again and figure out where the cool location I have the original image, but I'm going to do that was just a little error because I just messed up. I was going to close and it says it needs to be minimum. Won second place. I wanna see if he's okay. Yeah. Just just random for your just nothing special. There, there and there. And I have actually that one was the original natural and mess around with the almost when an accident. So that's a good sign. That was an accident heads. I'm going to hit that. And I'm going to come to the same menu as I had before. Every image view, every video you hit in the timeline. It will bring up the same information for you. This one. This one is nothing special. It's just video sequence. It will give you these basic options saying, What do you want to do to it? That's all it is. So this video that I messed around with just a moment ago. Yeah. I'm gonna delete that because that wasn't the original. No, actually. No, it was this one needs to be deleted. And this one also needs to be deleted. Now, I have my 123. This video needs to be trimmed, trim about six seconds, and bring it down to four. Now it go. Now. Press play. 1234 seconds. 1234 ish seconds. Next video One, 2341234 seconds. Done. As she has done. No. I'm going to add some sound and night oh, cool effect over it. And of course transitions. So in the middle you have this beautiful little icons here. Hit that. And that allows me to choose any transition I want. I'm just going to select a random dots. I'm going along, but you can put glitches on there. You can put sports, you can choose which ever one you want. Unfortunately, this app is free, but for all quid, you'll be able to get more of the pro options and highly recommended for four quid, computers are charging you thousands for what your phone can do. You tell me who is a stupid one. So I'm going to go to just basic ones are free. Select that one. You can choose the time it comes then the longevity, or is faster or slower. So that was very fast. Transition 20 to be a lot slower. Boom, that's what you do. That's all that is done. I'm going to hit the next one in the middle. So pretty much one clip is there, the second clip is there. You hit in the middle. And then you select, and it asks you what you want to do between those two images. That's all it's doing. So between these animations, I like to try this one next. I'm going to leave that to the way it is. And then this next I've done that one and that one you can tell how the image has changed from something diagramming to something where it's saying edit. So I'm gonna hit that again. I'm gonna choose something a little bit more out there. That's hit this one. Noise. Don't. Now I'm gonna go back to the beginning and hit play. And as you can see, it will change, faded. This one will be a swipe, and this one will be a glitch change done so that the transitions I'd like. Now I'm gonna add some audio and an overall filter over each image, nothing selected, you select something. It will only allow you to do individual stuff. So with nothing selected, you just on the basic timeline. I'm able to then select what ever I want to do to this. So again, you can trim the entire project beheading, trim music. You can add music filter, effects. Text can put text on top if I wanted to blablabla, as you can see, and you can move it wherever I want. This is your logo, mill King, the world. You can add whatever logo you want, your logo, company logo, just even a slogan. So I'm going to go back in there. And the wicked thing is put it here at the top for me. Let me go in there and adjust the text I written. Napoleon. Yo Yo Yo Yo Yo, you're done. I can change a class, sorry, let me go back and can change the text style. I can change the text size, color. I can change. If it were to have an animated effect as well. I can even increase the size of it and the direction. And now if I come back to this load here and I press Play, as you can see, my text will fly in and then it will cause disappear. And I can do that with any section I want. And if I were to increase its longevity, can drag its text wherever I want. So it came at the beginning and I'm able to click and reduce whatever I want. So it came in at the beginning and it disappeared. And then I'm able to continue and paperweight to ponder the texts in that icon as well. And I'm happy with that. And I move down. I come back and I'm gonna pop filter of this whole thing. And nice cool effect, something that just gives you a little bit of a pop, cleans the color. Chromatic, no film grade like that one actually. But it's a bit strong as go with something that's a little bit more. Well, the pros are highly recommend buying pro. Who will stick with that? You can adjust it by literally going in to the same filter I says adjustment and just mess around with contrast technical levels. Do you answers, just be creative, be stupid, made content. It's your phone, it's free, it's easy. Seriously? People questioning. Oh, sorry, that is paid one. So I'm going to have to remove the Unfortunately, I will I'm sure I paid for this app. I don't know why it's charging. So I'll sticks and the basic 14 quid, I'll buy mixed town because I don't want my phone as much anymore. Ok, done that. I just took with the basic filter. And then I guess the final thing is music. As you can see here, I'm just on the timeline, just keeping it very simple. Okay. So now the effects has been applied to my, to my T-Shirts. I am going to now just drop them sound in. This one here. It's kind of truck something from my archive. The wicked thing is you can choose their fake ones or you can use that basic ones. This is the music I'm dealing with now. And so that's the music I chose. I'm just going to hit. And the wicked thing is, you don't have to use just one of the beginning. You're able to scrub into the timeline wherever you are to really kick it in front. So he use Done. Now there is my audio track. It's a little bit long, but you are able to adjust it if necessary. You can hit the timeline. So the wicked thing is, you can hit your effects, you can hit the timeline. You can just do it everyone and you're able to adjust its homeowner trim. That timeline is a little bit long. So very small quip. So I'm able to bring that to their to their knife or press play. Yeah, that work nicely. So let me get it back at the beginning and put the sound on 1 second. And unless the way it does in mice, I am mean, this beautiful Nala is absolutely finished. I'm just going to literally go up to here top and hit Save. And it's asking me what do I want to announce was 30 is giving me estimate. Spouse eyes, it doesn't lie. So Phone ten ATP, do I want to increase it to ten? It appears premise the highest. So I'll accept that qualities obviously who is going to be high? And then keep draft. That just means it's gonna keep the working files so you'll be able to come back and adjust it if you want to. So I hit save. And then it's gonna just if you pay for the provision, You all have none of this bull crap. So don't worry about it. Then just going to avoid that. And at the top it says, it says Then he asks you, do you want to share it to your devices instantly? You don't have to. I'm just going to go back and then it's there. Don't it hit Save again? It's already saved. So then when I go backpack, completely photograph. As you can see, it's still there waiting for me to do any adjustments, add any filters or more create, learned and text or more content. So that is the apart and done. I'm gonna show you how to create a cool little animated text to add in the middle and beginning back in one minute. Okay, so the final thing that I use now and then not much, but it's a cool little animated GIF kinda thing. Robots use images and text and whatever you want really. So it is the legend animated text. There's load out there. So what's it called? Play around too. But you got this one I generally go to because it's quite easy. So I just hit the Play button and then it comes up with some basic text. You tap it, there's no cursor flushing, but it's there. And then I'm just going to delete all of that basic myths that they put them, it's gonna put something basic like T-Shirt said about the spelling, but who cares, right? I'm just going to make something basic T-Shirts. Smash S. S is marsh, rural. Awesome day. All day. Okay, so the text is there and then put wherever you want, cool. Mg related, et cetera, et cetera. And I'm just going to hit OK. It's and allowing you to bring an image. And if you want a video in as a background kind of thing, I'm just going to keep it basic for now because just paying on time. And what you have is the preview of what you, your text for that basic general animation. And then it has here the text layer. Now it is quite a simple program. There's not really much detail control. By the end of the day. Sometime the less control you have, the easier stuff gets done. So what you do is you choose a text and when you kinda just hover and scroll through them, will give you a little animation. So I tap that. Now that one I like, the one I lay down, I like. Now with that one, it will come with its own color variations. But remember, you can't tweak any of these colors and stuff. They just give you a very generic bug standard away. And they just keep going through C, which when you like the color, oh, which one that you enjoyed the most. And then once you're happy with the kinda just choose it. And I'm gonna go with this black and white. They looked cool. Yeah, I'm going with that one. That's quite nice. And then I'm gonna hit up here. And then it can be saved as GIF. Cause an animated GIF as in Generate image file. No, no, that's not right. Generated number, gallery image frequency, current number. But sorry, there's a, you can say there's an unmade gift. This is just a small quali eat. Problem with that is, you'll get a lot of errors is when you're driving into some editing programs and stoplight outside, sick to save as video. It's gonna hit that. And then it will have this bar here that's going to save it for you. And it saved is asking me here, do I wish to view it? And like yes, view. And there he is. This is the video I have. Now. I didn't know is when I opened the program, I'm going to go back and back and back again. I'm gonna go to the beginning. This is a new edition I've not seen because I've not used this program for a couple of months now because I've done a lot of my stop on my PC computer. But I did, I was blown away by. What they've done is they've given you basic and pre created ones. You can look at their new ones, you can look at their old ones, animated ones, et cetera, et cetera. All you do is pretty much hit it. When you like the lookup. It's gonna download it for you. And then when it's done, we should be able to use it. So I click it. And there, here's just creating the basic text in the middle. And then I'm able to control its text, color. Anime it timing is same as before. There's just more pre-determined or Presets as you like to call it. So I'm going to change the color. And it changed the animation from this one where it was just like that to this one or this one. And then I'm able to go into it. I sorry to click down here to where it says text. And remember to put my text in there and et cetera, et cetera. But it's cool. Buddy is limited and stuff either. So have a play around and see where you go with that. So now I'm going to go back into the editing program and create that thing we just did lead continue. Okay, so we're back in the program we were using before. This one here, I click down here asking new project. The one up currently when working on or drafts ones that I have saved. So the one I've been currently working on it here. And as you can see, all of its still there with the, with the filter on top of it, with the text and with the audio on top. Now, I need to import another I need to import that. I generally don't like to put that texting at the beginning because people think it's an add dollar, it's boring, gets straight into the juice. That's my rule. So I'm going to put that at the end. So I'm gonna hit there and hit plus this plus button here. As you can see. As you can see how to cover up the other images, they're not permission and apologies for recording on my camera phone and there's no other way I can get this on my PC. So as you can see here, I want to ask to import. I have the video I just made. I'm gonna click that. And then I'm going to come down here to where it says lacked done. And then when we go back into the program, she is literally there at the end. Now the beautiful thing is, when I press Play, it looks a bit. It took a while to get there. So I can literally tap it. Tap the sequence with the speed and duration. I can reduce the speed by literally dragging this thing down to about two seconds. And now, when I hit play, nice and fast, unfortunate the sound is not coming all the way. So I come in here to music and oop, sorry, not my bad. I literally tap the second layer of music. Tap it again. And I drew ragged. And now if I click Play again, god, don't, don't don't upload and engaged. No drama, no, no, no headache. You just created cool content, making t-shirts. And you video damn video camera phone with the lenses. And then you edited it on your phone, drops a musical nature of some text on there. And then you hit the save button, and I click Save again. And she is exploring math. Like I said, you're gonna spend about 56 credit on the app by it. Maybe I will just to support them because they did give me a lot of it's done, not gonna go into my gallery. Okay, so I'm in my gallery now and this is what I created. And I got jeez, I created this ultimate my phone. A lot of people don't know the power of your phone in your hand. We're in like 2020. Your your phone is not just a camera, isn't just a basic camera. Somebody you ring and torque on this none, no, your phone is whole much more. The only disadvantage to using a phone is, is that the screen and the editing on your screening gets a little bit finicky. It's either that or pay one to 2 thousand pounds for a supercomputer. And this camera and all this and all that. So my advice to you is, when I save somebody, have some fine, keep it easy and awesome on your camera phone. So till the next tutorial, I think I'm gonna make a poster printing or fabric printing. We'll see what happens. Till then. Lovely faces, bye bye, Beautiful.
11. how to get print work an make money : Okay, so a quick rundown of how I create
quick super simple, super easy images to post on sites or whatever to
get some what's it called attention
back toward you? You really just got to
throw yourself out there. Who cares? It doesn't
have to be perfect. So I make crazy quick
images like this. So open photoshop and I
keep the images generally file new I keep the images. Let me speed it up
around four by six, like, the size of a photo. You remember those
disposable photos, those hand photos you get
printed from the shop, like, just really small because
you're going to be looking out on your phone and
laptops and stuff. It doesn't have to be
massive. And also, if the file is like
A four A three, it's going to take forever for the other person to
upload to see it. So how I start with.
The first thing I do is when I open up
photoshop or Gimp. I'll show you some gimp. It's the same. I'll show you
some chtoes if you need it. Just message me is to break
up the background instantly. Put a background color on. If that's a bit too
boring for you, drop a nice gradient on it with just some splashy
lines or whatever. Try not to stick with
just a white background because it's so daunting. It's so intimidating. You do not need to
start with that. It pickles the brain. So I drop on a nice background,
whatever, scratchy lines. I don't care. Trust me.
It's not going to matter. And then I go on to Google or
any sort of selling sites, image selling sites, and I buy myself or get a free
download of their T shirt. And then I just cut it
out of its background, and then I go to it and I
click on its layer style. If you double click on it, it gives you a layer
style, and I drop a stroke and a drop
shadow. That is literally. As you can see here, the
drop shadow is that. And then the stroke
is just that lit In. Where's it go? Oh, sorry. That little thin line around it? It just really helps it pop, as you can tell. See, pop pop. That. And then from there, what's it called Oh, sorry. 1 second, I have then I drop
a binding box around it. Normally, I have normally sorry. I'd put the text on first. Just on the chest area. Where's the text for
the chest? There it is. Sorry. So just to help you
understand a little it. Sorry. Nope, There we go. Then on the T shirt, I
saw this working online. Somebody was just
posting it like that, and I thought, Hey, I
ain't broke, do it. So your logo here and also a binding box around
it was kind of cool. And you can of course, give it some color
if you want to make it pop out a
little bit more, but I like the black and
white stands out nicely. Then you just put
some filling text around it. T shirt printing. Simple. This whole design took
me like 3 minutes, fives. And then you put five pounds. This is very important to put this five ten
pounds. It's up to you. You're not saying your giving them any design
they want for five pounds. Five pounds is for
something very simple. Ten pounds is very simple. Like your design, your logo. But I assure you that
people will ask for more, and then you need to just
relate your pricing to that. So say if they want
color give color and trust me they will
know the more they want, the more they will
potentially have to pay. So what's it called? Done that design, exported
it out super wicked. While I was making them, just to show you that you do
not need the best designs, the best hours hours of designs, find some more images on what's it called
image selling sites, type in T shirts, type in T shirt stacks, type in T shirt, models, T shirt, picks,
whatever you want. And again, just copy and
paste the same generic text. Mix it up because when
you're going to be uploading every other
day or every week, You don't want it to be like, you need to catch your
attention again and again. You need different
designs. So just mess around, same text again. I just moved it around, dragged in two different more images, changed the background simple. This one was even easier. All I did is had a big image
at the back, faded it down. Sorry, did the
transparency down. Put the text on, and then I
did a drop shadow on there. If you're super lazy.
You just get a brush, and you just put a opacity really low and you just
move over it slowly, and then you can see what's it called the text a
little bit more pop out. That's it. And
then the last one, this one is probably,
I think, my favorite. I'm totally going
to post that today. All I did was I cleared everything, thinking
what next to do. I just dragged the T shirt on. And I was like, Oh, my God. That's perfect. You cannot
get more simple than that. So now I have all of these images and
examples and designs. I'm going to show you which
sites I post them on and No website required
paying for a website, like the ones where
they're selling you buy webs buy
website blah blah blah. They're amazing. Don't get
me wrong. They're wicked. But me and my friend started T shirt printing
in at the same time. He did the whole getting a website and paying all the domains and the
storage and all that. Wicked. It's amazing
his website. I thought I'm going
to hang five, and I was just
posting on Facebook, Instagram, and stuff like that. And he gets, like, five, six orders through his website. I'm still getting
messages from posts, I forgot to delete. I was like, Where
am I still getting the messages from 'cause I'm tired of people messaging me. Hey, bro you're still
making T shirts. So trust me for month for
your first month or two, maybe a couple of months a
year. Follow my process. And then later when you're
getting a lot more orders, and you want it to
look a lot more professional and sexy and pretty and I'm just on
point, then get a website. So go to move over
to the next page. So as I was saying from
before, what's it called? How to I can say, get work. How to find work, how to get your art out there, how to get printing
and stuff like that. How to make all this
worthwhile? Okay. And the first thing
I noticed over the past five years was
that I should never have made a website in the first month or two or six months or
the year, if anything. You're still figuring
it out. You're still practicing, trying,
and this and that. And then if you want to waste money within the
first year on this, Go for it, honestly. I'm not saying don't do it. I'm just saying there's so
much more important stuff because these sites,
they're beautiful. They are so beautiful. Like, I would love to
have had one of these. I would love to have done it. I have nice little templates, and Look at these. Look at that one. It's awesome. But the problem was is that
they cost 20 to 30 pounds a month or 150 a year on
many, many sites out. They're selling how to create
nice website templates. But the one fundamental
problem they have is they charge extra or they don't even give the option for
bringing traffic your way, as in traffic, as in people
aware or interested. So you would launch this site and The only people who know it exists is
the people you tell. This is my website. So I didn't dive into this
first year or two years even. I still haven't made a website because I'm
like, I don't care. But if I ever chose
to do it now, I would probably have more what's it called
interest that way. SEO, of course,
SEO in Google SEO. The one thing that
really did help were these sites at the top. Let me talk you through them. So the first one is Facebook. Now, Facebook is
Huge. It's massive. You have no idea
what's it called? How beneficial it is to
use something like this. People underestimate
this Milons millions and millions of people a day log onto their Facebook and they type in what's in the
market and stuff like that. So safe. I just
typed in something like T shirt designing,
T shirt designing. There'll be lists of them. I would do it now,
but you get the gist. There's just loads and
loads of people on there looking for what's it called print T shirt designers
and stuff like that. So I I uploaded the image
that I showed you had to make on here and
later we just typed in five pound thir printing. Also on my own personal feed, so you can go on your own
personal Facebook and upload the image and post
it on your feed or post it on your story line. What's it called T
shirt printing service. I promise you people will
start messaging you. The next is, I highly
recommend for you to make a Instagram. You can either add it to
your personal account, or you can add it or you
can do a separate one. And then just on there,
just post your videos, post your photos, and now and then post a little
image saying, Hey, T shirt printing
service available or pant some Christmas
T shirts or say, there's a theme happening like COVID T shirt or I don't know. What's it called groundhog
day T shirt? I don't know. I'm just saying crazy stuff, but this I found a couple of
people did message me also, it was very nice
network on Instagram. I found networking a
lot more beneficial on Instagram than
selling T shirts. I made a lot more
creative people. They send me designs
and I printed them and then took them
back and blah blah, blah. It was a It was fun, if
anything, Instagram. Now, bay, 100%,
what's it called? You will sell on
this hands down. The only disadvantage
is that they will charge their fees. But as long as you
take that into account and add it
into your price, you'll be fine custom t
shirts, your own designs. As I said, your logo
here, see this one here. Already, look, 57 sold, seven sold, four sold, as long as you're flexible and it doesn't matter
where in the world because it's the postal service of this world is on point. In Europe, America, England, it's just on point. So Consider this. I
remember posting one or two on there around
Christmas just for jokes, and I did sell a few. I would have sold
more, but then I just got tired.
I'm kind of lazy. I'm sorry. Other two things that people don't realize
are these two things. Craig list, I don't
know if it applies in your country, but Craig list, when I was traveling
around Europe and I was doing some
screen printing and chilling and just art and having fun with
friends and stuff. I posted some ads on Craigslist and some people
did kick me back. These undercover depends
on what country you're in. Everybody every country, sorry, has this kind of designated, unique kind of free. And this is free as well. Free and Craig list
is free as well. Free what's it called trading? Like it's kind of like
a car boot sales site. So you swap something with someone or they
have something you want, you have something they
want, you use money, or you use presents
back and forward. It's kind of like, a car
boot sale kind of app site. Sorry. Craig list
is one of them. Do you have a chainsaw? Yeah. I have a car. Do you want to trade?
You're like, Yeah. So, these are the two sites. I did post some images, T shirt printing services, or anybody want to
screenprint with me? People hit me up on there, and Gumtree definitely
hit me up and there. I literally put it
as either services, jobs or for sale, selling cool hippie
festival t shirts. And a few went from
there 'cause I was trying to get rid of
some of my Tii T shirts. I was just like, try it,
and it actually worked. Another thing that is very
high up there is Etsy. Ets gets a lot of I'm going
to say traffic their way. They get a lot of clicks,
they have a lot of interest. So if you do stuff like this, you do stuff like that, I
swear somebody will hit it. And it's up to you
if you want to hit their price or you want
to just be a pound lower. Once you've figured
out your pricing, once you figured out your maths and what works and what doesn't work
and what you're doing, what you're not doing,
you'll definitely always be able to undercut
your competitive. And also, that's not always
the most important thing undercutting your competitor because if you just
post it on there, somebody will just hit it as somebody will click your link. Just because your
images look good, then your services is good. You don't always have
to be cheaper because more and more people
start clicking your ads. More and more people will start responding in kind
and start liking it, and you're getting
higher higher likes. It does not matter if you're
trying to be super cheap. It's up to you if
you want to, but it's not a very strong
business model. And then from there, I'm sure there's loads of
other sites out there. There is loads of
the top of my head, like apps on your phone as well because not a lot of
apps on your computer, sorry, on the Internet coincide
with apps on your phone. You can download,
like Spock, bungle. There's another one
that just came out. I just seen it
yesterday on my phone. And I think it was called
Kazoo or something like that. You can post on there,
cool hippie T shirt, hopi designs, and this and that. But I promise you, hang off getting a website and wasting money on the domain, wasting money on the server, uploading images,
and this and that. Build some foundations by
literally hitting in Google, selling sites,
advertising sites, what's it called artistic sites, T shirt sites, and you'll
find some crazy stuff. And if you can't be
asked with that, that's fine. Avoid the website. Post it in Facebook market
and then post it on your own personal page as well and do regularly
picks and stuff. People like, Woo. Do the thing I showed
you as in making cool, what's it called 1 second? I'm just going to
bring it up for you. Post cool images like this, on your Instagram, on your feed, what's it called daily
blogs, every other day. People will hit you
up. Also on Instagram, and you can also do
it on your personal feed story of the
day kind of thing, while you're screen printing
and stuff like that. Post it on here. It's
free. Nobody buys it. It doesn't matter,
but somebody will buy if you just keep posting
and stay on top of it. And Craiglist and
stuff like that. So your own little
village or your own little town or country, you'll have this like
carboo sale Internet thing. It's free and it's more
effective than you think. Just be careful on these. What's it called? Try
to post it to them. Don't let them come
to your house because it's full of a lot
of widows, man. I met them when they wanted a
T shirt and I posted a ten. The ones I did meet,
they were really weird. I was so happy I did not meet them anywhere
near my house. I recommend to post
over Craig list and Gumtree because it is
full of a lot of weirdos. Ets is, of course,
minimum posting. And this is all worldwide. So guys, go crazy. Do not be scared. Just
bugger it and think, make it, make them out, and at the end of
the day, you'll just remember to
have a lot of fun. Just have fun. Don't
care about making money, and I promise you the
money will just come anyway because you'rehaving
fun and enjoying your designing. Love you guys. Wish you the most funnest
creative you can and message me if you need to know any more tricks,
hips or things. I will be making some more
tutorials on how to poster printing and how to
create more designs, different unique, crazy designs, and I will be
showing you that in the next couple of weeks,
a couple of months. Love s. Bye bye. Take care.
 Aftab Rehman