Transcripts
1. Introduction : Hi. My name is Andrea Lyles. I'm a seamstress and a designer. My company name is Calgary A collections. And today, what I'd like to show you is how to design a cheater quote for a spoon. Flour. So this is not going to be a technical class on drawing or using a particular program, but rather the logistics behind designing your cheater. Quote. So we will talk about choosing a theme. I'm doing a little bit of brainstorming, Um, choosing your color palette and the layout of your cheater quote. We'll be focusing on a six inch block cheater quilt. Since this is the most common, um, type of layout used for cheater quote. I really hope that you benefit from this class and that you enjoy it. And if you have any questions, please feel free to ask. You consent me a direct message or leave a comment in the discussion section, and I really want you to know that I appreciate your support very much.
2. Choosing a Subject or Theme: before we get started, I'd like to mention that I am going to make this class is concise is possible. Help that you're able to use the principles that I mentioned in this class in your own style of work and also in whatever program you are comfortable using for your designs. Okay. So for our first lesson, we're going to talk about creating a theme for our cheater quilt, and something that I have found is that my best selling designs are things that means something to me. So I have Ah, a couple of examples. Um, well, I have three designs and a couple of different variations. So the 1st 1 was based on my favorite animal cows. And then I have one about dancing and sewing, So I have a list of things that could help steer you in the right direction. So perhaps your favorite animal, our hobby. I'm like the sewing. One that I did, Um, your occupation. What? Which sewing is actually my occupation as well? Maybe a sport or a place like your hometown in your home state, or just a favorite vacation spot or something like that. So I want you to think about which one of these appeals to you the most. Which one is something that really means something to you? If you choose a subject or theme dealing with something that you're already passionate about, then the brainstorming process won't really take very long for you, since it's going to be something that you're already familiar with that you have knowledge about. And then you can use your knowledge to create the artwork for your individual tiles. Something to keep in mind is to make sure that you don't violate any copyrights as you're doing this, um, for example, using a person's face or a name or some kind of a trademark things like that. You don't want to violate, um, anybody's copyrighted material. So for this part, we'll talk about one of the things I used for one of the examples I showed you, which was my favorite animal, the cow cheater quote. So I could brainstorm when we just opened up a a new file here. So I'd want to start off with my theme, which is cows, and I decided that I wanted the focal point of this cheater quote to be a cow portrait and I knew I wanted a couple of sayings or quotes that had to do with cows, so that was my next thing. Quotes are sayings. And then as a filler, I decided to just kind of paints, um, cow hide ish looking squares or tiles. So this one was very simple. There was not a lot of elements that were needed to create this particular quote, even though it does have quite a few tiles, okay, and then to show you the other example. So let's go to my retro dancing design. So it started off as just a dance design, but then I decided to make it more interesting. I'd go with a retro look to kind of hone that in, So I I, of course, had to include dancers. Um, I decided record players would be a good addition and then either dance or music sayings or phrases or just words in the case of dance, and I decided to use just lines and geometric shapes for my filler tiles. Okay, so what I want you to do is to take the subject of your theme and then just brainstorm what you would like to include in your tiles, and then we'll talk about Lay out later on. But let's say you do add quotes or sayings that something that you know you want to have in your design. Then we can just head on over to Pinterest and, for example, I could look up cow quotes and this will give me a bunch of ideas I decided just to use to in mine. Home is where the hurt is. That's one that I used in my design. Perhaps I should have done cow quotes Love I love you till the cows come home. That was the other one that I used. So you can use Google or Pinterest as a resource in order to gather quotes that go along with your theme and go ahead and add those to your brainstorm list, and then we'll use that list to create our layout later on.
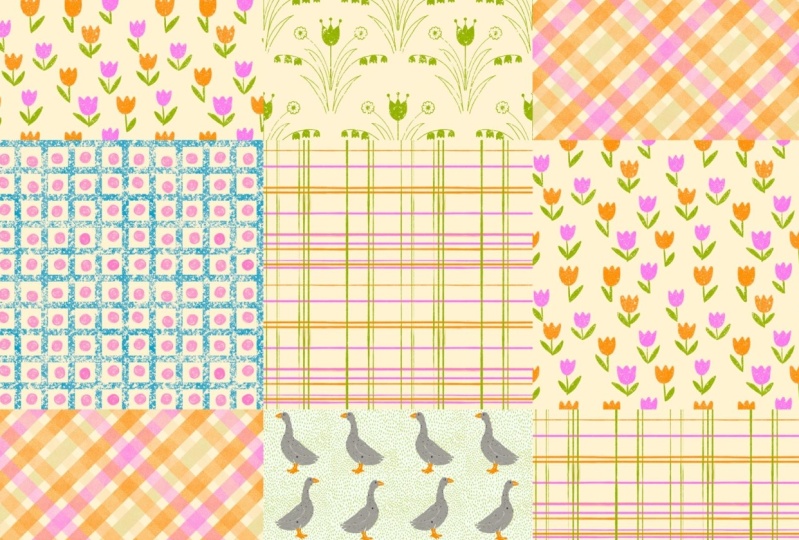
3. Cheater Quilt Layout Options: okay, in this section, we're going to talk about layout. Once you've done your brainstorming, you'll have an idea of how much you want to include in your cheater. Quote. It will give you an idea as to how many tiles you should have. You can certainly Havas Few is two tiles, but that won't have as much interest as a tutor. Quote with more tiles. Keep in mind I'm only showing you how to do square tile cheater quilts, but there are other shapes that you can use if you search on spoon flour, you'll see that some people use triangles, rectangles, Chevron shapes. But right now we're going to focus on the's square tiles. So let's say I used the example from my first art board here. Then I'm going to select that and move it over to this little mock up art board so you wouldn't want to use this in such a way where it was just a basic repeat, and they stock right on top of each other. You would at least have to use this in 1/2 brick form, Um, so let's go ahead and fill this so that's what you're design would look like with just two horizontal tiles and 1/2 break formation, It would kind of look like, um basically how polka dots are normally laid out. And actually, that's the same way it would look if we use this vertical, um, two tiles, except that you would choose half drop instead of half brick whenever you were uploading it into spoon flour. So let me erase ease. Basically, you would start off with this, and when you choose half drop, then it does. This does a repeating pattern, and it would create exactly the same look as we had with that one. Okay, let me delete that. Now let's say you had these four tiles. Then we can so, like that Helps doesn't mean a cut it to duplicate it, move it over here. So that's what it would look like if we uploaded it as a basic repeat, which would be just fine. Um, but you could also do it as 1/2 break or half drop. Repeat, So I'm just going to move these down. That's what half drop would look like. Or if we move these over. That's what half Brick would look like. So that that's something you can play around with even before you up uploaded to spoon flour. Once we have our, um, tiles finished and we can play around with what we want the spinal layout to look like. Okay, you could also do multiple tiles, horizontally or vertically. It would do the same thing. Um, the sewing cheater quote that I showed you earlier was made in this style with nine tiles and the retro dance one and the cow one, or made it with 16 tiles. Um, now this one has a different shape in each one of the tiles, representing a different design. But I actually used the same design for a couple of tiles, Um, and those cheater cult. So, for example, I could remove this arrow one and insert this triangle one down here, and it's still it's still visually interesting, and it works that way. So let's say you wanted to use the 16 tile version, but you may be only had, like, 12 designs. That would be fine. You could duplicate a couple of them and just kind of scattered them throughout your layout . So let's look at my examples again, so you'll notice that you'll notice that the cow portrait repeats, and also since I only used two phrases, this one repeats down here and this one repeats up here but still 16 tiles. But it's not 16 different designs. And in my retro dance one, I use the record player in four different tiles, so that's OK if you want to use more tiles than the amount of designs that you have.
4. Developing a Color Palette: Now let's talk about color. So how do you build a color palette? Sometimes it's very simple. For example, this one actually used, um, a limited color palette from one of spoon flowers design challenges. So that was pretty straightforward. I didn't have to think about that one for my cow portrait shooter quote. I actually, I did the port cow portrait first, Um, that was just something that I wanted to do for myself. Then, once I had that done, I pulled colors from that portrait for, um, the cow hide tiles and I wanted to keep the quotes is very minimal and neutral, kind of, you know, like the farmhouse I'll basic neutral colors. Then for this one, I used reference images for, um, from like the seventies to, um, pull colors from. And then this one is actually colors from a floral bouquet. That's actually one of my favorite ways to make color palettes. I'll show you how to do that. And this one, um, I kind of started playing around with the colors and just finding colors that I like together just with the background color of each tile, without any design in them yet, Um, so I'll show you that, too, for the bouquets. I would normally go to Pinterest, and I will just look up wedding bouquet and that one would be a good one to pull a lot of colors from. So just pull it up, maybe take a snapshot of it. I really like that one, too, or that one. So try to pick something that has a few colors, if that's what you want. If you just want to go with maybe two or three colors, depending how elaborate your designers. And that's fine, too. That one's beautiful. So the reason I like to use the bouquets is because those colors already look pretty together in those images. So I know that they'll also work together when I use them for different designs. So once I have, ah, a couple of snapshots that I might go to my photos and just cropped them down. So why don't have this other stuff, Um, for when I pulled these into Adobe capture. Okay, now that I have those three than a nisi way to pull, coordinating colors from an image is to go to Adobe capture, you'll have to sign in, so let me take a second and do that. Once you sign in, um, it'll automatically start, um, looking through your camera, trying toe pick colors from what your camera sees. What? Just find you could use their surroundings as well. But here I'm going to show you how to use those images we just took from Pinterest. So, for example, that one adobe capture will automatically pick five colors that go well together. And you can stick with those. Um, if you decide you would like to change any one of them, then that's fine, too. So let's say I wanted to change that, like fusion color. Then I would just click on that, um, circle and drag it toe where it's a color that I like a little more. Maybe something like that. Um, as far as I know, it will only do five colors, but once you're done, then you click on the check mark. Also, make sure it's in the color section that might have been on one of the other ones. When you first open Adobe capture, mind automatically goes to colors and then click on the check mark, and you can either just take up snapshot of those, and, um, used the dropper tool in whatever, um, application you'll use for your design to to pick those colors. Or it also gives you the hex code fridge color. As you click on each one, it'll change. You have the RGB slider values that you can use if you're programming you're using, doesn't have a place and her hex codes, and you can click down here and use any one of these values. If if you prefer that instead, okay, if you use ah, photo shopper illustrator than you can click, save up here and it will save to your, um, Adobe files their storage. I guess that I don't know exactly what it's called in those programs because I don't use them. But if you use those programs, I'm sure you know how to get to what you've captured on Adobe capture. So that's one way of getting your color palette, but another way to do it. Let's say you want more than five colors. Well, you could always do this a couple of times here in adobe capture and just ah, pick different colors the second time around. Or let's say you're going to use procreate, which is something a lot of people use for their design process. Then I could always add my image. Okay, And here in the color section, you'll see that you have the disk and you have a palate. This is a pelt that I built for another design. And if you click on pallets, you can make a many pellets as you want. So let's I wanted to build a pallet off of this one the night that click ad, and then I could go in and start. I use this little, um, square thing. Just hold on to it as you drive your pencil across the screen. Then you can pick colors from the campus and then go into the color section again and just tap on a box, and it will automatically fill that box. So let me do that a couple more times, so that's just to show you quickly how you would do it. Obviously, those colors don't look so great. But if you could take your time and um, really, you could fill this whole thing and then see what colors you don't like, And if you don't like them and you can just um, click and hold, and then just delete it out of there and use what you have left. And you can move these over kind of condense your your palate a little bit. If you're using affinity designer, then we could, um, do the same thing, actually, and let me go ahead and place my image in here. Okay, then. Affinity Designer has the color studio up here at the top right hand side there, um, are a number of ways that you can choose colors. Right now, I have it set toe RGB hex sliders so you could do it by the values, um, rgb values. Or if you click on here than you can enter the hex codes that maybe you brought in from Adobe capture or if we want to just color dropped from the image, then we could go to swatches. Um, here's another palette that I used. It's actually almost the same as the one from procreate, but we could either continue to build on whatever swatch palate is there, or we can add a nap, location, pellet or document palette. I always recommend using the application pilot because then if you change documents than you won't have access to it if you just use document palette. But if you know it's gonna be a one time thing, then by all means, just used the document palette so I could add application palette click up here than I could rename it whatever I want to rename it. And then I can use this color picker and come over here and pick my colors. You see that? It fills into the right. If I click on that, it makes it the current Phil, which then we could do add current filter pellet, and we can continue to build our palette that way. Okay, I won't need that. So I'm just going to remove palette.
5. Designing Individual Tiles: Okay, now that we have, um, Cem colors in mine and a layout in mind, then we can experiment to see, um, how we like the layout of the colors. So I'm going to show you on example of when I was recently working on this one centered around a, um designed that I had previously made. And so I knew I wanted to use the colors from that design. So that was my color palette. And I knew I wanted to use three quotes and then fill in the rest with different sewing related objects. So what I did was I added, you can see each one of these individual squares, which then I could change the fill color of with my color studio just like that. And once I liked how that looked. Then I came into a separate, aren't board, and I duplicated that four times so I could get a bigger picture. And I didn't like that. So those were the colors I decided to stick with, um, as my background colors for each tile design. If you don't know how to do this whole art born saying that is covered in, um my affinity designer classes. You could do something like this. Probably an adobe illustrator or photo shop. Um, just to kind of get an idea of what you want your colors toe look like in your quote. Um, you can see here the final result of that quilt for this one. I told you I'd show you how I pick those colors. Um, yellow was not originally a color I was going to use in it, but I decided that it went well with the colors I chose. Um, I actually started with a couple of colors from a different color palette I had built previously. And then with the other tiles. I just I really just played around in the color studio, Um, until I found colors that I really like together and added those onto a pallet. So sometimes you may start with an image that you like the colors off. Other times you might just wing it and create a color palette you like. So sometimes I do the color layout first, and then I start designing. Sometimes I start designing, and then I choose the colors. So it's up to you, whatever works for you. So for the design process. I like to use, uh, grid notebook. I'll show you what I did for my sewing shooter. Quote. So I use each space between the dots to equal an inch. We'll talk about deciding the size of your of each tile in just a second, but I knew I wanted nine tiles. Like I said before, I wanted three sewing related quotes or freezes. And then I filled in the rest with notions and stitches, a sewing machine, and I just kind of wrote in what I wanted the said. These other two to say that wasn't set in stone until later than I decided the exact design of the quotes. But I just feel them. And so I knew where I wanted them to go. Once I had, um this decided. Then I went into procreate, and I designed each tile. Well, I I drew out each tile. Another thing I wanted to mention before moving on is the use of filler designs. So I'm gonna go ahead and go to a spoon flour to show you some examples. You'll notice that a few things are very common throughout many of the cheater quote designs. Let me pull a few up. Okay, so what do you see in common? I see the use of platitudes stripes, and you'll see dots or small geometric shapes used. So if you know that you want a, um, larger amount of tiles, but you don't have that many designs to use. I'm for each tile. You can always fill in with any one of these types of designs, so over him procreate. And I'll show you the examples here. So, for example, with the buttons, we can go toe canvas. I was gonna quit cropping resize. I'm not gonna actually resize it, but I want to show you the size of my tile. I didn't actually need it to be this large for the purpose of using it for, um, the cheater quote. But the reason I made it this size is because I may want to use this design or the objects and is in this design for, um maybe just a standalone print or something like that later on, and this size will allow me to print on a larger steel was procreate being a, um raster program, um, things will get blurry if you blow them up too large so if we keep zooming in, you would see that the picks elation. But being that this was a relatively large campus than I could put it out at a relatively large size. So that's something you might want to think about if you will be using it for using your designs for individual prince or for other items later than you might want to start off with a larger canvas. But if you're using a vector based program, then you don't need to start out with a canvas that large. Um, you'll see here. These are ones I am moves. These are ones I imported from procreate. So there, that 3600 um, pixel size. But if I was, um, just designing everything here in affinity Designer. Then when I went to open a document, I would set the DP I to 150 because that's what spoon flour uses unless you specify otherwise. But 1 50 is good, and then the width and the height will depend on how many inches you want your tile to be. So, as a general rule of thumb, six inches is a good size tile for a cheater. Quote But you will also see other sizes usually smaller than that maybe four inches or three inches. Um, they're not usually bigger, because in sewing a quilt, you usually want their the stitching to be no more than about six inches apart. Um, because of the batting. Anyway, that was a side note from sewing. But the West would then be determined by, let's say, six inches times 150. That's per inch. Then that would be 900. So that would be 900 by 900. Will be our square on those actually points, not pixels. It would be pixels, but, um, and also some programs will let you work in inches, so you could just put six inches by six inches. Okay, and then that will create your canvas that when you export it, it'll be six inches by six inches. You can still use this for other designs. Um, larger prints if you wanted, even though you're starting with a smaller canvas, because when he export from a vector based program, you can always change the size and you will not lose the quality of your design. So it even though it's at 900 pixels right now. I could export it. 9000 if I wanted. And I mean, that would be huge, and it would still print with very, very good quality.
6. Finalizing Your Design and Uploading to Spoonflower: Once you have all of your tiles designed, then I suggest bringing them into a program like affinity designer or another, um, factor based program, where you can place images or photo shop whatever you prefer. Um, and the size of your either art board or campus will be determined by the number of tiles and the size you want each tile to be. So this one is three tiles across three tiles high, and each tile is meant to be six inches by six inches, so that would be 6 12 18 inches by 18 inches. Again, we multiply that by 150 that determines the campus or art board size. So if I were to choose this art board, you would see that the size is 2700 by 2700 um, pixels. In the case of these cheater quotes, I do like to make to separate art boards, um, one with just the the design that will be repeated, Um, and then another one where it has the design duplicated at least four times so that I can see what it would look like in the yardage this way. Instead of uploading my designed to spoon flour and realizing I don't like how a tile looks in a certain place and then having to go back and fix it, then uploaded again and seeing what it looks like on there. Then I can just go ahead and and see the whole thing here and see if I need to change anything before even get to the up loading, um, and then the second art board. It doesn't matter what size it is, as long as it it fits on your screen and you can you can see the the whole thing. You won't be using that for anything. So with this design, I was happy with the final layout, and so then I could go ahead and take this to spoon flour, and I could go to my studio home once. Once you're logged, then you can go to your studio home. You can upload your design that's available even from the home page. Just upload your design. Then you choose the file. You go to your photo library after you've saved it. Let's This is assuming that you're working from your I pet. If you're working from Ah PC than, um you have uploaded from wherever your files are. And I could click on my design that says, I own the rights to this image. Then I click, upload and wait. Once it's uploaded, you can see whether or not you uploaded it at the proper size. Um, by looking at this little section right here, it will tell you how many inches tall and wide it is, and it shows you your, um dp I So I did upload this at 150 d. P. I. And it's just right. 6 12 18 Okay, once you have that done, then you can just go ahead at it to a collection. If you have collections, um, rename your design type in all your information, your tags. You definitely want to tag it. Cheater quilt. Um, and choose how you wanted to show right now you would be able to make it public. You want to be able to sell it just yet until after you have ordered a proof. If you just want to order Ah, whole yard of your cheater quote. You can do that. If you just want to do a test Swatch, that's fine. Or if you have several designs than what I recommend doing is adding them all to a collection, and then you can go to your collections. Let me just go into the thes cheater quotes. Um, this little symbol right here is the fill A yard symbol. You can click on that, and this will allow you to order one yard that is divided into several different tiles. And each one that you choose counts as a proof. So that's better than ordering a bunch of, um, test swatches. Okay, so, um, you would probably used this one unless you have, um, a bunch of designs. 42 squares, 48 squares. I just usually do the 42 and then he consumes your fabric. If you're just proofing, you can use the pedal signature cotton, and then click design your project. Once you're in here, all you do is click on a design click on the tile, and it automatically uploads part of your design there. And you can do that just individually, all the way across. Um, you don't have to proof the entire design. You can just proof that little six inch square in that counts, Um, or if you're like me and you. So then you can just fill a whole section with the same design and make a teeter quote out of that, and either keep it for yourself or sell it, and then you get your money back, comes gonna fill this so I can show you the next step. Then you just added to your cart be your cart and you check out once you actually receive your proof, your print. Then you're able to go in to your design when we go to my design library. Once you've received your proof, then you can go back into wherever your design is, and then at the bottom, you'll have the option to sell this design as fabric or wallpaper. I want to do that. You're all set. So for your class project, go ahead and choose a topic of interest, preferably something that means something to you, because if it means something to you, it will mean something to somebody else. Go ahead and choose a color palette, a designed layout designed each one of your tiles. Put it all together and upload it to spoon flour. Go ahead and show us your final design so we can all rejoice with you. I look forward to seeing what you create. If you have any questions, feel free to ask, and I'll do my best to answer them. Thank you guys so much for watching. I really appreciate your support.
 Andrea Lyles