Transcripts
1. Introduction: Hi, My name is Andrea Wiles. I run a small business Carl Calgary A. Collections. I'm primarily a seamstress, but I also designed my own textiles, and I use my surface patterns for other product. My two favorite design APS are Pain Storm Studio and affinity designer. So that's primarily what I focus on in my classes. In this class will be using affinity designer, and I'll show you how to first create a custom color palette. And then I'll show you how to use the different growing tools, such as the pencil tool and the pen tool. I'll show you how to add dimension and texture to your shapes by using Grady INTs and using the pixel persona. Then, once we have all our motifs done, then I'll show you how to create some templates for basic repeat. We're also create templates for half drop and half break repeats. The tile themselves don't repeat that way, but the motifs within them will, and we'll do one diagonal Repeat as well. I'll show you how you can play around with them and customize them to make them to weigh directional patterns, be able to color the background or fill in the gaps with with other objects. I'll show you how to export everything and save it to your camera roll. I look forward to seeing what you create. Please upload a snapshot of your template. I really hope you enjoy this class, and I thank you very much for watching.
2. Creating a Custom Color Palette: Okay, so we're in affinity, designer, and we're going to first of all, build our color palette. I've been working on a lot of geometrics lately, as you can see, um, so I clicked on the plus sign. New document. I'm going to work in pixels, and I'm going to make this 500 by 500 pixels. Um, that is kind of small, but since I'll be working in vectors, son, I'm not really too concerned, because I can export it at the size I would like later on. If you're going to be importing something from procreate or an image from your photo library, then you might want to make it bigger. So you you don't lose the quality of your image winning export later on. Um, but the reason I'm keeping it a smallest possible is because we are going to eventually have multiple art boards. And I don't wanna, um, slow the system down too much. Someone of Click on Create Art Board. Okay. And there is our first art board. Um, before we start adding more art boards in, I'm going to build a color palette. So, uh, in the color studio, you'll see where it's a swatch is down at the bottom. There's an example of a palette I built from photo reference. So gonna import an image at the documents menu place image import from photos. And here is a floral image. Some going to drag that in place, making a little bigger. Okay? And I d selected it just by tapping outside. So back in our color studio, I'm going to click on these three little lines and add application palette. The only time you add document palate is if you're sure you're only going to use this palette within this particular document. Okay? And let's rename it, I'm going to be working on butterflies, so I'm going to call it butterflies. And we can use this color picker tool by tapping on it and then dragging into the image and , uh, picking colors. I'm gonna go ahead and start with the lightest first. This like almost white. And then if I tap on it here, it'll make that my fill color. And then I think, click up here and add current fail to palette. So I'm going to keep doing that. Let me go to the pinks and add current filter palette. So I'm going to do that throughout my image. I'm gonna pick probably, um, two or three tones of each color. Um, that will have, Ah, a little bit of a variety to play with. Okay. And then I usually add white and black. Um, it's usually available in your quick colors. Okay, So I'm gonna close my color studio for now. I'm going to click on the image and delete it. And now I'm ready to build my other art boards, so I'm gonna have four motifs, and so I'm gonna have four art boards of the same size, so I can go to the document menu and click art boards, and I'm just going to drag out another one. Okay, I'm gonna move them. Just kind of aligned them just I don't know for my O c d, I guess. Okay. And now I'm ready to place my sketches in. I sketched out some butterflies just really quick, and I'm going to import each, um, butterfly into a nart board, taken, rotate that. Okay. And I'm going to select all of them clicking. Add to selection, and I'm gonna go to my layer studio Click on the three little dots and lock them in place so I don't move them around as I am working on them. Okay, De select. Add to selection, and then click out. Okay. And then I'm ready to start on my first motif.
3. Using the Pencil Tool: all right, we're gonna go ahead and start with the pencil tool. It's the most straightforward of the drawing tools. It's just like regular drawing, Um, so if I was going to draw the outermost portion of this wing, then I would just draw like I normally would. But as you can see, the line is not entirely smooth, so there are stabilizers that you can use when drawing. I'll undo that stroke and down here in your context toolbar, you'll go over to where it's a stabilizer, and there are two other options. Rope stabilizer and window stabilizer. I'll show you the differences between the two. I have the length set up to 50 just so it'll be easier for you to see the differences. So what? The rope stabilizer? It's like if you're dragging that line with the rope and that rope stays the same length. So I would go to my starting point, drying my line out. Make it stop it, that corner, come down and around, stop at the corner and come up. And you see that line is a lot smoother than the one that I had drawn without a stabilizer . I'll undo that and I'll show you how the window stabilizer works. So the window stabilizer, um, the the window indicates the maximum length that rope will stretch, but you can think of the rope as being kind of elastic, where you'll see when we stopped at a corner, the line will continue to where we stop our pencil. As you can see, the line continued off to where my pencil was, so I would have to be more mindful to stop the pencil in the corner rather than look at where the line is dragging behind the route. So we still would get a smooth line. But, um, this might be better suited for something that doesn't have, ah, the sharp curves. At least that's my opinion. But you can play around with, um, the two stabilizers and see what you prefer for different scenarios. Okay, so I'll go back to my rope stabilizer. I'll undo that stroke and then you'll see that we have the option to use Phil. So if we turn that on, then it will fill the shape as we draw. Ah, but we can't access are swatches. From here. You can you can get to the color wheel For some reason, it's not popping up. It normally pops up right there next to it. Annual. You'll see where you can access the color wheel. But to get to this watches, we would just go up towards our color studio. And, um, when we see, I'll go to my swatches and I can pick like the orange so you'll see that as I'm drawing. Ah, it'll fill with the orange. Okay, so that's really convenient and quick. And then the last thing that I will show you is that you can control what the stroke looks like. So I turned the fill off so we can focus on the stroke right now. We don't have any controller set, so it'll just be a solid line. But let's say I used pressure. Then let me increase my stroke with a little bit. I'll start off with light. Pressure increased my pressure. Light pressure increased my pressure. You see that you can, um, control the width of the stroke with the pressure of your pencil. Another way to do this. If we go back to none while our stroke is selected, we can go into our stroke studio, and you can see that the pressure curve is kind of all over the place. But we have control over what are stroke? Um, will look like So if we're going here, this would be the start of the stroke. This would be the end of the strokes if I wanted a tape right at the end. I could do that. But I can tape right at this end to all right, I'm just gonna delete a bunch of these nodes, or we could just reset pressure. Okay, so that's two different ways of doing that. We can drag that down to taper it, drag that down a taper it, and then we could pull it up in the middle to increase the width of the stroke in the middle. And you can do that. You cannot as many points as you want. So you can do this after the fact. Um, even with the pen tool that will be using in the next section. But anyways, that gives you a good introduction to the pencil tool. And in the next part, we will use the pen tool to actually build our motifs.
4. Using the Pen Tool: all right, so now we'll get into using our pen tool. If your brand you too, it It may seem a little more complicated, but it really is beneficial to use it because it simplifies our lines. Makes it easier for the program to process, especially once you get a lot of objects going. Um, and it simplifies editing as well. So to kind of explain how the pen tool works, you'll see that there are handles on the anchor points, so it's like two little lines it that drag out with two circles on the end. Try to picture those handles as being like magnets, that air pulling on the line. And so it dictates which way the curves go, the depths of the curves, etcetera, so you'll see as I'm drawing. So I have my pen tool on, and the way that I like to work is from the top down, which I know is not typical, so you can try it out. If that work for you, then great. If you prefer another way, that's fine, too. We can get to the aim to the same end result using different techniques. So for this wing, the top most layer would be this little since strip. So that's that's what I'm going to start with. And I want to I'm gonna use Phil, and I'm going to feel it with black, okay? And I think I'm going to turn my stroke with all the way down. Um, that's something that that I like to do a lot as well. Okay, so I'm going to start by just tapping in the corner. And that will create a sharp point there rather than a curb. And I'm going to go in here, drag my handles out, go to the end and tap drag handles out here and go back and tap, and that closes my shape. Then we can use the no tool, which is the 2nd 1 down toe. Edit the nodes. I'm going to zoom in a little bit, so it's easier for you to see. These are our nodes. And those are their handles. While you're drawing the handles pull equally in opposite directions. But once you're editing, you can, um, decrease the the length of the handle on individual sides. Okay. All right. I'm happy with that. And so I would de select it with the EC's down here, and then I go back to my pen tool, and then I will build the next shape. So I'll start in the same corner by just Well, actually, I'm gonna set in my field color. See, Now it shows up the field color and you'll see that the locally will comes up or you can change to the sliders. I'm going to pick White, start in the same corner, drag my curve out. I'm gonna tap in that corner, drag this curve out here and back to my starting point. Then I can edit. I didn't out another No dare because I knew that I could edit that from here by just making that side longer. Okay, so now I will go to my layer studio, and I will just drag that white curve under the black. Make sure it goes under not in between because it gets clipped off by the black shape. Okay. And then I can de select and I'm happy with that. So then I will build the outermost portion of the wing. I'm going to use oranges. My fill. Go back to my pen tool. I'm going to start here in this corner. Just a single tap and I'm going to come all the way to the end, and I'm just going to drag that curve out as far as it'll let me right now, but I'll probably change that later. Um, I don't want the curve to continue in that direction so I could tap back on that same node and it leaves just one handle. And then this turns this side into a sharp corner without a handle. And I can continue my curve this way and around back to near the body, and I will just go back to my starting point. I'll use my no tool to said justice a little bit, right? I'm pretty happy with that. And then I'll drag that beneath the two other curves. Okay, so I will continue to draw the bottom part of this wing in the same manner. - If you find this to be a little difficult right now, don't worry. It just takes practice before you know it will be second nature. You just need to get used to seeing how the handles affect the line. Okay. And while we're here, I'll just show you a couple of different things you can do to edit. You're a stroke after the fact. So if I go back into this shape, I can at it each one of these nodes. First of all, I would like Teoh take this time to point out the simplicity of this line. There's only five nodes, whereas you remember when we used the pencil tool, there were, I mean, at least a dozen nodes around the curve, which shows you why this would be easier for the program to process, especially once you get a lot of things going. Okay, so let's say I wanted to delete a node that, in your context toolbar for the no tool you could click delete, and that would be gone. Or if you wanted to turn that into a sharp corner, you could click on sharp or if you wanted to turn one of the sharp corners into a smooth curve. You could do that here, and then you'd have the two handles, and then the smart tool would just, um, change a curve according to what it thinks would be, you know, a proper direction and shape of the curve. So, for example, here I did click Smart and it would change it into a different shape. I don't really use that too much. No, I'm going to de select that. I'm going to go to my layer studio and just group this entire wing. Now I can duplicate it and I'm going to go to transform studio, mirror it and then drag it to the other side. Now I can work on the body, which I'm just gonna build out of shapes. And then I will select both the body and the head. I'll come appear and I'll click on add, and it will turn that into one single shape. The next thing I want to do is at it the wings so that they fit close to the body. So right now that everything is grouped. If I were to click on it, it would grabs a whole section of wing. But I can click on select inside and to select one portion of it. Then I'll go to my edit, my no tool and at the point, Okay, now that I have finished editing, then I will group everything together. I'll go to my layer studio and select every part of this butterfly and click on group and now I have my whole butterfly together. So I'll just continue to build my other butterfly the same way. I will just show you the the beginning portion of it where I'm using the shapes. And then I'll just ah, do kind of like a time lapse of the remainder of it. So I'm going to come over here, use the Ellipse tool I'm going to fill. It was white, and I'm just going to move it right where I want it. Sometimes it wants to move this the selection box instead of the actual shape, And so just zoom in a little bit more and then move it. As you remember, I can duplicate objects from the menu up here. I can also just put two fingers down and then drag rotate it, put two fingers down, drag and rotate. So I'll do the same down here. And then I will be using my pen tool to build the wings and the shapes for the body. So I'll pick back up after that. You you do a tsunami just going to add my antenna. I'm going to turn off the Phil. I'm going to increase my stroke with toe one. And I'm going to go over here to my art board and I'm going Teoh use line mode, which allows me to be able to draw one line at a time rather than one continuous stroke. So I clicked my starting point in my endpoint. Let me change my pressure curve, reset pressure, and then I can draw my other line over here. Okay, let's just edit those. Even though I started with a straight line, I can turn them into a curved line by just tapping on smooth. And then it will give me a handle that I can curve that line with. Then I can go over here, make sure that point turns blue six moved again and then curved that one as well. So I'll I must have accidentally, um, had that one selected previously. And so I will just draw my intent of the same way in this one. Okay, Now I have grouped all parts of my butterflies together. I can delete my reference sketches, and I'm just going to go ahead and center my butterflies. And in the next video, I will show you how to add a little bit of texture or dimension to your shapes.
5. Adding Texture or Dimension: The last thing I'm going to show you before we get into our template is how to add texture or dimension. So I'm gonna duplicate thes into our other art boards. Okay? And I'm going to use thesis elect inside function. If I don't have it on, it selects the whole ah, butterfly. But if I have select inside than Aiken, select individual parts, I'm actually going to turn off the inside of that wing so you can see this a little better . We're going to start off by using the radiant tool, which is that one, and I'm just going to drag a line out and then explain it. Okay, so in linear mode, you have two points and each point will have a different color. I'll change my top point to yellow, and I'll change the bottom 12 black so I can drag the points to dictate the angle of that Grady int like so. And then this middle bar dictates where that Grady int takes place. So if I wanted more black, I would drag it up, and if I wanted more yellow, I would drag it down. So that's how the linear mode works. But There's a couple of different types we could go over to elliptical, going to drag the center, point toward the middle, and it starts off as a circle. But you have the two lines so you can make it into more of an oval shape. So I'll leave that one out there. But then I could pull this one in, and you see that it turns it into a little bit more of an oval, and you can change the color in those notes as well. And also how big that inner circle is. There's also radio, so this is like the elliptical one, except that you have just a circle. You can't turn it into an oval, and you can make the circle bigger or smaller, and also the depth of the ingredients or the hardness of it. Okay, and then you have conical. So with this one, I like to explain it as being kind of like a lighthouse. Um, that light gets directed in a certain direction, so the the the colors of our Grady int get directed in a certain way. So if I were to drag this around the circle, you would see that it kind of turns, just like that light in the lighthouse does bit map. I don't use none. Obviously, there's nothing there and with solid, you could just turn it back into a solid color. So that's how you would do the radiant tool. I'm also gonna show you how to use the pixel persona. So I would go to my layer studio and add a pixel layer, and I'm going to drag that pixel ear inside of that curve. Okay, now, when I draw in that pixel ear, it will get clipped to the curb. So up here, the second button is the pixel persona, and I'm going to increase my brush size a little bit and you can pick the color out. I always go to my layers. I mean, my color studio further the colors, and you are in the brush mode so you can pick a brush over here. So, for example, and just get that one, we'll bring that down actually a little bit. And if I were to draw, you would see that it stays inside of the curve so you can add texture is that way. You can, um, at a little bit of dimension to it. So that allows you to paint inside of whatever section the pixel layer is in. So those are just a couple of ways of doing that. Um, I'm not gonna use any ah, dimension or texture in mind. I'm just going to re color the wings before we move on to creating our surface pattern templates.
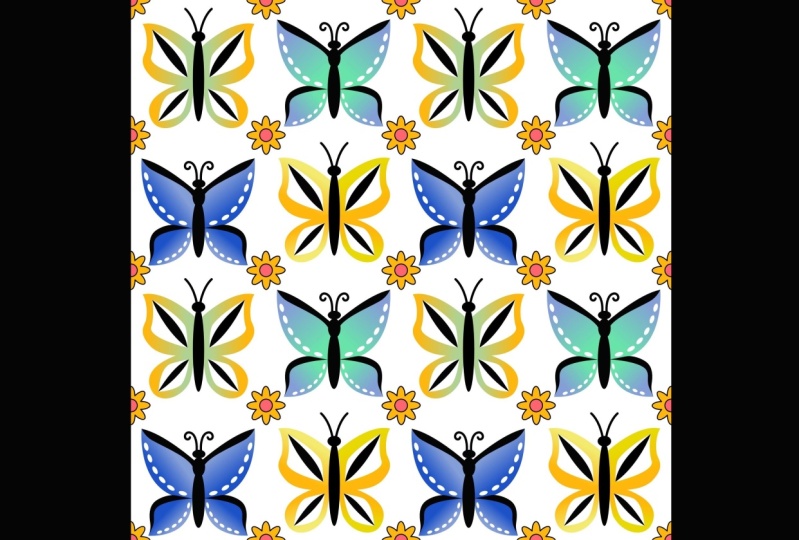
6. Basic Repeat Template: all right. Now that we have four butterflies complete, then we're going to make another couple of art boards, and we're going to use the symbol thinking method that we use in the previous class to build a repeating tile. So I am going to go back to my vector persona, go to my documents menu, click art boards, and I'm going to drive a new art board at 1000 pixels by 1000 pixels. So I have to go to my transform studio and dictate the dimensions, and I will duplicated and drag it over. Okay, so this, um, art board five the 1st 1 I'm going to rename that as our tile and the other are bored, I will rename as repeat preview. Okay. And we're going to do the rectangles like we did in the other class, going to make it the exact size of the art board I'm going to use and no Phil and no stroke either. And I will turn this stroke down to zero. Okay. And then I'm going to go to symbol, and I'm going to click. Add symbol from selection. All right. I need to go to my layer studio and make sure that my butterfly is within that symbol. Okay, then I will de select and do the same thing for each one of the other art boards. It's already set to know stroke and no, Phil, So I don't need to change that again. Okay, so now we can duplicate thes symbols into our tile and our repeat preview. So first, we're going to do it into the tile, so I'm going to start off with E symbol from Art Board. One duplicated. So I moved it down into my tile. Um, but it's so gonna show the dimensions are the position in terms of the original art board. But I went ahead and just de selected and re selected, and then it shows the correct X and y. So I just want to make sure that that zero and zero then I'm going to go into my layer studio, select the symbol from art board too. Duplicate that one. Bring it down. Onda de Select it re selected. Go in here and put it at 500 on x zero on Why? Okay, Make sure that symbol is selected. Duplicated. Drag it down here de select re select and set the exit zero. Why? At 500 and then one more duplicated. Drag it down here. X will be, Oh, I had a de select re select X will be 500. And why will be 500? Okay, so then we can kind of group these together and duplicate them and drag it into our repeat preview. And I'm going to scale that down to where it feels just a top top left quadrant. Put two fingers down to placate it over again and again. Now, if we were to make changes to our original all right board, you would see the changes not only in the tile but in your repeat preview. So this would be a good way to keep a template for motifs at align horizontally and vertically. We can also, uh, duplicate this file and this document, this entire document, and then turned this into a template for 1/2 drop or 1/2 brick pattern. So I'm going to close out, and then I'll show you how to make those adjustments in the next lesson.
7. “Half drop” and “Half brick” Templates: Okay, so I'm going to duplicate this file. The original one. I will rename basic Repeat, and I'm going to rename this one half drop. Repeat. So it's not necessarily that the whole tile will be half dropped, but the elements within our tile will be half dropped. So for in order to accomplish that, then I would go to my layer studio and in my tile layer, I would select the green one and the purple one, and I would add 500. Oh, I'm sorry. I meant 2 50 for why? And then I would select the green one duplicated and drag it up. Okay, let me just make sure I set that in at the right coordinates. Okay, in order to make that happen over here, then I would go to my layer studio and in the repeat preview art board, I would select all of the green and purple butterflies. Okay. And I would ad 1 25 since these tiled or smaller, they're actually 500 by 500. That means that each, um, symbol for the motif is 250 by 250 pixels. So I only need to move them half of that. Okay, there is that. And then I can I'm going to diesel it. These other ones just keep the two green ones selected. I'm going to duplicate them and just drag them up. Make sure they're in the right place. Yes, they are. And so that would be your preview for this, um, half drop. Repeat, and then you can see that it still makes changes if you make changes in your original motifs Now we're going to duplicate the original file again. Okay, The one that says basic Repeat copy. I will rename it and call it. Uh, half brick. Repeat. So for this one in the tile, I want to move these two over. So in my tile, let me select the green one and the yellow one. Oh, sorry. That's art. Boards need to go to my tile. So let the green one and the yellow one. And I want to move them laterally. 250. So I will subtract 2 50 from X. I'll select the yellow butterfly, and I'll duplicate that over on this side. Okay, so that takes care of the tile in order to be able to preview it, then we're going to do the same thing we did before, But except we're going to move them, um, sideways instead of up and down. So in the repeat preview, I'm going to select all of the green and yellow butterflies. Okay? And again, I'm gonna move them by 1 25 going to click, Add to selection because it also allows you to de select things that are already selected. And I'm just going to duplicate thes two butterflies onto the other side. So there's your your preview for that. So the reason we created these is because then you can always go in and just change these motives. And you will already have this preset template so you can see See what things look like. Another way that you could use the same template. Um, is that rather than having a one way directional pattern, you can make it a two way directional pattern, and all you would have to do is, um, flip the the symbols within your tile. So let me select the bottom ones, which would be the green and the two yellow butterflies. And then I can go into my transform studio and mirror them the other direction. And I could do the same with the ones in my repeat preview. So I would select all the green and yellow, okay? And I would then flip those. Okay, So now whatever changes you make to this one will reflect in here as well. Don't be afraid, Teoh. Um, either mirror or flip your symbols. In this case, I just did it. I just flipped it on the X axis instead of the UAE access because, um, my, my motifs are symmetrical. But if they were asymmetrical, you could flip them on the y axis access as well. And experiment with that. I was just thinking that everybody would probably want to know how to change the background color. So, for example, in our basic repeat in the half, drop in half brick repeats where we are exporting this tile, Um, we can just add a background color by dragging a rectangle over it. And let's just make that the right size that it snap into the corners and we're gonna goto our layers studio and we'll drag it below the group of symbols, and then we can just spill it as normal um So that's one of the reasons why we left our rectangles without Phil where we have our motifs. Or if you wanted to just change individual, um, squares, you could do that. So let me turn off, um, that rectangle air and we can go to our original art boards. For example, With this butterfly, let me make that the right size. I would go into my layer studio, and I would drag it below, are actually within that symbol and then below the butterfly. And then you see that we have a Phil just in those squares, so that's how you would do that.
8. Diagonal Pattern Template: okay, and then we're going to do one more. So well, duplicate this again, and I'm going to just rename this diagonal. Repeat, Not sure what else to call it, but you'll kind of see why. So the reason in the other ones that we've done the tile and the repeat preview, um, is because when we go to export, really, this is all we need. But if we wanted to just do this, we could. But it would just be kind of redundant, but it's it's not really a bad thing. Um, so for what we're gonna do now, we don't actually need this tile because we need to place our motifs four across and four down instead of to a cross into down. So I'm gonna go ahead and just get rid of the tile, and I can actually let me see Repeat preview. I'm going to go to the Transform studio, and I'm going to make it 2000 by 2000. Okay, I'll drag the whole art board over. I'm going to select everything that's inside of it and just drag it down to the corner. Okay, So what we're going to do now is move thes symbols around. So basically, they will be in that order. So I'm going to just go ahead and I will just get rid of the's groupings, and I'm going to I'm gonna UN group this for now. Okay, so we'll move the yellow symbol over here. We'll move the green one over here, okay? And what we're gonna do is regroup them and we can duplicate it. Drag it down. So what I'm going to do now is I'm going to shift everything over by 500 which is the size of one of the symbols. So I'm gonna click plus 500. Okay. And I'm going to move. Let me. It won't let me grab it since it's outside of the campus. But I'm just gonna grab that symbol over here and drag it over to the beginning. Okay, then I'll just of these duplicate them again. I'll move everything over by 500 again, and I will get the yellow butterfly that's on the outside and drag it over here and again. Does grab everything duplicated. Move it over by 500 go to my layer studio and get the purple one and drag it this way. So now you'll see that they go, uh, in kind of a diagonal form. That's why I called it a diagonal. Repeat. Um, but if we want to see what this looks like, we can always create another art board. We'll make it 2000 by 2000. Okay? And we can get all of the I didn't mean to do that. I have to use the move tool, have all of our symbols duplicate them de select, have him again and then set them at zero. Okay, And put them into a corner, duplicate, duplicate and duplicate. And there you have a preview of what your pattern would look like. So the ways that I've showed you aren't the only ways to make this happen. For example, if you wanted them to kind of go like that, then you would just use the top half of this. You can create a large number of different patterns using this technique using the symbols , and this would work great for coordinates to your pattern collections. If you want more information on color theory and and, you know, kind of balancing your pattern out and everything. Shannon McNabb has a really good class on that. I'm just showing you how to accomplish this whole template thing within affinity Designer, since that is more of an illustrator class. So I'm gonna do one more video just to show you how to kind of fill in some gaps.
9. Saving Assets and Adding Filler Objects: Okay, So in this last video, we're going to cover two things. One is going to be saving assets, which is really useful. Um, if you want to re use certain motifs for later projects. So I have my green butterfly selected, you'll notice I reduce the size of everything so that I can. So you had to fill in some things later on. So I have my green butterfly selected. Since it is a group, it's considered as one object. Then I can go to this little grade right here. And this is where I have my assets. And, um, you'll see things that I worked on in previous patterns. So if I go up here, I can add a category that would actually be the name that's up here at the top that has a little arrows, and then these air considered sub categories birds and flowers and leaves. So if you added category, you'd have toe, you know, scroll through and get to what you wanted. I'll just add a subcategory for now. And so when I scroll down, it says assets. I can rename subcategory, and I will name it Butterflies. Okay, so now in my butterflies. While I have that, um, Butterfly selected, I can click on the three lines and click at Asset from Selection. And now, my butterfly, is there ready to use on a future project? Okay, So to illustrate that, I'll use some assets I already have saved. So we have our tile, and we have a repeat preview. The tile is what we would actually be exporting. Um, for for use in our patterns. So let's say you had something that, um maybe needed some filling in. You could certainly do that. Um, you can build on top of this on top of the symbols. You likely won't be able to see it in the preview, but it's still going to be a functioning tile. So I'm going to go to my assets. And Ah, even though these flowers don't necessarily match up, it will just kind of give you the idea. So I would click on one click insert, and then I can scale it down and move it toe wherever I want it. Okay? It's not part of any of the symbols, so you're not going to see it show up there. But if I really wanted to I could add it to a symbol and then duplicated into the corners of the other ones. So, for example, um, let's see words that it's in my tile appear I would have to add it to Okay, let's add it to the red one first. Okay, you see, it pops up in the corner in there. Oh, look, it does actually show up in the preview, so that's great. So we don't have to duplicate the items that we put in in the inside of our tile. Now, once we get working on the edges, once we get working on the edges, then we have to use the principles that we learned in the previous class. So let's say I let me grab this this, um, shape, and I'm going to duplicate it. Let's say I drag it over to the edge over here, even though you see it, repeat in here, that, um, does not mean that it's actually repeating in the tile form. You'll see that it does not show up on the opposite side, although it does feeling on the inside, so we would have to duplicate that and move that to the other edge of our tile. So we would add 1000 Toe X and then we could continue working on our tile that way. But then you can let me select insides. Aiken, grab this. Okay, so it'll be easier to just grab things in your layer studio. Okay? That middle one, Um, you know, let's just mirror it, move it around so you can continue to fill things in in your tile. And, um, you're not stuck to just the one motif that you filled your your art boards with. So anyway, I hope all of that makes sense. I know some of it can sound a little bit complicated. If you have any questions, feel free to ask in the comments or send me a message. I'll be happy toe to try and help you out the best that I can. All right, I'm gonna go to my history and just undo everything that I just did. Um, and she had exported. So I would go to my layer studio and make sure tireless selected. And then I can go up here to the documents menu and export, and you'll see where it says area and you can select the tile okay, and you can change the dimensions here. That part's a little glitchy with the aspect ratio. So I would just undo that if I wanted to do it, um, 2000 by 2000 and I would just import input those numbers and then I can click share if I want to save it to my camera roll or I can click, OK to save it to my iCloud, please. For your class projects. Go ahead and post on example of one of your pattern templates and perhaps even the motifs that you drew to go in it. If you wanted to just follow along with the butterflies, that's fine, too. Um, but I'd love to see what you create, And I hope that this makes your work flow a little bit easier. Thank you so much for watching. I certainly appreciate all of the support
 Andrea Lyles